Serious enthusiasts know that handling is where it’s at. The best driveline in the galaxy is worthless if it’s surrounded by mushy shocks, cheese ball tires and a wonky alignment. Building better performance through a solid foundation has been our Prime Directive for more than two decades. It’s part of the reason why we get out of bed every morning.
While we often discuss handling fixes on these pages, now it’s time to look at the total package: Here are 10 simple steps to better handling.
We’re going to start with a totally bone-stock vehicle and increase the handling by 10 clicks. Sure, we hope our end result is a car that can adeptly make its way around a track. However, there’s a slight twist: We’re not going to turn this into a race-only rattle trap. Bolting on a set of race-valved shocks and competition-bred tires would be too easy. In addition to being faster, the final car must also be composed and civilized.
Test Subject

Before going too far with this idea, we needed a test subject. And we had a couple of requirements for it, too. First off, we wanted to work with a popular chassis so the data would have some relevance. Sure, we could have used a Trabant or some other obscure Soviet-era car for this exercise, but the final setup isn’t really going to help the masses. Being able to use popular off-the-shelf speed parts was another plus.
We also wanted a car that is a little soft in stock form. While it’s possible to make an already fast car even faster, the law of diminishing returns can make this a difficult task. Factor in some statistical noise, and sometimes it can be hard to see tiny gains.
We figured that something a little top-heavy would also work well for our exercise. Thanks to the pendulum effect, that extra weight up top should place more load on the suspension and make our suspension work even harder.
Finally, we wanted to go with a new car so we’d always be working with fresh equipment. We didn’t think it would be fair to work around blown shock absorbers, toasted bushings and other worn-out components.
Our little requirement list quickly pointed us toward Subaru. In a relatively short amount of time and with the help of turbo boost in many of their products, Subaru has gone from a pimply nerd to the school’s football god. This maker of once obscure cars generally only seen in mountain communities can now be found supplying a good chunk of autocross, rally and track event cars on any given weekend.
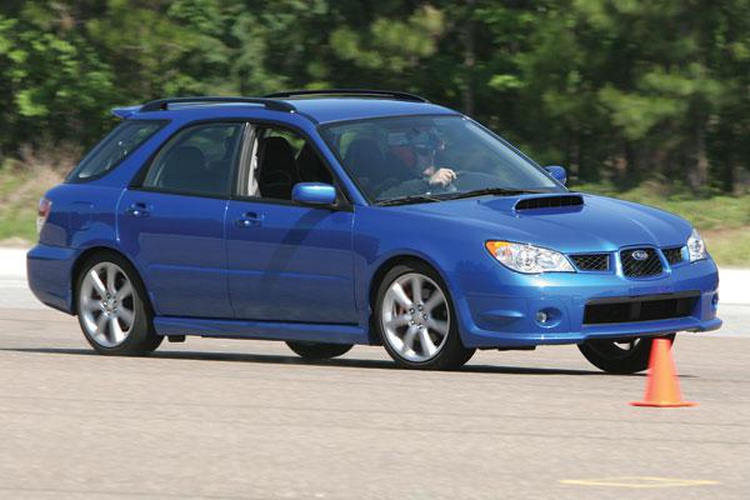
The Subaru Impreza WRX Sport Wagon perfectly fit our bill. Thanks to its turbocharged 224-horsepower engine, it has plenty of get up and go. The suspension, however, is a little on the soft side, as this 3252-pound car comes from the factory on mud-and-snow-rated tires and garden-variety shocks. It would be the perfect starting point.
Test Site
On a sunny day, the GRM crew descended upon Roe Racing’s test site in Green Cove Springs, Fla. The plan was to get all of the work done in one day in order to keep variables to a minimum.
Our primary driver would be Tech Editor Per Schroeder. He’s no stranger to Subarus, either, as he owns a Saabaru and recently campaigned our Impreza rally car.
To help with the actual work and setup, we brought in a chassis pro: Geoff Thompson. Geoff has set up a ton of race cars ranging from local oval track machines to IMSA GTP cars. Plus he’s a nice guy to work with. (If any readers would like Geoff to set up their cars, contact him at Alignment Shop Inc.: (386)-281-3343.)
We also needed parts. After we came up with our wish list, we realized that most of the things we wanted are available through The Tire Rack. While their name suggests that they only sell items that are black and round, in reality they have expanded their offerings to all of the parts that make a car handle better. And like Geoff, it’s service with a smile.
Time to get to work.
Step 1: Totally stock

Mean time: 33.949 seconds
Change: Baseline run
Cost: Free (wheel and tire combo in garage)
Our first order of business was to run the car in bone-stock, as-delivered condition. Well, sort of, as we took one small liberty: To show how plus-sized tires affect performance, we backdated the car to the 16x6.5-inch wheels and tires found on the pre-2006 WRX. (We actually used a set of 16x6.5-inch Saabaru wheels, although a small 1/4 inch spacer was needed to clear the front brake calipers.)
These wheels were wrapped with a set of 205/55R16 Bridgestone Potenza RE92A tires. They’re a good quality, all-season tire often used in original equipment applications. No, they’re not going to win many autocrosses.
As expected, the 16-inch setup was hardly the hot tip, and you didn’t need to be Carroll Smith to see that we had massive front tire roll. The road rash extended down to the widest part of the tire; given more laps, we probably could have ground the words Bridgestone and Potenza right from the sidewall.
The car had a roly-poly feel about it, Per said, adding that the steering felt very slow. “I had to wait for steering, suspension and car to catch up,” he said.
After our first session, we had a benchmark time of 33.95 seconds.
Step 2: Increased air pressure

Mean time: 33.193 seconds
Change: 0.756-second improvement
Cost: Free
A lot of enthusiasts seem a little too quick to throw aftermarket equipment at a car. Sure, trick springs and shocks are going to impress your friends and strike fear into the competition, but sometimes it’s the free things that matter most—like air pressure.
We broke out the air compressor and upped the tires a bit from their factory recommended pressures of 33 psi front and 32 psi rear. Based on the amount of sidewall roll observed as well as previous experience, we set the tires at 45 psi front and 35 psi rear. (While it’s possible to spend a good part of the day just evaluating different tire pressure settings, that wasn’t our goal for this outing.)
“It felt a little more controlled,” Per said of the Subaru during our second set of runs. However, there was a caveat: The car had become a little easier to overdrive as the slip angle was now a little smaller. Still, we’ll take a smaller slip angle when it’s accompanied by faster lap times. Our mean time had fallen to 33.19 seconds, a three-quarters improvement all thanks to a modification that didn’t cost us a dime.
Step 3: Performed alignment

Mean time: 32.789 seconds
Change: 0.404-second improvement
Cost: Free
We know that most cars are built these days using robots, lasers and other things that were once only science fiction, but there’s one area where we still sometimes see a little slop: wheel alignment. We have seen brand-new cars delivered with wheel alignments that are out of spec. In those cases, just getting the wheels pointed in the right direction made a huge improvement in at-the-limit performance.
The exact angle of the wheel as relative to the car and the road itself plays an important role in handling. We explored this topic in depth last issue, and the short answer is that cars generally like a healthy dose of negative camber—that’s where the tops of the tires lean in toward the center of the car. Having some negative camber helps handling by placing the outside tire nearly perpendicular to the road as the vehicle leans while cornering.
In stock form, our WRX’s alignment needed a little churching up. The left-front tire’s camber was set at zero (meaning it was perfectly perpendicular to the road) while the right-front had only a quarter of a degree of negative camber.
For this step, we just wanted to maximize the front negative camber while staying within the factory tolerances. After just a few minutes of work, the left-front had 0.7 degrees of negative camber, while we got a full degree of negative camber on the right-front. Before hitting the course, the toe was set at 1/8 inch total toe-out to help initiate turn in.
Both the driver and the timing system showed that the alignment helped, as Per noted a lot more front grip in the sweepers and we were rewarded with a four-tenths drop in average lap times. That increased front grip did come with a price, however—the car had become a tad bit tail-happy, making transitions seem a little slower.
Step 4: Upsized the wheels
Mean time: 32.871 seconds
Change: 0.082-second loss
Cost: Free
By now we had felt as if the tall, soft sidewalls found on our 16-inch tires were the limiting factor, so we went to our plus-one setup. The theory behind a plus-size tire setup is fairly easy to understand: By pairing a larger diameter wheel with a tire that has a shorter sidewall yet the same outside diameter as the original ones, handling is improved since there’s now less compliance in the system.
Generally speaking, the advantages of a plus-size setup include crisper handling as well as the option of running larger brakes since there is now more room inside the wheel. On the downside, replacing a soft tire sidewall with unforgiving aluminum can increase the noise, vibration and harshness felt by the car’s occupants. The increase in size can also increase rotational mass.
We wanted to keep the variables to a minimum, meaning our plus-size tire also came from the same Bridgestone Potenza RE92 family. We simply replaced the 16-inch Saabaru wheels and tires with the 215/45R17 Bridgestone Potenza RE92 tires and matching 17x7-inch wheels that came standard on our 2007 WRX.
In short, we went from the wheel and tire setup found on the 2005 Impreza WRX to the one found on this year’s model. The move also gave us a slightly wider tire to the tune of 3/10 inch. The overall diameter decreased by the same amount, which in theory helps acceleration a bit. Based on our earlier testing, we kept our tire pressures at 45 psi front and 35 psi rear.
Where the extra front negative camber didn’t help our transitional grip, the plus-sized tires did as the rear end felt more nailed down. The car exhibited better transitional grip and there seemed to be a much better link between the car and the pavement.
Unfortunately, our average lap times didn’t improve. In fact, they rose a tiny bit—less than a tenth of a second, but that’s still a move in the wrong direction.
However, looking at the lap times does reveal an interesting data point: The 17-inch wheels yielded more consistent laps. Our lap times varied by more than a quarter of a second with the 16-inch wheels; on the 17s, that spread dropped to a tenth and a half. Whether the sport is autocross or endurance racing, consistency counts as it makes the driver’s job that much easier.
Step 5: Upgraded the tires

Mean time: 31.882 seconds
Change: 0.989-second improvement
Cost: $125 per tire (Tire Rack special)
Larger tires are good, but stickier ones are even better. Up until this step we had been tearing up original equipment Bridgestones rated for mud and snow. Now it was finally time to move to a real performance radial—and we didn’t have to leave the Bridgestone family to find one thanks to their new Potenza RE-01R.
The Tire Rack puts this one in their Extreme Performance Summer tire family as it’s designed for maximum handling in nonfreezing conditions. And that’s not just marketing talk, as the Potenza RE-01R has quickly become a serious contender in the street tire autocross wars. It can hang with the benchmark Falken Azenis RT-615 yet seems to hold up better under higher temperatures. The Bridgestone also seems a bit more civil in daily use.
This tire is not available in the 215/45R17 O.E. size, so we went with a very close 225/45ZR17. The wheel size remained 17x7 inches.
“It’s like we pressed the ‘more’ button for handling,” Per said after his runs. “Better grip everywhere.” The Potenza RE-01R setup offered everything a driving enthusiast could want: more grip, more speed, more braking, more everything. The Potenza RE-01R was also easier to drive at the limit, and the lap times didn’t disappoint: Just moving to the better tires shaved nearly a full second from our runs.
Step 6: Added thicker anti-roll bars

Mean time: 31.362 seconds
Improvement: 0.520-second improvement
Cost: $671 for bars, $161.95 for front end links, $323.95 for rear end links
Our biggest problem at this point seemed to be too much body roll—load transfer that allows the tire’s contact patch to become inconstant through a turn—so we took a break to install a pair of Hotchkis anti-roll bars.
Anti-roll bars act as transverse-mounted springs to limit the amount of body roll. While stiffer suspension springs do the same thing, thicker anti-roll bars can improve handling without making the ride any stiffer. It’s basically a win-win scenario.
We went with Hotchkis’s competition anti-roll bar set, which replaces the stock front and rear bars with a pair of 1-inch hollow bars. According to Hotchkis, their bars increase the front rate by 88 percent. The rear bar is adjustable, and the three available positions increase the rate by 71, 123 or 200 percent over stock. (We used the middle setting.) We also went with Hotchkis’s billet aluminum end links that are a bit beefier than the stock Subaru pieces.
“The car is slow to respond because it still has stock shocks,” Per noted. “But it’s much easier to get the car to the apex.” The increased response also allowed Per to better keep the car on the desired line, and that extra control rewarded us with a half-second drop in lap times. We’ll take a half-second advantage with no tradeoffs any day of the week.
The Tire Rack didn't have this specific competition part in their inventory, so we got the bars direct from Hotchkis. The Tire Rack does carry a sport-level Hotchkis anti-roll kit for the WRX Sedan for $370.
Step 7: Dialed in more camber

Mean time: 31.300 seconds
Improvement: 0.062-second improvement
Cost: $26 per pair of camber adjusters
Our friend the pyrometer showed that the inside edges of our front tires were running too cool. Where the outside and middle tread areas were in the 150-degree Fahrenheit range, the insides were nearly 15 degrees cooler. This is a sign that there’s not enough negative camber.
While we had maxed out our negative camber within the factory tolerances, there was still more that we could do. A pair of Eibach eccentric camber bolts would do the trick. (While technically it’s possible to install two eccentric camber bolts per strut for even more negative camber, we have found that this setup sometimes doesn’t offer enough clamping force to properly secure the strut.)
The Eibach camber bolts allowed us to get 2.1 degrees of negative camber on each side. We again set the toe at 1/8 inch total toe-out and sent Per back on course. Sweeper grip was up, while his lap times were down. The time savings weren’t huge—less than a tenth of a second on average—but our WRX wagon was starting to feel more like a real performance machine as the handling crispness increased.
Step 8: Upgraded springs and shocks

Mean time: 31.244 seconds
Change: 0.056-second improvement
Cost: $220 for spring set, $178 each front strut insert, $171 each rear strut insert
By this point we had greatly reduced body roll and already shaved more than two and a half seconds from our average times, but the car still felt too soft as the chassis pitched and dived a bit drastically. The stock springs and dampers had become our weakest link.
Before we go too far, some quick indications as to which parts are tasked with which jobs:The springs are tasked with supporting the car’s weight, while the shock absorbers essentially control the movement of those springs. Our soft springs were allowing the car’s body to pitch, dive and roll too much, while the soft stock shock absorbers were allowing those movements to happen too quickly. The end result was a car that was difficult to control at the limit.
Our remedy was a popular, proven setup: Koni Sport shock absorbers teamed with an Eibach Pro-Kit. The stiffer, shorter Eibachs would do two things: lower the car’s center of gravity while increasing the spring rate at each corner. The Konis would provide plenty of spring control. Plus, they feature adjustable damping, allowing us to fine-tune the suspension setup.
While it’s possible to just upgrade one of these items at a time, we did both since it’s a more realistic upgrade. If you’re going to take the time and money to replace the shocks or springs and then do an alignment, why not do the entire setup at once?
Koni only provides the internal strut cartridges for our Subaru application, so in the interest of keeping our test day on schedule we had a new set of strut assemblies put together before our test day. The basic strut and spring swap went smoothly—replace the old parts and install the new ones—and once complete we aligned the car back to our previous specs.
While our average lap times didn’t decrease that much, the car had become much easier to drive—and the lap times bear out this consistency. The times for our four-lap session were all within an eighth of a second. “Ultimately, it’s easier to drive at the limit,” he explained.
Fixing one chassis issue had uncovered another, Per noted: “The car is now using its contact patch as well as possible. And now we need to improve our contact patch.”
Time to mount up another set of tires.
Step 9: Wider wheels and tires

Mean time: 30.788 seconds
Change: 0.456-second improvement
Cost: $176 per tire, $239 per wheel
So, why do performance cars feature wider tires? Easy. A short, wide contact patch provides better grip through the turns. As we’re all about handling, it’s time to upgrade our contact patch once again.
We’re going to stick with the Bridgestone Potenza RE-01R, but we’re going to go a little wider, replacing our 225/45ZR17 tires with a 235/40ZR17. To better support those tires and place more of their contact patch on the ground where it does some good, we’re also going to upsize the wheel from 17x7 inches to a full 17x8.
The new wheel is the Kosei K-1 TS, a product that’s aimed squarely at the motorsports enthusiasts. These lightweight aluminum wheels are shot-peened and heat-treated for strength. They’re also available in a very wide variety of sizes and fitments with rim diameters ranging from 14 to 18 inches. Our 17x8-inch wheels weigh a slender 15.5 pounds each; each wheel also came with valve stems, center rings and lug nuts.
The bigger wheels and tires actually made the car feel a little slower through our course’s tighter parts, but the lap times show that the tradeoff was worth it: We dropped nearly half a second on average. On a 30-second autocross course, that’s a pretty huge savings.
Step 10: Added strut bars

Mean time: 30.832 seconds
Change: 0.044-second loss
Cost: $404 front, $491 rear
The shadows were getting long and our internal batteries were starting to fade, but we still had one item to test: strut bars. The main function of strut bars is to tie together the tops of the strut housings. One bar handles the two front struts, while another takes care of the rears. The theory is that boxing them in increases chassis rigidity and pays off in a faster car.
DC Sports offers upper strut bars in both carbon steel and flyweight titanium. We tried the titanium bars, which weigh almost nothing at less than 3 pounds each and easily bolt in place.
While in theory strut bars are a good thing, they didn’t help our lap times. In fact, our average increased by a few hundredths—at this point, that can almost be called statistical noise. The Subaru’s chassis is obviously rigid enough in stock form to cope with the forces generated by these street tires; a jump to ultra-sticky R-compound tires or some jumps on a rally course would do more to justify the strut bars.
What Did We Learn?
Whether we’re just commuting to work or carving up our favorite race track, we all want our cars to handle well—file better handling under both performance and safety, as it’s easier to avoid a collision when driving a car that perfectly reacts to the driver’s every thought.
The good news is that the aftermarket offers a ton of solutions that pick up where the factory left off. Sometimes it’s hard deciding where to start, however.
Having a methodical plan versus just throwing parts at the car shows the precise effects the available options have on handling. In our case, a handful of common upgrades—some of which were totally free—helped drop our lap times by more than 10 percent.
These tweaks and changes turned our 3200-pound Subaru into a very competent, consistent, dialed-in car that’s a joy to autocross yet is still quite comfortable on the roads. We have covered more than 2000 miles since this test day, and the Subaru has been nothing less than quiet and comfortable on the streets.
Mission accomplished.


