Raze
SuperDork
9/16/12 9:48 p.m.
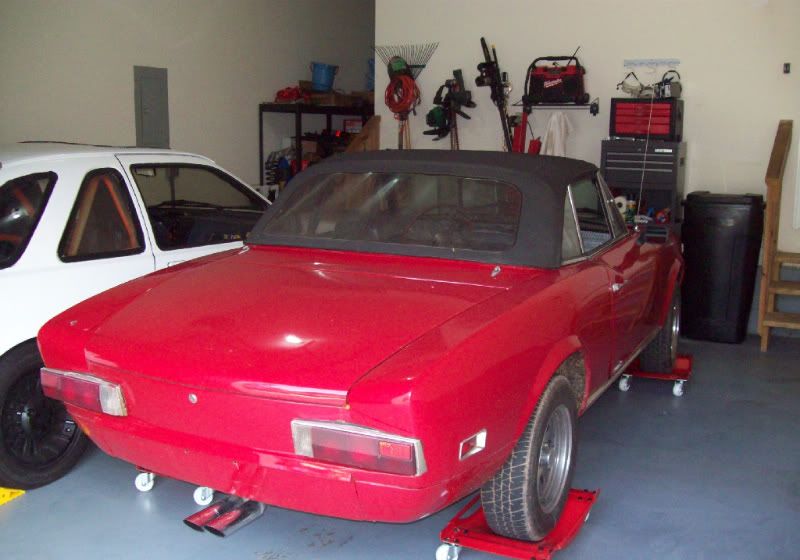
Since we now have a proper build-thread section of the forum again, it's time to add the Fiat. The 'overview' can be seen in my garage and link to more pictures, but this will serve as the official thread with more detailed photos and discussion.
This project started a little over 2 years ago in 2010, and here was my original post about it with updates as I've learned information about what I had bought:
First Look:
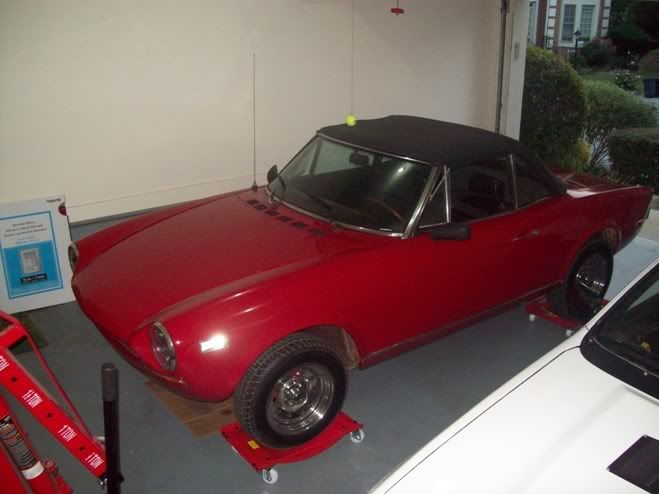
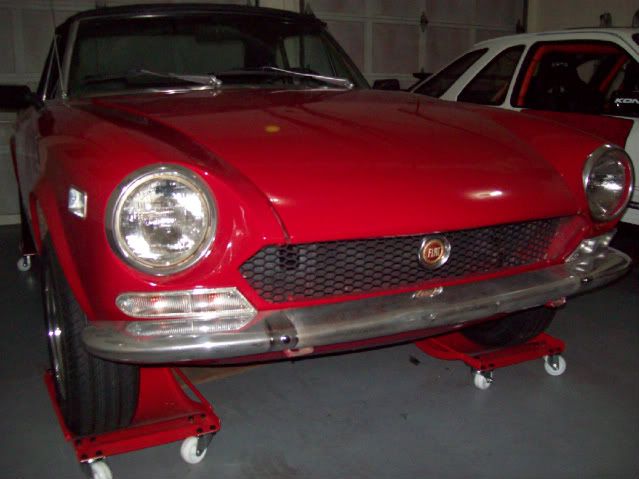
Well after looking for the better part of a year, and passing on an 850 which proved to be too much of a wreck and unsafe to dolly I was close to giving in when my wanted add on CL landed me an email from a father/son 72 Fiat Spider project who had bought and thought it was previously amateur restored 6 years ago. The transmission popped 4 years ago and it sat in their garage until last year when they put a reman in from IAP (got the paperwork $$$!). By this time though the son was in college, father didn't have the time to deal with it and wanted it gone, same sad story. I checked the engine it's a 125BC000 ~ 1608 with a 32/36 DFEV Weber. The chrome bumpers were removed and the fascia filled and smoothed before the restoration respray (originally yellow in color), but I have all the bumpers and they're really nice (no rust) for 38 year old's and the chrome is still good. I'm planning on putting them back on sometime down the road. Believe it or not I got this at a VERY challenge price so I may just drive it down as is for giggles (still might someday). Anyway, time for some pics, will have more in Reader's Ride section:
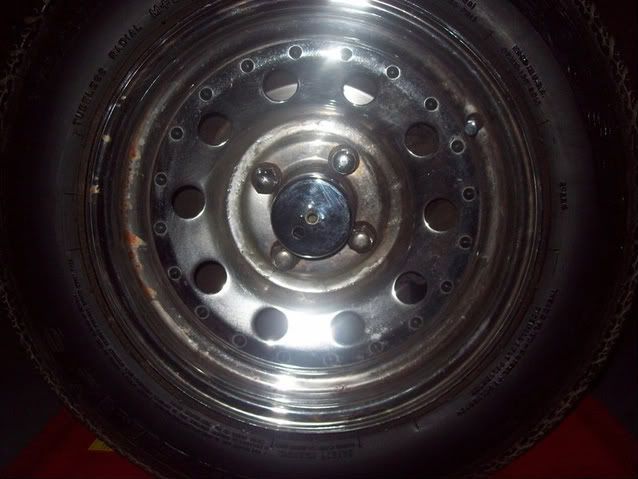
Anyone know what type of wheels these are? They are at least 2 piece as those little black rivets are indeed real fasteners.


As I dig into the car, I'm finding it's more original (good upkeep / garaged) and less restoration at least the body, the dash is custom and the header is a pacesetter unit, there is some rust in corners but minimal, but the underside has been under body coated at some point in life and the pans are fantastic. The only parts that need help are the bottoms of the door. I've only found about 4 spots of bondo and it was to fill dents, two of which were on the hood, no real rust repair.
Raze
SuperDork
9/17/12 6:46 a.m.
Exterior Changes:
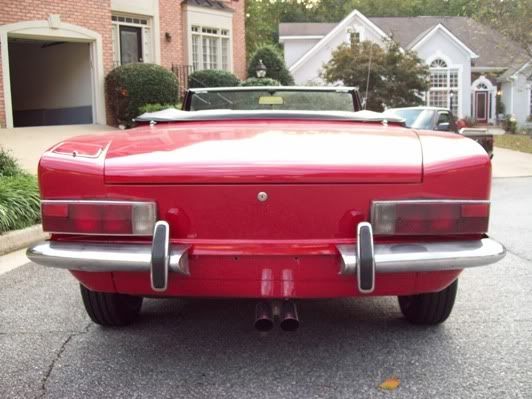
First up was to add the bumpers back, I also blacked out the grille, reattached the front badge, added euro style clear turn style front lenses, used Krylon stained glass paint on the rear plastic lights that had faded out.
Before:
After:
Raze
SuperDork
9/17/12 6:47 a.m.
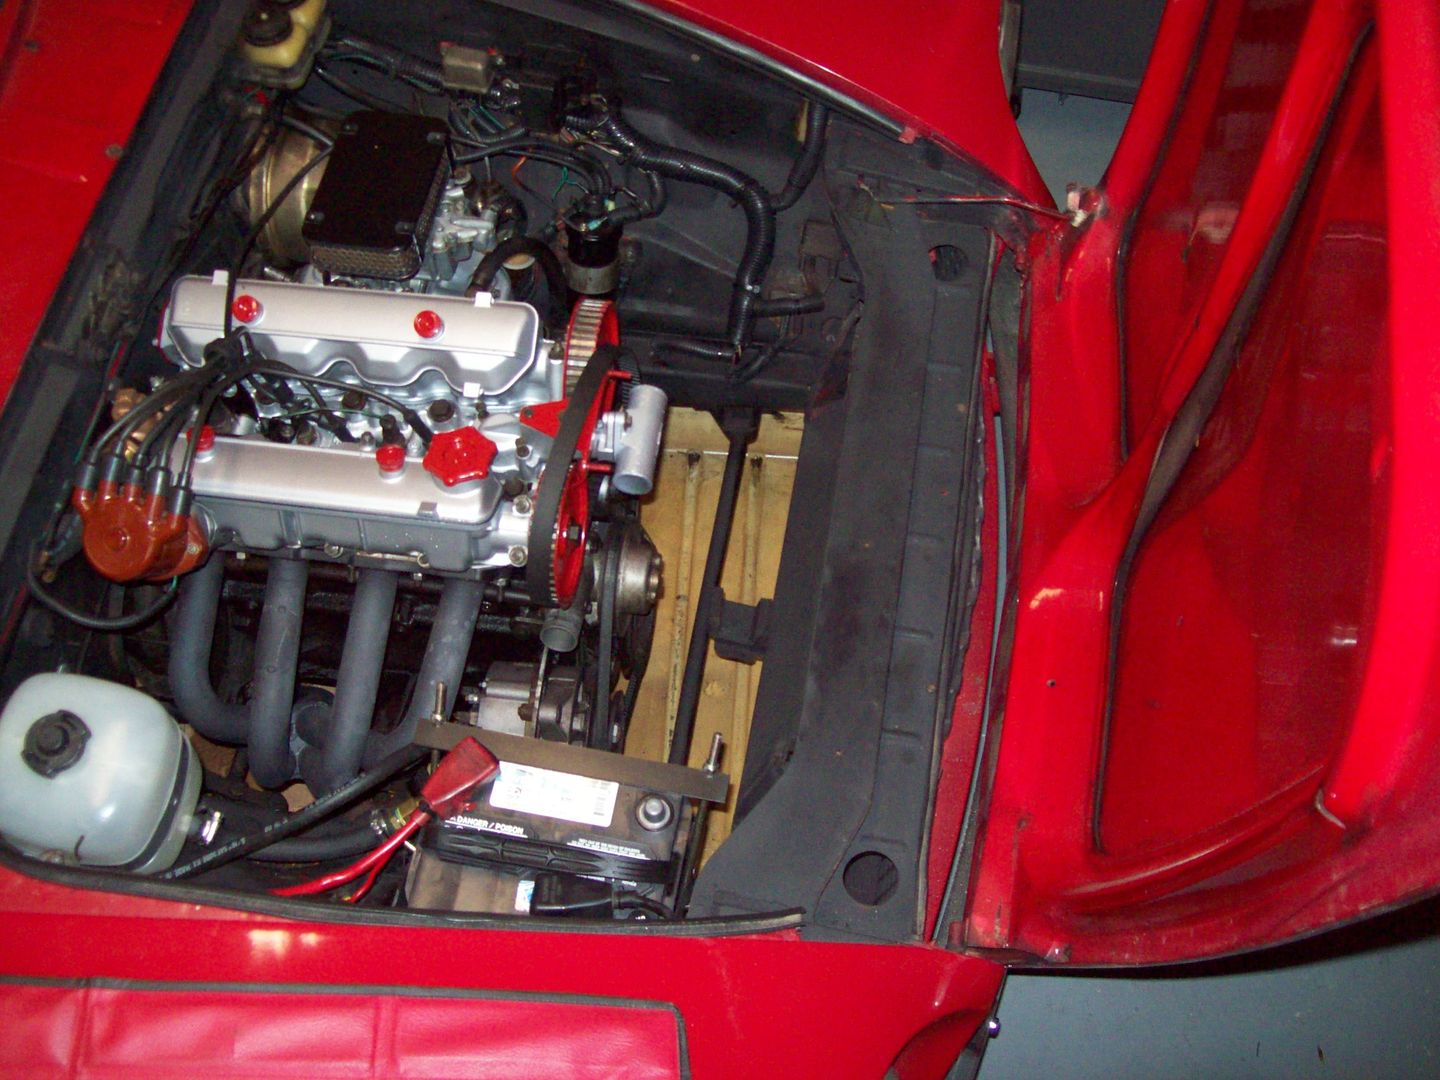
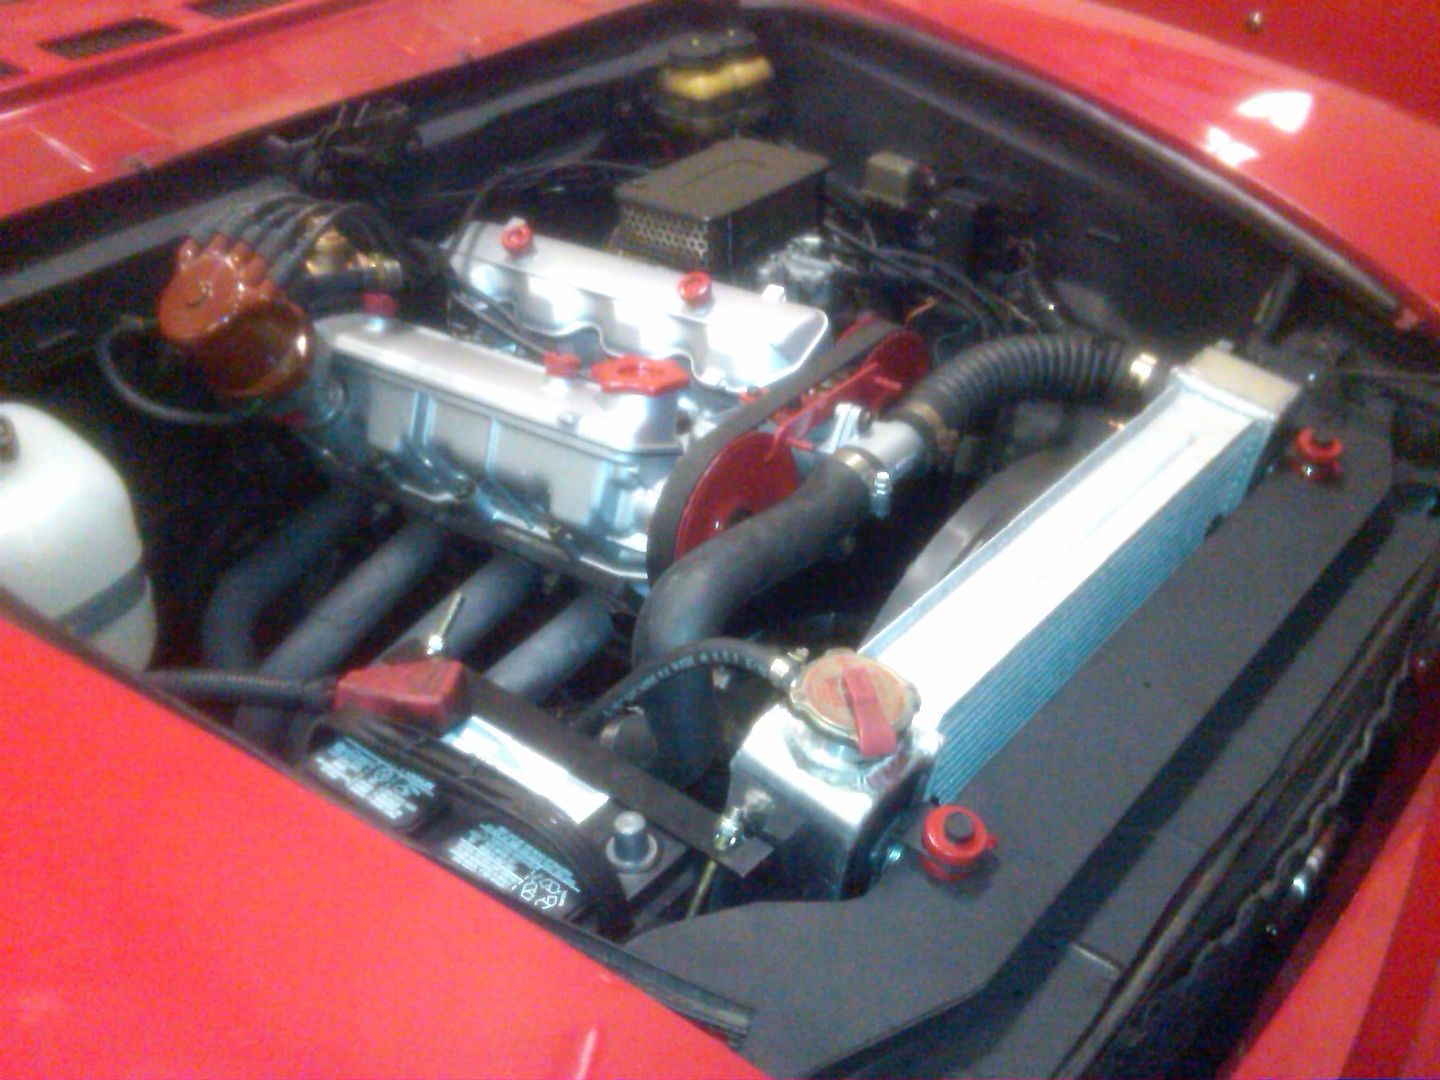
Engine Repair:
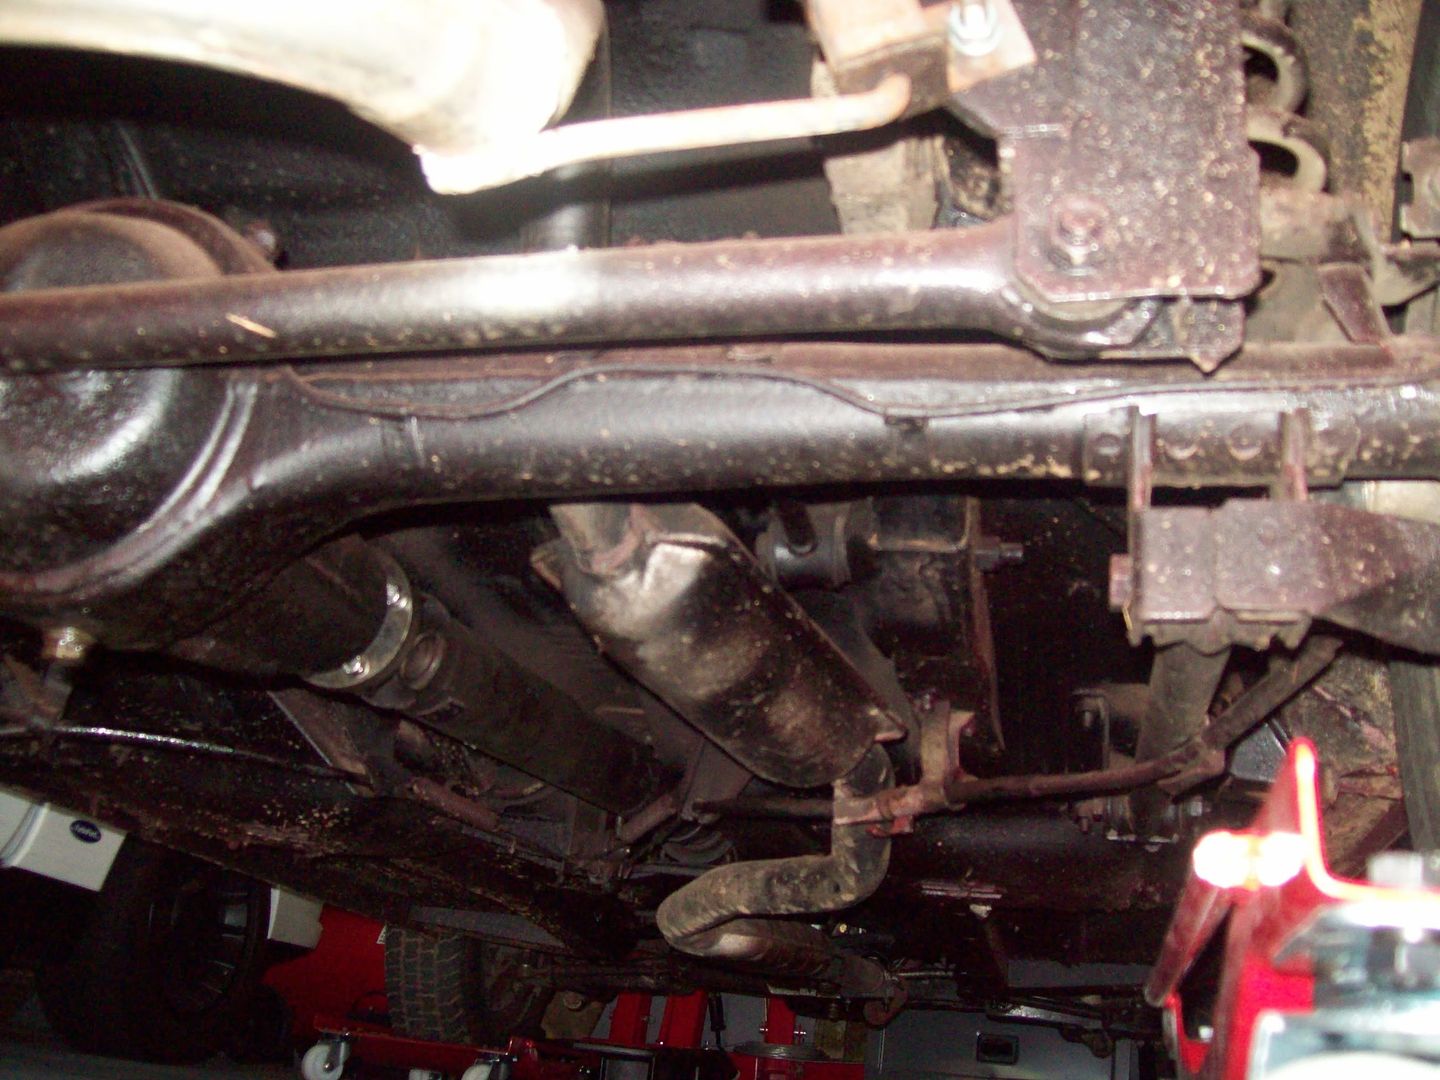
The list of repairs here was extensive, after adding a new battery and installing a new battery bracket, I needed a new coolant overflow bottle. I also found the radiator was leaking so I swapped to a universal aluminum radiator and a modern slim line electrical fan. These were good fixes, but with all the leaks in the head I decided to remove and replace all the seals. This led to full disassembly, and a paint job. I found timing the cam to be hard with the belt cover on so I chopped it. I also added a coolant filler attachment at the highest point in the system at the firewall. While I had the head off I dropped the exhaust and used ceramic header paint on the entire system. I finally topped all the work off by repainting the bay:
Before:
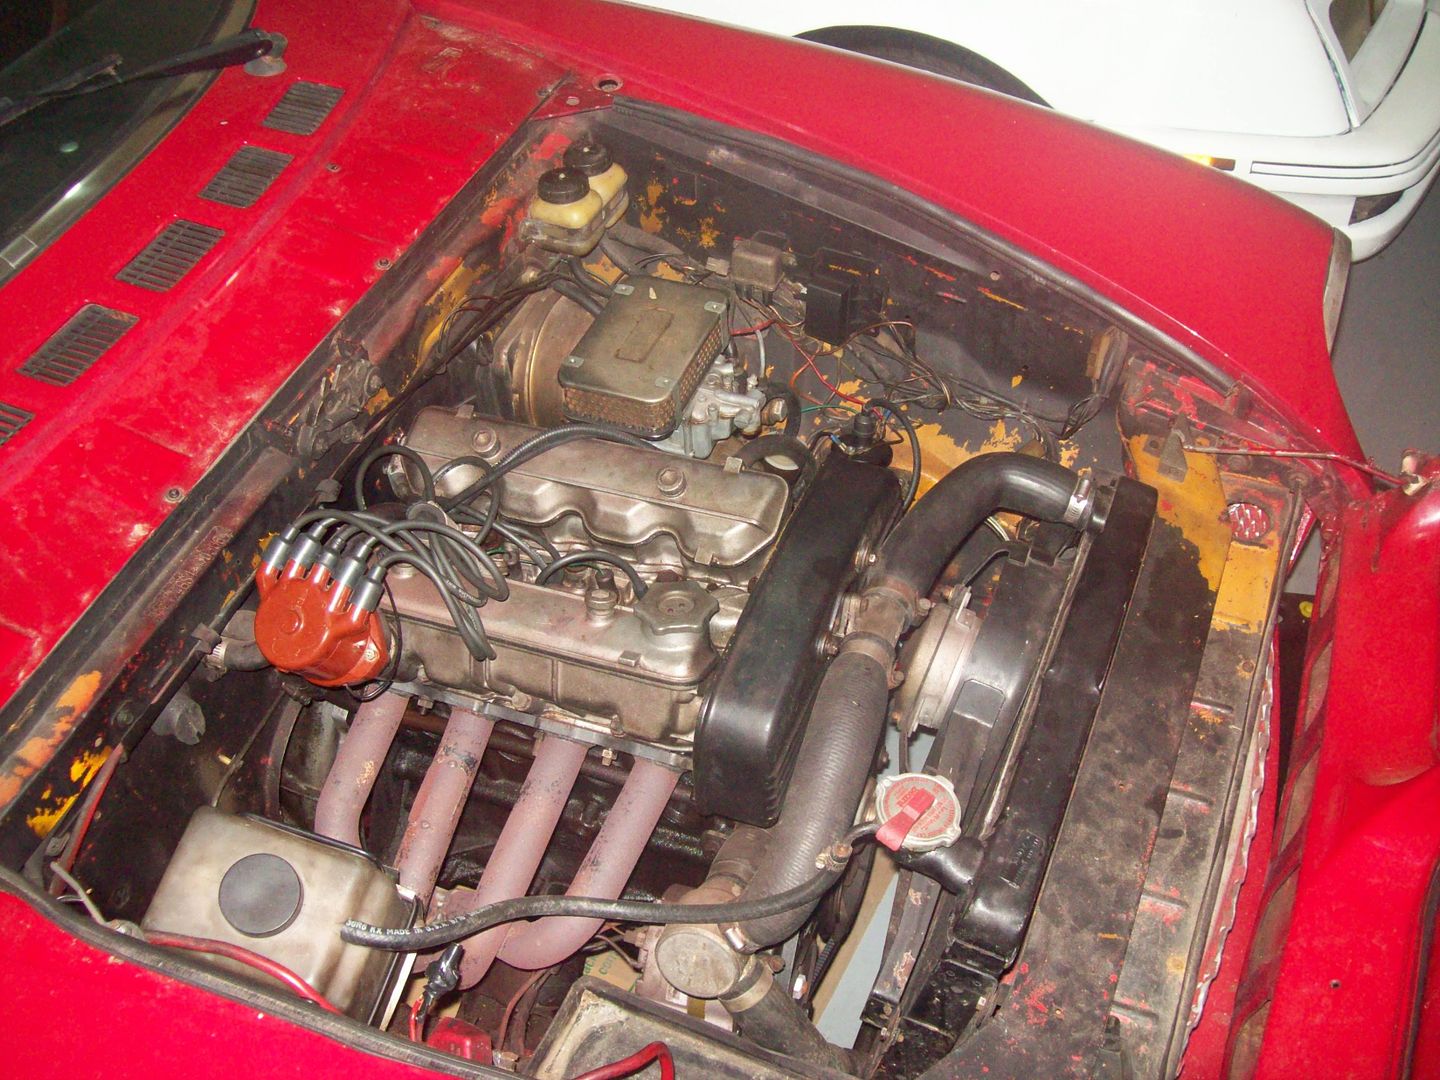

After:
Raze
SuperDork
9/17/12 6:47 a.m.
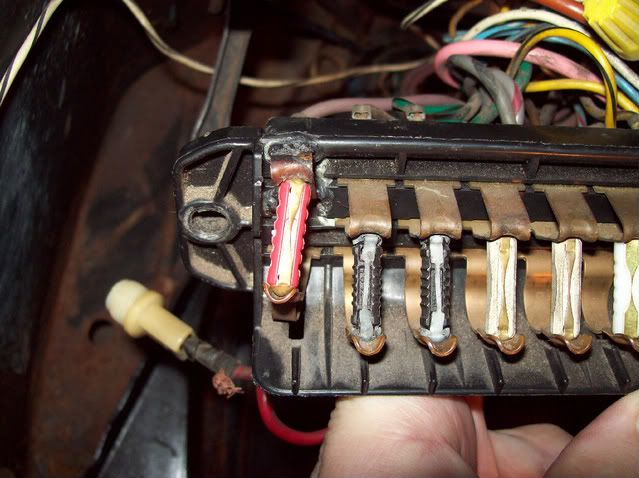
Electrical Repair:
After constant shorts, and other electrical problems, I dove into the electrical system. This was the worst part about this car, but luckily also the easiest to fix. Turns out a PO had wired in an aftermarket stereo and burned up wiring near the fuse block. I decided to switch over to ATO style as I'd seen the mod on Mirafiori and it seemed simple.
Before:
After:
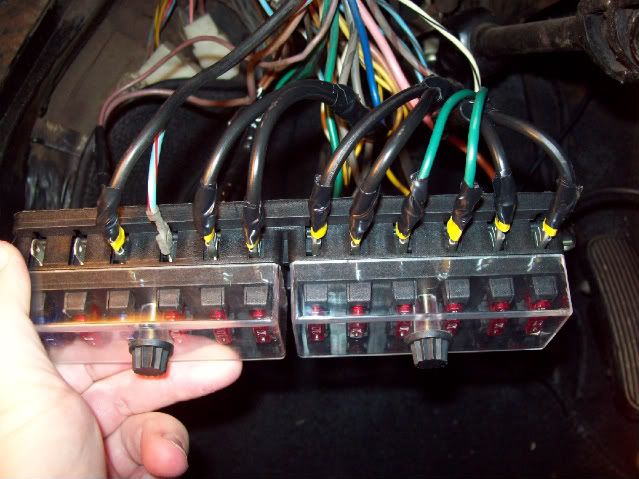
I need to put a better picture up, but the connectors have all been heat-shrinked
Raze
SuperDork
9/17/12 6:47 a.m.
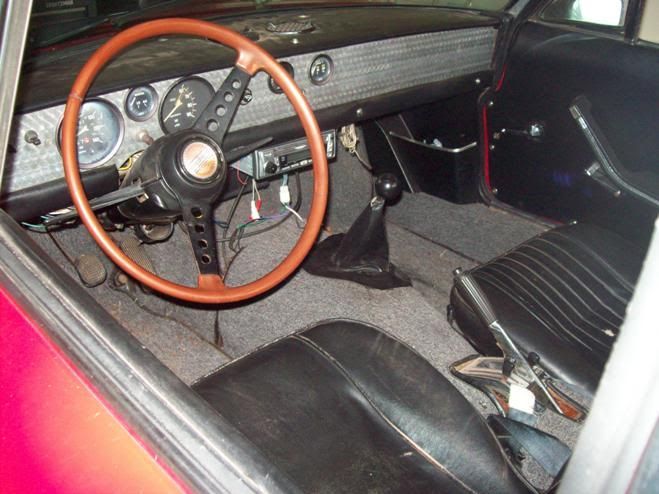
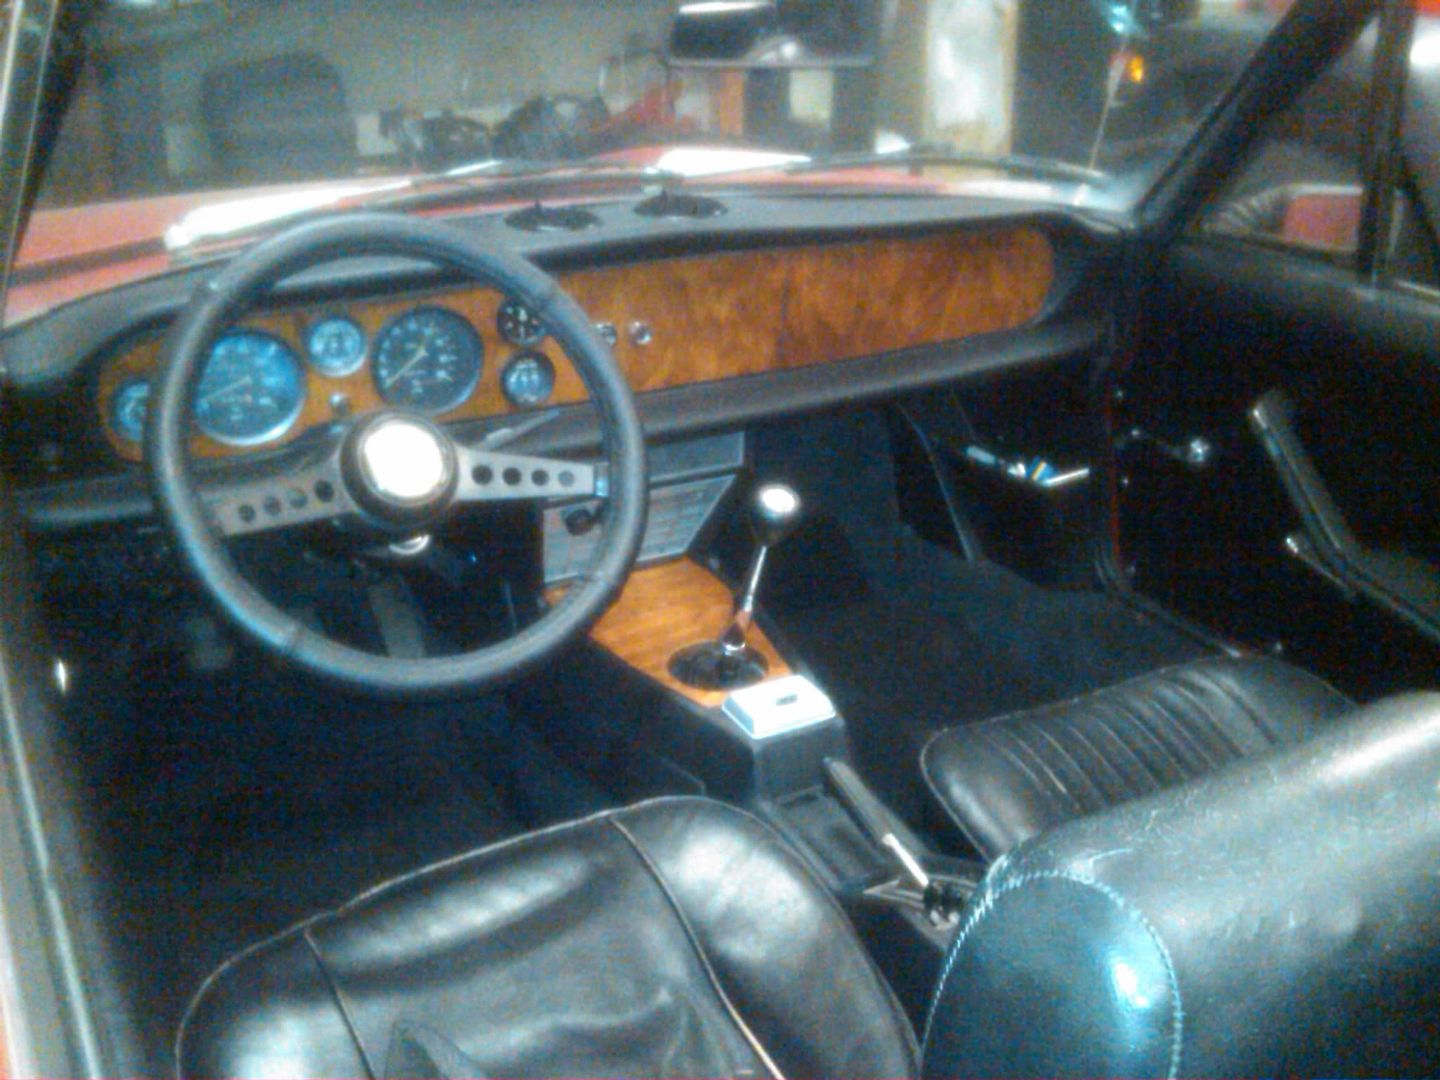
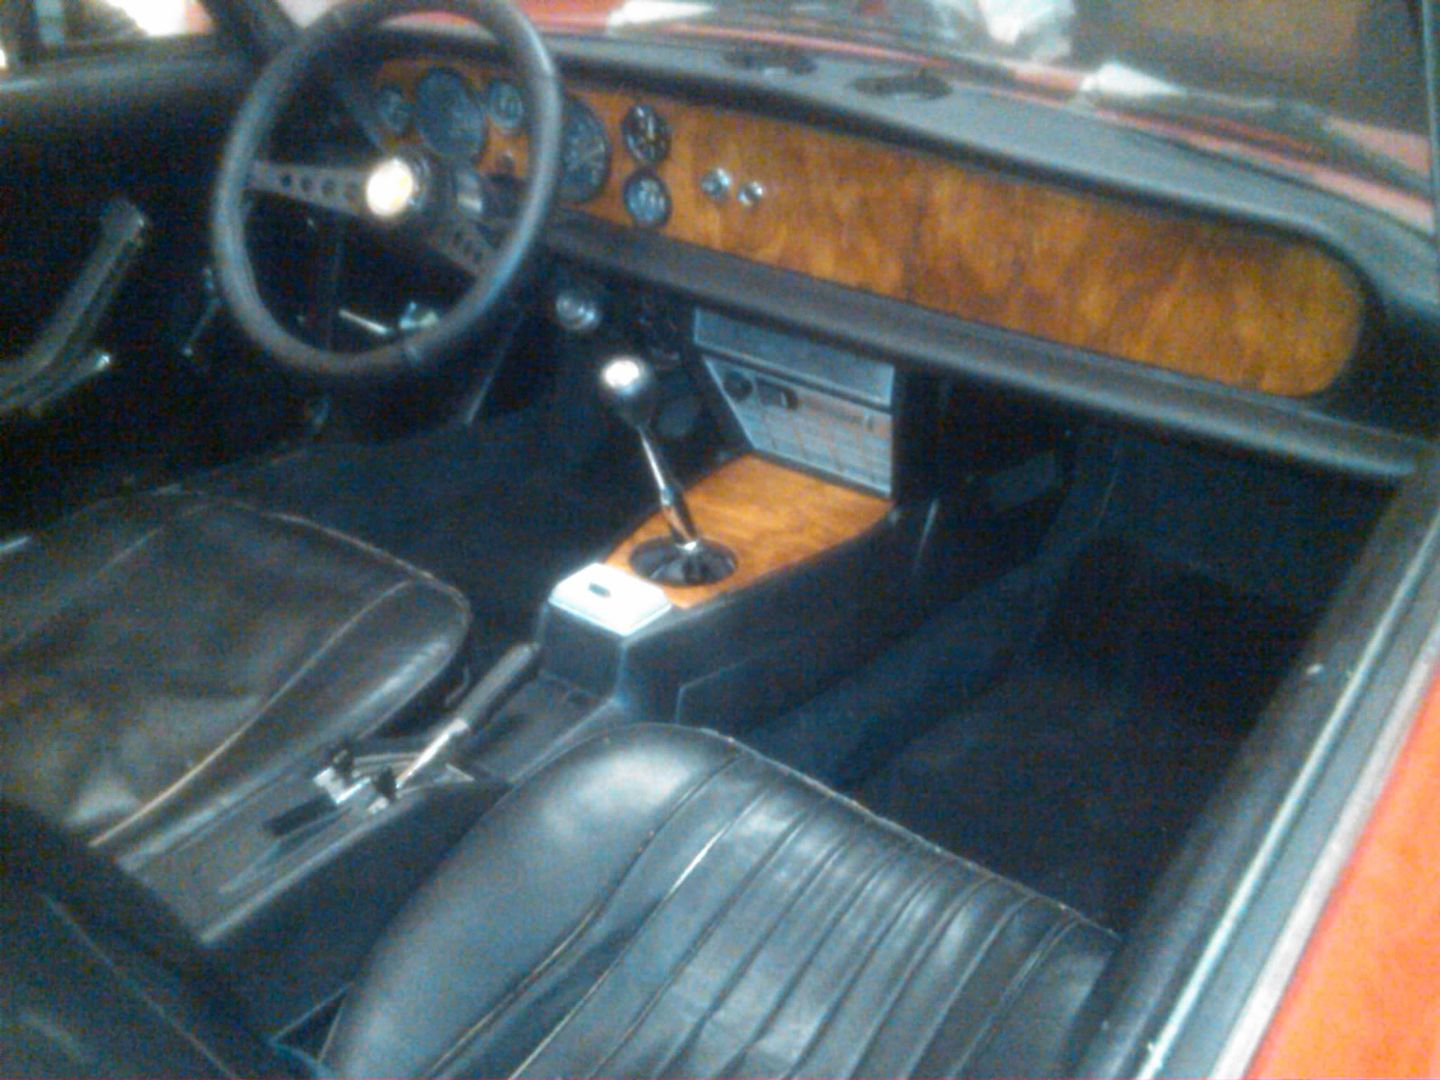
Interior Restoration:
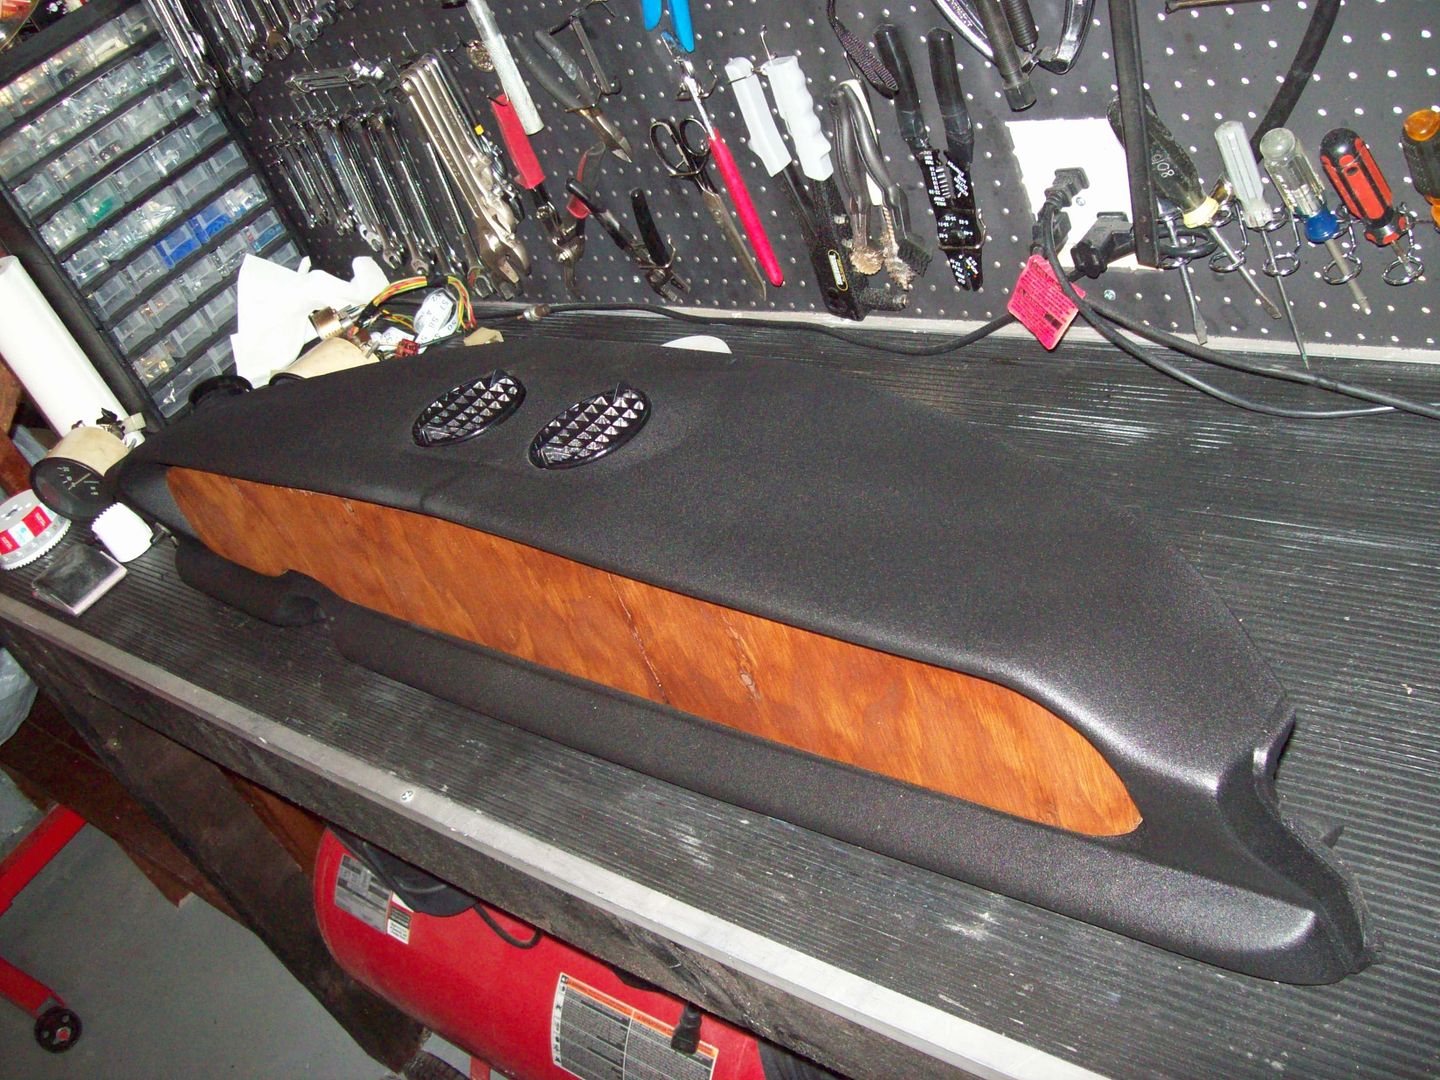
The car came with a 'home-made' interior that was sadly dated, and not very nice. I decided I wanted to put original parts back in, only problem is I'm missing all of them. I ended up slowly buying from other Fiat enthusiasts different panels of various repair, and doing a low-budget restoration. I'm still missing the wood panels, so I made some up out of leftover plywood and some varnish I had laying around. Needless to say this is temporary, but it looks nice for what it is. I dyed the carpet black after deep cleaning it, and I still need to recover the seats, but that will be an enjoyable learning experience. I also leather wrapped the steering wheel which was plastic and cracked.
Before:
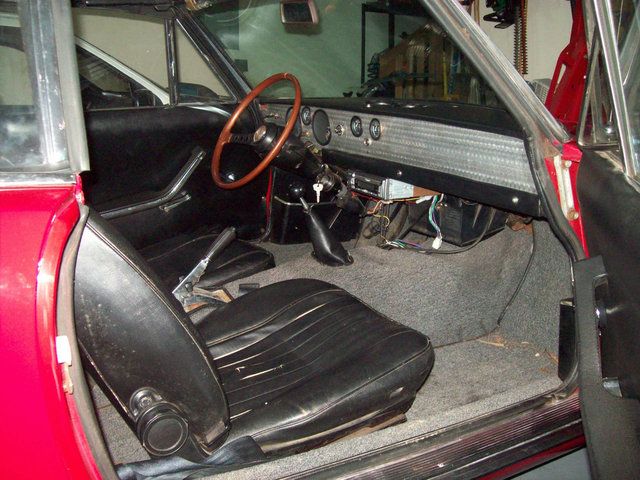
After:
Raze
SuperDork
9/17/12 6:48 a.m.
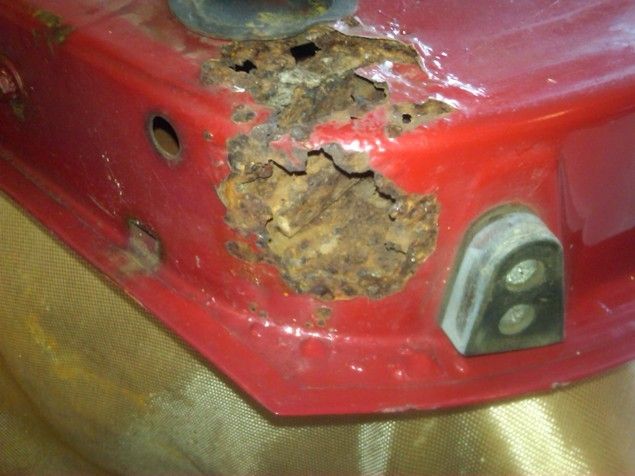
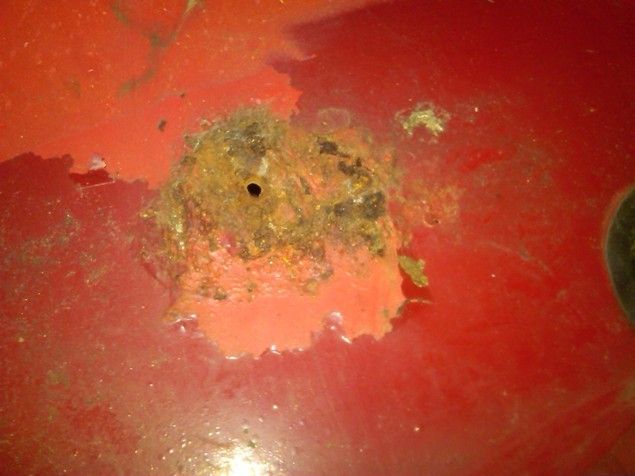
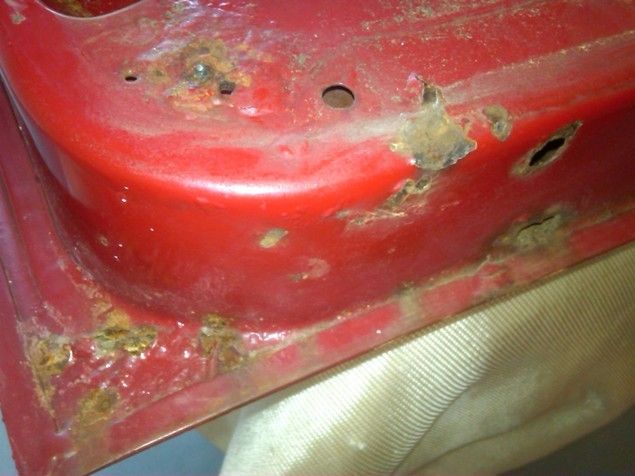
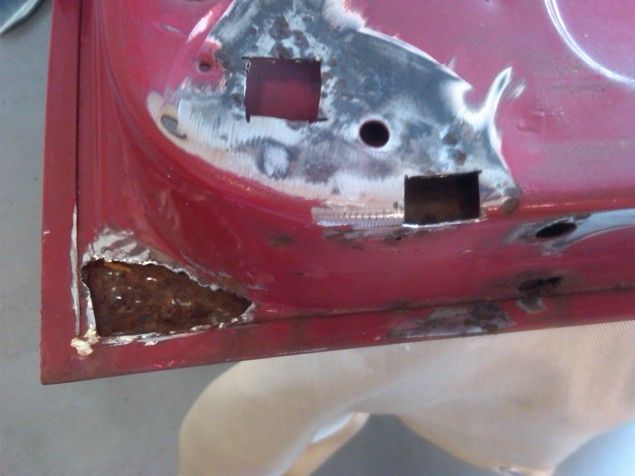
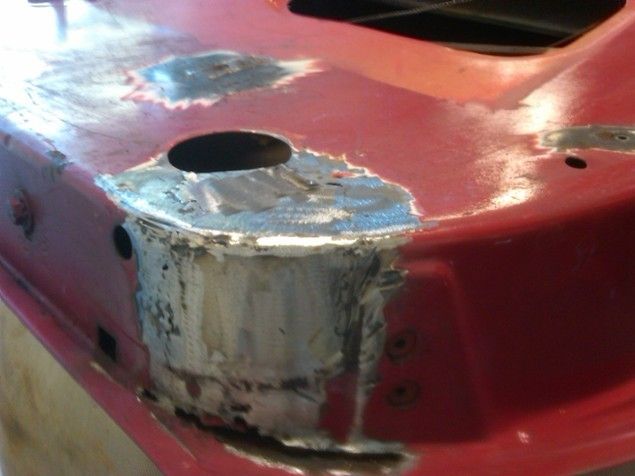
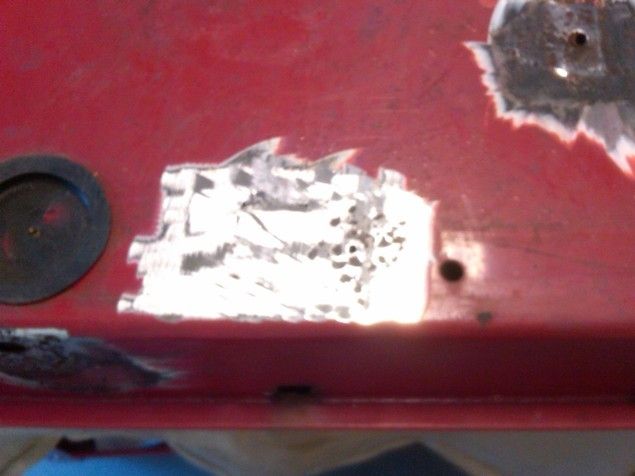
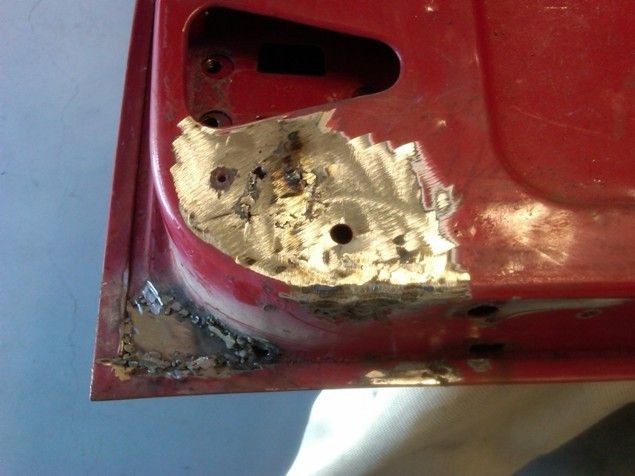
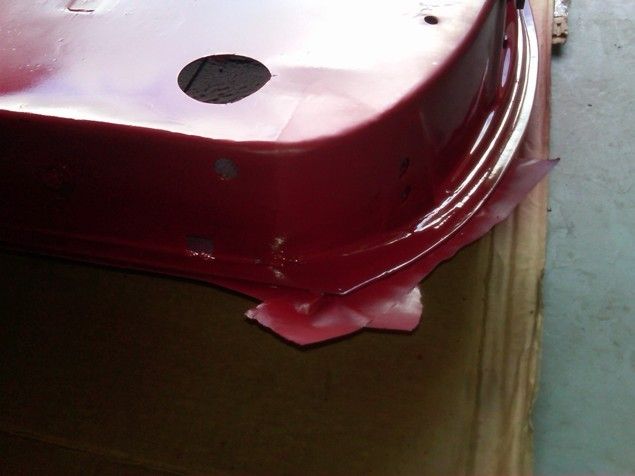
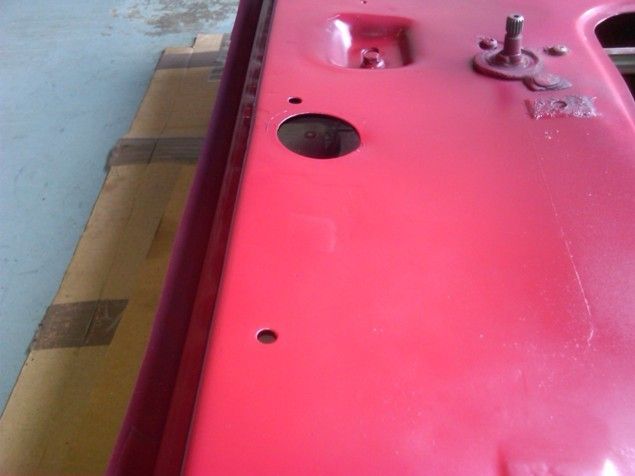
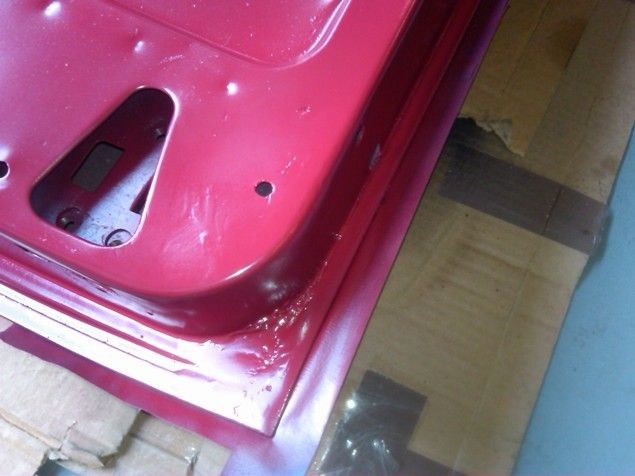
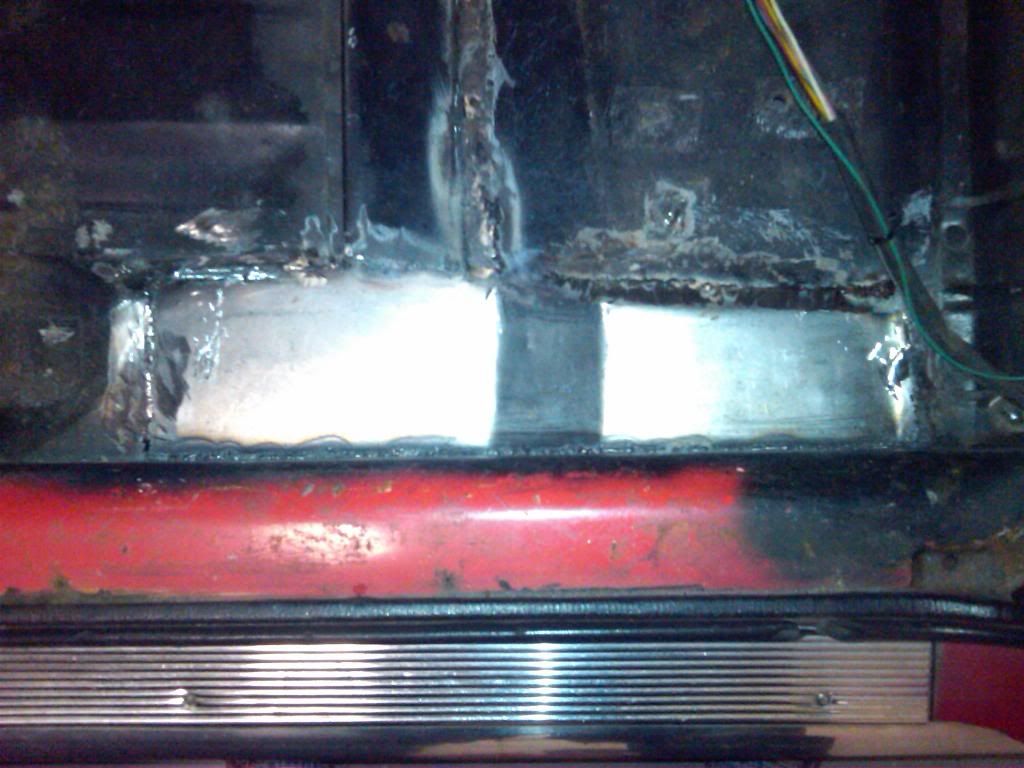
Rust Repair:
OK, I know what you're thinking, it's about time there was some rust repair, I mean it's a Fiat, it should have been rusting since the moment I bought it! Indeed I ended up repairing the two door inner skins which had some level of rust. I still need to patch one hole in the driver's side floorboard that was bondo'd, as well as the driver's side seat rail which rusted out. After those (which I will document in upcoming reports) I should be done with the rust work, this car really is in good shape. Please excuse me, this was my first time welding sheet metal, and I was using .030" flux cored wire. I learned alot, mostly what not to do, and why everyone says to use gas. I've since switched over to 0.024" + Argon/CO2 mix and the difference is night and day (but I didn't take pics).
Before:
In-Process:

After:
Finished:
more to come...
Very cool! Those patch panels don't look too shabby, and after paint you can hardly tell there was ever a problem. Nice before and after on the engine bay. Looks great. Interior is coming along nicely, and though I would have been tempted to keep the metal dash, you can't argue with a nice wood dash on a classic roadster.
Oh man... I really liked the car without bumpers. The dash, engine bay and wiring look great. I like the chopped timing cover too.
An hour ago I could see all the pics, now all I see is red 'X's?? My normal trick to make pics appear is copy the address, past it into the address line, go there direct then come back to the thread. Didn't work this time?
FYI, there is some issue with the pics. I think it might be their size. Last night at home, my computer slowed to a crawl trying to load this thread (and only this thread). Here at work it's still a little sluggish even with our awesome connection.
Raze
SuperDork
9/17/12 5:18 p.m.
I reduced about 80% of them down, should load quite a bit faster, I still have some more to do and I will. Most were 3-8MP images, I've downsized them to significantly smaller...

PDoane
New Reader
12/13/12 6:14 a.m.
Great thread! Love what you're doing.
I had one in BRG back in college. It used to break clutch cables a lot so I got good at driving it w/o the clutch, just hell on the starter at stop light & signals. Easiest top mechanism I've ever put up/down.
Raze
SuperDork
12/13/12 10:58 a.m.
Thanks,
I've finally gotten the driver's side interior removed in anticipation of repairing the one bondo'd hole in the floor pan and the seat mount which rusted at some point. The upside is the floor was POR'd at sometime in it's life, the downside is the floor was POR'd at sometime in it's life. I'll post pics as the work progresses (over the holidays).
I may swap out the brake calipers for reman units and replace the brake lines as they're looking quite poor. I'm still hunting for the wood panels for the dash and console, and I'm either going to try and recover the seats myself or pick up some good old seats to swap in. At that point I won't have any work left to do.
Raze
SuperDork
12/21/12 10:18 a.m.
New Seats:
So I've wanted to get new seat covers but they run $250/per seat which is way outside my budget (plus you can usually buy an entire Fiat for that price!). A member over on the Fiat forums who lives down in Warner Robbins (120 miles south of me) had a couple seats listed that were dirty but looked serviceable. He wanted someone to take them away to clean out his unit, but I was a sport and threw him $20 for meeting me while he was working.
Before (that's actually pine sap on the seat to the right):
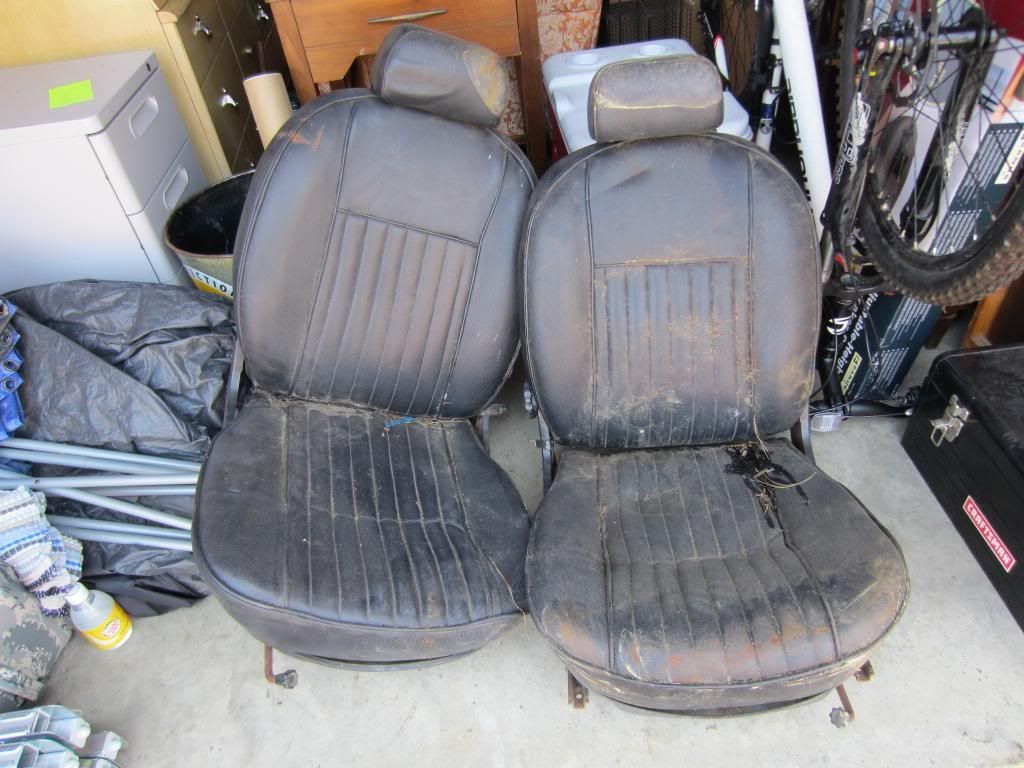
After Cleaning (amazing what some soap and water, Goo-Gone, and elbow grease can get you):
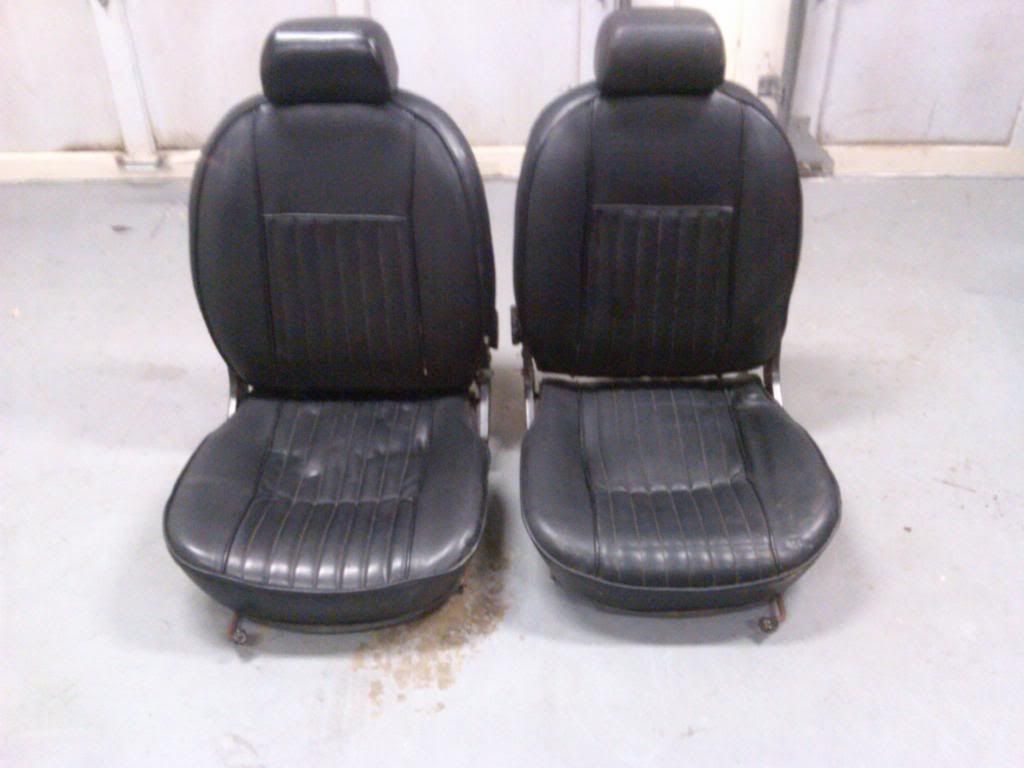
After Repair, swapping of good pans for bad pans, swapping backs, and vinyl dying everything:
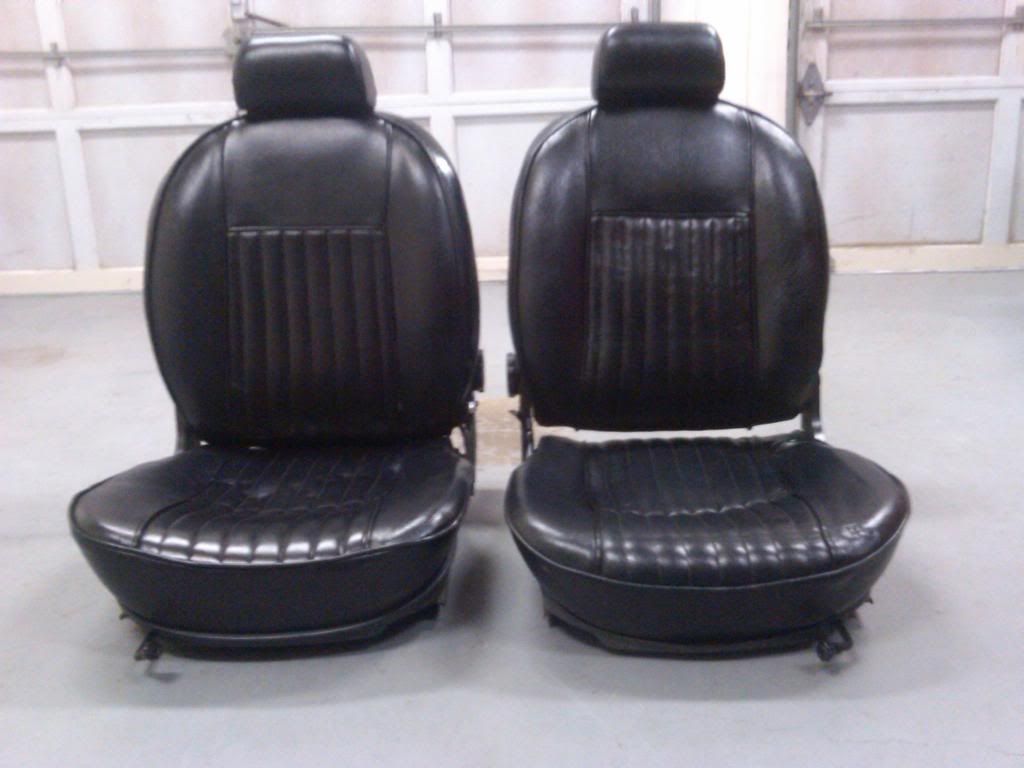
I'm buying a vinyl repair kit for couple of small spots on the driver's side that need filling, final result was well worth $20 + $30 in gas and 4 hours of driving + 1 hour of cleaning, swapping pans and backs, some paint for the pans, and vinyl spray over both seats.
Raze
SuperDork
12/21/12 10:26 a.m.
Fred Flintstone Would be Proud!
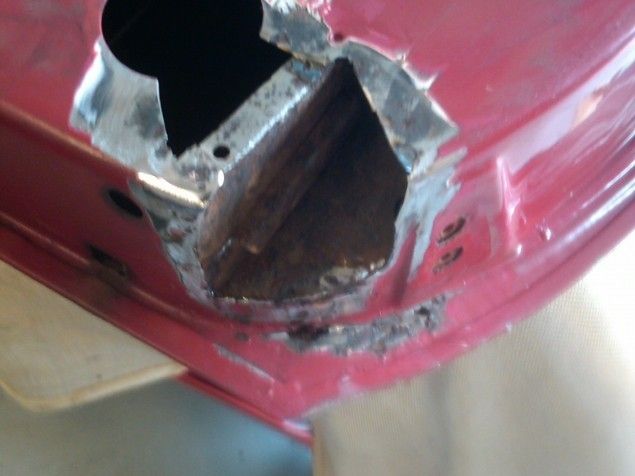
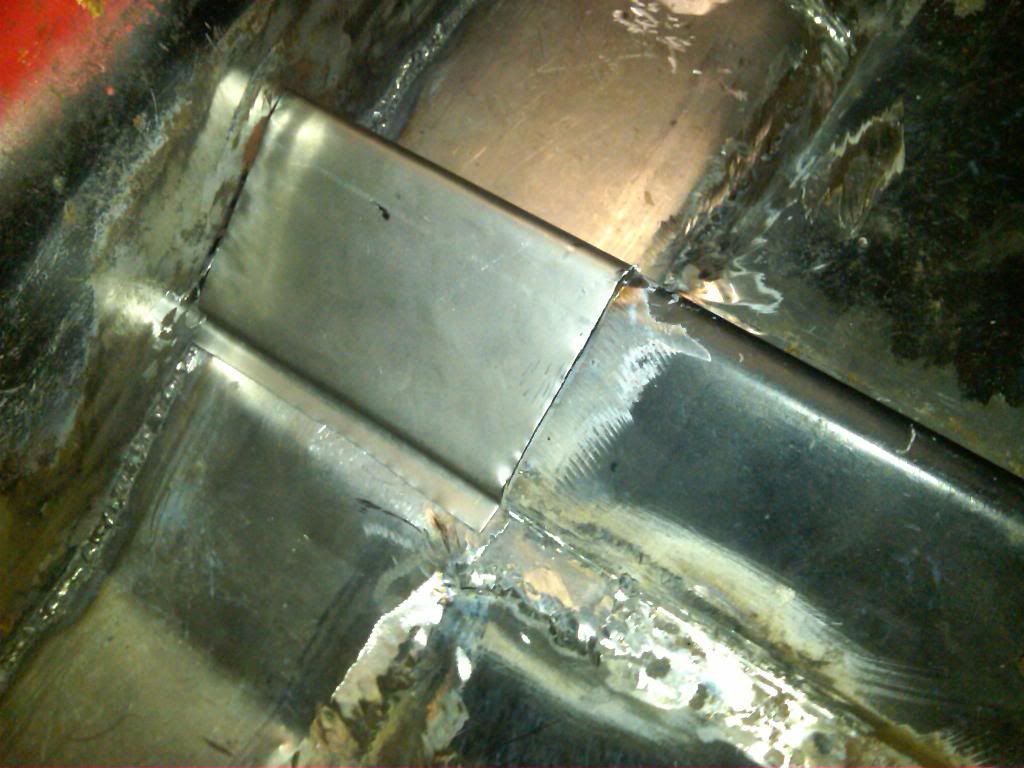
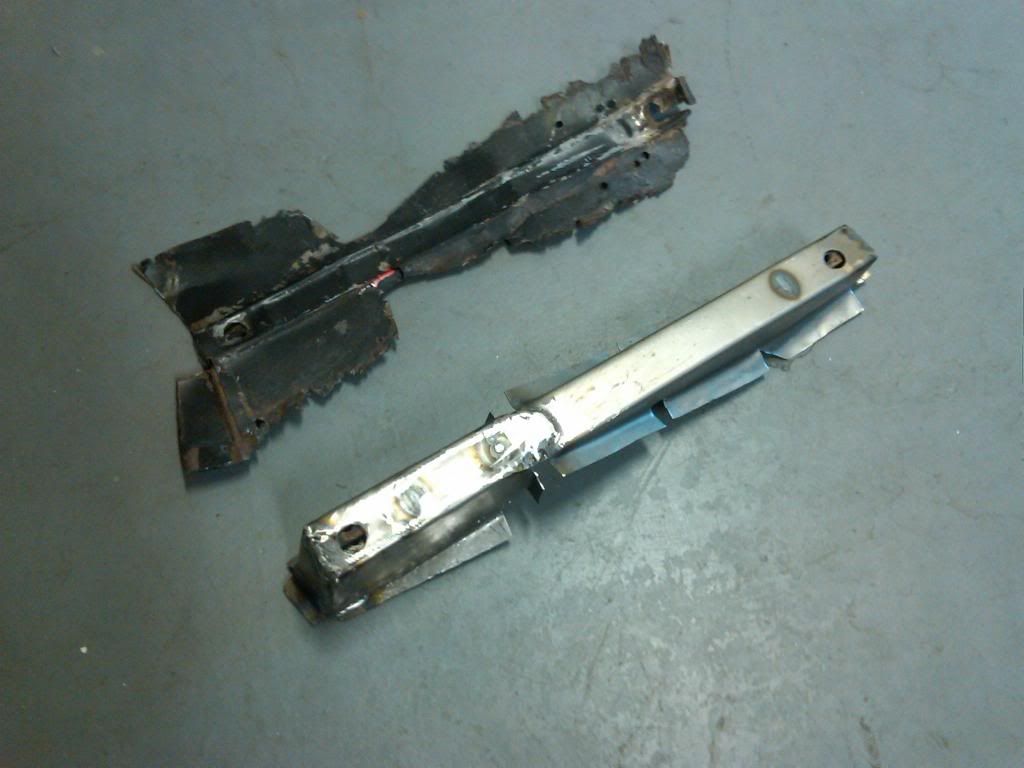
After pulling my driver side seat I noticed an odd piece of aluminum attached to the rear of the outer seat rail mount. Upon closer inspection the rail had rusted out, as had a nice 6"x6" hole in the floor. The PO had used a small piece of angled aluminum against the frame rail to add support to a mesh+bondo'd patch that he then covered underneath with rubberized coating, and the inner floor with paint/POR. One 'tap' with a 1lb hammer opened a huge hole. After carefully scraping and ripping out the bondo, I realized I need to cut out all the cancer. Out came the air saw. When I got tired of trying to make the lines perfectly straight, out came the sawsall. Here's the result:
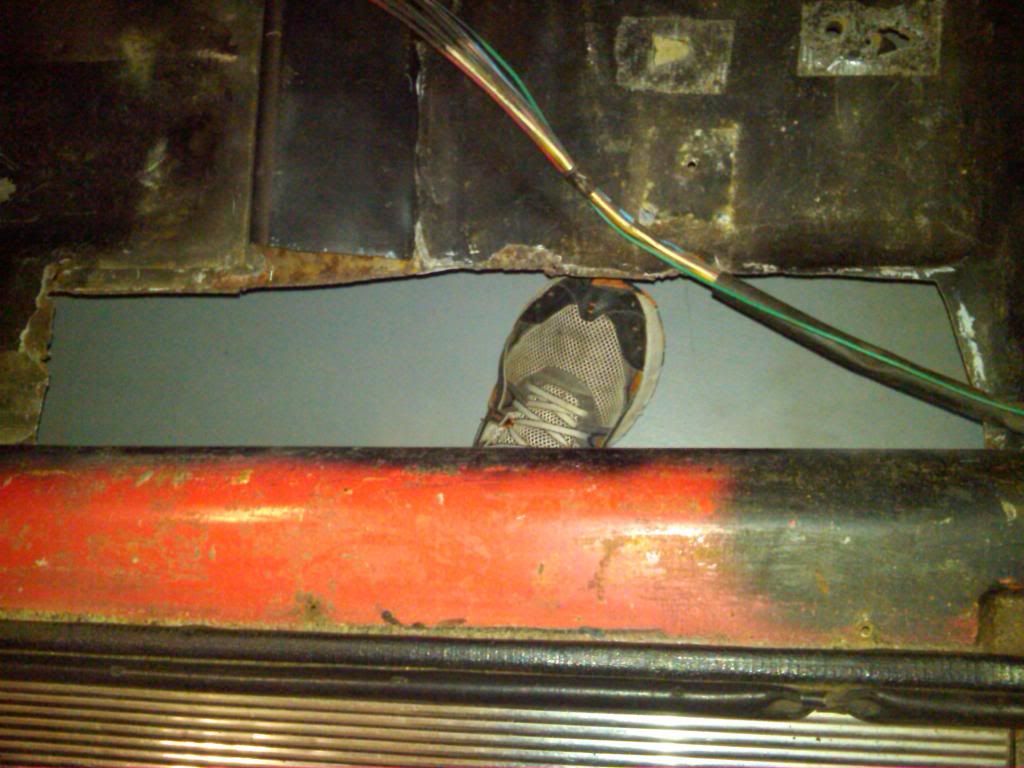
Ended up with over a 18" long by 6" deep bad spot. Not all of it was cancer, turns out the floor pan cracked either due to rust or flexing body over time. Needless to say I had to cut out quite a bit, but it's not bad and shouldn't be too hard to replace, bending the sheet metal I have will be the hardest part, stay tuned for updates.
Raze
SuperDork
12/29/12 6:28 p.m.
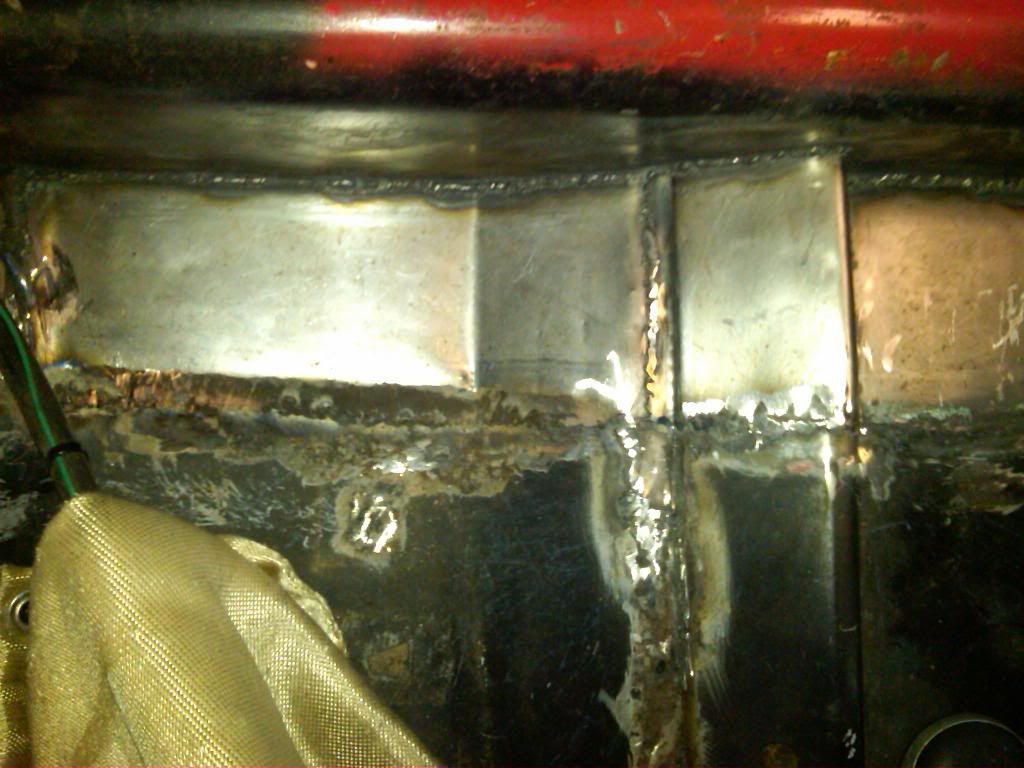
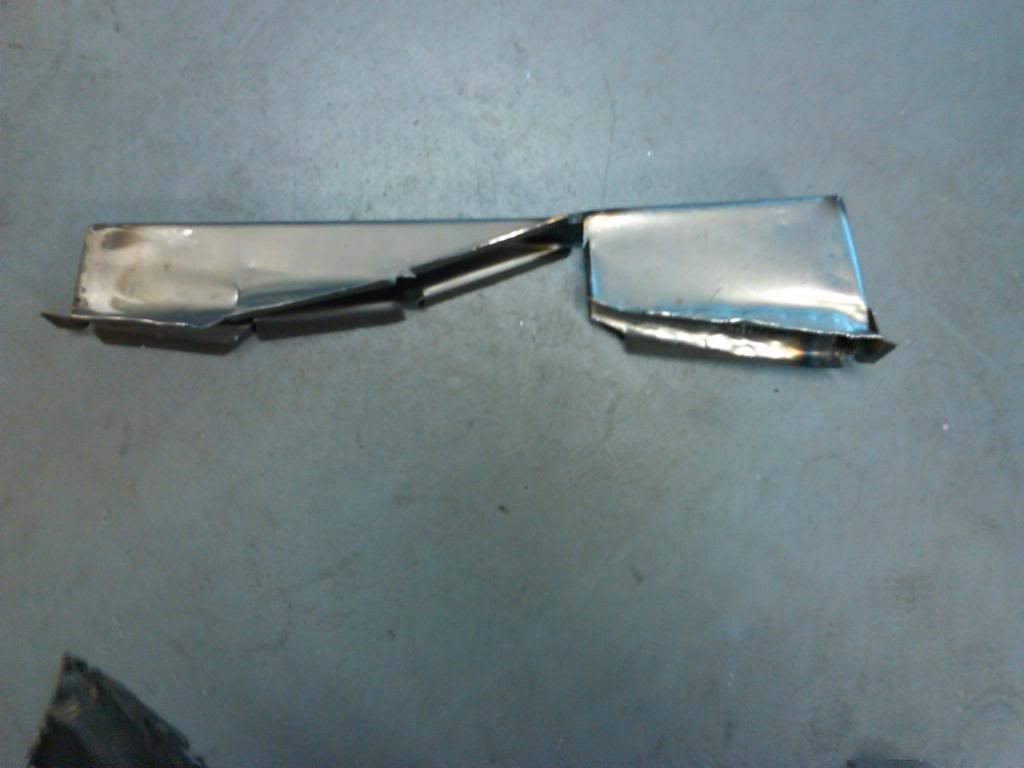
A trip to Harbor Freight and the local metal supermarket and I had a 30" bending brake (not a real brake but with some hand-made pieces you can get approximately the same effect, as in the difference between a Yugo and a Rolls Royce, both will get you where you want to go, one just makes it a whole lot nicer and easier:
I really meant to take a picture of the piece I bent (16ga, slight overkill as the boards are originally 18ga but the metal market only had 16ga and 20ga cast offs and I didn't want to pay $50 for a piece of metal. The final shape of the floor board along that section has flat sections near the frame rail that bends right behind the center seat bracket brace, it also had 1/2" tabs welded to the frame rail bent 90 degrees, and then there was also some bending inboard as the foor transitions from flat sections for the seat rail to curve downward to transition to maximize space. It was actually fairly complex and took a couple hours to cut, bend, rebend, and bend some more. Once done I just viced it to the body and started welding. I tested it by jumping up and down on it. There are some pinholes but I'll fill before I paint and undercoat so as not to leave any possibility of future rust. In place from above or below without very careful inspection you can't tell it's been repaired and that's all I was really going for:
Raze
SuperDork
1/2/13 3:42 p.m.
After getting the floor welded in I needed to fabricate and weld in the seat bracket cross mount bracket:
And we're welding:
Time to show you the old outer seat bracket mount, I butterflied it open so you could appreciate what I was working with, all of the edges were so badly rusted there was almost nothing left, and it was scaling and flaking off badly from the inside. It took some time to make a new one but with some bending, hammering, and some drilling, I was able to make up a new one:
And we're welding:
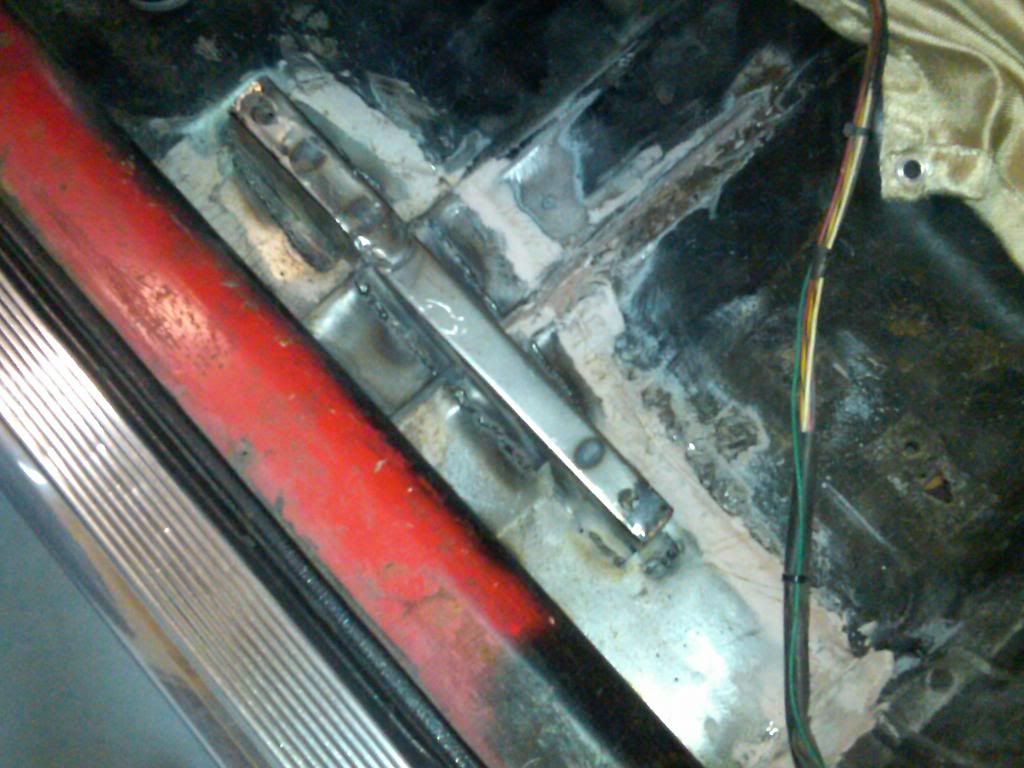
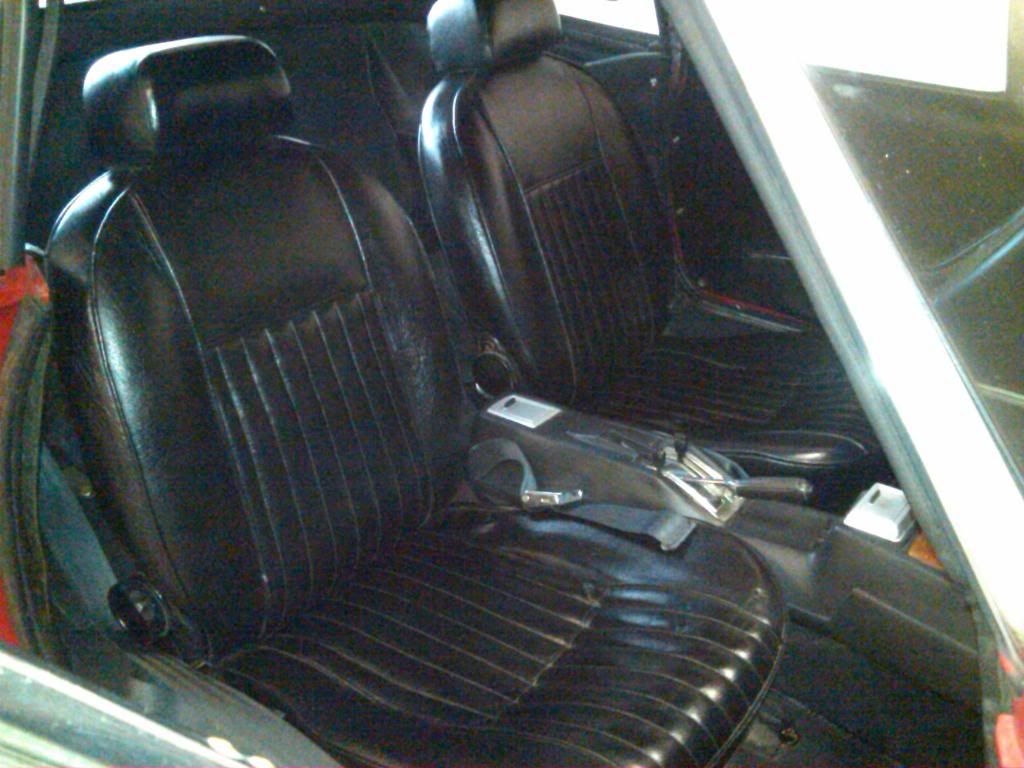
All finished up, I used some bondo to smooth out my welds and blend the floor better, I then primed and painted the floor, and used rubberized undercoating underneath on the fresh floor board patch. It's now all sealed up. The last thing I did was install those new (old) seats I picked up a few weeks ago for $20. After cleaning and vinyl dye they look great:
Lookin good! I love the way it looks without bumpers 
Raze
SuperDork
1/2/13 5:54 p.m.
In reply to DukeOfUndersteer:
Seems to be the consensus around here but for some reason I like the bumpers, makes it less Alfa and reminds me more of the Ferrari GTO but hey that's just me 
I like the lack of overriders on the bumpers. That's really the way the car was penned by Pinin Farina.
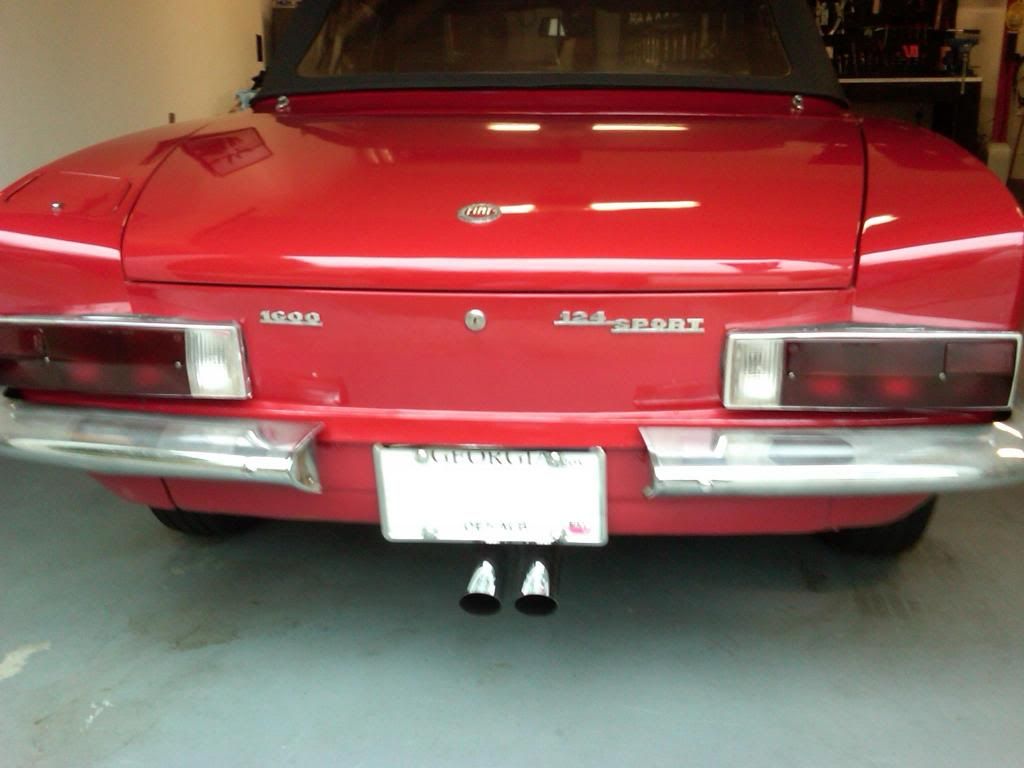
Not sure about the center exit exhaust, but it's your car. 
Raze
SuperDork
1/5/13 9:39 a.m.
In reply to ddavidv:
Came like that, unless I want to redo the exhaust and cut out all the bondo from the filled rear lower valence (headache) I'm leaving it alone!