
java230
UltraDork
7/29/19 10:03 a.m.
In reply to Dusterbd13-michael :
Its good and boogered in there already.... Welding upside down where you can see sucks. And I missed some paint..... couldn't get the grinder in there and was trying to hand sand it. Welds are not pretty, but should be solid....
But yes I did, and they do grow a little. at "ride height" with some air in them I had ~1/4" clearnace to the bag.
Awesome! Glad im two steps behind you.
And im going to try to remember your shock mount method. It looks slick!
java230
UltraDork
7/29/19 10:38 a.m.
In reply to Dusterbd13-michael :
Ha that just happened to be some scrap tube I had lying around :D Its not peferct, needs washers inside to center the shock, but I am sure you could get the correct tube if your buying it.
java230
UltraDork
7/30/19 9:46 a.m.
Well this arrived. All 1148 pages.

However I was REALLY hoping the wiring diagrams would be better.... There is really no color indications on anything. The wiring appears to be in good shape, but a painless harness is looking really good right now.... I really wish I had taken the engine stuff apart. Maybe I can get it worked out though. I think I should just have power to coil, starter signal and oil and temp wires.... They are just all green or black it seems. Connections are all seen here pretty much. The body harness is straight forward.


Fuel tank came in! Looks like I need a vent fitting of some sort. And Ford Quick connect fittings for the fuel lines. Assuming I cant just slip past hte "quick connect" crimped ring and hose clamp it.

Cant zoom in enough, but the diagrams seem to use the gauge wire followed by color abbreviations at the terminals. Like 18/bl g would be 18 gauge, blue with green tracer. A lot of the domestics did it that way then for the fsm. See if thefes a legend at the front of the diagram section.
java230
UltraDork
7/30/19 10:04 a.m.
In reply to Dusterbd13-michael :
Here is a zoomed in section, almost everything is a circuit number and wire gauge. The circuit number chart has no colors..... I only need a few wires to run I think..... Like I said I am not good with carbs and old school ignitions. Lots of learning to be done. I was really hoping the manual would help with the wiring....

Oof. Yeah, not a great diagram there....
Ignition hot to positive side of coil, points ground to negative. 12v to starter, 12v momentary to starter relay and itll run. The rest? That may best be served by an american autowire harness (i like installing those much more than painless. Better product)
java230
UltraDork
7/30/19 10:23 a.m.
In reply to Dusterbd13-michael :
Yeah not great. I think by going TBI I may even simplify things mores..... Thanks for the input on harnesses, Ill take a peek at those.

ShawnG
PowerDork
7/30/19 10:59 a.m.
Lol! I forgot all about that!
IHC used the same colour wire for everything.
They were very smart and silkscreened the circuit number on the diagram onto the insulation every foot or so. It was easy to ID the wire you were looking for by matching it to the number on the diagram.
Until 40 years went by and the silkscreening all faded or wore off.
All the wires in my Scout were green.
I feel your pain.
Wow. That SUCKS. why??????
Oh. Wait. Planes are all white wires. All.
WHY???????
java230
UltraDork
7/30/19 11:09 a.m.
In reply to ShawnG :
I'll have to try unwrapping a harness and see if I can read anything.... Yep everything is green. That's good to know the numbers are on there maybe.
I can't imagine 40 year old electrical tape it's going to come off the harness nicely either.
java230
UltraDork
7/31/19 8:53 a.m.
Well look at that! I found a couple numbers (95 and 95A go figure).... Unwrapped the whole engine loom.

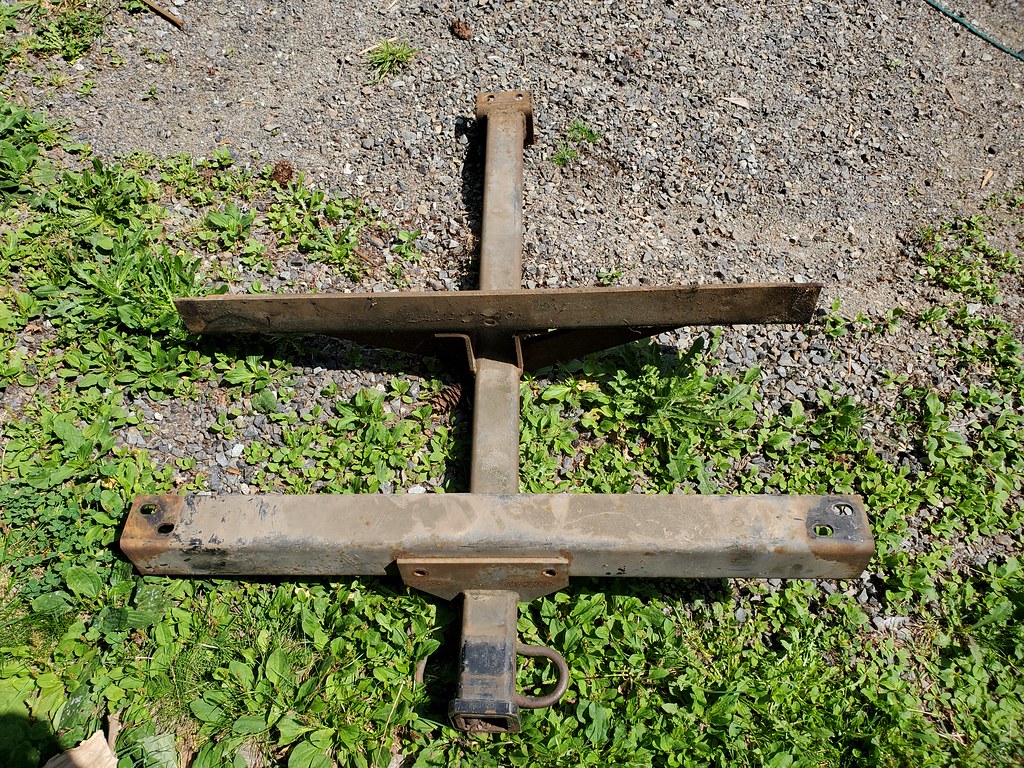
Hitch is off. Its a beast.
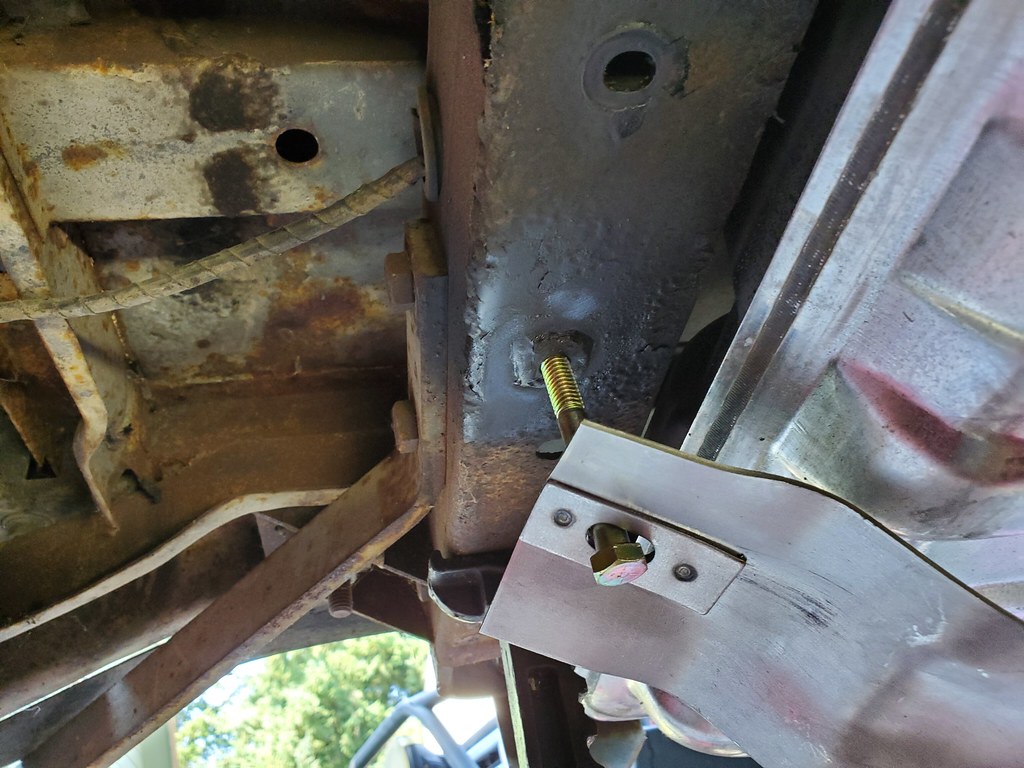
Tools of destruction and a removed crossmemeber.

Tank mocked up, I built myself a Pinto!

A couple weld nuts of the passenger side.
A couple of pieces of tubing and bolts on the drivers side. I offset the tank to the pass side, all the connections (expect filler) are there. As is the OE wiring harness, I figured a little more room wouldn't hurt.

Need to get tank strap pads and the vent parts, but that felt like pretty good progress for the day. Poked at the wiring a bit more. Ammeter on the dash is going away. Thats a scary wiring nightmare!

Medchin
New Reader
7/31/19 10:47 a.m.
Looks good! The hole in the top of the tank is for the EMS (Emission) system. You can try to find a plug for it, I tried a 1-1/4" rubber body plug but it wasn't quite right. I ended up just using the Ford EMS valve and capping it, not the cheapest solution but not having a hole in the tank is kinda important. Linked the part numbers below.
https://www.amazon.com/gp/product/B000O023KG/ref=ppx_yo_dt_b_asin_title_o04_s00?ie=UTF8&psc=1
https://www.amazon.com/gp/product/B008D33ZF8/ref=ppx_yo_dt_b_asin_title_o04_s00?ie=UTF8&psc=1
Keep in mind too (you may have already realized) since we have the tank mounted 90 degrees from normal the straps don't do the best job keeping the tank from moving fore and aft during operation. My plan is to just weld some flat bar straps to the provided straps at 90 degrees up to the cross member to help retain the tank fore and aft too.
If you've got a better solution I'd love to hear it cause I haven't done anything yet.
java230
UltraDork
7/31/19 11:20 a.m.
In reply to Medchin :
I didn't think about fore aft movement..... Hmmm. mine is tight to the crossmember in the front of it (over the axle) I could add a couple riv nuts there easily to the flange of the tank.
I have those two parts on order from Amazon already :) Hopefully that is enough venting to fill nicely. The filler is going to be the hard part.....
ShawnG
PowerDork
7/31/19 11:56 a.m.
Looks like you could bring the filler out through the rear apron.
Have a look at a filler neck for a 1968 Chevelle.
java230
UltraDork
7/31/19 11:58 a.m.
In reply to ShawnG :
I looked at it, its up too high to make it under the door. I want to make the OE filler location work if I possibly can. More noodling is needed.
ShawnG
PowerDork
7/31/19 12:12 p.m.
Ahh, the joys of custom fabrication.
Just once I want to work on one of the T.V. show cars. The ones where everything magically fits together the first time with no re-work of crappy "reproduction" parts.
java230
UltraDork
7/31/19 12:27 p.m.
In reply to ShawnG :
Yeah if only it worked that way in reality! LOL
I find the custom stuff can be fun mental exercise though.
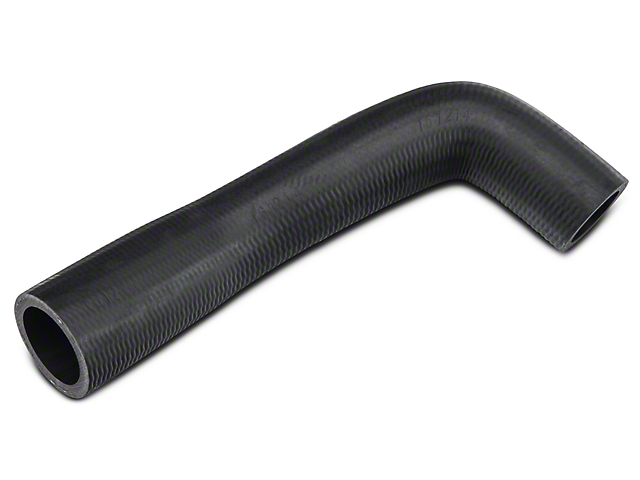
NOHOME, how flexible was that"flex" filler you posted earlier?
Found this filler hose, but no one lists ID.... Nice tight 90 like I need tho. What happened to old school parts stores!
java230
UltraDork
7/31/19 5:23 p.m.
Well that's not going to work! Damn. I need dropped TRE's. Was hoping these would work, but way too long....


Cotton
PowerDork
7/31/19 8:23 p.m.
Dusterbd13-michael said:
Oof. Yeah, not a great diagram there....
Ignition hot to positive side of coil, points ground to negative. 12v to starter, 12v momentary to starter relay and itll run. The rest? That may best be served by an american autowire harness (i like installing those much more than painless. Better product)
Agree 1000% on American Autowire. I went with them on my k10 after buying painless for another project and sending it back.
java230
UltraDork
7/31/19 8:37 p.m.
In reply to Cotton :
Good to know... I was just looking at them again. American is 100$ more than painless

NOHOME
MegaDork
7/31/19 8:49 p.m.
In reply to java230 :
Not going to make a 90 like that for sure; the stuff is stiff. Maybe a straignt piece with a 90 degree metal tube grafted in the middle where needed.
java230
UltraDork
7/31/19 11:07 p.m.
In reply to NOHOME :
Thanks, I'll head to the flaps and see what's available.
java230
UltraDork
8/1/19 10:02 a.m.
Looks like Speedway has just what I need. threaded LH one end RH the other. Factory the outer on the drivers side is RH thread, inner is LH, so I should get a new inner that's LH also if I don't want to run it goofy and flip things around. They are 7.25" which looks just right!
![[IMG]](https://content.speedwaymotors.com/ProductImages/91634_L_b6993dd0-79aa-47c4-b3c9-3e49aa83ae5a.webp)

Any reason to not only do the drop on one side?
java230
UltraDork
8/4/19 11:34 a.m.
Shocks are in

Added some real bolts to the inner fenders.

Started to break the calipers down for cleaning. Need top rebuild and get them mounted so I can make brake lines.


