1 ... 29 30 31 32 33 ... 47
Gimp
Gimp GRM+ Memberand SuperDork
11/14/18 8:22 a.m.

That had to be quite a moment, with the ramp breaking.


I think I have a perfect piece of tube to do just what you did.  A friend also had an idea about using a cable... we shall see.


The good news is the frame was really built for the splitter/front end support, so it's not effort lost. I was just hoping to kill two birds with one stone.

GTXVette
GTXVette SuperDork
11/15/18 5:59 a.m.

For that purpose it looks fine, I was more concerned about the UNexpected,  very glad he has those pics.

Gimp
Gimp GRM+ Memberand SuperDork
12/6/18 8:32 a.m.

Still out there working on things.

Not pictured - the other weekend Larry and I got the car up in the air, replaced the clutch, hoped to replace the bellhousing (more on that another time), cleaned things up, and welded four (yup) O2 bungs into the exhaust.  We also tweaked a few things like pinion angle, etc.  That same weekend, the winch on my trailer exploded, so I got to learn how fun it is to push this car on a trailer with two people.  I'll have pictures of the winch carnage later, but the company is working with me to replace it.

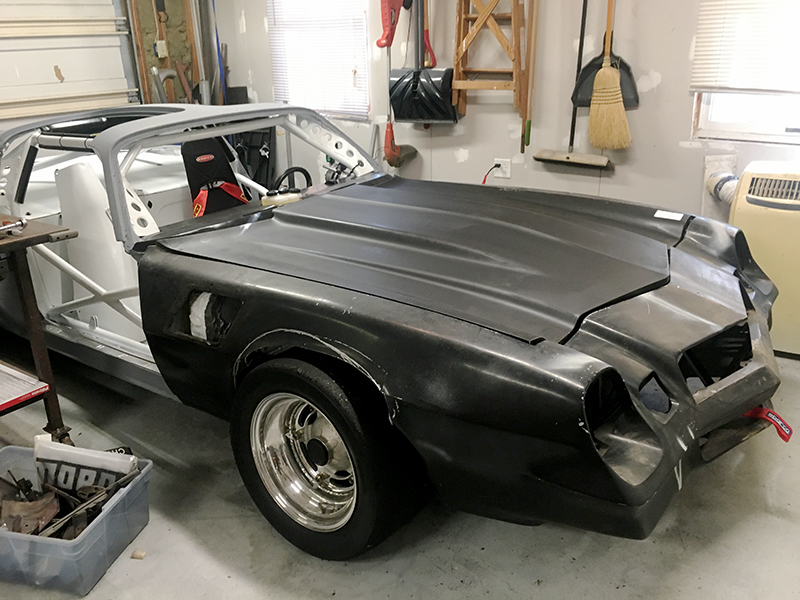
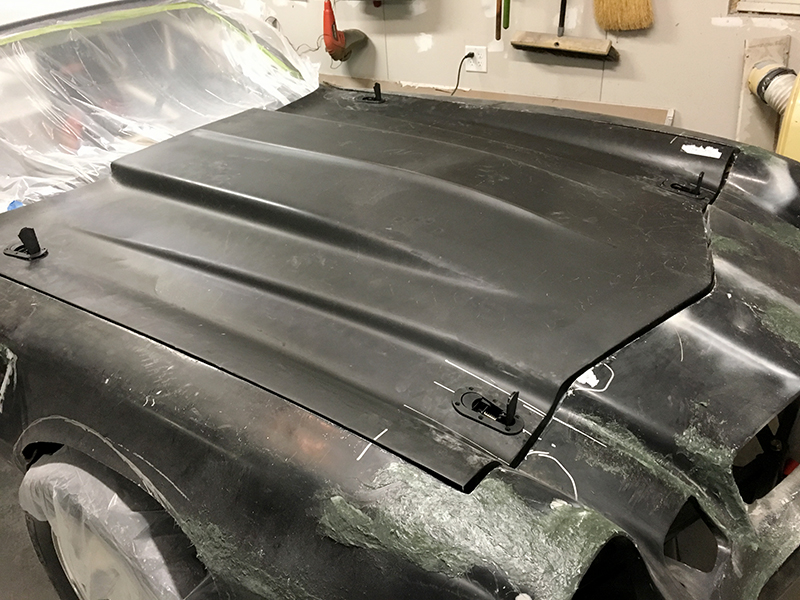
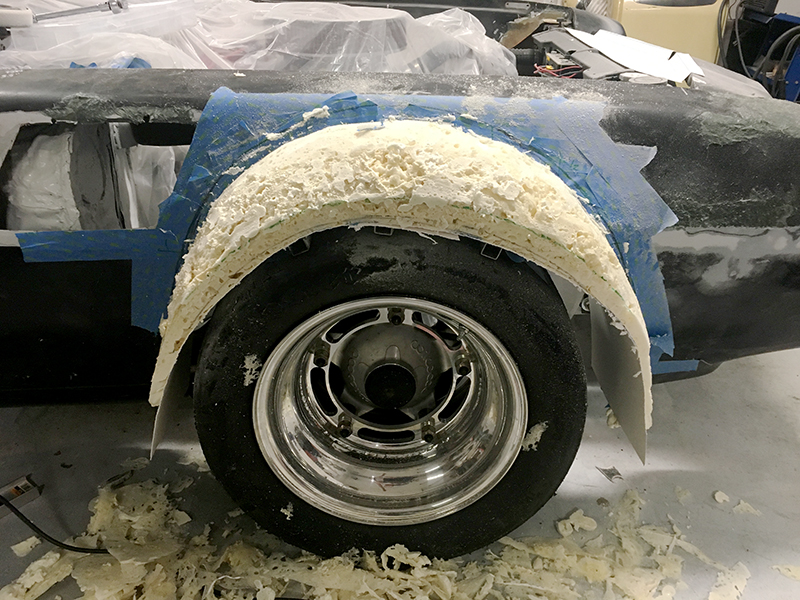
With winter being here, we need to move into bodywork.  A bunch of years ago I scored a fiberglass front clip for this car, and it was in rough shape.  I didn't mind, as I knew I'd be cutting it up a bunch, but now is the time to start fixing things so I can get it on the car and make it not look like total trash.


Years of dirt on the front clip are not helping it in the looks department.


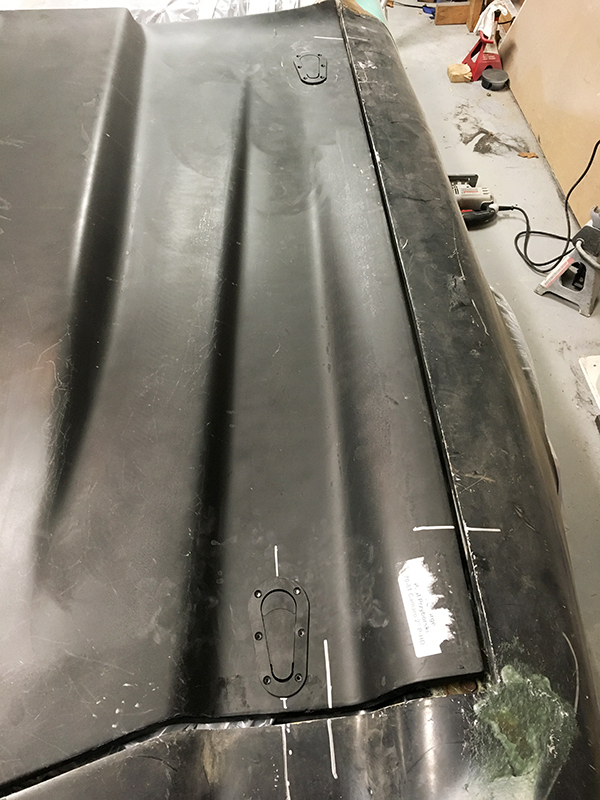
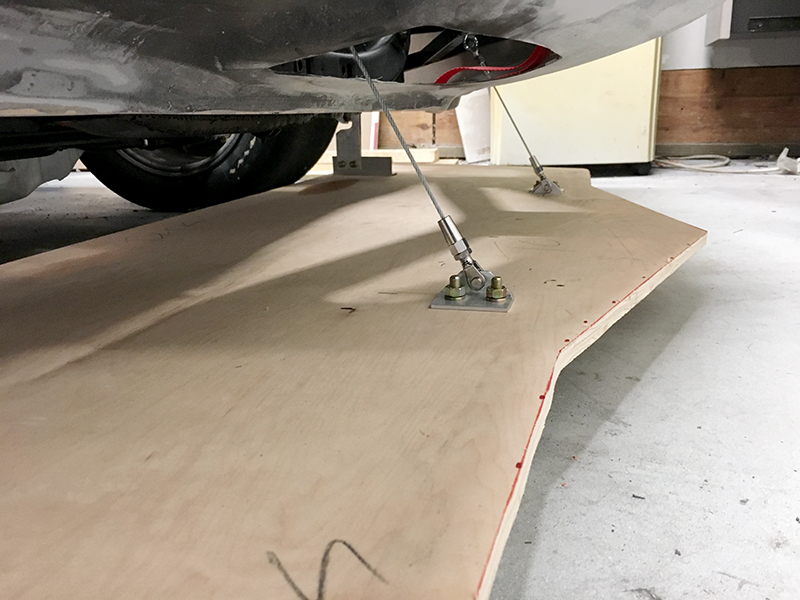
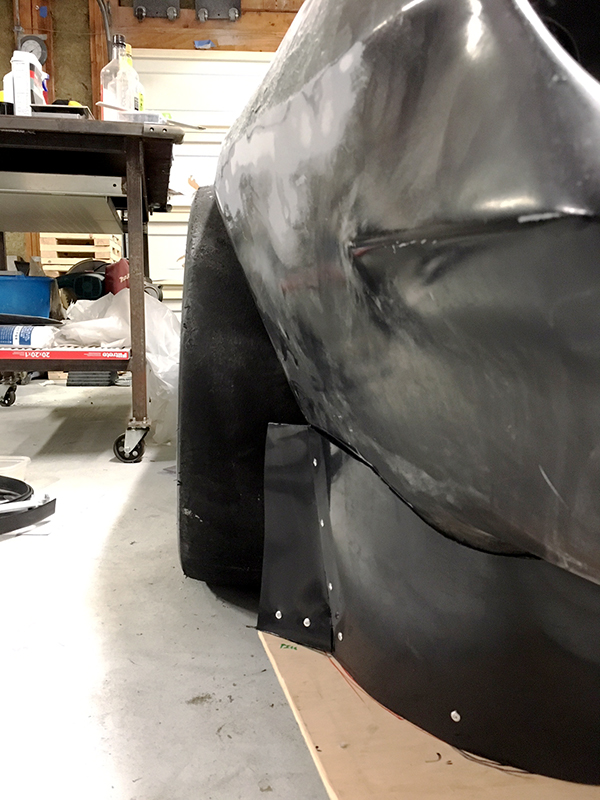
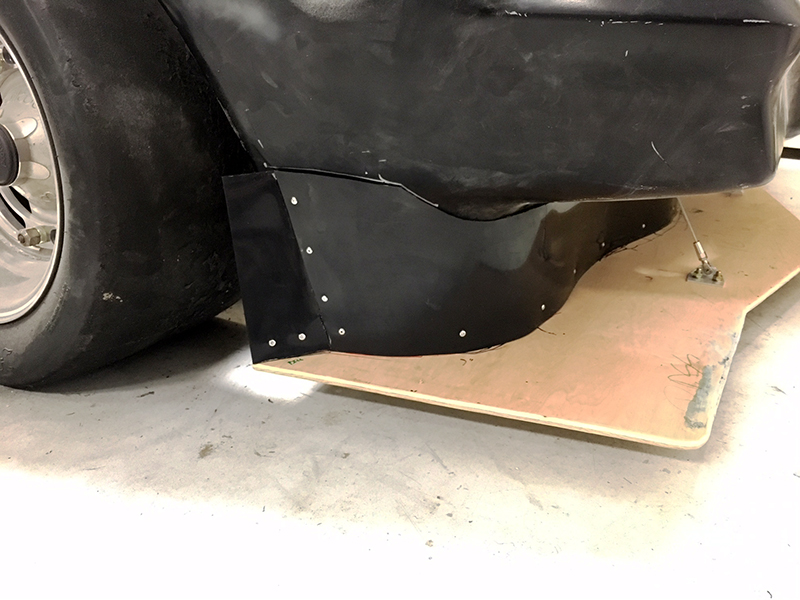
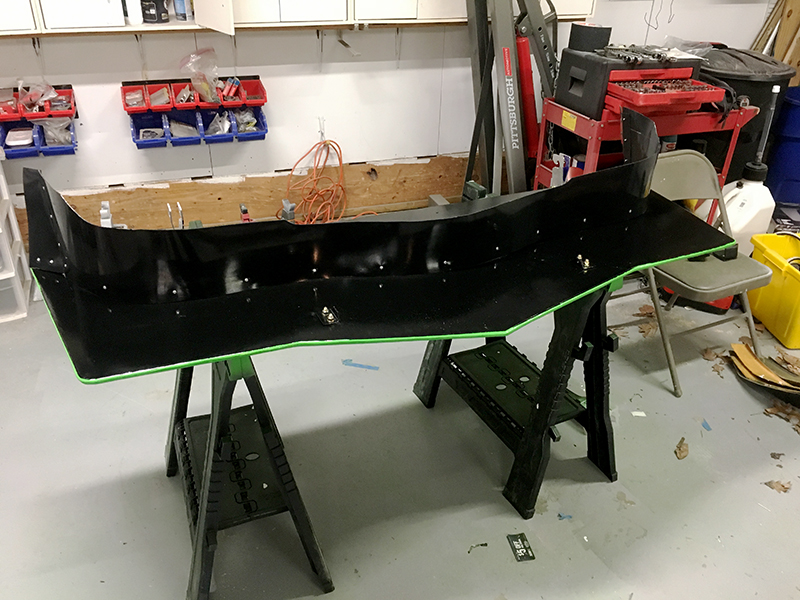
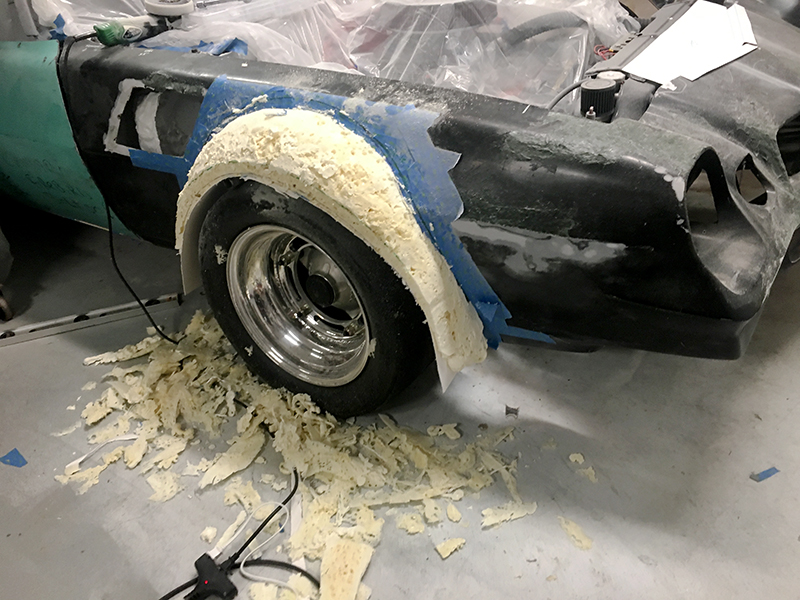
The driver side rear corner was completely broken off.  I had someone cut off a big chunk of the rear of a steel fender, covered it in packing tape, and screwed it to the underside of my fiberglass fender as a sort of mold.  Seems to have laid up well for the first pass.


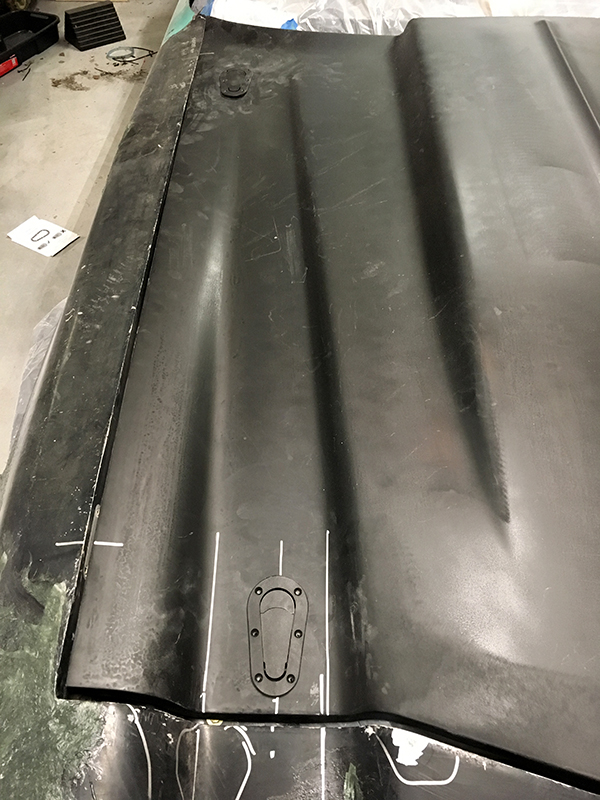
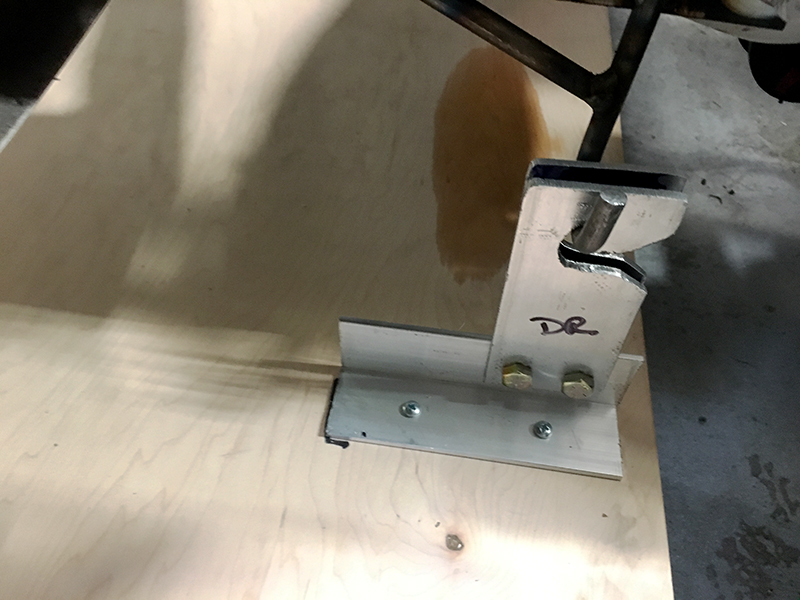
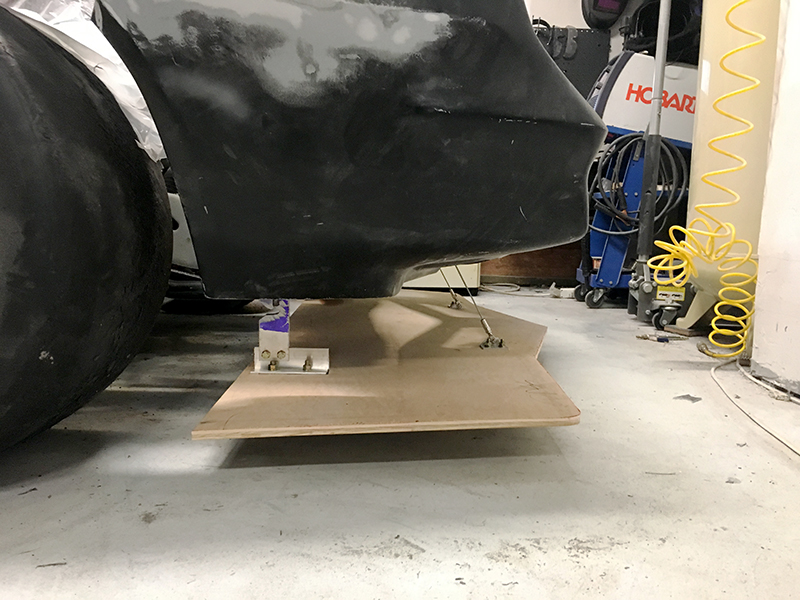
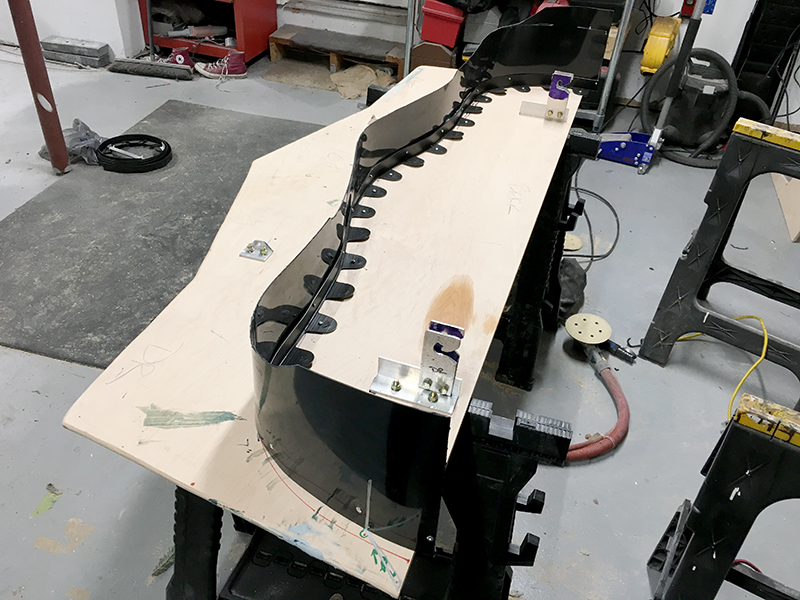
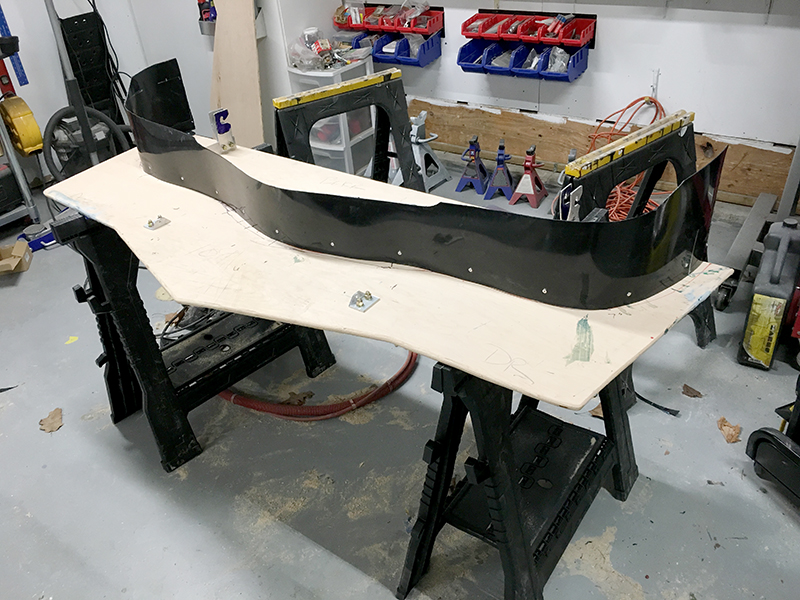
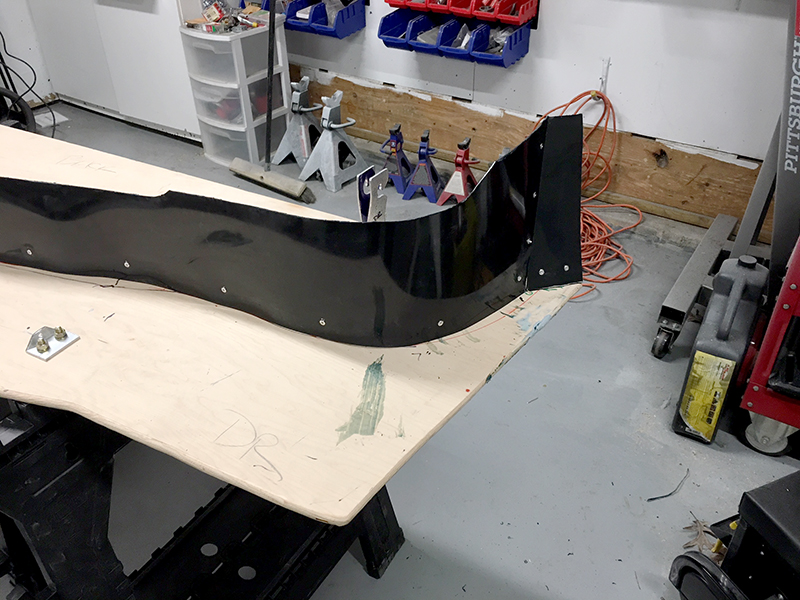
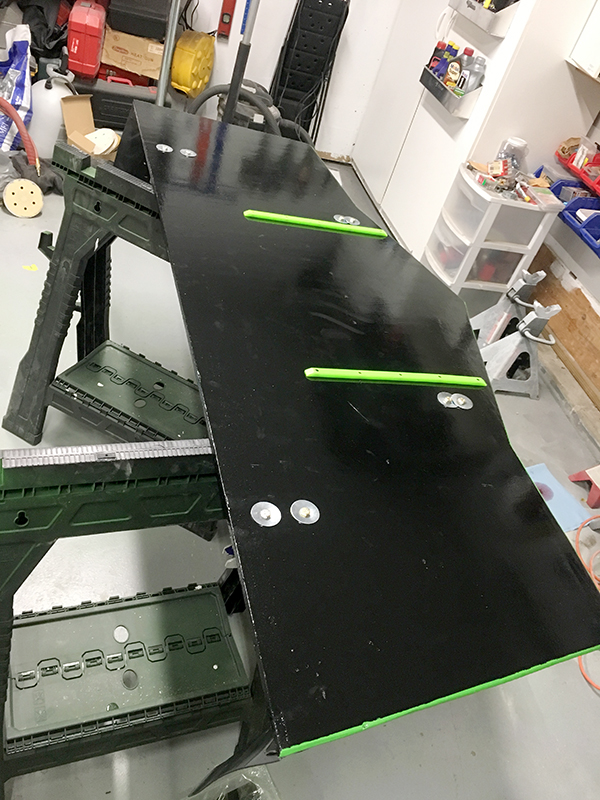
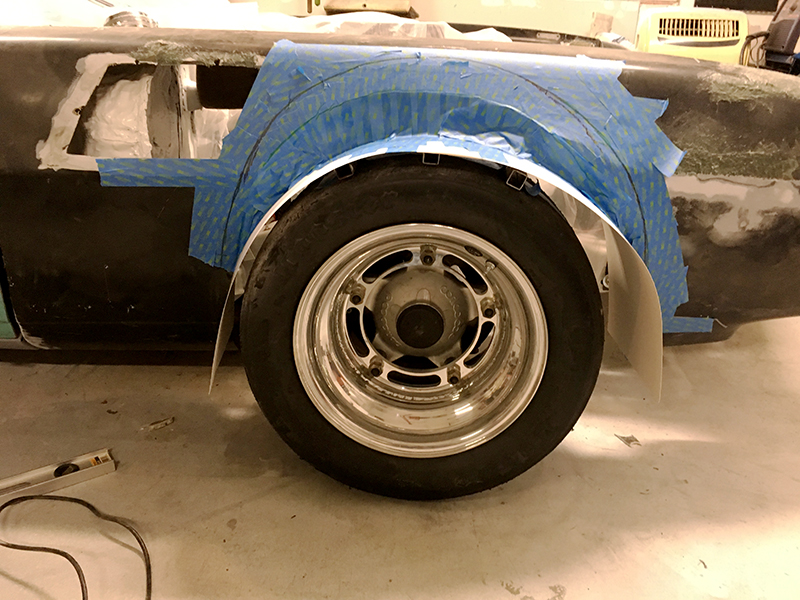
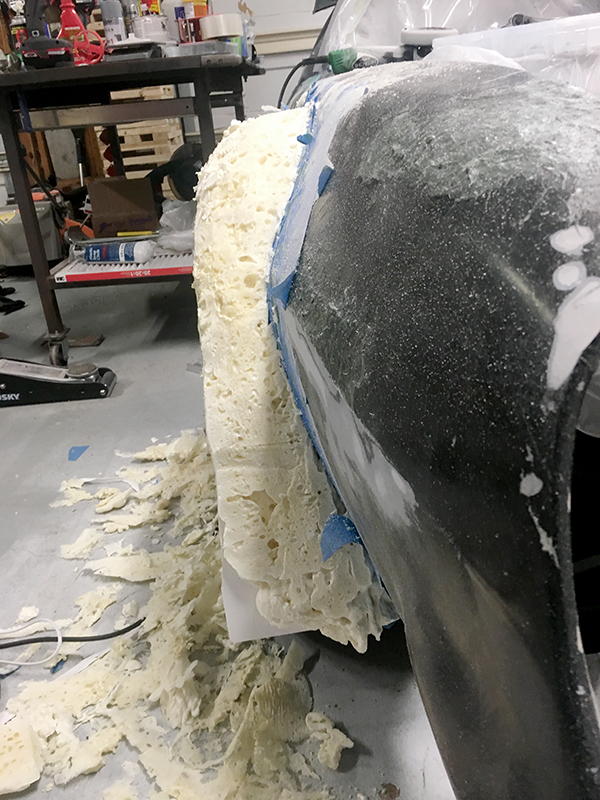
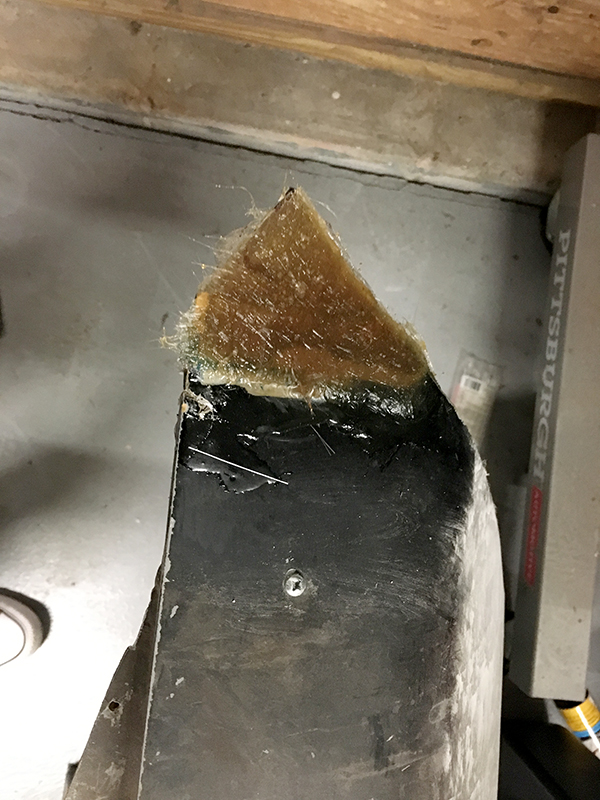
This was the other, worse part.  The section on the driver's side where it bolts to the core support was missing completely.  I just created a wood buck with the ledge where I needed, covered it in the same packing tape, and went to town.  There will probably be some more fiberglass, and a bunch of trimming, but it's a start.

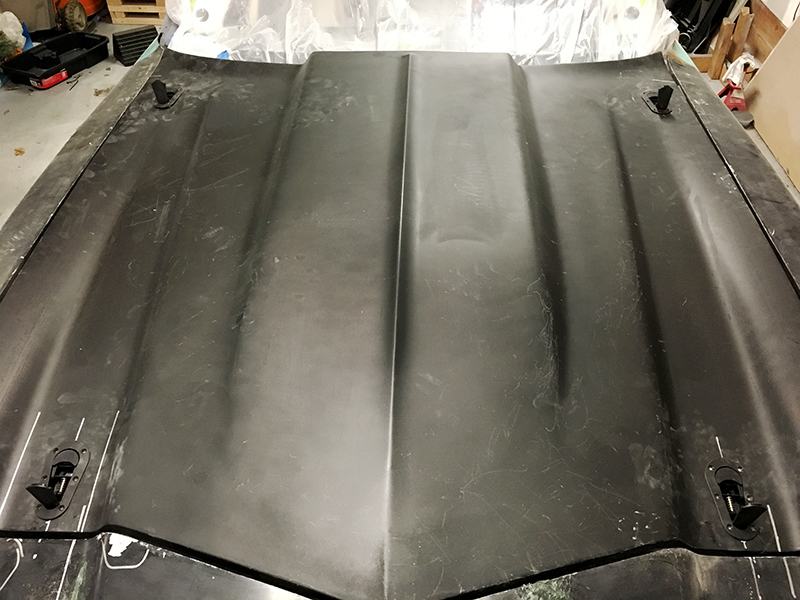
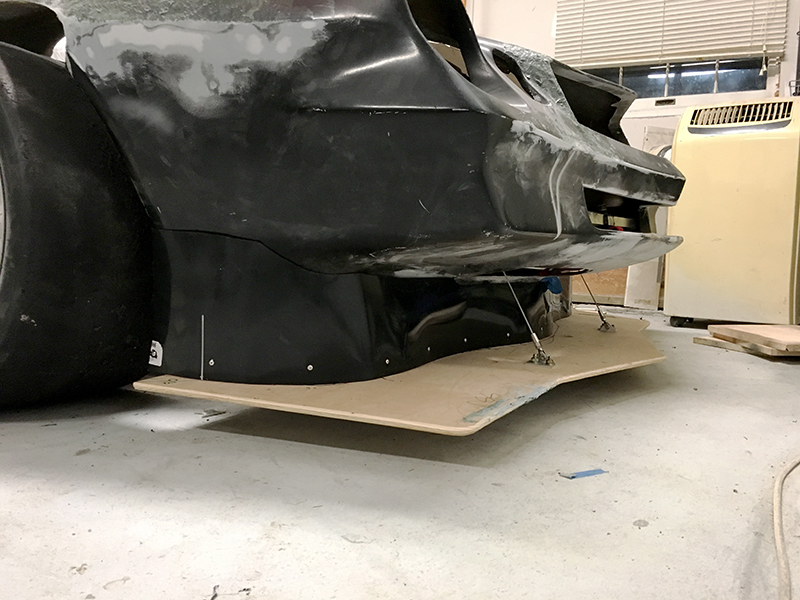
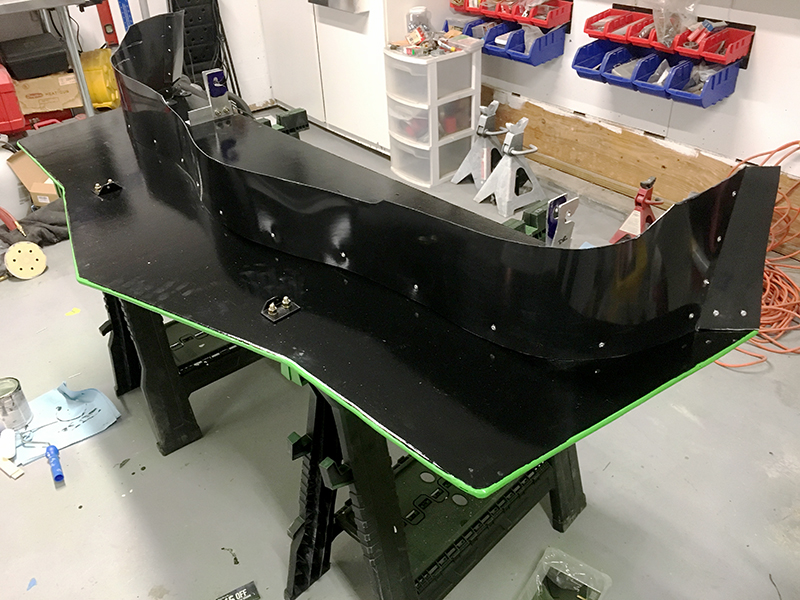
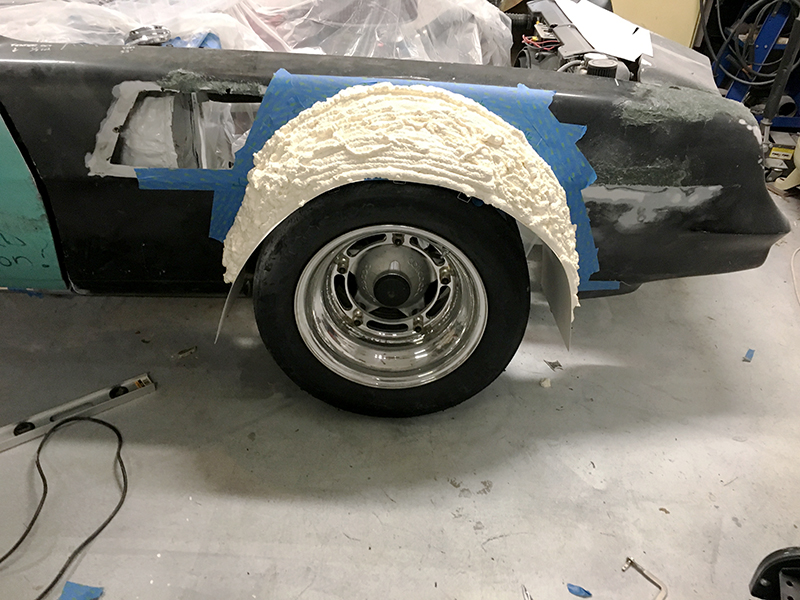
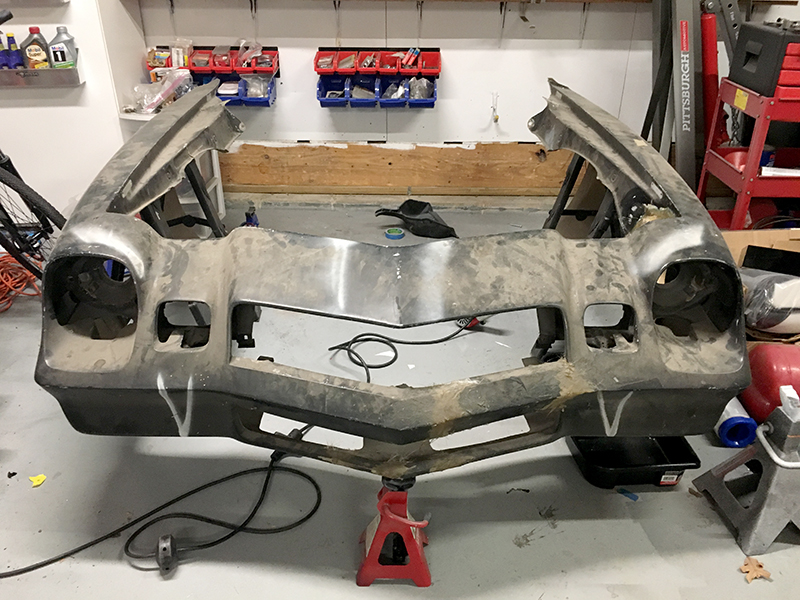
With the temps lower, it took a little longer to cure (both garage heater and heat gun), but I hope to pop the molds off tomorrow and start test fitting things.

759NRNG
759NRNG SuperDork
12/6/18 8:59 p.m.

Not that this probably helps.....but CuzE with his current MazPU(resuscitation)  ...proceeded to show how

one can repair cracked interior panels/bezels using nothing more than old T'shirts and 

fiberglass resin.....my JD4410 side panels are patiently awaiting the 'Treatment'.....

Gimp
Gimp GRM+ Memberand SuperDork
12/11/18 11:55 a.m.

Christmas came early, or at least one of my gifts did.


I told Santa I waned a Glasstek 2" pin-on fiberglass hood, and it arrived today.  This is the same size/make hood that was on Randy's car when I raced it, and I really liked how low profile it was.

I literally just unboxed it and tossed it on the car with the front end that I fixed and mounted up over the weekend.  Nothing is shimmed or set, and the hood is just sitting on whatever is in the way, but it's not too far out.  Hopefully it won't be a nightmare to get this old front end looking right.

Gimp
Gimp GRM+ Memberand SuperDork
1/10/19 8:10 a.m.

Been working away with all the un-fun, itchy work that is fiberglass.  

The front clip is very old, and has quite a few spots of damage. I have been grinding out any cracks in the fiberglass or gelcoat, and refilling with a think coat of kitty hair.  Once all the top side repairs are done, the front clip should be stable enough (and cured in a more correct position from being mounted to the car) that I can take it off and reinforce it from the back before starting top side body work.

While it was in place, I took some more care to fit the hood, including cutting the holes for the Aerocatch hood latches.


The back of the hood uses existing holes in the cowl for the pins.  I'll have to make some brackets for the front, but that's no big deal.

crankwalk
crankwalk SuperDork
1/11/19 12:07 a.m.

I'm sure you've seen this but when I saw this car I immediately thought of your car as a sibling in the same style.


https://www.youtube.com/watch?v=4f6rCx8_zEU


TIGMOTORSPORTS
TIGMOTORSPORTS Dork
1/11/19 6:50 a.m.

I like the fiberglass front end. I have a 78 Z28, with a VFN L88 fiberglass lift off hood that weights 13 lbs. Their fiberglass front end (bumper and fenders) weighs 18lbs. My original urethane front bumper is rough.

Gimp
Gimp GRM+ Memberand SuperDork
1/11/19 8:48 a.m.

In reply to TIGMOTORSPORTS :

I considered buying a new front end because this one was so rough - then I looked up the cost of new.  A little body work never hurt anyone, right?

TIGMOTORSPORTS
TIGMOTORSPORTS Dork
1/22/19 6:36 p.m.

Yes, you are correct, the price is high and our labor is cheap. I'll probably keep the front steel fenders and buy a new nose. My nose has been patched a couple of times and is now starting to sag.

Gimp
Gimp GRM+ Memberand SuperDork
1/28/19 8:30 a.m.

Started work on the "carbon based composite" splitter this weekend.  The goals were to make it easy and quick to remove, and to also allow the front to move up if it hits the ground from a bump or otherwise rough surface, instead of breaking.

First, I had to make some chassis mounts:


Once those were it, I carved out some rear mounts out of aluminum (don't worry, it was bolted in later):


The front is suspended by cables to allow for movement:


And where it sits at the moment:


I'm still waiting on some plastic to arrive so I can make the air dam, and I have some skateboard rails on order to keep the bottom from being too badly damaged.  Once those are here, I'll set the final height at the back and be good to go.

ctk339
ctk339 New Reader
1/28/19 8:46 p.m.

This is neat, will be reading for a while 

Gimp
Gimp GRM+ Memberand SuperDork
2/4/19 7:35 a.m.

While not as cold as Chicago, it's been a bit chilly here in MD, so when the weather started to turn I got back out to the garage.

I used a trim router to round off the edges of the splitter, but of course, the bit slipped and gouged the wood.  Never fear - a little more Kitty Hair fiberglass and that bit was good as new.

The plastic for my air dam arrived, so I used some masonry edging from Lowes and lined up the air damn.


And the plastic was attached to the front and trimmed out.


Then I was able to mount it up and see how it fit.


The front can deflect up almost 2 inches, so it should survive most bumps.  It also comes on or off the car in under a minute, so I'm pretty happy with it.

Astute observers will notice that the side of the air dam are too long, and marked with a silver line.  There will be another small piece of plastic coming off each side at a 45* angle, but I have to wait for the front flares to finish that bit.

I'm pretty stoked.  Oddly, I think these kind of things really make it feel like a race car (ignoring the cage, huge tires, etc).

Patrick
Patrick GRM+ Memberand MegaDork
2/4/19 12:12 p.m.

Now i kinda want to go build a splitter and air dam for the corvair, but I should probably make it run first

Gimp
Gimp GRM+ Memberand SuperDork
2/5/19 8:18 a.m.

Small update.  I got the "extensions" (for lack of a better term) built last night.  These extend to the end of the splitter so that it isn't a wing, and the front wheel flares will meet up with them.

The splitter should come apart over the next few days for a quick paint job and then storage until it's party time.

mazdeuce - Seth
mazdeuce - Seth Mod Squad
2/5/19 8:24 a.m.

Where did you get your cable ends? Do they just screw on and compress the cable? I just did a set with a crimper and they work great, but yours are prettier. 

Gimp
Gimp GRM+ Memberand SuperDork
2/5/19 9:14 a.m.

In reply to mazdeuce - Seth :

Harbor Freight to the rescue.  They do just screw on and compress the cable.

https://www.harborfreight.com/fork-terminal-for-3mm-wire-96894.html

4cylndrfury
4cylndrfury MegaDork
2/11/19 4:05 p.m.

Referring to race day as "party time" is a sure fire indicator of winning at life. Bravo sir

Gimp
Gimp GRM+ Memberand SuperDork
2/15/19 12:26 p.m.


The splitter got some color (with a slight hint at the scheme of the car) and some sweet Powell-Peralta Rib Bones skateboard rails.

Crackers
Crackers Dork
2/15/19 1:10 p.m.

Glad to see you made it to your event. I'd have probably taken it without the bodywork on it too. 

I can't wait to see it with all it's clothes on. 

Lof8
Lof8 GRM+ Memberand Dork
2/15/19 2:58 p.m.

that splitter is sweet!

stafford1500
stafford1500 GRM+ Memberand HalfDork
2/15/19 3:10 p.m.
Gimp said:


The splitter got some color (with a slight hint at the scheme of the car) and some sweet Powell-Peralta Rib Bones skateboard rails.


I am going to suggest you consider replacing the washers on the bottom surface of the splitter with Tinnerman washers and counter sink screw/bolts. You want a really clean bottom surface on the splitter.

Gimp
Gimp GRM+ Memberand SuperDork
2/15/19 3:31 p.m.

In reply to stafford1500 :

Great idea.  Thanks!

Gimp
Gimp GRM+ Memberand SuperDork
2/19/19 8:18 a.m.

CP: Foam Home

For years I have been hoarding particular sets of fender flares.  When they came on the market, I bought them.  After years of work I have exactly two sets.  The rears are okay, but a bit too wide.  If you go back through this thread, you will see a few photos where I have sectioned them and managed to get them close to what I want/need.

Unfortunately, the fronts aren't so easy.  There are two major issues with the ones I have: 1. they fit like crap 2. they don't extend down to that fancy new splitter that I made.  So what is one to do?  Make your own.

Bring on the foam (specifically Great Stuff Big Gap Filler insulation).


Some advice for anyone attempting this at home.  Apply the foam in layers and wait.  What you see above is the result of me globbing two cans on.  There were a few issues with this approach.  This stuff keeps growing, even after you think it's stopped, which left me with A LOT of excess to get rid of.  It also hardened on the outside faster than it cures on the inside, so the next day when I started trimming, I found an huge internal void with sticky goo in there.

I've started to rough shape the one side.  I started with sanding disks, but I have way too much material, so I employed an electric turkey carver, which worked great.  Here are things after the first trimming.


There is still a bunch of excess material there, but I'm starting to move towards a shape that works.  Hopefully some more dusty photos by the weekend to show you the finished sculpture.

I will not be turning these into a plug.  It's just way too much work.  I will be fiberglassing directly on top of the foam (with a tape barrier as a release agent) and body finishing the top of them.  Down the road, I could always make a mold from them if I wanted.

Pete Gossett
Pete Gossett GRM+ Memberand MegaDork
2/19/19 11:57 a.m.

In reply to Gimp :

After you lay the fiberglass will you chip away the foam underneath?

1 ... 29 30 31 32 33 ... 47

You'll need to log in to post.

Our Preferred Partners
IDsr0WWOrWaLarGvJm0fBFXTvQXqhI9pOw9lsWdpPE7xYCobhjIcAvpc16I7ll8B