


In reply to Pete Gossett :
Once I get the final shape, I will cover it in packing tape and fiberglass on top of it. The fiberglass won’t stick to the tape, so it should just pop off.

In reply to Pete Gossett :
Once I get the final shape, I will cover it in packing tape and fiberglass on top of it. The fiberglass won’t stick to the tape, so it should just pop off.
Slowly sneaking up on a shape.
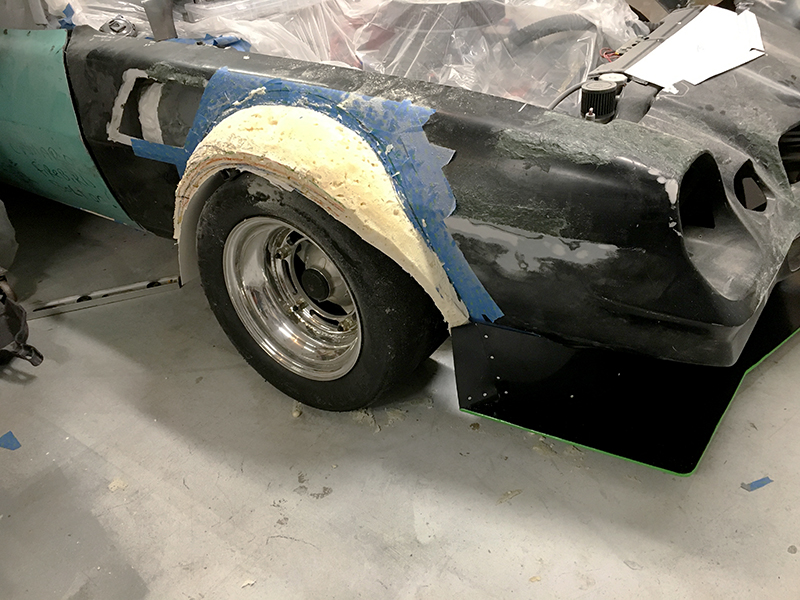
My ability with an electric turkey knife has increased tremendously over the past few days. I have some clay coming that will help me refine a few of the smaller details, but for what it's worth, I think the shape of the first flare is there and done. Excited to get the other side done and then turn these into fiberglass.
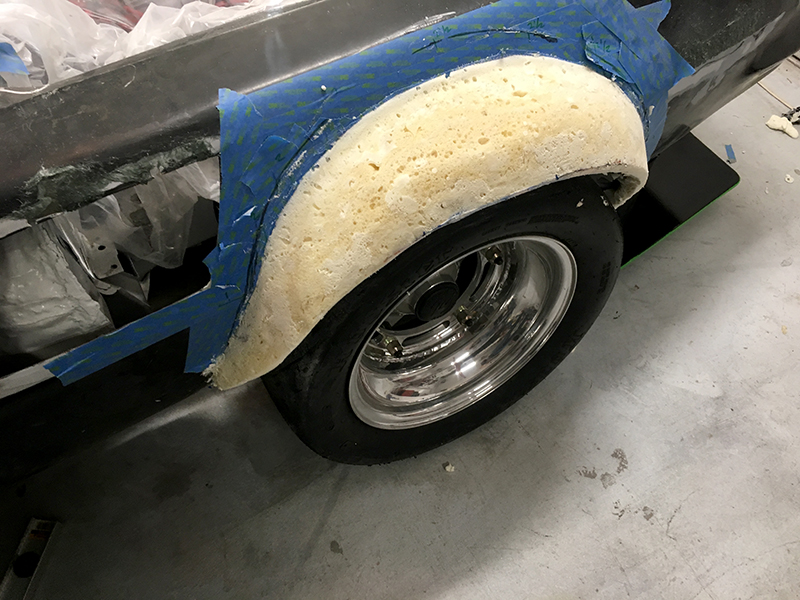

The body filler cheese grater contraptions work great on foam. (As long as they're not too dull.)
If I had set out to make the world biggest gross toe nail clipping, my work would be done.
Good news is, success so far! Now, a little something about the process.
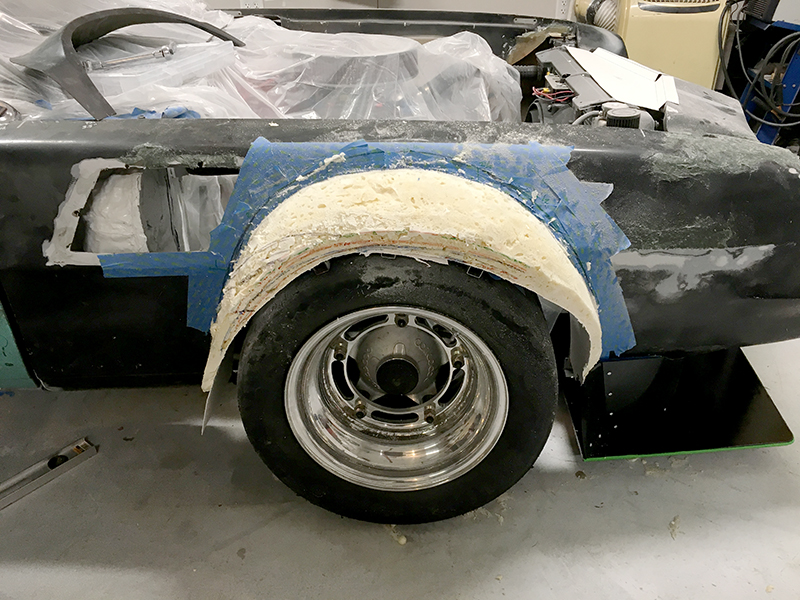
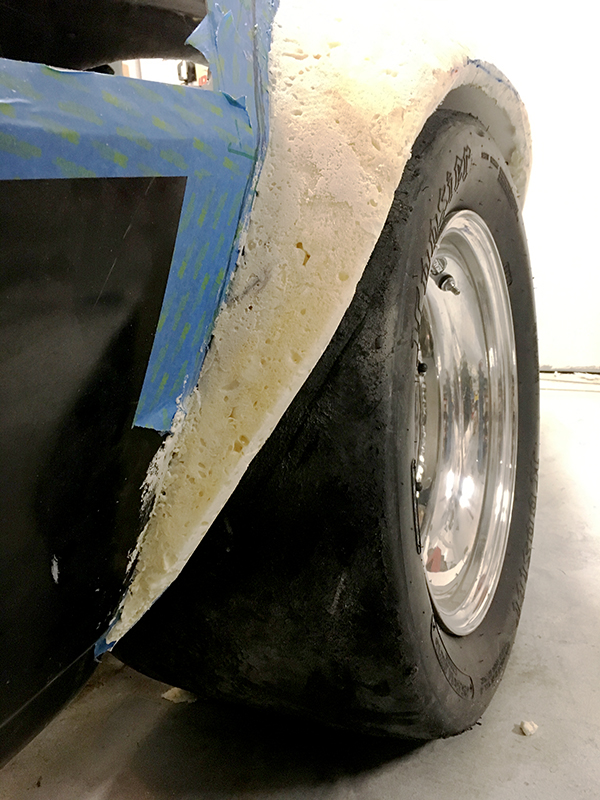
After I shaped the foam, my plan was to cover it in packing tape so that the fiberglass would release nicely from the buck. The problem is that packing tape would not stick to the foam at all. I needed to seal it.
After some testing, I found that PlastiDip wouldn't melt the foam, so I sprayed both bucks. After they dried, I applied packing tape, and it didn't stick. So much for that idea. The good news was that the new color help me identify some issues in the shape that I fixed up.
So, foam wasn't mean to be permanent, so with the fails out of the way, it was time to lay these up. I used packing tape on the body, and let a little bit of it lay on top of the foam where it met the body.
Because I wanted a somewhat smooth finish on the inside (which is only going to be so good due to foam) I started with a layer of woven mat, and then put two layers of chopped mat on top. The very top of the flare, where it is the flattest, got one more layer of chopped mat.
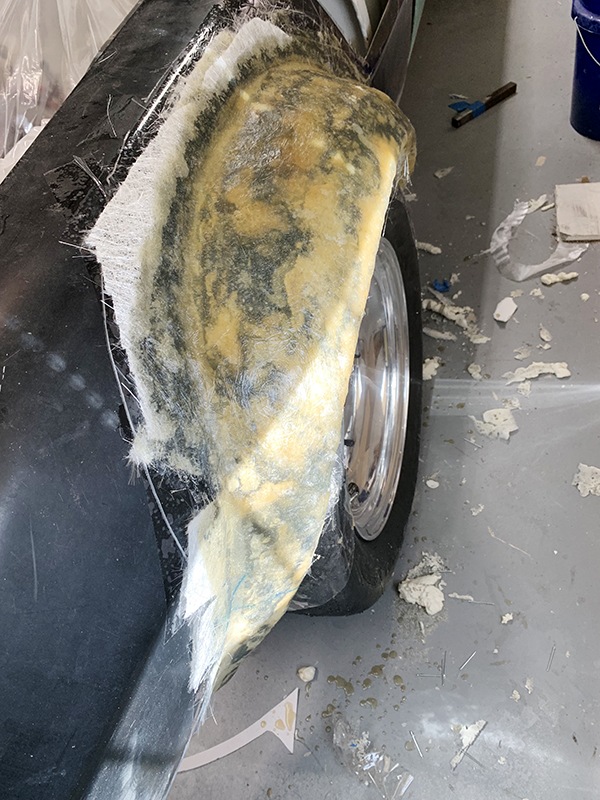
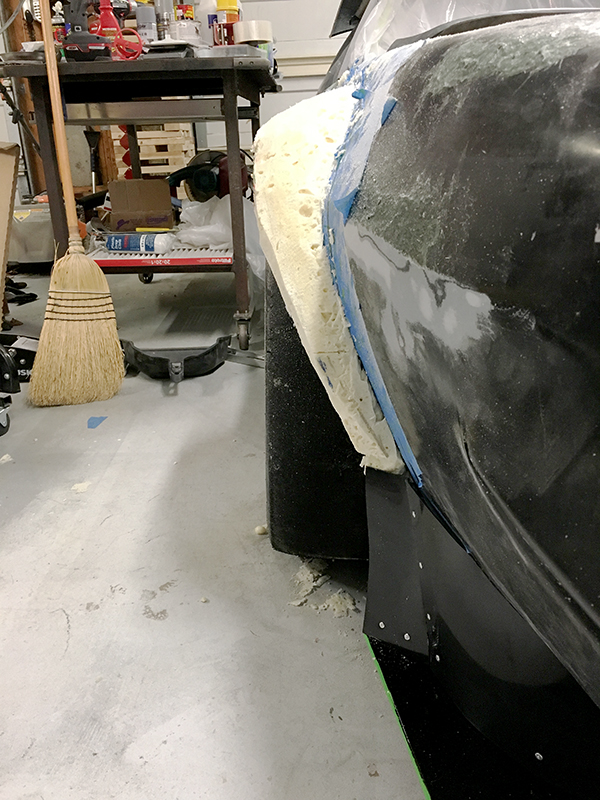
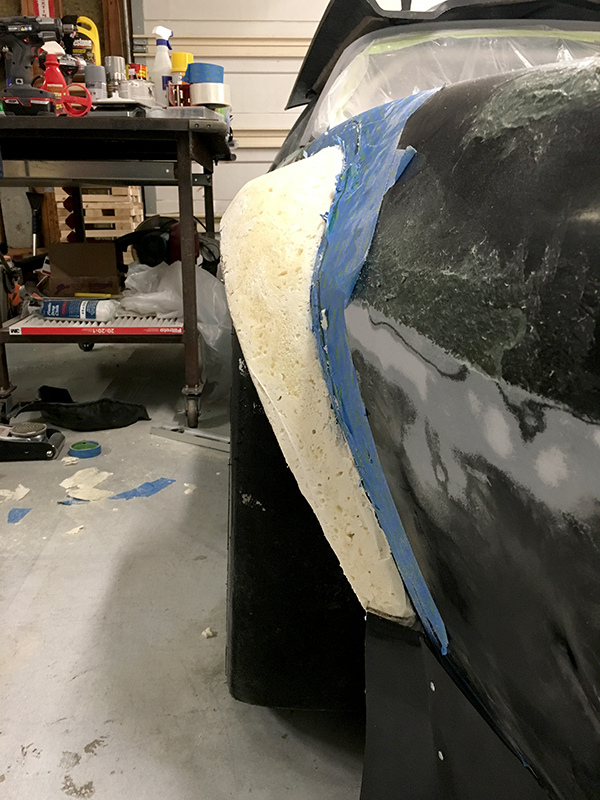
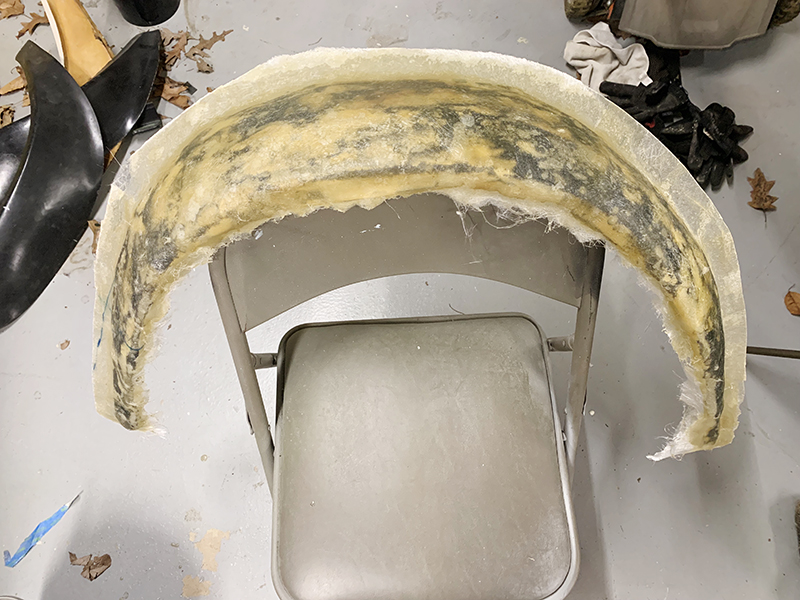
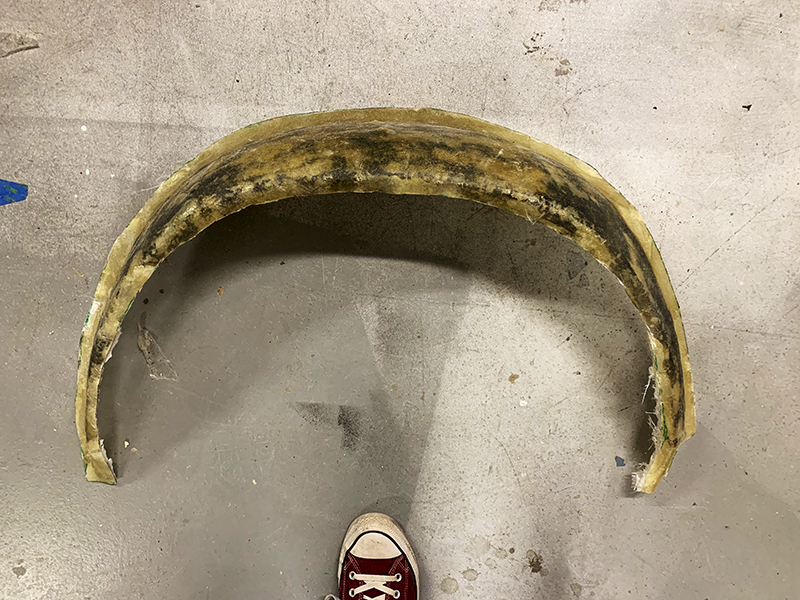
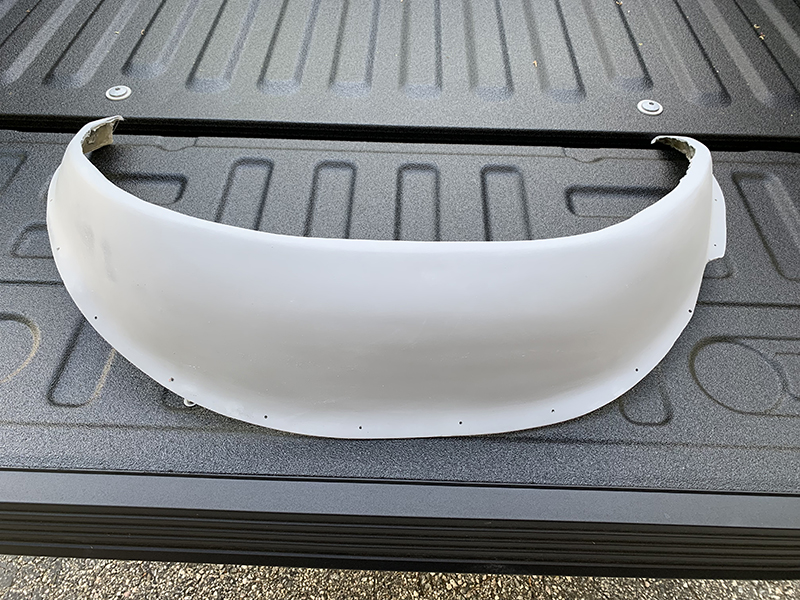
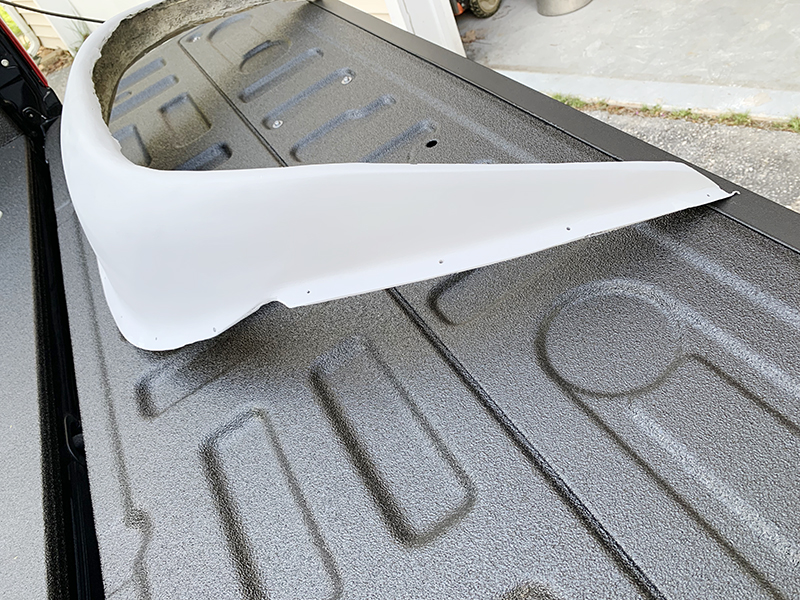
After everything cured for 24 hours, I just slowly worked around the edges until it popped off. A quick trim around the outside got me here:

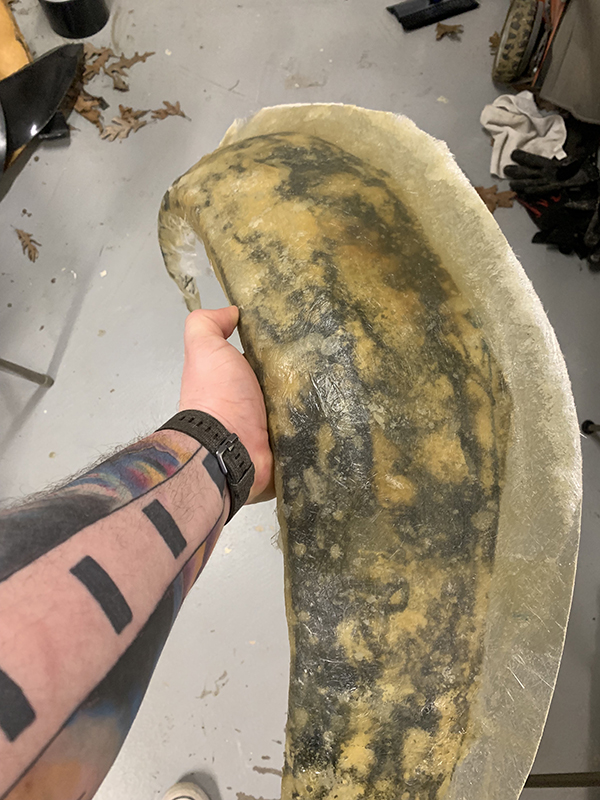
The top surface is by no means near where it needs to be, but the shape is close. The plan is to level out the low spots with kitty hair, do some sanding, add another layer of glass, and then bodywork them. I'm pretty stoked with how this is coming along so far.

Its about damn time Kate made you trim your toenails!
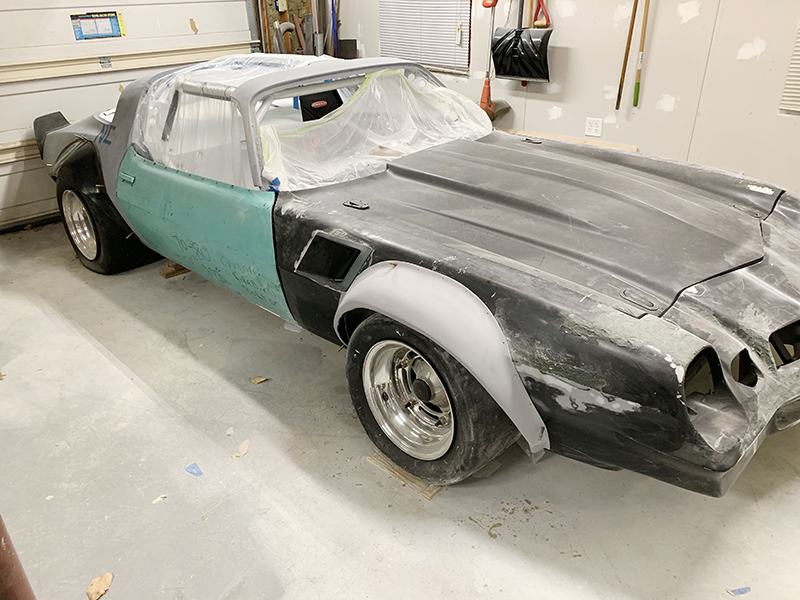
Still a ways to go, but good progress
A little while back, JG did a great video about putting flares on the GRM C5 Corvette (https://www.youtube.com/watch?v=5F7_HG2W5Pc). In that video, he talks about measuring a bunch of times before you do something like. Well, he's not my real dad and he doesn't understand my music, so I'll do what I want.
Well, he was right. It is often also good to measure before you cut, or in this case, mold a fender flare.
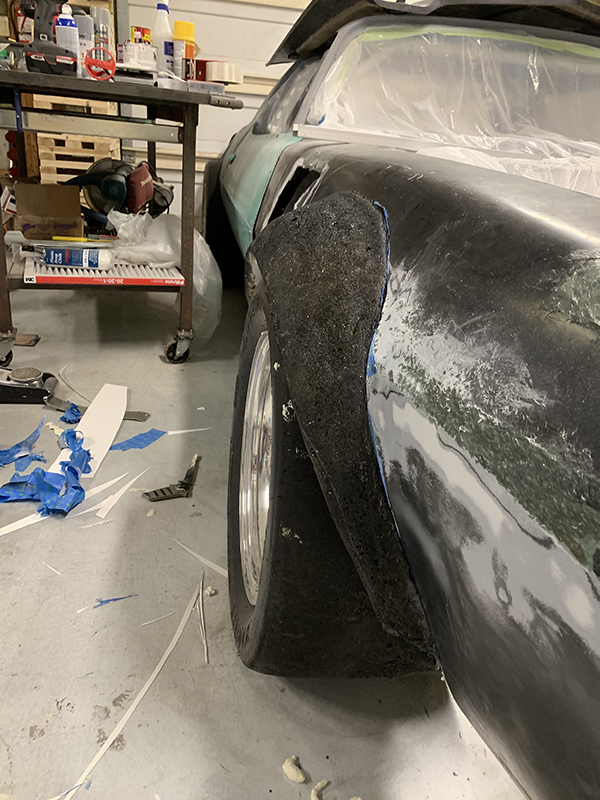
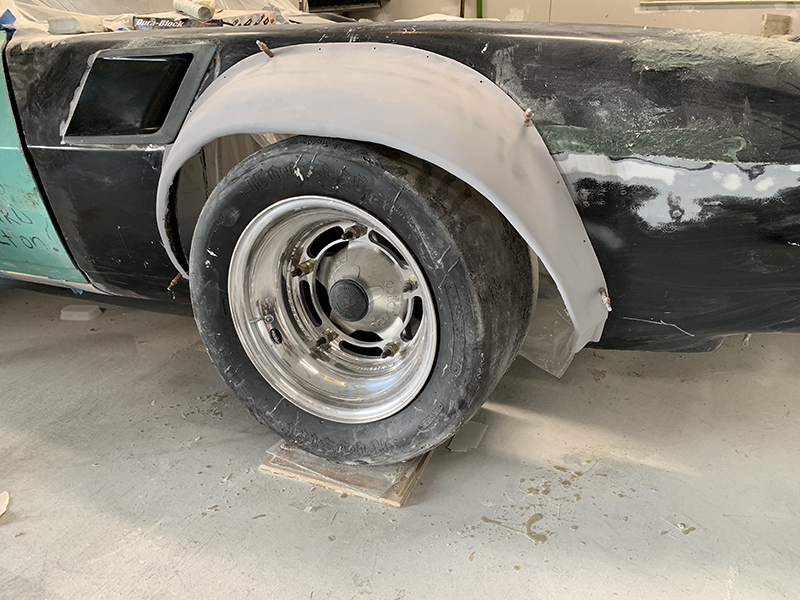
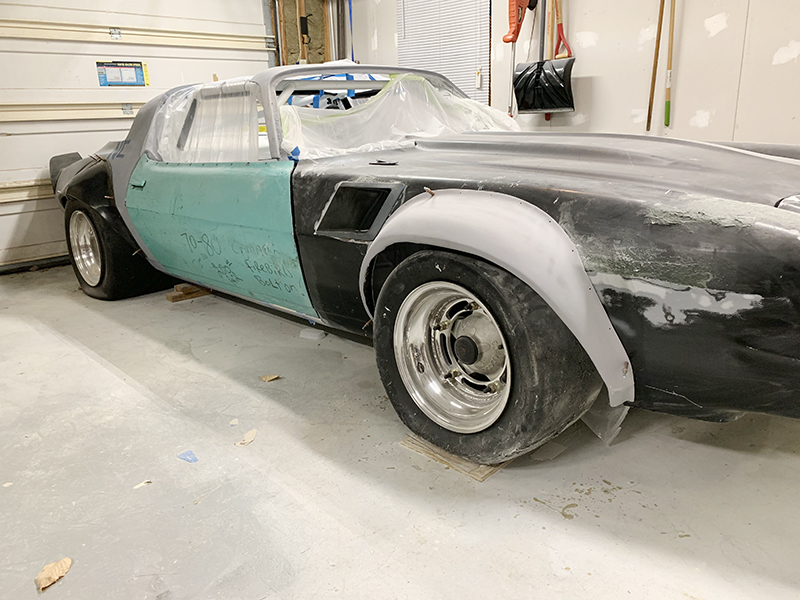
Full disclosure - lazy got me here. When I put the front clip on the car, I cut the fenders for plenty of vertical clearance, and trimmed a little at the front and back. The thing is, when the car is off and sitting on the ground, it's really hard to turn the wheels left and right (unless they are on turn plates, which I had on a shelf just in front of the car - lazy, remember?), so I never really bothered to check the fore/aft tire clearance from lock to lock.
That was stupid.
I realized this stupidity too late - foam was already down. I'd love to take full credit for realizing my mistake on my own, but it was actually Jeff Stroh via Facebook that first noticed the issue. By the way, if you want a badass, sorted, second gen CP Camaro, the one he and Todd Farris have driving for years is up for sale here - https://oversteergarage.com/cars-for-sale/ - and it's for way less then I have in this car.
Anyway, back to the story of me being an idiot, and how I'll fix it.
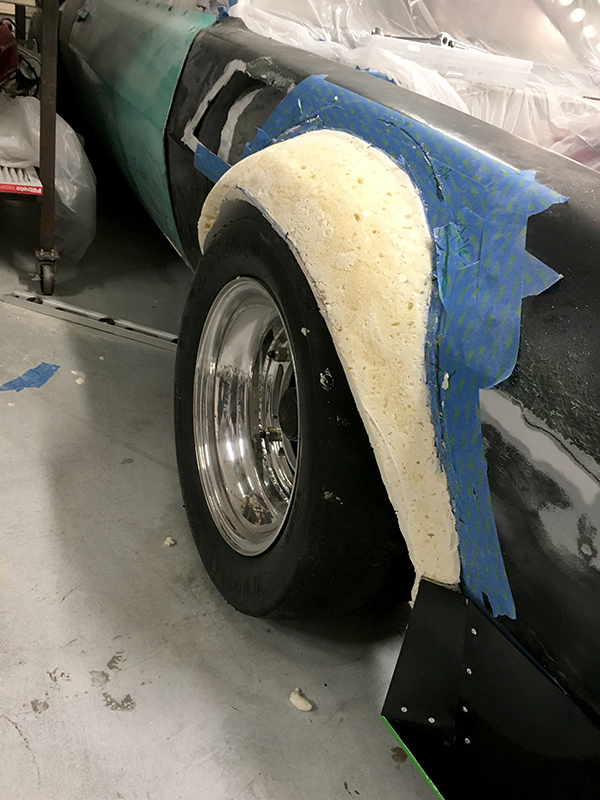
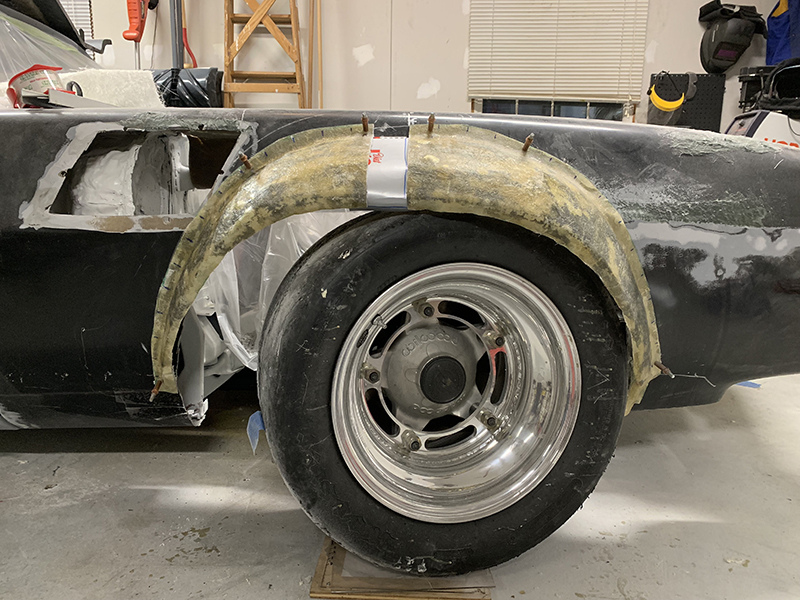
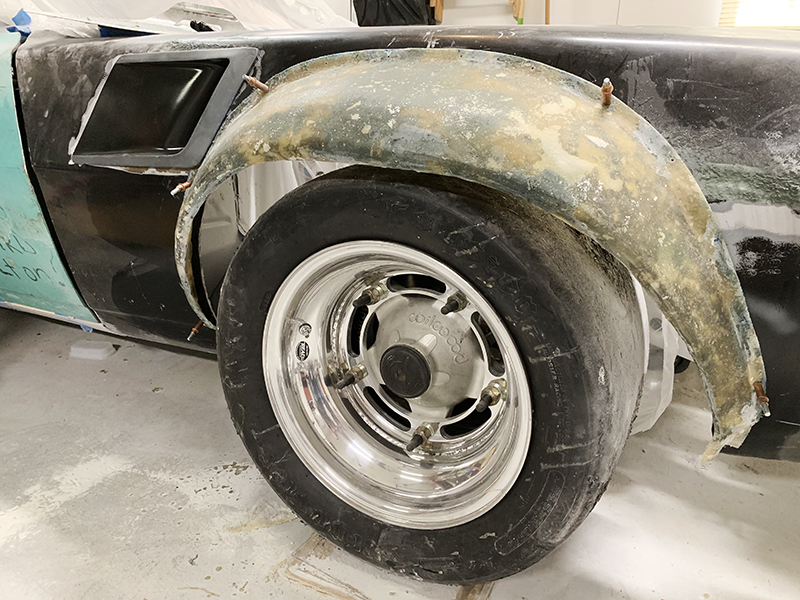
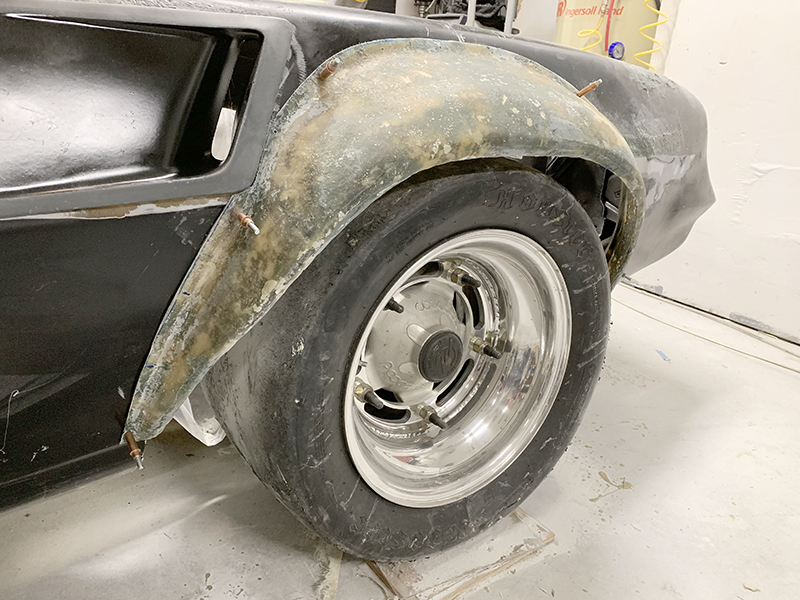
First thing was to clean up the edges of the flare so I stopped getting loose fiberglass all over me, and so it was easier to see what I was working with.
Once I pulled the flares off the car (which worked really well, so go me, I guess), I did what I should have done in the first place and turned the wheels. Boy, was I WAY off on what I thought would work. Now, remember that the wheels are spaced out 1", which is the furthest out they will ever be (and will probably only need 1/2"), which changes the arc by quite a bit. I wound up having to clear behind the wheel back to almost where the steel part of the body starts. On the front, I basically had to remove the flat outer edge of the wheel opening, and I was good to go.
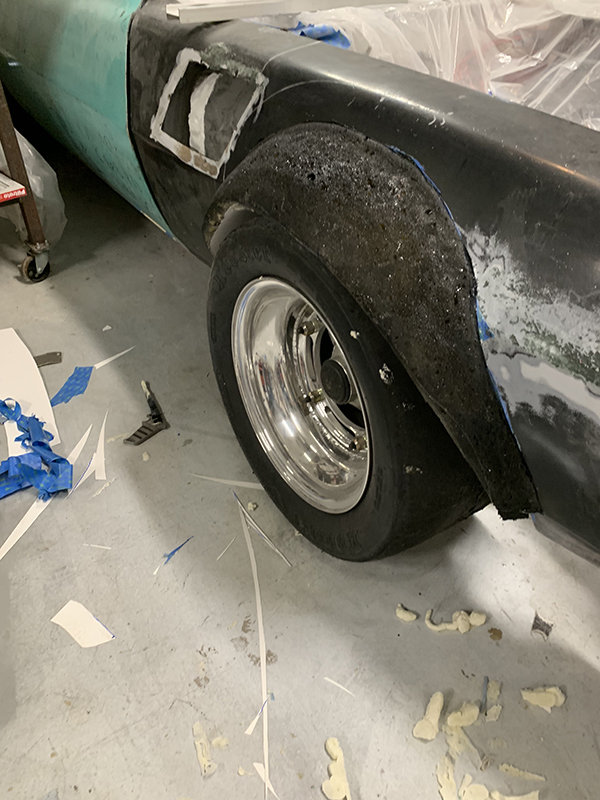
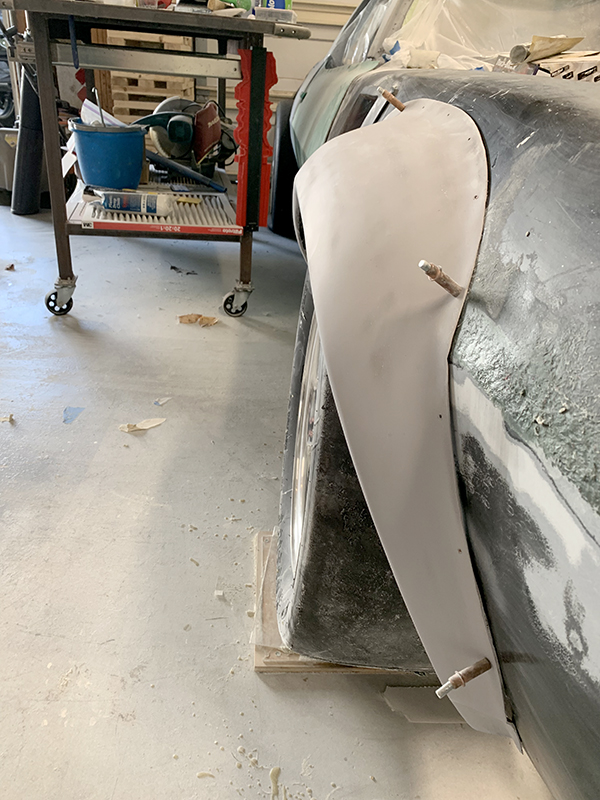
So, with the fenders clearanced as they should have been in the first place, let's mount the flare up and see how I did!
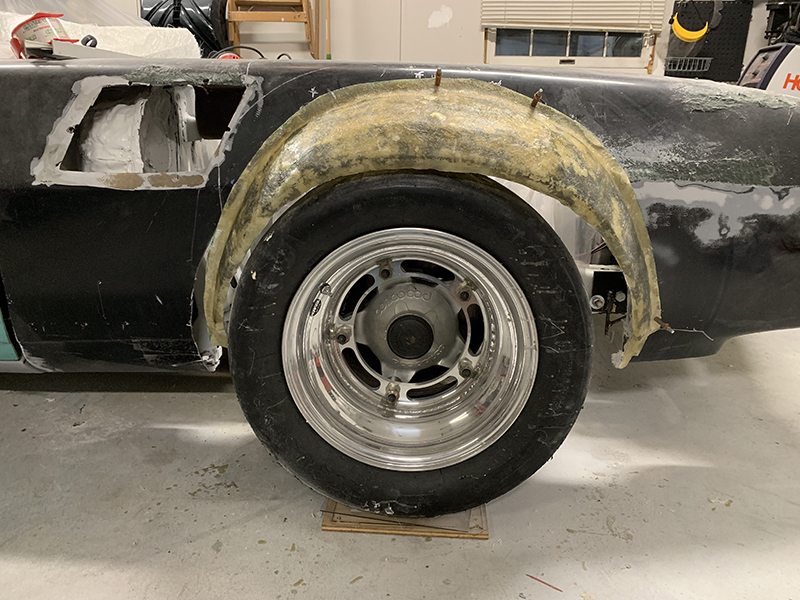
Fail.
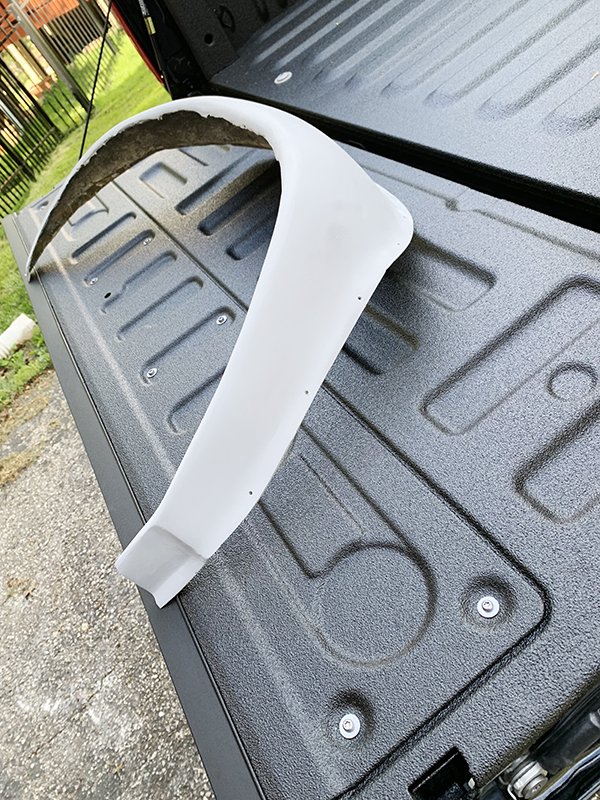
So, what's the solution to fix the part you worked so hard on making?
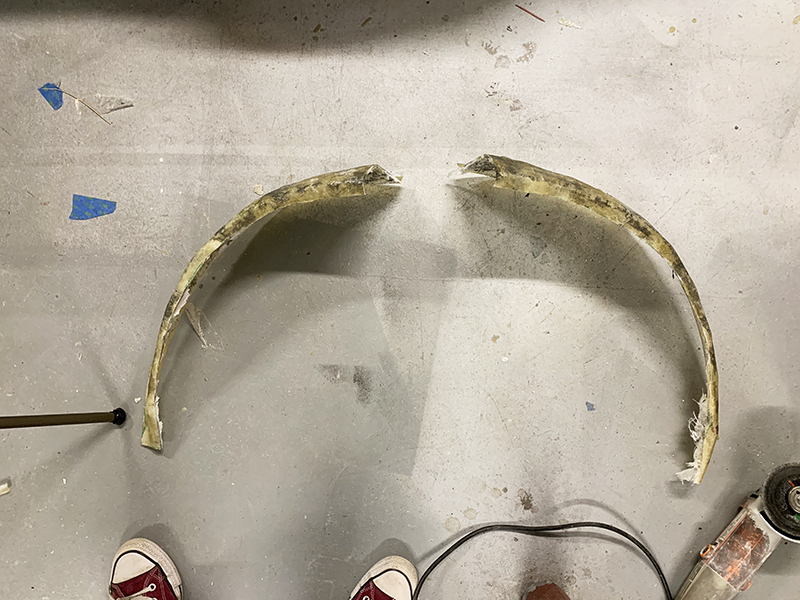
If you said "cut it in half," you get a cookie.
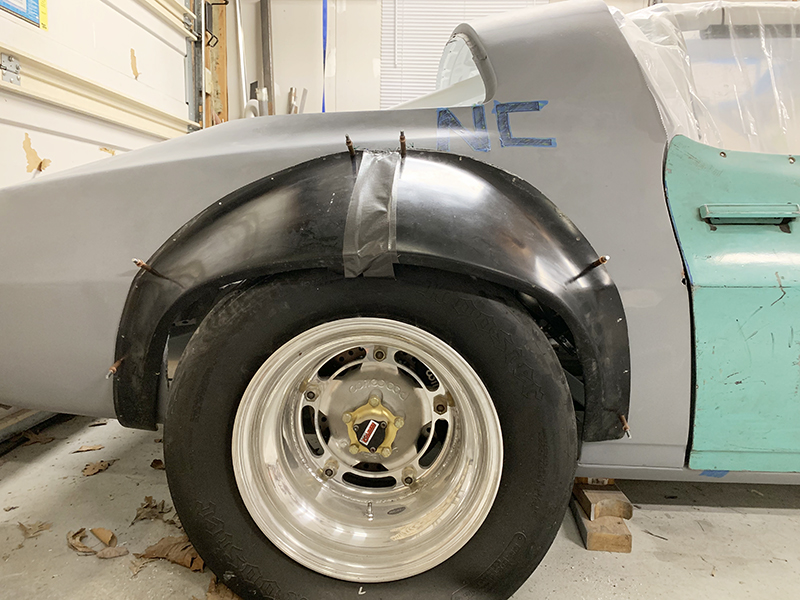
Once I cut it, I was able to mount the front and rear halves where they should be, and I was happy to see that things will likely work out. A little bit of cardboard courtesy of a Diet Coke container, and I have my filler piece that I can use to back some more fiberglass.

And for those who are curious to see how much sweep there actually is...
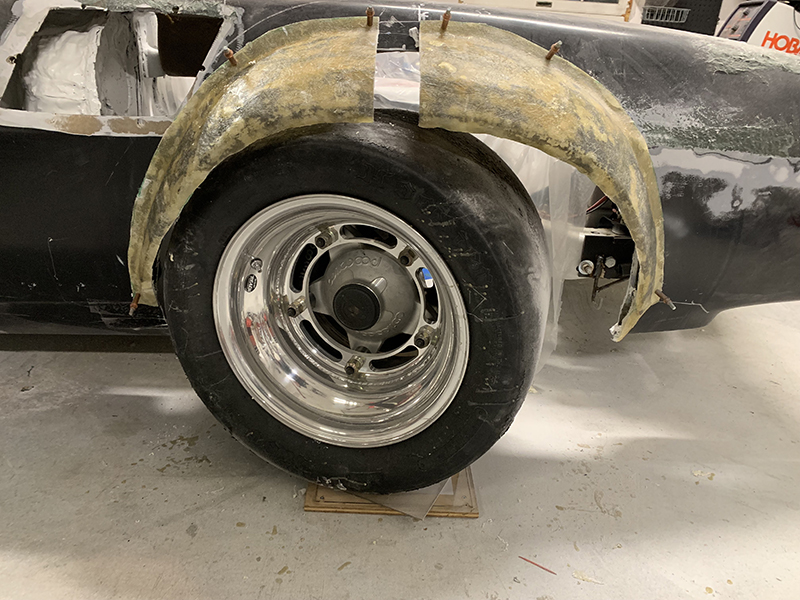
So, later this week I will do the same to the driver's side, and then get these glassed up so I can start bodyworking them and make them nice looking.

In reply to Gimp :
So I hate to ask, but did you also leave enough room to compensate for the front wheels at full-lock AND full-bump?
Pete Gossett said:In reply to Gimp :
So I hate to ask, but did you also leave enough room to compensate for the front wheels at full-lock AND full-bump?
Don't hate to ask! I've already outlined my stupidity once here. Yup, I checked and everything looks good (camber gain helps too).

Looking good. I know the pain the big wheels and tires cause. Before I did the flares on mine, I checked clearances and kept having to go back and trim a bit more. The tires need quite a bit of room. If the wheels would clear the steering arms, I could have gone with more backspace, but needed an 18" or larger wheel to do that.
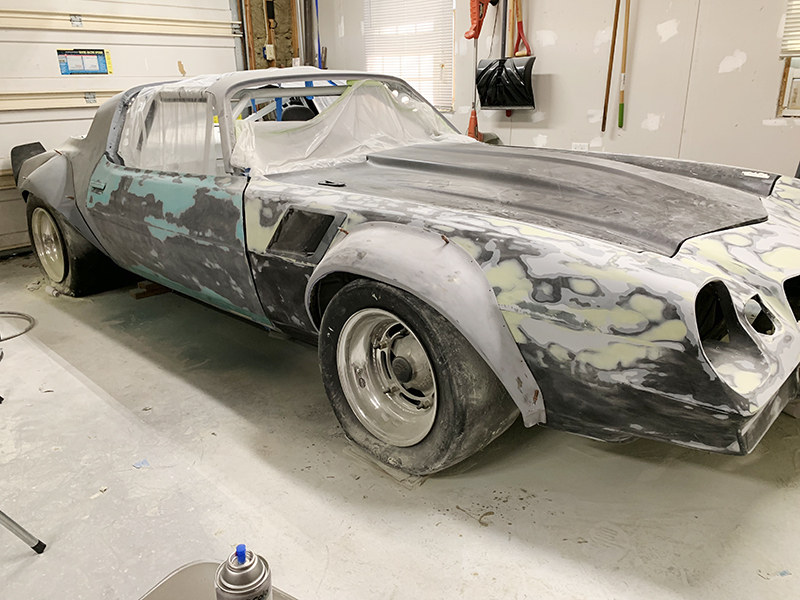
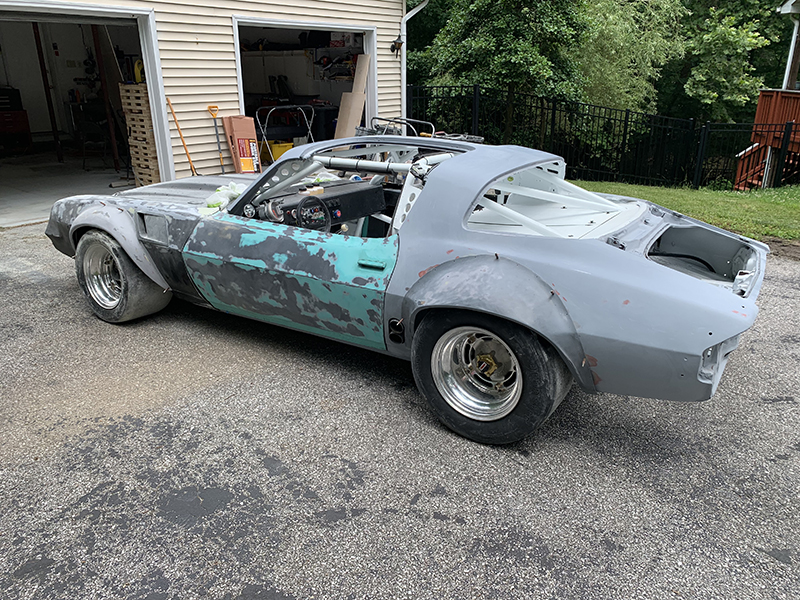
Still out in the garage getting itchy, but I think they are just about ready for mud.

If you're having trouble with itchyness sprinkle some baby powder on your exposed skin before you start. I do my forearms and my stomach when I'm sanding a bunch of fiberglass.
I hate bodywork, but progress is being made. Unfortunately, I injured my back doing the bodywork, so that slowed the process.
I did get the passenger side into high build.
The inside lip and outside edge still need a final trim, but it's starting to come together. I also trimmed it to fit the fender vent.
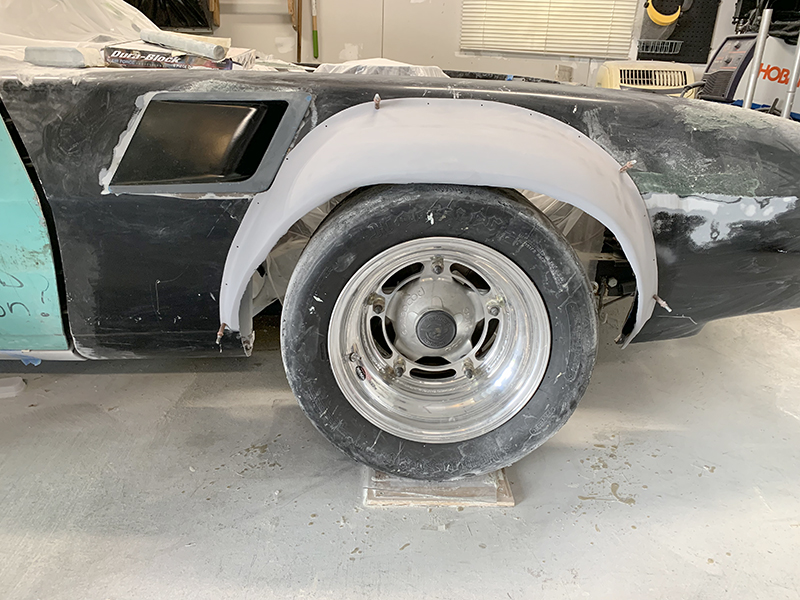
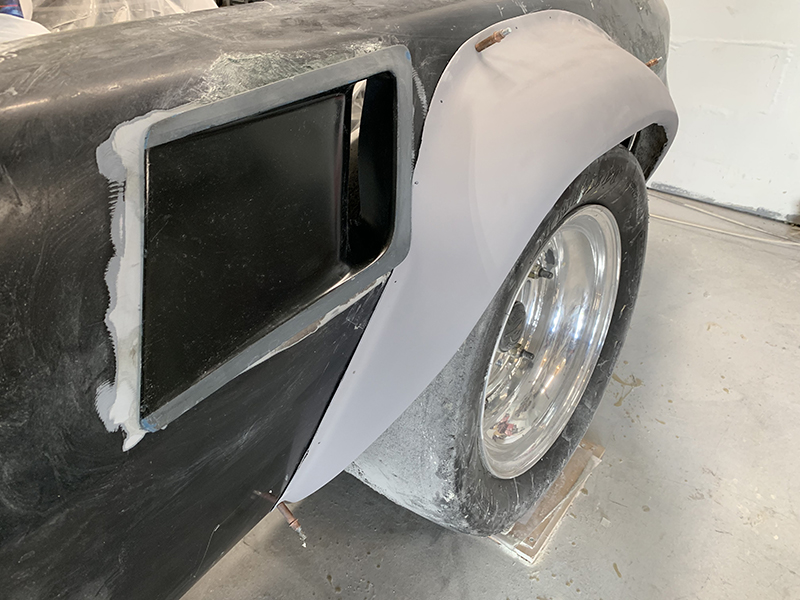
And the front should still line up well with the splitter, but I'll check after I've gotten further on the driver's side. The splitter is easy to tweak.
These are the hardest part of the bodywork, so things should really start moving once these are done.

this thread does zero to bonertown in 3.2 seconds.
Progress still going on behind the scenes. got the driver's side front flare done (no pictures, sorry - it looks like passenger side). With that done, I can start work on the rears.
I had already sectioned the rear driver's flare, and that went really well:

I did the exact same section on the passenger side, and things did not go so well:
Turns out the driver's side and passenger side flares are very different from each other. I blame 80's manufacturing, I guess. That said, I think I can get the passenger side better, it will just be some work. Worst case, I do have a second set of flares I can experiment with.
BUT, if you stand back a few feet, things start looking better.


I can't wait to see this thing in paint.

Are you going to pull molds off them?
Crackers said:
Are you going to pull molds off them?
Once I know they work, yes. Probably this coming winter.
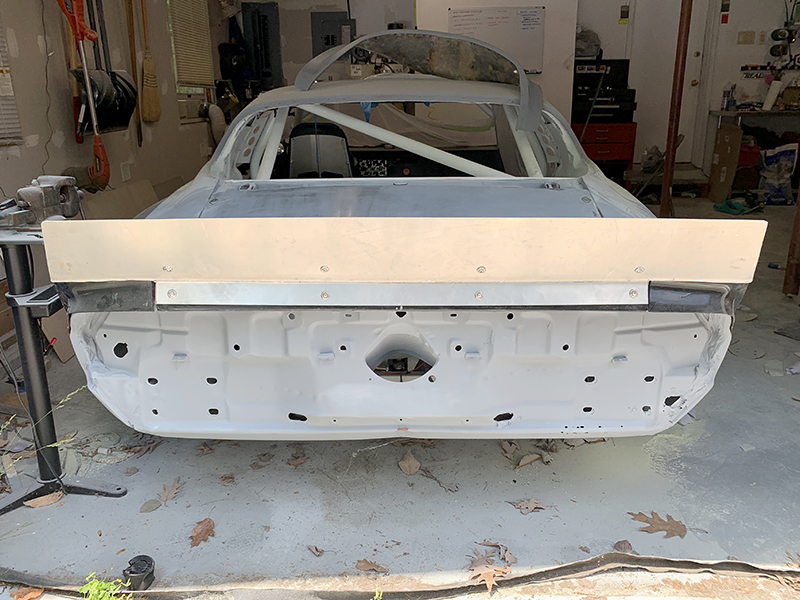
Still at it. I'm in bodywork hell. The front clip had some damage to it that I had previously repair, but now it was time for body filler. I hadn't really planned on blocking the whole clip (because race car) but it quickly became obvious that the fiberglass had more waves than the ocean.
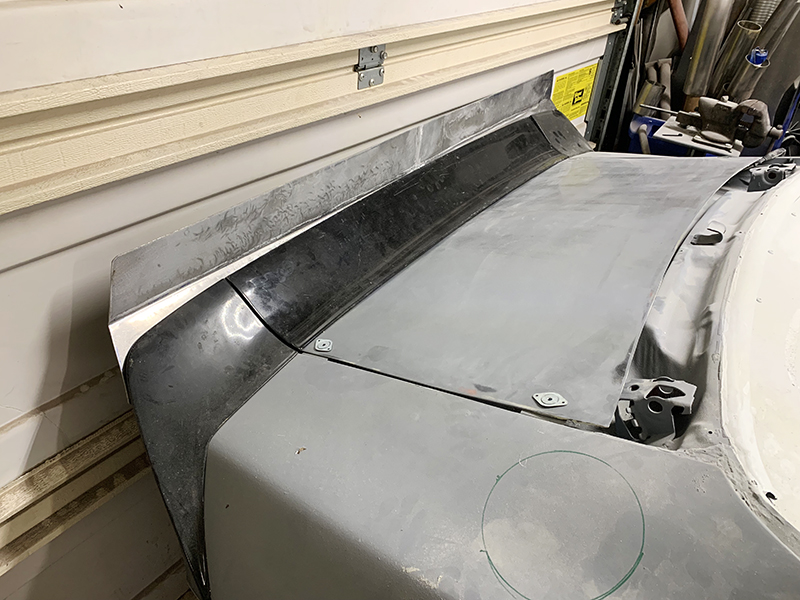
We spent the entire holiday weekend doing bodywork, so I had to take a break at one point and work on anything else, so I started the rear spoiler.
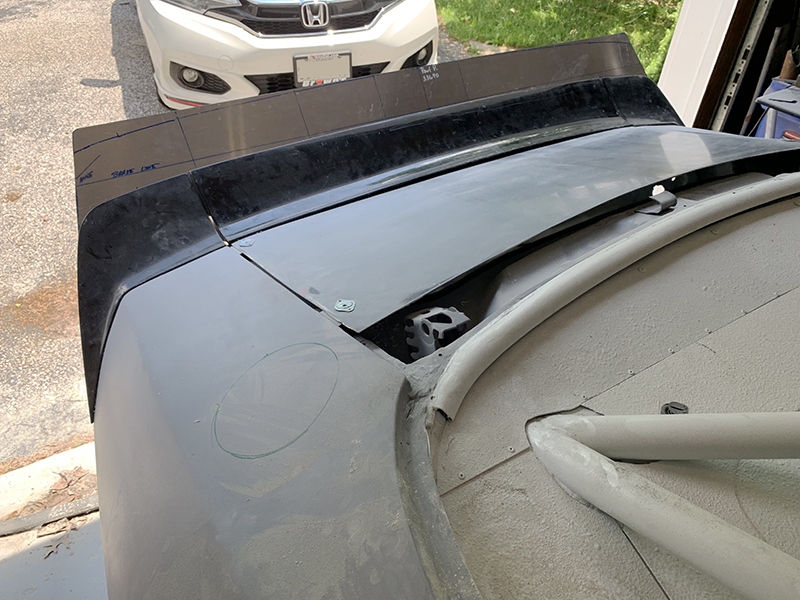
It's 6160 aluminum, and is attached with bolts that thread into rivnuts I installed in the stock spoiler. It sill needs one more bend to make the angle more vertical over top of the factory spoiler, but I'm pretty happy with how things turned out.
Do you really need a more vertical rear spoiler? It's already a pretty big air-stopper. Personally I don't think it will look "right" compared to the rest of the car that looks really badass! I would have tried it out first, before bending it more, to se if more rear downforce was needed. And before bending it investigate other options like underbody downforce etc.
The ideal scenario you force the passing air to change direction without causing it to stop which only creates drag. However as I'm sure you are well aware downforce can't be obtained without drag :) But to steep an angle and you'll loose downforce instead since the high pressure area will push the passing air upwards earlier.
Just my opinion :) It takes a fearless driver to really take advantage of the downforce a car like this can create, you might very well be one of those, I don't know you! But it's an easy thing to redo later if you feel you need more rear end vertical load :)
Cassius said:Do you really need a more vertical rear spoiler? It's already a pretty big air-stopper. Personally I don't think it will look "right" compared to the rest of the car that looks really badass! I would have tried it out first, before bending it more, to se if more rear downforce was needed. And before bending it investigate other options like underbody downforce etc.
The ideal scenario you force the passing air to change direction without causing it to stop which only creates drag. However as I'm sure you are well aware downforce can't be obtained without drag :) But to steep an angle and you'll loose downforce instead since the high pressure area will push the passing air upwards earlier.
Just my opinion :) It takes a fearless driver to really take advantage of the downforce a car like this can create, you might very well be one of those, I don't know you! But it's an easy thing to redo later if you feel you need more rear end vertical load :)
Thanks for the response. I'll do the best I can to answer, but know that a lot of what I'm doing when it comes to aero is <strike>stealing</strike> borrowing from the work others have done.
For autocross, especially in a car with enough power to overcome the drag, most people set the entire rear spoiler near verticle for maximum downforce due to the lower speeds.
I agree that this doesn't look "right" on this specific car, which is why I've incorporated the stock spoiler into my setup. Here is a more "traditional" rear spoiler:

My hope is that I'll have most of the aero, with slightly better aesthetics (not that it really matters when you're racing).
The other issue is no underbody aero is allowed for hte class. Hell, my entire trunk floor is missing and there are no under trays, so I'm already compromised there.
The real truth is no one has wind tunnel tested these cars, so no one really knows aside from testing. I'm just using that knowledge and doing the best I can to keep up with the Joneses.
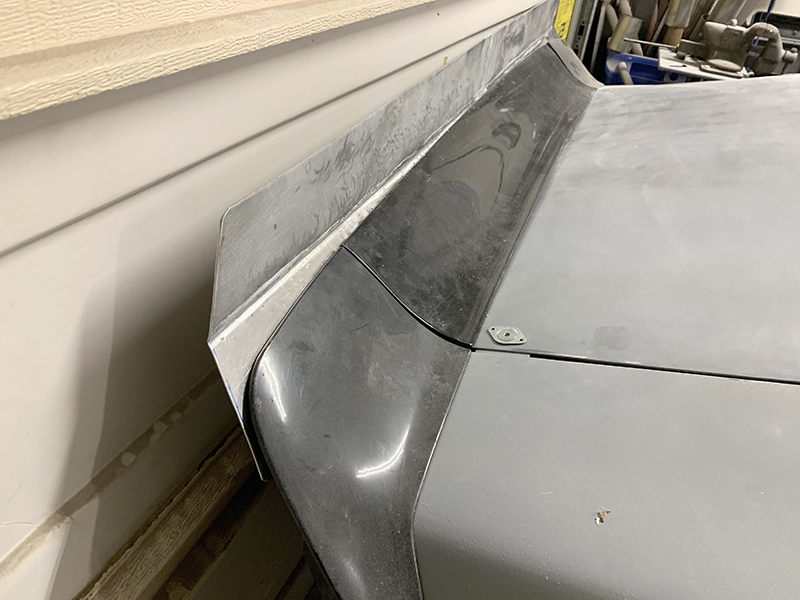
Chipping away at things. Got the final bend in the spoiler and prepping it, as well as the rest of the car, for bodywork.
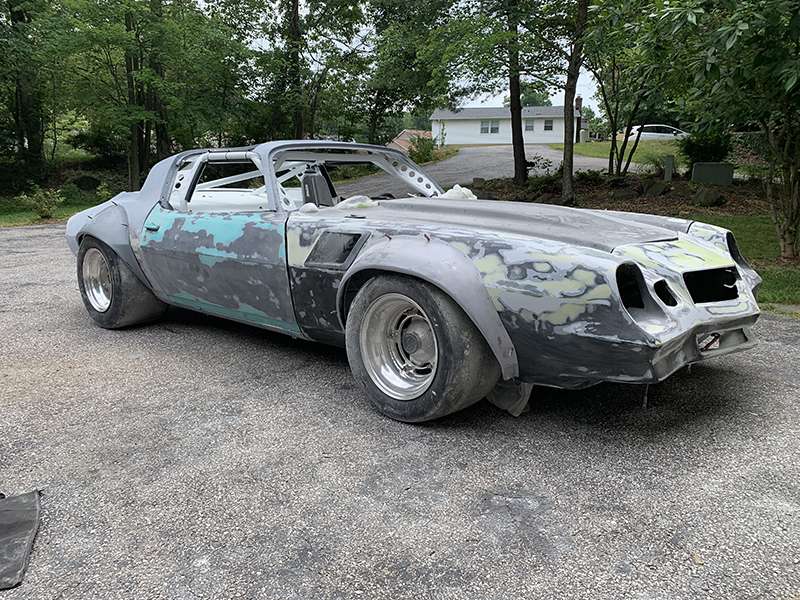
The most complete this car has looked in a very long time.
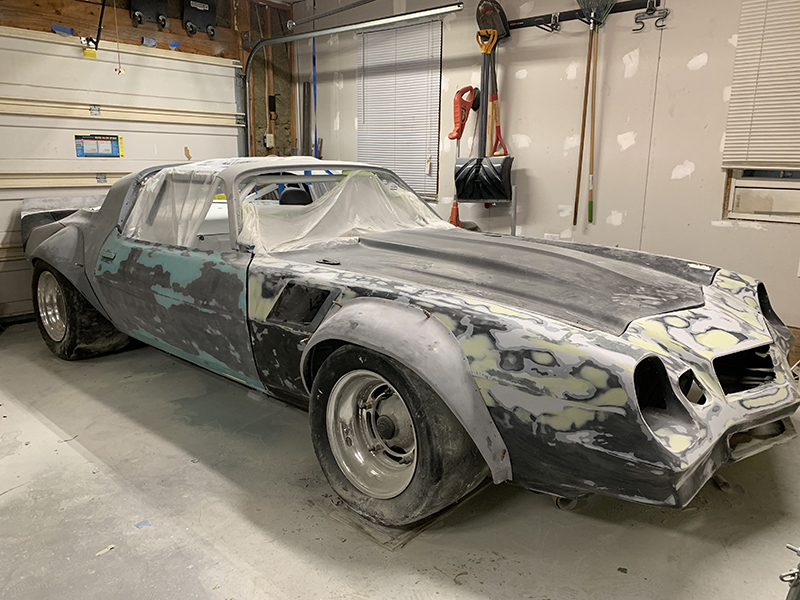
Trust me, I'm just as sick of seeing this car without paint, but we are getting really close now. Pulled it out of the garage, blew off most of the dust, cleaned out the bays, and basically got ready to spray, which will be happening soon.
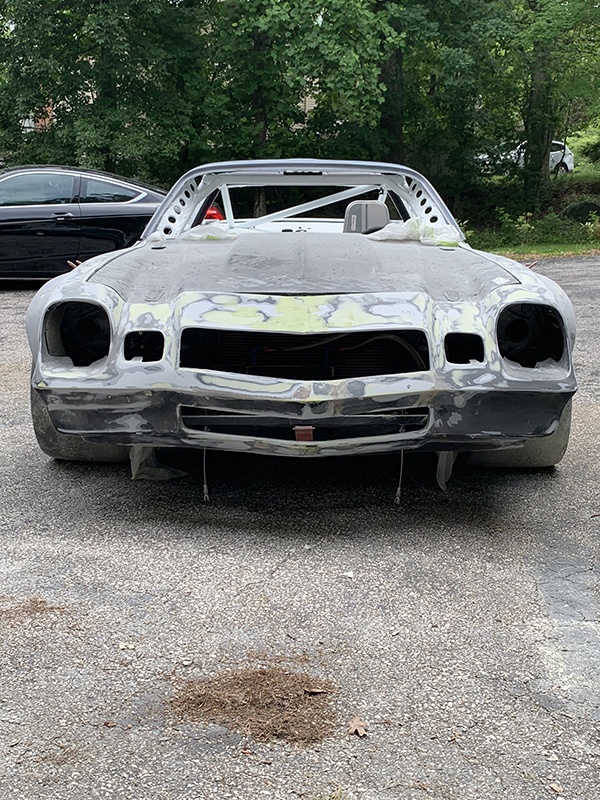
It's also the first time I've seen the car outside with the flares. I'm pretty happy.

I can’t wait to drive it.

IDK how i missed it, but just saw this last update...this is a full on 6-to-midnight situation. Looks incredible. Kudos!
Body work is done. I have a mechanical thing to fix, and then some prep, but in about a week it should be in color.
You'll need to log in to post.


