
Things moved along decently well over the weekend. The dash is now reinstalled, and I tested that everything seems to power on as it should. Unfortunately for the time being the tach is just Gorilla Taped to the top of the cluster as I've not had the time to try and 3D print the pod for it, but I wanted to have it hooked up and not have to pull the dash apart again to wire it up down the line. No clue whether the fuel gauge will work now or not, but worst case is that it's in the same condition as it was before.
I think I've got the intake & intercooler mounting worked out, but unfortunately didn't have the necessary couplers to actually install it so I had to order them from Amazon- they should arrive today. Since I couldn't finish that I got to work putting the front end back together and should only be a few hours away from that being done as well. So with a small bit of luck I should be able to have everything back together and it mobile again by the end of the week- which is good because I need to be able to use the garage for prep for the Dancer's non-profit's charity yard sale.
I had been trying to figure out a way to route the intake and filter such that I could pull air from outside the bay, but I just can't figure out a good way to do it, so for now at least I'll be pulling air from further forward in the bay away from the turbo.
A question regarding the intercooler and the ECM- will the computer automatically adjust for the (hopefully) lower air temps as a result of it? I would assume so, but if I need to do something more to take advantage of it I want to make sure to do so.

Ashyukun (Robert) said:
A question regarding the intercooler and the ECM- will the computer automatically adjust for the (hopefully) lower air temps as a result of it? I would assume so, but if I need to do something more to take advantage of it I want to make sure to do so.
A little bit, based on what the oxygen sensor sees, but not really as much as the proper ECM and Charge Temp Sensor plumbed in would.
Luckily, its fairly easy to install a CTS in the intake, there's already a boss on the intake plenum that has to be drilled and tapped. Adding the connector/wiring to the harness and pinning it into the ECU is a bit more work, but all capable. Sometimes the wiring/connector is buried in the harness already, just not plugged in.
Updating the ECU code is also possible with the proper software and EEPROM reader/writer. The rom files are available to burn and there is software to alter/tune them as well. You just have to dig the existing rom out of the ecu in the fenderwell, swap out the prom with the one written with the code you want to use (keep the stock one as a fallback).
SVreX said:
I'm about to get rid of a complete good condition 2.2 16 valve from a Spirit RT. With all accessories.
You know you want it! 
OK, with the work needed to really take advantage of the IC on the current engine, I'm curious enough to ask what you'd want for the 16-valve as it may end up being less of a hassle to swap it in (though I would have to re-wire the harness- but I've done that once and should still have all the schematics...). Of course, I'd also have to work out getting it to here...
So, didn't have a lot of time yesterday in the garage but made very good use of it- I was actually able to figure out how to route several of the somewhat randomly grabbed intake hoses/ducts that I grabbed at the half-off junkyard day- that $10 is turning out to be VERY well spent- to get air from outside the engine bay into the engine! The ducting runs down between the rad and the transmission into the driver's front wheel well- I still need to fab a bracket to hold the filter, but it will be located at the bottom front of the driver's fender. I hope to put together a bit of a shield for it too so it won't get damaged by crap from the road, but will have to see how necessary that is.
Will hopefully be getting the rest of the intake/intercooler piping together and installed over the next few days- for now I'm not going to be doing the computer and wiring mods to fully take advantage of the intercooler since I need the Rampage moving and out of the garage and I'm going to have to decide whether I should do those or just try and get SVreX's 16-valve and swap it in instead.
The bad news is that there's pretty much no way to retain the stock battery tray with the new piping and absolutely no way to retain the stock coolant overflow bottle- and I may have to relocate the ECM as well if I try and keep the battery in the stock location.
Do I really need the coolant bottle? Or can I just run a hose from it for any coolant that is vented if the coolant reaches a pressure that causes the cap to open?
So, the good: the intake & intercooler piping are all worked out, and I can retain the (smaller lawn tractor) battery in its stock location though I need to fabricate a real shelf & tiedown for it.
The bad: When I went to bleed the brakes I found that I apparently snapped the hard line from the prop valve to the driver's front brake and need to find a replacement for it- and they're not something that parts stores seem to carry. Is this something that simply doesn't exist in aftermarket/OEM replacements and I'm going to have to fabricate one myself, or am I just not looking in the right places?
Unfortunately until I get that brake line taken care of, obviously the Rampage isn't going to move...
Maybe inline tube or classic tube. But probably a fabrication project.
Buy generic metric line with the flares and fitting already, bend it up yourself.
As for the battery tray, ditch it and move the battery to under the bed or behind the passenger seat to help with the weight balance.
The coolant expansion tank is nothing fancy, it isn’t pressurized, just use whatever fits in the space and has an external vent.
While in the long run getting the tools and line and making the brake line myself will certainly be the more cost-effective route, at the moment that's not practical from a time standpoint, so I checked around and one of the smaller shops in town that I've dealt with a lot (intermittently) over the years is going to be make a replacement line for me that should be done tomorrow (holding out some hope they'll get it done today so I can install it tonight since I won't have time until Wednesday evening if I don't get it until tomorrow). So tonight I'll get everything else that I can taken care of (fill the coolant back up, temporarily secure the battery, figure out an expansion tank solution or just don't worry about it for the moment) so all I have to deal with is the brakes once I get the new hard line.
For now I'm inclined to leave the battery in its stock location. It would help weight-balance and space-wise to move it, but then there'd be the added expense of the wiring & battery cut switch to do so. That's something to consider for a later date.

Vigo
UltimaDork
5/22/18 12:22 a.m.
This probably sounds funny but i've bought so many crappy cars with stuff still in them that at one point i had accumulated a serious pile of jumper cables. On occasion i would cut up the decent ones to use on whatever i needed large-diameter wire for. Like a battery relocation! 
I actually have a small collection of old jumper cables too, but for now just need it mobile so I can get it out of the garage.
Just talked to the auto shop and the brake line is ready to go so I'll pick it up over lunch. Now I just need to be able to plow ahead with getting it back in and the brakes bled this evening.
Just picked up the replacement line from the shop- $25 well spent to be able to simply take it back home and drop it onto the car. With luck everything else will go smoothly and I'll be able to pull the Rampage back out of the garage this evening!
Got everything back together last night (mostly- more on that in a bit) and the Rampage started and moved out of the garage for the time being.
Things to do when I get it back in (after cleaning the garage up and the yard sale this weekend):
- Secure battery, overflow tank, and air filter (may not end up needing to fabricate a bracket, will see).
- Re-bleed brakes the old-fashioned way (with someone at the pedal); I bled them with the vacuum bleeder but they still feel WAY soft (That's what she said!)
- Replace the parking brake cable
- Properly secure boost gauge & install CEL (picked up a pack of 50 12V LEDs for dirt cheap)
- Replace broken bolt on driver's seat, properly secure it & reinstall passenger seat
Those are the basic things to be done.... that's not getting into bodywork and paint, nor into the ECM/sensor mods to fully take advantage of the intercooler... those are just the things to get it truly roadworthy and ready to try running around the cones at the local autocross to see what changes need to be made to alignment & if it's worth trying to modify & install the S10 rear sway bar.
Took the Rampage out to do a shakedown after work yesterday. Runs and drives, but there's something clunking on the passenger side that I need to track down. Also not seeing it go much into boost, but at the same time I was hesitant to just floor it to WOT on our street until I was sure everything was going to hold together. It could be that there's a coupler not holding pressure in the intercooler system or just that there's a lot more lag than there was before... won't be able to really find out until I get the clunking addressed.
Pulled it back into the garage and went over all of the fasteners on the driver's side I touched before running out of time- hope to go over the passenger-side ones this evening so I can take it to pick up some lumber we need for the Dancer's upcoming show.
I'm a bit curious as to whether the change to the filter location is worth it. Where it was (filter mounted to the turbo itself) it was definitely not sucking in the coldest air, but it did not have to worry about restrictions/flow coming in. Where it is now (located in the front bumper cover) it can pull in much cooler air, but has a LOT further to go and through some potentially less-than-ideal flow (not particularly smooth tubing)...
Don't worry about the intake too much. Air path doesn't quite matter on the intake side as much as the pressurized side. Do a boost leak test and drive it.
Just make sure the intake piping doesn't collapse. If you notice the stock intake tubing, it is reinforced to keep it from collapsing.
In reply to Stefan :
All of the intake piping is reinforced- I actually used part of the stock tubing and some intake tubing that resembles dryer vent hose.
OK, for now I'll leave the intake as it is. I probably won't bother with a full boost leak test before I need to do the lumber run tomorrow, though I will go over everything I can reach easily and make sure it feels tight and secure. If I'm not getting full boost it won't make much difference just running to pick up some lumber (though being able to test it under boost on the way there would be nice).
Do you have some pictures of the intake and intercooler piping setup?

wae
SuperDork
5/31/18 1:29 p.m.
My caveat here is that I don't know a whole bunch about how things are supposed to work, and I may have things completely screwed up, but I do know that I am able to build boost and make some pretty decent power, so take this for what it's worth:
Driving "normally" around town, I find that I rarely make it into boost because I keep a fairly light touch on the throttle. If I want to check to make sure that it's building and holding boost and not leaking (without doing an actual leak test), I will get going to about 30-35, preferably uphill a bit and shift into 5th gear and jam the throttle. Things don't get out of hand too quickly there, but it will rapidly go into boost and start pulling hard. All without attracting any unwanted attention and without anything happening too suddenly so I can glance down at the boost gauge. I always know there's something wrong if when I do that I only get to 2psi or so.
It's pretty fast and easy to leak test, though. I put a tire valve in a rubber sewer cap that fits my turbo intake and removed the valve core. The filter comes off, that goes on with a hose clamp and then I screw my blowgun attachment onto the tire valve. Hook up the air and press the lever to fill!
In reply to crankwalk :
Not the best picture, but all I have at the moment:
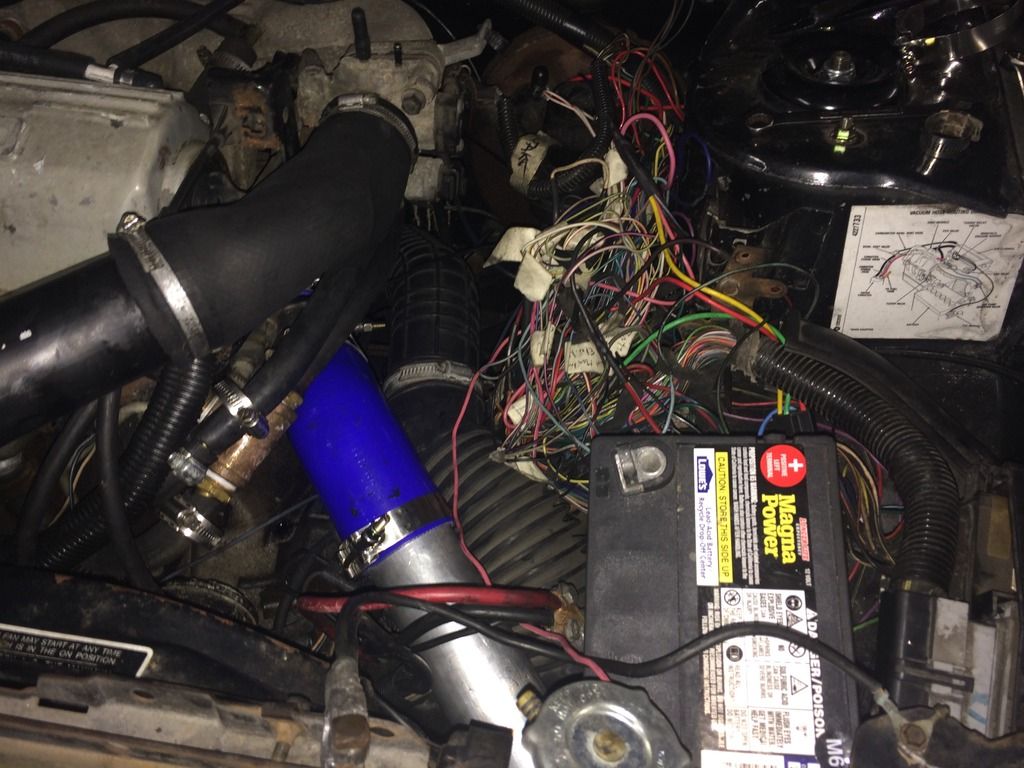
Cold-side of the intercooler piping is on top, the blue coupler & aluminum tubing below it is from the turbo to the intercooler, and the black ribbed piping below is the intake (connects to a more flexible dryer-exhaust-like hose that runs down in front of the trans through the inside of the fender to the cone filter in the front bumper cover).
Make sure the throttle body isn't leaking boost (I ran in to that with Mitsubishis after checking all my pipes multiple times. If you have nipples just capped off there and they see boost on the backside then that won't be too happy.
I also used the method wae was talking about. A little cap on the turbo intake and pressurize the system to 25 psi and then spray soapy water on the pipes. Easy enough to see and hear pin hole leaks.
In reply to crankwalk :
I didn't have any problems with just caps on the nipples before adding the IC, but I'll keep an eye on it. I did when I first went to start it up forget to cap the nipple that perviously had a line on it that ran to the stock BOV (haven't worked out putting the aftermarket one on, and the stock one was just capped off as it leaked- you can see the nipple without the cap on it in the picture) and the engine ran like crap but ran much better once I noticed it and capped it.
Its an automatic. Mash the brake and the gas, watch the boost build, release the brake and enjoy the smoke show.
I've added zipties to the caps and vacuum lines in the past if I've had issues with them blowing off.
So, went over the passenger side suspension and tightened a few things up last night and checked and found that one of the pipes I had used for the inter cooler piping did indeed have a hidden nipple that needed to be capped off and did so.
This morning we needed to get a load of lumber that a local business was donating for the Dancer’s upcoming show, which was why I’d been pushing to get the Rampage checked over. The drive out went reasonably well, other than it still not getting too far into boost (though I was seeing at least a few pounds and not seeing the temp gauge move at all. Checking things over while they got the lumber together, I found that the wire from the temp sensor had broken at the sensor, so that explains the lack of temp readings. Will have to either pick up another 3-gauge pack from HF to swap out for the broken one or see if I want to spend a bit more for a nicer replacement. No obvious reason for not much boost, need to get things together to check for leaks in the piping.
Unfortunately while I was waiting for the, to get things together, it started pouring down rain-and within seconds of turning on the wipers one of the plastic bushings on the wiper linkages had failed leaving me without a functioning drivers side wiper. I was able to cobble together a temporary fix with some cardboard and packing tape, but that gave out halfway home and I had to drive leaning over to see out the passenger side of the windshield. I already have the bushing I need to fix it- it just obviously wasn’t with me in the car...


