1 2 3 ... 5
oldeskewltoy
oldeskewltoy HalfDork
8/3/12 12:10 p.m.

MOST of my car has already been built, although there is still a fair amount of work still needed. With any luck maybe this build thread will help motivate me to finish my little hotrod....

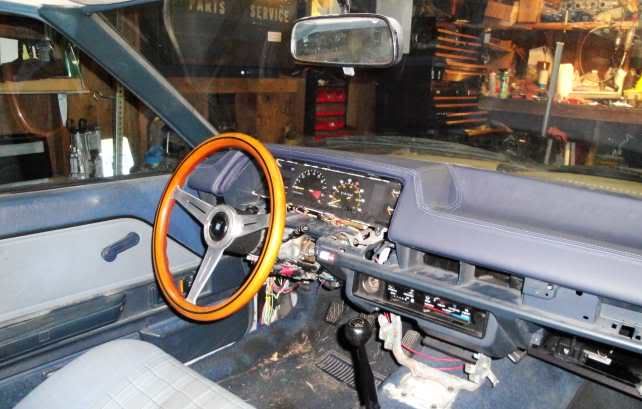
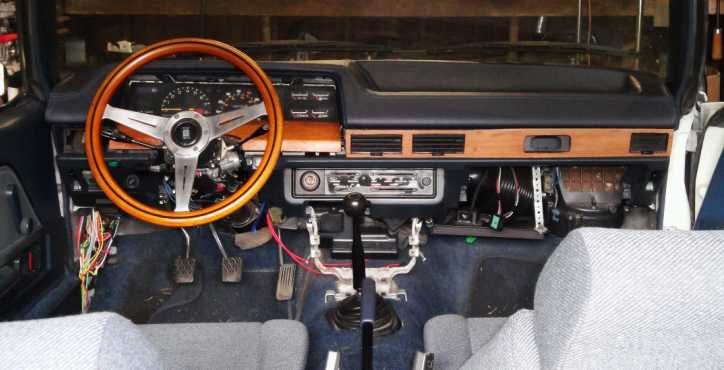
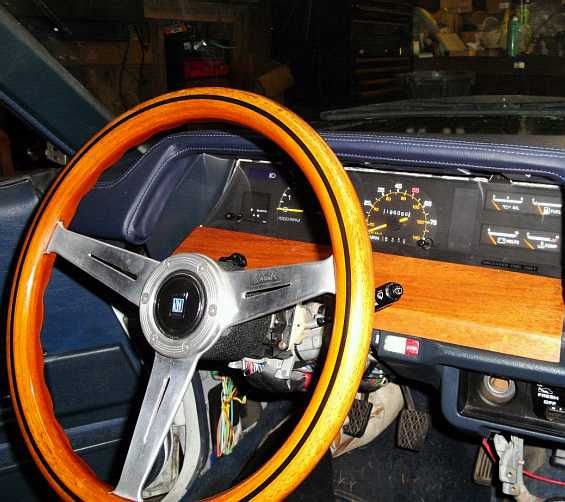
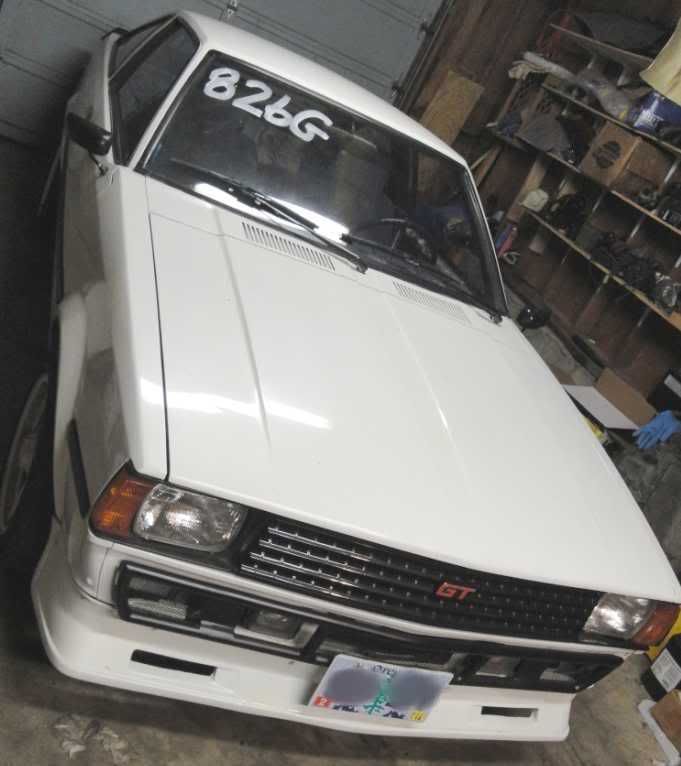
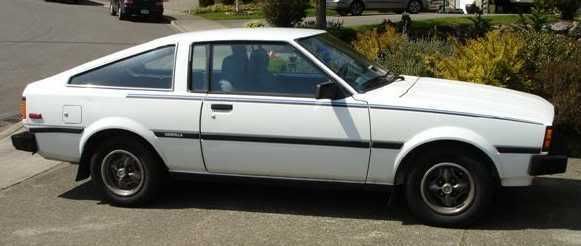
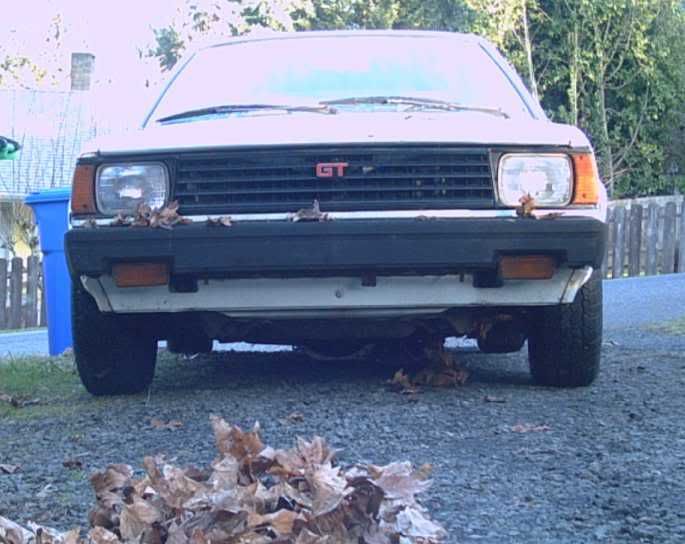
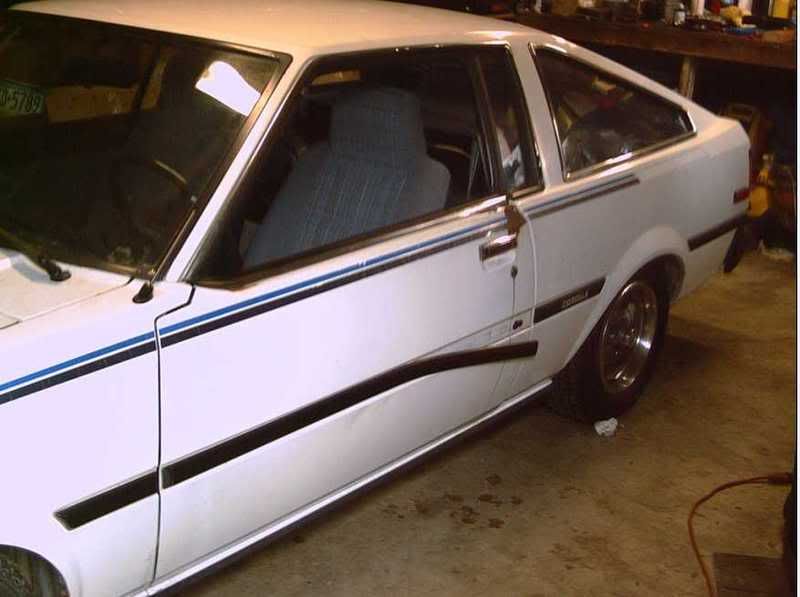
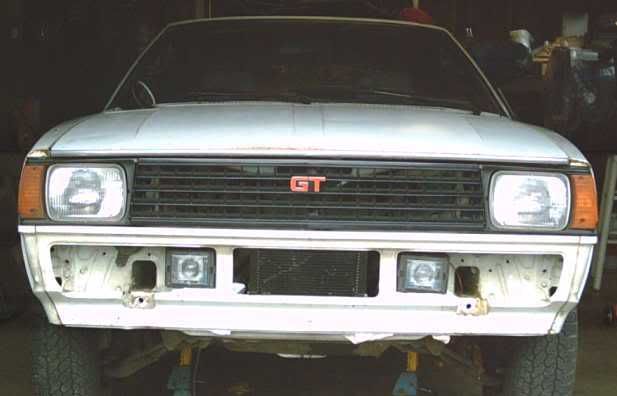
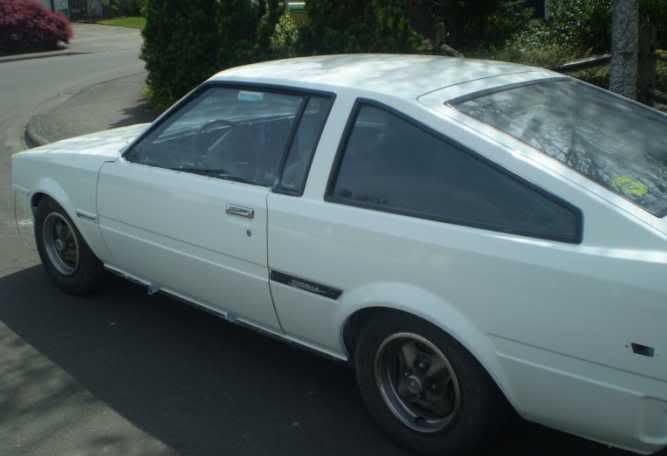
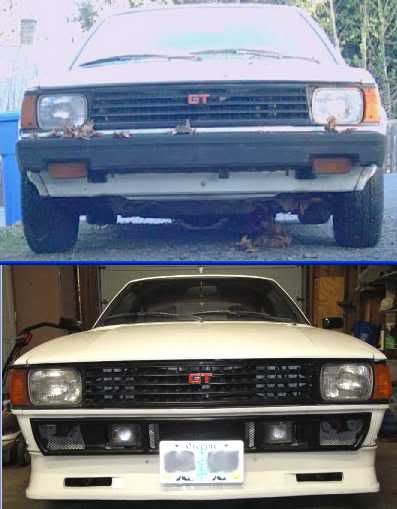
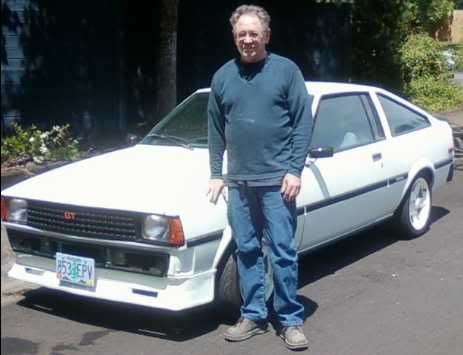
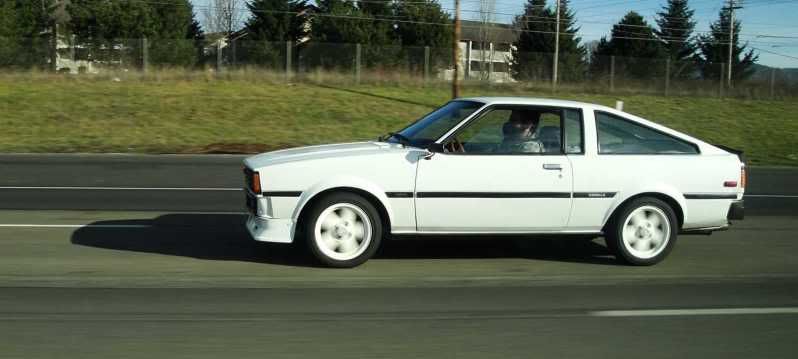
Take one part 1983 Corolla.........

now add one olde, cranky, ornary, SOB who thinks most people just don't have a clue.......

Now this olde fart grew up having owned an eclectic series of cars...

1964 Volvo 1800S
-1968 Volvo 1800S -1966 Shelby GT-350H (wish I still had) -1967 Shelby GT500 -1970 Ford Mach 1 428 SCJ -1971 Ford Courier -1971 Alfa GTV 2000(or was it a 1750?) -1968 Pontiac GTO Ram Air III -1967 Mustang 200-6, 3spd coupe -1970 Buick Skylark (ex mom car!) -1971 TVR Vixen S2 (wish I still had) -1971 Mercury Capri 2600 -1972 Chevrolet Vega -1972 Mercury Capri 2600 -1974 Mercury Capri 2800 -1980 Mercury Capri Turbo -1984 Volkswagen Rabbit GTI - (only wrong wheel drive car in the lot) -1983 Toyota Corolla - (aka - Surreptitious) -1986 Toyota Corolla GTS -1987 Toyota Corolla GTS

1 - I LIKE nimble, well handling machines... 2 - I LIKE good power (read as good, not brutal).... 3 - I like cars that you need to look @ 2 times, 3 times, more times! Cars that are unique.... cars that are just different....

Why was that all important to my build thread??? Simple really..."Your experiences shape who you are", extrapolated out... my previous cars have helped defined this build....

oldeskewltoy
oldeskewltoy HalfDork
8/3/12 2:35 p.m.

Surreptitious began life not as a car build, but as an engine build for a different car entirely.

Back in 2008, many people in the AE86 community had given up on 16V 4AGEs... desiring instead for an extra valve per cylinder - 20V

my goal back in 2008 was to build a 16V 4AGE that planted 20V power, while retaining emissions compliance.... The engine build began with a 1990+ smallport 16V block and head, while the internals remained pre-1987. The logic here is the block was much stouter, and the matching head far superior, while the early engines internals were substantially lighter.

My plan was to take this assembly of parts and have a local engine shop known for their 4AGE work to do the machine work - Loynings Engine Service

I know pics are desired...

The head... I de-shrouded

Chambers #1 and #2 before and after deshrouding

Chambers #3 and #4 before and after

I also set the initial chamber volumes

But the rest of the head work was performed by Loynings Engine Service...

intake bowl

exhaust bowl

exhaust port

The crank was checked for cracks, shot peened, and fully balanced.

The rods were dressed, and shot peened

The pistons were uncommon (non USA) high comp pistons - USA slug on left, high comp on right)

Loynings coated the skirts

and the only none stock internal part(besides cams and springs).... light weight wrist pins! Those wrist pins are over 23 grams lighter... PER pin!

Loynings cut the head so the chambers went from 37cc down to 33cc

To go along with all those parts, I chose a mid range cam from Web Camshafts.

As the engine was nearing completion I was looking for a way to make it look a bit different from all the other 4AGEs... I chose to modify the factory cam covers....

Loynings has unique serial numbers for all of their engines - block and head, as well as custom tag

Cone_Junky
Cone_Junky Dork
8/3/12 2:46 p.m.

Nice custom work.

Will subscribe to monitor progress

oldeskewltoy
oldeskewltoy HalfDork
8/3/12 3:08 p.m.

So... now that the engine is nearing completion... I realize that I don't want to cut up the harness of my very clean AE86 to fit aftermarket management - required for this engine. So it is time to think maybe this engine, needs an appropriate car to reside in... nothing so mundane as another AE86 build.

This engine deserves as unique a platform as the engine has become...... The engine went from run of the mill to something special... why not the car as well??????????????????

My original choice for Surreptitious was to be a hardtop AE71.. I had found one on CL for $650... I tested it, tried to be a smart guy offered the owner $450. He said it was mine if it didn't sell.... it sold...

The next AE71 that came my way was a white sport coupe, with manual rack, and no engine - $1200. I didn't wait this time, admittedly paying a non negotiated price... but I didn't want this chassis slipping away.

and so work began on my AE71........

As can be seen.. the car was showing a few early signs of decay... but the decay is still on the surface...

I did some interviews of hot rod shops, and body guys, and I found this older guy(mid to late 60s?) who did simple body work, as well as customization. His name is David... I'll post his photo up later...

So... besides fixing the rust, and getting her painted, I wanted to add a few distinctive features.

1) I like edges and angles... how can I make the front end more aggressive?? I have a set of vintage Hella DE2000 projector lamps (this Hella lamp type morphed later into the BMW projectors)

Now where to put them???

Also note the central opening... it is the perfect place for an oil cooler

oldeskewltoy
oldeskewltoy HalfDork
8/3/12 3:26 p.m.

So... with a place for the lights... and a place for the oil cooler.... the front end is starting to become that unique one off... that I desire.

Does anyone in GRM remember FOHA??? FOHA is an Austrian company that made aero dynamic body parts for many cars.... Well once I saw this European E7 coupe....

I knew I was going to need that FOHA spoiler.... I searched, and searched, finally settling on a FG copy of the original

So the car was trailer-ed over to David's shop and he began to restore her....

There are still problems to overcome. With the lights and cooler situated where they are... the OEM bumper will no longer work...... so work begins on the 1st truly custom part for Surreptitious.. a tube bumper, made from 1" DOM tubing.

David also restores the black to all the trim

Keeping within the theme... David suggests painting her with Lexus(Toyota) White Pearl

oldeskewltoy
oldeskewltoy HalfDork
8/3/12 3:47 p.m.

The wheels saga...........

It began in 2008, and finally ended in late summer 2009....

The saga begins waaaaaaay out west.... so far out west, its actually the far east... Japan to be exact, Yahoo Japan to be precise.

I was searching for a set of wheels that would contribute to the overall build. While on YJ I stumbled across these....

Air Stages in a staggered set - 2-15 x6.5 +18, 2-15 x 7 +5

I bid on them... and to make a long story short... they sell beyond what I'm willing to pay($300). Interesting note here, the company who outbid me... listed them 4 months later in the USA for $1200

I move on to the next set of wheels I like, TOM'S wheels (famous Toyota modifier - kinda like AMG is for Mercedes). I get out bid on these as well....

Feeling dejected... I stumble across a set of Trakyoto Drag 902 wheels (similar to Ronal R9, and other manufacturers Daytona) They are 15 x 6.5 +22

and the set never moves off 5000 yen(about $60 for the set)

I win the auction, and $450(fees, shipping, etc BS) + $60 to purchase them, they arrive @ my door.

SilverFleet
SilverFleet Dork
8/3/12 3:58 p.m.

Cool car and cool thread! Love the 80's-ness of this car.

oldeskewltoy
oldeskewltoy HalfDork
8/3/12 4:09 p.m.

So... we have a set of wheels... a restored rolling chassis... a professionally built engine...

The next plan is a complete rewire.

I decide this because from my own experience I've seen some of the nicest builds sitting waiting for a tow because of a failed original electric system. I've also seen some massive butchery when it comes to mixing aftermarket management, and original wiring. And finally, I also replace the wiring system because of unique (if available), and costly relays/components too.

I begin with an EZ harness, and a savant (excuse the use of the word) to install the harness.......

He also install the new engine management wiring as well. While "he" is working hard, I to am working hard... restoring 27 year old under, and in dash components

Now along with the cleaned and prepped in and under dash bits, the 2nd custom parts come into play....

Surreptitious comes with an 8k rpm tach, but I have an 8500 rpm capable engine... what to do.... take the tach from an FX16 Corolla (9k) and fit it into the earlier cluster

The FX indicators actually match the OEM amp/fuel/oil/temp gauges better then the OEM indicators do!

oldeskewltoy
oldeskewltoy HalfDork
8/3/12 4:27 p.m.

Now for a little before and after......

Now.... the body is coming together, and so is the wiring, but there is a 3rd custom part to get the new front end and and the wiring to all go well hand in hand...

If you look carefully at the 2 panel you'll note there is a set of lights now missing from the new nose. the under bumper lights were the original turn signals. The extra set of lights wasn't going to work on my new look, and so I customized the outer upper lights to do double duty.

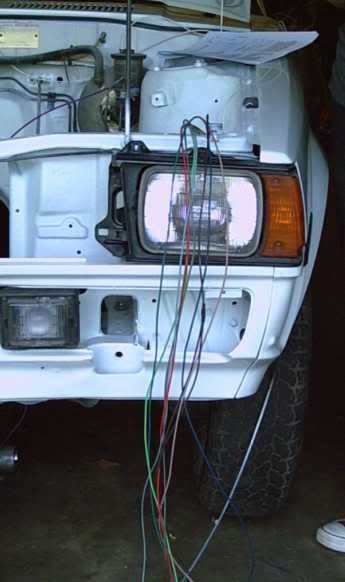
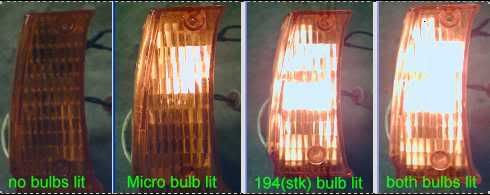
micro bulb = parking lamps, OEM 194 now turn signal

This I find is also a safety improvement, for now other drivers alongside me can now see my signal where they couldn't before

oldeskewltoy
oldeskewltoy SuperDork
8/3/12 4:57 p.m.

So with the new chassis wiring partially installed, and the body more or less finished, the engine gets installed

Now the 4AGE was never available in the E7, the 4AC(sohc version) was. This made much of the installation easier, but there was still a lot to be decided.... coil mounting, fuel filter mounting, wiring routing, ECU location, EFI fuel lines, etc.

I originally chose FJO Racing's 341B version2 as my management choice. FJO is reported to be manufacturing the new Holley programmable system these days.

FJO specs

FJO as it arrived

FJO crank and cam sensor mounts

and a custom single row crank pulley with pick up wheel mounted

oldeskewltoy
oldeskewltoy HalfDork
8/3/12 5:18 p.m.

designing coil mount

mounted

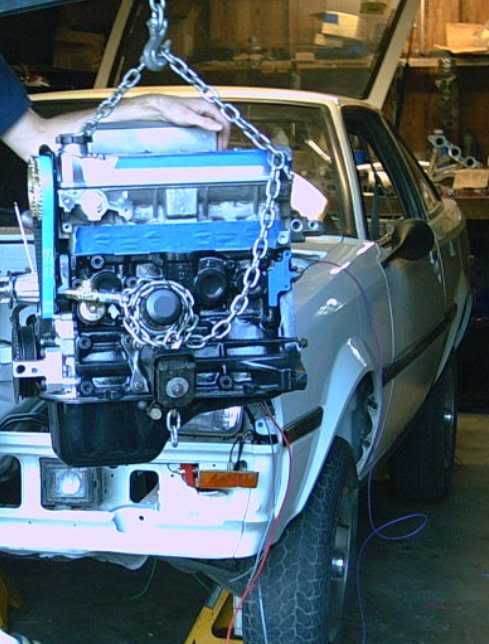
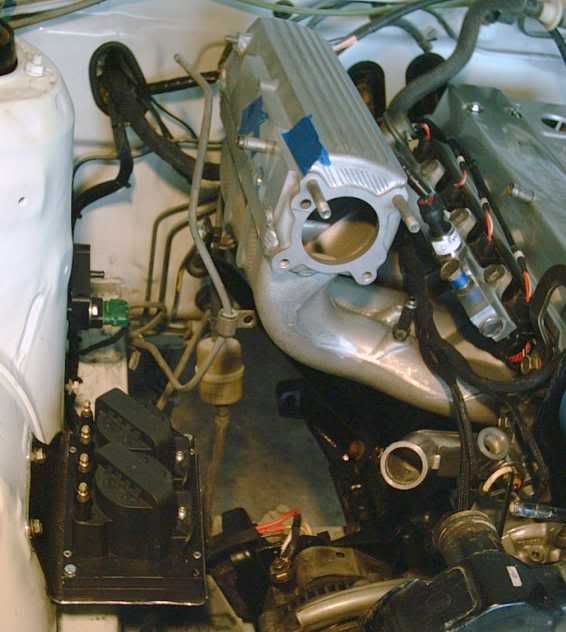
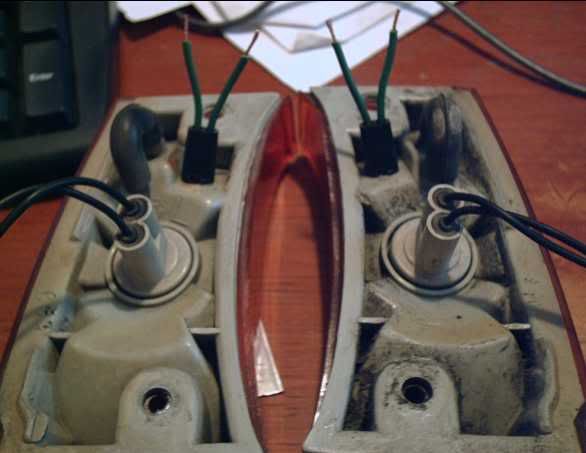
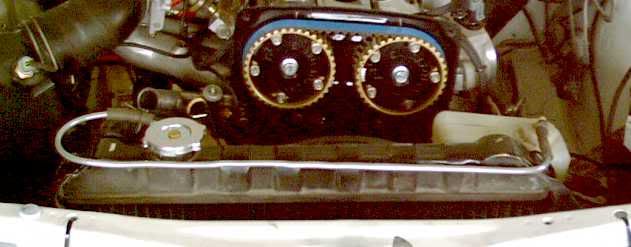
With the wires installed. Note the SAAB wire holder, they make routing through the intake manifold quite a sweet, neat arrangement. Also note the new fuel filter mount, and the charcoal cannister

originally the A/C was designed to go through here... No A/C, and I wanted the best accessibility

After finding a more appropriate sealing cover - looks like it belongs there

and opposite that hole... I got imaginative... note the ECU... is upside down mounted to the bottom of the heaterbox

designing and building oil cooler mounts... yes, that is a curved cooler!

and here it is fitted

I'm kinda proud of the sealing method for the pass through for those cooler lines... the sealing device is a sway bar bushing, split, and slipped into the hole

oldeskewltoy
oldeskewltoy HalfDork
8/3/12 5:40 p.m.

The management system helps monitor fuel, air, oil temps, as well as fuel and oil pressure

For those who don't know it... that air box is from a late 80s 2.9 Ranger

One of the earliest finds for this car was a fan shroud, (w multi bladed fan) that only needed minimal modifying to fit the AE71 auto transmission radiator - auto trans has dual core, and is the reason I chose it

The original overflow bottle originally was placed where the Ranger sirbox now resides, so getting a bit creative.... An old Honda overflow bottle fitted to the side of the shroud... and the system is finished

oldeskewltoy
oldeskewltoy HalfDork
8/3/12 5:51 p.m.

Oh... I almost forgot...... I promised a pic of David......

92CelicaHalfTrac
92CelicaHalfTrac MegaDork
8/3/12 9:49 p.m.

I know of FOHA!! I might have a few parts of theirs.

Matt B
Matt B Dork
8/3/12 10:20 p.m.

I knew you had a pretty effective engine build, but I had no idea the rest of the car was so thoroughly restored and worked over. Nice job man.

Oh yeah, 80's rwd 'yotas FTW

oldeskewltoy
oldeskewltoy HalfDork
8/6/12 4:15 p.m.

thanks............

So the only thing I didn't cover about the engine is the dyno. I have 3 over the past 4 years... All measured @ the wheels.....

Wyn Dyn chassis dyno - 138whp 108 #/ft - dyno run - http://s79.photobucket.com/albums/j143/oldeskewltoy/ae71/?action=view&current=M4V00077.mp4

Dyno Dynamic chassis dyno -145whp 112#/ft

Dynojet chassis dyno - 142whp 110#/ft - dyno run - http://vimeo.com/37280876

Original power figures for the 4AGE engine were 115hp and 95#/ft... @ the FLYWHEEL!!!

This engine flywheel numbers estimates out to 165-170hp, 135-140#/ft.

Gains of 45% in horsepower and torque, while retaining gas mileage figures that exceed 31 mpg.

So... we have 45% more power. Now the 4AGE never came in the AE71, it came in its successor, the AE86, aka Corolla GT-S. The AE71 is significantly lighter, then the AE86. Even though the chassis are similar, the non US models have a advertised mass of between 940 and 990 kilos. The AE86 on the other hand have a peak USA mass of over 1100 kilos.

So... 45% more power, and a mass around 100 kilos less

oldeskewltoy
oldeskewltoy HalfDork
8/6/12 4:36 p.m.

So the AE71 chassis is VERY similar to the AE86, mostly just lighter. The key mounting points all use the same, or similar components. This allows the LARGE AE86 aftermarket to be utilized in the development of Surreptitious

So... what was/is Pirelli's adage... "power is nothing without control........"

So lets get to the control part. As mentioned the AE71 and the AE86 use very similar chassis, and so a lot of the parts can be interchanged.

The one serious short coming to the AE71 is it originally used solid disc rotors. Ok, for going to the market(in a 950 kilo car) but something entirely different when it cames to performance braking. The AE86, on the other hand came with vented disc brakes, and as with the rest of the AE86 aftermarket, plenty of brake options.... that the solid rotor AE71 just doesn't have.

So a "simple" brake swap is in order.... but there is a problem... to do a brake swap, you need to use AE86 strut tubes because the backing/mounting plate patterns are different. Now here comes the but.... The AE71 has 12mm more room between the strut towers, while the lower cross member is the same... (give you a moment to digest this) .

.

.

.

.

.

. Figured out my problem??? The car is going to have 6mm more positive camber per side when using AE86 struts in an AE71... NOT something I'm looking for...

So how to solve my camber issues???

another custom made part... camber adjustable lower control arms!!!

So now we have the brakes capable of slowing her down on the front, the rear is still in need.

PLANS - For the rear brakes is to swap in a AE86 Disc brake equipped rear axle. This will update the AE71 brakes to AE86 brakes, and allow me all the current performance options available.

oldeskewltoy
oldeskewltoy HalfDork
8/6/12 5:03 p.m.

Too continue... the springs are custom units I had made 10 years ago for my AE86. A now defunct branch of Suplex suspension called Turkon Tonk. In essence, they ride about 1/2" to 1" lower then OEM... not a big change in ride height, but the rates are substantially changed. The current rates are 290# up front with 200# springs out back. All dampened with Tokico HTS AE86 full stroke dampers.

ooooh, I forgot to mention, the HTS shocks are fully adjustable... here are their adjustments... and how the shock changes

Stabilizers - Tanabe hollow 1" front - rear stock AE86 GT-S 14mm.

ALL new bushings... from the custom lwr control arm urethane, to a full set of TRD high density rubber... again originally designed for the AE86.

The ride is wonderful... with no suspension squeaks, or rattles. She rides firm, yet not hard.

RossD
RossD UltraDork
8/7/12 8:44 a.m.

Bravo! But what about the transmission?

oldeskewltoy
oldeskewltoy HalfDork
8/8/12 11:46 a.m.
RossD wrote: Bravo! But what about the transmission?

Ah yes... my 6 year quest to develop a proper transmission option for the AE86 GT-S.

A short story.... Back in 2006, when I 1st moved to Oregon, I decided that the AE86 truly needed a better transmission. February 1985 issue of R&T does a 6 sport coupe test, with the Corolla being the only rwd candidate. In the end, the only significant issue the R&T crowd found lacking in the Corolla was the transmission gear spacing was horrible, "The GT-S was a fraction slower... ...there were times and places when the engines power couldn't be used... ...the jump from 2nd to 3rd is too wide and the jump from 4th to 5th isn't wide enough"

If you have driven a Corolla GT-S you would concur. So I went to a few of the "performance shops" (hot rod shops, speed shops, you get the idea) and I asked around. A few seemed interested, most didn't give a flying "F". There was one shop... Pineapple Racing (Mazda triangle expert). 3 years, and a few stumbles... and although close, development halted because of lack of funds.

Well, across the Atlantic, there was a machinist in Ireland who was contacted by an Irish AE86 owner about developing the idea, for the Toyota cousin to the Mazda 6 speed... the Toyota J160. Needless to say, their version is now available.....

Here is a 2 panel view showing the original Toyota J160, and the LEEN J160

To fit the new transmission, the transmission tunnel (shifter hole) needs a bit of extension.

The underside needs a small amount of shaping too accommodate the shift rod

The transmission is raised into place - perfect fit

The mount is designed and built (see GRM thread) and the final fitment begins

Inside the car, a custom fabricated coverplate and rubber dam are used to seal the old hole from roadnoise, and minimal water splashing...

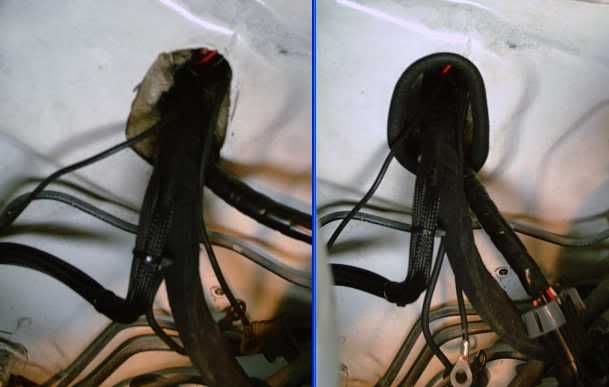
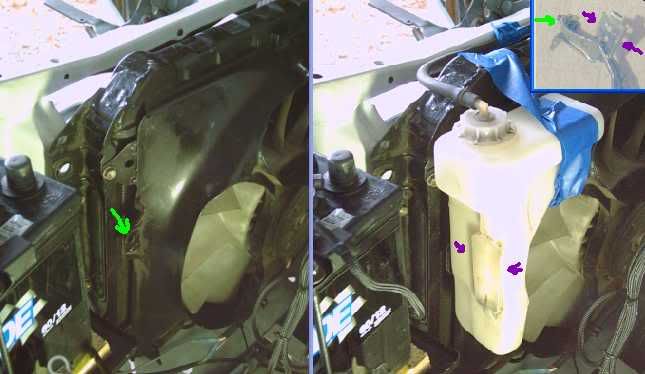
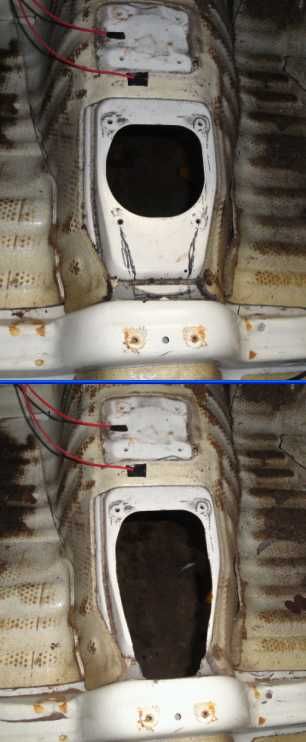
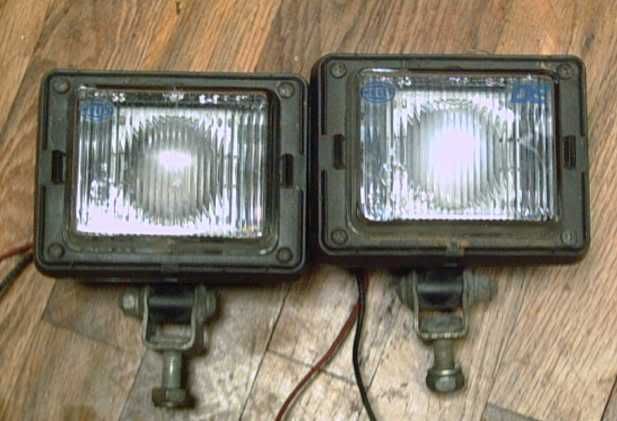
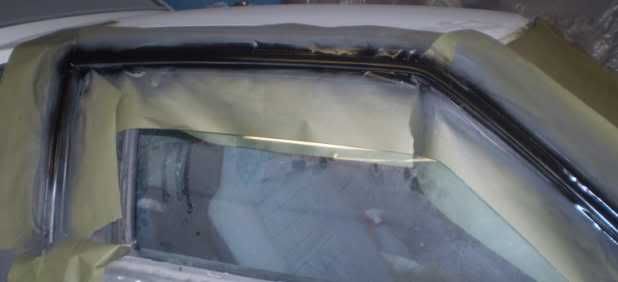
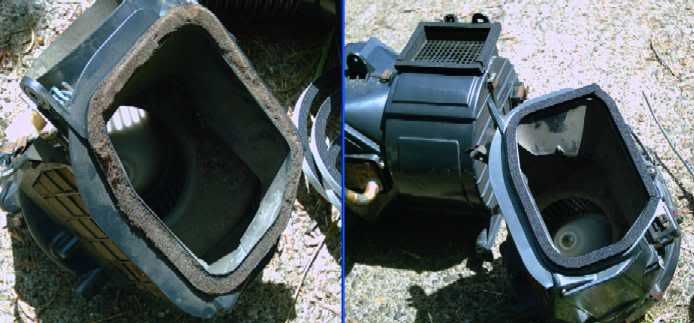
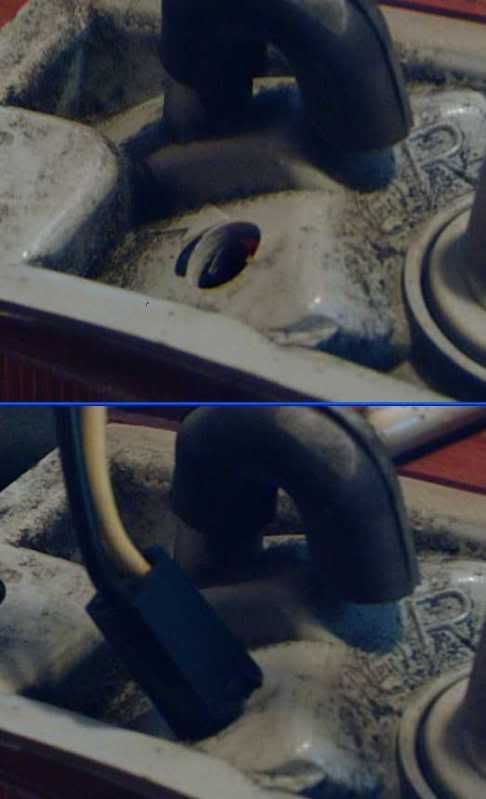
but by no means is this a weather tight fixture

And finally... with the old carpeting re-installed...

oldeskewltoy
oldeskewltoy HalfDork
8/8/12 11:51 a.m.

The transmission now has 30 miles on it so far.... its wonderful... except

I have to learn NEW habits. Reverse is no longer far right and down, that is 6th gear now. Reverse is far left and up.

oldeskewltoy
oldeskewltoy HalfDork
8/10/12 4:53 p.m.

So with most of the drivetrain, suspension, and brakes either finished, or well planned for finishing....

It is time to make the car a fun and comfortable environment. To do this, the stock interior needs a few upgrades.

The 1st one I already mentioned.... the "new" and improved dash cluster with the 9000 rpm tach.

Along with the dash cluster, the old dash pad is absoulte GARBAGE. cracked and just falling to pieces... so I get the padding filled, and then I get the entire dash pad wrapped, and stitched

OEM seats are ok... OEM seats from 29 years ago... from an econobox... are just not up to the task

Although not torn, or severely damaged, econocar seats provide no real support.

So... I go on a hunt for seats. The set I THINK I want is an old 1980s patterned* Recaro LS type seat. I find a set on the bimmerforum...

They would go with my blue interior............ but I find them about 60 days too late....

So I continue the search for blue Recaros when I "find" a set on CL, in San Diego...

They look good... a blend photo showing how they would fit in with the rest of my interior...

But when it comes to discussing buying them... he reveals they are actually a buddys, and he'll see if he still wants to sell them

Short answer... his friend does not want to sell... flamen motha... continue expletive on your own

So I go back on the hunt.... back to CL... and this time... instead of San Diego, the seats are in PORTLAND! I go, check them out....

they look a bit odd, but feel very nice. Why odd, look @ the upper back part of the seat, I had never seen so minimal a Recaro before.....

I posted the question on another forum I frequent(one from down unda) and I hit the jackpot(info jackpot that is...) http://www.toymods.org.au/forums/showthread.php?t=66005 - Read and learn about Recaro seats!!!!

To give you the Cliff notes version... The Recaros I have... are most likely from mid 90s Lumina Police cars!

SWEEEEET cop car Recaros in my car... something just so appropriate about that

Before I install them, I have a local interior guy check all the stitching, and re-stitch the seat bottoms. I also remove a set of lumbar air bladders from an old set of Corbeau seats so I can have adjustable lumbar support too

oldeskewltoy
oldeskewltoy UltraDork
8/10/12 5:07 p.m.

Now REAL wood inside a car is a throwback to the 20s, 30s, etc, upto and including the early 1970s(for example Alfa GTV). FAKE woodgrain... is a staple. Toyota used a LOT of fake woodgrain vinyl... in many of their models.... but never real wood

I know the wood look isn't in with everyone... but I LIKE the warmth and class of wood inside the car.

At first it begins with a 360mm nearly flat Nardi 3 spoke wheel

This I acquired on Yahoo Japan. The hard part was actually finding a VINTAGE, pot metal Nardi adapter! Found that in SoCal

the Nardi looks so nice that I had the entire facade of the dash done in real Brazilian Cherry wood!!! The left side has some lemon oil on it, the right side has not yet taken any covering... that explains the shine and depth of color difference

The last bit is still coming, I'm having a copy of the Nardi shift knob made(no logo, no chrome ring @ the base) to finish the wood interior trim

Winston
Winston Reader
8/10/12 11:36 p.m.

Wow, what an amazing build. I love the dedication that you have shown to this unsung hero of a car.

oldeskewltoy
oldeskewltoy HalfDork
8/21/12 2:05 p.m.
Winston wrote: Wow, what an amazing build. I love the dedication that you have shown to this unsung hero of a car.

thanks.... after the Mach 1, I chose the AE86 because it was light, nimble... and had no intrinsic value (1994). It then gained in value (not to pony car position, but pretty good for J-tin[Japanese car]) so that I didn't want to "ruin" it. So I chose the older, throwback car that preceded the AE86... to go custom with.

You know... I forgot to post the drag racing bit

YES, you heard that right... an N/A 1.6 liter Corolla... drag racing.

time slip... my "competition" in all 3 runs was a late 90s Dodge Ram w a 318. A few things to note... his reaction times compared to mine... and how bad my 60ft times are.... Ill wager $100 tht my little beast can easily break into the 14s with a half decent drag racer driving....

1 2 3 ... 5

You'll need to log in to post.

Our Preferred Partners
OYkbTiRzzgDFFLbpyQZFemkfreDq7FHyoiGgY71e96mgkAp5aQC3PVb0uMPkPJaW