1 ... 10 11 12 13 14 ... 23
CrookedRacer
CrookedRacer Reader
2/25/18 12:32 p.m.

I've been working on the exhaust and brakes.

When I bolted up the stock headers which go from 4-2 then from 2-1, I thought the "2-1" part would need to be cut off to fit. Turns out it doesn't quite reach the test pipe.

I needed 2.25 ID to go on the header, and 2.5 OD to weld to my flange. So I found exactly that adapter piece on Amazon (used, $4.65) and they unexpectedly sent me two of them.

Bonus, I guess.

The actual size of the header piece is a little smaller than 2.25, so I'm going to have to split it to make the fit-up work out. But I was pretty happy with this.

The finish of the extension part is "aluminized steel". I'm guessing I'm going to have to wire-brush most of that off to make it possible to weld to my stainless flange.


CrookedRacer
CrookedRacer Reader
2/25/18 12:50 p.m.

I had offered my 4-piston brakes in an even swap for stock 1-piston brakes. I had a lot of interest, and one respondent sent me these calipers, two front spindles and hubs, and rotors for all four corners.

That was eight months ago. I'm finally getting around to removing my 4-piston ones to return to him.

Recently I cleaned these up, and I put fresh bearings in the front hubs which needed to be changed as part of the swap.

Here's my spray booth... the 80cfm bathroom fan does a pretty good job of keeping the fumes out of the rest of the house.

I used VHT red caliper paint which turned out pretty nicely. Too bad I ran out of it (I never should have painted my headers with it)... If I had just a little more paint, I would have shot everything one more time to hit any light spots.

I had to mock it up on the car... I still have new rotors, race pads, seals & o-rings on order.

And I should be getting fresh(er) hardware clips and pins from the guy that provided the calipers.

One thing I noticed is that the wind scoop that attaches to the strut now interferes with the rotor. So I'm going to use the fog-light holes in the bumper for brake ducts. I already have the duct. I will need to buy or build a system to hold it near the rotors.

CrookedRacer
CrookedRacer Reader
3/4/18 6:58 p.m.

CrookedRacer
CrookedRacer Reader
3/4/18 7:03 p.m.

The brakes are now back to stock.

Hawk DTC-60 pads in front, blues on the rears.

Zimmermann coated rotors.

I rebuilt the calipers with the relatively inexpensive seal kits, and I got an extra set of clips and pins from the gentleman who will receive my 4-piston brakes in the swap.

CrookedRacer
CrookedRacer Reader
3/11/18 4:43 p.m.

This weekend was fairly productive, but there's one area of the car that I'm afraid of.

That's the area around the clutch housing. It's hard to reach, I don't know where all the grounds and wires are supposed to go, and I'm not the one that disconnected all that crap this time. So I'm kind of going to have to pare it down slowly... but it's just not a fun place to work.

So I did the exhaust, as promised:

And yeah, I know it's ugly and I know there might be really tiny pinhole leaks. My revised, compromised goal is to get MOST of the exhaust to go out the tailpipe.

The O2 sensor on both my header and this stock collector were cut off in exactly the same place. I soldered them together and shrink-tubed everything inside the heat-resistant sleeve of the stock lead.

The one from the stock collector was pretty beat up so I chose the better looking of the two...

I have everything set to install, except the new exhaust bolts I bought are all just a little too short. Some are OK but I really want to be sure the lock nuts have full engagement with the staked threads. So I have another handful of slightly longer (35mm) M8 x 1.5 bolts on their way.

CrookedRacer
CrookedRacer Reader
3/11/18 4:47 p.m.

Another area I was a little intimidated by was tucking everything back in below the fuse box. Fortunately the blocks of wires are all indexed so you can't plug any into the wrong sockets.

I was also able to reduce the number of relays (no A/C, no fog lights, sunroof, etc.)

So I'm really happy about this particular picture because all of the wiring cleanup that I've done is finally zipped up and DONE done.

CrookedRacer
CrookedRacer Reader
3/11/18 4:52 p.m.

I also finished my oil cooler hookup so it's also DONE done. That is, all the AN connections are fully connected with teflon on the threads and crush washers on the adapters.

I wrapped the AN hose in two layers (actually three or four in places) of cable harness to protect it and reduce mobility.

If I observe any wear, I have more hose and I'll just have to come up with a better grommet solution later.

CrookedRacer
CrookedRacer Reader
3/11/18 4:59 p.m.

Finally, I began working on the reassembly of the front end of the engine (since, as I mentioned, I'm afraid of the other end).

I installed the alternator and hooked up the wires to it.

And you can see I started hooking up the radiator hoses. I've got to find my snap ring pliers (in a bag somewhere) to remove my old snap ring. I'm a little concerned that the gasket is too thick and it will be a bear to get the thermostat in and the snap ring fully seated. The old one had no gasket o-ring at all. So I'm not sure it's particularly necessary.

I also have to wait until the threat of a freeze has passed before I add water to the system.

CrookedRacer
CrookedRacer Reader
4/2/18 8:03 p.m.

Huge progress this weekend! I put in two full days of wrenching on the car.

EXHAUST:

I welded a couple tabs to the side of the adapter I made for the headers, and it now hangs from a stock hanger just aft of the firewall. I bolted everything up with nice new bolts and nice new copperized locknuts. Done.

BRAKES:

Installed bleeder valves and filled the system with fluid and bled the lines. Done.

INTAKE:

Installed the intake, a mess of vacuum lines, the air-flow-meter, airbox, and connected all the sensor leads. Done, except I can't find the air flow meter support bracket that keeps it from flopping around. Not sure how that was mounted or what it looks like... 

FUEL RAIL:

Installed the fuel rail (hopefully none of the injectors are "stuck" after sitting in our laundry room for months). Hooked it all up along with the vacuum lines. Deleted the vent line all the way back to the fuel tank, and punched some holes in the gas cap to vent the system there. Done.

IGNITION:

Installed new plug wires on new-ish NGK plugs. Done.

ELECTRICAL:

Finished the ambitious cleanup by terminating just two grounds near the driver side frame rail up front. Hooked up lots of stuff. Not Done: Maybe three more connections remain. And I need to put the battery on a trickle charger pretty soon if I'm going to start this baby up this week.

COOLING:

Transferred the thermostat retainer ring from the old engine, with a new thermostat. Installed all coolant hoses and filled the system. It immediately started to leak from the temp sensor in the radiator. Turns out it was only hand-tight. So I tightened it up. Installed the fans again, and zip tied the leads to the support arms. Done, until I can start the car and do some real purging.

OIL:

Filled the crankcase with six quarts of oil, which only brought it up to the full level. It'll take at least another quart to fill those AN lines and the external cooler! Here I'm pouring the oil into what looks like a complete engine at this point:


About mid-day on Saturday, I put up a TO-DO board which is either motivational, or depressing, depending on how you look at it. Or WHEN you look at it. Here's what it looked like when I threw in the towel on Sunday:

I still need to connect the clutch actuator and bleed it. To do that I need to remove the starter (which was installed just to transport the car home from the swap party), and then re-install it. Hopefully I'll find and sort all the proper electrical connections up there with the starter out.

The steering rods are just loosely hanging from the hubs. I need to crank those on before driving it anywhere. I'm going to take the car for an alignment anyway.

The axles were removed and replaced during the swap. I need to just go back there and check the torque on all those cheesehead bolts.

I tightened the crank bolt as much as I could, but I don't have a flywheel lock. That still really ought to be done before I go out on track, don't you think?


CrookedRacer
CrookedRacer Reader
4/9/18 6:30 p.m.

I installed and bled the clutch... It was NASTY STUFF in there. Nothing would move with just the pressure from the power bleeder... I had my girlfriend throw in the clutch pedal and a plug of crap shot out of the bleeder valve with such force it nearly blew off the drain tube I had on there. It was gross, but I kind of expected that, considering it's the same stuff that was in there when I got the car. I think it must have been ATE BLUE.

Then I torqued the crank pulley nut... I locked the flywheel with an allen wrench on a flywheel starter ring bolt, and since I don't have a torque wrench that goes up to 155 ft-lbs, I used a breaker bar, a 2' length of pipe, and a luggage scale (the type that hangs) to pull 80 pounds at 2 feet.

I connected the steering rods, which wanted to just spin, but some patience with the impact wrench helped out.

Then I got the starter in and hooked up various wires. I found a place for all but one of them.

I got everything else done on my list and tried to start the engine.

The good news is the starter works, and it turns the engine with relative ease. More good news: the engine turns.

The bad news is my battery needed a lot more battery-tending. And it might be time for a nice new one at this point. I turned the engine a couple 10-second stints without spark or gas (pulling the coil lead and the DME), to try to get the oil moving, but it's cold, and the oil is thick.

Then I tried again for about 10 seconds with the coil reattached and with the DME in the fusebox. And I don't think I'm getting any spark at all. By that time, my battery was having no more of it.

So the plan is to buy a battery, buy a spark plug tester, thoroughly clean all ground points that I can find, and maybe try a trick where you vacuum oil through the oil pressure relief valve opening to prime the oil pump.

And try again on a warmer day. Warm days are coming later this week.

CrookedRacer
CrookedRacer Reader
4/11/18 8:21 p.m.

Today it got warm enough to try to start the car again.

I bought a new battery that goes to a Mazda Miata, but it was a bit too tall and it doesn't work with the stock tie-down brackets. It weighs 26.6 pounds.

The battery that was in the car was 26.8 pounds. It turns out that it was already smaller than a stock battery (and lighter). So I wasn't really gaining anything by using the Miata battery.

So I tried again, and found a Group V4 battery, which was PERFECT. It's shorter, but fits in the 944 tie-down brackets. And it really cranks the engine.

On the left is the battery that was in the car. On the right is the V4 battery - which fits in a Mercedes minivan. Which is probably why it was so expensive (but not as expensive as an Optima or some other racing battery). Everything about it fits perfectly in a 944, and it only weighs 24.0 pounds.

The battery on the left is the Miata battery, which weighs about the same as the big center battery. I'm taking it back.

So with the new battery installed, I was ready to try again to start it up!

CrookedRacer
CrookedRacer Reader
4/11/18 8:29 p.m.

BUT FIRST... I wanted to try a trick for priming the oil pump. I read on another forum that you could pull a vacuum on the Oil Pressure Relief Valve (OPRV) opening, and the oil would be pulled from the pickup through the oil pump and out the OPRV opening.

So I removed the OPRV, and created the apparatus you see here. Basically a beer bong.

I built up the other end with some tape to reach the right diameter:

I stuck that into the opening and put the wet-vac hose into the funnel until I saw oil come out of the tube.

It worked like a charm, actually. I don't know if it actually got oil into the oil pump, but it got oil from somewhere. I guess it must have gotten it from the oil pickup tube, which goes directly to the oil pump. Success!

I gently blew that bit of oil back in and didn't spill a drop.

CrookedRacer
CrookedRacer Reader
4/11/18 8:38 p.m.

Alas, the car would not start, because I wasn't getting any spark at all. I am going to need some help on this, so I may have to wait until this Saturday when I'll be joining a bunch of 944 guys for a car prep party. I was hoping to have a running car by then, but oh well.

No spark, according to my test light, which, incidentally, I've never seen actually light up since I bought it for this particular task.

I tried swapping the crank position senders. At least a couple times. Nothing. I'm worried that the ignition coil isn't wired correctly. It was, after all, part of my electrical cleanup project. The ignition coil normally has just two wires and the distributor cap lead. Mine has been integrated with a cutoff switch, so it has some bypassing and wires coming from different directions.

Ugh.

Just ugh.

jfryjfry
jfryjfry HalfDork
4/12/18 12:02 p.m.

It looks like you painted the caliper pistons....  paint on the exposed end would work fine but I hope you cleaned it off of the sides and bottom!

and for the oil cooler lines where they go through the body, you can cut a length of hose that is about the same id as the od of the oil line and split it Length-wise. Tape or zip tie it around the oil line where it goes through the body.  Cheap but effective

CrookedRacer
CrookedRacer Reader
4/15/18 3:29 p.m.

Thanks jfryjfry, I guess it’s not easily visible but the sides and bottom of the pistons were masked off with blue tape, as were the caliper cavities. They’re good.

I agree the oil lines should get better protection. When I have a chance, I intend to take a smaller hose (like the fuel vapor recovery line I just yanked out), slit it lengthwise, and wrap it around the metal opening, making a custom grommet over the entire circumference. Maybe with some zip ties to hold it in place as well if there are openings nearby.

CrookedRacer
CrookedRacer Reader
4/15/18 8:01 p.m.

On Saturday, I joined a veritable convention of 944 racers at our friend jh36’s house in Maryland.

We had lofty goals for one day of wrenching… to perform an engine swap on Kevin’s car, to diagnose ignition issues on Rob’s car, to diagnose ignition issues on my car, and to gaze in wide wonder at Jack’s newly painted, bad-to-the-bone, already-running, next-gen #36 car which replaces old #36 that met its maker last year.

Jack’s son James has a lot of 944 and general automotive knowledge and helped out with all of the projects. It was a beautiful warm day, full of potential.

James and I began to tackle the diagnosis of my car with the elimination of various possible issues… we tried a different DME Relay, an entirely different DME (engine computer), a different ignition coil, and we bypassed all the emergency cutoff and a lot of the wiring to the switches in the cabin for a more stock configuration at the coil. We traced a lot of wires. And we tested the coils in the sensors themselves.

It was at this time I was feeling pretty down. Half the day was gone. And knowing I had totally torn out half the wiring in the car didn’t give me a lot of confidence that we’d ever find the problem without a harness replacement or something equally drastic. In the garage 20 feet away, an engine swap was happening. So I helped out in there whenever I felt stuck, or when my hands were tired from reaching behind the damn bellhousing.

CrookedRacer
CrookedRacer Reader
4/15/18 8:06 p.m.

We eventually discovered that I had not properly adjusted the crank position setscrew’s height in the flywheel. The spacing should be 0.8mm from the crank position sensor to the top of the setscrew.

Measuring from the hole where the sender was, the spacing was at least a quarter inch. No way it was picking up the setscrew at that distance. Thinking back, I must have made the setscrew stick out of the flywheel the same amount as the stock flywheel, but the aluminum flywheel is definitely smaller, so it didn’t come anywhere close to the sensor.

Stock flywheel:

My new aluminum flywheel:

I think you can see the aluminum one is visibly smaller than the starter ring.

So we were encouraged that we had found something that could definitely prevent the car from running. Yay!

CrookedRacer
CrookedRacer Reader
4/15/18 8:08 p.m.

But how to get that little set screw out? We had a few things going against us. First, I had glued that bad boy in there with red Loctite. It wasn’t coming out without a fight. Second, I didn’t want to drop it into the clutch, or bell housing, or behind the flywheel from the top.

So I drilled a new hole into the bell housing from the bottom, so that I could access the set screw with an allen wrench. It wouldn’t budge.

The only heat source we had for trying to weaken the Loctite was a small soldering iron. It wasn’t enough, because despite holding that iron directly on the setscrew for ten minutes, I quickly stripped the hex inside the setscrew. Ugh.

I thought about a few ideas - a standoff with internal threads the same as that setscrew. But its leading edge might mess with the timing. Maybe with the top ground away? Eventually I used a Dremel tool to cut a bolt, and I fashioned a tang that would stick into the socket of the setscrew.


We were going to go with the full-on Nuclear Option:  JB-Weld.

CrookedRacer
CrookedRacer Reader
4/15/18 8:11 p.m.

My inspiration (don’t ever say Facebook click-bait isn’t good for anything):

Here’s the first piece I created from a spare 6mm bolt (the one I eventually JB-Welded into the setscrew was a bit longer). The dark part is the original. The lighter part is the piece that will be glued on.

You can see that I'm kind of just holding it there with the needlenose pliers through the hole I drilled in the bell housing.

Now, there are JB-Weld fixes that are janky, and we’ve all seen JB-Weld fixes that are JANKY. I would say that this case does not actually deserve the all-caps label.

From an engineering standpoint, the JB-Weld has plenty of purchase on the threads of both pieces. And the screw is not under any particular stress, other than centrifugal. So if I get that epoxy on all sides of the thing, it should be perfectly capable of nearly missing an induction coil sender by 0.8mm 6000 times per minute.

Because it was about 4pm by the time we mixed the JB-Weld and installed the implant, I decided not to try to start the car until the following morning. I poked at the stuff on our mixing board every hour or so to be sure it was going to “kick”.

I had planned to head home that night but I decided to stay over until the morning and try to start the car bright and early. I was tired, but full of gratitude for the friends with whom I’d spent a beautiful day wrenching on race cars.

CrookedRacer
CrookedRacer Reader
4/15/18 8:14 p.m.

In the morning I hooked everything back up and tried to start the car. No start. Did I miss anything? I swapped the speed and position senders. No start. Did I miss anything?

Oh snap. I forgot to plug in the DME.

I tried again. No start.

I swapped the speed and position sensors. For the hundredth time. I was the only one outside, as Jack and Kevin were inside finishing up Kevin’s swap. It's cold, and it's starting to rain. I literally took a deep breath and said to myself, “Ok, this is the last try.”

And it was THE LAST TRY. It finally started!!!! Suddenly, I had a LOT to do. Check coolant levels. Purge coolant. Check oil level. Look for leaks everywhere. get the thing off the jackstands. Let it warm up. Ensure the water temps stay normal. Check that the radiator fans kick on.


Drive it!

CrookedRacer
CrookedRacer Reader
4/15/18 8:19 p.m.

The valve train was really noisy at first… it sounded like a berkeleying diesel. But I knew that would be the case until the lifters filled with oil which could take some time. Plus the oil I’m running is really heavy.

You can't hear it, but the car in this picture is running!


Once it was fully warmed up, I slowly took it out to the end of the lane. I thought to myself about all the different systems I’d need to assess. Brand new clutch and a recently purged actuator. Brand new brakes all around. Newly converted-to-manual steering rack. Just so much going on.

It was raining lightly on the crowned, rural two-lane road, and as I eased into the throttle I felt the rear end loosen just a bit. Wow, this thing pulls! It was WAY stronger than I ever remember it. I went up and down the road for what amounted to maybe five miles total, accelerating, engine-braking, accelerating, braking to bed in the brakes, and so on. I was literally shaking with excitement about how it was performing.

I loaded it on my trailer so I could help Kevin finish up his swap, and then got ready to leave. When I got home, I learned Kevin and Jack had gotten Kevin’s car started not twenty minutes after I left. Which was AWESOME too! Hopefully Kevin, Jack, Rob, and I will all be running at Summit Point this weekend!


HUGE thanks to Jack, Rob, Kevin, and James for their help and encouragement.

jfryjfry
jfryjfry HalfDork
4/16/18 12:17 a.m.

Sufficiently jealous of the days you had with buddies, punctuated with major successes

CrookedRacer
CrookedRacer Reader
5/9/18 6:35 a.m.

SUMMIT POINT: NASA Spring Rumble, April 21-22, 2018

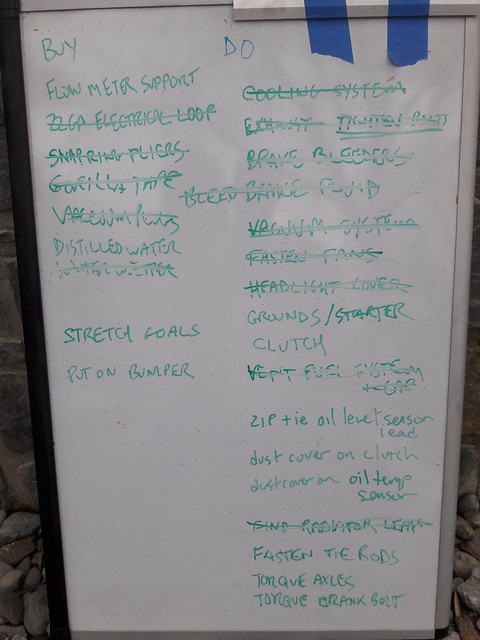
The Thursday night and Friday before the event, I got all my stuff done... except re-bleeding the brakes and clutch. I got the track packed, and took off for the track on Saturday morning. On the way I filled the car with gas so I could do some fuel/weight management.

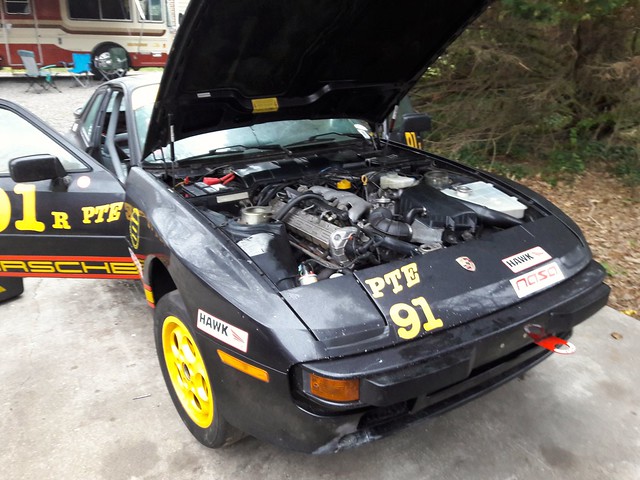
My car started up fine and passed inspection. Yay 2018 tech sticker! That felt pretty good.

On Saturday, racers get a 25 minute warmup session, a 15 minute qualifying session, and a 25 minute race. On Sunday no warmup, but a 40 minute race.

SATURDAY WARMUP: BREAKDOWN

During warmup, I got all the way around the track one time, but the car died on me and backfired a few times at turn five. I pulled as far as I could into the infield and watched other racers pass me by for 20 minutes before getting a tow into the paddock at the end of the session.

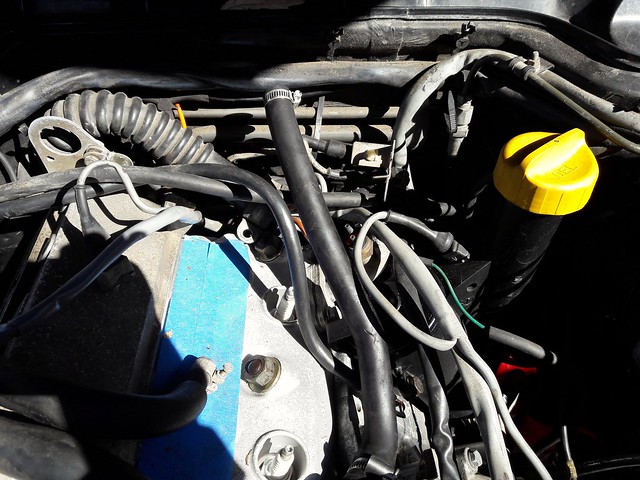
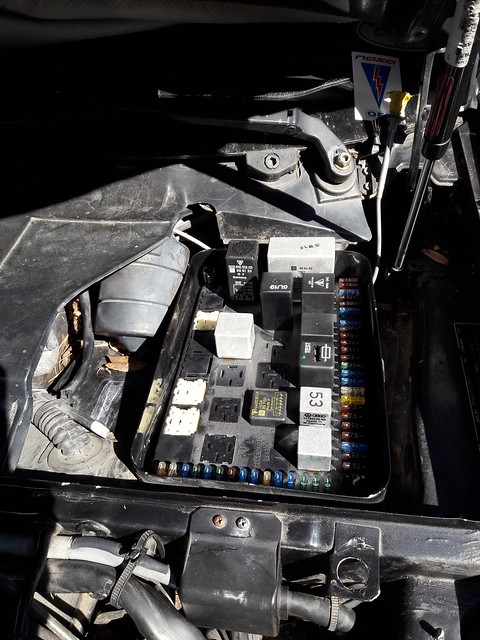
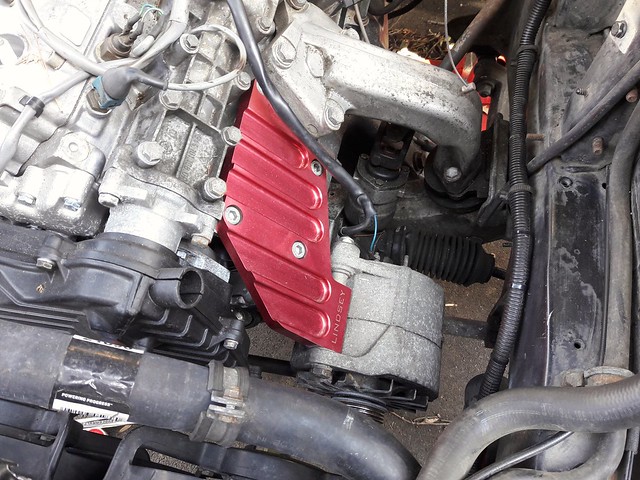
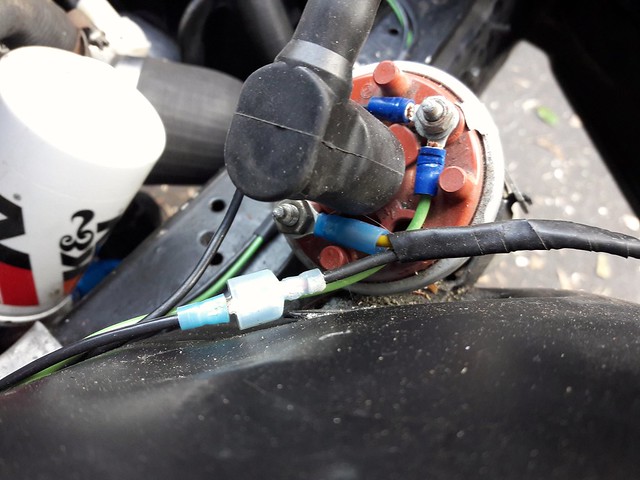
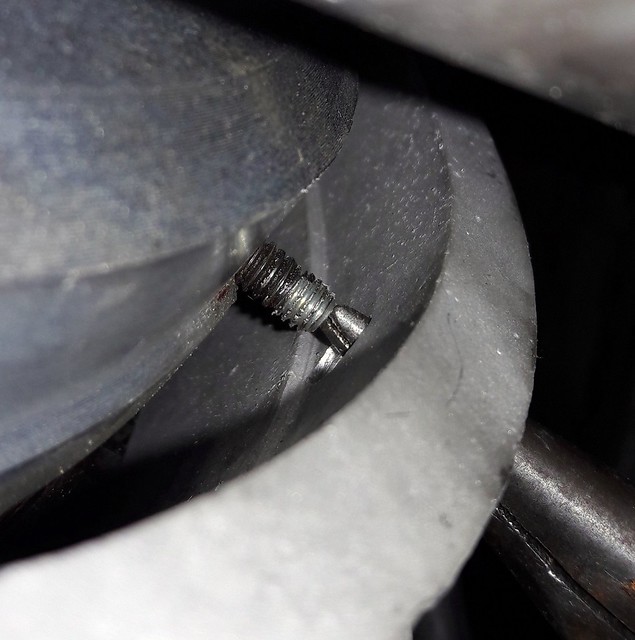
I discovered my distributor rotor and cap were both loose. When I took off the cap, the rotor screw fell out and onto the ground. Turns out I installed that cap upside down, and it just fits better when it's installed correctly. I fixed all of that, including some blue loctite on that screw, and the car started right up.

On a scale of 1-10, my confidence in my car was about an 8. Maybe 7.

QUALIFYING: WHAT'S THAT SMELL?

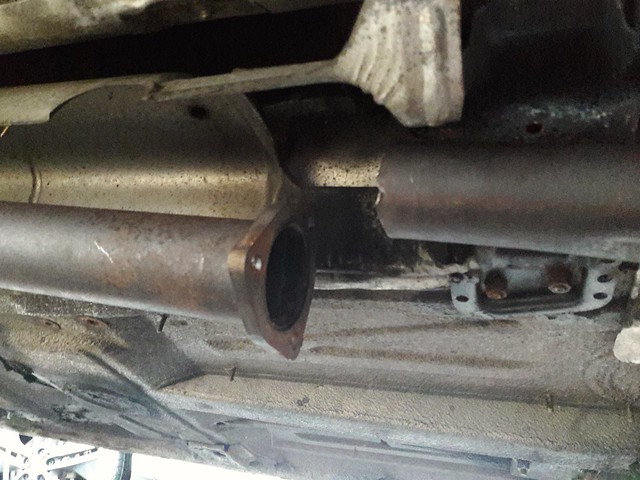
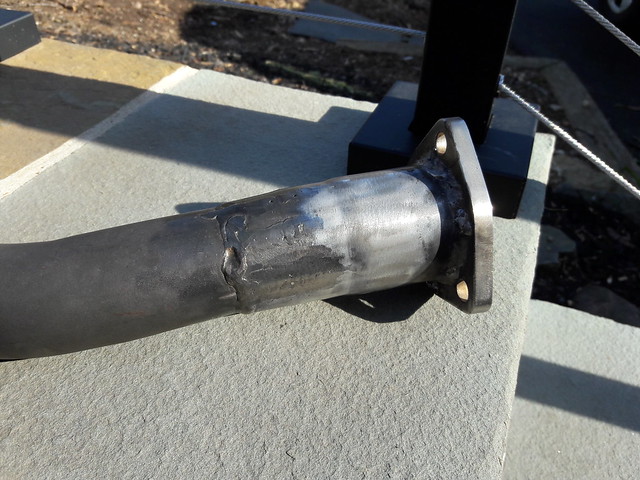
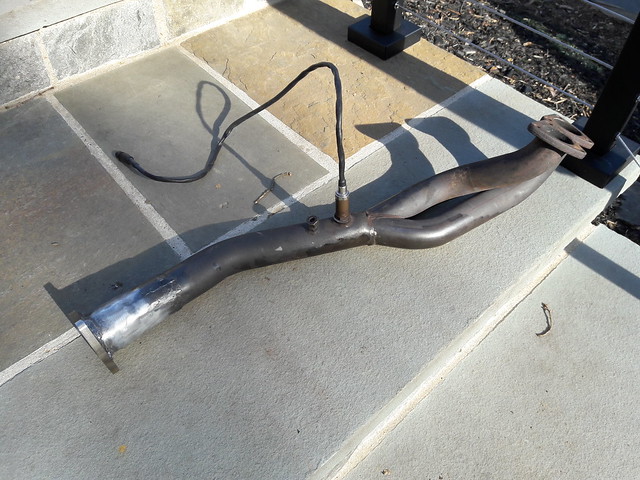
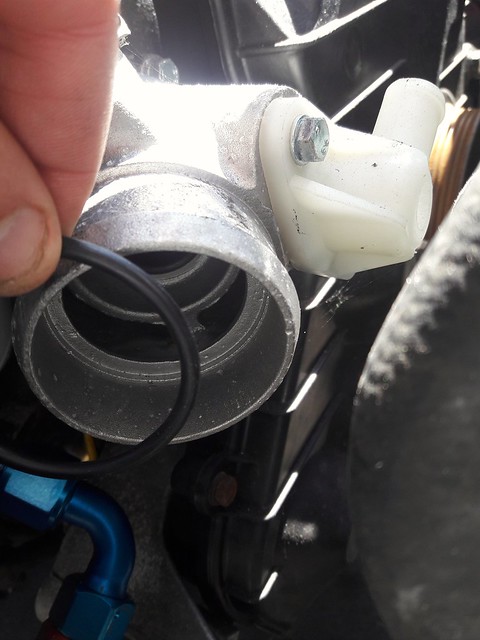
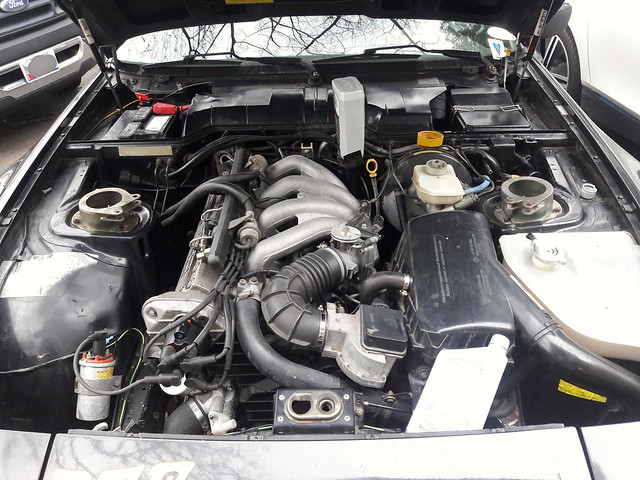
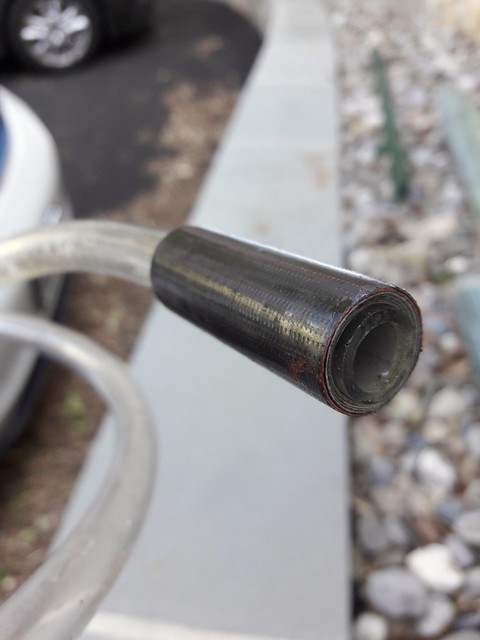
I got a couple laps into qualifying and I started to smell gas in the cabin. That's not usually a good thing in any car, but in a 944, where the fuel lines cross directly over the hot header pipes, it can be catastrophic. So I pulled into the paddock early to investigate.

Good news: the engine bay was dry. Turns out the gas cap was spewing gas on turns and was draining through the drain tubes inside the car, but not quite all the way OUT of the car. Not a big problem. I drained five gallons out of the car and decided that wouldn't be a problem anymore.

On a scale of 1-10, my confidence in my car was about a 6. Maybe.

RACE: BREAKDOWN BEFORE THE START

As we pitted out onto the front straight, I had only done a brake check and some tire-warming swerves before the car suddenly entered what felt like limp-mode. If I added throttle, it felt like the car was actually trying to slow itself down. Fortunately it made it all the way around the track and into the paddock. I never even saw the race start, which was disappointing becuase it would have been my first standing-start race.

In the paddock, I found the piece of JB-Welded screw was gone. The computer must have been able to keep it going on sheer guesswork.

At least the car failed where everyone would have expected it to fail. If that's any consolation.

A DAY OF DISAPPOINTMENT, WITH SOME HOPE

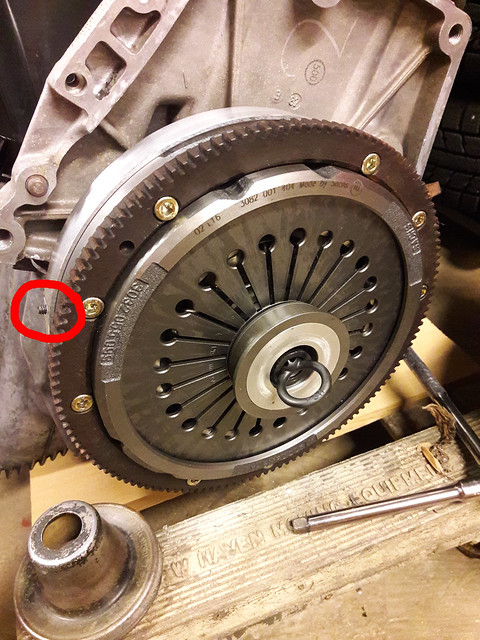
It was a disappointing day overall, but I did get a couple semi-hot laps in, bedding in the clutch, bedding in the brakes, and shaking down a few issues.

I didn't feel terrible about my engine build and car preparation. A LOT of things had to go right to get as far as I did this weekend. The goal is a reliable car with a reliable engine, and that goal isn't necessarily out of reach. It just wasn't meant to be THIS weekend.

tedroach
tedroach Reader
5/9/18 6:47 a.m.

Thank you for sharing this. As a 944 owner, these are the lessons we need to share in case any of us come across this. You have come a long way on this car. The fact that you were able to get some hot laps in is a success! It wasn't that long ago that the car was not even running. A couple small fixes and you will be up and running again. Keep your head up and get that thing back on the track!

And more pictures! wink

CrookedRacer
CrookedRacer Reader
5/9/18 8:19 p.m.

I'll have to carry my cell phone around more at the track in order to get some helpful storytelling pictures.

I did stay the night on Saturday, after purchasing a propane torch at the hardware store. I tried to heat up that dumb flywheel set screw but the surrounding aluminum, being the ambient 40 F temperature, was wicking away all the heat I was putting in.

So I stuck around on Sunday to try to help some other racers stay on track, literally. Rob had a blown head gasket which turned out to be worse than that... we didn't get him going again. Jack (jh36) got into a little contact on Saturday and needed a brake line. I wasn't using mine, of course, and I wanted to buy new ones anyway, so I donated one of mine so he could race Sunday.

And I stuck around to watch the afternoon race from the bleachers.

Here you can see the aftermath where a fellow PTE driver departed Turn 4 and hit the tire wall pretty hard right under the flagger bucket. I couldn't believe my eyes, thinking, "There's not supposed to be a car where that car is going." Fortunately he's all right and the car is salvageable.

I was grateful for the time I had at the track with friends, despite not making the races.

1 ... 10 11 12 13 14 ... 23

You'll need to log in to post.

Our Preferred Partners
gQL3PNwRbHHQDi9RPjZBjAW89GP5CjjqvykOP2JZGf5YhWpm5aAv04vnbR8MS7he