1 2 3 4 5 6 ... 24
Knurled
Knurled GRM+ Memberand MegaDork
11/25/16 4:40 p.m.

That may be normal depending on what you used for assembly lube or how anal retentive you were in cleaning the bores. (It's never good enough. Ever.)

If you want to be paranoid, cut the old filter open to get the element out, apply Band-Aids to the cuts on your fingers, then use a knife to cut the element off of the ends of its canister and spread it open. Let it drain for a day or two over a white paper towel and then give everything the look-see.

You'll probably find SOME fine stuff in there unless you assembled the engine in a cleanroom after thoroughly cleaning everything. Big shavings like this are, however, bad

wae
wae Dork
11/29/16 6:17 p.m.

I got a bit of gunk in the filter but no metal shavings to speak of, so I think it's looking good!

The various SRT4 forums seem to have a lively debate about what sparkplug to use and what the gap should be, so I went with a new set of NGK regular platinum plugs and gapped them to about .045. I really think that my miss at cruise (cruise missy?) is ignition related, but I haven't been able to make it go away with swinging the advance back and forth. Because I wasn't really sure how things would work, when I put the engine together I just threw in some cheap-o Autolite copper plugs that were gapped down to about .025. My gut says that this won't have any effect, but we shall see.

Knurled
Knurled GRM+ Memberand MegaDork
11/29/16 6:41 p.m.

.045??? Yikes!

.025? Much better!

wae
wae Dork
11/29/16 9:49 p.m.

Mopar gap specification is actually .050, oddly enough, and .040-.045 seems from my reading to be considered a good starting point. Which is weird, but something something Dodge?

Regardless, as I expected that had zero effect on anything. I'm going to have to do some logging and look at it more closely. Maybe the TPS accel/decel is still mucking with things.

One pro-tip I can give, though: When you crank up the manual boost controller, it's important to also adjust the overboost protection in Megasquirt. Otherwise, instead of a smooth, awesome, filling-pulling tear off of an entrance ramp to the highway, you get a mechanical bull ride. Not really as much fun.

wae
wae Dork
11/30/16 7:13 p.m.

Some good news: I put a section of the left-over wrap backing under the engine when I parked the car last night to catch any oil drippings. After about 21 hours, it looks like this:

Huzzah! Nary a drop!

I also found that I bought a bottle of Meguiars headlight restoring lotion at some point, so I went ahead and polished up the headlights a bit. This was just by hand with a rag, not with one of the fancy drill attachments.

Before:

After:

It's not a huge improvement, but it is a little bit better at least.

The next thing I'm going to add is going to be a proper shifter. I've reached out to Maddog STS and am waiting on a quote for a 50% reduction with a 2" rod extension (heh heh), rod brake, and threading on the rod. I'm also waiting to find out about the laptop that I think I ordered to replace the old TunerStudio laptop I had that crapped out on me. I got a confirmation number, but I never got an email from Dell and I haven't seen my card charged yet.

Regardless, I still need to adjust the overboost protection setting and then do some logging to see if I can find the cause of that misfire. Western Ohio Region SCCA is running a Road Rally this weekend and I've signed up. I think I'm going to take the Neon just because it's such a hoot to drive!

Jerry
Jerry UltraDork
12/1/16 8:00 a.m.

In reply to wae:

I've heard that's going to be an awesome road rally...

wae
wae Dork
12/1/16 8:52 a.m.

In reply to Jerry:

I've heard the exact same thing!

I broached the subject with my 10 year old this morning and she's psyched.

Somehow I missed out that there were a couple other road rallies that WOR did this year. I would have totally come up to do those, but I guess I just didn't think to even check!

Jerry
Jerry UltraDork
12/1/16 9:07 a.m.

In reply to wae:

You didn't miss too many. We had one from Piqua to Bellfountiane(sp?) that was fun, and a small one from a park to a BBQ that WOR had over the summer. That's it.

wae
wae Dork
12/3/16 4:59 p.m.

And it was a great road rally!

Secured third place. But it wouldn't be a rally if something didn't fall off my car! As we were turning in to the final checkpoint, the front bumper decided to fall off and get caught on the lower torque strut. I put the doughnut spare in front of the left front tire and drove up on to it in order to secure enough ground clearance to pull the bumper cover off and throw it in the trunk.

Other than that, though, it was great! For my 10 year old daughter, though, it was pretty amazing: Her first motorsports competition ever and she winds up on the podium!

wae
wae Dork
12/4/16 11:02 p.m.

There has been a tremendous amount of clunking about in the front suspension for a really long time, so I decided to take a look at it tonight and see what I can come up with. The first thing I did was remove the left front strut and take it apart. I already got some new upper strut mounts since that's the only thing in the front end that isn't brand new, so I figured I'd swap those out and see what happens. After I took the spring off the strut, I found this:

The bump stop is pretty much destroyed and that scrap of foam there in the middle of the picture appears to be what used to fill the space between the top of the strut rod and the upper mount. Basically, the strut was bolted down so it couldn't really go anywhere, but it could bang around a bit.

I started to look around the garage to see what I had that could become a new bushing up there and to see if I had any bumpstops hanging around, but I managed to drop a spare differential on my foot from a shelf that is about 5 feet high, so instead I did some internet searching while I iced my foot. I can't find any information about what is supposed to go in that spot to secure the strut rod. If the upper mount is supposed to have that bushing built-in, these Moog ones don't. And even if I do find a bushing to put in there, it's going to have to be an awfully tight interference fit to keep it from just sliding down the strut rod.

Right now, I'm thinking that maybe if I can find a sway bar link bushing that is the same diameter as the ID of the upper mount, I can press it in and then drill out the center to be a tight fit on the strut.

wae
wae Dork
12/6/16 7:24 a.m.

Apparently there really isn't supposed to be anything in that space, so I guess that bit of rubber that I pulled out was part of the bump stop. Regardless, I went ahead with the new mounts on both sides and also stopped and got new bump stops and strut bellows. I picked up the cheapest Duralast ones because there is a decent chance that I'm going to come across funding to completely re-do the struts and springs with something coilover-y in the next couple months. So, I went ahead and put these on:

The right side wasn't in bad shape like the left side was, but I went ahead and did it anyway.

I started off the night with the idea that I was going to go ahead and put the SRT-4 springs back on the front, but after fighting with the left side for a while I decided to just give up and go back to the stock springs. The SRT-4 springs are taller and have fewer coils so I just can't easily get them compressed so that they're both straight and short enough to be able to get the nut on the top of the strut. They've been on there before, so I know it can be done, but since I'm likely to be re-doing all that soon anyway, I figured I'd just take the easy route for now.

All that remains in that project is to put the wheels back on and torque the lug nuts. Oh, and top off the transmission. Apparently, I yanked the left axle out while I was wrangling the strut back into place and consequently dumped a bunch of Synchromesh all over the floor. Another bit of good news, though, is that since I changed the oil and fixed up all the senders and put in a new drain plug, there isn't a drop of oil on the floor (other than the self-induced transmission puddle). It's so exciting not to leave puddles everywhere I go!

Ever since I put in the new battery and the new battery terminals, I've been having an intermittent problem with the charge/battery light on the dash. It will come on intermittently, sometimes for miles of highway driving and sometimes for very brief intervals. My initial assumption is that I didn't reconnect the battery correctly, so I re-checked all of those connections and tightened them up a bit. Didn't seem to help. I've watched the volt meter in TunerStudio while the light is going on and off and there's no pattern to the change in the voltage displayed -- it's usually between 13.9-14.3. I've checked that the voltage regulator is plugged in as tightly as it can be. The belt is tight. Before I put the wheels back on, I'm going to double check that all the alternator connections are tight and that there aren't any wires rubbing against anything or pulled too tight. If all that checks out I guess I'll consider a new alternator or see if there's a good way to test the voltage regulator. I should double-check the wiring diagram to see if it's a signal from the ECU or if it's the old-school charge light, but failing all that, I may just try a new alternator.

wae
wae Dork
12/7/16 4:09 p.m.

Replacing the top mounts had absolutely no effect on the popping and clunking that I get in the front end. This is getting frustrating.

I've got a new steering rack, new inner tie rods, new outer tie rods, newer Prothane bushings in the control arms, newer Prothane bushings in the sway bar, new upper strut mounts, new steering bearings, new motor mounts, and new wheel bearings. The ball joints are supposed to be low miles (10k), but I did buy them used and already installed in control arms. When I put the car up in the air, there is nothing that feels loose, and there's no noise as I unload or load the suspension.

It could be the ball joints - I'm going to grease them up a bit to see if that has any effect.

There's a remote possibility that it could be the springs banging on the perches, but that seems really remote.

Could the urethane bushings be binding somehow and causing that noise? I suppose anything's possible at this point.

My next trick is going to be having someone else drive the car over bumps while I try to crawl alongside and not get crushed while I try to trace the sound, I guess.

wae
wae Dork
12/7/16 4:18 p.m.

Oh, and I check the wiring diagram and the ECU drives the battery/charge light on the instrument cluster. So, I don't think I can really trust that anymore. Based on that, and the fact that the ECU is coming out before too long, I need to add a volt meter to the dash.

wheelsmithy
wheelsmithy GRM+ Memberand Dork
12/7/16 7:50 p.m.

Great build and read!

To share something I learned the hard way: I went through about 7 voltage regulators trying to get my Cummins to charge properly- every parts store brand, used junkyard models, fancy, pricey adjustable internet miracle regulators. None worked. I finally had an armature shop put an internal regulator in there (originally controlled by the computer), and that has worked for a couple of years. After that whole mess, I heard Summit sells genuine made in the USA regulators that work well. The Chinese ones everybody else sells are absolute junk.

wae
wae Dork
12/10/16 3:02 p.m.

Thanks for the tip!

According to my voltmeter in TunerStudio, I'm getting the right amount of voltage in the system, so I'm thinking that the ECU may not be getting good ground or something. Which is kind of irrelevant since the only thing it's running now is that battery light!

Last night, I got my Maddog STS installed. That thing is amazing. It's a 50% reduction with a 2" rod extension, a bend towards the steering wheel, threaded with a comfort grip knob, and equipped with rod brakes:

Side-by-side view:

Don't you judge me for my messy garage.

Post install:

I haven't had a chance to drive it like that yet, but just moving through the gears feels absolutely great!

wae
wae Dork
12/14/16 10:30 p.m.

Tonight's update: Love that shifter! I need to adjust the rod brakes a bit still because I think I'm allowing a little too much travel. But it's still pretty amazing.

A trip to the junkyard netted the trim panel that goes over the B pillar on the passenger side, a window guide for the passenger side, a new grill bar, and a new front bumper. As it turns out, I don't know if I'll wind up using the grill - I forgot that my light bar bracket goes exactly where the grill used to go. I have, however, starting getting the bumper ready. To keep the airflow moving to the intercooler, I've cut out a section that I need to cover with fiberglass screening. Then I've got to come up with some bracketry to hold the bumper in a little more securely.

Since the garage is a disastrous mess, I put a bunch of things up for sale on neons.org. Part of that involved getting the head and the oil pan off the old engine. Here's the carnage:

It beat that up bad!

wae
wae Dork
12/23/16 11:23 p.m.

For my next trick, I need to do something about the suspension. Right now the fronts are stock 140lb/in springs with single adjustable Koni Sports and the rears are stock 120lb/in springs with non-adjustable Koni STR.T struts. I've got the smaller front bar and the R/T rear bar. I've tried using SRT-4 springs, but there's so little weight in the rear that I'm left with about an inch (if that) of upwards suspension travel. My budget is around 1,400 to do something about that.

I was all set to just go out and pick up the regular set of BC coilovers until I started doing some reading about them and coilovers in general. From what I've found, all the coilovers in the under 2k range for the 1gn Neon are about lowering the car. They're supposed to perform really well on tarmac, but conventional wisdom says they don't have the travel required for rally, which I assume also means RallyX.

There are a couple other coilover systems available but they seem to be either way out of my budget for their gravel rally versions (if they're even available for the Neon) or they simply don't have anything but short-stroked, rock-hard setups.

I reached out to Truechoice in Columbus and asked about taking all four of my Koni Sports (the rears are totally blown and sitting on the shelf) in for a revalve and conversion to coilover with 250 springs in the front and 300 springs in the rear, but they're telling me that I'm probably in the 1,600 range, which is a bit more than I had budgeted.

Another option would be to spend $400 to get a full set of NOS Koni Sports shipped in from Mexico (yeah, I don't know either, but apparently there's a small stash of them left) and then look to some cut Intrepid springs or some SRT-4 lowering springs. That could give me a little more spring, but not so much that it would beat up the stock valving on the Konis too bad.

Since I have three or four sets of blown struts on the shelf, I could take a set of those and cut off the perches and the tops and modify the bodies to accept a strut cartridge and build my own coilover setup with some Ground Control sleeves. The biggest problem there is that I can't seem to find any good catalog of strut cartridges by size and/or valving, so there'd be a lot of trial and error. Probably mostly error.

Hopefully by the time I get back from seeing the outlaws after Christmas, I'll have a better idea for what I want to do.

Knurled
Knurled GRM+ Memberand MegaDork
12/24/16 6:38 a.m.

You probably couldn't go very wrong with what Leon did with his Rabbit/Caddy/Golf thingy. Stock front springs, Bilstein struts. Rear end was all one-off since he put a Miata suspension in it, but I noted that the back end was so soft that the car would not pop up or bounce or otherwise be disturbed by course roughness.

eastsidemav
eastsidemav SuperDork
12/24/16 7:09 a.m.

Feel free to take a look/drive my car next time you are over. It's on KYB GR2 struts with Mopar Stage 1 SRT-4 lowering springs. It is a bit underdamped with the KYBs. If nothing else, it'll give you a good idea of the ride height.

wae
wae Dork
2/4/17 2:42 p.m.

What the heck was I thinking? Next time, I'm just going to live with the exhaust leak.

Ever since I put the car back together, there's been a bit of an exhaust leak at the front. I thought it was the flex section on the downpipe, but before I started tearing in to things I thought it just might be a good idea to take a look and make sure. I'm not 100% convinced that the downpipe isn't leaking, but I can tell for certain that the exhaust manifold gasket is leaking. Today's lesson, then, is that while manifolds are super easy to install when the engine is on a stand, they're a real pain in the neck when the engine is in the car!

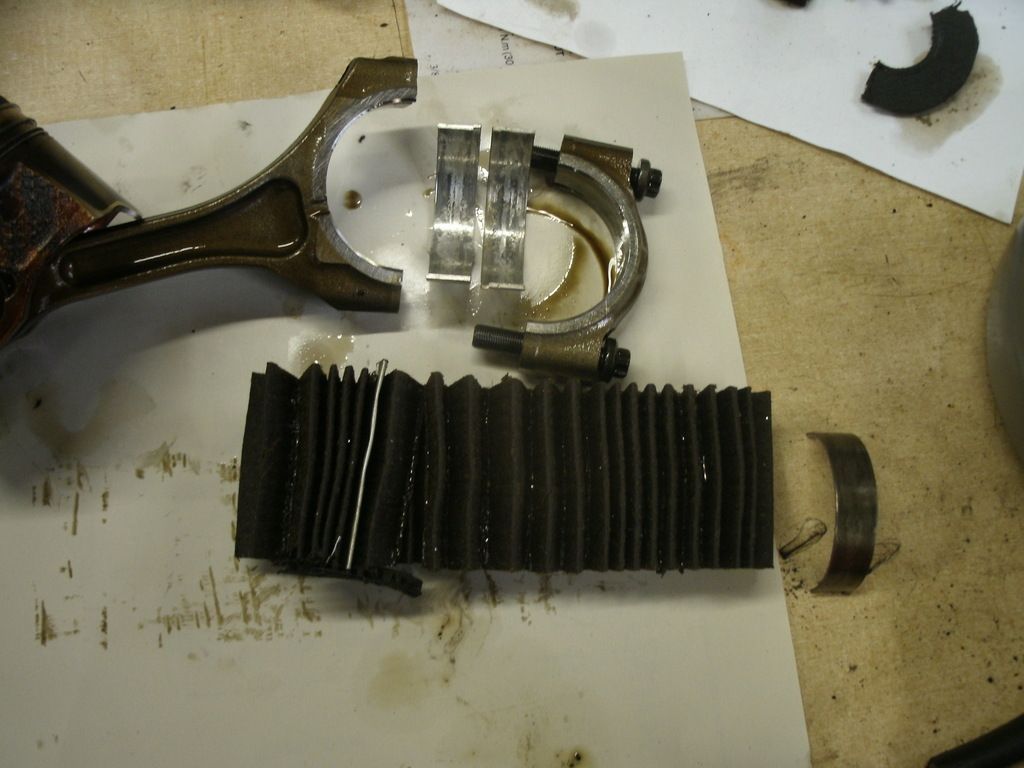
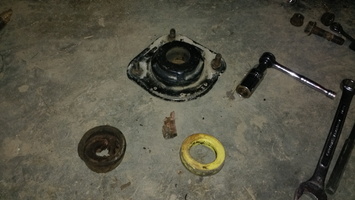
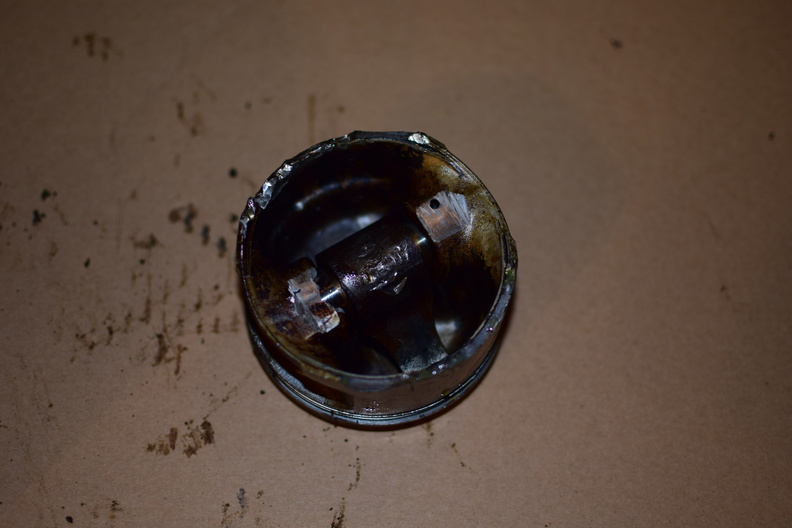
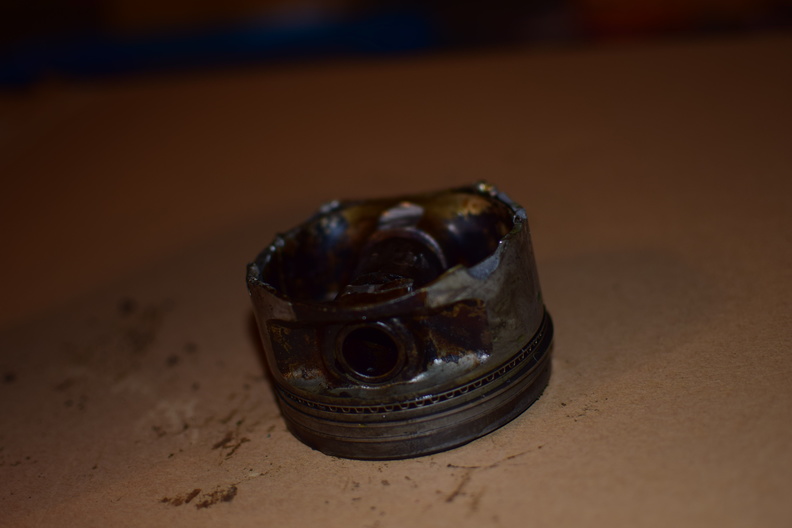
Here's the offending gasket:

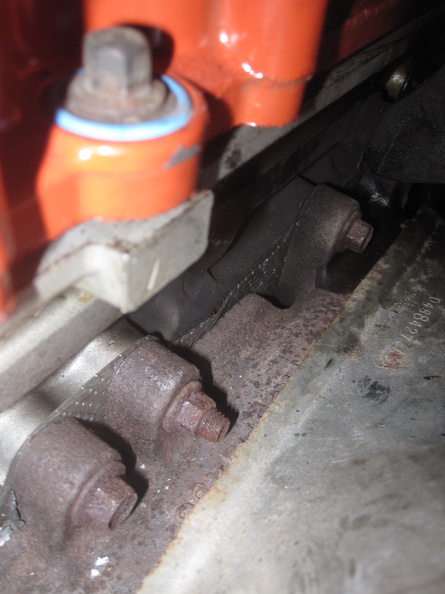
There's enough air coming through there that I can feel it with my hand when the engine is idling. I'm not sure how it happened this way, but the manifold bolts were not fully tight. I'm not sure if I just forgot to torque them down or if they worked loose, but it managed to break up the gasket.

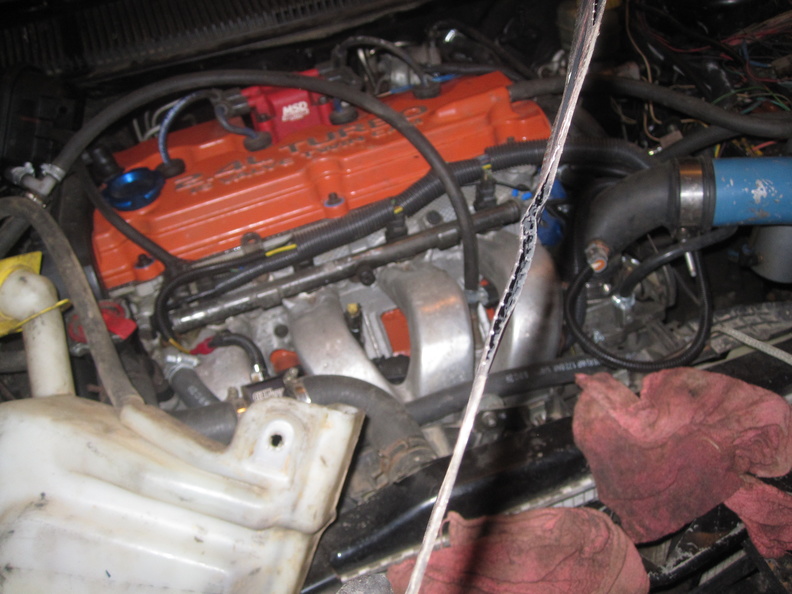
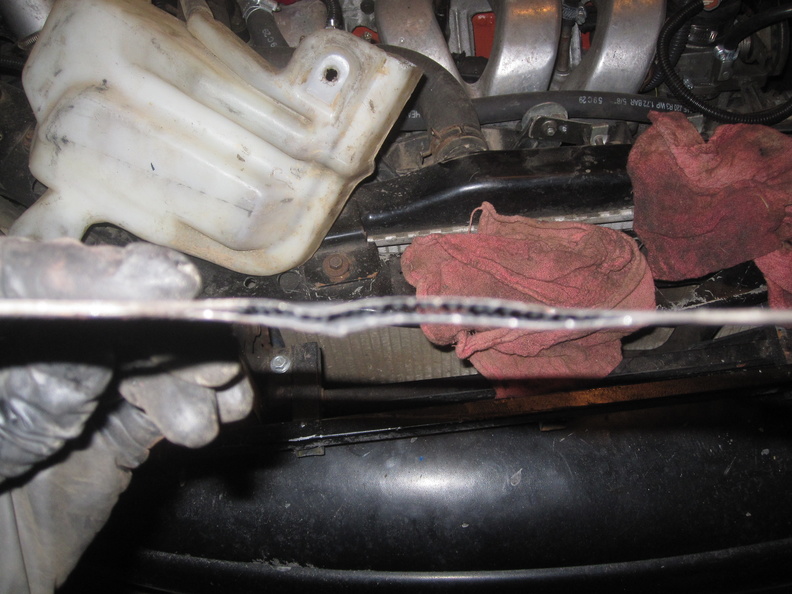
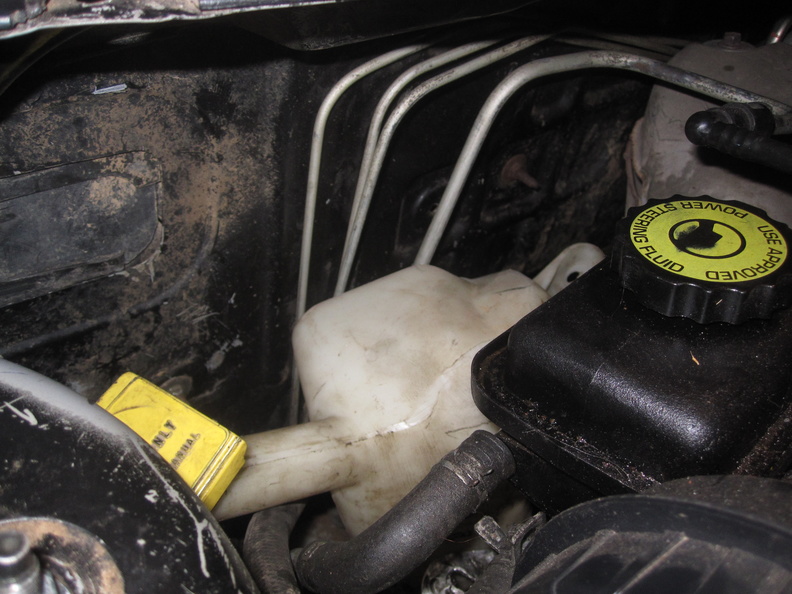
By putting that motor in this car, I've created a few serviceability issues that I need to work through. First up, the power steering reservoir and the coolant overflow bottle have a bit of a catch-22 removal process. The bottle needs to be unbolted and pushed down, and then you can get to the bolts holding on the reservoir.

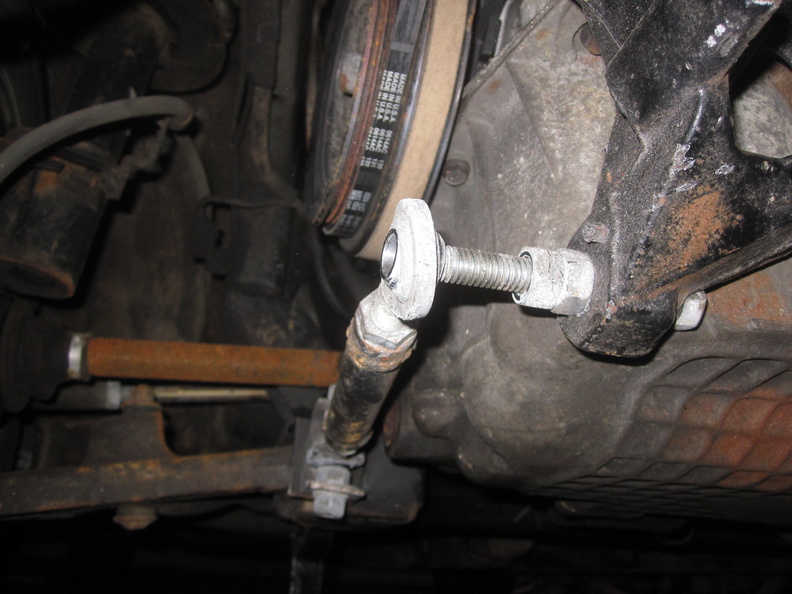
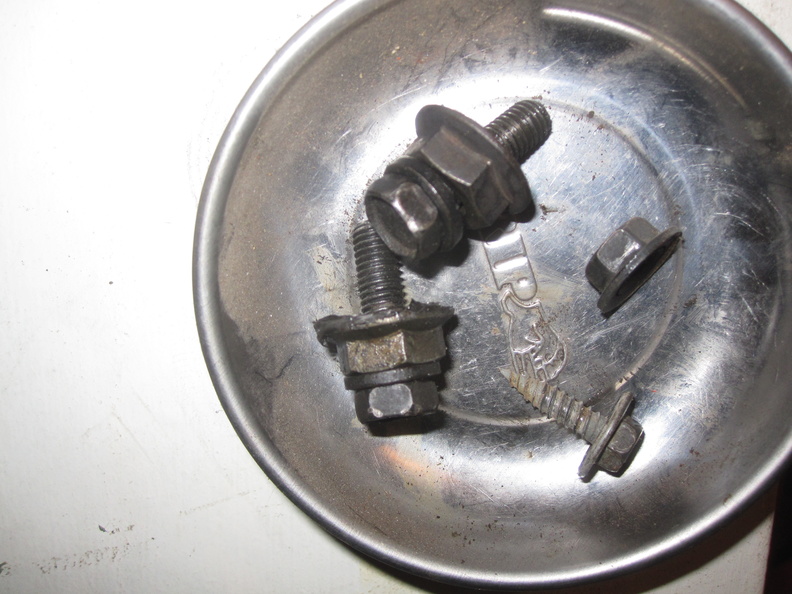
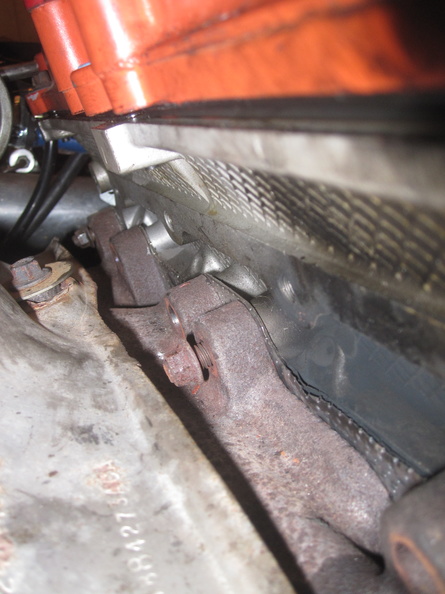
As a reminder to myself, these oversized nuts (heh heh) are the mounting spacers:

Once that was out of the way, I was able to get the top manifold bolts off pretty easily:

The bottom, however, is a different story. I removed the top half of the heat shield so I could loosen the lower half. With that gone, I could get three of the four lower bolts out pretty easily. The fourth, however, is a real treat. Eventually, I removed the turbofold brace and relocated the heater core coolant lines a bit to gain access to the bolt that is basically under the turbo. Because of the heatshield and the oil and coolant lines running around behind the block, it is nearly impossible to get to that fourth bolt. While I was able to remove it after about two hours, I'm still not 100% sure how I'm going to get that bolt re-installed later. I guess that's Future Bill's problem, and what has he ever done for me, anyway?

My next challenge is getting the manifold back far enough on the studs to be able to slip the old gasket off and a new one on. I think I can do it without disconnecting any of the exhaust piping, however, I will need to rock the motor forward because there is not enough clearance between the firewall and the body of the turbo.

For now, I took a bit of a break to watch Bathurst and do family stuff. I'll probably try to get a little farther along later tonight.

In the coming-soon department, I just purchased a KnockSense MS kit to be able to add knock detection to Megasquirt to try to keep from blowing this motor up. From srtforums.com, I found someone selling a stock intake manifold and throttle body so I should have those next week as well. The throttle body doesn't have an IAC or TPS, so I'll need to get those, but I'm going to see if the PT cruiser parts can be adapted in any way first. That should seal the engine up a little better since the intake wasn't a perfect fit on the head and the 1gn Neon throttle body shaft has no ability to prevent boost from blowing through. Once I know what I'm doing for an IAC, I'll pull MegaSquirt back off the car and add in the tach, idle control, and knock detection circuits all at once.

wae
wae Dork
2/5/17 9:22 a.m.

Well, I fell asleep watching Bathurst after we got home last night. I'm not saying that the race was boring, but I did manage to check out during what I think was the 13th safety car. Given that I was tired enough to sleep through cars on a racetrack, I went to bed with a plan to get that gasket out first thing in the morning. You need to understand, though, that first thing in the morning means something different around here on Sundays, so after three or four cups of coffee and some really serious web browsing, I padded out to the garage.

First order of bidnizz was to loosen up the longitudinal engine mounts. That meant the torque tube on the front right and taking the top nut off the solid bobble strut on the transmission:

May I take a minute and say, "what's the deal with all the surface rust down there?"

Anyway, once those were popped loose, I loosened the bracket holding on the coolant feed for the turbo and put my floor jack to the back of the transmission to rock the engine forward. Again invoking the principle of "I have no idea how I'm going to do this in reverse", I used a prybar to push the manifold back over the studs so I could slip the gasket out. I think I might be best served by trying to remove the studs before trying to re-install, but I'm open to suggestions.

Here's the exhaust leak:

The focus is pretty terrible, but you can basically see right through the layers of the gasket. The number 2 exhaust port (giggity) was the worst, but #3 was pretty bad, too. Later on today, I'm going to make a run to my FLAPS and get a new gasket and a new knock sensor.

wae
wae Dork
2/7/17 2:23 p.m.

Nothing to really see, and it's not back together yet, but I've been out there the last couple nights for an hour or two here or there.

I was very concerned about getting the gasket over the manifold studs and about getting the one manifold bolt installed, so after sourcing the new Fel-Pro gasket, I took a really deep breath and got out my pry bar. Amazingly, it took almost no effort at all to get the gasket slipped over the studs and in to place! The only part that required some effort was the act of holding the really long really heavy pry bar in one hand while manipulating the gasket with the other hand.

With the gasket in place, I've started the re-assembly process. I put the other 9 bolts and nuts on first and snugged them up before I even attempted the devil bolt. The biggest fear I had was cross-threading it since there wasn't an obvious way to come at it straight on. My approach was to put some blue RTV on the head of the bold and use that to attach my 10mm socket to the bolt and then use an extension on the other end of the socket. By manipulating the lower heatshield, I was was able to find a place that I could slide that whole contraption forward and try to start the bolt by feel alone. It was one of those situations where I knew I'd have to try to turn it a bit, then back everything out and take a look, then try to start it a second time, and so on. The first time I pulled the socket out to take a look, I was shocked to find that the bolt was no longer attached to the socket but was, in fact, halfway threaded in to the head! Huzzah!

From there, it was torquing down the manifold bolts, re-attaching the manifold braces, and re-setting the engine position and re-connecting the front and rear mounts.

In other bonus news, while I was down there, I discovered that the right sway bar end link was loose! I'm hoping against hope that is the cause of the suspension banging that I keep hearing. If tightening that up solves it, that will be the fourth vehicle on which I had a front end suspension noise and the fourth vehicle where the fix for that noise was the sway bar. Updates as they become available.

Later this week, I should be able to get the headshield reconnected and the power steering and coolant reservoirs re-mounted. Then I can start it up and see how she sounds. Looking at the flex section on the downpipe, I'm pretty sure there will still be an exhaust leak in the system, but at least it will be after the turbo this time!

wae
wae Dork
2/8/17 11:16 p.m.

Mission accomplished.

Boost is coming on smoother and faster and the car sounds so much better. There's a little bit of power steering fluid that got spilled which is now burning off a bit, but otherwise things are pretty great.

I tried to tighten up the swaybar endlinks tonight, but that didn't seem to make a difference. I'm starting to think that when I was told that the control arms I bought had new ball joints installed what the guy meant to say was that they didn't.

Intake manifold and throttle body arrived today, but I need to clean them up and check my supply of gaskets before I do anything with them.

wae
wae Dork
2/11/17 6:05 p.m.

I failed to mention before that the speedometer stopped working after I put it back together. The VSS connector was solid, but no reading.

I put a multimeter on the VSS connector and turned on the car but got under 4 volts when it was supposed to read 8. Pushing the ECU wires around a little would get me 8v momentarily but it wouldn't stick. I read that the VSS can run on 5V, so I ran a new ground wire to the MS central ground and tapped in to the 5V ref signal out of MS. Works like a champ.

Loose ECU wires does also explain the battery light that was coming on intermittently. Now I'm one step closer to just pulling the stock ECU out.

wae
wae Dork
2/18/17 12:04 a.m.

Ugh. I've been too sick to get out of bed for the last couple days, but before I crashed out, I started cleaning up the new intake manifold with a little Purple Power and a wire brush. It looks nice, but I think before I put it on, it's going to get some color. I was thinking of using the same VHT Hemi Orange that I used on the block and the valve cover, but my wife is pretty convincing in her argument that it would look mo' better in a flat black. I don't think I have enough primer left over, so I'll need to pick that up as well as a can of VHT SP130. My original plan was to get it from Amazon, but they want $10.24/can with Prime shipping and $15.42/can for the primer while Autozone has it in stock for $7/can.

I think it's supposed to be nice tomorrow, so I'm going to try to mask it up and get it painted tomorrow so that some night next week I can install it.

Before I succumbed to sinus hell, I also went ahead and placed the order with Davenport Racing USA for the non-adjustable HotBits rally suspension. I guess I'm going to have to call them on Tuesday and see what's up because their store is set up to process everything through PayPal, but PayPal is saying that they haven't accepted my money yet, which seems weird.

1 2 3 4 5 6 ... 24

You'll need to log in to post.

Our Preferred Partners
iliJ1FHaAc6WfEyFuhJXFOQeEL31JSjfguW5yY2JfoK8hNuaPY3JWp2qaHGganTe