


In reply to Dammit :
Look me up the next time you're out there. Interlocken is maybe 45 minutes away from me.

In reply to Dammit :
Look me up the next time you're out there. Interlocken is maybe 45 minutes away from me.
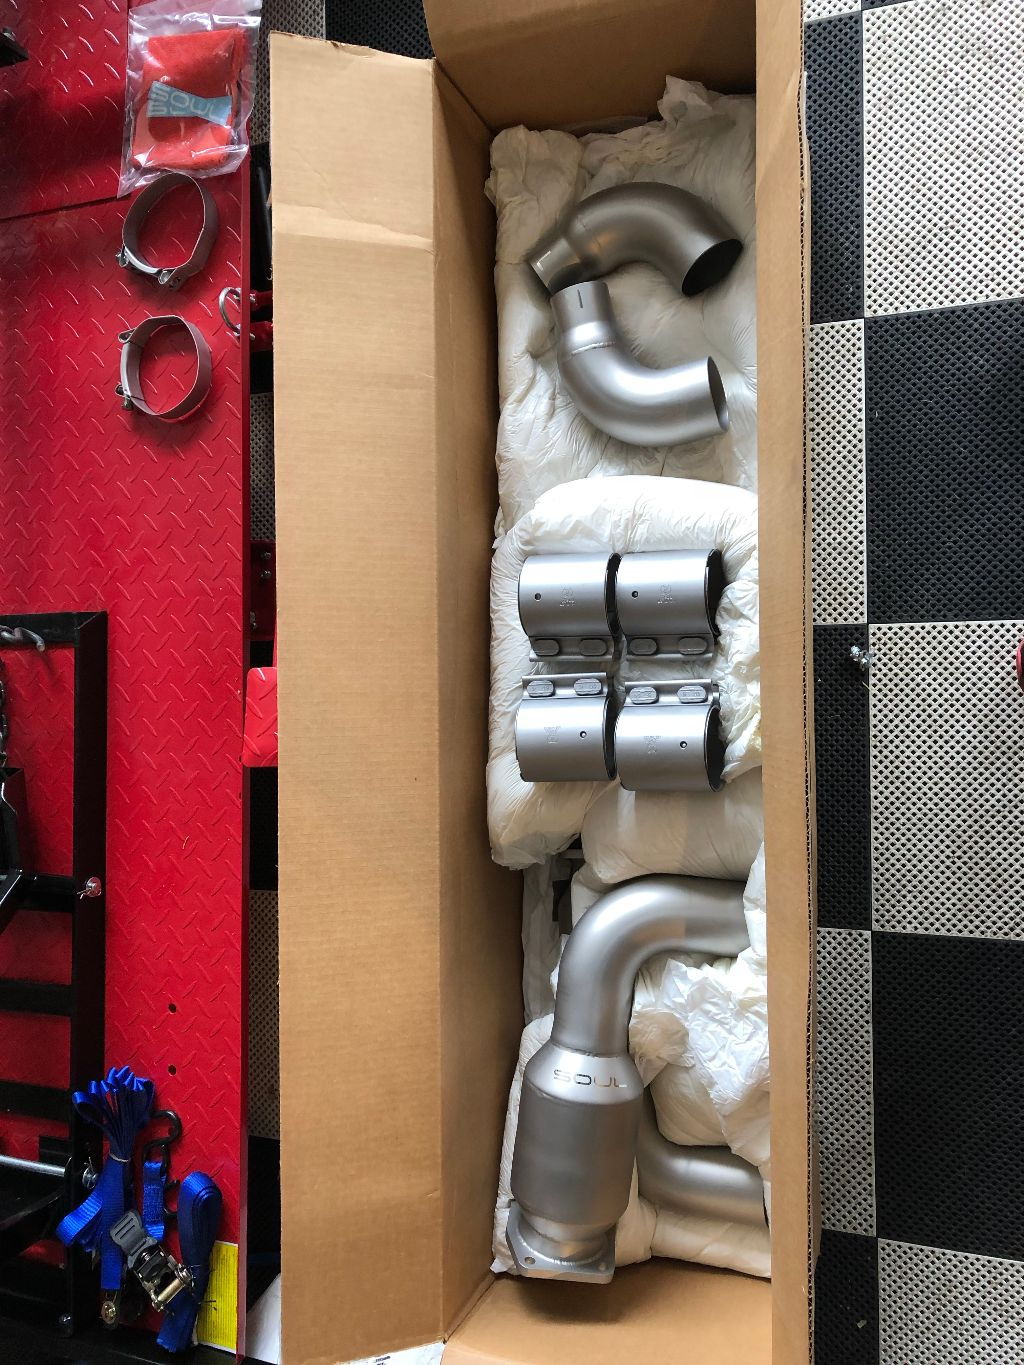
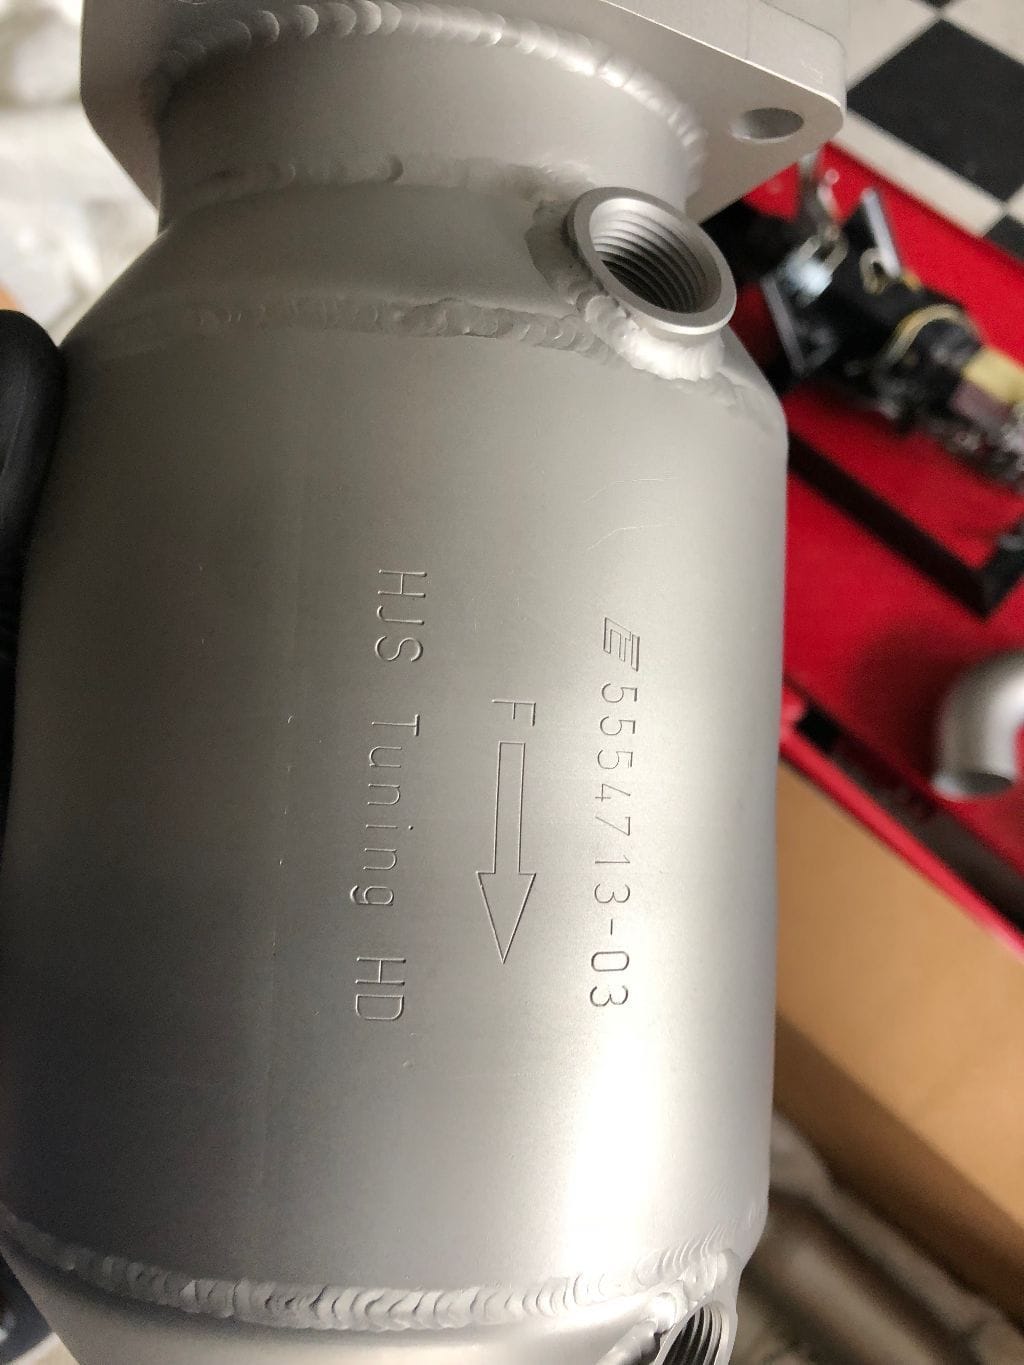
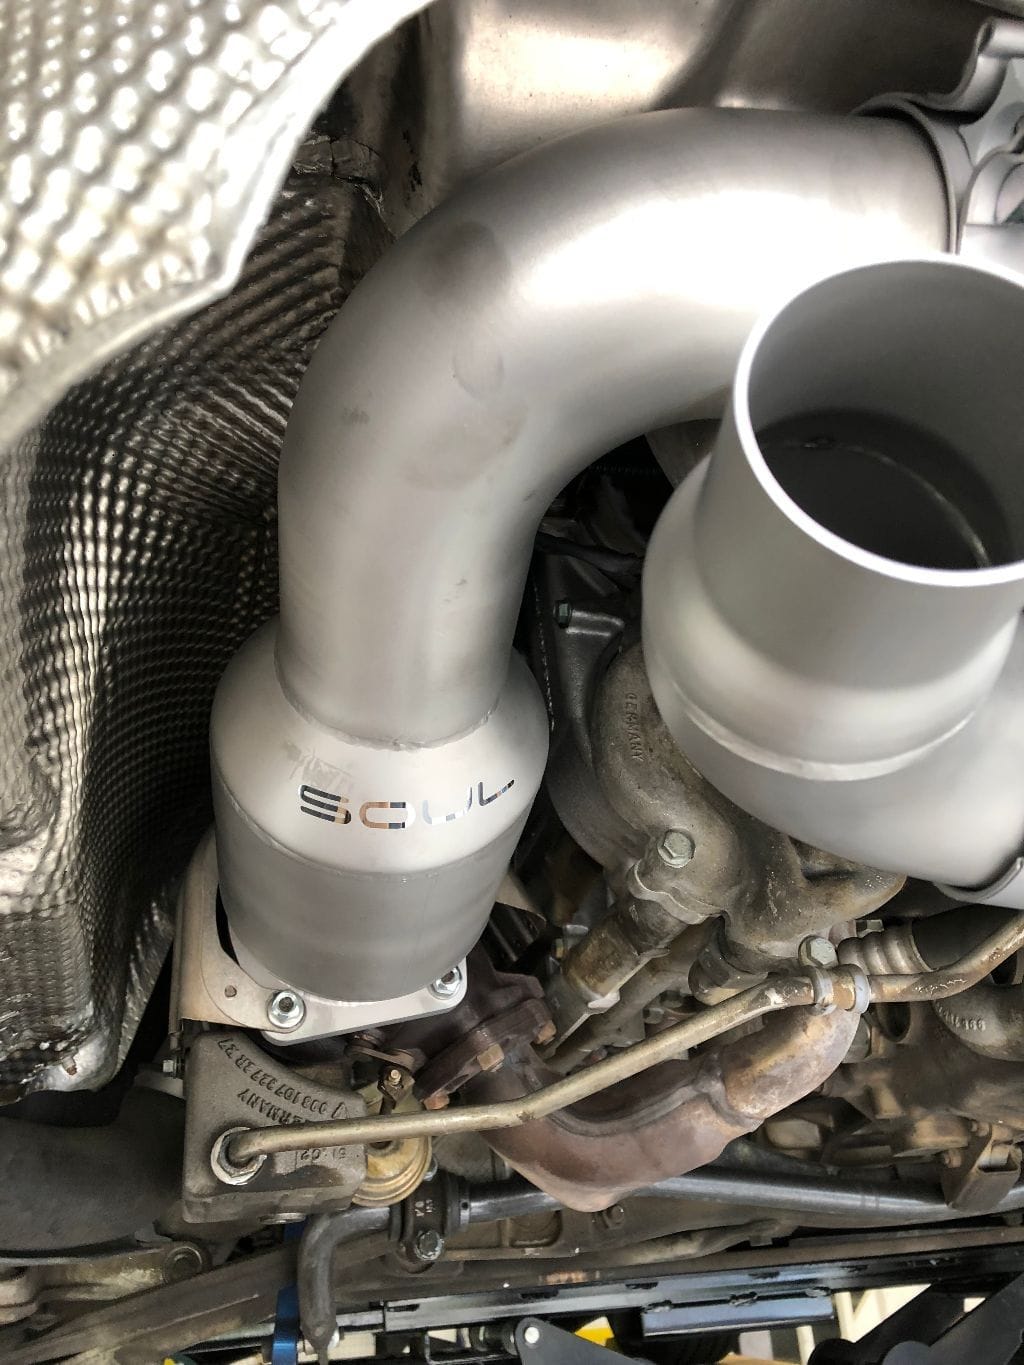
I've been looking for an exhaust for awhile now. I wanted an X pipe design, preferably 3", that had 200 cell HJS cats and that I could reuse my stock "sport" tips on. In looking around Soul Performance had all my boxes checked. A quick call to John and they were making one for me and had it winging its way over to me the following week. Things got messed up a bit by UPS, they were supposed to deliver it Friday, then it got delayed. It looked like it wasn't going to arrive until tomorrow (Monday) but I was pleasantly surprised when it showed up yesterday morning.
Time to get on the stick and get this thing installed! First impressions, SP (Soul Performance) does a fabulous job packing these! Foam wrapped, comes with nice, detailed instructions with pictures, exhaust nuts/washers, stickers and a micro fiber towel to wipe the exhaust down with as the exhaust has a satin finish and any fingerprints left on it will burn in.


OK, let's get the stock exhaust off! First step, remove the rear bumper cover. This is quite easy to do and there are a few DIY's already out there, I like the one on Pelican Parts.
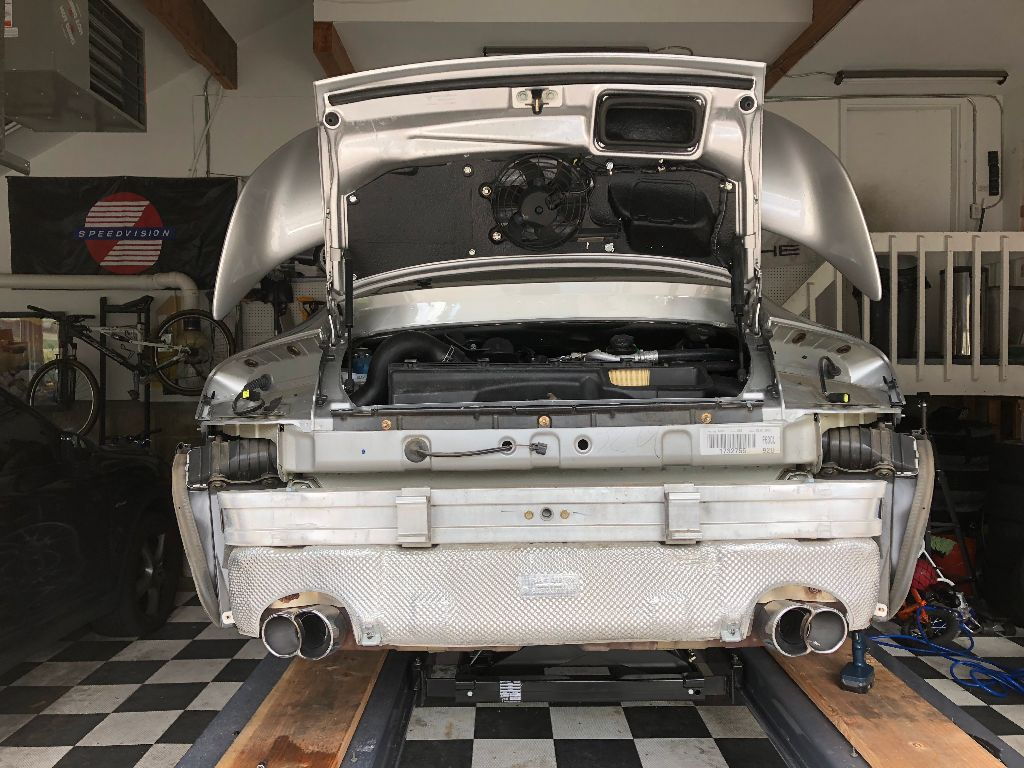
Next step, take off my stock exhaust tips.
The bolt on the drivers side one was a little rusty, which is surprising given that my car is a low mileage, fair weather car. Off they come!
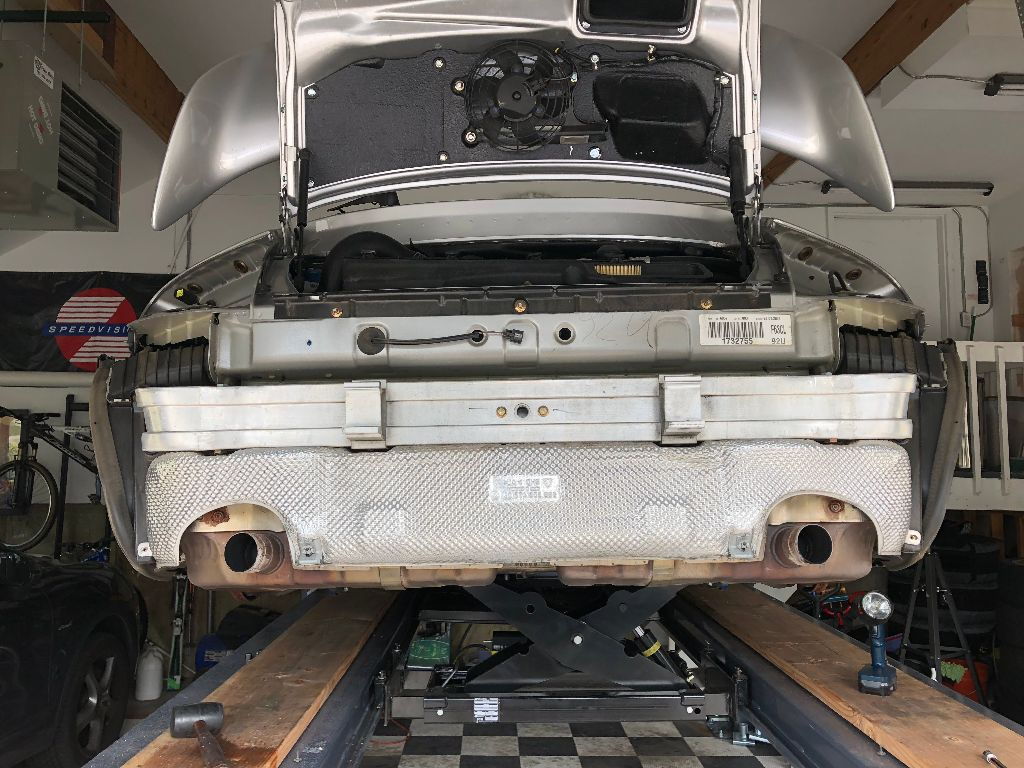
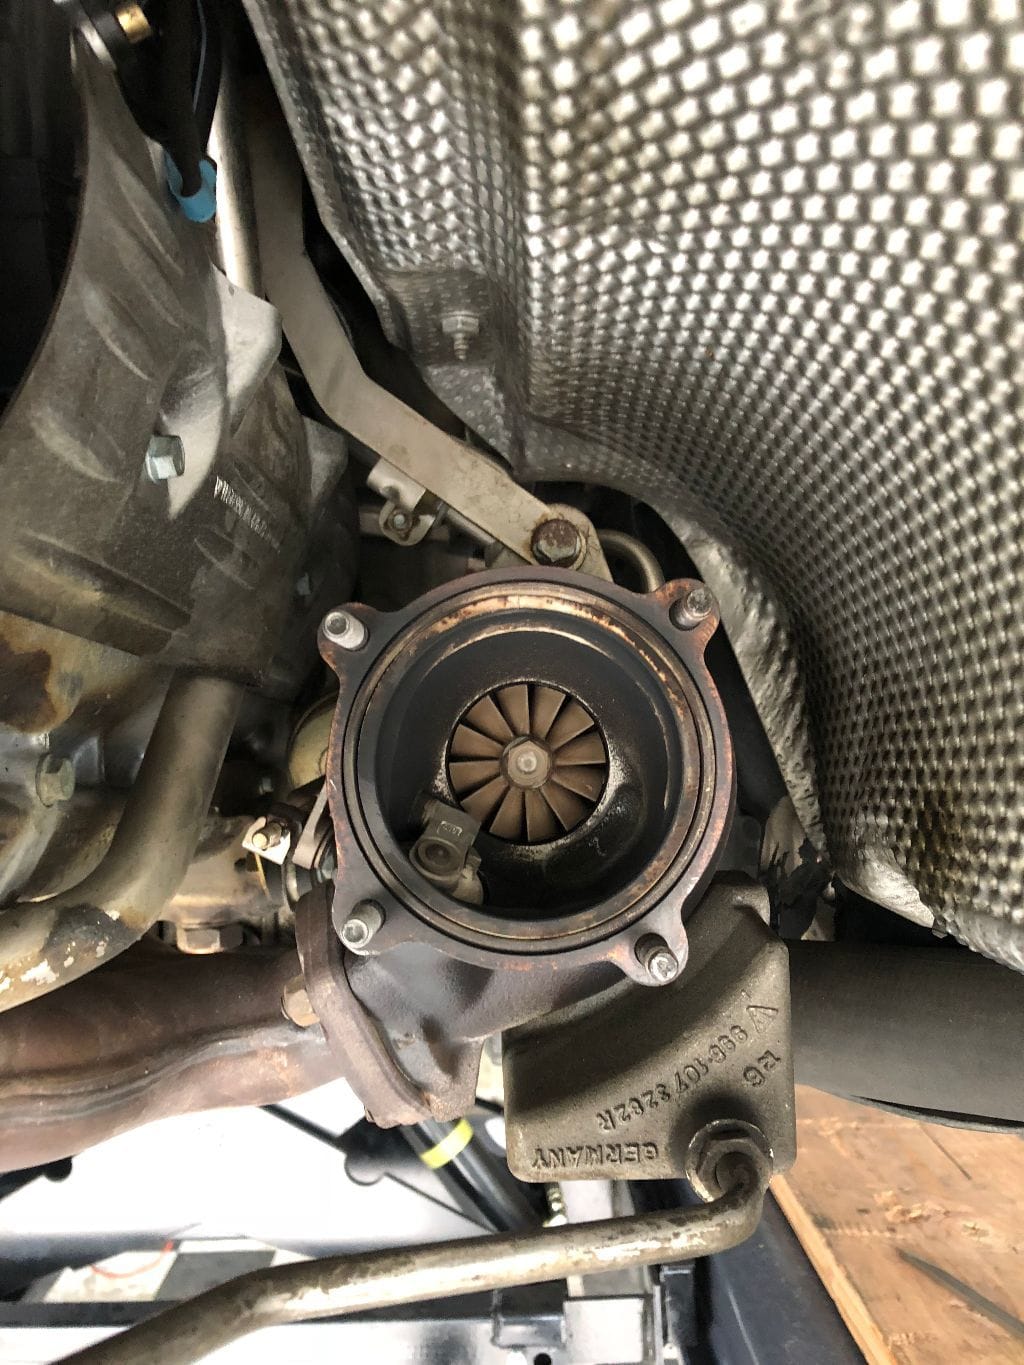
These stock exhaust straps are held on by 6mm allens. Go ahead and take them off. Next up, take off the 13mm nuts on the studs coming out of the turbos and going into the stock catalytic convertors. I soaked these liberally several times in PB Blaster, along with the O2 sensors. Like I said, my car is a fair weather, low mileage car that also had the exhaust off of it not that many miles ago. If yours isn't any of these things, use more PB Blaster and be prepared with the "hot torch"...
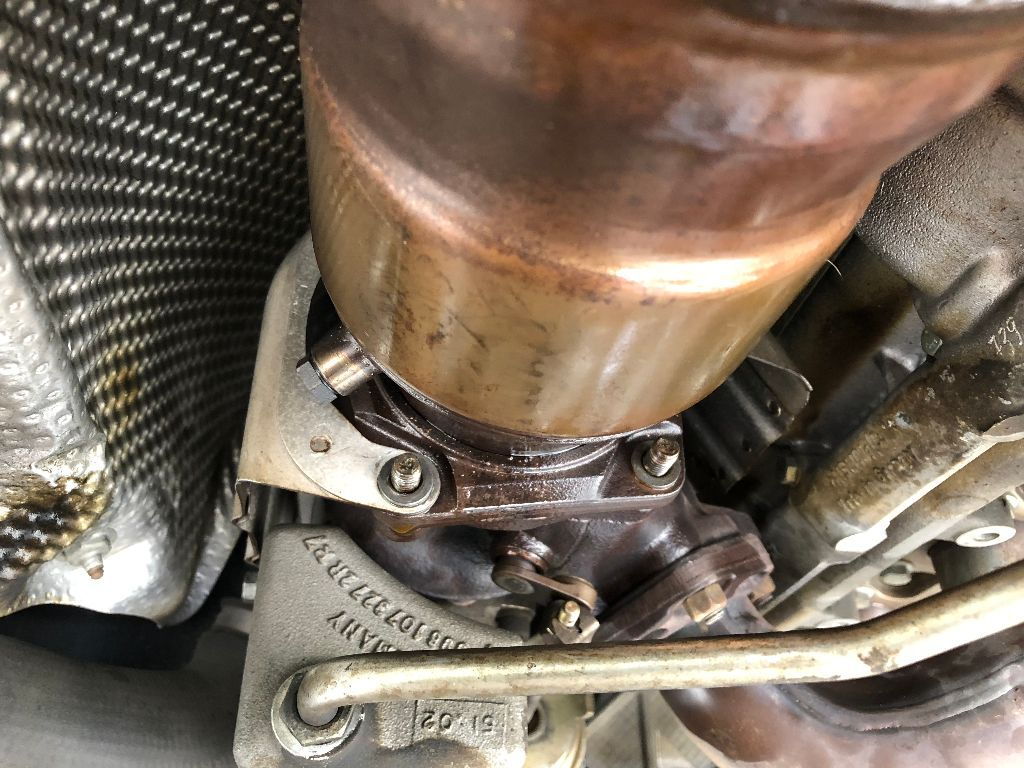
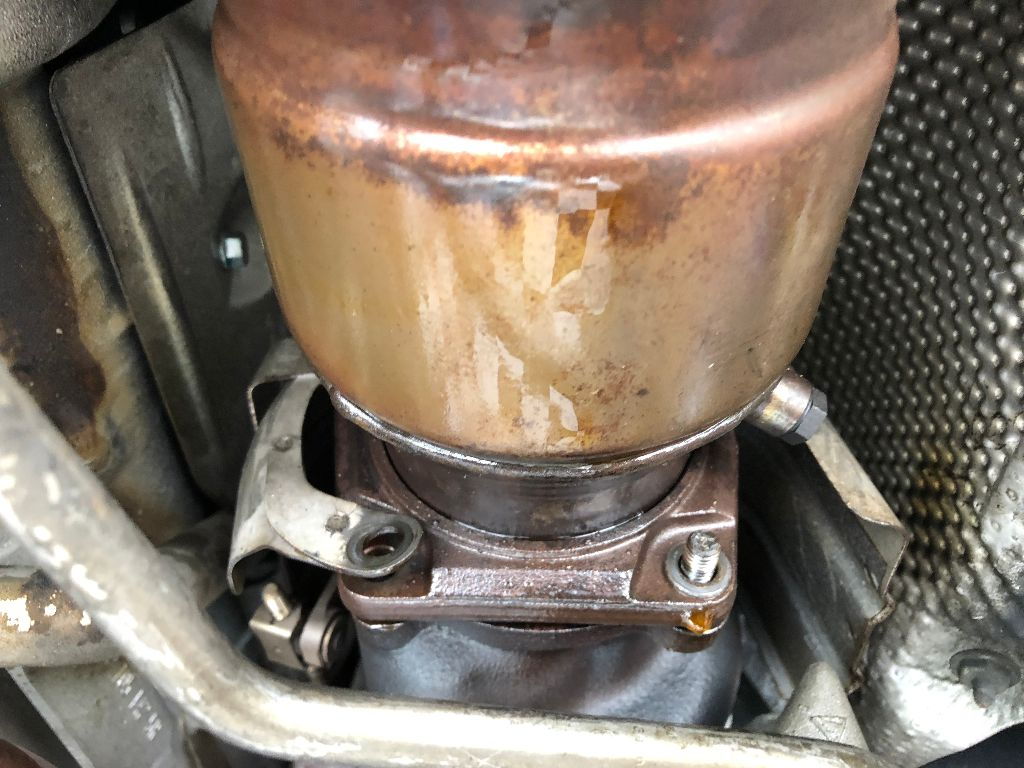
All my nuts came off easily. Note the missing stud on the passenger side turbo. Bought the car like that. The bolt holding the turbo heat shield on that side was missing too. Not only that, one of the studs backed out with the nut on that same passenger side.
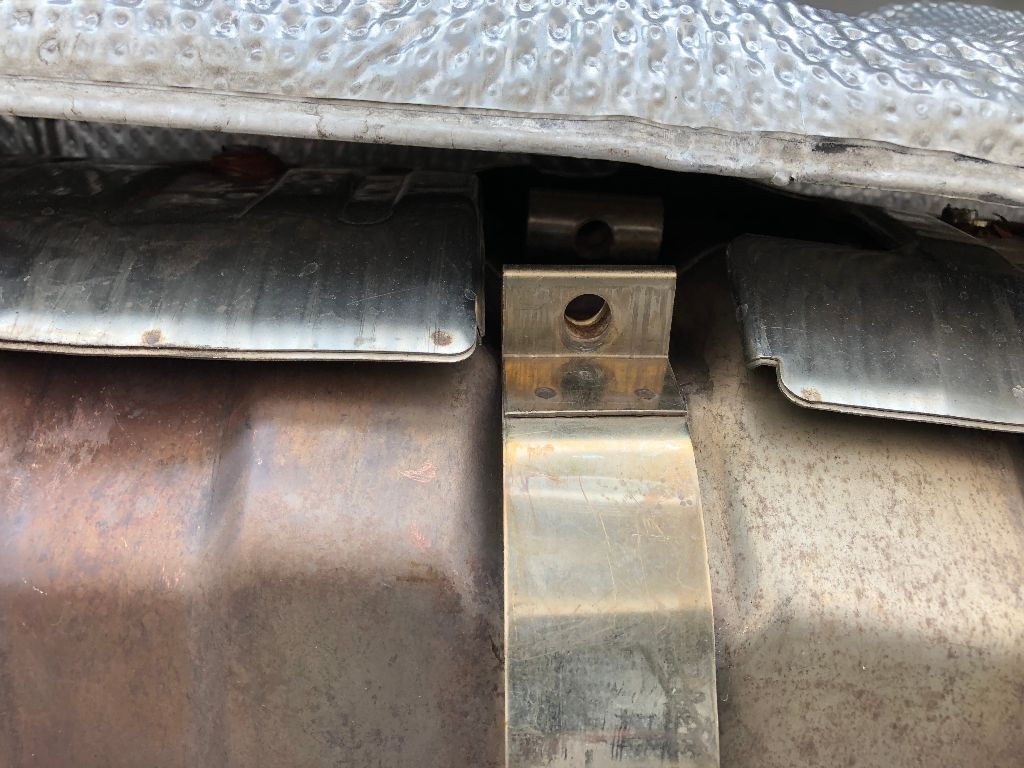
Ok, time to remove the straps off their brackets. This puzzled me for a bit and it didn't help that I did this step out of order. Do NOT pull the exhaust off the studs first! You need to take those straps and move each of them out towards the outside of the car. That'll pull them free from their brackets and let you drop the exhaust.
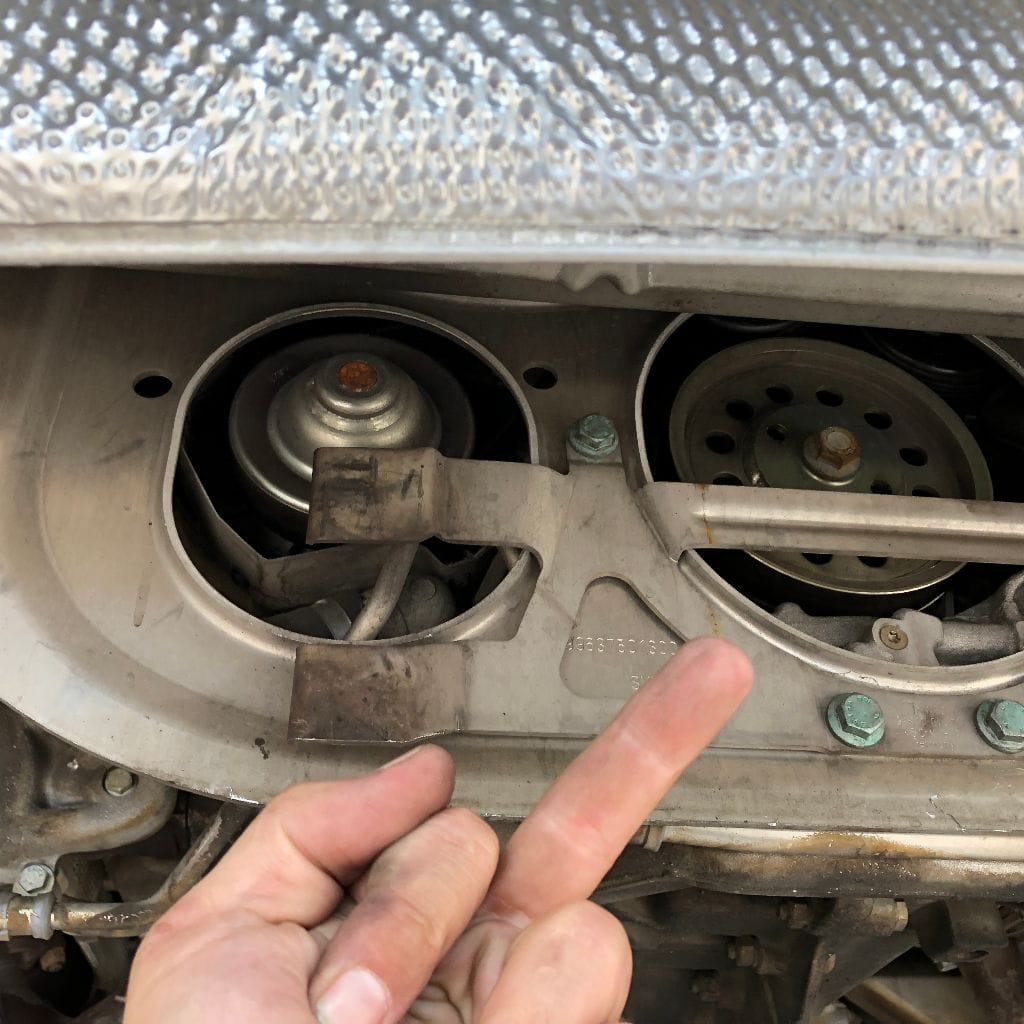
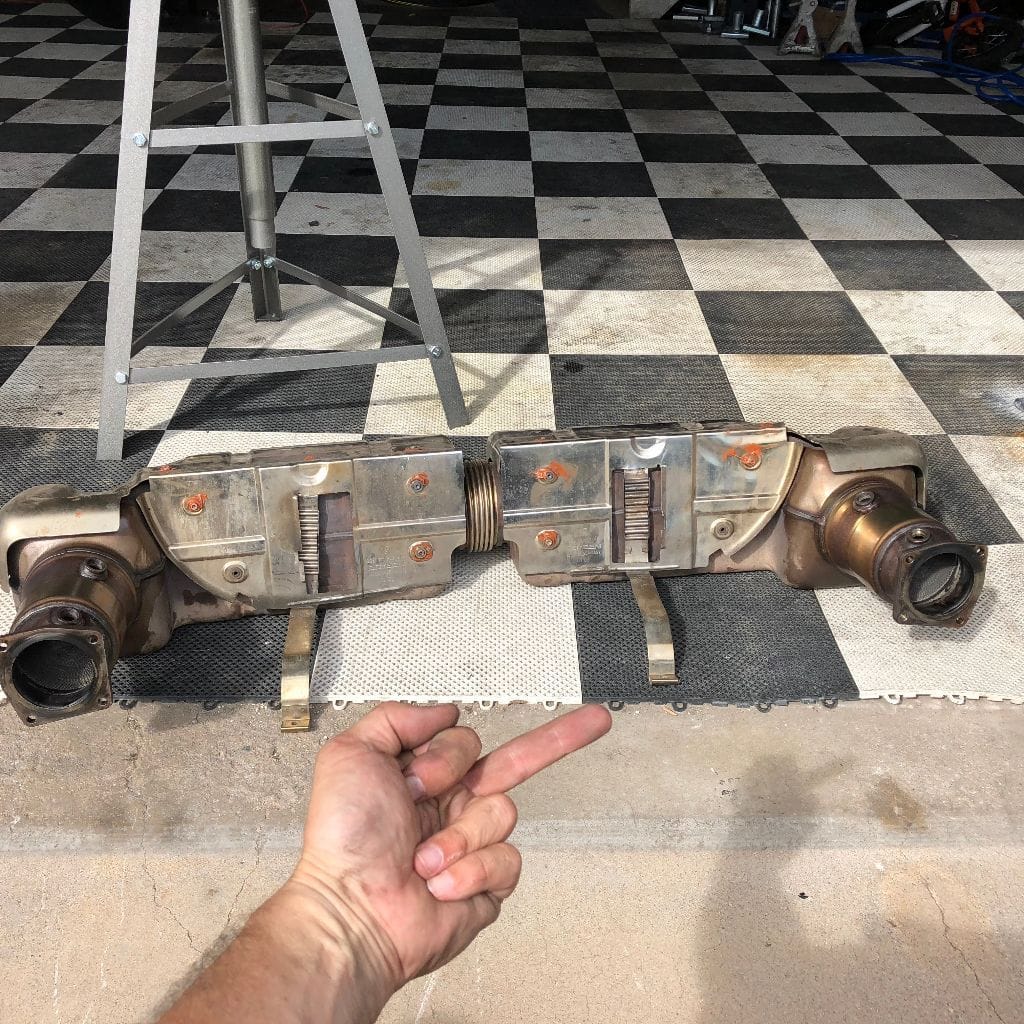
Now you can pull the stock exhaust off the studs. Use a really tall jack stand to support it, it's really heavy!
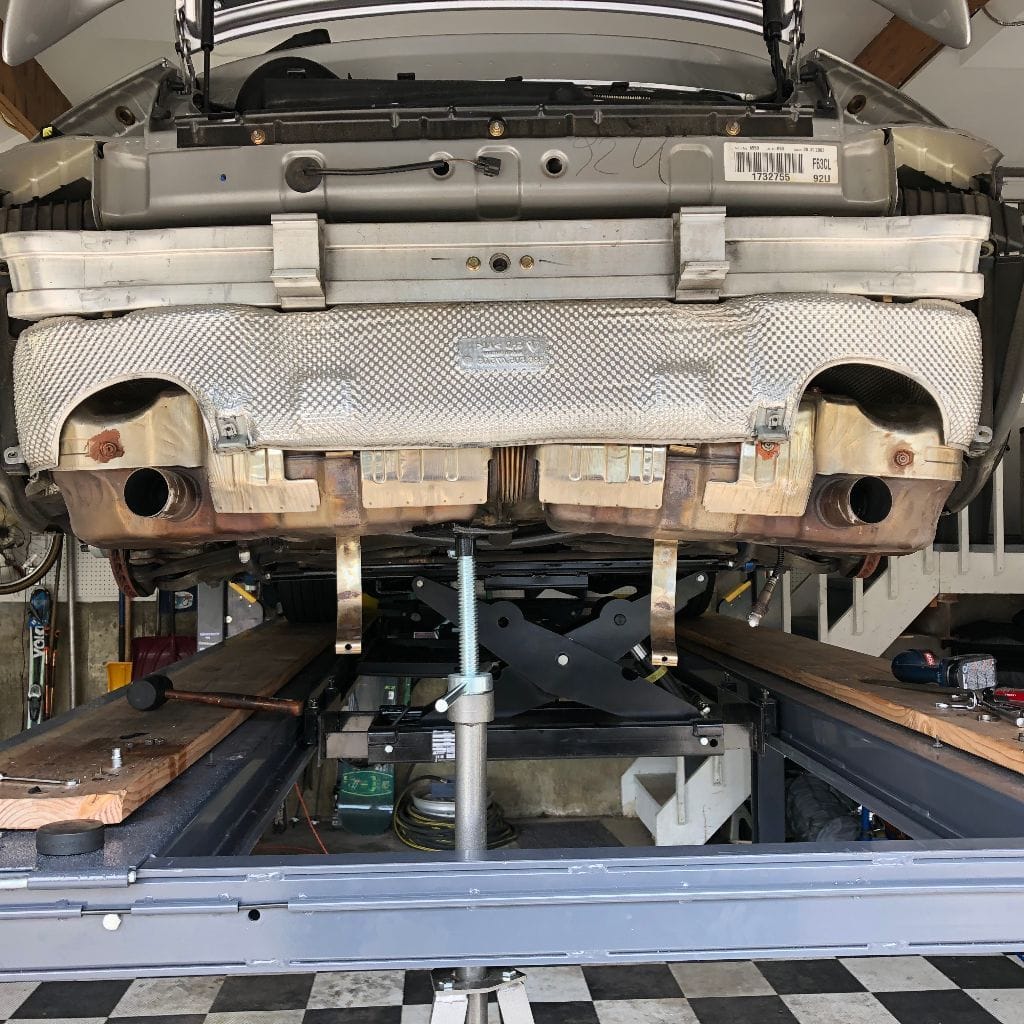
And, it's out!
TOP TIP! You can pay $9.xx a stud at the Porsche dealer, or you can buy the exact same stud at a VW dealer for $1.80. How's that for the Porsche tax? Seriously Porsche, WTF? Here's the VW part # you need.
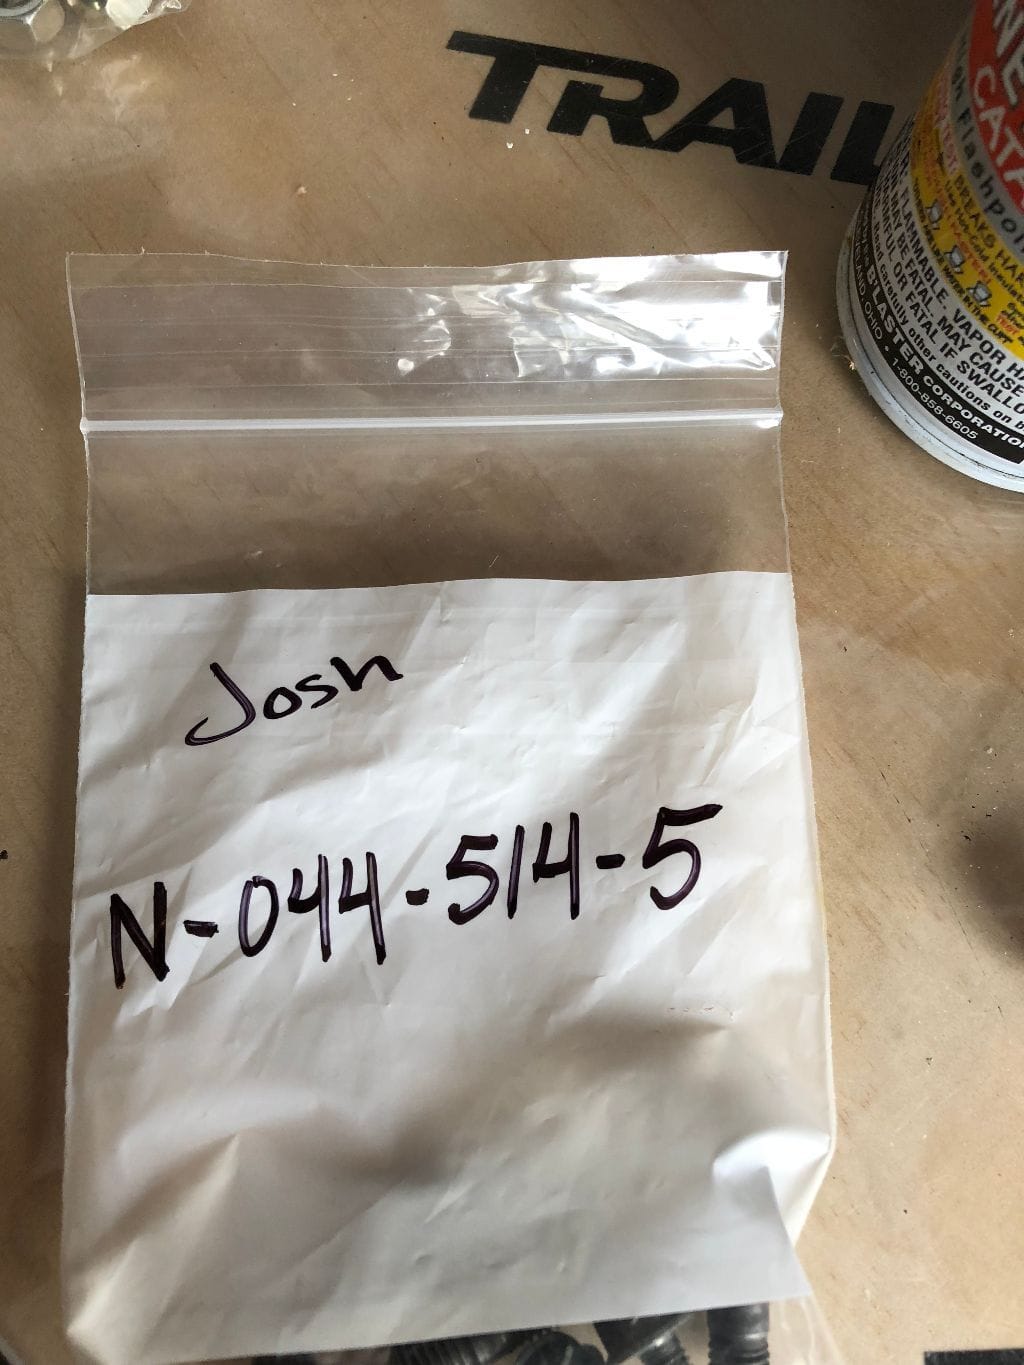
Proof they fit....
Time to start to put everything back together. Soul Performance handily provides new nuts/washers for you. Let's start with hanging the cats in place. I marked the primary and secondary O2 sensors so I wouldn't get them mixed up and installed in the wrong places...
Let's get that X Pipe into place.
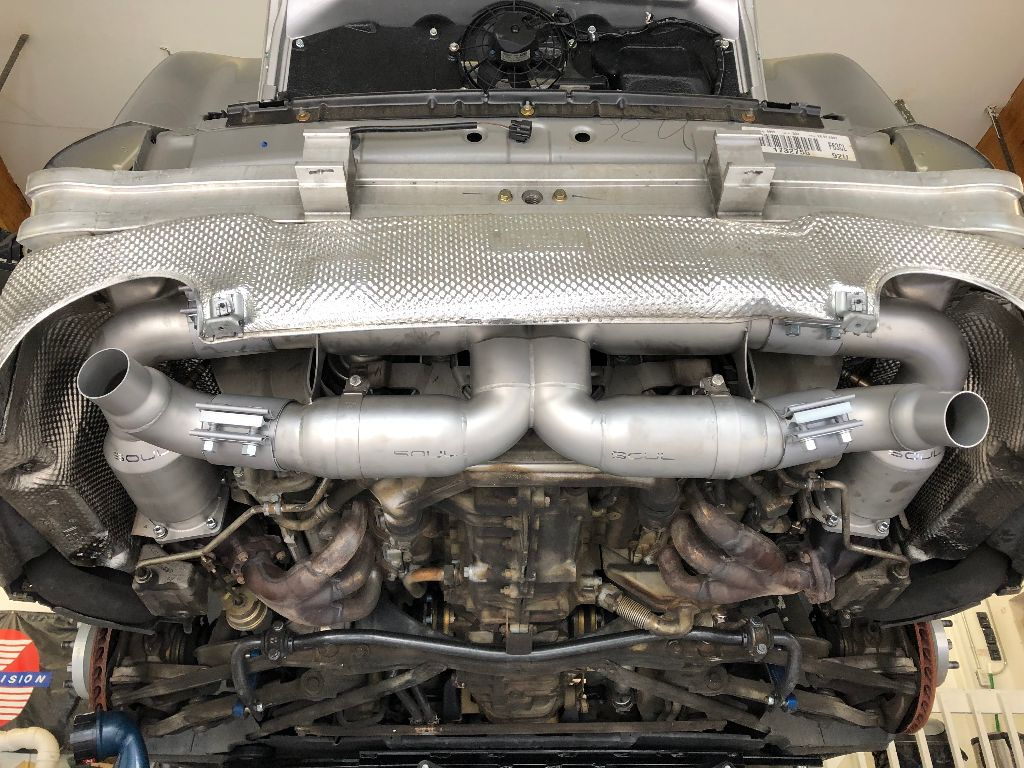
Then the tip pipes go on. Tighten down the clamps holding the X pipes into place. Then tighten down the nuts on the cats and the turbo heat shield bolts. Center up the X pipe and tighten down the upper clamps on it. Time to get the stock bumper cover on!
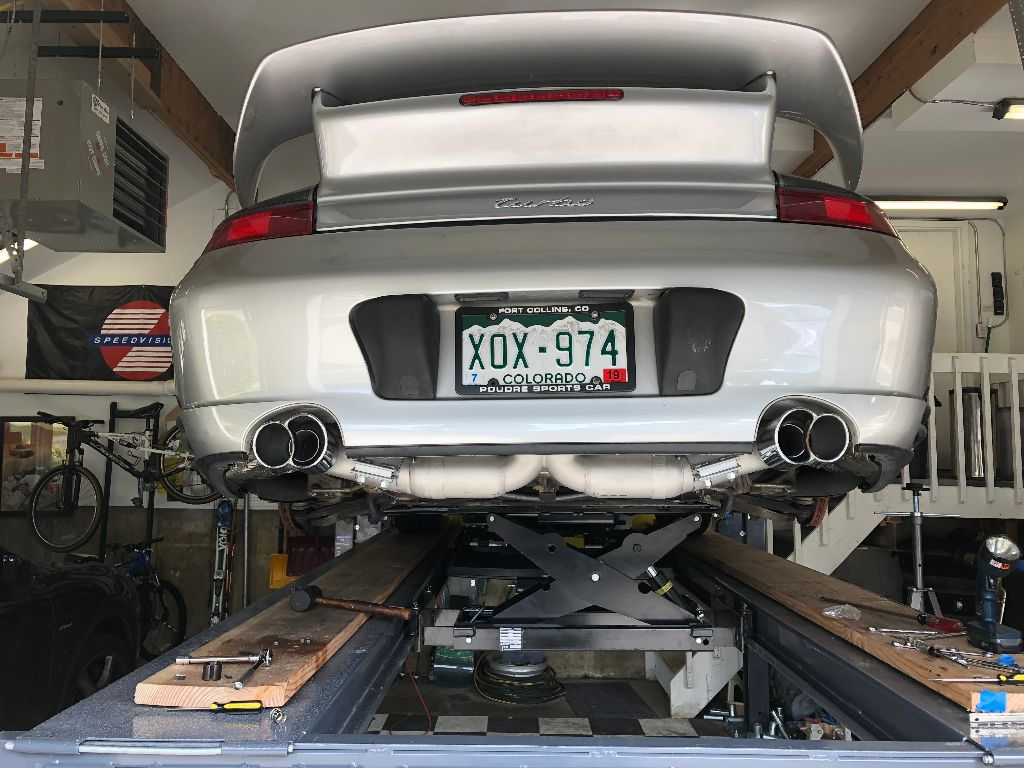
This will let you hang your stock tips and position everything. Tighten up the clamps on the SP tip pipes, then tighten down the tips themselves.
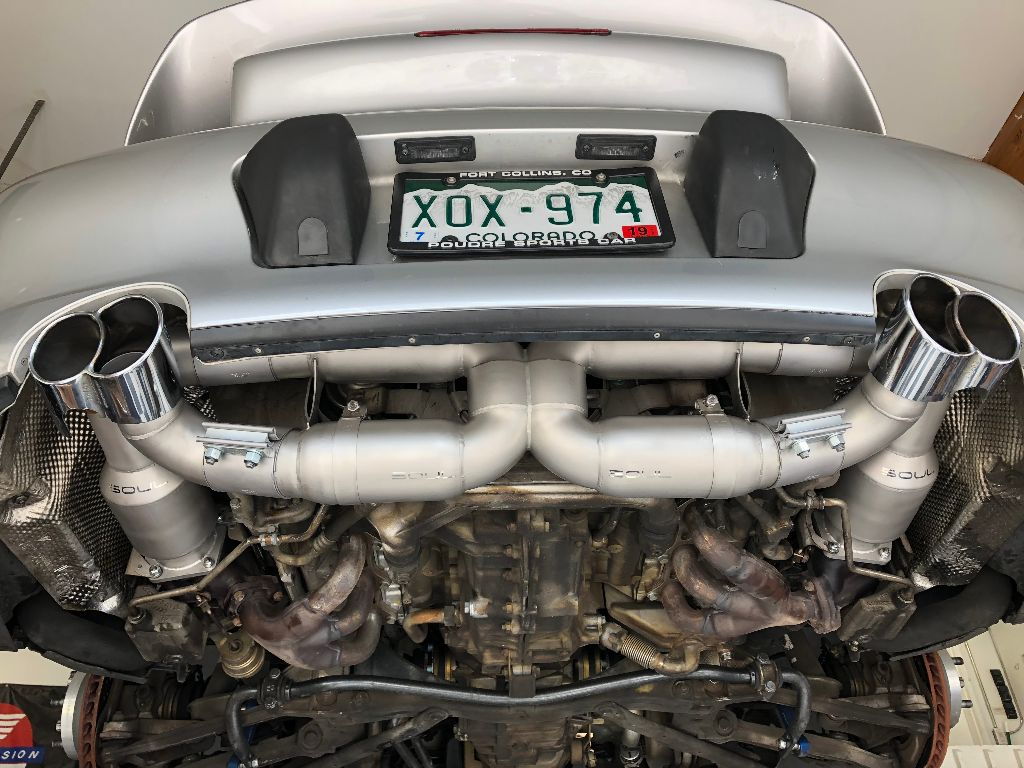
Wipe down the entire exhaust with brake cleaner and the microfiber towel.
Install impressions! This system went together really smoothly. I didn't have to modify anything, oval out any holes, play around with positioning, none of that. Even the tips lined up pretty much right away. Super impressed by it, as well as the fact that SP basically provides everything.
Let's do a cold start....
https://youtu.be/QXZowUPdkKc
How about an interior drive?
https://youtu.be/NXYnWEtIXBA
How about some drive bys?
https://youtu.be/iuyuynyvE30
https://youtu.be/vRY6L8VqmkY
https://youtu.be/LKgoslISoO4
OK, well that's all fine and dandy, but what do I think? Well, I think it's freaking awesome! When you're on it, it's rowdy, raucous and rips! There's a huge power gain, the turbos spool noticeably faster and my traction control was going crazy in the first several gears when it never did before with the stock exhaust. The exhaust in the cabin is noticeable. I've got about 100 miles on it now and its burning in and mellowing out some. I expect that to continue. That said, you can carry on a conversation at normal levels, I don't have to raise my voice at all. You can hear the radio just fine, don't need to crank it.
The exhaust doesn't drone but at around 2200 rpm the tone of it is louder. Cruising at closer to 3000 rpm it's noticeably more quiet in the cabin. Windows down this thing rocks and rolls! On the throttle its a giggle fest, I don't really get great gas mileage on this thing as it is, I'm sure I'll be dipping into single digits now for sure!
Conclusion: This exhaust is well made, well packaged and goes onto the car with no hitches. Performance gain is palpable, sound outside the car is amazing. Inside the car the sound level is quite livable, I wouldn't have a problem road tripping this car to California. With the HJS cats its 100% smog legal, no check engine lights, no stinky exhaust smell. All in all, I'm quite pleased with my purchase and recommend Soul Performance!

Great review!
Any idea why they finish in satin?
The car sounds great as well- enjoy!
damen
In reply to badwaytolive :
From what I gather, to make their systems look different. It definitely looks nice!
Love the sound and it added a whole bunch of power!
Well, my cheapness got the better of me. The Euro 996 GT3 seats I bought were cheap. But the set were cheap for a reason, the leather is creased and showing a bunch of wear. So yesterday I ordered from Carnewal in Europe, they sell new back cushions and leather covers for the butt cushions.
However, between what I paid for the seats, plus what I paid Carnewal I probably could've just bought a set in much better shape to begin with. At least I'll have spare covers/cushions now...
Exhaust looks great! I'll definitely give you a shout next time I'm Denver bound, always good to meet a fellow enthusiast.
Slightly odd question - do you happen to know what the intake port spacing on your Mezger is?
In reply to Dammit :
Unfortunately I don't...

Beautiful car. The new deck+wing, really gives it a great look.
In reply to mr2s2000elise :
Appreciate it!
This past weekend I decided to put the race wheels/tires away in my heated basement and rearrange the garage to see if the tire trailer would fit in the corner of the garage. A tape measure made it look like it would just squeak into where I wanted. I borrowed my friends sawzall to cut maybe 18" off a false wall, it let the tire trailer push back another 10" or so.
Happily the tire trailer did just fit where I wanted it to go. I need to move the 2*4 stair support over an inch or two, that'll let the trailer roll in easier. I took the tongue off the trailer, lets me get my air compressor in/out easier.

Upshot of getting my tire trailer into the corner is now I have to find another place to park my mtn bike. Pretty sure this isn't what this lift is intended for but I'm confident it can handle it. Especially since I've sold my motorcycle...

Figured this hadn't ever been done to my recently purchased 996tt, so after 15 years and ~30k miles thought it was due. Let's remove the front bumper cover and clean the road debris out from the radiators.
Tools needed:
T25 torx
Phillips head screwdriver
Vacuum
3/8" rachet and extensions
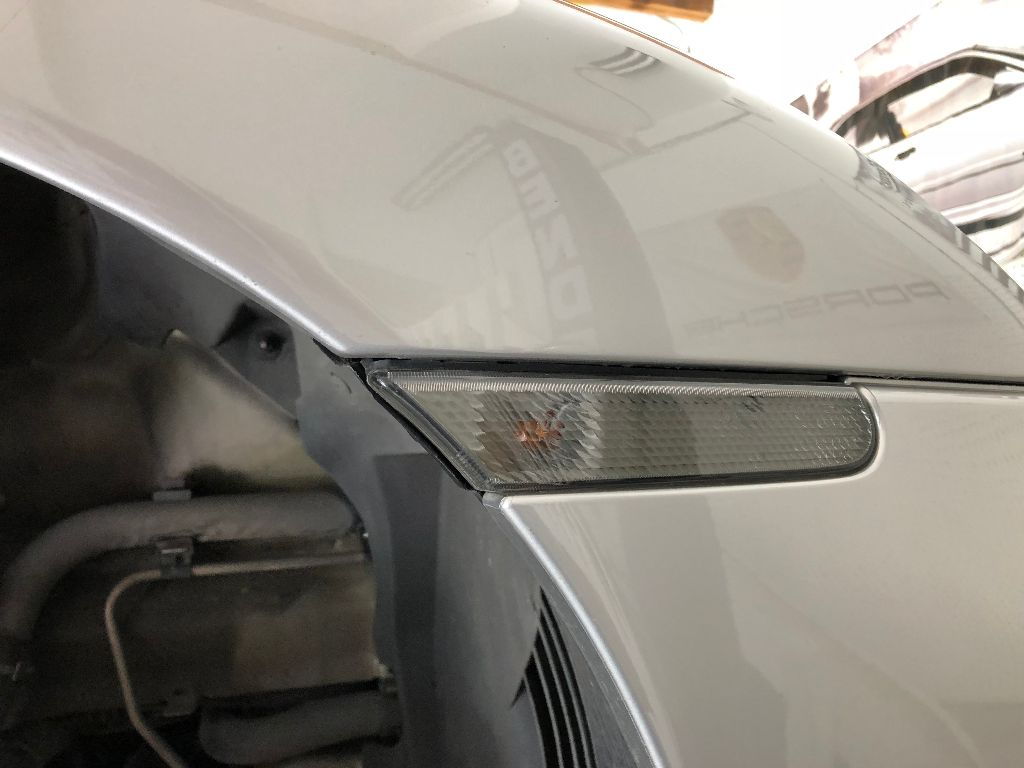
OK, start by popping out the front side marker light. Just push it forward and it'll pop out. Don't worry, you didn't break it!
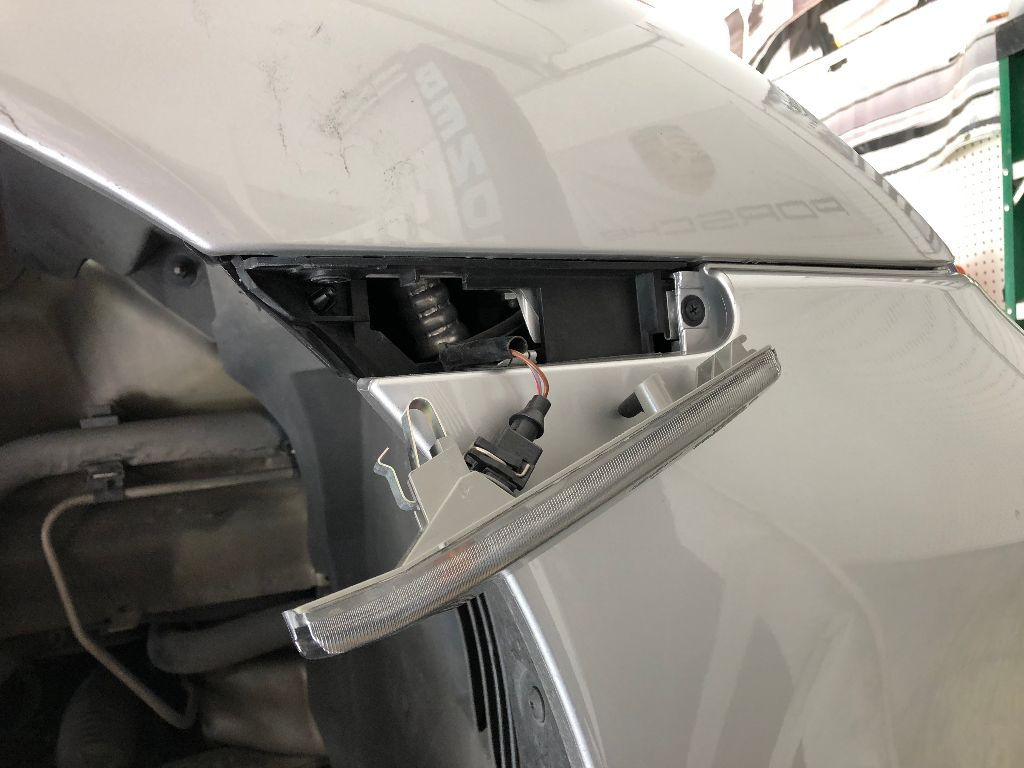
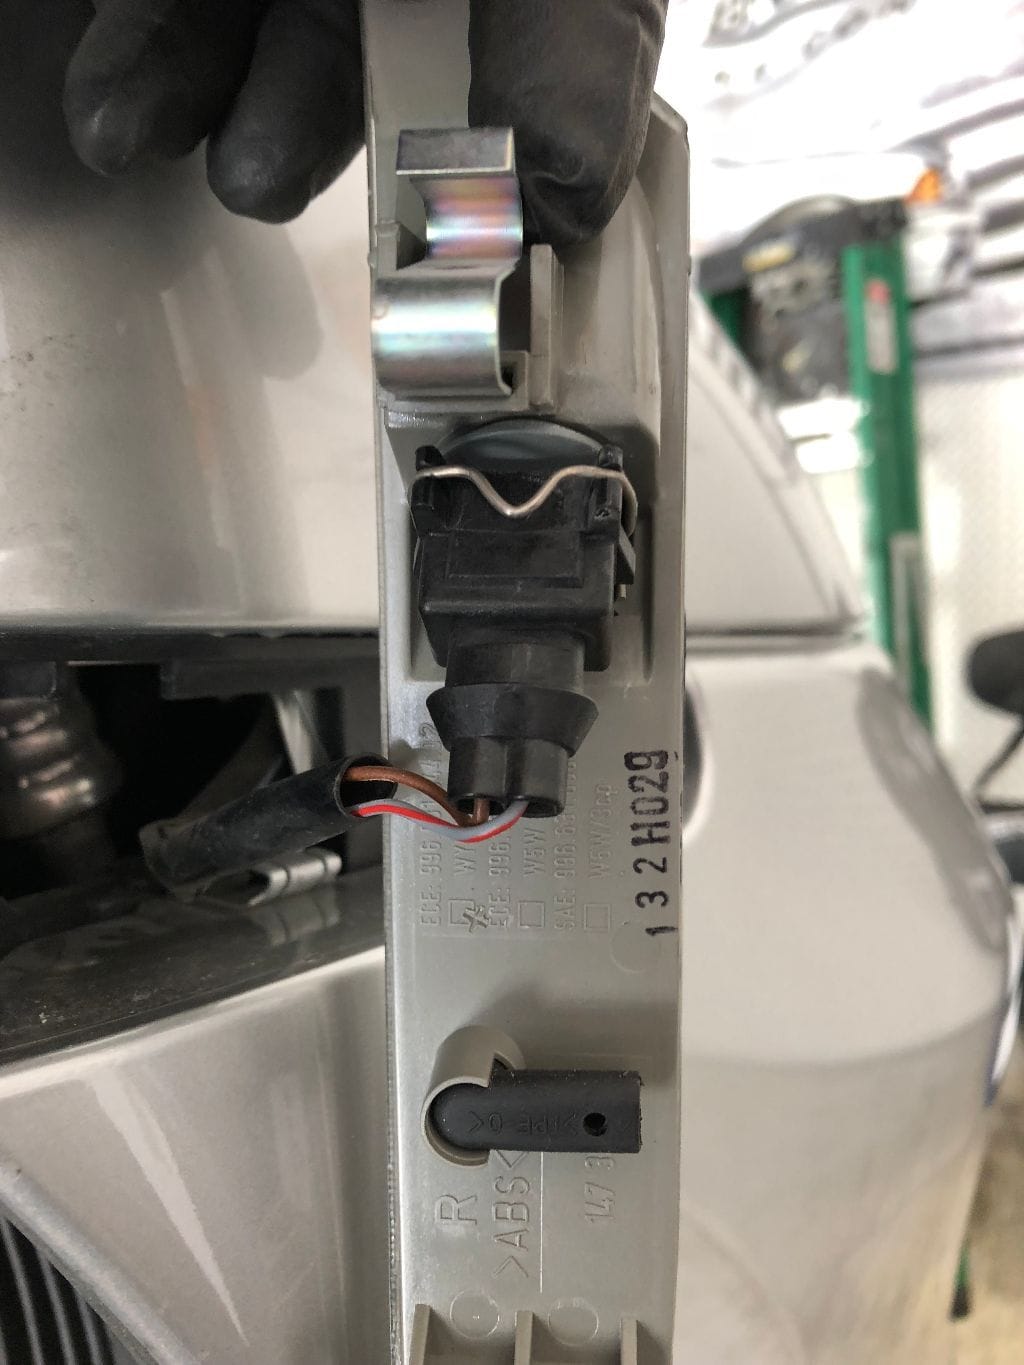
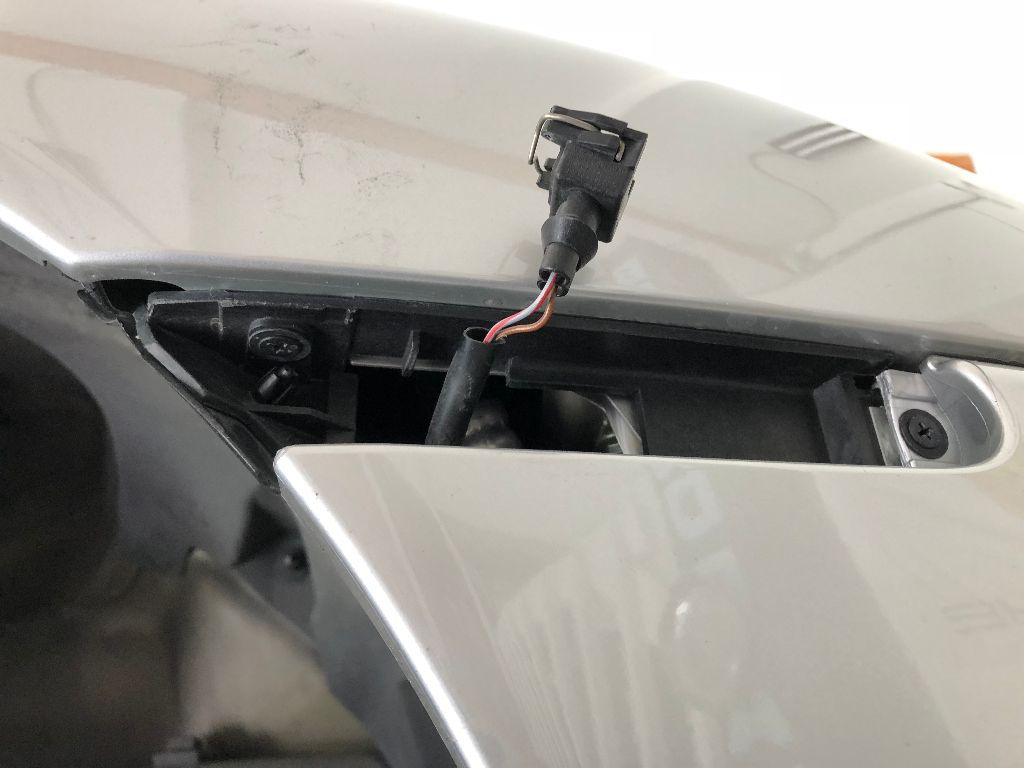
Ok, now pinch the silver bracket to release the harness and remove the side marker light completely
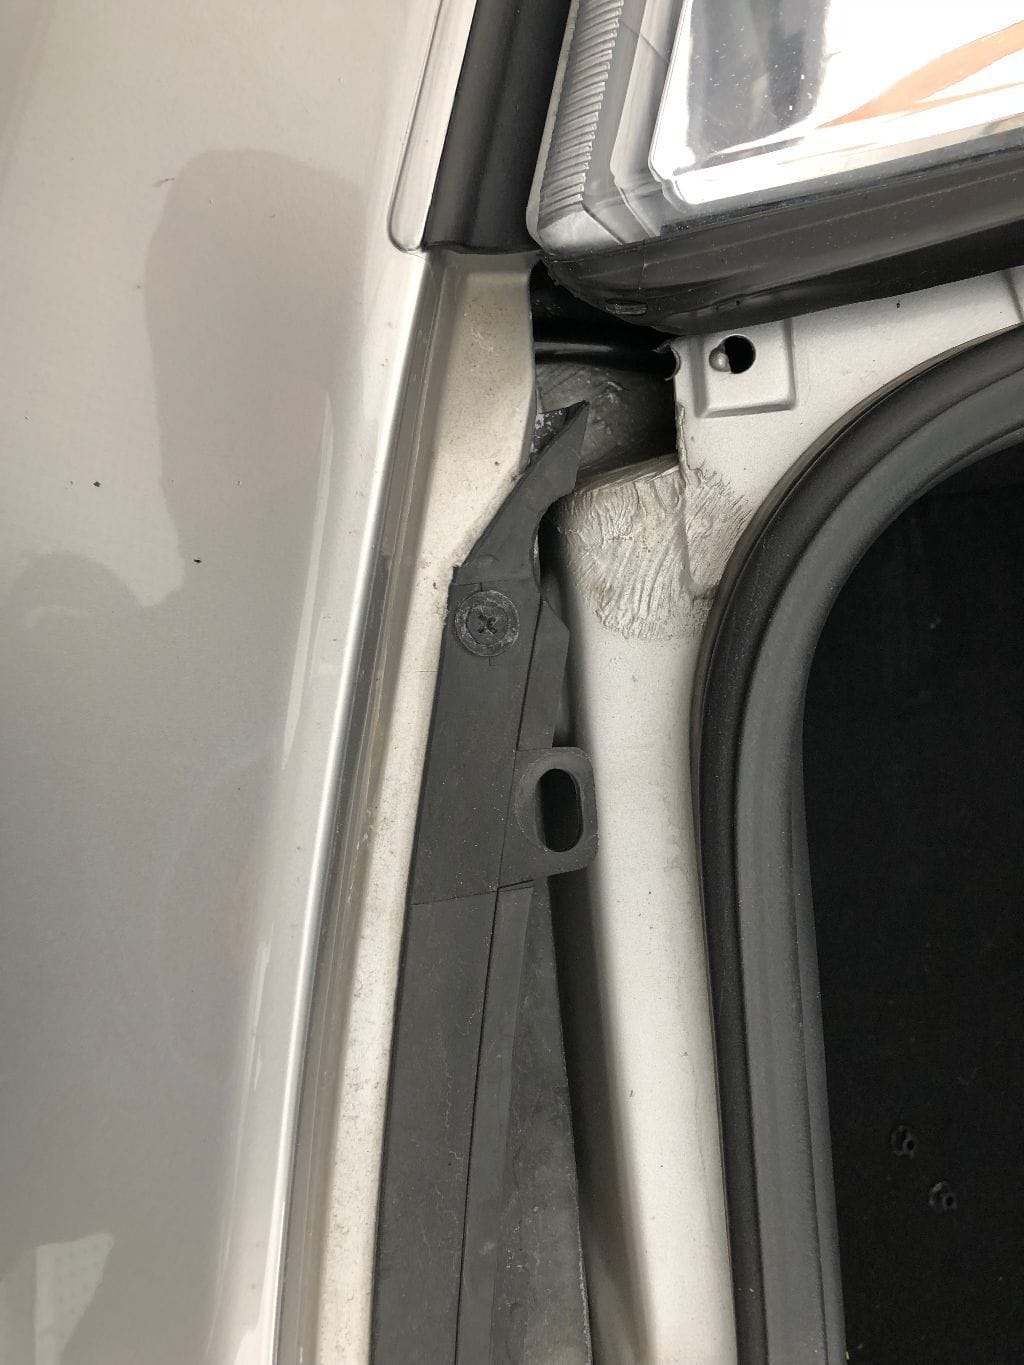
Now remove the two screws you find behind the side marker light. Be aware there's a *third* screw you'll need to remove here too! You'll need to take the T25 screws out of the front inner fender liner, peel it back to see and remove it.
There's also a plastic dowel pin on the fender liner attaching to the side marker part that you'll have to remove. These are a total bitch, I usually end up destroying them on removal and just replacing them with new ones.
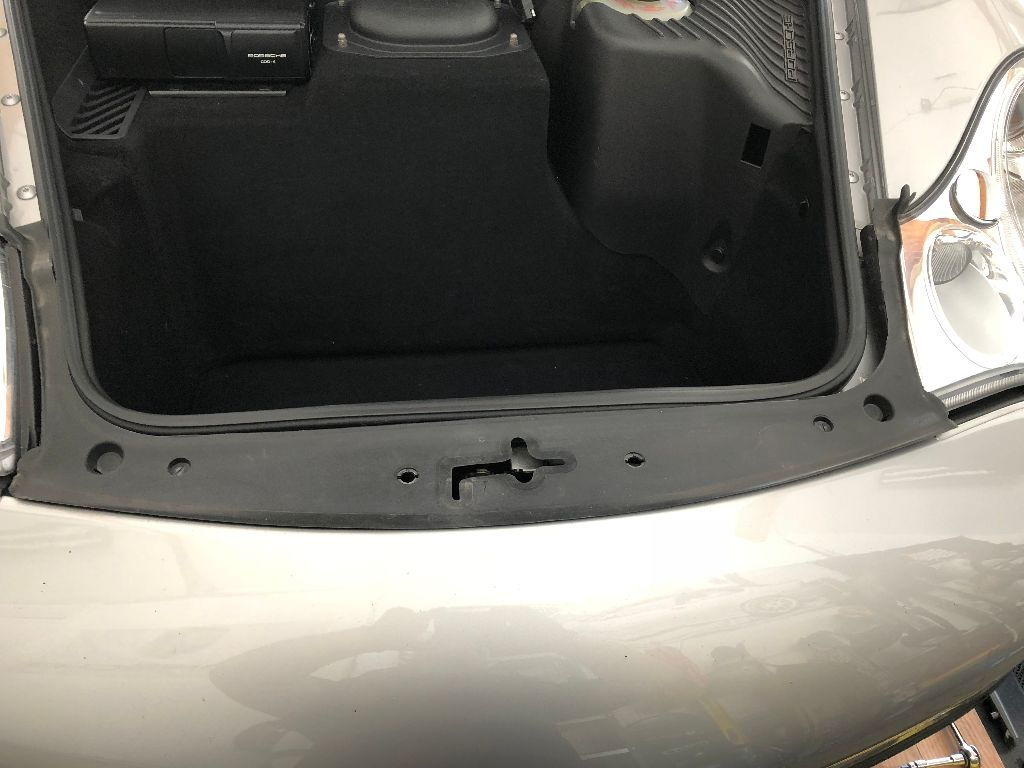
Ok, let's open the frunk, you need to turn those pins 90 degrees, then you can pull out the front trim piece to access the screws underneath.
Ok, now go underneath the car and remove the 4 T25 torx screws on either side of the bumper as well as the 3 torx screws in the center. Also remove the 1 phillips head screw in the inner fender liner holding onto the back of the front lower lip spoiler.
That should be all of the screws, pull the bumper away from either side, then pull the entire thing forward and off.
Let's take a look at the radiators...

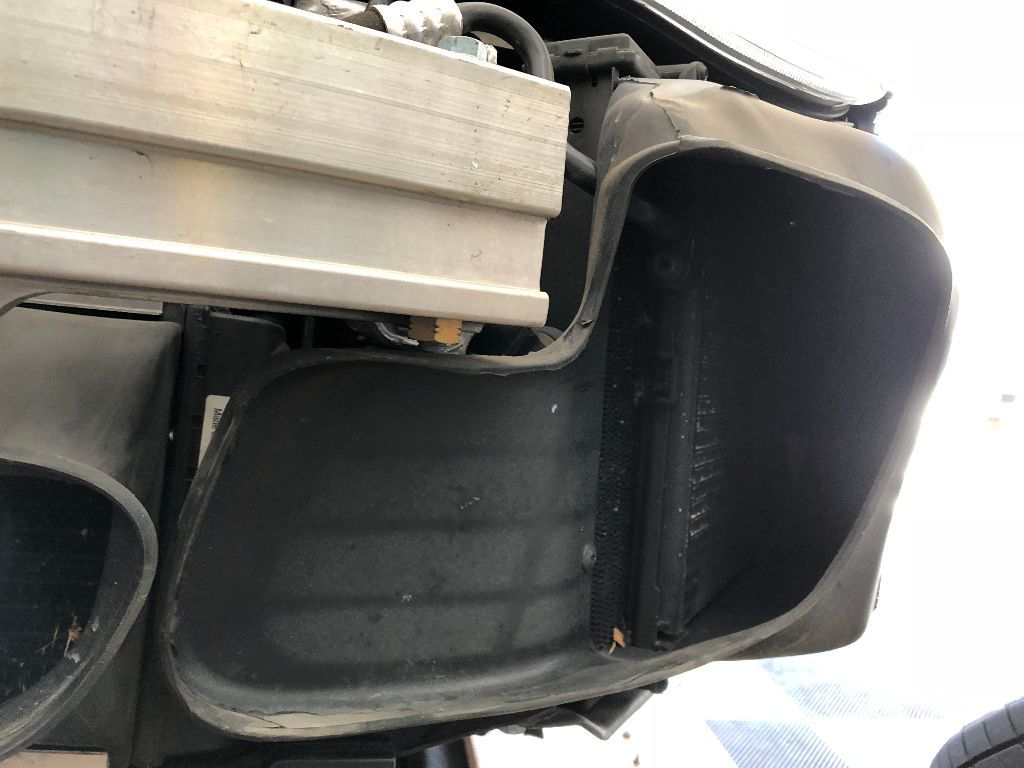
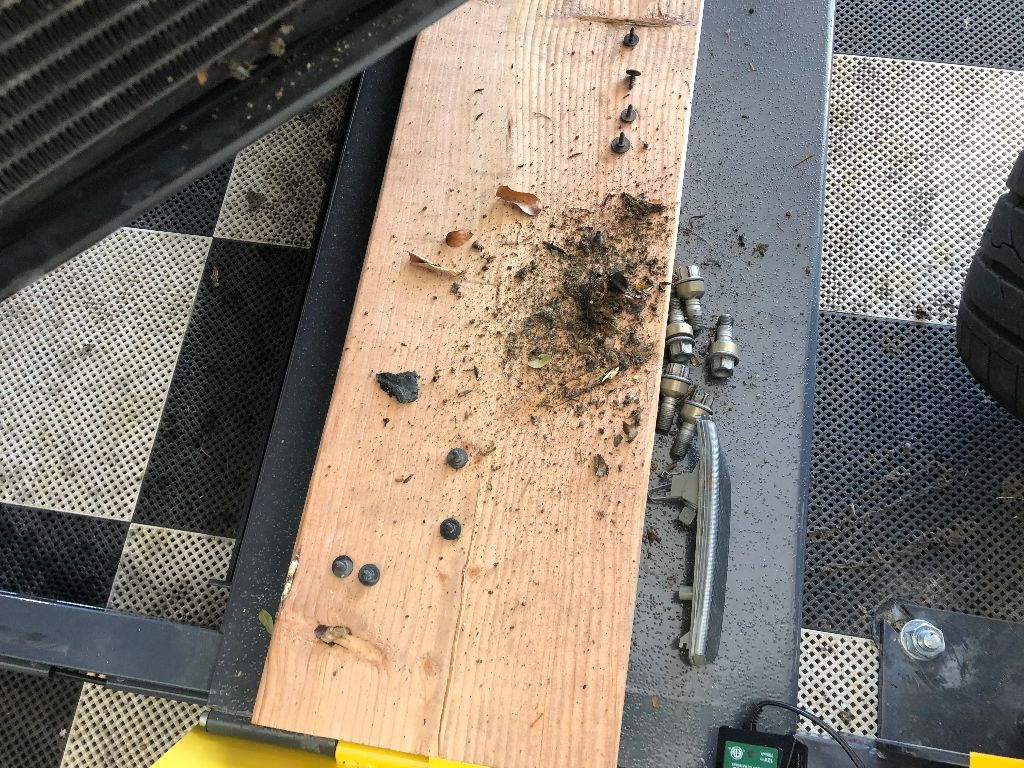
Doesn't look bad, but don't let that fool you. Remove the shrouds from the side radiators, there are 2 T25 torx screws. Pull the shrouds towards the center line of the car to remove them. Then you'll get to see all the garbage vacuumed up by your car
That's just what fell out when I removed the shroud!
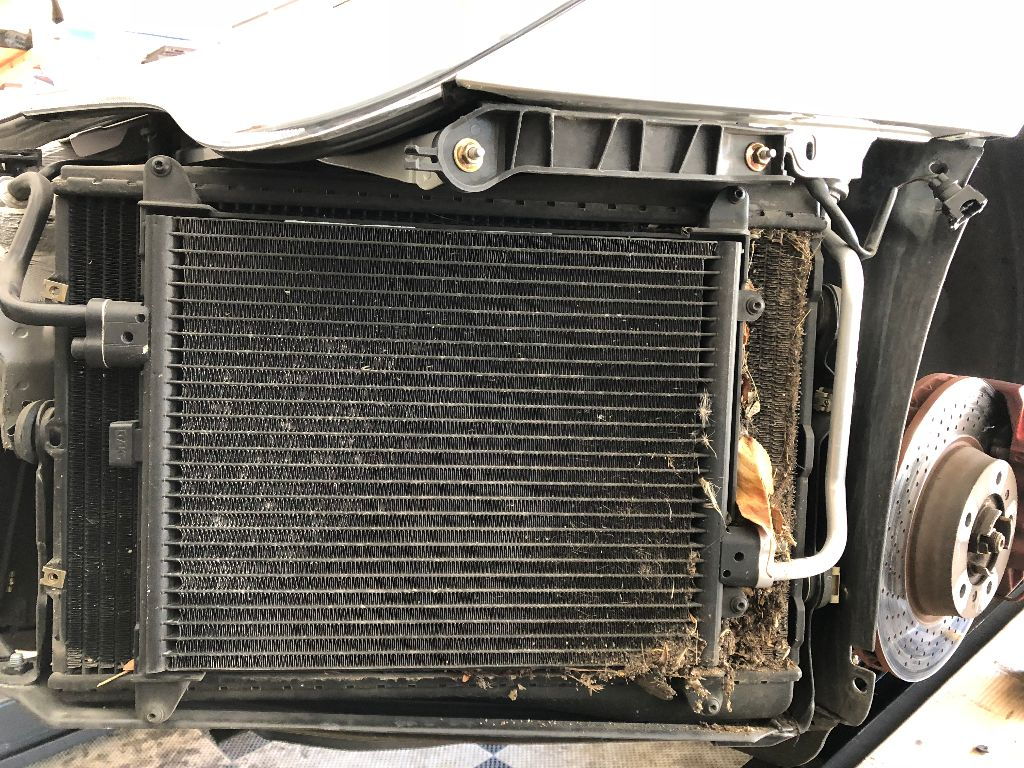
Vacuum up what you can, then remove the 4 T25 screws holding the AC condenser onto the front of the radiator. Gently pull the AC condenser a little bit away from the radiator. This is what you'll find, more debris!
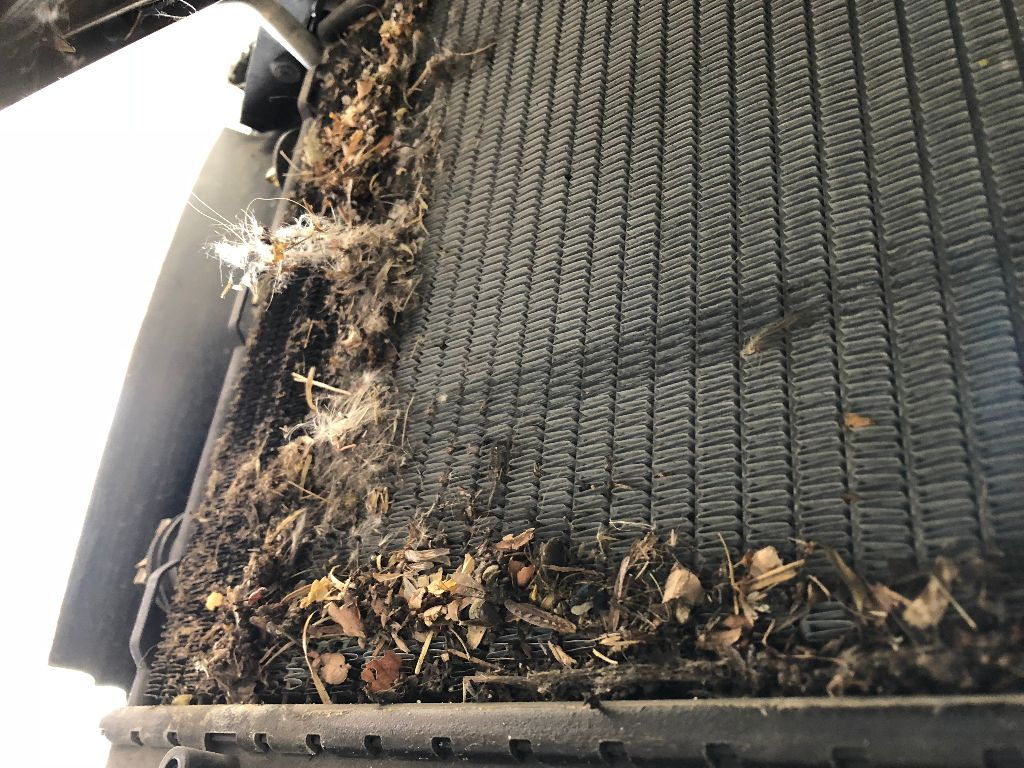
Vacuum all of that out, then as they say, reassembly is the reverse of removal!
Nicely done! Certainly not low hanging fruit, but it seems mighty satisfying...
In reply to badwaytolive :
Took me a little under 2 hours from tools out to tools cleaned up. So not too bad, something I don't need to do very often. Next job is spark plugs and coil packs. That'll be a decent bit of work!
So, since I sadly sold my moto and it looks like life will keep me from being able to ride one for some years I decided to sell my moto lift.
That led me to eyeing that bay of the garage and start measuring. I’m thinking that the 911 will fit there.
Yes, it does have a spot up on the lift. Yes I could leave it up there. Yes there’s no way a kiddo can damage it up there.
But! It being up on the lift is more of an impediment to use than expected. Having to move the suv, put the lift down, ramps down, pull off, ramps away, drive off then reverse the process when I get home makes me not want to take it out for a fun little drive.
So, plan is to park it in this garage level spot once the weather is nice in the spring and leave it there until the weather turns nasty in the late fall. It’ll sleep on the lift during the winter.
That’ll give me the space to put the snowblower there in the winter, etc.
So I moved stuff around, put unused bikes in the basement and used the garage bike rack for (boys!) bikes that are getting used. Gave me a nice garage spot for the 911....

So I decided that the wear on the Euro 996 GT3 seat cushions was bugging me too much and I ordered a new set of leathers to recover them from a Porsche vendor in Europe. I initially had thought they were OEM Porsche parts but turns out they're not, they're aftermarket. I was told this prior to ordering them but figured this place sells a bunch of Porsche stuff and it'd be a good match/fit, so I took a chance.
They showed up this past Tuesday and I put them on yesterday. Briefly. Then I took them off immediately. The grain of the leather is a decent match, but the color really isn't. My seats are a darker black. I also noticed that the new covers were much thinner as well as being larger than the stock ones. Stock is on the right below. See what I mean?

The vendor did agree to take them back for a refund but I'm out the shipping back to them as they wouldn't send me a call tag. Lesson learned, if its not OEM, deal with local vendors.
My next step is to take the cushions to my local auto upholstery place and see if they can make me covers in black alcantara. I figure that they won't be able to get the leather to match any better and my OCD will drive me nuts!
I just had a message from the trimmers who are (amongst other things) fitting my Function First shifter - they said that they can't get the shift pattern to align so that it's straight, does this sound familiar from your install? If so, how did you resolve it?
In reply to Dammit :
Yup. Tell them that the Allen head bolt that’s directly on top of the shifter shaft is meant to adjust the knob.
So you back out that bolt and that’s what you use to adjust the knob to get the shift pattern where you want it.
let me know if you need pics....
Bonza, thanks - I'll relay your sage advice and shall come back to you if that doesn't do the trick.
I got them to re-trim a Tequipment handbrake lever in alcantara, and make a shift boot to match - so all three contact points should now look the same, material wise (even though the wheel is actually suede, but when that gets ratty it'll be redone in alcantara as well).
Looks like your instructions worked - many thanks!

(Please forgive the terrible mobile phone camera used to take the picture, in the dark with flash).
In reply to Dammit :
Looking good!
I took my Euro GT3 seat cushions to my bodyshops interior guy. He's going to do alcantara covers for me. I need to drop him the seat, which I'll do this Friday. That way he can line up where the velcro should be to make sure they stick. This works out fine since I only have 1 seat in the car right now.
Drove the car a bunch this weekend, got caught out by weather on Saturday. Only supposed to be a 30% chance of rain but turned out raining the entire day plus snowing some. Think its getting to be time to put it up on the rack with Stabil in the tank, on the trickle charger and underneath the cover...
Besides the seat covers, I need to check it for boost leaks, replace the spark plugs and coil packs, then I'll probably install the tow hitch at the same time. Next spring I'll flush the brake fluid again, get an aggressive alignment and more than likely replace the 8 year old Sumitomo tires.
In reply to AnthonyGS :
Yup, that's the problem buying a garage queen car. Guy I bought this from drove it ~550 miles a year and owned it for 6 years. So he never bothered to replace the tires, or clean out the ducts, or flush the brake fluid, etc, etc.
I'll probably put a set of auto-x tires on the GT3 wheels, that way I can be lazy and not swap over for auto-x, plus they'll probably wear out in 3-4 years, which is fine. Not a whole lot of tire choices to fit this car tho, either Falken Azenis 615K or BFG Rival's.
Snowed last Sunday and its supposed to snow this Saturday. So I decided to call it for the season and put the car up on the rack.

I did go to a recommended local upholstery shop, he's made me the alcantara covers, I go pick them up tomorrow!
Meanwhile I got my coil packs and cabin air filter today, so tomorrow I hope to start replacing the spark plugs, coil packs and finally install the tow hitch I have.


Picked up the alcantara seat cushions/covers for my Euro GT3 seats today. They look awesome if I say so myself! Didn't find the time to get the spark plugs/coil packs/tow hitch done today. Luckily I have all off season to get that done, so I'm sure I'll find an open Friday soon....

Very nice.
I've had some issues with this Bendpak lift, regarding bad welds and quality control. Bendpak did take care of it and I do like the way the lift works. So I suppose alls well that ends well.
Well, had a little set back. I'm beginning to amass a small pile of parts to install on the 911, like the WillWood tow hitch, spark plugs and coil packs, and a set of bullet nose wheel studs.
The set back is I crashed on my mtn bike at the end of October and just found out yesterday that I broke my shoulder. So not only can't I ski/snowboard until I'm better, it's also a bad idea for me to be pulling bumper covers and wheels off the car too.
So I guess the 911 will just slumber underneath the car cover until my shoulder heals, which could take anywhere from 1-3 more months....
You'll need to log in to post.


