Rats. Seems like I'm stuck with what I've got, then. Have I ever mentioned how much I love wire wheels?

Got the crossmember cleaned up and ready to paint. It was covered in dirt and flaking paint before. The metal isn't perfect anywhere, but it cleaned up alright.

I love this stuff:

And the sorta, kinda finished product. Lots of bedliner and some black paint.

I bedlined the passenger's side inner fender as well, but for some reason the driver's side is rubber so that's going to have to stay as is!

Skervey
HalfDork
12/24/16 8:54 p.m.
Cleaning the bay on my RX7 was a huge motivation seeing a clean spot for the motor was awesome!
Here is another way guys got around the saw-bar.
just an idea to get you thinking.
That's probably at my ability level, but I'm not confident enough to do that just yet. I started out tonight thinking I'd be doing something productive. I pulled the lower intake off the engine (It's painted blue, and I really don't like how it would contrast with my very nice, clean upper intake. So, after failing to remove the paint with wire wheel and Airplane Paint Stripper, I pulled a spare lower intake out. The sensor ports are slightly different so I will be checking on the 2.3 forums if it'll still work the same (given the Megasquirt harness), but I ended up spending most of tonight cleaning up the casting leftovers/getting the aluminum cleaned up.
Uncleaned 'new' on left, Blue on right


And where I'm at cleaning the lower intake:


I have 1-2 more days of work before everything goes back away.
As I was putting everything away today, I ran across a bracket I had laying around. I've got some ideas but I think it will make a passenger side alternator mount a little bit more simple, just needing to fabricate a static bottom mount.

Here's where I could see it working out. Not sure if It's something I'll be able to squeeze around the lower radiator hose, but I'm hoping so.

The truck is back outside and tarped up. It will, in all likelihood, be several months before I can really get any work done on it. Counting down the months to being able to find my own garage..

Alright guys, I found my $130 store credit to the junkyard the other day and had some fun Friday afternoon and today.
Friday, I was looking for (and found) the passenger side mounting alternator bracket/alternator. Initial test fit shows heater lines in the way, so I may still have to do some creative bracketry design. Total cost: $40 in store credit.
Then, digging around with some buddies, came across a 1986/7 Chrysler Lebaron turbo convertible. We had time to take out head bolts, VC, Hood, and remove most accessories. But, time and access was tricky and we couldn't get the turbo out.
Went back this morning with a sawzall to chop the exhaust off, pulled the head, and had the turbo out in just over an hour. It's a Garrett, only designation on the front is A/R .42. If I can exchange hot sides/mounting flanges, I think I'd prefer to run this turbo. The car had under 100k on the clock, and there's basically no play at all. Both the T3 I have and the IHI have serious amounts of play (no way to check if it's in spec but noticeable) and unknown mileage so I'd prefer to run this one if I can swing it. Thoughts?
Total Cost? $77 in store credit. $7 left to go! I'm a happy man even if I have to sell it


What do you do when you want to see if you can use the Power Steering bracket for an alternator mount, but don't have the Ford Pulley removal tool?
You go to the shop on-campus and attack it with an angle grinder!


It's not much (and I don't know that the stock alternator will fit, diameter wise), but it was fun and that Power Steering pump/pulley setup wasn't going to get used anyway. On to the next attempt!
Using the waterjet in a different section of the shop, I started a template for engine mounts. As the Sharpie shows, many changes need to be made before transferring this to real/heavier metal. But, it's a start and I'm happy with that aspect.

Doug
So, I realized that although the Passenger alternator bracket was very nice to have, they traded for much more money than it would take to replace. So I went to work on Facebook and offered to trade for either a nicer valve cover (one of the ones with "script" on it) or a hydraulic bellhousing, and within a few hours I had set up a trade for a Hydraulic Bellhousing. I would be fine with the feel/effort of using a cable clutch, but given that everything is already in place for hydraulic this seemed easier. I'll still have to do some math to see what slave cylinder and length rod I'll need, but this is a step in the right direction.

Doing my best to check parts that I need off my list without having to pay too much for them! I still need: Engine mounts finished, Trans Mount, Alternator Bracketry, Water Hardlines cleaned up (I have no heater..), B.o.v, Wastegate Block off plate, mini-starter, and Clutch to run. Then, BMW Battery cables, Battery mounts made/welded to frame, remote terminals and a cutoff switch, and driveshaft worked on to drive. Then, floors patched some so that seat brackets can be made and welded in so I have somewhere to sit. Lots of learning ahead! Doug
After finding a piece of large angle iron I had forgotten about, I got back to work planning mounts. The passenger's side mount seems pretty simple, there are 3 bolt holes in the block relatively spaced out, and only one is recessed by .25". So I traced, Cadded, and yesterday cut the general shape. The angle started out as 4"x4", .25" thick. I haven't cleaned up any of the cuts or rust or gotten ready to drill yet. I attempted to run an FEA, but I really made an amateur attempt. Anyone who's good at that, I would love some input/feedback.
Edit: Removed the pictures here cause much changed later (after the great photobucket crash)
Continuing on in the quest for effective mounts, progress has been made! I began by taking apart my second spare block (luckily I have at least one everywhere I live) and setting up on a table to get it level. Then, I made a paper template, transferred to CAD, and used a laser cutter to cut the general shape and holes that I needed. I cut a second rectangle to use as the perpindicular piece, shown here. Once the glue set, I could check the level, eyeball what needed to change for where the holes were located in relation to each other, and redo the process. The passenger side only took two iterations, and the driver's side turned out the way I wanted the first time I cut the wood.
Passenger:

Driver:

The other benefit of the wood/countertop setup is I can check and attempt to match the mounting height on each side. I left a little extra on the driver's side intentionally.

Today, I took the driver's side mount to the waterjet with some of the 1/4" steel I had laying around. The steel began a little ugly, but it should work


Thanks to the on-campus machine shop, I made a lot of progress in cleaning up the 4x4" angle iron and getting sizes appropriate as well. Once I can decide on a final height for the mounts on the engine, It should be a simple matter of drilling the two holes in the right place. My goal is to just weld a few brackets to the frame, and use a puck like this as a mount: 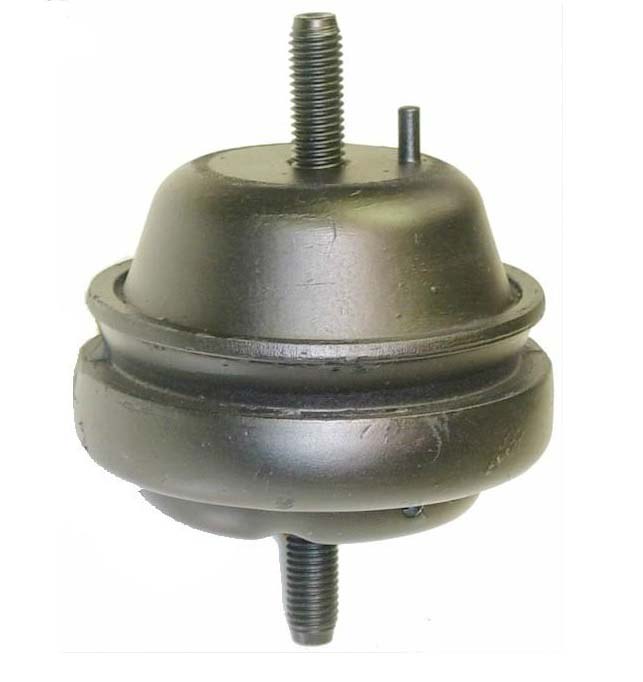
Looks good man! the cad drawings look sweet with the stress test. What are you going to school for?
Thanks! I've enjoyed the process so far. Looking forward to finishing the mounts.
I'm in school for mechanical engineering - If I could do this type of stuff for my classes all the time I'd be so happy. (I am getting extra credit for finishing these mounts - I signed up for the project to encourage me to get these done in a timely manner!)
I ended up ordering some biscuit style mounts today - I think these will be better for what I want, they look a little nicer, and they're still pretty cheap.

Alright, so I got the driver's side mount tack welded yesterday and mostly finish welded today. I cleaned up the welds some and have found a few areas to hit again before it's done.

Also, with the new mounts received, I went ahead and cut the "body side" mounts out of the same .25" steel angle. each section is about 3" wide and accomodates the puck nicely without much extra overhang. I think I'll still have to trim the ends of them off to fit between the frame rail/engine, but doing that and adding a gusset should prepare these to be welded on to the body.

In the next day or two I should be able to drill out the holes on the passenger side mount (not pictured here) and then I'll be ready to drill holes for the mount to sit with (based on some CAD drawings) and call it a day! Once I have the video of the overall preparation put together, I'll share it here.
Doug
Sweet you have a video of the build posses? Sweet! Im going to be doing videos ofmy next build witch should be soon!
I should soon. I can hopefully swing some extra credit for a class I'm in if the video turns out well. It'll mostly be pictures rolling together with a few clips of tools in use.
In lieu of mount updates, I bring to you something totally unrelated and potentially impossible. I've been considering what to do with gauges this whole time. I don't like or want to keep the stock gauge cluster. I would prefer if the replacements could look stock, but I obviously would like to have a tachometer, among other warning gauges.
I was at home today and realized that this Nissan gauge cluster might actually fit in my stock surround, given some trimming of course. The tach is huge (ideal), and not gaudy (ideal), and if that were to be all I used, there is lots of room left to add the other gauges I want, even If I had to trim some housings to do so. Any real work is a little ways off, but it got me excited to think about.
Doug


The ribbon even tells you what the signal is coming from!!

One of the gauges I know I want in there
Why not an autometer or speedhut quad gauge and tach combo, using an ebay hud for speedo?
Mainly for budget. I can't spend $4-600 on gauges, and I still need a wideband. I have several (boost, water temp, volts) laying around. I'm more comfortable going without a speedo/ with a Phone speedo for a while as this will probably never be a daily driver again.
Well, a brief update: Here's the video on the mounts being put together. They really aren't done, as they need gussets and paint, but this is good enough for now (and the video is due Tuesday...). I'll hope to get these done and ready to be fully mounted in the first few weeks of May.
https://www.youtube.com/embed/8YjDCwsqt6c
Rock On Dude. Looking great!

Well I'm popping home again this weekend to try and get the motor fit, and (at the very least) a place and idea for the trans mount. I grabbed this shot a week or two ago, though, and now I'm thinking I'll have to re-make motor mounts to have a straight, vibration free driveshaft.
P.S. - that's the second bullet hole on the passenger floorboard!

Here, it looks like the differential is offset to the passenger side. I'll be measuring based on the frame tomorrow (using a bar/meterstick across the frame and a plumb bob to make marks on the floor??)
If the differential
IS offset from the centerline, I'll have to redo the motor mounts. I could try to oval the holes, but the tools I need are only at school - it can't be a quick affair, unfortunately.
Other than this, I've been trying to practice Solidworks while I have access to it and get things drawn up. I've worked some on the gauge cluster (like I said above - I'll need a new one) and some on getting the transmission and tunnel drawn.
Slow progress is still progress, right?
Offset diff isn't a bad thing. Single piece driveshaft, or multiple? Basically you want the trans output shaft axis and diff input axis to be parallel, but a bit offset. Better for the bearings.
I was somewhat going off this thread Driveshaft Discussion.
I know that offset Vertically is okay, and I've been watching some videos on how to measure that. But the thread above made it seem like horizontally, they would need to be more or less "in-line". Stock was a 2 piece, and I'm hoping to be able to re-use it, at least partially (Explorer rear end at some point means I don't want to pay for 2 fully custom 1-piece driveshafts).
Edit: re-read the link, and the last few posts make it seem okay to have the offset, if a 2 piece shaft is used. I missed that before..
Well it's been a good 24 hours of work so far. Last night I got the transmission and my spare block mated together and manuevered "into place". I found several snags, and the block separator plate snagged on everything possible on the way in.
There were 2 main obstacles - the old engine mounts, frame side, kept the engine from being centered, and the transmission tunnel/frame brace kept the transmission from sliding as far back as it should and from being able to sit level and centered in the tunnel.
Tonight I went ahead and sliced/peeled back the transmission tunnel where the interference was, and cut out the engine mounts before getting too hot. 80* and humid in the garage while grinding gets old quick.
I'd like to get back out tonight and finish grinding down what's left of the engine mounts, or at least wire wheeling them so they aren't so sharp, and then try to re-fit the engine and transmission to see where everything ends up at. I was pleasantly surprised at how close to stock the shifter was - for whatever reason I expected it to be much further back.


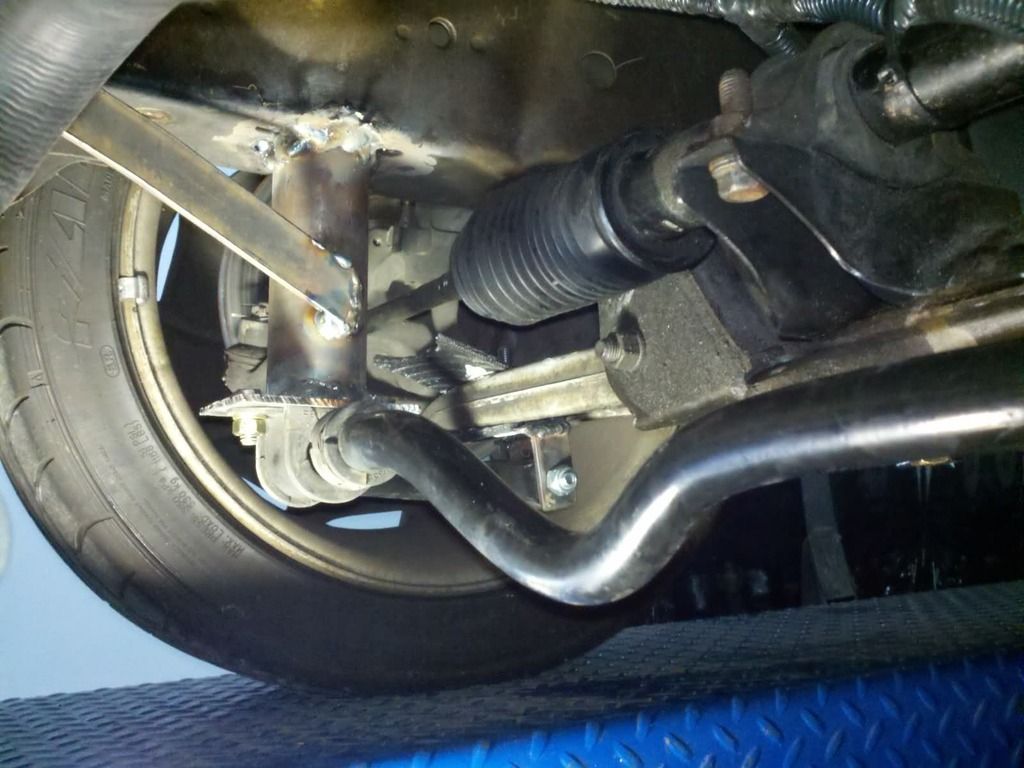
And the engine mounts (sorry for potato quality):

And Current:

Well, I have been active, if only a little. Last week I got the frame cross-brace chopped out enough that the transmission can hang pretty freely now. I also got an angle gauge in so that I can try to adequately measure driveline angles. Results below.
On the (sloped) ground: about 89*

On the Differential output Flange: About 83*

SO, if I'm not mistaken, the differential has an upward angle of about 6*.
At the moment, the tail end of the transmission needs to come down significantly. Hoping that in the next weekend or two I can get a little more time on it. Inching along..
These past few days have been pretty good for work. Managed to get the motor mounts tacked in place, and have some things figured out for the Transmission mount, too. Motor sits right at 0* side-side, too, which is good.


Hopefully in a few weeks I can report back with transmission mount, and from there the ball can start rolling much more quickly.


