So now you're probably asking yourself: "come on Mezz, you've got wheels, tires, coilovers, and a running engine with only nuisance leaks. When are you going to drive it?!"
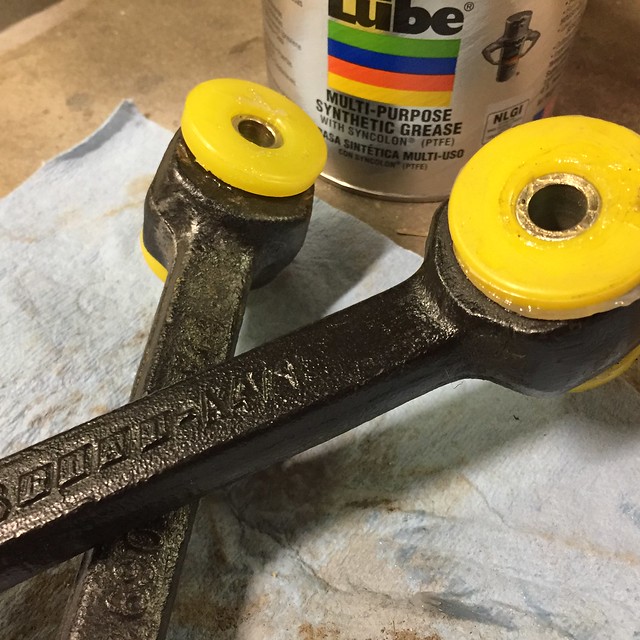
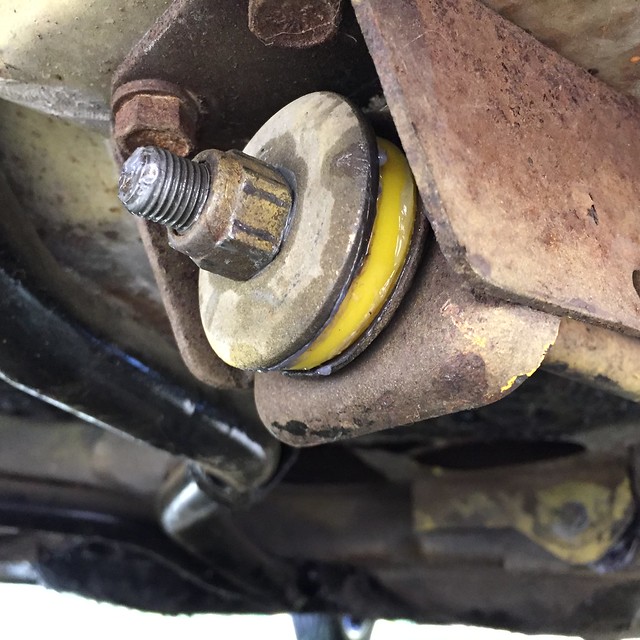
Soon grasshopper. Soon. I drove the car around the block a year or two ago with blown shocks and some splashy bushings, so I wanted the next drive to be closer to the final product so I could compare with that (not so) fresh memory. I wanted to get these poly bushings installed. Front is all installed poly now. Rear has two pressed in steel sleeved bushings on each lower control arm, but I haven't installed those yet. New lower control arms, with bushings:
Radius rods:
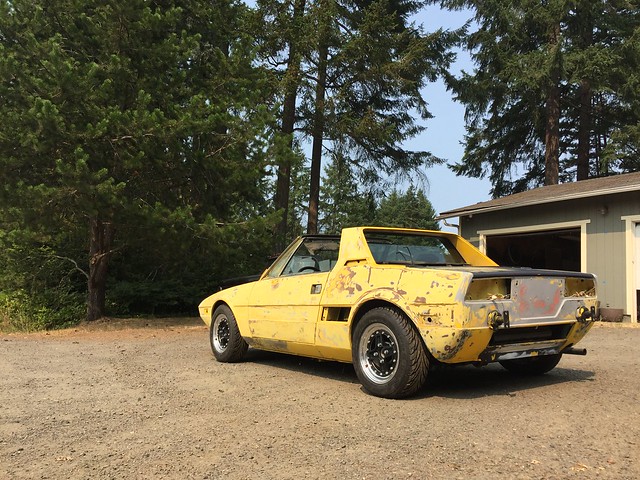
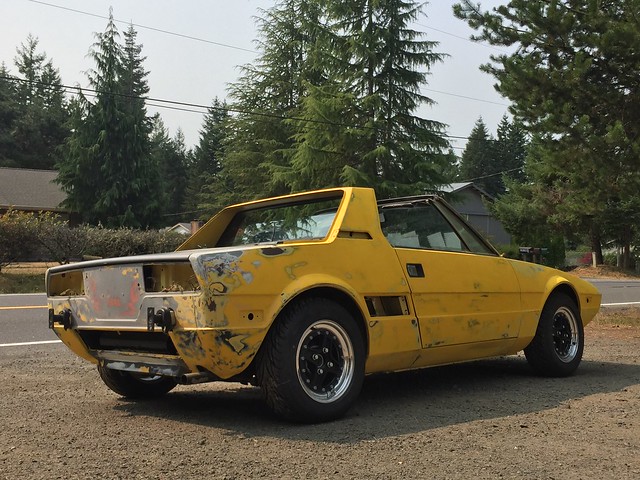
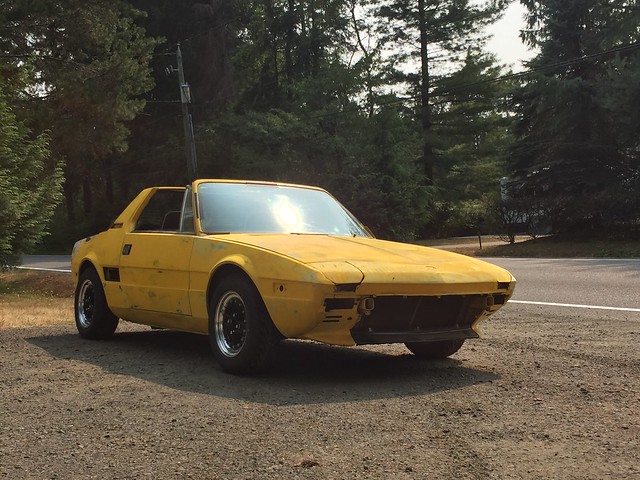
And then this happened: back on its wheels for the first time in a year or two...
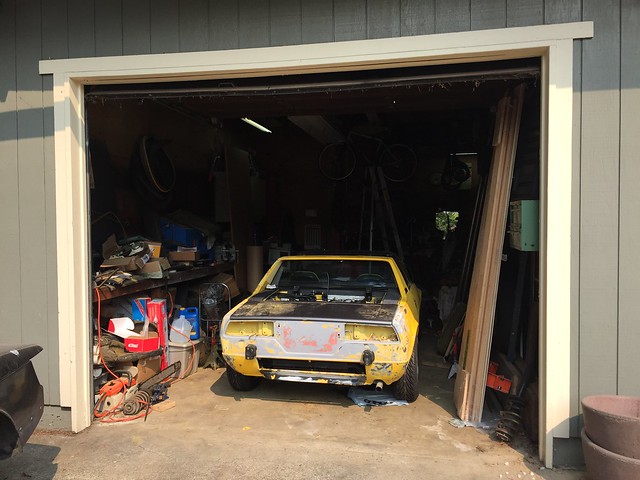
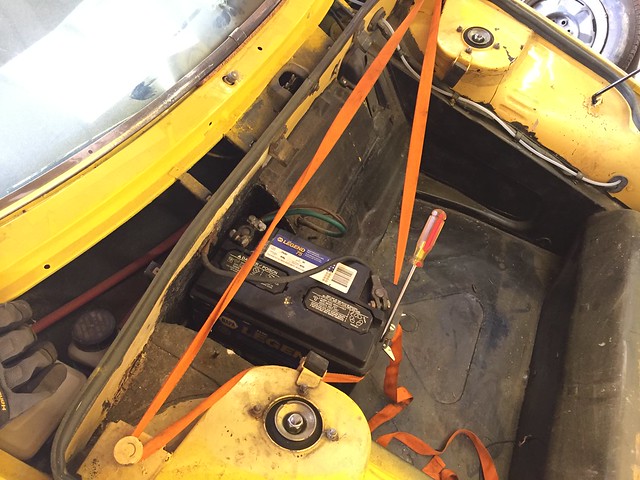
It was at this point that it became a thrash to get it out for a short drive. Borrowed an ill-fitting battery from the Mercedes that's in the middle of a headgasket replacement:
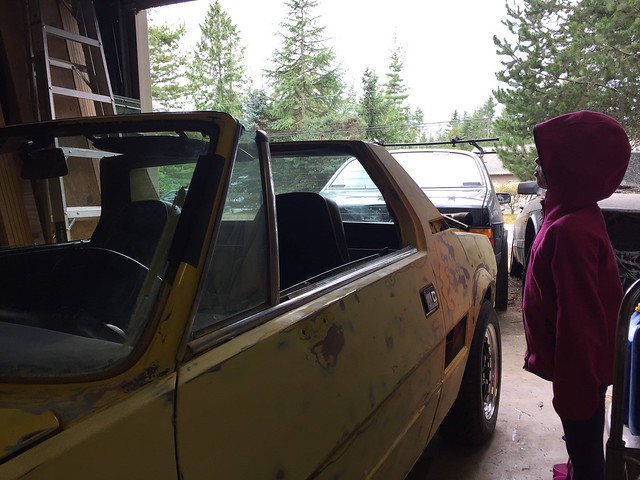
My (now six year old) daughter made sure I told everyone how she is taller than the car.
Fired her up and backed out of the garage.
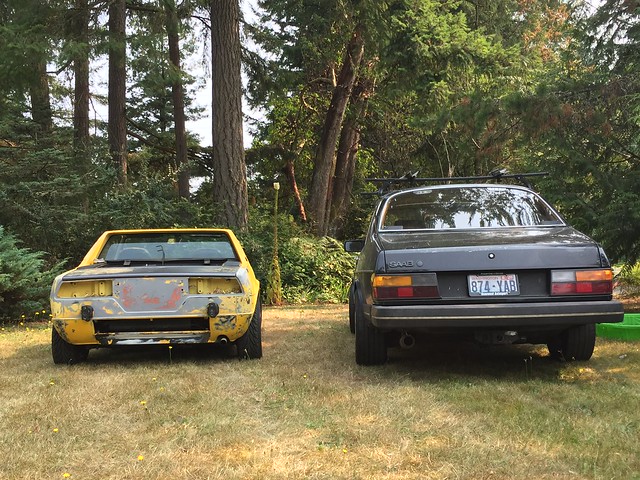
And for scale, here it is next to a Classic SAAB 900, which is already a small car by comparison to most modern cars. The front of both cars are in line.

The video is really short (sorry about that), but I was already in a car without any form of signals or licensing, screwing with taking video while rowing through the gears. I think you'll see that it is all worth it though. Listen to that snarly little beast! 

https://www.youtube.com/embed/hviFF5dG0m4
After a lap or two around the rural block, I came in with a list of things it needed:
-
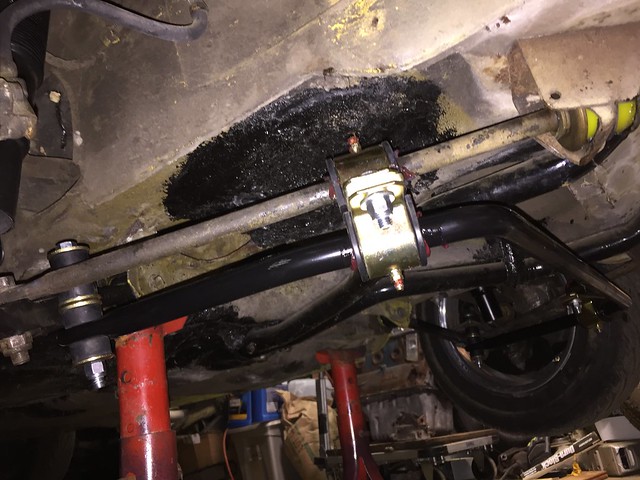
Front sway bar. Car handled really nicely, but there was a good deal of body roll. Good thing I had already bought one. Took about 30 minutes to install:
-
-
Cooling fan wasn't coming on, but the car didn't overheat as long as there was some airflow over the radiator. This probably had something to do with the fuse box dangling in the driver's footwell. I poured over the electrical diagrams and quickly found out I was right: the fuse wasn't being fed, because the supply had gotten unplugged. I let it idle for 45 minutes yesterday and the fan cycled nicely.
-
Idle is really high - 2000 RPM, but I can get it to drop to where it is supposed to be if I manually push on the idle adjustment screw that rests against the water choke...not sure if there is supposed to be another spring there or not. Not too worried about this because of my new plan for the car (below)
-
Seat belts or other form of restraint: need to do something about this before I do much more testing. Signals too...not sure I want to reinstall them before I'm done prepping for paint though.
-
Drivers rear brake caliper was dragging again/still. I pulled the wedges last night and ran a file across them, the caliper, and the mounting frame to make sure there were no burrs causing them to bind. Applied lots of anti-seize paste, so we'll see if that resolved it.
The Current Plan
I've talked about engine swaps earlier in the thread, and have decided that Lampredi deserves a fair shake: hence the hill climb motor. I intend to go with standalone fuel injection by way of a twin DCOE style manifold and use a commercially available header from Vick's or Allison. To make this happen, I need to do the following things:
-
make a cam position sensor. This one is pretty easy since there is a removable plate at the non-driven end of the cam where some models drove their distributors.
-
Acquire a five speed from a later X. This old 4 speed isn't known to be very sturdy, but more importantly it is geared really low: I'm turning 4250 RPM at 60 MPH.  This is great for acceleration, but I think the top speed is something between 85 and 95 MPH.
-
Make a crank position sensor mount
-
Make and install a toothed wheel on the crank pulley
-
Acquire a FI fuel tank from an injected X1/9. My carb'd tank doesn't have any gravity fed ports at the bottom of the tank.
-
Create a fuel system, including: pump, filter, rail(s), regulator, and return
-
Build engine wire harness. This will be easy to build right on the loose motor in the garage.
The remaining sensors are pretty easy (coolant temp, intake air temp, WBO2). I suppose I'll have to make a bracket to hold coils, but that is an easy item too.
I want to use all the above tasks as filler for when I get bored of paint prep. Ideal case: I get the paint work completed around the same time I get the new engine done.
Now all I need is to not travel so much! 
Do a little research, I think there is some fit issues, to convert to the 5 Speed. I forget what has to be done, but I don't think it is a direct fit. Maybe it is only a fit issue for some of the front drive cars, sorry I don't recall exactly. On the Xweb forum there are stories of other that have set up different types of fuel injection, so there should be some examples.
Looks like great progress on a fun car, now I need to get back to working on mine... I always seem to have to many other priorities...
TED_fiestaHP wrote:
Do a little research, I think there is some fit issues, to convert to the 5 Speed. I forget what has to be done, but I don't think it is a direct fit. Maybe it is only a fit issue for some of the front drive cars, sorry I don't recall exactly. On the Xweb forum there are stories of other that have set up different types of fuel injection, so there should be some examples.
Looks like great progress on a fun car, now I need to get back to working on mine... I always seem to have to many other priorities...
Passenger side control arm has a notch to clear the trans. Grab one off of a 5 speed parts car or call up Midwest Bayless, they'll have used ones available.
linky
I believe the driver side frame rail needs a notch also.
Thanks for the input guys - you're right about the control arm and clearances. I believe I will also need the starter from a five speed as they changed from the four speed.
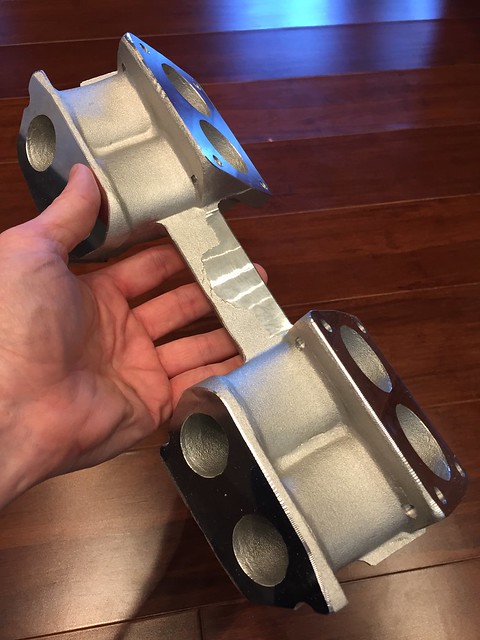
Craig, I'm pretty sure I still have some of the Motronic pieces from the Yugo I parted out. It had a crank mounted skip tooth wheel of some sort (60-2 if I do recall) with a VR sensor in a nifty cast aluminum bracket and a cam driven distributor. I'll try to locate it this afternoon. If it's of any use to you, consider it yours.
In reply to Burrito:
Oh hell yes! I'd definitely be interested in that stuff! Let me know when you dig it up - FB message is probably an easy way to make contact. I'm SO excited!
I just spent the morning looking at different Jenvey throttle options - I've got some motorcycle ITBs here in my shop, but since my time is limited, I know I need to look at more ready to go options.
DCOE and DCNF manifolds are both available, and I'm leaning toward the DCNF since I can easily go up in the engine bay, but going straight back (like with the DCOE) would likely mean cutting a good deal of steel out of the car to make room. DCNF have similar port spacing to the cylinder head too, which is a bit better for flow than the much wider-set DCOE. Twin DCNF are down draft and would look like this:

Here is what DCOEs look like on an X1/9 - you can see that they extend into the trunk, which is a mod I'm not too keen on.

They have some super skinny DCOE throttles (30mm long!) that might make it work without cutting, but it would be pretty tight to get air filters in there, and never mind that it is all sitting right on top of the exhaust header.

In reply to Mezzanine:
Also, you'll lose what little low end torque you have with short air horns/filters.
Ideally, you'll want much, much longer air horns to help balance the power curve, so DCNF's would work better for that (plus they just look fracking cool poking up from the engine cover.)
There's some interesting air flow issues behind the rear window and engine cover, so you may need to plan on some scoops or air flaps (like the 1st gen MR2 did).
DCNF's will likely interfere with the rain tray on the bottom of the engine cover. I had the "low" cover on my '74 and the tray was removed entirely to clear the carbs. Not sure if your '77 with the taller cover will have a problem but keep it in mind as a possibility.
In reply to mblommel:
Many people remove the rain trays to improve cooling in the engine bay and remove another rust point. Of course this only really works if you drive the car in nice weather.
I took the inner rain tray out of mine and trimmed the gutters down before reinstalling, to allow more cooling and still retain some of the rain protection.

JoeTR6
HalfDork
8/17/17 1:31 p.m.
I was considering those Jenvey throttles for a TR6. There's not a lot of room between DCOE Webers and the fender arch, so I wanted to minimize the fuel injection throttle thickness. Otherwise, they really cramp the air horns and air box.
The downdrafts do look cool on an X1/9.
I can definitely make the dual DCNFs clear the engine cover with some selective trimming of the rain tray if I stick to short velocity stacks...but what's the fun of that? The only DCNF stacks I've found so far are 40mm or 50mm tall. Since they have a flat flange to mate with the carb or throttle, I can easily make spacers. Once everything is up and running (some time from now), I'll get it on the dyno and test different velocity stack lengths to see what is optimum. I'm not afraid of having 8" stacks poking out of the engine cover if it comes to that - I'll still put a box over them to manage air filtration.
Here's an example of a homebrew airbox for what looks like a set of DCNFs:

I could draw air from one of the side-body air intakes behind the drivers door instead of putting a filter right in the hot engine bay.
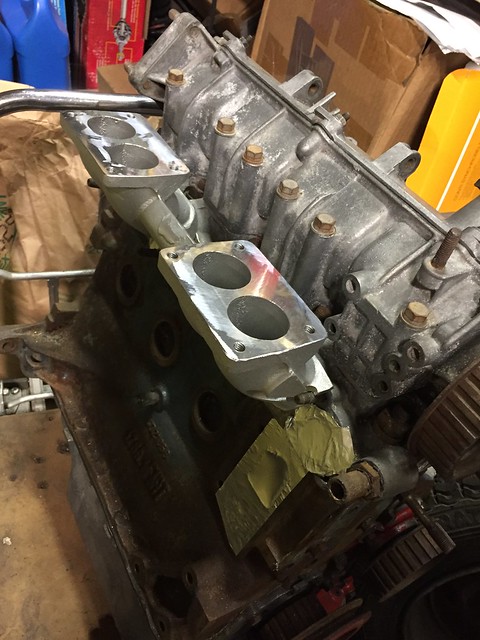
Look what the UPS man brought me!
Fits great...now to get the rest of the stuff to make this work.
I do covet Jenvey's forced induction bonnet for throttle bodies. Not sure it's worth $700, but it's still a good looking piece!
In reply to Stefan:
Yeah, I've been looking at lots of filtration options. At first I'll just put some socks or a pipercross/ITG style foam filter over the horns, but when I get to do some dyno testing then I can figure out what I gain and lose with longer than stock stacks. Then I can make some decisions about what trade-off I want to live with and get a proper airbox together. I'm really leaning toward ducting it to the driver's side side scoop.
Shouldn't be too hard to build or repurpose an air filter box for the driver's side air scoop to feed and then subsequently feed the throttle bodies.
Something like the air box used on the old 1984-1987 Chrysler Turbo cars. The air inlet comes in along the side of the box with the outlet at the top rear with a 3" outlet with a smooth 45 degree hose bend.

I’m back on the road this week, but I’m trying hard not to let it break my stride with all the progress I’ve had on the car recently.
Last week I posted a WTB on the Xweb forum for a five speed transmission, flywheel, and a FI fuel tank. Lucky for me, a longstanding member came through with a generous offer on a five speed that needs a bit of work. Rodger has two X1/9, and one is getting an engine swap to a Honday K20, so he wouldn’t be needing the trans or flywheel.
Friday I was able to cut out of work early and head to his house, a bit over an hour away to the south of me. I don’t have pics because I was too busy drooling. Not only does Rodger have a beautiful X1/9 in the late stages of a Honda K20 swap, he also has the 1978 X1/9 that he BOUGHT NEW in very tidy condition.
I’ll post some pics of the transaxle when I get home – it is fully disassembled, so this thread will soon venture in to the transaxle rebuild process.
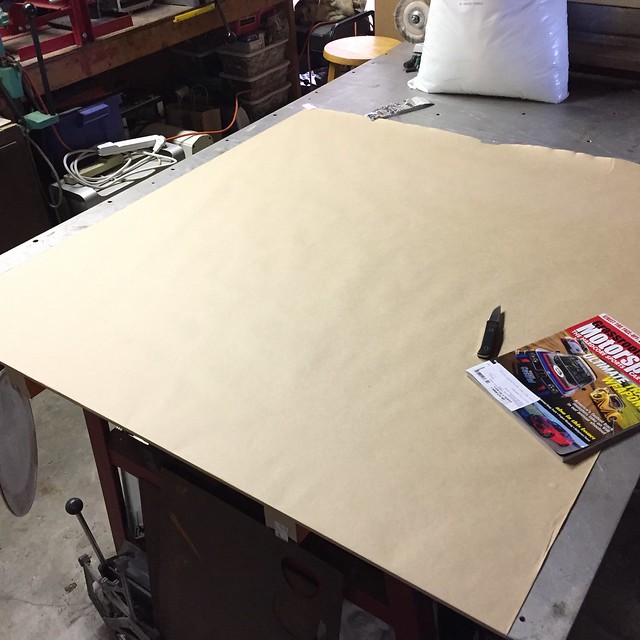
Major milestones at my house this week - I finally finished the head gasket replacement on my wife's car that took far longer than I care to admit. I mention that here only because it means all the parts are finally off of my work bench and I can get started on another Fiat related project!
For posterity, here is my clean work table:
Now I can add a five speed transmission. Only one problem with this transmission: it came in pieces. Lots of pieces.
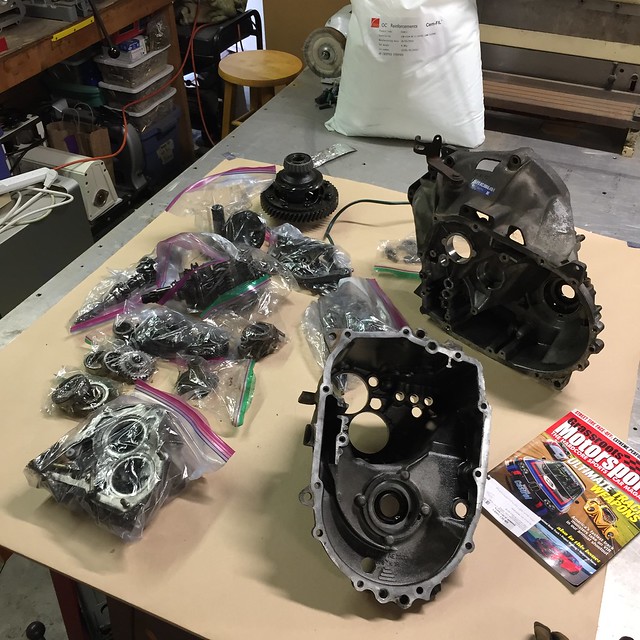
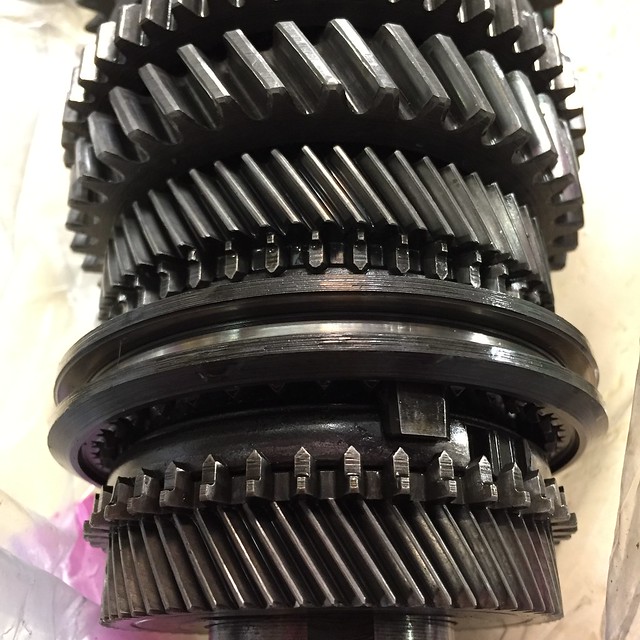
Ok, maybe that isn't the only problem...it needs some rebuilding. Here's the travesty formerly known as fifth gear:

The rest of the gear cluster is in pretty good shape. Might need to replace a few syncros and perhaps reverse.
Someone was in this transmission before. Looks like they used bathtub caulk to seal up the case. 

Transmissions are fun, as long as you aren't rushed!
I'm just gonna go ahead and live vicariously through this wonderful thread... I am not in a place where I can do a sporty car just yet. Yours looks amazing!
Mezzanine said:
Look what the UPS man brought me!
Fits great...now to get the rest of the stuff to make this work.
May I suggest you consider a Remflex intake/header gasket when you plan on installing that permanently? They are solid graphite that is 1/8" thick and really helped with sealing up small leaks.
http://catalog.remflex.com/FIAT_MANIFOLD_HEADER_GASKET_p/37-001.htm
http://catalog.remflex.com/category_s/154.htm
The horrible paper gaskets that are usually come in the gasket kits are just sad.
EDIT: I don't work for Remflex
Why yes mblommel, you may suggest it! In fact, thanks very much for the suggestion - the paper gasket I just put in a few weeks ago never properly sealed and there's a little coolant leaking from the intake manifold interface to the head.
I'll pick one up for sure.

Mezzanine said:
Why yes mblommel, you may suggest it! In fact, thanks very much for the suggestion - the paper gasket I just put in a few weeks ago never properly sealed and there's a little coolant leaking from the intake manifold interface to the head.
I'll pick one up for sure.
I had the same intake. Since there are no coolant passages in the intake the best thing to do is tap those coolant holes in the face of the head and install some plugs with some thread sealant. I can't remember what size thread it is but the holes in the head are the correct size for tapping with an SAE thread. (If I'm remembering all this correctly). I'm sure somebody on Xweb can give you the details. The Remflex gasket was a real problem solver for me with exhaust and vacuum leaks. The low torque of the bolts along with them sharing duties on the intake exhaust can make it really challenging to not end up with some sort of leak. I also ended up face milling the intake and exhaust flanges to make them perfectly flat. You may want to put a straight edge on both of yours and see how much they are deformed with a feeler gauge.