


Thunder stealing 101:

Sorry, buddy!

Thunder stealing 101:
Sorry, buddy!

Careful Burrito - if you post behind-the-scenes stuff here they might catch onto our illicit love.
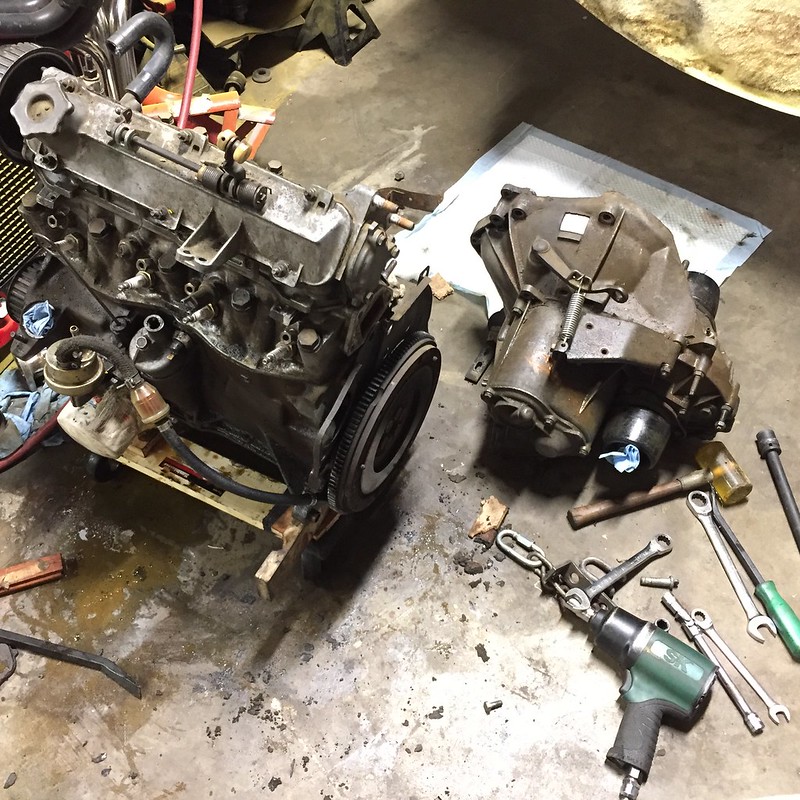
Steps to remove a X1/9 engine:
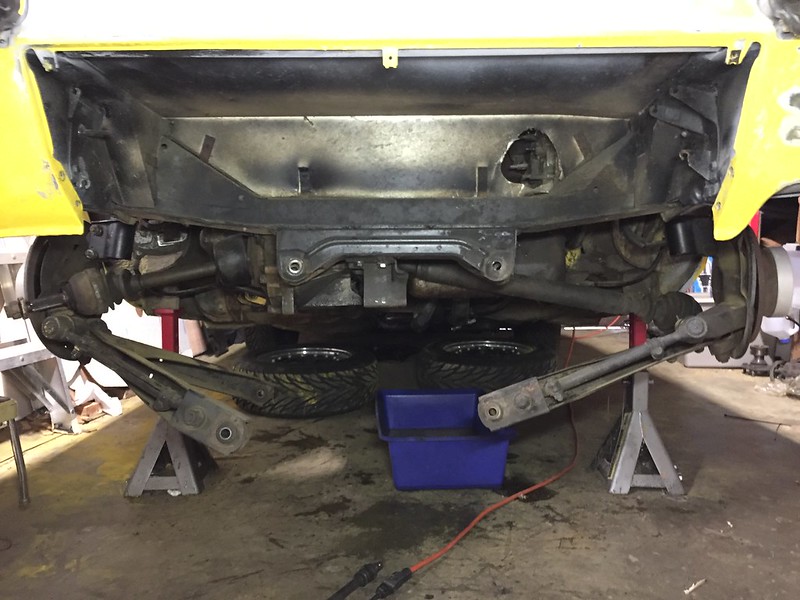
Robbie was right - these assemblies weigh a ton. Lots of opportunity for improvement here.
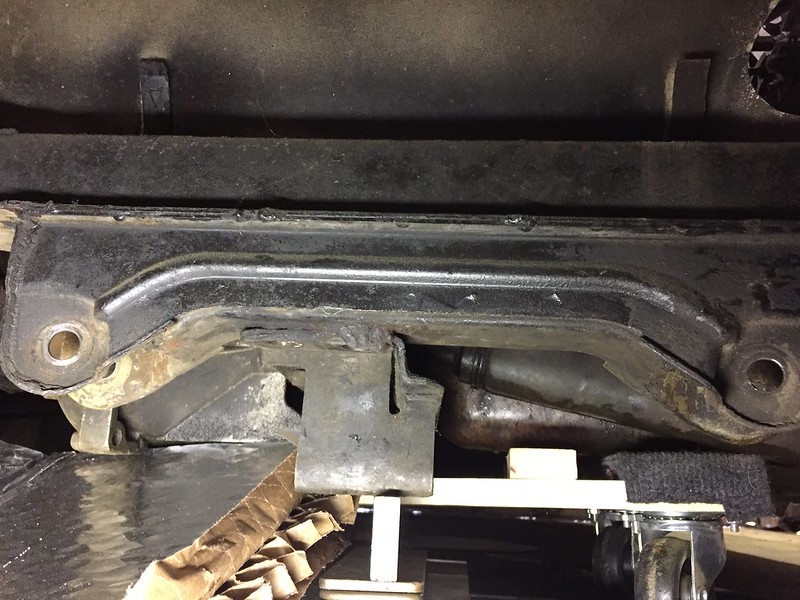
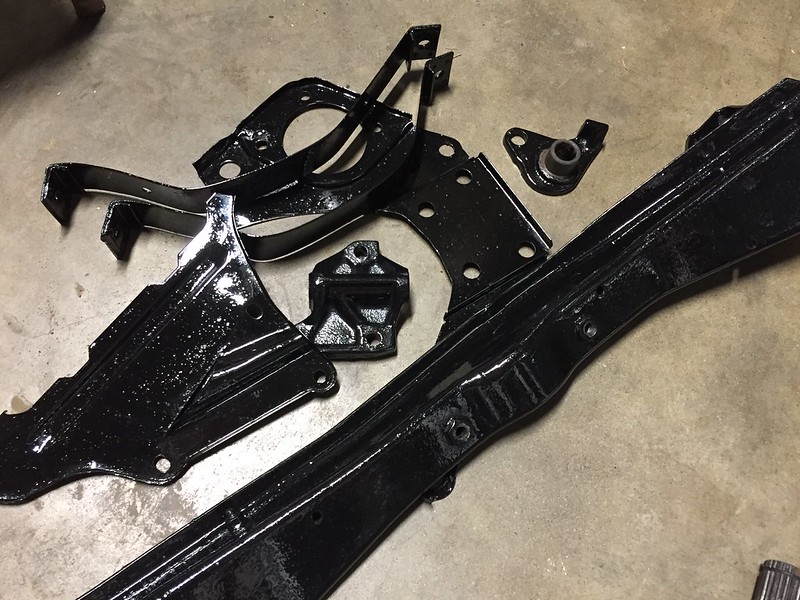
3. drop the whole car down so the engine is resting on a cheap HF dolly. Unbolt the motor mounts and the subframe
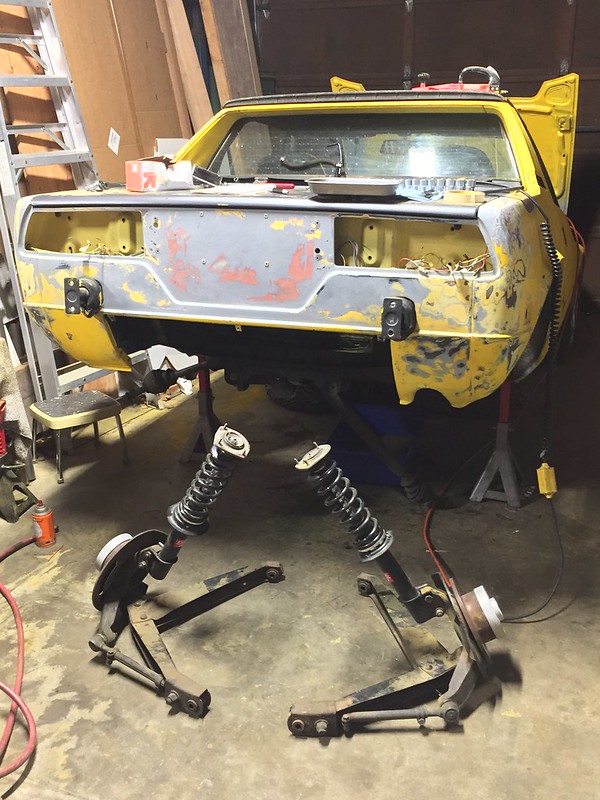
4. Discover that some PO had badly welded the subframe to the car. Cut those E36 M3ty welds off and then lift the car off of the engine (center of pic you can see the booger weld).
Lift the car ridiculously high up to get clearance. Slide it out through the wheel well so you don't have to raise the car another 8".
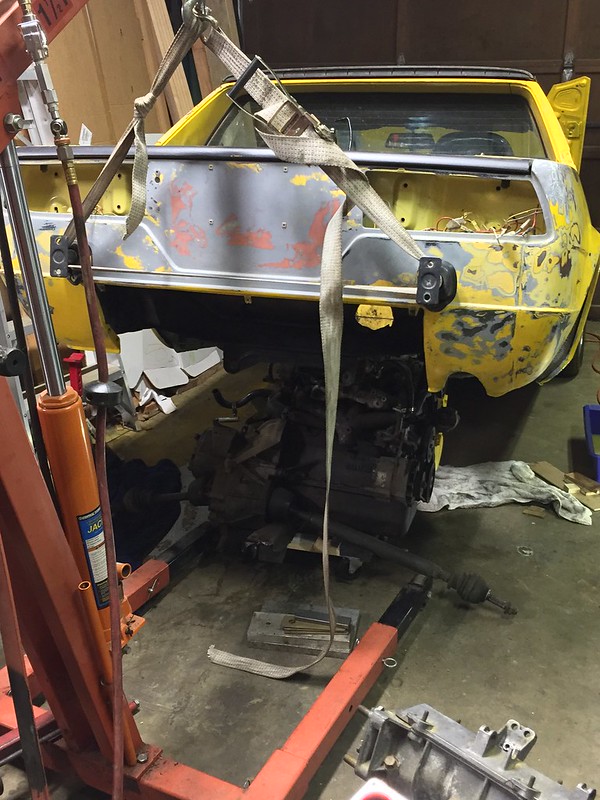
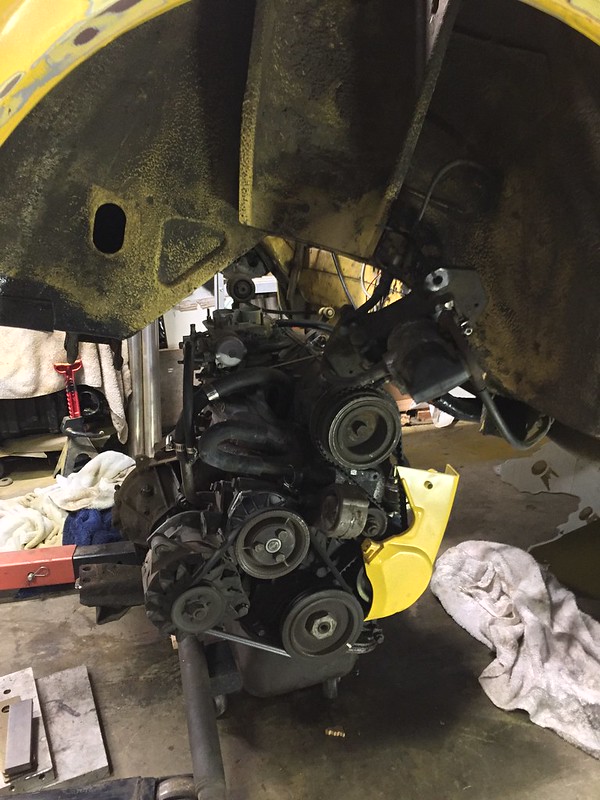
It was a remarkably easy engine removal. For such a small car with tight packaging, it sure is easy to work on.
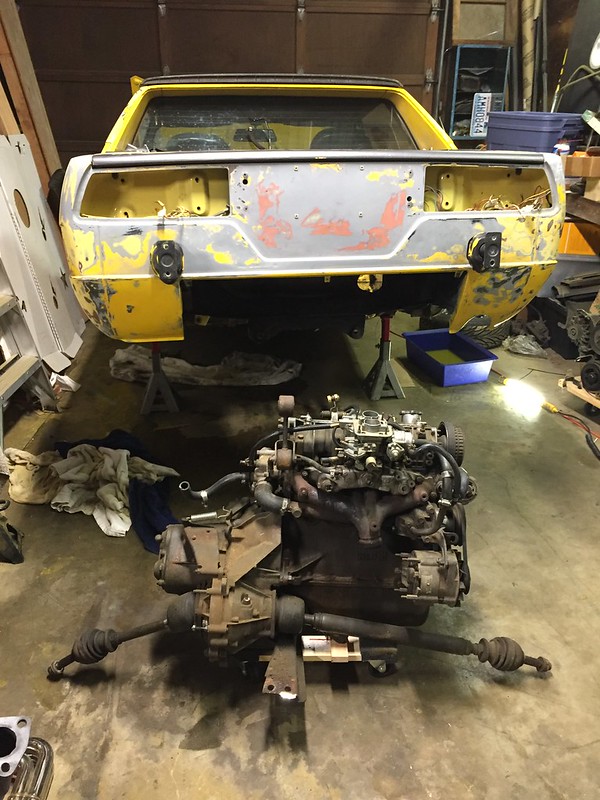
While the car was airborne, I dropped the fuel tank. Since it lives vertically behind the driver, the car has to be way up in the air to drop it down. Good thing I opted to swap it. The old tank had taken a beating a few times in its life and the inside was a little rusty in places.
Here it is swimming in the slop of coolant and oil that spills everywhere in an engine removal.
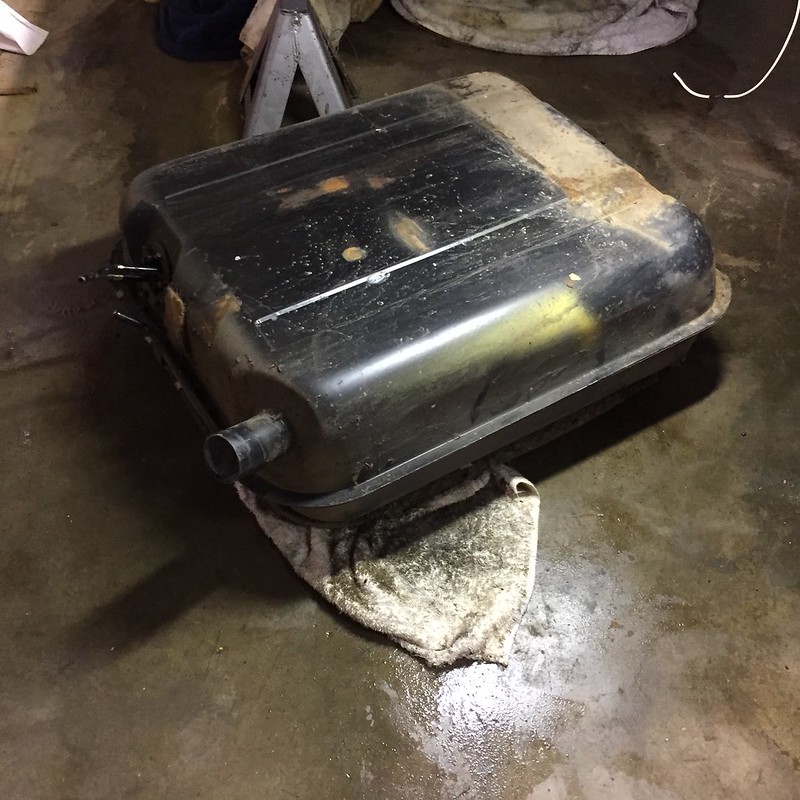
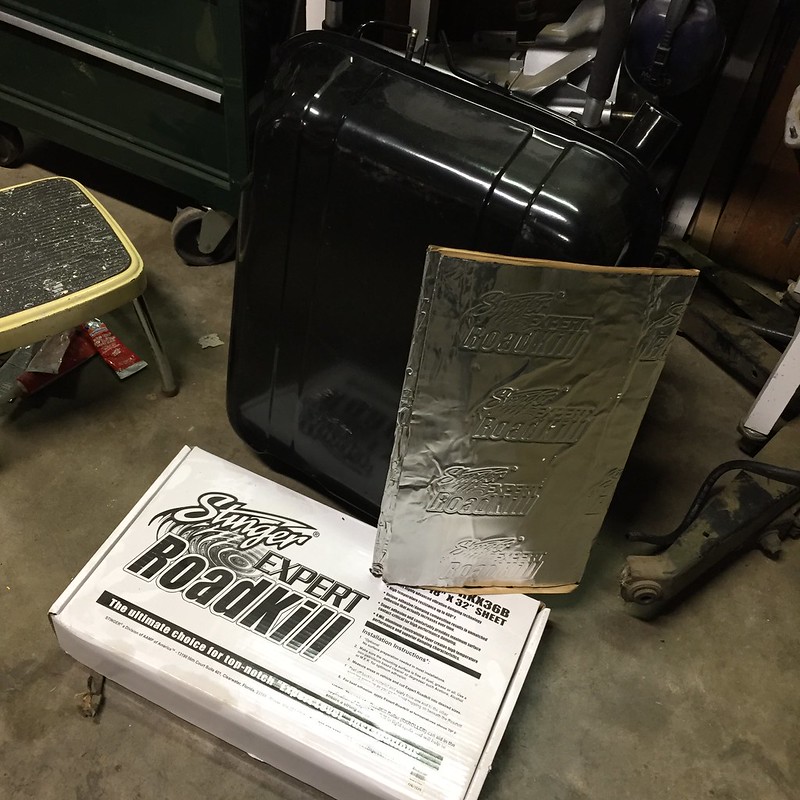
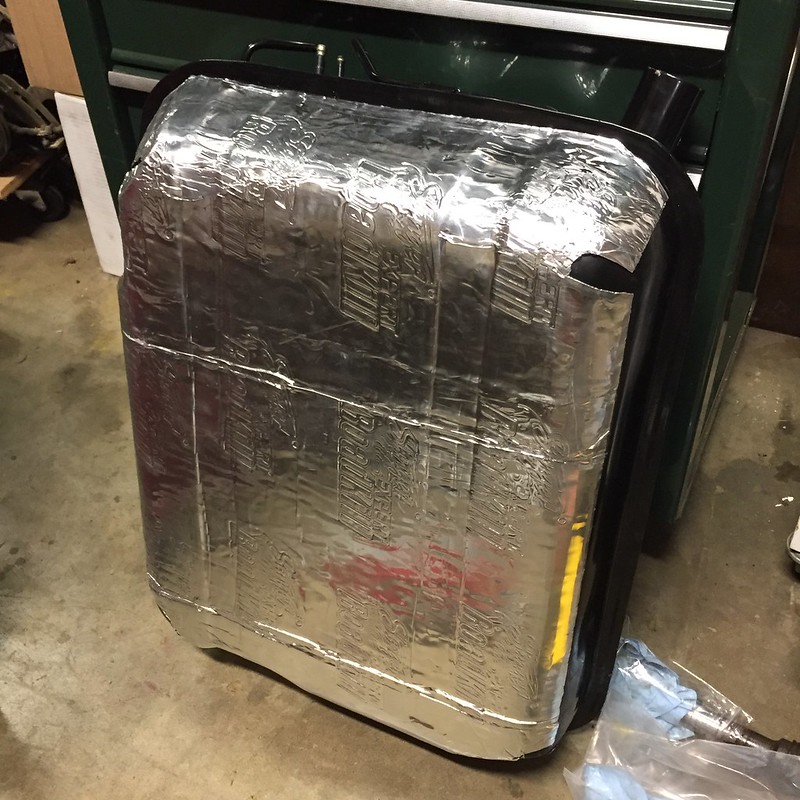
Old tank had some insulation on the passenger compartment side to keep it from rattling around in its cubby. Old insulation was toast, so I dug out this box of sound deading mat I've had for ever.
Not sure how necessary this was, but I don't mind the minor weight penalty to prevent the tank from flopping around.
Level sender was reinstalled and it's ready to go back into the car.

It'll keep heat away from the gas too, always a plus.

I dunno how they weigh so much. And you don't even have the brake calipers on!

Mezzanine said:
Robbie was right - these assemblies weigh a ton. Lots of opportunity for improvement here.
I left my struts attached to the car, but had the axles thru the hubs still(bolted flanges at teh trans FTW!). Definitely not light units.
What sort of seat adapters do you have there to run 2.5" springs on your struts?
In reply to gumby :
They're an older iteration of the Vicks coilovers - the fronts are dedicated coilovers, the rears are just some slip on aluminum spring seats and tops. No adjustability. I picked them up very cheap. The shocks are just KYBs, but they'll suit fine for now.
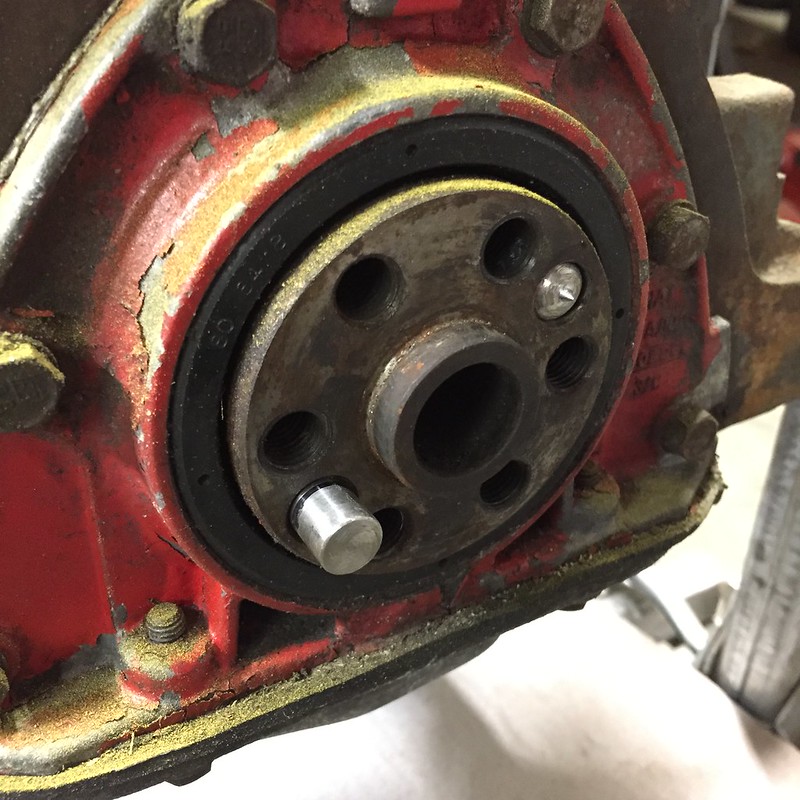
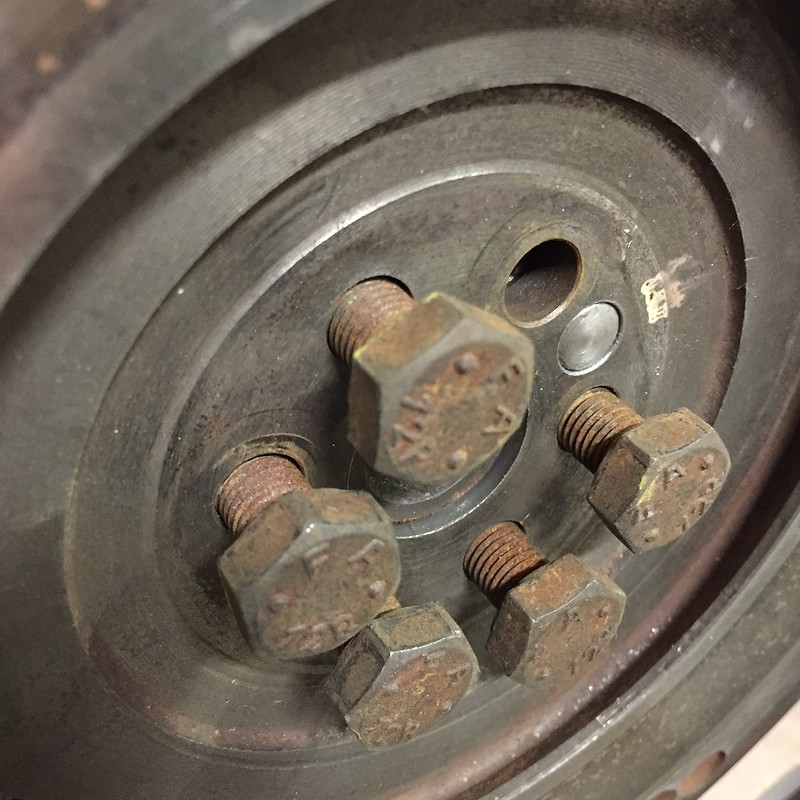
Interesting quirk of the Lampredi engine: it's about as balanced as a washing machine with a brick in it, and has a curious habit of shearing flywheel bolts. This really only happens in tuned engines, but with no harmonic damper on the engine combined with a high rev range means it often shears the six bolts or just tears the center out of the flywheel. Weird, right?
The solution is to dowel pin the flywheel. The crank is pre-drilled for dowels, but the factory never drilled the flywheels. I turned down some drill rod to 10mm to fit. This stuff was not the happiest stuff to machine, but it worked well enough.
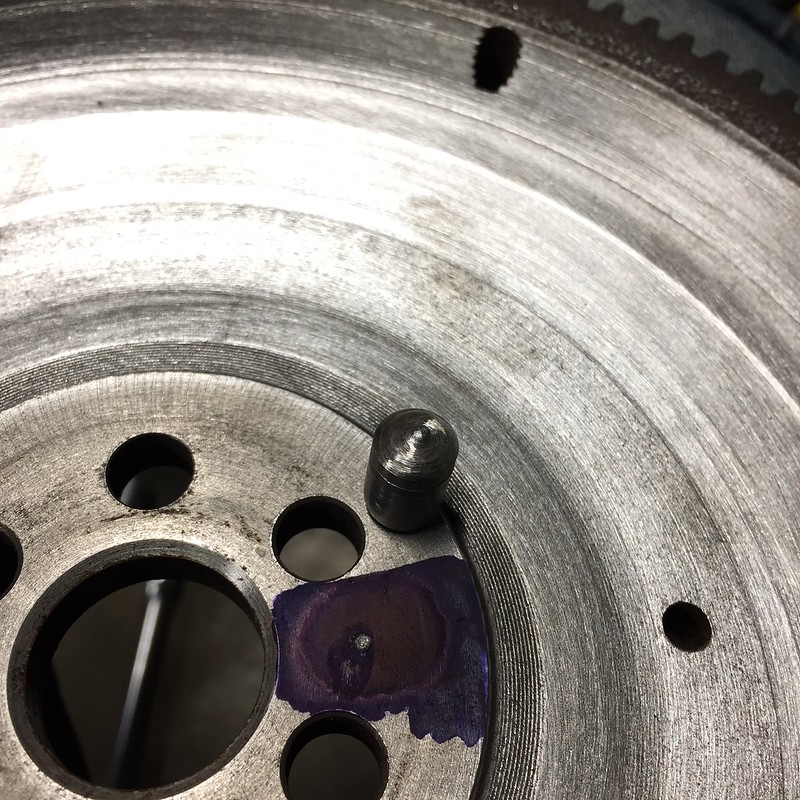
I'm not much of a machinist and doing a detailed layout on the flywheel made me nervous. So I just made a transfer punch to do my layout for me. You can see it in the right hole in this pic:
Take the dowel out, bolt the flywheel up carefully and let the little point on the transfer punch mark the flywheel.
Here's the mark:
When my 10mm drill bit arrives I'll get the flywheel drilled and mounted up. Then the flywheel and clutch stuff will get balanced and mounted up.
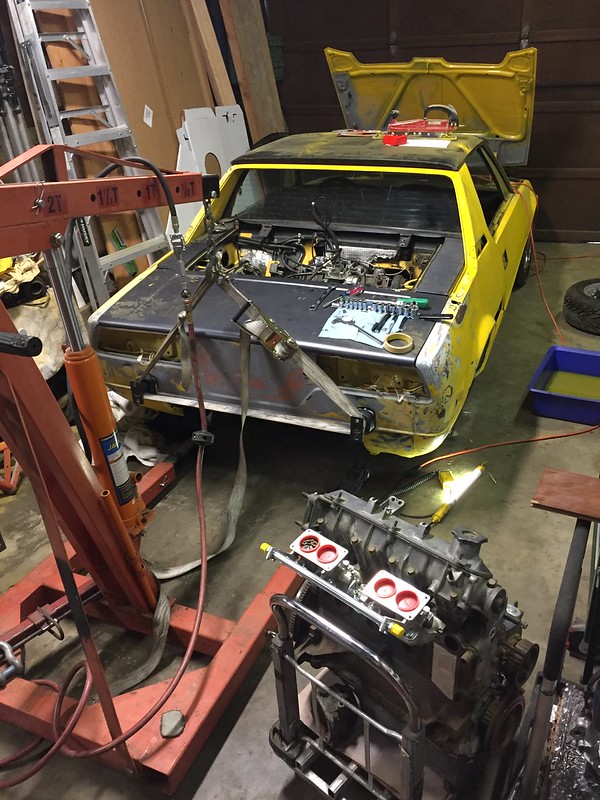
Had to strip the old engine down a bit to get some tin/gingerbread/window-dressing needed to go on the new engine.
Made a mess on the floor. The clutch (not pictured) was nearly new! Too bad I'm going over to the 1500 clutch.
Got all the tin scrubbed before I left for Canada for the week.

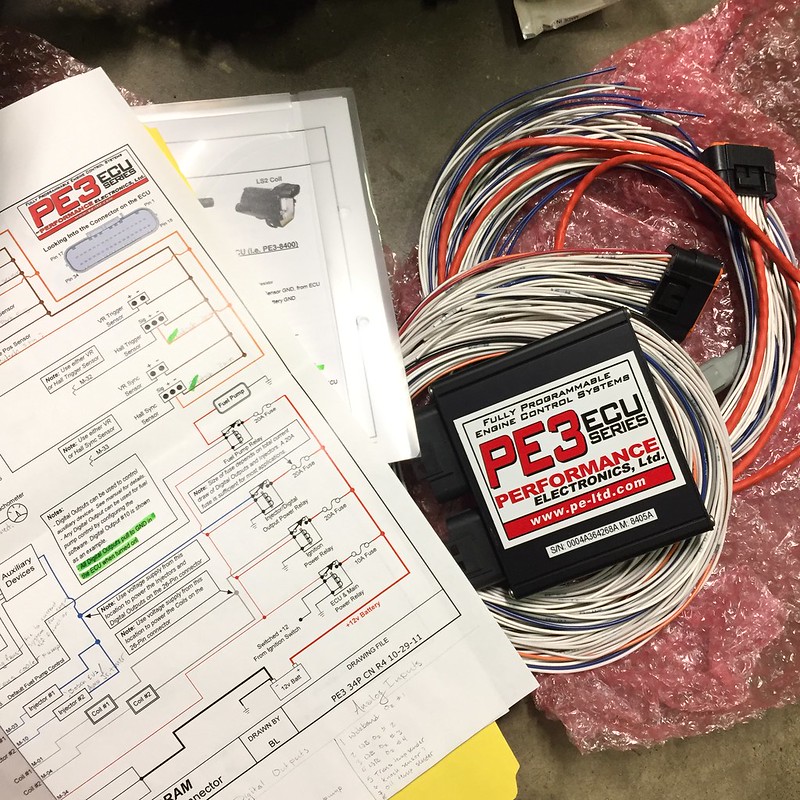
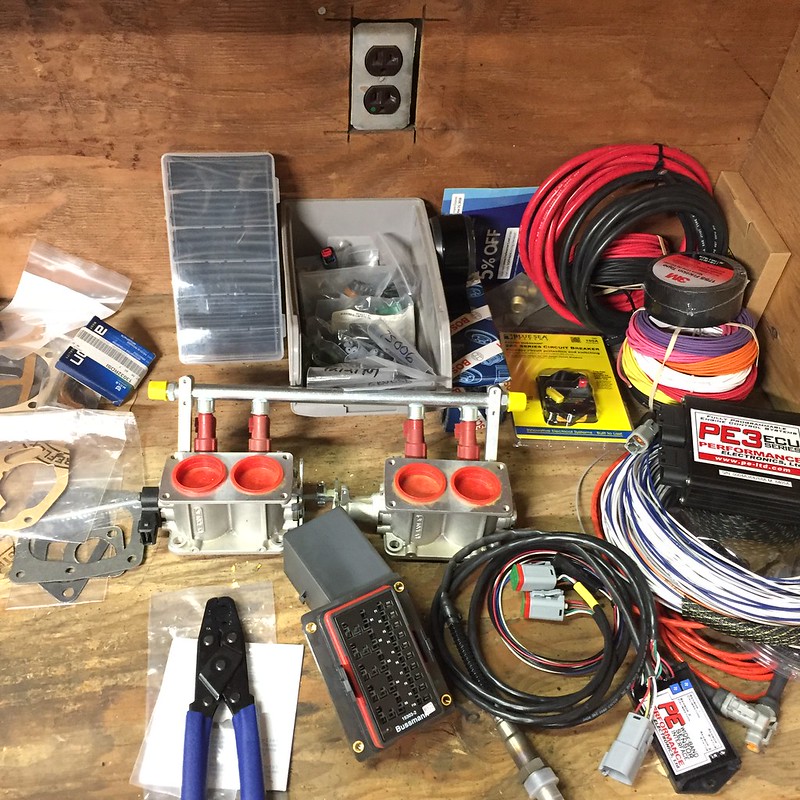
Probably won't get these painted before Burrito gets here next week...but I'm thinking we'll spend part of the day screwing around with the engine position sensors and maybe some of the ten thousand other tasks needing completion while he is here. Might not be putting the new engine in this week, but the motivation is high to continue. I've been dreaming of wiring for days now. Teaser:
I am still stupid excited to come and hang out! 9 more days!

Ooooh wiring schematics fantastically fun reading for me. So when is this wiring party going on and if possible are other hands welcome to join in?
Brad, are you local? I'd love to have you out sometime over the next few weeks if you want in on a wiring party. Burrito and I have plans aside from just Fiat love, so making it a group event might not fit this time around. A Clockwork suggested coming out sometime too - maybe we're due for a work party like maschinenbau's recent challenge car prep weekend?

In reply to Mezzanine :
His profile says “Sammamish, WA”
In reply to Stefan :
Why you so smart like that? All over here clicking on profiles where people make info like that public and stuff? ![]()
Stefan, I know fatherhood limits free time, but any chance you'd road trip up here sometime? You can bring the whole fam - we're friendly like that.
In reply to Mezzanine :
Yeah well, you know us computer nerds....always with the clicking :)
I do have a birthday coming up next month and a trip to the Museum of Flight/MoPop, etc. could find it including a side trip to Casa de Mezzanine. I’ll chat with the wife and see what might work.

Wow... I've been missing a lot because I never check my watchlist. This comment will ensure that all subsequent commenting will go noticed by me (since I check "your posts" quite often). Apparently there has been some amazing E36 M3 going on in my absence! ![]()
Flywheel is finished up:

Nice snug fit.
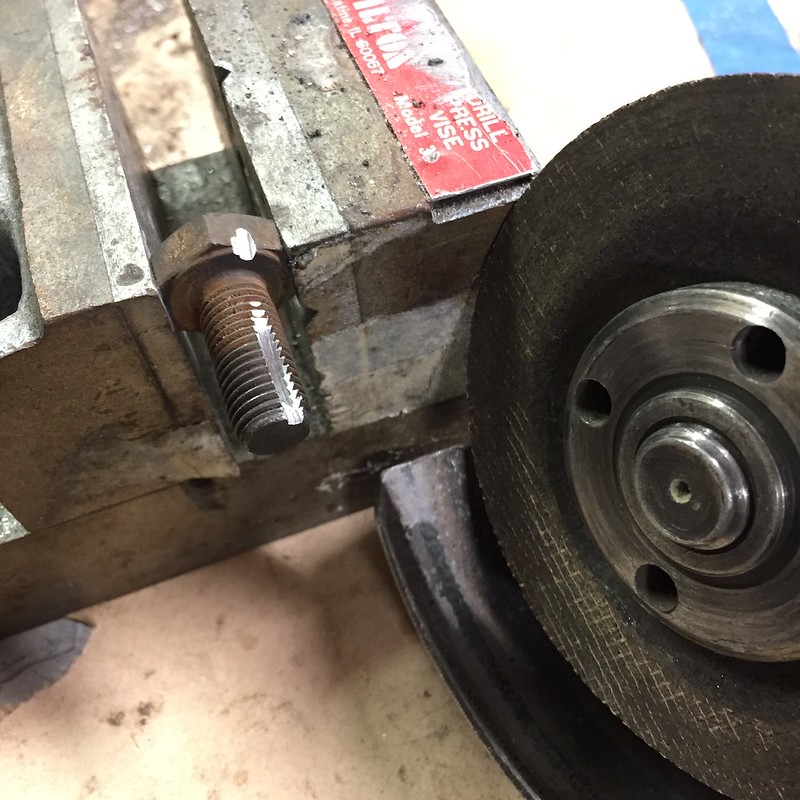
Slotted one of the old bolts to help clean the crank threads:
Flywheel balancing quandry...I was pretty panicked yesterday because I couldn't find a machine shop ANYWHERE near me that can balance my flywheel. Basically the only surviving machine shops around here are "small block assemblers" as I call them. No actual machinists on staff anywhere. ![]()
Managed to find another shop that confirmed they can balance a flywheel with a 1" center bore. Just a 45 minute drive away! ![]() Sounds like Burrito and I won't be putting the engine in on Thursday, but there's still plenty of work for us to do.
Sounds like Burrito and I won't be putting the engine in on Thursday, but there's still plenty of work for us to do.
Additional prep this week includes cleaning up the engine bay. Old insulation was skuzzy to say the least, and years of grime needed some attention. Before photo:
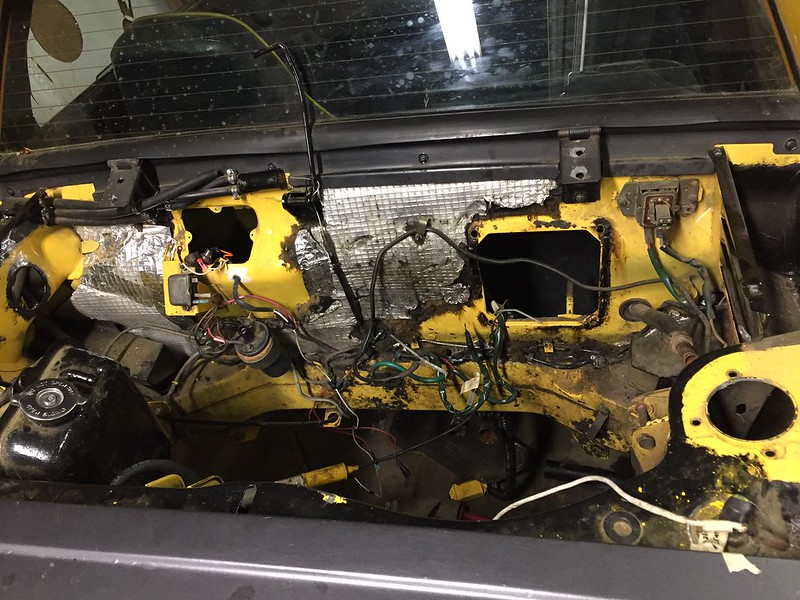
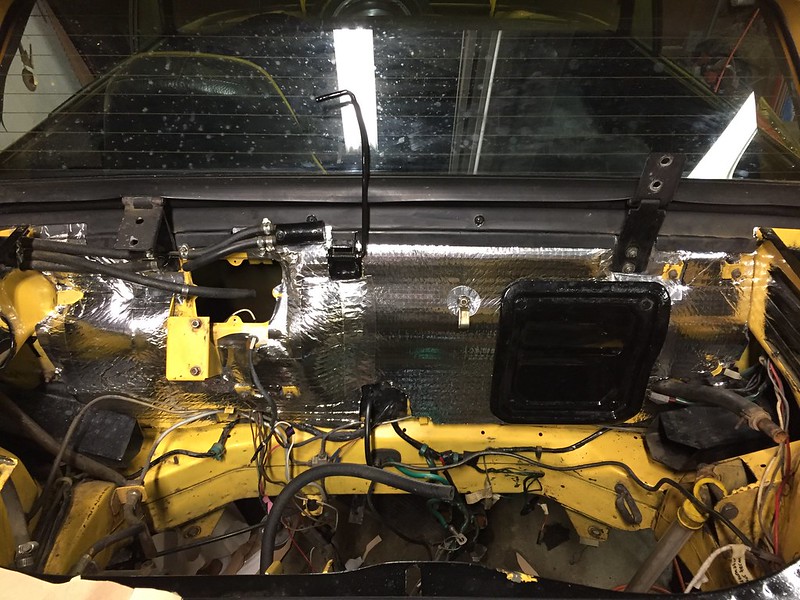
Clean:
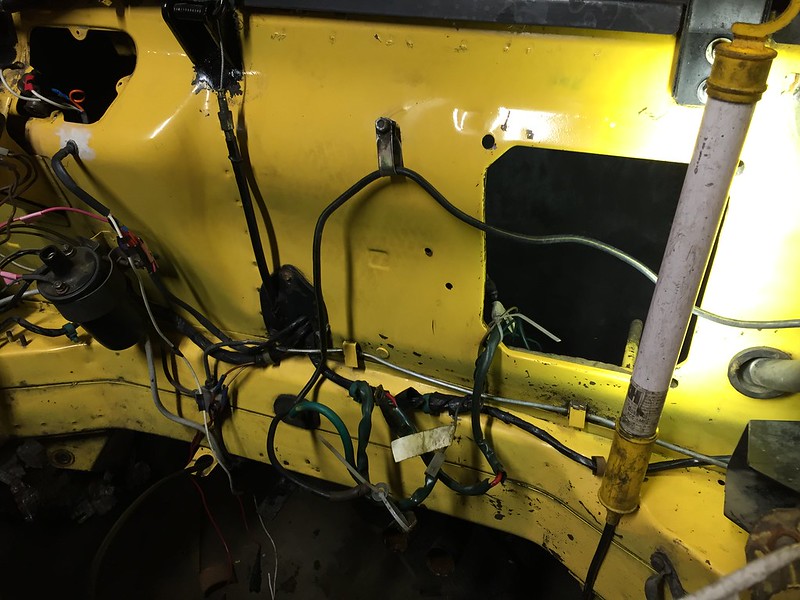
The wires are a mess...and I feel like redoing some of it to make it neater. The starter solenoid gets that GIANT metal bracket on the left of the fuel tank, and I'm thinking about rewiring it into my new power distribution panel. After some pattern making, I got insulation applied:
I've got most of the parts I need for the wiring work here now.
Slapped some POR15 on a few parts.
I hung the new engine on the engine stand and pulled the oil pan for a quick inspection. Everything is visually clean and in order. Do you guys think I should pull a bearing cap or two and take some clearance measurements? Or button it up and go for it?
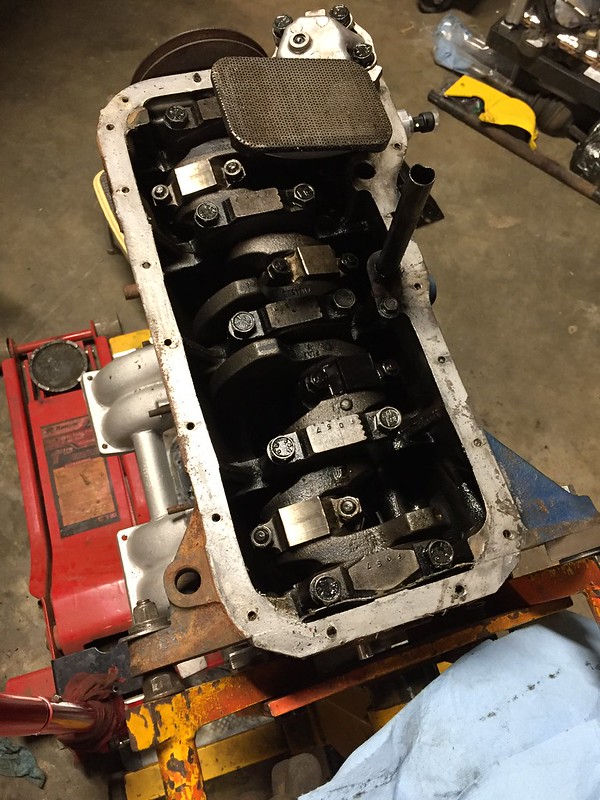
I suppose I should add the engine details as a refresher: I bought it second hand. It was a motor used for occasional hill climbs, autocross, and some road use. Supposedly has about 15k miles on it. Kobenschmidt high compression pistons, Midwest Bayless P&P'd head, FAZA 40/80 cam.
If it's been run I'd leave it.

Robbie said:If it's been run I'd leave it.
My thoughts too!
I love it when people agree/validate me. ![]()
Thanks for the input!
x3(or is it x4 including yourself?) If it has been run, I would be more likely to just toss it in. It never hurts to pull a cap or two if you have time, to make sure it isn't eating itself, but I wouldn't sweat the clearances too much at this point.
Mine had not been fired post rebuild, and I didn't know who did the work. I am glad I spent the time to double check things.
Slotting that bolt to clean those threads is pure genius!!!!!!
Why oh why did I never think of that one???
You'll need to log in to post.


