


In reply to captainawesome :
Hope you feel better and can keep chugging away!

In reply to captainawesome :
Hope you feel better and can keep chugging away!

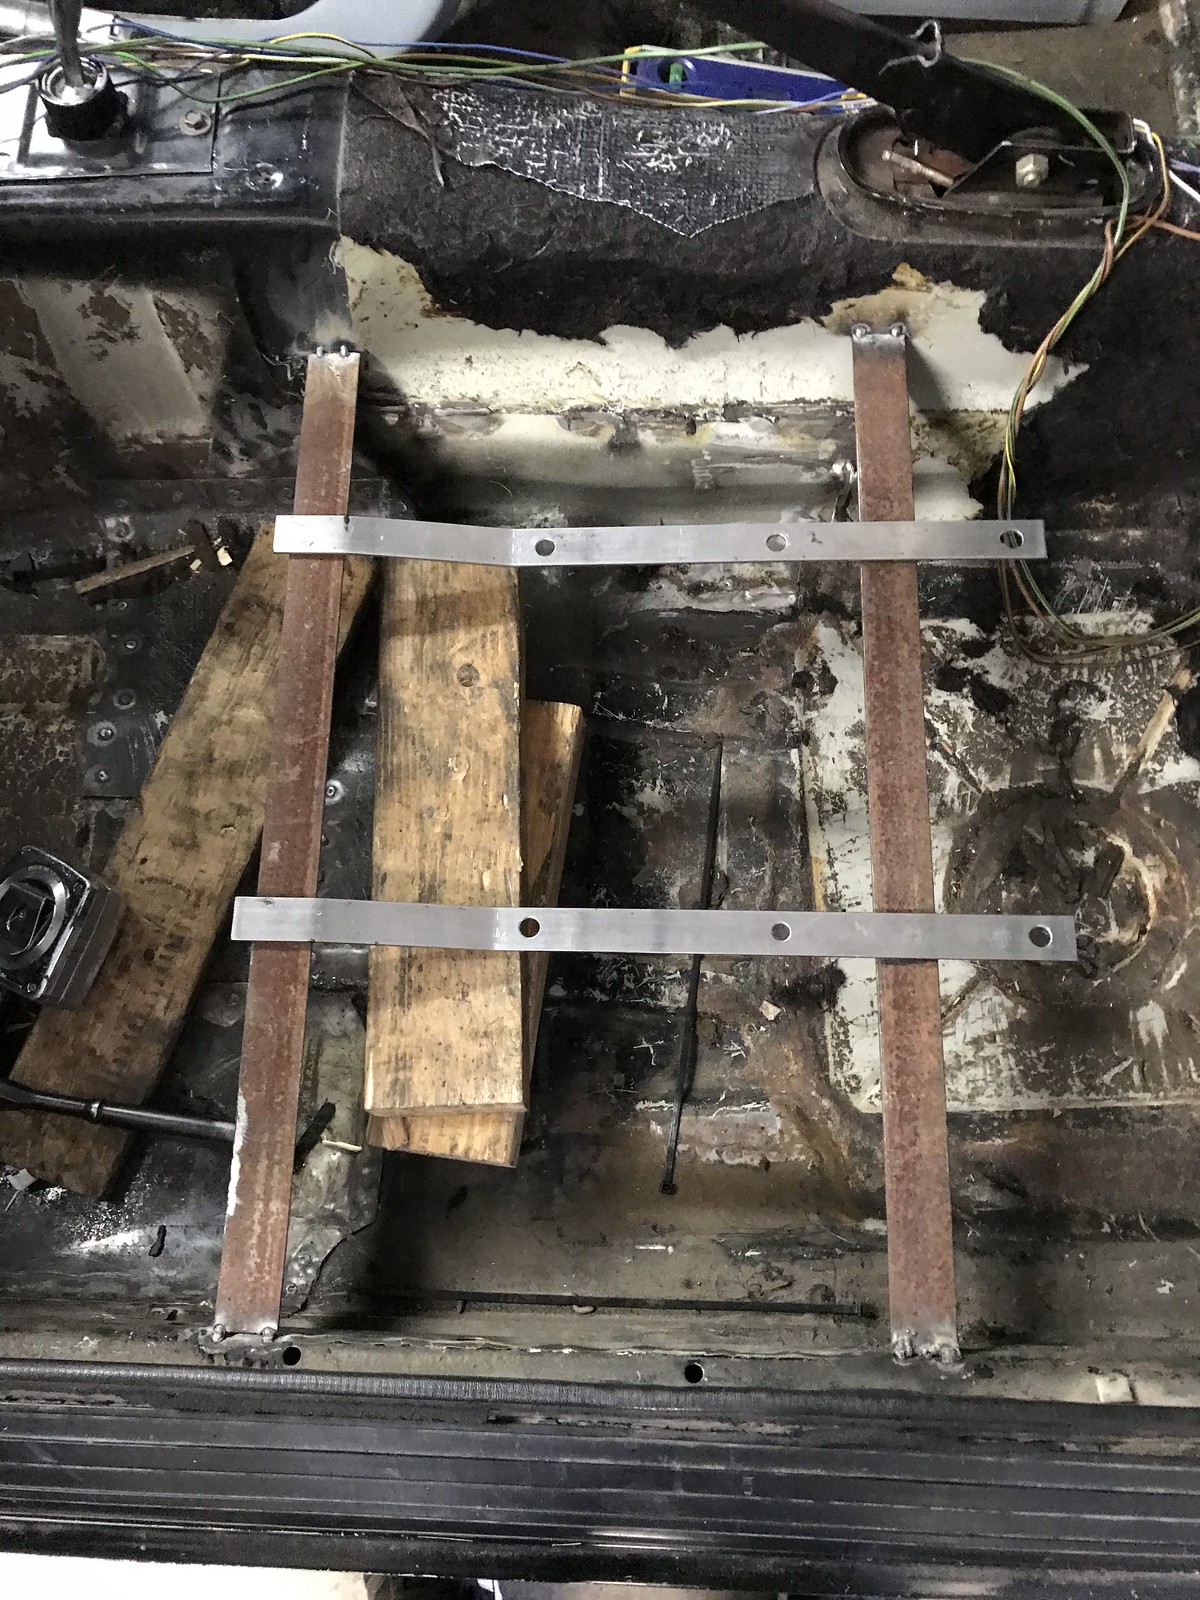
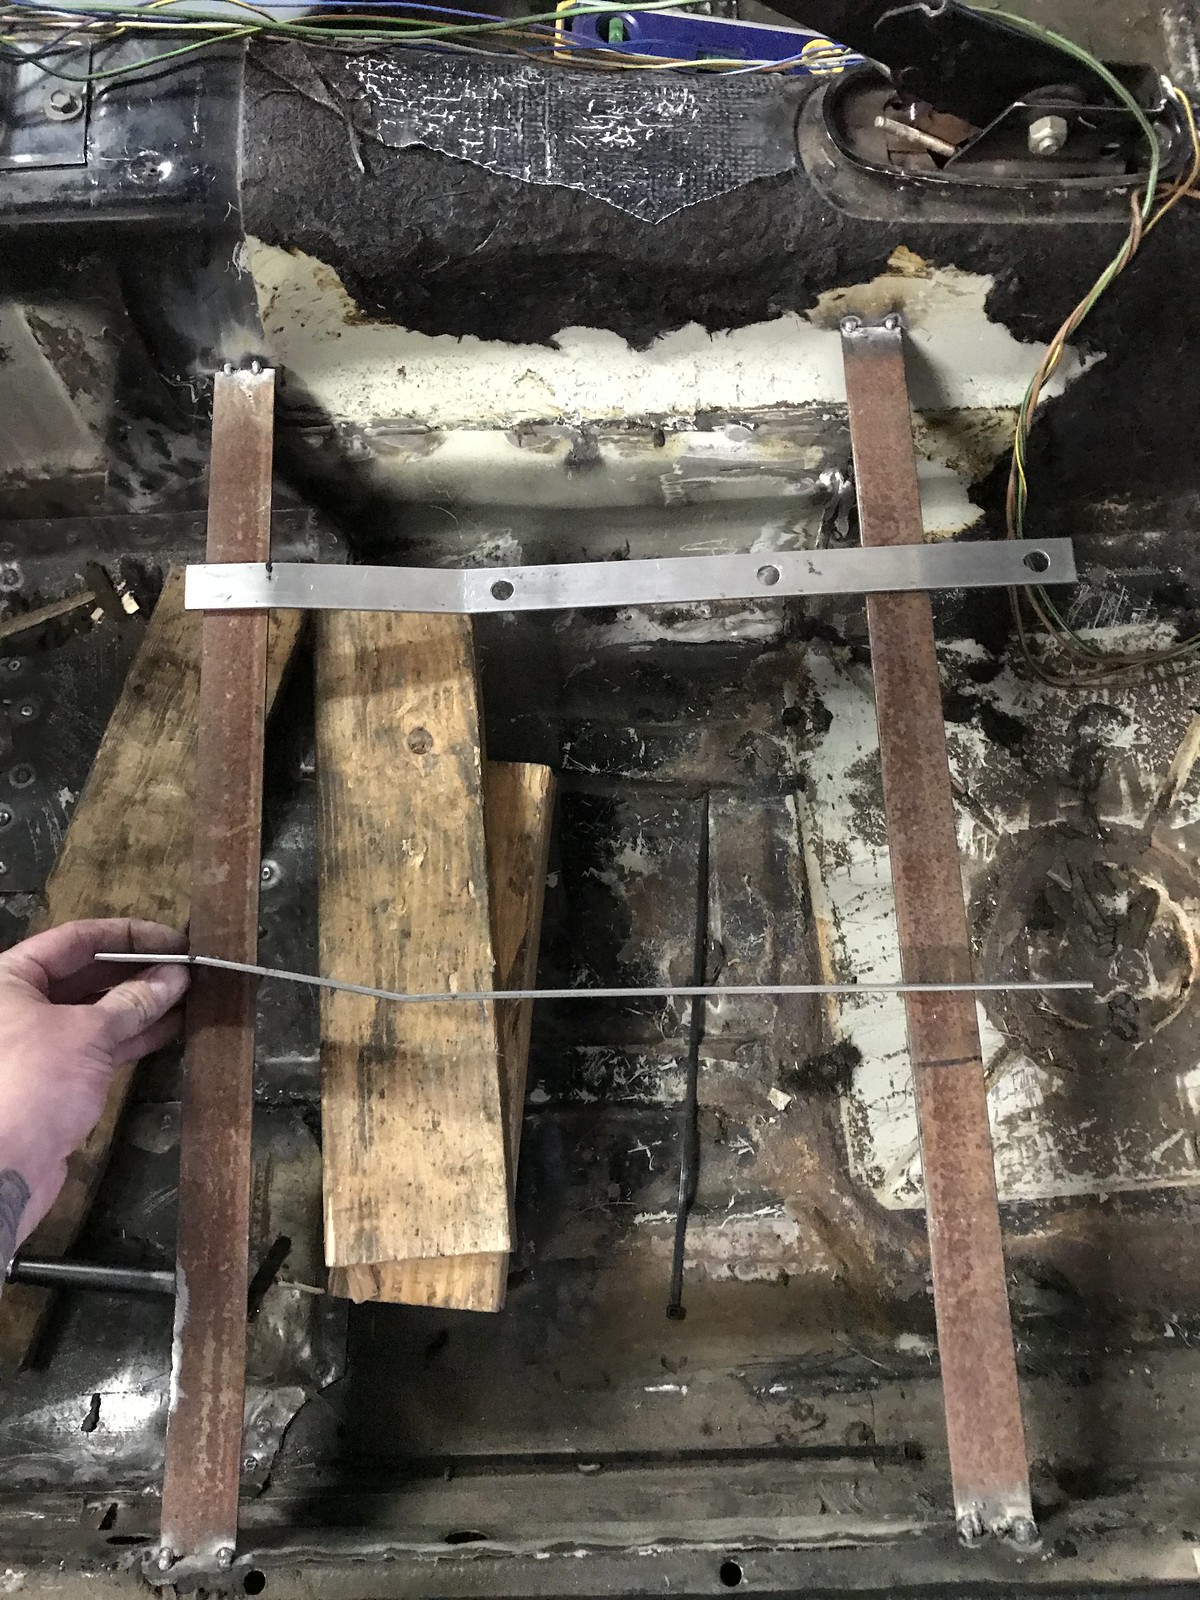
Version 1 of the battery bracket is finished. It works, and with a little adjustment version 2 could be considerably more sturdy. Version 2 is going to be made months from now since time is fading away. I have around 5-6 weeks before I need to have this thing on the ground ripping through the neighborhood. That's kinda scary to think about.
 Untitled by hatchethairy, on Flickr
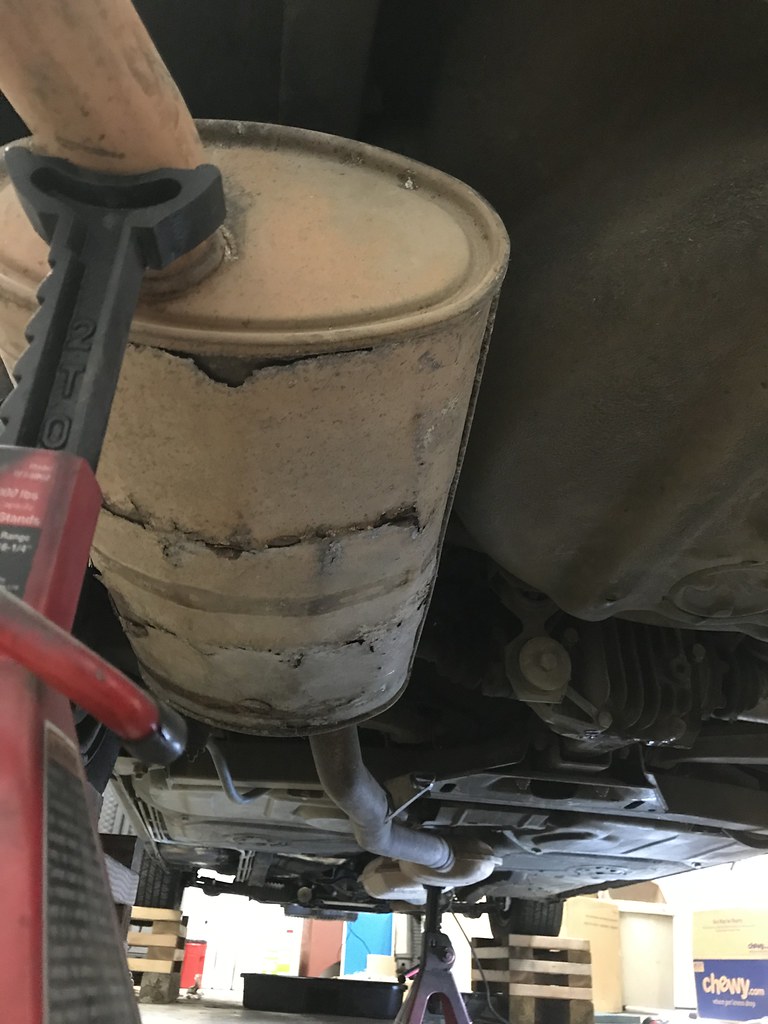
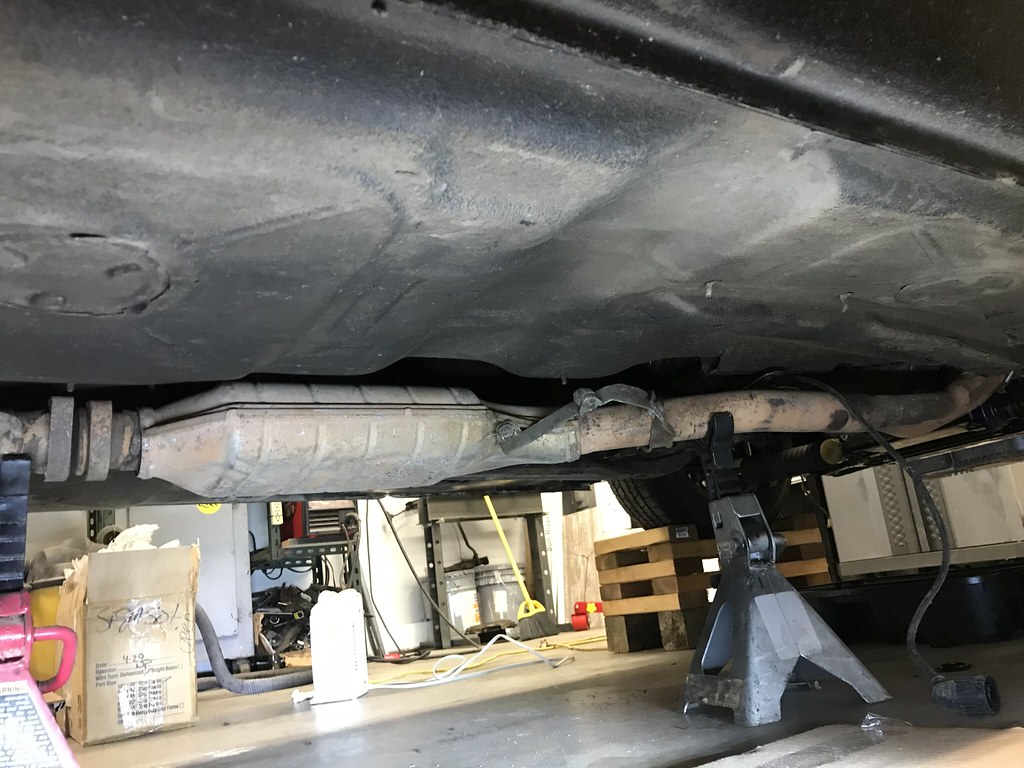
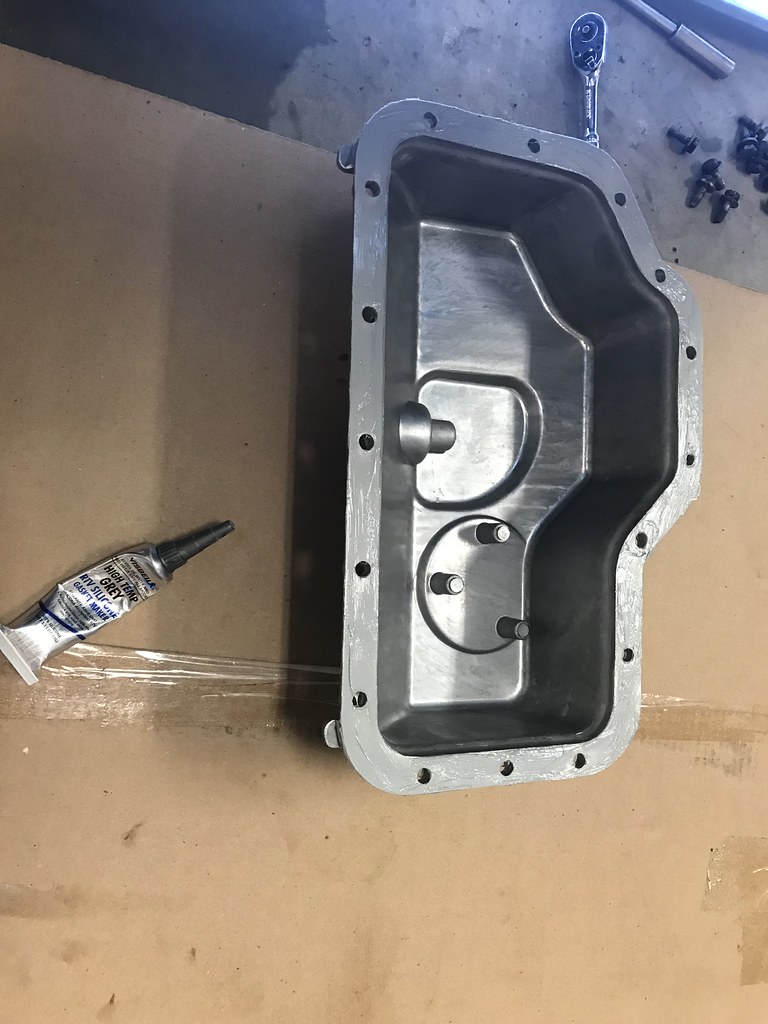
I've been gathering exhaust stuff, but haven't ever mocked up the stock e30 system yet to see what direction I need to go. Surprisingly the e30 exhaust looks like it could be made to fit as is without doing much work. I tried to snap some pics to show how it all lays out, mainly because I haven't really seen many pics of how people usually finish this part of an m42 swap. I will be replacing the rotten muffler with a $20 ebay unit, and swapping the cat section for a straight pipe. I also have a nice stainless resonator, but the stock one looks decent enough it's probably not worth the effort and saves my budget ~$28 which helps make up for the oil pan hiccup. Speaking of which, the new oil pan came in the other day, but I haven't had a moment to install until tonight. It came with two little tubes of grey sealant, so I am officially gasketless now on the lower pan to save a few more bucks.
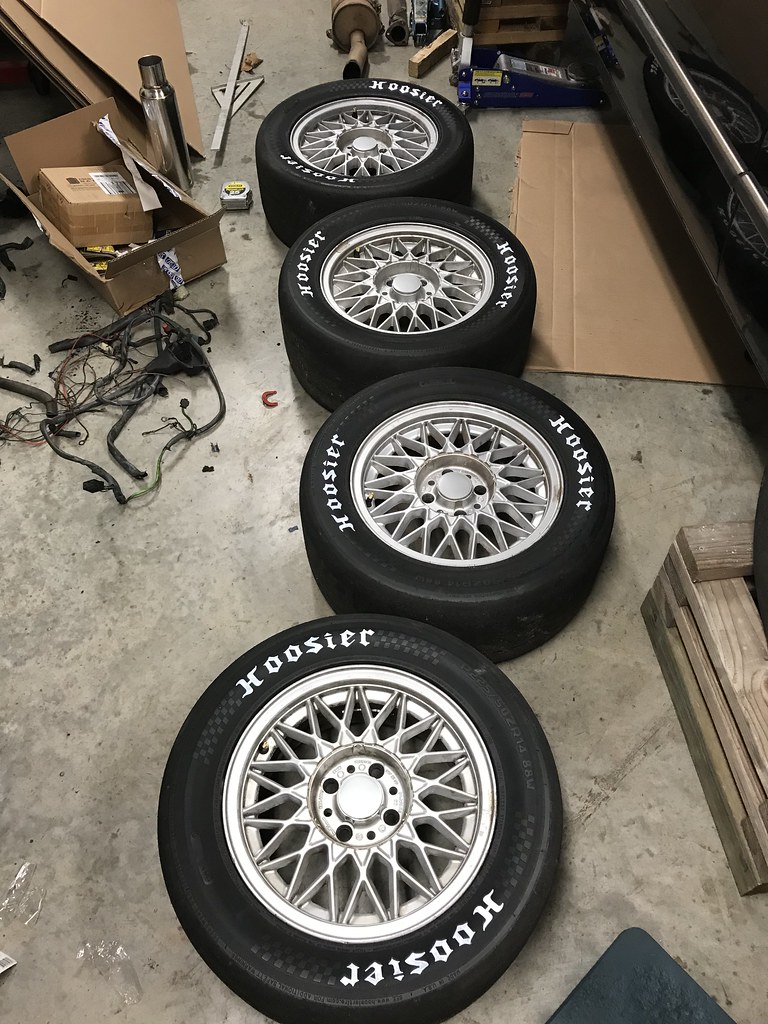
While the sealant was drying I decided to start some arts and crafts with the Hoosiers. I bought a couple different sized paint pens to color in the letters. The larger tip was just too big, and the smaller version was just about perfect. In about 30 minutes or less they were all done and overall look pretty good. I've wanted to do this for a while, and honestly it ended up being much easier than expected. It certainly helps the wheels were off the car.
 Untitled by hatchethairy, on Flickr
 Untitled by hatchethairy, on Flickr
 Untitled by hatchethairy, on Flickr
 Untitled by hatchethairy, on Flickr
 Untitled by hatchethairy, on Flickr
 Untitled by hatchethairy, on Flickr
 Untitled by hatchethairy, on Flickr
 Untitled by hatchethairy, on Flickr

Hoosiers and basketweaves look sweet!

I'm surprised that you aren't going to just dump the exhaust out of the side for weight purposes. I don't remember, are you still going to be driving this to and from events?
Lof8 said:Hoosiers and basketweaves look sweet!
Agreed. Weaves and tires in general tug at my dude strings though.
AxeHealey said:I'm surprised that you aren't going to just dump the exhaust out of the side for weight purposes. I don't remember, are you still going to be driving this to and from events?
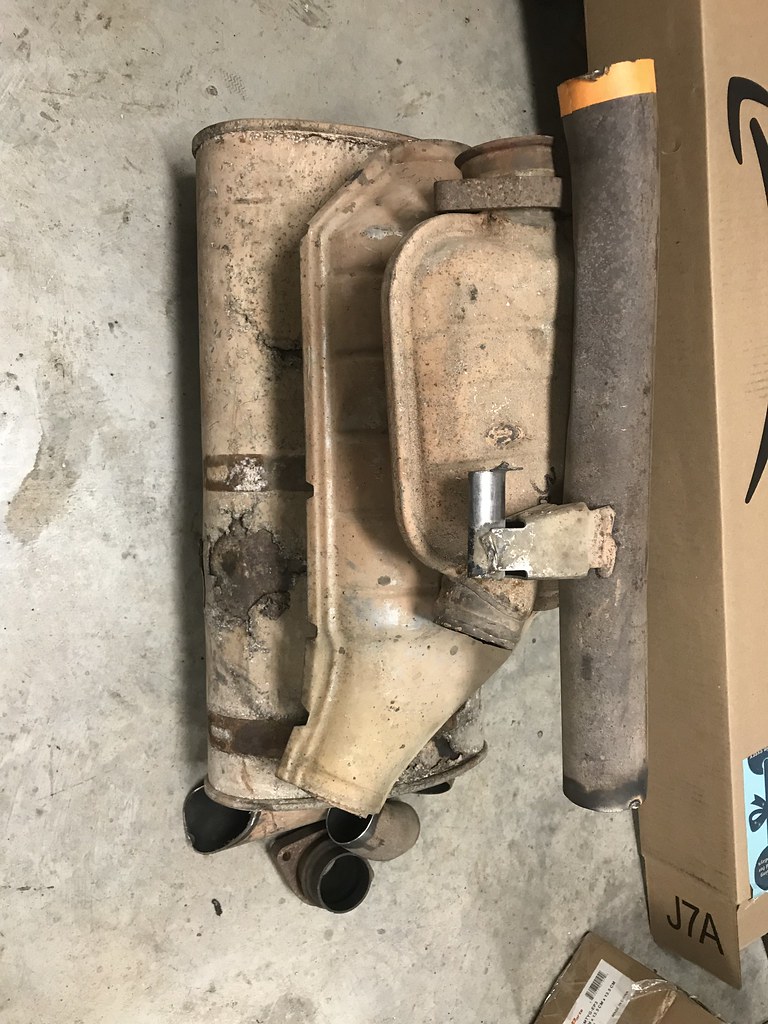
Yeah I've got to drive about 35-40 minutes to my autocross meets until a trailer and some sort of hauler appears in my driveway. Once the old worn cat and muffler are gone, most of the weight will be reduced. They are ridiculously heavy. I put some thought into a side exit exhaust, but that usually causes more clearance issues unless I do some choppy choppy to the rocker and floor pan. With this setup, all of the weight will be centrally located and the new stainless muffler should be considerably lighter. The stock setup as is weighs in at 51 lbs, and I think it will end up around half that weight done. We will know soon enough.
I haven't managed to accomplish much over the past week or so other than collect parts that probably won't fit within the Challenge budget as well as re-buy parts I found at a lower cost to help pad the budget considerably. At least I'll have spares...
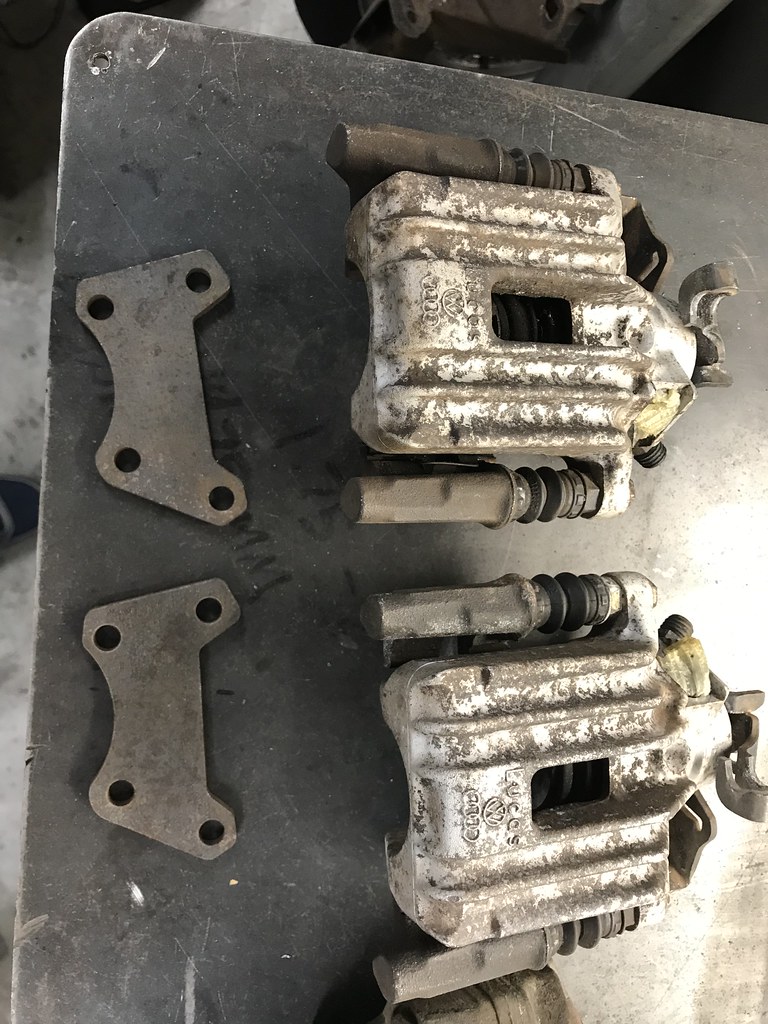
Anyway, first up a set of vented calipers from a 77 hit my doorstep. A day or two after that I got a set of Euro single headlight grills and headlight assemblies. A couple days after that a set of lightweight aluminum mk4 VW rear calipers and adapting brackets to eventually swap out the drums. Then my attention was directed to some lightweight front Brembo calipers for an Alfa Romeo weighing in at HALF the stock vented calipers! These bolt on just like stock with no modification necessary. I'm basically rolling in a mound of calipers now. I hope to get the Brembos cleaned up and fit within Challenge budget since they can still be ran with the stock non vented rotors. From those alone I'll be able to drop 4 pounds per corner!
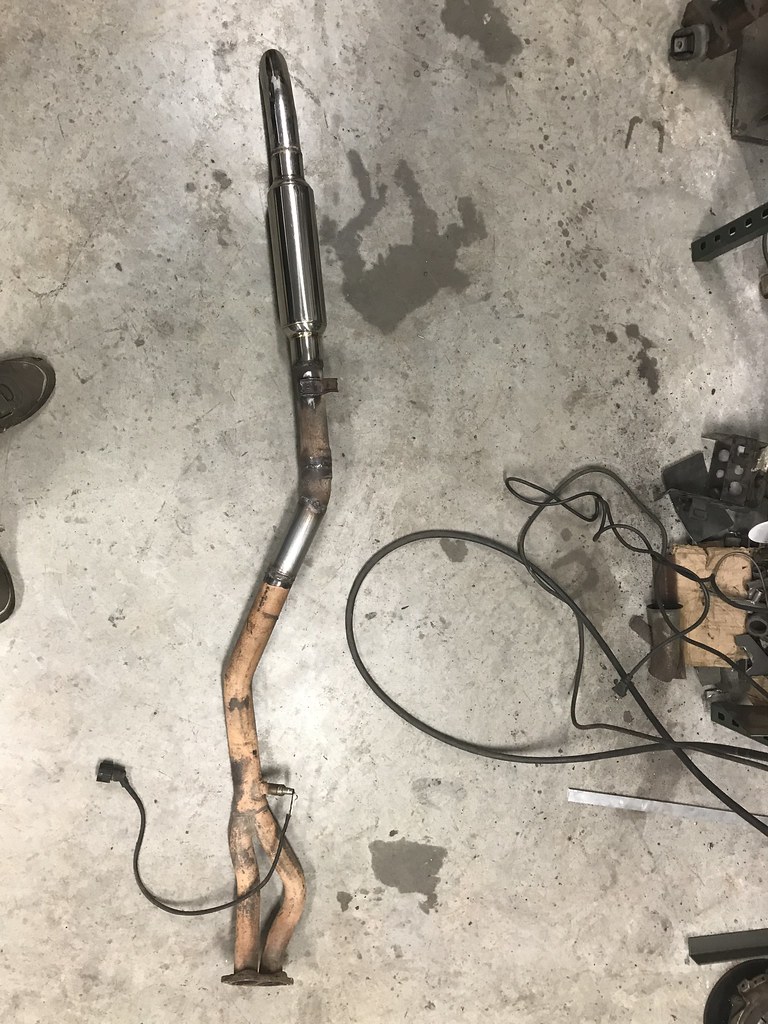
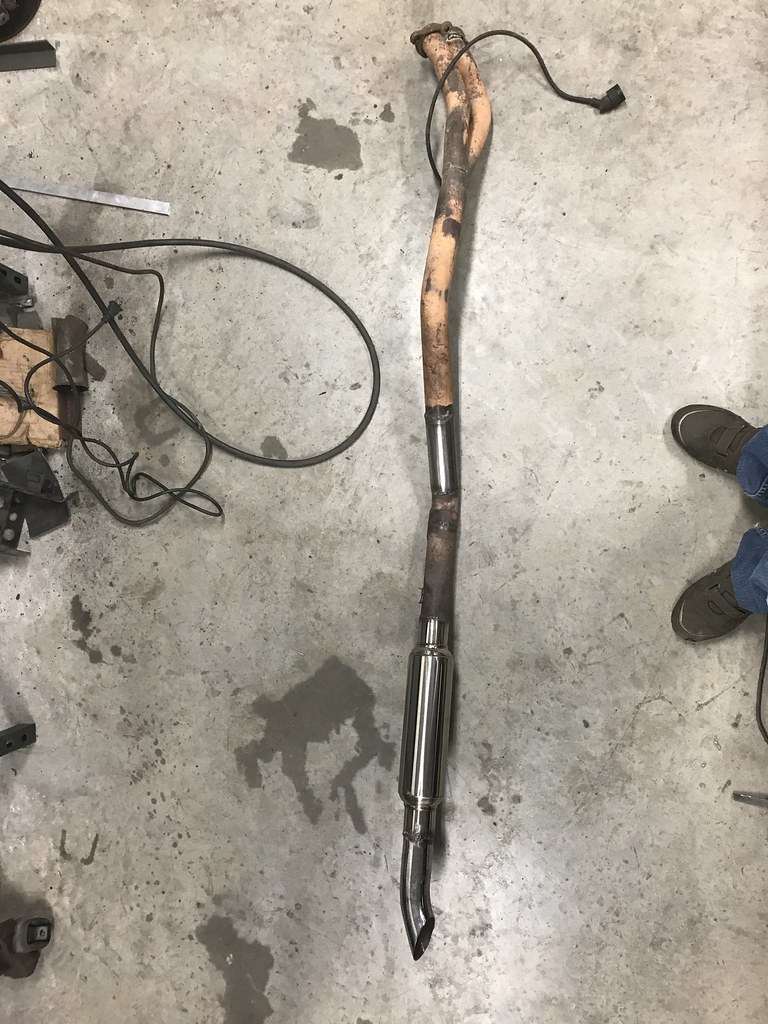
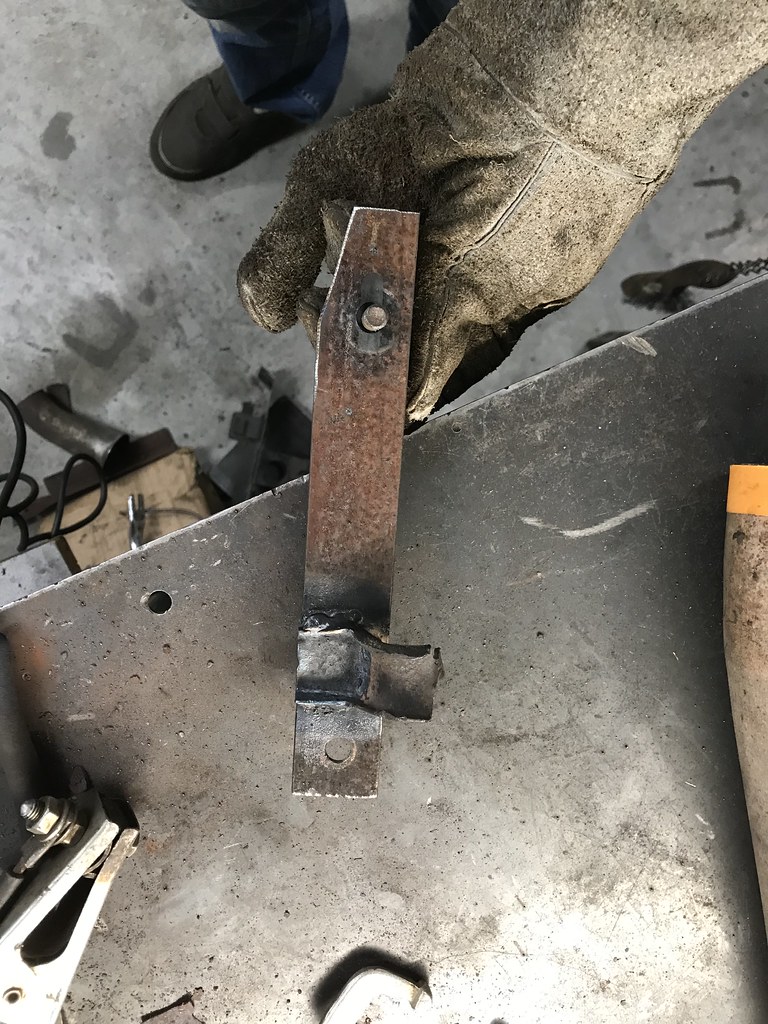
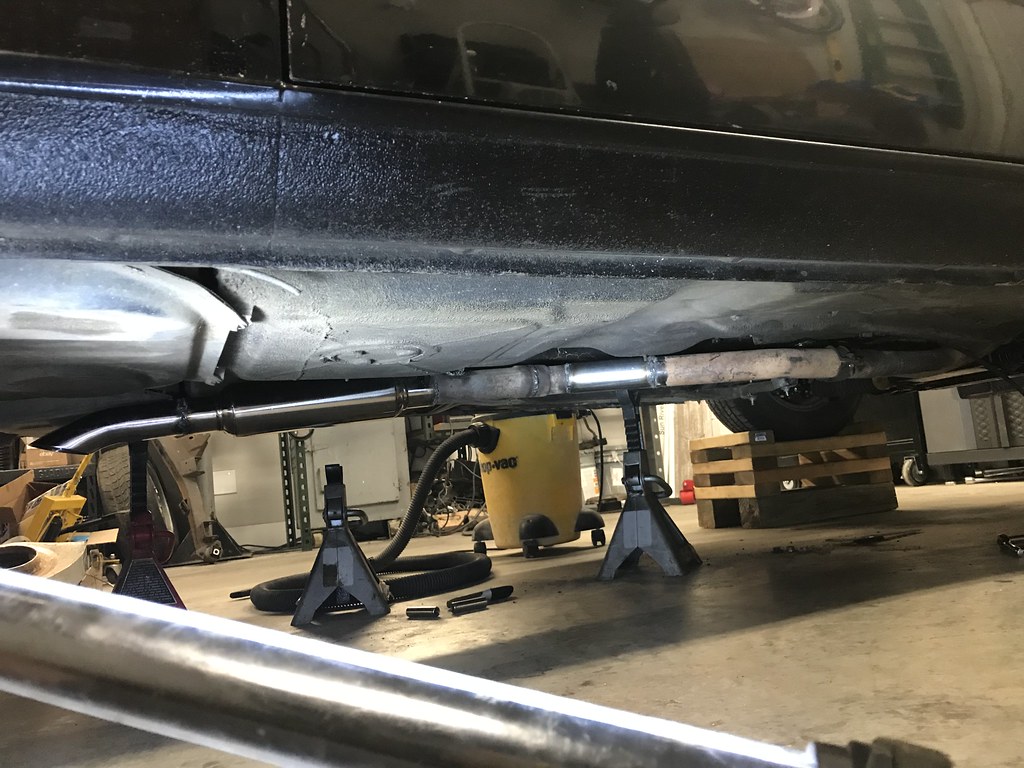
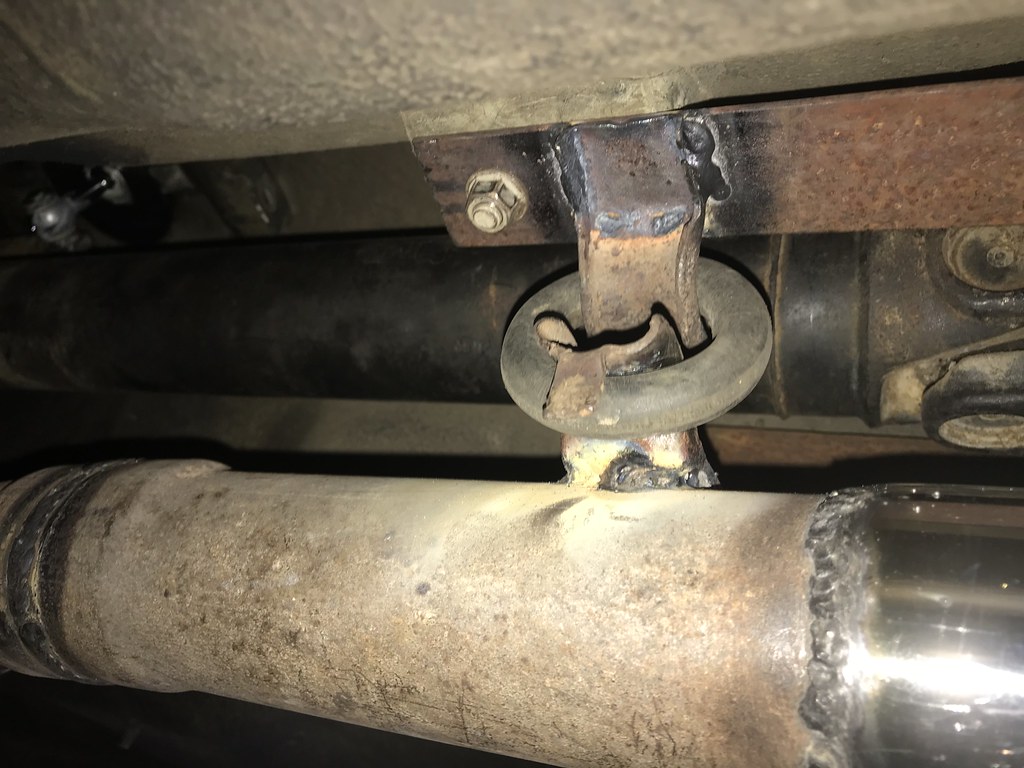
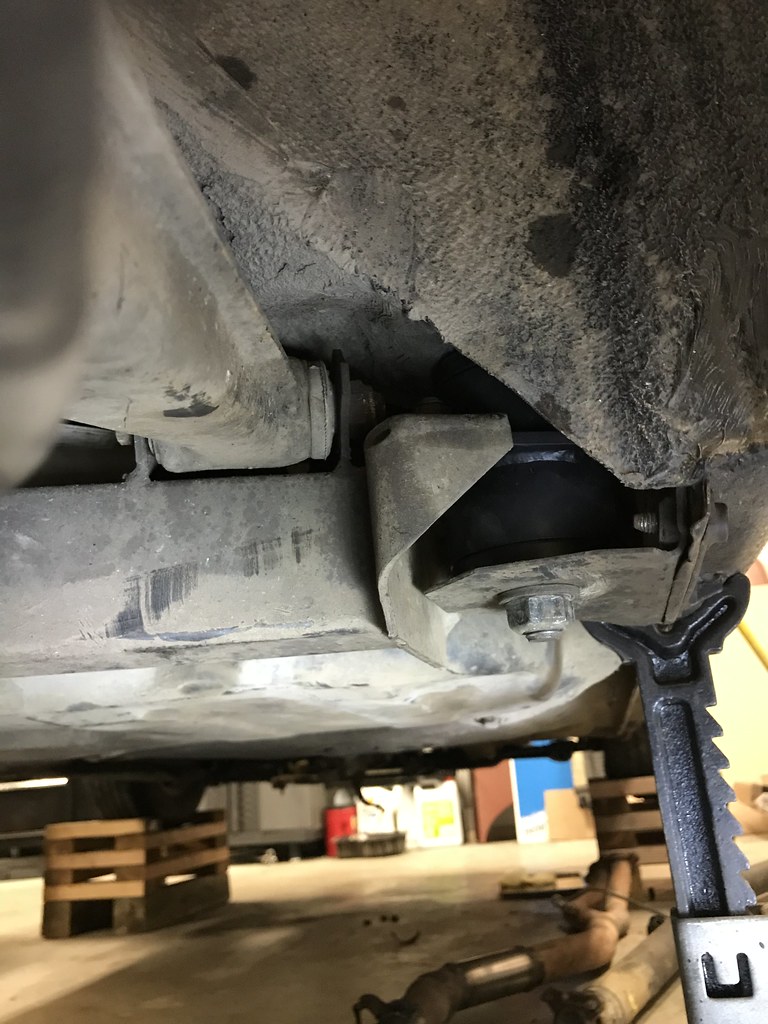
For the most part I've been getting some wiring stuff sorted or at least getting a game plan in order. Thursday I had a few hours from an early day off at work so I decided to get the exhaust all done or at least tacked together. That turned out to be a nightmare and left me wanting to just set the car on fire. Nothing went according to plan at all, so I stared at my mess for 45 minutes feeling sorry for myself, and eventually retreated to a few beers to finish off the night. After formulating a new plan, Sunday would be the day to finish the exhaust. I spent an hour or so cleaning up first thing this morning, and then started cutting up my failed attempt from Wednesday. The system ended up being fairly simple and mostly used pieces of the old exhaust. I added in the stainless steel resonator I bought months ago as well as a scrap chrome exhaust tip from my old e24. The pipe dumps a little before the fuel crossover and with the slashcut downturn tip should help keep the decibels from being too insane, or at least I hope. I scabbed some pieces from the stock e21 rubber hanger system to help support the weight right where the center support bearing bracket bolts to the chassis. After it is all said and done, I went from a 51 pound exhaust system for the m42 all the way down to 11 pounds. So I effectively dropped 40 pounds overall which is about 15 more than I expected. I'm super happy with that.
 Untitled by hatchethairy, on Flickr
 Untitled by hatchethairy, on Flickr
 Untitled by hatchethairy, on Flickr
 Untitled by hatchethairy, on Flickr
 Untitled by hatchethairy, on Flickr
 Untitled by hatchethairy, on Flickr
 Untitled by hatchethairy, on Flickr
 Untitled by hatchethairy, on Flickr
 Untitled by hatchethairy, on Flickr
 Untitled by hatchethairy, on Flickr
 Untitled by hatchethairy, on Flickr
 Untitled by hatchethairy, on Flickr
 Untitled by hatchethairy, on Flickr
 Untitled by hatchethairy, on Flickr
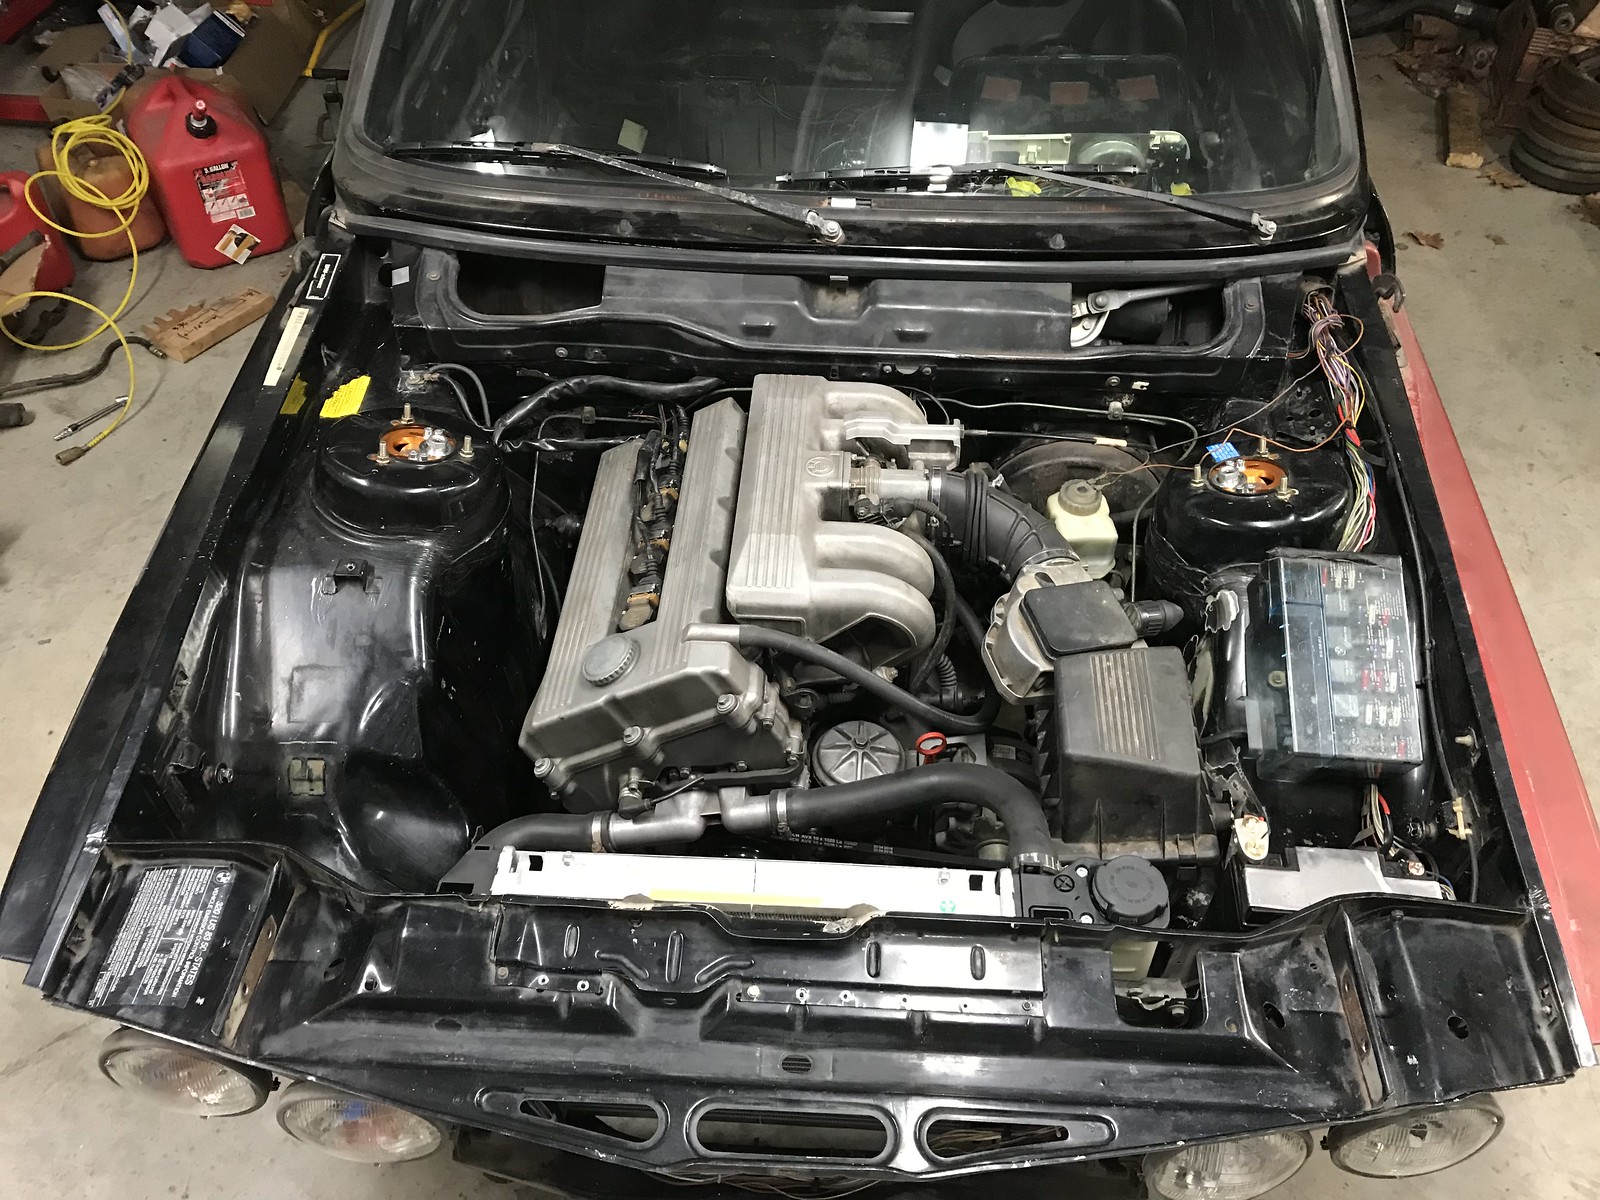
With my first autocross of the season only a month away it's time to start knocking stuff off the list. I only want to do work that will get me on the road and anything else is just getting put to the side for now. After staring at the wiring in the engine bay for far too long I finally decided what plan of attack was needed. I bought a cheap ebay post set off ebay for the battery. The thread pitch was larger than the battery I bought, so I tapped the positive hole and tightened it down. I then bolted down this nifty clamp that has two holes to fit accessory lines up to 8 gauge. This works perfect as I need one line for the fuse panel, and one dedicated line to a 50a fusible line to the DME. The negative cable I'll just keep the ring terminal as there is only one line coming off the battery.
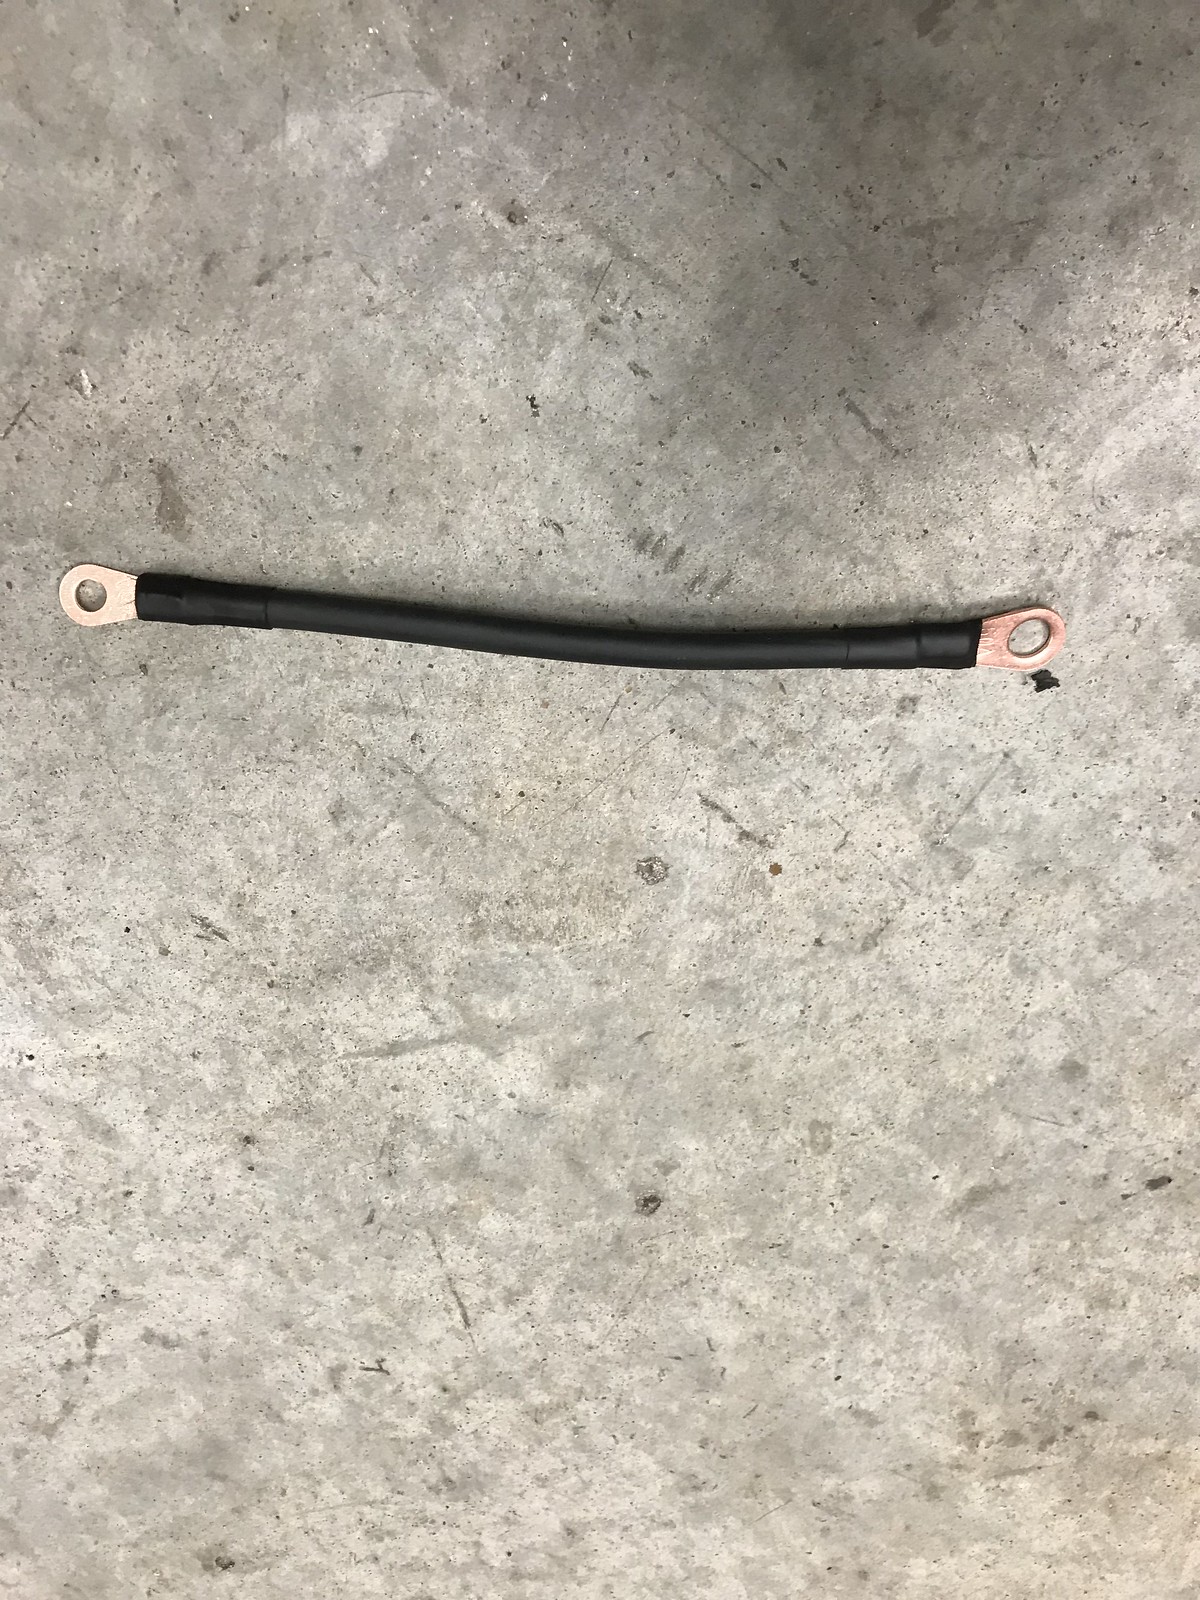
Originally I bought some ground straps off ebay to use for the alternator and motor mount grounds, but they look a bit thin compared to stock. Since I bought a considerable amount of 8 gauge wire for the DME line it makes sense to just make my own lines which helps budget wise as well. A little crimpy crimpy, heat shrink tubing, and it's done.
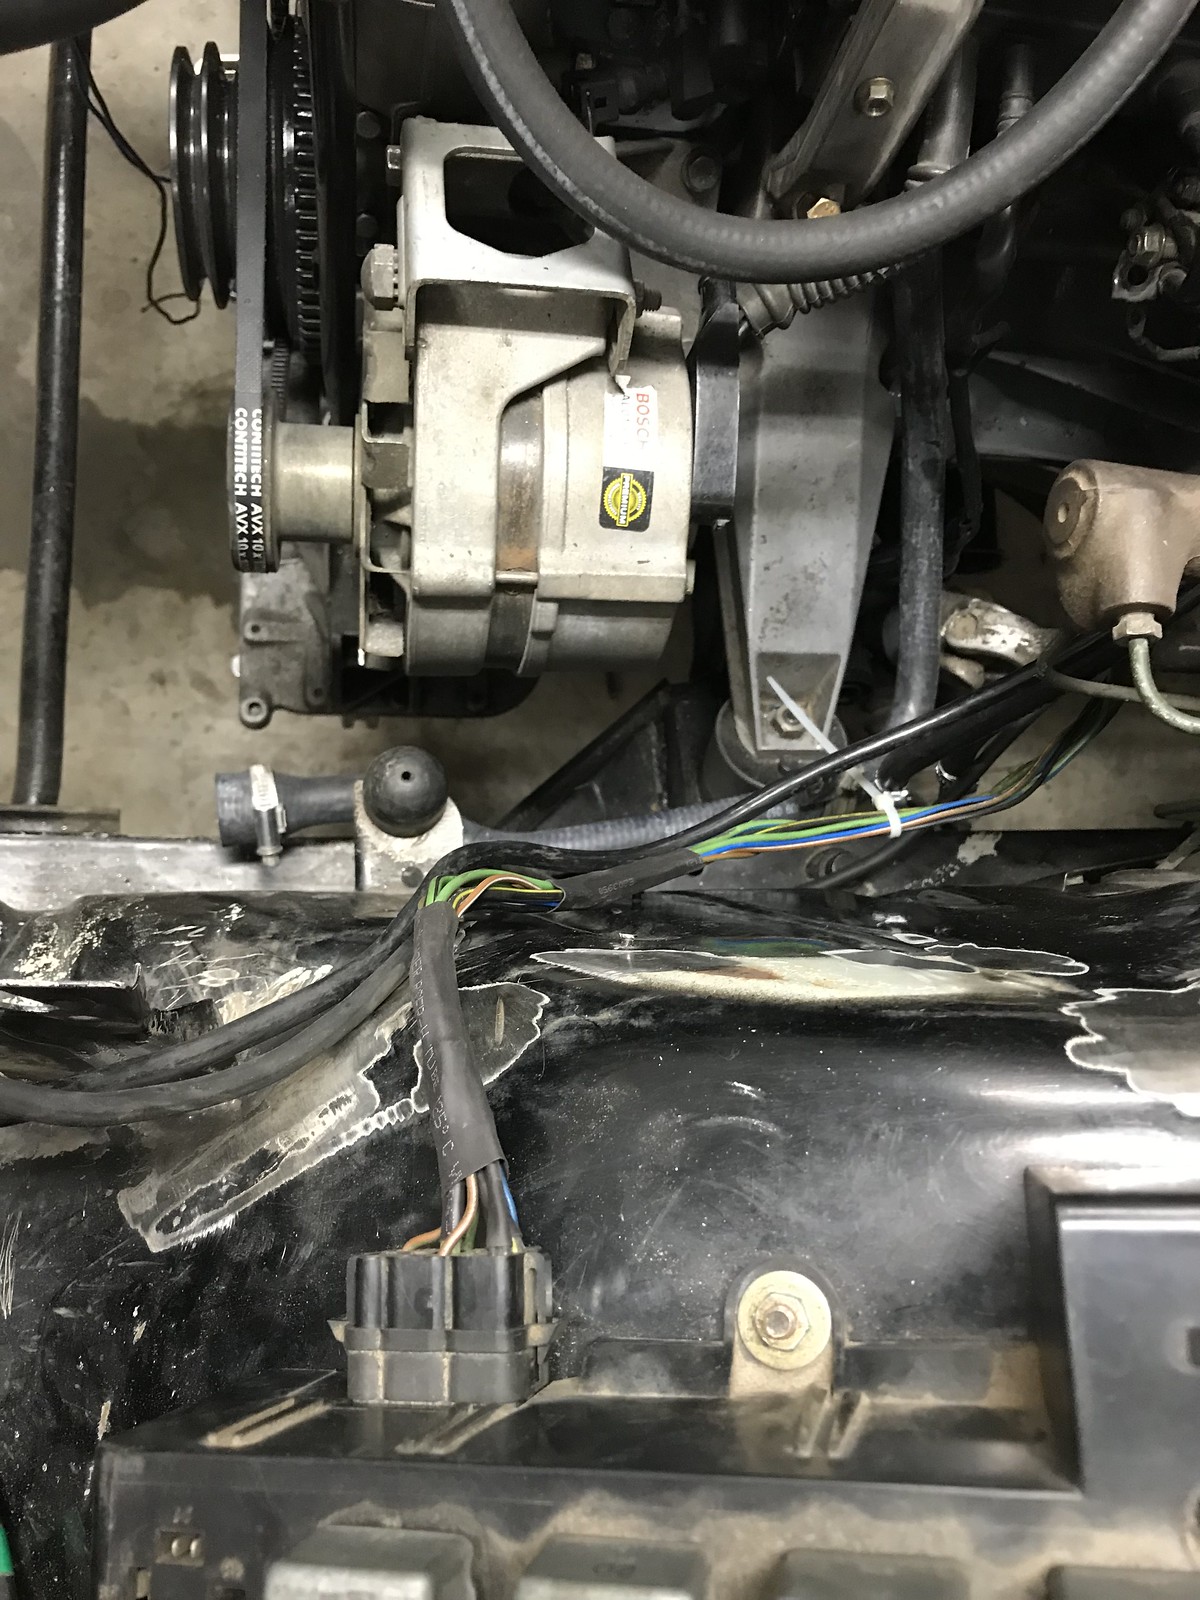
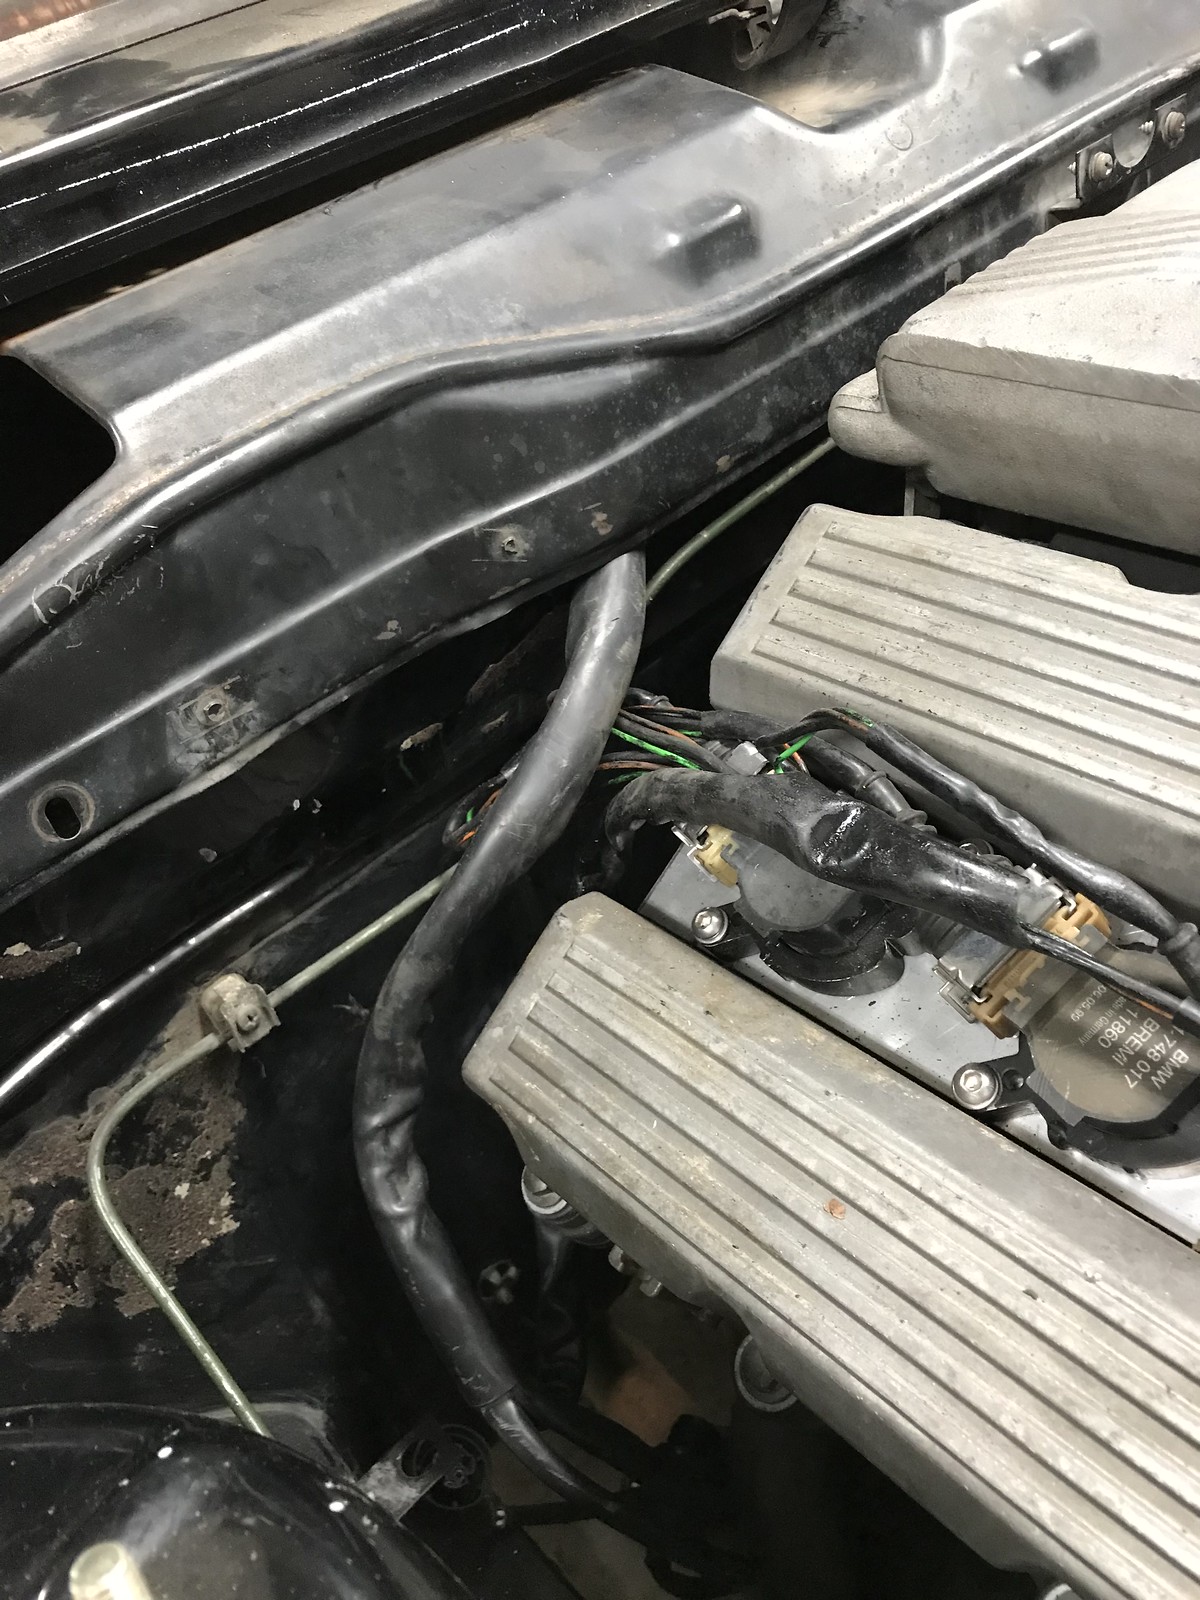
After that, I moved on to wiring in the engine harness. A lot of folks like to make an adapter harness that keeps the c101 plug from the e30 and still uses the e21 connector. I'm not a fan of that method as there's only 7 wires that need to be connected, and the c101 plug is huge. I spent time with the e21 harness getting the longest run of wires to the engine connector as possible so I could just splice directly into the e30 harness. After trimming out the unneeded wires and staggering joints, it was all connected and looks super tidy. Once I finish connecting the fusible link to the DME it will be ready to wrap in Tesa tape. With the harness ready to go, I trimmed out the lip of the firewall where the scuttle panel sits. The accordion wire sheathing feeds right into the scuttle panel hiding a large amount of wiring, and one section pops out on the passenger side to feed wires to the coils, o2 sensor, and harness ground. I still need to trim the transition and put in some sort of grommet, but they have a home now. With the harness in the scuttle area now, this allows me to put the diagnostic port and 3 relays right near the window wiper motor up and out of the way. I'll make a bracket for it and the relays to keep things nice and tidy later on.
Anyway, this is kind of a boring post. I spent a few minutes spraying all of the suspension and subframe nuts/bolts with PB Blaster, put the back of the car on jack stands, removed the rear wheels, and am ready to start dropping the rear subframe. Sunday and Monday will be dedicated to getting all of the rear suspension and brakes done. If there's extra time available I'll drop the gas tanks and figure out my in tank pump situation as well as replace the soft lines. Originally I planned to ditch the driver side tank and weld up the crossover connection to keep weight down, but with e85 and turbo in the future that may be a bad idea. For now it shall stay. If I can manage to get all that done I think the car could be doing test drives down the block in a week or two. Seat mounts, sunroof stuff, and fluids are the main items that come to mind.
 Untitled by hatchethairy, on Flickr
 Untitled by hatchethairy, on Flickr
 Untitled by hatchethairy, on Flickr
 Untitled by hatchethairy, on Flickr
 Untitled by hatchethairy, on Flickr
 Untitled by hatchethairy, on Flickr
 Untitled by hatchethairy, on Flickr
 Untitled by hatchethairy, on Flickr
Two full days of tinkering were had. There were some setbacks, but I pushed on and accomplished my goals.
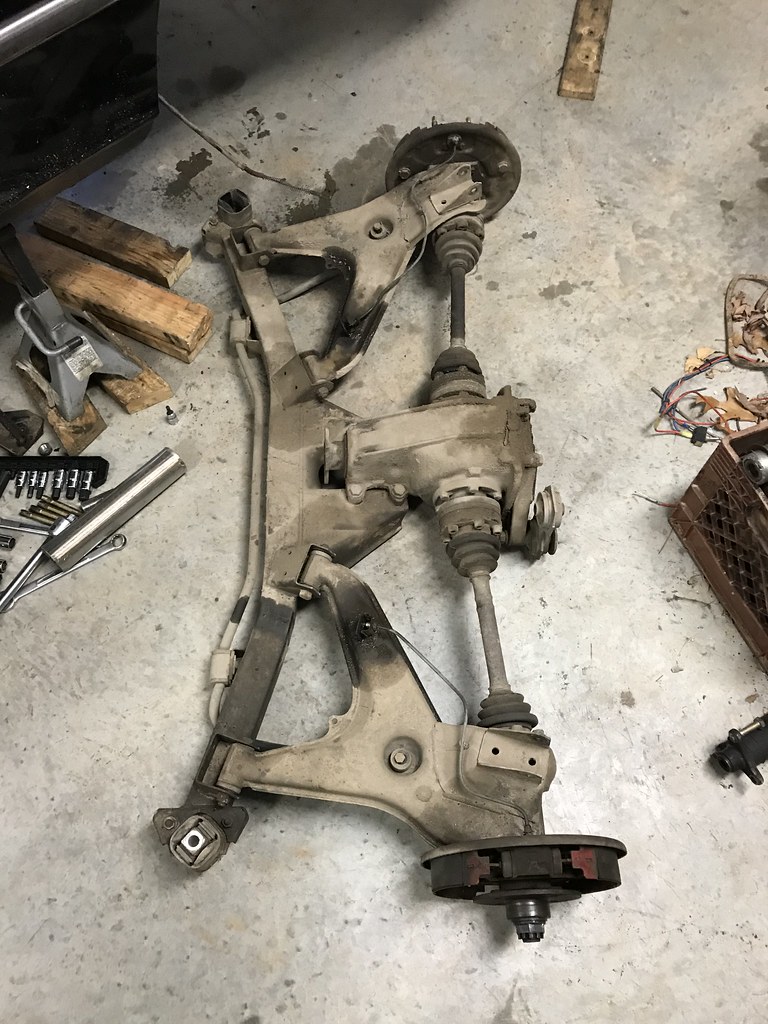
First I dropped the rear subframe with my ATV jack and started swapping the delrin diff bushings. After that I moved on to the driver side trailing arm bushings. They looked to be in decent condition, but I figured while I already had them out it makes sense to just get them done. Unfortunately when installing them back into the arms, the last little bit on each just didn't want to squeeze into the hole. I've installed these Febi branded ones on my e30 without issue, and I even have the rtab tool to help remove or install them. At that point I decided to finish just the driver side and leave the ones in the passenger. I'll revisit these at a later date. I went ahead and drained the diff fluid, and put in some fresh stuff. After changing out the driver side wheel bearings, I bolted on the delrin Garagistic subframe bushings.
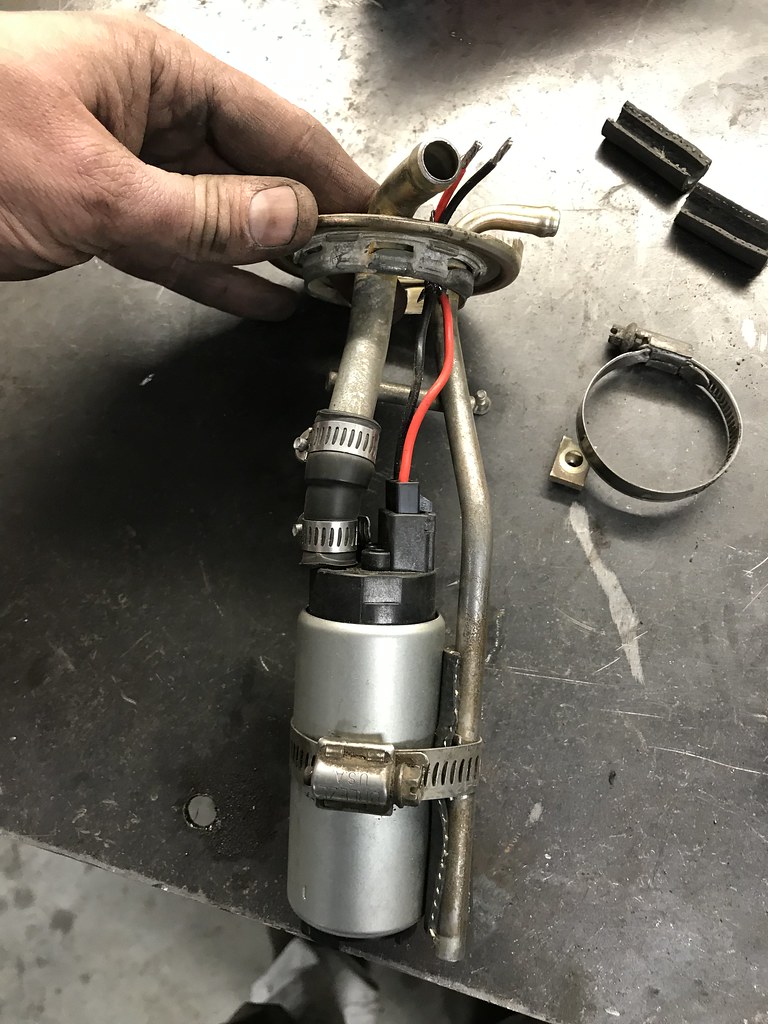
Before putting the subframe back, I wanted to drop the fuel tanks to install new brake lines, fuel lines, fuel filter, and fuel pump figured out. The stock setup has a two pump setup, and I want to get that all to a single in tank assembly. It's a simpler setup, and drops quite a bit of weight in the process. After using my siphoning tube to drain most of the gas out I used the ATV jack to lower them out without much fuss. The wiring in the stock pump assembly is a bit thin, so I popped out the plastic bung and epoxied the Deatschwerks wires in place, then new o-ring at the pump assembly flange, and also on the sending unit. The old o-rings were completely borked, letting fuel and vapor spill out when I last filled the tank. To mount the pump, I split a small section of fuel hose and clamp keep it tight to the assembly. Unfortunately the strainer I have is in the wrong position, so hopefully the one I ordered will do the trick. Luckily with an access cover inside the car, I can easily install one without much fuss. Did I mention the tank is super clean inside? I though for sure it would be a rusty sludge mess with my luck, but nope. It's nice and clean.
This is another hurdle I ran into. I didn't know this before pulling the tanks, but there is some 12mm/1/2" fuel line on the feed side. HUGE! No one close to me had any in stock, so I decided to use the best looking section that came with the car, and reduce it down to 5/16" with a Pex coupler. Super cheap, and the feed really only needs to be 5/16" anyway. After the coupler I looped the line through a super small and cheap filter that can be swapped out pretty quick. The filter is mounted with a couple hose clamps and some pieces of the factory rubber from the stock filter to the stock brackets. With that sorted I wrestled the tanks back in place and tightened everything back down.
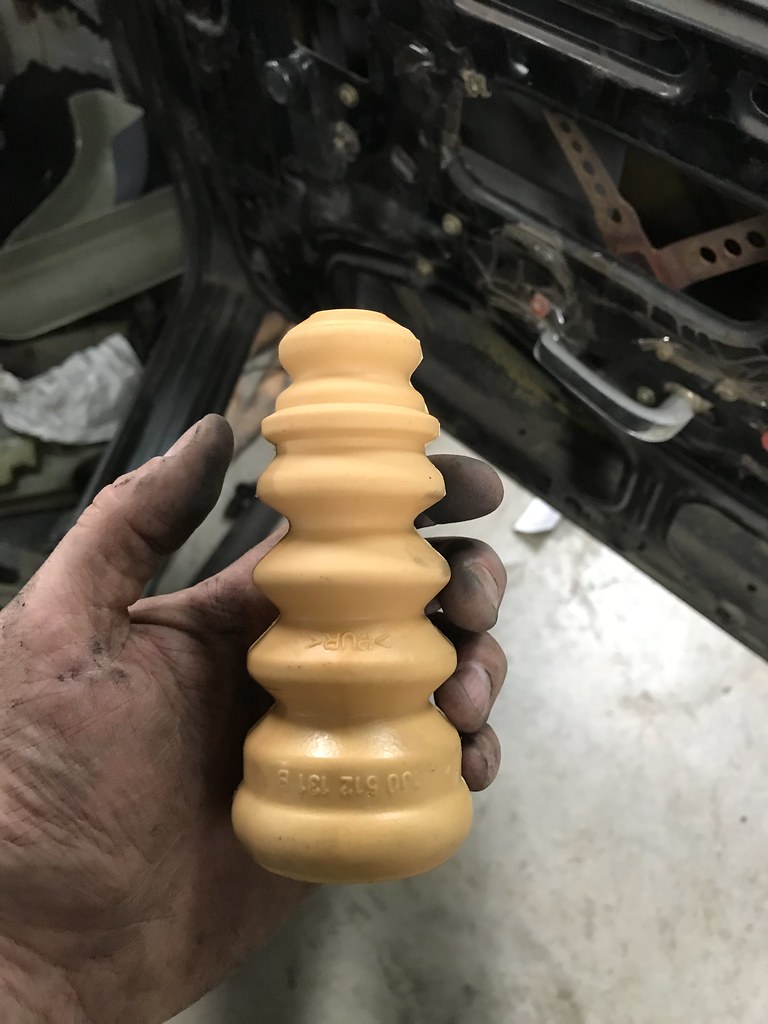
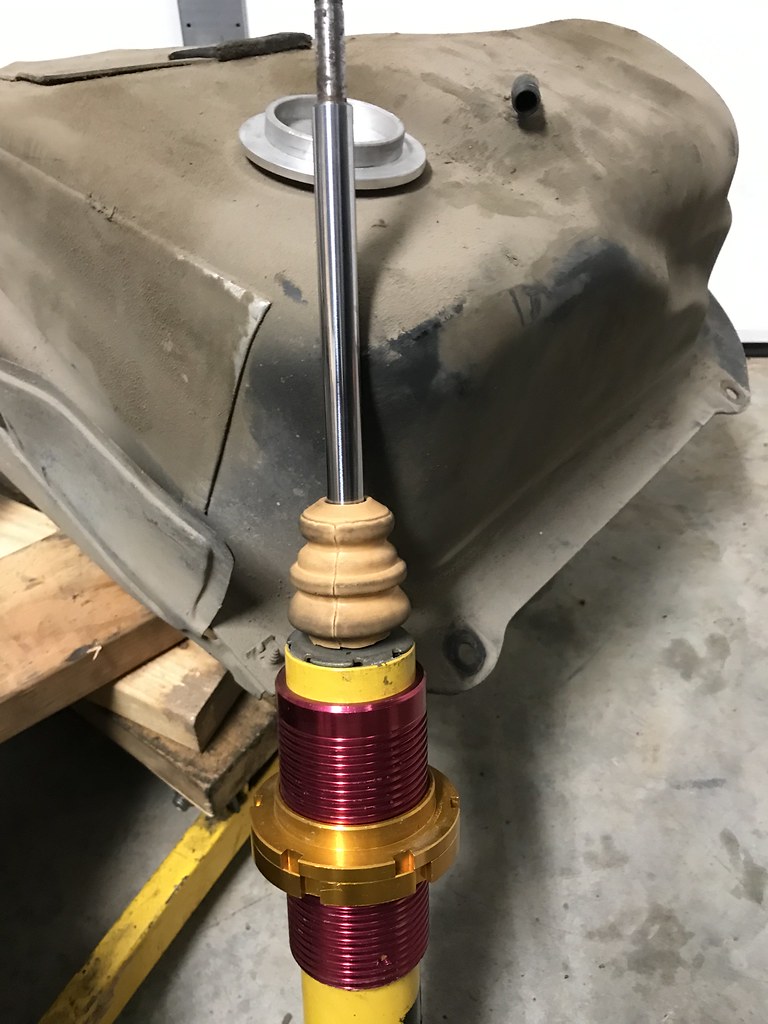
Brake lines were swapped out for new, and the subframe was ready to bolt back in place. Before moving forward with that though, I needed to install some bump stops on the rear coilovers. The factory ones are super pricey for Challenge budget, so I found some random cheap ones that I cut down and reamed the ID a bit to reduce friction.
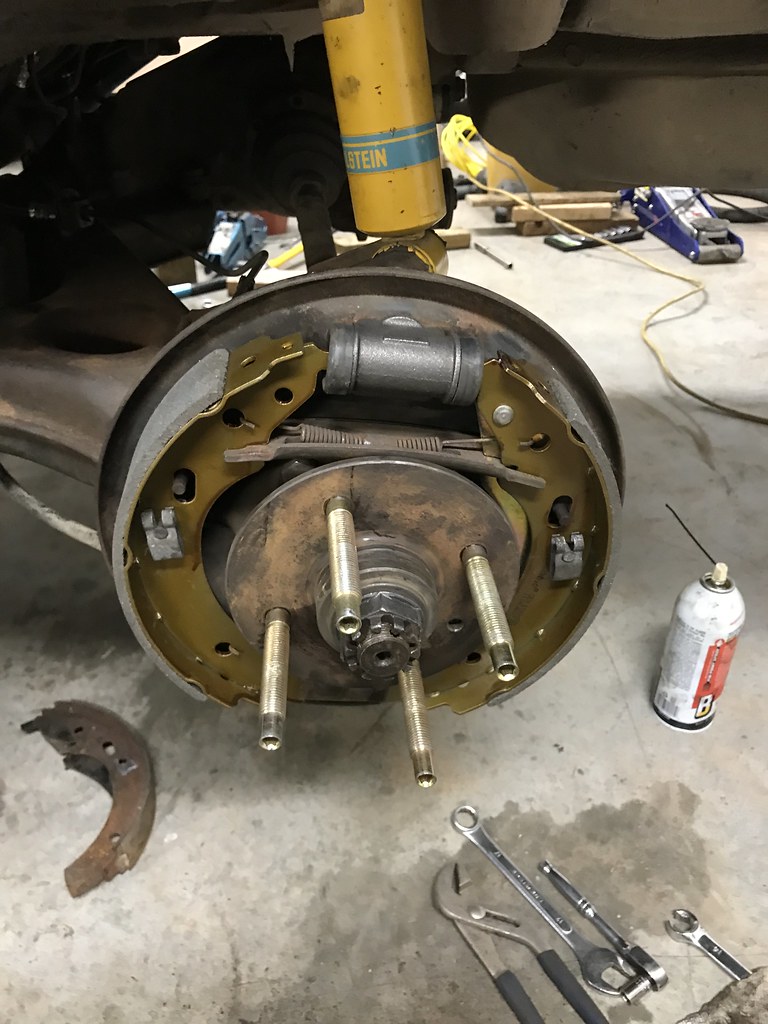
With the subframe back in place, I started removing the old drum brake stuff. After a bit of aggressive wrench turning and lubricant, the adjusters finally were functional again. Passenger side required some vice grips and a ton of heat, but finally freed up enough to be useful. New shoes, drums, and red loctited studs to finish it off. I need to do some reading on how to properly adjust the shoes, but I think it's fairly close. Everything still needs to be bled, but until I install the Brembos up front I'm holding off. Also, notice how the drums look completely different? Same part number, same brand, one is from Italy, and the other from China. Guess which one is from China.
Moving on. I bolted the driveshaft back in place, only this time I snugged it all down for good. Yeah. Feels nice. The exhaust got the same treatment with a new flange gasket and nuts.
At this point I'm happy with the progress and call it a day. I still have quite a bit of stuff to do before it's roadworthy. March 24th is probably still not going to happen, but I'll keep plugging away in hopes it all works out.
 Untitled by hatchethairy, on Flickr
 Untitled by hatchethairy, on Flickr
 Untitled by hatchethairy, on Flickr
 Untitled by hatchethairy, on Flickr
 Untitled by hatchethairy, on Flickr
 Untitled by hatchethairy, on Flickr
 Untitled by hatchethairy, on Flickr
 Untitled by hatchethairy, on Flickr
 Untitled by hatchethairy, on Flickr
 Untitled by hatchethairy, on Flickr
 Untitled by hatchethairy, on Flickr
 Untitled by hatchethairy, on Flickr
 Untitled by hatchethairy, on Flickr
 Untitled by hatchethairy, on Flickr
 Untitled by hatchethairy, on Flickr
 Untitled by hatchethairy, on Flickr
 Untitled by hatchethairy, on Flickr
After looking at my to do list, I decided rushing to get all of it done before my first autocross was not how I wanted this project to go. I want to be able to drive the car to the event and back without worrying if it's ready for the big show. Shake down miles should be made before hand, and I won't have enough time to do that properly. After a couple weekends off from the project, I put together a list of little fiddly stuff that needs to be finished so I can be certain bolts aren't loose, wires aren't touching things they shouldn't, and fluids are all kept inside their intended places.
Fuel pump with smaller sock installed, wiring finished, and all hoses connected so it's ready to fire.
All wiring in the engine bay is connected, placed where it belongs, and is ready to fire.
Coolant hoses were all fastened tight, and rad fluid was placed in for the first time. After spending some time hand bleeding the system, I noticed a weep from the thermostat housing. Fook. I know this won't go away on it's own, so I'll have to drain some coolant and get that sealed up right.
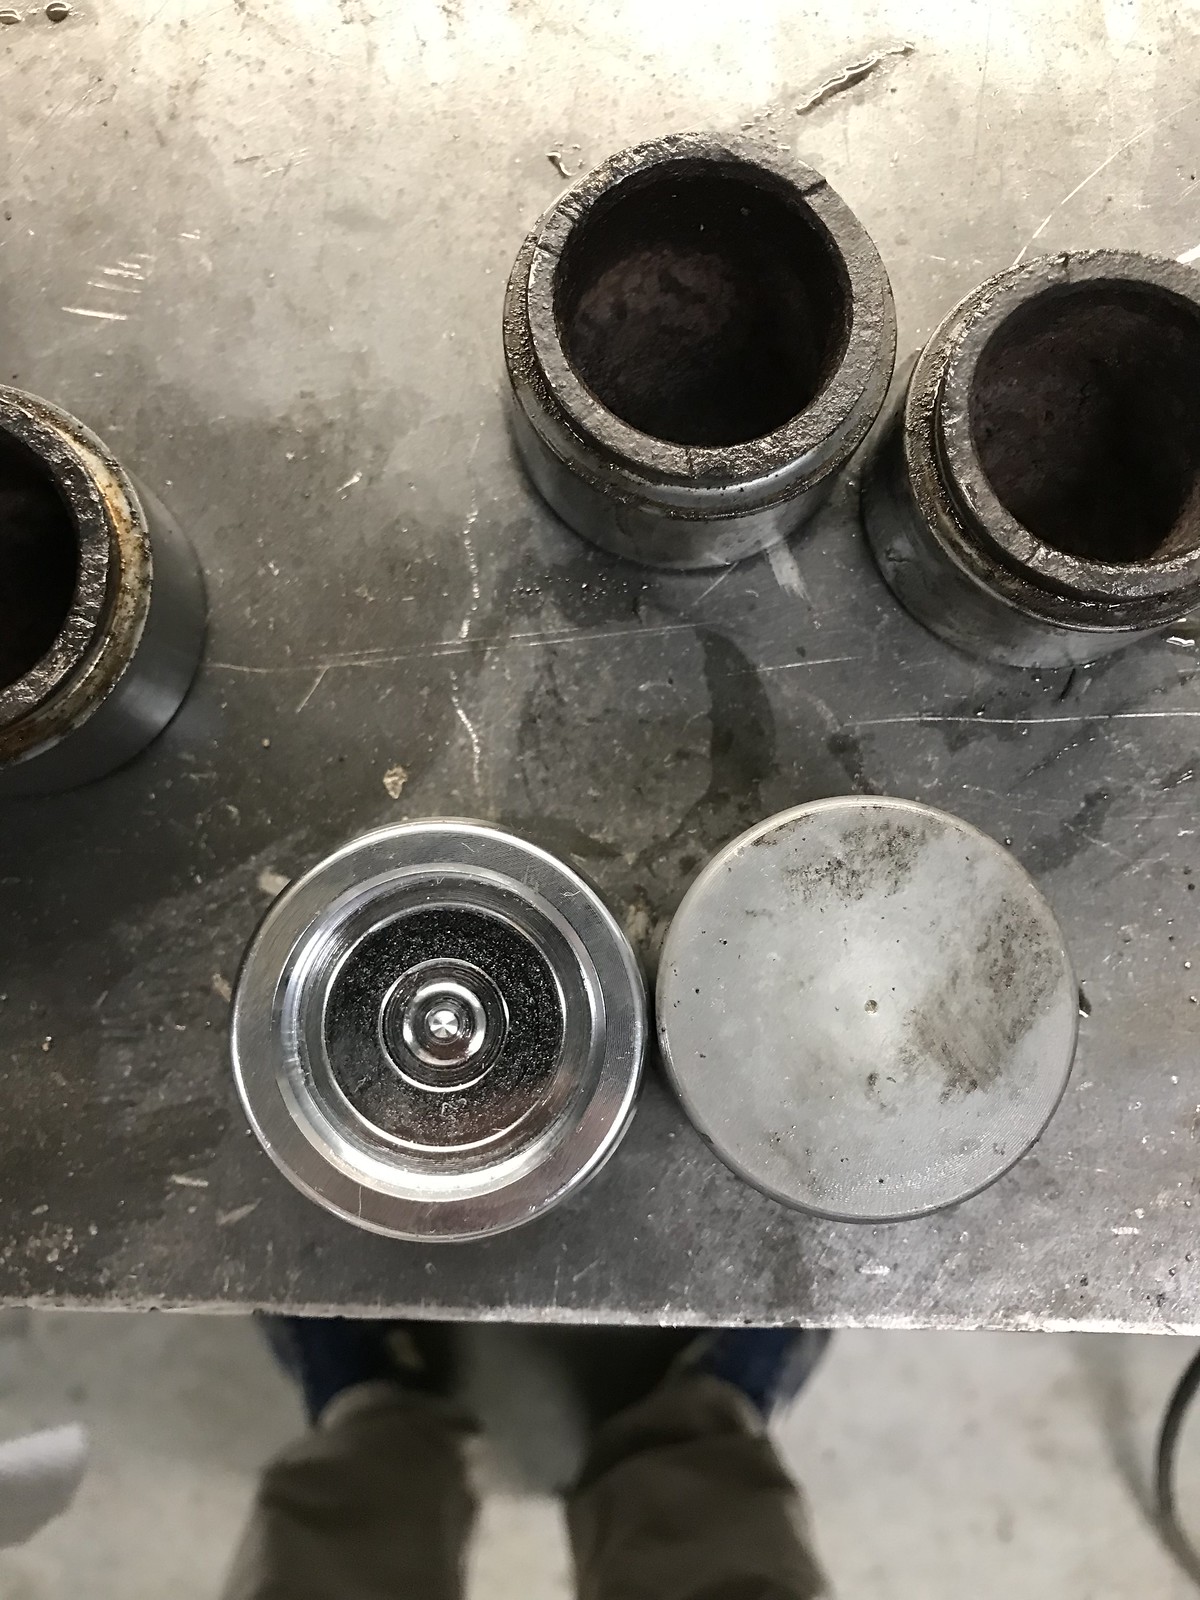
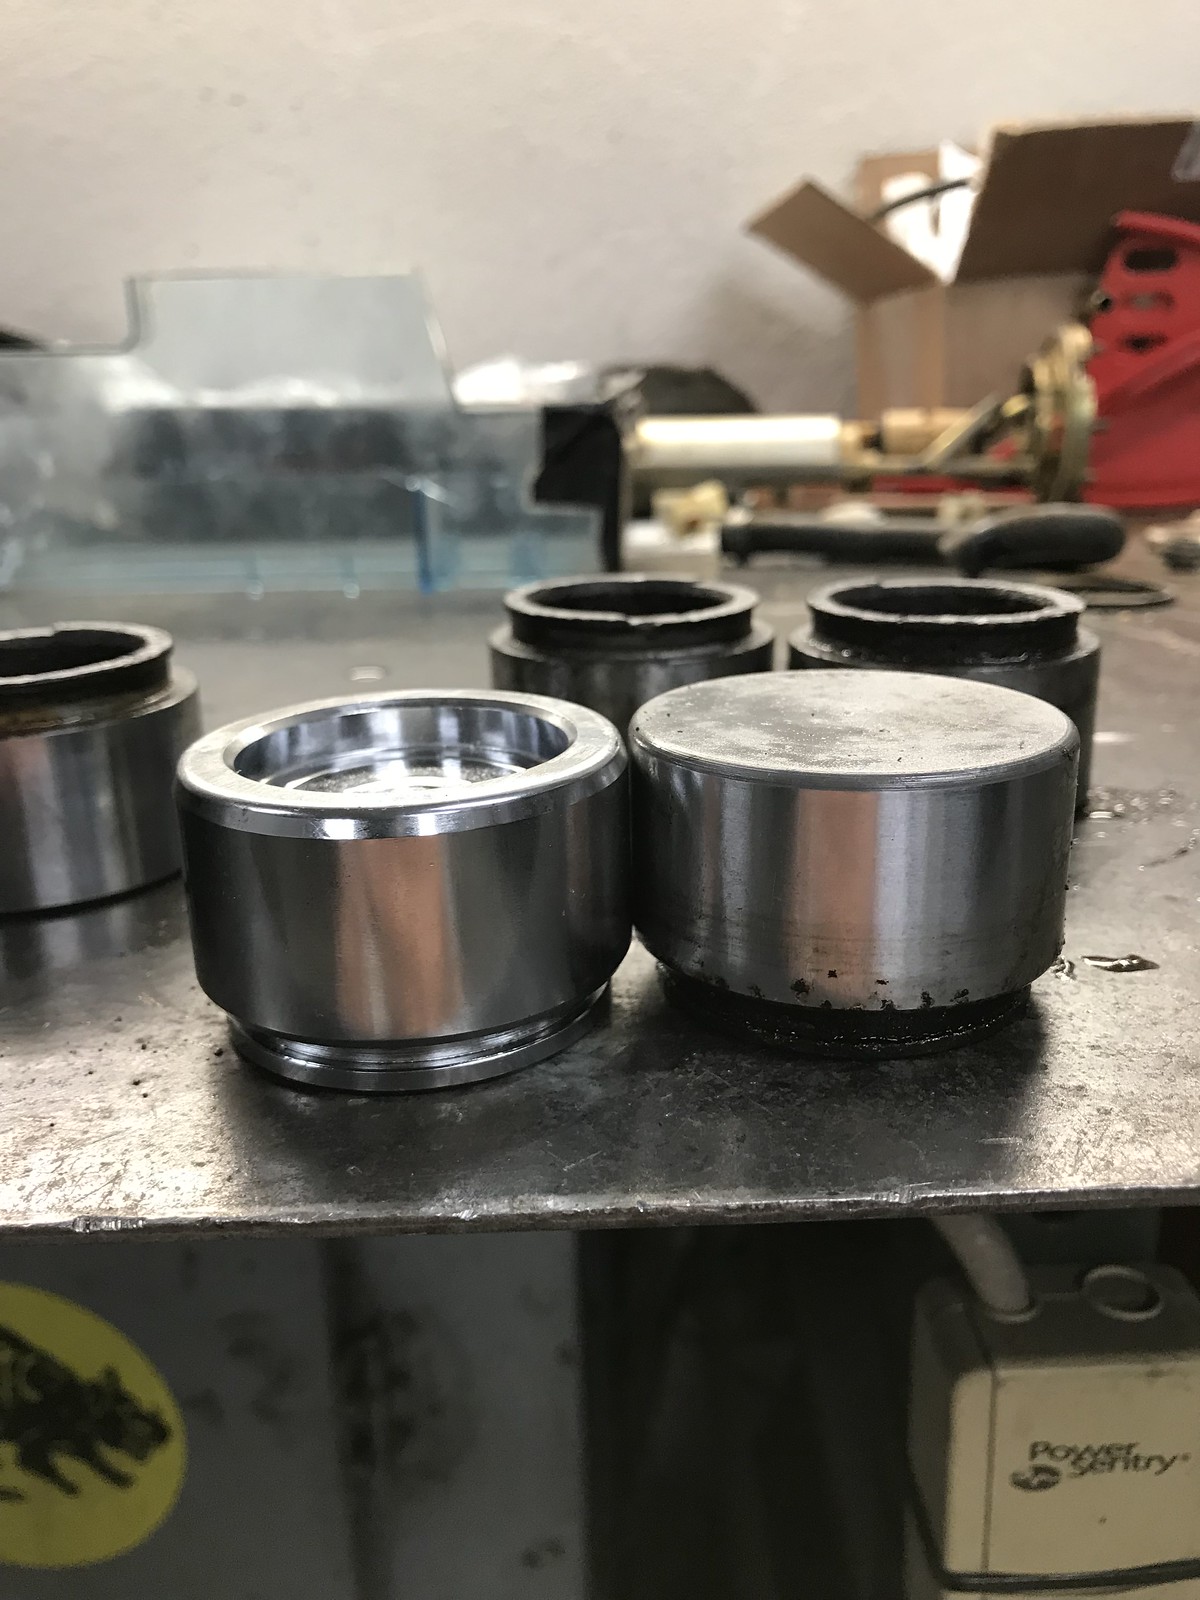
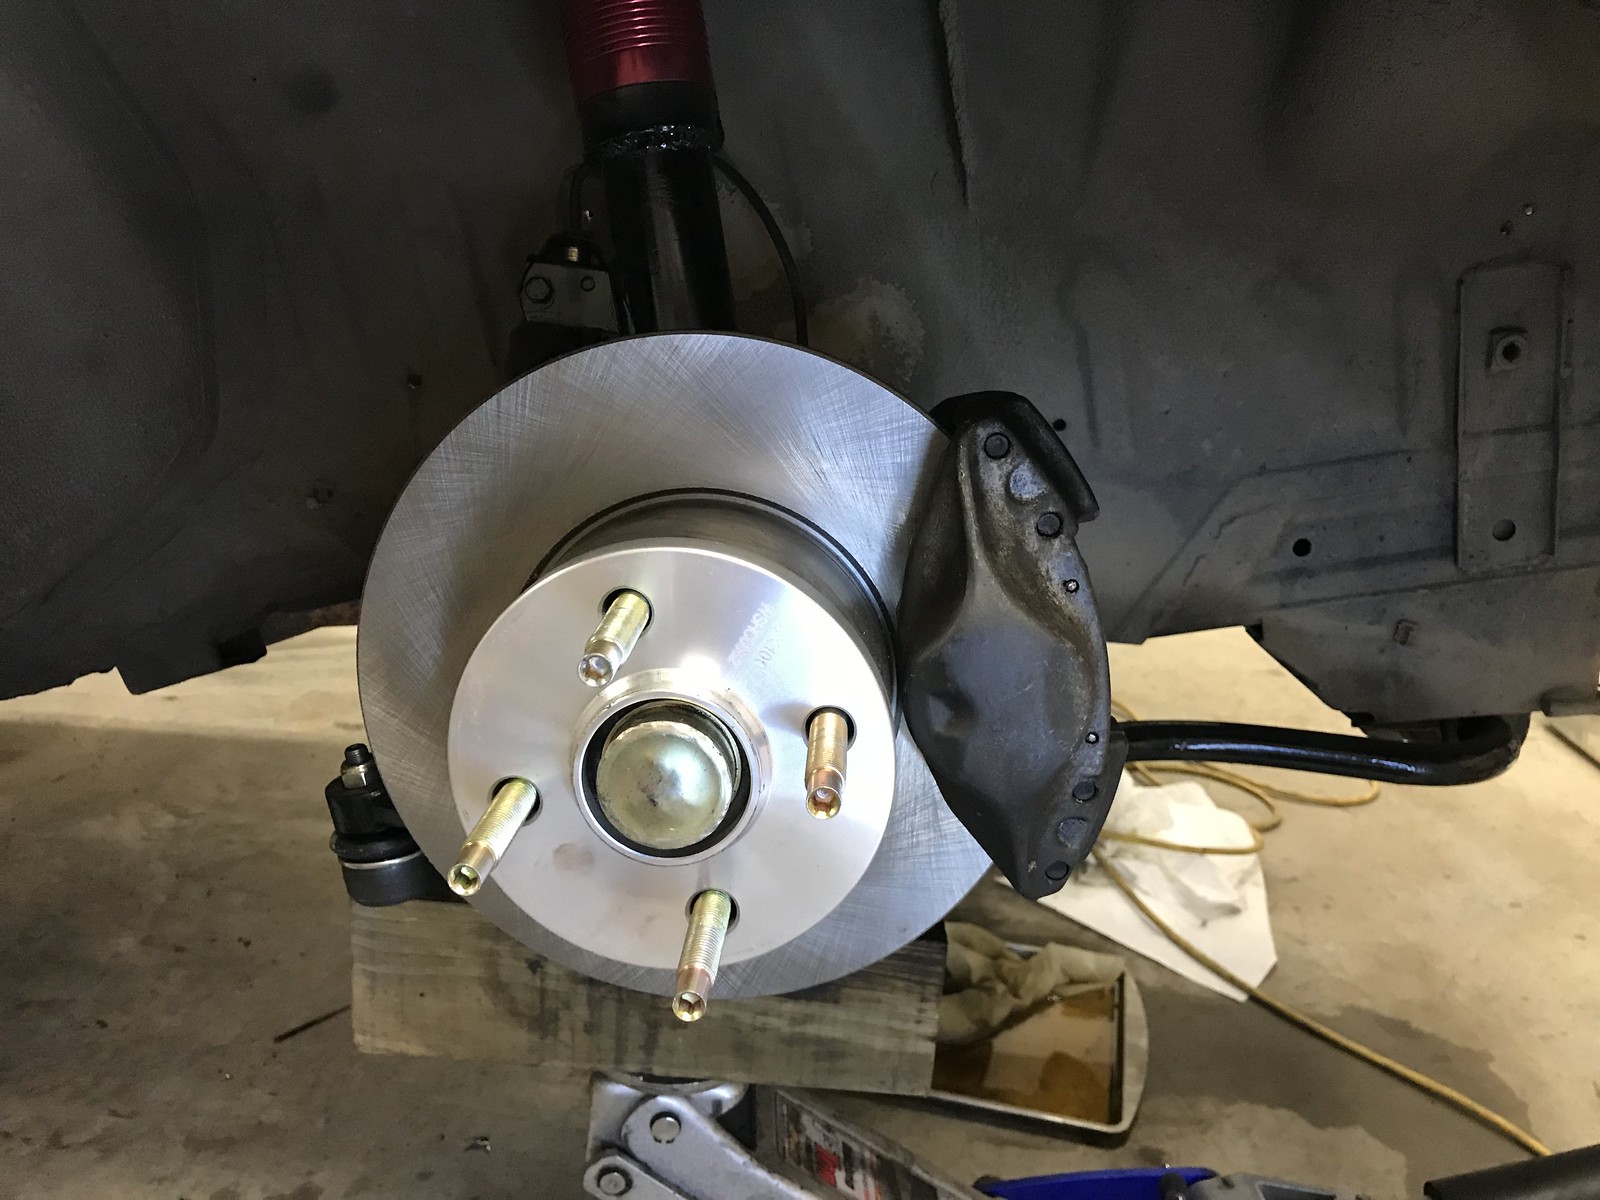
Front super-lite Brembos were disassembled, cleaned, new seals, new pistons, and bolted up. From the back to the front, all brakes are bled and ready to stop.
Clutch master is bled, just need to fiddle with the slave and reverse bleed it with my hand pump.
I also fiddled with the seat mounts. I hate the Kirkey. It has like 3-4 little bends in the bottom causing me grief trying to fabricate some simple brackets. Once I got it in the position I liked, getting in or out was not impossible, but way more difficult than expected without some sort of removable steering wheel. That's not in the budget, so I have decided for now to skip the Kirkey. I have a Jeg's poly seat that should show up today for $31 shipped off ebay. I love when ebay does the %15 coupon codes. Anyway, the poly seat should be a quick seat mount setup, and I can bolt in the stock 3 point belt until a harness bar/4 point is done. I never weighed the Kirkey, but the poly one is only supposed to be 13 pounds, so it shouldn't be a gain. If anything it will be a pound or two less.
That's where I'm at right now. I took some pics of the Brembo pistons and one of the caliper installed.
Oh yeah, I also spent an hour at the DMV yesterday to get antique plates for the e21 and my Gambler 500 Baja Bug. I'm street legal baby! Arkansas is about to change it's antique plate laws from 25 year old vehicles to 45, or at least that's what they are threatening, so it was time to run in there before it becomes a thing. I'm grandfathered in now on both my e30 and e21.
 Untitled by hatchethairy, on Flickr
 Untitled by hatchethairy, on Flickr
 Untitled by hatchethairy, on Flickr
 Untitled by hatchethairy, on Flickr
 Untitled by hatchethairy, on Flickr

You've done some great work!
I used to be of the opinion that e21s were only good as parts cars for 2002s but by now they have really grown on me. They look especially good once you get rid of the monstrous US bumpers. I dig the euro 315(?) grill too!
2002maniac said:You've done some great work!
I used to be of the opinion that e21s were only good as parts cars for 2002s but by now they have really grown on me. They look especially good once you get rid of the monstrous US bumpers. I dig the euro 315(?) grill too!
Thanks!
Yeah a euro e21 is the car to lust after looks wise, The US versions were and still are in my opinion hideous. I hope it is half as fun as my e30 though.
I'm running out of reasons to get this thing running. Family stuff and general laziness have been at the top of the pile.
Anyway, I finally got around to finishing up the last couple of items before turning the key. I broke the ignition switch when removing it from the column quite some time ago, so I bought a cheap 4 position one on ebay for around $6. A few ring terminals and a zip tie to hold it to the dash bar was all it needed. After checking all the grounds and snapping in all new torpedo fuses, it was time to see if it would turn over. With the coil wires disconnected it turned over without issue and built up oil pressure. After a minute or so I wired the coils back in and tried to fire it up for good. Apparently I forgot to put the fuel pump fuse in it's new spot, so it wouldn't sputter to life. After sorting that, I got a blurble and could only keep it running with throttle input. I adjusted the throttle cable to get an idle going for now and took some video. It's STUPID loud. The fuel pump is running in accessory position, and the feed line is leaking. I assume I've got the order of the fuel lines correct or I don't think it would start. I'll start addressing the fuel leak first, then fuel pump wiring, and then on to the thermostat leak next. I still need to bleed the clutch slave, make a seat mount, install stock seat belt, and figure out the sunroof.
Edit: struggling to embed the video, so here's a link instead.
I'm feeling rejuvenated, so I'm already knocking out the little details that will get me closer to rolling.
The fuel line leak is fixed.
The fuel pump now primes properly and runs when the car is started instead of always running. I ran my fuel pump fuse through the wrong bus bar when I wired it into the stock fuse panel, but now it's good to go.
To get the car to idle or even start initially I had to adjust the throttle cable to just slightly open the TB. This isn't the correct way to get the proper idle, but at the time got me started. I pulled the ICV as that's probably the culprit, and it's not flapping like it's supposed to. I tried to just quickly spray some cleaner in there, but it's going to need a good soak sesh to hopefully break it loose. Right now it's submerged just enough in a pot of Berryman's carb dip. Hopefully it cleans up well, or I'll have to just delete it for the Challenge, and hope my idle doesn't suffer dramatically because of it.
I thought I was going to still need to bleed the clutch slave, but apparently all the time I spent getting air out of the master worked well enough. With the car running on jack stands I was able to get the clutch to work through multiple gears nice and smoothly. I'll put a clutch stop in at some point soon, but not until it's back on wheels to set the proper release adjustment.
A couple new things on my list to tackle are:
Tachometer not reading
Engine temp gauge maxes out once I turn the key
Engine oil light is on
Headlights aren't turning on but brake lights, cluster bulbs, and tails do. Currently I don't have the front indicators plugged in, but I don't think that's associated with that problem.
Still have a slight weep at the thermostat housing, but I'm going to ignore that while I troubleshoot the other stuff.
Last night I was determined to put a seat in the car, drop it on the ground, and at least take one spin around the block for it's maiden voyage.
First up, I cut two pieces of 1" flat stock, drilled three holes in each, and then added a couple bends to help leg position. With the seat positioned in place I zapped a few good tack welds to hold it all together so I could confirm the position works for me. I checked the oil level, topped it off, and then dropped the car off the jack stands. About that time the sun was almost set, and the headlights had not been addressed yet. I decided just to go through a little loop on my street just to get that feeling of accomplishment.
First assessment, the exhaust isn't fun to be around, and I'll assume the neighbors really love me now.
I couldn't see crap out the windshield. The cluster lights are just flailing around casting a glare on the windshield, and without the headlights it was tough. I took it easy but rowed it up to third gear. On a little straight stretch I punched the throttle a little, but found some hesitation. Too soon to tell what that's about, but for now I have put it on the road.
Brakes are braking. I'll try to bed the pads in this evening and make sure the drums are adjusted properly.
All in all I accomplished driving it a block and it didn't blow up. After I pulled it back in the garage I started working on making the next trip less eventful.
E-brake cables connected and adjusted.
Headlights now work.
Wipers now work.
Tachometer should work(too late to test when it was fixed due to exhaust noise).
Electric fan wire was found unclipped inside the fuse box, glad I found it before the big overheat scenario played out.
Coolant temp gauge fixed itself.
Oil light didn't turn on.
My plan for the evening is to get a seat belt installed, license plate attached, and take a few laps to get familiar with the car. If that's uneventful, it's time to install grills, signals, and front bumper. I need to epoxy some brackets on the bumper, so while that's drying I'll try to address the sunroof lid. I'm hoping to split the two pieces to just get the top skin. Right now the whole lid weighs around 7 lbs, it may be possible to reduce that by half.
 Untitled by hatchethairy, on Flickr
 Untitled by hatchethairy, on Flickr
 Untitled by hatchethairy, on Flickr
 Untitled by hatchethairy, on Flickr
 Untitled by hatchethairy, on Flickr
 Untitled by hatchethairy, on Flickr
 Untitled by hatchethairy, on Flickr
Hell yeah man! Awesome.
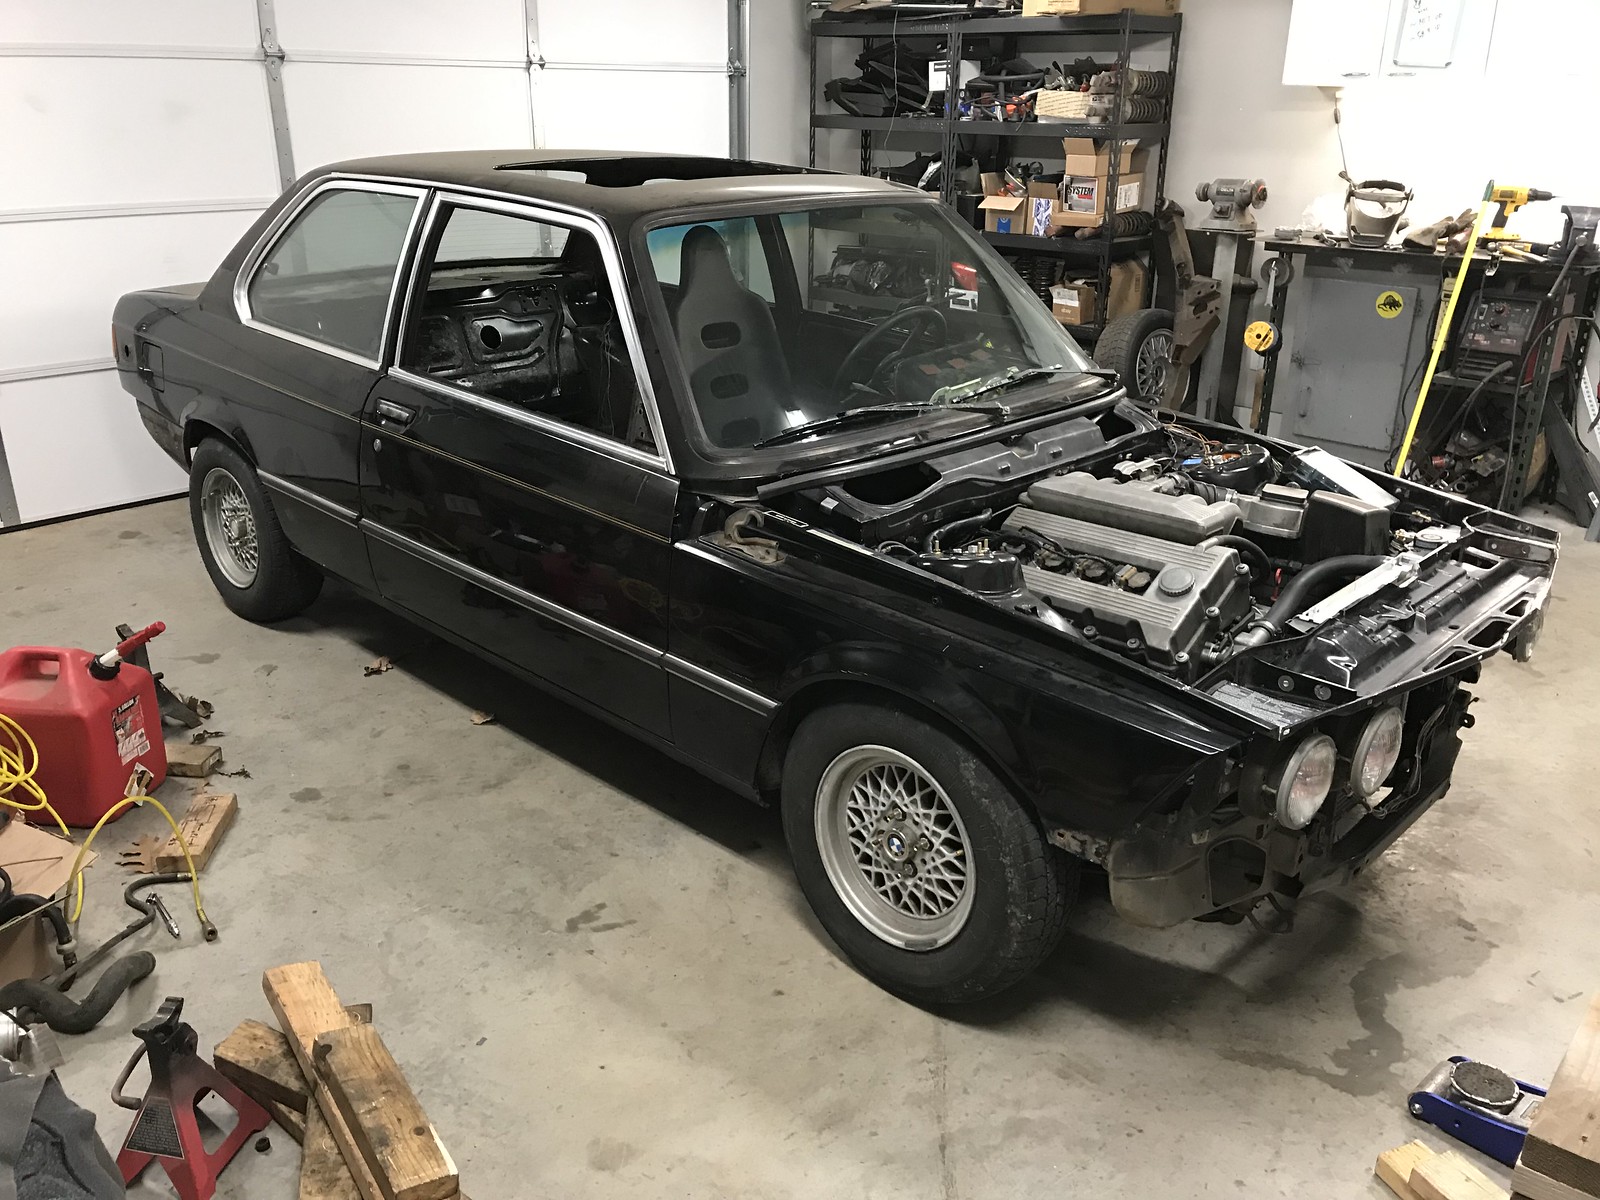
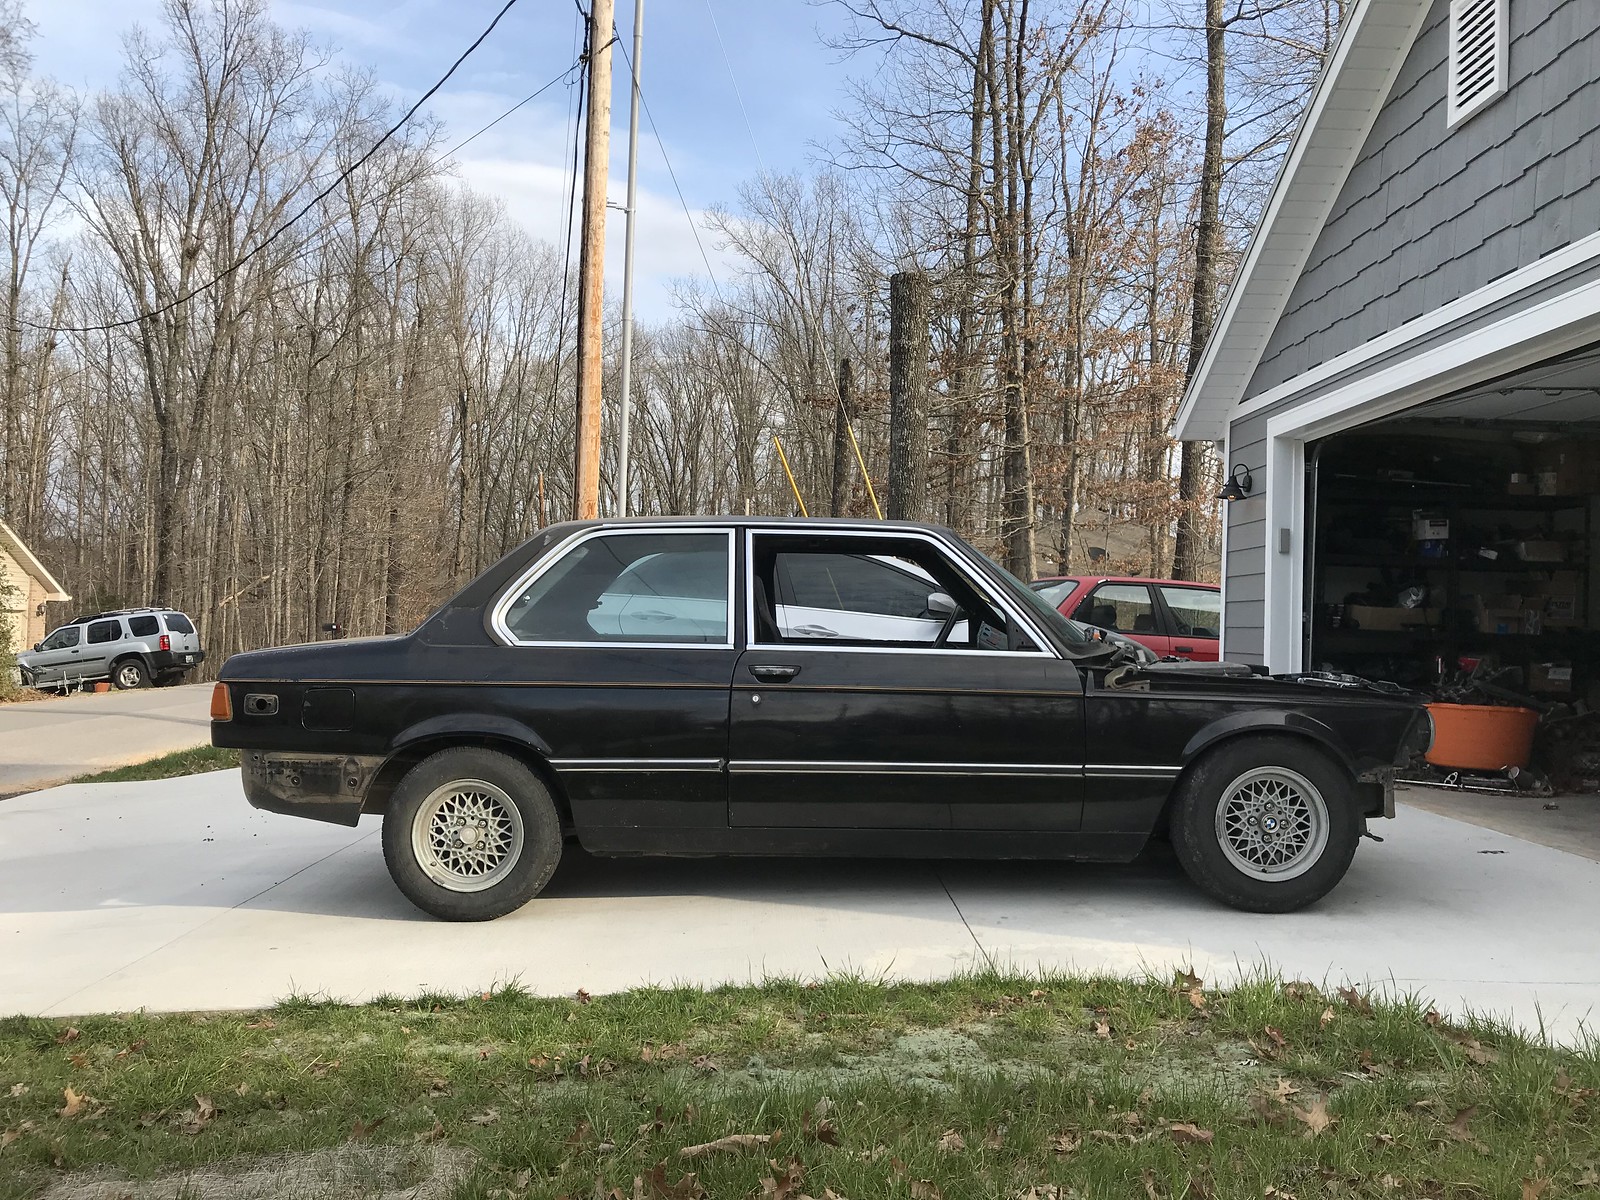
Yesterday after work I took the car around the neighborhood, this time in daylight. No tag, seat belt, hood, bumpers, etc.
The exhaust is now at the top of the priority list. It's too loud to drive anywhere, and certainly difficult to hear any possible issues like tire spin.... With that said, I think the car is running decent. It's responding to throttle well, the clutch stop needs installed as I'm used to the position on the e30. The tires that are on the car aren't exactly sporting right now, and the wiring is just kinda dangling around. I'm driving a half finished car basically. Time to start sealing the firewall stuff, a hood, bumpers, trim, and again the exhaust.
Any suggestions on how to quiet the exhaust down a TON, but with a small inexpensive package?
Look, proof it saw daylight!
 Untitled by hatchethairy, on Flickr
Maybe one of these louvered glass packs?
Plus one of these mufflers?

I'm sure more muffler will help a lot but I wonder if just getting your tailpipe out from under the car will make enough of a difference. Maybe you can rig something up to try that with a quick drive before you buy another muffler (even just having it exit in front of the rear tire).
Adam
In reply to adam525i :
The resonator on there now is just a straight through core design. At least with a glass pack there are louvers and the muffler is not a straight through design. I went ahead and bought a 12” glass pack plus the turbo tube muffler. The wife was excited to hear the news. It will effectively add a little length to it too but I don’t think more than a few inches.
After my first few times starting the car, the temp gauge would stay fairly steady when running, but just turning the key it would peg out. After running the car for a bit, the oil light would SLOWLY start to light up. I knew something was funky, because oil is getting to where it needs to, and it wouldn't light up until it was warm. Paranoia started to set in that I've got some bearing issues or oil pump problems. The way it lit up really bugged me though, so I checked how I clipped the harness on my 318is with this one and sure enough I had oil swapped with coolant. That makes sense, and best of all was a simple fix.
Before starting a victory dance, I let the car idle for a while to build up temp and see how the gauges reacted. Temp gauge is now doing it's thing, and the oil light hasn't come on at all other than when it's just the key flipped over. Unfortunately while idling the car started to run rough and didn't what to idle any more. After unclipping ICV, the idle started to go back to normal. A minute or two later though it started revving up and dropping, until it finally shut off. Weird. I turn the key over, and the battery barely turns the starter. It's drained. Either I've jacked up the alternator wiring or the alternator isn't alternating. I wouldn't be surprised if it's the alternator as it wasn't looking too purty before I cleaned it up. I was really hoping to get the car hot enough to trigger the electric fan, but didn't quite make it to that point. These little details are the main reason I have chosen to just take my time and work through the bugs. If I tried to drive the car straight to the next event Sunday, I would have been screwed.
My louvered glass pack and small tube turbo muffler should be here Thursday, so hopefully I can get those welded in quickly to help save my ears.

I think you've got two things hurting you quite a bit in terms of exhaust noise:
1. Dumps under the car
2. Turndown points exhaust at the ground
Between those two things, you're essentially bouncing the exhaust noise off of the ground and right back at the car. I think you'd see a significant improvement just by extending it to exit past the bodywork and not point it at the ground.
In reply to artur1808 :
That's a good point. I may try to extend it to dump in front of the rear tire, but facing out and away.
In reply to captainawesome :
This may be what you mean by away, but I would also run it out the passenger side even though that means crossing the driveshaft tunnel. Either way it'll be better than dumping under the car.
You'll need to log in to post.


