
zordak
Reader
6/3/18 5:11 p.m.
Have a look:
I believe I have most of the electrical connections in the engine bay modified. I still need to mount the cruise control and the starter then the battery can be installed. I am debating between re-pinning the ecu or working on the exhaust. Re-pinning is not difficult just need to run a couple of wires from the engine compartment and 2-3 hours of uninterrupted time to do it. Lots of concentration and triple checking. The exhaust is mostly just modifying the Y pipe and hooking up the rest, but the Y pipe is going to take a lot of fitting and checking and more fitting and more checking to get it right. I also need to source an air filter, I have seen some on ebay for around $50.00 so I think that is the direction I will go. If I could get parts and had the time I think I could have this running in a couple of weekends. I just have a lot of other things going on, I have 4 grandkids graduating from high school and associated parties to attend and a camping trip to show my daughter and her hubby about travel trailers, the latter will be a good time, we are going to a nice campground that is close to ATV trails and they bought a toy hauler type of travel trailer.
zordak
Reader
6/8/18 9:40 a.m.
Started on the Y pipe last night. It is a 2 piece and I have the left side tacked together where it needs to be. I started on the right side(more complicated) but ran out of steam after the first try and called it a night. The plan is to get the exhaust done then the air intake( I ordered the ebay one earlier this week should be here tomorrow) then finish the wiring. Reasons being if I finish the wiring I would not be able to resist the urge to try and start it and I keep going back to trying to run it on the engine stand and dealing with the noise in the garage. (not to mention not annoying the neighbors)
zordak
Reader
6/11/18 9:55 a.m.
Air filter assembly showed up Saturday. After setting it in place I decided to finish off as many of the little things I told myself I would do later. It seems I forgot about the PCV port on the lower intake on the left side of the engine, so I got a piece of 3/8" brake line and bent up a hard line to connect the PCV valve to the port after installing a 3/4" npt to 3/8" hose barb fitting. That allowed me to hook up the charcoal canister to the correct port on the throttle body. I moved on to mounting the cruise control. This allowed me to mount the battery and finalize the battery cables, including putting the starter in and the grounds and the positive wire to the distribution point on the other side where the battery was. I double checked the fit fit on the Y pipe last thing on Sunday before calling it a day and even though it looks ugly I believe it will work so I just need to tack everything in place then remove for welding.
zordak
Reader
6/13/18 9:44 a.m.
Pulled the computer out and took a long look at the parameters for the ECU. I lowered the temps for the fan control so the coolant doesn't have to get to 230 deg before the fan comes on. and I bumped the volumetric efficiency table by 2% in hopes of not running too lean because of the 1.6:1 rockers and the better air filter and exhaust. I just need to flash the chip and install it in the ECU with the adapters I got off of ebay. I will be doing that when I re-pin the connectors for the ECU.
zordak
Reader
6/18/18 10:10 a.m.
I got the wires run from he engine bay to the ECU area. I pulled the ECU down to see how much play I had in the wires, and it looks like I might be able to put a cushion on the ground and do the connector re-pin with out laying on my back. I also got the Y pipe tacked and welded. I think I will drag it to work and go over my welds with the TIG as my harbor freight welder likes to slow the wire speed as I was trying to weld.(yes the welds look that ugly I won't post pics for fear of people retching on their keyboards)
In reply to zordak :
good work! glad to see updates on this!
zordak
Reader
6/19/18 9:42 a.m.
I took the Y pipe in to work this morning in hopes of getting the welds smoothed out before work but I am way out of practice with the TIG and blew a large hole in it. Thankfully I had some scrap sheet metal sitting around from my Bradley gas tank project, so I switched over to MIG made a patch for the hole and did a reasonable job tacking it up. So for right now I will just use it as is and see how long the cheap stuff last.
zordak
Reader
6/20/18 9:40 a.m.
Started to install the Summit racing 3" exhaust last night. Bolted the Y pipe in finger tight( i don not think it warped much in welding it) then attacked the pipe over the rear axle. What a pain had to drop the panard bar and cross brace to get it in. I then looked at mounting the cat and found that the I need to fabricate something to match the factory mount. This is going to take a lot longer than I thought.
zordak
Reader
6/24/18 9:05 p.m.
Ok about $70.00 later I got the exhaust in. The Summit racing 3" cat back exhaust has a slight bend where it meets up with the piece that goes over the axle, I does not need it I ended up cutting it off and adding a section. I also just made a straight pipe to replace the cat. Here are a couple of pics of the exhaust.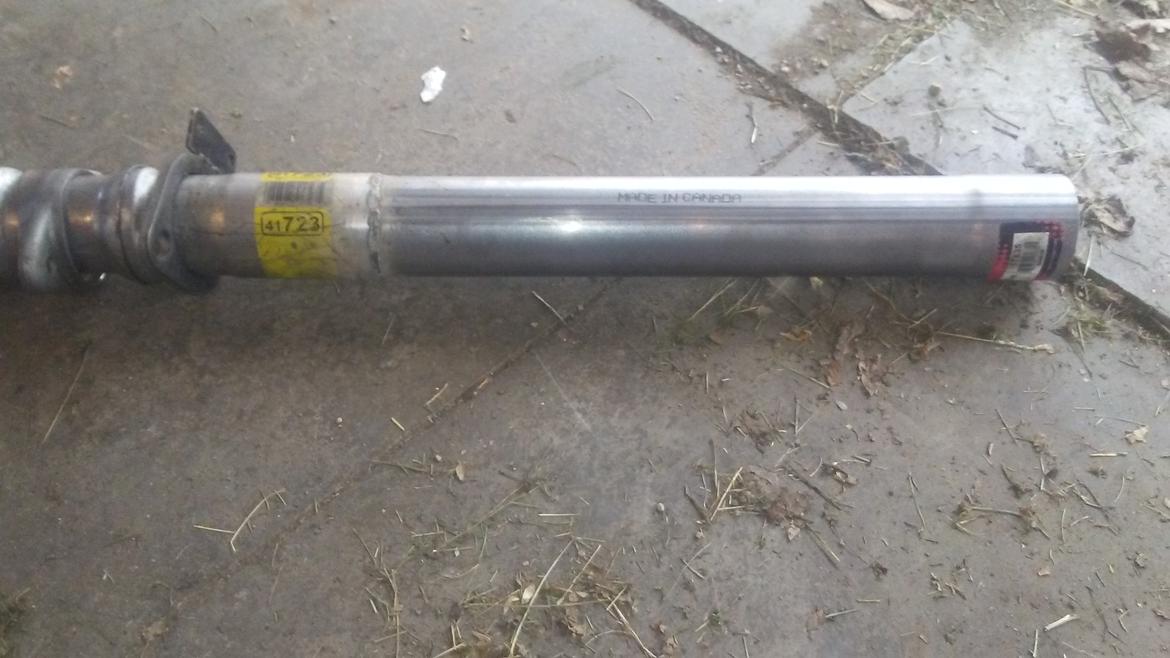

After I finally got the exhaust bolted in I started in on re-pinning the ecu. I got that done and found I need to cut a notch in the case for the computer to clear the chip adapter I bought. So I tried to start it with the stock chip. Here is what happened .
zordak
Reader
6/26/18 9:43 a.m.
I got out to the garage after work and started to tidy things up a bit. I remembered I needed to by pass the knock sensor module as the TPI computer does the job of that. I also notched out the housing for the computer so I could put in the adapter for the memcal. I was able to get it started after that and ran the engine for a while. I toasted a plastic plug wire holder so I need to fix that. and It appears the brand new knock sensor I installed might be bad. I got a mil light and did the quick jumper watch flashing light and it showed 43 bad knock sensor. I will check the wire from the sensor to the ecu first but I think the sensor is bad. Still need to remember to set the timing and do an IAC adjustment. So lots to do yet before I start on tuning. It is also idling rough I need to check to make sure all cylinders are firing.
zordak
Reader
7/2/18 9:45 a.m.
I checks the wire for the knock sensor, and found I had done it correctly. Now I need to swap the knock sensor. I thought I screwed it up when the inside turned before I thought it was tight. now I need to remove the starter to be able to get a pipe wrench in it to remove it. Unfortunately I have been feeling lousy for a couple of weeks so I went to the doc and found out I have been walking around with a sinus infection. between that and the hot(for me)weather(90 deg+ 90%+humidity) I could not force myself to do much over the weekend. I will also be spending most of the time off at the cabin this week so it is next weekend before I get to it again.
Make sure spark plug wires aren't crossed. My dad tested me once by crossing 5 and 7 when I was doing a tune-up a long time ago. Since then, I mark both ends of every plug wire.
zordak
Reader
7/8/18 6:46 p.m.
Ok a day of work. First I pulled the starter so I could get the bad knock sensor out, put in the old one off of the old engine. re installed the starter and refilled the cooling system. Then I attacked the trans, remove the pan, pull the filter clean everything including the magnet glued to the bottom of the pan, found 2 screws and washers that were missing re installed everything and refilled with fresh fluid. Installed the torque converter cover. I set the timing and found the miss problem, the #1 and #5 were switched. YES timing was pain I had to go to the #6 wire to time it. That is when I checked the wires and found the problem. Now it runs smoother. Then I had 2 error codes to deal with. 42 and 43. At this point I took it around the block. I made it.
Now starts the real fun. I tried to hook up my computer to the ALDL and see how the engine is running and use the software to clear the codes. The computer would not talk to the ECU. So the first thing I check is the wires from the ECU to the ALDL connector, this entailed disconnecting the battery, everything checked out. I reread the directions on the ALDL cable and try to see how to make sure the cable works tried everything the instructions said and no joy. But the battery was disconnected long enough to clear the codes. Dammit the 43 code came back bad knock sensor. so know i need to try to figure out if the ECU has a problem or the cable I was using has one. At least it ran well enough to get around the block. One last thing I need to put in a starter shim as the starter will not disengage right away. Took me awhile to figure out that one.
zordak
Reader
7/11/18 9:23 a.m.
I put the shim in the starter and it fixed the slow spin and pinion sticking problems. I had backed the car out and cleaned the floor because of the trans filter change. Any way while I was under there I noticed coolant on the floor on the drivers side. I hope it is just a loose hose clamp on the oil cooler. I need to get the car back up and check it out.
zordak
Reader
7/16/18 9:50 a.m.
OK got back into town earlier on Sunday than I expected, so I checked out the brakes on my Liberty. As I suspected the tire guy said something might be wrong with the brakes and then the wife thinks they feel different. After wrestling of lug nits put on by an idoit (1 at about 250 ftlbs and the rest little over finger tight) I find what I thought a set of brakes at mid life, no stuck pins or dragging calipers, all pads wearing the same on both sides. Any way this is not about the Liberty or tire shops, it is about the Firebird. I crawled underneath and tightened up the hose clamps on the oil cooler, I did not see any signs that anything else was leaking so here's hoping. Then I called in some help and got the hood on. Now is where the fun begins. I dug out an older laptop with an on board RS232 port and tried to talk to the ECU. Nothing. so I pulled the ECU and removed the case and then checked continuity from the ALDL to the circuit board to make sure I did not screw up when I re-pinned the ECU connectors. I had continuity. put everything back together and tried 1 more time to get a computer to talk to the ECU and no dice. So I decided I could at least listen to the nice rumble the exhaust makes for a few minutes. What ever I did when I had the ECU out of the case I screwed something up. It will try to start the just crank. I tried to just push the pedal down a little to engage cold start mode and the same thing. My best guess is I had an ECU that had some bad parts in it (communications and knock sensor) and when I took it apart I got to something vital, either injector control or spark control, anyway I believe it is toast and now need to source a new one. I am glad the wife mentioned a warranty, because I was going to source another used one from ebay, but I checked sources for new and found I could get a refurb from Summit for less than one from ebay once I send in the core. So I just need to wait till the budget says I can spend some money and I can try again.
zordak
Reader
7/21/18 6:15 p.m.
Definition of idiot: See Zordak on the GRM message board. So I got a new ECU and finally had time to mess with it. I swap the covers so I could use the adapter for using a different chip. I disconnect the battery then exchange ECUs then try to talk to the new ECU. No communication. Try to start it, still acts the same way. Oh god did I mess something else up? Start checking vitals. Fuel pressure? next to nothing, hot wire the pump still low. Did I blow the hose connecting the pump to the rest of the line in the tank? Had it happen before. In the midst of deciding to start pulling the tank(lots of work) It dawns on me that I was really low on gas when I started the engine swap and was thinking about putting more in but hadn't gotten around to it yet. So before I dive into yet another time consuming task I will get some gas and try again. 5 gallons of gas later and hot wiring the pump again shows 40 lbs of pressure. Hook everything back up and she fires right up. $75 on a new ECU and a $25 core charge for running out of gas. Of course it starts right up the last time, then I mess with the ECU doing things I really probably shouldn't do like use an ohm meter on connectors and handling it with out a ground strap on. So now I have 3 good ECUs sitting here. 1st the one that was in the car for a TBI 305. 2nd the one I got with the engine which if my research is correct is an 89 350 with a MAF sensor. Now I have a spare speed density without the memcal. I still cannot connect to the ECU with any computer I have sitting here using the adapter cable I bought earlier to confirm that the TBI ECU was seeing all the sensors. The adapter cable worked then but I think there is enough of a difference between the 2 ECUs that it is just outside the operating parameters for the adapter to work on the new ECU. I also am still having nock sensor problems according to the codes I pull out of the ECU using the old fashion method.
zordak
Reader
7/24/18 9:41 a.m.
I found the problem with the knock sensor. There are 2 types of sensors for each displacement one for the TBI and one for TPI. I ended up with 2 for a TBI. According to Thirdgen.org forums the TBI have a white connector and theTPI (which I need ) have a black connector. To be absolutely positive the TBI are 100k ohm checking from the terminal to the body and the TPI are 3.9k to 4.5k ohm.
zordak
Reader
7/25/18 9:32 a.m.
Knock sensor on the way. After doing some more checking on Thirdgen.org, the cable I bought, which worked just fine on the TBI computer, seems not to like the 730 ECM, which is for the TPI speed density. I put up the engine, air filter assembly and the 3 ECM on the local craigslist. I also ordered a ALDL cable from moates, and it has shipped. Hopefully when all these things arrive I can get on with tuning and start driving it before it is time to put it up for the winter.
zordak
Reader
7/27/18 9:30 a.m.
The cable from moates arrived last night, so I decided to check it out. At first I got nothing, but then I tried one of the things I tried with the old cable, I hooked up jumper wires so instead of using pin E which is the pin for the slow ECM I ran a jumper from E on the car to M on the cable and I got communication. I am going to see if I can pull the car connector and move the wire from E to M so I can just plug the cable in. Hopefully I can get the time to do some tuning after the knock sensor gets here. My guess is on the other cable in an effort to make it robust they used components that do not switch fast enough for the change from 160 baud to 8192 baud. And why GM did not just go with a standard RS-232 system is beyond me.
zordak
Reader
7/28/18 2:23 p.m.
The knock sensor arrived last night, so before I left for the weekend I opened it to find it had a white connector. Well I thought I would check it with an ohm meter anyway just to make sure. 3.9k ohms, yes the correct sensor. So it appears the connector color does not matter. I just hope it is for a 305 and not a 350, as I have read there is a difference there too. Well when I get home sunday I will get it installed and start the tuning.
zordak
Reader
7/30/18 9:43 a.m.
I got the knock sensor installed with little mess and not much trouble. On to the ALDL port on the car. took out the 2 screws holding it in and could look at the wires. The wire on pin M looked big and there was not a wire on pin G for the fuel pump. Further examination showed I could use a small pin to remove the terminals so I removed pin M and put in in pin G(I will have figure this out later if it is the fuel pump test or not) and moved pin E to pin M. This got me so I could just plug in the ALDL to USB cable and get Tuner Pro up and running. Got the engine started and watched the data on Tuner Pro. The SES light did not turn on after 10 seconds or so like it did with the wrong knock sensor, good so far. I let the engine warm up and confirmed the fan would turn on and off at the correct coolant temps. After 15 minutes it still did not go into closed loop so I could start checking BLMs, so I took it out for my longer test loop. About a mile out of town the SES light came on. (dam) Pulled over and checked Tuner Pro and it said bad O2 sensor. Could be it was the one from the old engine and got knocked around a little in the install. I will double check the wire from the sensor to the ECU but I am pretty sure it is the sensor. If not either I might have to go to a heated sensor as the O2 sensor is a few inches further from the exhaust ports with the headers. Thing to check out.
zordak
Reader
8/1/18 9:32 a.m.
Took a look at the O2 sensor wiring last night and the wire from the sensor to the ECU is good. I noticed the ECU has a dedicated ground for the sensor, so I checked that and got some funny readings it would never hold at a steady ohm or zero out. I decided the ground got messed up some where and ran a new wire to ground to minimize noise as they ECU si looking at millivolts and it is easy to induce voltage in such a circuit. I got good continuity to the sensor itself. I will hopefully have some ambition left after work and drag the laptop out and try another test run.
zordak
Reader
8/3/18 9:42 a.m.
Grabbed the computer and went out and tried to do some tuning. Fixing the ground seemed to do the trick, it jumped in to closed loop mode much faster than before. Now is where everything goes sideways. The ECU is seeing a really rich condition and bottomed out the BLM to compensate. At first I thought is was from the 2% I added but after double checking the BIN I found out I did not know HP tuner as well as I thought. I forgot to save the changes I made and just programed a chip with just the changes to the AIR and fan temps but with the stock VE values. Ok so it is running rich, I drop the VE values 20% and make sure I save the changes before programing the chip. The engine took longer to get to a really rich condition but it still bottomed out the BLM. AS I see it now I have a few things to check out. 1) faulty O2 sensor 2) I am getting an induced voltage on the O2 sensor 3) I have a misfire on the left bank(only 1 O2 sensor on the left side) 4) the injectors I bought are larger than advertised. The engine idles good and stays close to the commanded rpm. If I try to hold the engine at a speed over idle it will surge, looking at the injector pulse it gets way small then goes back up along with a drop in the O2 sensor readings. Thinking about it as I write this it seems to me that a bad plug or wire or over size injectors are the culprit. I need to do more checking.
zordak
Reader
8/4/18 10:16 a.m.
I am going to post here as I step through figuring this out. I pulled all 4 plugs on the left bank(the one with the O2 sensor) and although the electrodes looked clean the end of the threaded part had black on it so I think it is running rich as the ECU is showing. I am going to try changing the flow rate in the BIN to 24 instead of 19 to see if this leans it out. then I need to decide if I need to get different injectors or not. I don't wan to run into a too short pulse. GM had a reason to run 19 lbs/hr injectors on the 305 instead of the 24 lbs/hr on the 350. Car companies do not like to have too many different parts around if they do not have to.


