


Excellent work so far!
I'm kinda surprised you didn't add a pot-filler (tall faucet/sprayer) above the stove while you had it all apart. They can be pretty convenient from what I understand.

Excellent work so far!
I'm kinda surprised you didn't add a pot-filler (tall faucet/sprayer) above the stove while you had it all apart. They can be pretty convenient from what I understand.

Looks great. Where did you get the door? That's another thing that I need to do.

In reply to Stefan (Not Bruce):
My wife and I discussed the concept last night and decided the convenience of not having to turn around to fill a pot didn't outweigh the design/visual aesthetic negatives.
The backsplash over the stove will likely be back-painted glass, so we're going for a really clean look.
In reply to Enyar:
Door and window was ordered through the local builder supply from Ply Gem. I'm very pleased with the quality - it is similar to what Home Depot and Lowes sells, and might be a tiny bit nicer for a similar price.
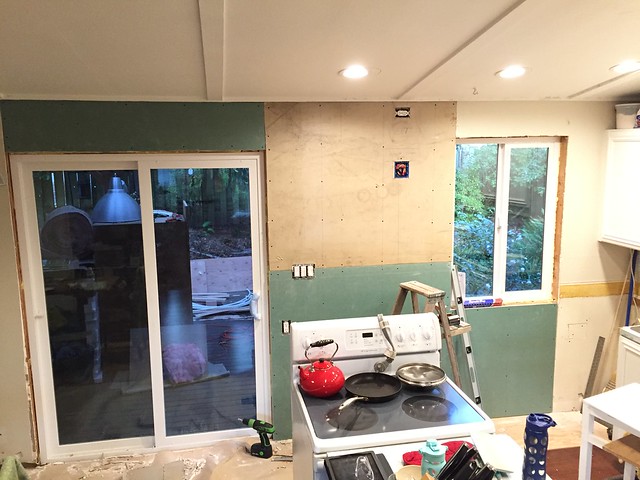
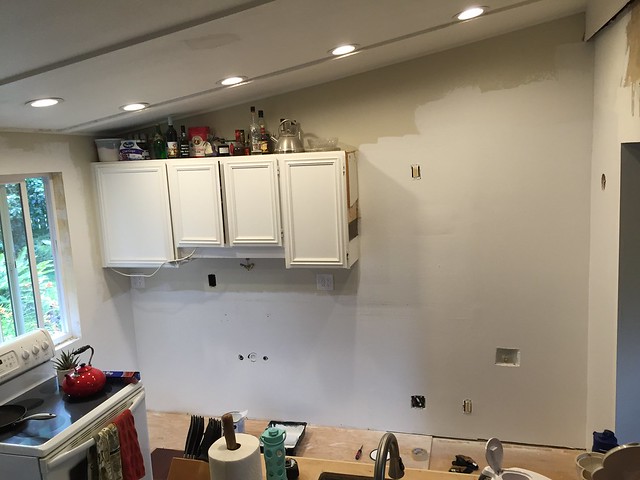
I had plans to get drywall up this weekend, but standing in the way of that goal was getting the wall behind the stove sorted out. I had to deal with the following things:
Centering the hood over the stove meant that it would be mounted smack dab on top of two sistered studs. Those studs probably wouldn't like being dissected by a 6" hole for the vent, so I slapped in one on either side. Here is a photo with those two studs cut off, ready for their new friends to join in:
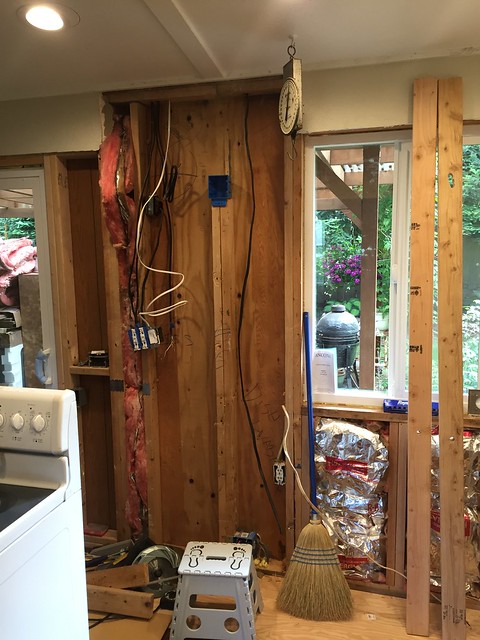
The vent would have been a straight-forward prep, except I needed a junction box in order to extend the wires to the new light switch location. Code says any junction box must be accessible after a wall is finished/closed up... I really didn't want a junction box in the middle of my cooktop backsplash, so I got creative and hid it behind the hood. I'm not sure an inspector would sign off on this, but in my opinion it meets the intent of the code if not the letter. Here you can see the wall all framed up with goofy stud spacing in order to squeeze everything in. I also added a block where the hood mount will actually go.
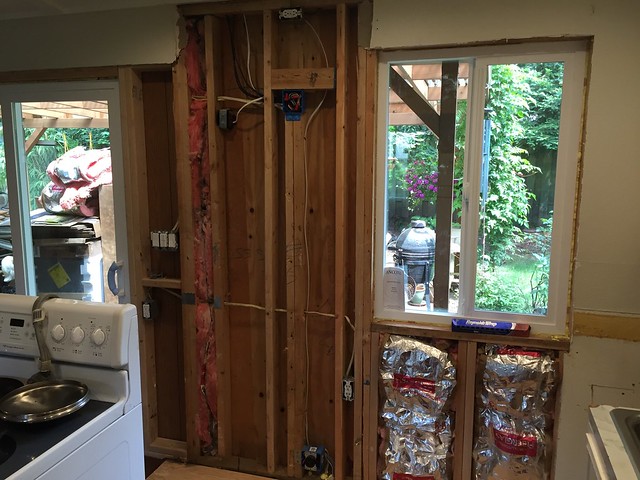
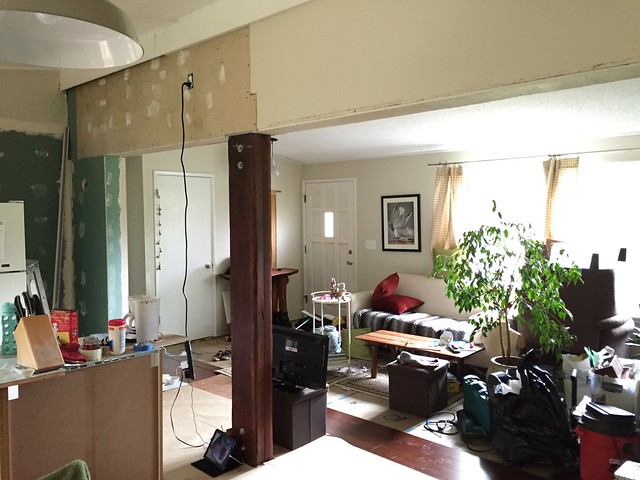
There is wire going every which way in that wall, and I cleaned it all up and put a few staples in after this photo. I was pleased to get all the lights working again as intended in one attempt. It's like I knew what I was doing!
So now I could move on to drywall.
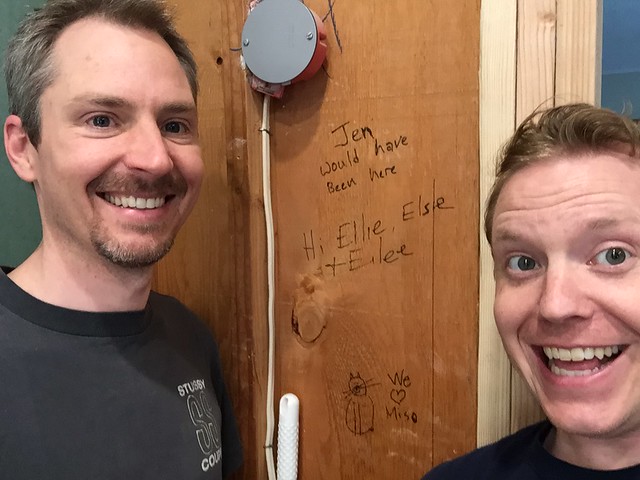
Everyone knows that before you put up drywall, you have to deface the inside of the walls, right? My friend Chris volunteered to come help, so we got to work calling out some mutual friends that had every intention of coming over and drawing a penis on the walls. I won't post that pic here. ![]()
The drywall I'm using was acquired by me for free from a company I worked for years ago. I have a stack in the neighborhood of 1000 square feet of drywall that has been taking up space in the shop, so I was happy to finally put some to work. It is all dusty and lots of it is damaged. You'll notice all the blue/green stuff is wet location drywall - it was on the top of the pile, so I used it. ![]()
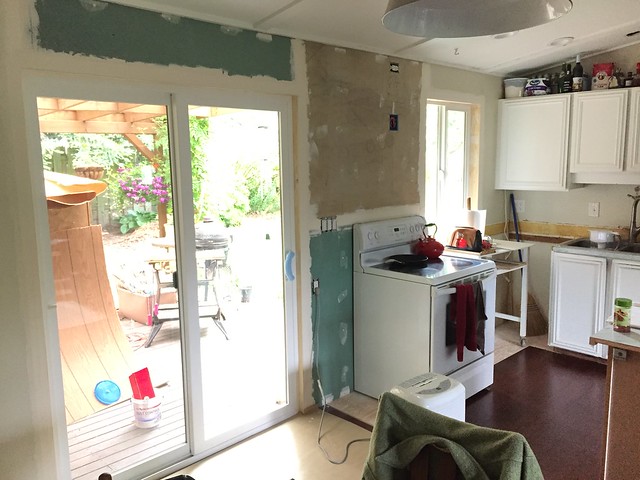
First pieces up. You can see the hackery that was the previous owner's attempt at pulling wire for under counter lights. I'll be cleaning that mess up:
Back wall hung:
Here is the rest of it:
You can see I've started mud and tape. Lots of corner bead to get up.
Room is starting to feel a tiny bit smaller, but with every corner and seam I get taped, the more it feels like it might all be finished someday.
My friend Cameron came over Friday afternoon, and we got the last of the drywall patching and tape up. Photo bombed by my daughter.

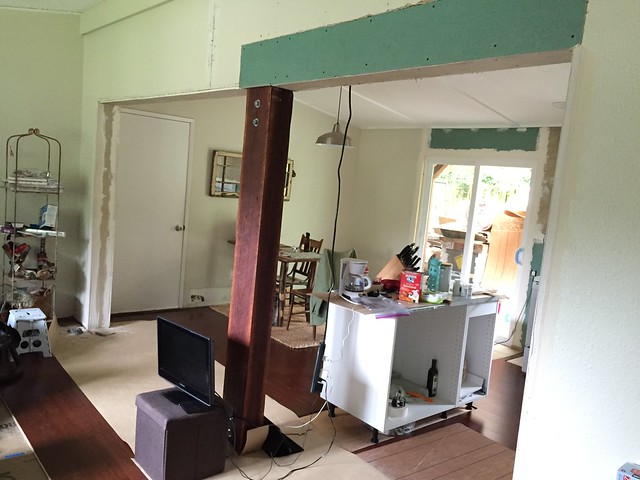
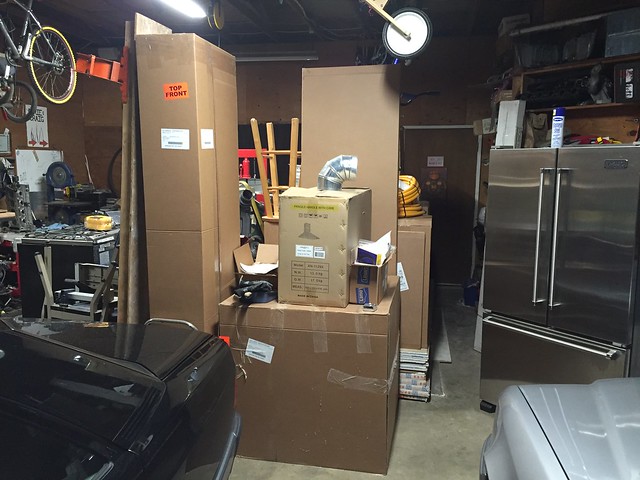
Ever wonder what your garage will look like when you do a big remodel? Here you go...in this photo you can see all our new appliances plus all the cabinets. I can still get both cars into the garage at night, but there isn't much room after that!
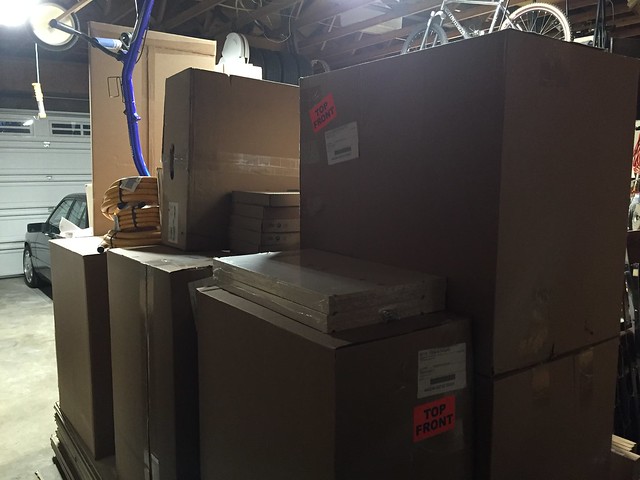
The view from the other side:
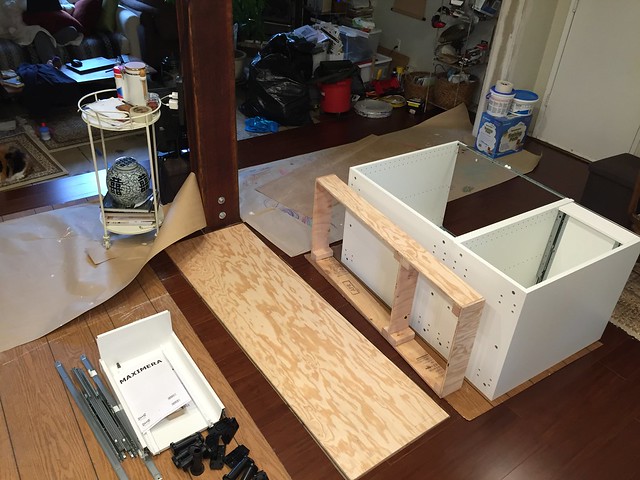
I spent the weekend getting the island installed for realzies, not just sitting where it would live as it has for the last few months. This allowed me to get the old sink decommissioned so the new cabinets could go in.
The IKEA cabinets come with plastic adjustable height legs, but they wouldn't suit in my case since I needed to anchor the cabinets to the floor. Ordinarily they would be anchored to a wall, and the factory legs would work great. Since this is an island, I decided to make a riser base like a traditional cabinet. Base assembled:
Here is the base in place, with a bunch of angle iron brackets I made up:
The eagle-eyed among us will notice the fletching of an arrow sticking up through the floor in the above photo... I had to make sure the drain pipe would clear any floor joists, so I made a pilot hole in the floor and used the arrow as a marker that would stick out into the crawlspace through the insulation. I got to spend a lot of time in the crawlspace this weekend.
I put the cabinets on and off of that riser at least twenty times, as I had to mark one thing, then drill, then measure another. Very tedious getting it all leveled and aligned with the rest of the room. Here it is landed, with the new dishwasher in place!
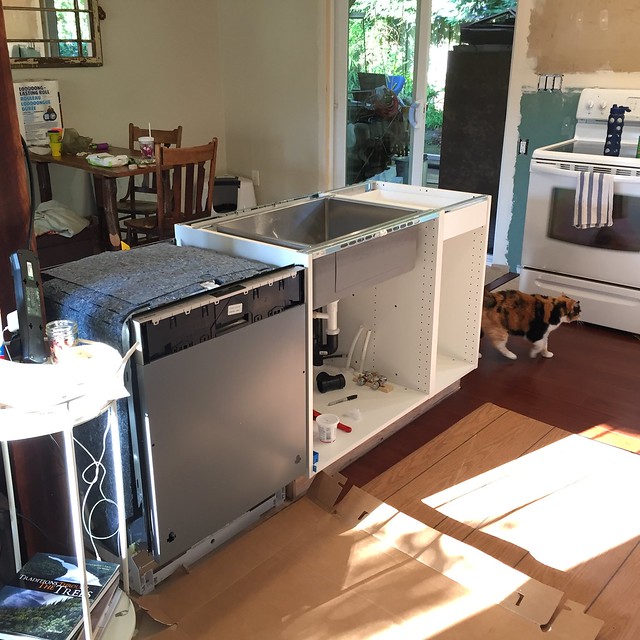
Dishwasher is a panel front, so it will match the rest of the cabinets on the island. Bosch 800 series.
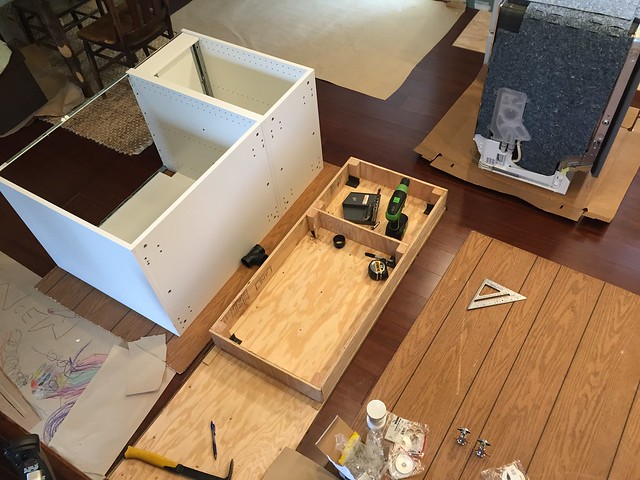
I went ahead and cut out a plywood counter top to serve as our temporary until I get around to pouring the concrete tops after all the cabinets are in place. The plywood is basically the finished size that the new counters will be, except the finals will have more overhang left and right for the waterfall edges.
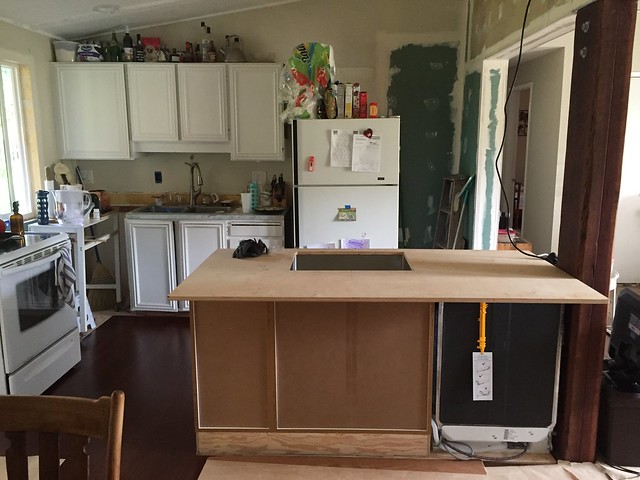
And just because we're all about that custom look, check out the hand-applied masking tape edging on this plywood:
Fancy, right? So after spending all day in the crawlspace, I got a new drain line run, hot/cold water to the sink, hot to the dishwasher, cold to the fridge ice maker, switched electrical to the island for accent lights, a circuit for the dishwasher and island outlets. Good weekend.
I continue to add drywall compound every night - basically two or three mud pans full each night, picking away at getting all the seams finished. I grossly underestimated the quantity of mud needed - I started with one premixed pail and have gone back to buy "just one more" two more times. Tonight I will go get TWO pails, and hope that is sufficient. If I had known what I was doing, I would have just gotten the five gallon bucket in the first place.
I might get crazy and start installing cabinets this weekend!

Mezzanine wrote: I continue to add drywall compound every night - basically two or three mud pans full each night, picking away at getting all the seams finished. I grossly underestimated the quantity of mud needed - I started with one premixed pail and have gone back to buy "just one more" two more times. Tonight I will go get TWO pails, and hope that is sufficient. If I had known what I was doing, I would have just gotten the five gallon bucket in the first place. I might get crazy and start installing cabinets this weekend!
Been there. The mudding never seems to end. You think you have it all done and then you notice another spot that needs smoothing. Of course coming from an automotive background I have a tendency to go a little overboard on the smoothing part trying to make things as straight as a trucks bedside. I went through two 4 gallon buckets and one pail of the stuff between all the reno stuff I've done.
Feels good to get it done though. I need to update my thread, I got my cabinets in and have the granite guys coming out to measure on Monday.

I haven't mudded in awhile, but my new train of thought is to focus less on the joints and more on doing a full skim coat. Reason being that it give a much bigger area to feather out imperfections.
RossD wrote: I haven't mudded in awhile, but my new train of thought is to focus less on the joints and more on doing a full skim coat. Reason being that it give a much bigger area to feather out imperfections.
From the youtube videos I watched to bone up on the process, this is the advice I am trying to take to heart. Most of my past mud/tape experience included overworking each coat trying to make it right, instead of knowing when to quit. Since I have so many butt-joints merging with textured wall, I am trying to feather much wider.
This also means I am trying to correct some of the really poor tape jobs existing. Probably a futile effort, but I can't stop now. I'm really hoping that wet sponge sanding helps to blend the mud with the existing textured walls.
Torx, I was going to harass you about an update. Glad to hear work continues.

Drywall is a job I'd farm out every time if I could.

Yea that sponge trick doesn't work like that. It will make the mud smooth but it takes a lot of effort. Best thing I found that works is to make the mud as thin as thick paint and roll it on with a paint roller then remove it with a 6" blade. This will make the wall very smooth and very little sanding or sponging is needed. If you need texture for small areas then the stuff in the spray cans works fairly well I've found. I tested it on some spare sheet rock until I found the right distance to get the desired effect needed.

Looking good Mezzanine.
What is the plan for the concrete counters? Cast in place or pre-cast?
In reply to brad131a4:
Aw man, why you got to rain on my parade like that? ![]()
In reply to T.J.:
Precast, GFRC is the plan. In-situ isn't a great option when you're trying to keep the kitchen functional as much as possible, but I considered it.
Sorry just trying to keep you from going through the headache I had thinking the same thing a few years back.
GFCR? not sure what this is. I've seen a few of these made at various jobs and it looks pretty simple. Just remember it's upside down and flipped back to front when turned over. Got a good snicker when the framers forgot this and made the form for the casting as it would sit on the cabinets.
I do know they use 3/4 plywood with the coated sides and use some kind of releasing agent just not sure what. They also had rebar in it as well.
Glass Fiber Reinforced Concrete = GFRC.
I still want to make some concrete counter tops to try it out. I think a vanity top is where I may give it a try first, but I am trying to stay away from bathroom remodeling for now. I did replace a toilet and remove a bidet this year, but avoided a full blown redo of the room so far.
Brad, this is a long video, but it shows the details of the process for GFRC that I'll be applying to my project quite well:
https://www.youtube.com/embed/zdZsWhq54UE
Feel free to skip through the video to get the basics.
Only had one day this weekend to work on the kitchen, so into the crawlspace I went to install our new gas line.
We have a 250 gallon LP (propane) tank that was plumbed into a gas fireplace. Judging by the materials used, it was converted not too long before we bought the house. Unfortunately when they installed it, they ran 1/2" line for the full ~60' of the house, which is undersized for the total BTU capacity of the stove in question. As I would be ADDING more BTU capacity (an additional 48k) with the gas cooktop, I decided to replace the existing stuff and make sure I had the flow needed.
Corrugated stainless steel tubing is what the cool kids install these days according to my interballs research. Lowes carries Pro-Flex online (not available in stores near me for some reason...), and the reviews for this is much higher than the stuff HD sells. Here's the stuff ready to head under the house:

No pics from in the crawlspace, because my phone doesn't belong down there.
Here is the inlet to the house from the buried gas line:
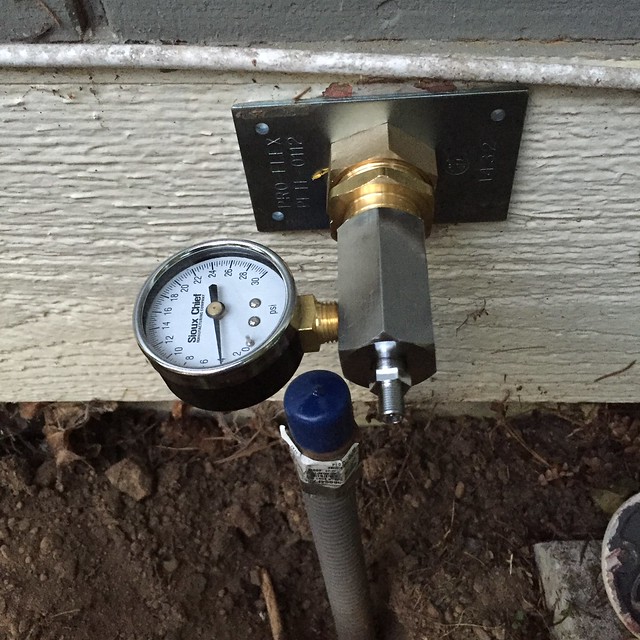
I've got the pressure test gauge on there at 4 lbs - it has been holding that pressure for almost 24 hours now with no change at all. This is the reason I bought this stuff - the reviews for the HD product said the joints rarely seal up right the first time, which is why I bought the stuff from Lowes. My experience with Pro-Flex was great - it was zero bubble at every fitting the first time out, and no special cutter or extra tools needed.
I ran a 3/4" x 25' line from the above port to a Tee, and then ran 25' of 3/4" to the stove and 25' of 1/2" to the gas fireplace. I didn't hang the line to the fireplace yet because we will be tearing the old one out and demolishing the hearth in order to move to a wall mounted unit. That leg of the run is just valved off for now.
Now to have the propane company out to do a final leak test and connection!
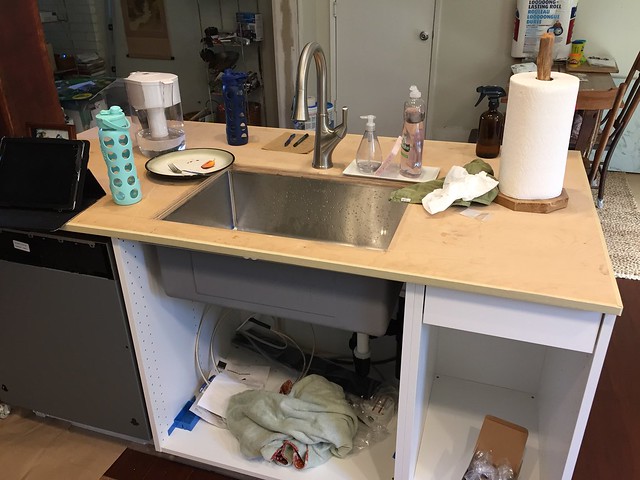
Had my first warranty job last night, before the project was even over. I went into the house in the afternoon yesterday to discover the isolation valves supplying water to the sink and the dishwasher had inexplicably started to leak. There was a towel in the sink cabinet that had soaked up a few gallons of water, but the rest had run under the island cabinets and the floor. Lots of water.
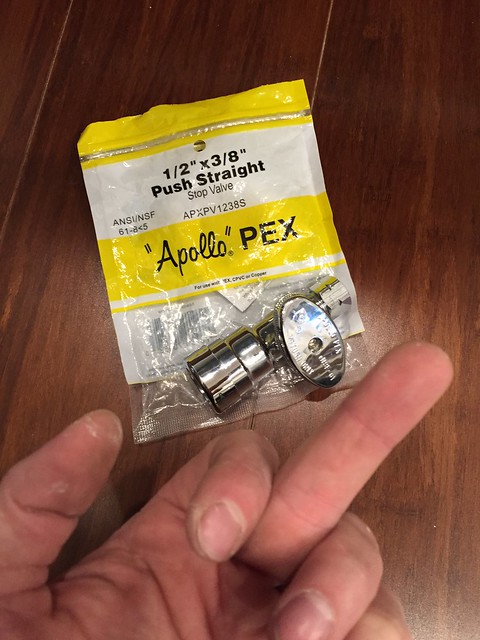
When I bought all the supplies to plumb in the island, Lowes was out of stock of the standard Pex crimp valves, so I bought the only thing they had: push-to-connect valves. I've always been skeptical of this style connection, but had no evidence to support my skepticism. Yesterday I received validation in the worst way possible. We're on a community well, and sometimes the water pressure spikes a bit - this is the only answer I can come up with as to why both valves would suddenly start to leak after being dry for weeks. So berk you Apollo Valves.
I shut off the water to the house and got a big fan and the dehumidifier set up in hopes of mitigating damage to the floor. I ran off to Home Depot to get some new valves and a few other supplies to remove the old supply lines in the wall where the sink used to be. Got back and plumbed everything up, including the decommissioning of the old water lines.
In the course of two hours, we could see the damage to the floors set in. The flooring manufacturer assured me that it would be a fine choice for a kitchen and didn't have any concerns to share when I asked how it would do if it got wet. I can tell you now that I got snowed by the sales guy. This bamboo soaked up water like a sponge, and in the photo below, you can see that it is buckling and de-laminating at the ends. We could see that the water had run under the floor, between the flooring and the vapor barrier, and there was nothing we could do about it except remove as much water as possible with the fan and dehumidifier. This is in contrast to the Indonesian Kempas hardwood floors I have installed in my bathroom - it has been soaked a few times and has shown exactly zero change. The sink cabinet will need to be replaced too - I won't touch that until right before I'm ready to put the finished counter tops on.
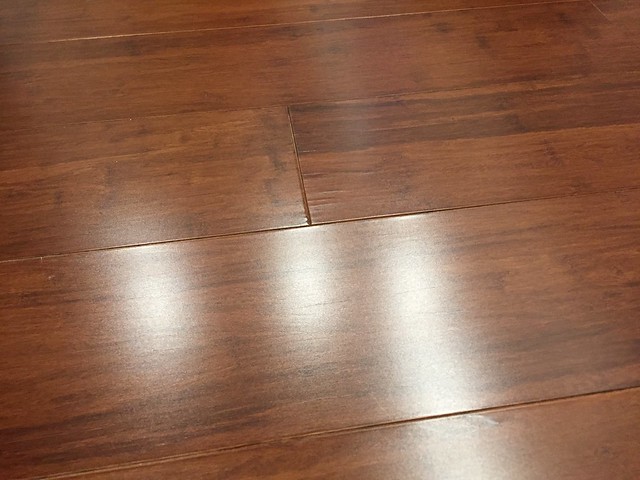
To be honest, it doesn't look terrible - we've still got the dehumidifier going and will over the next few days in hopes of it drying back out. The puckered edges of the boards will likely flatten back out, but I suspect the rippling caused by the strands of bamboo de-laminating at the ends of the planks is here to stay. I'll be making a decision over the next few days as to whether I am going to pull it right back up and replace it or not.
Needless to say I was very, very angry yesterday. I feel like a call to Apollo valves is in order, but to what end? At best I'd expect them to reimburse me the cost of the valves. Berk you.

That sucks! Hope the flooring all dries out and looks pristine.
Remember this crappy wire job the PO did?
At the other end of that wire hackery was some wire for undercounter lights. I pulled it all out because I was getting that done a different way and discovered some really classy wire work. What's under this here electrical tape?
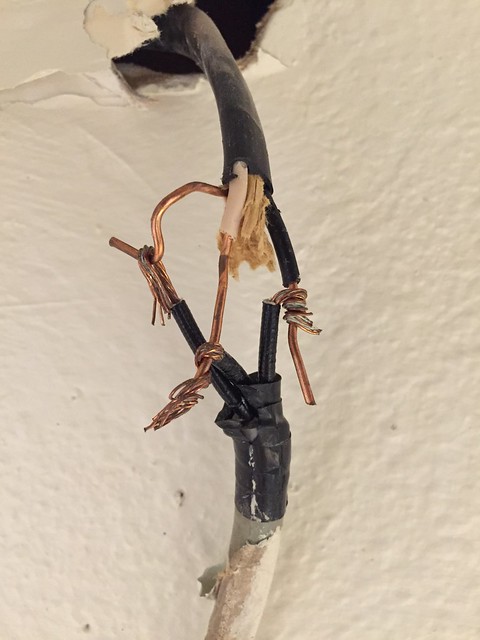
Plus there were two automotive crimp connectors at the other end. Scary. Good thing this is the only place in the house that I've found this level of poor quality work.
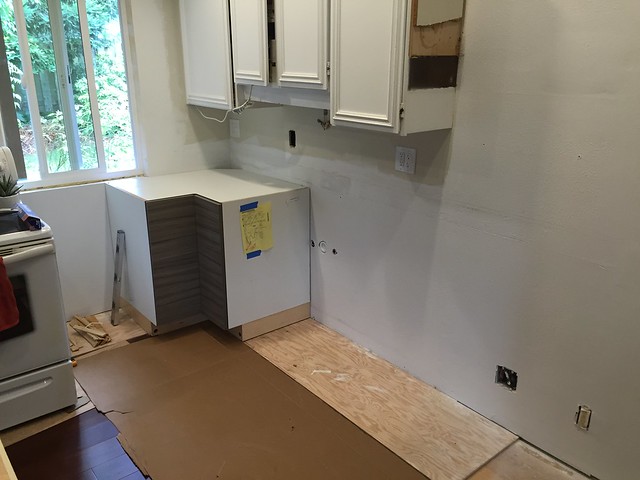
Big weekend! Started off getting the old cabinets out and made one last pass at sanding the drywall; I didn't put too much effort into this wall since it would all be behind the cabinets.
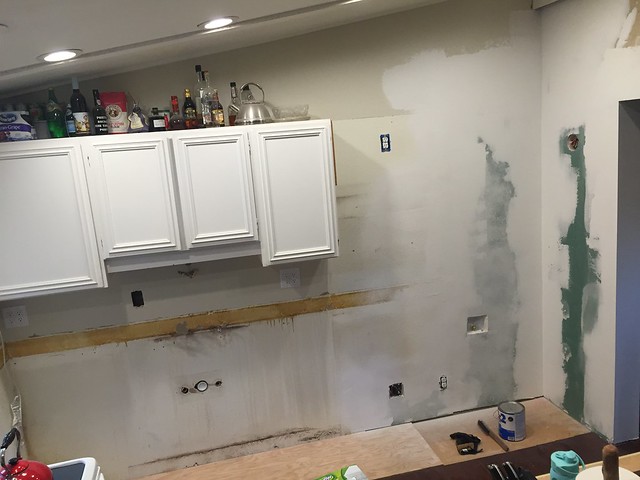
You can also see the decommissioned plumbing from the old sink. Two coats of primer later:
While the paint dried, I headed out into the garage to get the cabinets ready. I'd purchased some cabinet levelers from EZ Level since I knew the floor was not terribly level.
These levelers are a GREAT product. I'd helped a friend set just three cabinets a few days ago using the old fashioned way with shims. It took a long time because the access was poor and the floor was all over the place, so each box went in and out of place at least ten times.
The only caveat to the EZ Level is where to use them. I bought enough to install my cabinets per their instructions, but as soon as I got started I could see that I didn't need all of them. If you have good access to the sides of a box (like on the ends of a run), then you really don't gain anything over using shims. This is what they look like installed:
The hardened carpenters here will scoff at them, which is fine by me. The instruction suggest screwing together a gang of boxes, so you don't have to have a leveler at each box's corner, but just one at each seam. In my case the idea of tipping the first giant corner box on its back and back up with a whole row of other cabinets was unreasonable, so I set the corner by itself and the run to the right as a unit.
The highest point of the floor was right at the window, so that is the place to start. I began with the big corner box. Coming in the door, you can see there wasn't much room:
I wound up using a set of levelers on just the right side of the box, as the left side sat right on the floor with a little adjustment courtesy of my circular saw.
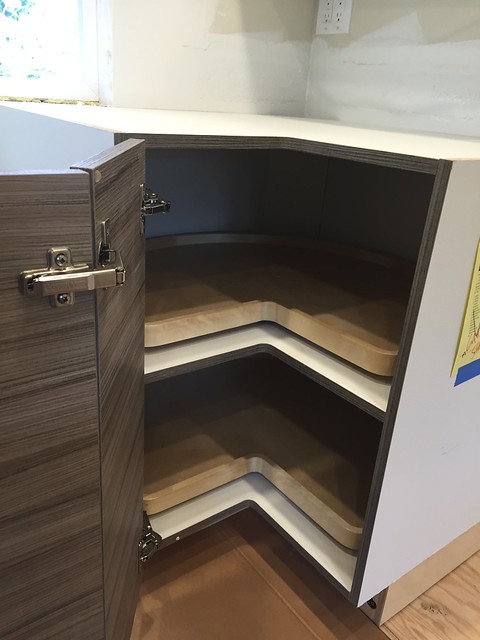
The inside of the corner cabinet:
Next, the two boxes to the right got screwed together. A leveler on each end of this two-box run, plus one at the center seam.
I wound up cutting a little off of the base of the cabinet to the left of the corner box, in order to split the difference between the high and the low points of the floor. Here I am getting things leveled and secured.
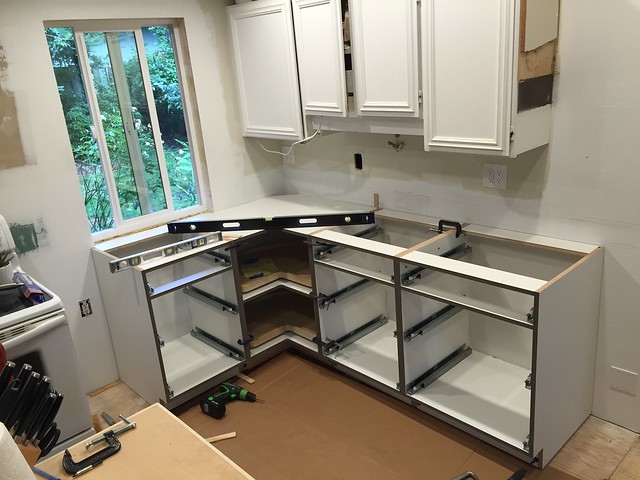
Set in place:
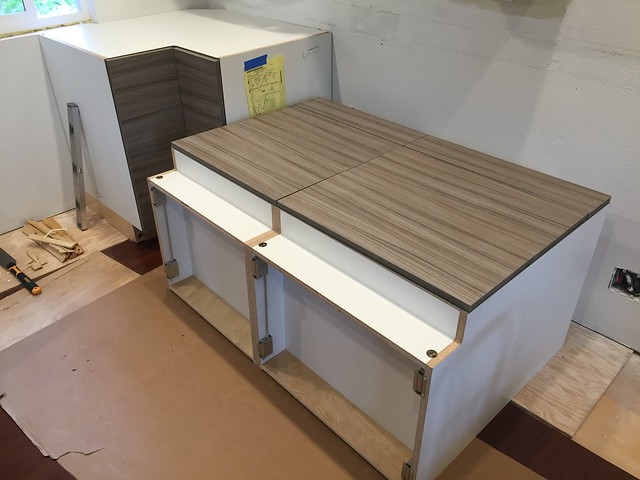
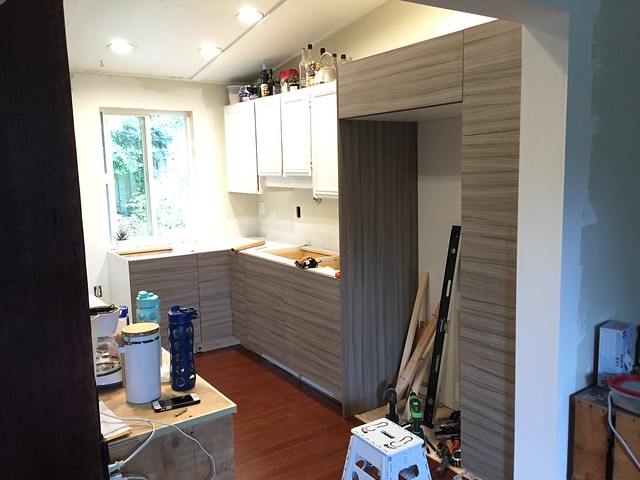
Next up were the pantry and fridge cabinets. All the cabinets are justified to the window wall. The cabinet over the fridge dictated the spacing between the finished panel and the vertical pantry cabinet, so all three items had to be set together. Here is the finished panel mocked up, with the tall pantry cabinet waiting.
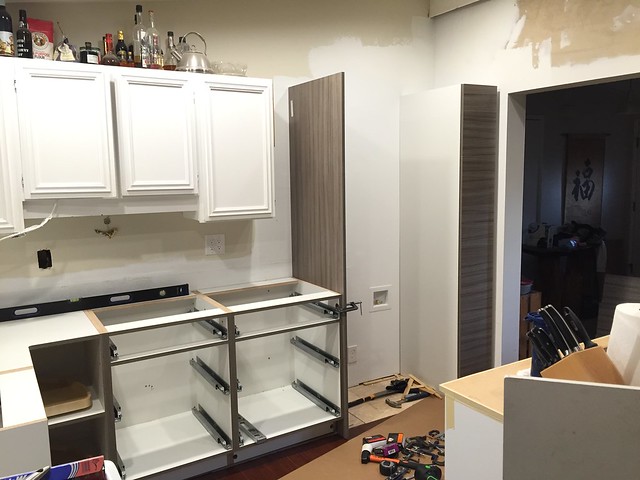
I clamped some rails in place to support the fridge cabinet. In place:
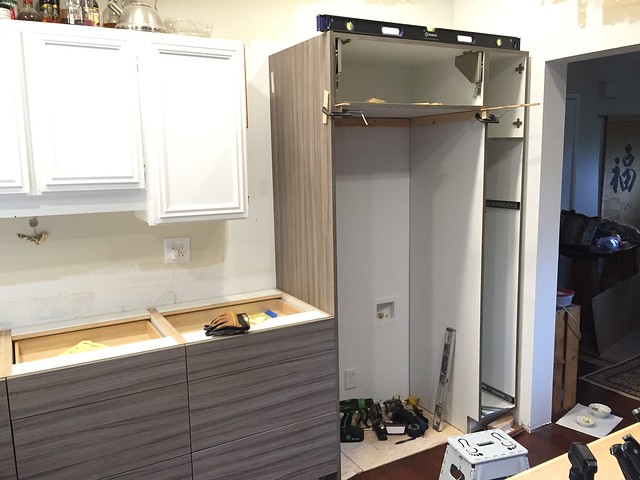
From the other side:

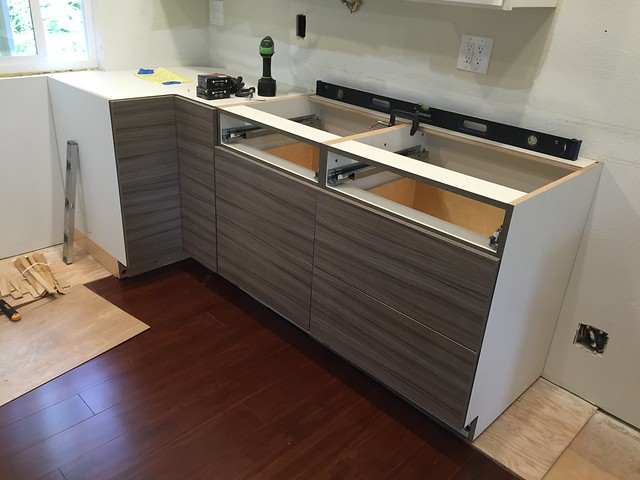
All assembled:
Drawer adjustment: Since they are faceless cabinets with zero reveal, getting all the doors and drawers to line up properly took a few hours of berkeleyery. The slides are Salice Futura line, and are six-way adjustable. There wasn't quite enough range of movement in a few places, so I resorted to a few card-stock shims to make it all work right. Pretty pleased with the hardware; the adjustments weren't very intuitive, but I should only have to do it once. I think the IKEA hardware (made by Blum) is a little more simple in design. The Salice closing action is a tiny bit smoother with a loaded drawer, but both are quite nice. Hotlink of the slides:

Now to deal with those wall cabinets.

Poop Deck said:
Did your PO own an Alfa, by any chance?
You'll need to log in to post.


