


A thread to document my progress on the buggy I recently picked up. It's a 1970 Beetle chassis. 
It had been sitting for several years, so to start, a fuel and brake system overhaul are in order. I'm digging how cheap air cooled parts are!
Started by draining the tank. Someone had put a nifty drain valve in the line right off the tank!
broke it open with a pair of pliers, and proceeded to drain 2-3 gallons of Amber colored stinky fuel. When I went to close the tap after draining it... I couldn't get it back together. I'm assuming it wasn't supposed to come all the way out? Anyways, just removed it all together. It served its purpose.

Moving to the rear, I removed the fuel pump:

Carburetor (pic28)
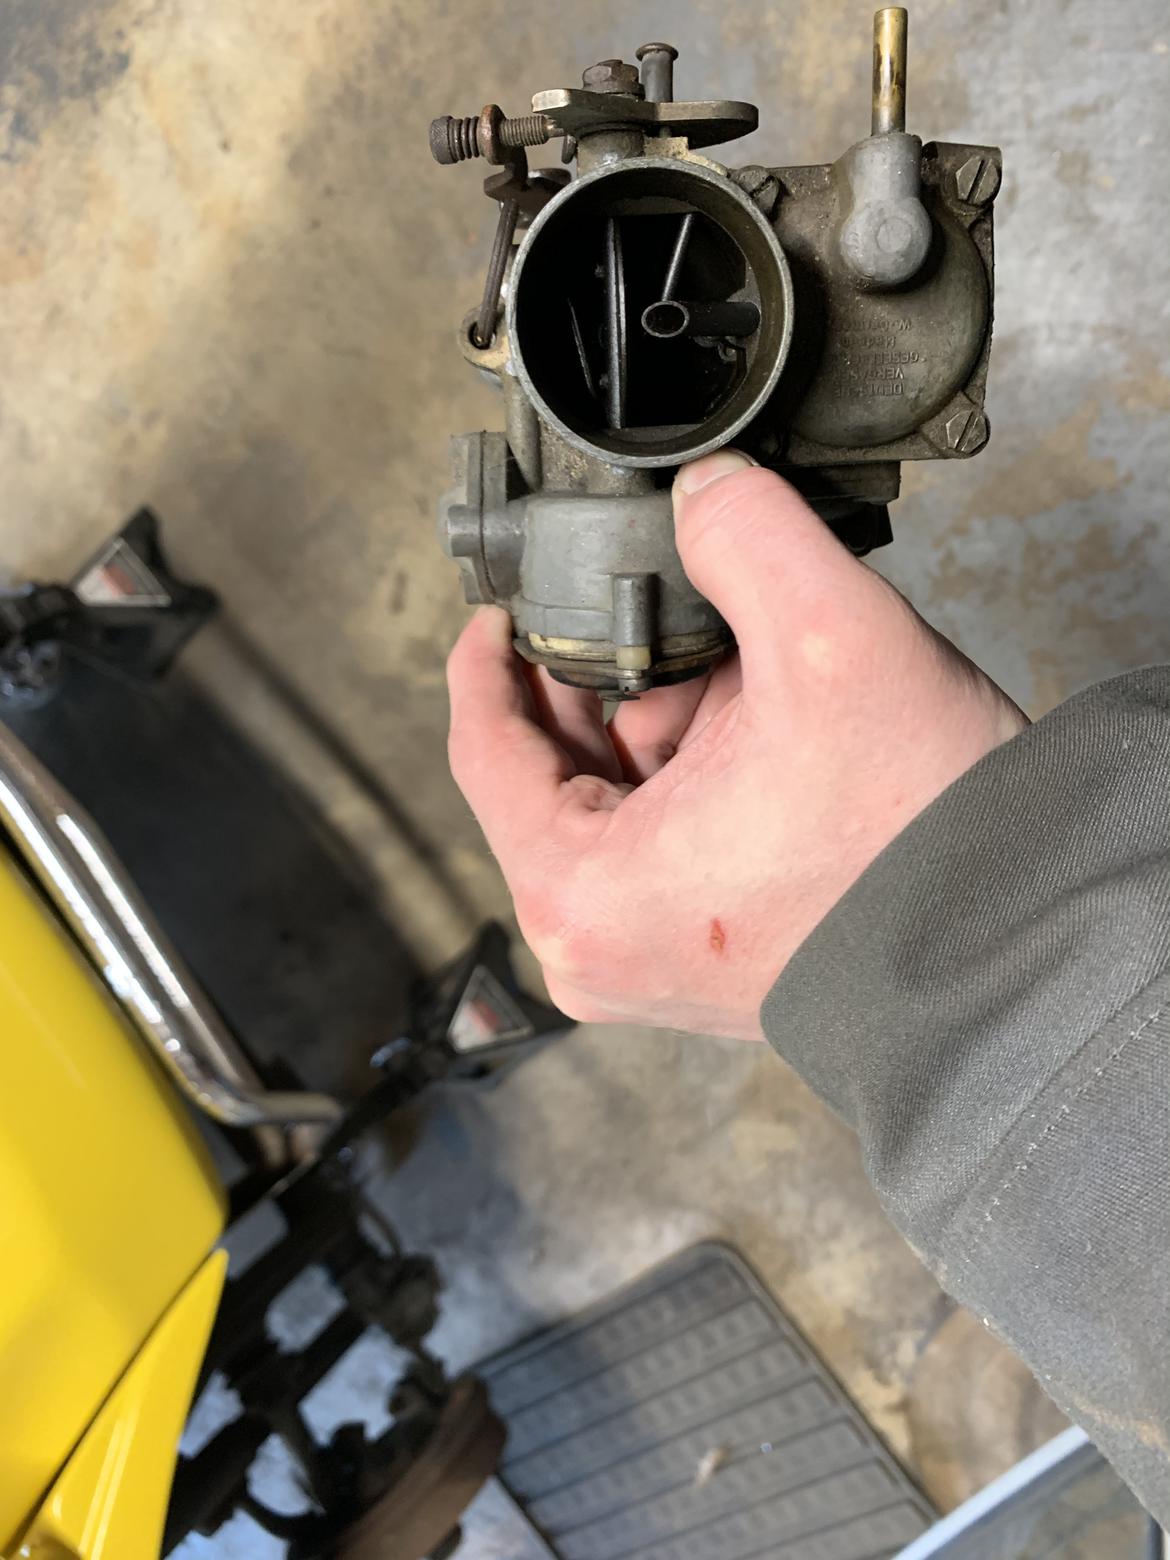
and crusty filter

In preparation for new parts. They're all so tiny! My 450 ATV had a bigger carb (and made more power, lol.)
Next I turned my attention to the ignition system.
Installed and set new points (been a while!) and put on a new rotor. Put in new plugs.
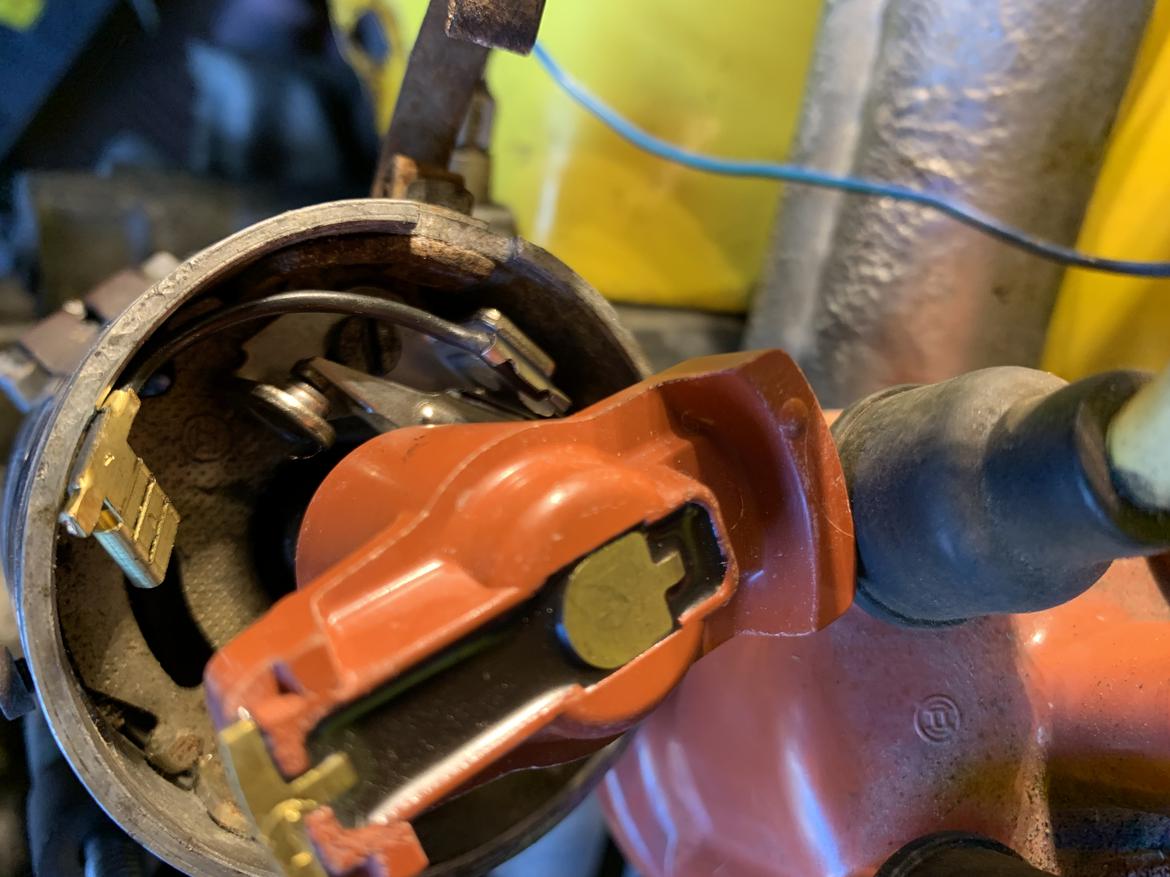

Went to install the condenser, and noticed it was different. After running the engine number, it appears this is actually a 61-65 40hp 1200 instead of the single port 1600 the chassis would've come with (sad trombone.)

Oh well... at least all the other parts fit.

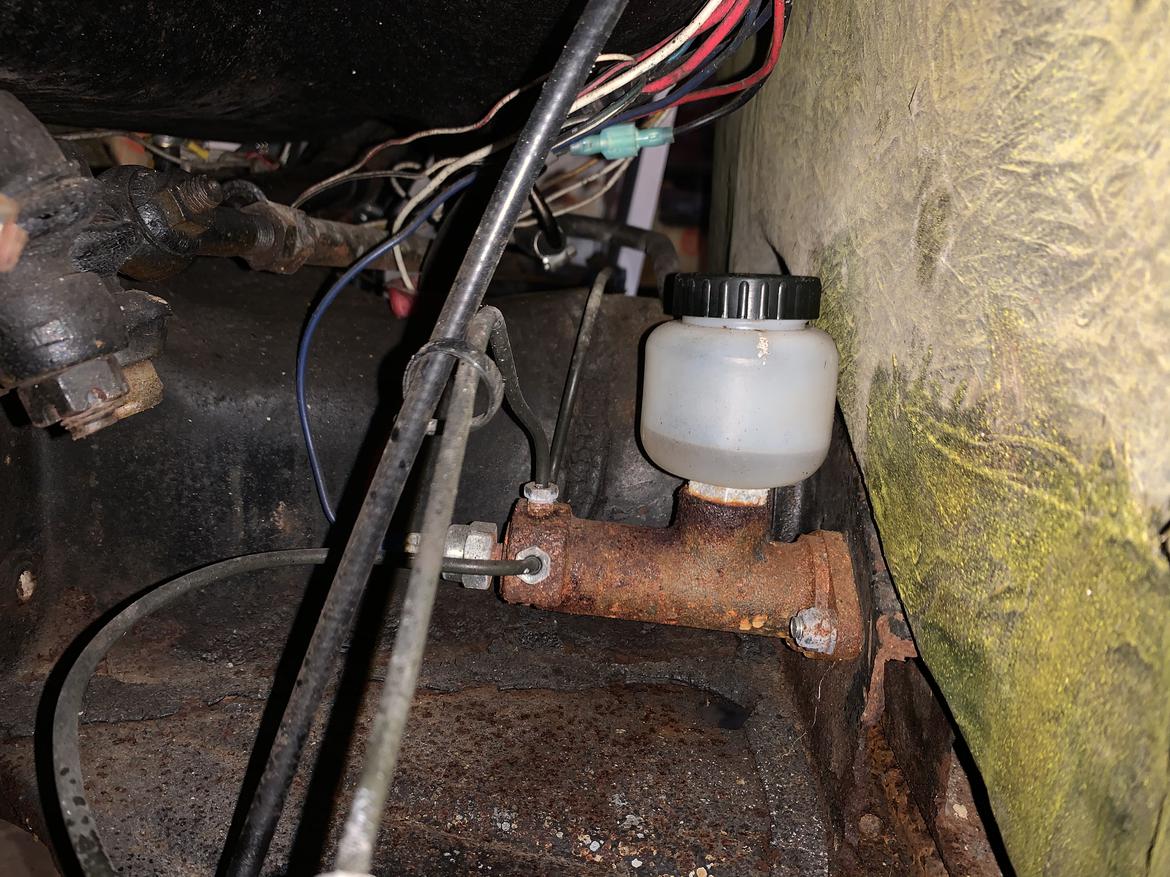
Also redoing the brakes before I hit the road with it. All new parts are in order. The master cylinder I have coming is going to be wrong though... ordered it for the chassis, and it appears this one has an earlier single circuit master cylinder in it. I assume for space reasons. I'll see how much work it'd be to get the dual circuit one to work with remote reservoirs.
Removed the wheel adapters (VW 4 bolt to GM 5 bolt) to remove the drums, and snapped one stud, and bent 2 more. D'oh!

I also looked at some electrical... none of the lights work except the brake lights. Traced it to a bad headlight switch. It has power going in, but nothing out. If I jump it, all the lights work. So, one more thing to order!
Called it a day after that. Just waiting on parts now...


