GaryC83
New Reader
5/11/20 11:28 p.m.
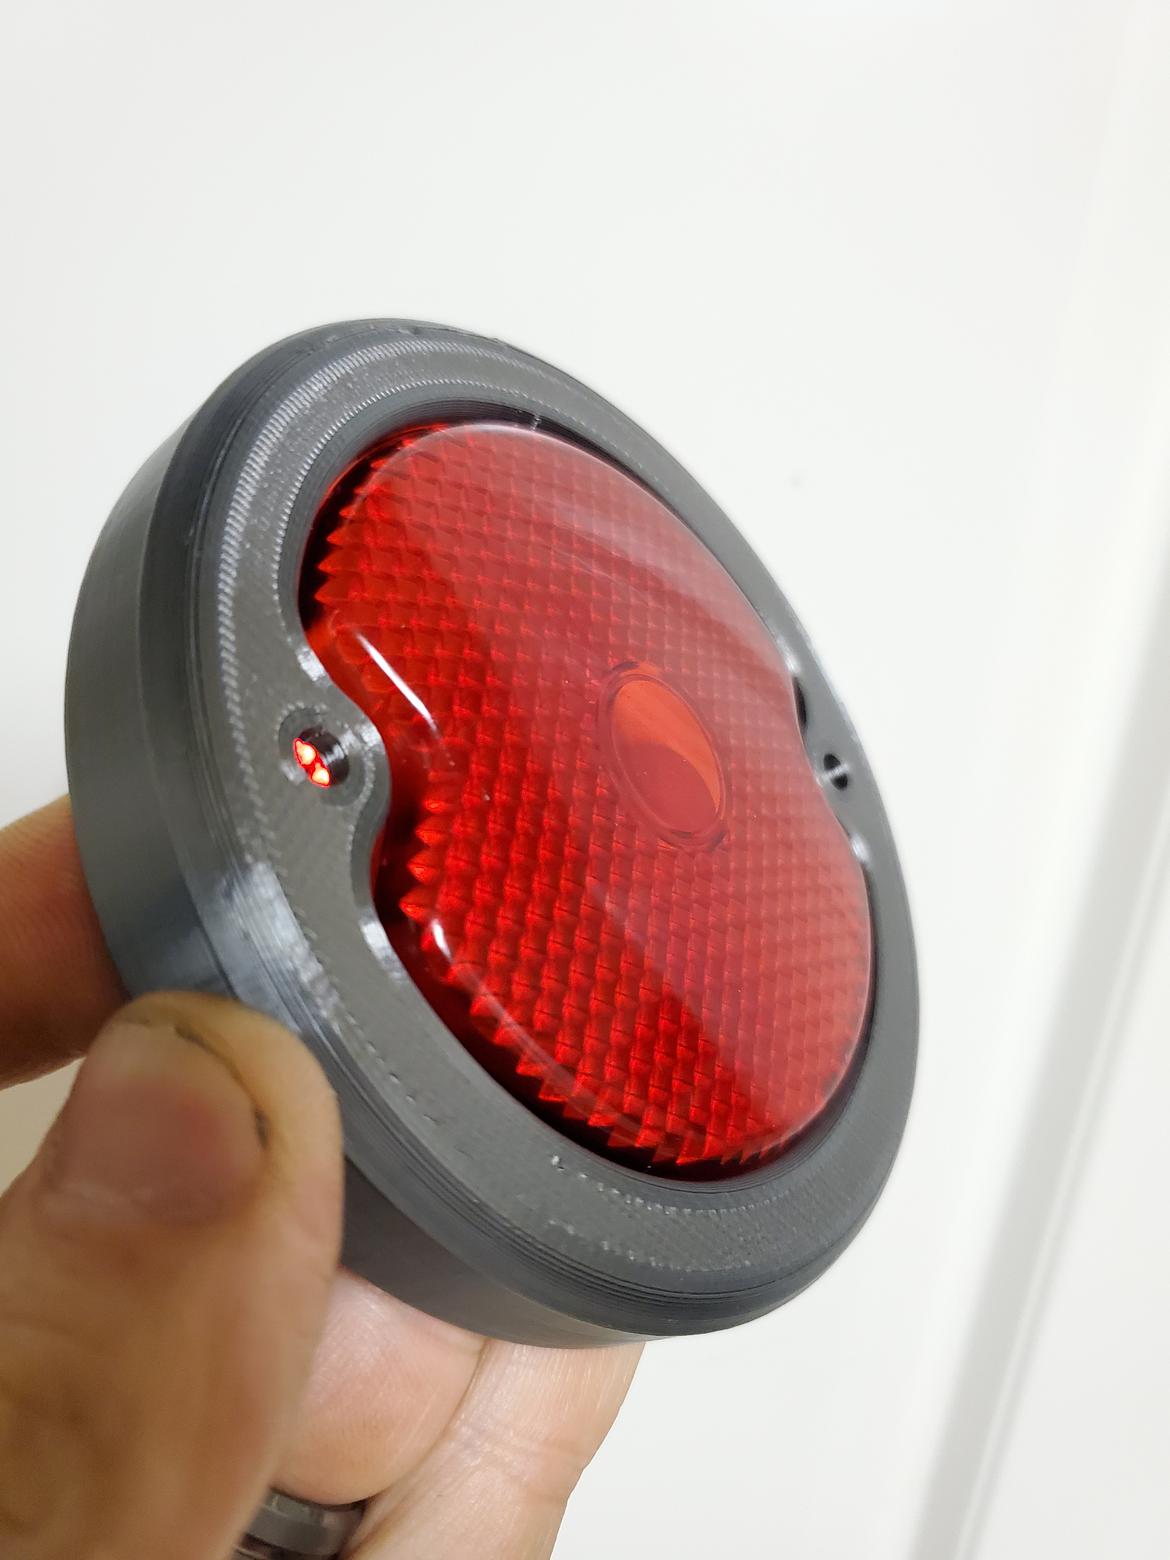
Wound up shrinking my margins for a tighter fit to the lense, and doing another print after being pleased with the first one and wanting to improve it. So. I did. This stuff is addictive. Im pretty pleased with where this is headed...
Still got adhesive on it from the bed..but.
Nice work!
You may want to consider using ABS for longevity in sunlight, or if you paint the PLA it should be OK. Also with ABS you can do acetone vapor polishing to get a nice smooth surface, though it may shrink the finished dimensions.
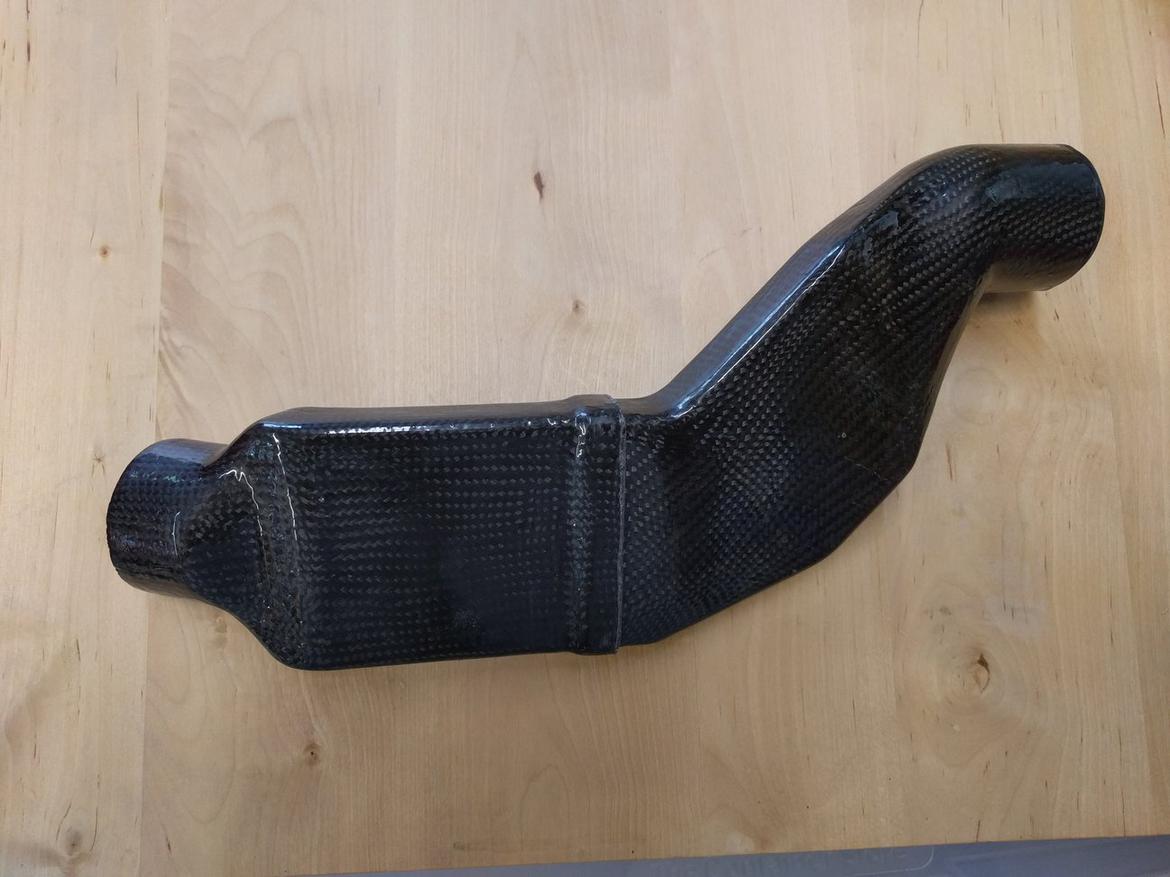
Here's some projects I have been working on to make some ducting for brake cooling.
This is to get through a really narrow spot so I can get air to the back of the rotor. Ducts were printed using ABS, I had to print them in multiple parts. Then used acetone to solvent weld them together.
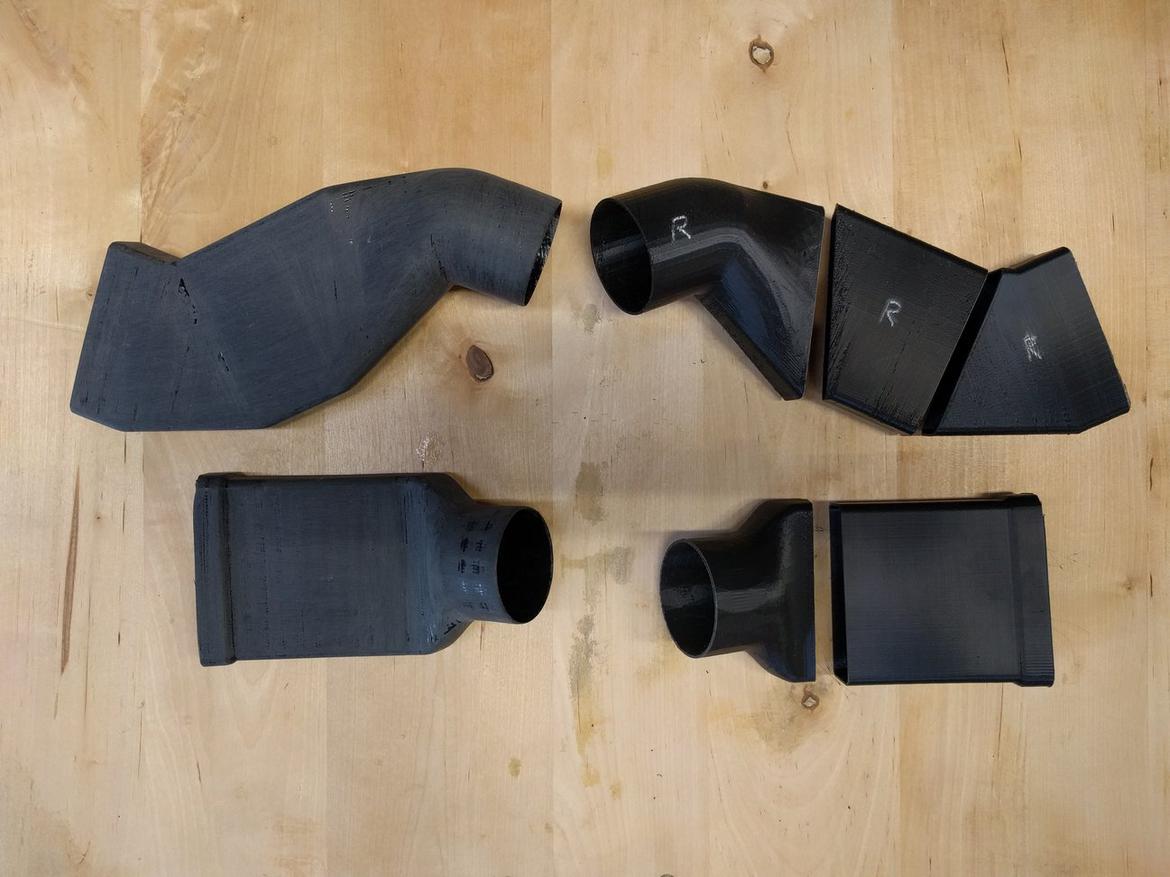
Then I covered them with carbon fiber sleeving
GaryC83
New Reader
5/11/20 11:54 p.m.
R56fanatic (Forum Supporter) said:
Nice work!
You may want to consider using ABS for longevity in sunlight, or if you paint the PLA it should be OK. Also with ABS you can do acetone vapor polishing to get a nice smooth surface, though it may shrink the finished dimensions.
Thanks much! Good to know with the ABS. I have some on order, along with some T-glasse. Right now I'm playing with what has come in, so far.
My long term plan is to lay these up with carbon fibre, using the prints as a buck and dissolve out the PLA. Im planning on having to make some adjustments to my files, when that time comes, for fitment of the shell to surround, and surround to lens..but, For right now I am just messing around trying to learn fusion360 & 3d printing. So I figured might as well make an actual thing, that interfaces with other things. If that makes sense.
Good to know I can highbuild prime and paint these though. Pretty cool. I have a background in paint and body, so I'll have to make a finished and painted set.
GaryC83
New Reader
5/11/20 11:58 p.m.
In reply to R56fanatic (Forum Supporter) :
those brake ducts are awesome and honestly flipping through this thread were and are part of what inspired me to finally get one. I seem to remember either seeing those in this thread or another one you were a part of, showing how it interfaces... at least I think that was your post. Awesome stuff though, regardless.
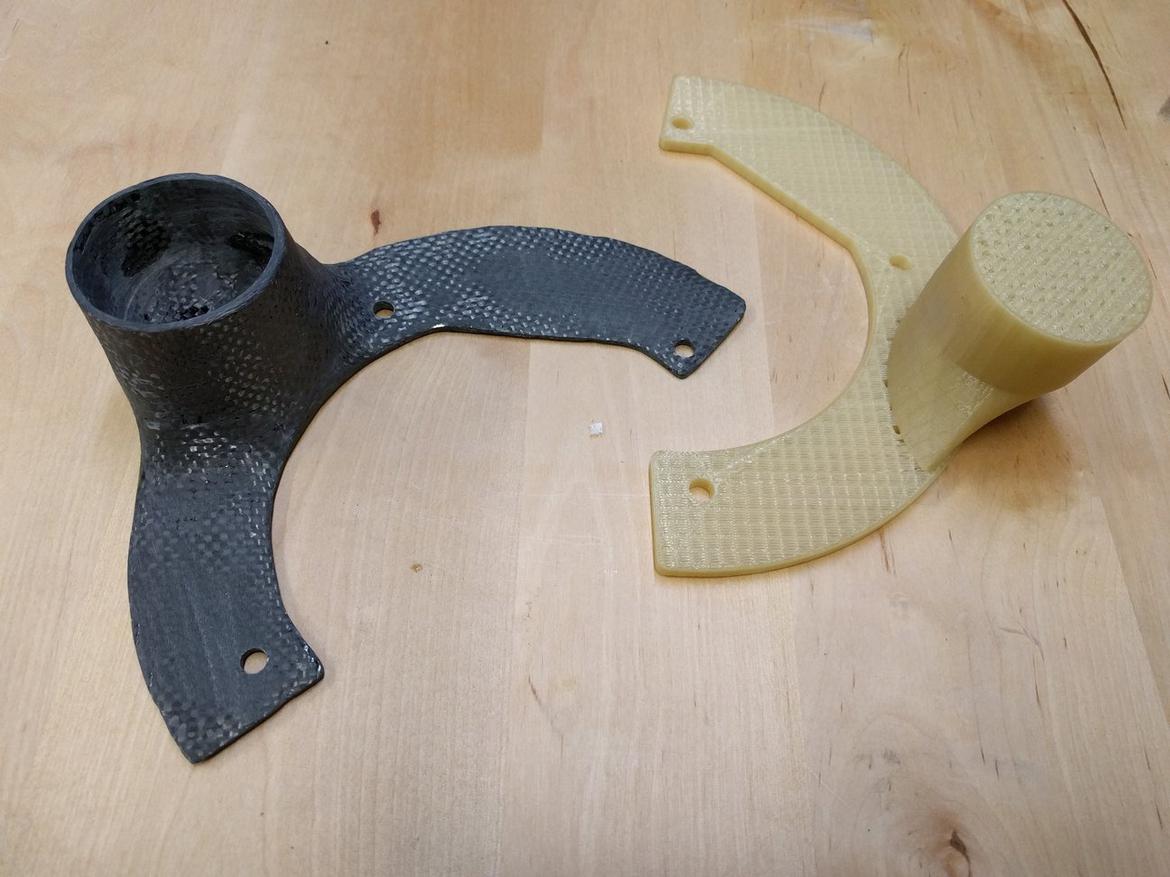
Here's a plate that replaces the "dust shield" behind the rotor, it directs the air into the center of the rotor. I printed a form using PVA which is water soluble (on the right) then laid up carbon on top of it with high temperature epoxy. When the expoxy set I just dropped it in the sink and dissolved the PVA.
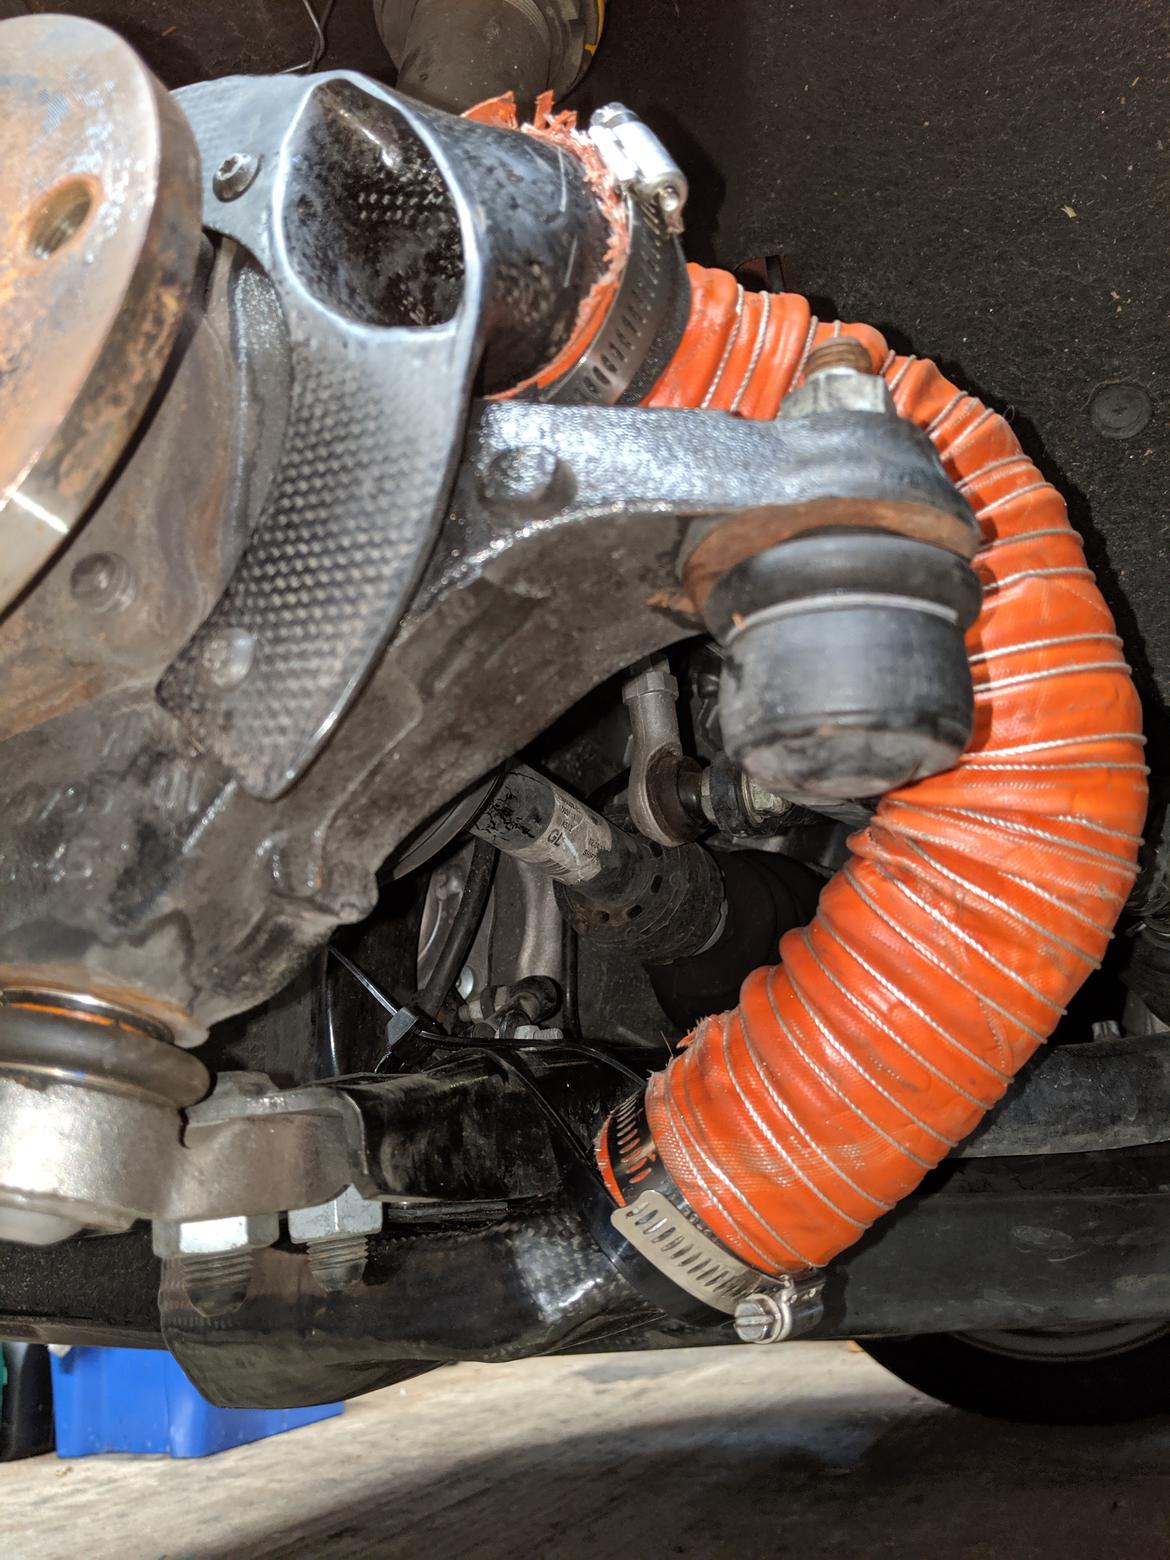
Here's the finished part mounted on the hub, this uses a scoop under the lower control arm that was also ABS with carbon over it. Unfortunately it didn't work very well.
In reply to GaryC83 :
Thanks! Yeah I think I posted a few pics in another thread where the OP was doing some 3D printing. I'm still working on getting the dimensions right to get around all the obstacles.
PLA is difficult to dissolve, so look at PVA. I have had success making some simple forms from PLA where I 3D printed a male and female half then covered each with plastic film and sandwiched the carbon/epoxy between the two, but for the brake rotor plate the PVA was the way to go.
A couple more opinions:
I don't trust the strength of FDM printing. It's OK in compression, but for anything where there will be force perpendicular to the layer build up I don't trust it. Even with 100% infill it is too easy to snap things in two. That just gives me an excuse to cover it with carbon.
With ABS you can brush it with acetone which will help bind the layers together, or do acetone vapor polishing. But that will only penetrate a little ways into the surface.
For PLA if you want to sand it you'll need to wet sand it, otherwise the PLA will just get soft and smear.
TPU or "Flex" is awesome - that is material that seems to have really strong layer adhesion. I made a couple of things for the boat with it, will have to see how they stand up to long term sun exposure.
RacetruckRon said:
Scored an "open box" Ender 3 Pro from Amazon. I'm going to build an enclosure for all three of my Enders this weekend and put this new guy to work!

How did building the enclosures go?
GaryC83 said:
My long term plan is to lay these up with carbon fibre, using the prints as a buck and dissolve out the PLA. Im planning on having to make some adjustments to my files, when that time comes, for fitment of the shell to surround, and surround to lens..but, For right now I am just messing around trying to learn fusion360 & 3d printing. So I figured might as well make an actual thing, that interfaces with other things. If that makes sense.
Good to know I can highbuild prime and paint these though. Pretty cool. I have a background in paint and body, so I'll have to make a finished and painted set.
How are you planning on dissolving the PLA? Been a while since I looked into it, but from what I remember the stuff to dissolve it is pretty nasty.
In reply to AWSX1686 (Forum Supporter) :
It's drawn up in CAD I haven't built it yet. Decided to take an impromptu "vacation" to see my FIL in Gulf Shores. If I'm going to be working from home might as well spend a week with my laptop on the porch in 80° and sunshine.
GaryC83
New Reader
5/12/20 7:14 p.m.
In reply to Mr_Asa :
I guess dissolving it out isn't exactly accurate, per say. With the way the parts are made I planned on throwing them in some near boiling water to start to soften up and start to break down the PLA, then bust the PLA structure apart and out of it, as i planned on using a mold release on it. So, everything in theory should have come apart. The parts will wind up getting a candy and clear over the carbon anyway, so having some cleanup work wasn't the end of the world, in my book.
Being said, I having looked into PVA more after hearing and being told about it, that seems like an easier way to go, so when the time comes i will likely go that route, as its easier and less chance of messing stuff u,, from the sound of it.
GaryC83
New Reader
5/14/20 11:53 p.m.
In reply to Javelin (Forum Supporter) :
Nice!!
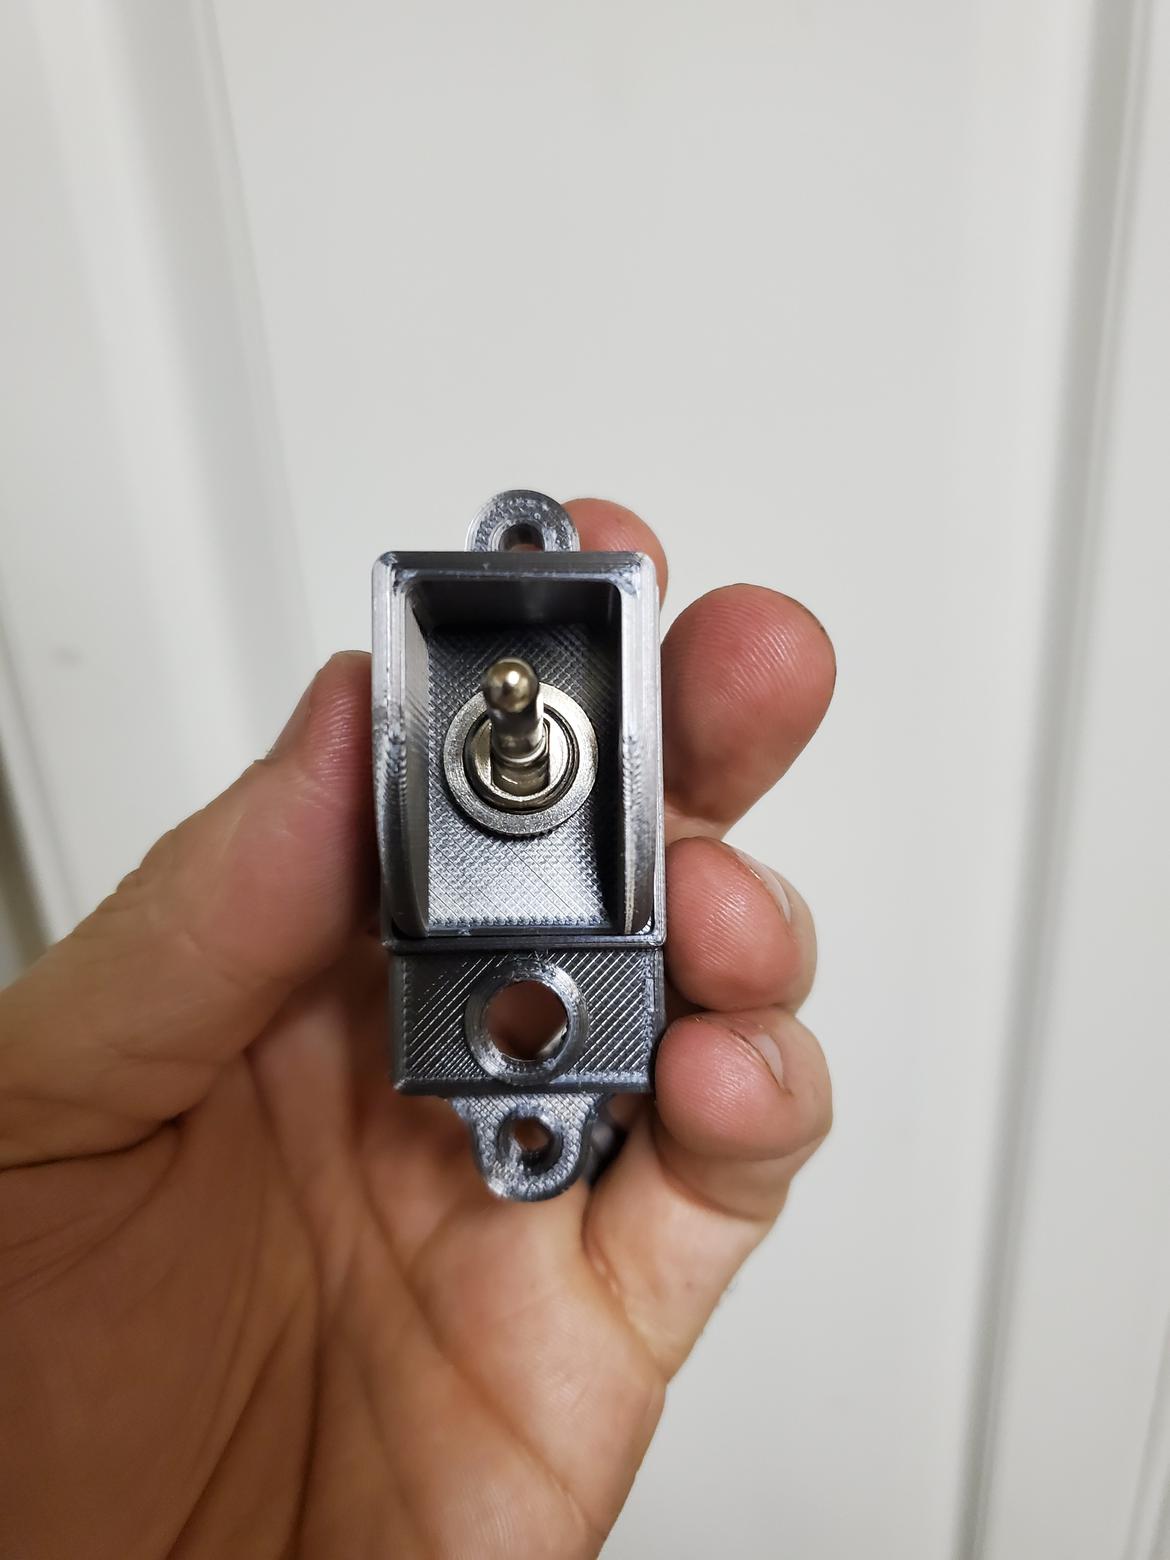
Been playing with some toggleswitch covers. End game is throwing a turbo on my escalade with methanol inj. Into the motor for its latent cooling and obvious fueling effects, along with a setuo for spraying the intercooler core's exterior for its evaporative properties. So there will be two toggles. Right now I'm just messing with the design and starting to print it in PLA for general screwing about. Eventually I would like to do the base in probably black ABS and maybe a dark brown wood pla for the cover. *shrug*
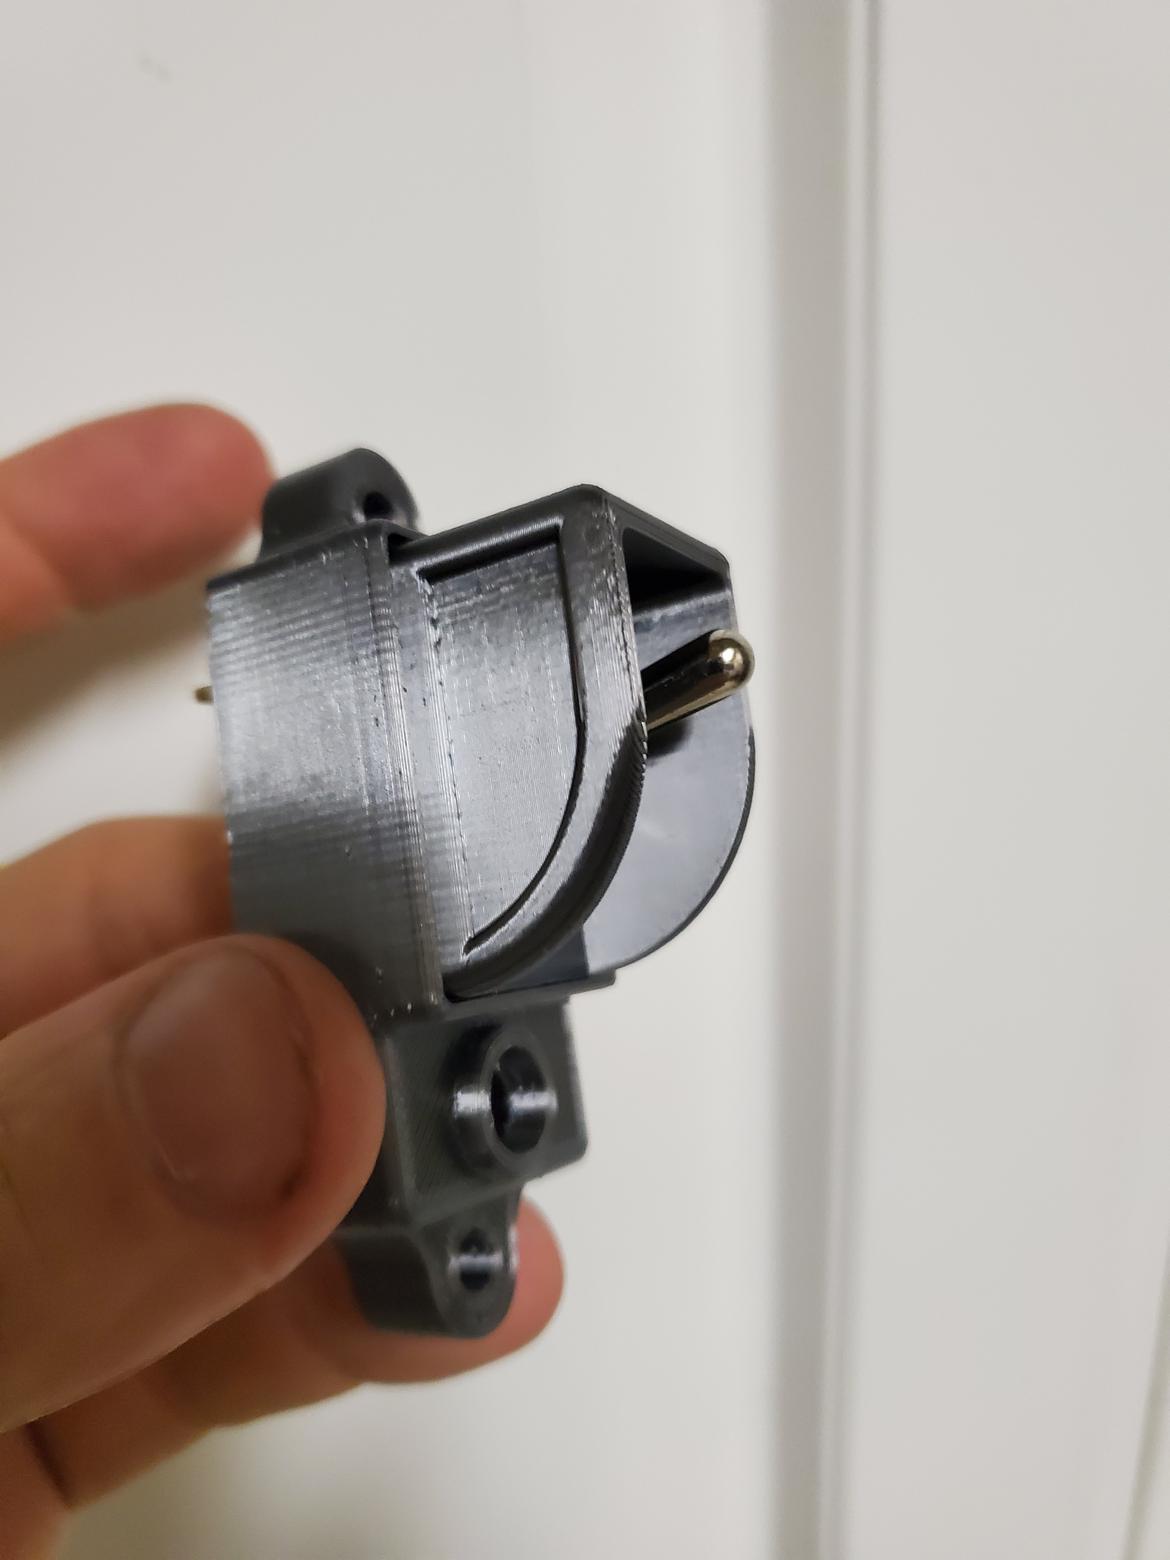
Anyway cover is a 2 piece. Upper saddles into lower and held on with rocker switch locking nut. Lower will mount onto 10-32 studs from backside. So only 2mm will protrude from dash. Stepped hole in bottom is for an 8mm led indicator, so i can see when the stuff is on at a quick glance. Still playing with the designs...but having fun. Just started printing the top now.

GaryC83
New Reader
5/15/20 11:55 p.m.
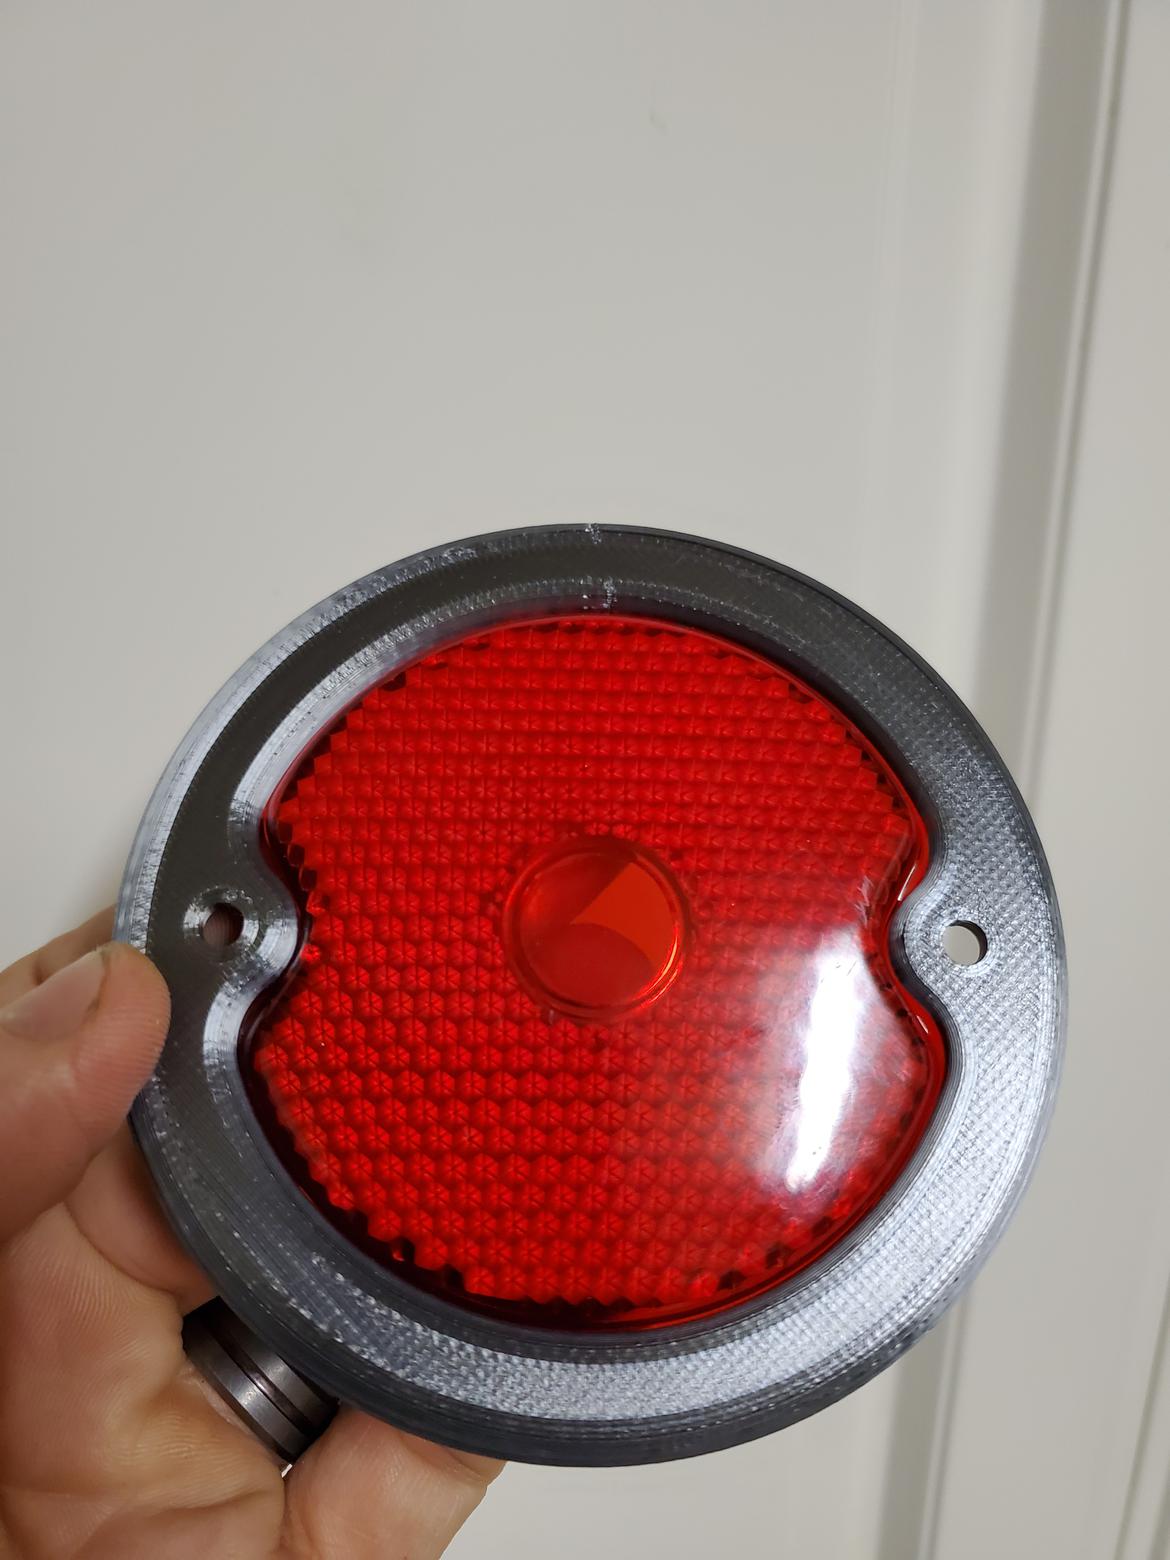
Printed them. Pretty pleased. Mount on blind studs on backside of panel so there are no exposed fasteners from front. Cover saddles into the baseplate nicely. Sticks out about an 1/8" when mounted. Other hole is for an indicator light.
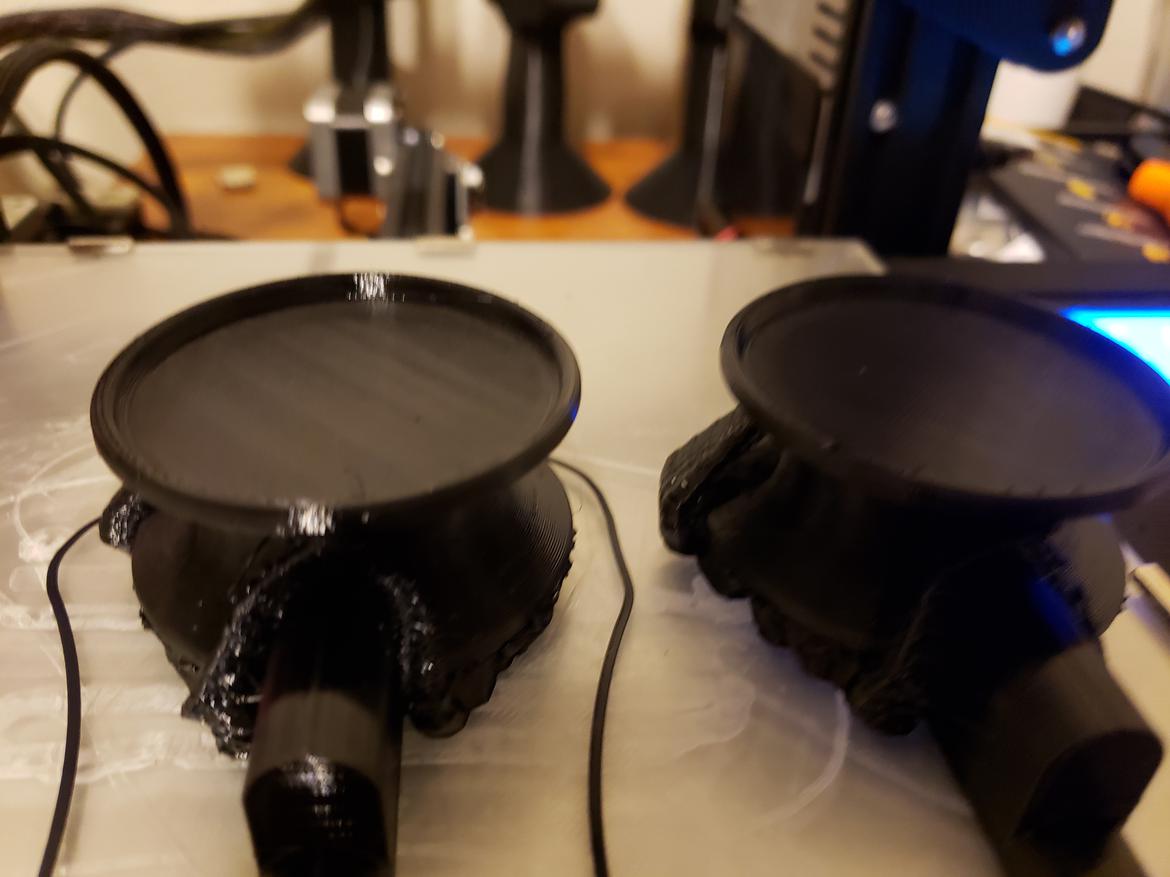
There are few things more satisfying than knowing you may not have enough filament to finish a print and to come back when it is complete and find it perfectly complete and the end of filament right at the stepper motor.
On the right is a finished one, the left is the past print of that roll. I cant even see where it ended.
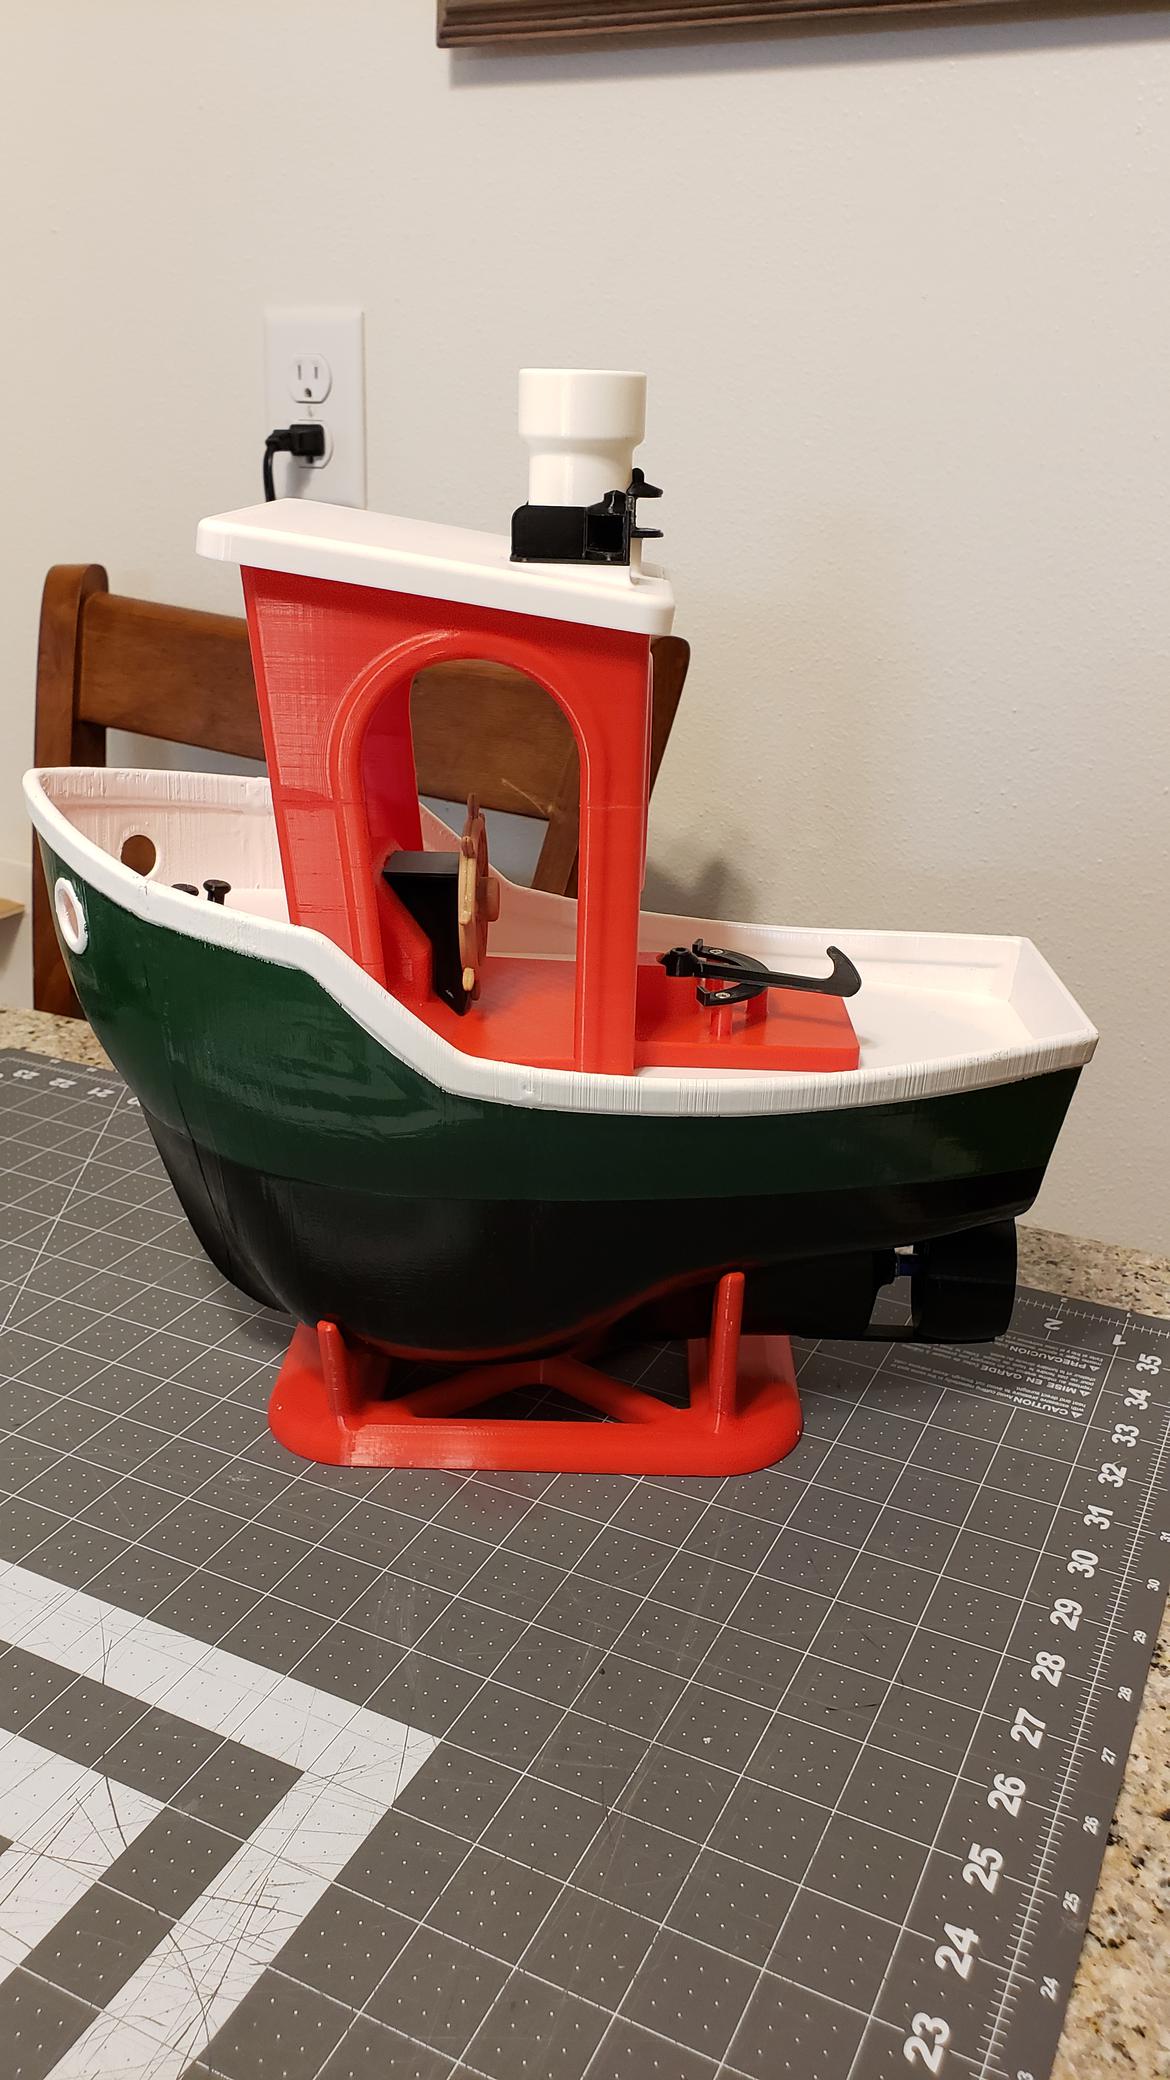
I've been printing and painting and building an RC Benchy. It's almost to the point of adding ballast, to balance it out. My aim is a caricature of the Carol Moran tug boat.
In reply to RealMiniNoMore (Forum Supporter) :
That RC benchy is awesome!
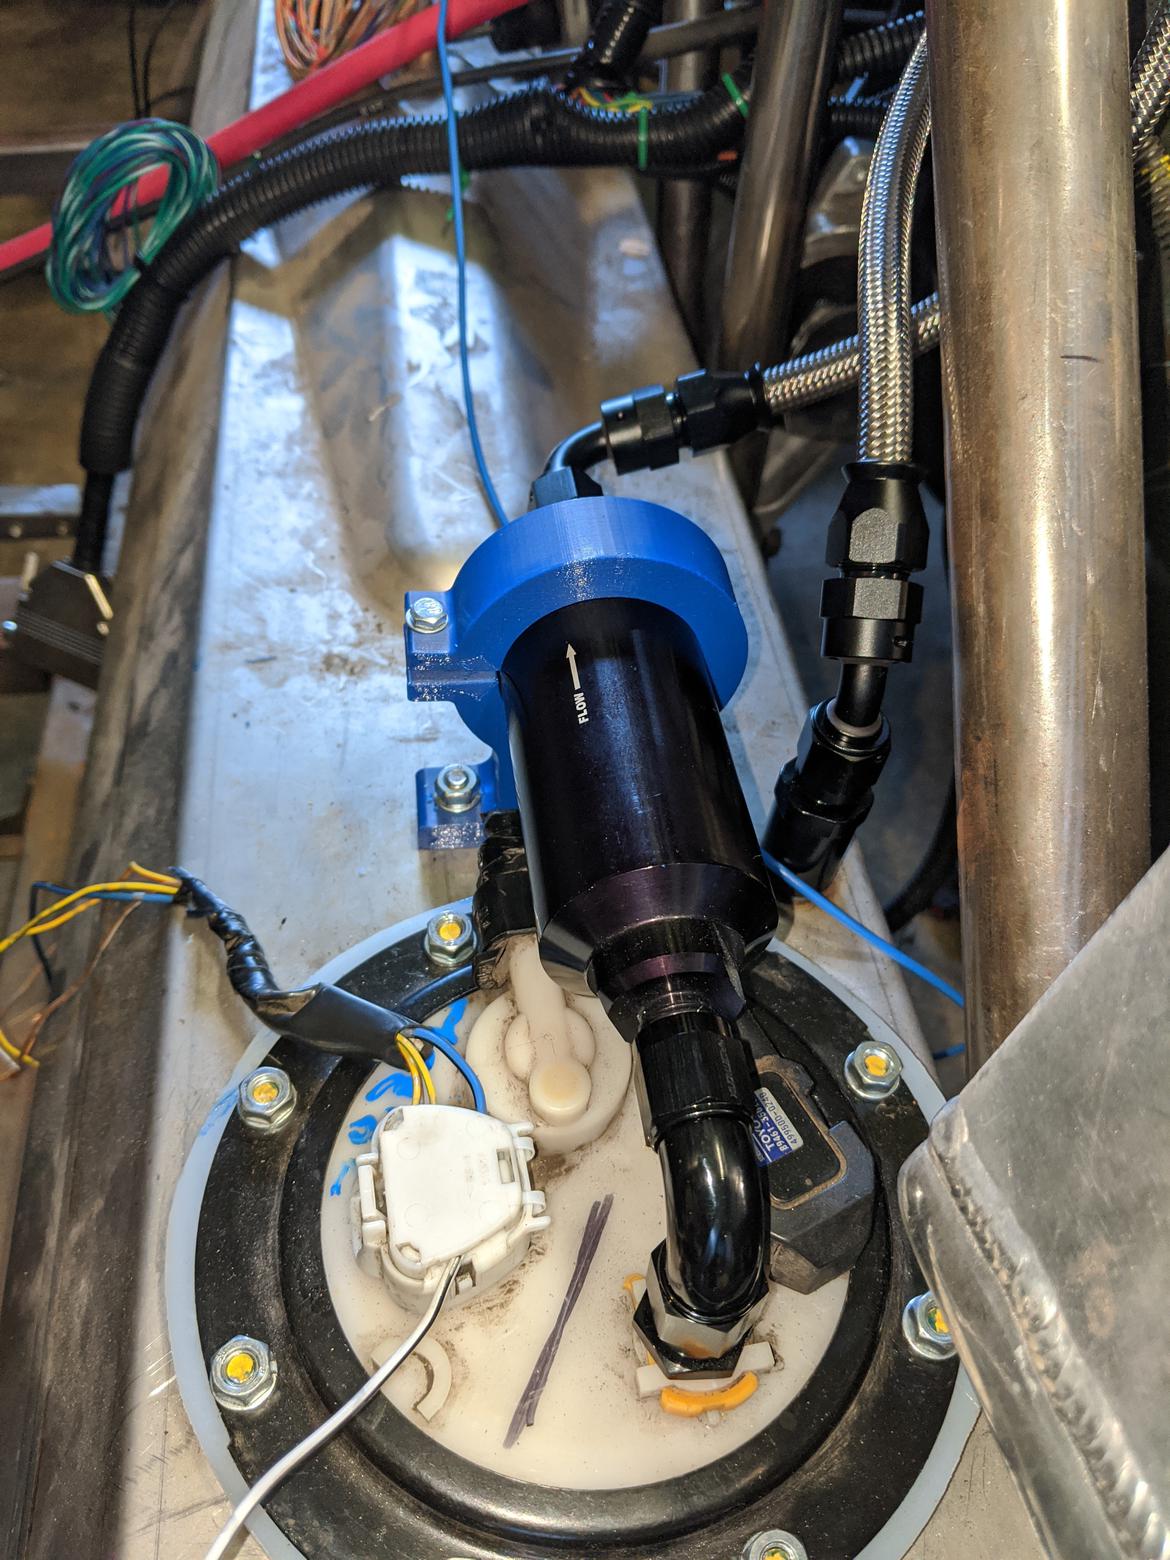
I finally designed and printed a car part
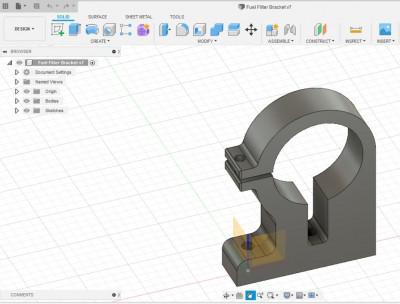
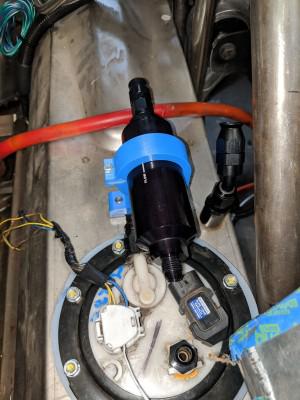
It's a bracket to hold a fuel filter. It mounts to some existing studs that were on the tank. I need to make a few tweaks before I print the final part from PET-G. This is a PLA prototype.
I also designed and printed a new leg for my daughter's toy dog.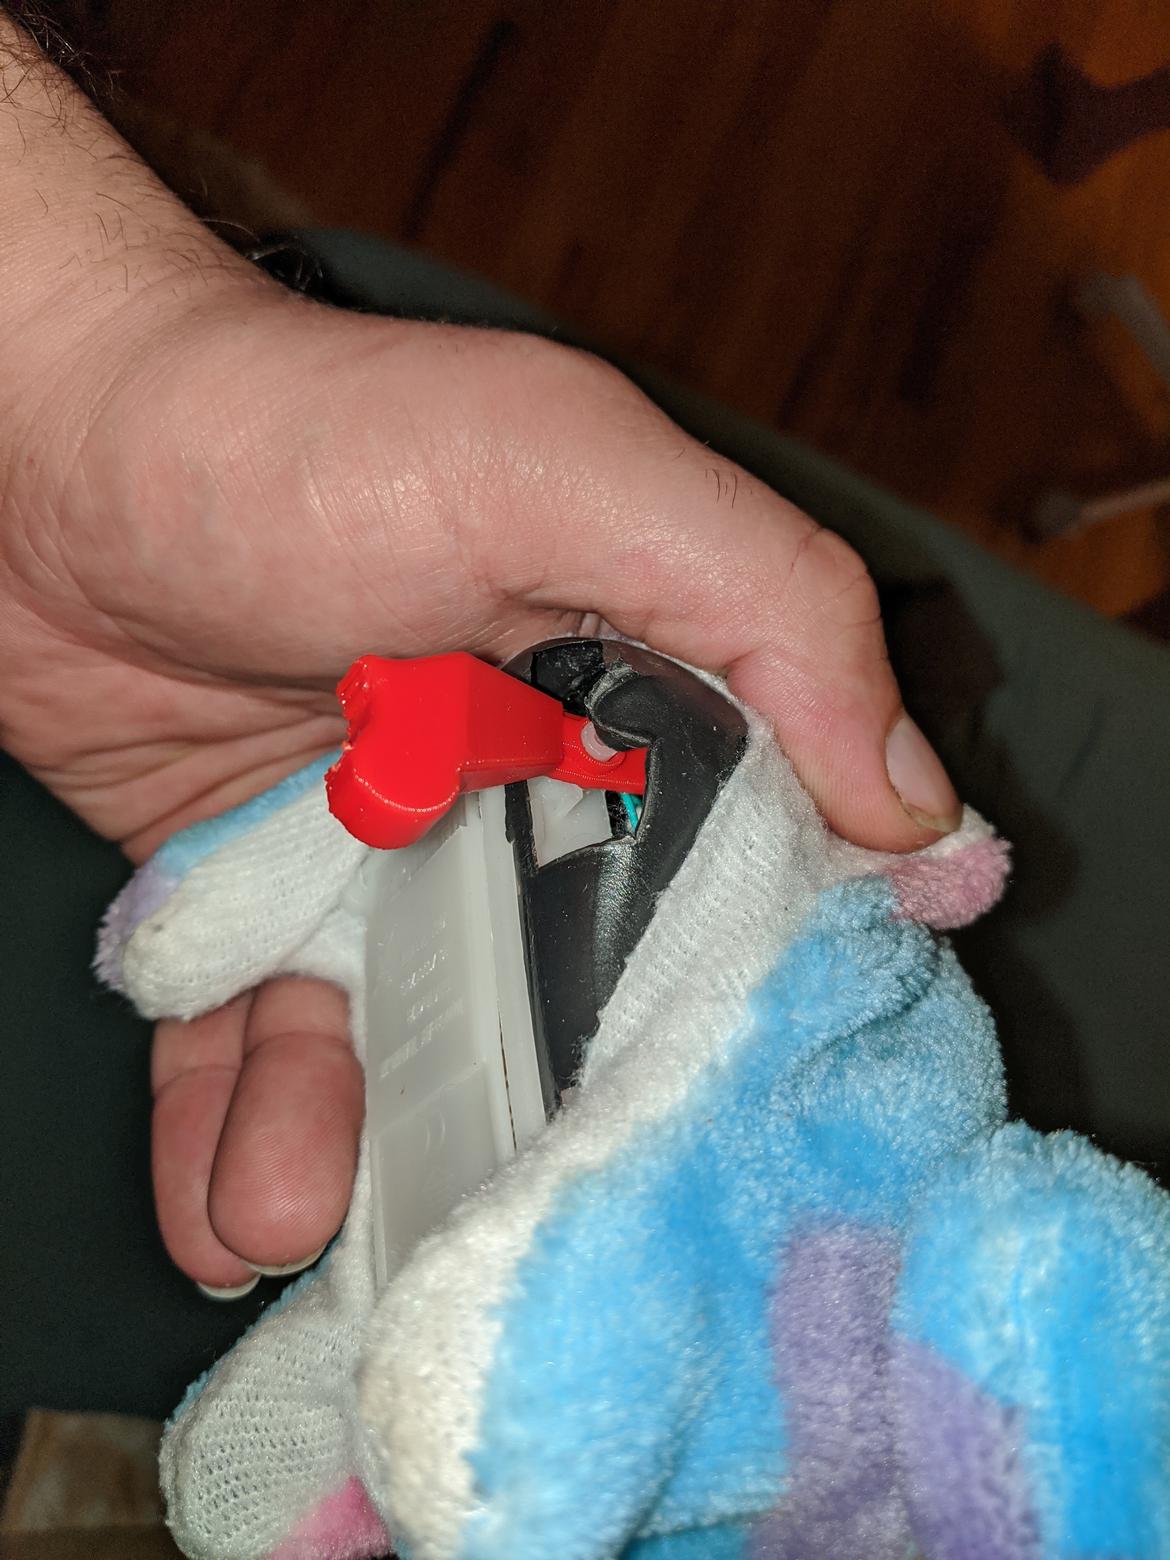
bgkast (Forum Supporter) said:
In reply to RealMiniNoMore (Forum Supporter) :
That RC benchy is awesome!
I finally designed and printed a car part
It's a bracket to hold a fuel filter. It mounts to some existing studs that were on the tank. I need to make a few tweaks before I print the final part from PET-G. This is a PLA prototype.
I found a bunch of AN6/8 models, hadn't thought of fuel filter / pump brackets. that looks handy though
I forgot I also printed some soft jaws for AN fitting assembly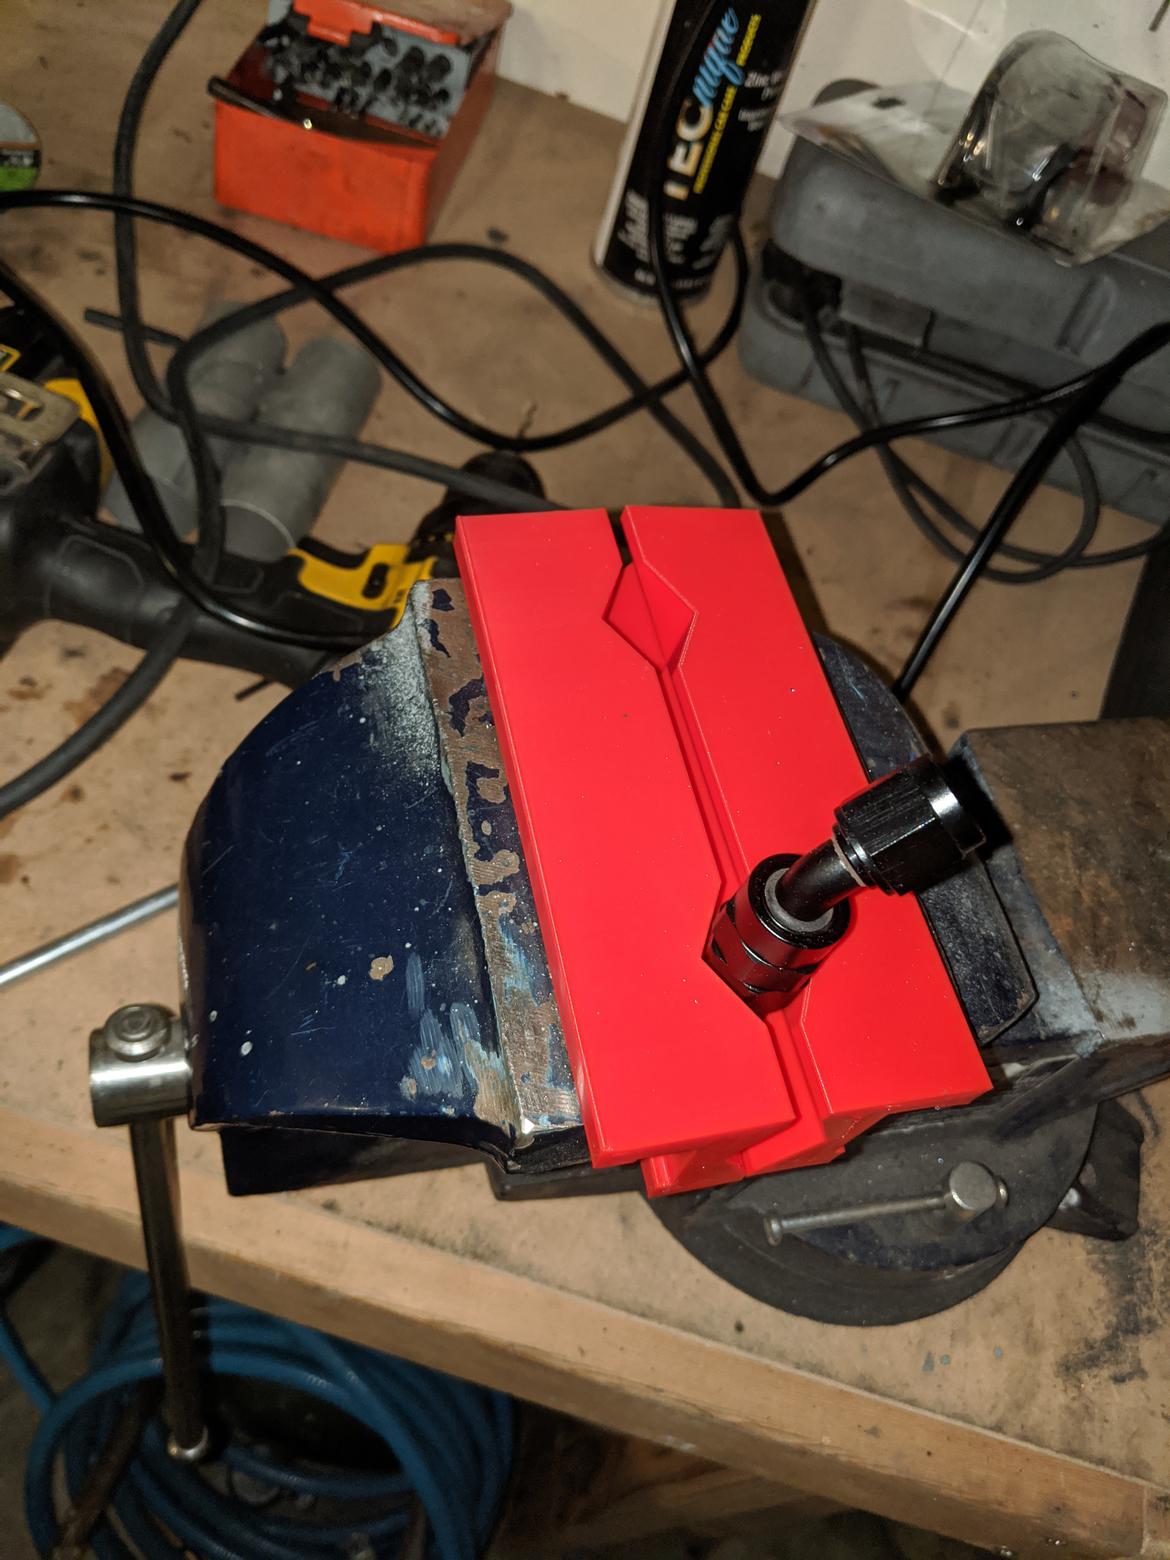
https://www.thingiverse.com/thing:3428144
I had to scale them to 115% to fit my harbor freight vise
Interesting article about noise attenuation and vibration damping. Looks like I'm gonna grab one of those unused pavers out back.
https://hackaday.com/2020/05/20/bricking-your-3d-printer-in-a-good-way/
In reply to bgkast (Forum Supporter) :
Ooh, cool bracket, and leg!
In reply to Mr_Asa :
I've been thinking about grabbing a patio block for my printers, too. Hearing the zigzag of infill on a narrow section is... annoying... especially sitting on an ikea lack table.
GaryC83
New Reader
6/5/20 9:05 p.m.
Love that RC Benchy. Super cool. What material is it?
I just put a microswiss all metal hot end on mine and some capricorn tubing. Cant bring myself to start really tearing into it yet as it has been printing so well for "stock". 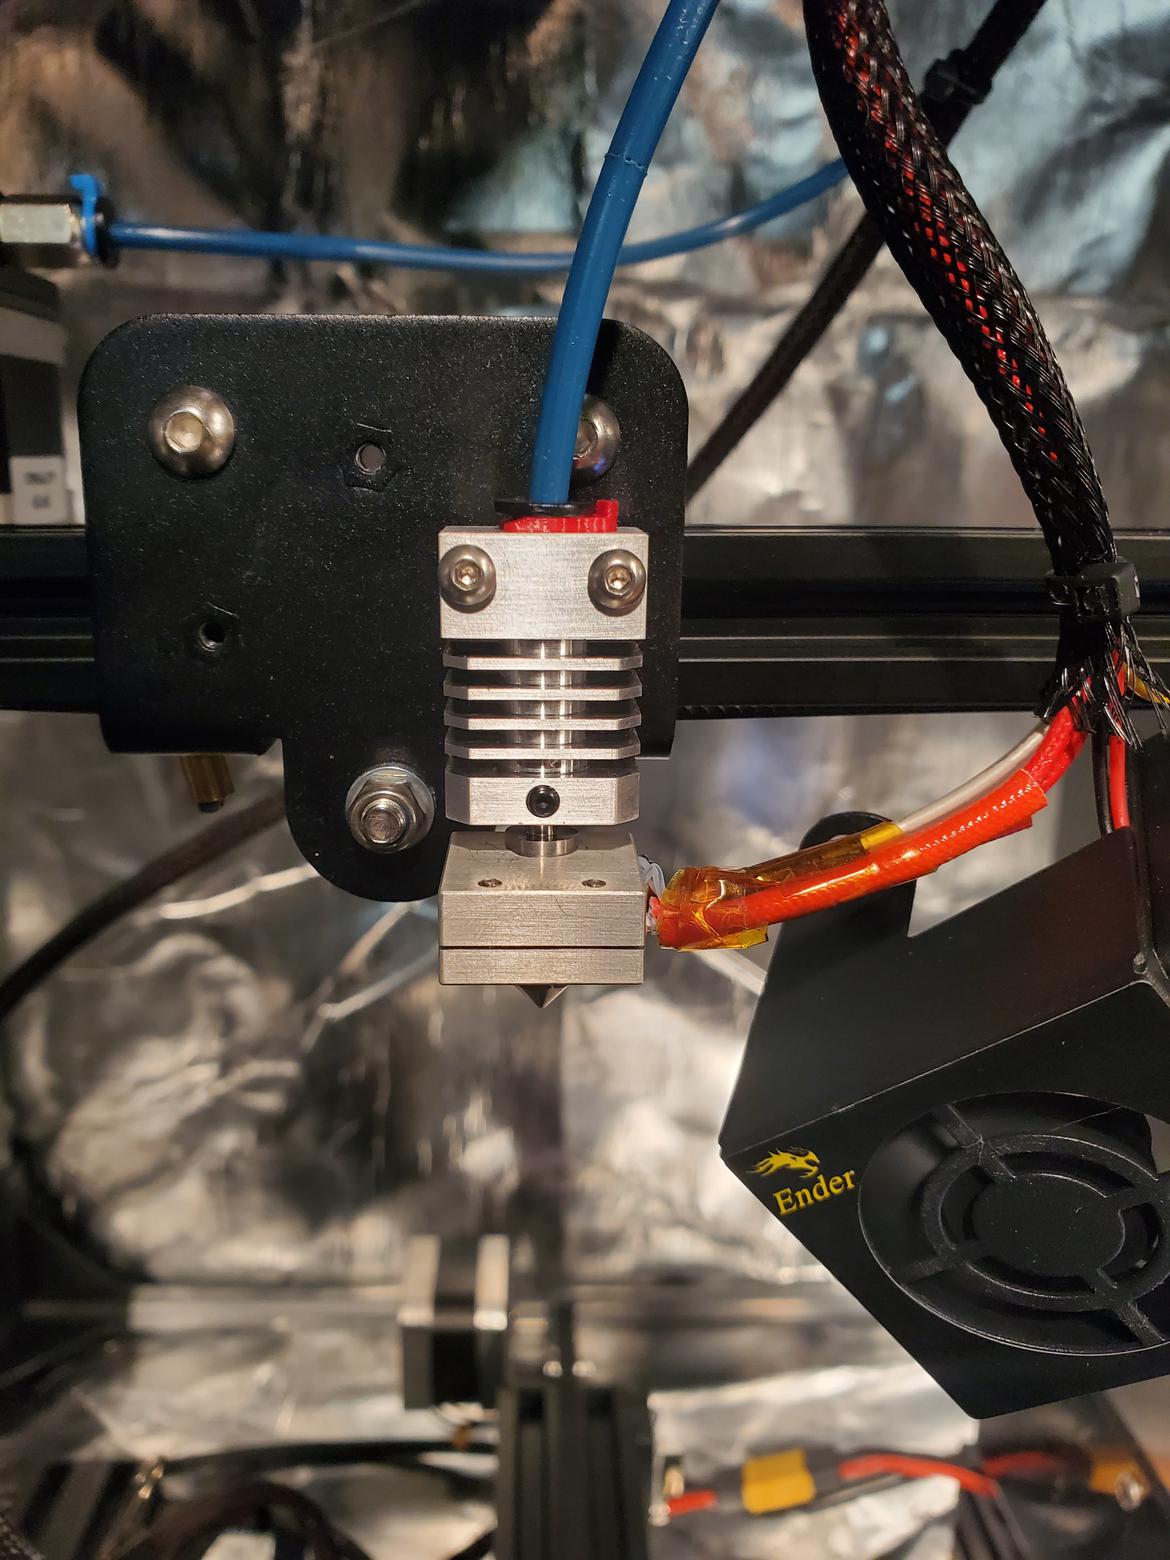
And is the final iteration of toggle setup i settled on. T-glase and pteg. Printing another couple bases in abs just to play with the new hot end and vapor smoothing.


In reply to GaryC83 :
Looks great! I just had my first try with PETG printing mk2 of the fuel filter bracket. It printed great using blue painters tape for the bed surface.