1 2 3 ... 146
tuna55
tuna55 UberDork
1/11/13 8:55 p.m.

So, the restoration query that started in the other thread a few YEARS ago gave birth to this. I threatened to part it out, and John intervened. He inspired. We'll see for how long. For the background, click here:

http://grassrootsmotorsports.com/forum/grm/restoration-question-terrible-idea/33695/page1/

Essentially, I am doing things in one hour chunks. Small tiny insignificant progress for most of you is trophy winning type achievement for me with these circumstances.

For day 1, see below:

Darn you John!

OK folks, dare I say that John has gotten me going again. I am slow, and this will be slow, and painful, but it's going to be a build thread. You've all seen the mess, now watch as I clean it up. I expect the result to take about 4 more years.

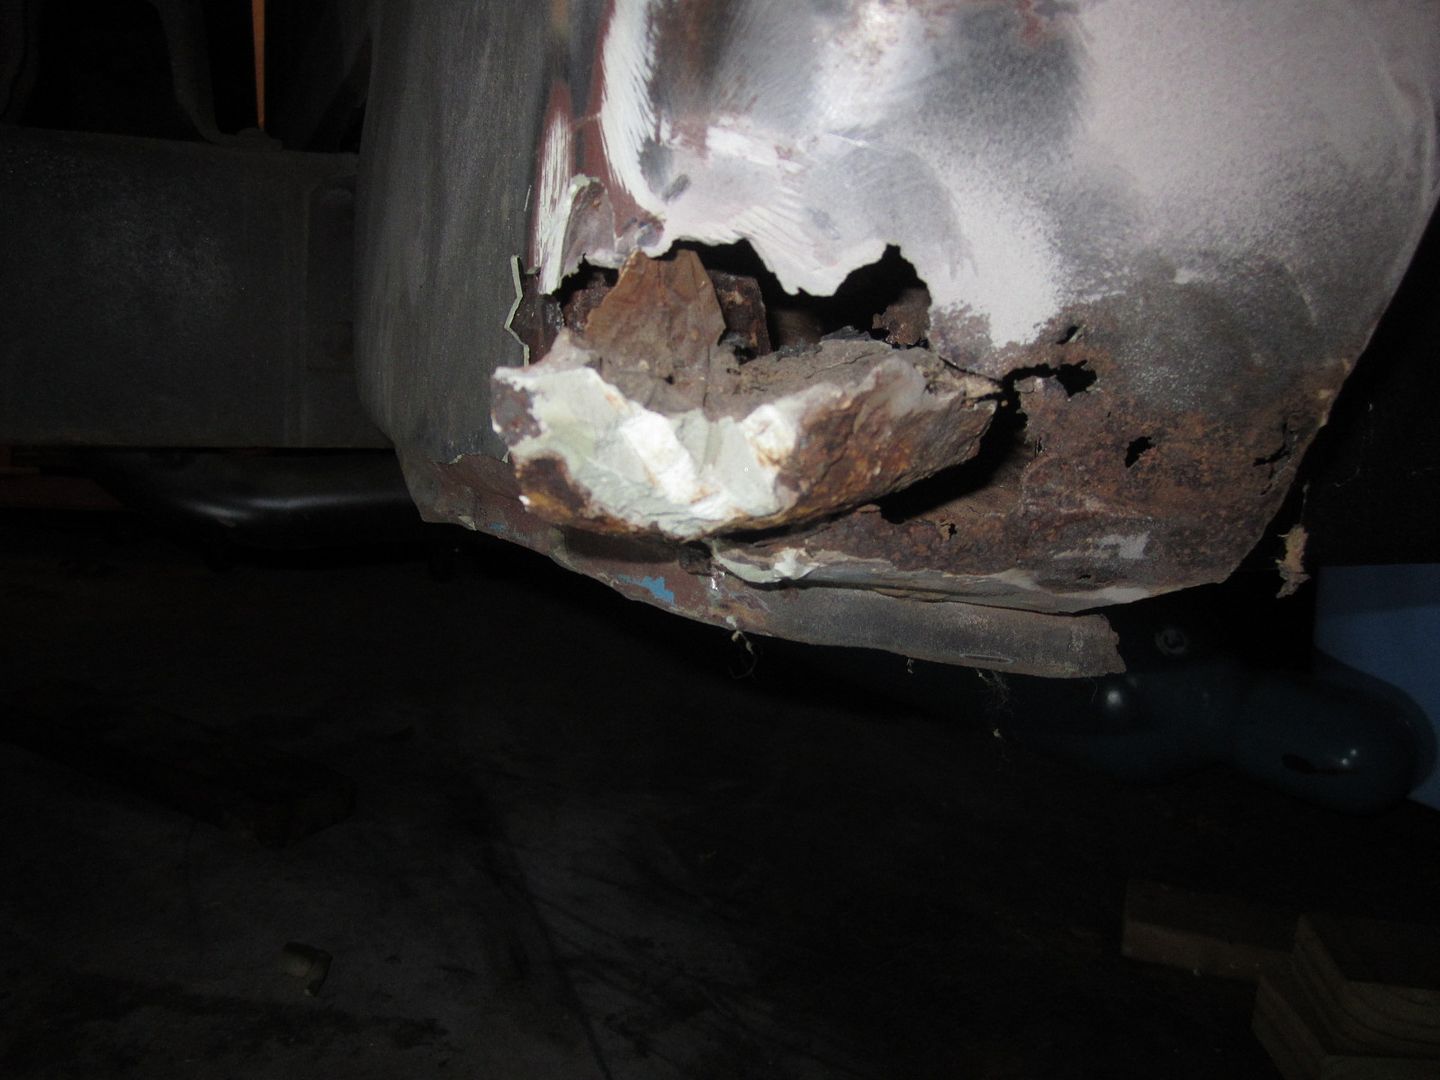
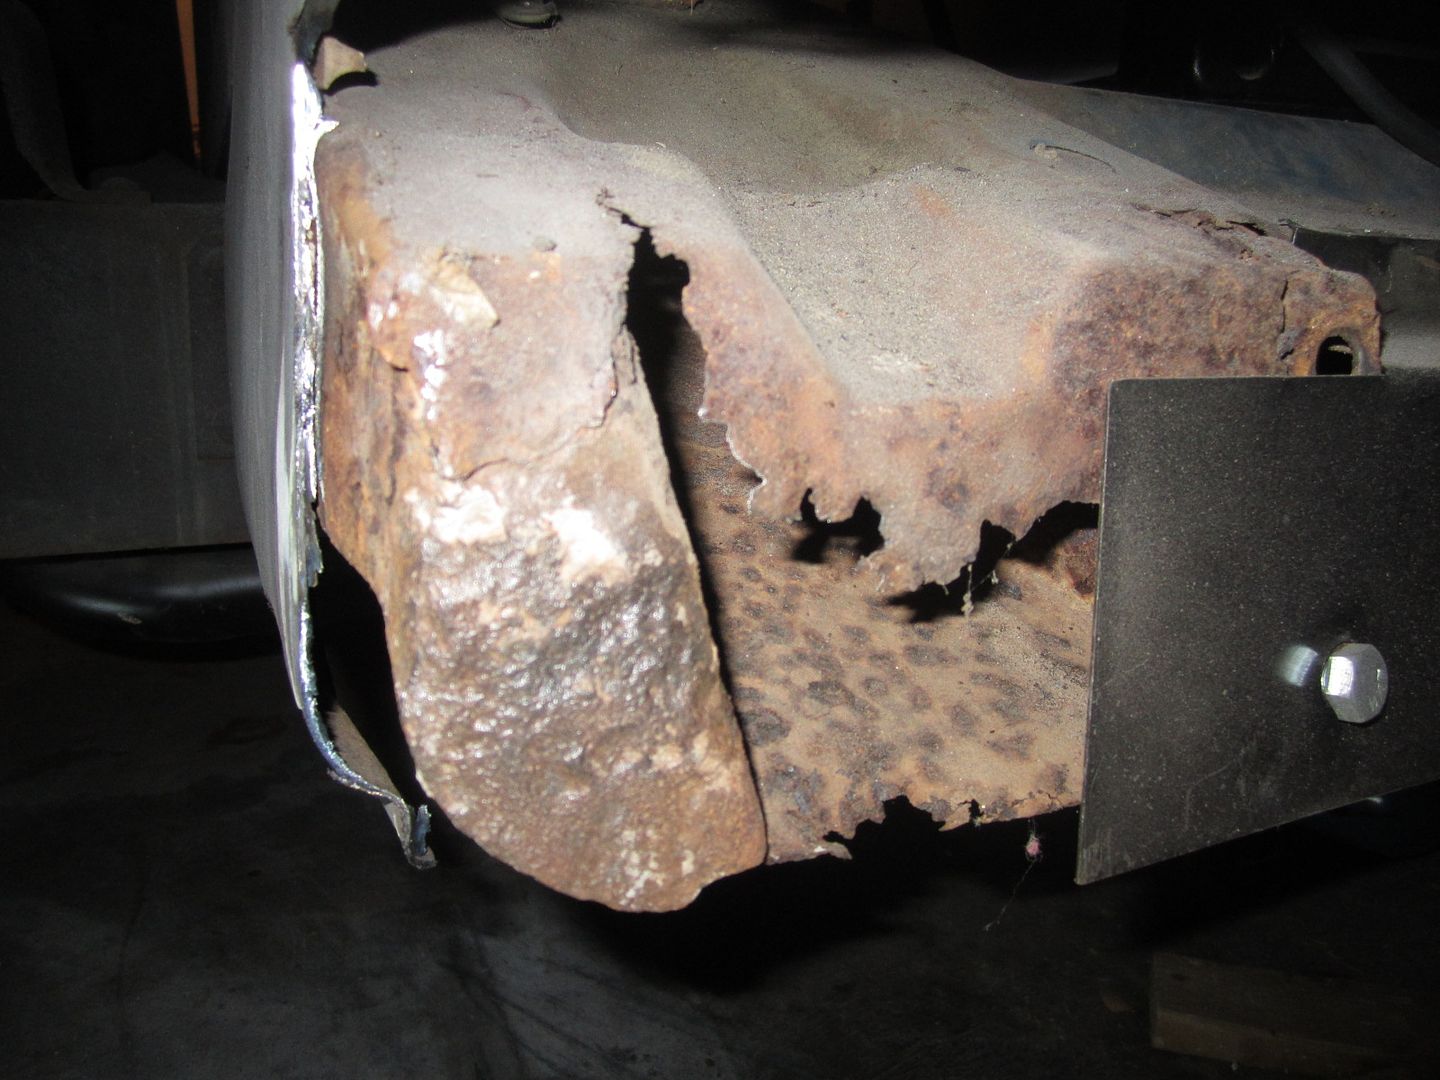
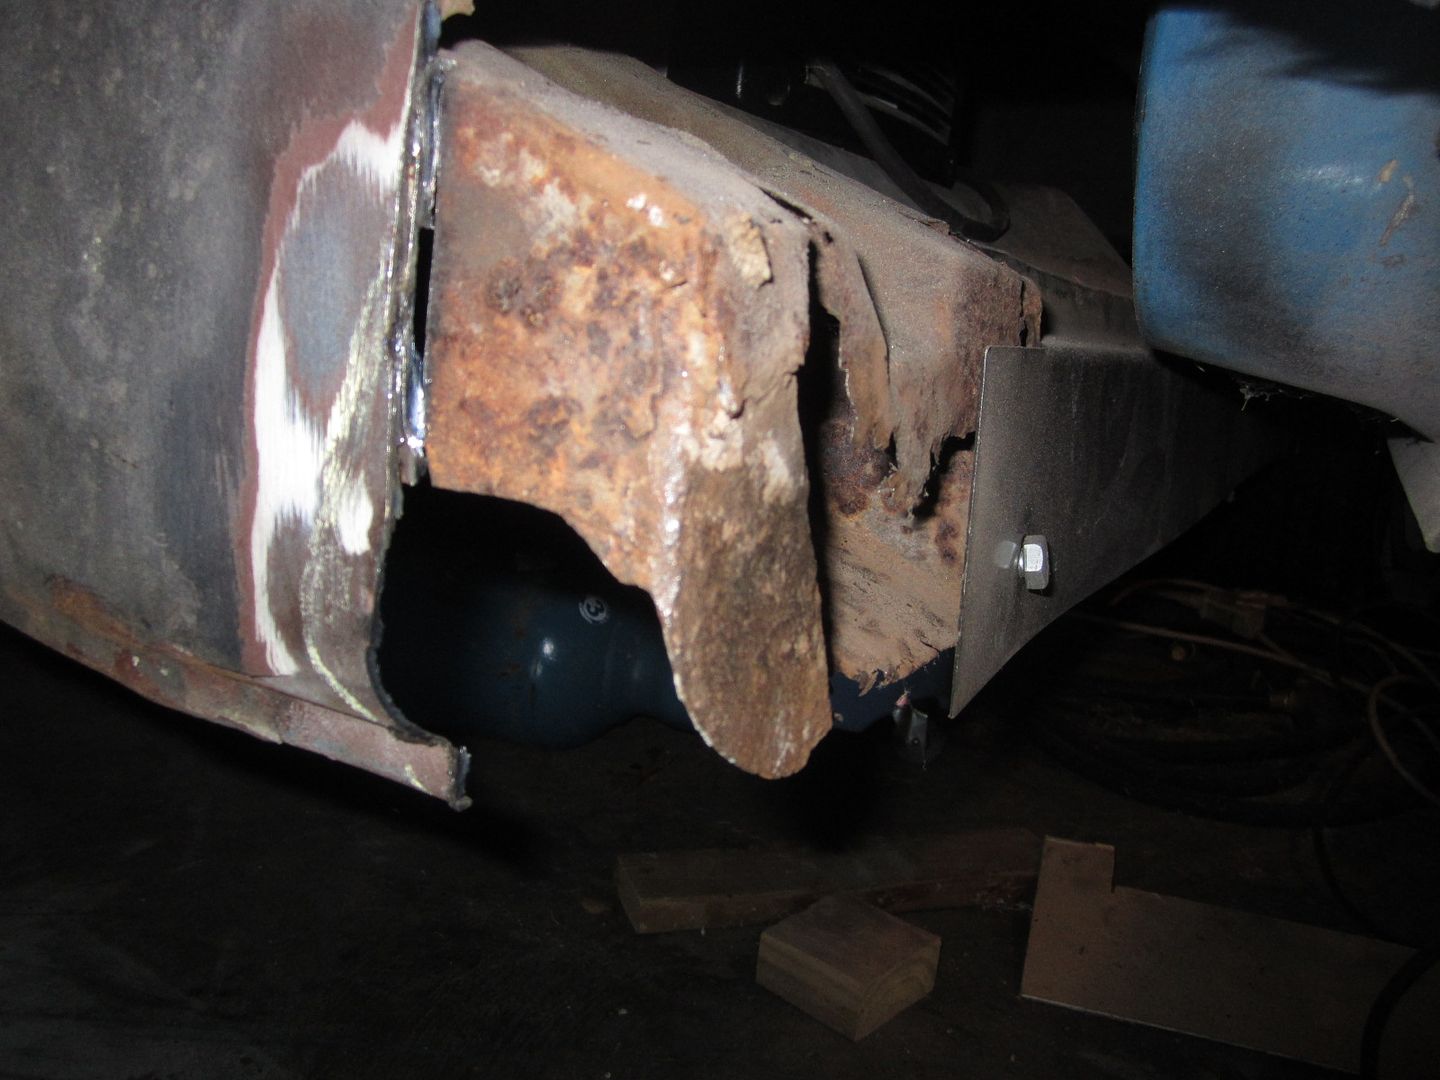
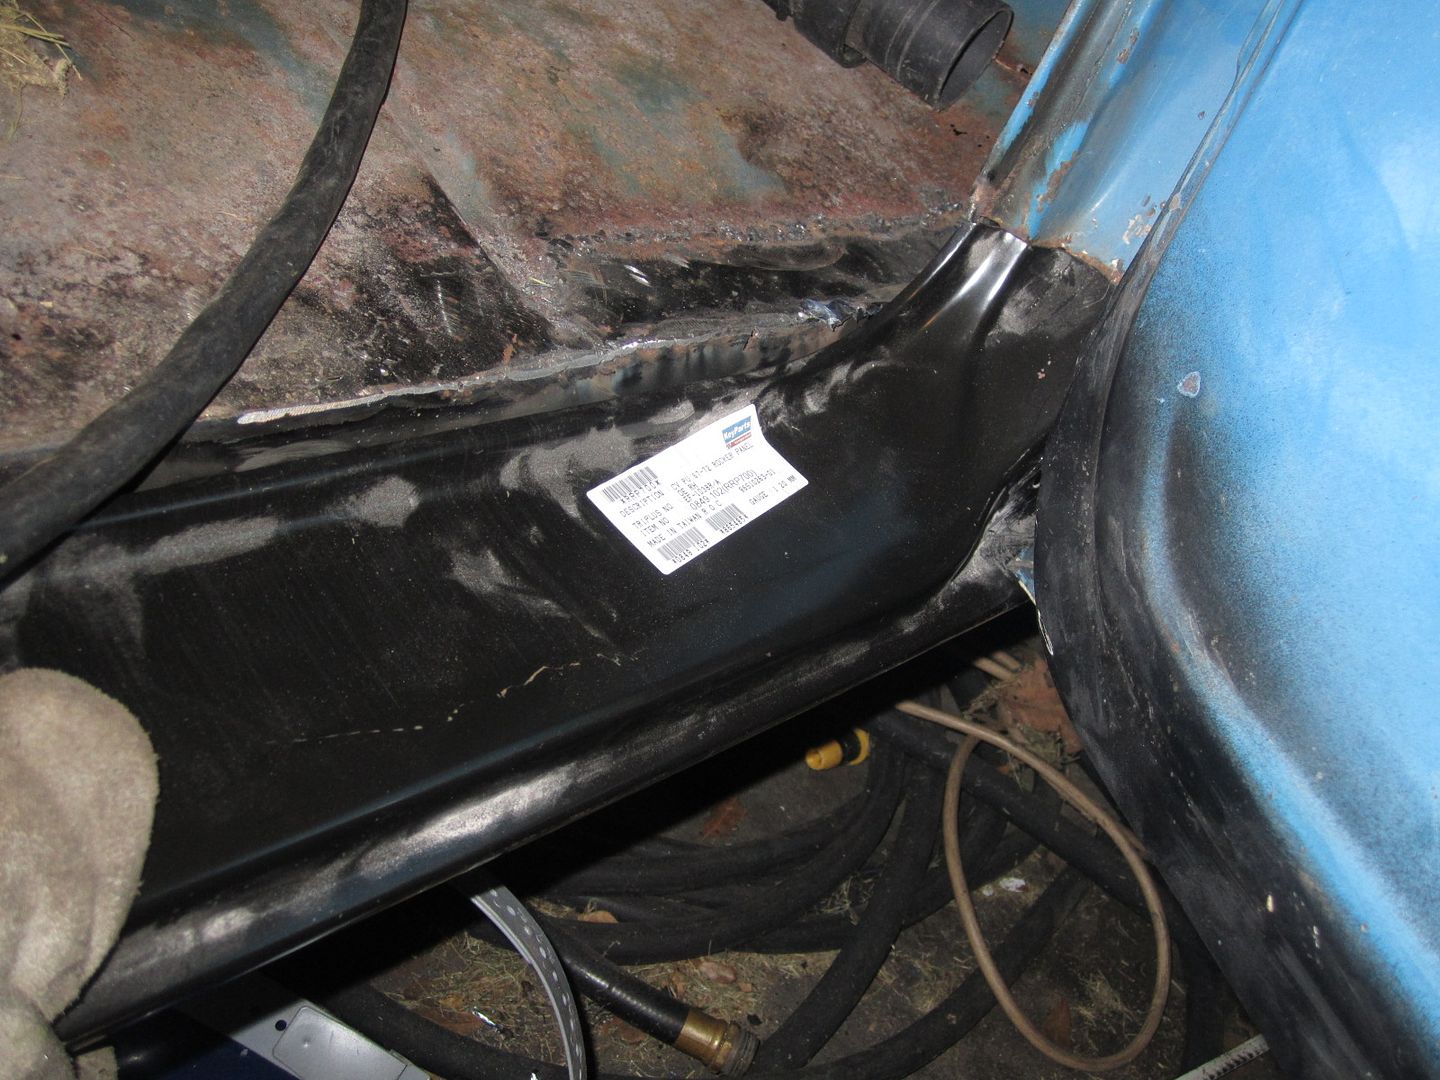
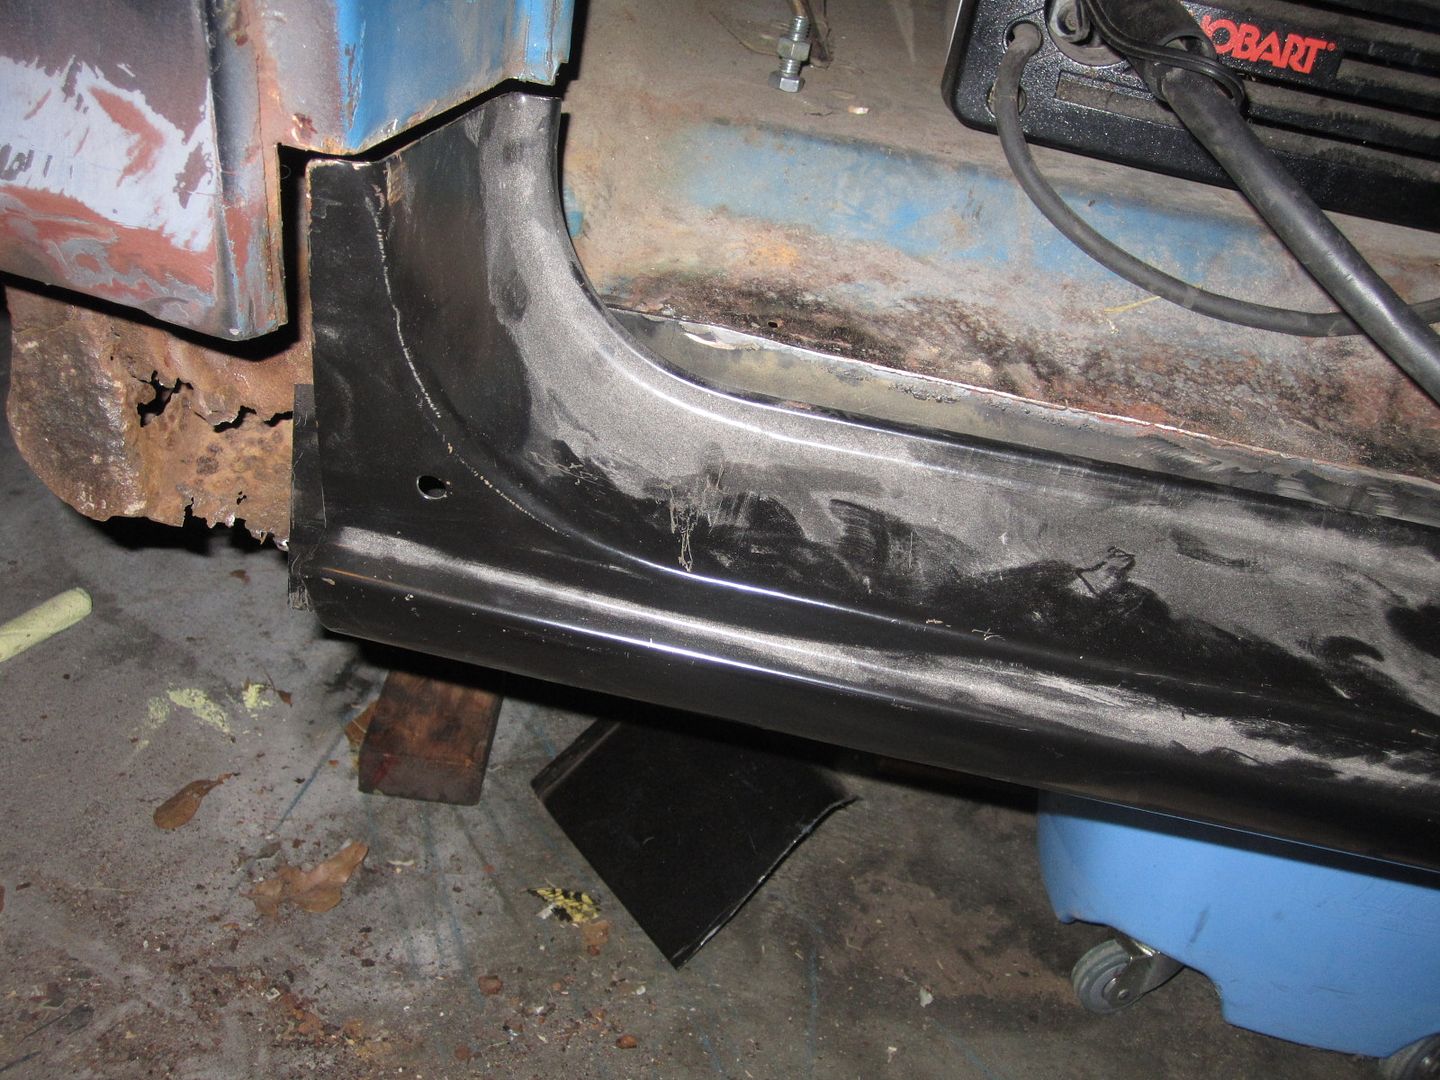
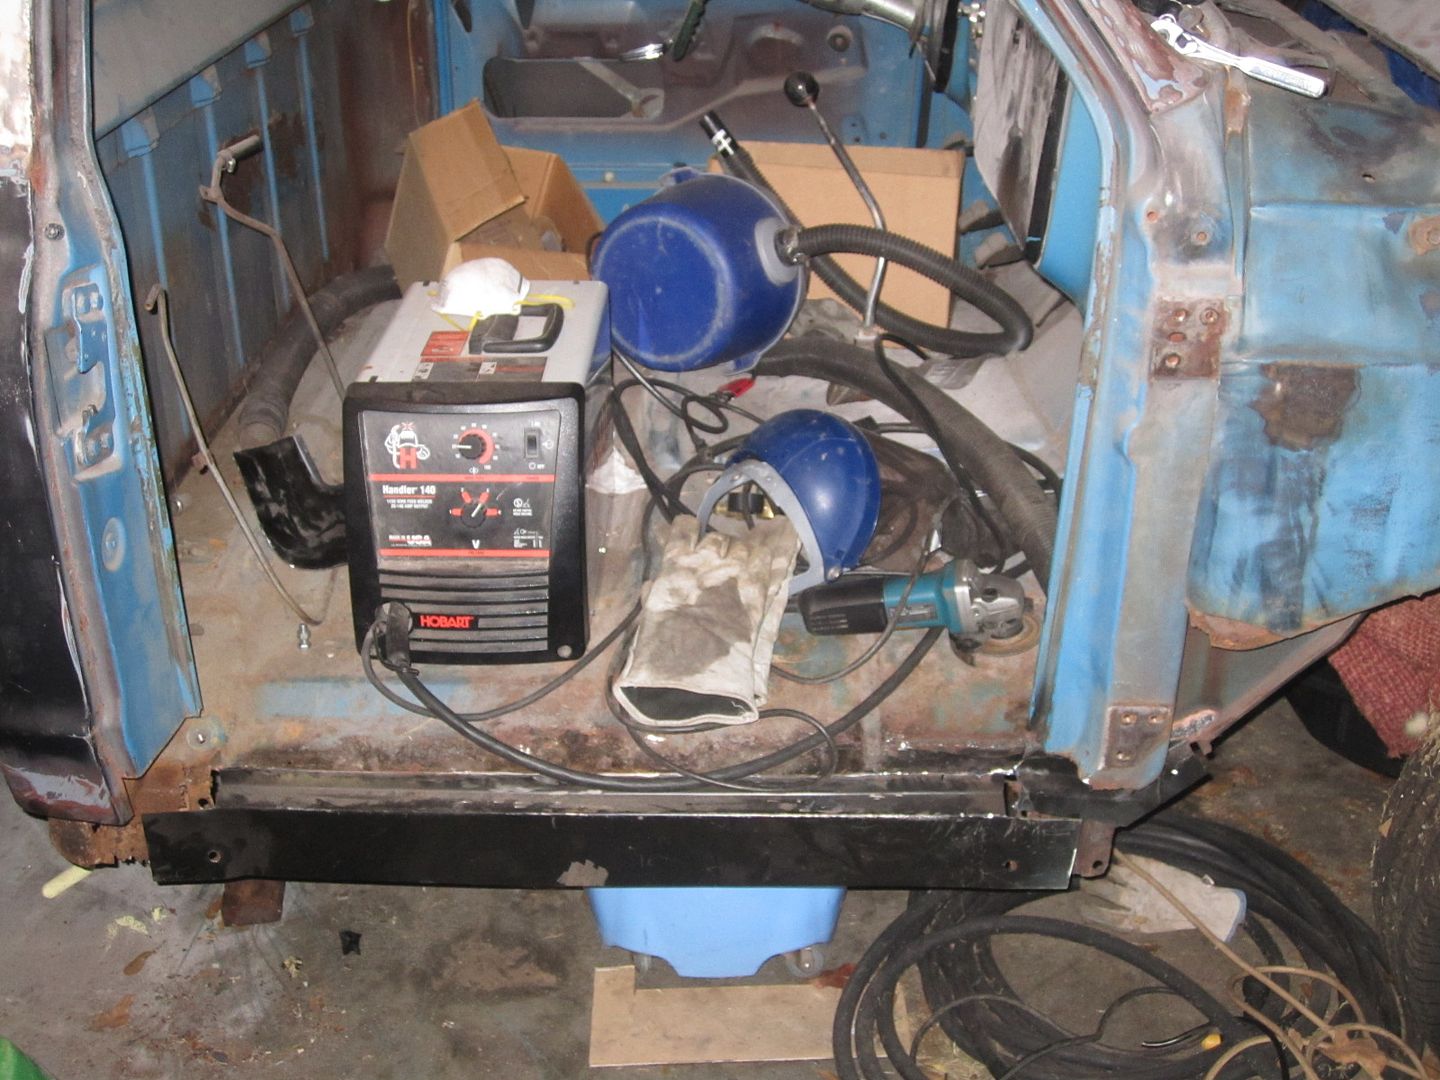
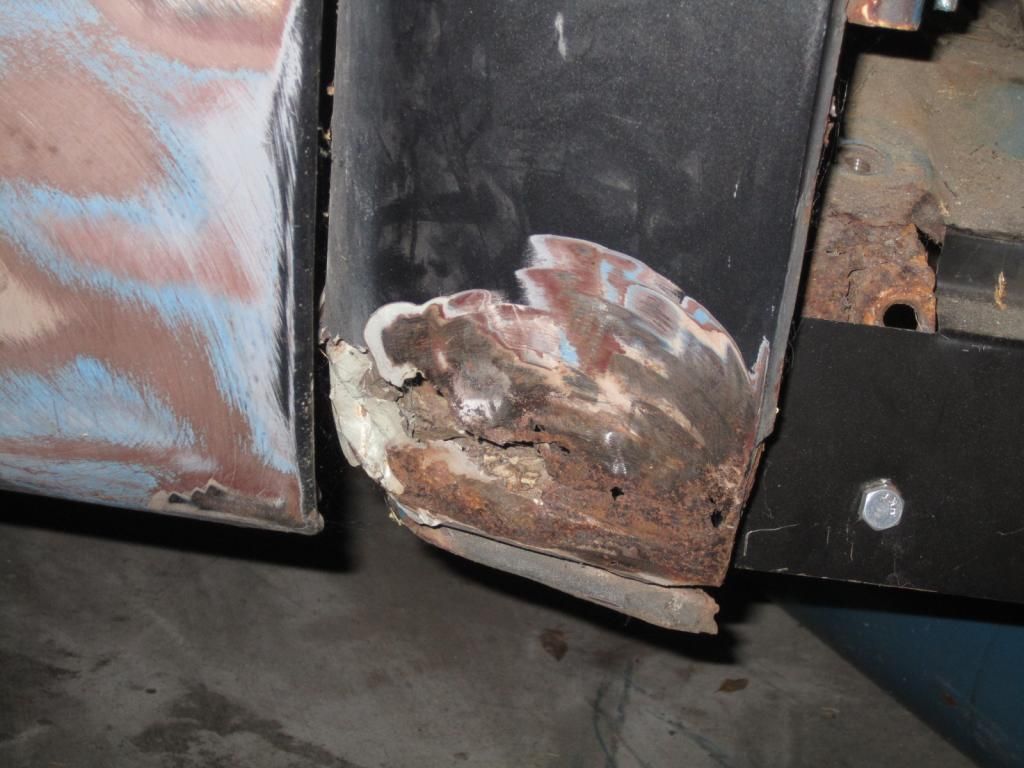
So I want to tackle the cab corners because I hate them. They stink and they're hard to get to. They're hard to work on because the bed is in the way. Here are some pictures:

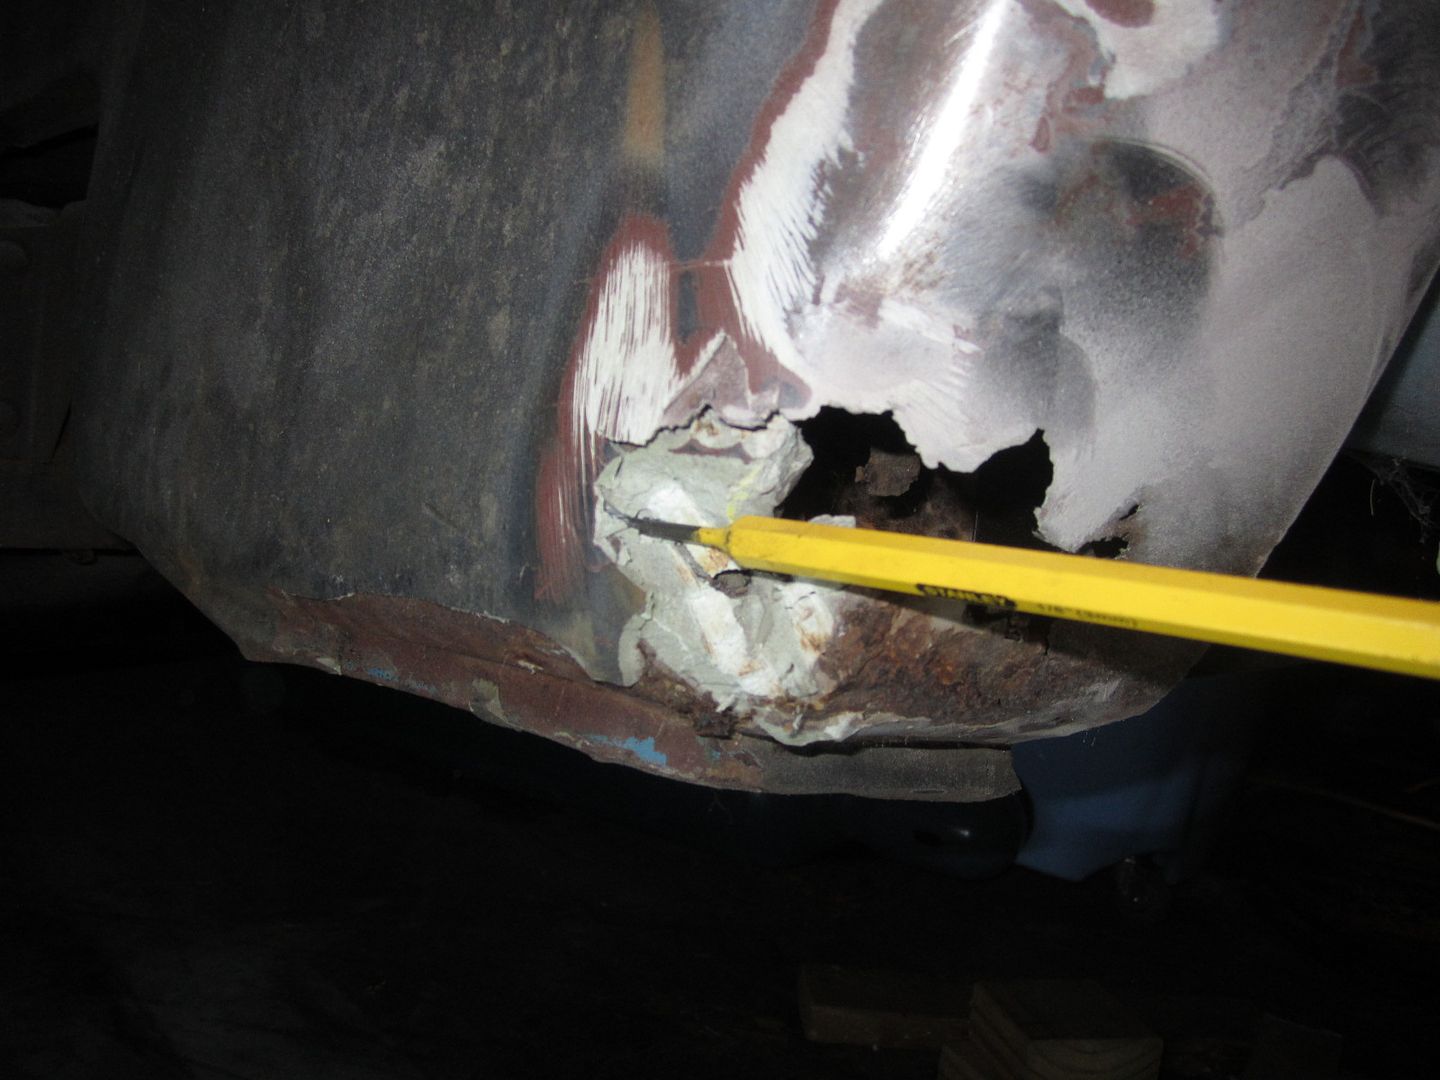
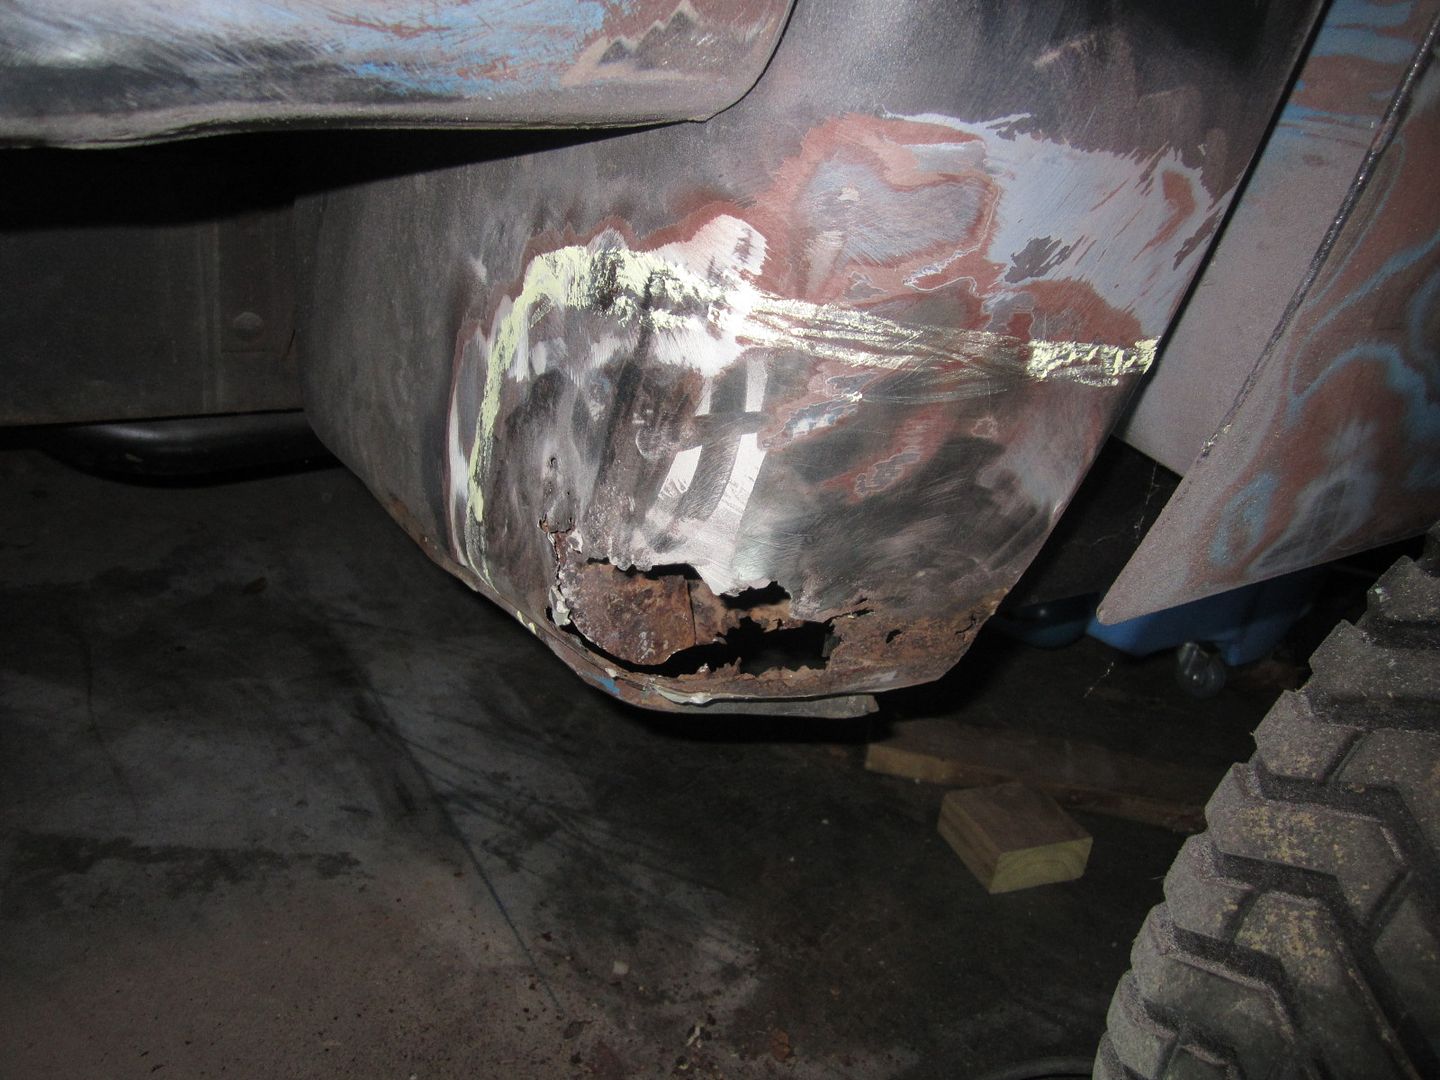
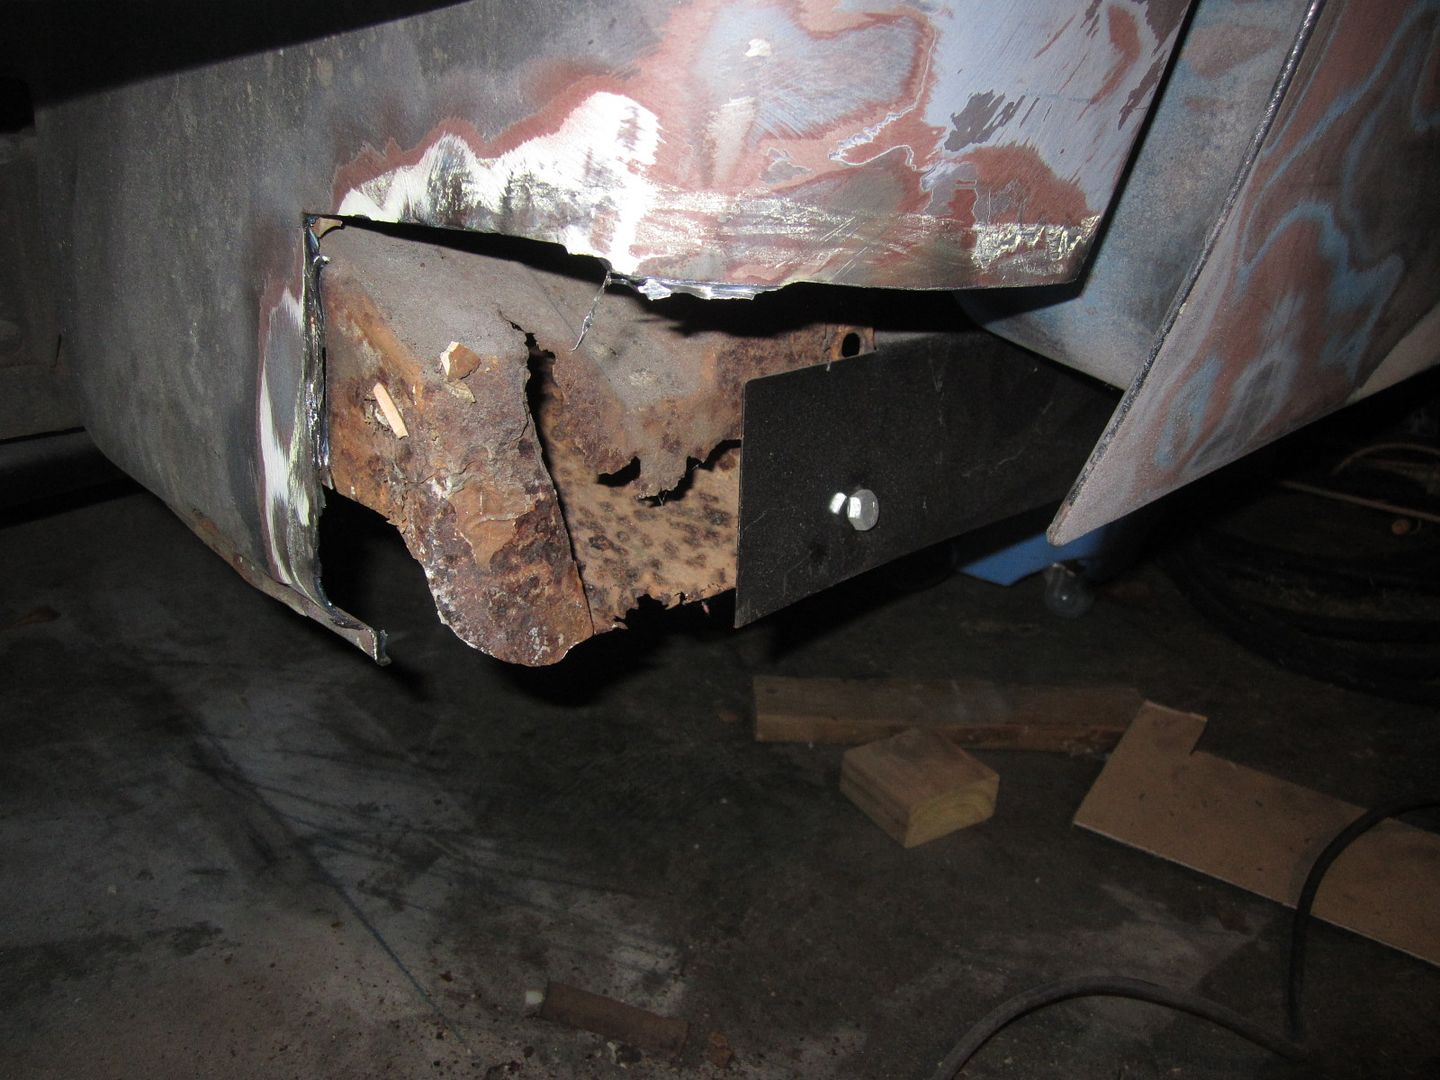
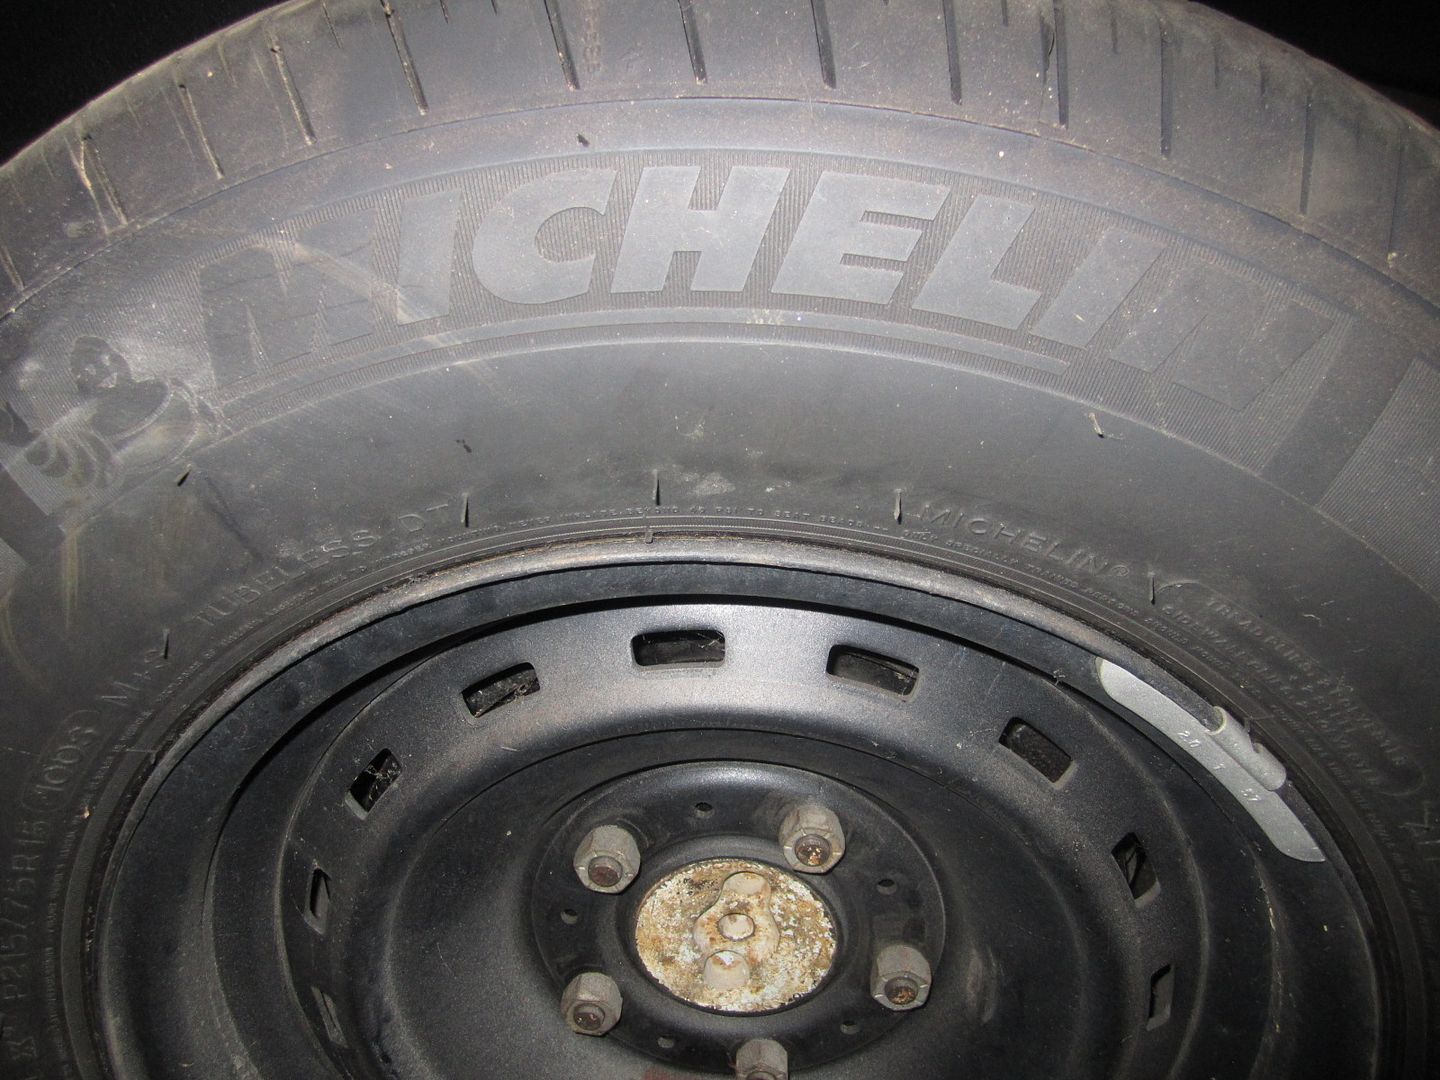
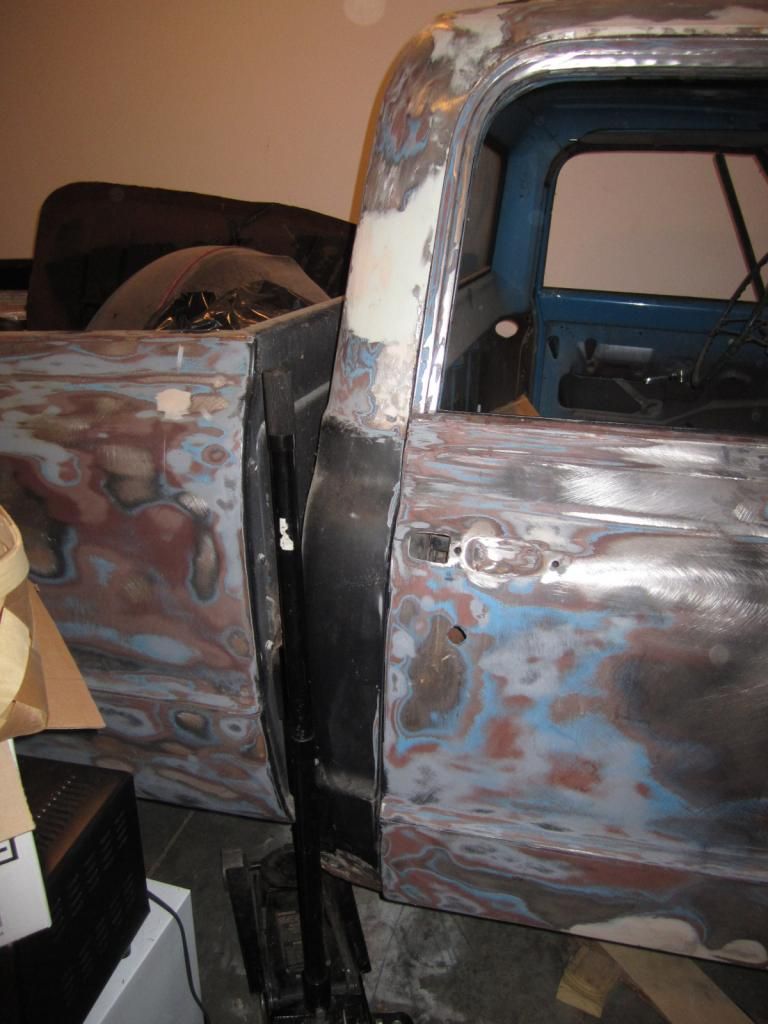
This is how the passenger side cab corner looks now:

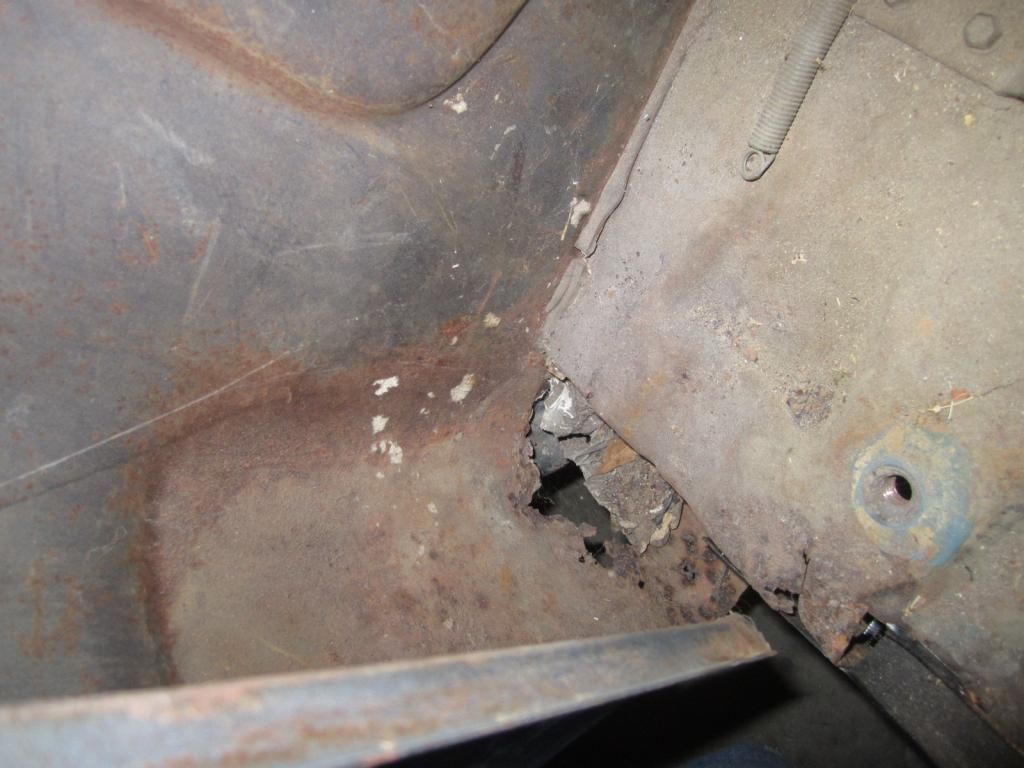
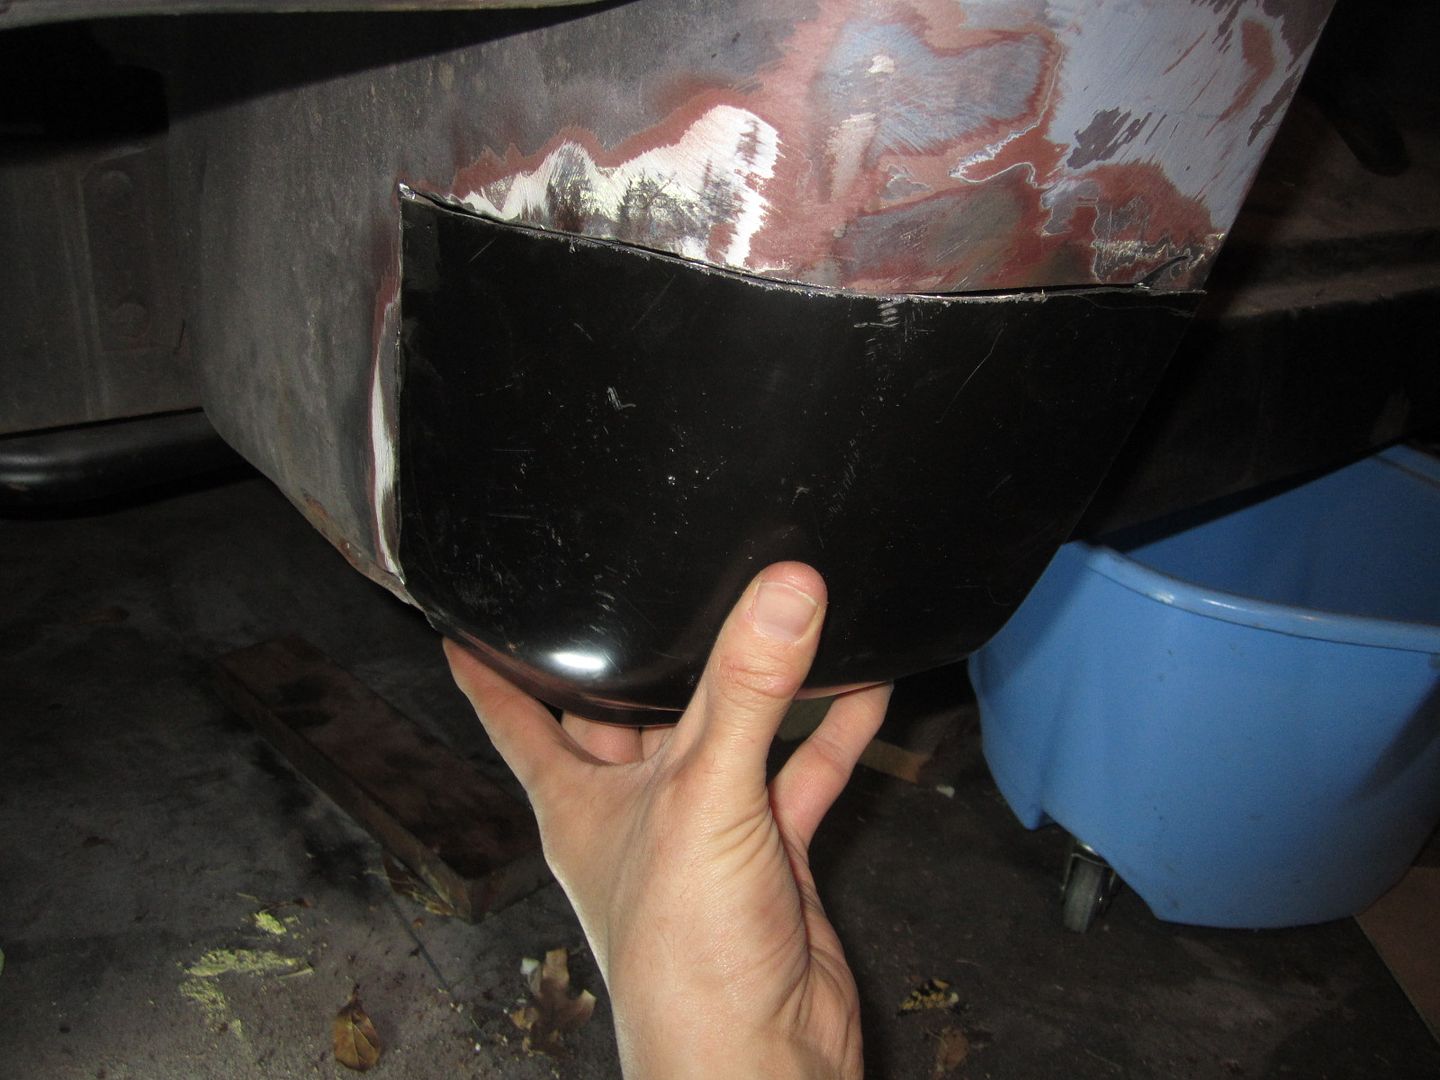
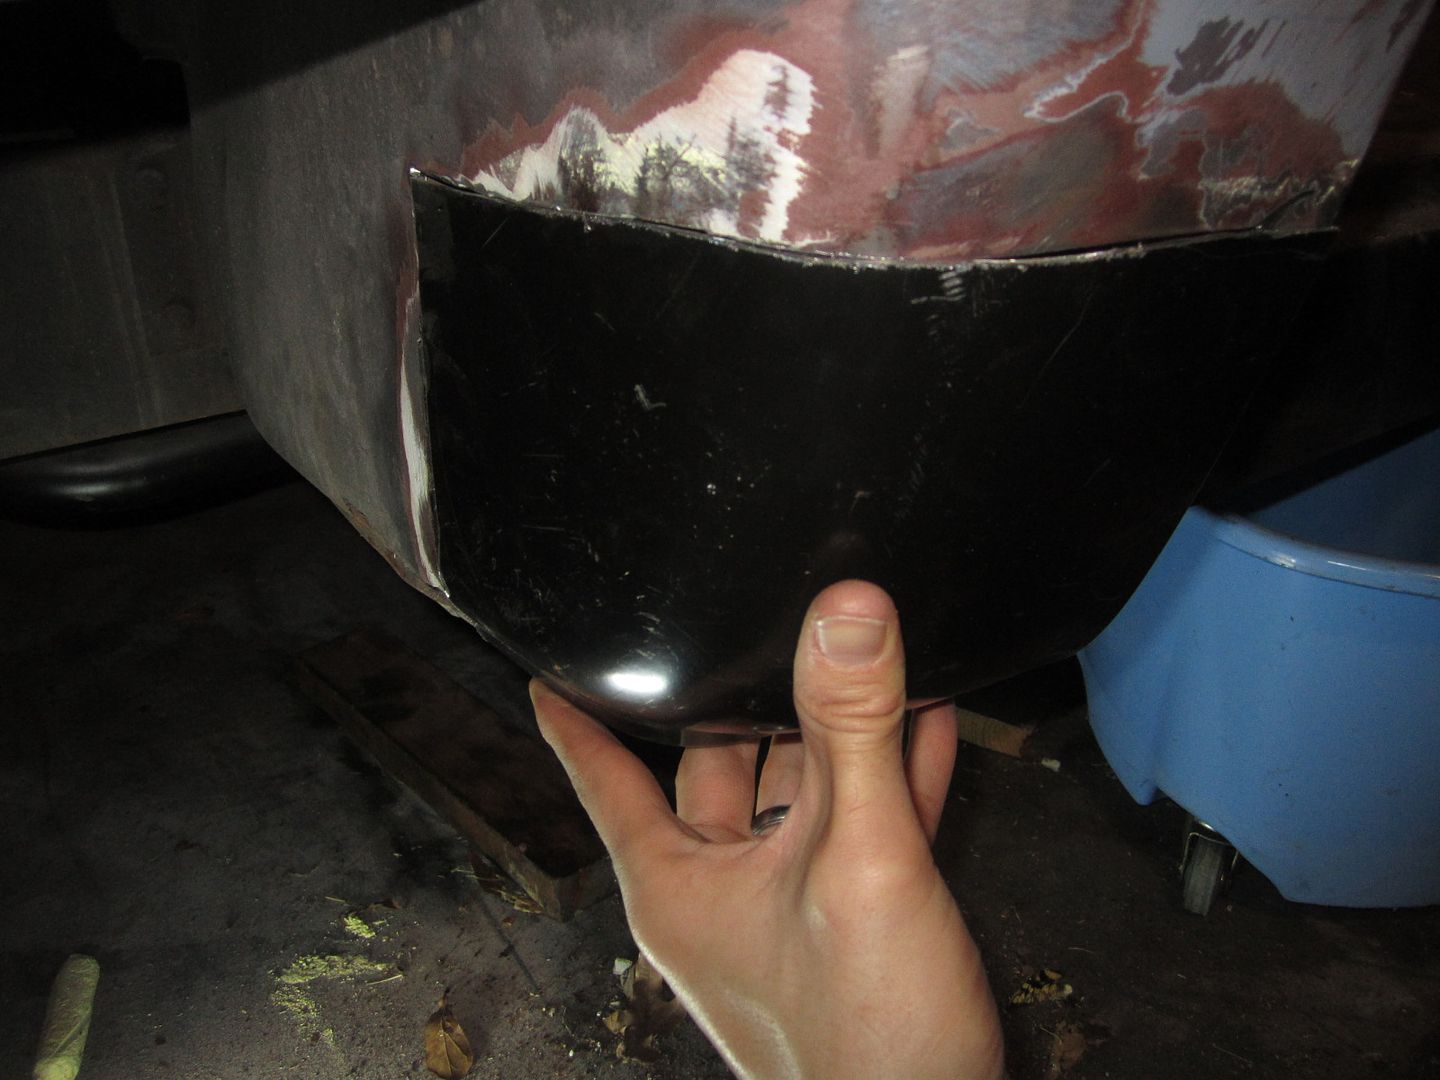
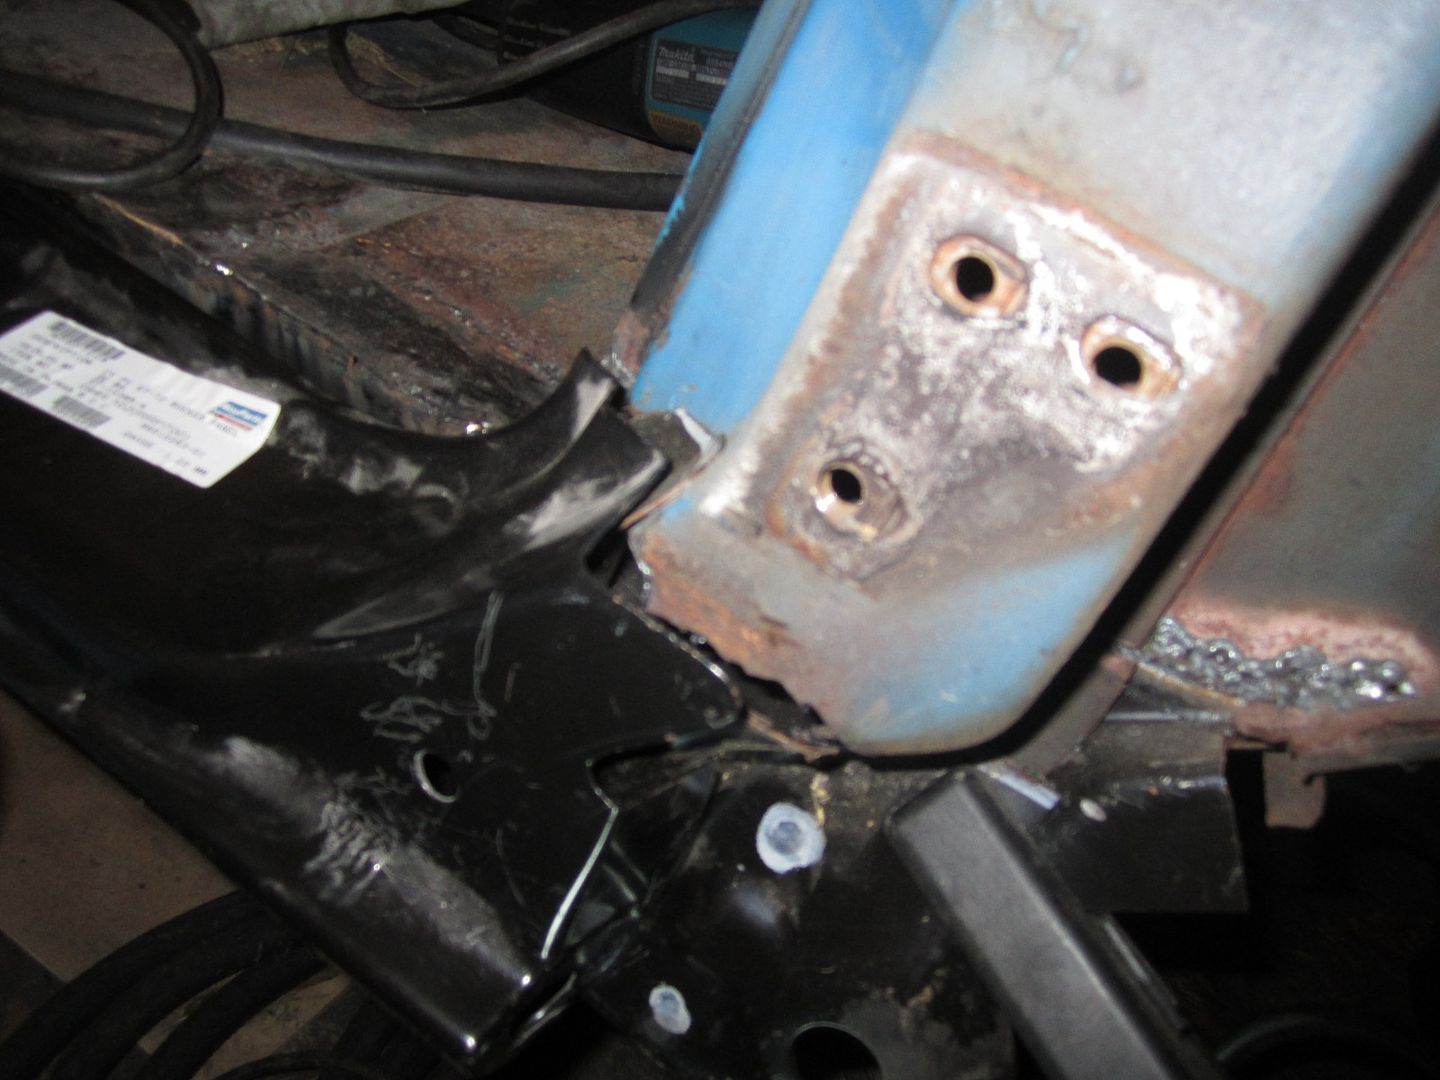
And from underneath:

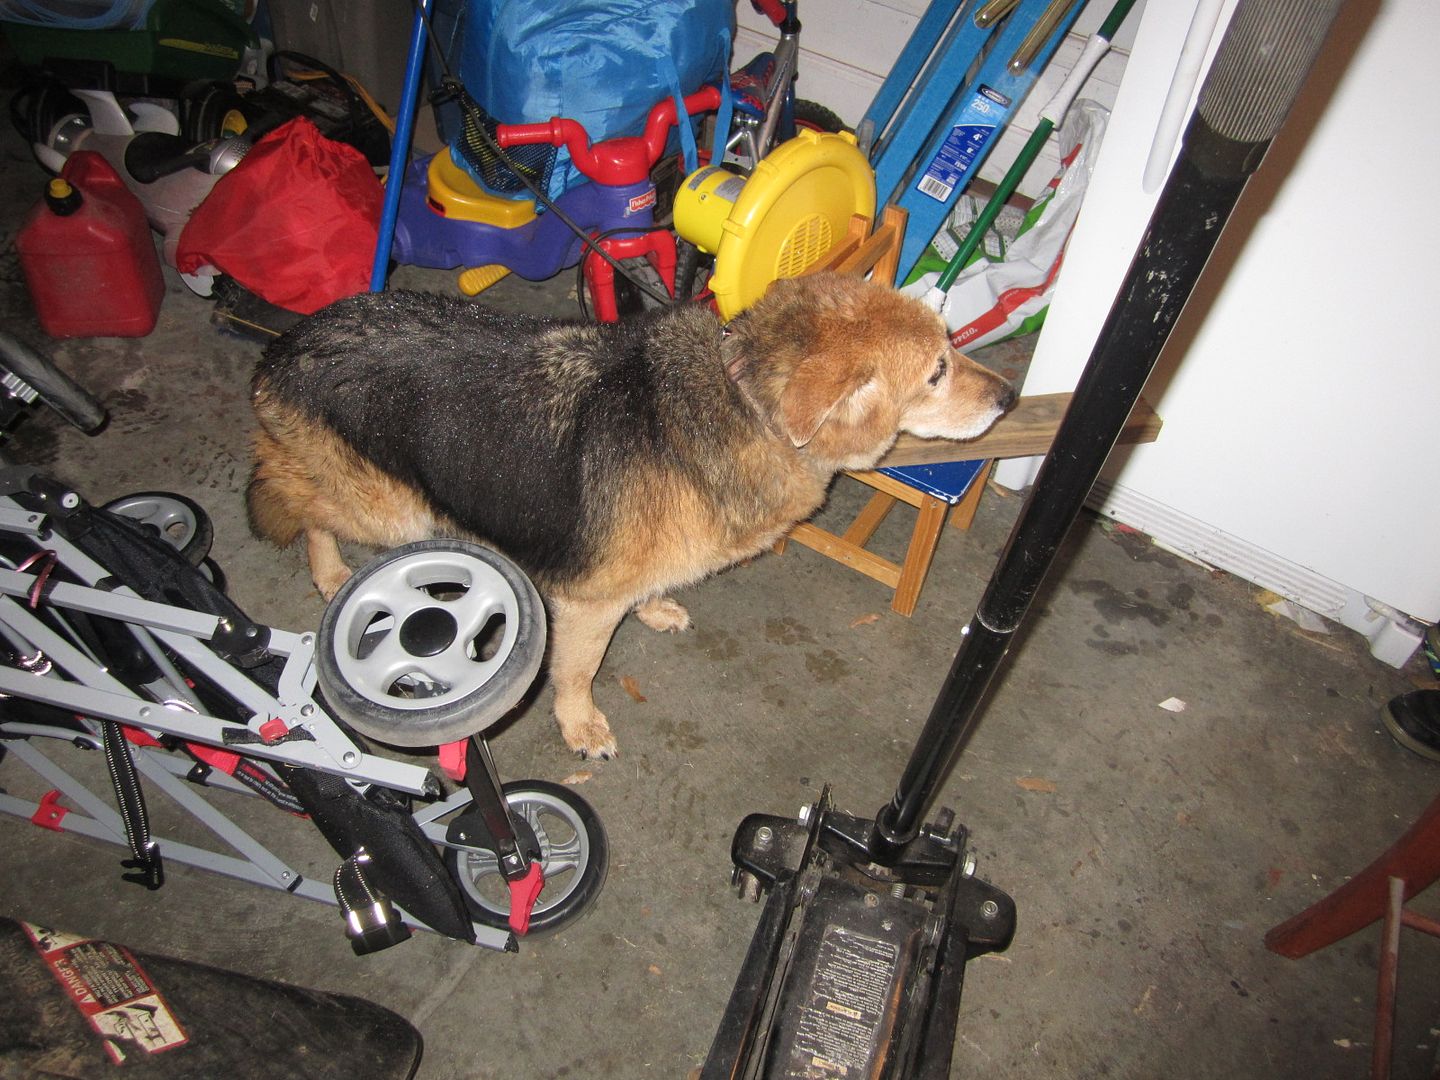
So today's quest is to lift the bed. I have about an hour between start and bedtime. The morning starts at 5:30 with children screaming (baby screaming happens at all hours), I am working on maybe 2 dozen more or less consecutive 4-5 hour nights, broken up mostly by the baby. So I am slow.

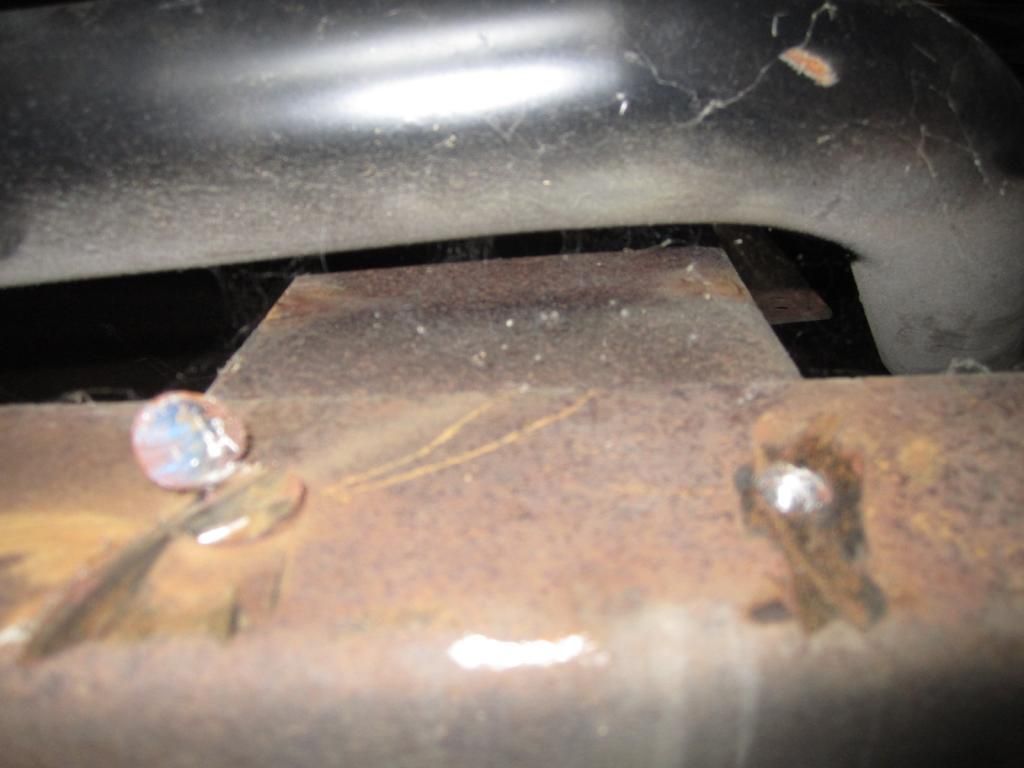
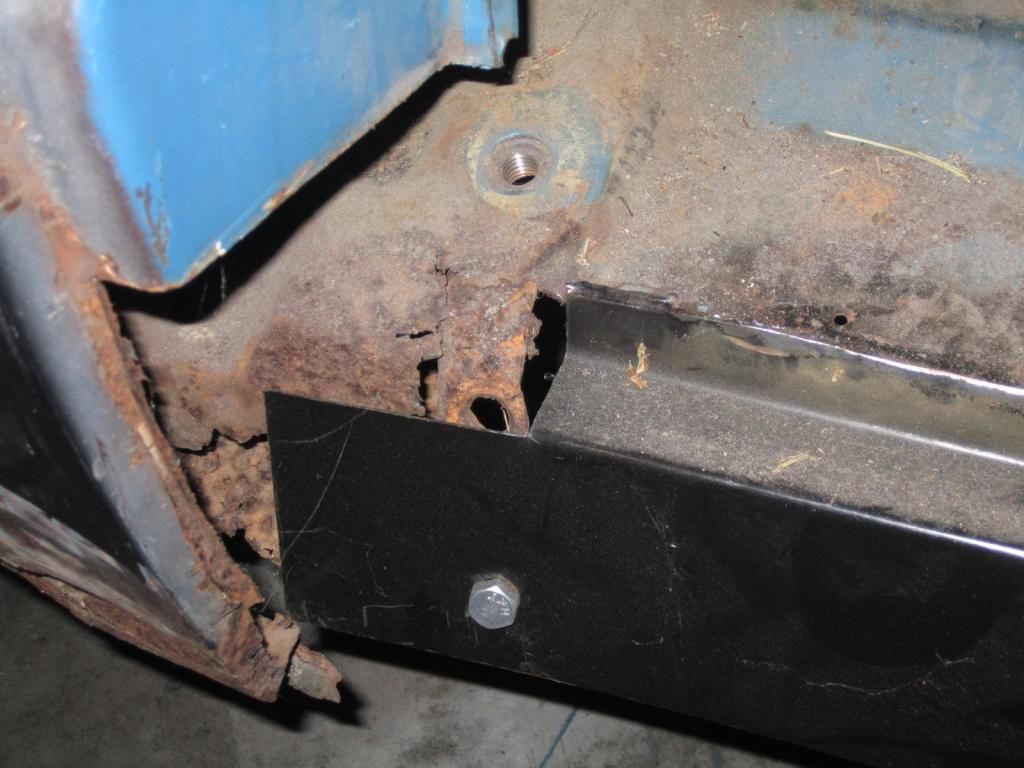
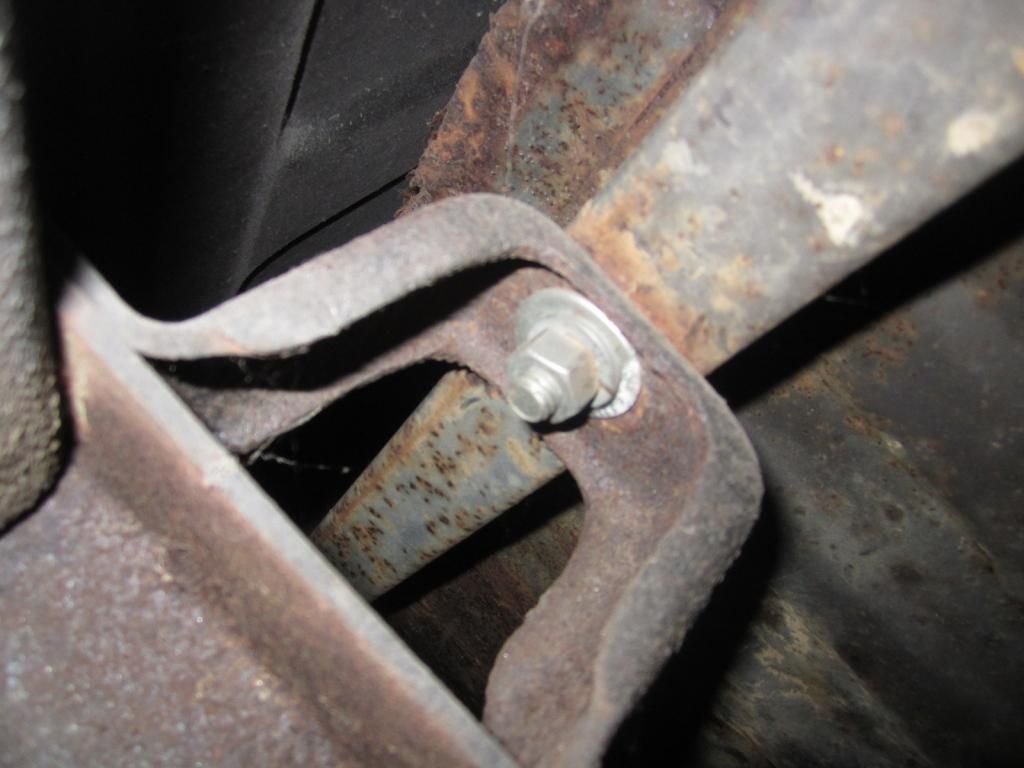
Someone has been here before, I know GM didn't put lock washers here. They are the devil and will not be replaced:

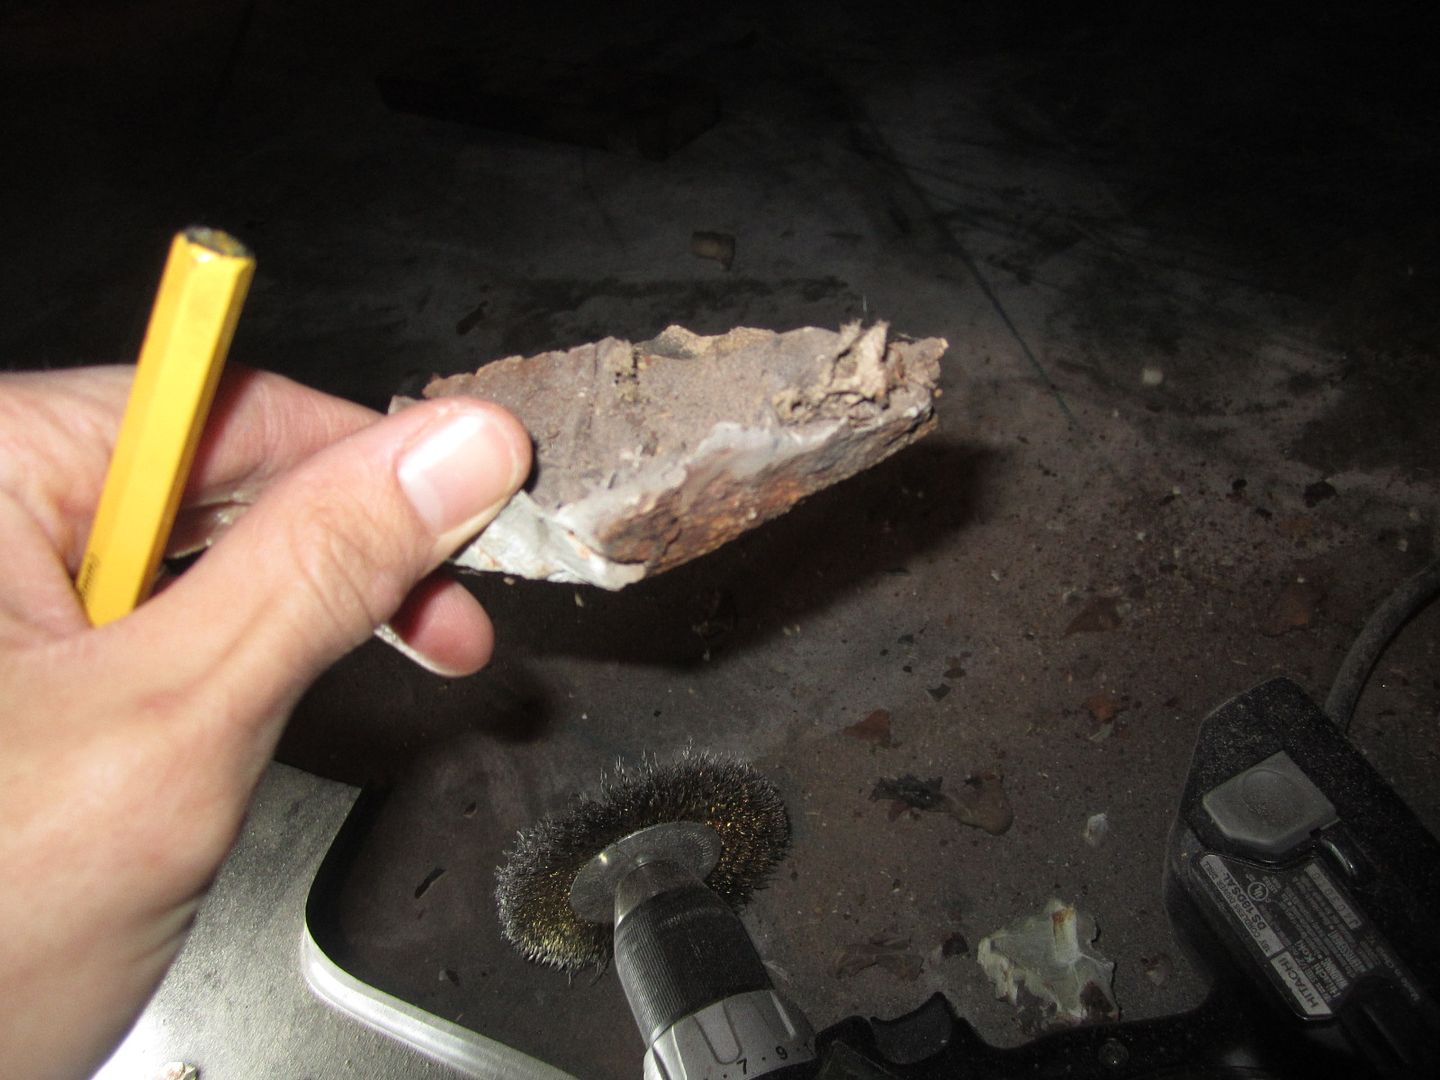
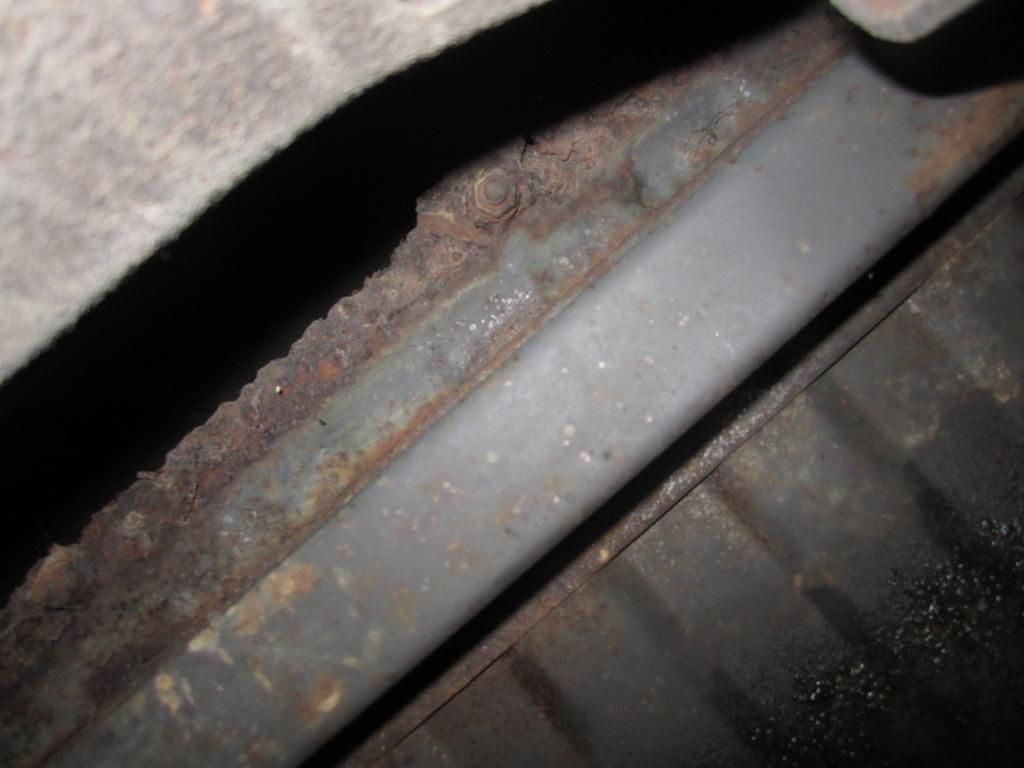
Ick, rust that I didn't see initially at the front edge of the bed at the bottom, not sure how to tackle this. Anyone have any ideas?

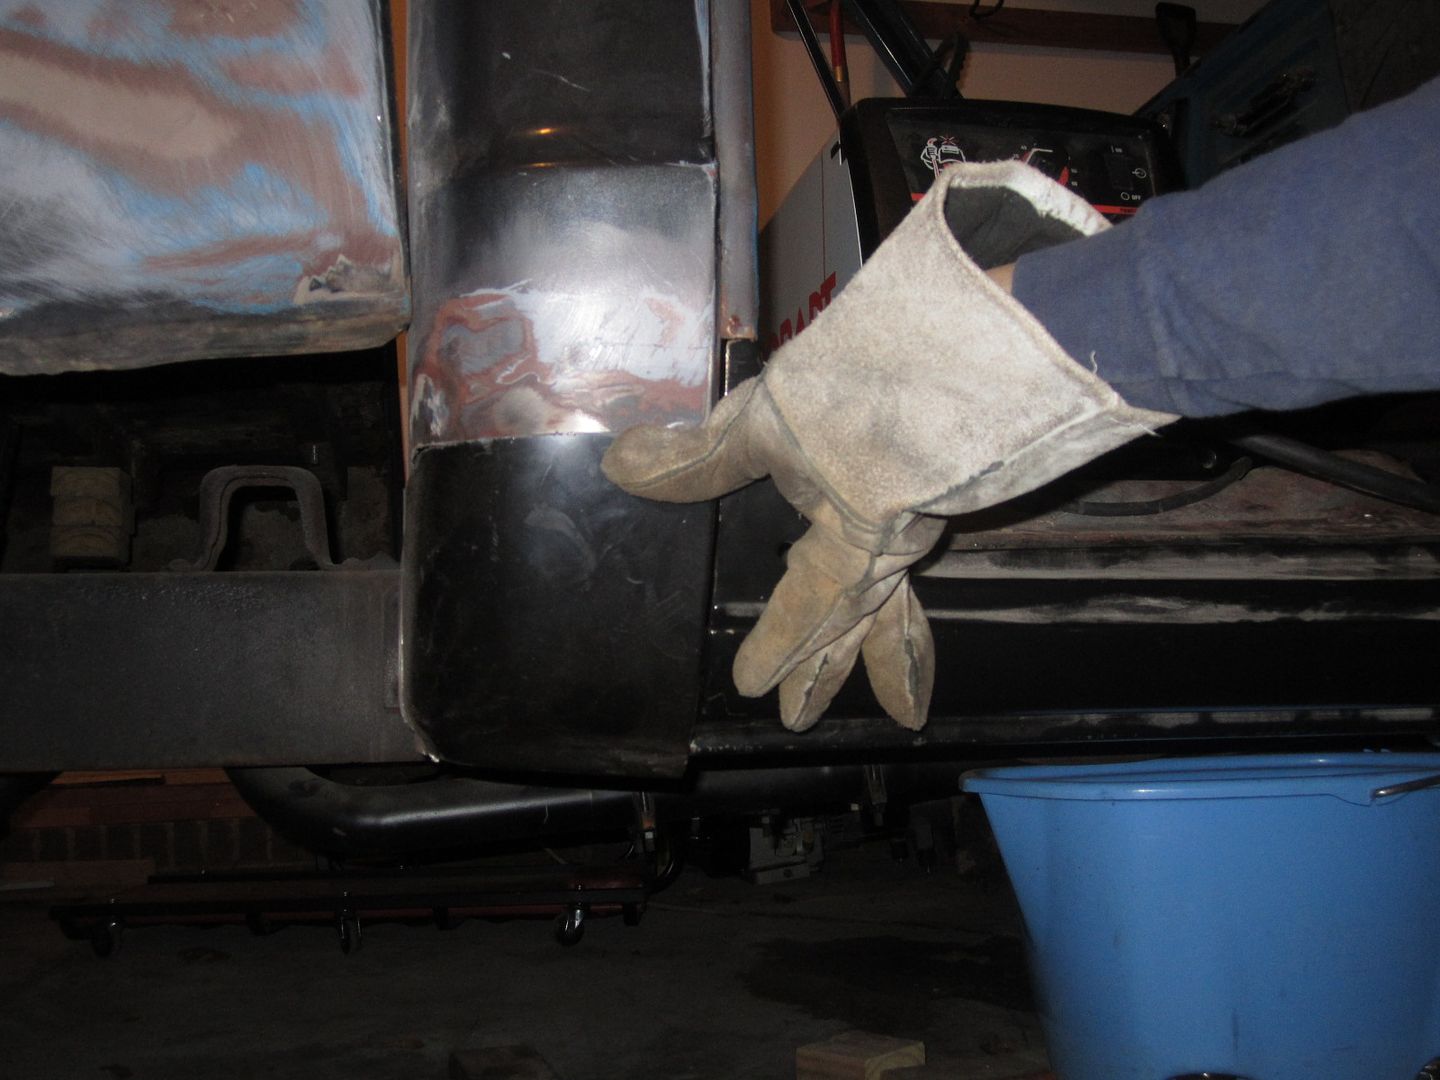
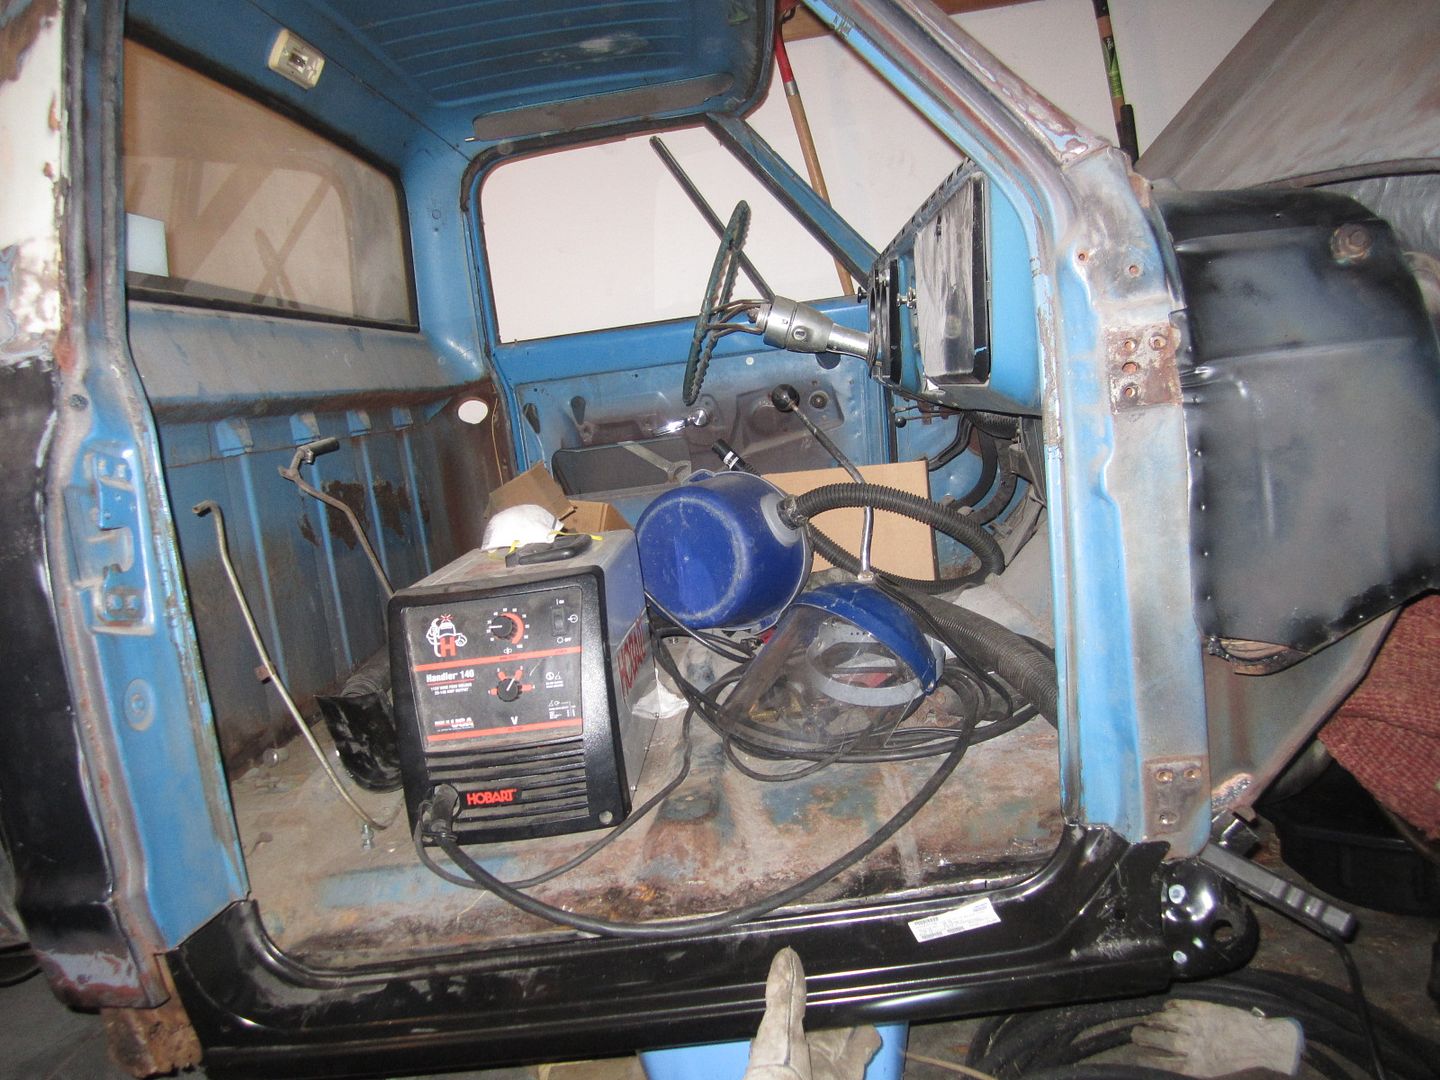
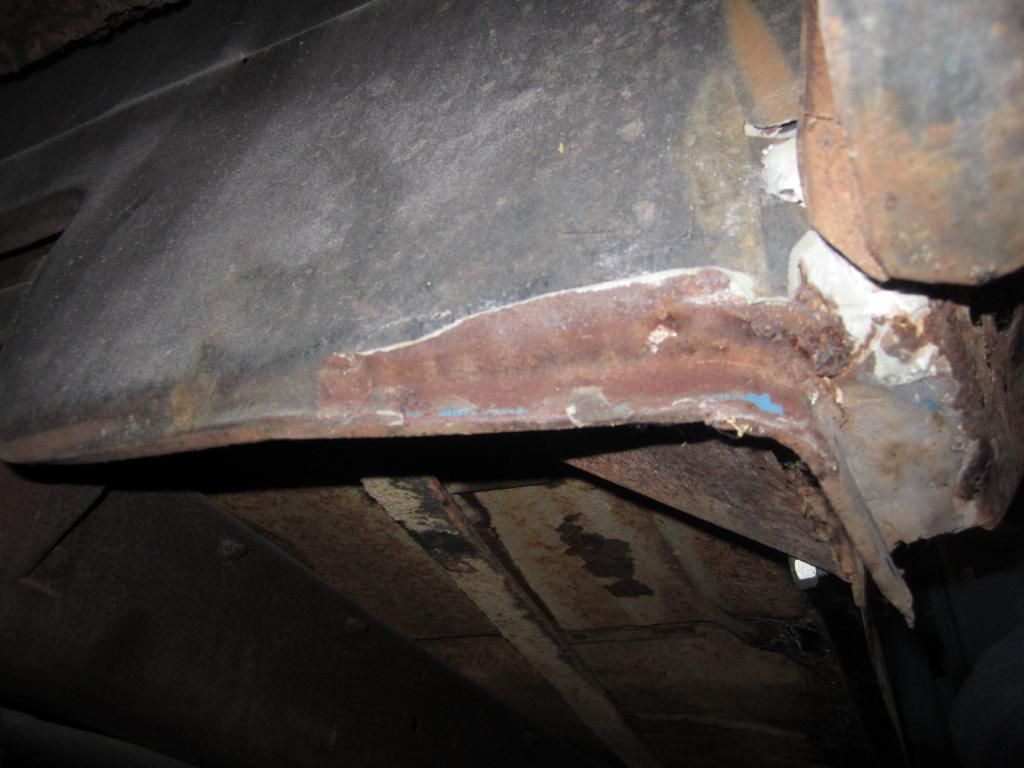
Here it is up in the air, from the bottom:

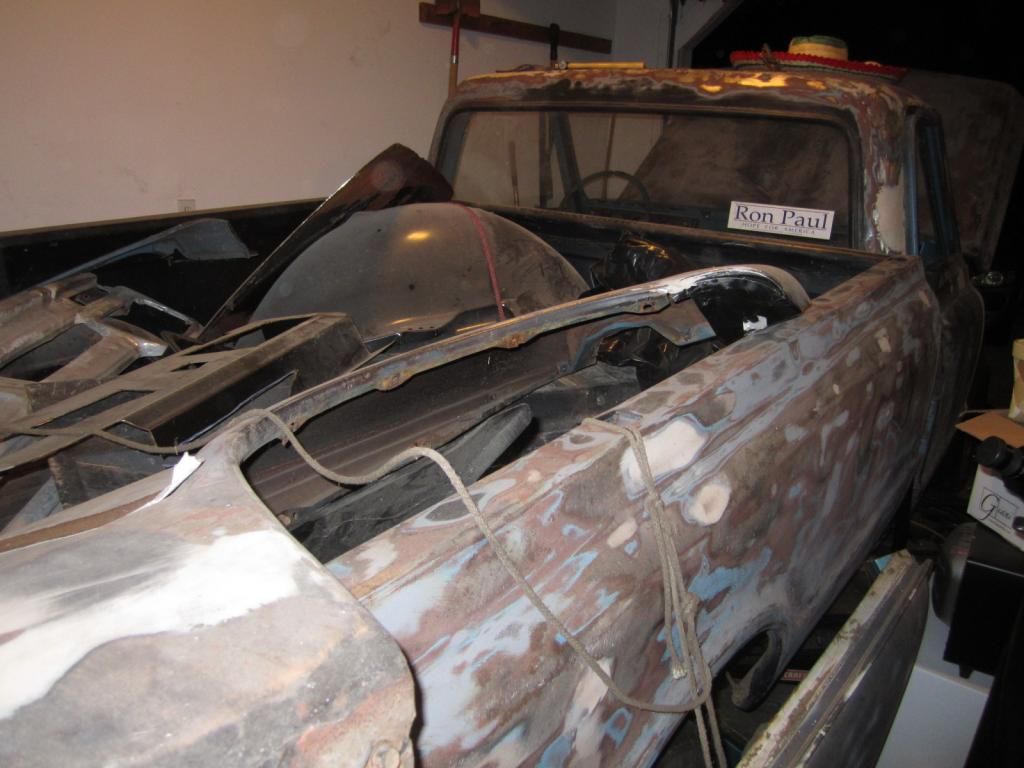
...from the top (apologies for the political paraphernalia)

...from the side

Also I realized a few things. My exhaust hangers stink, and were attached to the bed, not the frame. Also, I decided to cut and redo the center bearing crossmember rather than remove it, so I need to figure out what to do with the rivets I began cutting off, any ideas? I am thinking of grinding them smooth after a good weld, just ignoring that I ever did it and hoping nobody notices the rivet hears which are supposed to be there:

tuna55
tuna55 MegaDork
1/11/13 8:58 p.m.

Day two. The goal was to cut out the cab corner and locate the patch panel.

Done!

OK, ok, just kidding. I found the patch panel, though. I had Sandy, the 16 year old wonder dog to keep me company.

She didn't help. And yes, she is tied on a bungie cord.

This punch is sunk about two inches deep, ouch.

This previous body guy LOVED the Bondo!

A LOT

MORE

So here is the plan, carefully laid out in... children's sidewalk chalk.

The correct cutting tool is not available, crap.

So that's why this is so messy:

Does anyone knows what this is supposed to look like?

The black flat piece to the right is a somewhat-incorrectly welded in inner rocker panel. The cab corner is going to cover this mess, but I am not sure what is supposed to go here. Right now the plan is to weld flat sheet over it and join it with the inner rocker, but I have no idea what's supposed to go there. Please, folks, if you know, attach some pictures for me.

So there you have it, I located the patch panel and cut out the cab corner. It's going to be a long build thread.

fasted58
fasted58 UberDork
1/11/13 9:03 p.m.

that year body style is one of my favs ever

glad you decided to move forward

tuna55
tuna55 UberDork
1/11/13 9:15 p.m.
fasted58 wrote: that year body style is one of my favs ever glad you decided to move forward

I appreciate the support, this type of encouragement is what I am going to need to get this thing back on the road.

JThw8
JThw8 PowerDork
1/11/13 9:42 p.m.
tuna55 wrote:
fasted58 wrote: that year body style is one of my favs ever glad you decided to move forward
I appreciate the support, this type of encouragement is what I am going to need to get this thing back on the road.

You're on the right approach, just a little at a time. Dont focus on the whole thing or it gets overwhelming, just pick a spot and work it to completion. When you finish this first corner the accomplishment will definitely give you more drive to continue and each subsequent part will keep you going.

Keep it up! :)

AngryCorvair
AngryCorvair GRM+ Memberand PowerDork
1/12/13 8:39 a.m.
JThw8 wrote:
tuna55 wrote:
fasted58 wrote: that year body style is one of my favs ever glad you decided to move forward
I appreciate the support, this type of encouragement is what I am going to need to get this thing back on the road.
You're on the right approach, just a little at a time. Dont focus on the whole thing or it gets overwhelming, just pick a spot and work it to completion. When you finish this first corner the accomplishment will definitely give you more drive to continue and each subsequent part will keep you going. Keep it up! :)

i remember wheels777 saying something along the lines of "when i have 30 minutes, i do a 30-minute job" as his answer to "how do you build a new challenge car every year?"

re the cab corners, i'd google "cab corner replace chevy _____" where the blank is filled in with the model year of your truck. someone's already done it and documented it, so learn from them.

Javelin
Javelin GRM+ Memberand MegaDork
1/12/13 12:06 p.m.

Dude, I'm so happy that you're going to stick with it! Subscribed.

tuna55
tuna55 UberDork
1/12/13 2:23 p.m.

Ruh Roh, today's goal is in jeapordy, Tractor Supply no longer handles argon, and my bottle is empty.

tuna55
tuna55 MegaDork
1/12/13 9:26 p.m.

Today's goal is to:

Cut the cab corner to match the hole

Grind the rust off the end of the cab support

Contemplate how to attack the part of the cab support thingie that the inner fender doesn't cover.

Contemplate the inner rocker

I had no welding gas, so I couldn't tack the cab corner in. As a result, I set my sets ultra low. I even had a chore I had to do first. Play with my meat, here are some pictures:

That's the rest of the pig. It had to go in the big fridge with the cow:

Done!

Now, on to the bodywork.

WAIT!

I have a tire question. This thing has been sitting on the same (basically brand new, very expensive) tires for like four years. I have rolled it from time to time. Today I rotated the tires 180 degrees each, to avoid flat spots. I am unsure if they are still good, or if the dry rot on them (very minimal) is a big deal. Can anyone take a look at see if these are going to make it? That's like $500 I can't part with anytime soon.

Close to fitting now.

Closer, and I got it done very quickly.

Now I have been contemplating the inner rocker/rocker/cab corner interaction. I had an epiphany.

I real one.

A really really big one.

Not that big.. BIGGER!

This is the result:

BAM!

The stupid kick panel aftermarket panel was in the way. I didn't realize that the aftermarket kick panel and the aftermarket rocker panel cannot be installed together as they actually intersect. I had to cut the kick panel to fit. Once I did, the rocker actually fit. Now, I have some trimming to do with regard to the cab corner/rocker interaction, but I am nearly set.

I am going to extend the inner rocker panel to the end of the cab support, drill out the holes, bolt it in and then weld the rocker panel on. This should take like one or two more days once I get argon. I have to do something else tomorrow, but, if all goes well, by Friday next week I should be able to bolt on the fender, preliminarily align the door, and then I can attack the tiny bit of floor perforations on this side before switching sides. I am STOKED! I am so stoked that I even use the word STOKED, which I hate, but I AM STOKED! Thanks again for the encouragement, especially JohninKansas.

tuna55
tuna55 UberDork
1/12/13 9:55 p.m.

Vain on!

Oh, another awesome thing happened, right before I went to the garage, I was on the throne perusing the latest GRM, and I saw this:

That's us. That's me on the hood wearing Murilee's old hat from 2009. That's my Dad with the goofy red sunglasses on the roof. Elder team member Rob hanging out of the driver's side, team captain Mike driving, ace driver Matt hanging off the passenger side, and the rest are hidden. First time my face has been in the magazine. What's neat is that opposite that picture, the old Lemons ad has the old Tunachuckers Amazon in it. The whole spread, Tunachuckers everywhere!

Vain off!

Excited, though...

tuna55
tuna55 UberDork
1/13/13 12:26 p.m.

I am apparently a whole lot more excited than the rest of you guys!

xflowgolf
xflowgolf HalfDork
1/13/13 12:31 p.m.

I am EXCITED!!!!

tuna55
tuna55 UberDork
1/13/13 7:00 p.m.

Today's goal is to cut the A pillar patch for the passenger side and align the three patches (cab corner, rocker panel and a pillar) with the inner fender patch that's welded on and begin prepping the cowl for the fender to be installed (Eastwood underhood spray bomb black). Let's see how I do.

Javelin
Javelin GRM+ Memberand MegaDork
1/13/13 9:49 p.m.

Cool job on the GRM ink Tuna!

tuna55
tuna55 UberDork
1/13/13 9:58 p.m.

Ick.

There is cab corner. Without this piece, the end of the cab can easily move 1/2" in either direction. Then there is a rocker panel. The location is defined by the end of the rusty floor (the welded in inner rocker), the B pillar (see 1/2" comment above), the A pillar (rusted away, sooo the A pillar patch), the kick panel patch, and the fender (not installed) and door.

Basically, everything was rusted away, nothing was GM, and the only real thing is the door, everything else is fluid.

So I panicked. I went looking around for pictures of exactly what the bottom of the A pillar was supposed to reference. The rocker panel had wrap around arms which touched the pillar, but nothing referenced the vertical position, and to make matters worse, none of these repop parts are known to be accurate, to work together, or to even be the right size. ARG! Worse yes, I had cut the A pillar to size like 2 years ago.

Then the wife showed up. I tried explaining the issue. She asked if I could see the part interaction on a finished truck in person, and I said that you'd have to remove the fender, the door and cut away part of the rocker panel to see how it fit. Then I realized that if you couldn't see it, it really didn't matter. So I finally got to work.

That worked.

Than I spray bombed the area to be covered by the fender underhood black. Job done! I should get argon tomorrow.

tuna55
tuna55 UberDork
1/13/13 10:03 p.m.

So, based on the above, I BARELY managed to maintain the momentum I started last night. I still say that if all continues to go well, I ought to have the passenger side all welded up and sanded with filler on the seams, door and fender aligned, all by Friday. If I do that, next weekend I'll pull the truck out of the garage and switch sides after I put on the radiator support and inner fenders. That's super exciting.

JohnInKansas
JohnInKansas Dork
1/14/13 6:58 a.m.

LOL @ epiphany face.

Keep up the good work.

tuna55
tuna55 UberDork
1/14/13 6:59 a.m.

The goal for this evening is to tack weld everything and check the fender/door clearance. I'll try to set my goals before I go into the garage, that way I can actually measure myself against them instead of potentially making them up as I go.

AngryCorvair
AngryCorvair GRM+ Memberand PowerDork
1/14/13 11:01 a.m.

i would've suggested bolting the door in place, adjusting it to have good gaps to the existing sheetmetal, then clamping / tacking all the patches to have proper gaps to the bottom of the door. sounds like you got it whooped though. my excitement is more subdued than yours, but i am excited about this project and your progress on it. go, tuna, go!

Datsun310Guy
Datsun310Guy UberDork
1/14/13 11:19 a.m.
tuna55 wrote:

Dude; you're doing a great job on your dental work. None of those good mercury based fillings for you?

tuna55
tuna55 UberDork
1/14/13 11:25 a.m.
AngryCorvair wrote: i would've suggested bolting the door in place, adjusting it to have good gaps to the existing sheetmetal, then clamping / tacking all the patches to have proper gaps to the bottom of the door. sounds like you got it whooped though. my excitement is more subdued than yours, but i am excited about this project and your progress on it. go, tuna, go!

The annoying part is that you can't get the A pillar/rocker panel combo on with the door in place. I had to take it off to get it on there. Once I tack it, I'll bolt the door back on, align with the upper, frontal and rearward lines, and see how things need to be adjusted. Assuming I can find argon today, stay tuned!

fidelity101
fidelity101 HalfDork
1/14/13 12:11 p.m.

holy cancer! nice work though and what kind of dog is that?

tuna55
tuna55 MegaDork
1/14/13 12:15 p.m.
fidelity101 wrote: holy cancer! nice work though and what kind of dog is that?

Yeah, pretty rusty, especially for a southern truck.

She's a mutt. She stumbled on to my parents doorstep back when I was in town during college in winter back in NY. We're talking 2005 maybe. She wouldn't leave, and my parent's wouldn't take her in, and nobody responded to the 'lost dog' stuff, so we took her with us when my wife and I left to go to SC after getting married.

ClemSparks
ClemSparks PowerDork
1/14/13 12:18 p.m.

Looking good! I appreciate the project and the progress.

This thread will help enable me to drag home a rusty (like there are any other kind in these parts) 60s Chevy truck of my own before too long!

(First...I must finish fixing the trailer so I can drag one home)

Clem

tuna55
tuna55 UberDork
1/14/13 10:13 p.m.

Ick, that was a rough night in the garage. Pictures and story to follow:

1 2 3 ... 146

You'll need to log in to post.

Our Preferred Partners
QyBDWZOTiTOW7ATgI32N6GhQ2DkNSCrqRHUPsRe7k9VbND43VkGulKd0koBjBKXh