1 2
Rufledt
Rufledt SuperDork
4/23/14 1:30 p.m.

Welcome! Some of you may know my archery build thread that kinda died off over the winter. That will be revived when I get my new garage set up for that kind of work. Until then, i've been starting to work on my cars. My RX8 is almost all nicely cleaned/waxed, but that won't take long since it was pretty good to begin with, and my wife's car is going bye bye so I have little motivation to work on that.

The Van:

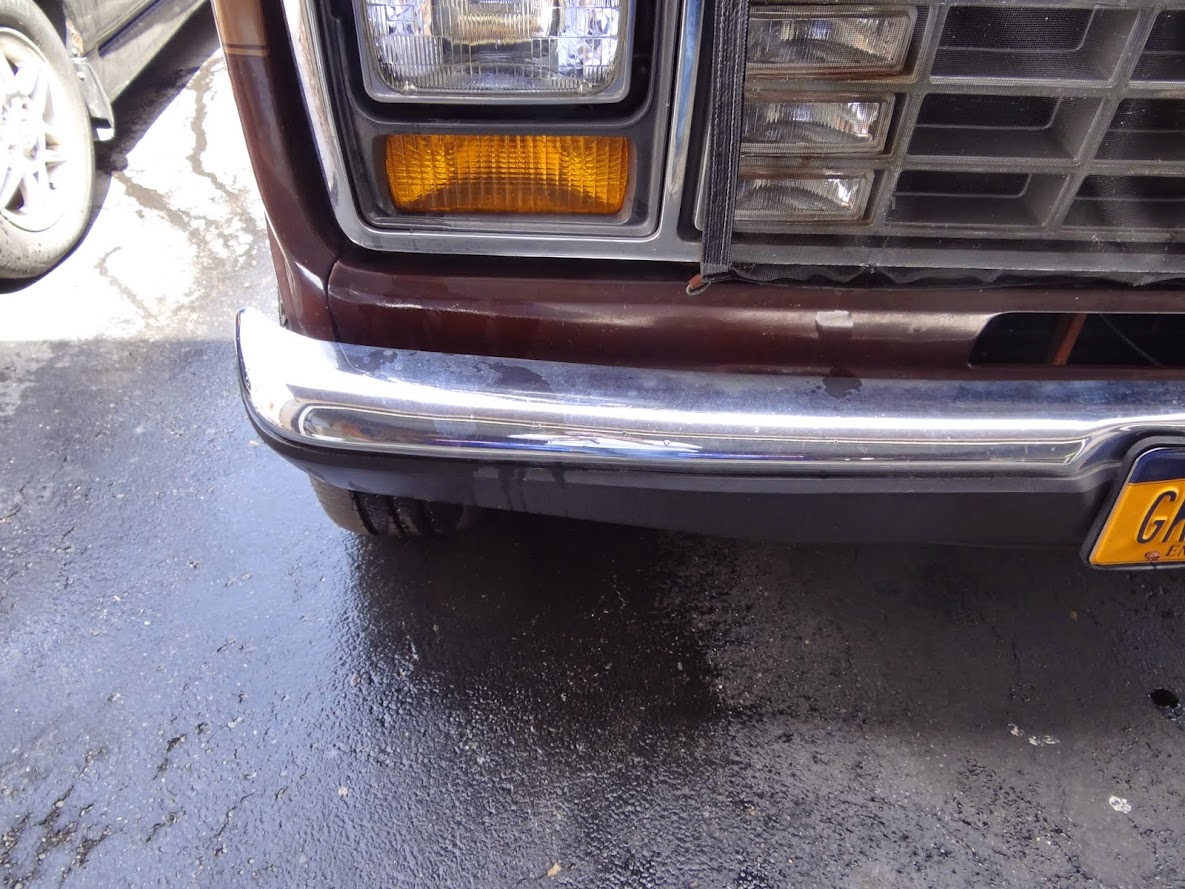
In that very old picture, you see the van as it was my freshmen year of college. Yes, i've had it that long. In truth, it was the first vehicle I drove around after I got my license, though I didnt' take ownership for a few more years. It's a 1987 E-150, with a 302/auto. Came as an "incomplete vehicle" according to the thing in the door jam. My parents purchased it new before I was born, conversion by DMC in Milwaukee, WI, . It's not that good looking anymore, but not a ton different. a little more rust, a little more dirt, a few extra lights, you get the idea. There is a more detailed description in my profile, but a little of it has changed since I last updated, a couple parts died/rusted off, etc...

The Plan:

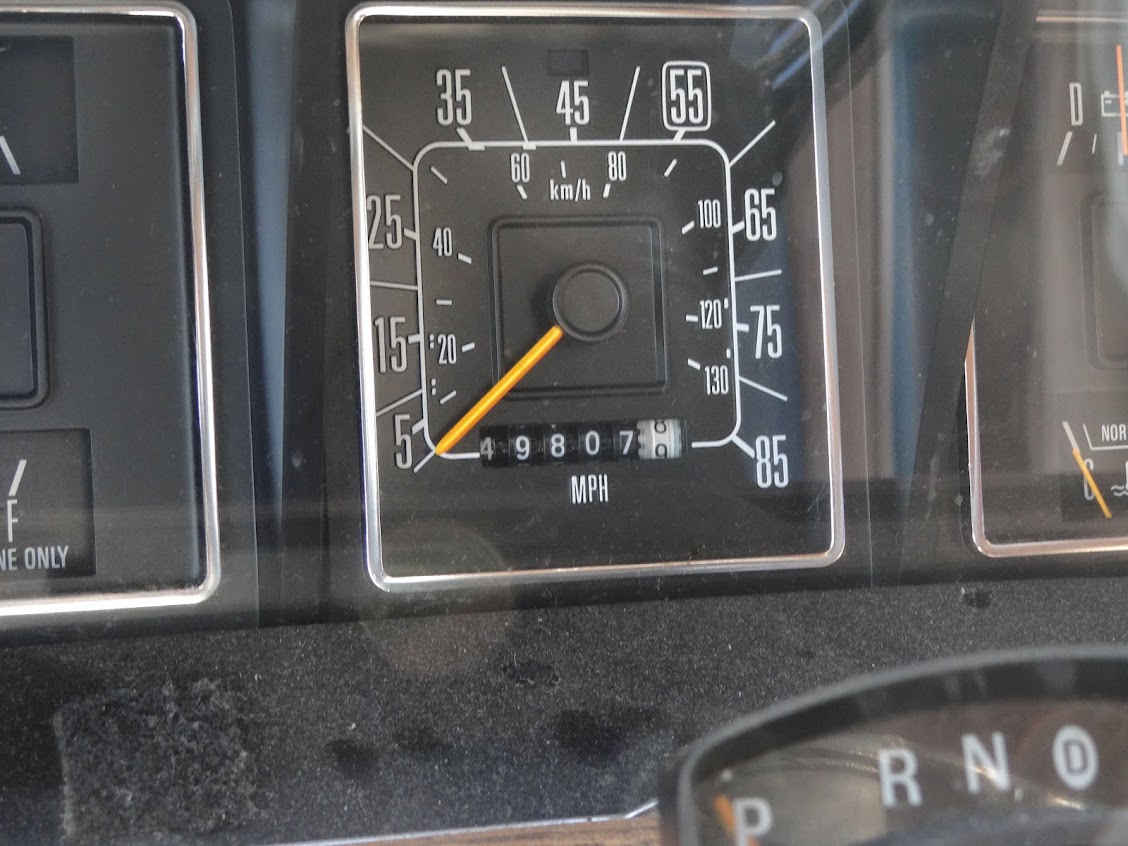
I want keep it running for a long time. That part isn't hard, since there are no mechanical problems at the moment. all new brakes, radiator, water pump, and a couple other things replaced last summer, runs/shifts well, got 15 mpg last summer on a long road trip with A/C cranked (yes, it works, but not well). The only thing that does not work anymore is the cruise control, and that sometimes works. all the windows, accessory lights, even the power seats still work. The VCR might not, but I don't have any VHS tapes to try it out so that matters little.

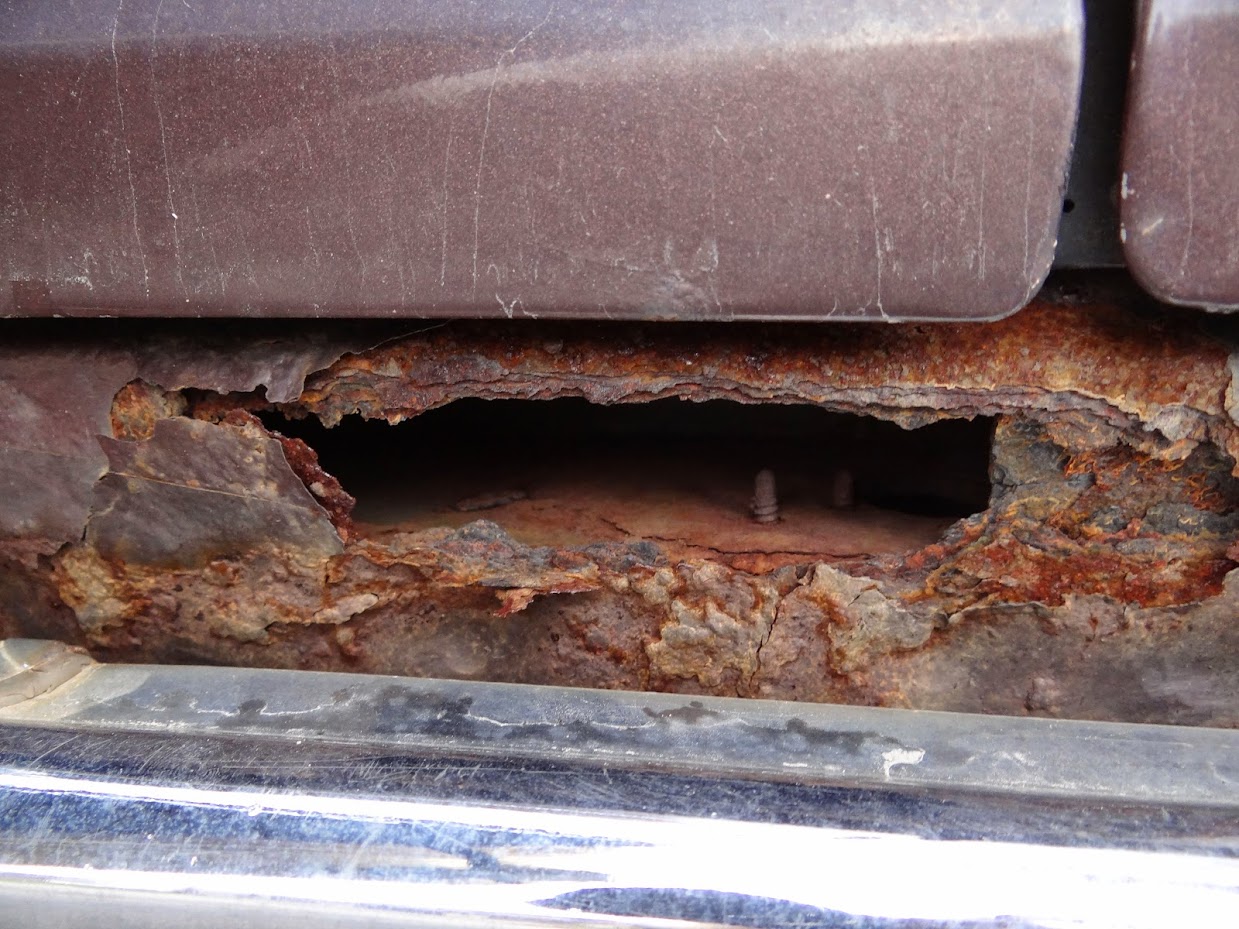
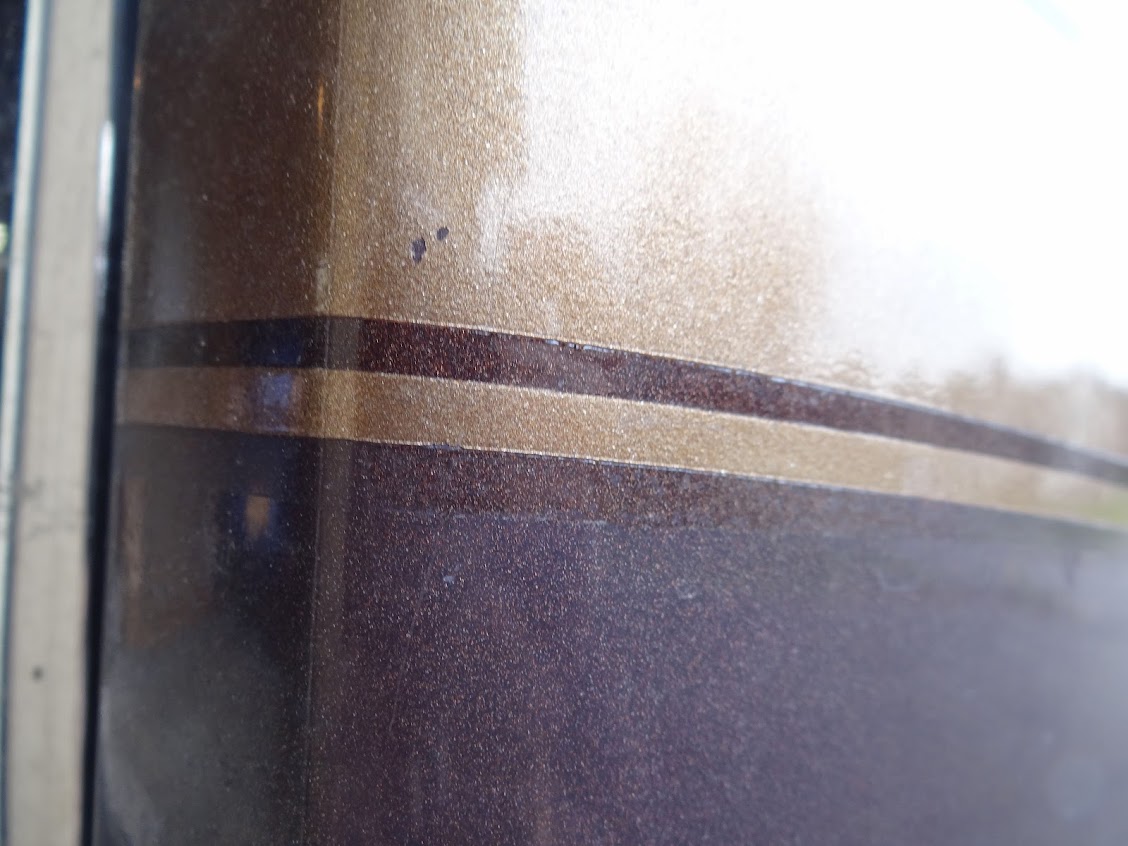
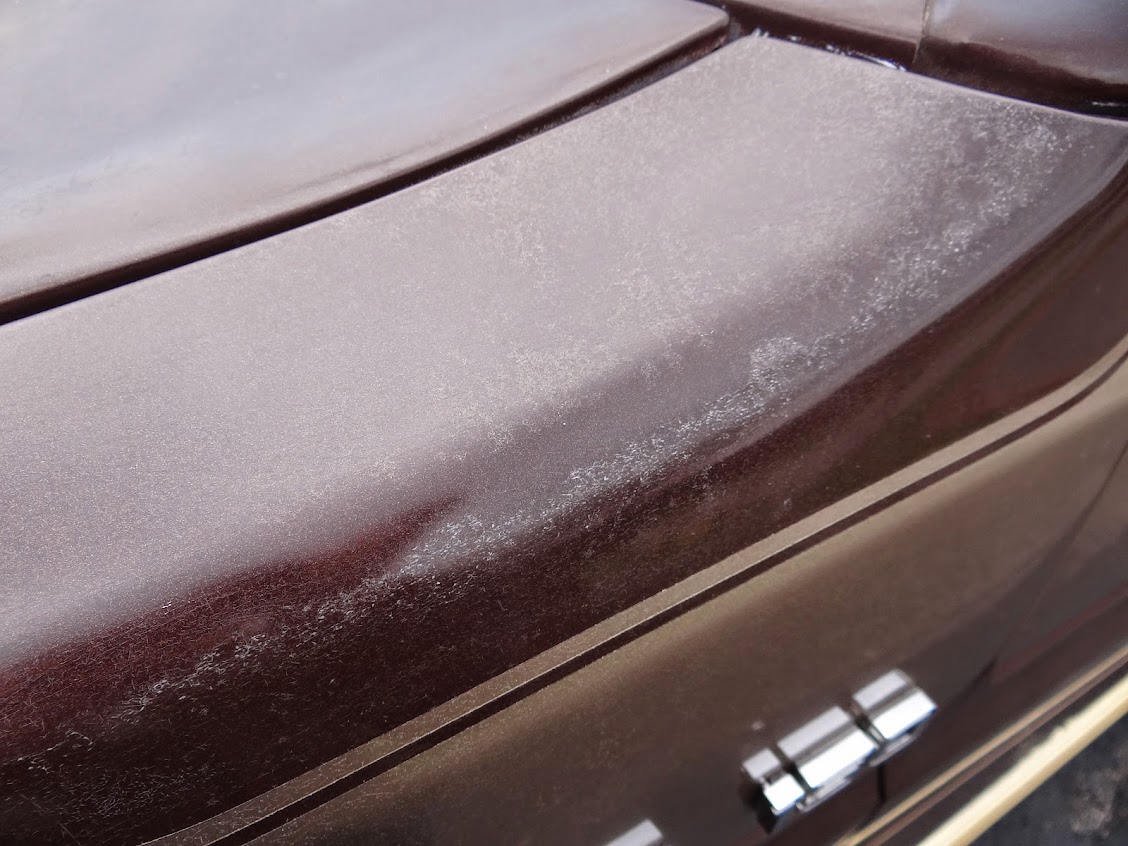
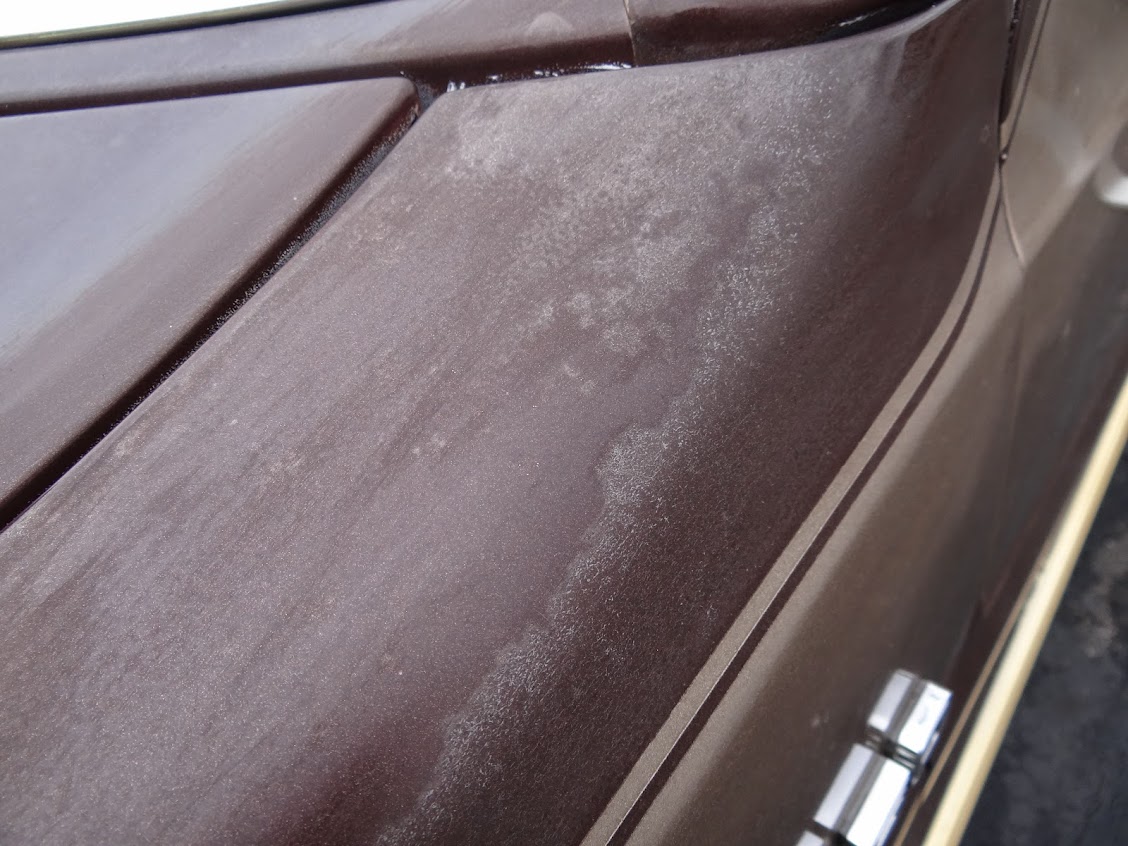
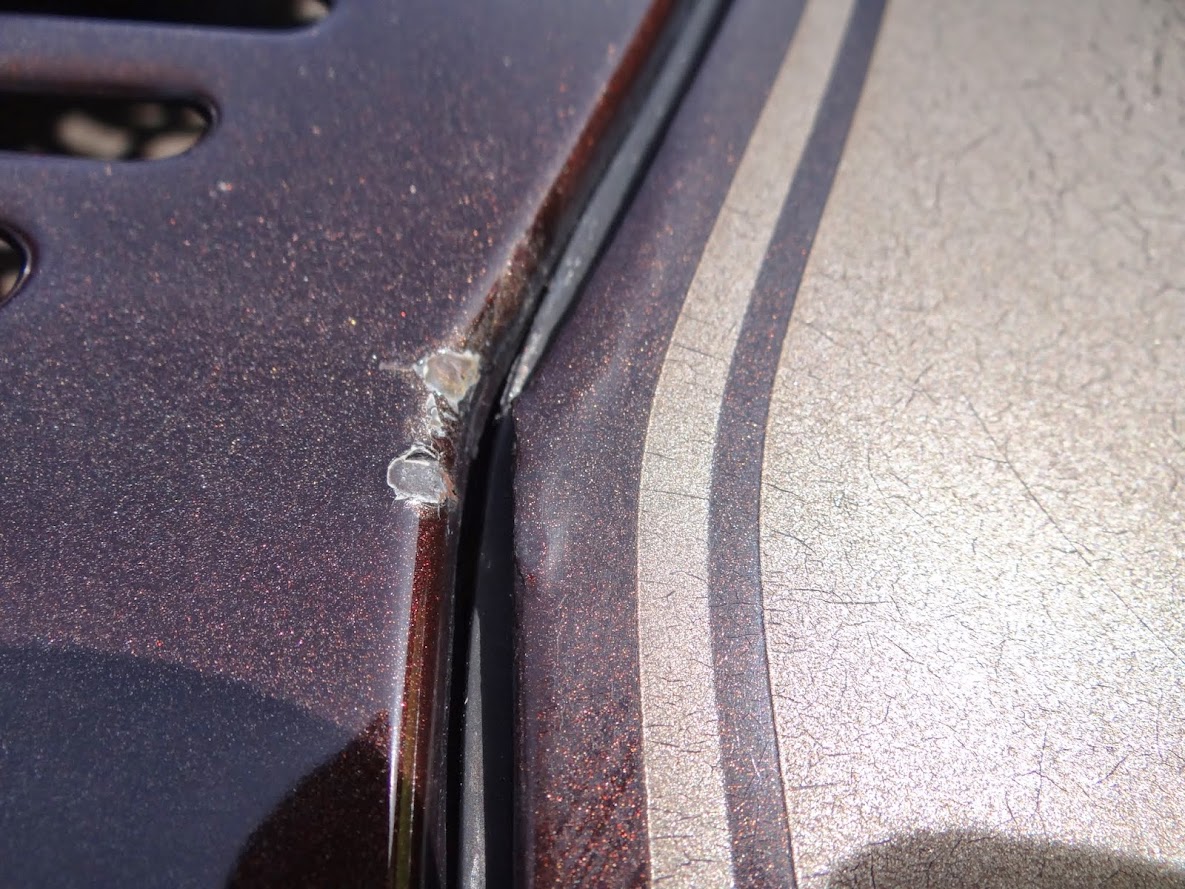
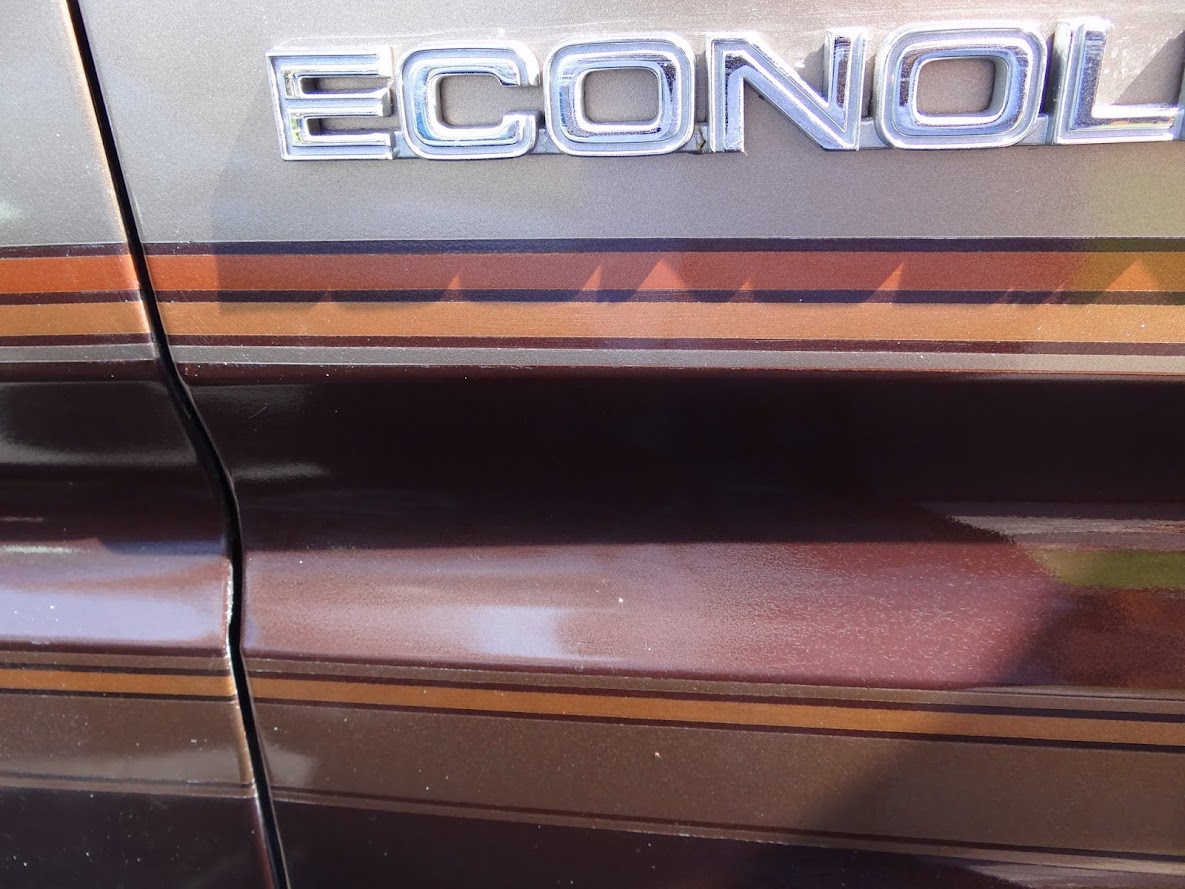
The main problem, however, is rust. There is only 1 hole, but surface rust is appearing along edges of panels again. A few years ago a young me tried fixing those spots (crapily). It kinda worked. Over half of them still have no rust reappearing, but half have new rust, as well as a number of new areas. I don't want those becoming holes. The frame/floors are solid according the the shop that replaced the brakes last year (they were highly impressed by almost total lack of frame rust). The thing is also quite dirty and has numerous paint problems. Someone supposedly told my dad the clear coat over the stripes is a bit too thick, causing some of the issues. Plus, the years and use have rendered quite a bit of the paint completely ruined.

It needs paint, but I can't do that yet, so i'm going to try to polish a turd. I can make the existing paint look better, and in doing so spot everywhere that really needs a rust patching job.

Then I can make a game plan for moving forward. I'm thinking an eventual repaint all in the original dark brown. As much as I love the brownish gold/reddish brown/brownish tan on brown stripe design, It seems like a lot of work. Also, I'd like to do some underbody cleaning and coating the frame with something to keep corrosion at bay for another 27 years.

Stay tuned of the horrendous before shots!

Rufledt
Rufledt SuperDork
4/23/14 1:33 p.m.

Also I didn't explain the title. In that pic, you see the old license plate (DAN DAN). My dad's name is Dan, it was his van. The hall director at my university called it "dan dan the van van". It doesn't have that plate on it anymore, though the plate is decorating my garage at the moment.

Speaking of garages, my van wont fit through the door. Luckily, since i now own a house and driveway, I don't have an apartment manager telling me washing/detailing cars on the premises is against the rules.

mazdeuce
mazdeuce UltraDork
4/23/14 2:05 p.m.

I like the increased van content around here lately. I'll be following along with this.

Rufledt
Rufledt SuperDork
4/23/14 2:16 p.m.

Here's some updated pics as it sits half an hour ago:

Behold! not a lot different from the years old pic, but you can see where I did some fixing before when I had no idea what I was doing. Look where the door meets the front fender. It looks even worse up close, but there isn't any rust 4 years later. At least not in that spot.

That's the hood. As the story goes, it got all cracked in it's heavy travel trailer towing years. Later, my dad tried buffing to see what would happen, and that happened.

There's a front shot. You can see the additional lights, one or 2 of which had moisture get in and rust them. Also, above the left head light, you'll see a rust spot on the hood. That goes through. It's not a hole you can look through, but the rust does work its way through the layers of metal to the other side.

The fender has a tiny bit of rust working around from underneath. I can't get a shot of inside the wheel well to turn out. I suck at camera-ing. 2 of the other fenders have spots like that.

There's a shot of an ugly old patch that has not rusted again next to a new rust spot.

Along the bottom of a door. The patch hasn't held super well, but I never cleaned the rust under it very well, so that's what I get I guess. Still no holes, though. Speaking of holes:

under the rear doors/ rear bumper is a death zone. That hole is maybe 3 inches wide, but I'm sure some poking around it would double that width. This is beyond my non-welding skills.

This is another major problem area:

I can't jam my finger through it, but it looks like hell. The small previous spot held up a lot better than the stuff around it, but still it's not doing well. I think the rust came from around the seam. I don't know how to address this, but i'll figure it out or get someone else to figure it out. I got a good referral for a local body shop guy, though he would probably point and laugh for hours as my teenager level prior rust patches. I point, too, but I usually cry, not laugh. Sorry no interior shots but the wood paneling isn't rusting, so i'm not too worried about that.

McTinkerson
McTinkerson New Reader
4/23/14 2:23 p.m.

Corroseal is your friend until you can attack that rust with a grinder and some new sheet metal.

Magic

Awesome van! Ever since I've discovered Rollin' Heavy I can't stop thinking about buying one. Yours isn't helping with that urge.

Rufledt
Rufledt SuperDork
4/23/14 2:24 p.m.

Also there is some of this action going on. You can see where I crapily tried patching it, which mostly held except for that one spot.

Here's a wheel:

Again, they look like hell. They are american racing 15" aluminum wheels, with gold anodizing. The plastic hub cap there got all melty during a stop and go traffic scenario with the previously mentioned travel trailer.

So, where to start? It'll be with a car wash, that's for sure. maybe 2 or 3.

aussiesmg
aussiesmg MegaDork
4/23/14 2:24 p.m.

Ford Van love, repair it one piece at a time, weld it and take your time

Rufledt
Rufledt SuperDork
4/23/14 2:28 p.m.
McTinkerson wrote: Corroseal is your friend until you can attack that rust with a grinder and some new sheet metal. Magic Awesome van! Ever since I've discovered Rollin' Heavy I can't stop thinking about buying one. Yours isn't helping with that urge.

I've tried those seal things before with a Jetta I had. It never seemed to work for more than a year or 2, but that was before I had this van when I was even more incompetent. I was eyeing this stuff when the repainting begins: http://www.masterseriesct.com/home.html Anyone tried it?

Rolling heavy has some pretty sweet vans, but that vanning culture scares me! I have no murals in the plans for this van, but it does have shag carpeting and a bed...

Rufledt
Rufledt SuperDork
4/23/14 2:29 p.m.
aussiesmg wrote: Ford Van love, repair it one piece at a time, weld it and take your time

Thanks for the love! That's my plan, fixing it slowly over time. To be honest I don't have time to do lots at once anyway. Till now i only had time/money for mechanical stuff and it has paid off mechanically, but my inability to even work on the van due to apartment contract regulations has caused some problems...

mazdeuce
mazdeuce UltraDork
4/23/14 2:59 p.m.

Those wheels are bitchin'. I'm not sure how one would go about restoring them, but they're cool enough to make the effort.

Rufledt
Rufledt SuperDork
4/23/14 3:02 p.m.

I've tried before getting them cleaned up, but some of the brake dust and other things are impossible to get off. I've even tried a pressure washer right up against them, some extremely potent cleaners, everything. The only way I could see getting it clean is to use a method that would also likely take the anodizing off, too. I suppose I could just do that anyway, polish them up, and use some gold paint where it was anodized to replicate the color? My dad tells me he fixed part of the gold anodized roof rack with gold paint and I can't tell the difference unless i'm really up close.

I don't know what i'll do about the warped center cap...

Rufledt
Rufledt SuperDork
4/23/14 4:54 p.m.

I lied, I'm not starting with a wash. I already did something. The NEXT thing I do will be a wash, I promise, but not until it stops raining every day.

Check this out:

That is the top of one of the front fenders. You can see it is clear coat hell. As far as I can tell, the un-striped parts of the van are not clear coated at all, so this must have been painted over due to it's proximity to stripes. I tried a bit to remove the clear coat on the other fender, and this happened:

That's the other fender. It does look a lot better, but I didn't get all the clear coat, nor did I polish up the area very well. I'll get back to it. I just got back from buying some more stuff for detailing/paint repair. Stay tuned for results. It might be a little while, since my weather forecast involves rain every day for the next 10 days except Sunday. Maybe i'll try to streamline it, just wash one panel and work on that Sunday since I won't have time to get to anything else before the rain hits...

I might have to section off everything and do it that way for the duration of this project. Of course that means it will look patchy until i'm done, but it'll look patchy then anyway. What the heck, i'll do that. I'm also going to have to figure out how to get the panels off when I do get around to fixing the rust... Shop manual ordered and is on the way. Now I have to wait until Monday! Not that i'll get around to needing it anytime before, say, summer.

Rufledt
Rufledt SuperDork
4/24/14 6:24 p.m.

Turns out the weather forecast was dead wrong. Today was absolutely beautiful, if maybe a hair chilly. Unfortunately I didn't get home until now (7pm) so I don't have daylight enough to do anything outside, and now the weather guy thinks both weekend days will be rainy. I have decided to ignore it for planning purposes.

I have a book on detailing and I picked up a few things suggested that I might need. That plus what I already had is the following:

0000 steel wool
1200 grit sandpaper
2000 grit sandpaper
Rubbing compound
Polishing compound
cleaner and super hard shell wax
cotton terry towels
soft cotton polishing towels
Those cool microfiber towels
a bunch of car washing stuff

Anything I'm missing? From what I read, anything harsher than polishing compound is really to be used with caution, but I may need to break out the more serious stuff for this van.

I also found I have some wheel cleaning stuff, I figure I'll use that and see what happens on these wheels, but i'm not hopeful. I'll make them look nice somehow, if not quite the same. They arent exactly 'original' nor is this a Shelby Mustang or anything that needs to be original, so ill figure something out there.

I also found this site: http://www.masterseriescoatings.com/index/ It's the same stuff as the above link but that appears to be a regional distributor, not the main site. I found out about that stuff from this forum years ago but never tried it, has anyone reading used it? they have a few products i'm interested in, but sadly nothing in brown. The primer and chassis/underbody stuff looks pretty cool, also the heat coating looks neat. Thoughts?

Datsun310Guy
Datsun310Guy PowerDork
4/24/14 9:13 p.m.

you can't go wrong with some new wagon wheels..........

Rufledt
Rufledt SuperDork
4/24/14 9:18 p.m.

You know, there is nothing wrong with having 2 sets of wheels/tires for a vehicle...

Rufledt
Rufledt SuperDork
4/25/14 1:42 p.m.

So in an earlier post I said I had the following towels:

"cotton terry towels
soft cotton polishing towels
Those cool microfiber towels"

What I didn't say is that I only have 2-3 of each. I tried them out doing different things on my RX8 and SWMBO's G20, and I came to the conclusion I like microfiber best, for about everything. Today, I got this:

a 25 pack of microfiber towels for the low, low price of $19. I also got some JB weld, but that is to fix my wife's computer chair. That's a funny and unrelated story, though...

Let's hope the weather holds out. It's another nice day but I have stuff that needs to get done before I kill any time working on the van.

Rufledt
Rufledt SuperDork
4/25/14 5:49 p.m.

I had a minor window of time today before the rain hit, so I attacked the front left fender. Here is how it looked:

I have weird marks like these:

Here's the clear coat problem:

Some rust by the bolts:

Here's a paint close up:

I like this shot, you can see where the clear coat ends and original bare paint begins:

Not terrific. Dirty, you can see the clear coat problem close to the window, it wasn't great. Step 1 was washing, but since my hose isn't hooked up due to all the freezing night time temps, I used this set up:

Admittedly, the small bucket with a little washing stuff in it was FAR more than I needed for 1 fender, but the watering can for rinsing worked extremely well.

After a wash and some turtle wax polishing compound, the original paint started looking pretty awesome:

But, the marks did not go away:

The clear coat spot didn't change at all, but I didn't expect polishing compound to do that. I tried rubbing compound:

That didn't do it. I tried a bunch of times to no avail, I then tried 2000 grit paper:

Careful careful sanding didn't progress, so I switched to 1,200 grit:

There's still clear coat. I was being careful to keep it all wet, and when the slurry started changing from white to brown, I stopped. I officially called it good enough, then hit it with 2000 grit again, then rubbing compound, then polishing compound, and this came out:

Happy with that, I moved on. Rubbing compound got some of the other weird marks out:

My method so far was wash the whole thing, then polish the whole thing, then see what was still screwed up. Then try polish a few more times, then rubbing compounds a few times, and that always worked except for the clear coat spot. That was the only time when anything harsher than rubbing compound was needed. Then, a coat of wax:

And done:

Here's a really close up macro shot of the original paint:

I can't see those very well with my naked eye, but it goes to show the paint is deeply cracked. Not bad for 27 years in the north!

Here's an extreme difference shot:

The hood was much worse to begin with, and I didn't do anything to it, but it makes it look like I worked miracles.

Here's a slightly more realistic shot:

The door isn't even really clean, so still not a fair example, but it makes me feel good

Timeormoney
Timeormoney Reader
4/25/14 6:09 p.m.

Rufledt
Rufledt SuperDork
4/25/14 6:10 p.m.

So the rust along the bottom I figure shouldn't be too hard to patch temporarily. I'm thinking remove the fender (which probably means remove the bumper, that corner signal, and so on) and clean up the back of the fender, plus around the wheel well where that rust is, and paint that. I have some rustoleum stuff, but I may give that masterseries stuff a shot to see how it works. I can just get a quart of the silver primer from their website. Then, I have some rustoleum paint that is sortof close to the brown color, especially if just painted under the wheel well where nobody will see it.

Thoughts?

nicksta43
nicksta43 UltraDork
4/26/14 12:20 a.m.

I love brown. When I was 14 dad had a 76 GMC sierra stepside in brown. I loved that truck and wanted it when I turned 16. It had an awesome set of Cragar SS's on it. He sold it to my sisters husband at the time and he took off the Cragars and put those ugly white wagon wheels on it.

Do not do that, I may never forgive you, just like I never forgave that guy my sister was married to.

Rufledt
Rufledt SuperDork
4/26/14 1:08 a.m.

In reply to nicksta43:

If it makes your feel better, I don't have money to blow on an extra set of wheels. Plus when I looked, I only saw black ones on the website... No me gusta black wheels (no offence to the other econoline project). I still think i'm going to try to revive these wheels, even if it means polishing off the anodizing and painting the gold stuff gold again.

I still don't know if I want to stick with rustoleum for the patches, or use this stuff as a base.

I have the motorbooks "how to paint your car" book, and I plan to read all through that before i'm done with the panel by panel wash/polish/wax to get an idea of the task at hand. I've read the thing before, but it has been a few years. It's clearly beyond my skill level at the moment but I want to try repainting stuff that is out of sight for practice.

Rufledt
Rufledt SuperDork
4/26/14 6:03 p.m.

Today has been rain on and off, so I did some detailing on my car in the garage, nothing on the van. However, This arrived:

And I spend some time decoding the vin and various codes. I learned the following (some of which I knew):

-302 engine, AOD transmission, originally a non-window van, built in Ohio. All of that I knew.
-rear axle- 3.50 ratio, non limited slip (also knew that, it was obvious all winter) 3750# rating. Locking diff codes begin with letters, one of which has a 3.54 ratio (close enough i assume it would be unnoticeable) and double the capacity...hmmm...
-my trans code is T for the AOD, but A and B codes are 4 speed manuals...also hmmm...
-The paint color is dark walnut metallic, code 5U
-No opt/aux front spring, but rear has the code 4, indicating the 'handling package', whatever that means. This thing doesn't really 'handle' so much as 'dunkenly meander'. I'd hate to try the normal one -138" wheelbase
-Originally had a cloth captains chair in chestnut, that chair is in my parents attic.
-I see the code E142, meaning 6,000lb GVWR, a D in the vin meaning 5,001-6,000 GVWR, and "6100lb GVWR" on the same sticker, so i'm slightly confused there, but willing to ignore it and move on with cleaning.

I also took a shot of the original window sticker, indicated hwy mileage of between 12 and 28 MPG! 28?! I understand that's the top of the range, but to even suggest 20 is possible is more than generous. 28 is flat out lying. I bet someone put that on there as a joke but it went out like that anyway.

Does anyone know what these numbers mean:

the main ford code doesn't match the code in the manual

I'm thinking ahead here, but once I get the outside shined up as good as I can, i'm going to attack the interior. I just hope there is a 'shag' rated carpet vac I can borrow from somebody... I think my neighbor has a wet/dry shop vac, that should work with some carpet shampoo I think. So, here are some interior shots:

only 49k! just kidding, it's 149k. It rolled over before I got a drivers license, but I was there (and watching it). Good times.

Good oak stuff. A lot of it is splitting now, and those cup holders (with convenience coffee mug cut outs) may be held on with gorilla glue, but it's still classy.

that last picture was my seat growing up. That little cabinet by the feet area is the VCR. The TV is above where the camera is. The purple-ish tint is not my failure to use a camera, but the purple tint on the slider window. I don't know why purple, ask my dad. There aren't any real detailed shots of the interior, but i'm focusing on exterior at the moment. If and when I get everything done, i'll take more photos. One step at a time.

I really like the custom interior job. My grandmother had a van of the same era done by another shop (she lived far away from us) and the interior felt poorly thought out in comparison design-wise. I know oak, brown shag, and pinstriped fabric isn't exactly 'in' but I like the cohesiveness of the design. If I re-did it, and woodwork really is more my thing than body work before taking this project on, i'd try to replicate most of it in white oak rather than red oak. Red is cheaper, but i like the look of white a little better.

mazdeuce
mazdeuce UltraDork
4/26/14 7:10 p.m.

My parents were never classy enough to roll in a van like this and I was always jealous of the kids who got rides to T-ball in these sweet machines.

Rufledt
Rufledt SuperDork
4/28/14 2:56 p.m.

Today was beautiful and I had enough time to spare for the fender and a couple small pieces around the bottom of the windshield.

That fender, plus the large piece next to the hood, and the small strip along the bottom of the windshield. You can see i'm missing a '150' badge, the antenna is broken, and the paint around it is super dull. Here's a closeup:

you can see on the upper right where I previously used sandpaper too course (600 maybe?) to remove clear coat, and remaining clear coat on the left.

Here's a bumper closeup:

Once long long ago I slid into an ice bank. That is the extent of the damage. The bumper is twisted slightly on that side, and the bottom of the fender is bent like that. It started rusting where the paint cracked, and years ago I tried patching it with rustoleum. I did a crap job, but the patch isn't rusting. The stuff around it is rusting, though.

Here's a shot around the wheel well:

Years ago this van was undercoated, which I believe protected it from rust for a long time. It certainly explains why there is so little rust under this thing after 27 years spent no farther south than upstate New York. You can still see rust, though. it wasn't a permanent rust sealer, but it was damn good. I don't know what kind of rust proofing it was exactly, as it was applied before my birth, but it is everywhere under there.

There is some rust around the bolt.

This fender is rusted worse than the others. Here the paint is coming off. To be fair, it was only flaking off, and I pulled a flake off to take with me to find a matching spray. I found a rustoleum gloss brown that matches perfectly, but it is not metallic. I'm thinking using that over some rustoleum rust sealing primer (or maybe over that masterseries stuff) as a stop gap until the time comes when (or if) I repaint the van. That or i'll try to get dark walnut metallic paint from a paint shop so it matches better. I haven't decided, I'm not done washing yet. The rust hasn't worked around to be very visible yet:

I know it may be farther along than I see, but If I stop it soon, it won't get much worse.

I tried to get a shot under the fender where it was bent from the accident, and it sortof came out:

Again i'm surprised the rust isn't worse, but it certainly should be fixed before the next winter. Here's a shot to emphasize the bumper twist:

I'm thinking I'll take it off when I do the paint patching and try to bend it back then. I have some huge clamps with long bars for leverage, I bet I could bend that back. Maybe.

I also focused on this panel:

You can see paint chips from Ford's top notch 80's panel fitment:

I'm not going to go through all the step by step shots because I did essentially the same as the other fender. Around the crappy clear coat areas I needed to use 2000 grip paper, then rubbing compound, then polishing compound. I don't think the rubbing compound got all the sand marks out, but I don't have a buffer, I'm doing it with elbow grease.

I think I need to get a buffer, especially before I attack the large panel sides... any suggestions? I have a harbor freight nearby if that helps.

This shot minimized the visibility of the sanding marks:

It looks almost mirror shiny now!

Whole panel now:

The original paint that isn't clear coated, or areas of paint not facing the sun, seem to polish up great with only one hit of polishing compound. Elsewhere needs a lot more elbow grease. Some of the original paint on this fender is more cracked:

This strip of dark brown is clear coated and slightly cloudy looking:

I hit that spot again with polishing compound and some more elbow grease:

It looks a bit better. Not perfect, but to make it perfect would probably require stripping the clear coat off. I don't feel like doing that. Nobody is going to mistake this for a van with good paint. For that, I would need new paint, some metal, probably a new van.

I then waxed it, called it done.There is a panel in the front under the grill that I should get, too, but to do so requires removing the front bumper, so i'll get to it later.

Next up is probably one of the front doors. Don't count on it anytime soon, though. We are supposed to get rain every day this week.

Rufledt
Rufledt SuperDork
4/28/14 4:15 p.m.

Thinking ahead to the rust patching problem. I found this place:

http://www.expresspaint.com/automotivetouchup/pc/Ford-Dark-Walnut-Metallic-23p13648.htm

9U, Dark Walnut Metallic. That's the right color. I don't have paint spraying equipment, but it comes in an aerosol can for an additional $10 or so. That, plus the primer, plus clear coat jacks the price up a bit, but certainly cheaper than buying all of those same components in the cheaper form plus a spray gun, and all the trial and error it takes for me to learn how to do it, etc... This stuff: http://www.masterseriescoatings.com/index/products/primer/ can be brushed on the metal for sealing effect, and according to their website, any primer can be used on top. They have their topcoat stuff, too, but it doesn't come in brown. sad news.

I'm thinking that mastercoat stuff, then the primer/paint/clear from expresspaint. That will work better than my previous idea of sortof matching rustoleum dark brown, and should halt the rust long enough for me to get around to a repaint, or lose interest all together. Thoughts?

For the record, I won't lose interest. This is the first vehicle I drove alone ever. I went to prom in it twice. It has moved me every time I had to move. Extreme sentimental value here. The only things stopping me from serious restoration are skill, space, and the fact that I still use it as a DD. Ok, those are huge, but they may not last forever. Until then I need to stop this thing from rusting away...

Now if only I could find out what some of the other colors are. The sticker looks like this:

But I don't even know what "Ford 56" means. Ford calls it 9U, not 56. I think DMC is still in business, I'll try emailing them. That's the problem with a 4 colored van, I don't have to track down an ancient color that nobody makes, I have to track down 4.

I have an old spray can my dad got years ago just in case, but as it's nearly 30 years old, it doesn't spray very well. It says "acrylic lacquer", so i'm assuming that's the kind of paint the van came with. My reading suggests lacquer paints were not clear coated, so that makes sense, but the stripes painted later must have been urethane or something, hence the clear coat. I may eventually need to invest in actual spray equipment, but until then i'll have to stick with what I got.

Anyone have any suggestions for buffers? Even cheaper paint guns that work decently well? Is that stuff easier to use than I'm thinking? I may have time this summer to allow for some serious project creep, we'll see. I think then i'll take the fenders off to fix the surface rust, and while i'm in there I might as well hit the whole area. Perhaps the doors, too. And I might as well get the running boards out and see what it looks like under there... this could get bad, i've only done like 3 panels so far. Am I the only one who does this?

1 2

You'll need to log in to post.

Our Preferred Partners
bw1d4XQmHmfGL8mjVG0GN8tujsJaop42v1jsSEy5R8IGySoVQzhgYvQTRYHyWzrv