1 2 3 4 5 6
75280z
75280z New Reader
3/7/18 7:56 a.m.
Sanchinguy said:

I absolutely loved my ‘71 510.  It was my first car and took me rallying, ice racing, and a mess of other hooniganing that taught me car control (and wrench control).  We called it the E36 M3 Box - I’d be honored to pass along that name to your car in the hope that it brings you as many grins as mine brought me.

I can't edit the first post, at least I can't currently figure it out. I used the name suggested a while back Benjamin Frank510, calling him Frank for short. It is a cool little car, and I am really making her my own

75280z
75280z New Reader
3/12/18 10:26 p.m.

Still working, but figured I would show off where I am currently. I have all the timelapses, but just haven't had time to edit the videos, been working on the car too much. I wanted to give an update though. There were HUGE rust holes in the engine bay so I did my first real rust repair under the hood and did a bit of painting I need to get the car running under its own power very soon so I am having to put in quite  a few hours.


From when I pulled the engine to all the work that got me to tonight!


75280z
75280z New Reader
3/17/18 3:42 a.m.
75280z
75280z New Reader
3/29/18 10:08 p.m.

I am way behind on posting things, but that is because I have been working on the car itself. The L20B is now in it, and I fired it up tonight! I will finish buttoning up the car this weekend! I have been keeping notes, but not as religiously as I have been working for ~ 4 hours a day on the car for the past several weeks. I am so pumped! Just wanted to share


NOHOME
NOHOME UltimaDork
3/29/18 10:13 p.m.

4 hours a day is a pretty heavy time-commitment.  I find that 10 hours per week is about all I can manage and still juggle the family and full time job.

75280z
75280z New Reader
3/29/18 10:28 p.m.

In reply to NOHOME :

I needed to get it out of the garage and that was averaging it over several weeks to include 2 full Saturdays. 


75280z
75280z New Reader
3/31/18 12:23 p.m.

Timing is set! I should hopefully be producing the next couple videos over the next week. I only have to close up the trans tunnel (new metal) and wire in relays to control the electric fans!

Teaser shot. I have most of my logs written in the garage journal. Need to type up still (actually keeping detailed records is very time consuming)


75280z
75280z New Reader
5/19/18 1:11 a.m.

Next video is up. I cut out the old rusty spots, and welded in new spots.

Doc Brown
Doc Brown Dork
5/19/18 12:18 p.m.

Awesome!   I have to admit, I sort of liked the beer can ignition coil cover.

75280z
75280z New Reader
6/1/18 9:32 a.m.

Still working, some big life stuff happening right now, news to post in a few weeks. Been slowly working on the next videos. Here is a teaser shot of my first love, with the 510 in the background. 

IMG_20180528_145442~3


75280z
75280z Reader
6/9/18 10:34 p.m.

Way back machine. Trying to catch this thing up in the project log. Expect some verbose posts hopefully over the next few weeks. Some of them will match the videos already posted. 

Project Log (18 Feb 18):

Start Time:

Not Recorded

End Time:

Not Recorded


Driving the car home from the junkyard my clutch pedal did the dreaded “sink right to the firewall with ZERO resistance” I was about 1 mile from my house so I limped her home. When I got home I checked the master, it was bone drive. When I change master cylinders I also change the slave (it just makes life easier in the long run). I ordered the parts from ROCKAUTO ($41.40)

To Do (Daily):

  1. þ Remove the old clutch master/slave cylinder and hydraulic hose
  2. þ Install new parts
  3. þ Bleed System

1. All parts came off very easily.

  • Tool Needs:
    • 10mm flare wrench (to remove all the hard lines)
    • 10mm end wrench (easier to use after the hard lines are loose over a flare wrench)
    • 12mm end wrench (to take the master cylinder off)
    • 17mm end wrench (to hold the hydraulic hose still while tightening hard lines)
    • 14mm socket, with associated wrench (To take the slave cylinder off)
    • Flat head screwdriver (to get the hydraulic holder tab off)
    • Small Hammer (to tap the hydraulic hose holder tab back into place)
    • Pliers (to remove cotter key)
    • WD-40 (soak everything)
  • Steps:
    • Remove pedal rod bracket, pull cotter key, remove pin
    • Remove hardline from master cylinder, I went slow and used lots of WD-40 to keep the line from breaking
    • Remove master cylinder from fire wall, a ratcheting end wrench works well for this
    • Break old hardline connection from softline near slave cylinder (again WD-40 and 10 mm flare wrench)
    •  Remove holding tab on frame
    • Disconnect soft line
    • Remove Slave (leave soft line attached)

2. The re-install happens in reverse, just add the softline to the slave while it is all still on the work bench. Some notes below

  • Use the hammer to tap the tab into place
  • Adjust all rods appropriately to allow for good throw on clutch pedal and at the slave cylinder
  • The master cylinder had its hardline connection in a different place that was approximately an inch difference from the old master cylinder, this caused a ton of time to be spent just getting the dang hardline attached to the master cylinder, had to remove the part from the firewall and wiggle a LOT
    • There was even some mumbled curse words (sorry Mom)

3. The wife (Danielle, the most gorgeous and wonderful of all women folk) helped me bleed the system

  • “push down”
  • Loosen bleed nut
  • Let air escape
  • Tighten bleed nut
  • “let off”
  • (Repeat a trillion times)
  • Also of note a vigorous pressing of the clutch pedal gets the bubbles out at the master cylinder and should be accomplished too

Notes:

  • Need to ensure that newly bent hardlines are not rubbing on the master cylinder, which would cause rub through


coexist
coexist Reader
6/10/18 2:05 a.m.

OT Helped a friend with a little 510 action this weekend

75280z
75280z New Reader
6/10/18 8:29 a.m.

That is a neat looking carb set up. Does he/she have a build thread somewhere?

75280z
75280z Reader
6/10/18 3:49 p.m.


Project Log (22 Feb 18): Start Time: 0815 End Time: 0915


Ever since I swapped back to the mechanical fuel pump the car has been missing really badly @ Wide open throttle. So I want to switch back to the mechanical pump to see if that fixes my issues

To Do (Daily):

  1. ☑ Re-install and wire in the electric pump

  2. ☑ Re-PLumb the fuel lines

  3. ☑ BLock Off Mechanical pump

1. The original location of the electric pump was a bit too high for my liking, so I relocated it lower, I also re-used the wiring which is a bit too short to run cleanly, for proof of concept it will work

  • I like the new location, as it is much less of an eye sore

  • The ground for the pump isn’t the best

2. I was able to reuse the old fuel lines. I have purchased one more that was longer that is now running from the output of the pump to the carb

3. Looped a hose around on the mechanical pump, will remove the pump later

Notes: The mechanical pump did not fix anything it still had issues. After awhile I determined that I had a vacuum leak, it was a while until I determined this though (I added this note in June 2018)

----------------------------------------------

Project Log (22 Feb 18): Start Time: 1300  End Time:1430

Welded more on the trunk patch panel, I switch to .030 from .035 an it i welding mech better

Pictures: None today

TImelapse: No my welding was an abomination

75280z
75280z Reader
6/10/18 3:51 p.m.

Project Log (24 Feb 18):  Start Time: 0815    End Time:0915

The swap did not fix the stumble so I decided to take apart the carb to see if there was something wrong inside it

To Do (Daily):

  1. ☑ Take apart the Carb

  2. ☑ Check all jets

  3. ☑ Inspect Carb

1. I took the air cleaner off, removed the top 6 bolts, checked float everything looks fine

2. Started taking the jets out one at a time, dropped one into the engine bay, I have no idea where it is. I have literally spent over an hour looking for a jet. I cannot find it

  • Author’d note: It would be over a month until I found the jet, it was in the very bottom fin of the radiator behind the fan shroud. This loss of the jet prompted me to swap the engine because of the rust I found

3.  The throttle looked like it wasn’t opening the second barrel (it was). The jet pump (accelerator) work. Nothing looks wrong in that circuit

Notes: I found a ton of rust below the radiator in the front cross frame square tube I am not excited about that. I literally pushed my finger through what was supposed to be metal.

75280z
75280z Reader
6/10/18 3:52 p.m.


Project Log (26 Feb 18):  Start Time: Not Recorded  End Time: Not Recorded

With the discovery of the rust, and issues with the carb, I decided to do the engine swap, the goal is to have the engine swapped in approximately 2 weeks. Note here is where my notes have gotten a bit more sparse. I did however, video all portions of the swap and have produced most of those videos that are currently out on youtube.

To Do (Daily):

  1. ☑ Clean Garage

  2. ☑ Start Dismantling

1. Cleaned the garage and got out the folding table, cleaned all my work benches

2. Took the battery out and hood off

  • A buddy of mine named Eric came by and chatted with me. We did more talking that woking, but we did get the battery out, cables removed (will be moved to the trunk)

  • Took off the hood

    • Forgot to mark bolt location on hinges

  • Drained the oil and coolant

Notes: The mechnical pump did not fix anything it still had issues. After a while I determined that I had a vaccum leak, it was a while until I determined this though (I added this note in June 2018

Pictures: None today

Timelapse: The next several days are all combined into one single youtube video.


75280z
75280z Reader
6/10/18 3:53 p.m.

Project Log (27 Feb 18):  Start Time: Not Recorded   End Time:Not Recorded


Continued the swap, I want to get the engine and transmission out today

To Do (Daily):

  1. ☑ Remove Intake

  2. ☑ Remove Exhaust and exhaust manifold

  3. ☑ Remove Engine and Transmission

1. Nothing significant to report (NSTR)

  • Bolts have been mixed and matched

    • Would like to run studs, but @ $3.50 a piece, I will likely only run a couple

      • Note here I also determined that intake is actually more difficult to remove if you run only studs later in the project

  • The fluid lines are a bit tired and cracked (Fuel and coolant) will replace
  • Still did not find the carb jet

2. The exhaust and exhaust manifold removal was not difficult

  • The exhaust manifold was missing the rear nut to keep it tight

  • The exhaust was being finicky, so I used a sawzall to cut it in half, it came out real easy after that

3. When I removed the engine and transmission it did not go perfect, I had several missteps throughout, below is the general order that I removed the engine in though.

  • Engine Bay Process

  • Remove battery

  • Drain coolant/oil

  • Remove intake and exhaust (Not mandatory)

  • Remove all electrical connections to the engine (Spark plugs, starter, distributor, coolant temperature, et.)

  • Remove all firewall connections to the engine (Throttle, vacuum)

  • Remove coolant and fuel lines

  • Disconnect the Air Conditioner from the Engine

  • Remove Grill (helps remove Radiator)

  • Remove radiator

  • Remove Fan

  • Hook Up engine hoist

  • Remove motor mounts

  • Notes on the pull

    • The table I had, was not tough enough to hold the engine’s weight

    • I made a HUGE mess with the fluids

    • The angle of the engine gave me a heck of a time

  • Under Car Bay Process

  • Disconnect the drive shaft and remove

  • Drain Transmission Fluid

  • Remove clutch slave cylinder

  • Remove electrical connectors from trans

  • Remove shifter

  • Remove SPeedo Cable

  • Loosen parking brake lines

  • Remove transmission crossmember

The next thing I did was have a buddy of mine, Craig, come over and help me get the engine out. It took quite a bit of finagling but the engine came out pretty OK.

  • Removed transmission from engine worked on cleaning the garage

    • Lots of kitty litter on spills

    • Organized tools

Notes: The next things I need to get done is get the drive shaft shortened 5.5” The cost was $98. Need to get color matched paint

Pictures: 

TImelapse: Use last link video

75280z
75280z Reader
6/10/18 3:56 p.m.

Project Log (1 Mar 18):  Start Time:  Not Recorded  End Time: Not Recorded
Removed Engine bay accessories today

To Do (Daily):

  1. ☑ Prepped Engine Bay for welding and patching

  2. ☑ Remove Battery Tray

1. Continued with the removal/stripping process

  • Remove the headlights and associated electrical connectors

  • Removed Fuse Box (Cleaned the box with vinegar the next week)

    • Fuse Box cleaning process

      • Remove fuses

      • Soak in vinegar bath for ~10 minutes

      • Use old toothbrush to scrub (or new)

      • When satisfied switch to hot water and baking soda bath

      • scrub again

      • Thoroughly dry

      • Admire!

      • Replace the fuses

Removed the A/C components

  • This was a hard decision, most f the systems people warn not to take apart

  • Then I found a hole in one of the hoses

  • Cut it all out, branch trimmers work well for cutting off old rubber hoses

  • Remove evap canister/compressor/radiator/lines

  • Moved all of the wiring out of the bay (I just laid it on top of the car)

  • Little parts and bracketry like the hood prop, steering box, brake lines, horns, etc., get removed when you get to them

2. The battery tray, I got a spot weld cutter from Harbor Freight, it worked quite well

  • Start slow with the cutter

  • Could tell when I made it through the first panel, because there was usually a puff of rust dust

  • Used the removed tray to get paint matched

Notes: None

Images:

Story Time

Links to Timelapse: Same as above

75280z
75280z Reader
6/10/18 3:59 p.m.

Project Log (2 Mar 18):  Start Time: Not Recorded    End Time: Not Recorded
Cleaned on engine bay

To Do (Daily):

  1. ☑ Get rid of road grime

  2. ☑ Cut out old rust

1. This took forever I tried degreaser, didn’t work, gasoline and steel wool seemed to work best with brake cleaner after the fact to wipe that down

  • Hours of scrubbing on the inner parts was what I did, it was awful

  • The front crossmember had over ¼ lb of grime on it (I weighed it)

2. I did this portion two pieces at a time

  • The rust spots in the engine bay

    • Left front lower frame (Under radiator)

    • Right front lower frame (Under radiator)

    • Driver lower wheel arch inner and outer skin

    • Passenger lower wheel arch inner and outer skin

    • Passenger Front upper inner fender

Notes: Make sure to treat the rust/surface rust before closing up cavities with welding

Images: 

75280z
75280z Reader
6/10/18 4:02 p.m.

Project Log (9 Mar 18): Start Time: Not Recorded End Time:Not Recorded

Repaired the rust in the engine bay. This took place over several days and many hours. I learned a lot. One of those things is that I am not the best welder, but I am getting better

To Do (Daily):

  1. ☑ Front Cross frame driver and passengers side replaced

  2. ☑ Passengers side wheel well

  3. ☑ Drivers side wheel well

  4. ☑ Passengers Side Inner front fender

  5. ☑ Weld up MIscellaneous small holes

1.  I learned a valuable lesson from the trunk. You need the patch panel to be as perfectly shaped as humanly possible, it saves you time in the long run

  • Both pieces were ~2” wide with an approximate length of 12”

  • Flap discs are great for small material removal on a patch panel

  • Tac the pieces moving around the perimeter

    • A small hammer can help with shaping

  • My Process

    • Hold patch panel in place with magnets

    • Tac weld at corners

    • Remove magnets

    • Fully weld, by adding small tac-welds around the perimeter then small ~1” beads

    • Grind

    • Repeat the last couple steps until satisfied

2. Cut outer and Inner Skin for the wheel well

  • I attempted to cut out the spot-welds, this was pointless as both the inner and outer skins were TOAST (read rusted completely through)

  • Suggest cutting inner skin ~1-2” beyond the outer skin so you are not having to weld on top of your own welds

  • NOTE The fuel line runs right behind this panel, please move it first!

  • I drilled small holes to put “Spot welds” on the outer skin

  • There is a slight curve in both panels, i replicated it by adding a slight bend across my leg and a hammer

  • After welding it in, I hit the backside with some rubberized undercoating

3. Very similar to the passengers side, this rust wasn’t as bad

  • Must disconnect the steering box

    • Very Large Bolts

  • No Fuel line

  • Brake proportioning valve gets in the way, if you haven’t removed the it, now is the time

4. This panel was terrible. It started out as a 2”x3” patch and ended as a 5”x5” patch

  • The metal was much weaker than anticipated

  • could not get the welds to “bite”

  • This is the reason they make Bondo

  • THis is also why I need a better welder

5. The assorted holes I tac’d around the outside. I should have used a “Brass Spoon” to help with these welds. I did not know that such a thing existed.

Notes:

  • Welder with gas and much smaller wire 0.025” wire would be better

  • Weld/Grind x5 seems to be my repeat number

  • Panels inside the engine bay sound so much more solid now

  • This little project is getting a bit more expensive

$98 - Drive Shaft Shortened

$60 - Paint and Rust Converter

$60 - Flywheel bolts, 280zx shifter, random little stuff (trust me it was a good deal)

$13 - Relay box for electric fans

$20 - Header Paint

$60 -  Assorted Hardware (Thanks Ace)

$20 - Transmission Mount (510 Mount doesn’t work)

Images:

Links to Timelapse: Not finished yet


75280z
75280z Reader
6/10/18 4:14 p.m.

Project Log (11 Mar 18):

Start Time: Not Recorded

End Time: Not Recorded

Paint for Engine and Engine Bay. This was done over several days, so it is more like March 11thish.

To Do (Daily):

  1. ☑ Prep Engine Bay

  2. ☑ Paint Engine Bay

  3. ☑ Clean Parts

1. Using the grinder, flap discs, and sandpaper I cleaned the engine bay

  • Primer helped show the imperfections

  • Bondo was used to smoothe out transistions

  • I could have done more, but the goal is to have a nice engine bay, not a perfect engine bay

  • Once complete I sanded more, cleaned the entire bay with shop towels and a bit of brake cleaner

2. The paint was color matched by Finish Masters, they did a FANTASTIC job and for what I got it was a great deal. Also their primer is much nicer, albeit expensive, compared to just walmart primer.

  • I used a combination of tape and tinfoil to wrap the parts I did not want to paint

  • I also took the time to paint the crossmember black

3. I re-used many parts, but tried to restore the luster of them before installation. The restoration usually included a good scrub, sanding, painting, and a clear coat. Below is a list of parts I cleaned or transferred over.

  • Alternator and Alternator Bracket (ended up replacing alternator, my taking it apart ruined it)

  • Starter

  • Dipstick Tube

  • Crank Pulley

  • Coolant fittings and hard lines

  • Water pump pulley (Had to cut down the bolts so it wouldn’t hit on the water pump)

    • Note the original fan had a broken fan blade

  • Hard Fuel Lines

  • Hard Brake Lines

  • Splash/Rock Guard

  • Oil Pan

  • Motor Mounts

  • How I cleaned the Parts

    • Gas Scrub with rough steel wool

    • Wipe Down with cloth

    • Spray with Brake Cleaner

    • Wipe down again

    • Buff with fine steel wool or wire wheel it

    • Paint/Clear it

Notes: When I painted the engine bay, the paint had a tendency to rub off so I hit it with a clear coat which helped, but I only had Matte on hand I will likely be re-spraying the engine bay in the years to come, but I will be painting the whole car at that point likely.

Images:

PULL!

Links to Timelapse:


75280z
75280z Reader
8/1/18 8:18 p.m.

Still working on the 510. I have moved, and trying to catch up. I have not been writing as much because I have been just doing. Videos aren't posting sorry


75280z
75280z Reader
8/12/18 11:00 a.m.


Project Log (14-16 Mar 18):


Engine Reinstall.

To Do (Daily):

  1. ☑ Assemble engine

  2. ☑ Add Flywheel/clutch

  3. ☑ Attach Transmission

  4. ☑ Install Engine and Transmission

1. The engine has had small amounts of work done over the past month already, so I don’t go into excruciating detail, this is mainly the final work that accompanied getting the engine in the car

  • Rotate the engine and swapped the oil pan and oil pickup tube

    • Checked the main crankshaft bearing torque specs

    • Everything looked clean and checked out correctly

  • Bolted on the alternator and slid on crank pulley

    • Had a heck of a time getting the bolts to fit the alternator bracket, I finally had to drill the holes out a bit more

  • Added the water pump pulley

  • Installed Dipstick tube

  • Installed water fittings and thermostat housing

2. The flywheel and clutch came with the car. Upon inspection the stock 6-bolt flywheel was lightened down from ~23lb to 19.25lb, that was nice to see

  • I don’t know who lightened the flywheel

  • I picked up the bolts from TJ (A really helpful Datsun guy in Colorado) along with several other parts to make the build nicer and better

  • The clutch is from Clutch masters, I don’t know the specifications it fit, so I used it

  • I ended up making my own flywheel lock, I used the opportunity to tighten the crank pulley down as well when I put on the flywheel bolts

    • I used blue lock tight and torqued them down to specifications

  • NOTE: Don’t forget to install the transmission front cover BEFORE the flywheel

3.  Set the new transmission on the pop-up table then adjusted the engine tilt and height with the engine hoist. The transmission slid on so easily I thought I did it wrong

  • before install I added the throwout bearing collar and a “new”, to me, pivot fork, and a new throw out bearing

  • The lower bolts did not fit for the transmission I should steal them from a 280zx if I were going to do this again

4. This went surprisingly easy. I was able to install the engine and transmission combo with little to no drama, as the engine hoist lowered it naturally moved backwards which helped the installation

  • The driver’s side mount lined right up

  • I spent the better part of 3 hours working on the passenger’s side mount

  • How I eventually got it to line up the next day:

    • Greased the surface

    • Used a 3ft long 2by4 to wedge and lever the engine

    • The engine finally rotated the couple degrees into position

    • I used the alignment holes with a large screw driver to fine tune the mount location

    • Finally I had to have the wife come out and pry with a 2by4 so I could get the bolts started

  • Cut a hole in the transmission tunnel to accommodate the shifter being relocated towards the back of the car ~3-4 inches

    • Be CAREFUL, not to cut into the hard lines on the passengers’ side of the trans tunnel

    • I almost did on accident

    • Clean up the cuts with a sander

    • I had to massage the tunnel to get the shifter pin in (read I hit it with a big hammer)

  • The T3 Transmission Mount was great, though I used way to long of bolts which had too large of a non threaded collar at the top of the bolt and poked into the passenger compartment

    • Replaced with bolts from Ace Hardware (one of the many trips to Ace)

  • Attached the driveshaft

    • I had it shortened 5.5”

    • I took the measurements and dropped it off at a local place

    • They had it done in like two days

    • They even repainted and balanced it

    • Total $98

  • Reconnected speedometer cable and parking brake

    • The Speedometer cable has to be routed to the passengers side now

    • Note: After driving my speedometer is off by ~10 MPH at 40 MPH

Notes: While this stuff isn’t rocket science, I found that putting it all back together went well, especially with the clearly marked containers with all of the different bolts I had waiting to reinstall

Images:

https://www.youtube.com/watch?v=0tV-vHQUQHU 

75280z
75280z Reader
8/12/18 11:03 a.m.

Project Log: 27 March

Built Exhaust and worked on electric fan wiring. I didn't capture this very well, because this was all done before I went out of country for a month. Some notes added below:

To Do (Daily):

  1. Make the exhaust

  2. ☑ Start the wiring for the the electric fan

  3. Close the hole in the transmission tunnel

1. The Exhaust was not that straight forward I used 2.25" tubing for the exhaust.

  • I started first by cleaning up the ehaust manifold and coating it with VHT high temp exhaust paint
  • I decided not to use the header at this time as everything I have read says that the cast manifold is good at doing its job here
    • I cut my finger pretty badly not being careful with the angle grinder, I suggest everyone be very careful while using angle grinders
    • I first cleaned up the manifold, then I primed and painted it, then I baked it to dry the high-temp paint
  • The exhaust was made with a series of straights and bends I either had on hand or bought from the parts stores.
  • I would create a section, mount to manifold, determine where I need to take it, remove, tac a piece in, check for fitment, weld completely, repeat
  • This took the better part of an 8-10 hour day and is definitely not an A+ exhaust, but it is much quieter than the previous cut exahust
  • Please do not use my exhaust as a template it is bad, but it gets the job done
  • The muffler is a Thrush muffler that I purchased from Advanced Auto and I really like the sound of it.

2. I ran the wires for the fans to the front of the car, now I just need to mount the fans. I have tried really hard on this project to run the wiring very cleanly though the engine bay.

3. I created the template from paper, cut it out of my metal sheet, and welded it in

  • I used bondo to smooth the welds and then hit the hole thing with some paint to make it look nice in the interior

Note: I still need to add in better removal flanges

Images:

Catch all images:


Patch Panel for transmission tunnel


Replacing the Altenator

https://www.youtube.com/watch?v=eeonZ3MdLIE&t=4s&index=13&list=PLLssIyjv-gNXYYNhGGEvCo3Otv7SUO5Xa 

75280z
75280z Reader
8/12/18 11:09 a.m.

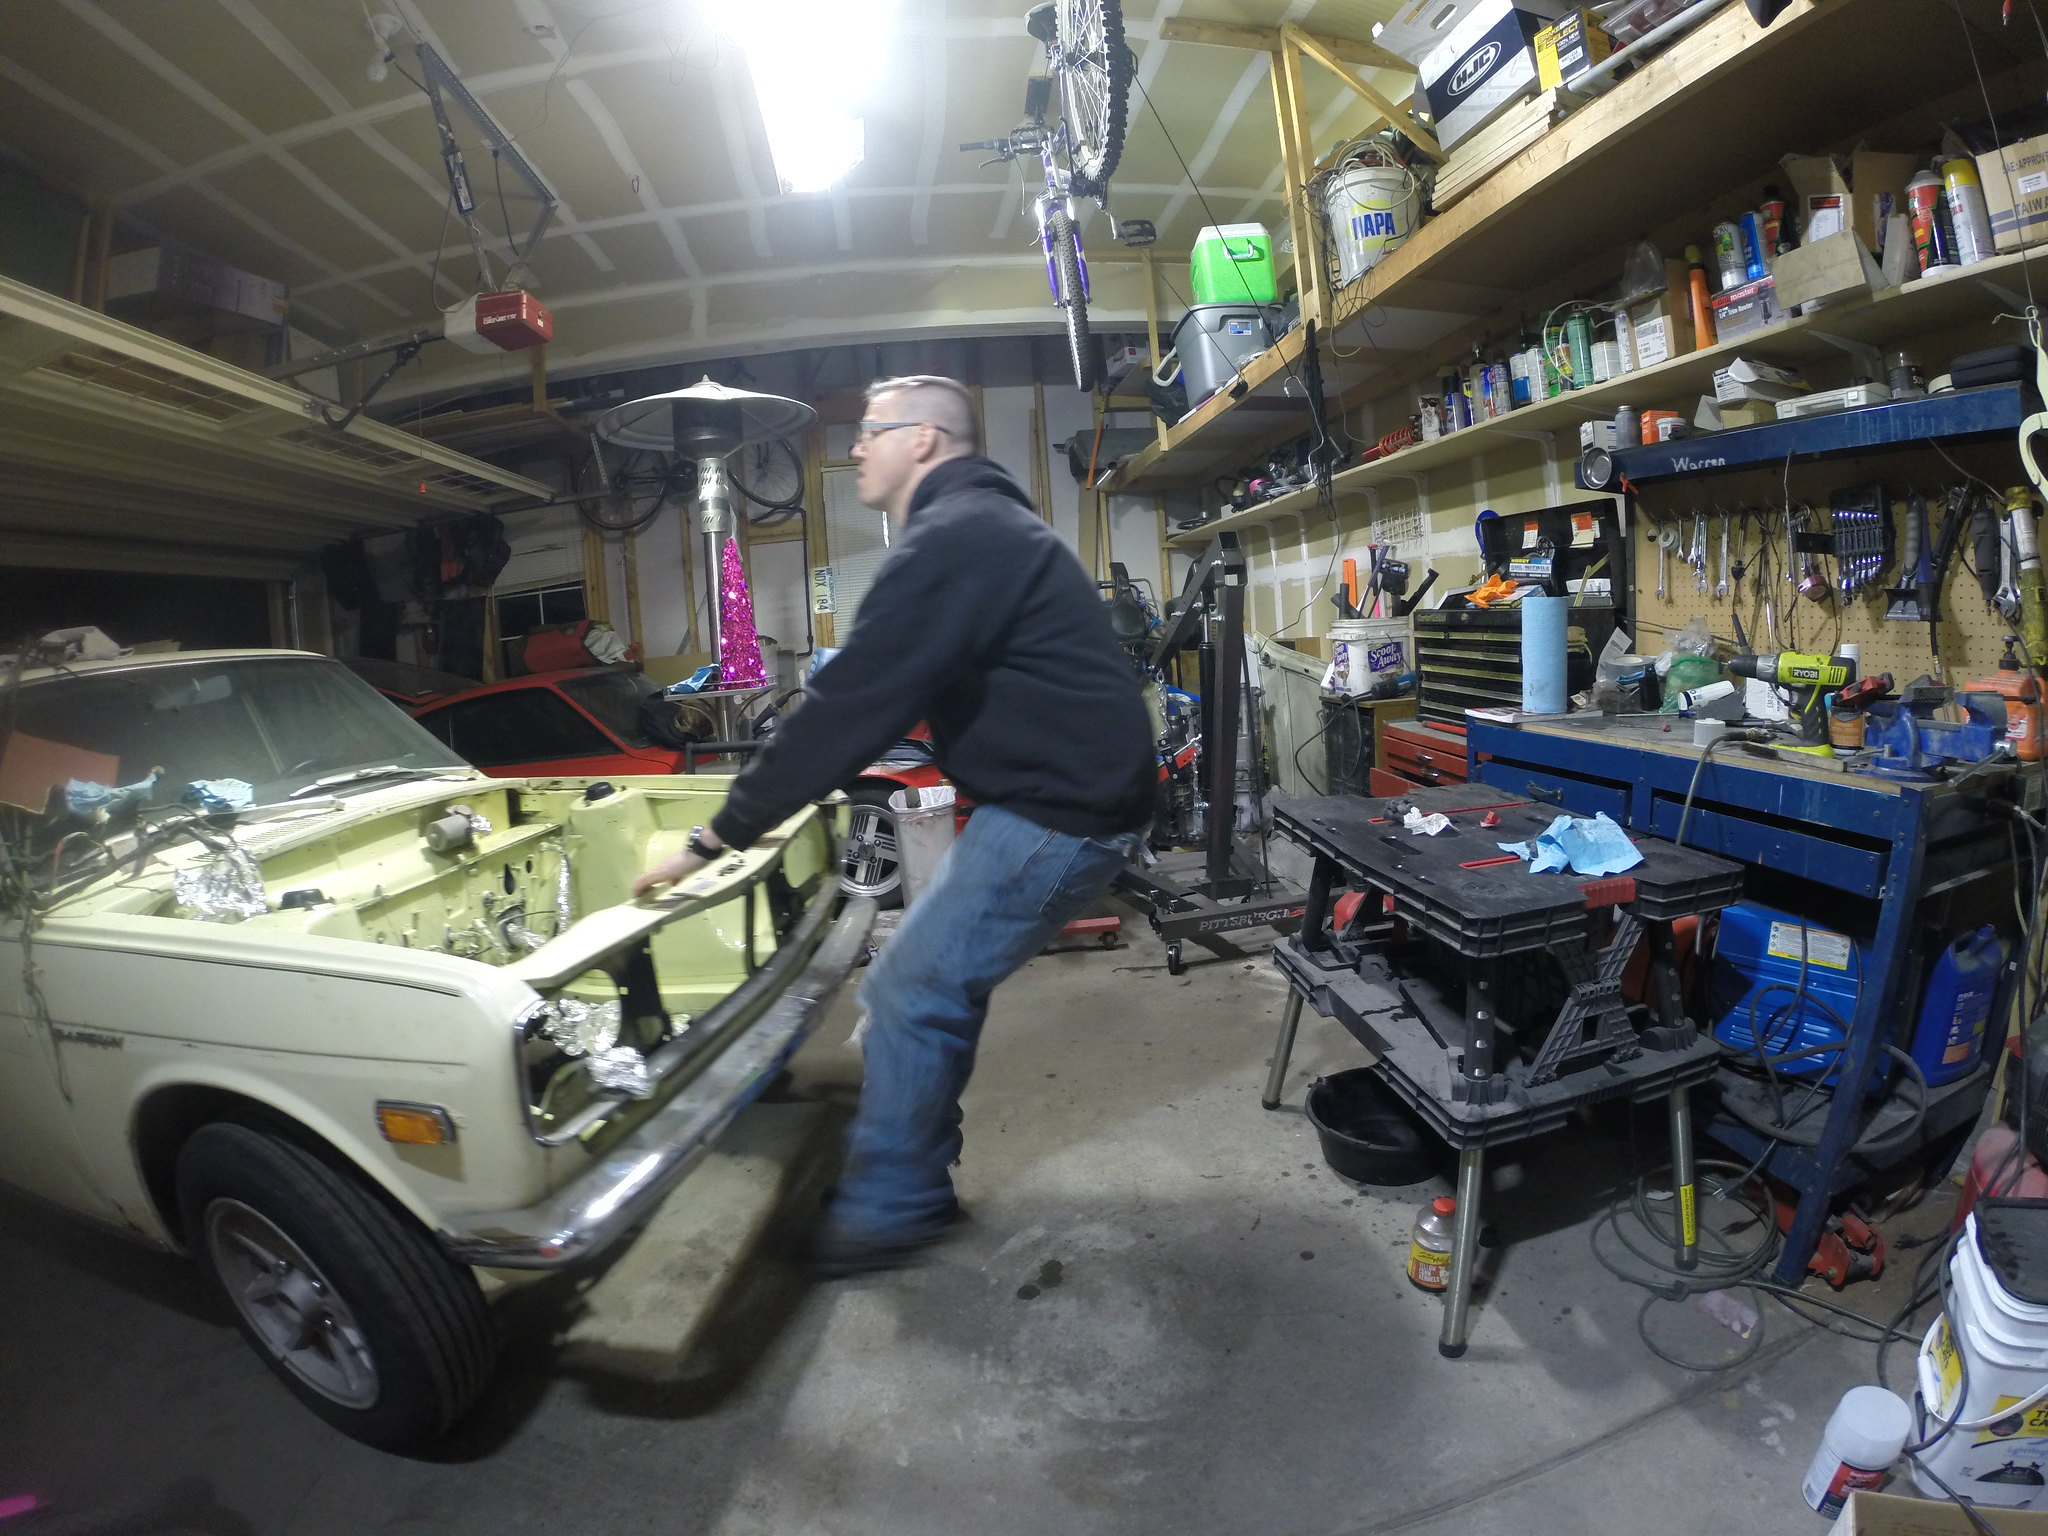
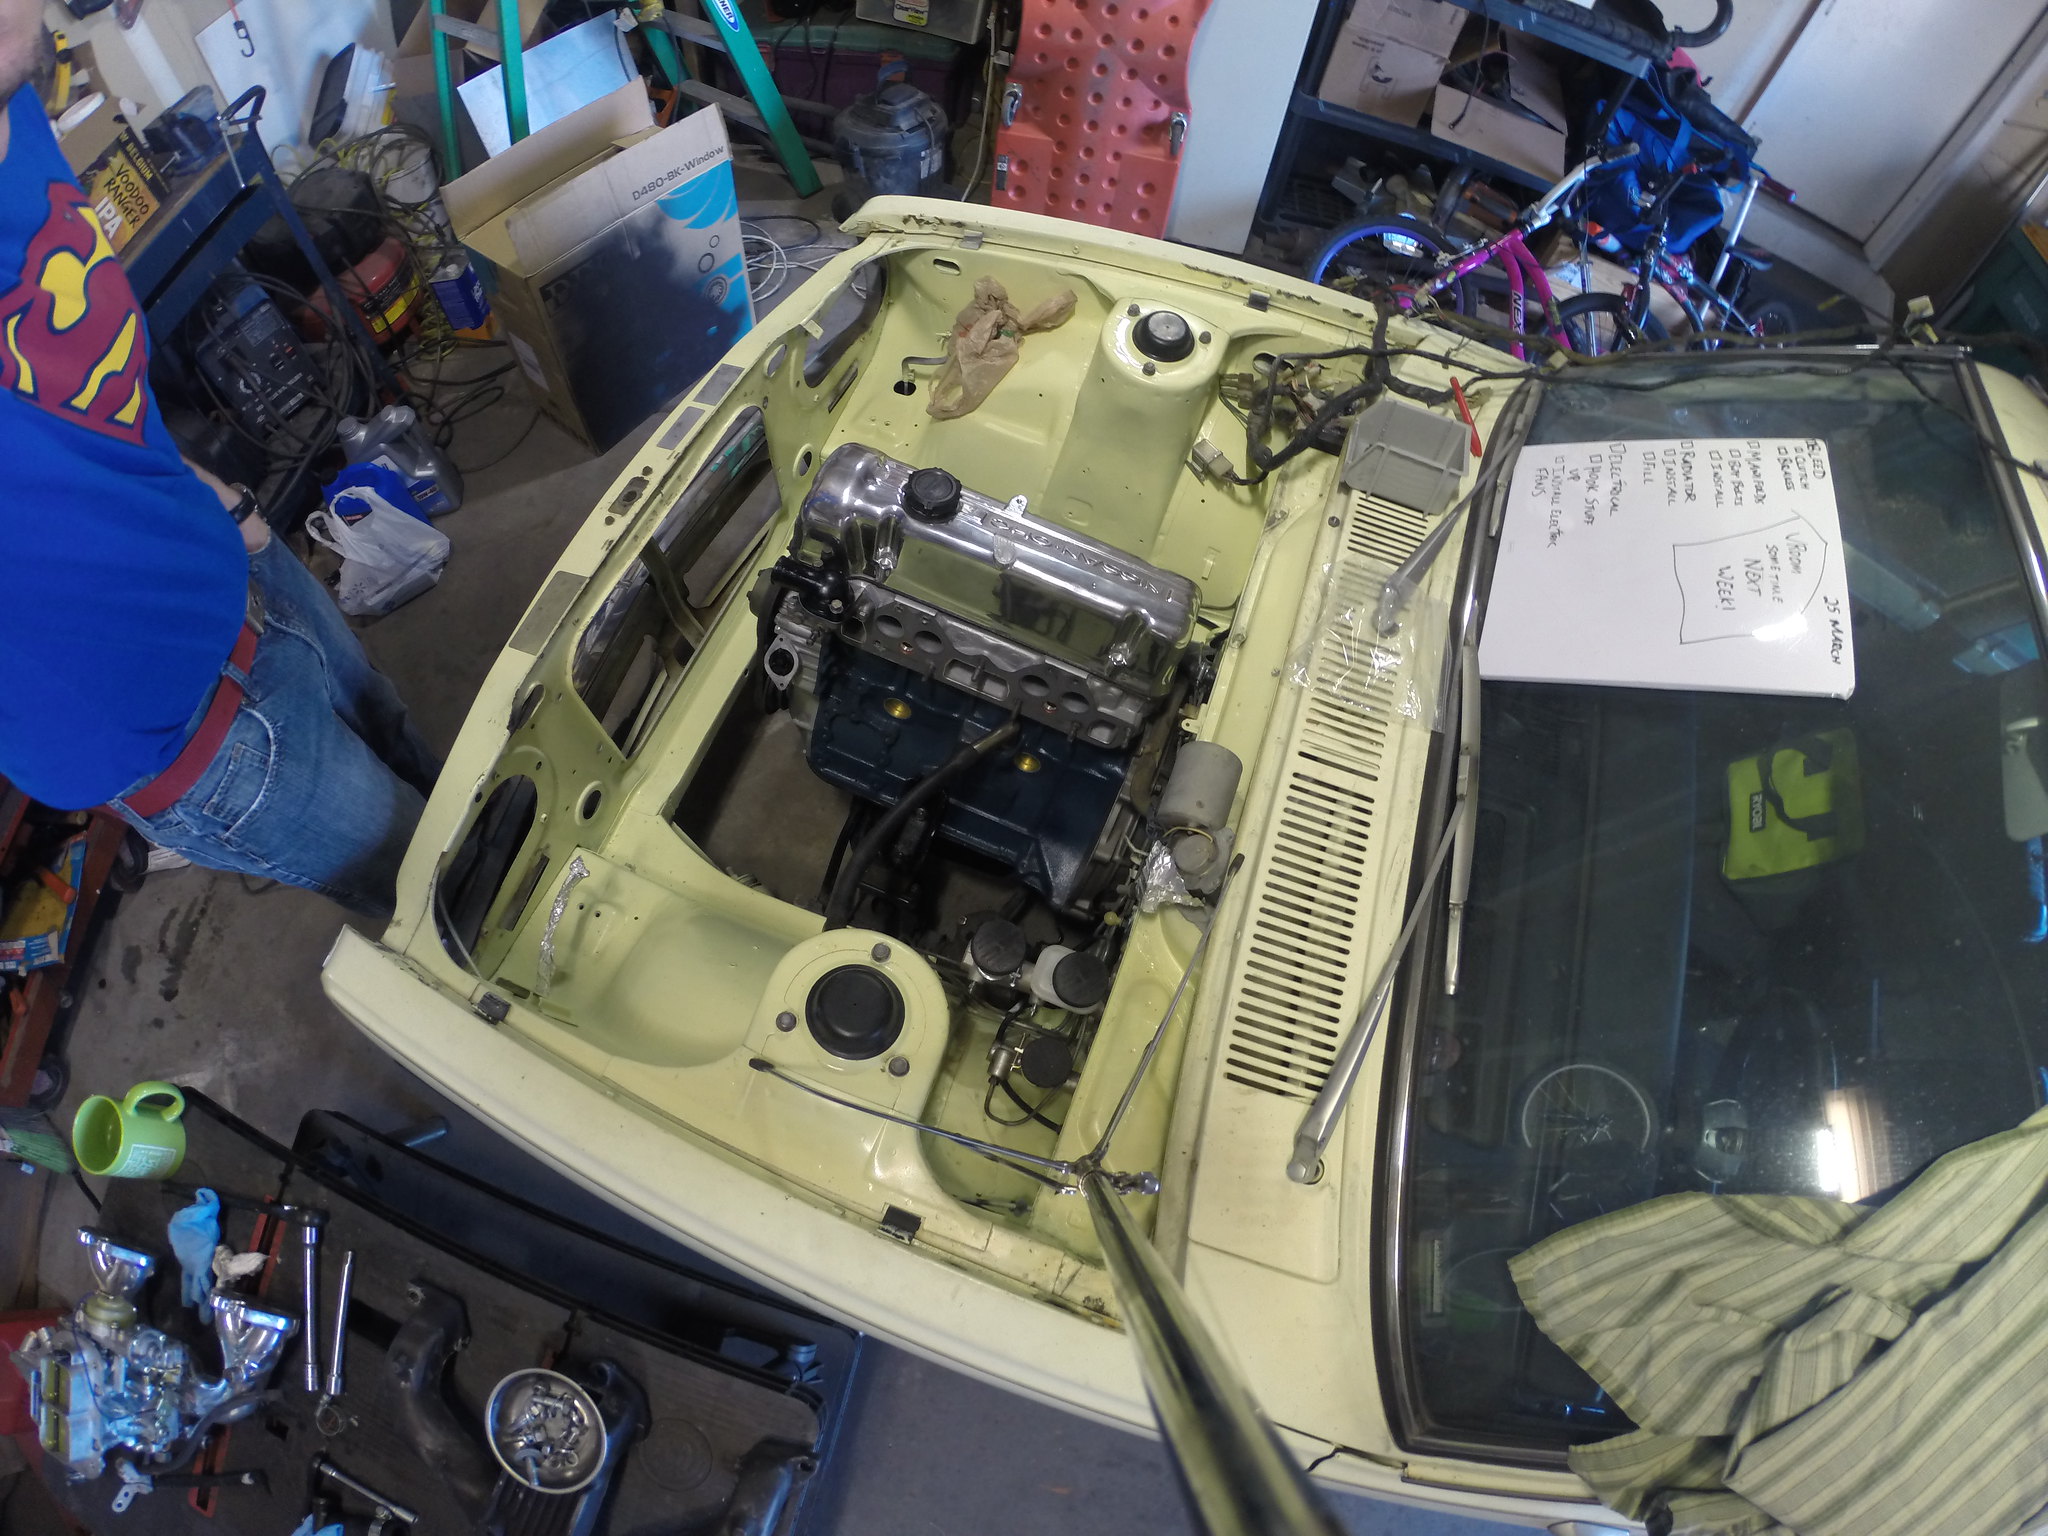
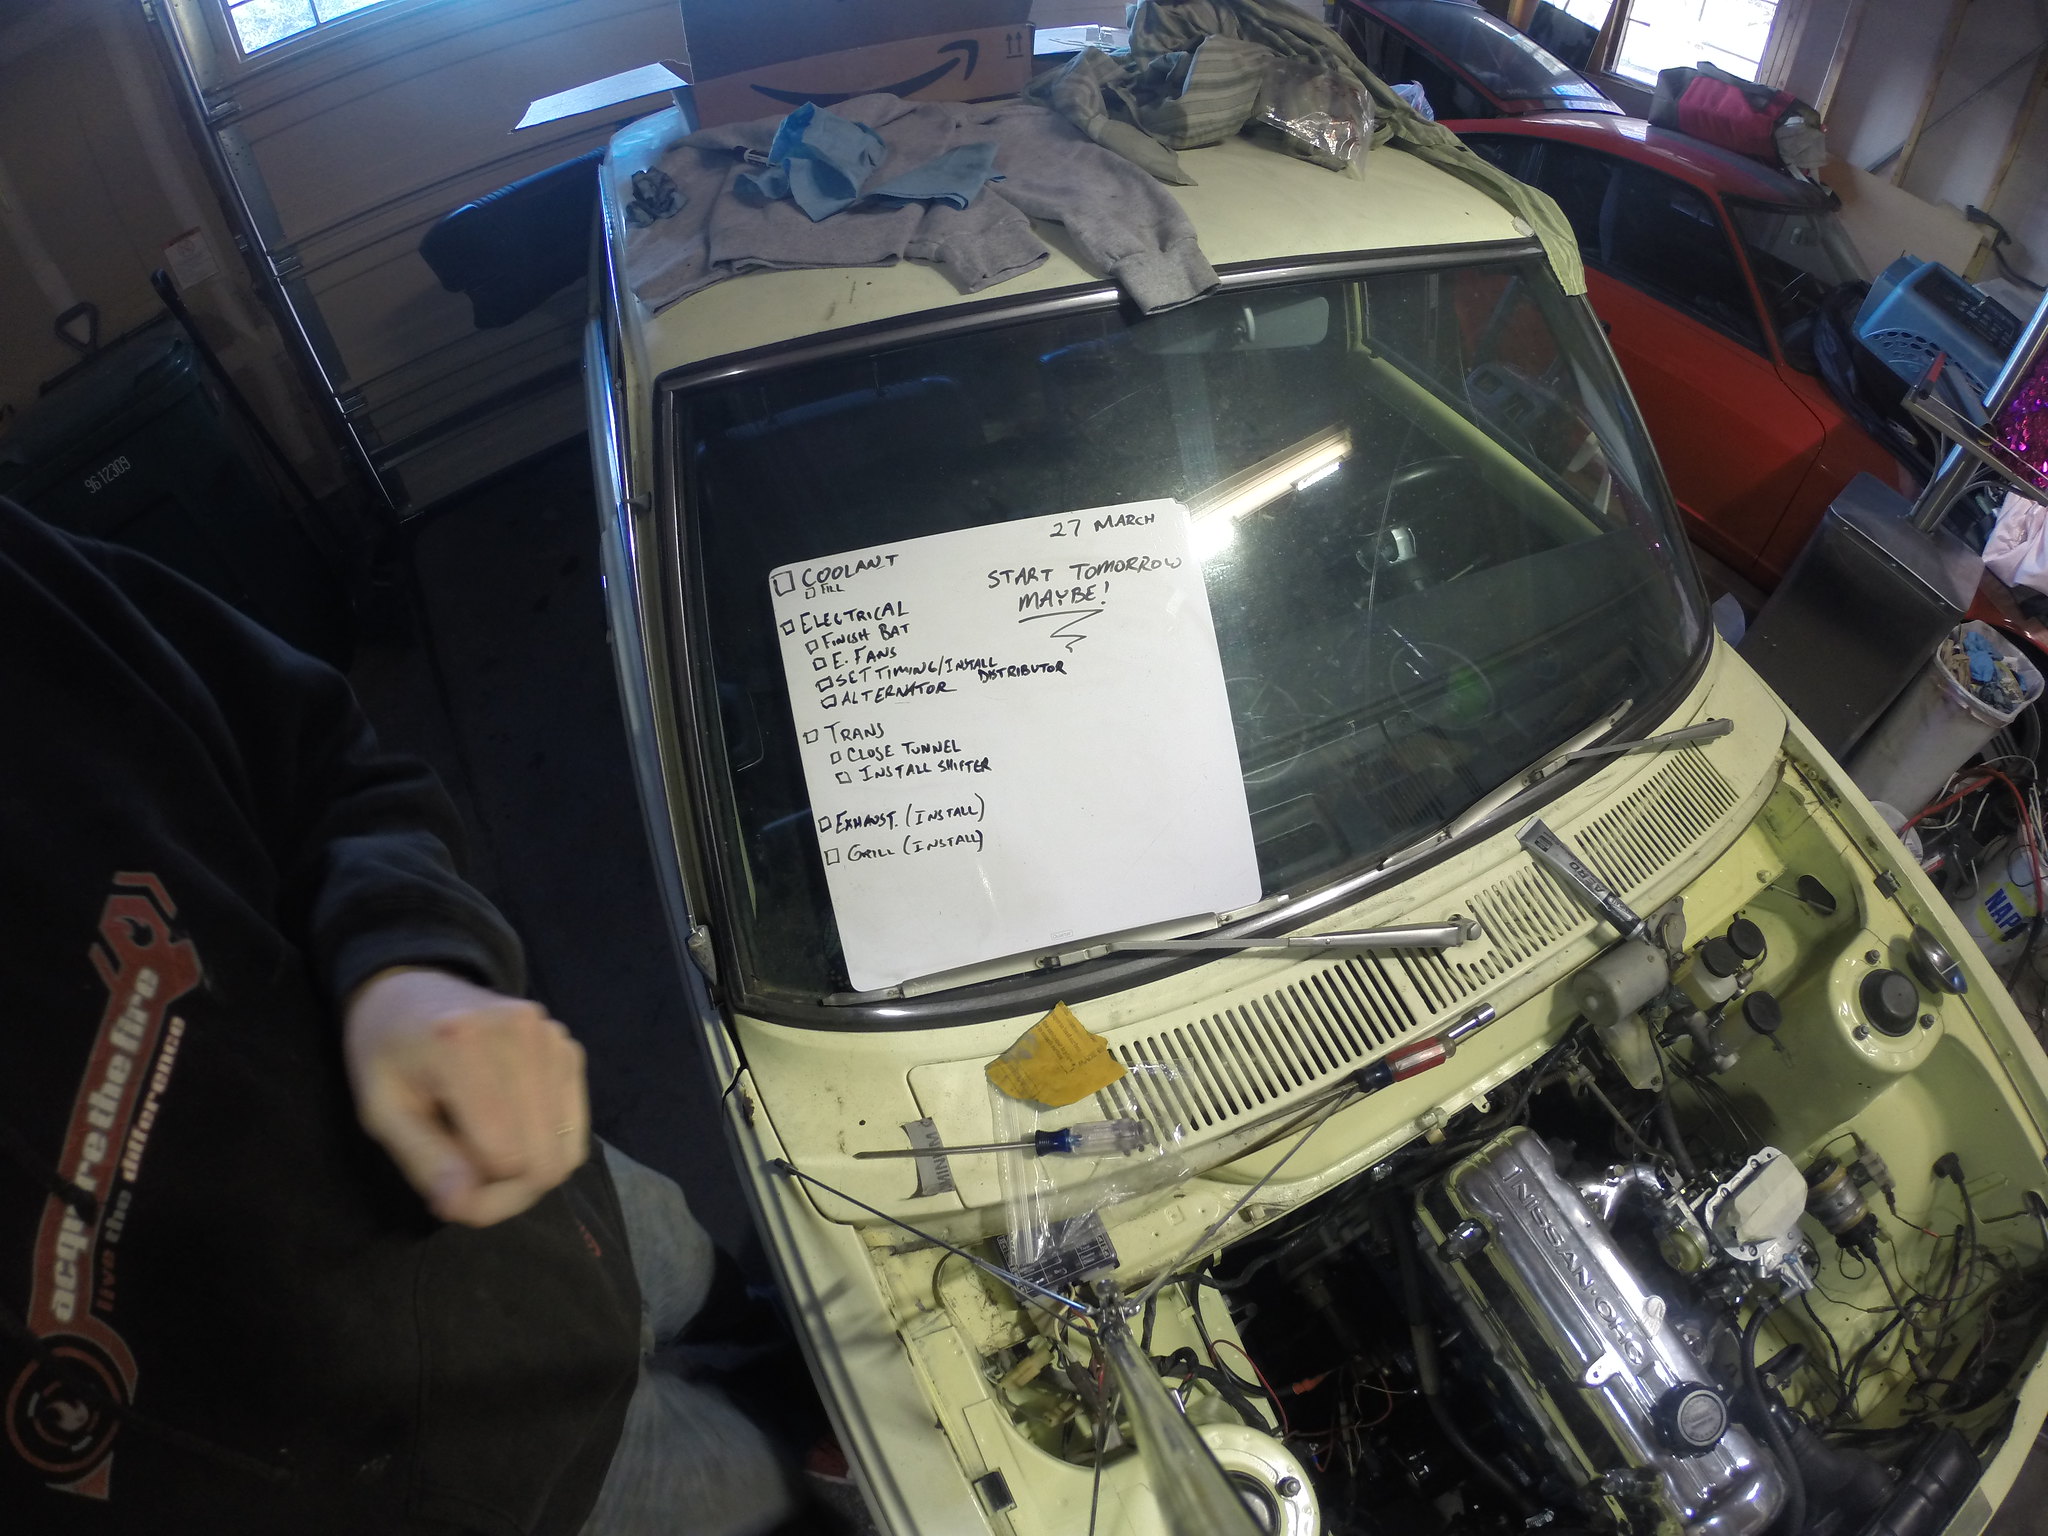
Project Update: 4 April

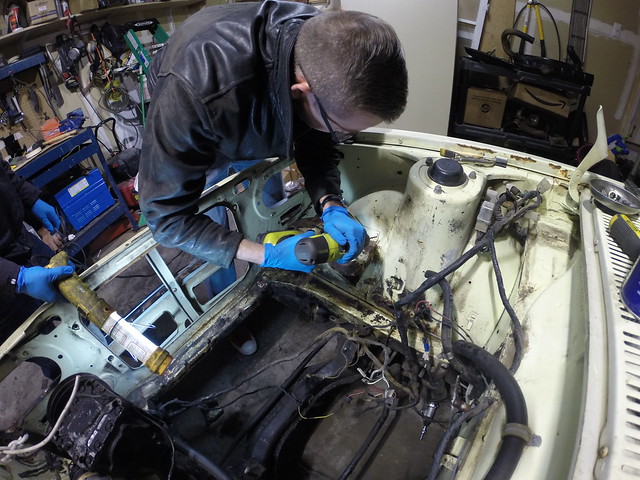
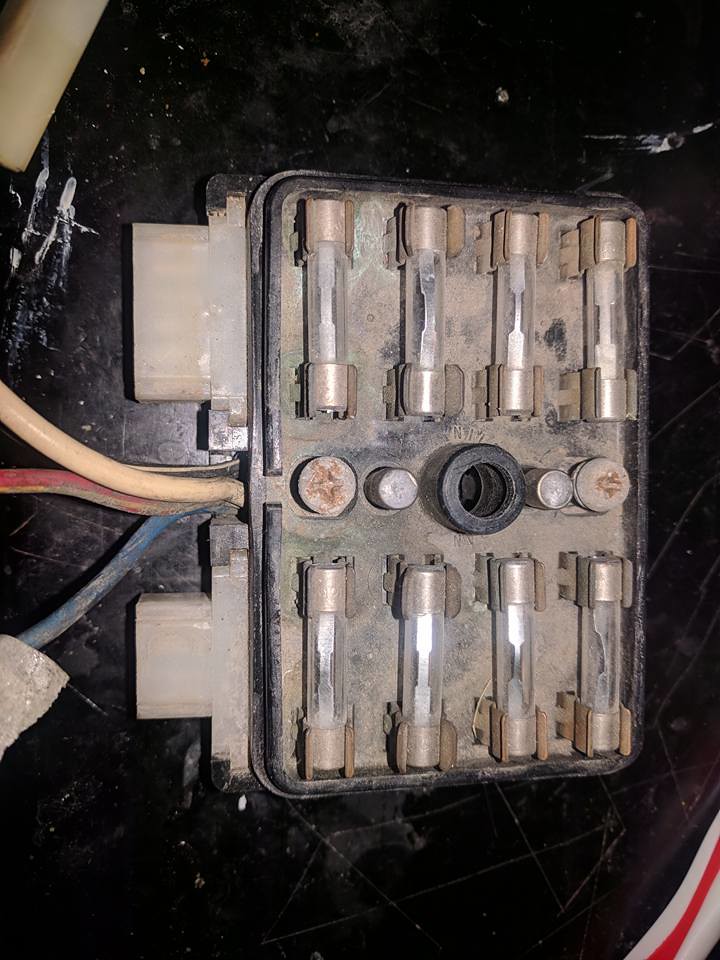
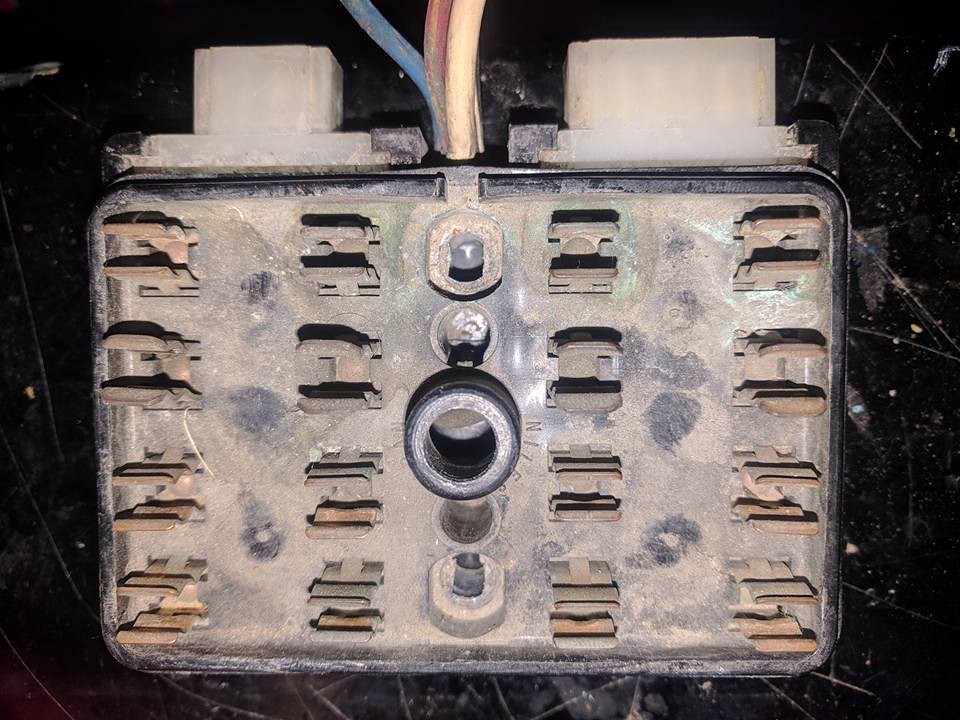
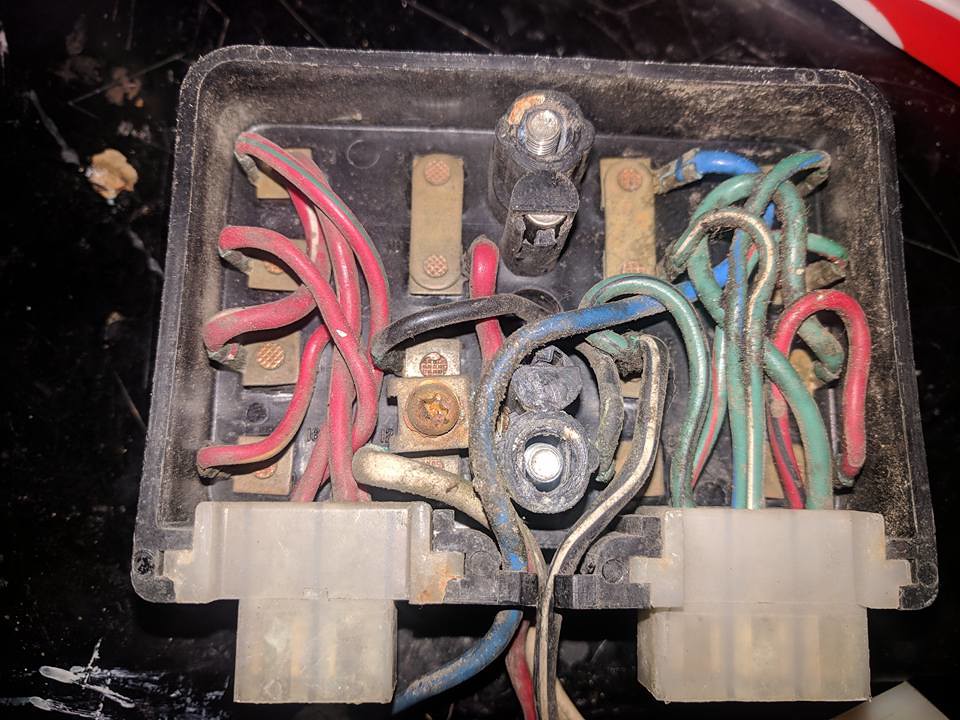
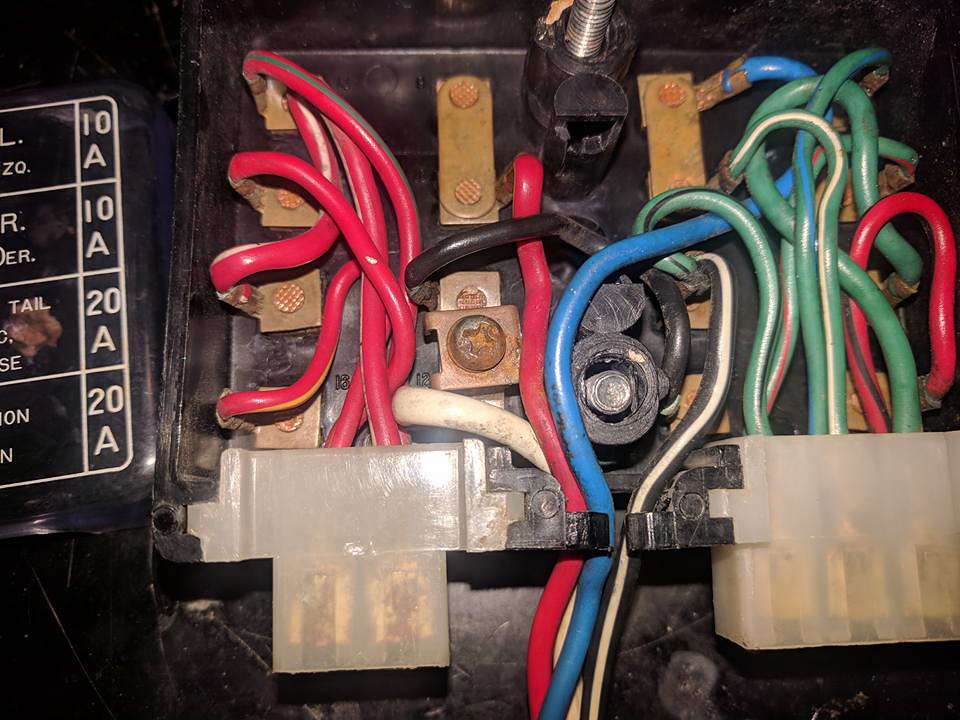
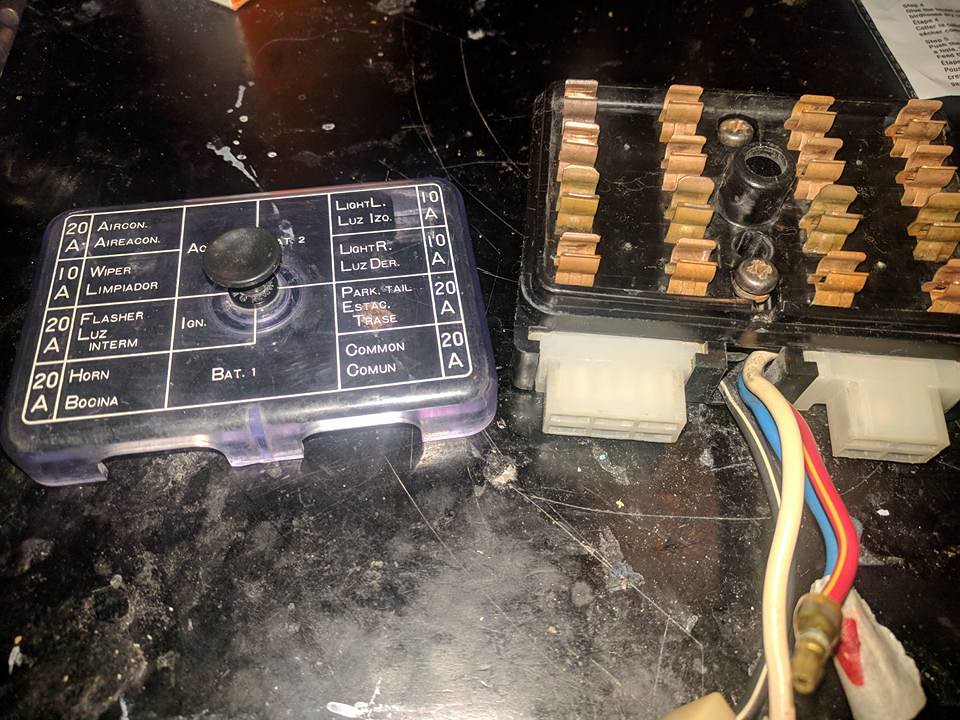
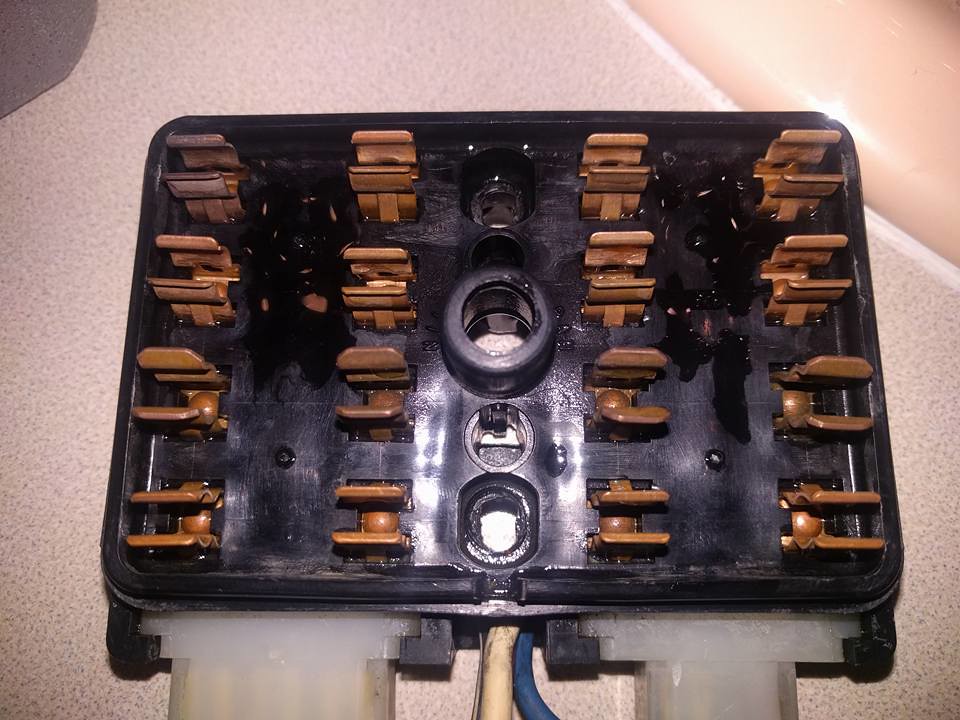
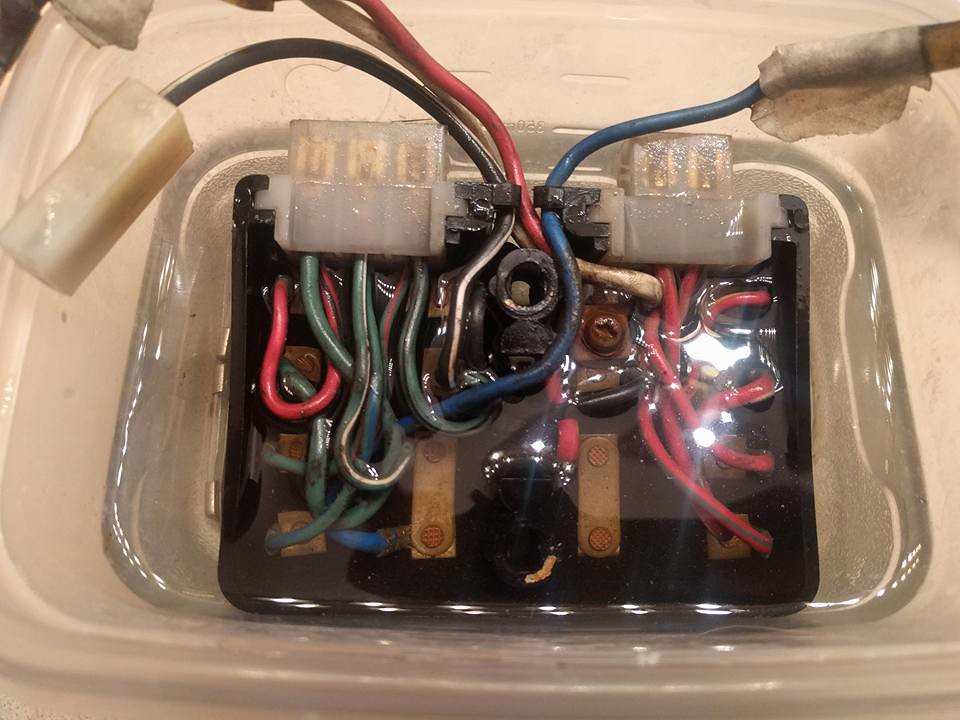
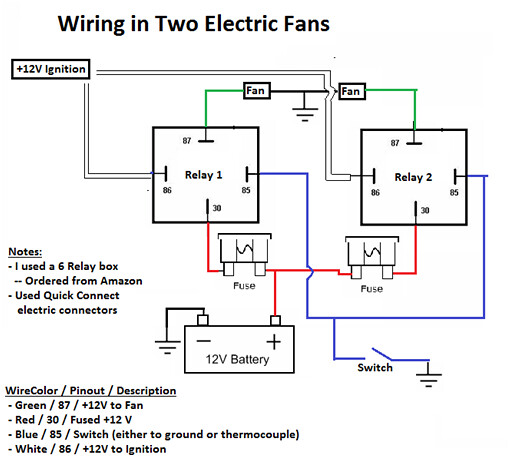
The plan and information for the electric fan install: I drew up the plans and wired the relay box in an evening, but it took me over 2 months to get it installed. I was out of country for over a month of that, and work has kept me very busy. The above time is just for the wiring schematic and wiring the relay box

To Do (Daily):

  1. ☑ Determine Wiring Schematic

  2. ◻ Wire Relay Box


1. I used my garage journal (hard copy) to write out the schematic below is a picture. I used the relay box linked below to build the box. https://www.amazon.com/gp/product/B072KJNPHJ/ref=oh_aui_detailpage_o04_s01?ie=UTF8&psc=1

--------------------------------------------------------------------------------------------------------------------------------

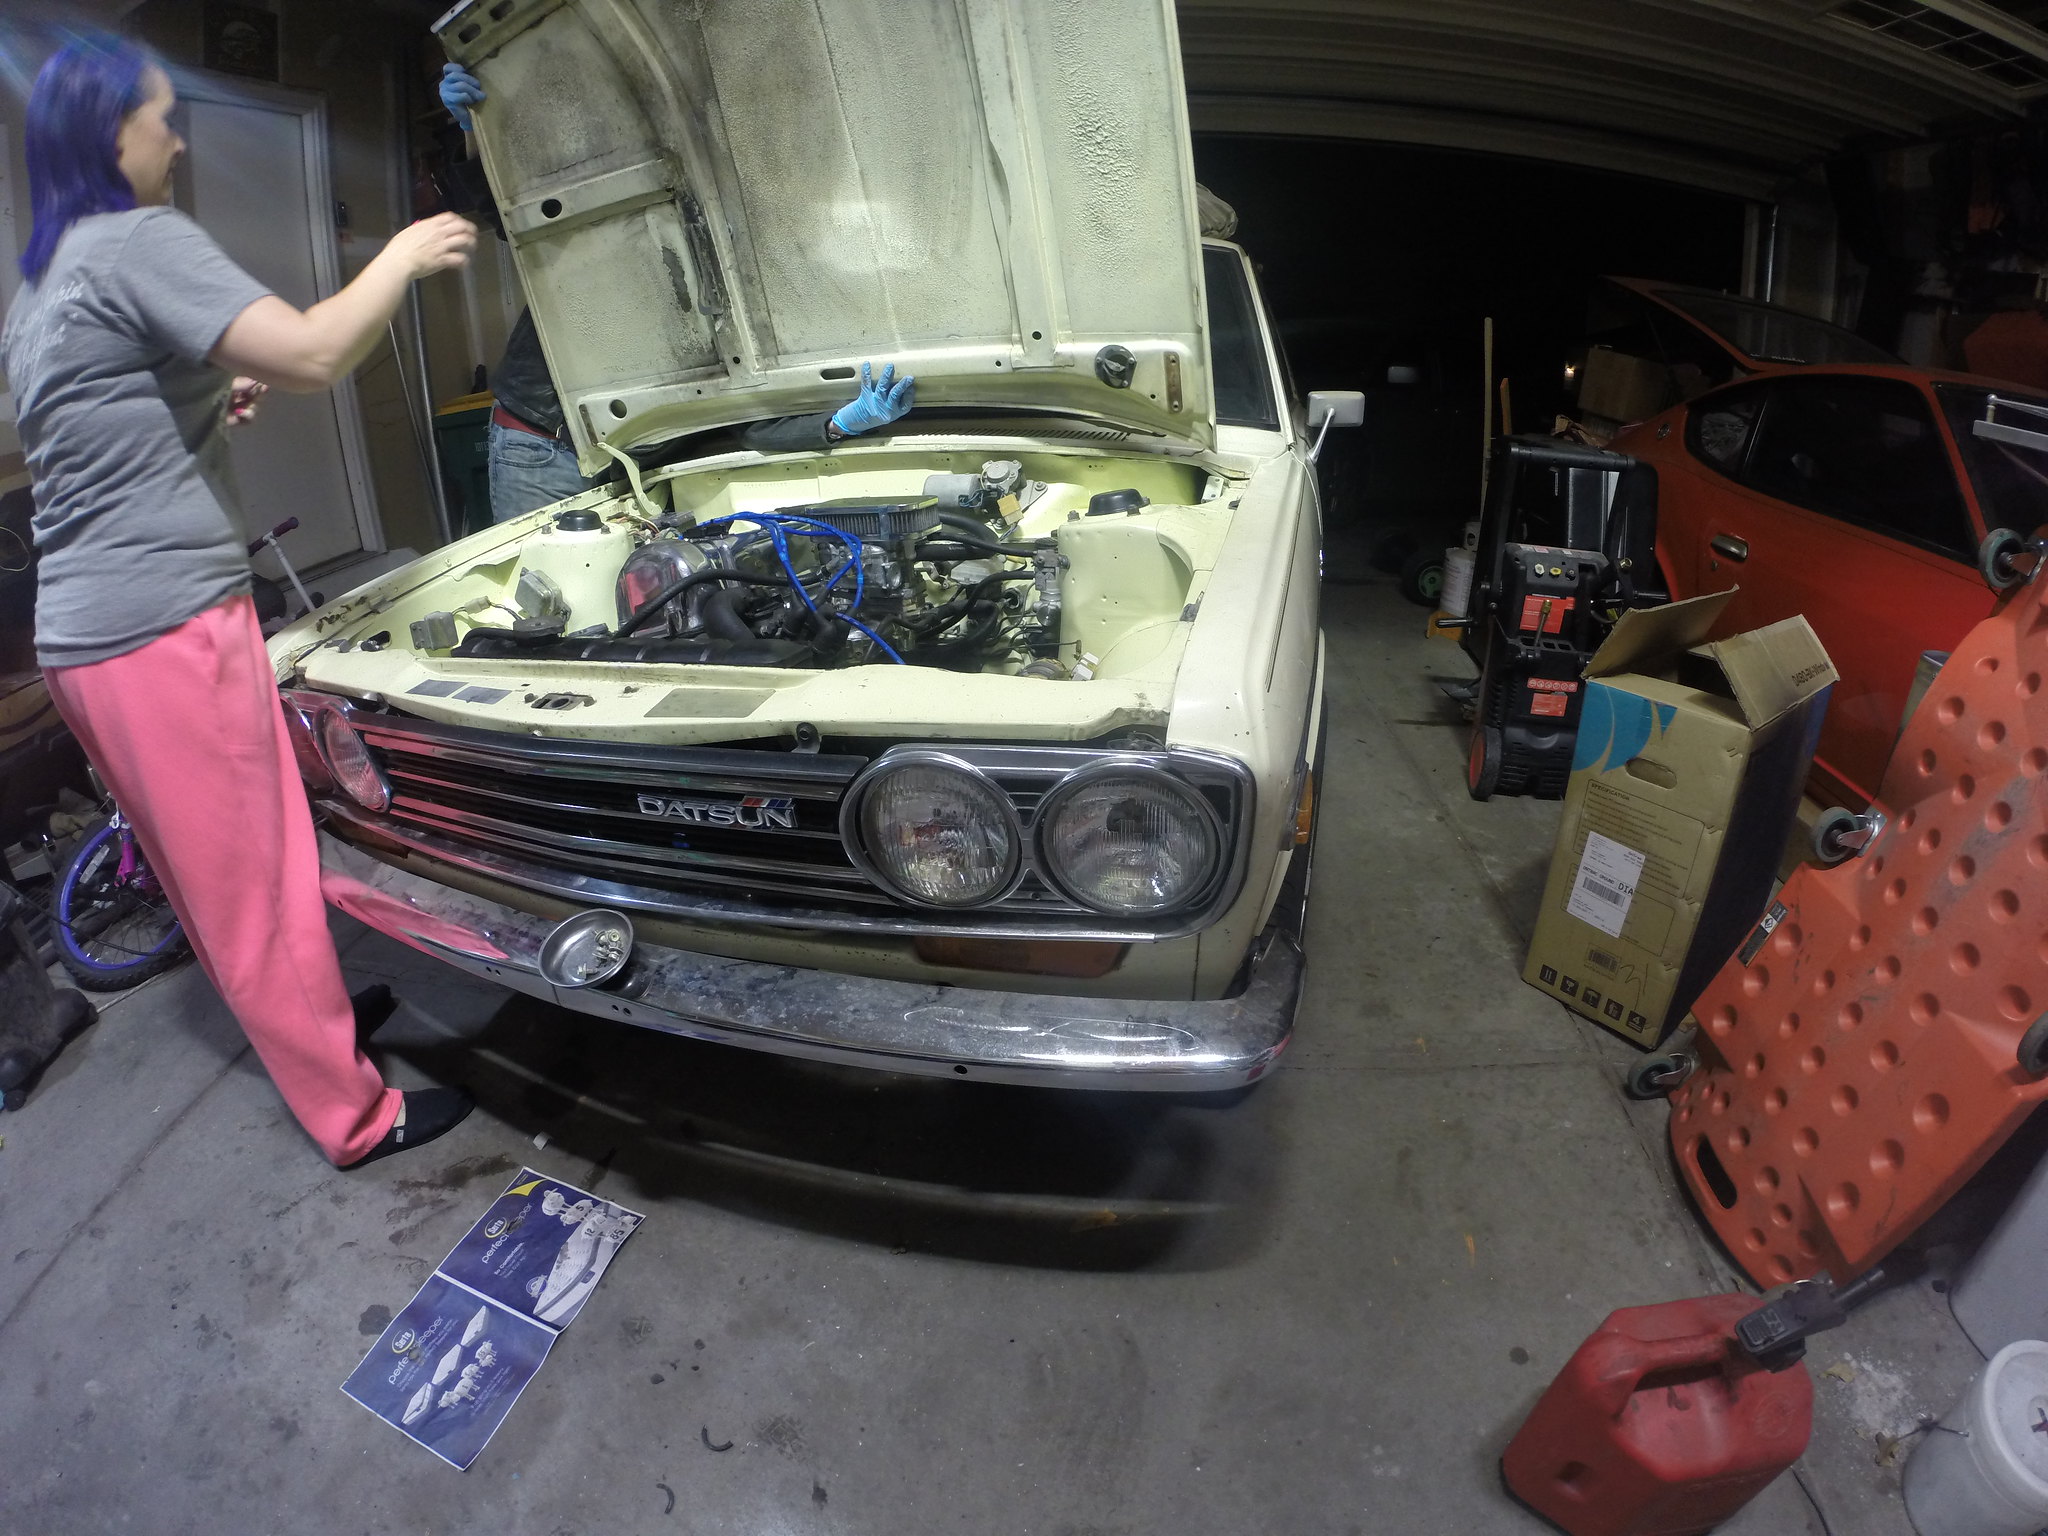
Project Log (9 Jun 18): Start Time: 1800 End Time: 1830
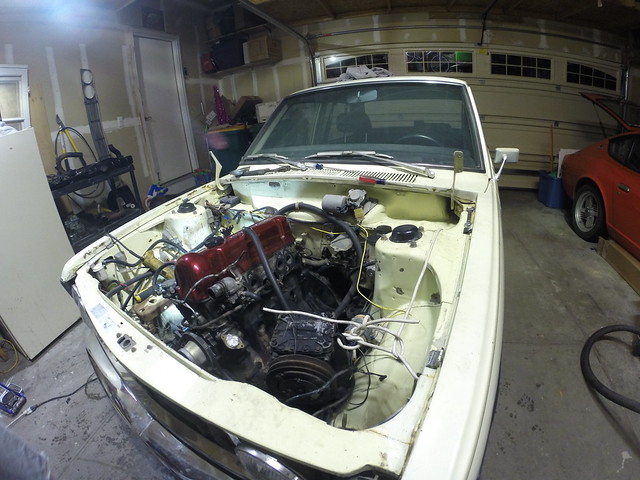
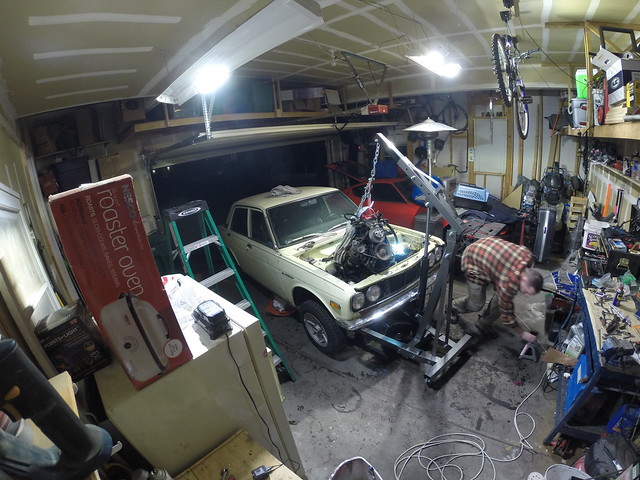
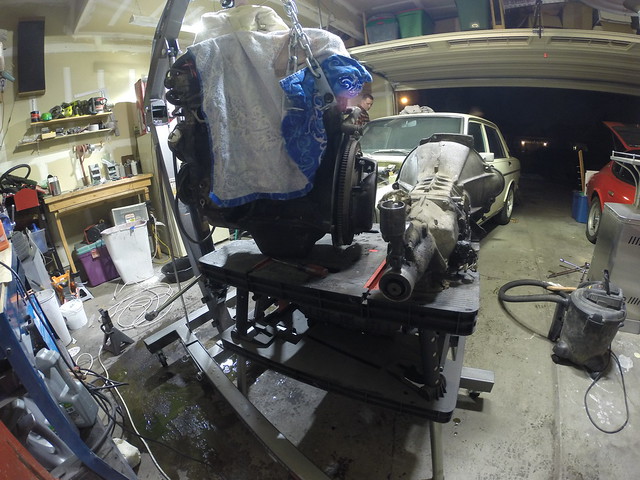
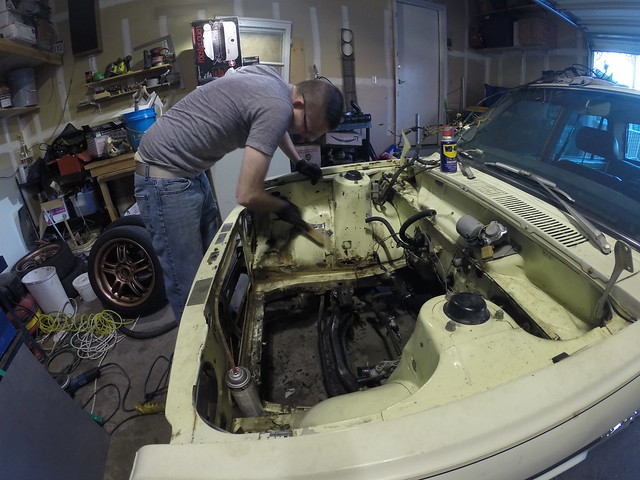
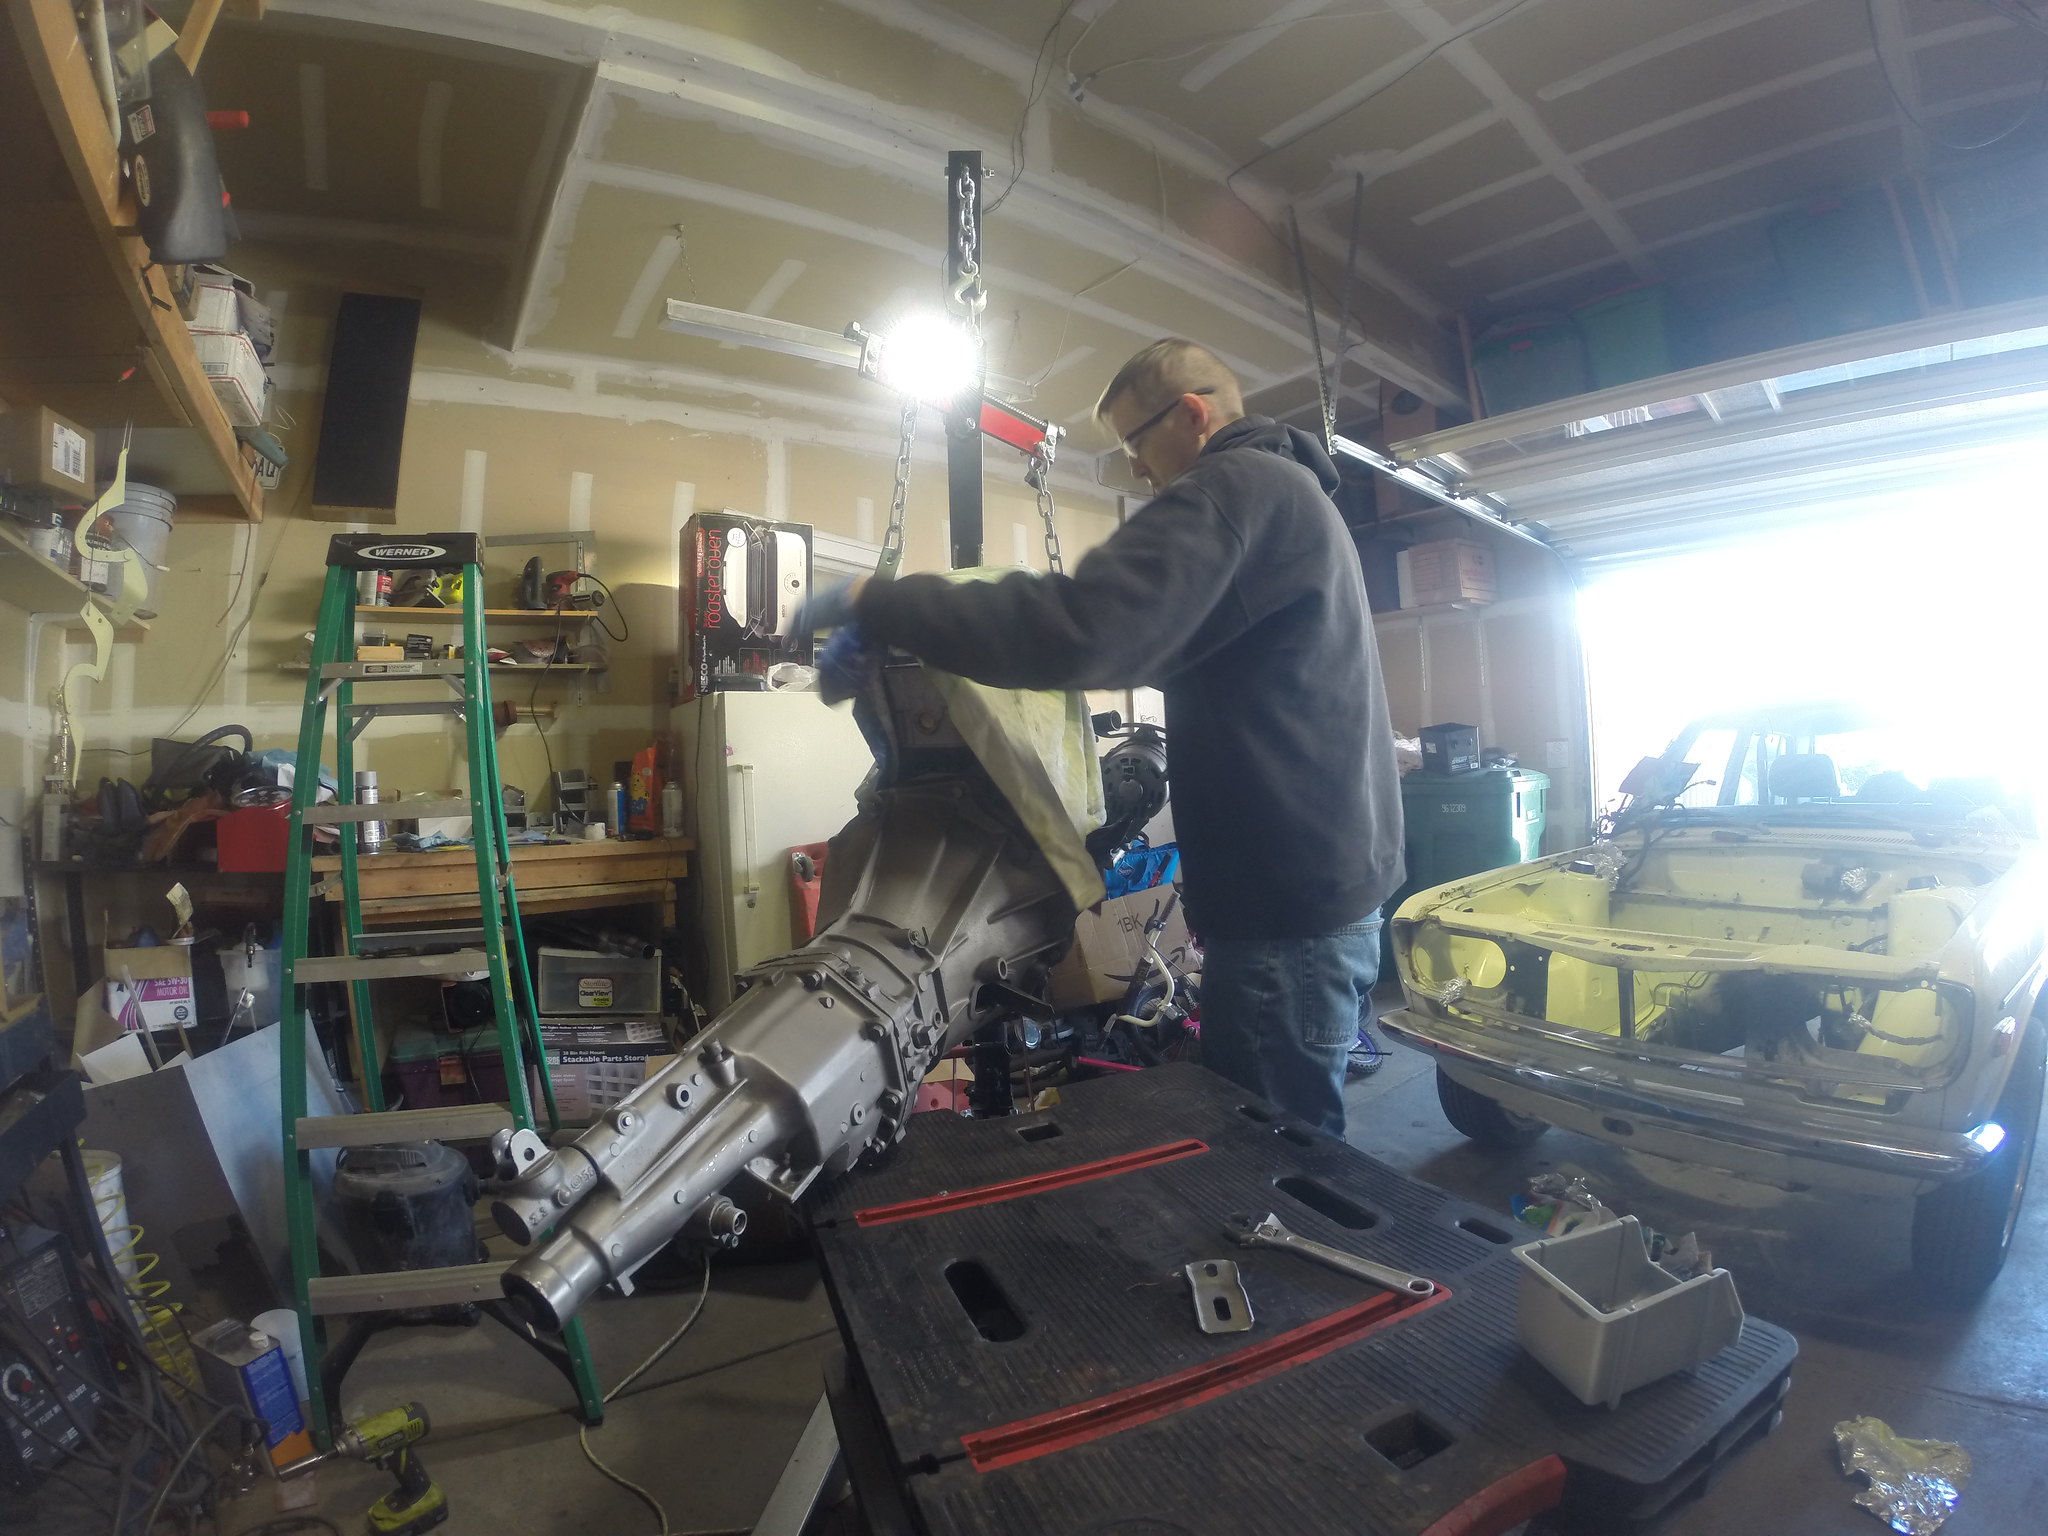
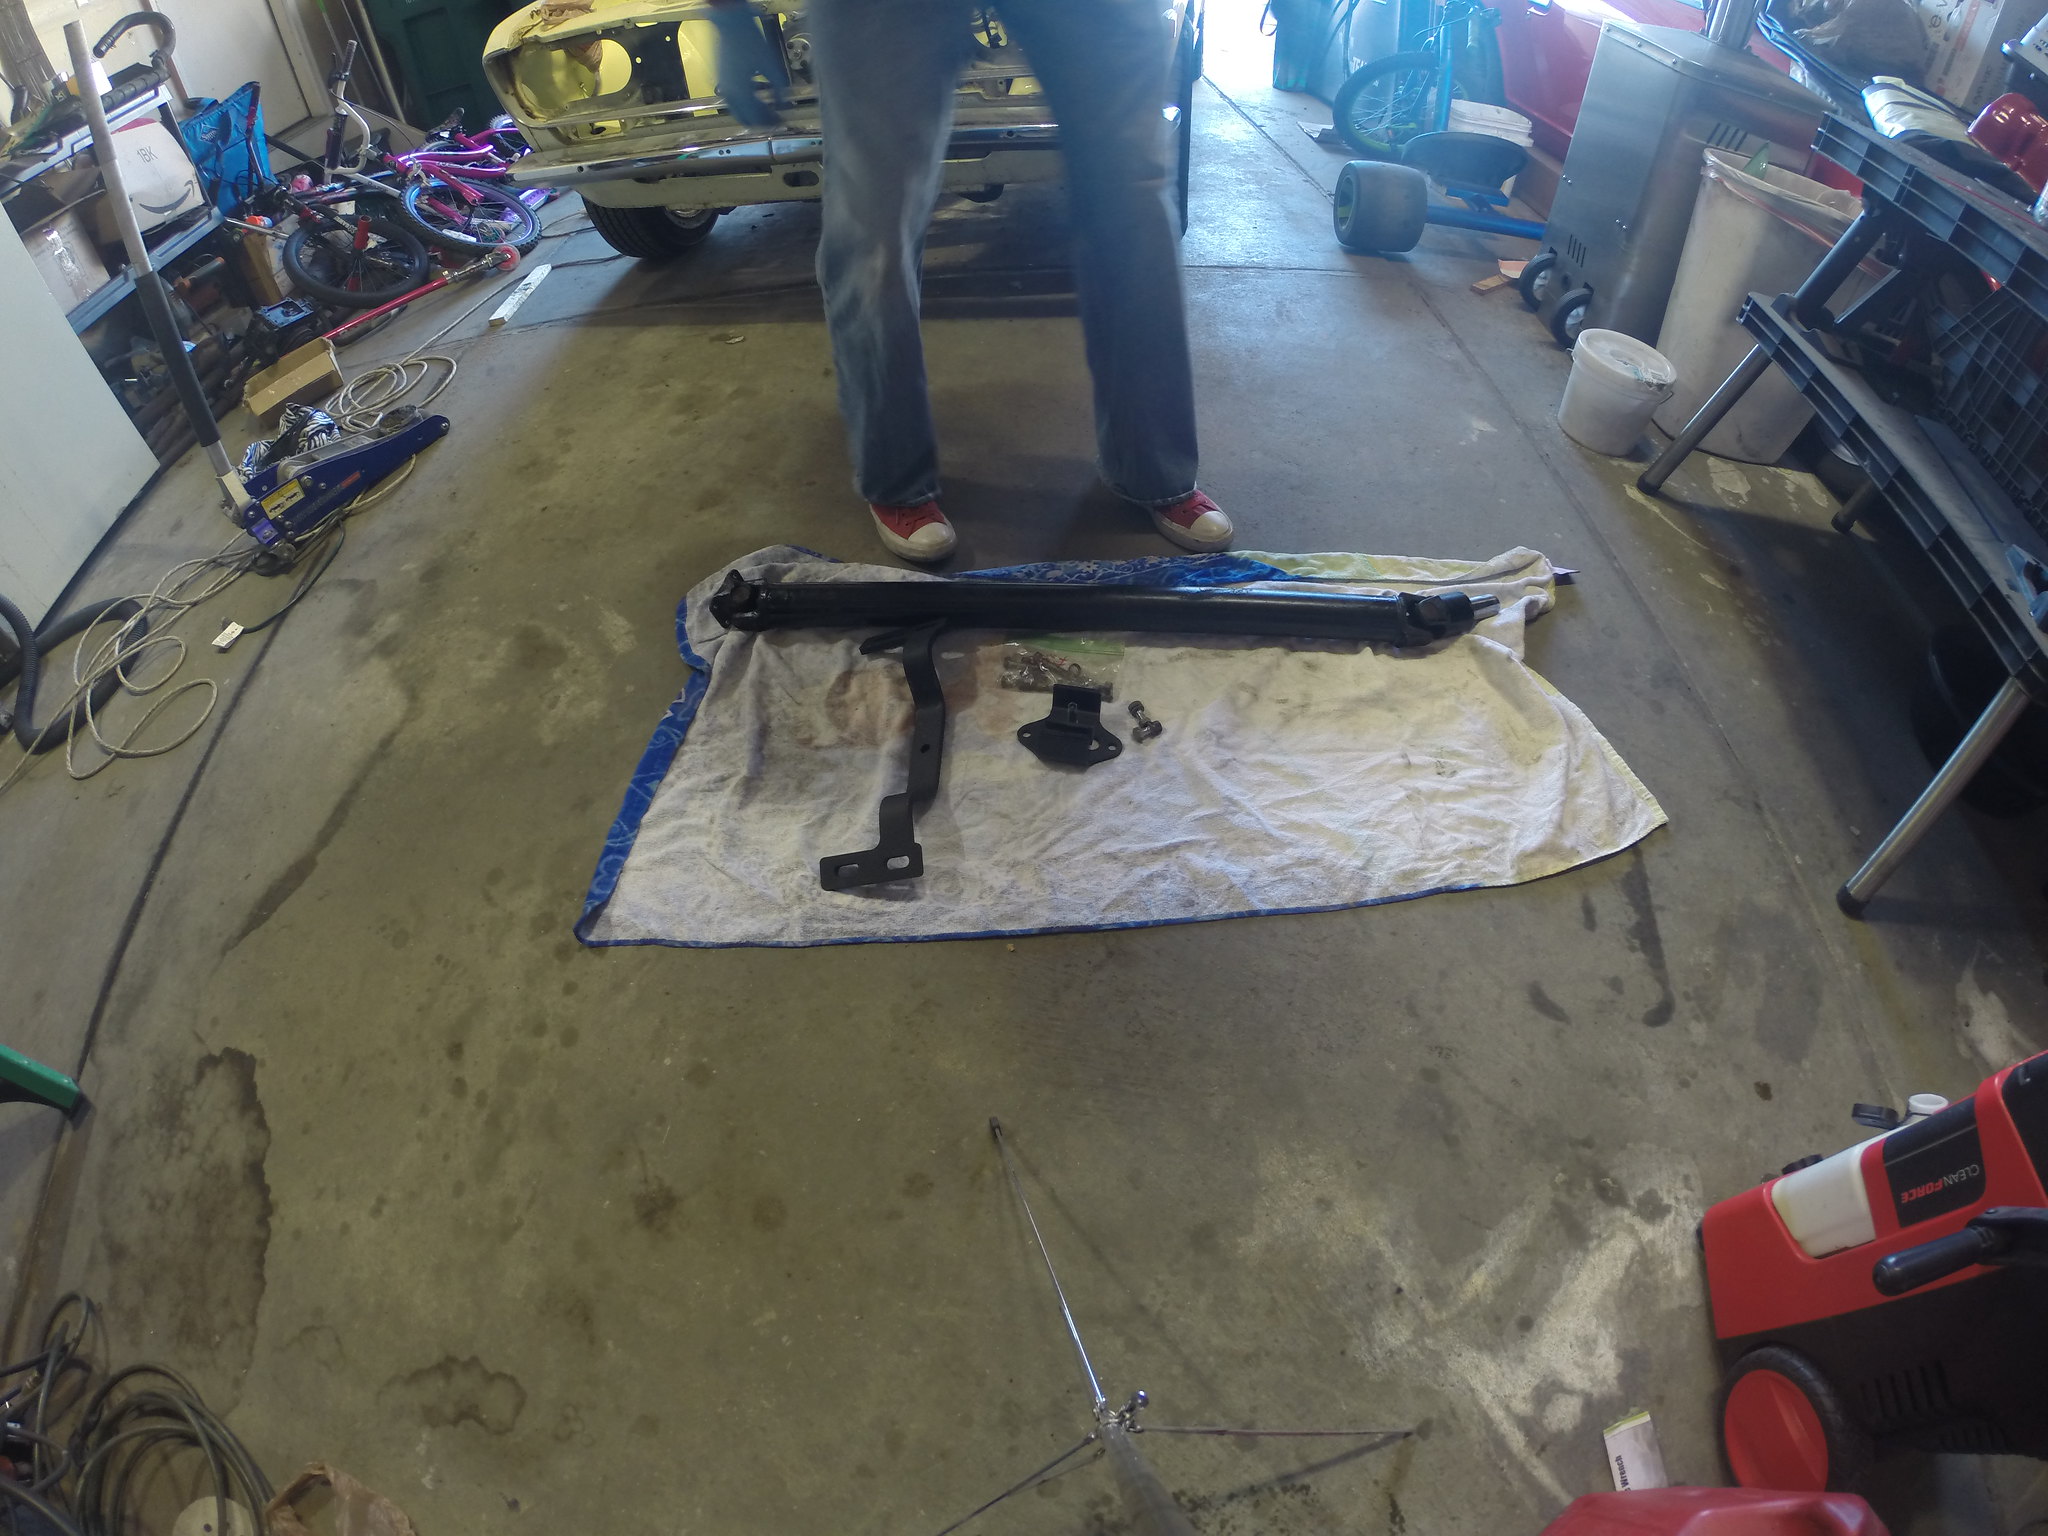
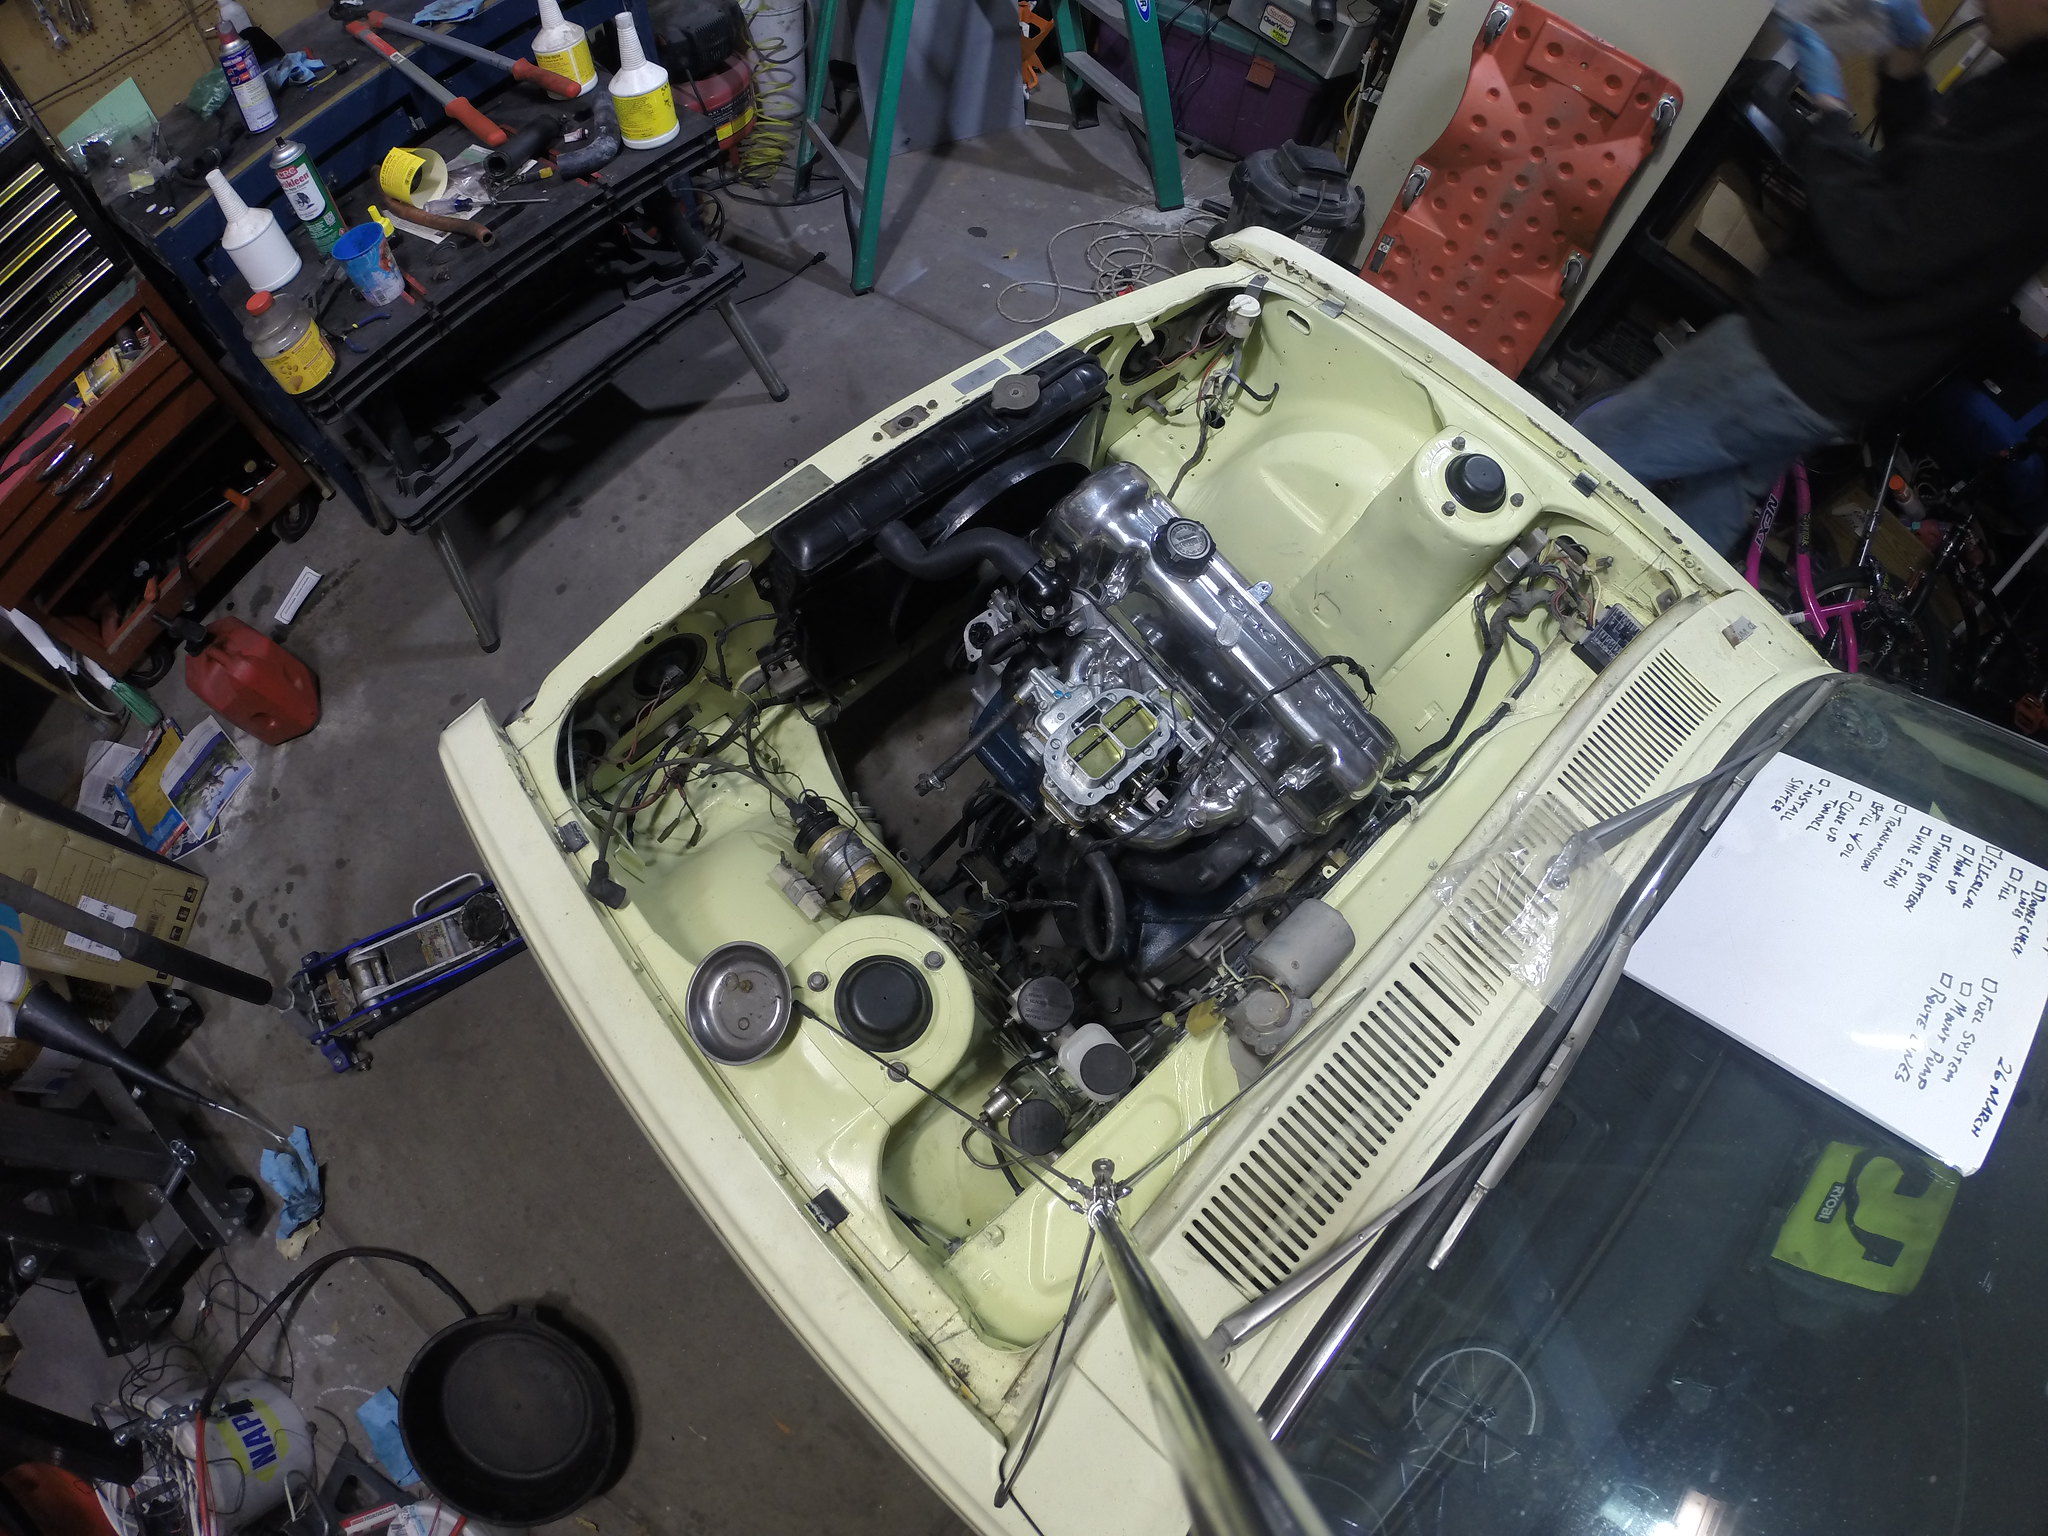
I have not been idle, but a month long trip overseas definitely puts a damper on working on the car. To recap I have swapped the engine, added a 5 speed, lightened flywheel, electric fans, battery relocated to the trunk. These are all things I have accomplished since picking up the car.

Some things that have happened:

  • Radio stopped working

  • Car stopped idling correctly (fixed 25 May)

  • Huge gasoline smell from trunk (fixing today)

To Do (Daily):

  1. ☑ Replace Hose

  2. ☑ Drive

  3. See about fixing radio

1. Done it was as simple as taking the old part off (and it was definitely bad), cutting the new hose to length, and reinstalling with clamps

  • I had to remove the metal tube from the filler to the tank on the filler side

  • I had to remove only three hose clamps

    • I had to replace 2 of the original nissan hose clamps as they didn’t fit over the new hose (new hose is thicker)

  • Finished before 1830


-------------------------------------------------------------------------------------------------------------

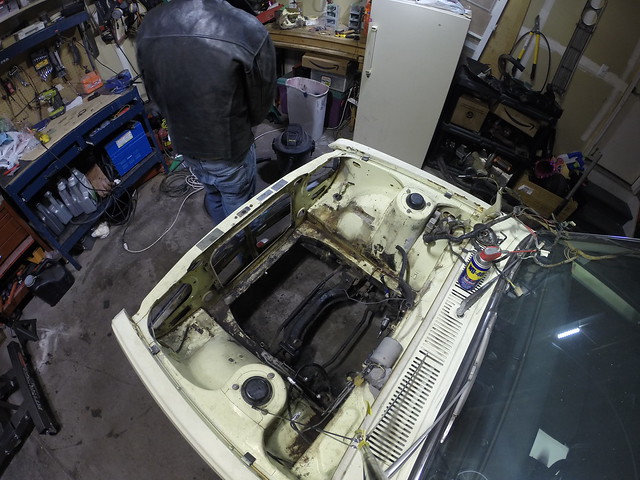
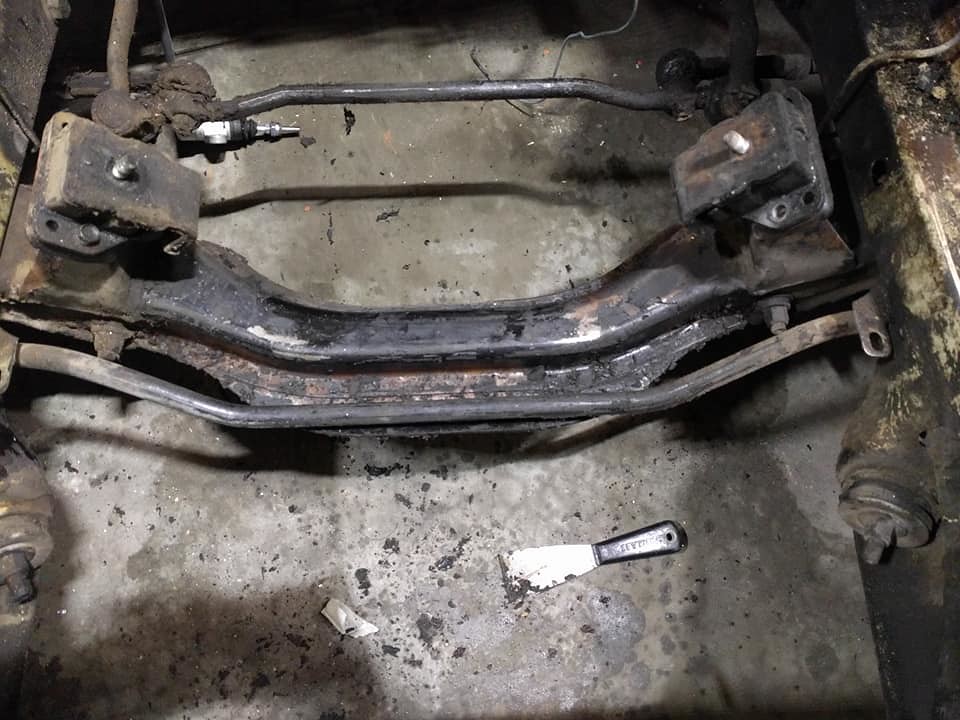
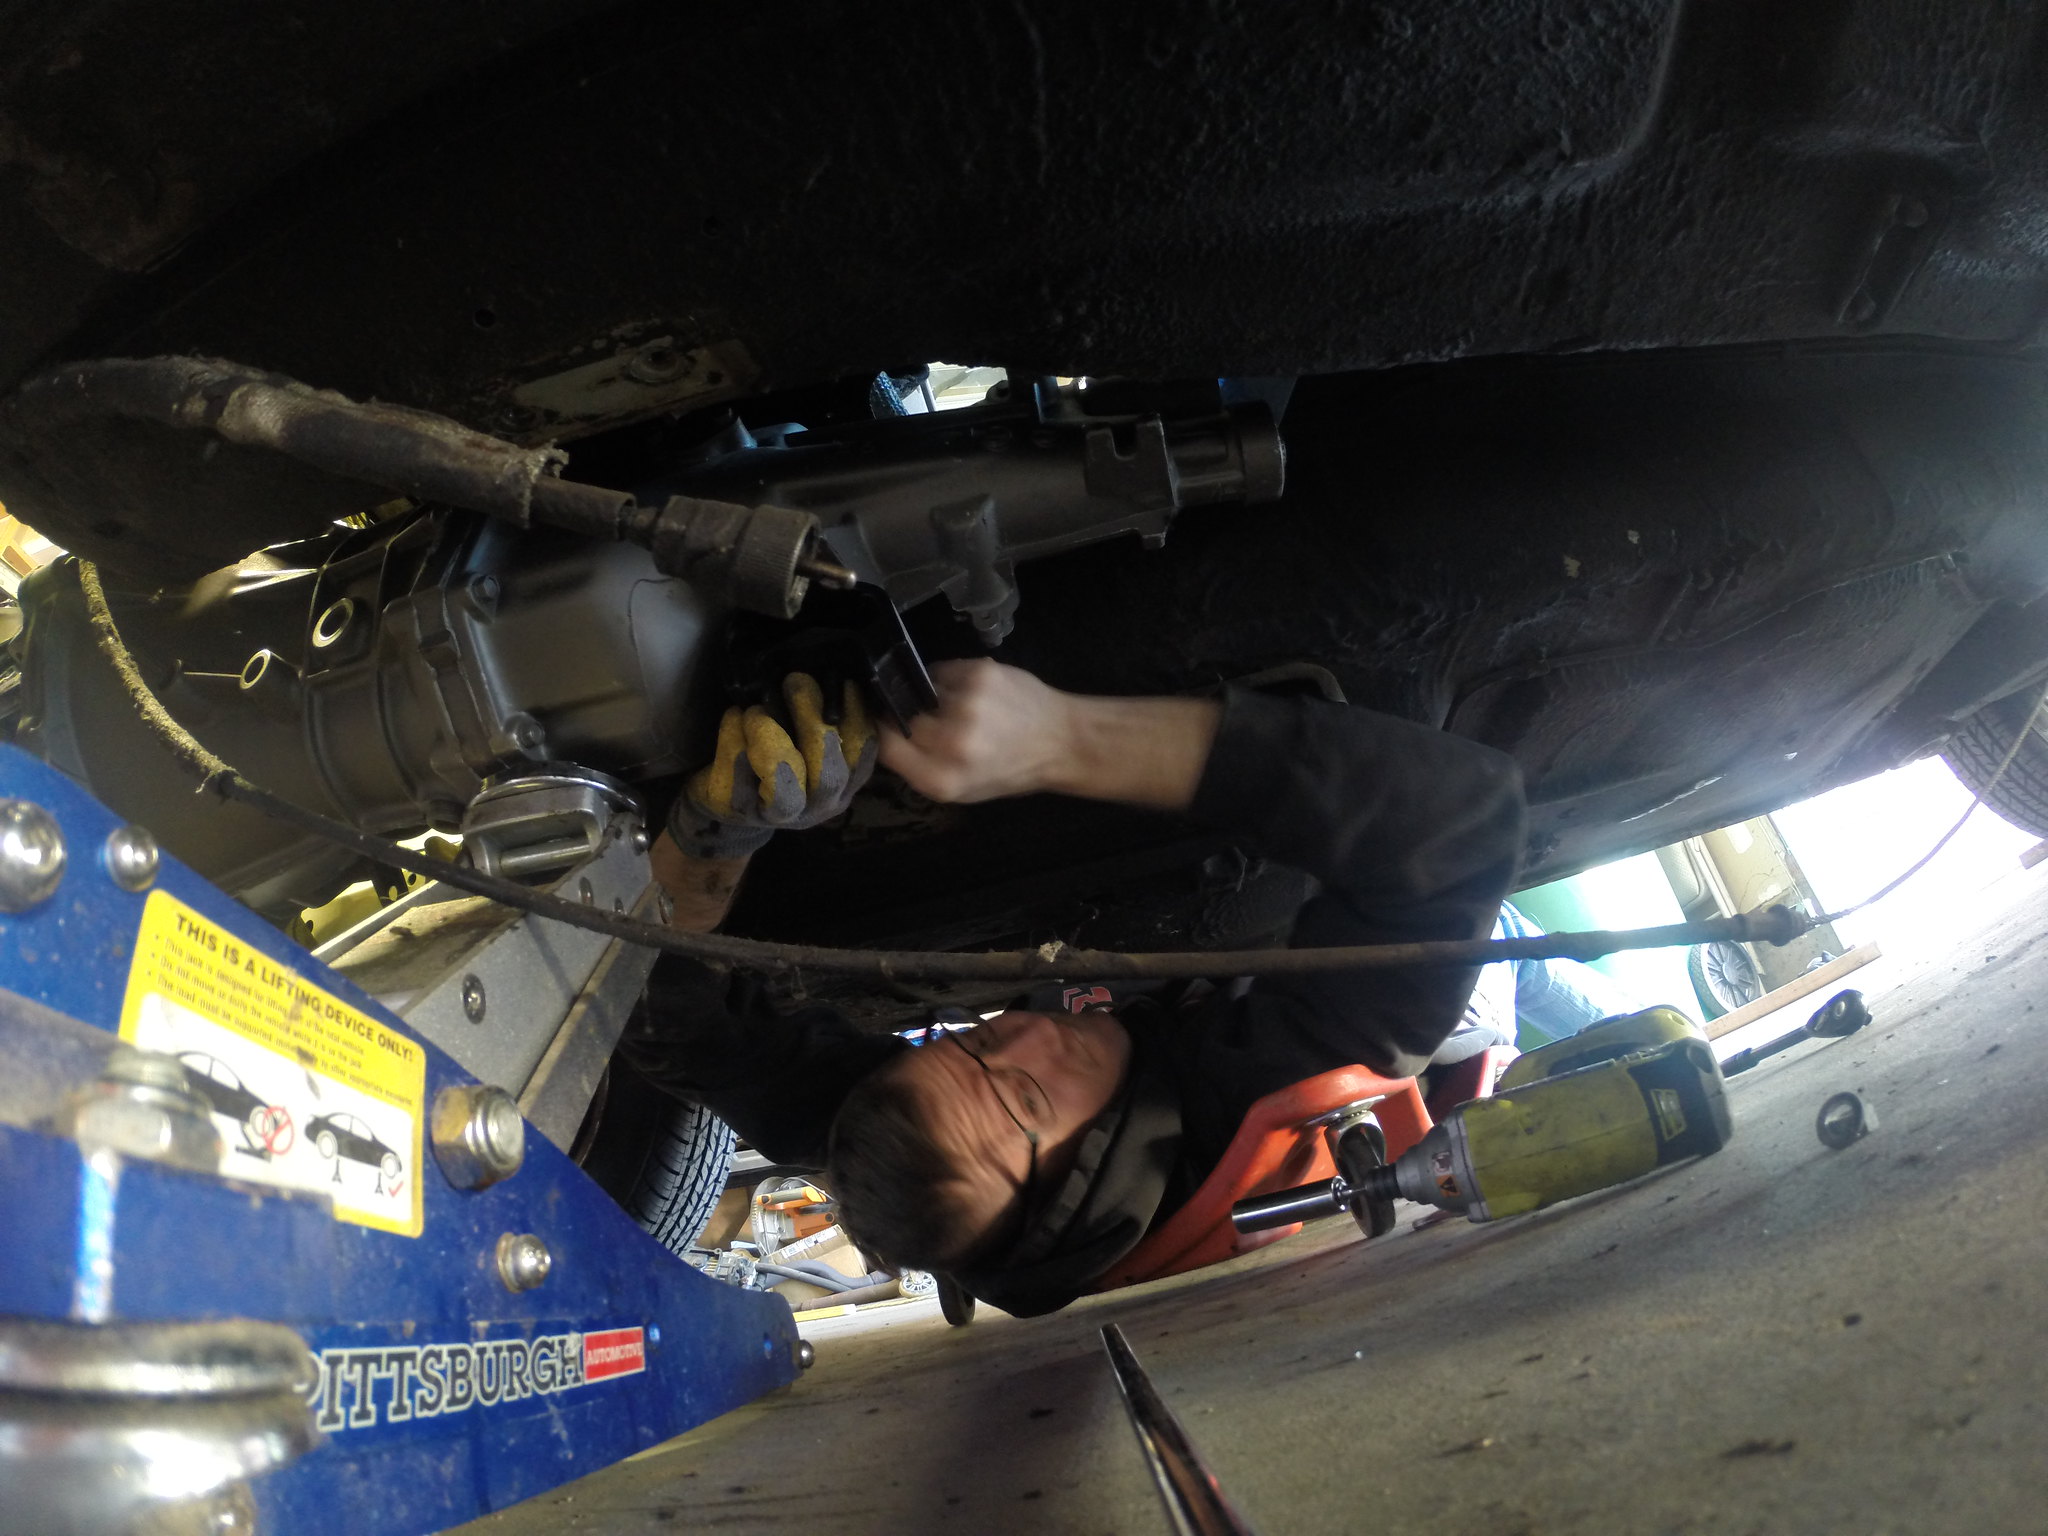
Project Log (26 Jul 18): Start Time: Not Recorded End Time: Not Recorded

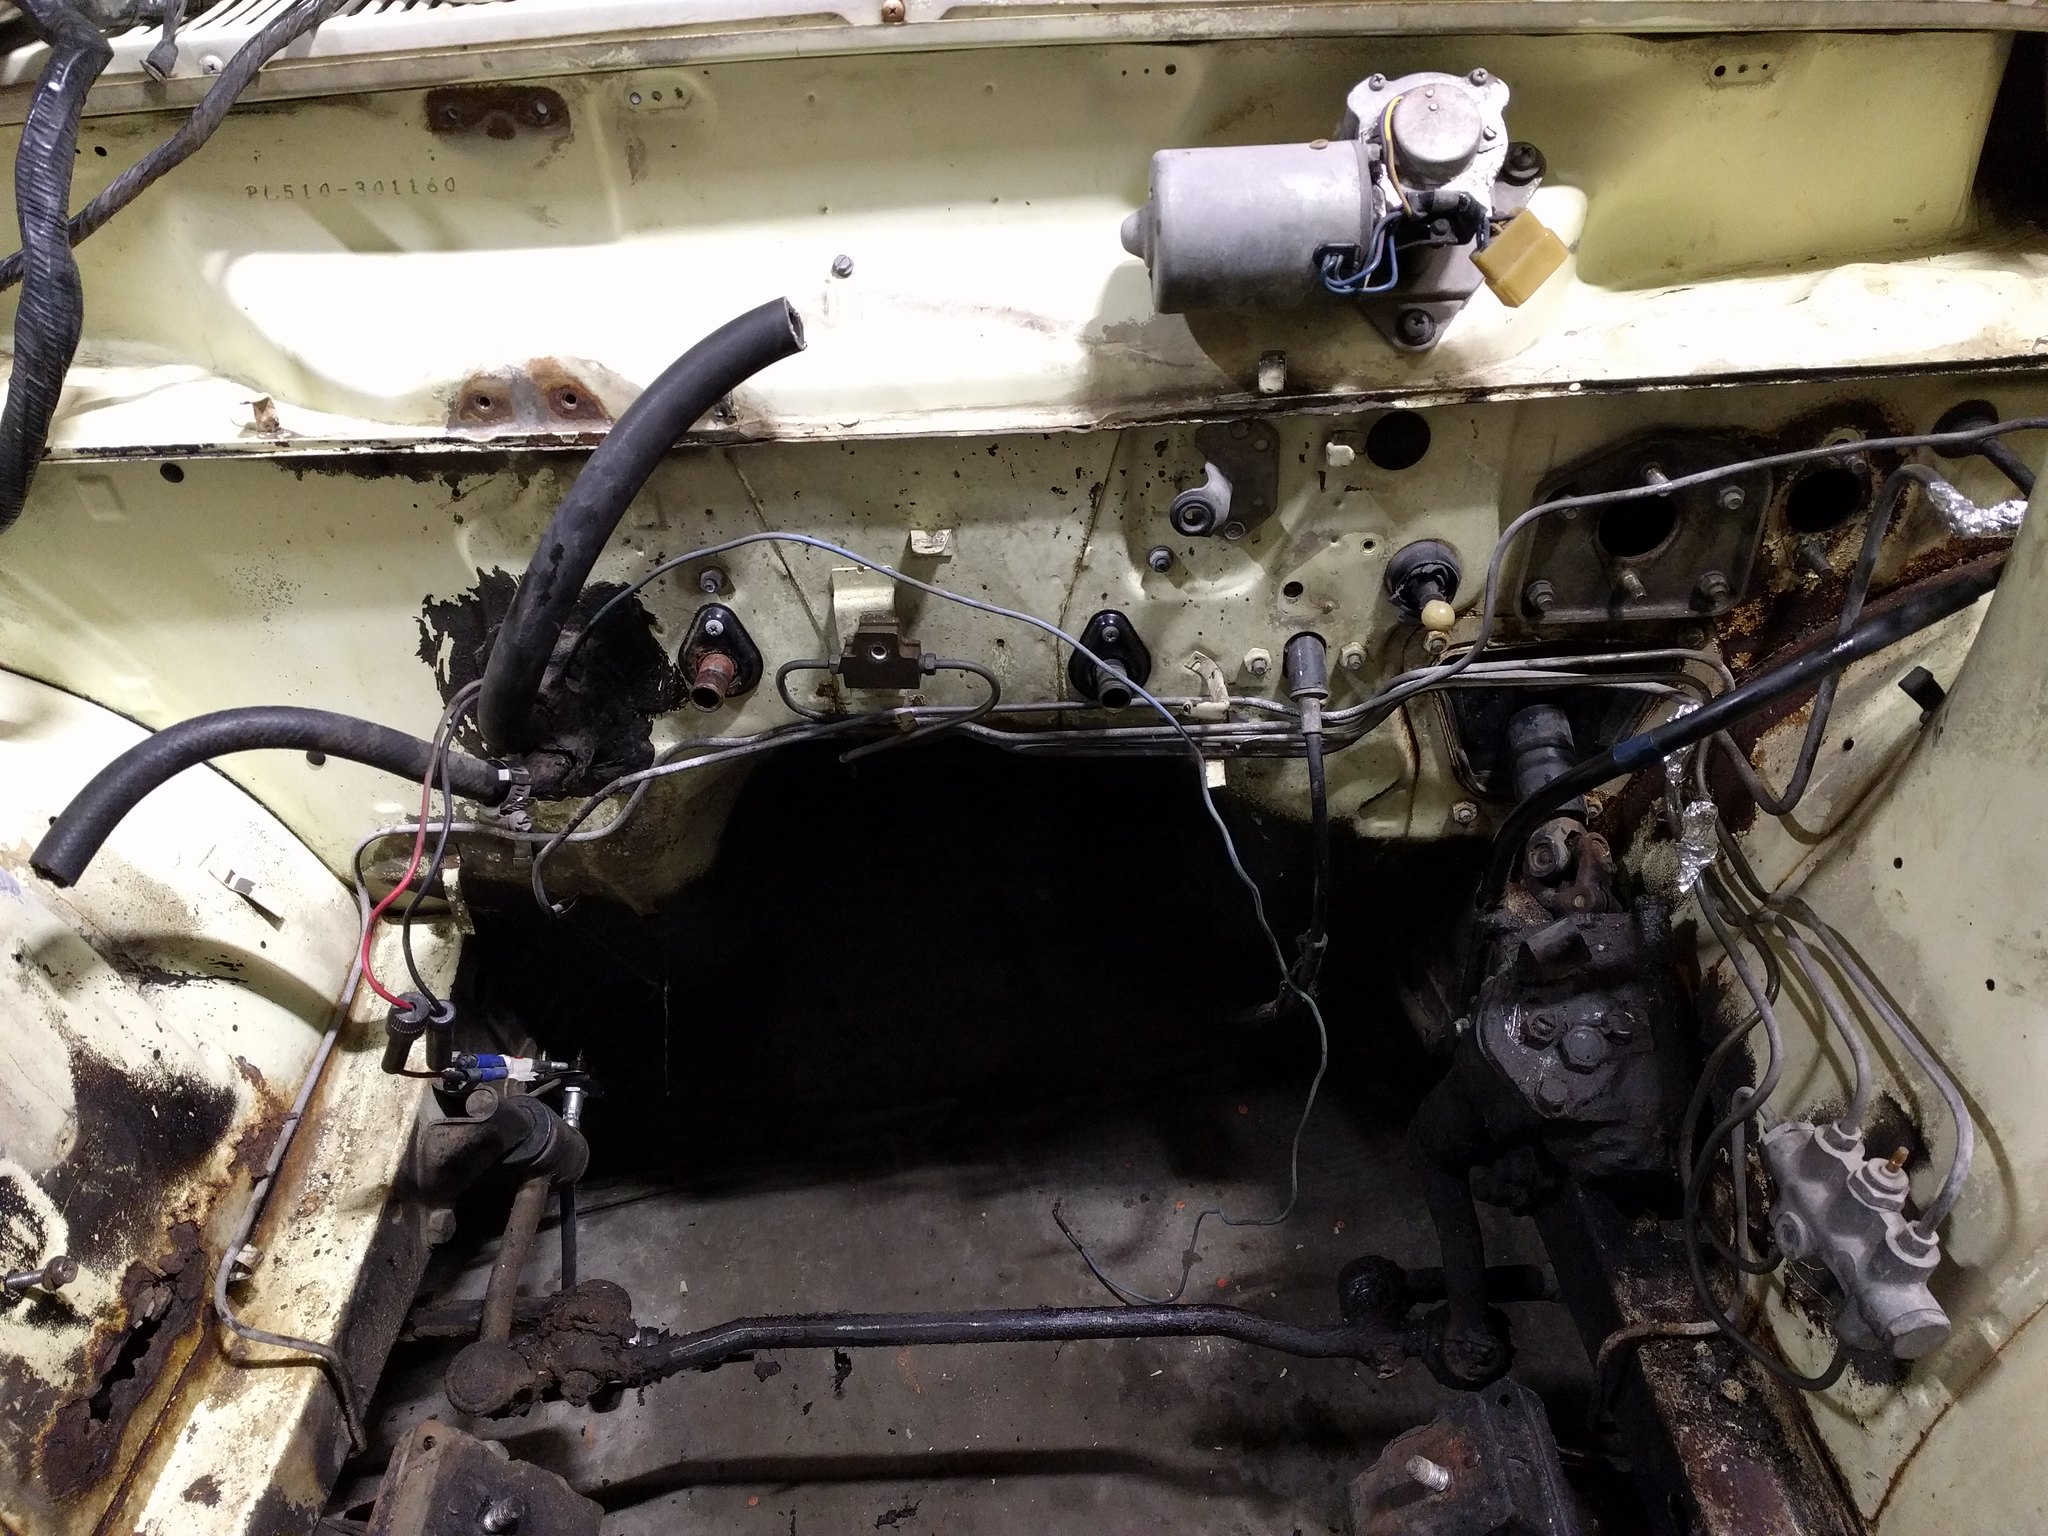
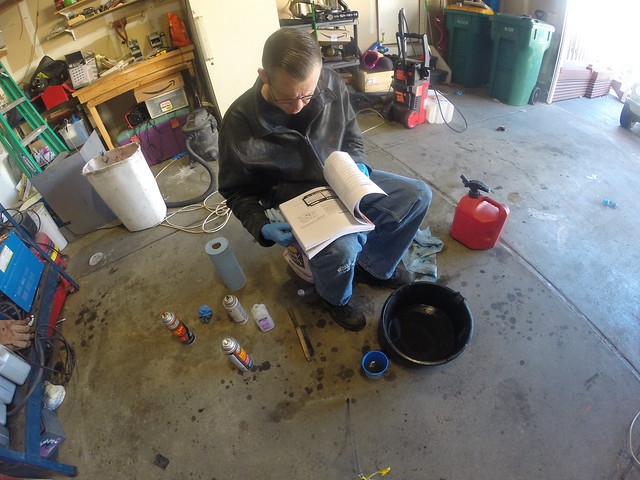
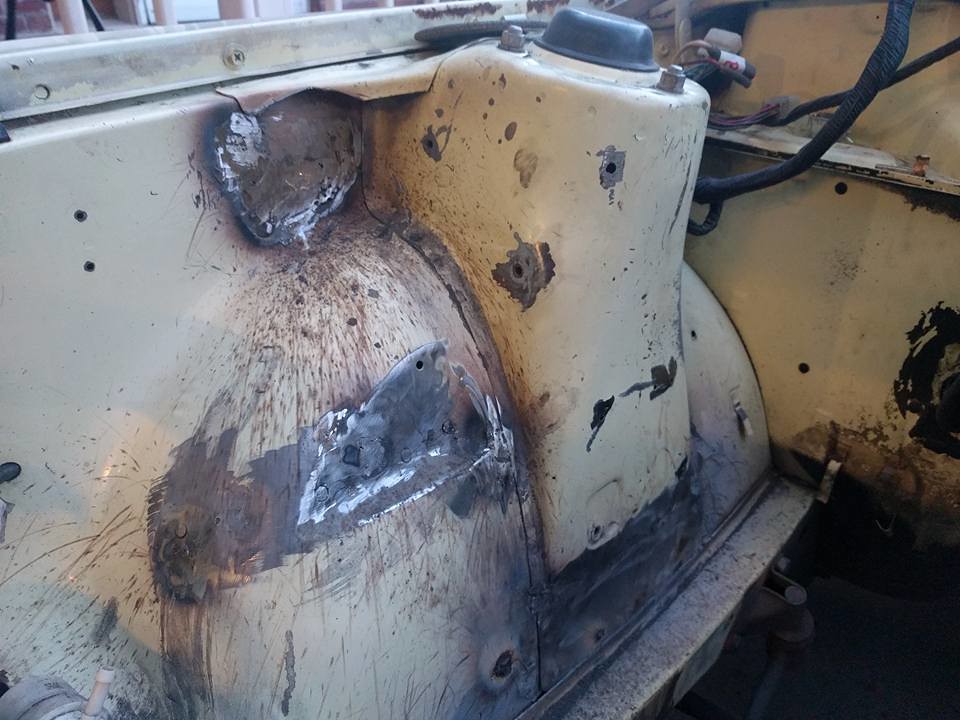
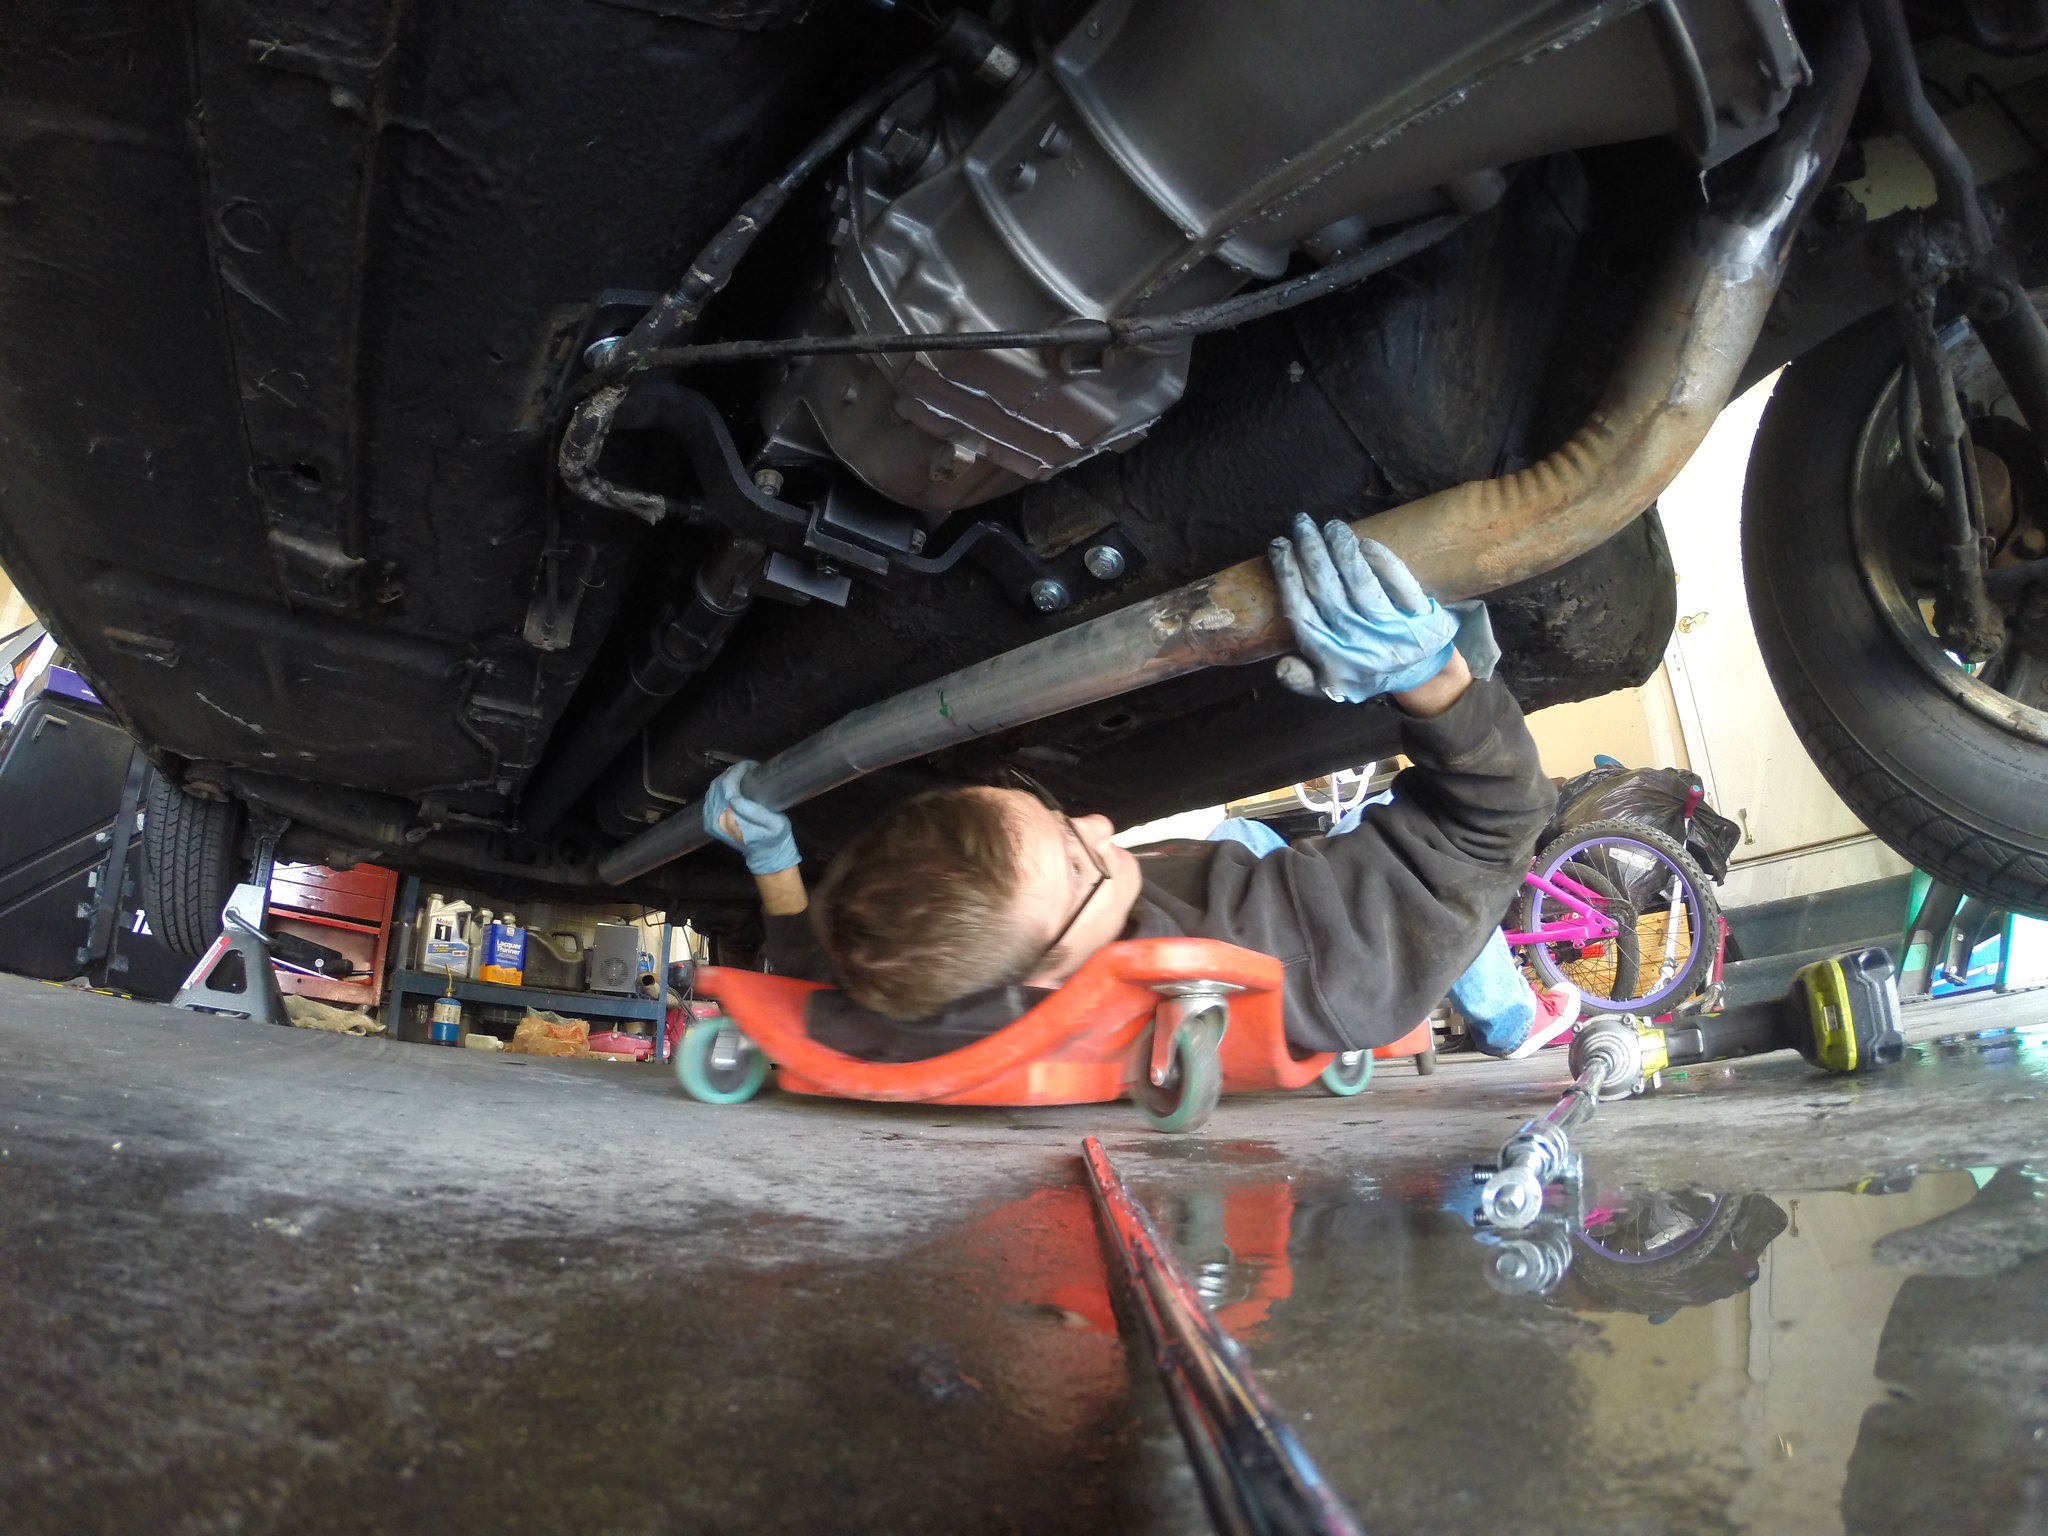
The goal of today is to fix the oil leak coming from the transmission.

To Do (Daily):

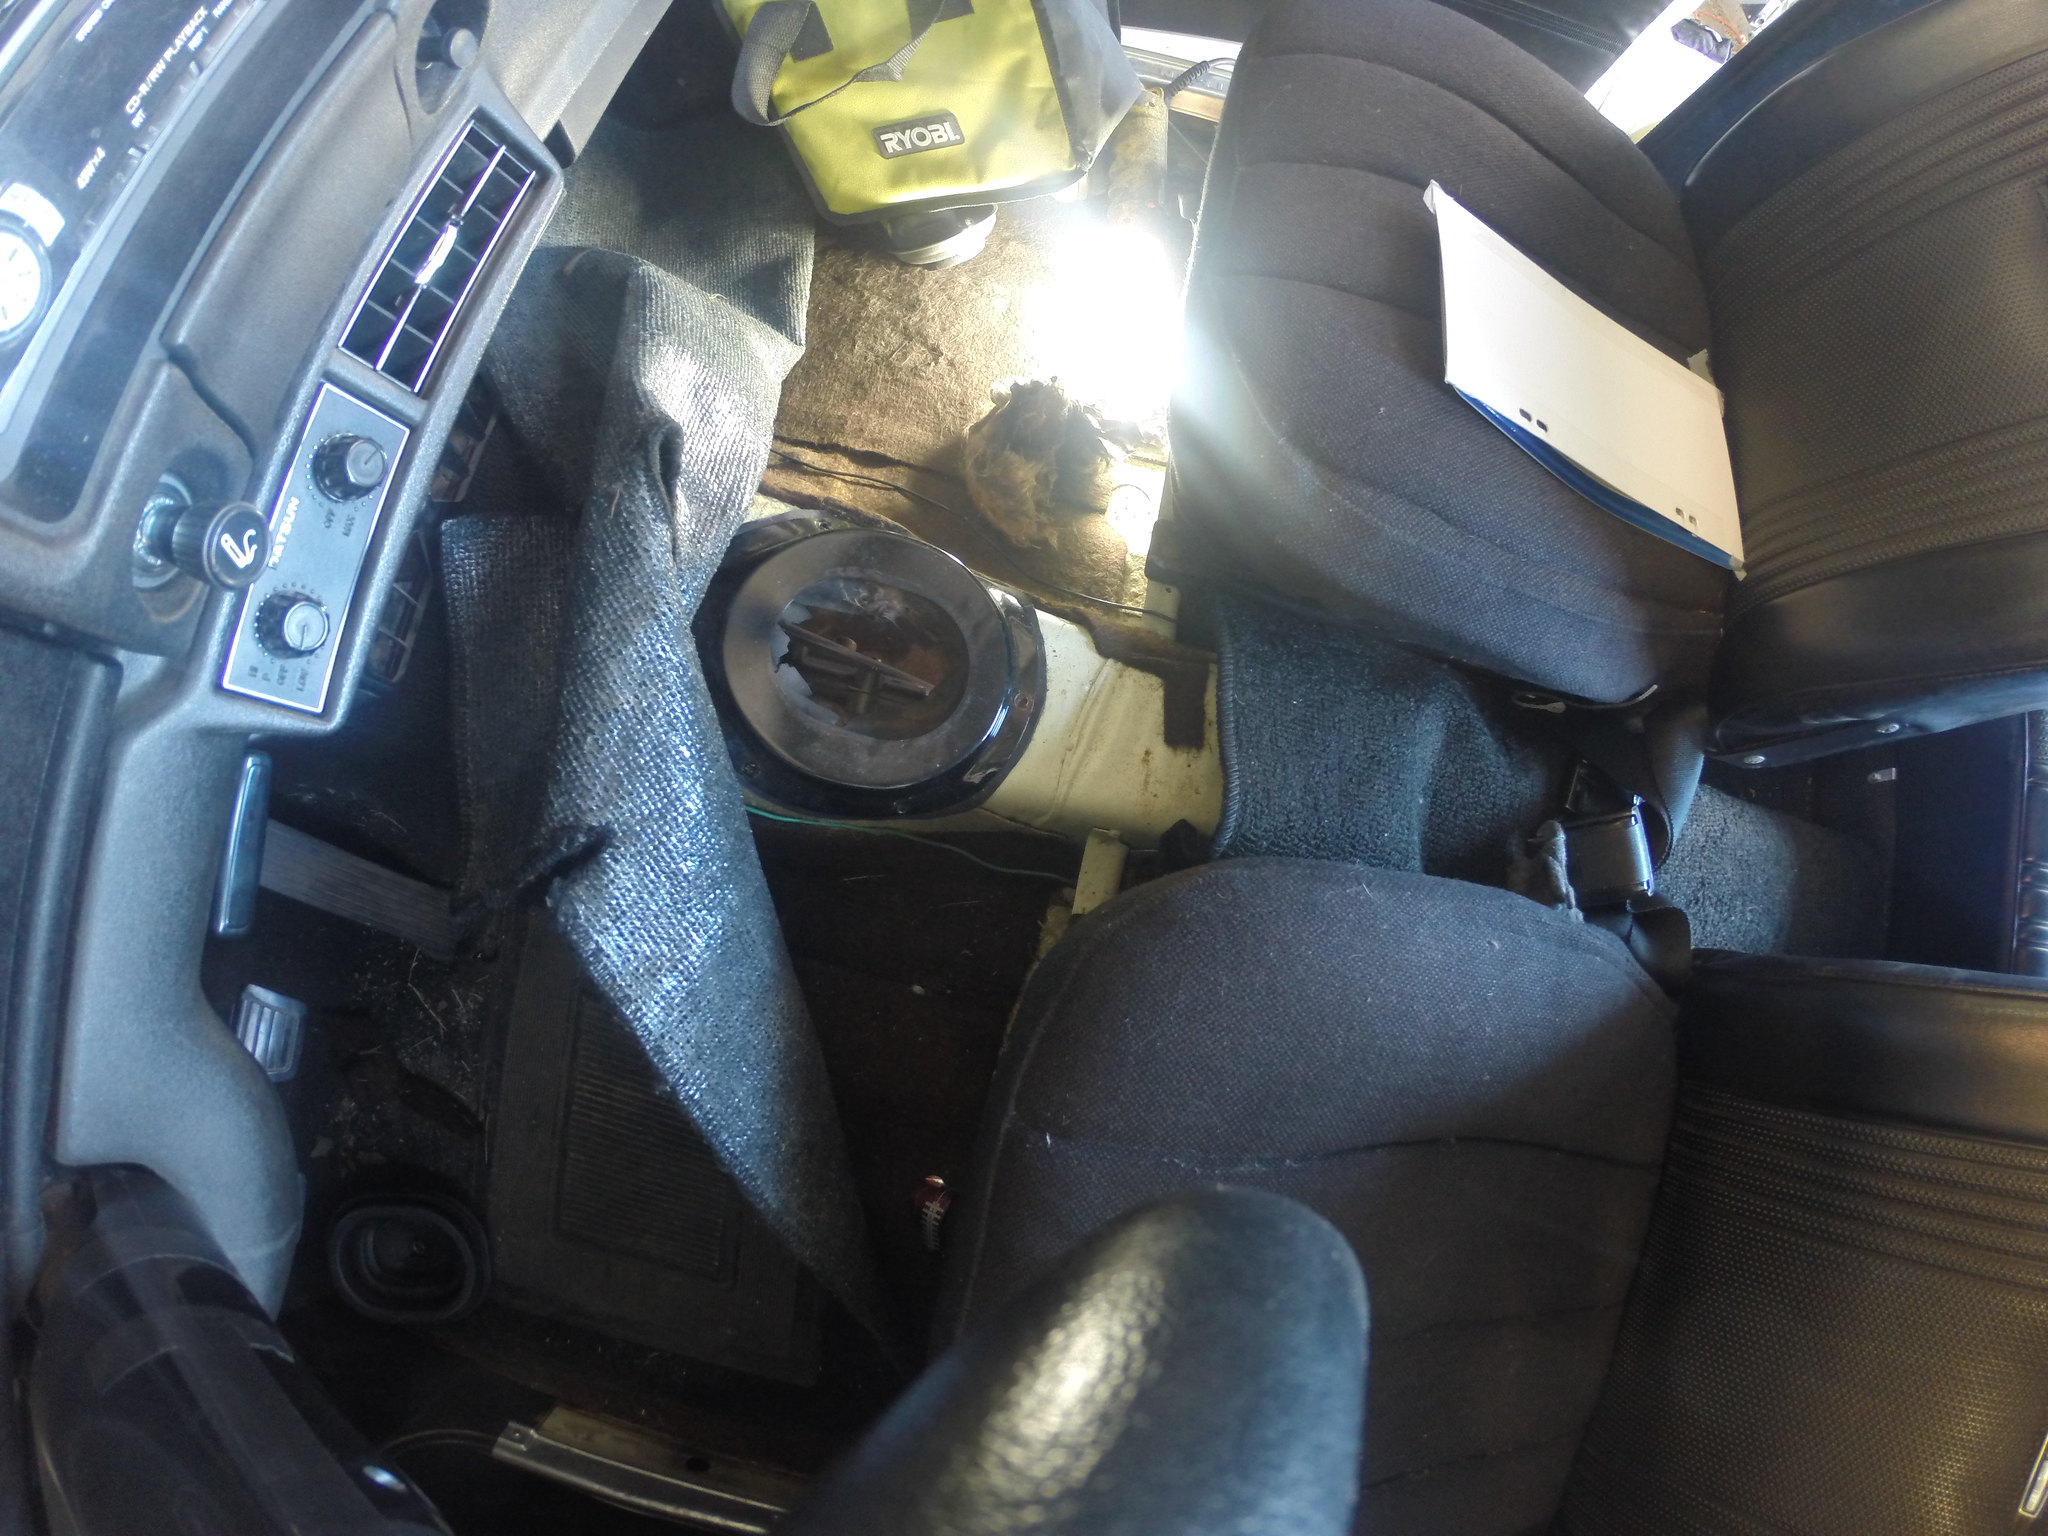
  1. ☑ Remove the Speedo gear

  2. ☑ Replace the seals

  3. ☑ Reinstall

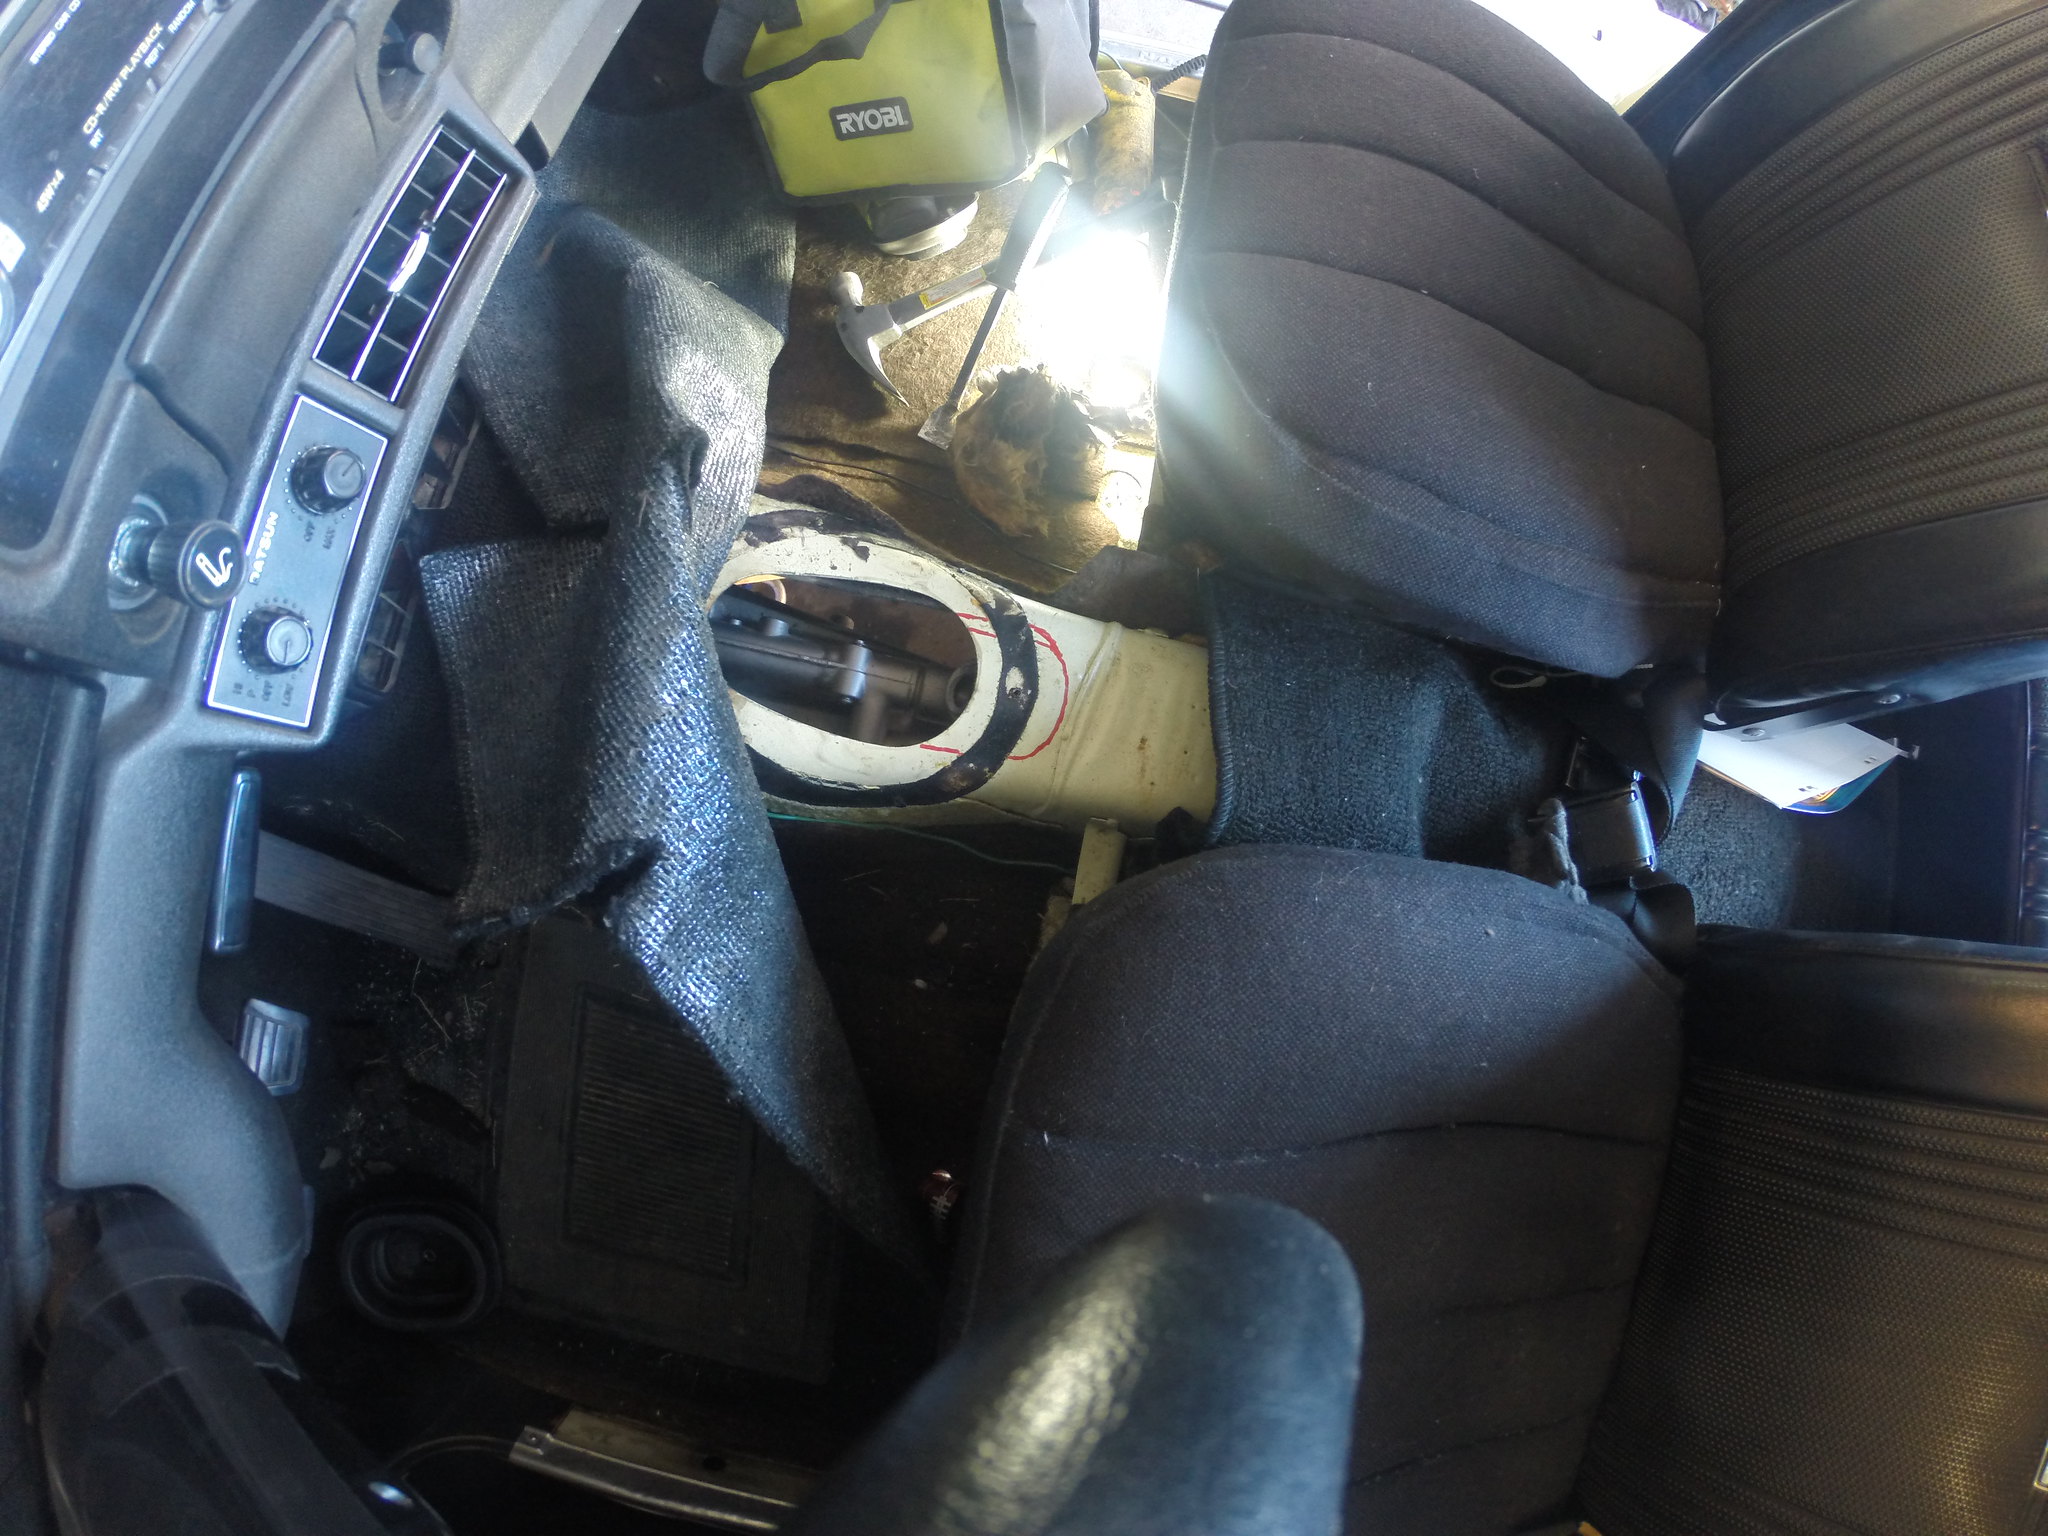
1. The speedo gear housing came out pretty easily. There is a small bolt holding the gear on, and the speedo cable itself attached to the housing

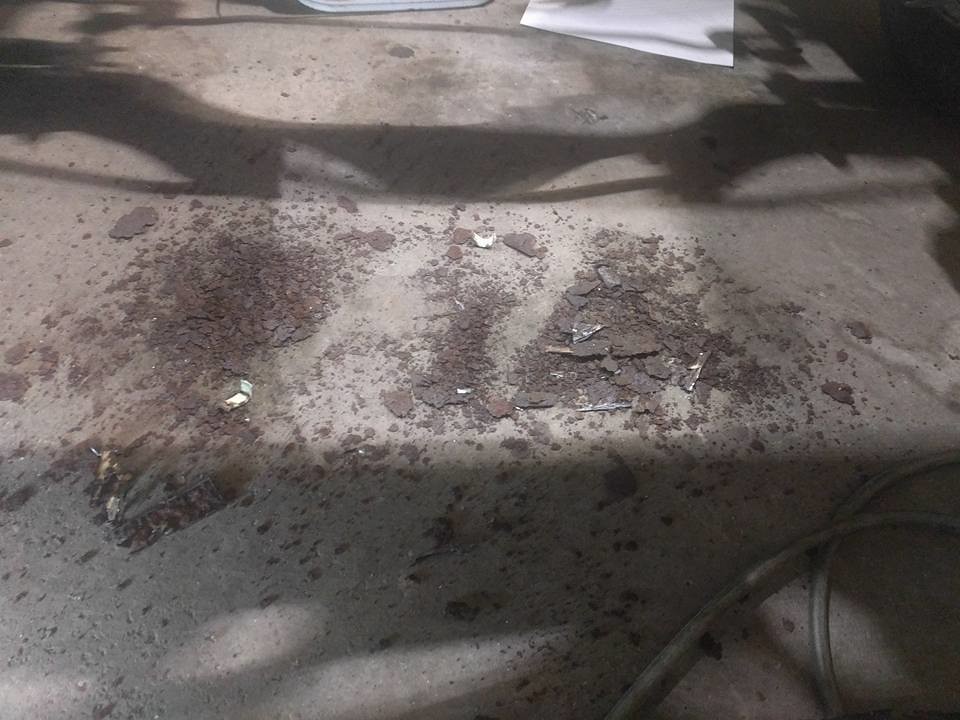
  • The leak has put a ton of oil up into the sleeve surrounding the speedo cable

    • I cleaned with with carb cleaner and brake cleaner spraying it into the sleeve up at the firewall, then using compressed air as well

    • Note you should have a rag at the other end to ensure that you don’t make a giant mess

  • The transmission was overfilled (by me) which meant that it immediately dumped a ton of oil out on my shoulder, pretty much soaking the upper part of my shirt. There is very little I like less than getting soaked with oil.

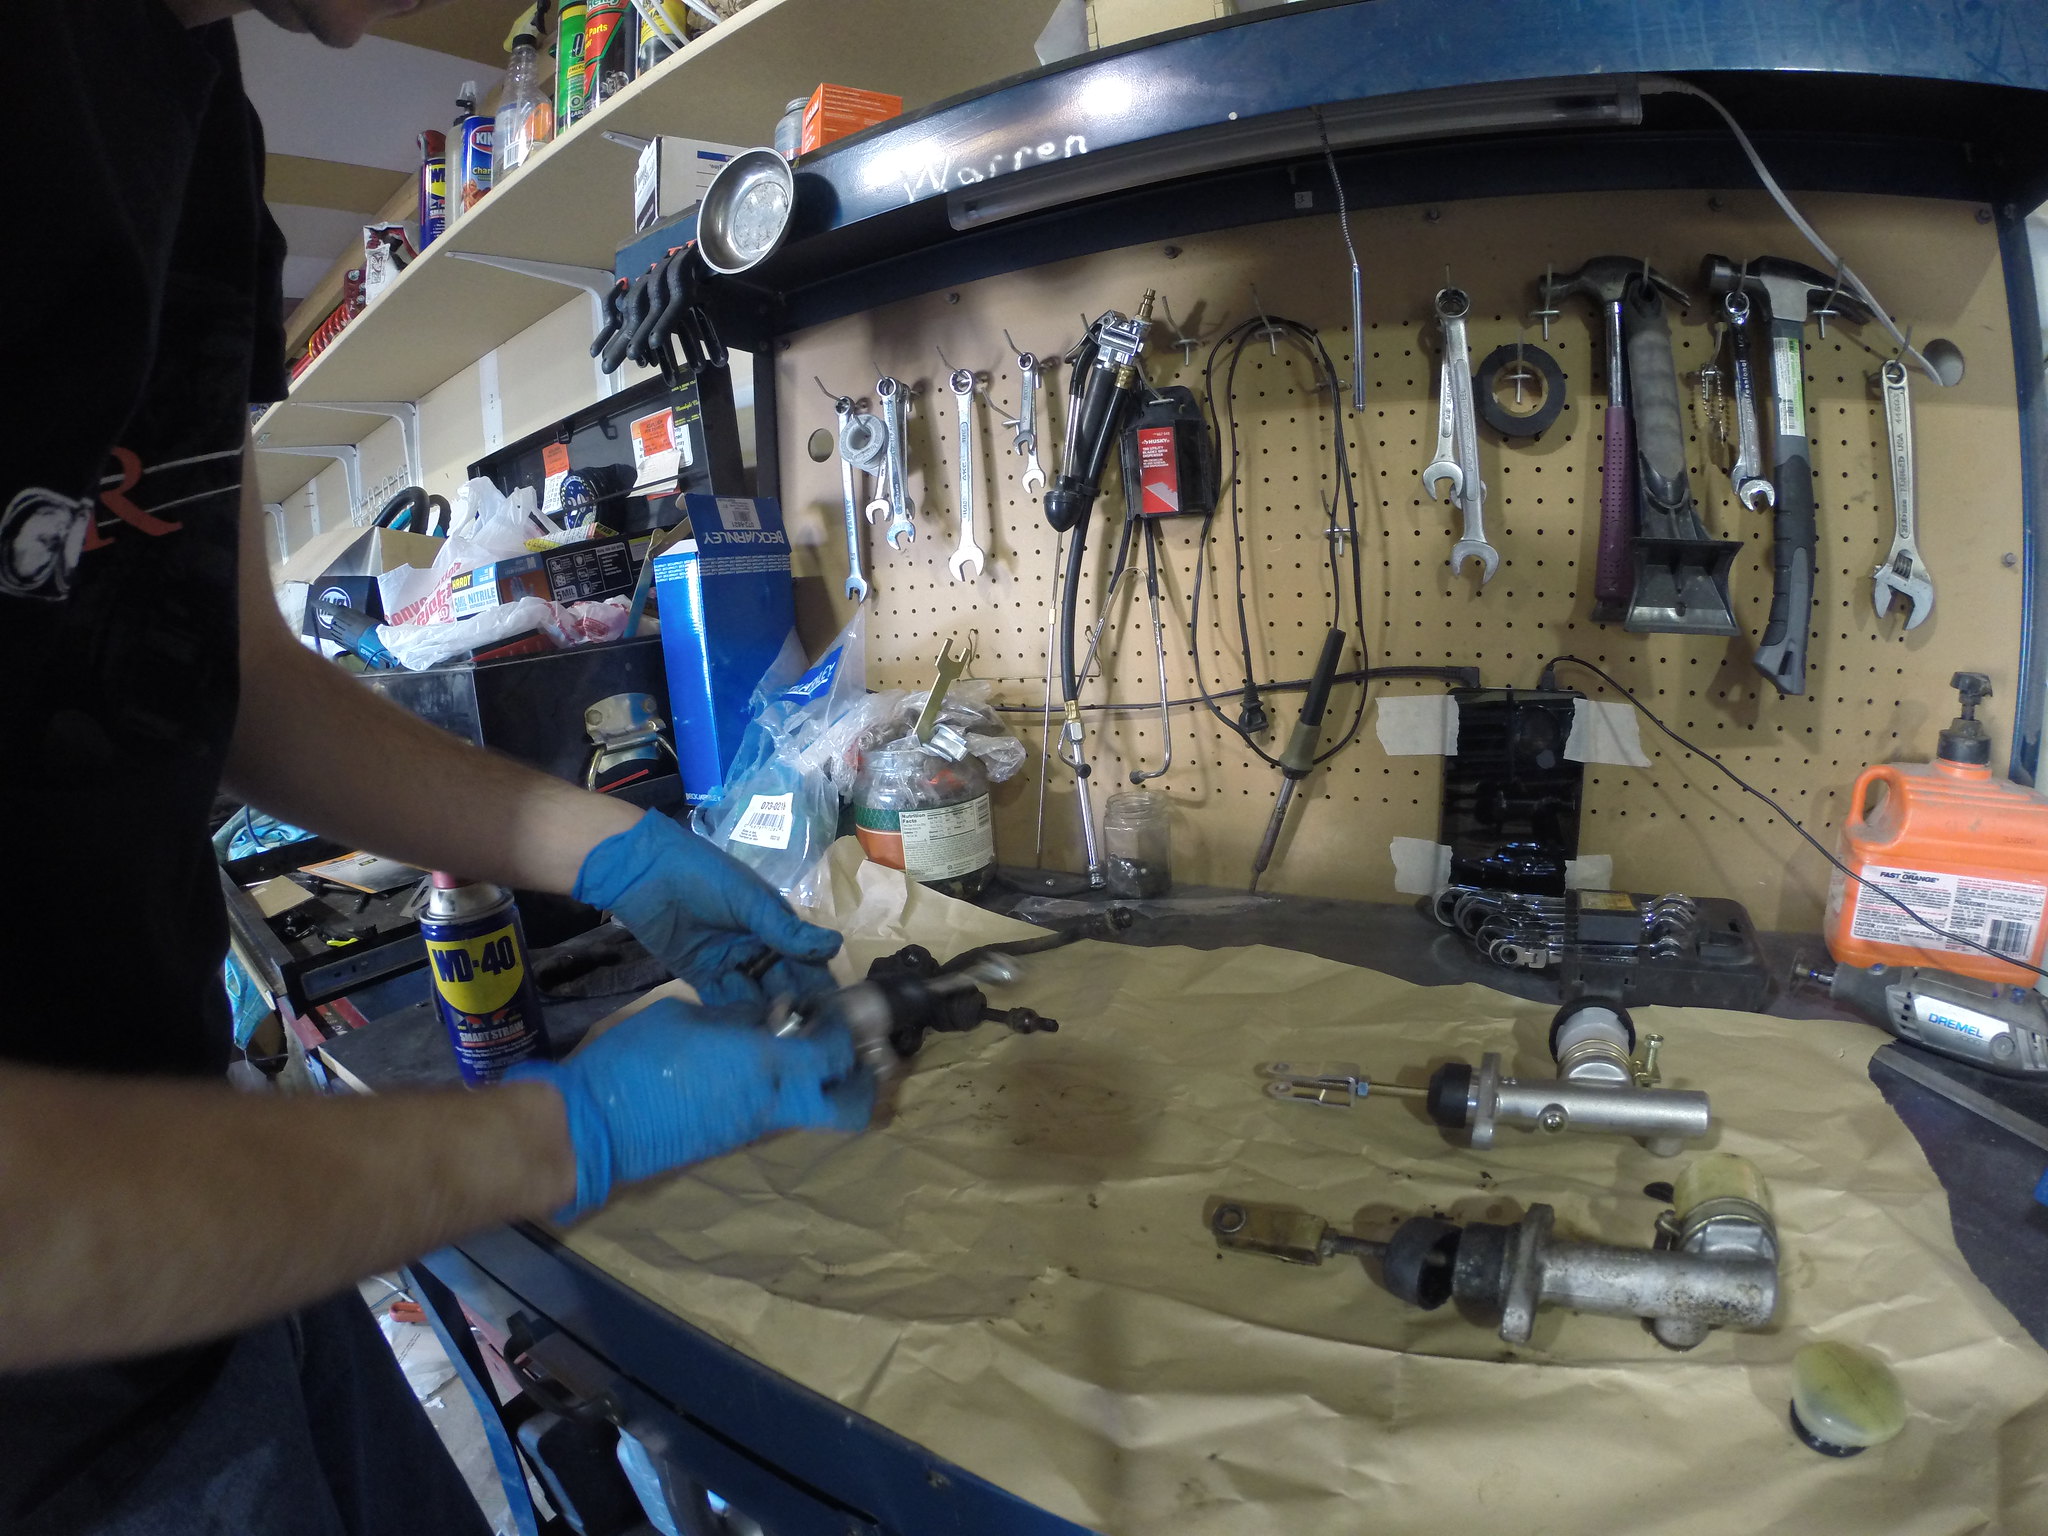
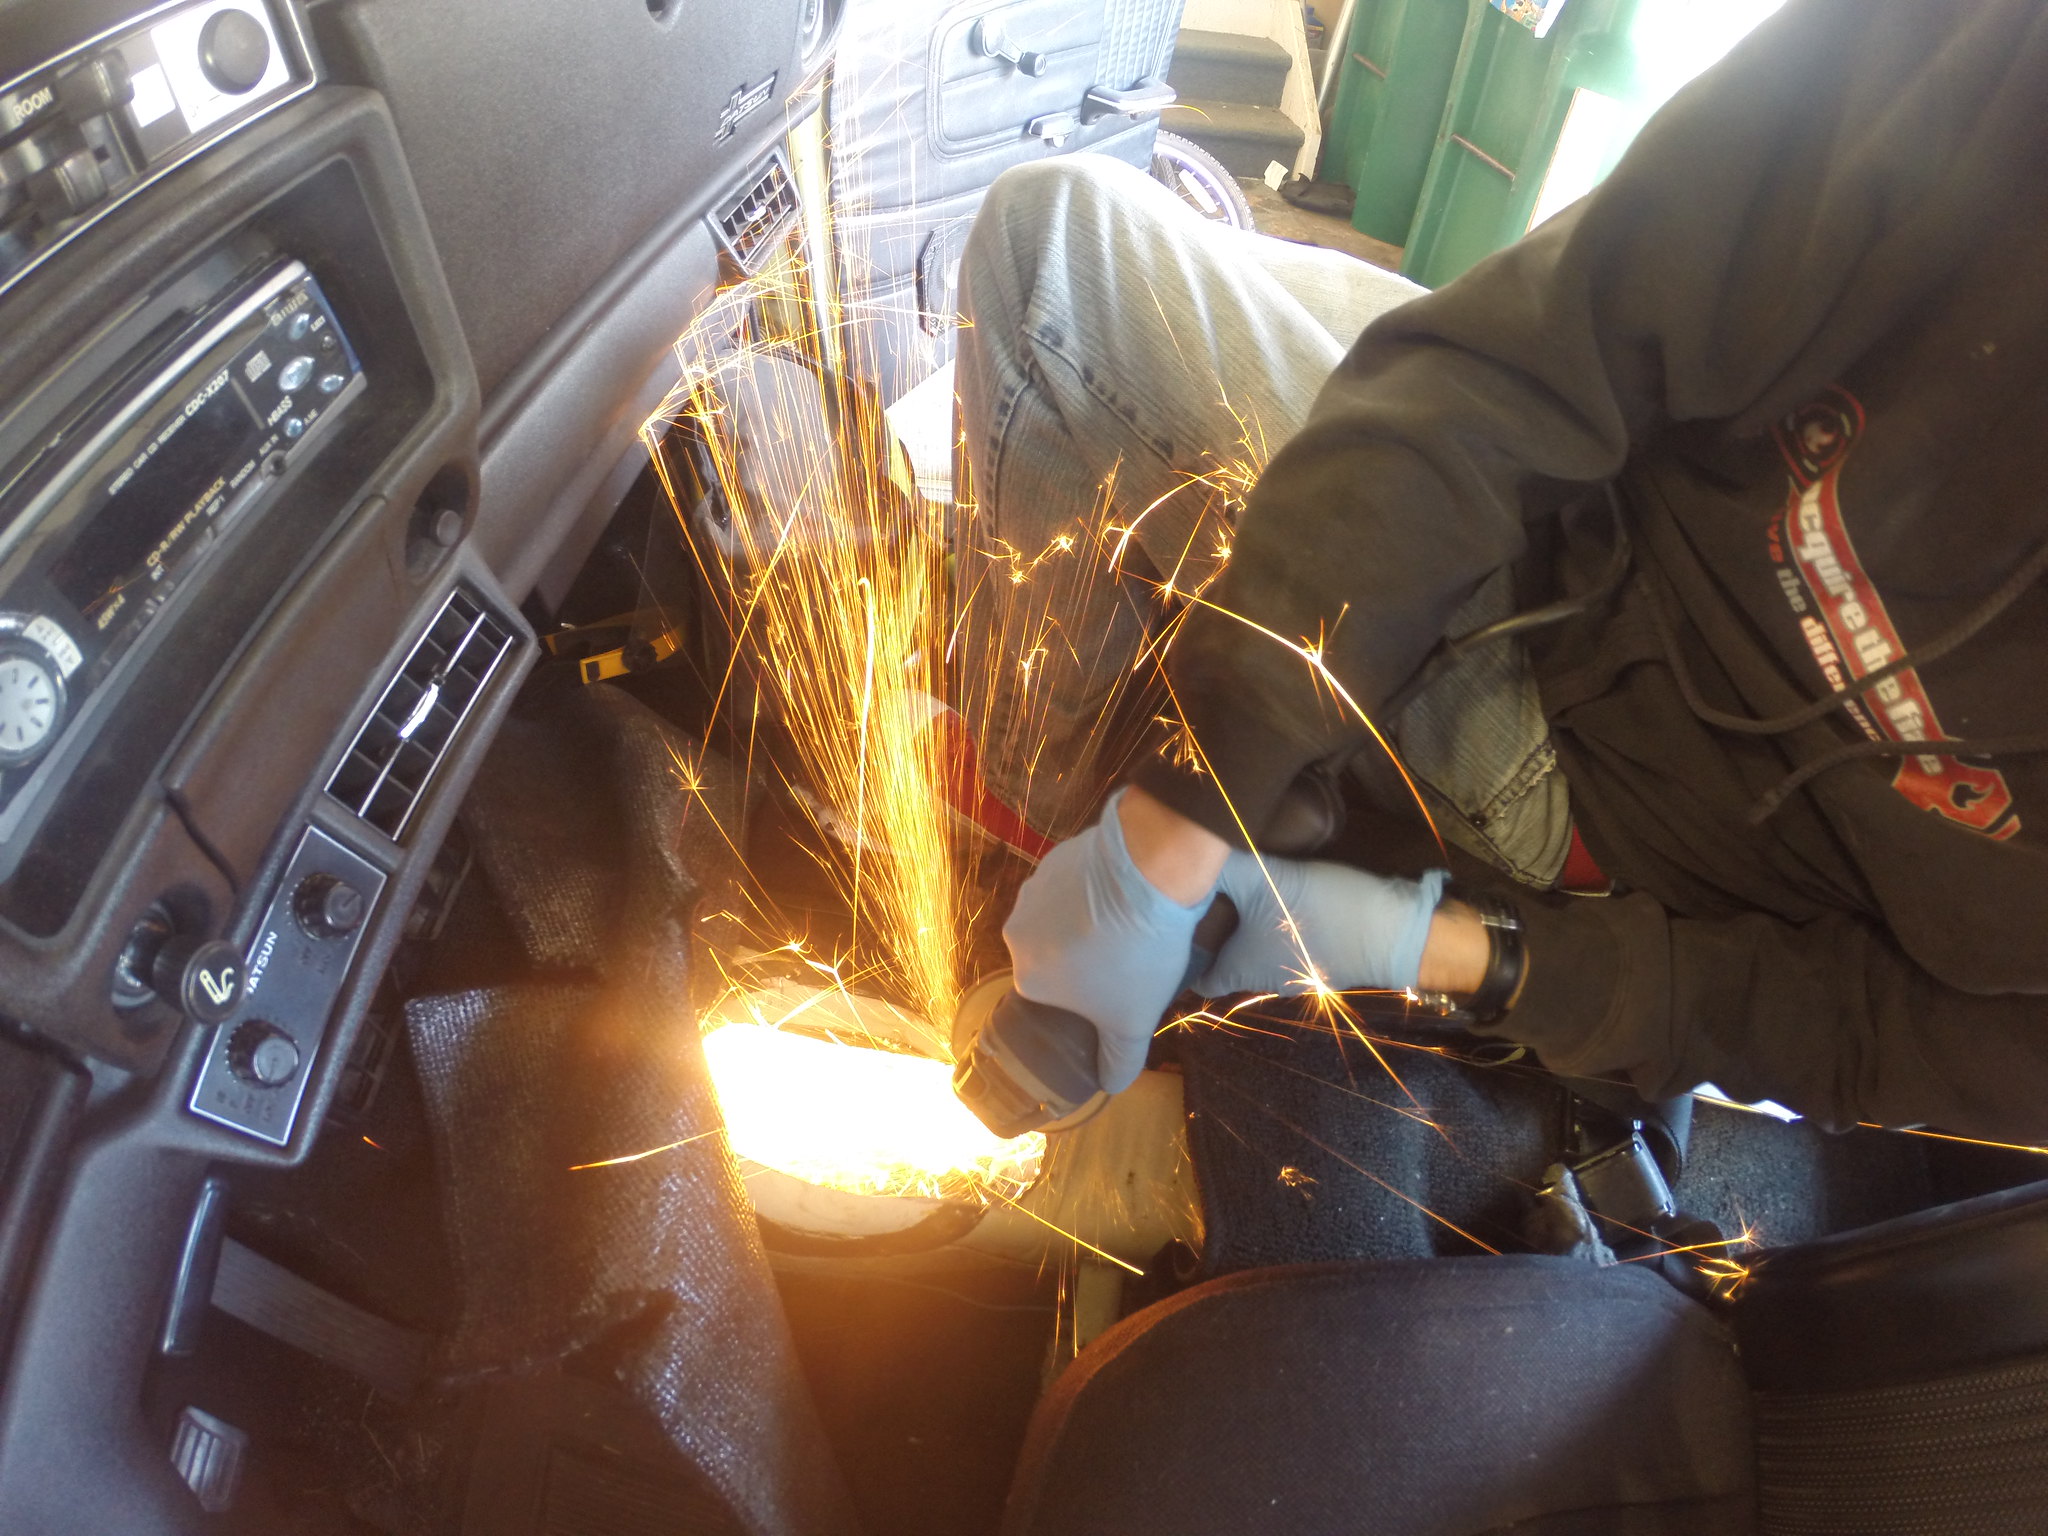
2. Replacing the seal was fairly straight forward. I attempted to remove the pin that locks the speedometer gear in place, but after ~30 minutes of fiddling with it I gave up and just replaced the seal.

3. When I re-installed the speedo gear, I topped off the oil again. And took the car for a test drive

  • No oil leak since

  • The gear installed very easily

Notes:

  • I noticed quite a bit of metal shavings from the transmission when the gear popped out. I think I should look into a transmission flush as the transmission was sitting for a while.

  • If this car keeps overheating I am a bit worried about the headgasket

Link to Timelapse:

--------------------------------------------------------------------------------------------------------------------------------------

Project Log (28 Jul 18): Start Time: Not Recorded End Time: Not Recorded

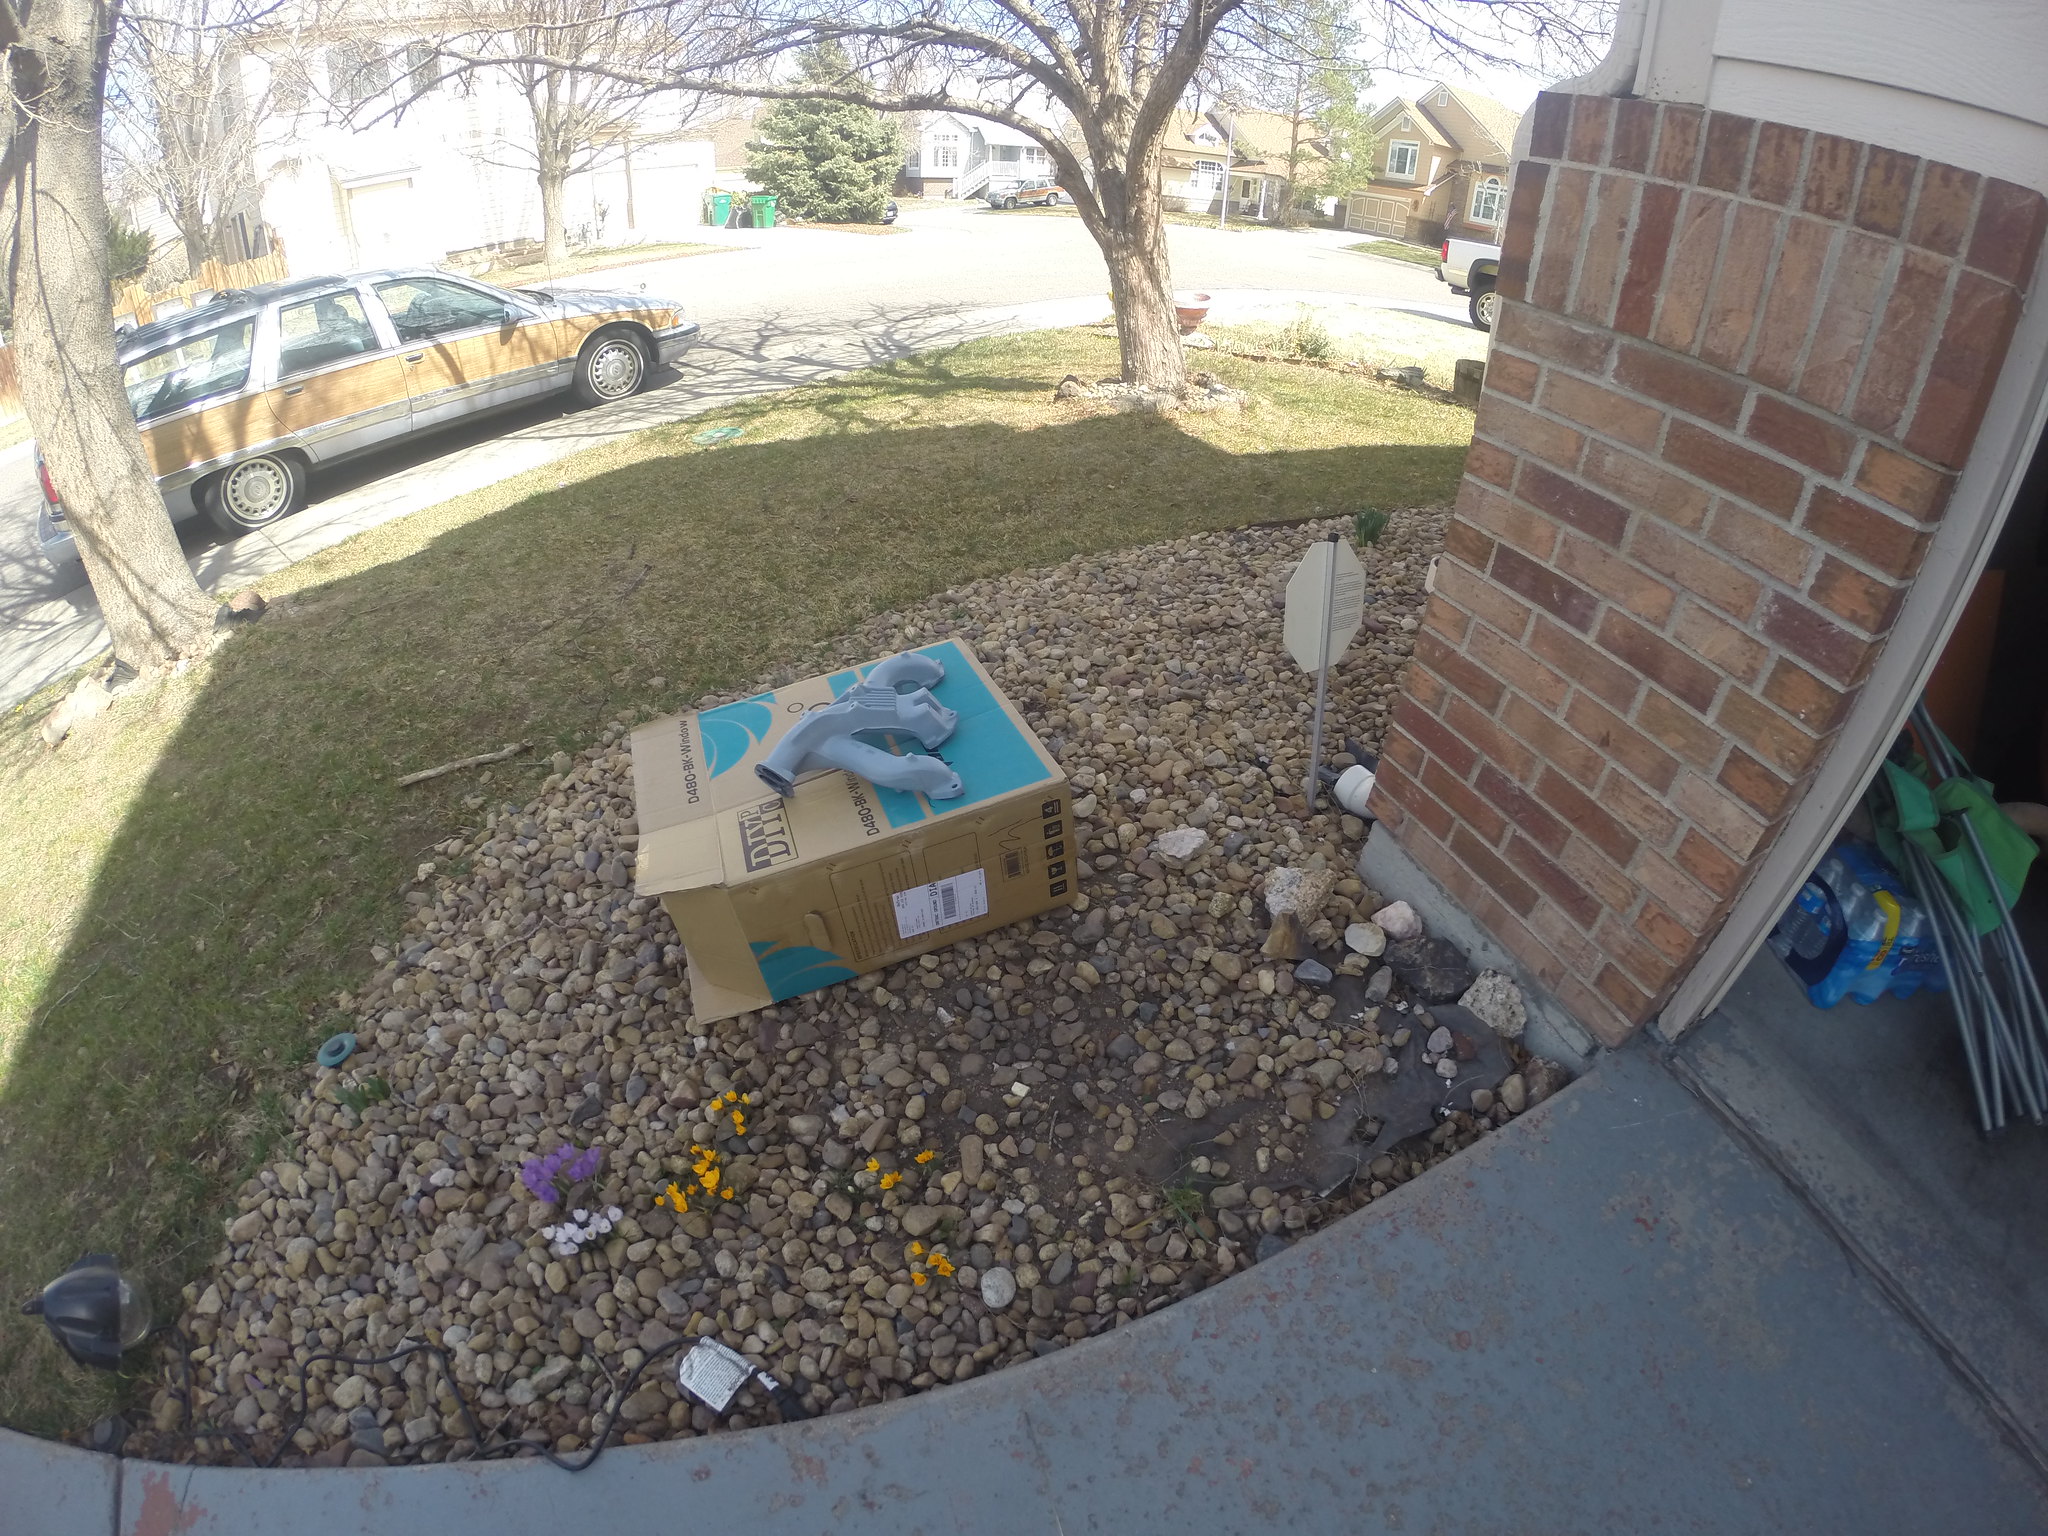
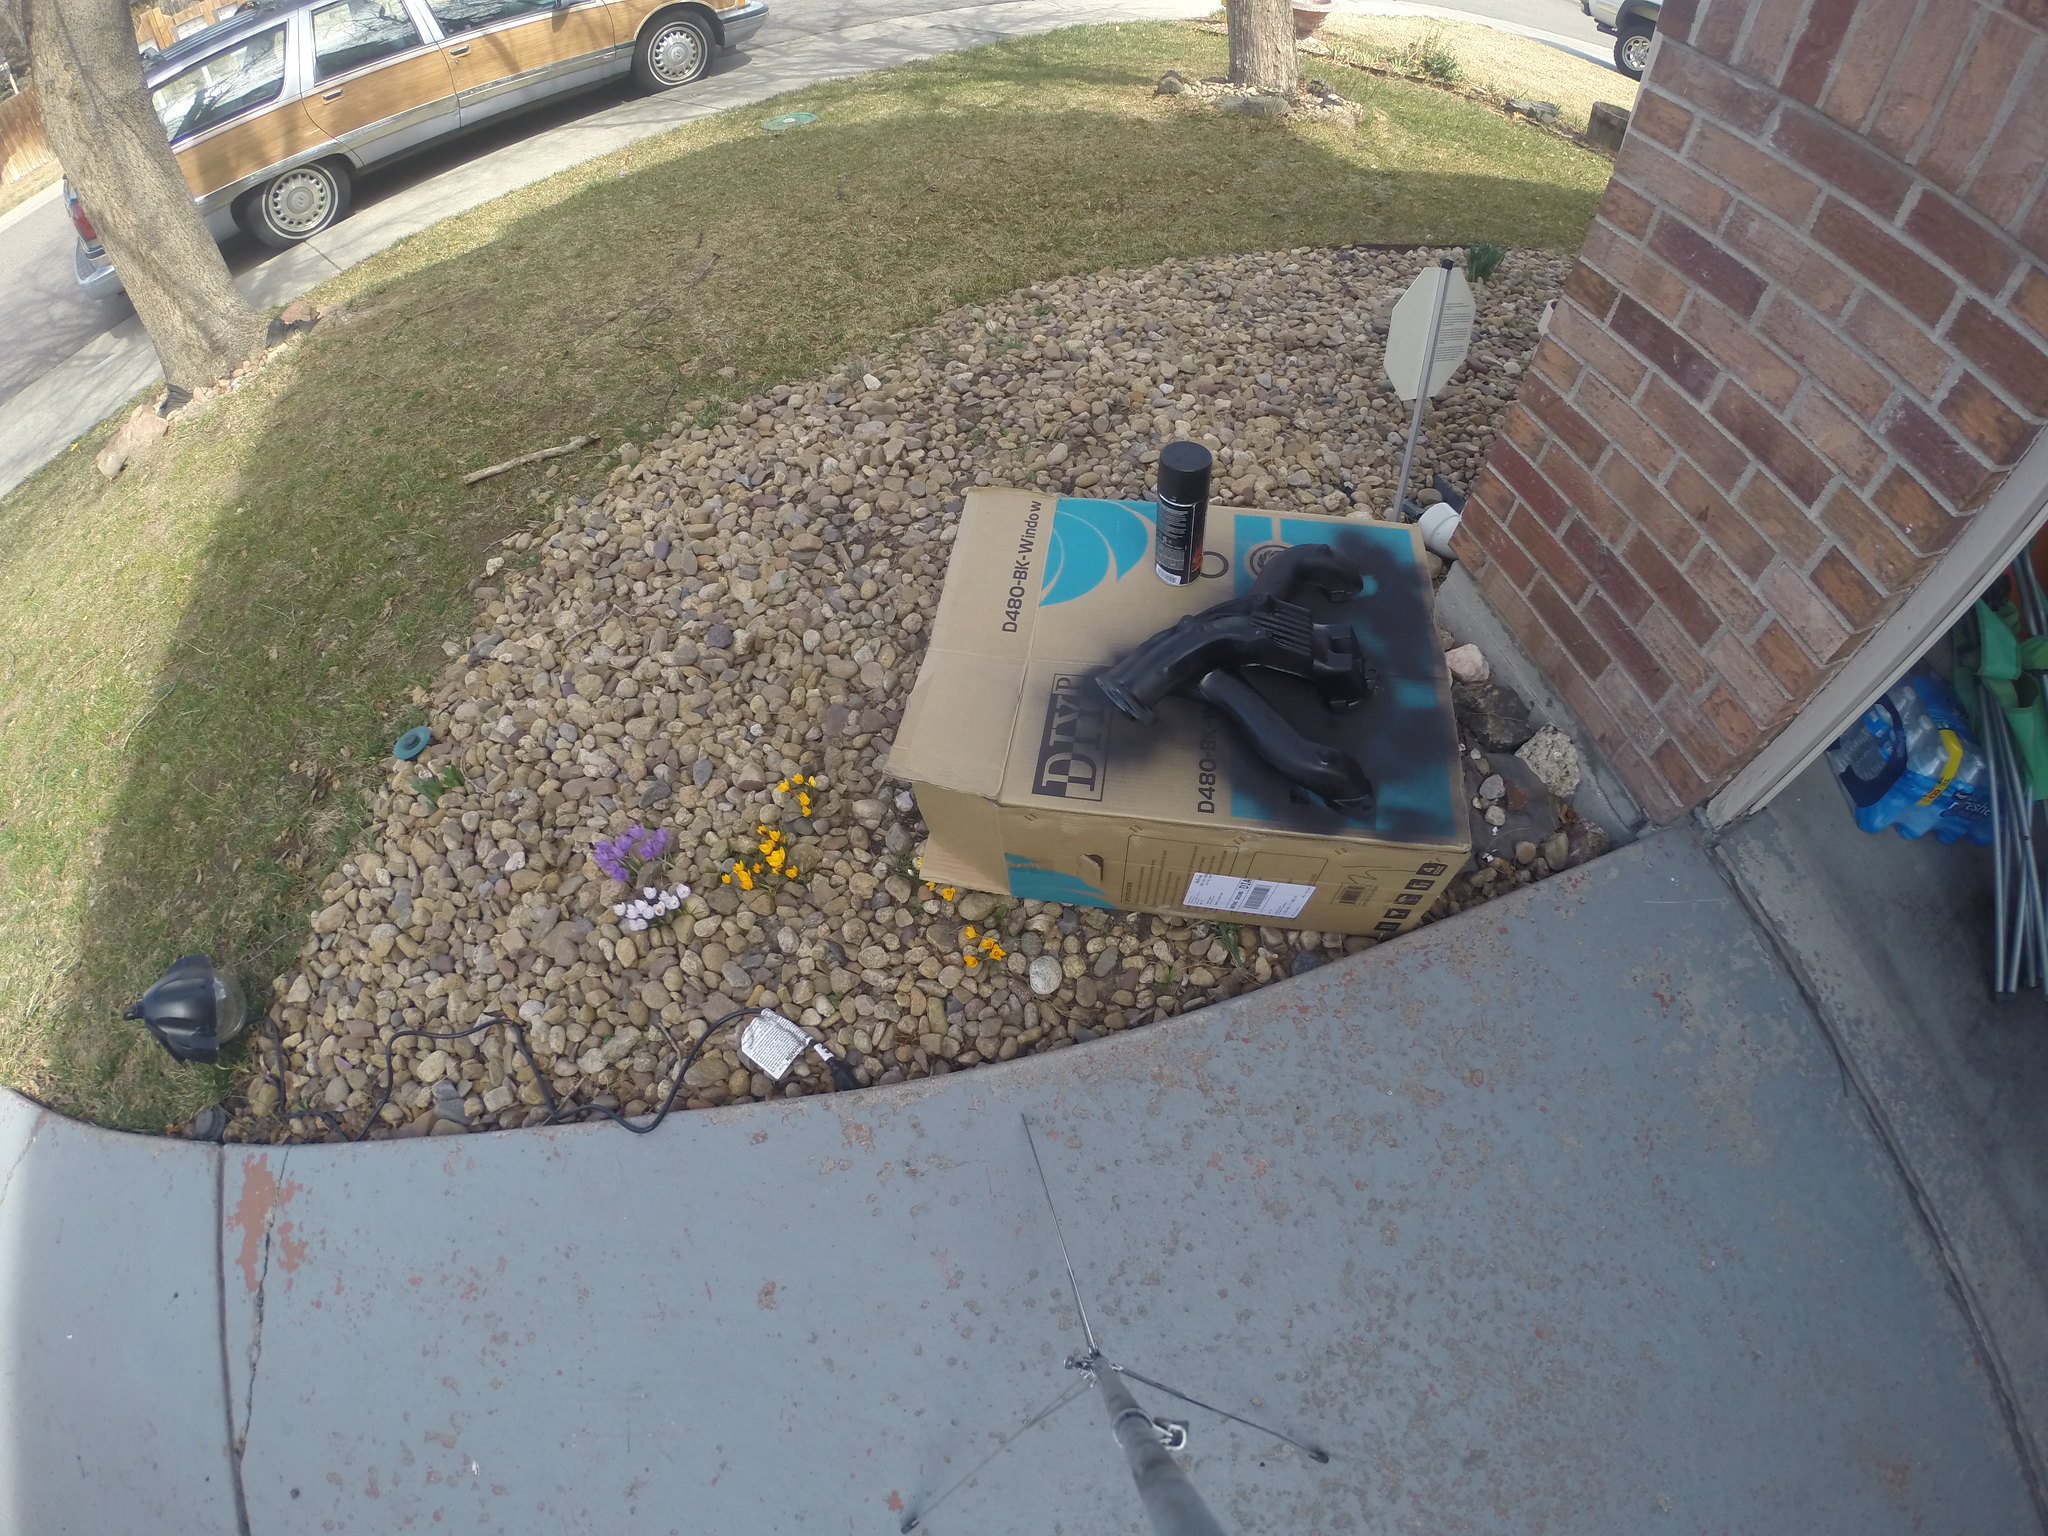
Want to get the car ready to drive in Vegas so I am going to do some quick checks on everything. I have been fighting overheating on the car, the electric fans do not seem to push much air at all. Going to try and “burp” the system

To Do (Daily):

  1. ☑ Check Spark Plugs

  2. ☑ Reattach Splash Pan

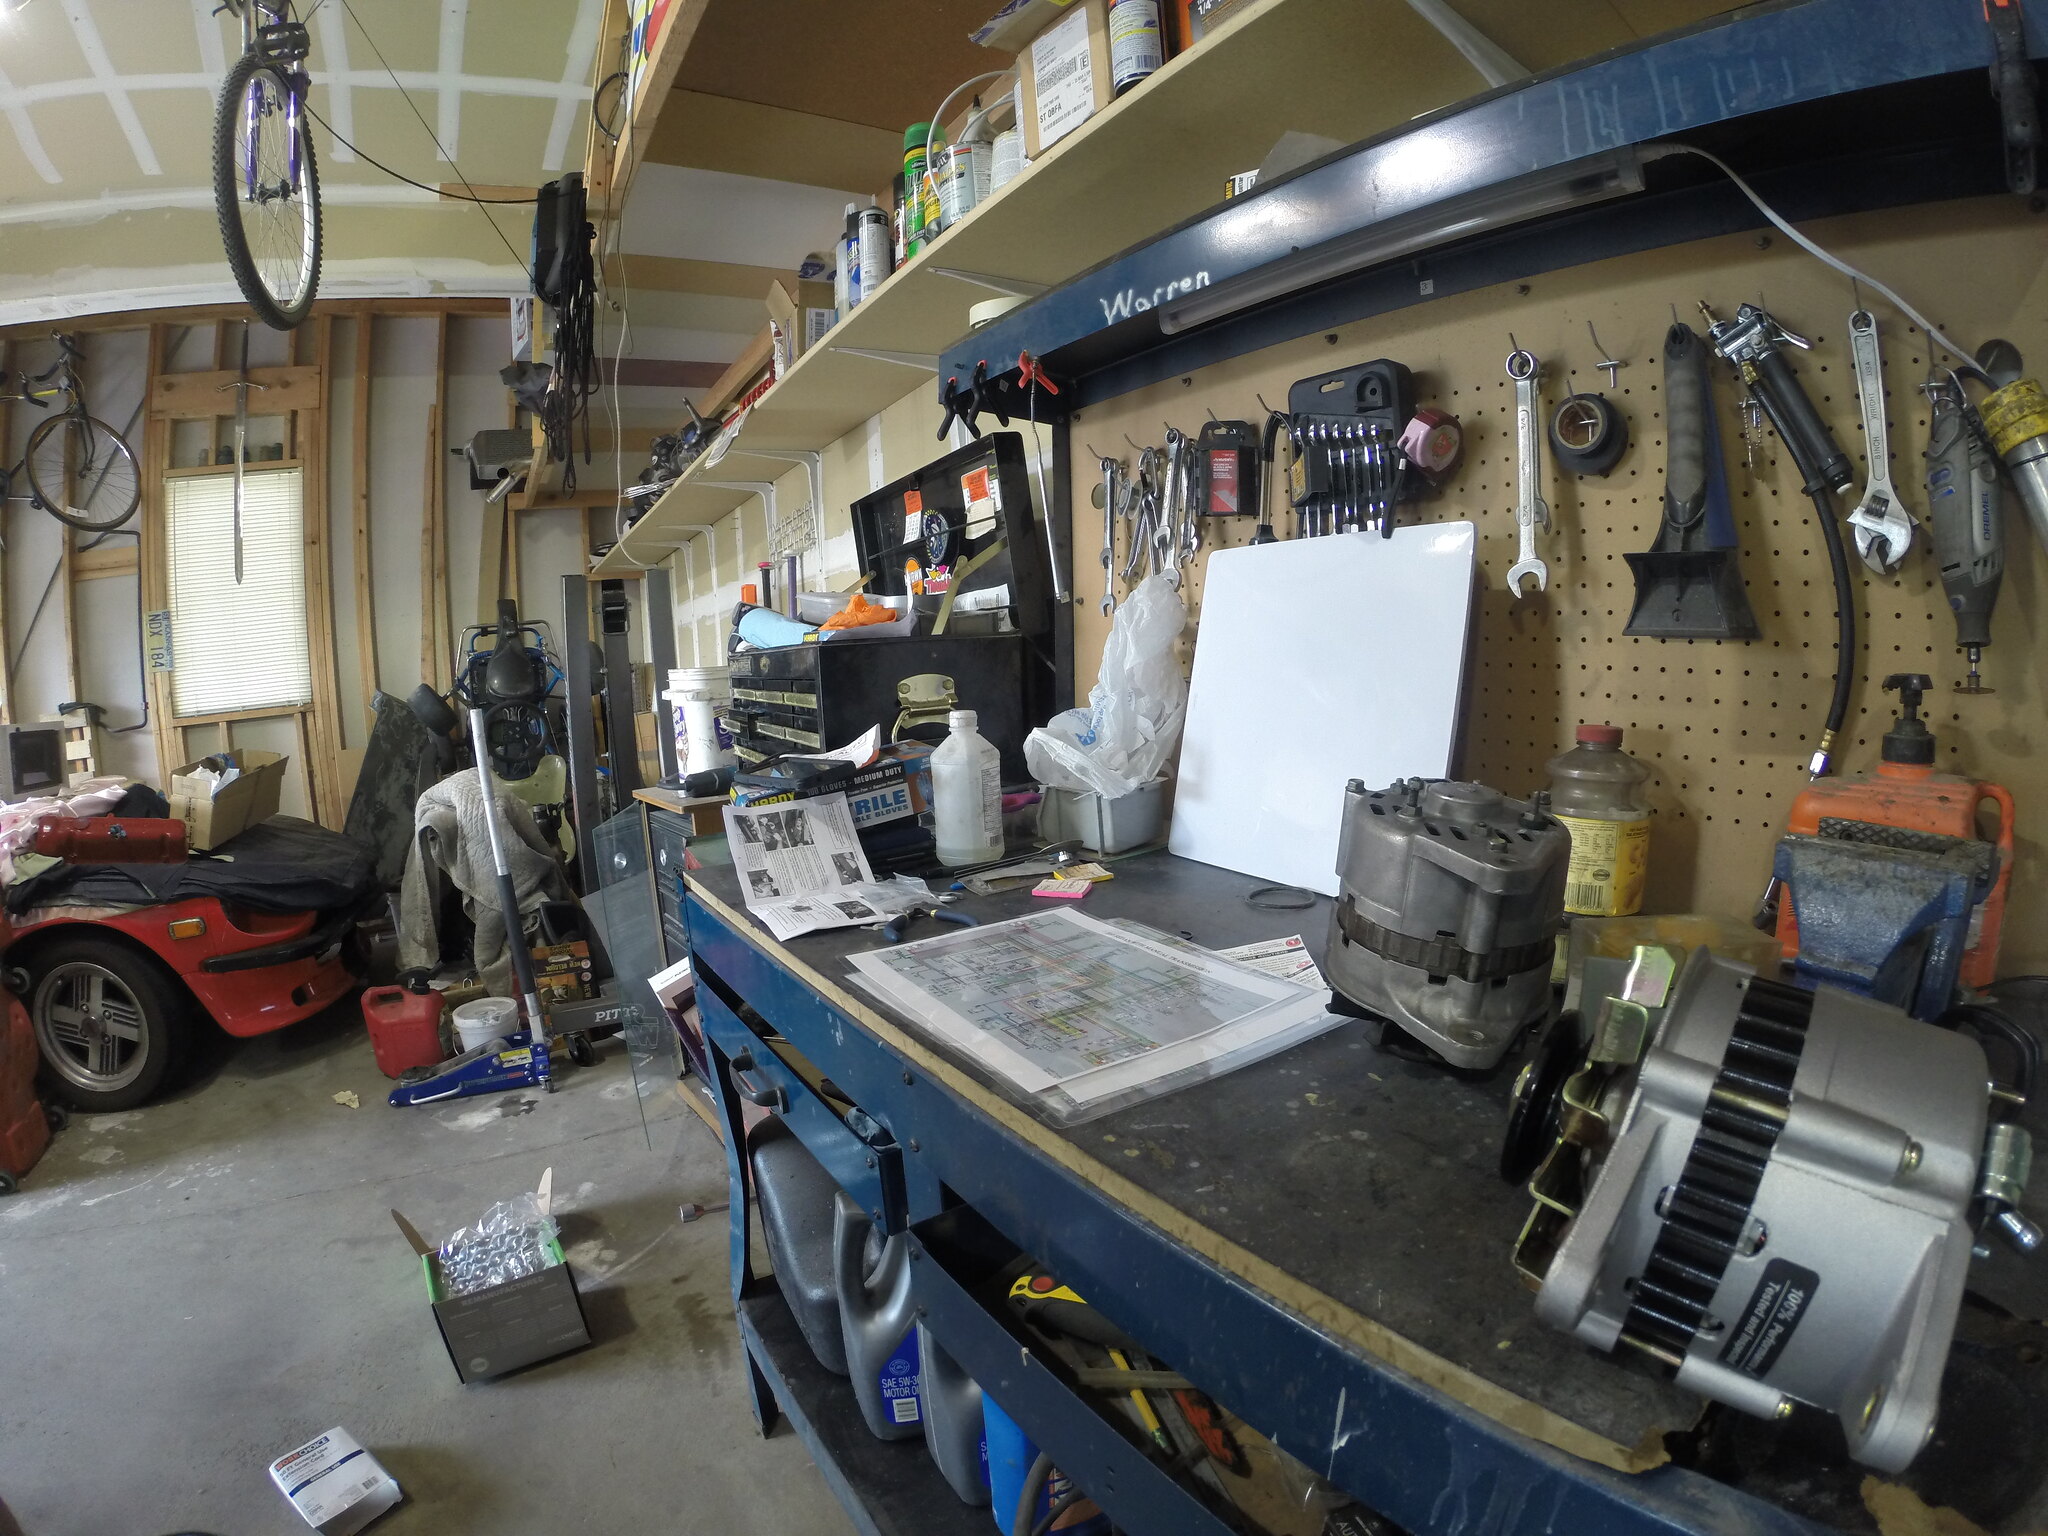
  3. ☑ Clean Car (Vacuum) and Garage

1.  The spark plugs looked fine none of them were an odd color and seemed to be gapped correctly

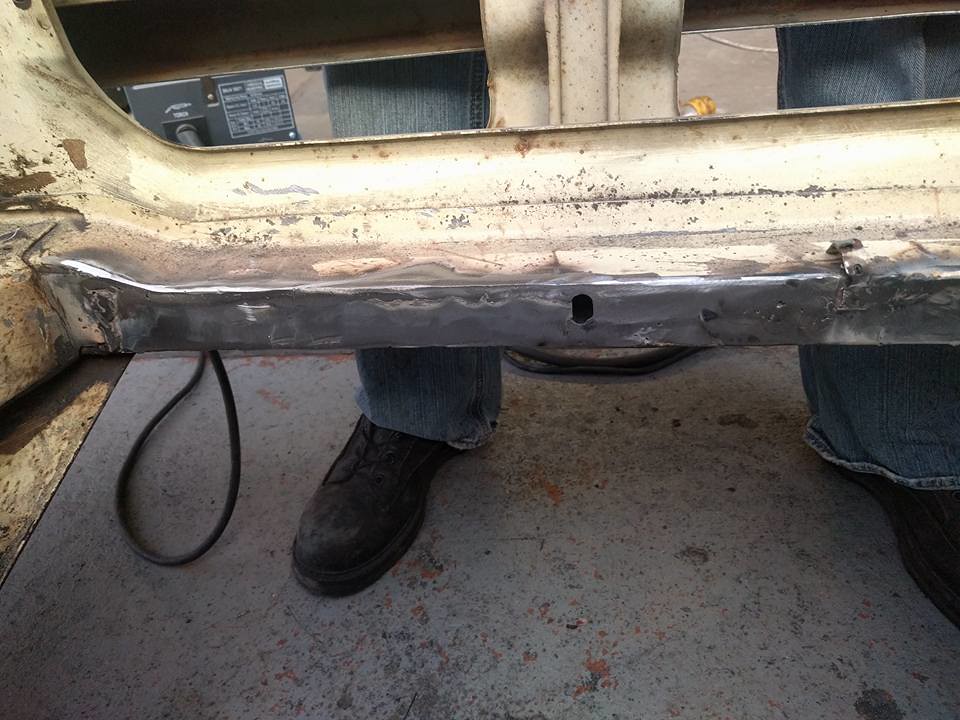
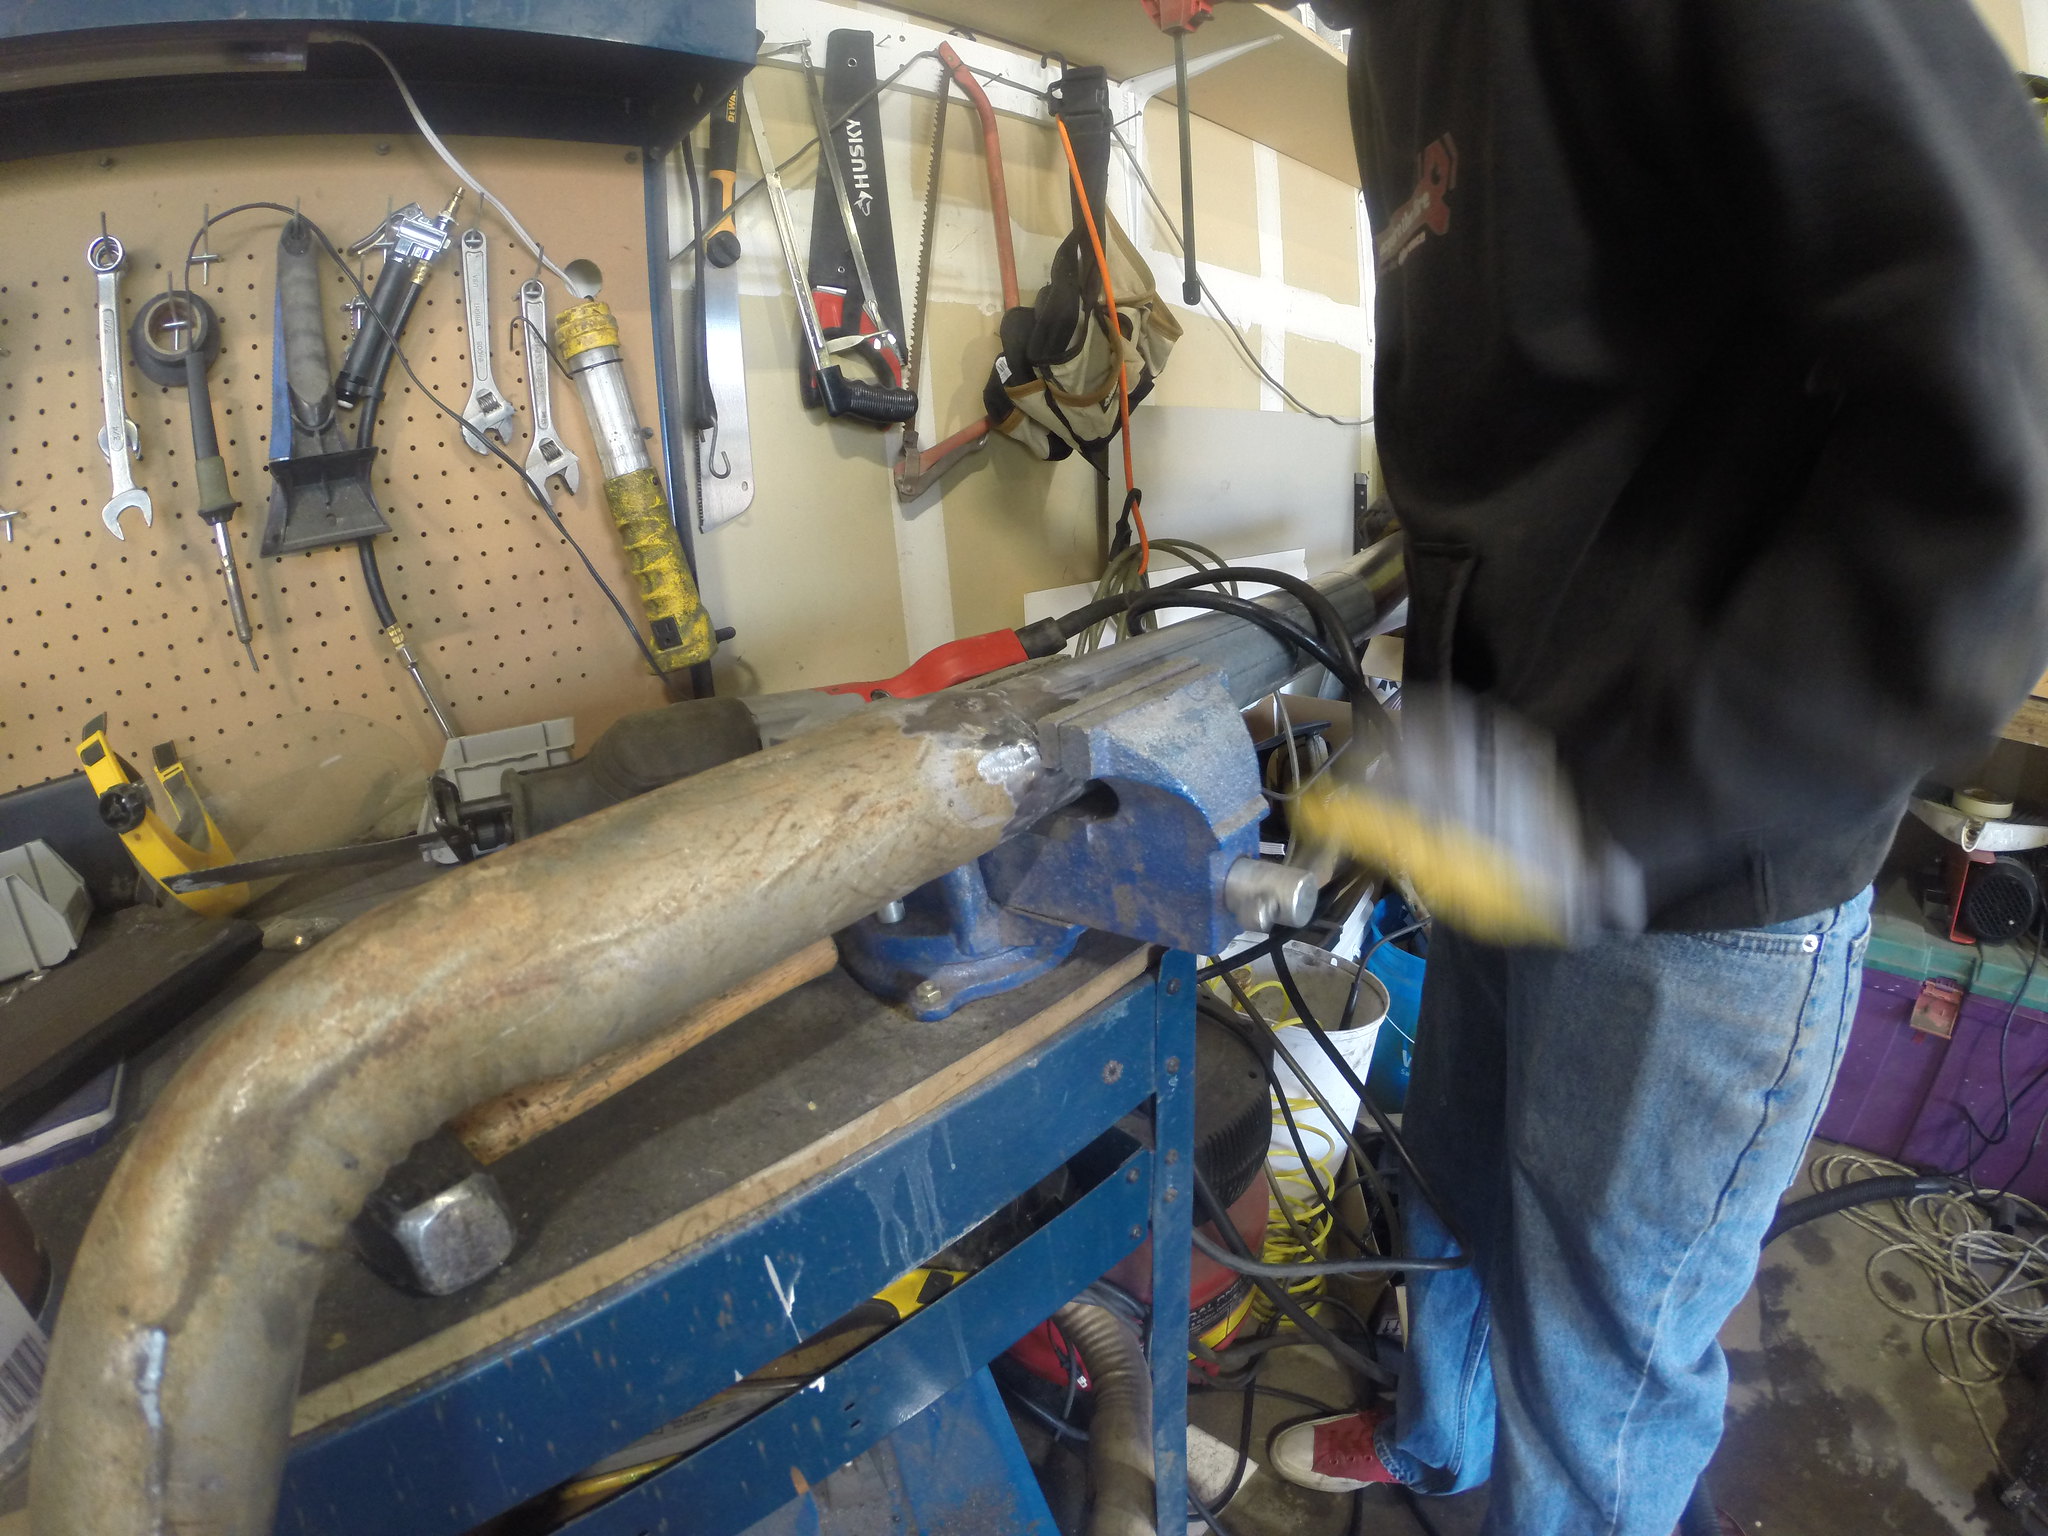
2. The car came off the jack (26 Jul) when I was working on the coolant system. I was very lucky that the car came forward and not backwards. It completely bent the splash pan though

  • I used a deadblow and a 2x4 to get the piece mainly righted

  • Then bolted it back up using prying strength to get it back to where it needs to be under the car

  • The jack put a little nic in the paint on the oil pan when it slipped off the crossmember, gosh was that scary

I pulled the car out of the garage and it doesn’t seem to overheat, just sitting there. On the test drive I noticed that when I sat at a stoplight the fans just can’t keep up with the heat here. I am once again looking for a stock fan

  • I threw mine away because it was missing a blade, it was an odd 7 blade fan

3. After the move there was small crap in the car that needed to be cleaned out to get the car ready for daily use, I decided to vacuum the car out and sweep up the garage

Note: N/A

Link to timelapse: N/A

--------------------------------------------------------------------------------------------------------------------------

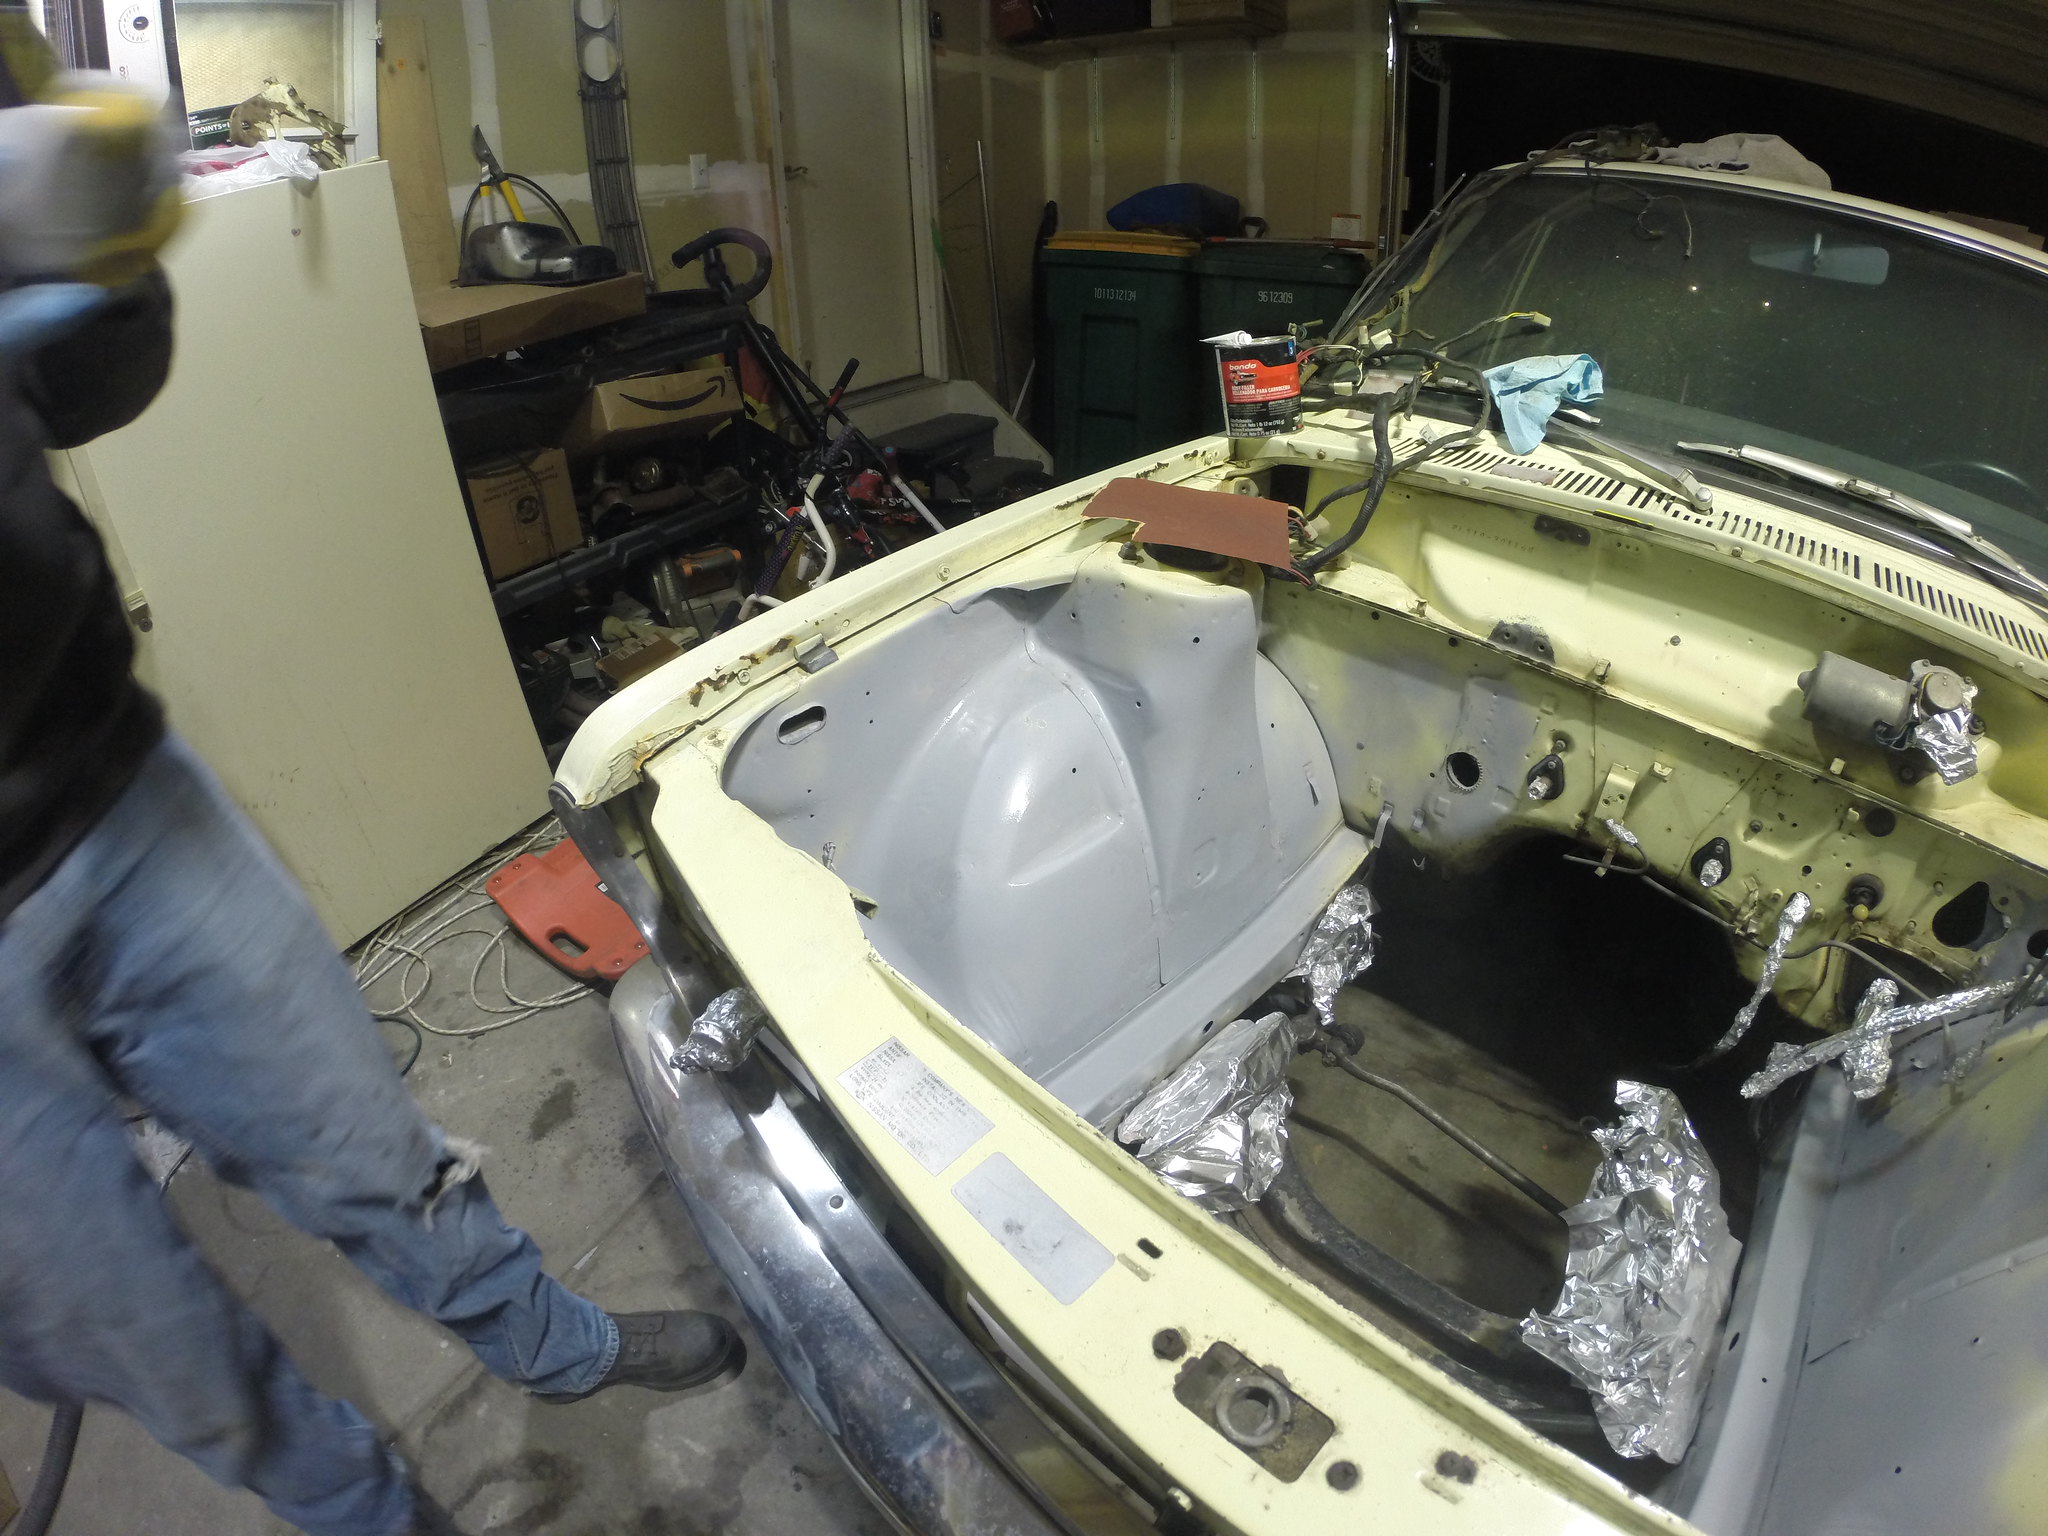
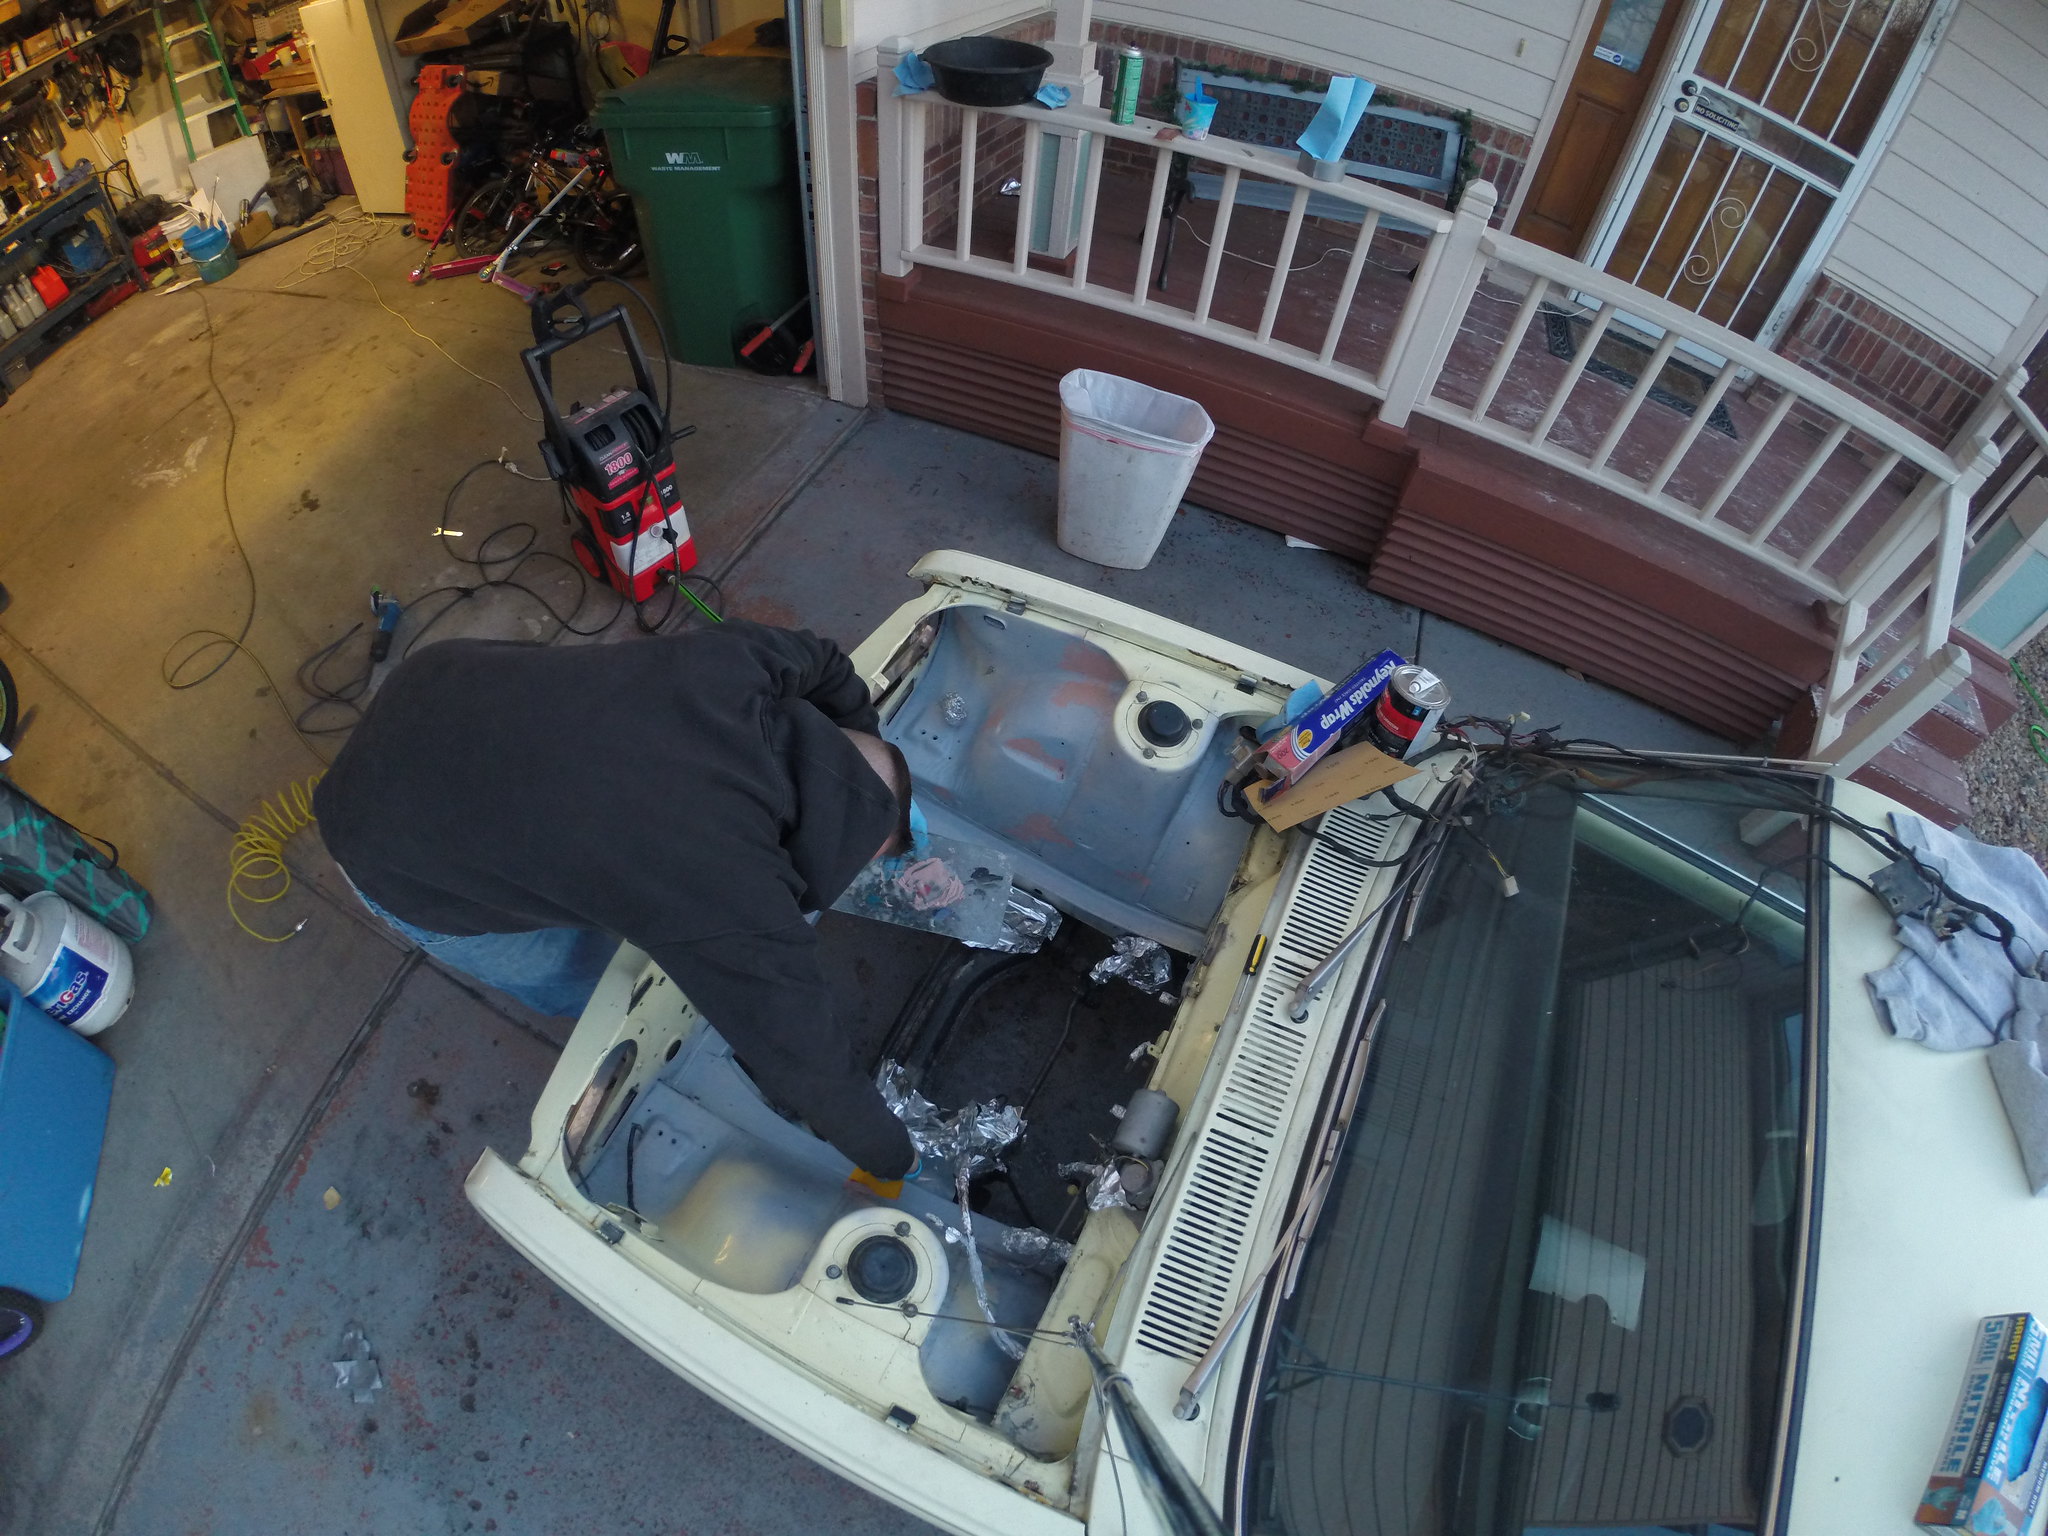
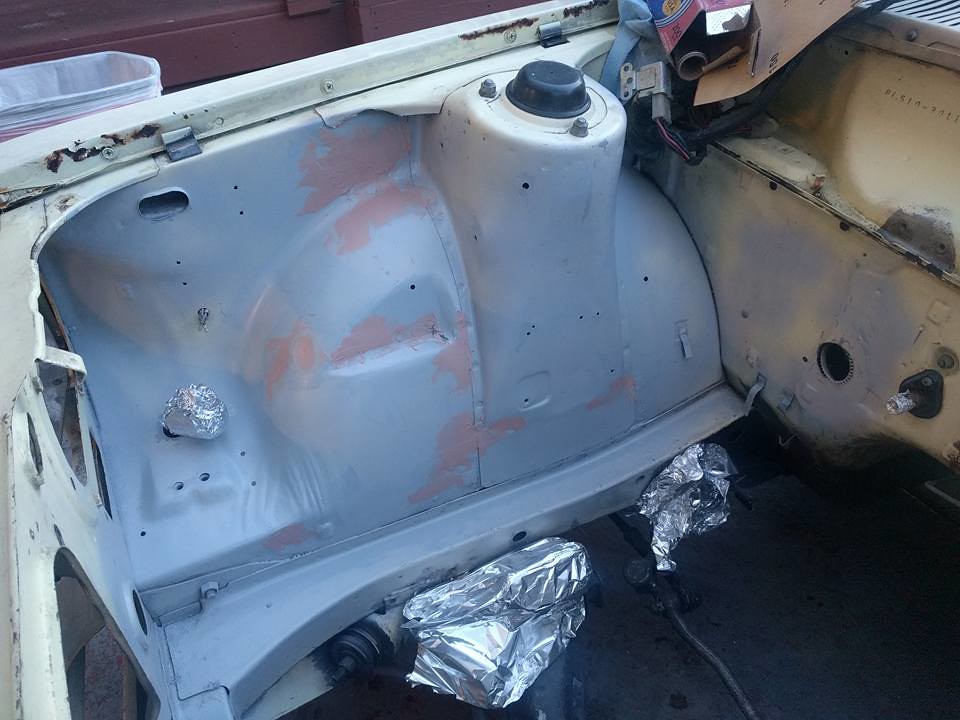
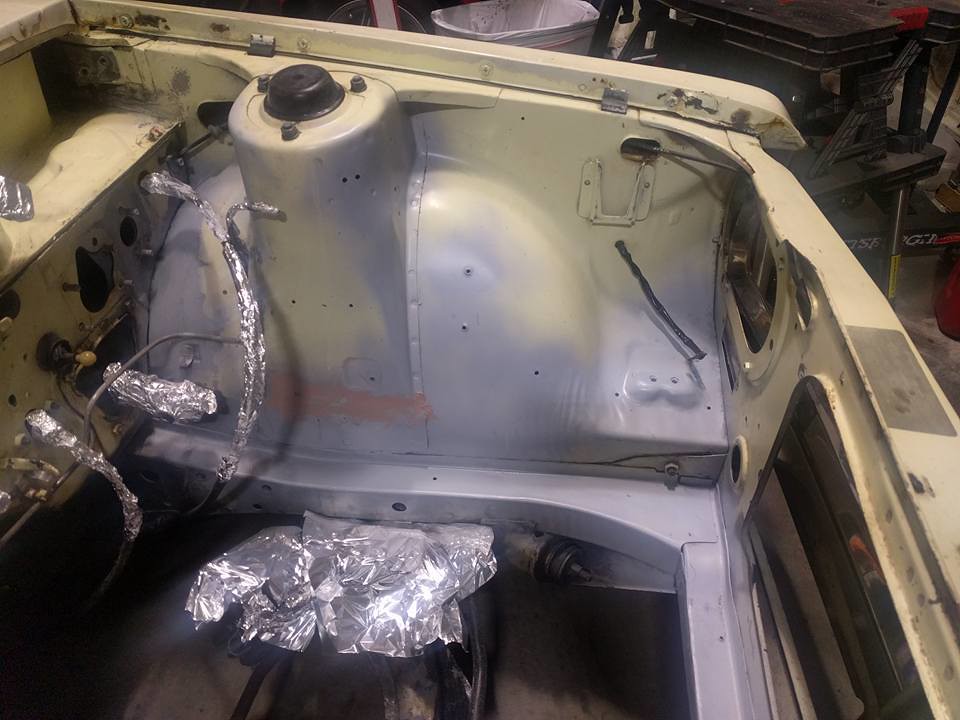
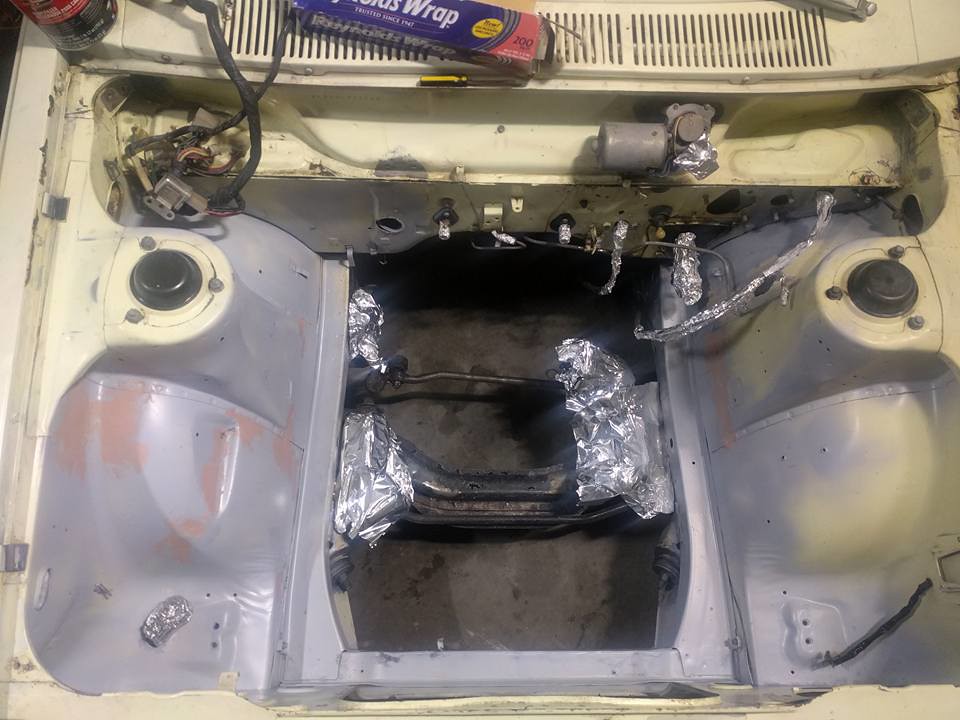
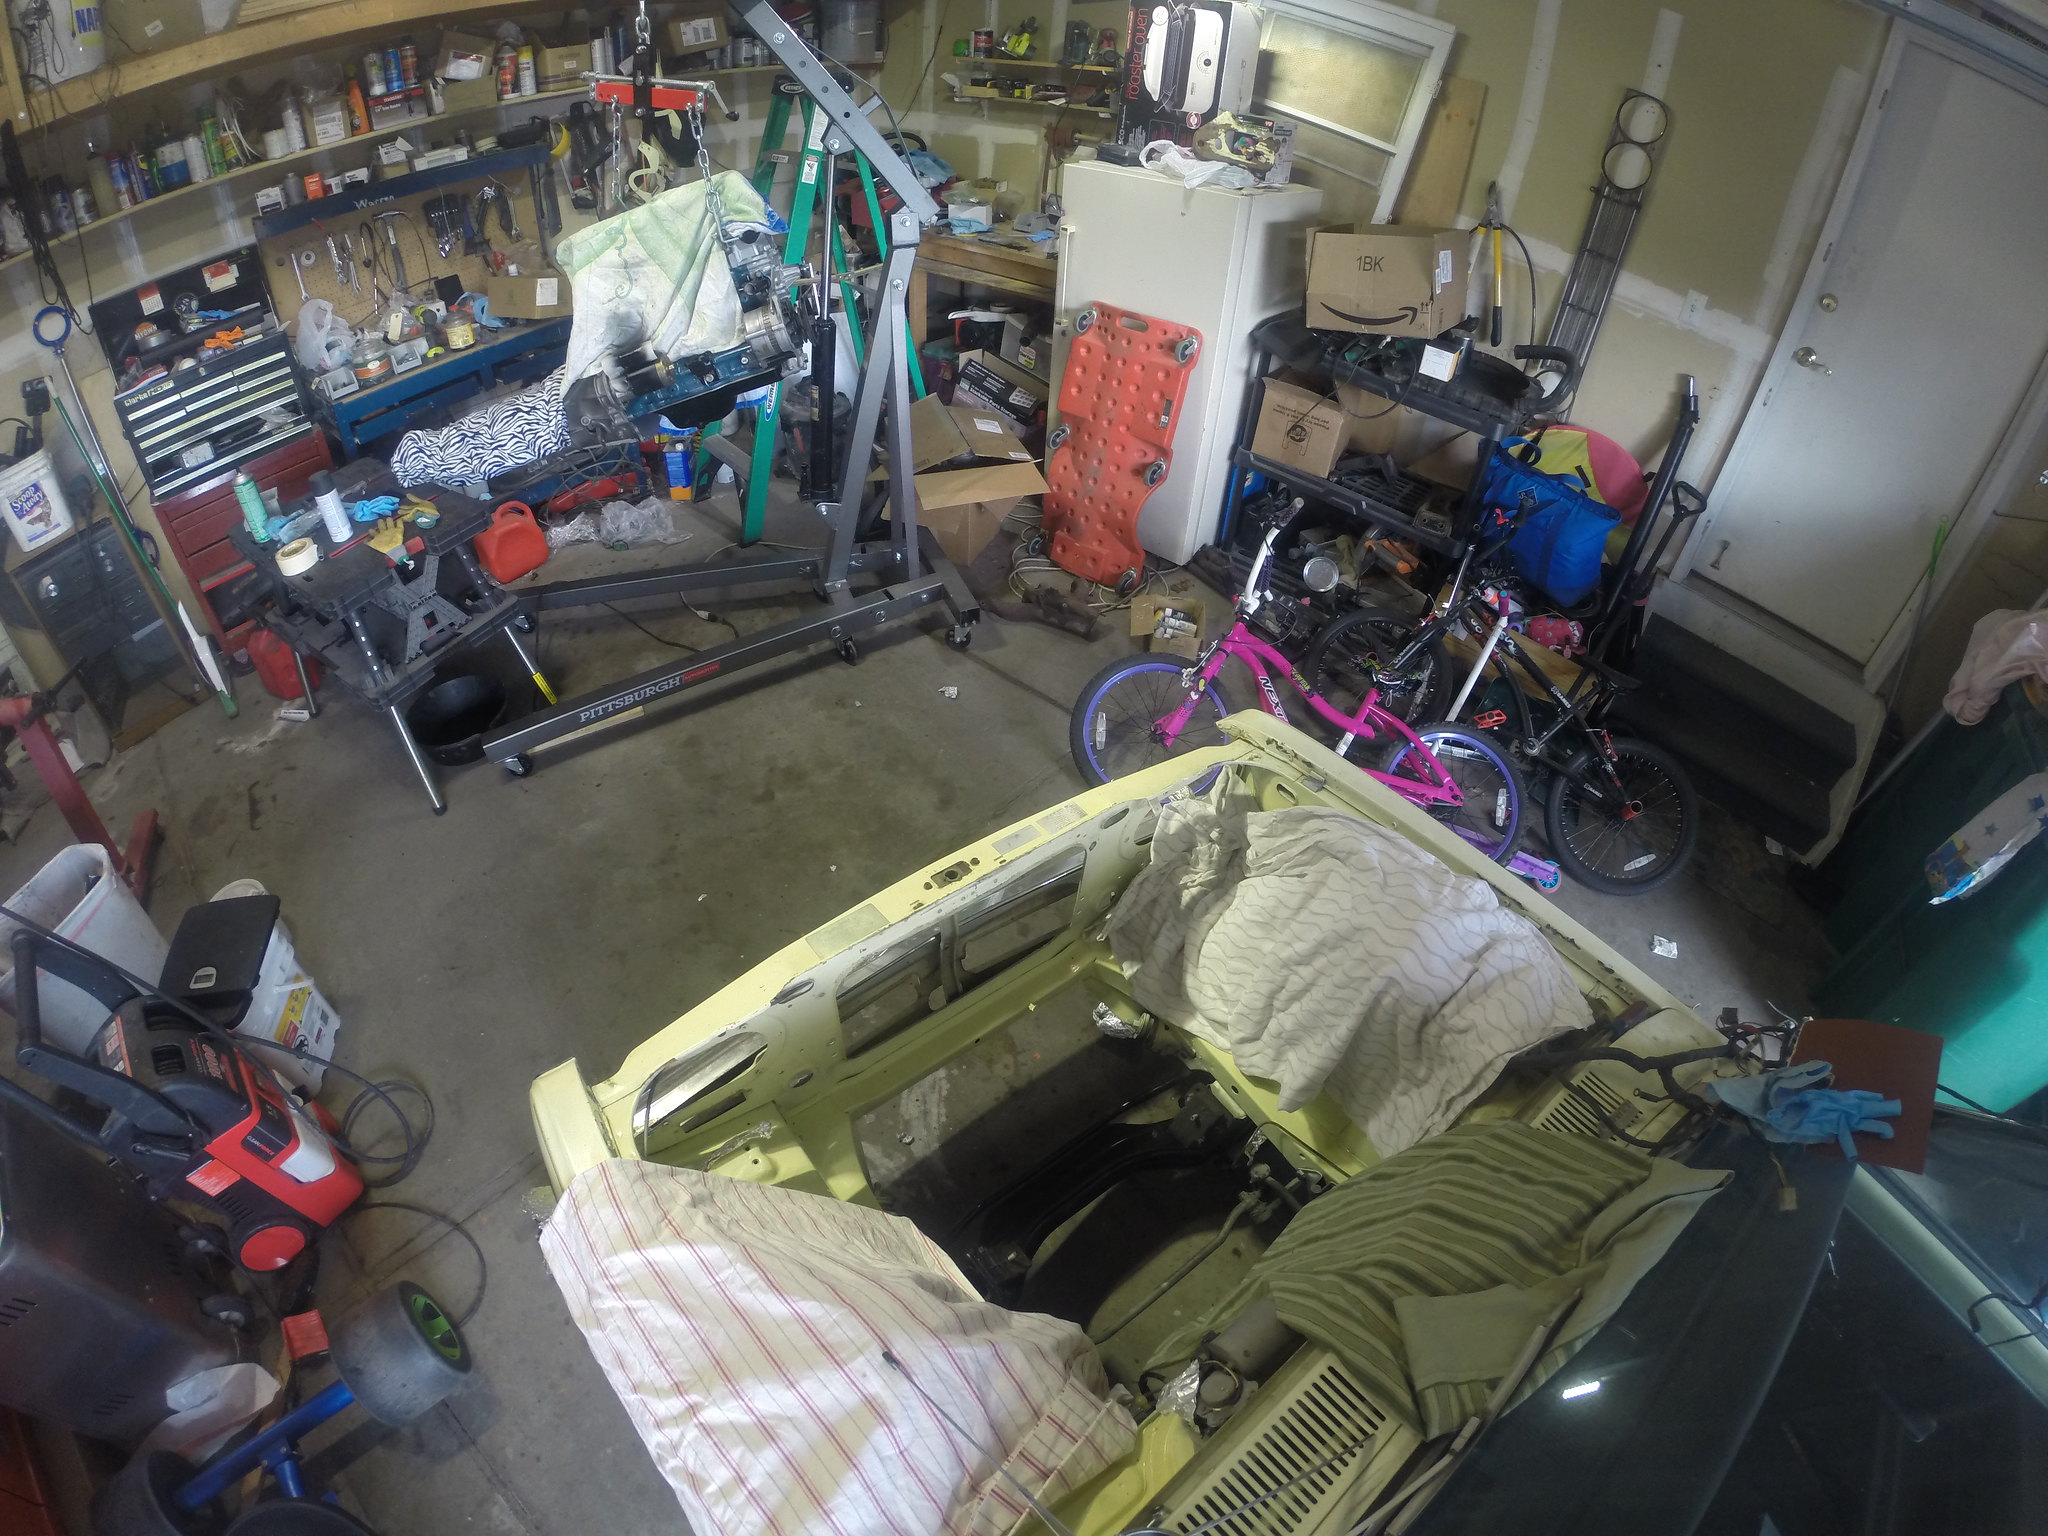
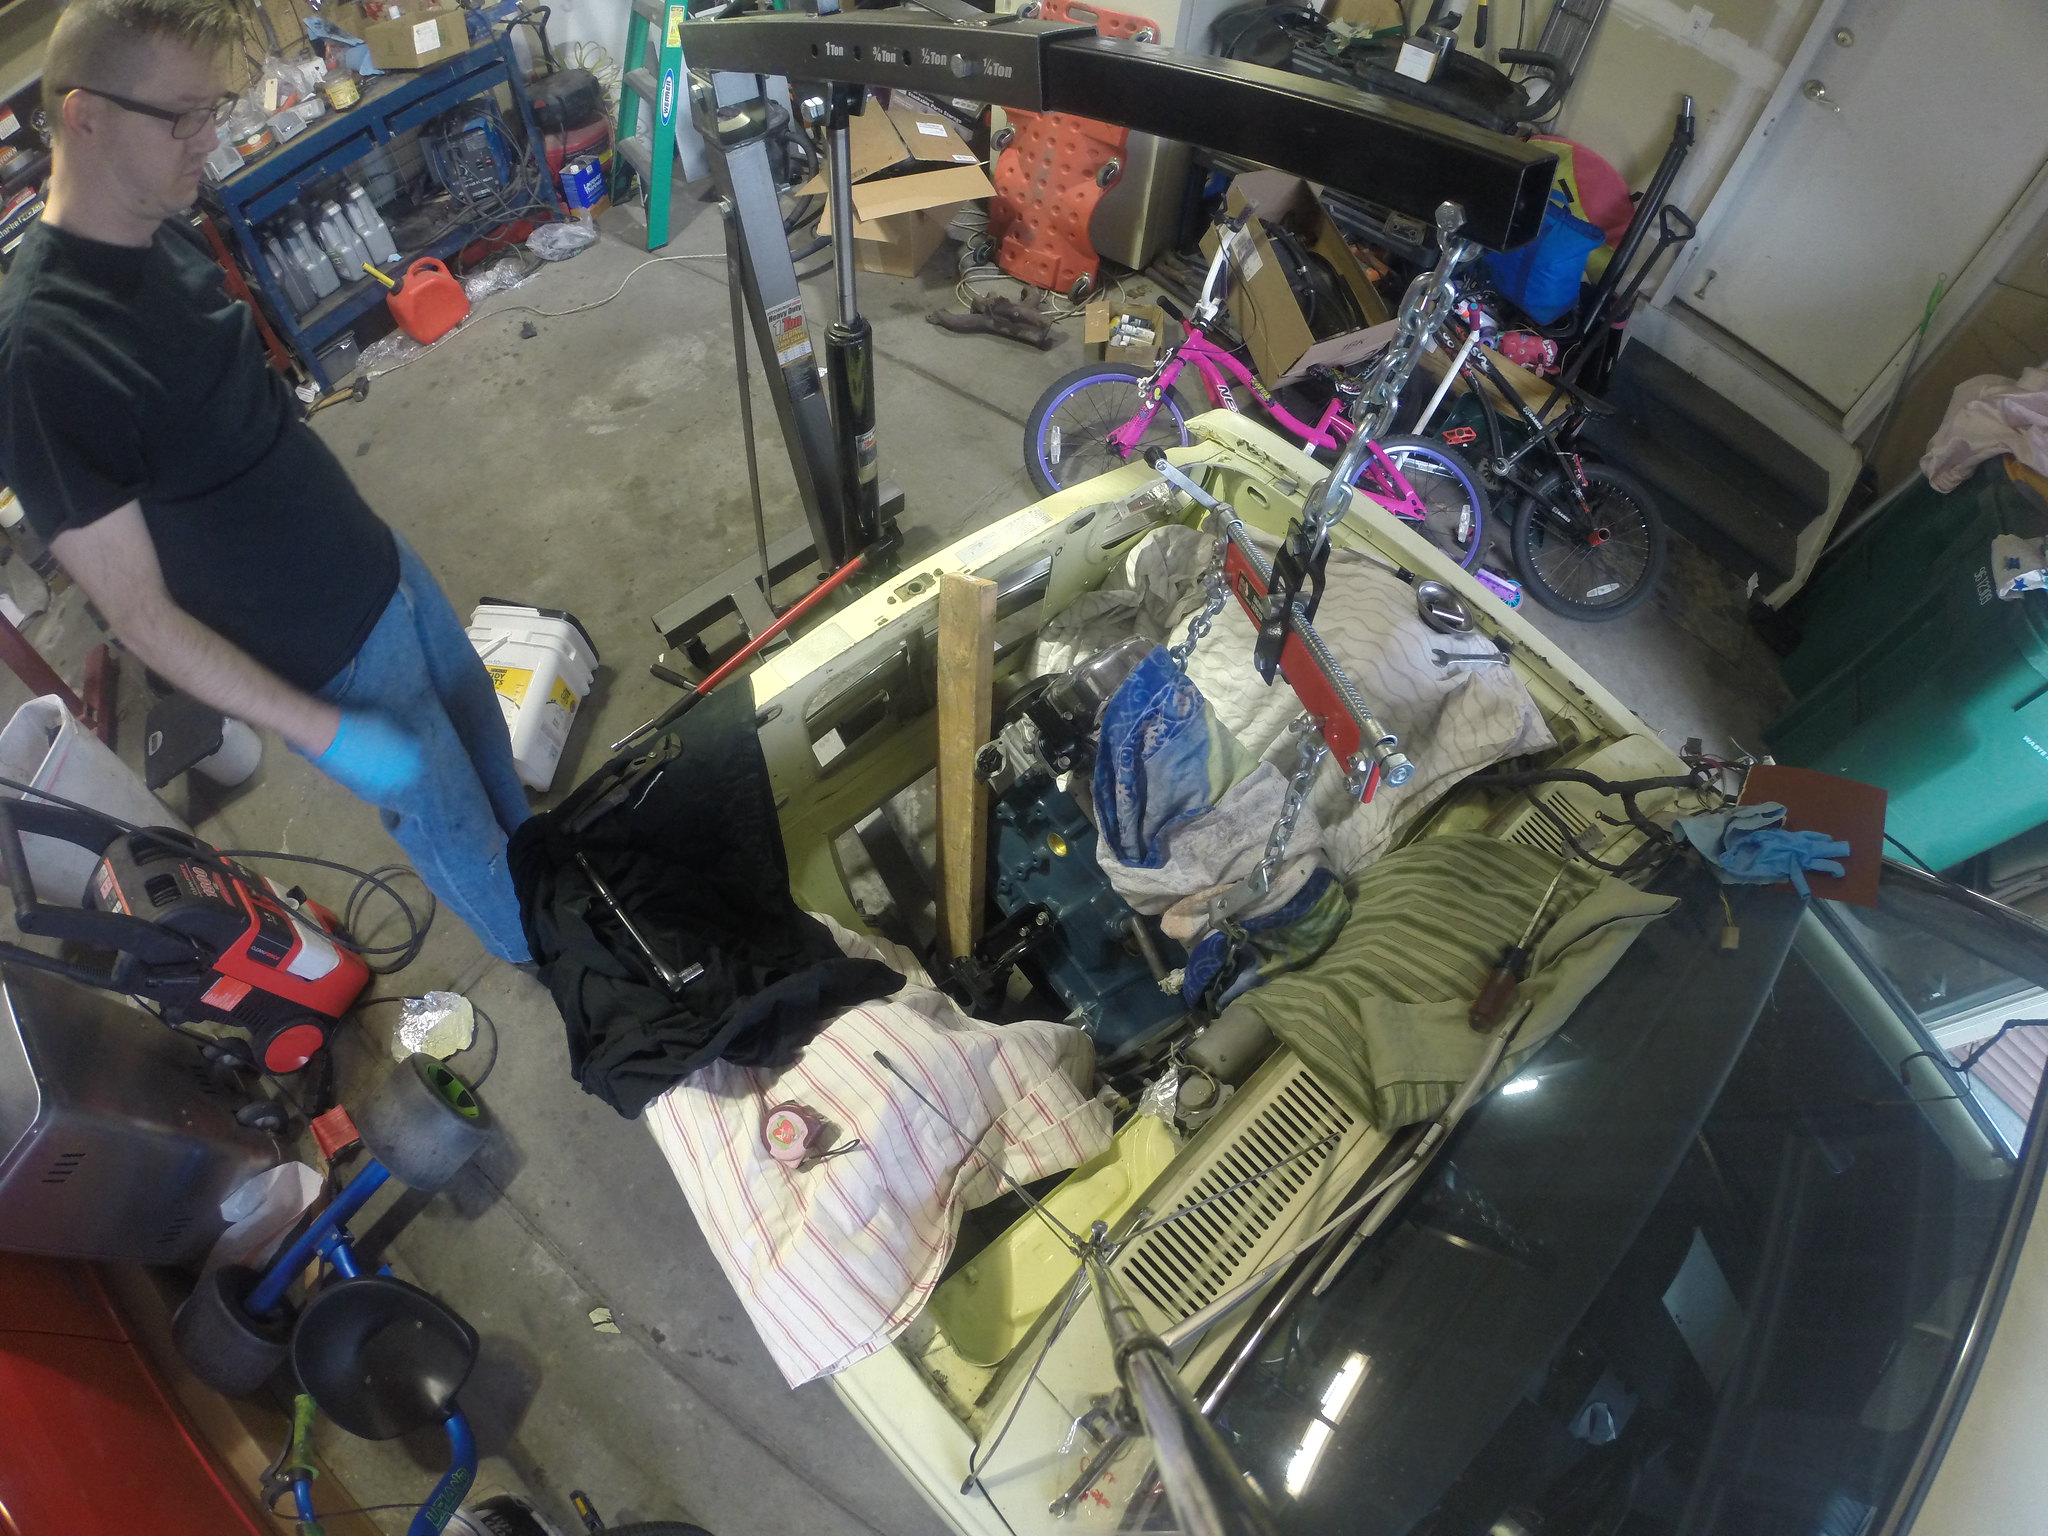
General Project Update:

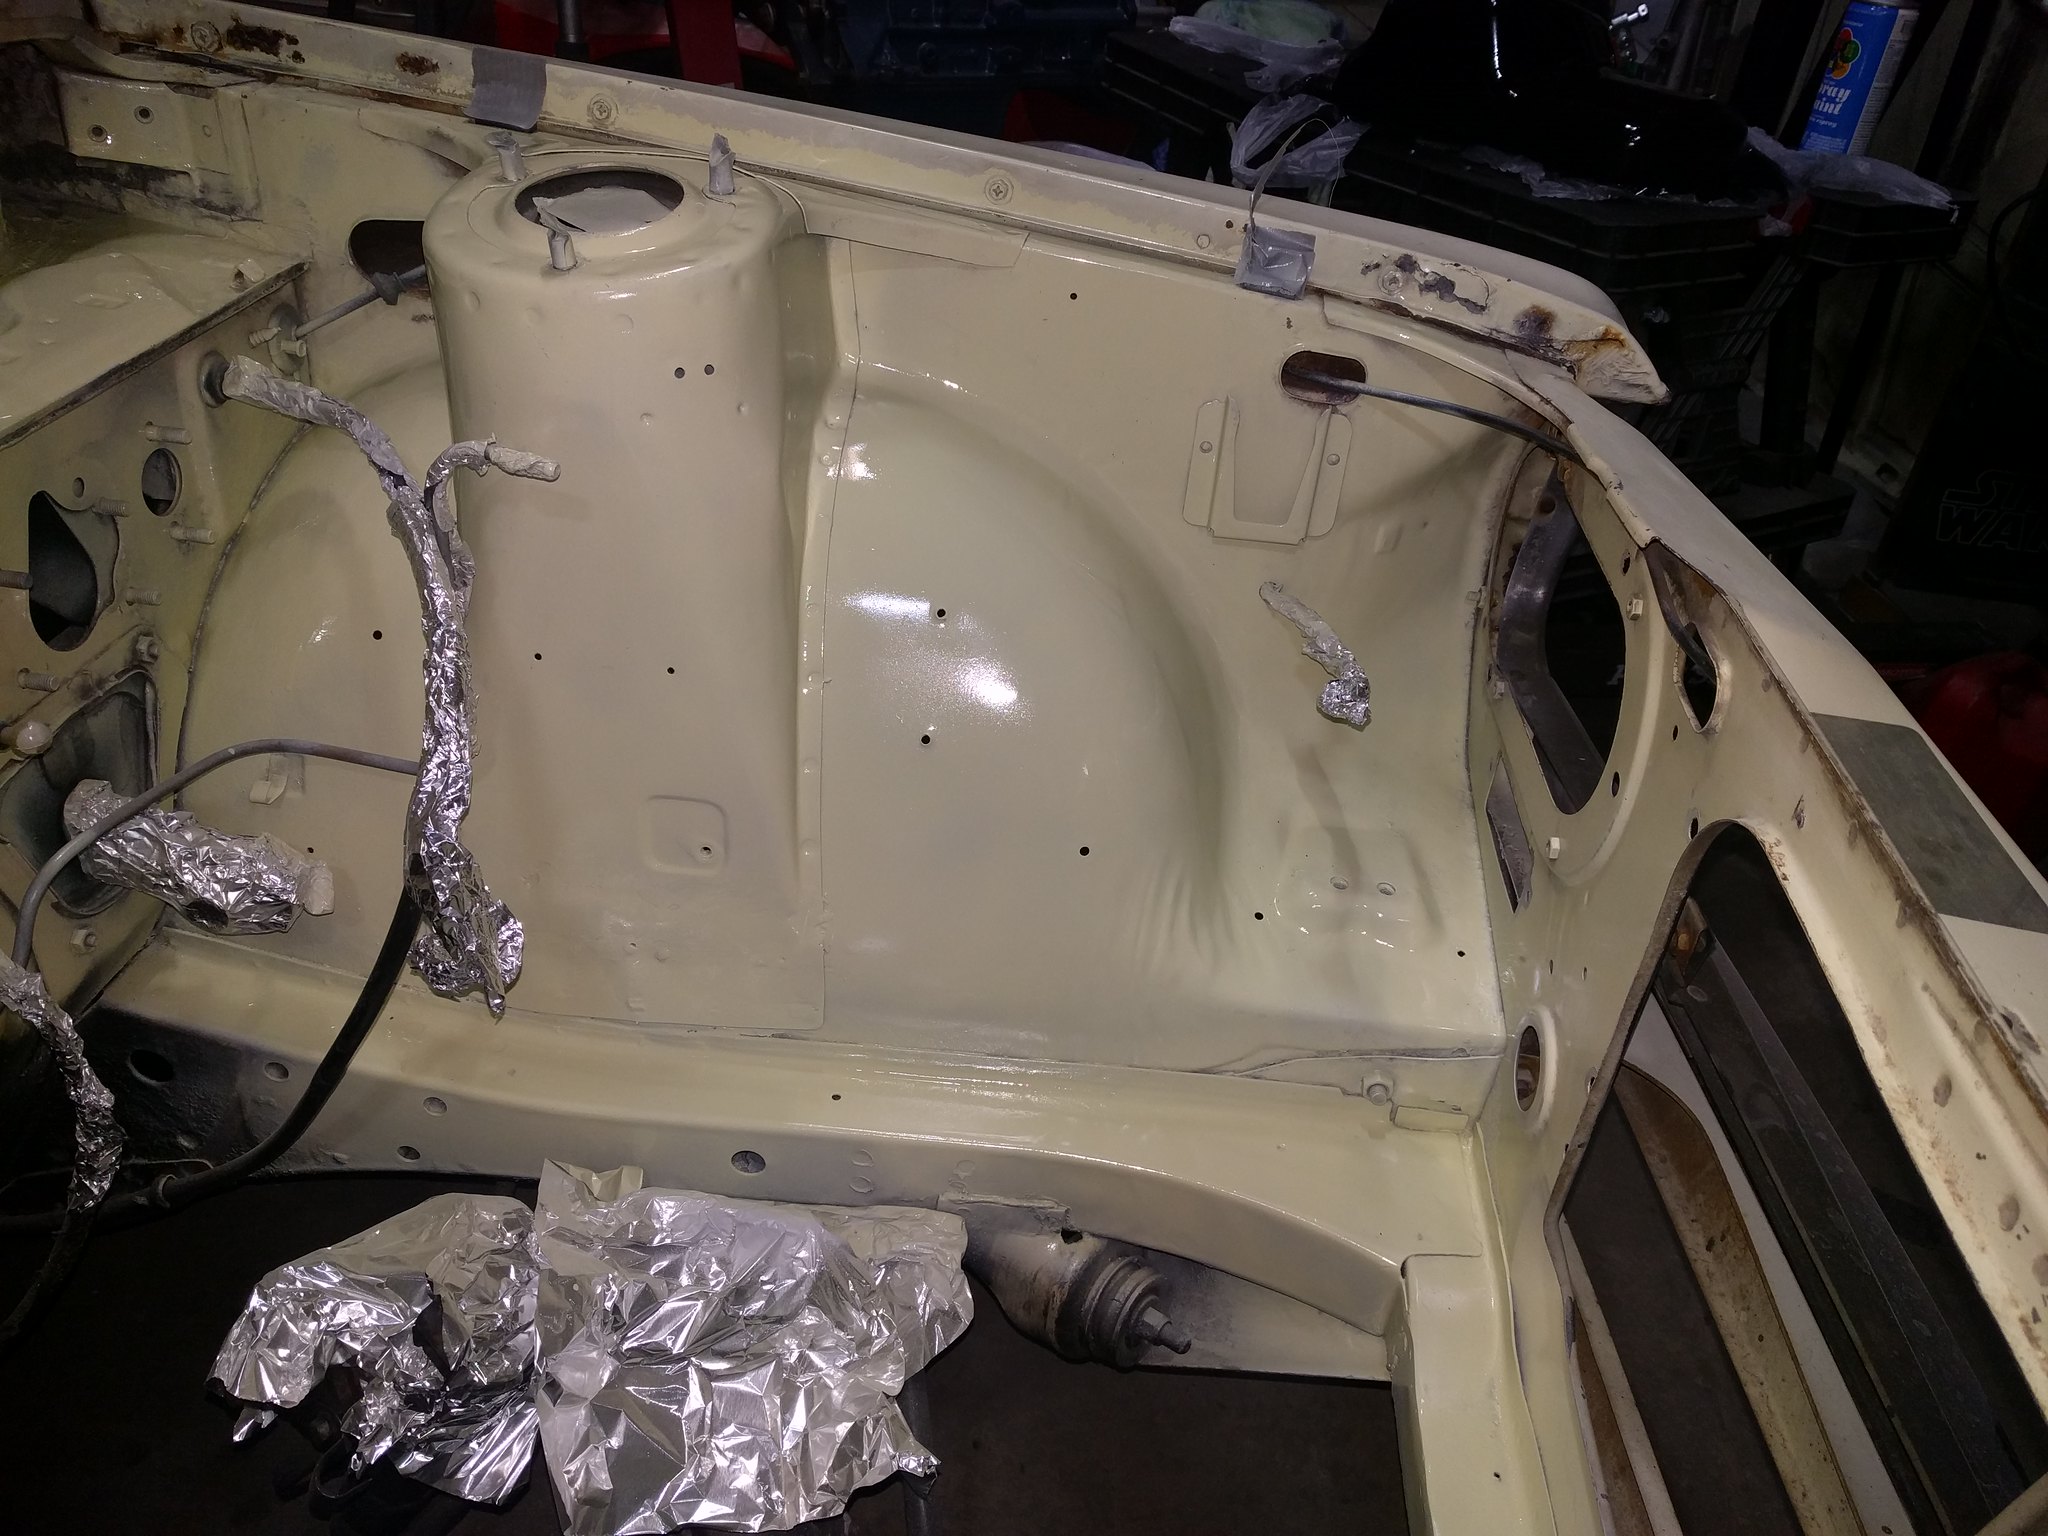
Alright just general update time. In the past couple months I have:

- Replaced the fuel filler hose

- Finished mounting electric fans

- Replaced the radiator

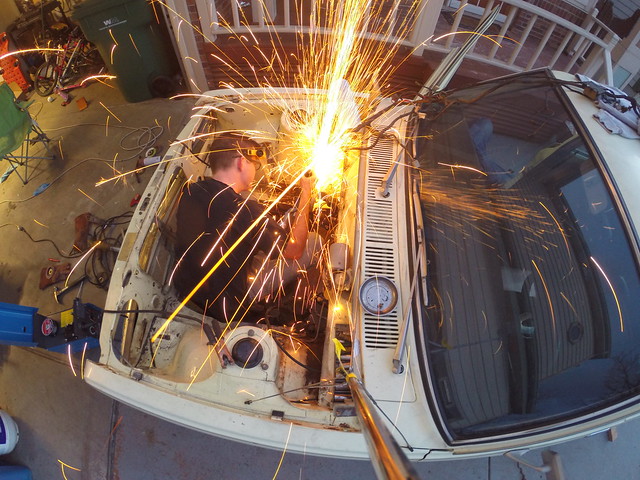
- Almost destroyed the engine (having the car come off the jack)

- Replaced the thermostat

- Got new wheels for the Z, which means the 280zx wheels are available for use on the 510.

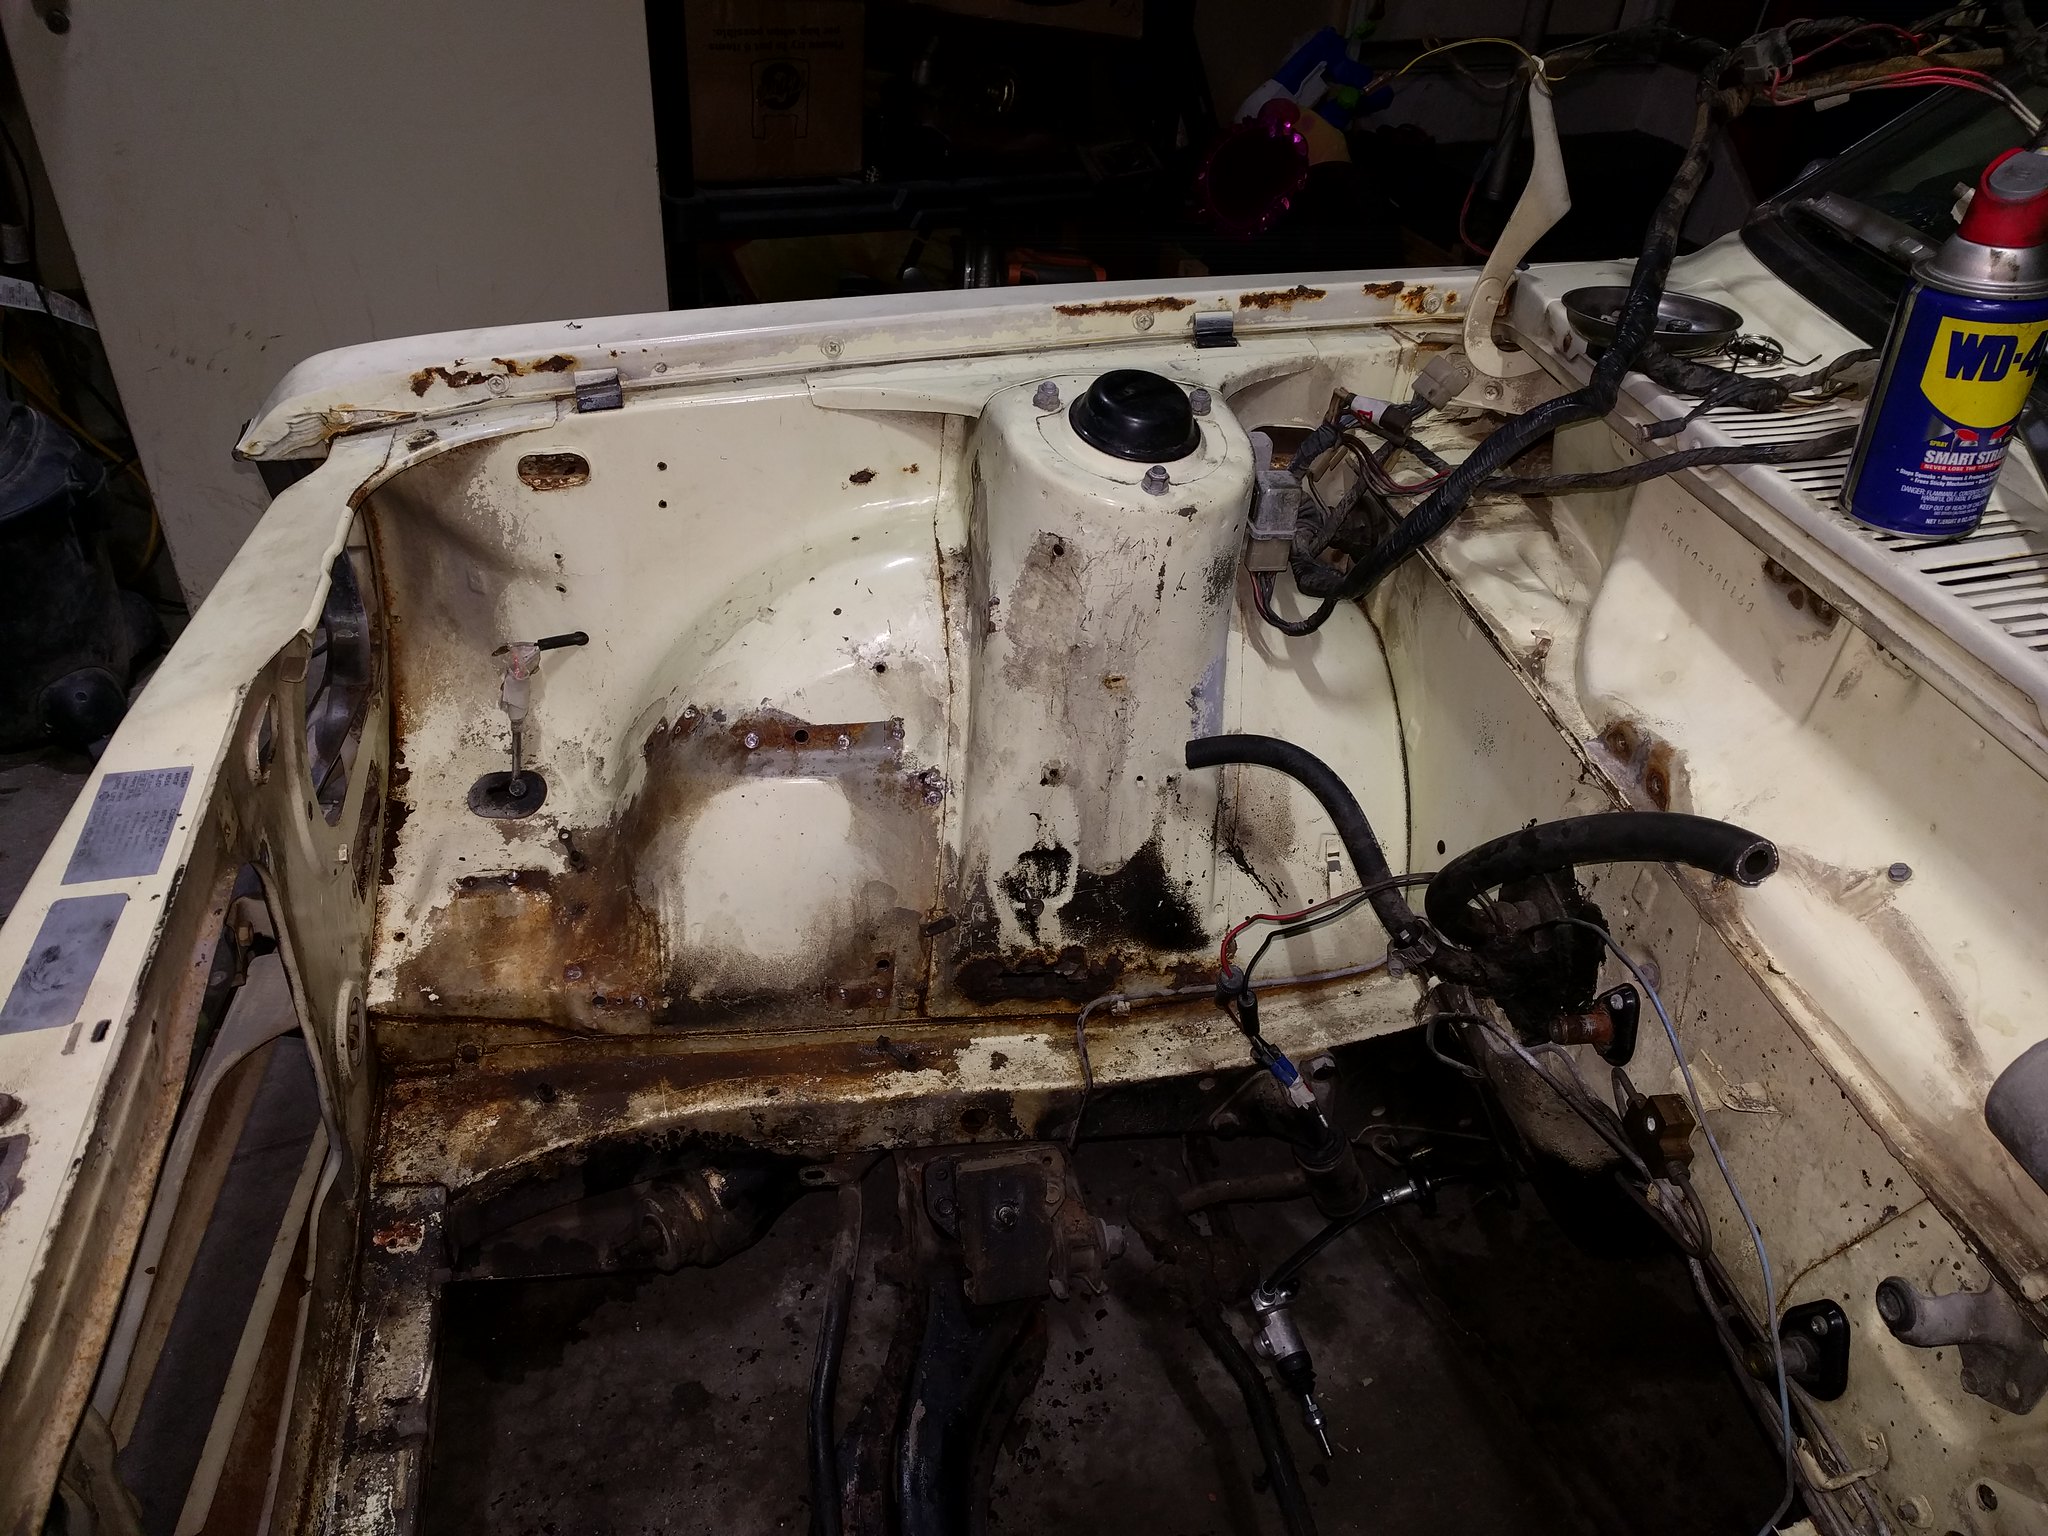
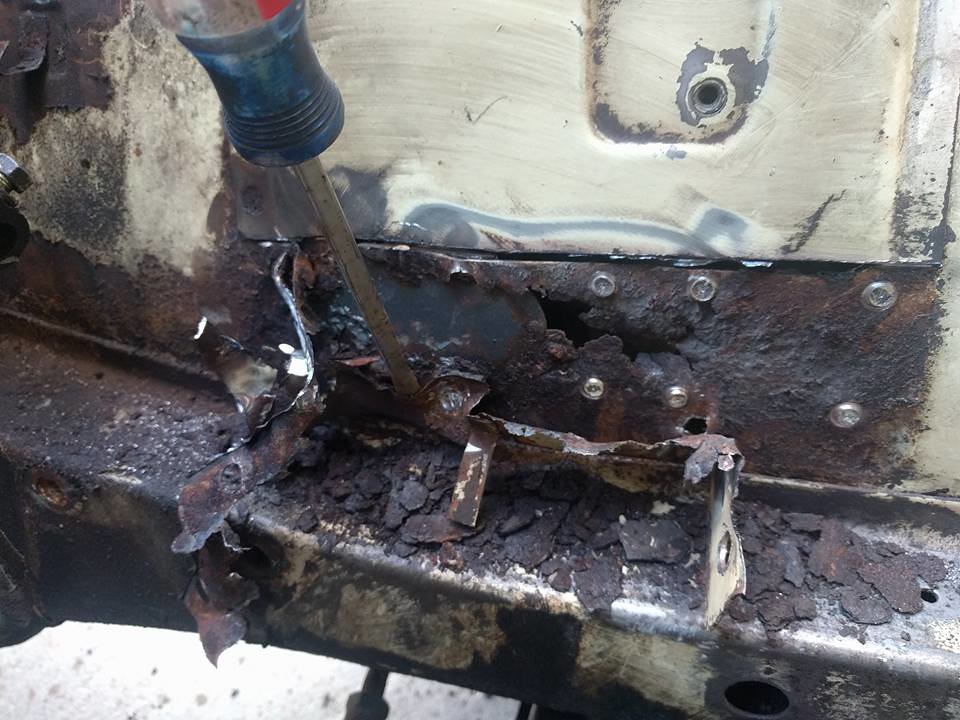
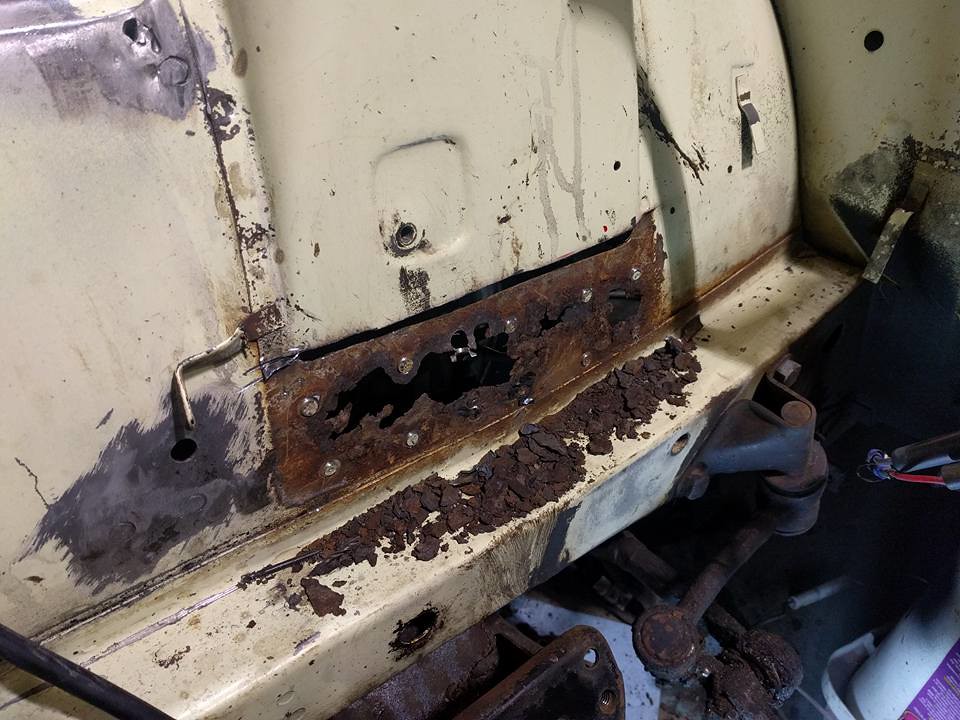
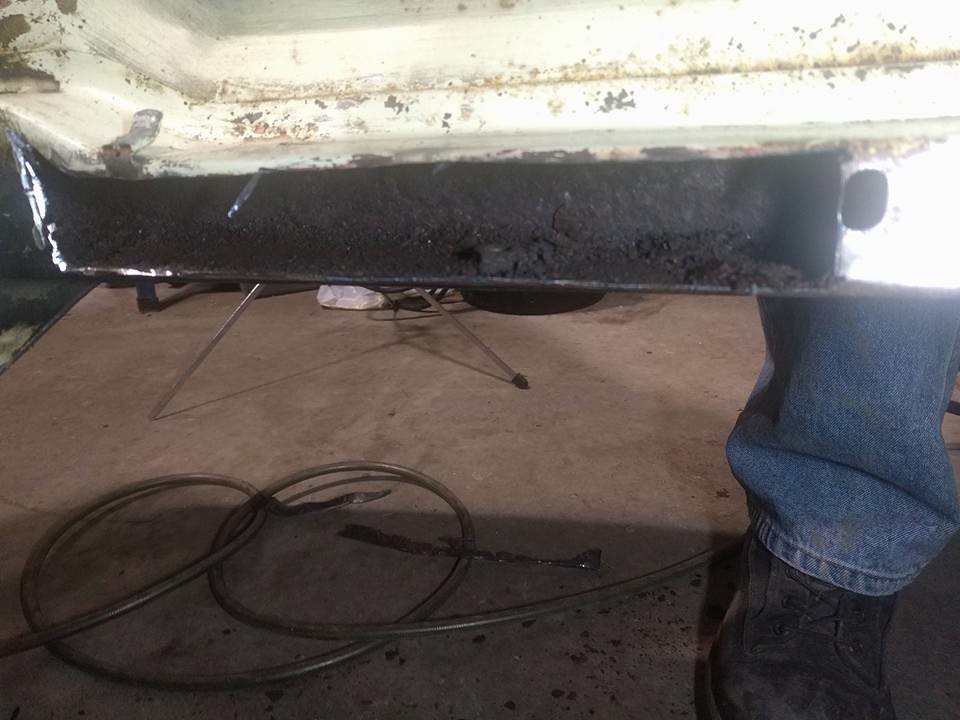
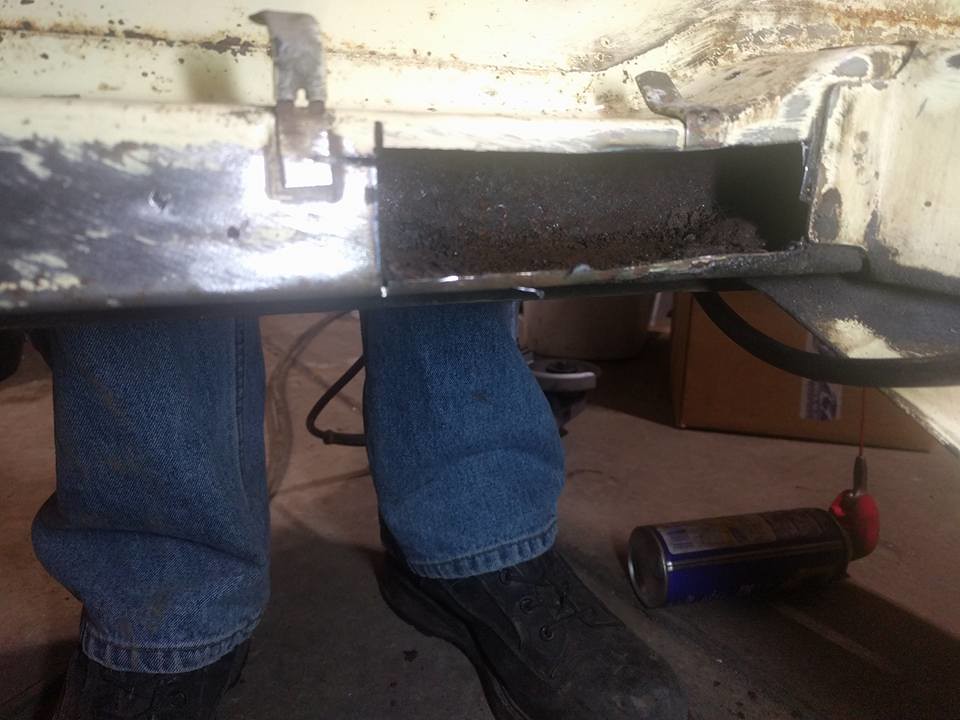
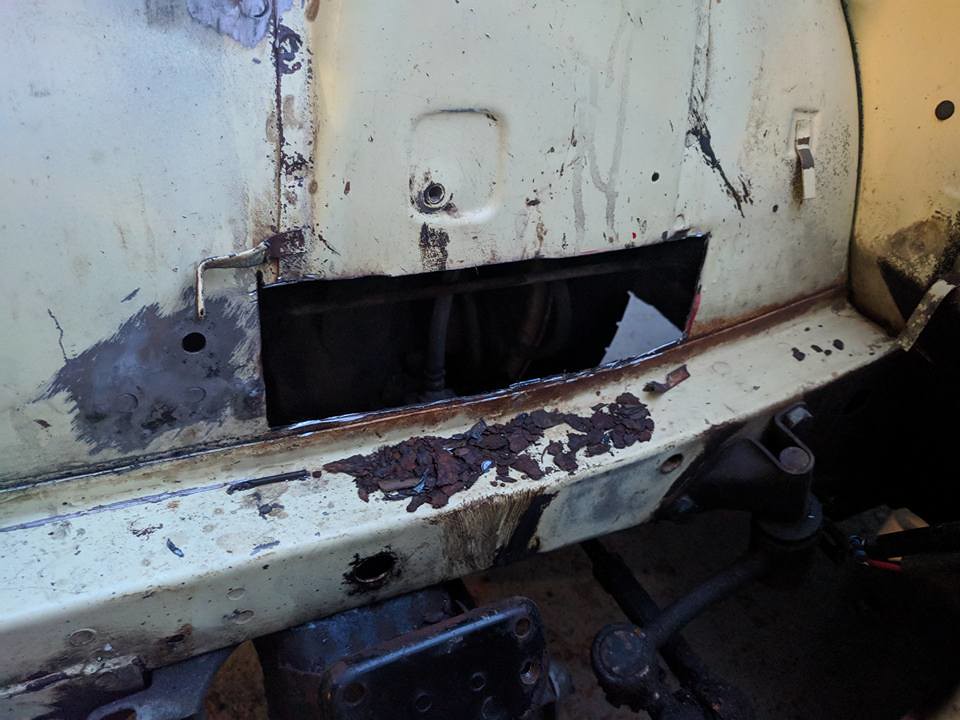
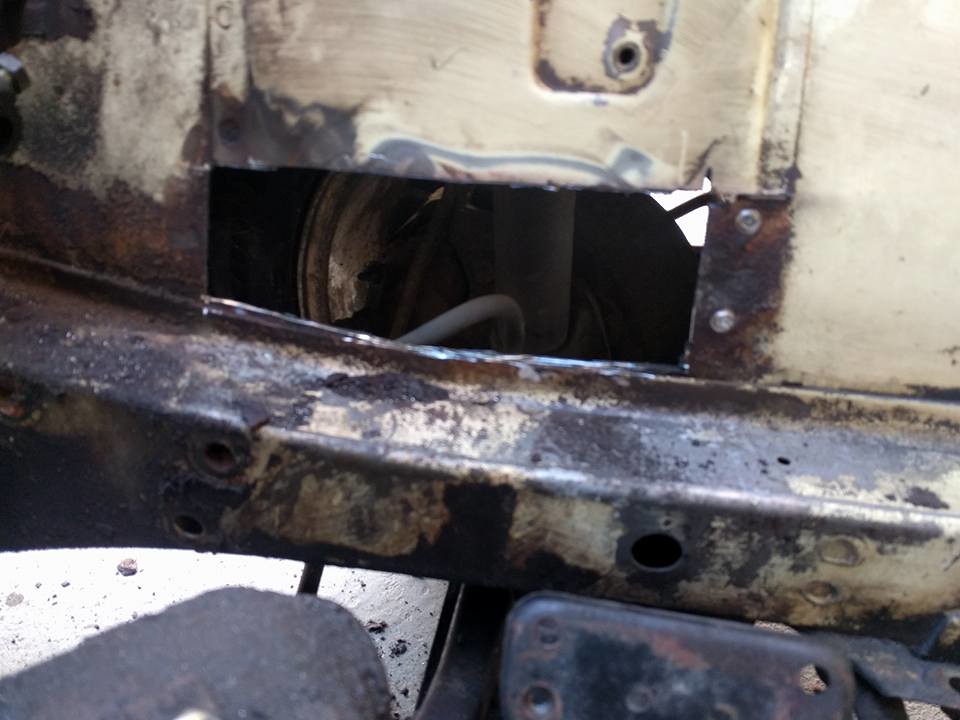
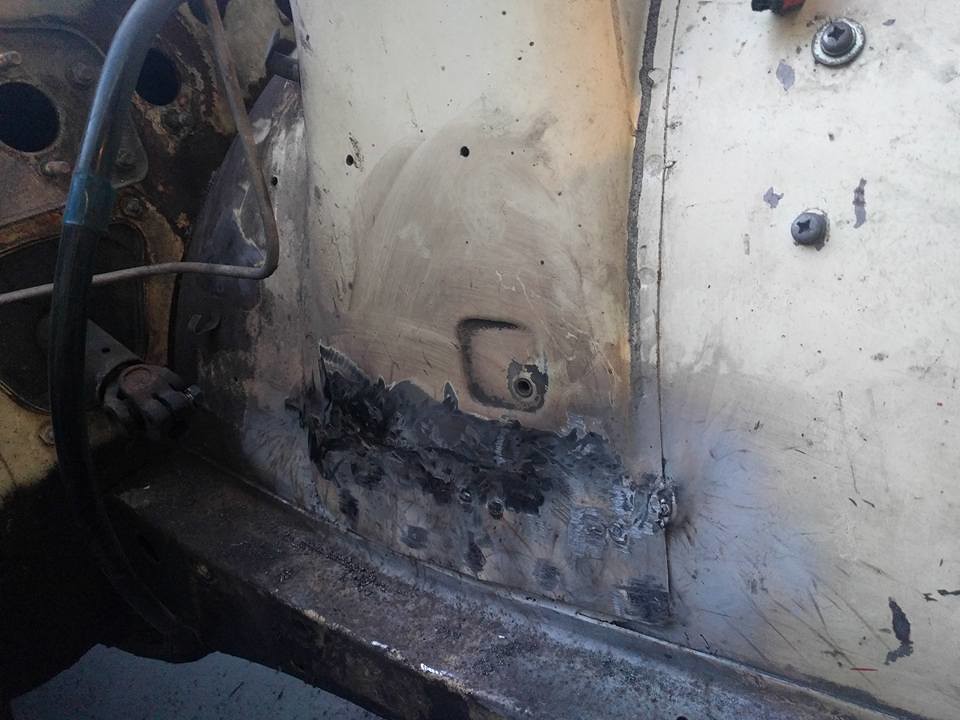
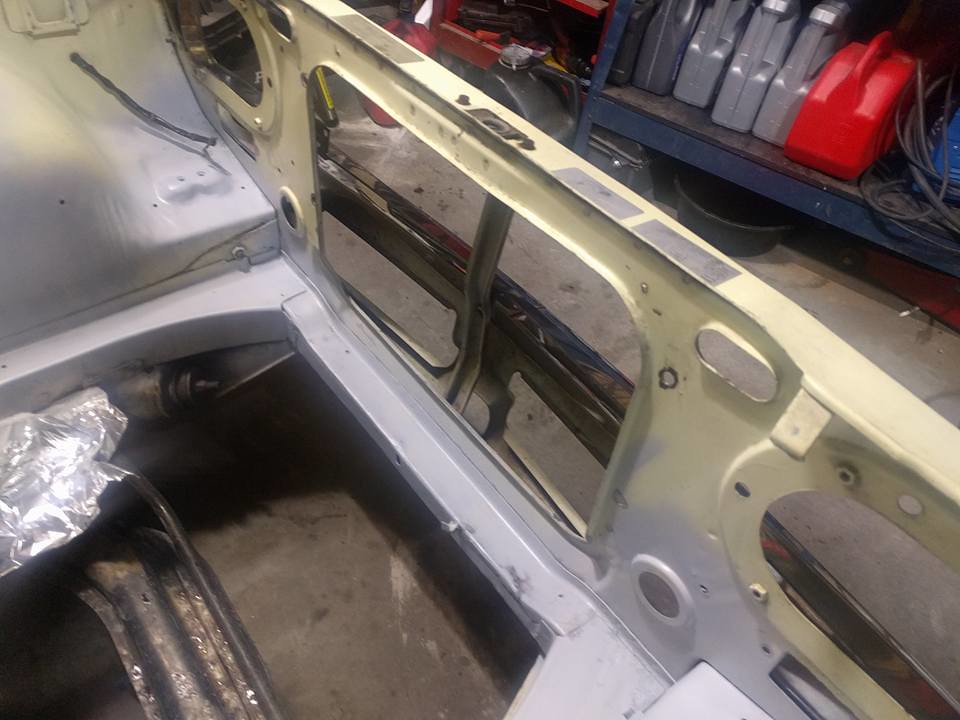
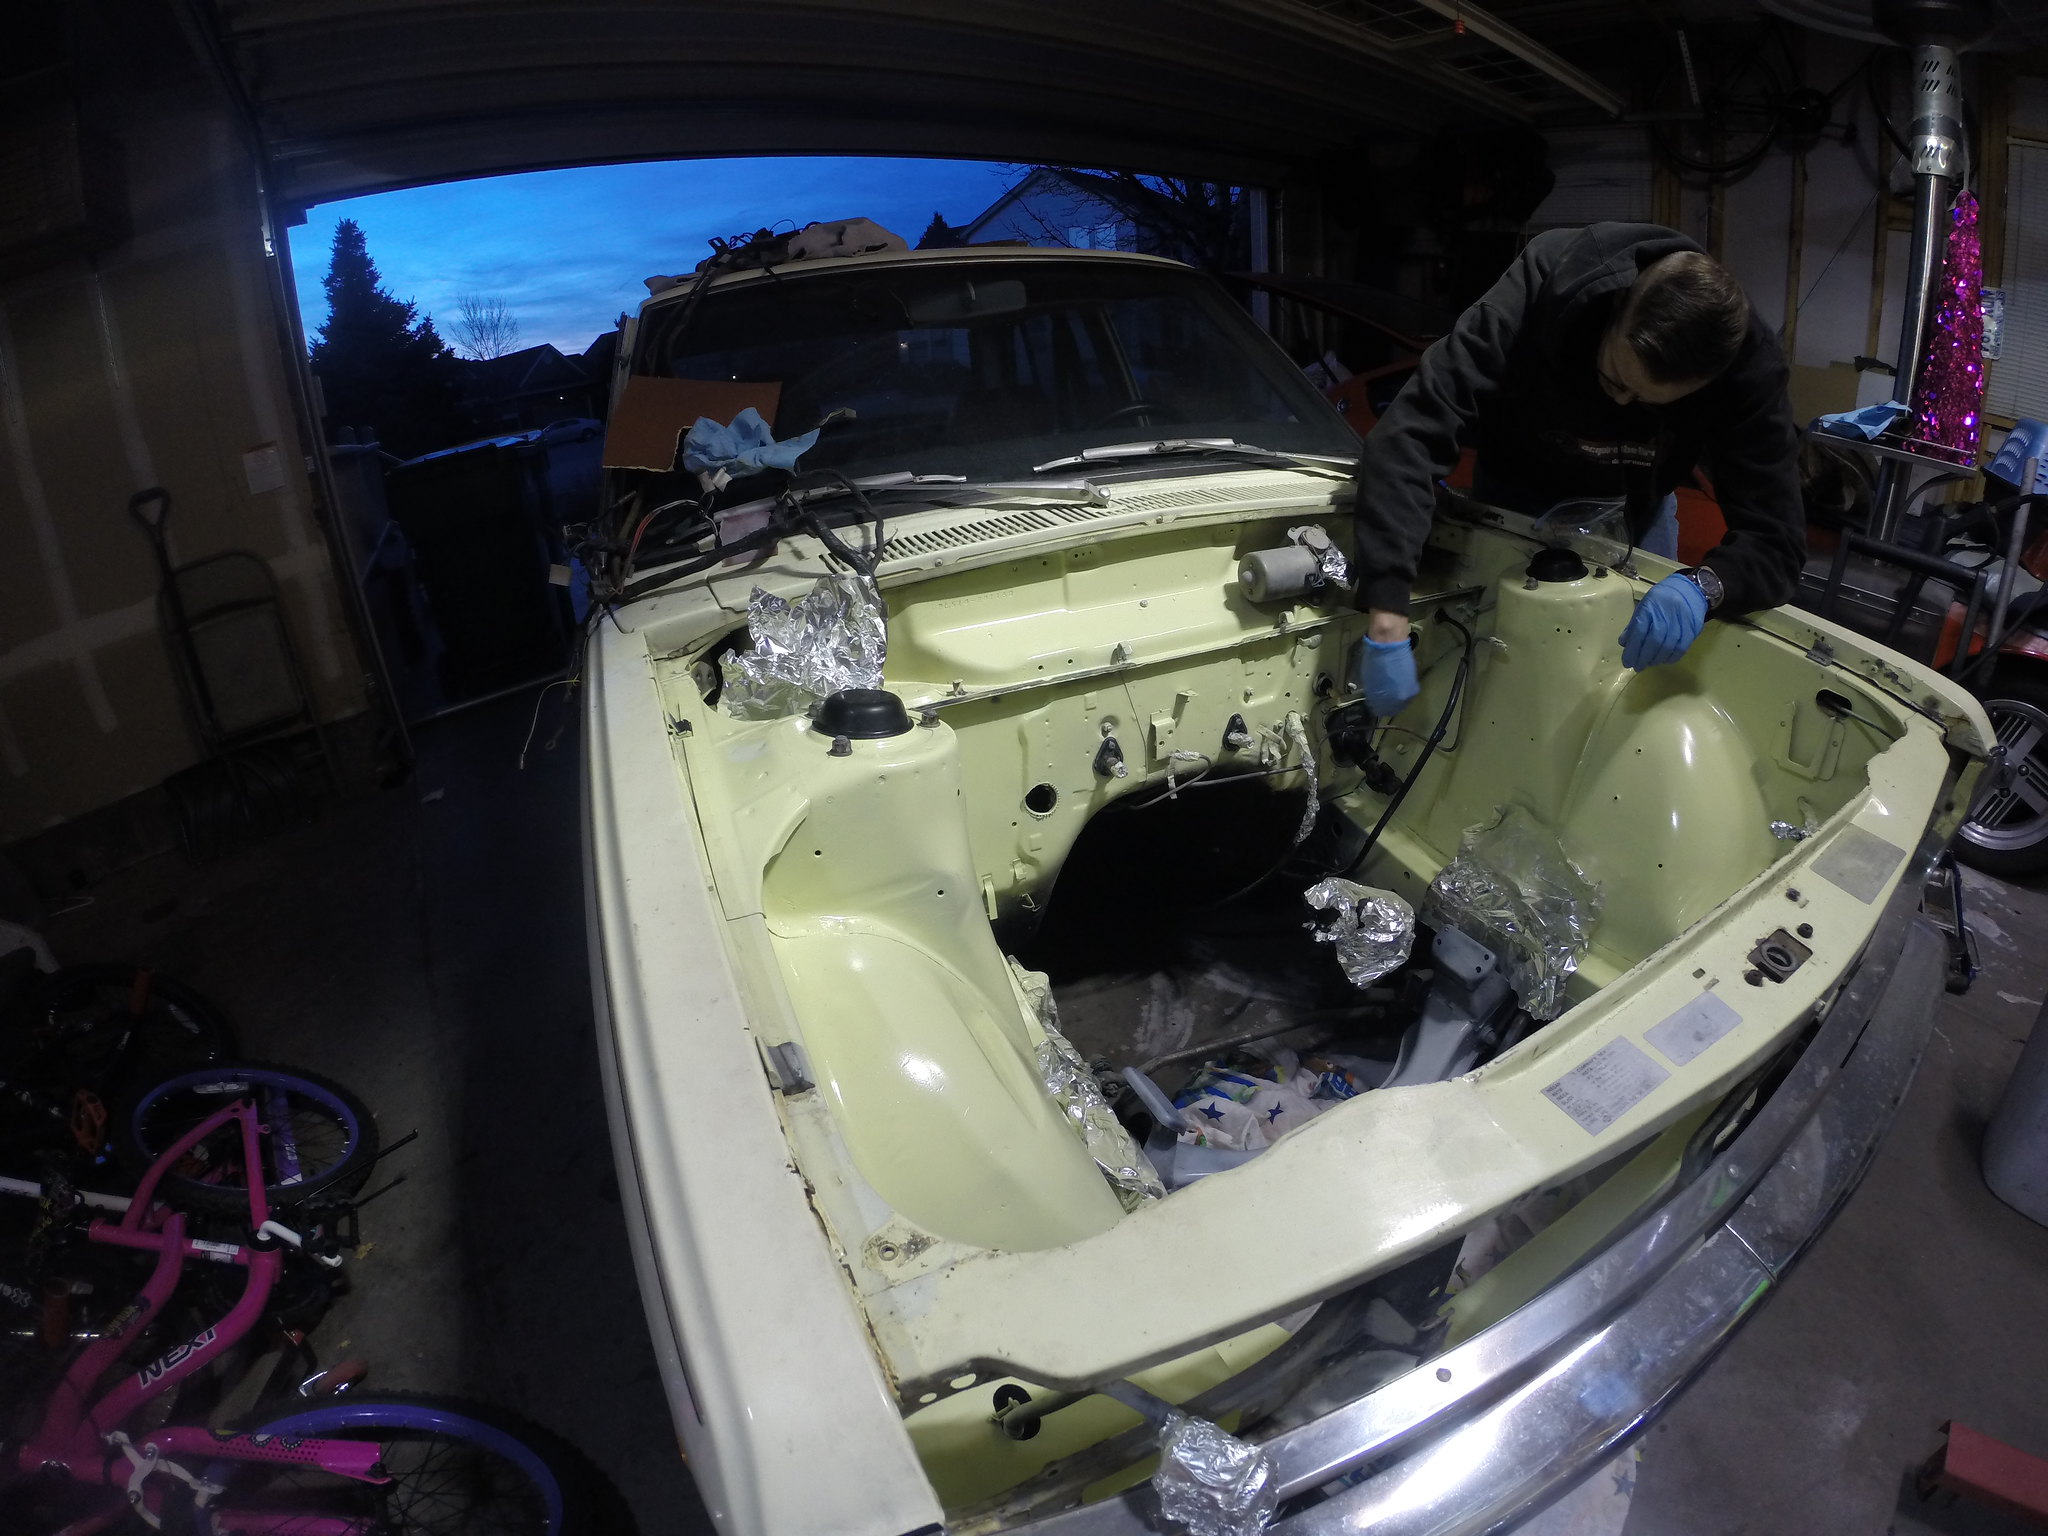
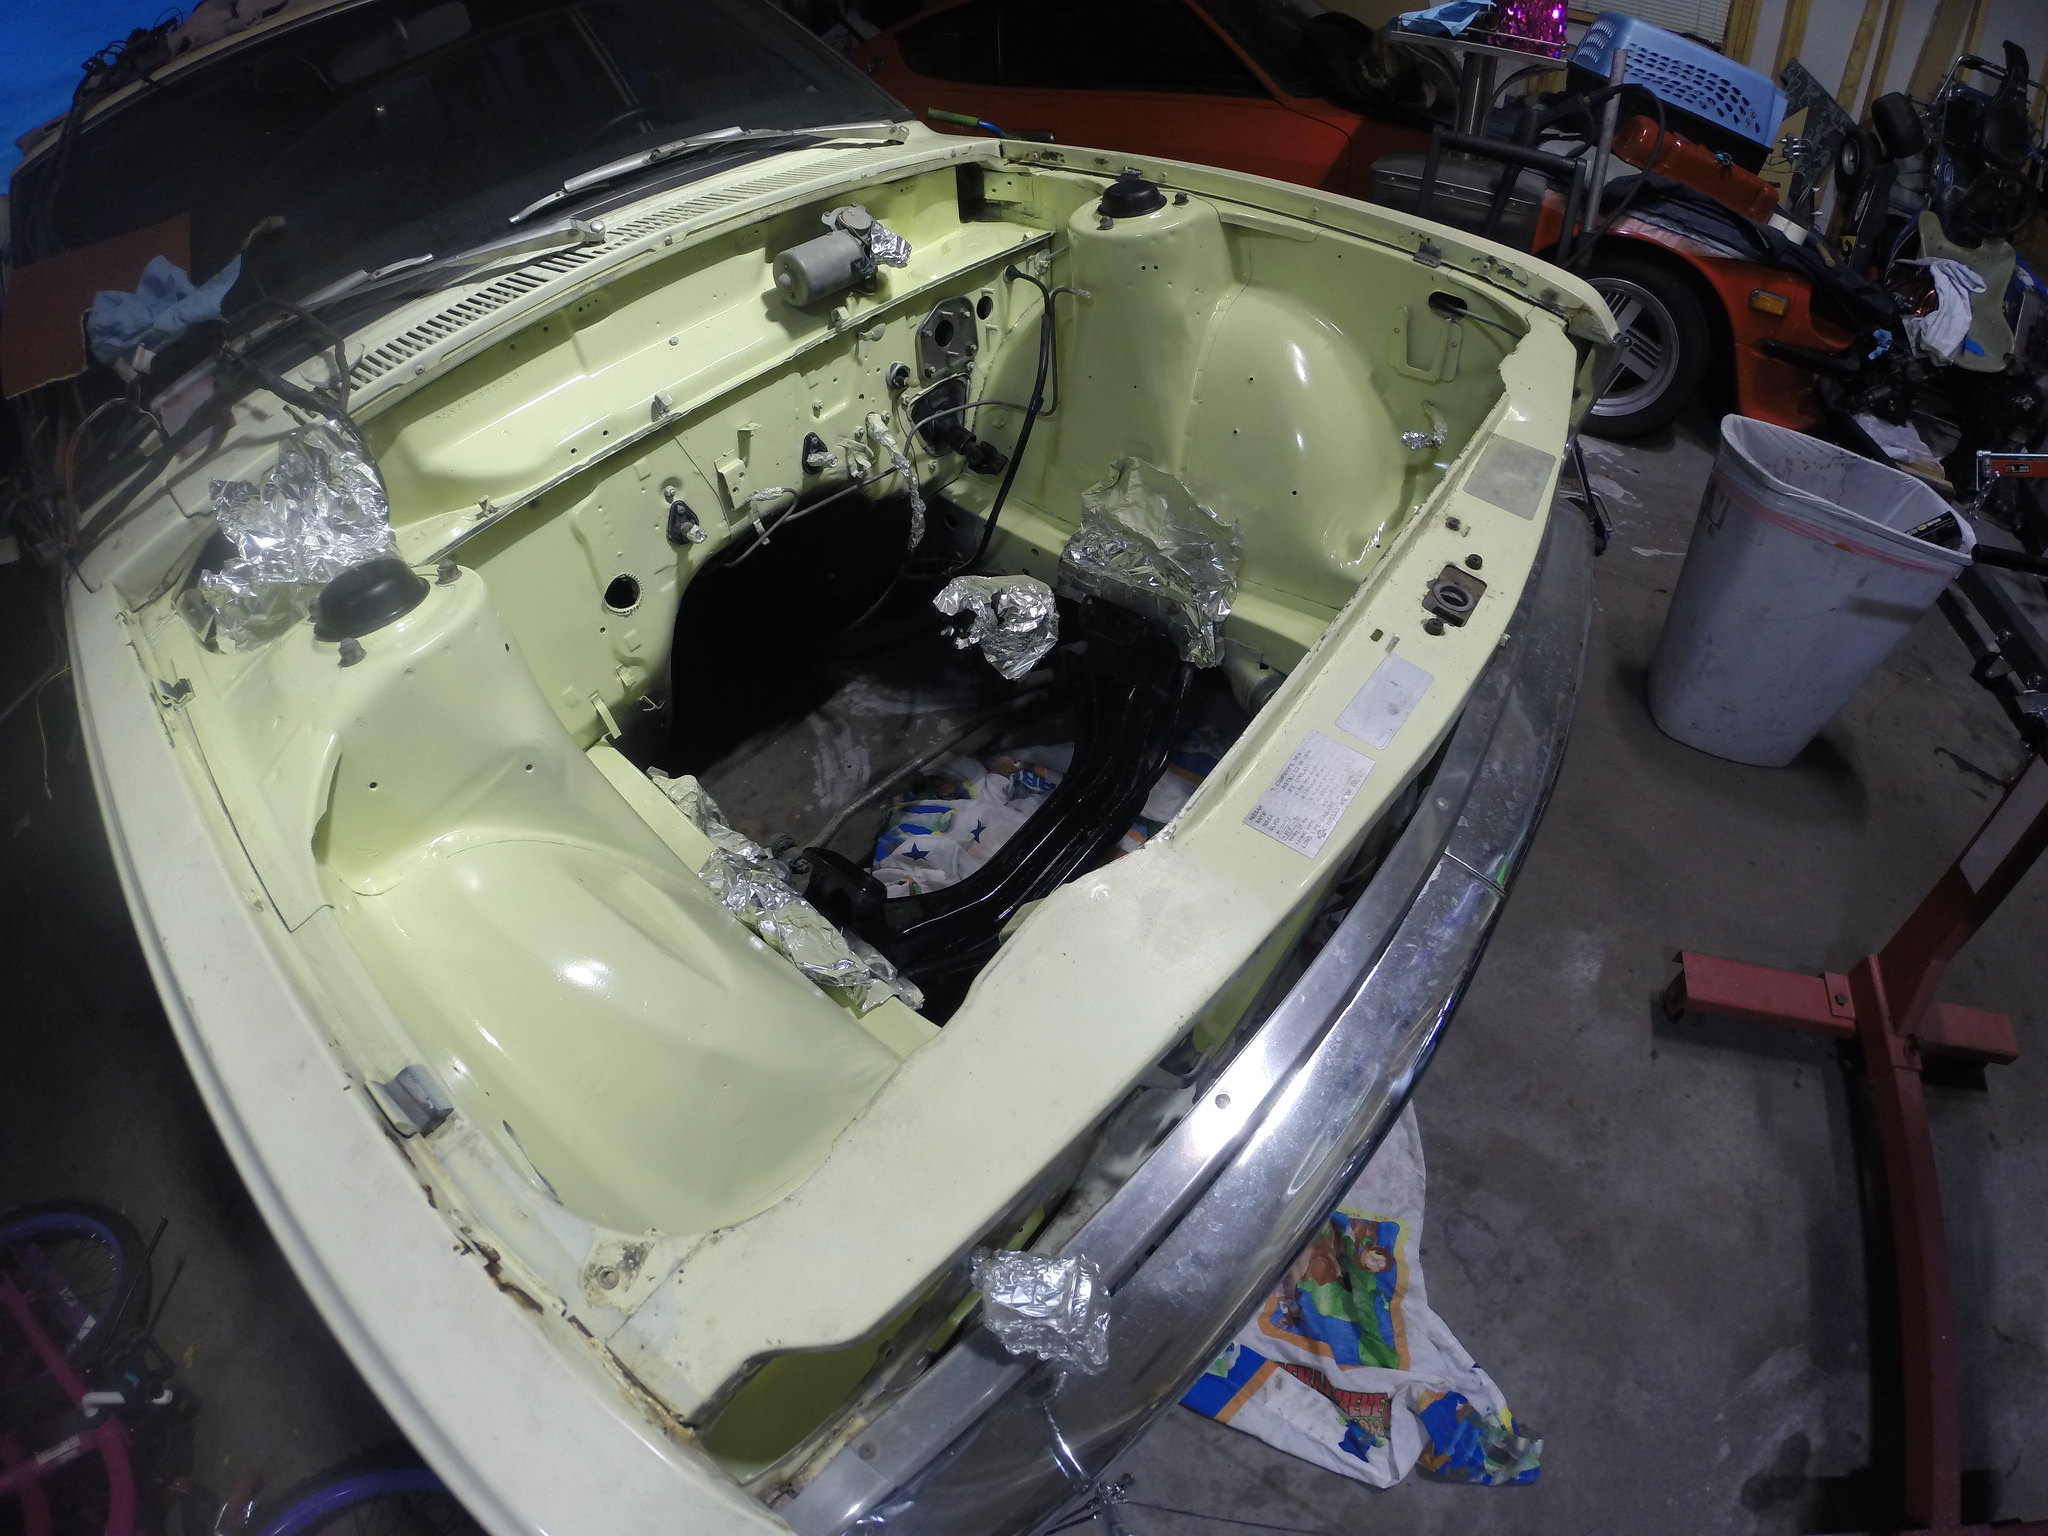
- Ordered new floor pans

I have been chasing an overheating issue, I believe I have finally narrowed it down to not enough air movement through the radiator. I recently moved to Las Vegas and it is hotter than heck here and the electric fans can't keep up with the heat when sitting at stop lights. 

Plans for the next couple months

- Get a stock fan back in there

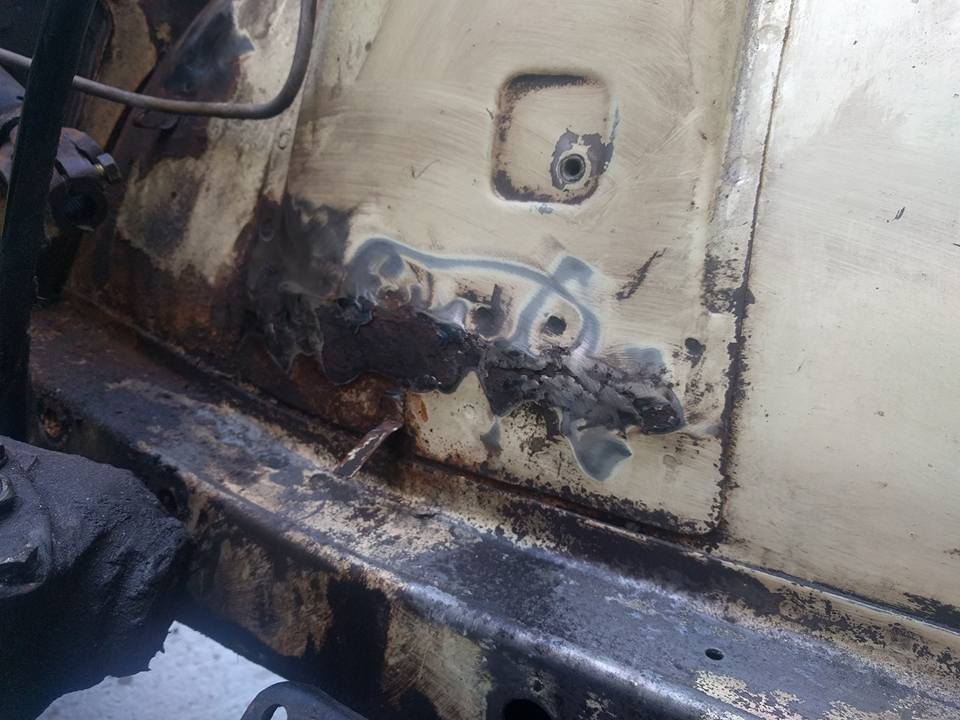
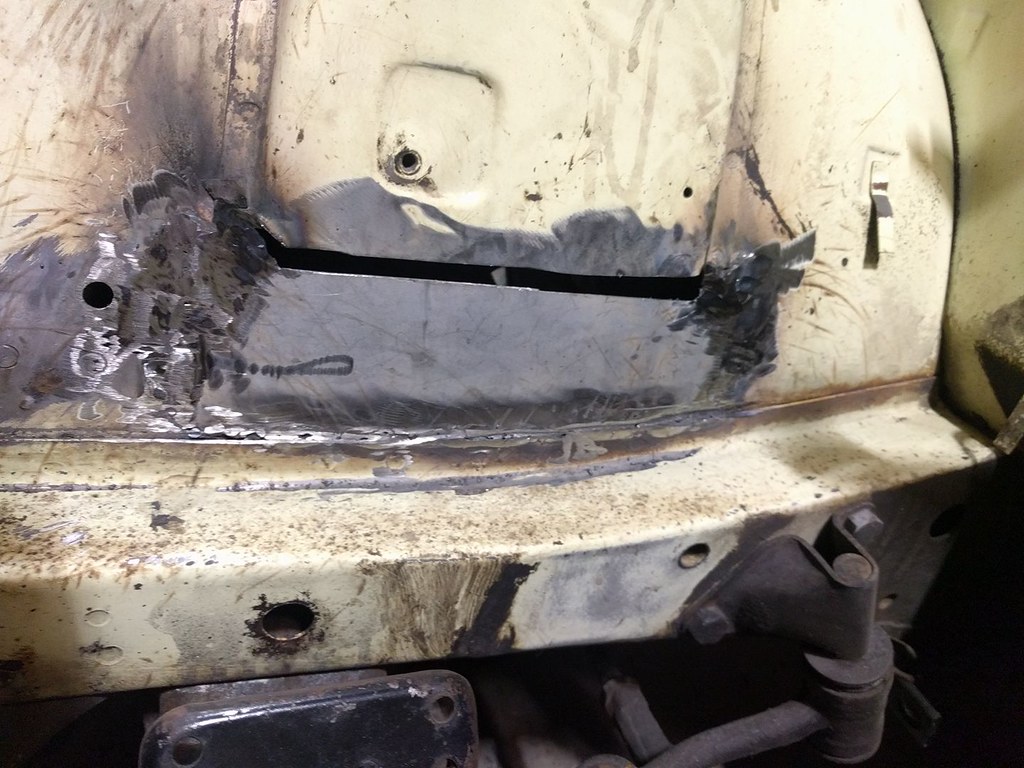
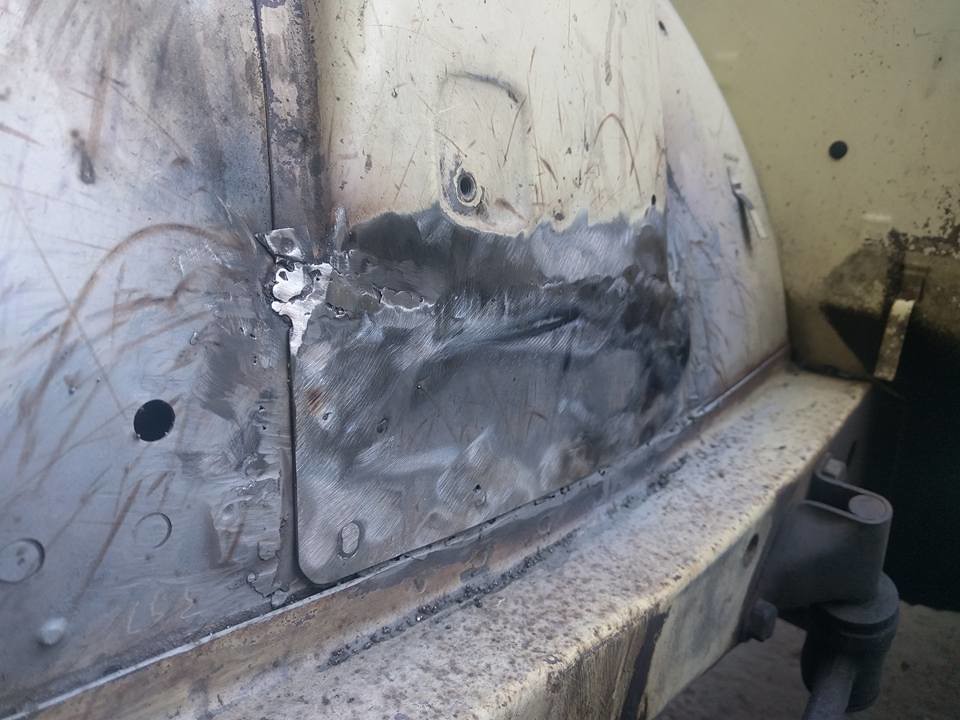
- Replace rocker panels

- Replace Floor Boards

1 2 3 4 5 6

You'll need to log in to post.

Our Preferred Partners
7RyTY4Frs5LTcsXrAtdR7u8fTUWxh0isiQSvzGcFQjhsq95eZ4ntOjlOnqLdekJ9