1 2 3 4 5 ... 20
95maxrider
95maxrider New Reader
4/5/16 2:10 p.m.

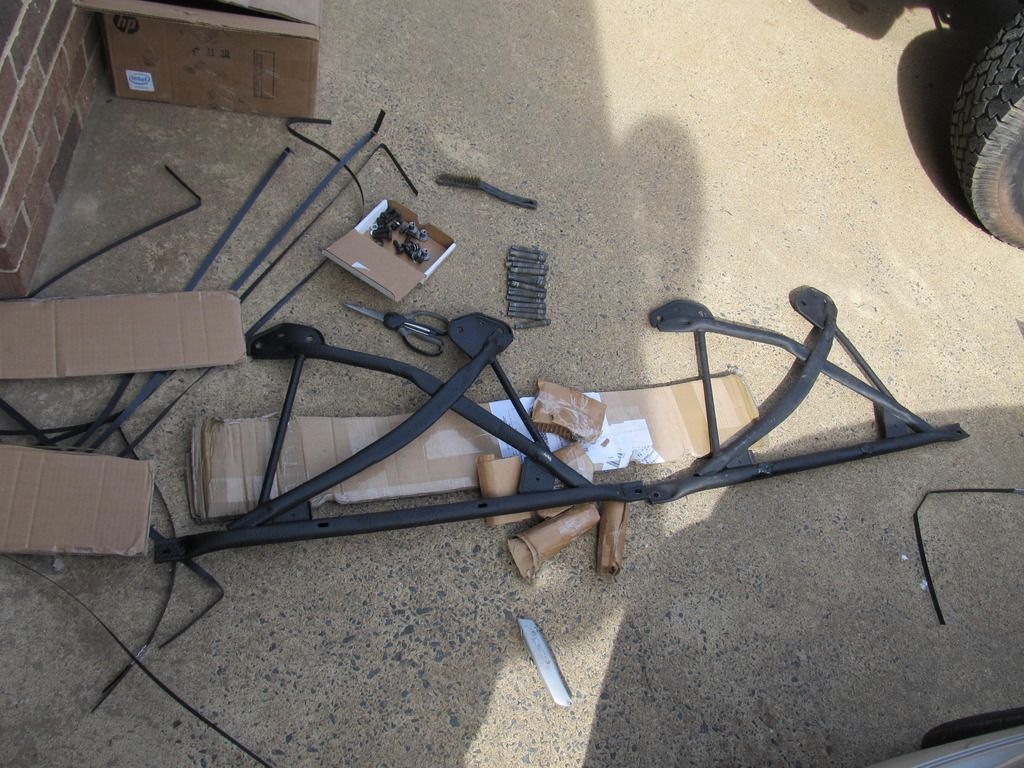
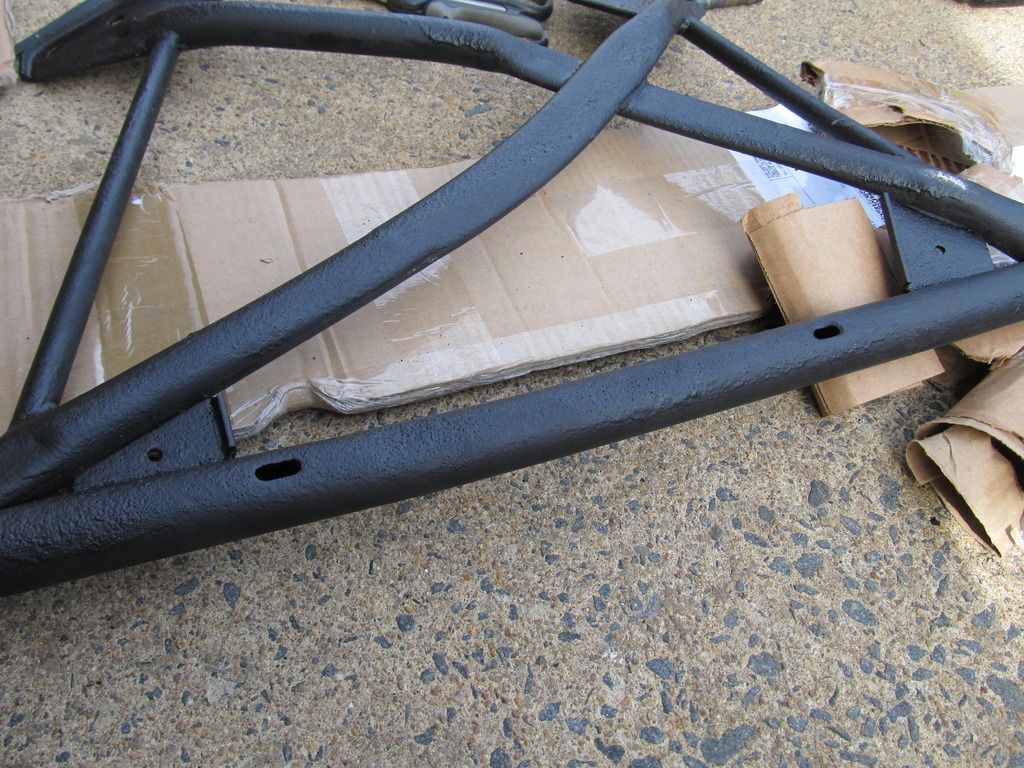
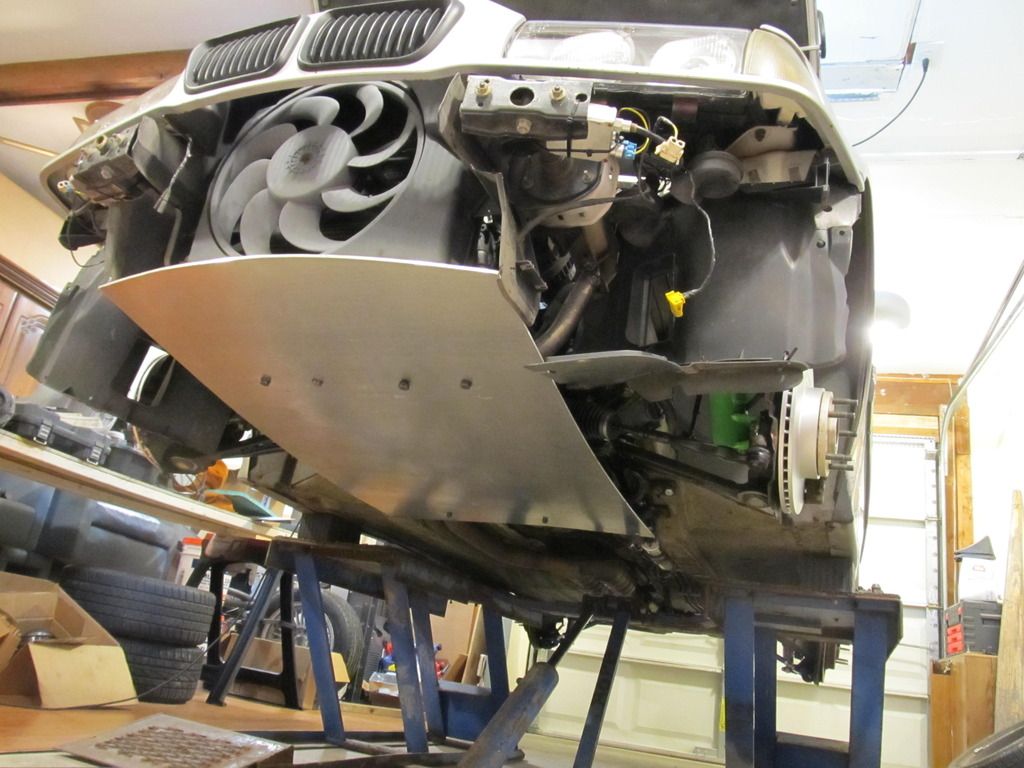
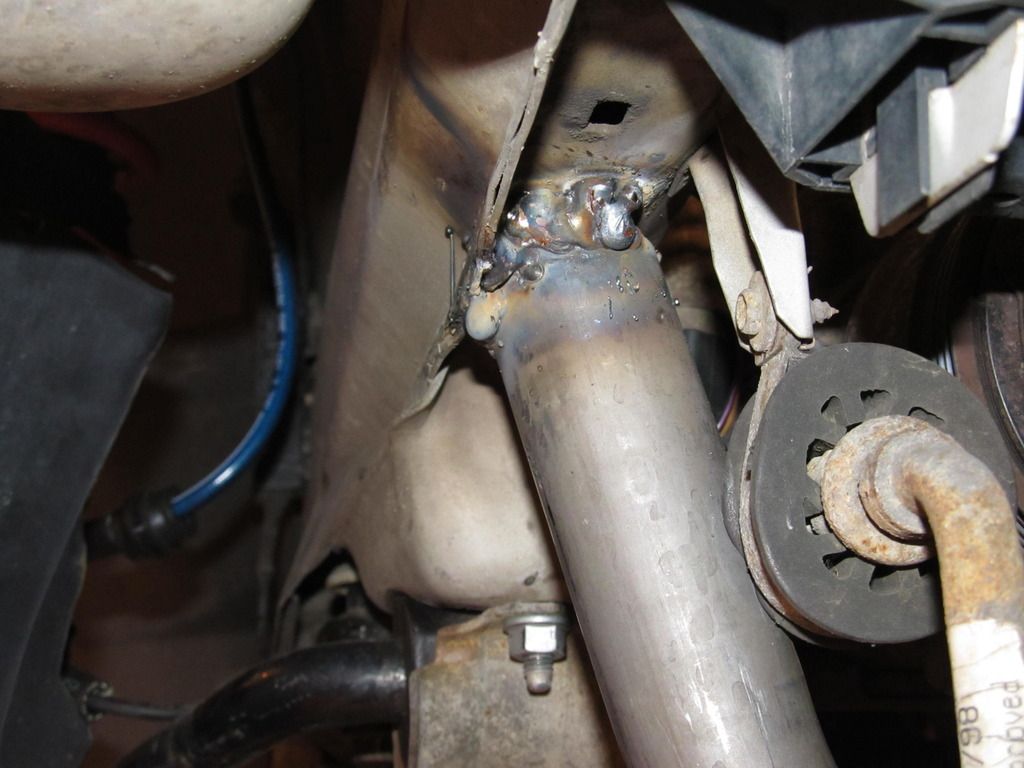
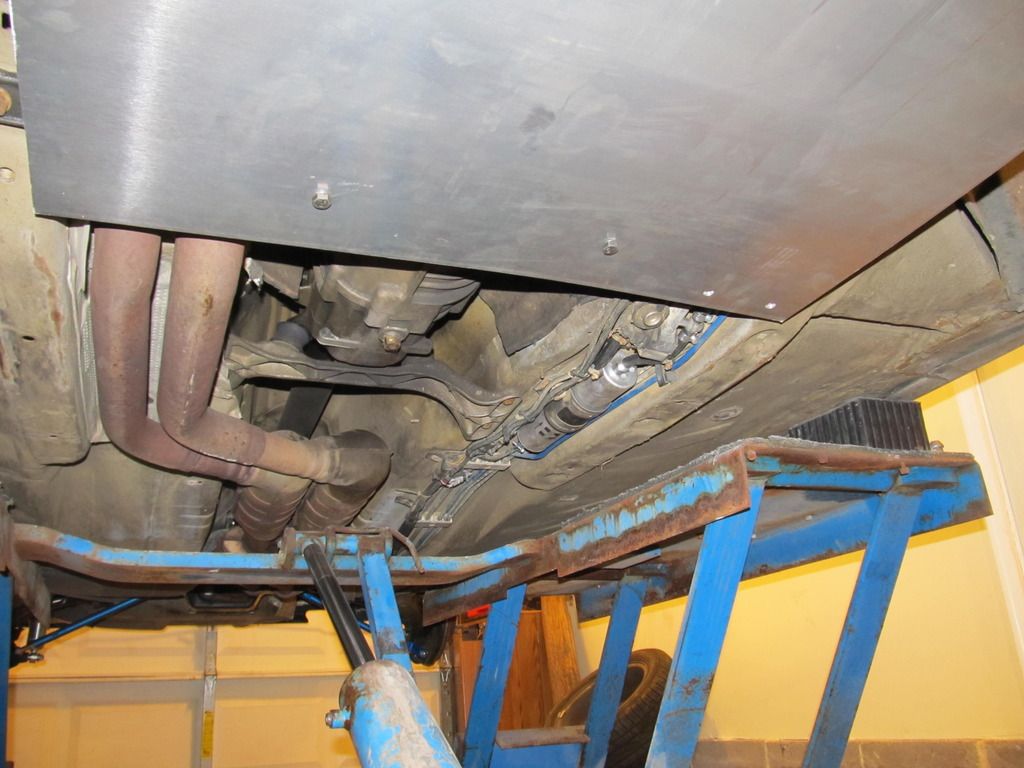
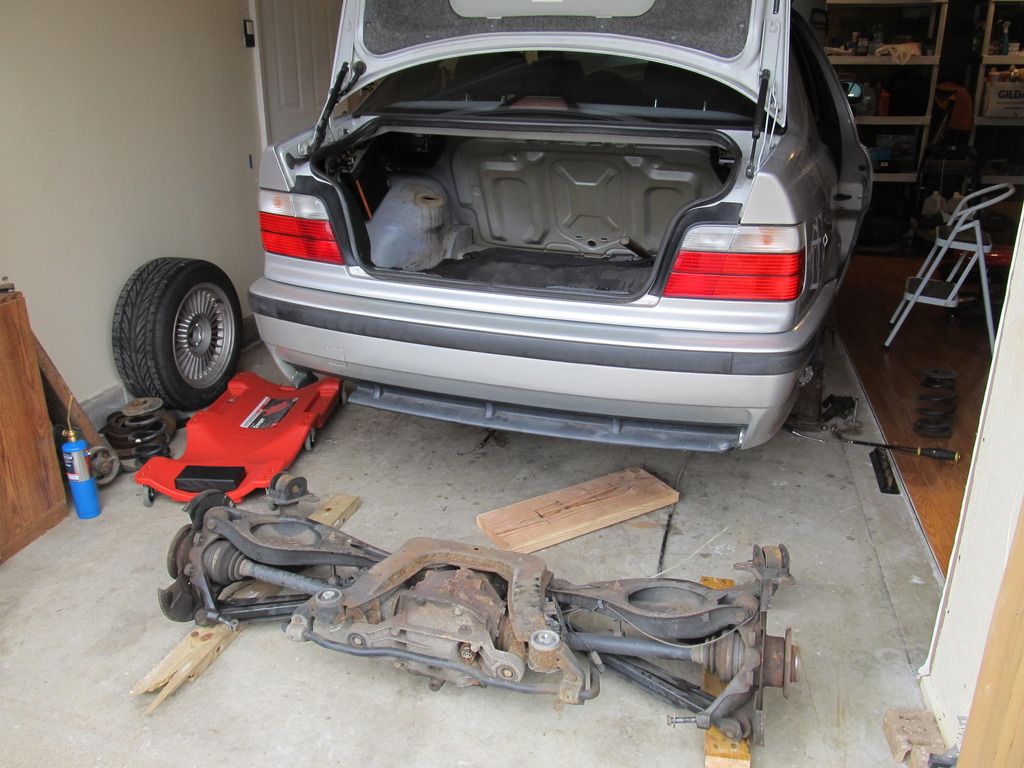
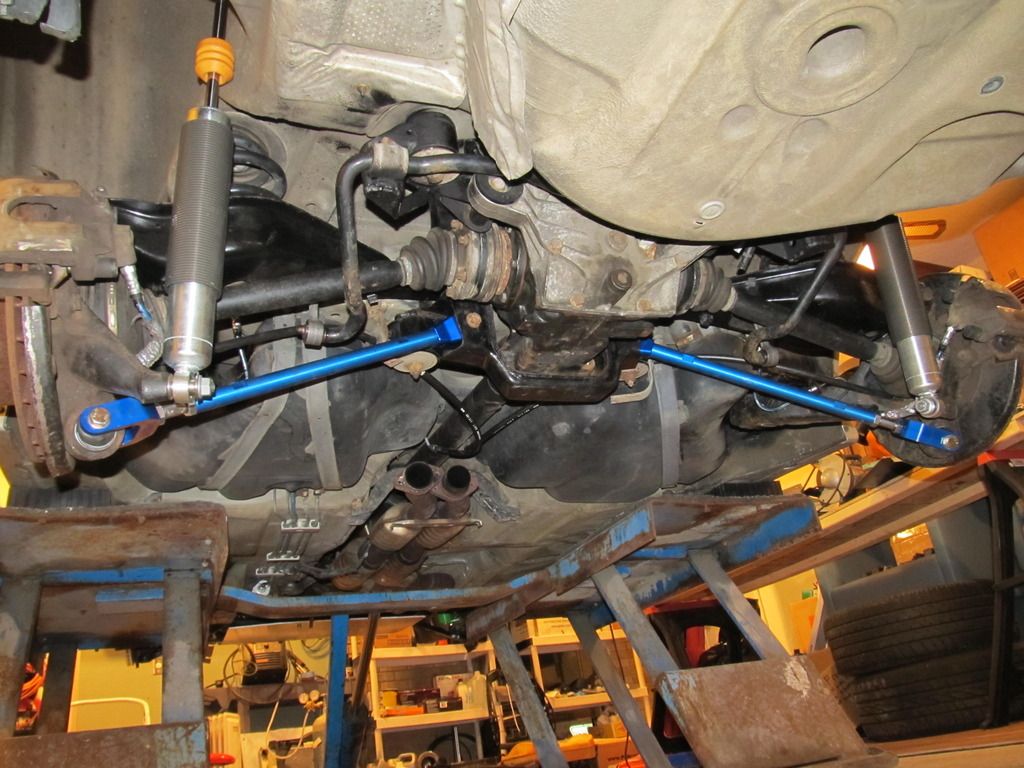
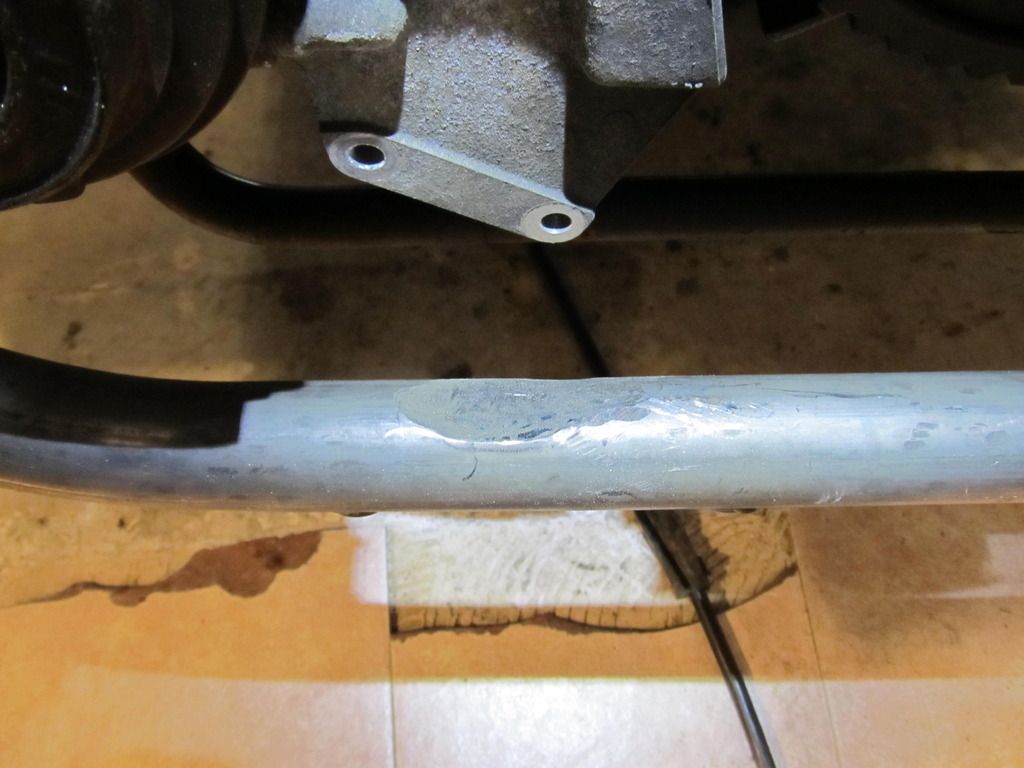
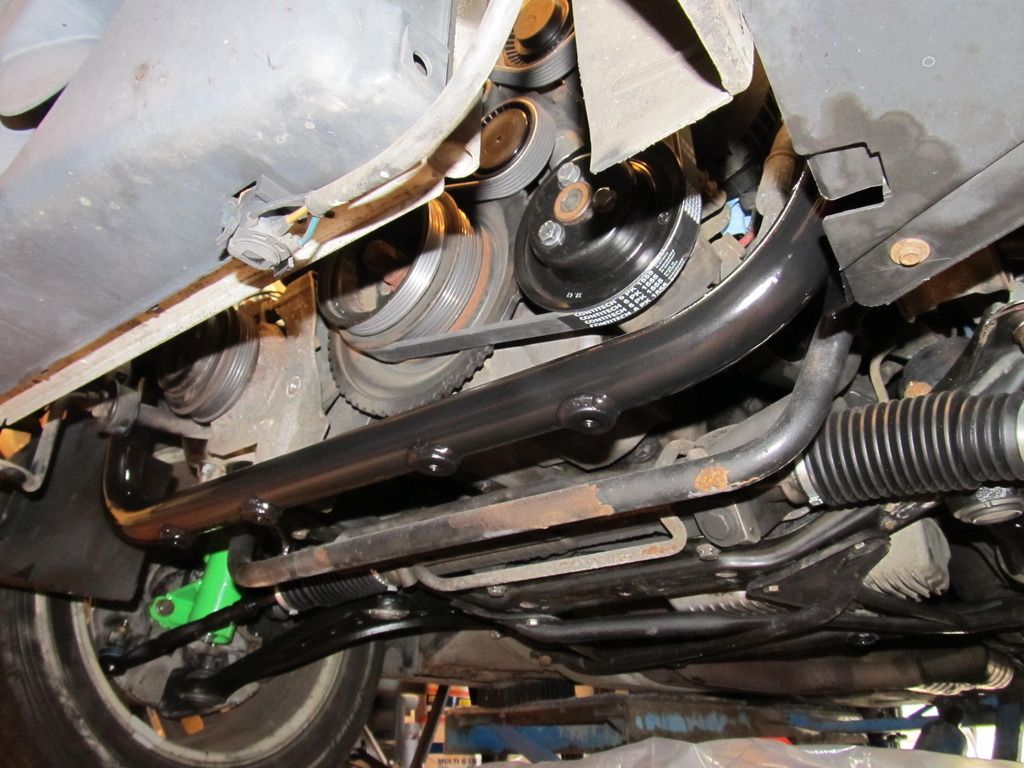
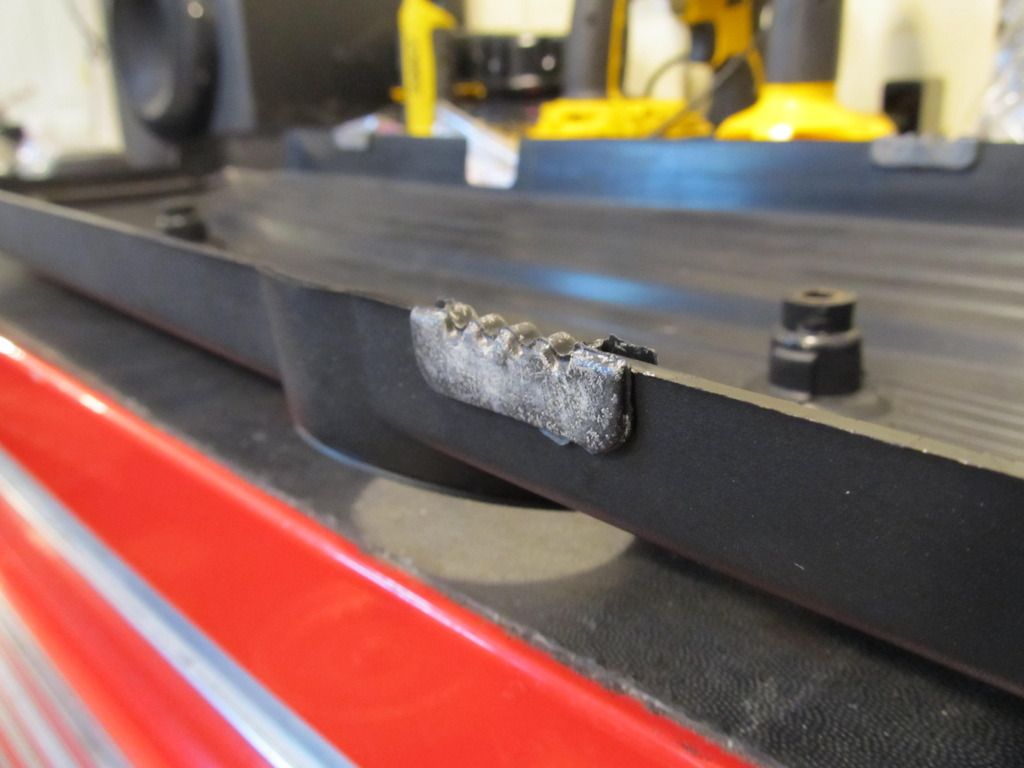
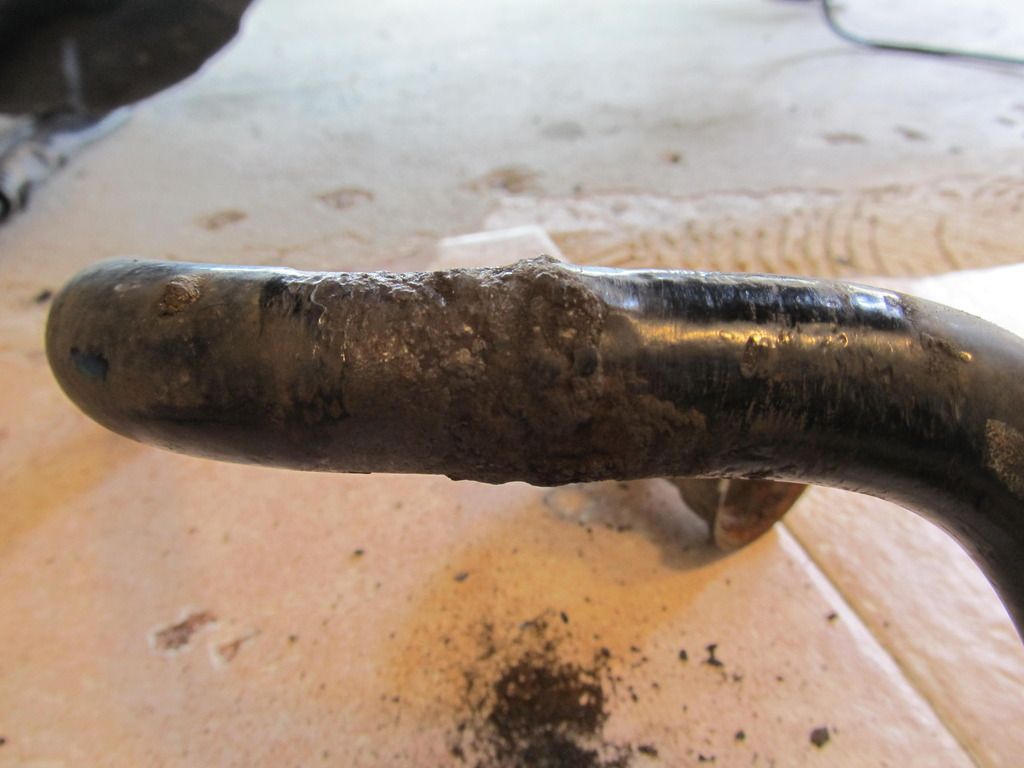
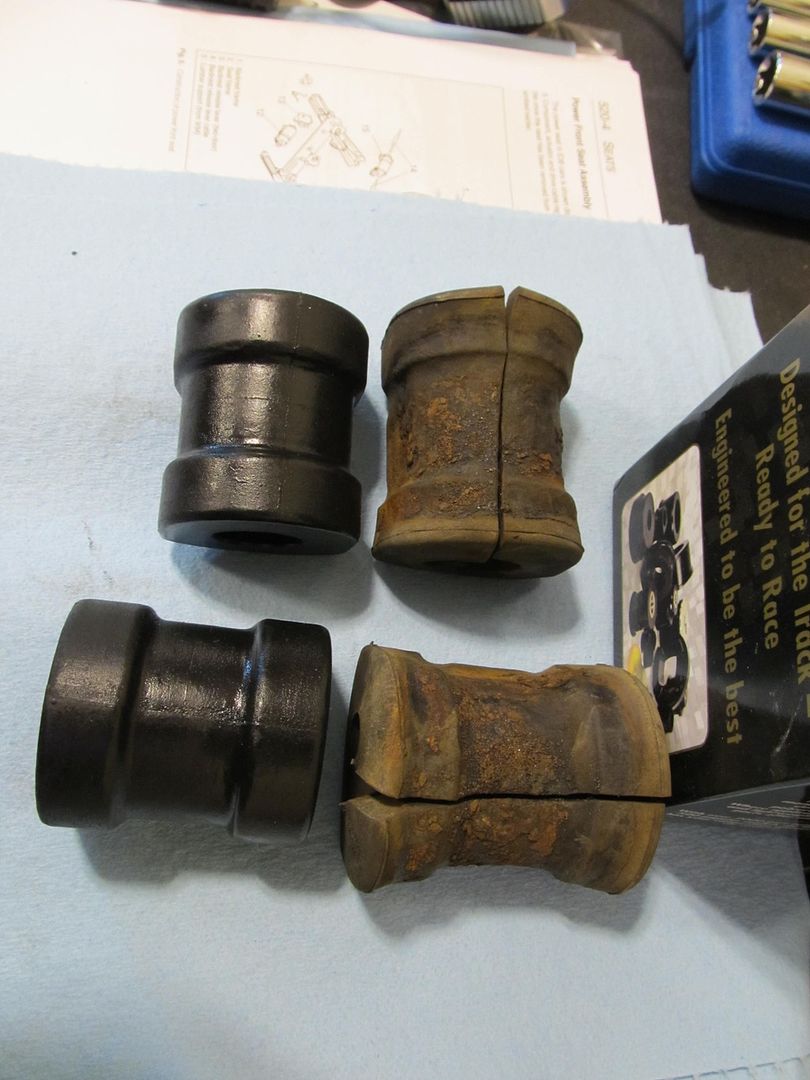
I started by taking apart the front end of the car. First thing was the front sway bar, and it wasn't pretty:

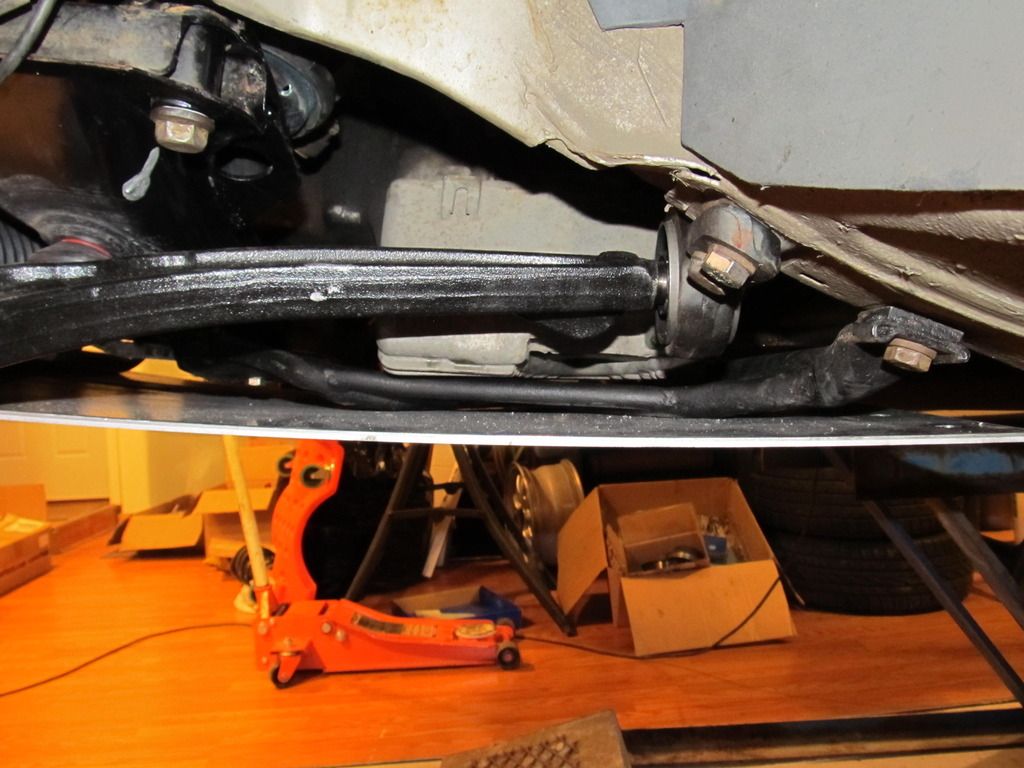
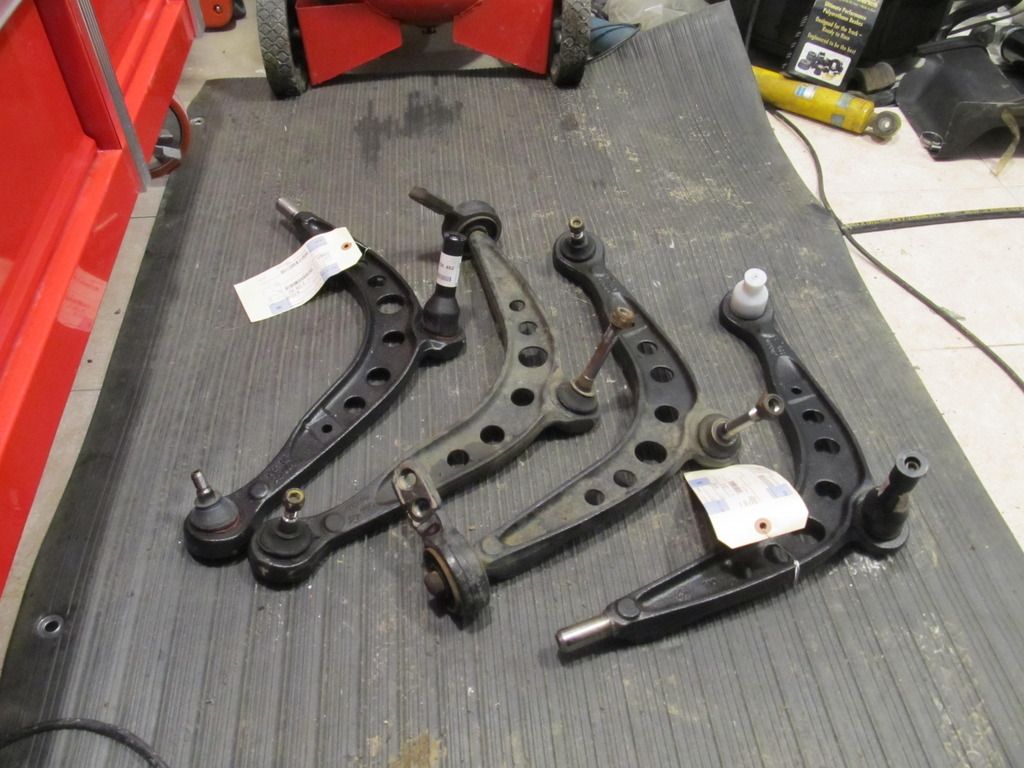
Then I admired my brand new BMW front control arms for a while....

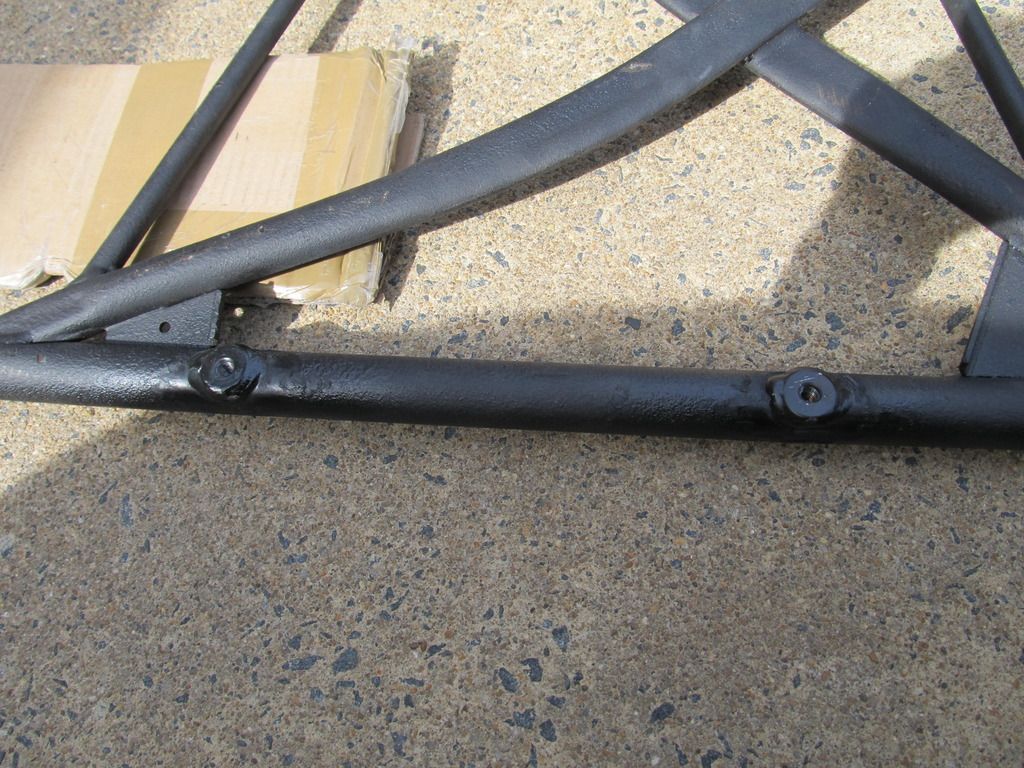
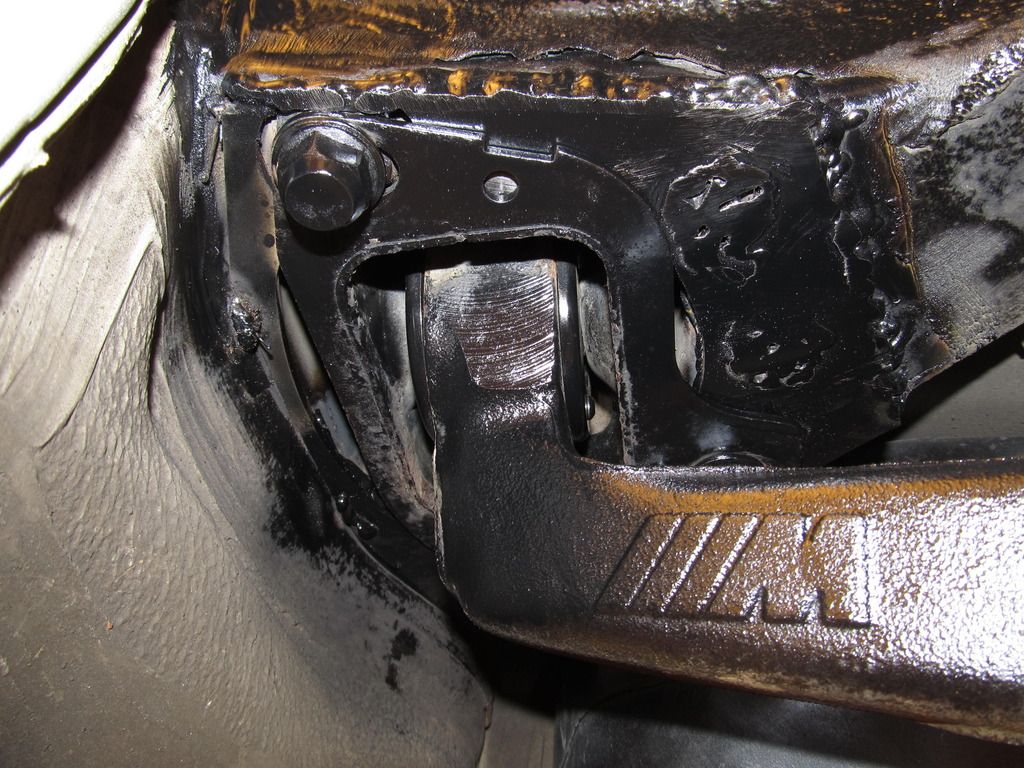
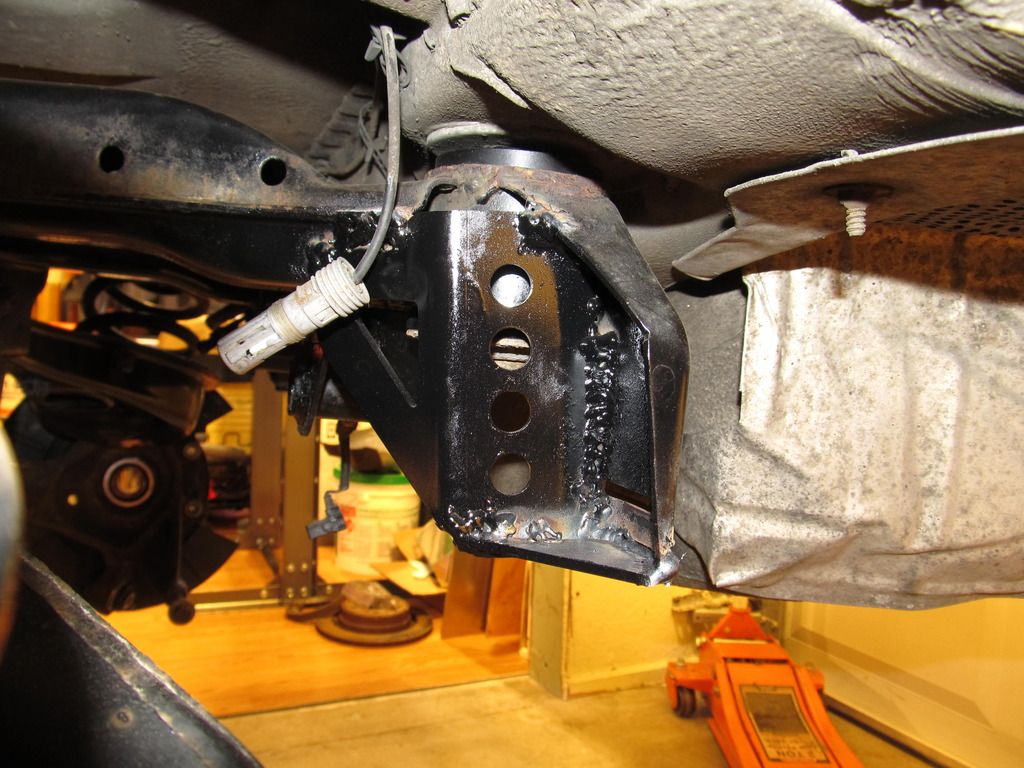
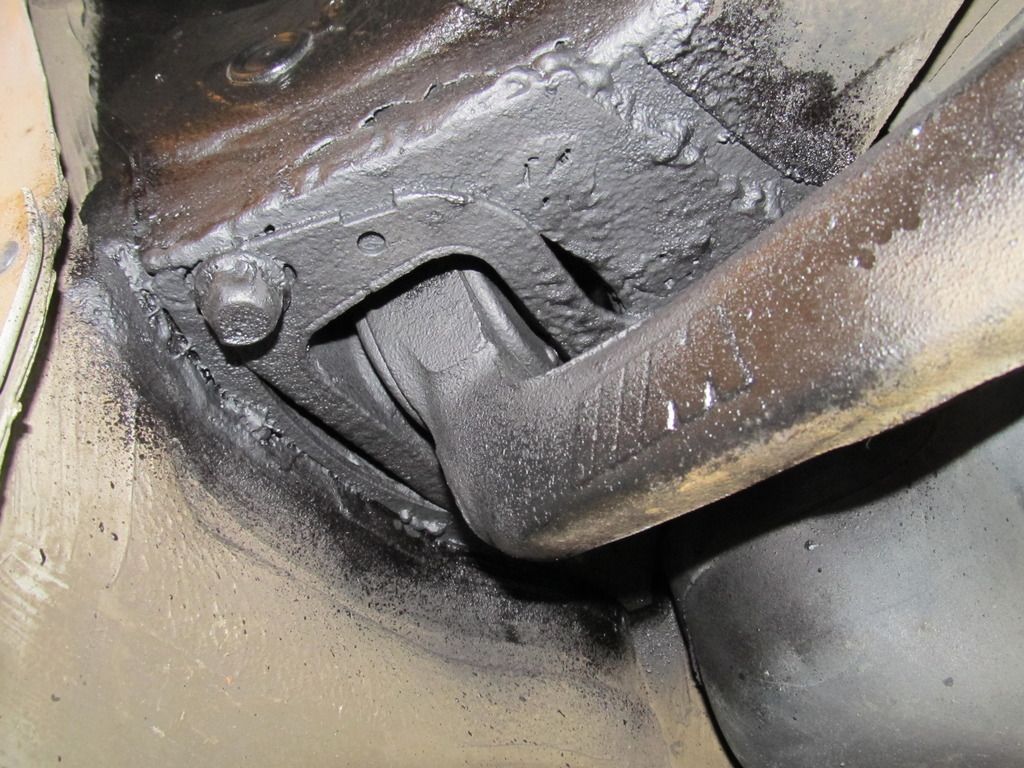
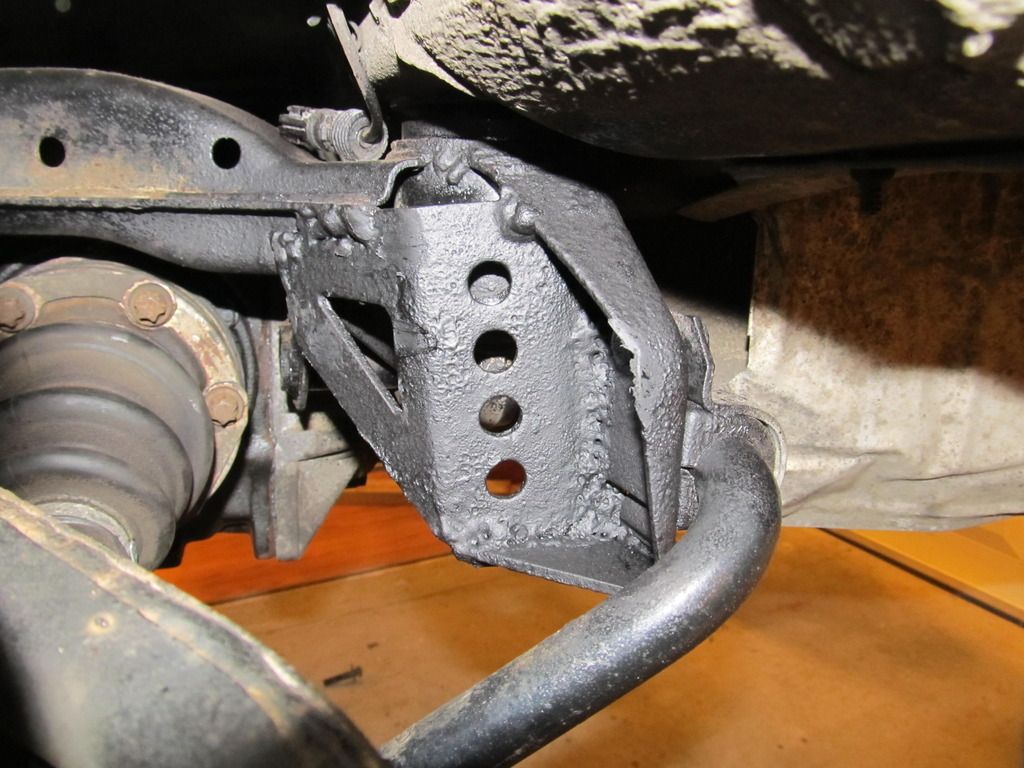
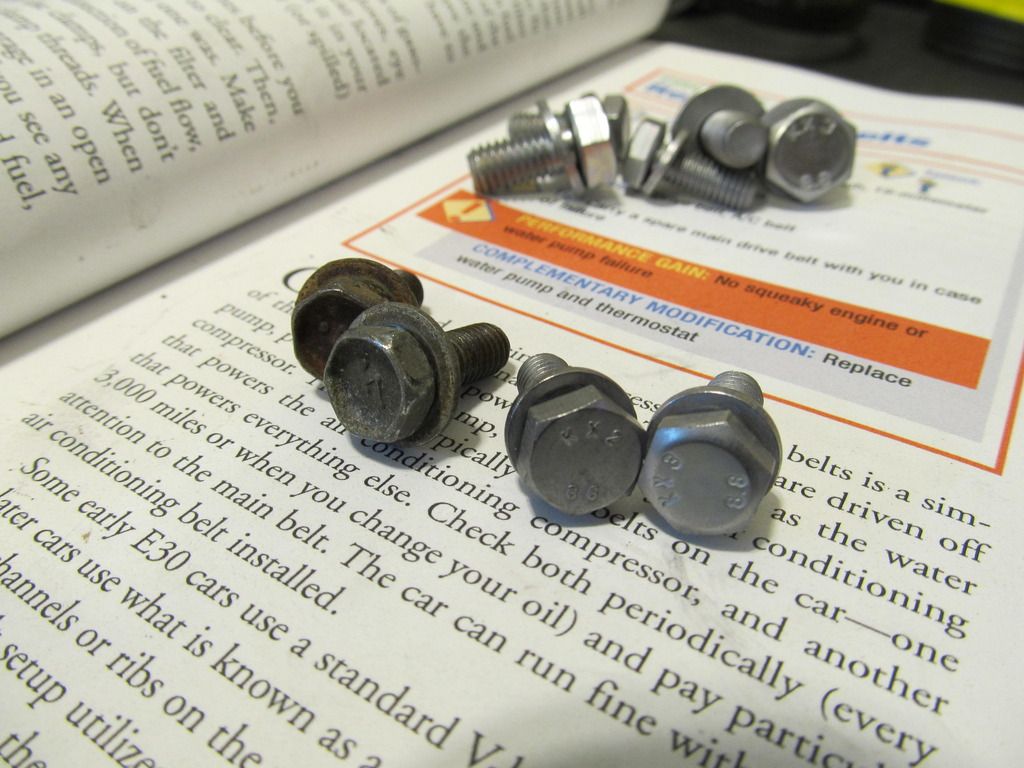
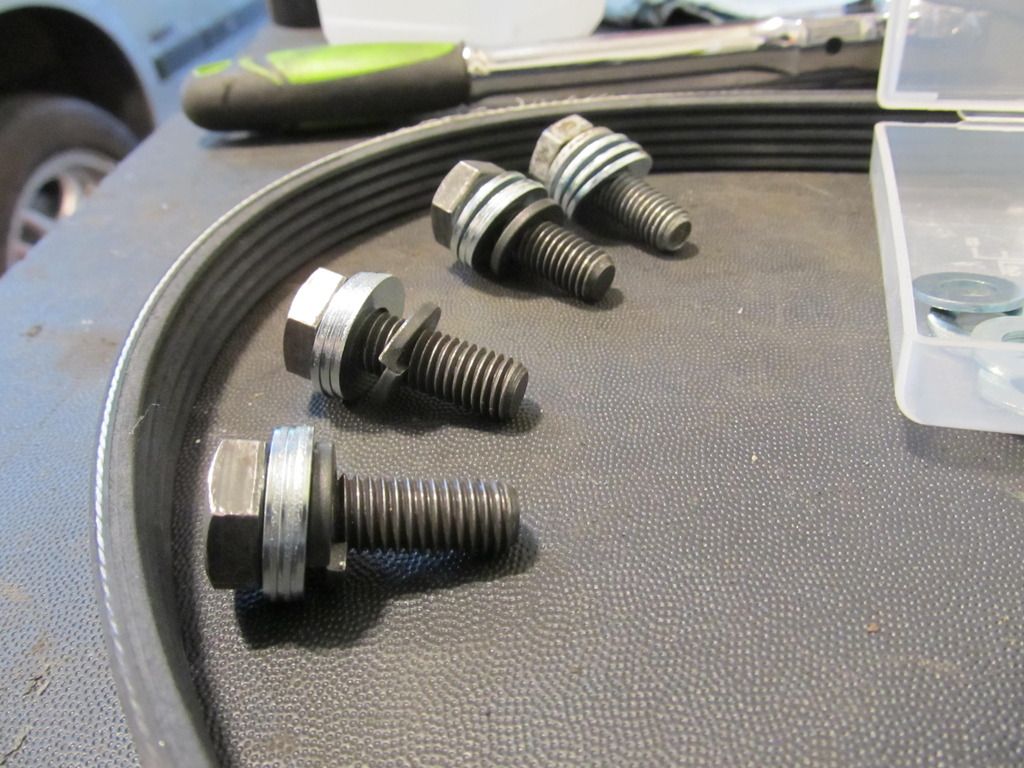
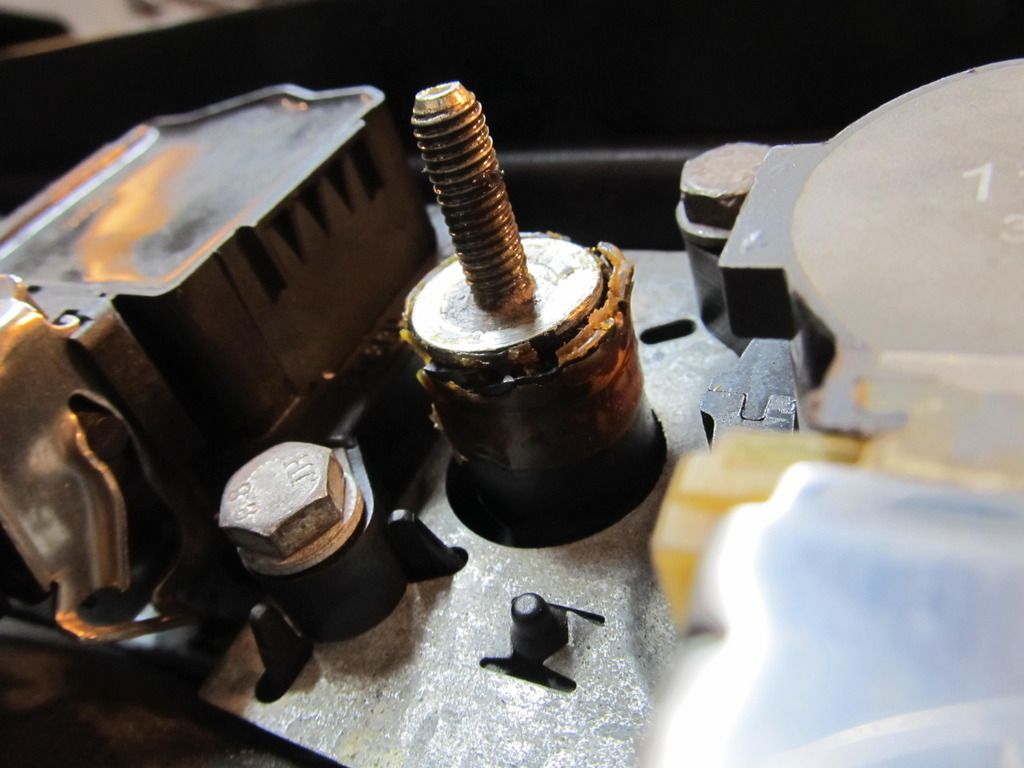
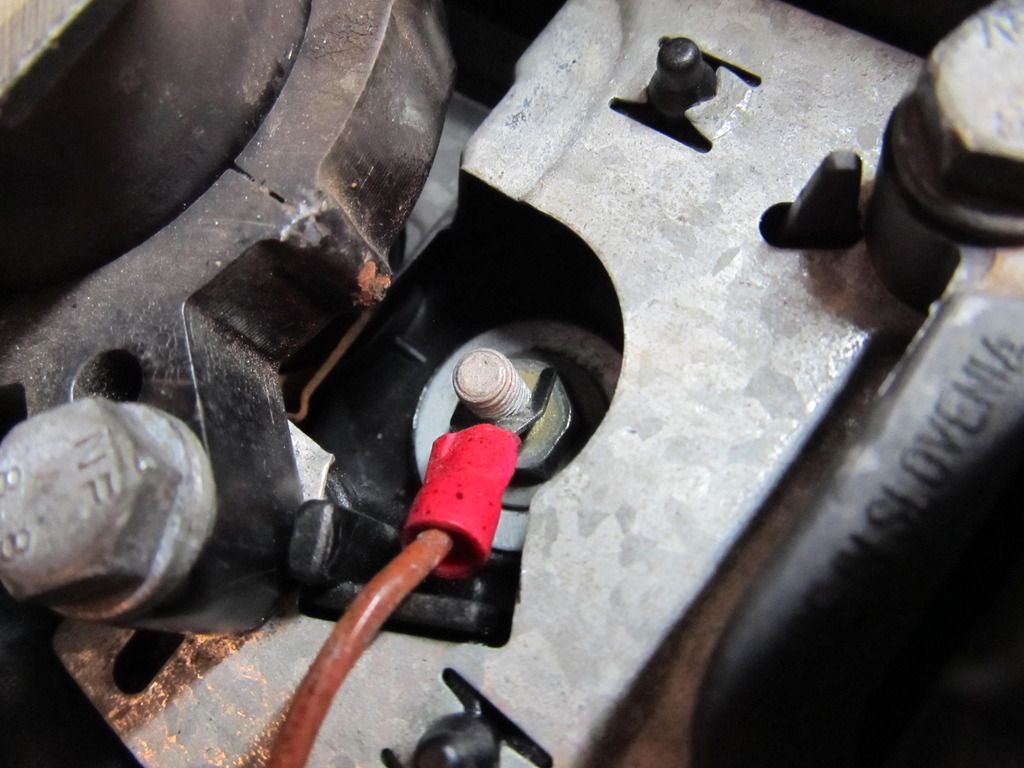
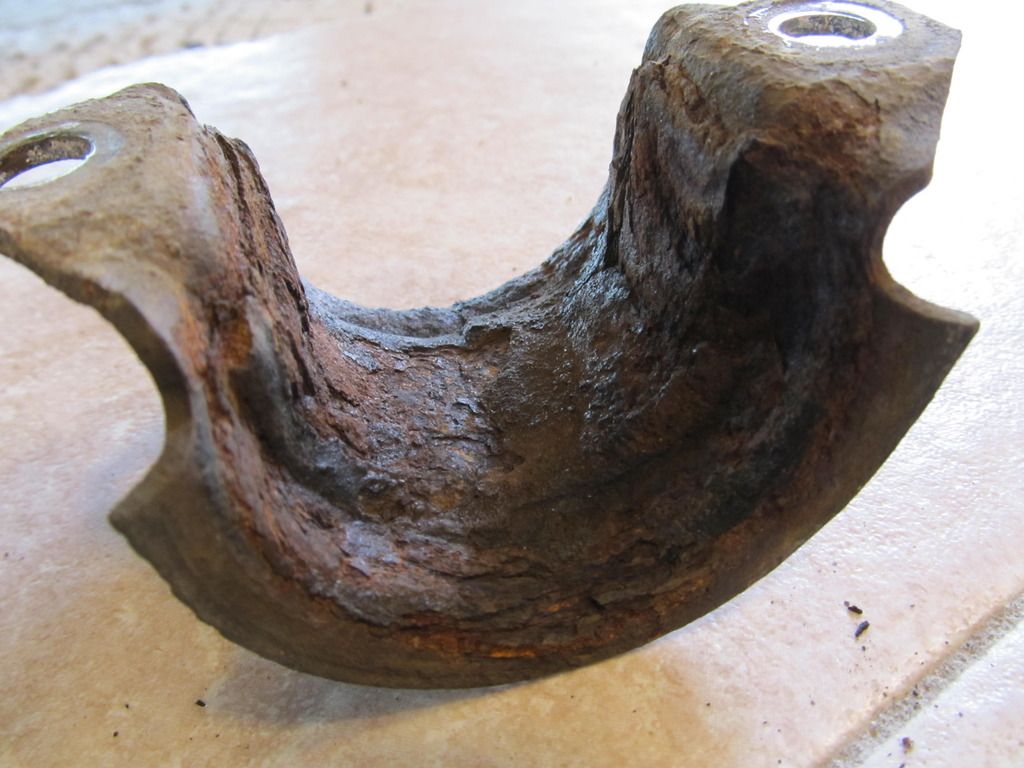
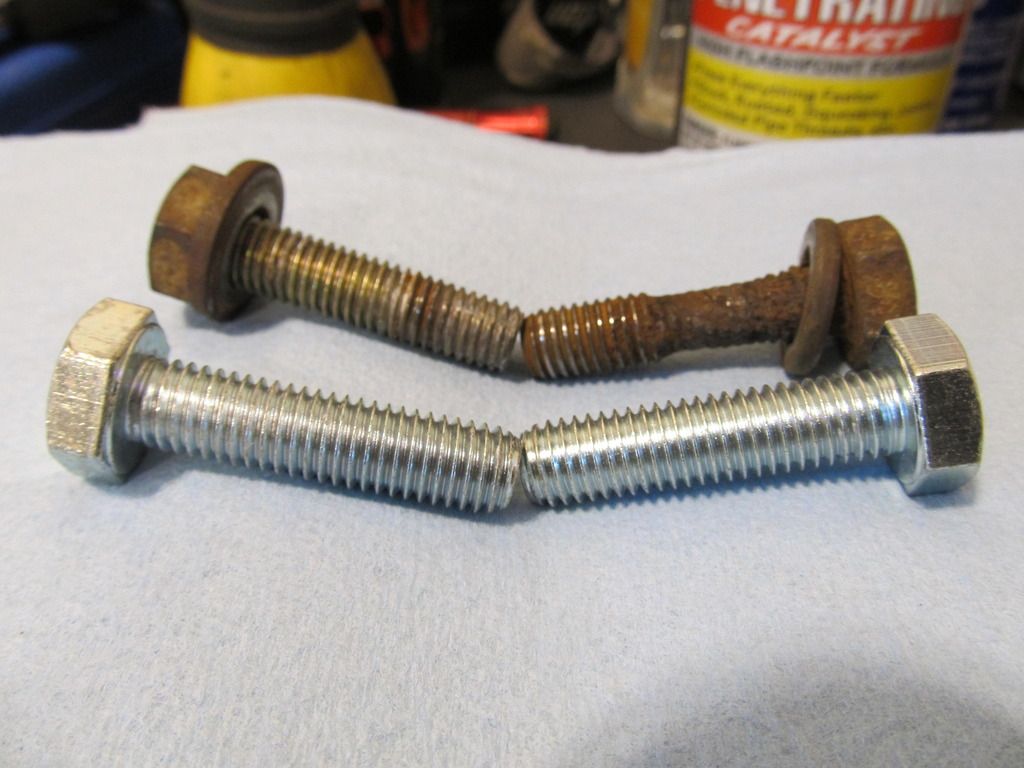
And I discovered that one of the bolts that holds on the "lollipop" for the FCA had some rust damage....so a run to home Depot and two new grade 10 bolts later I was back in business!

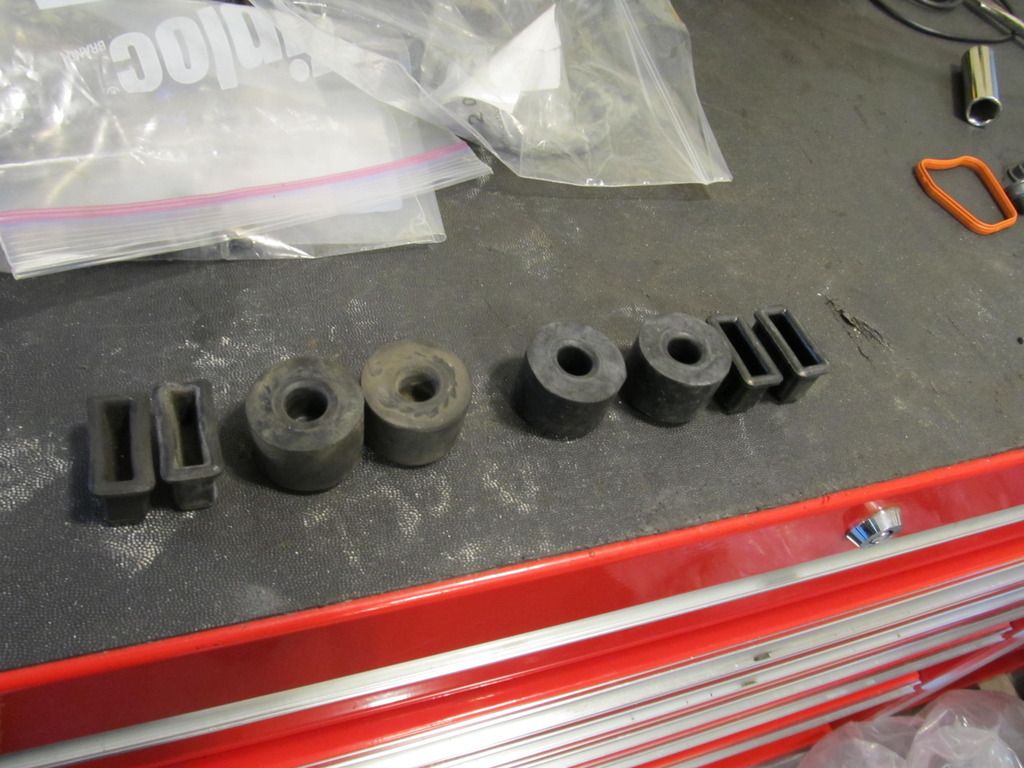
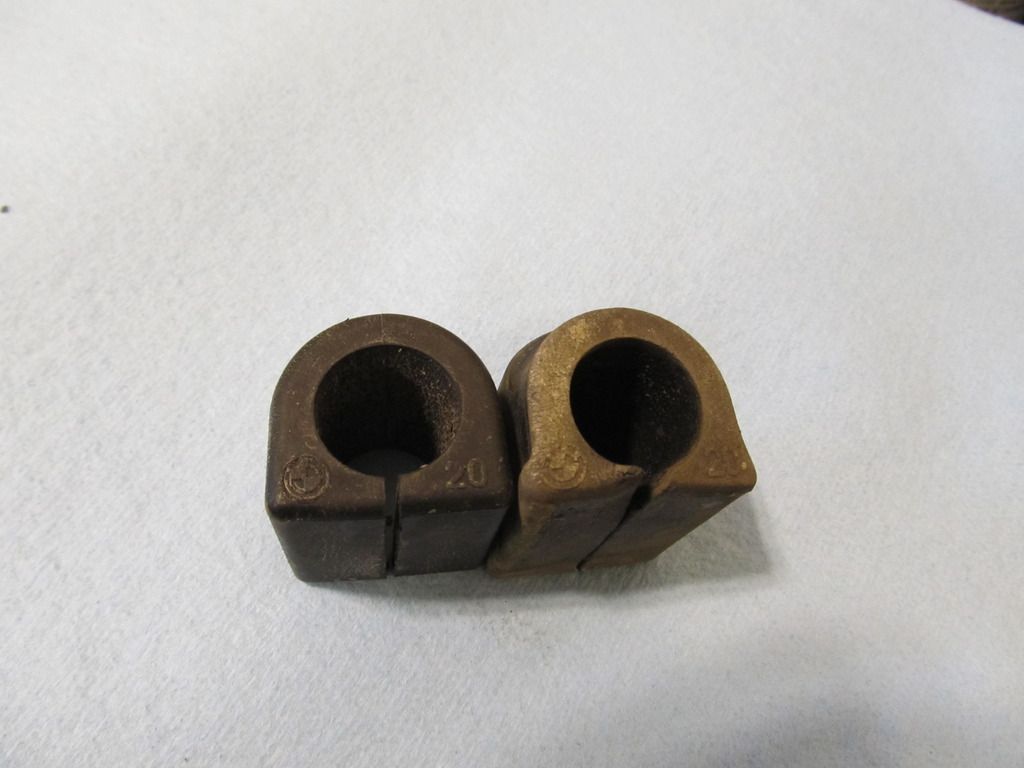
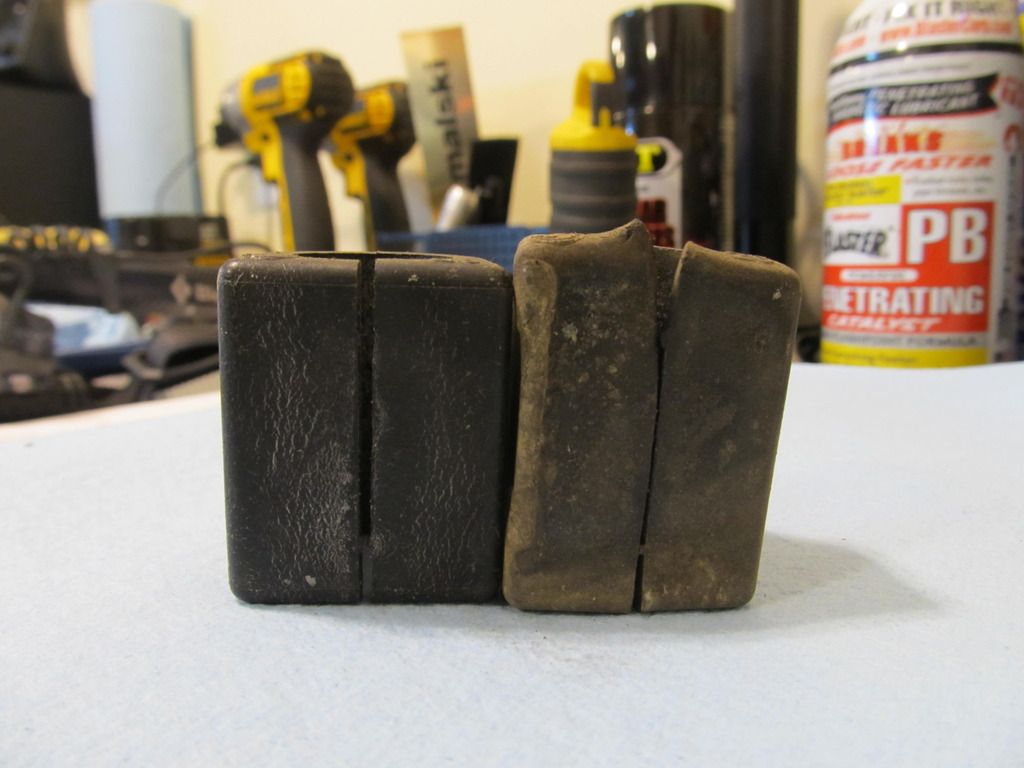
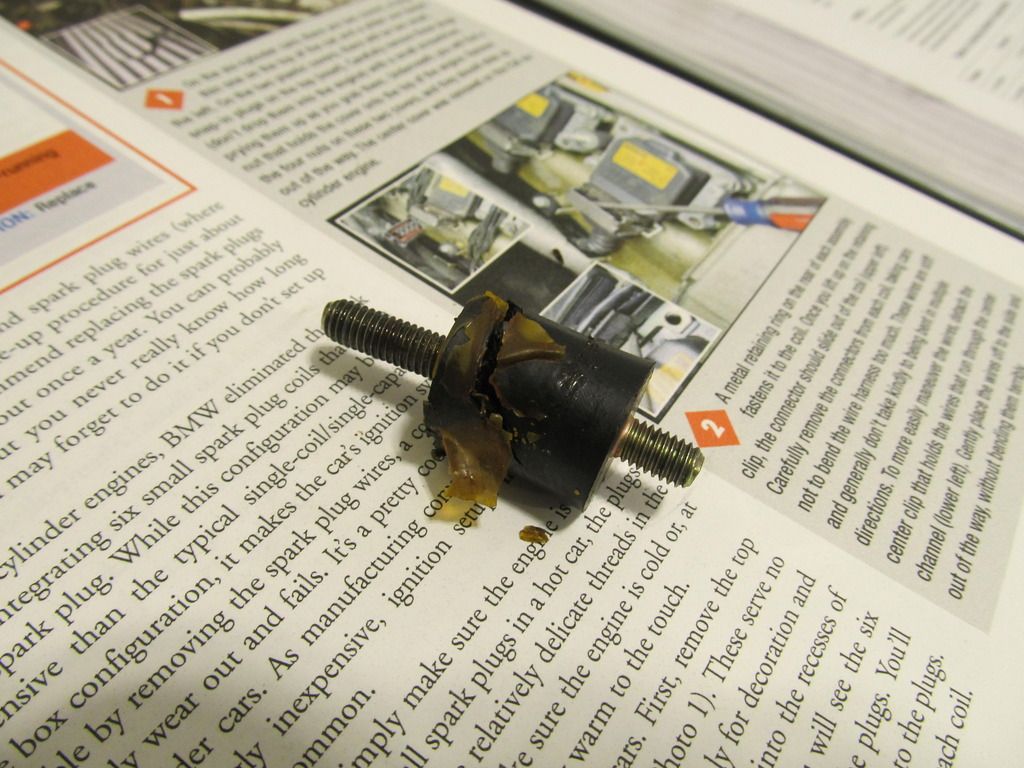
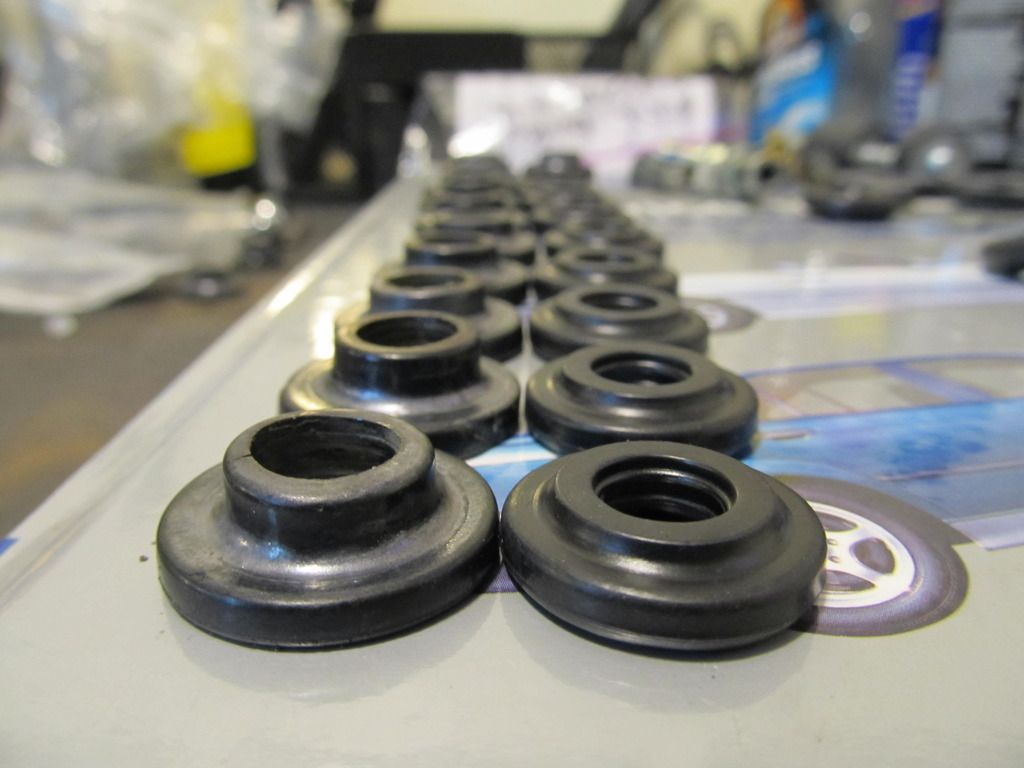
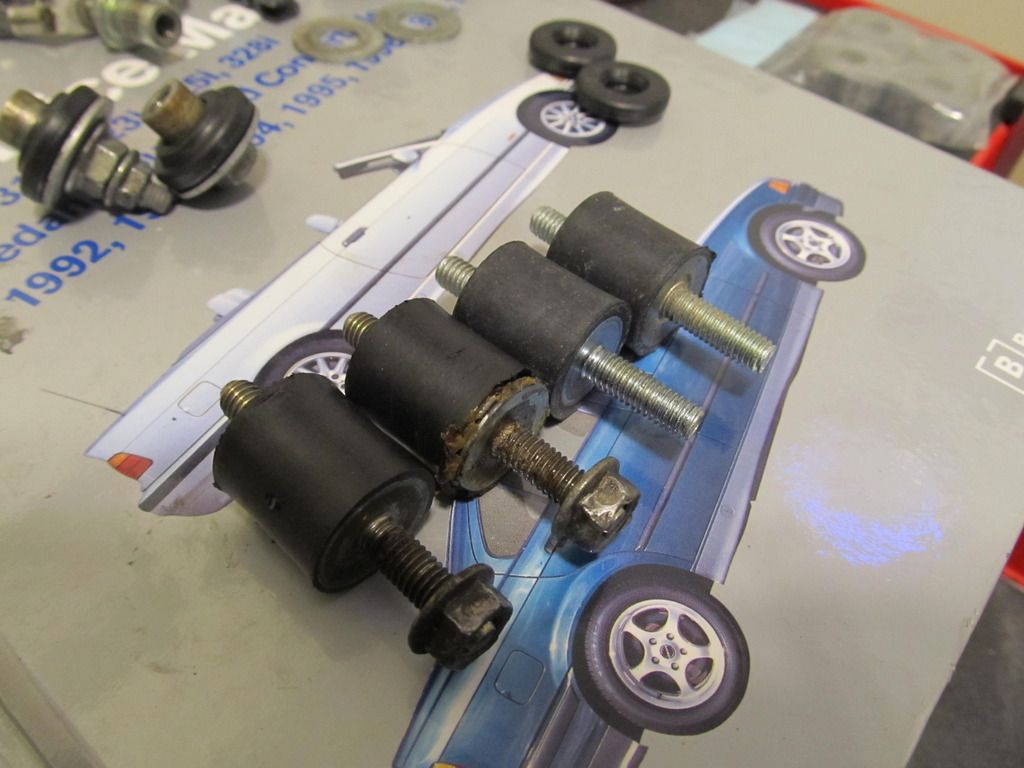
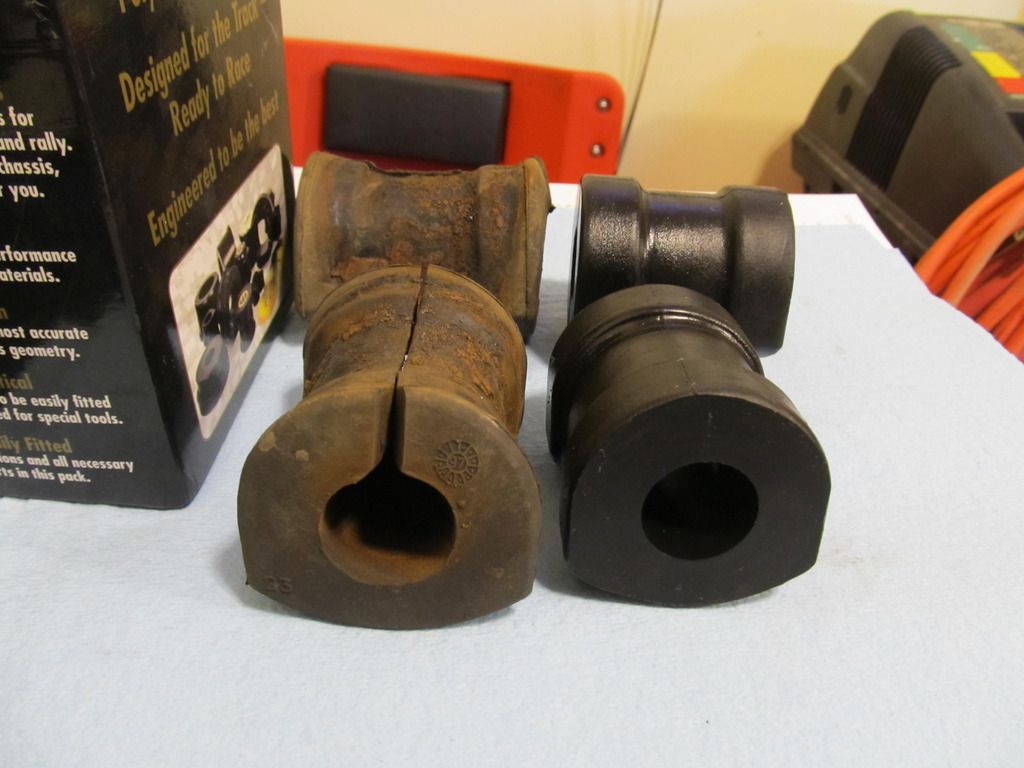
The bushings for the FCAs were looking pretty shot:

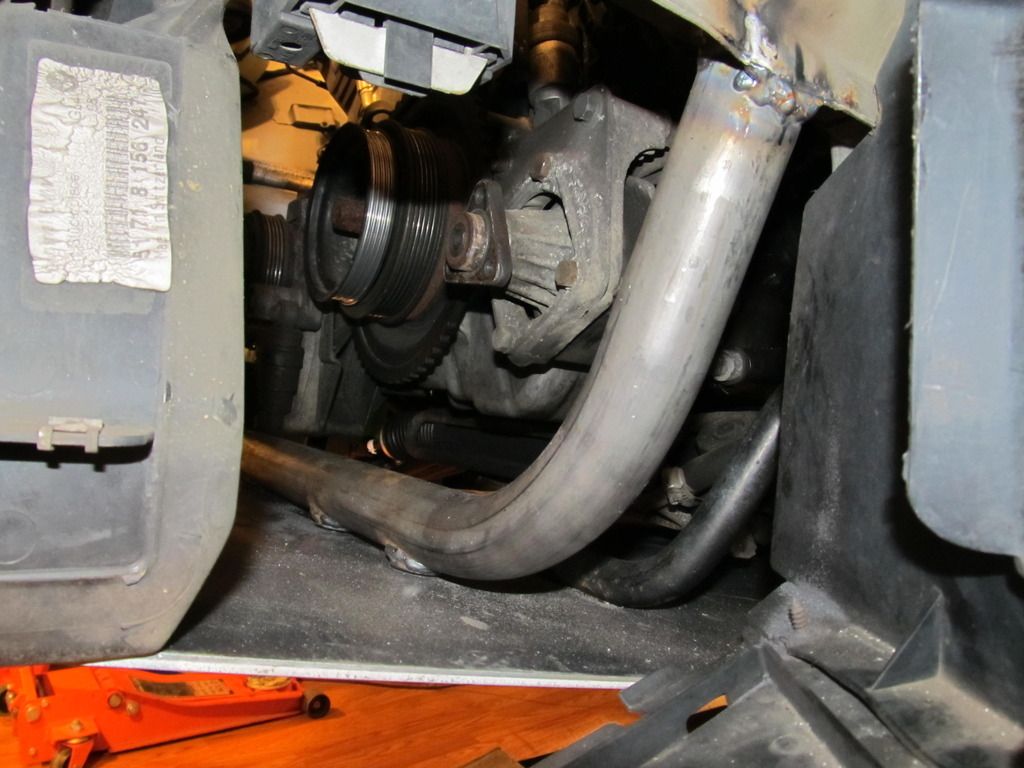
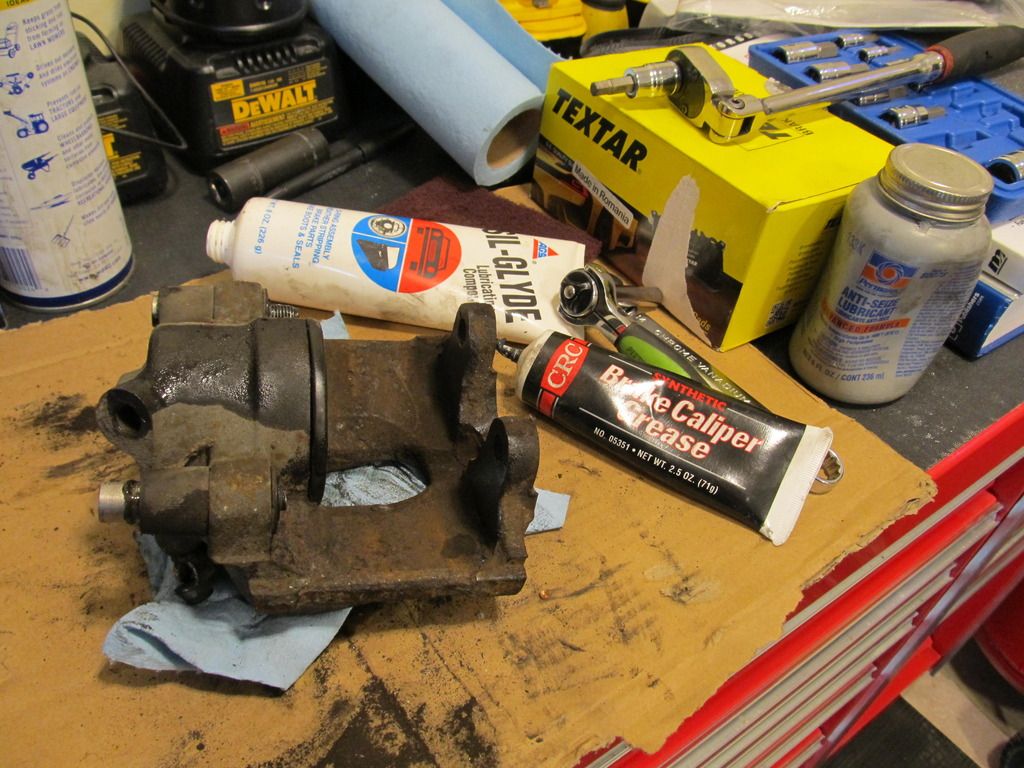
Did some caliper maintenance to the 328 front calipers....they were dry as a bone!

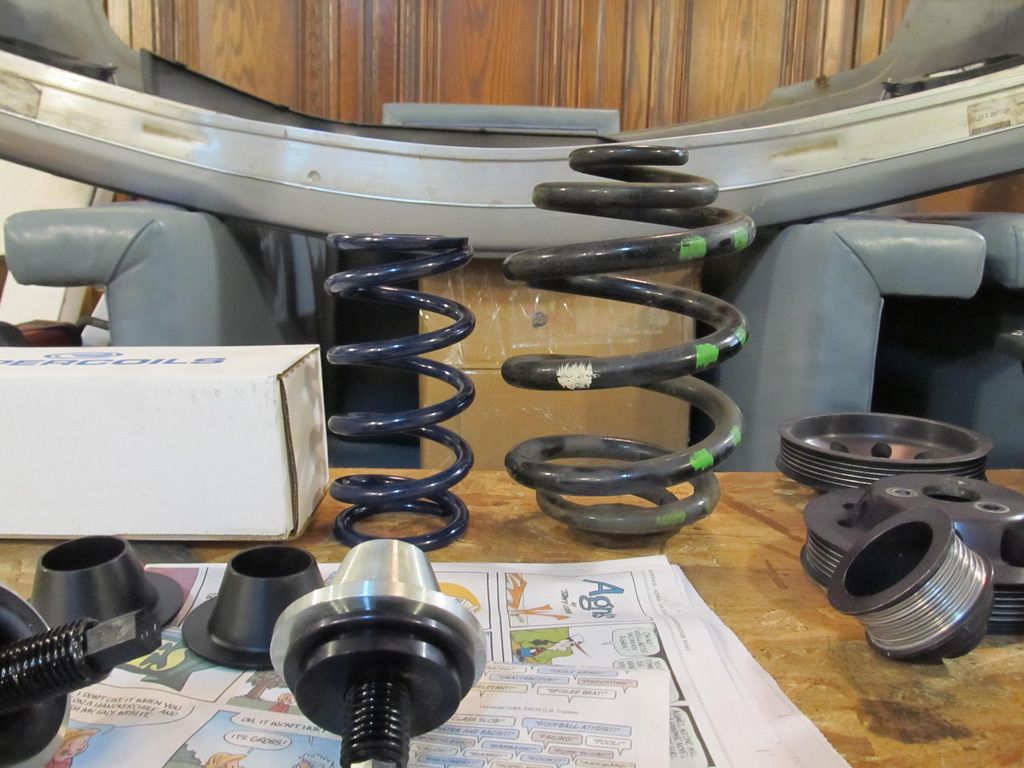
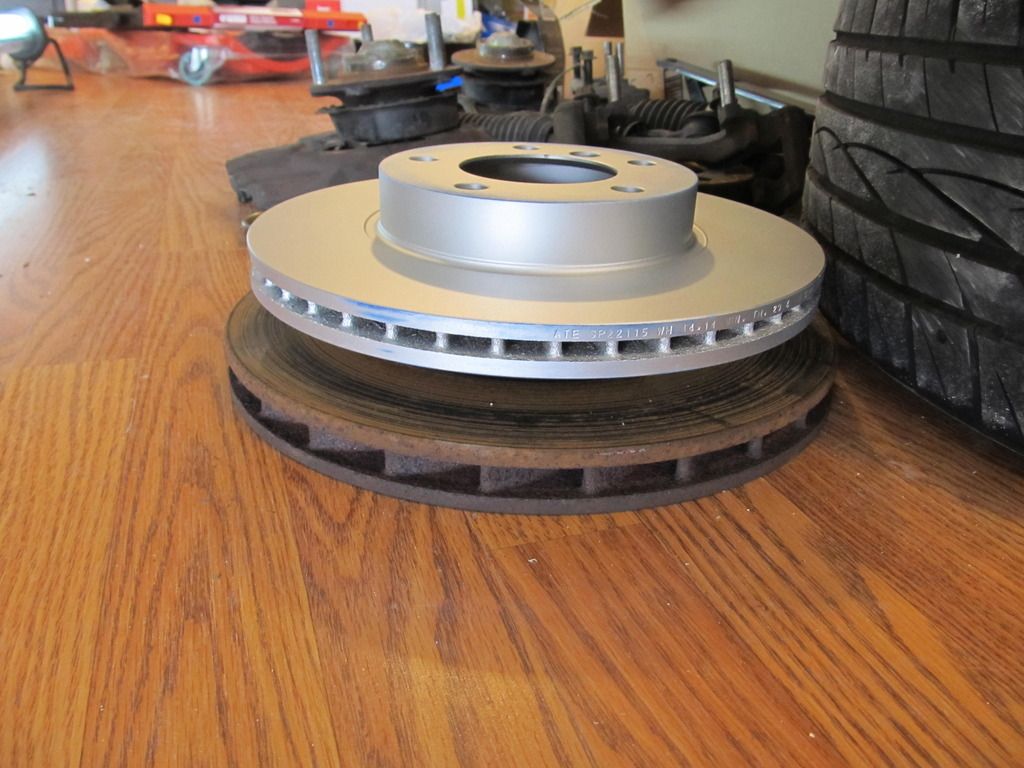
Here are the new 328 front rotors on top of the old M3 rotors. Big difference!

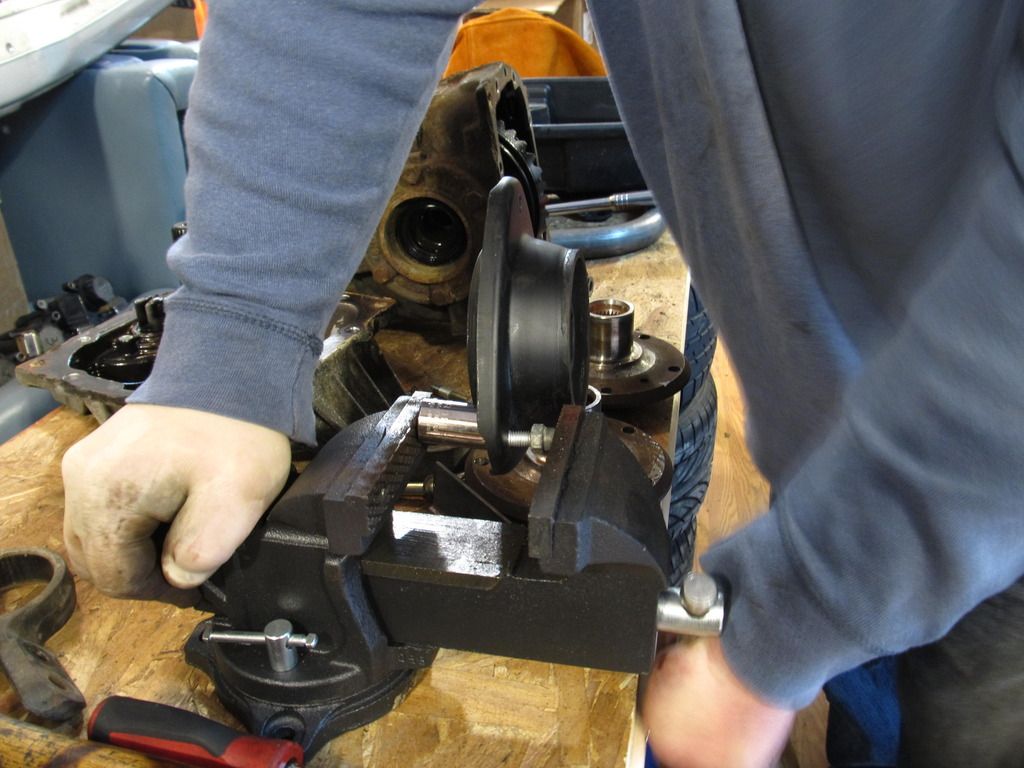
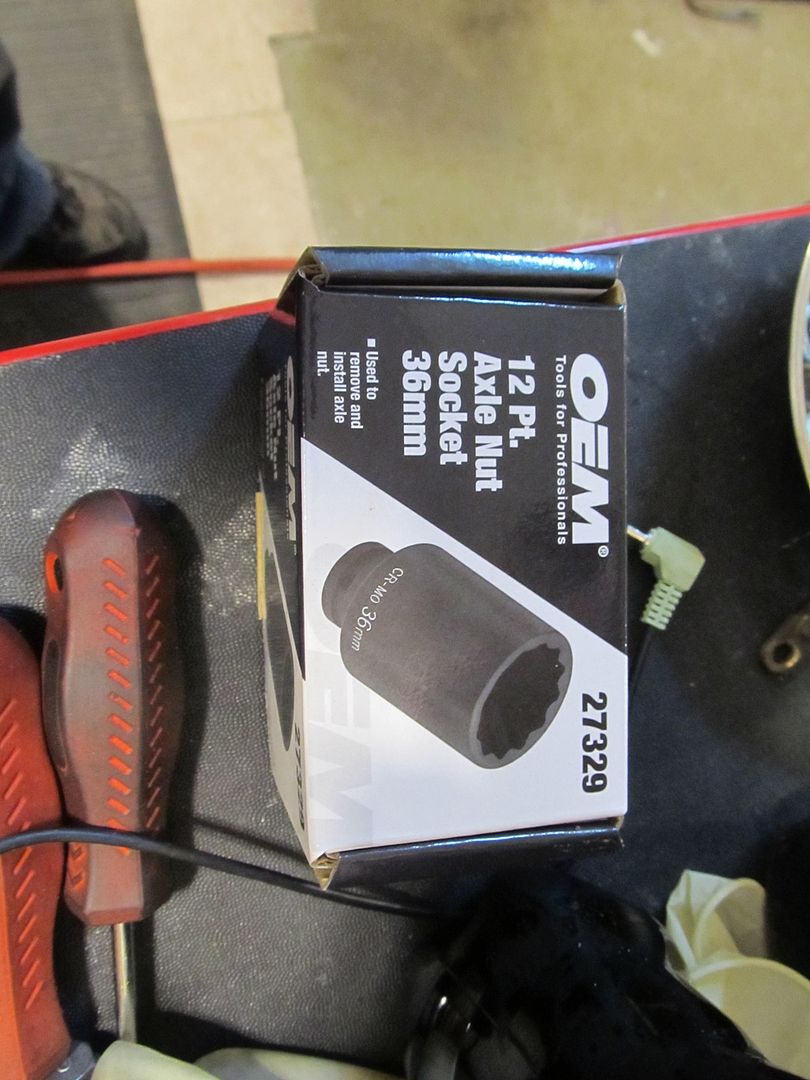
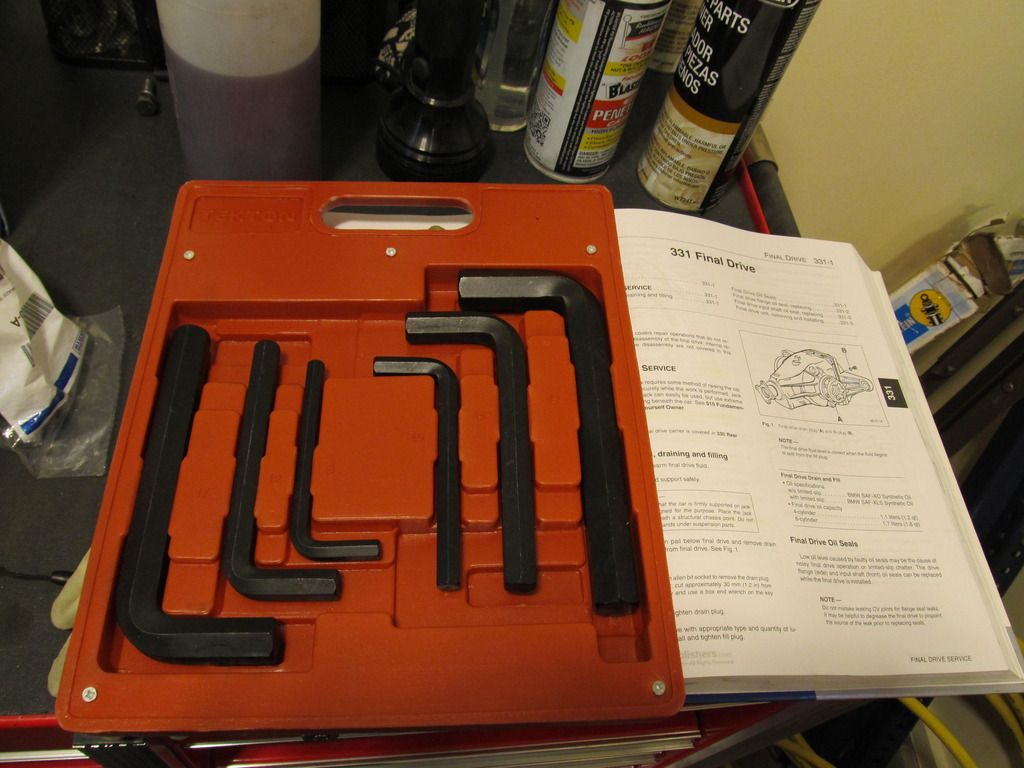
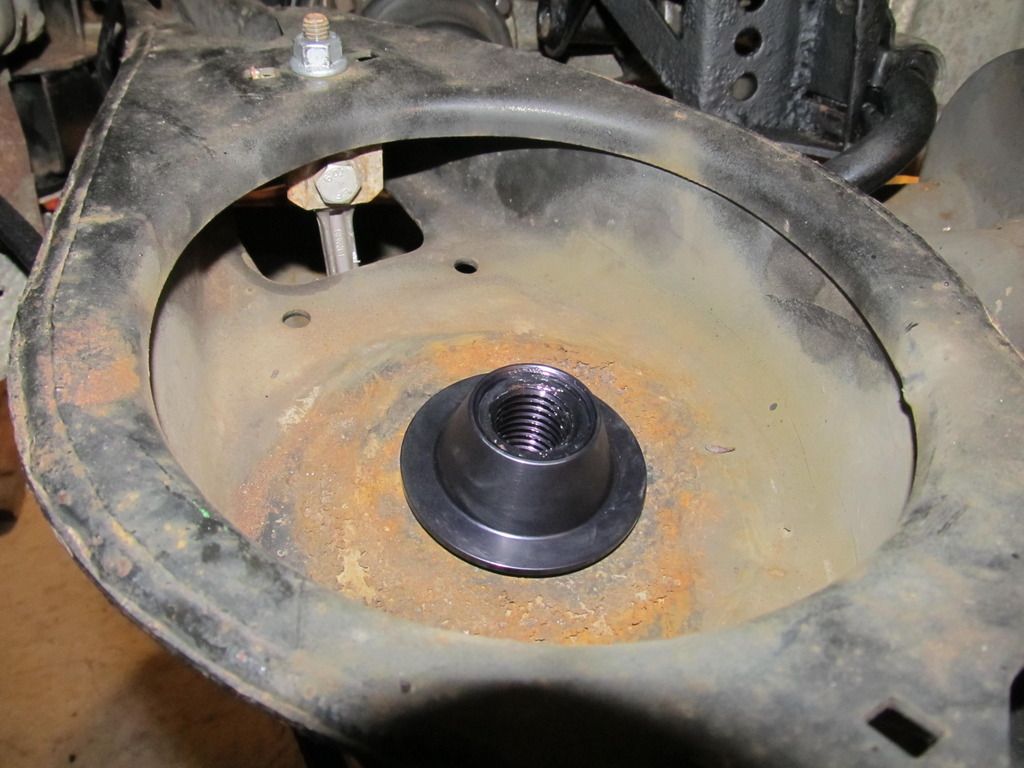
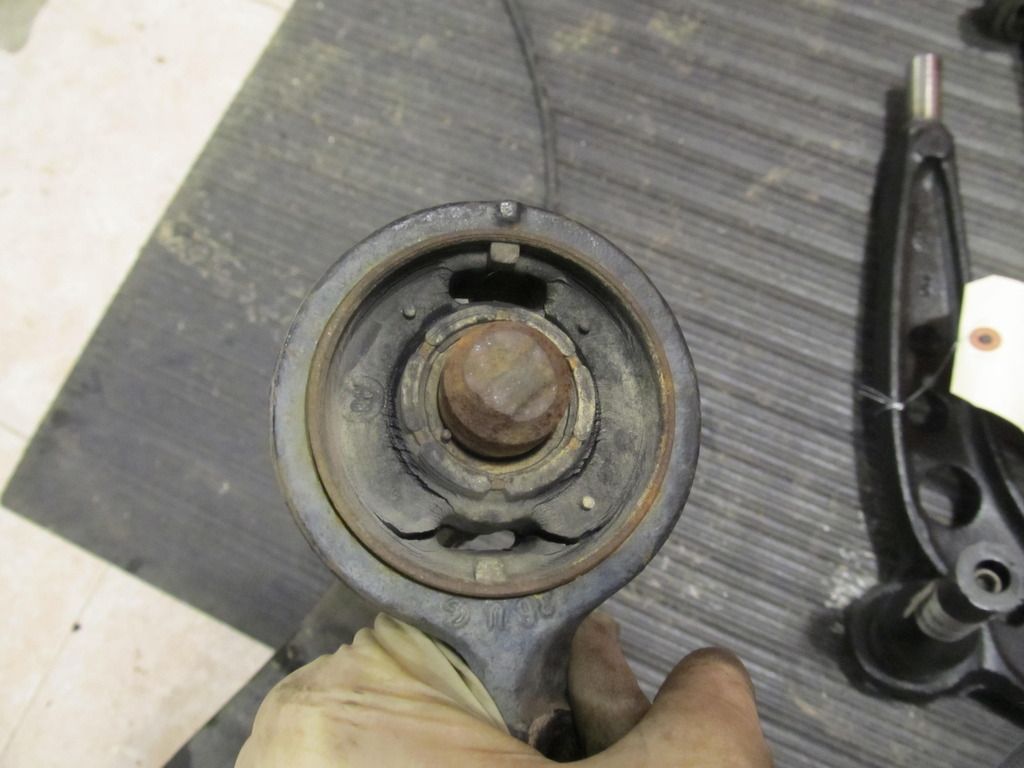
I ordered new front hubs/wheel bearings since everything was already off the car, but when we went to remove the big lock nut, none of my tools would fit. I went to Harbor Freight and nothing they had would fit (something around 46mm). I took it to one local garage and they didn't have anything that would fit the nut either. Crap! I then went to a nicer garage that does BMW work, and after digging through 4 tool boxes, they found a socket that fit. They didn't tell me what size it was, but they said it wasn't normal. Thankfully, I had ordered a new one of the correct size from BMW, so rather than risk not being able to disassemble the rest of the hub at my house, I just paid them $40 to install the new hubs and press all the old stuff out. I think it was money well spent!

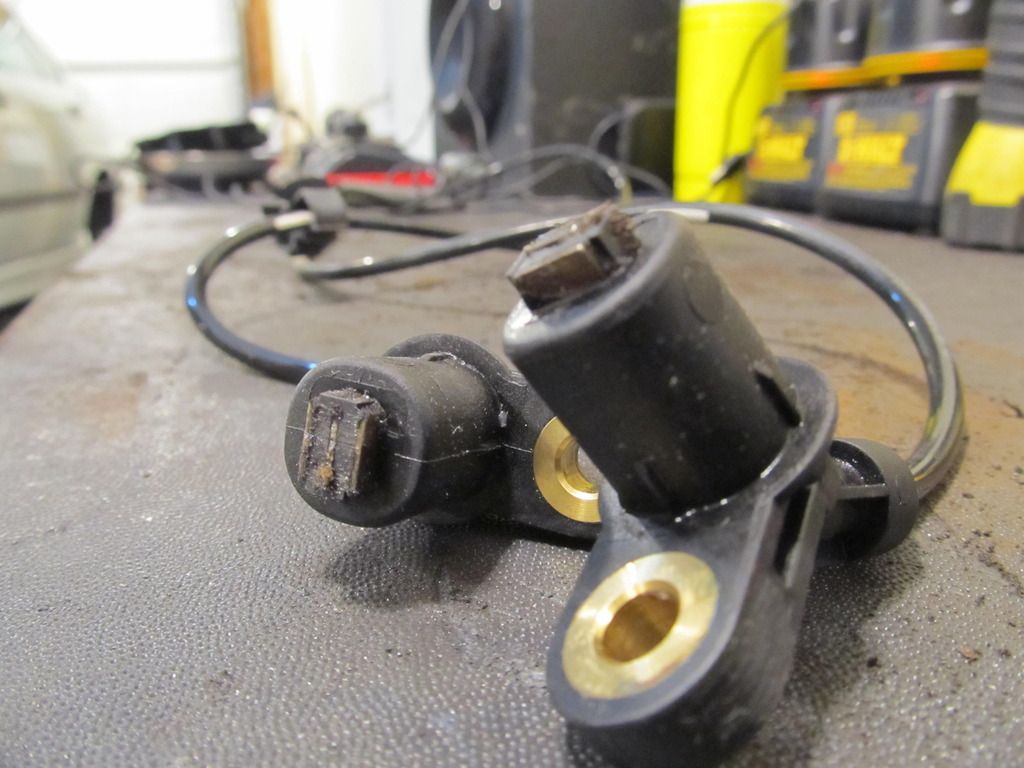
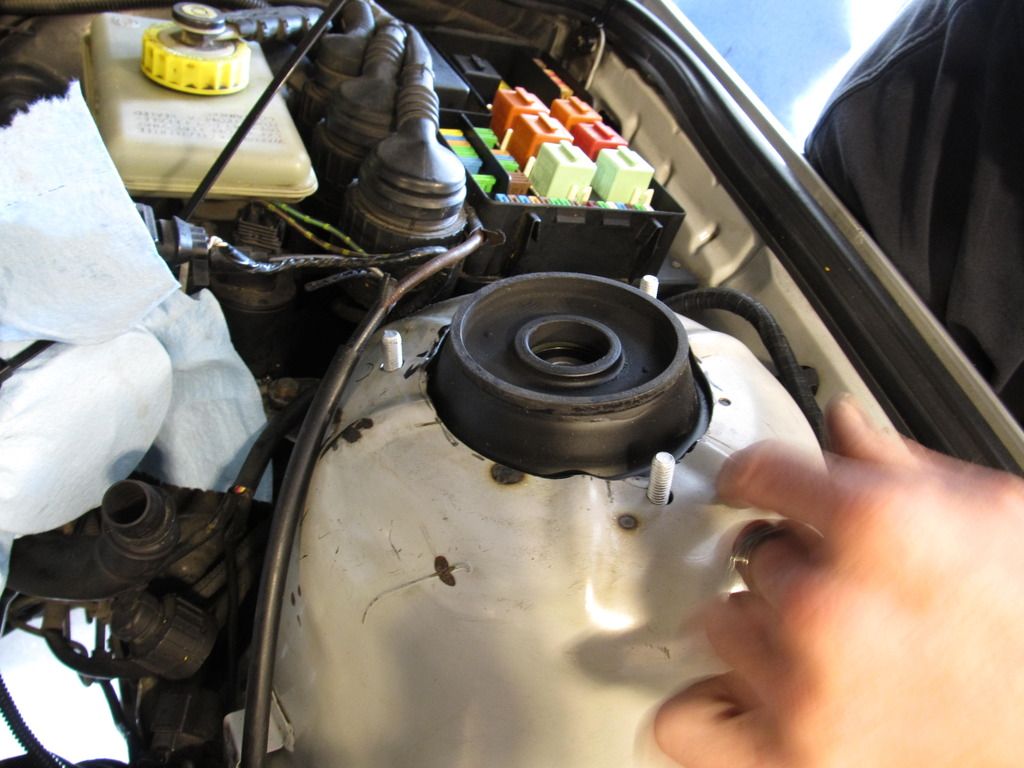
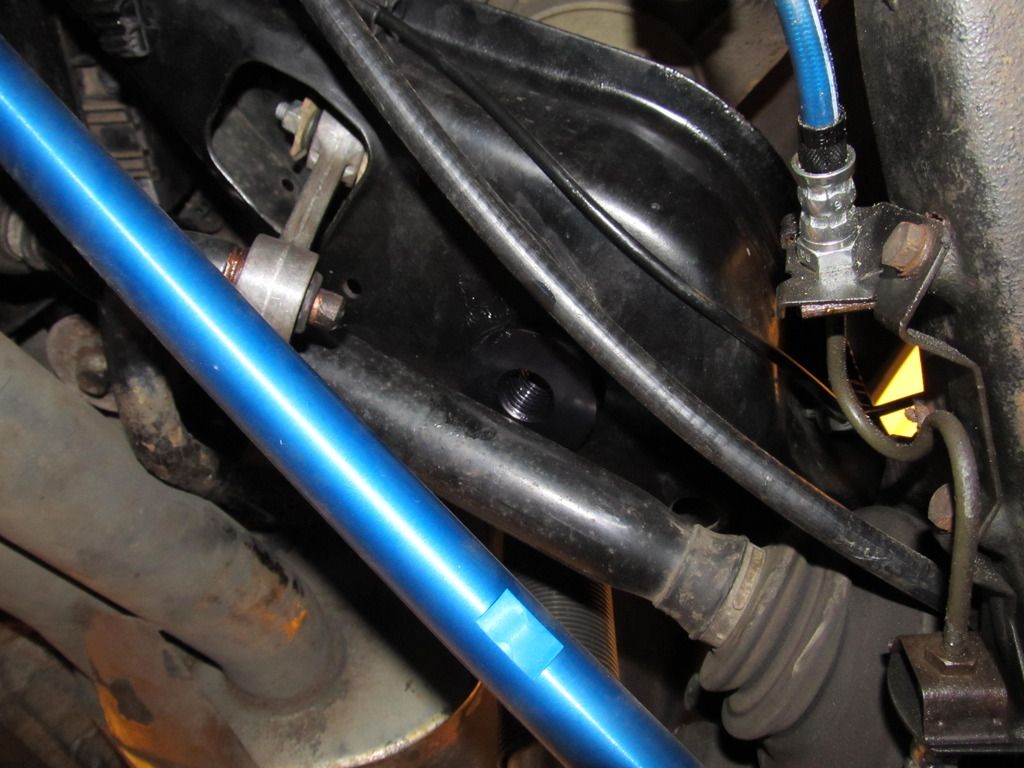
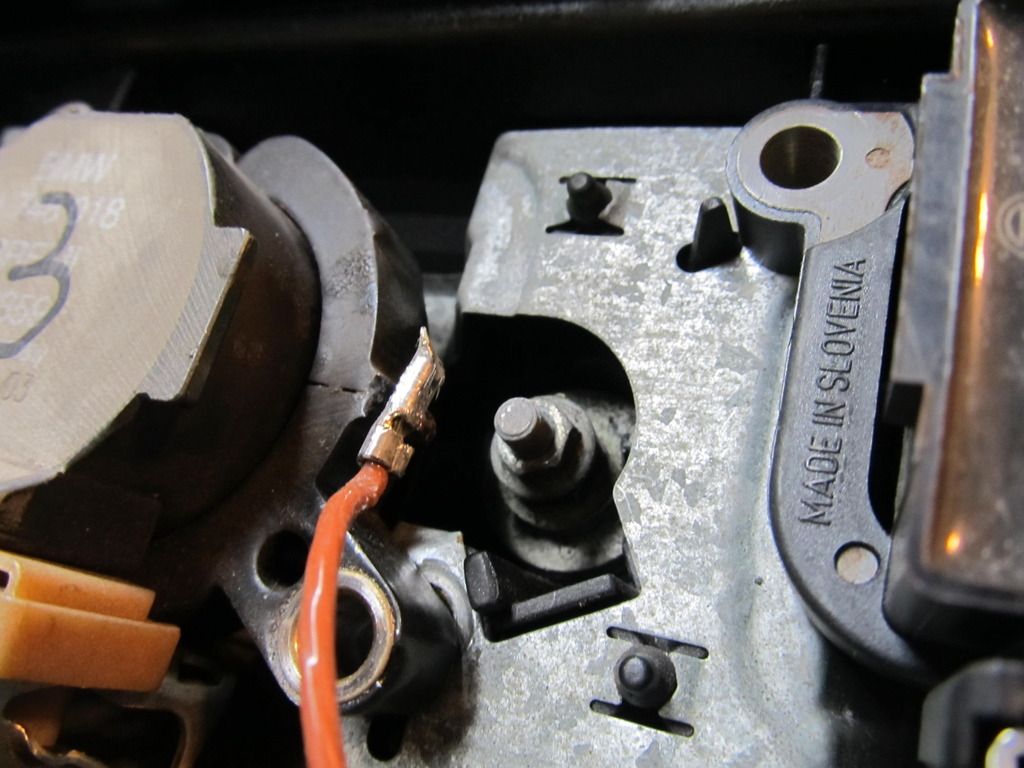
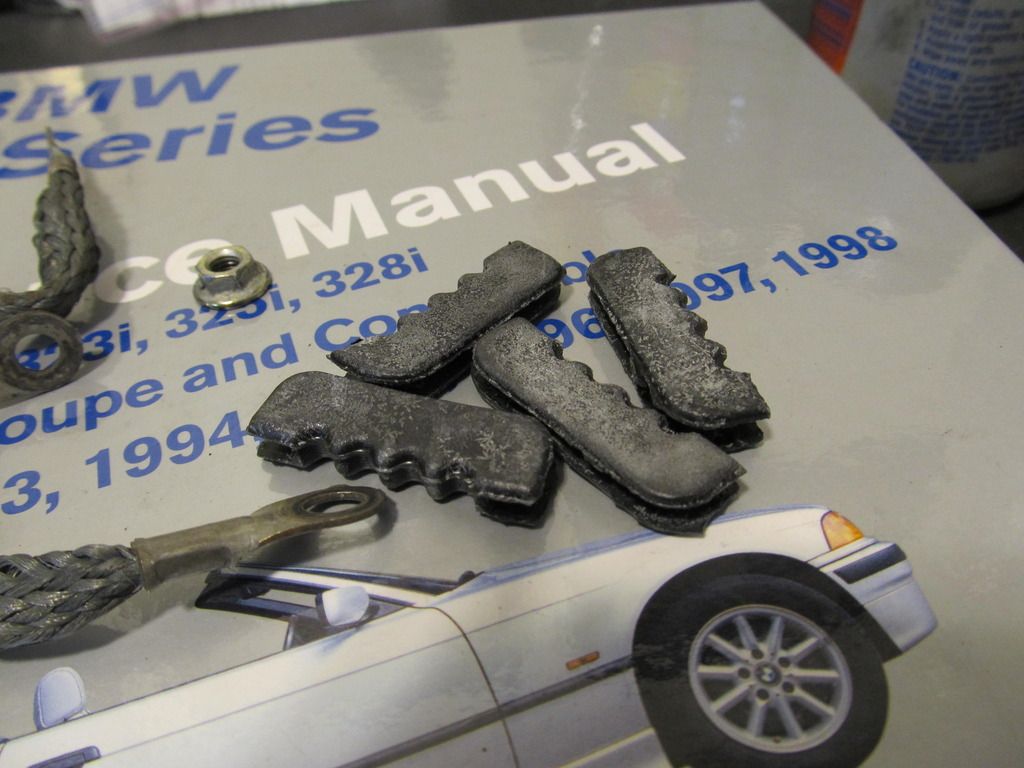
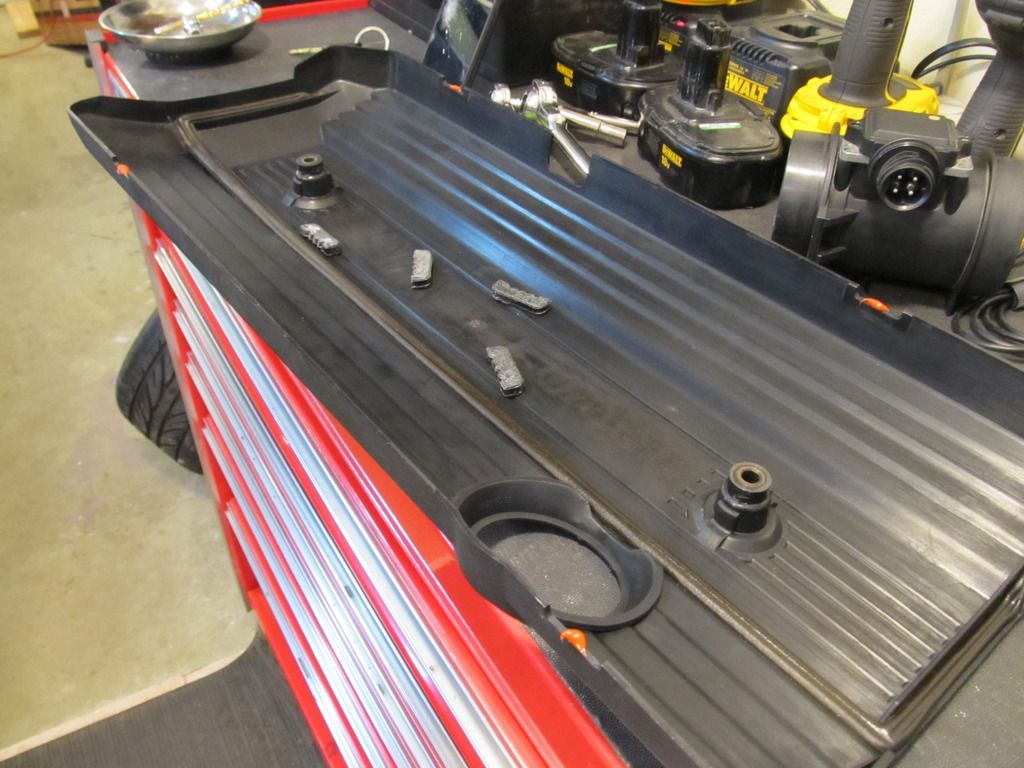
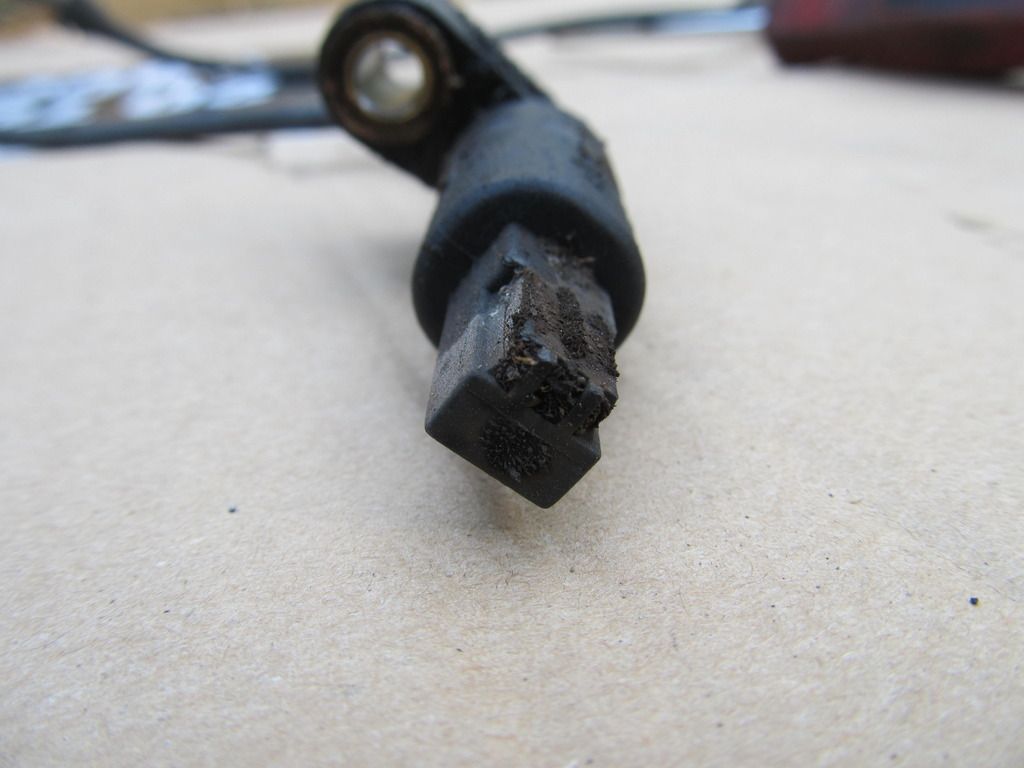
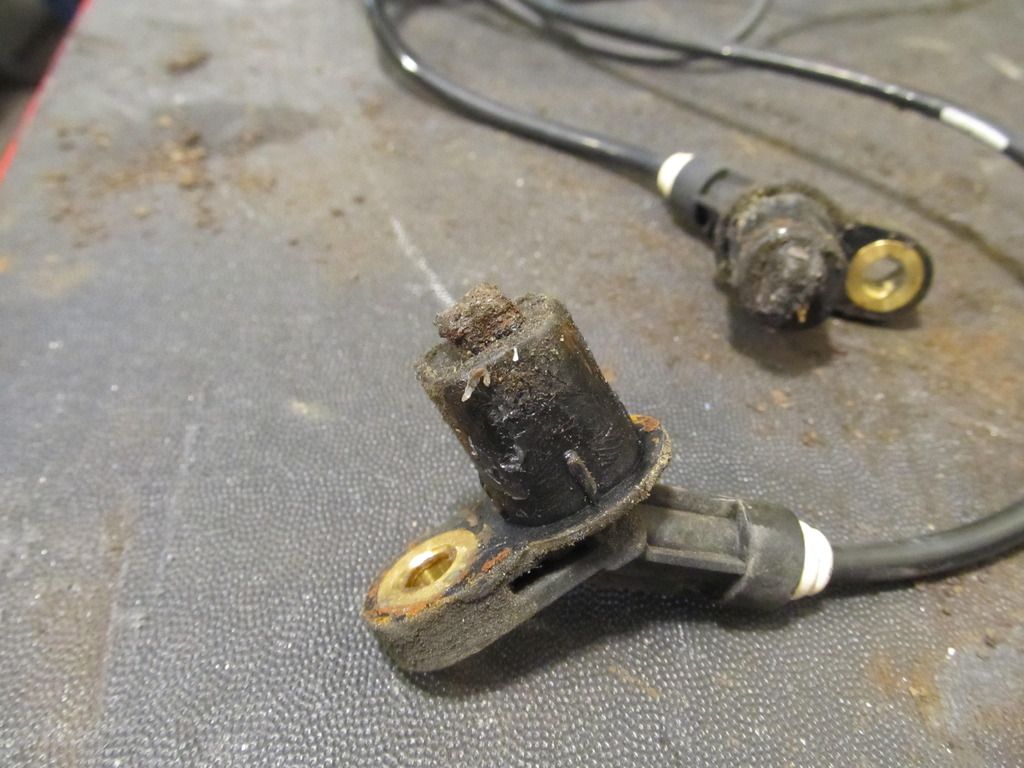
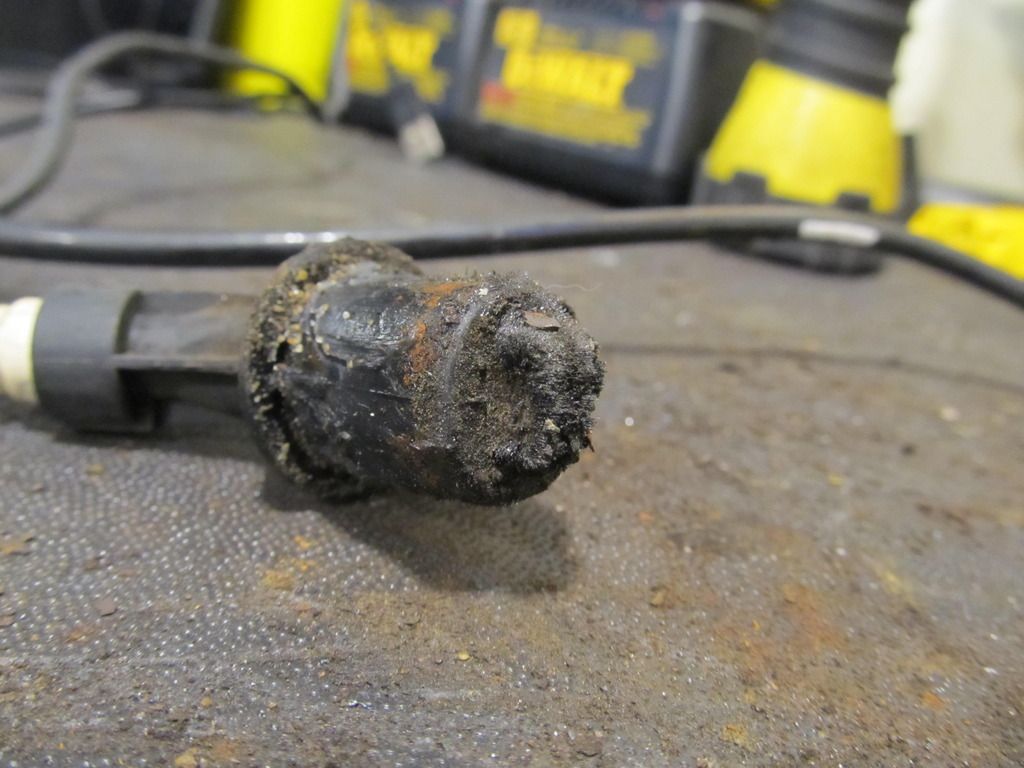
The shop gave me a good recommendation, which was to clean off the ABS/speed sensors before I reinstalled everything. The only problem was they were stuck in there real good! After much PB Blaster and wrenching, I was able to get them both out, and boy did they look nasty!
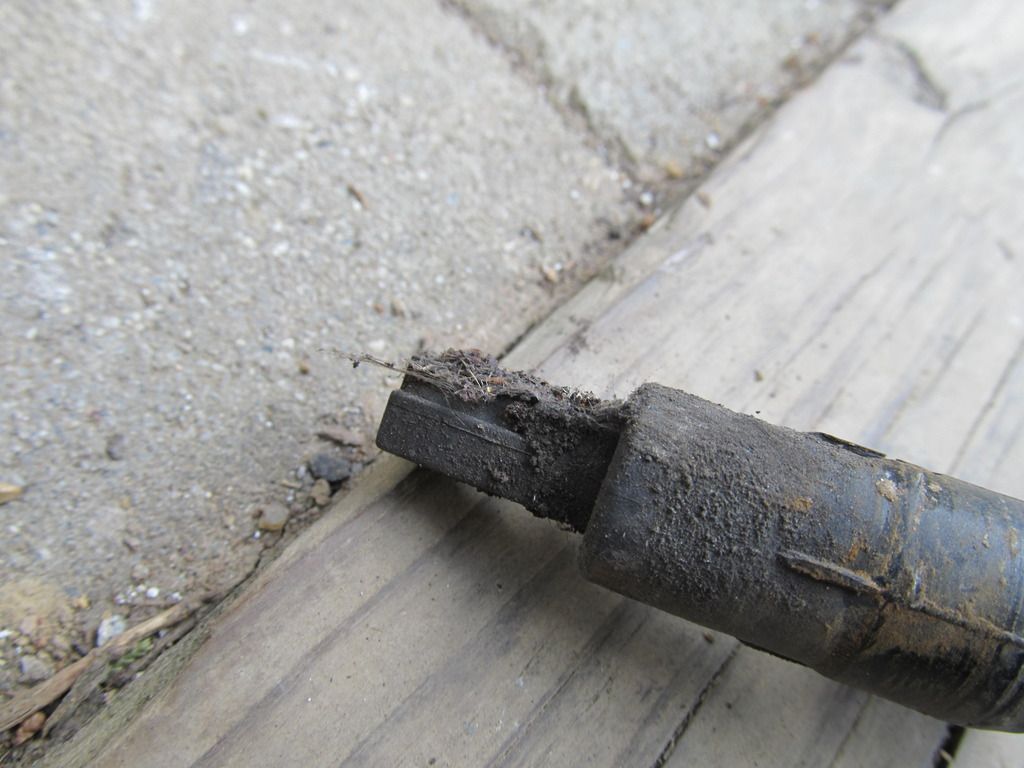
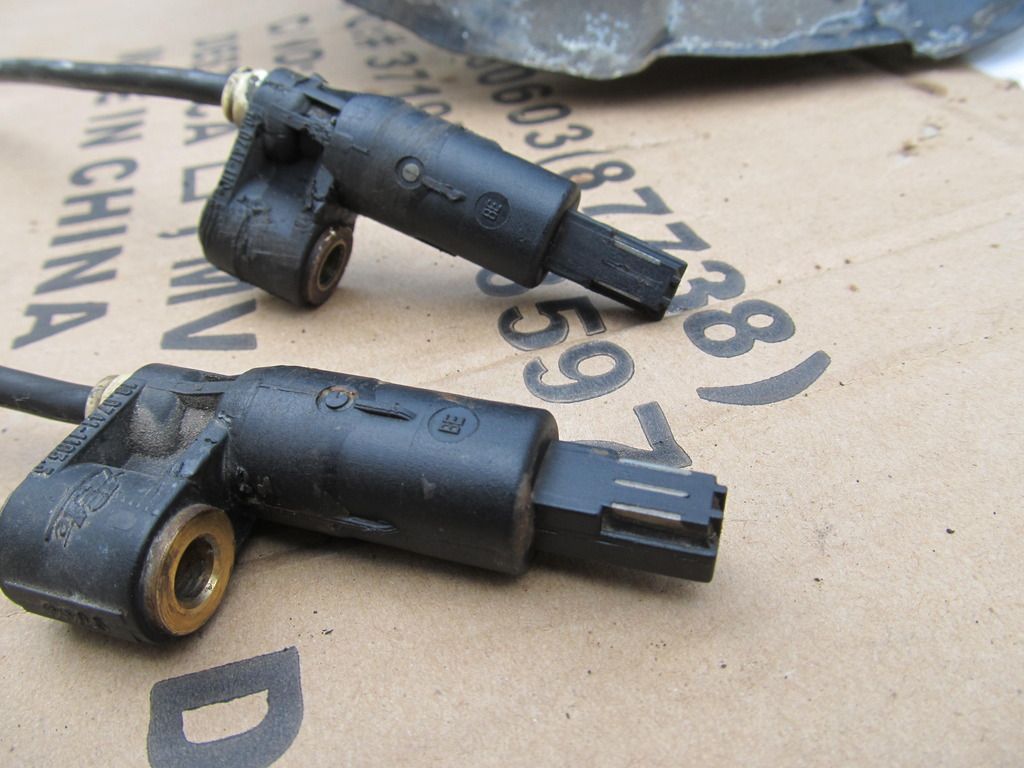
All clean!

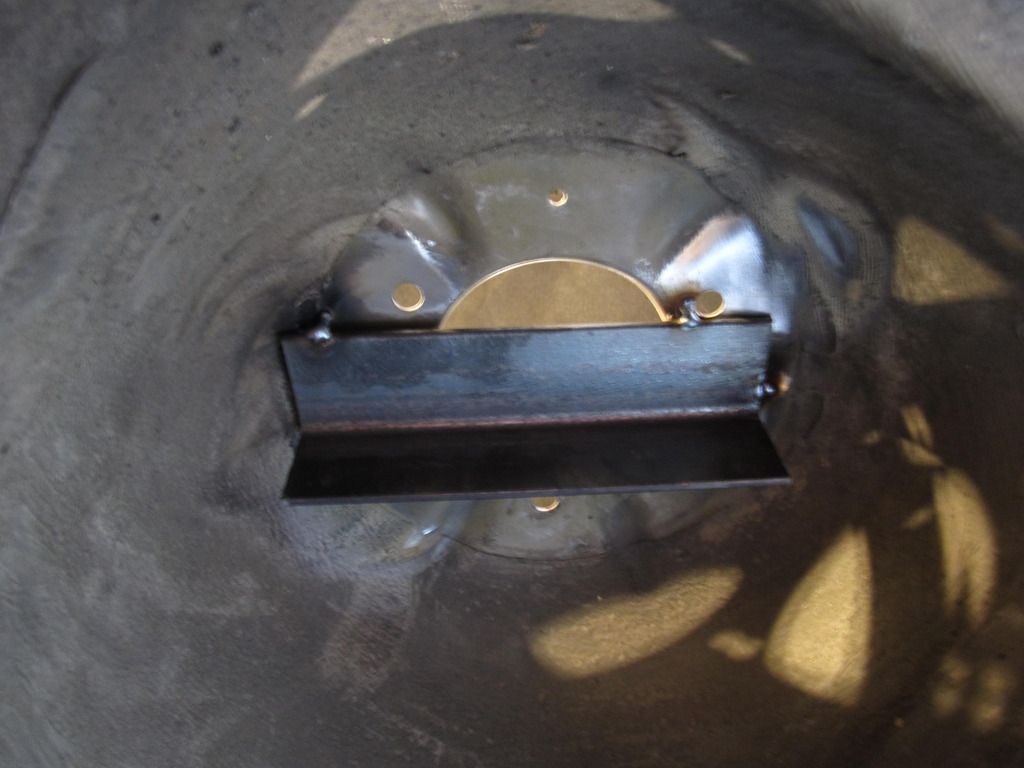
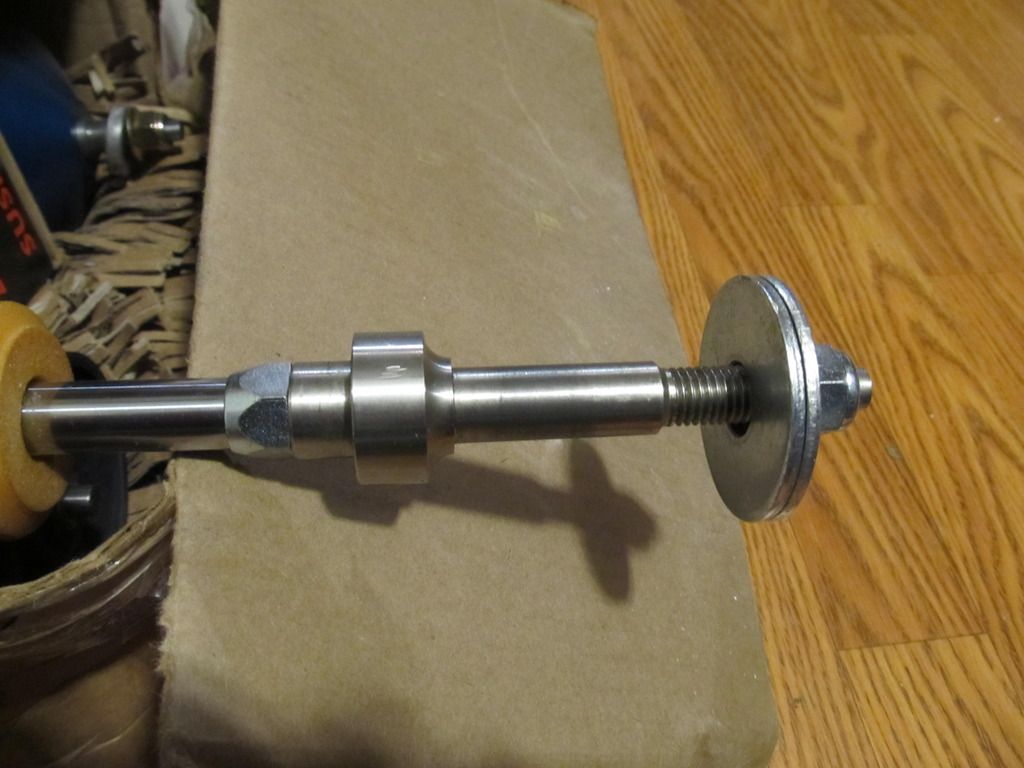
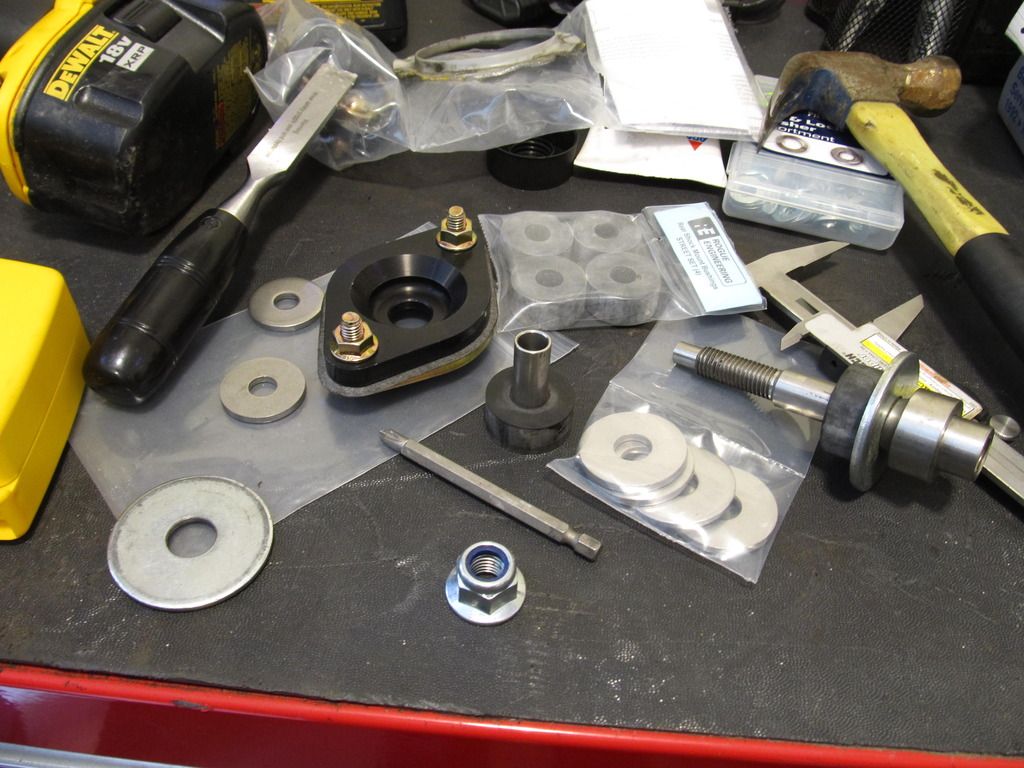
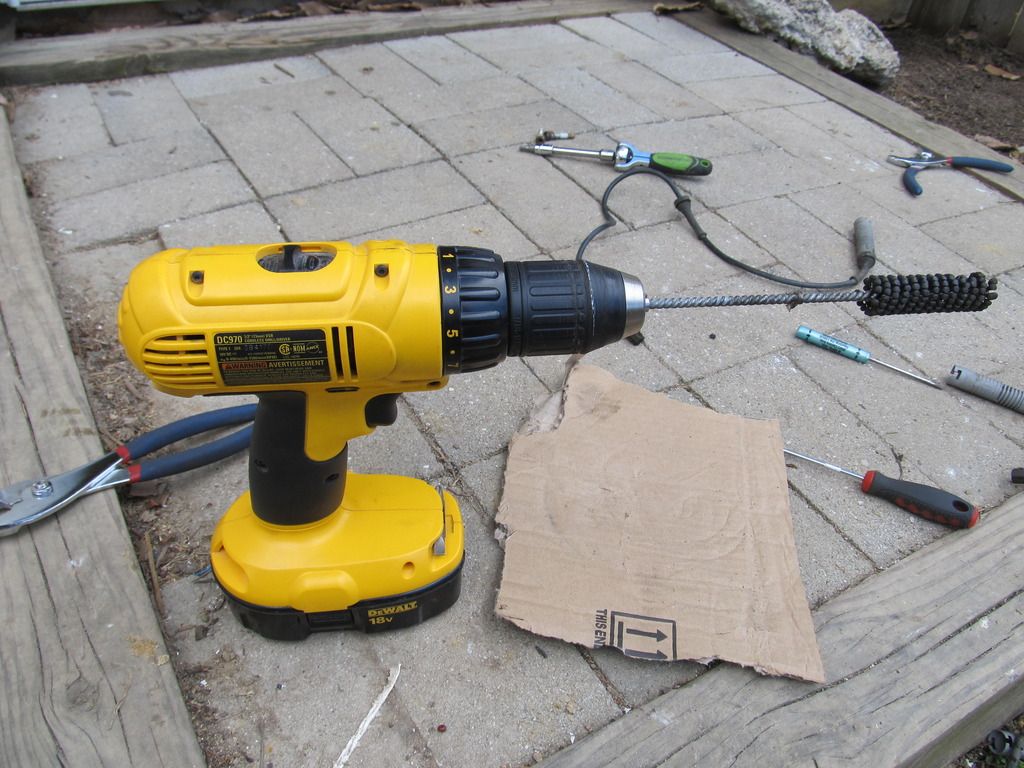
To make this job easier in the future, I cleaned up the holes with this nifty tool that Eric (my buddy who helped me do much of the heavy lifting on this project) brought over.
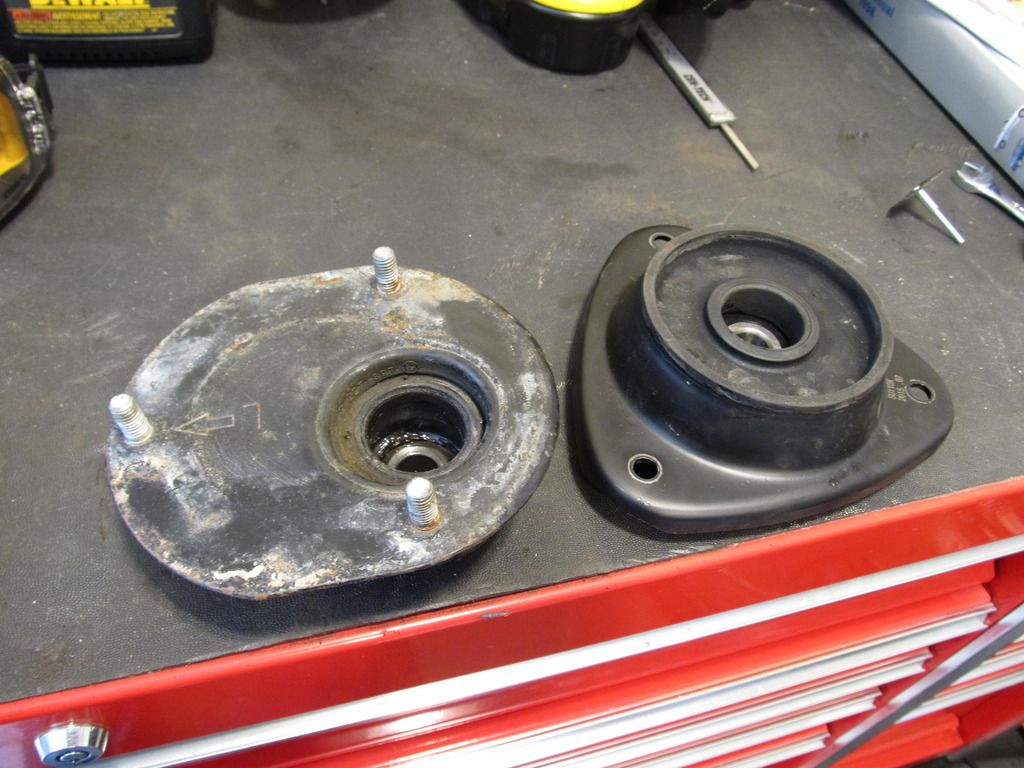
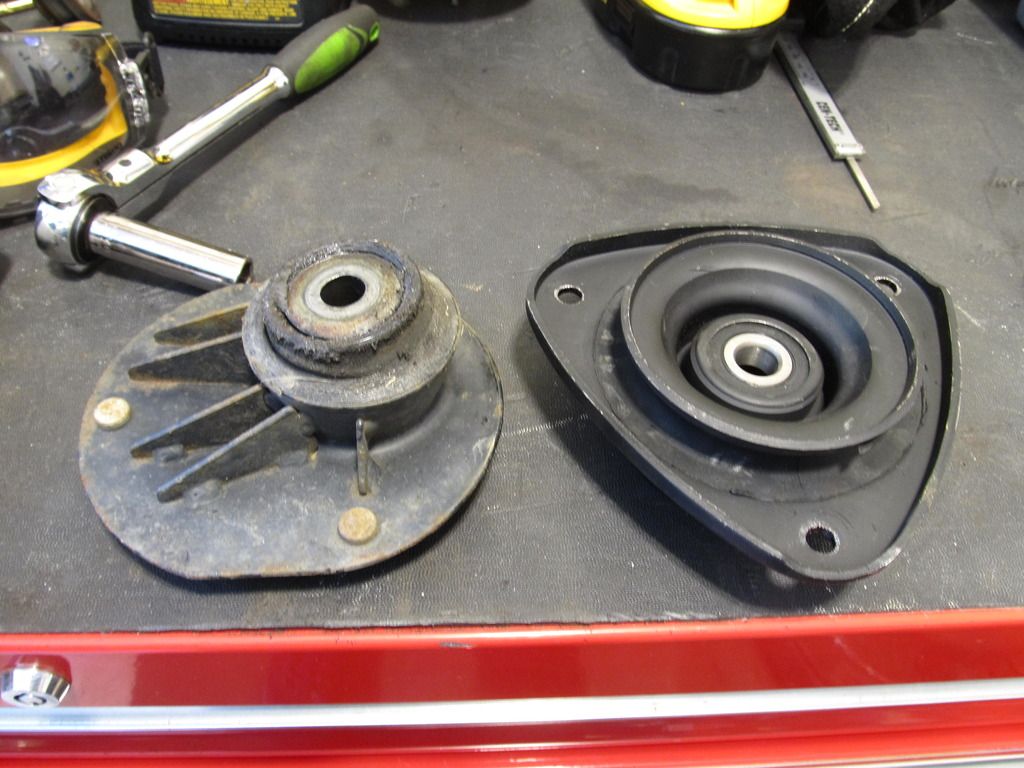
So this:

Turned into this:

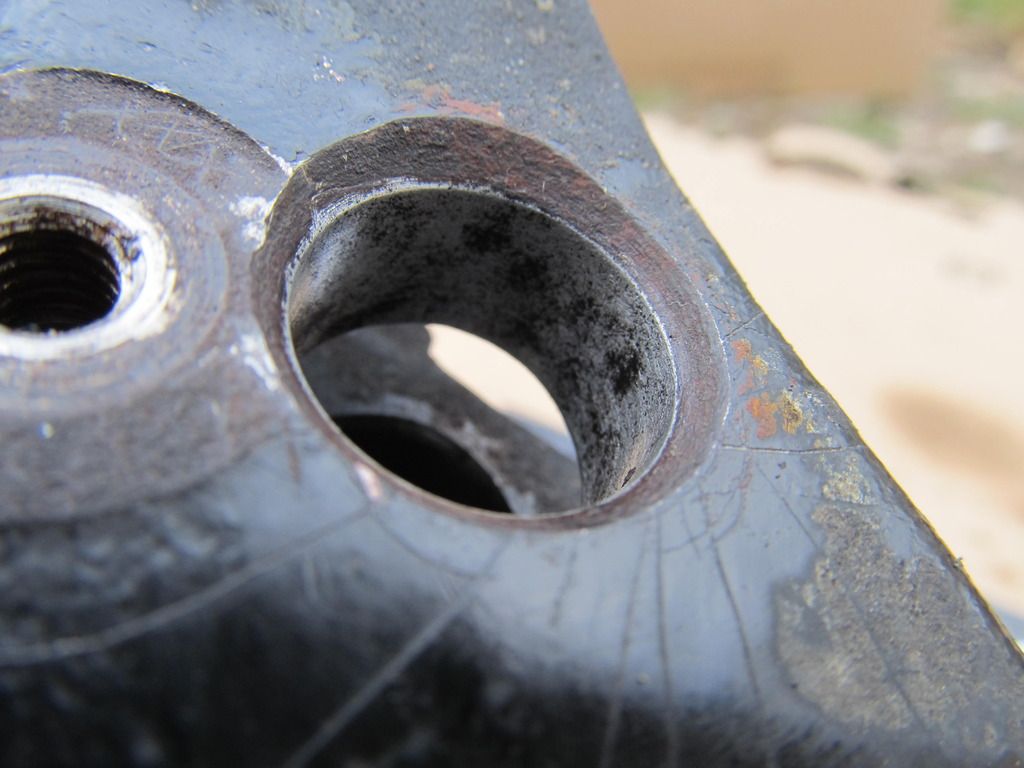
And while I'm on the subject, I did the same thing to the rears when we got them off:

Ahh, so much better!

95maxrider
95maxrider New Reader
4/7/16 2:13 p.m.

I need to start this post with some sad news. Wade Chamberlin, the previous owner of my M3, and a friend of mine who I've raced with in the XP class at Solo for many years, passed away on Saturday at the age of 47. Wade had many FTDs at Solo events in his Cobra, and was a great guy. I was hoping to have him join me for a few rally-x events once the car was sorted out, as I'm sure he could have given me some pointers and made me a better driver. The autocross and Cobra communities are reeling from the unexpected loss. Wade was a husband and father, and he helped out so many people over the years. Solo just won't be the same without him or his monster Cobra. Rest in peace Wade, you will be sorely missed.

:( :( :(

I knew going into this build that I was making certain things more difficult by choosing an M3 over a 328, but the price was right, and I wanted an M3 dammit, so I would just have to figure some things out. The rear brakes were one issue, the front bumper another, but the biggest one was going to be getting some extra ground clearance and suspension travel into the car. Sure, I could have gone the super-ghetto method like I did on the E28 and get some rubber spring spacers (although I did that on the E28 to increase spring rate), but I wanted something a little more sophisticated. I also probably could have just run 325/328 front suspension, but the spring rates would have probably been too soft. After much research, I decided to have John Vanlandinham (JVAB) build me a set of custom coilovers. John has been building and tuning shocks since the 70s, and has a great reputation. He uses some special 50mm Bilsteins as a base, but orders them with custom valving and makes the rest of the hardware himself.

Front struts: For the front, John convinced me to try using Subaru top strut mounts, as they provide something like an additional inch of shock piston travel, since they go "up" rather than the BMW top mounts which go "down." The Subaru mounts also use much larger bearings and are known to be pretty indestructible. I of course didn't quite know what I was getting myself into when I agreed to use them, but I hope the decision pays off. During the build process, John realized that the front sway bar end links attach to the M3 front struts, as opposed to non-M cars which have them attach to the control arms. This posed a new problem: the ears on the struts that the end links attach to sit directly under the lower spring perch, so unless they are relocated, we were severely limited in terms of spring length. We came to the conclusion that the best thing to do was to drop down the ear on the strut, which meant the end links had to be shortened to match, so I sent John 3 pairs to trim, since I want to have them ready should I need them without having to ship them across the country and wait for him to have time to trim them for me.

The center hole for the top mounts in the strut towers would need to be enlarged to fit the larger Subaru mounts as well, so I ordered a 4.5" hole saw and hoped for the best.

Rear shocks: At first, we were going to go with a coilover setup, but after he talked to some of his E36 buddies and heard stories about them shearing off the lower mounting point for the rear shock on the rear knuckle/kingpin, we decided to not go the coilover route and stay with a separate shocks and springs. Apparently, the rear E36 kingpin/knuckle is cast iron, which can't be reinforced, and when you convert the rear to a coilover setup, all the force goes through that one bolt at the bottom of the shock, instead of being distributed between there and the spring/upper control arm. This is probably fine for street cars, but for offroad stuff, that cast iron piece can break, and there's no fixing it. I wanted to avoid this, but again, I wasn't fully aware of how big of a headache it was going to be.

In addition, I had to figure out what to do for rear shock mounts. I was planning on getting the nice Rogue Engineering mounts, but they only make them for shocks with 10mm or 12mm piston diameters, and the JVAB rear shocks are 15mm. John advised I try to use rear mounts off some other car, but I'm aware of how rear E36 mounts can fail, and I wanted something that I knew was going to bolt in and be strong, so I ordered the 12mm Rogue mounts and planned to have the top portion of the rear JVAB shocks turned down from 15mm to 12mm to fit. Unfortunately, when the Rogue mounts came, the metal sleeve that goes inside the rubber bushings was 10mm! I didn't really want to turn them down so far, so I started fooling with the parts. It turned out that the center hole in the metal plate was more than 15mm, and the rubber bushings slid over the 15mm section, so I decided to take a little risk and just not use the metal sleeve, since that was the only thing holding me back from using the Rogue mounts. As far as anyone I've talked to can tell, the metal sleeve is there just to make sure you don't over-tighten the top bolt and squish the rubber mounts.

So last Saturday Josh came over and helped out with the front strut towers!

This is approximately how much we needed to cut out to get the Subaru mounts to fit:

We needed to find the center point of the tower to know where to put the pilot bit. The initial plan was to bolt up a block of wood and find the center point by going between the three bolt holes with a line, but we decided wood is probably too soft, and the bit might wander, which would really mess up the cut, so Josh got to work welding in some steel to act as our base.

I will probably never use this hole saw again, but at least it held up and didn't break!

There's no going back now!

We then pressed out the three bolts from the Subaru mounts so we could use the holes to mark where we were going to drill the new holes in the tower.

Success!

This is what we cut out:

And here's a comparison of the BMW and Subaru mounts. The last picture really shows how the Subaru one will provide extra travel:

Holy crap, it's actually in!!!

Far more details coming later....

GPz11
GPz11 New Reader
4/7/16 2:22 p.m.

John makes nice bits but geez will he talk your ear off!

Got his Supra diff conversion in my XR4Ti.

95maxrider
95maxrider New Reader
4/7/16 5:18 p.m.
GPz11 wrote: John makes nice bits but geez will he talk your ear off! Got his Supra diff conversion in my XR4Ti.

Yeah no kidding, my right ear fell off sometime back in January....

bluej
bluej GRM+ Memberand UltraDork
4/7/16 5:51 p.m.

Tasty!

Adrian_Thompson
Adrian_Thompson UltimaDork
4/8/16 12:49 p.m.

That looks awesome. Are you going to reinforce the strut top area after cutting it out. Don't under estimate the strength the raised lip on the old hole added to the structure. With that gone and just a gaping hole you've lost a lot of stiffness. Are you going to weld in a new lip there?

Lof8
Lof8 GRM+ Memberand HalfDork
4/8/16 1:44 p.m.
Adrian_Thompson wrote: That looks awesome. Are you going to reinforce the strut top area after cutting it out. Don't under estimate the strength the raised lip on the old hole added to the structure. With that gone and just a gaping hole you've lost a lot of stiffness. Are you going to weld in a new lip there?

I was going to say something similar. The car's looking great!

irish44j
irish44j UltimaDork
4/8/16 3:22 p.m.
Adrian_Thompson wrote: That looks awesome. Are you going to reinforce the strut top area after cutting it out. Don't under estimate the strength the raised lip on the old hole added to the structure. With that gone and just a gaping hole you've lost a lot of stiffness. Are you going to weld in a new lip there?

Yes, he's going to do that.

bluej
bluej GRM+ Memberand UltraDork
4/8/16 3:33 p.m.

what's the plan for it?

95maxrider
95maxrider New Reader
4/8/16 5:27 p.m.
Adrian_Thompson wrote: That looks awesome. Are you going to reinforce the strut top area after cutting it out. Don't under estimate the strength the raised lip on the old hole added to the structure. With that gone and just a gaping hole you've lost a lot of stiffness. Are you going to weld in a new lip there?

Yup, the reinforcements arrived in the mail today, more updates are coming soon!

95maxrider
95maxrider New Reader
4/8/16 5:29 p.m.
bluej wrote: what's the plan for it?

I assume you mean for the reinforcements? They are some plates made by the company that made my skid plate for Subaru front strut towers. They're going to require some cutting the get them to fit right, and the shock tower reinforcement ridges need to be flattened, but it should be pretty tough when it's all said and done.

95maxrider
95maxrider New Reader
4/11/16 10:48 a.m.

With the M3 being as low as it is (at least before I raise it up), I knew a skid plate was going to be necessary. The one we had on the E28 was some cheap diamond plate aluminum that bent very easily, and was a real pain to get on and off the car because the bolts holding it in place kept getting bent. I had some trouble finding a company that made a real heavy duty plate for the E36, but eventually stumbled across a company called Rally.Build. I ordered a skid plate from them and asked if they could make it work with the OEM x-brace. A few weeks went by, but eventually they modified an x-brace for me and sent it along with the skid plate, which is 3/16" aluminum. I also sprung for their fuel line skid plate, since the fuel filter on the E36 is directly under the driver, and is very exposed. It didn't help that the factory metal protection plate for the fuel filter had been previously lost, so it was wide open to getting smacked.

Anyways, here's what stuff looked like before installation:

It comes with a nice brace the gets welded up in front of the frost sway bar to give the plate some much needed rigidity.

I already had an x-brace, but it wasn't going to just work with the skid plate, it needed to be modified. Thankfully, Rally.Build took care of that for me on their end and sent me a modified one that would bolt up to the plate.

Stock:

Modified:

Install pics coming soon!

95maxrider
95maxrider New Reader
4/11/16 1:19 p.m.

Let's talk about rear shocks!

As I mentioned previously, there were some issues getting rear shock mounts to work with the rather large upper piston thingy that goes through the mount, but after some thought, I decided to just leave off the metal sleeve that goes inside the rubber bushings and just put the rubber directly over the top of the piston. Here's what stuff looked like:

The portion of this towards the right comes off the piston, so I was planning on taking it off and taking it to a machine shop to have them turn it down from 15mm to 12mm to fit the Rogue mounts, but since Rogue shipping me a 10mm mount instead and I didn't want to turn them down that much, I improvised:

Here's all the pretty Rogue stuff:

This is how the Rogue mounts look when assembled. The metal sleeve is shown sitting on top of it, since I decided to not bother trying to use it. I hope this doesn't come back to bite me.

And here's a comparison of whatever mount was in the car before and a break down of the Rogue mount:

And here's a closeup of the sleeve and bushing it's supposed to go inside of:

I'm stilling waiting on rear springs/adjusters, but that's a story for another day. So does anyone see any potential problems from not using the metal sleeve inside the bushings?

95maxrider
95maxrider New Reader
4/15/16 2:39 p.m.

Things are happening so quickly that it's hard to keep this thread up to date!

First up for today is the main part of the skid plate and x-brace install. I'm holding off on installing the fuel line protection until I drive the car around so I can more easily check for fuel leaks, since I replaced the filter and all the lines down there.

My buddy Eric took care of the welding for me for the u-brace. Fitment wasn't perfect, as it was pretty much touching the belt tensioner for the AC before we ground some stuff down a bit. But it's on, and it should do the trick!

I'm just now realizing that the skid plate is making contact with the FSB, so I'm going to have to fix that.

Here's a shot of the x-brace sandwiched between the oil pan and the skid plate. Nothing is going to be denting my oil pan!

The skid plate goes back pretty far too and protects the front portion of the tranny.

You might remember from the pre-install pics that the skid plate is flat, but it appears curved here. That's due to the "height" of the u-brace, which I believe should be taller. This is also what's causing the interference with the FSB. To get the plate to mount up we had to use a jack, since it was about 4" too low to bolt up to the u-brace. Getting it off isn't going to be fun, but as long as it works, I won't care too much.

Next up are finished pics of the AKG RSB bracket reinforcement and trailing arm pocket reinforcements. Eric once again handled this part of the job since I don't know how to weld (yet). I came in afterwards to get some rubberized undercoating on it all to prevent rusting.

Here are the pocket reinforcements with rosette welds:

And the RSB bracket reinforcement:

And after the undercoating:

Yes, I know this bolt is loose....

And now for the front strut tower reinforcements! I bought these plates for a GC Impreza from Rally.Build and Eric got to work getting them installed.

Had to buy some HF welding blankets...

That's it for now, more coming soon!

Lof8
Lof8 GRM+ Memberand HalfDork
4/15/16 2:58 p.m.

This build is getting pretty serious! Want to sell that unmodified x-brace?

95maxrider
95maxrider New Reader
5/6/16 8:23 a.m.

Can anyone tell me if the EWS system disables spark or fuel, or both?

I got the car back together, but it won't start. It cranks great, and the muffler reeks of fuel afterwards, but it won't start. Keep in mind that I had the battery disconnected from the car for over a month. The local shop I called said the EWS might have lost connection to they key (IIRC) and might need to be re-synced. Does this sound plausible? All the lights work on the dash, and I see the check engine light come on. I trickle charged the battery up to 100%, and I have 3/4 tank of gas. I did drain all the fuel out of the system when I replaced the fuel filter and most of the fuel lines, but I let the system pressurize for a long time, and the fuel smell in the muffler tells me that isn't the problem. I also did change the spark plugs, but I reinstalled everything properly as far as I'm aware. Aside from a bad crank or cam sensor that just randomly died, the EWS theory sounds plausible. What do you guys think? Oh, and the alarm system locks and unlocks the car just fine, and I tried using the valet key and that didn't help either.

My understanding is that on earlier E36s you can bypass/disable the EWS, but that can't be done on later cars like my 98. Am I understanding that correctly?

95maxrider
95maxrider New Reader
5/13/16 2:21 p.m.

As always, I'm behind on my updates, so let's try to catch up a bit!

As we all know, the cooling systems in modern BMWs are absolute crap, and aside from a semi-new aluminum radiator and thermostat, I had no idea what was new in my cooling system and what was original. Rather than risk an overheating incident 3 hours from my house in the middle of nowhere (our Frostburg racing site), I decided to play it safe and go hog wild.

I purchased: Stewart water pump OEM thermostat and thermostat housing/cover (apparently the metal ones on the market are of sub-par quality) All new hoses OEM blue coolant, distilled water

While I was in there, I knew I should also do all the belts and pullies. Boy am I glad I did. For this part of the motor, I purchased: 3 OEM idler pullies 2 new Continental belts

Let get this thing drained!

Oooh, that doesn't look so good. Do these iron blocks usually deposit so much crap into the coolant?

Oh look, another oil leak.

I spent a LOT of time cleaning up old caked on oil around the valve cover. Unfortunately, I somehow managed to forget to take a single picture after it was all done and super clean. Take my word for it, it looks great now!

Thermostat with some goo on the bottom of it. Can anyone guess what this stuff might be? I almost seemed oily....

And this is when I ran into my first problem. For some reason I had decided to purchase a new pulley for the water pump from the dealer. Don't ask why, because I don't know. But when I compared it to the one that came off the car, it was immediately apparent that my car came with a set of underdrive pullies.

Yeah, at this point in my life I'm just not okay underdriving my water pump, alternator, and power steering to gain a few HP. The pullies also didn't have any brand names on them, so I couldn't figure out what size belt to get for them. This meant I had to find new/used OEM pullies so I could use the OEM-sized belts I bought.

Well, at least the Stewart water pump is nice an pretty.

The area around the thermostat was pretty nasty, so I cleaned it up with a wire wheel.

New thermostat housing vs. old housing:

Hooray, new coolant hoses!

Apparently this hose is no longer on my car, and I believe it has to do with the M50 manifold swap. Now I'm stuck with this dumb $80 hose that I can't return....who wants to buy it for cheap? It's a BMW hose, nothing cheap here.

Good god, look how badly the old hose had ballooned out...

More weird goo in the hoses and radiator:

The throttle body had to come off because metal shavings got shot into it when drilling out the strut towers, so I might as well clean it up!

I ordered new throttle body gaskets, but apparently they don't play nice with the M50 swap, so I reused the gasket that was already in there (the bigger black one).

So, those belts weren't in very good shape....

Getting the UDP off the alternator was a PITA....

UDP vs. stock

The UDP pullies were all aluminum vs the stock plastic for the water pump and power steering. The OEM alternator pulley was steel though. I had a scale handy so I figured I would check out the weight differences!

I believe this is the OEM water pump pulley- ~4 oz.

UDP, water pump- ~9 oz.

OEM PS pulley- ~5 oz.

UDP, PS- ~14 oz.

OEM steel alternator pulley- ~6 oz.

Aluminum UDP, alternator- ~1 oz.

So, total OEM weight= 15 oz. Total UDP weight= 24 oz.

I have absolutely no idea if this is important or not, but there you have it.

Anyways, time to reassemble!

New OEM thermostat:

Some black RTV for the housing....

Done!

New idler pullies as well! I don't know what happened to my pics of the weird offset one for the alternator, but that one was new too.

berkeley it, got some new hardware to make it all look purdy.

All assembled! Well, except for the pulley cap for the AC....that came in the mail a few days later....

Ahh yes....

I also got new bushings for the radiator, even though it didn't need them....

irish44j
irish44j UltimaDork
5/13/16 9:51 p.m.

you are out of control, son

95maxrider
95maxrider New Reader
5/16/16 1:43 p.m.

Look, a wild rear subframe!

And some new OEM RSB bushings. Why was it so hard to find poly bushings for sale?

Mmmm, squishy.....

I had to buy this bad boy to get the rear axle nuts off....

These guys (rear wheel bearing inner races?) really didn't want to come off.....but they did and I now have new rear wheel bearings!

Aww yeah, fancy!

I'm just going to ignore all that surface rust and focus on the pretty AKG reinforcement plate.

One of the output shaft seals was leaking on the new diff, so I threw new ones in.

With everything reinstalled I went to fill up the diff annnnnnd, nope. My 14mm hex socket was too long and wouldn't fit between the fill plug and the spare tire well, so I placed an order on Amazon and got these bad boys the next day!

Success! I filled the diff with Redline 75w-90 using my little hand pump thingy.

95maxrider
95maxrider New Reader
5/16/16 1:57 p.m.

I was still in need of some rear springs, since I really didn't want to use the progressive stock springs, so after much discussion with people like Jason at Vorshlag and Phil at Bimmerworld, I settled on Hypercoil 7" 350lb rear springs. I was going to get the Vorshlag adjustable rear spring perches, but they were sold out for a while, so they recommended I get the Rogue pieces. The Rogue kit is pretty cool because as far as I can tell it's the only kit that articulates. I'm not an engineer, so I can't prove that that feature has any real world benefit, but damn if it isn't cool as hell!

Installation was pretty easy; just unbolt the shock from the rear kingpin and disconnect the RSB from the subframe.

Before:

7" Hypercoil vs. stock:

It sounds like 7" is the longest spring I can run back there, and with the Rogue perches at their lowest setting I'm just above stock ride height. Sweet!

So one part of the Rogue kit feeds up through the bottom hole, and another piece threads on from the top. Another really cool thing about the Rogue kit is that the ride height is adjustable with the car on the ground with the turn of a 14mm bolt from underneath! Too bad I'll probably never take advantage of this feature, but you never know.

Installed!

Aww yes, that's the good stuff.

95maxrider
95maxrider New Reader
5/16/16 2:10 p.m.

Remember how I had clearance issues with the u-brace for the skid plate and with the skid plate itself? Well, it was time to fix them before taking the car out and damaging something.

First up was the u-brace. I'm not sure if it was due to installation error or a poorly designed brace, but the u-brace was right up against the tensioner for the AC belt. My buddy Eric (who welded up the bar) tried to clearance the u-brace, but it looks like he did it in the wrong place.....So it was up to me to remove the tensioner and do some more grinding.

The skid plate was right up against the FSB as well, as seen here by the marks:

Unfortunately, instead of removing the tensioner along with its assembly, I tried to just remove the tensioner. Big no-no. I'm not sure if it was just at the wrong angle, or under tension, or if it was just old and ready to explode, but it exploded.

Crap.

I wonder if these puny washers on the bolts for the u-brace/skid plate will get me enough clearance for the FSB...

While I was waiting for a new tensioner to arrive, I decided it would be wise to paint the u-brace. This was of course after I ground it down in the correct location.

Better.

New vs. old.

I haven't put the skid plate back on yet, but the motor is reassembled and smoother than ever.

95maxrider
95maxrider New Reader
5/17/16 2:13 p.m.

As previously shown, the car came complete with plenty of oil leaks, and the majority of them appeared to come from the valve cover. Having read the Bentley manual and the 101 Projects book from Pelican, I knew I had to buy all the little parts to ensure a good seal. I would also be doing the spark plugs, of course.

First up was disassembly. One of the two little rubber guys that hold up the plastic outer cover was destroyed by coming in contact with oil:

Next up was removing all the grounds for the coil packs. Unfortunately, this little one in the center snapped off while I was trying to undo the upper nut, so I had to make a new one.

With everything off, it didn't actually look too bad in there! I wonder if the head was already replaced, since the car has 220k+ on it....

The main valve cover gasket was in fine shape, but the ones for the spark plug holes had turned into hard plastic a long time ago and were in no mood to come off easily. I don't know why my camera refused to properly focus on this thing.

Rubber ----> plastic

After I cleaned things up, I noticed that there was a 4" long crack towards the back of the VC. QuikSteel to the rescue!

After much cleaning and scraping, it was time to reinstall the VC. I applied some gray RTV to the problem areas according to my two books, and let it set up for 24 hours.

Next up were the little rubber grommets that go around the VC. The old ones were clearly worn out...

And two new other things....

The VC didn't come with this rubber gasket, so I bought one.

Then there are these little berkeleyers. They isolate the VC cover, but they don't like to stay in place, and prefer to fall into the dark recesses of the engine. I was not a fan, and completely understand why the car didn't come with any.

Here's my new ground...woo woo

All cleaned up!

Apparently I forgot to upload pics of the spark plugs, but there wasn't anything noteworthy in there. Maybe later....

I had to do some troubleshooting to get the car started, which involved checking all my coil packs and ground. Of course, those little rubber berkeleyers got lost again when I took off the VC cover. I decided I had had enough, and threw some red RTV on them so they don't get lost every time I take the cover off!

Not long after I got the VC and plugs in, I tried to start the car. Eric and I had removed some fuses when he welded and when I changed the fuel filter, and they were labeled and in the cover for the fuse box. I reinstalled everything, but the car wouldn't start. I could smell fuel in the muffler, and the starter was cranking over. I called up the local shop that was going to do my alignment (RRT) and the owner thought the problem was related to the EWS system. After doing some more research, it turned out he was either lying (and trying to get me to pay for diagnostics), or didn't know what he was talking about, because apparently if the car is cranking, the EWS is happy, and thus not the problem. I figured that if I smelled fuel in the muffler, that meant I was getting fuel injected into the motor. Little did I know that the motor will actually draw fuel in without the fuel pump working, it just won't build real pressure. After more troubleshooting, I realized that there was one fuse missing from the panel: the one for the fuel pump. Apparently we didn't label that one, so when I went to reinstall all the fuses, I didn't realize I had missed one. After a few seconds of cranking the car started right up! I topped off and bled the coolant, checked for other leaks, and prepared to drop the car off for the alignment.

95maxrider
95maxrider New Reader
5/31/16 2:24 p.m.

So I dropped the car off at RRT to get it aligned a few weeks ago. On the way there I was surprised at how smoothly the car ate up bumps, and was relieved to not hear any weird noises from the car. Apparently there isn't much of a penalty to running aluminum subframe bushings and hard poly diff bushings! I was really worried that they wouldn't be able to get enough negative camber in the front due to the Subaru top mounts, but with a shim or two they were able to get it good enough. Hooray! Unfortunately, the good news ended there.

Going back a few weeks, you may remember that my buddy Eric (who did all the welding) noticed that the pocket for the PS trailing arm was mashed up a bit. He did his best to straighten it out with a slide hammer, but it wasn't enough. Apparently RRT couldn't get the rear PS tire to have less than 1" of toe in! They got the DS to match, so at least the car drove straight, but I now had more than 2" of rear toe in! Their guess was that the trailing arm was bent and needed to be replaced. Crap! That means I would have to press out those nice new ball joints and BW sealed bearing/bushing from my trailing arm, and find a straight one to install them all into.

In the mean time, I was anxious to see how the car drove, so I took it out on a nice Sunday afternoon to have a little fun. I noticed that the rear of the car kind of hopped around when it went over bumps, but I didn't think much of it, since everything else felt so great! The turn-in is amazing, the motor runs much smoother, power delivery is great, the suspension eats up bumps, wow! I thought it was ready for a shake down at the auto-x the following week. Well, the next Sunday rolls around, and it brought lots of rain. I head out the door around 7 to make the hour drive to FedEx Field for the auto-x, anxious to really thrash the car. It's raining steadily as I cruise on the highway, doing about 60 mph. Now, the car is on some rather junky all season tires, but they at least have good enough tread left. With the highway mostly to myself, I try and get a feel for how the car handles at speed in the rain. Hmmm, well that doesn't feel right. Oh well, I must just need more coffee. I take an on ramp to the Beltway, and things start to get weird. It's a bumpy ramp, and the whole time the car is feeling very strange, like it's trying to spin me off the road. Now I'm starting to get spooked. I start driving at 50 mph, and the whole time I've got a death grip on the steering wheel. Something is definitely wrong here. I eventually pull over to check for flat tires, but nothing. I'm now the slowest car in the slow lane, and I'm terrified. This car is trying to kill me. Every single bump sends the rear end all over the place, but I eventually make it to the event.

It's raining pretty good the entire time I'm racing, and the car just never settles down. I put down equal times to an S52 M coupe, but he isn't a great driver. Aside from him, I'm way back from everyone else, and I never built up any confidence in the car. I was at least consistent, with all four runs within 0.4 second of each other, but it was damn slow. Crap. Now I have to make the drive home, and it's still raining. I stay in the right lane, rarely going above 50 mph, and I get home exhausted from concentrating so hard. After thinking about it for a while, I come to the conclusion that what I was feeling were the rear tires not pointing anywhere close to straight ahead, so when one would hit a pothole/bump, it would come back to the road at an angle, which made the car want to step out. When both rear wheels hit something, they both wanted to go in different directions. I believe these handling characteristics were hidden the week prior due to it being dry out, which gave me more grip and covered up the demon that lurked beneath. I knew that I could no longer wait to repair the trailing arm situation until the off season, it had to be done before the next race.

With that in mind, I made a thread about the trailing arm situation, here: http://www.bimmerforums.com/forum/showthread.php?2298736-What-bends-first-trailing-arm-or-pocket&p=29257124#post29257124

There was one guy who chimed in and we ended up speaking over the phone. Apparently he wanted to correct what he believed what some incorrect information people were telling me, and he believed my problem was not a bent trailing arm, but rather more likely frame damage. He said he had owned over 50 E36s, and really knew his way around them. He lived pretty close to me and even offered to swing by and take some rough measurements. Score! Well, yesterday Terry came by my place and poked around under the car for a while, and took some measurements. Right off the bat, he was seeing differences of 1/2" between the right and left sides, and didn't see any indication of a bent trailing arm. He pointed out some cutting and welding that were done to the PS rear wheel well and unibody around the trailing arm pocket. So with that, it looks like the car needs its frame straightened. :( More on that as it comes. Until then, enjoy my alignment sheet:

irish44j
irish44j UltimaDork
5/31/16 4:56 p.m.

Yeah man, I warned you that the serious toe was going to give you some really strange handling. I mean, when I could visually see the toe while standing 50 feet from your car, I knew it was excessive..

bluej
bluej GRM+ Memberand UltraDork
5/31/16 5:47 p.m.

I can't be reading that right... a whole inch of toe in?!?! and they were able to get the drivers side to match?!?! what the?!?!

either way, sorry dude

1 2 3 4 5 ... 20

You'll need to log in to post.

Our Preferred Partners
4ekLt8lXnooNa9Yho5uqP24dNv4nQbaDSQa9tTPlU3DnrI1iPhtZgCMPDk8awE61