


Do you know when the alternator was replaced? With euro cars they can do very odd things when the voltage goes low in the system as they are designed for exactly what are needed for without much spare room.

Do you know when the alternator was replaced? With euro cars they can do very odd things when the voltage goes low in the system as they are designed for exactly what are needed for without much spare room.

JtspellS wrote: Do you know when the alternator was replaced? With euro cars they can do very odd things when the voltage goes low in the system as they are designed for exactly what are needed for without much spare room.
Nope, I have no idea how old the alternator is.
Ok, more updates! But first, a question: Can someone explain why these cars require a lower temp fan switch when you convert to an electric fan?
I just got back from taking the car to Autozone and Advance Auto Parts and had both places do a full electrical system test, and both tests came back as passing. CCA for the battery is 730, and it shows about 695. The battery is over three years old. When I got home, I let the car idle in the driveway and turned on the AC. Surprisingly, the idle seemed to be fine, and it never tried to stall out. I do get a lot more flywheel chatter with the AC on (which goes away when I push the clutch pedal down), but aside from that my idle problems seem to have improved or disappeared. I'm wondering if the car needed time to adjust for a working ICV and no vacuum leaks. That's probably it for this weekend, now I'm just waiting on parts to arrive!

In reply to 95maxrider:
How many miles since the last time the battery was disconnected? There is an ecu re-learn feature that takes, I could be wrong here, about 60 miles to recalibrate. Extremely annoying when trying to hunt down intake and vacuum leaks.
Source- me, after replacing 2 icv's because I thought the 1st was also bad...
golfduke wrote: In reply to 95maxrider: How many miles since the last time the battery was disconnected? There is an ecu re-learn feature that takes, I could be wrong here, about 60 miles to recalibrate. Extremely annoying when trying to hunt down intake and vacuum leaks. Source- me, after replacing 2 icv's because I thought the 1st was also bad...
Ha! Good to know, because I had the battery disconnected while I was doing the ICV after it sparked on the starter when I was trying to reinstall it.
Im not saying that that was the problem... but that was most likely the problem, haha.
Also, I too have flywheel chatter in neutral without the clutch depressed. It's very common in e36's, with lightweight flywheels specifically notable. It is of no significant issue mechanically from what everyone tells me, it's just inherent of the clutch design in the e36s. Run it.
golfduke wrote: Also, I too have flywheel chatter in neutral without the clutch depressed. It's very common in e36's, with lightweight flywheels specifically notable. It is of no significant issue mechanically from what everyone tells me, it's just inherent of the clutch design in the e36s. Run it.
Yeah, I think I'm gonna try what UUC recommends:
"Due to the frequency of the power pulses, slowing down the engine slightly more at idle by turning on the A/C and loading up the alternator with headlights and other electrical draw may increase the amount of residual rattle. A change to a slightly heavier grade of transmission fluid (UUC recommends a specific mix of transmission fluids, 1 bottle Redline 75W-140NS and 1 bottle Redline D4 ATF) will eliminate it entirely in some cars, or at least reduce the remaining rattle a subjective 90%."

How high do you have to raise the idle to not have to worry about rattle/stumbling/AC berkeleyery? That was my first thought on the easy way to handle this.
Hey guys, I need some help figuring out what to do with the droop/limiter straps I ordered for the rear suspension!
The helpful guys over at Vorshlag recommended I get some limiter straps to make sure my rear springs never unseat themselves, and since they're pretty cheap, I figured it would be worth it.
I ended up getting the basic pair from Race Ready: http://www.racereadyproducts.com/limit-straps/limit-strap-clevis/
http://8903e7f0897f2982f439-51d6683c30d3fc51d493ee4745c5d29a.r14.cf2.rackcdn.com/uploaded/c/0e545011_clevis640x480.jpg
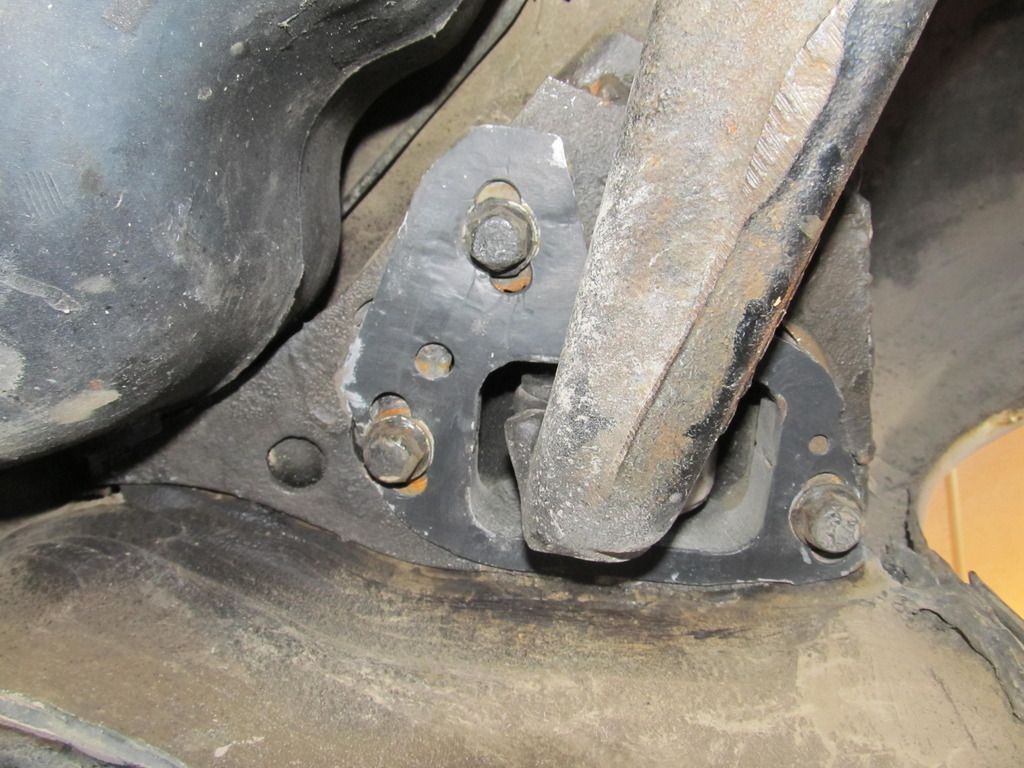
I'm planning on bolting it up to the lower shock bolt, but I'm not sure where I can attach the upper point to.
Here are two threads about limiter straps on E30s/E36s: http://www.r3vlimited.com/board/showthread.php?t=322304 http://www.bimmerforums.com/forum/showthread.php?1778270-rear-spring-falls-out-at-full-droop-on-e36-whats-good-fix
And here are some pics of what others have done:
http://www.apexeta.com/img/325e/strap.jpg
But apparently that upper hook rips out very easily, so I need to keep looking....
I believe this is an E36:
http://i240.photobucket.com/albums/ff67/flink-gto/e36/mods/rear-droop-travel-limiter/dsc00059.jpg
http://i240.photobucket.com/albums/ff67/flink-gto/e36/mods/rear-droop-travel-limiter/dsc00056.jpg
It looks like a bent piece of metal sandwiched between the upper shock mount and the body. This seems like a better solution.
I guess it will kind of depend on how my straps end up being designed, but what do you guys think? Should I make a little bracket that attaches to the upper shock mount? Or should I have something welded on to the body and use that point instead?
If there's an easy solution and the only problem is that the hook rips out, reinforce the hook. It could be as easy as just welding or epoxying a washer to it, shouldn't see a ton of force as long as you're not using it to preload the spring.

Seems like a big washer, ala seat belt mounts would work.
Coming from the offraod world, double shear everything (lower mounts only I guess as the upper has the clevis eye), and those paracord and cable ones look scary.

I still don't know why you need limiting straps if your springs have preload. Limiting straps are usually for guys with short springs (lowered) cars have because there is more droop travel than spring travel and/or guys with off-road suspensions where the shock travel exceeds spring droop. But really, there's an easy way to determine if you need limiting straps:
Again, IDK what those guys are talking about. They must not understand what your suspension setup is, if I remember correctly.

In reply to irish44j:
Yeah, what Josh said. If your springs are loose at full droop, you need longer springs. you're losing travel.
irish44j wrote: I still don't know why you need limiting straps if your springs have preload. Limiting straps are usually for guys with short springs (lowered) cars have because there is more droop travel than spring travel and/or guys with off-road suspensions where the shock travel exceeds spring droop. But really, there's an easy way to determine if you need limiting straps: 1. jack up the back of the car (both sides to take sway bar out of the equation) 2. the rear control arms/trailing arms will droop as far as they can 3. see if the spring is still snug in the seats. 4. if it is, there is ZERO reason for straps - the only way your springs can unseat is if your shock breaks, since it is the thing that is limiting down travel on the RTABs. Again, IDK what those guys are talking about. They must not understand what your suspension setup is, if I remember correctly.
That's pretty much what I was thinking, but taking extra precautions can't be a bad thing, right? Straps are cheap, and since I've already bought them, I might as well figure out the best way to use them.
Here's what the guy from Vorshlag said when I basically told him the same thing:
"The motion of the E36 arm drops down and away which opens up the possibility of a spring getting unseated somewhat easily in extreme situations."
So, assuming my springs have pressure on them even at full droop when at rest on jacks or a lift, I'm wondering if when actually driving the car in "extreme" circumstances, with "extreme" forces involved, and the unsprung weight of the wheel/tire assembly getting thrown around, if those forces could potentially pull the control arm down further than it is when at rest on jack stands, thus making it potentially more likely the spring could unseat itself. But I really have no idea, I'm not an engineer. I'm just trying to make my car as tough as possible.
I"m not sure what "extreme" circumstances have to do with anything (other than extreme breakage of your shocks). The shock down-travel is a SET distance. It can't go any farther - doesn't matter one bit what your tires and wheels and whatnot are doing. If it goes farther than max droop on jackstands, your shock has just blown itself out.
But, you have em so if it gives you peace of mind, might as well install.
The only thing I can think of is RTAB and control arm bushing flexion for the springs to even remotely come close to unloading, but holy hell, that would require some EXTREME forces combined with worn out E36 M3ty rubber bushings to do something like that in extreme driving conditions. I can't comment on bone stock springs, but my H&Rs were borderline bombs when trying to remove them at full droop and removing the control arms, so I used compressors just for safety's sake. My PSS9's are the same thing- even at the longest ride height in the rear, those springs are berkeleying tight as crap.
I never ever would have even thought of a spring deloading and coming unseated in the rear of this car if you didn't mention it here. It just seems so... impossible, especially if your bushings are all up to snuff.
Good god, I never want to do this again.
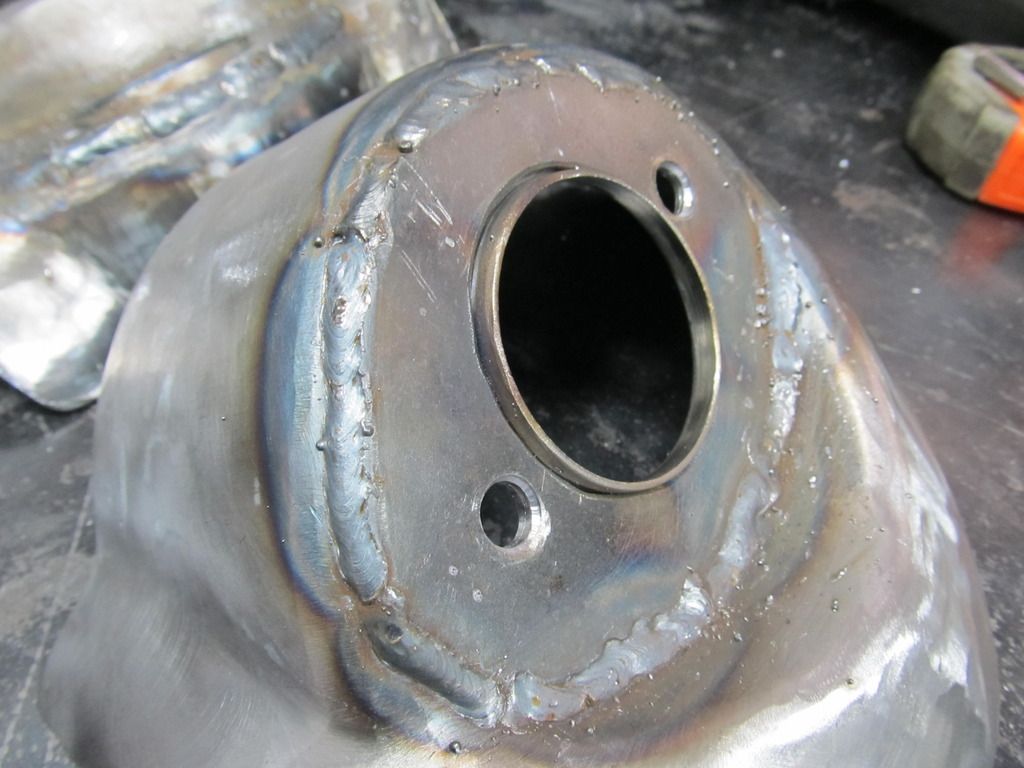
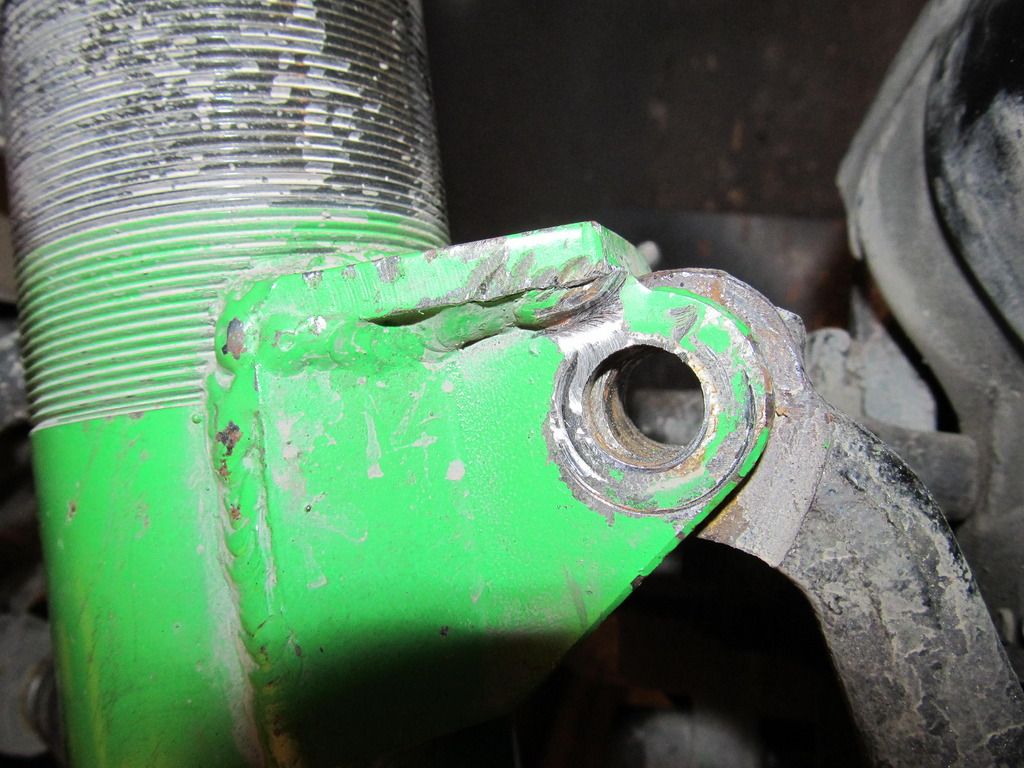
So after my Rogue Engineering rear spring height adjuster failed at the car's first race and the car bottomed out hard, I noticed what appeared to be a little crack in my driver side rear shock tower.
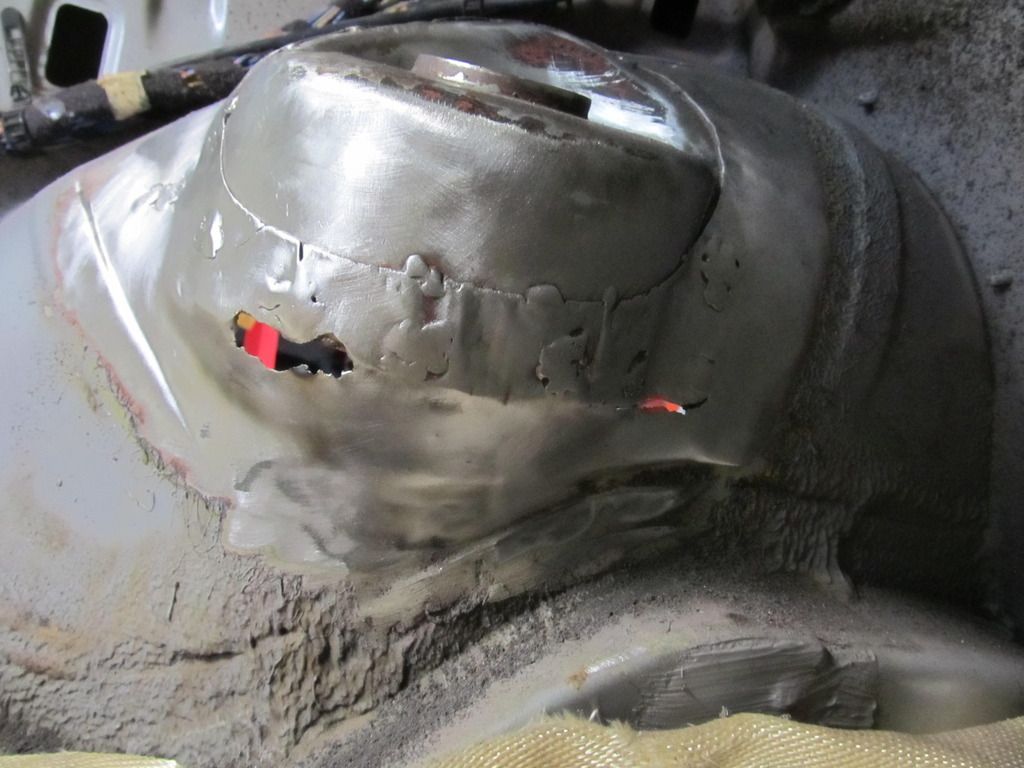
I dropped the car off at Brian's house, since I knew the tower would require some welding. Brian got to work cleaning up the area a bit, but quickly came across a lot of problems.
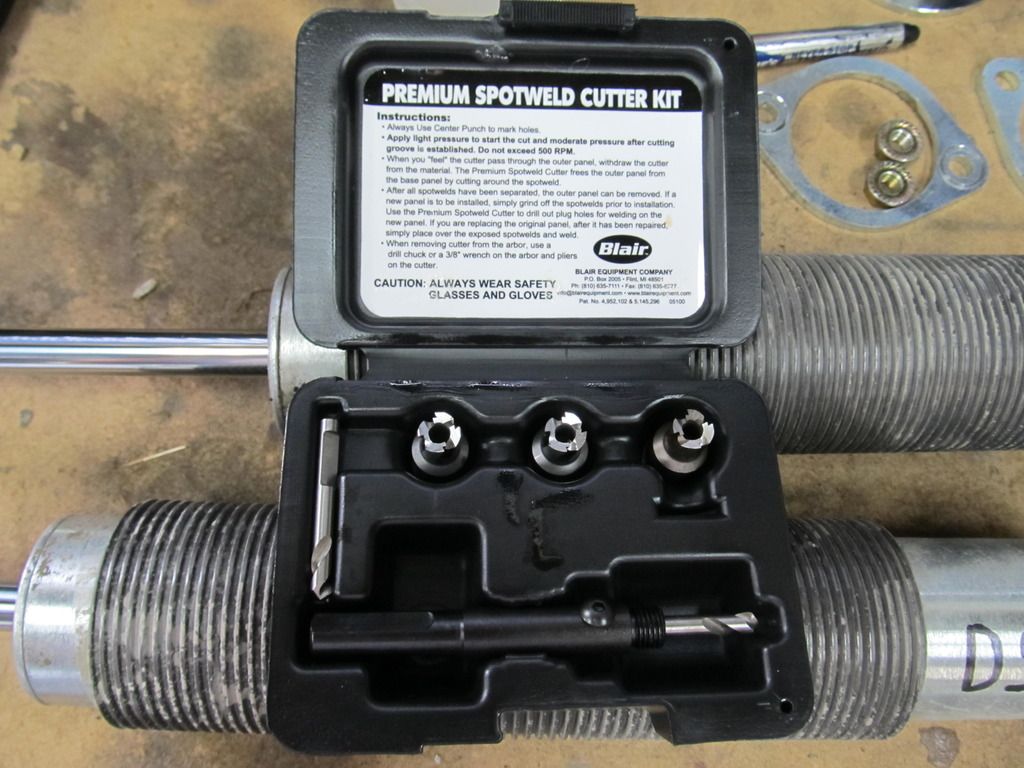
This is bad. If this is what a cursory inspection reveals, what are we gonna find when we really tear into this thing? I came to the realization that Brian couldn't just weld up the cracks, there were too many of them. And what about the passenger side? What's lurking over on that side? The only proper solution is to get new towers for both sides, and preferably make them bulletproof in the process. Thankfully, the car was in good hands with Brian, so I was optimistic. In anticipation of drilling out the 28+ spot welds, I got a few different spot weld drill bit cutting kits. Specifically, one fancy $30 kit, and a bunch of $5 HF versions.
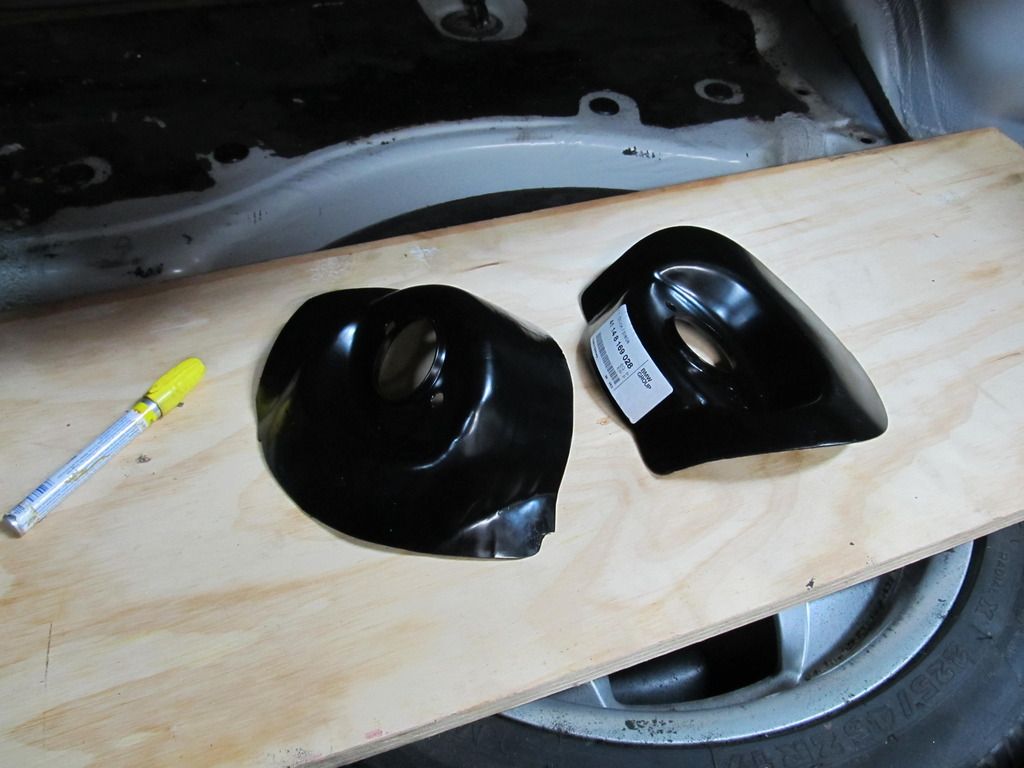
New towers are new:
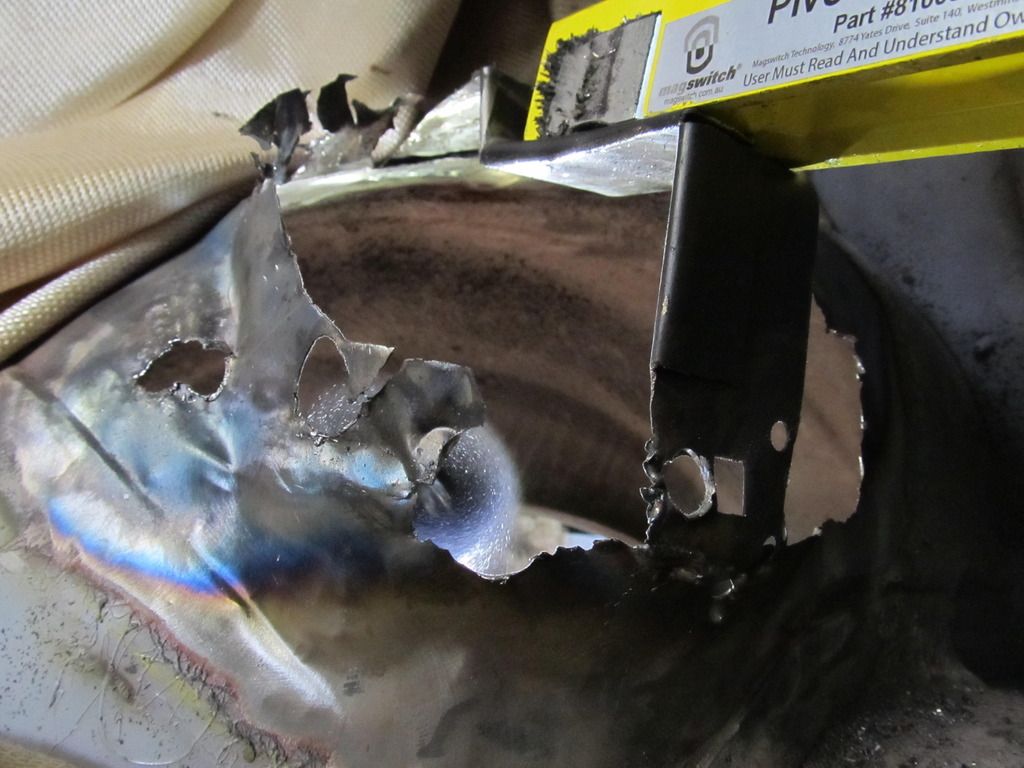
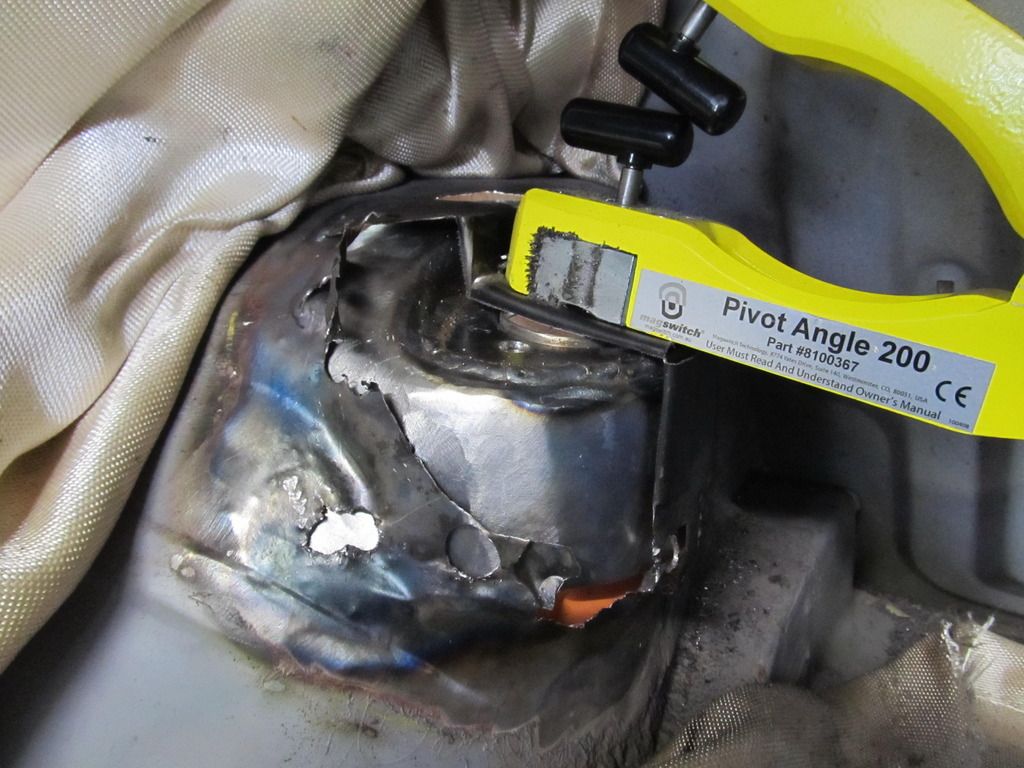
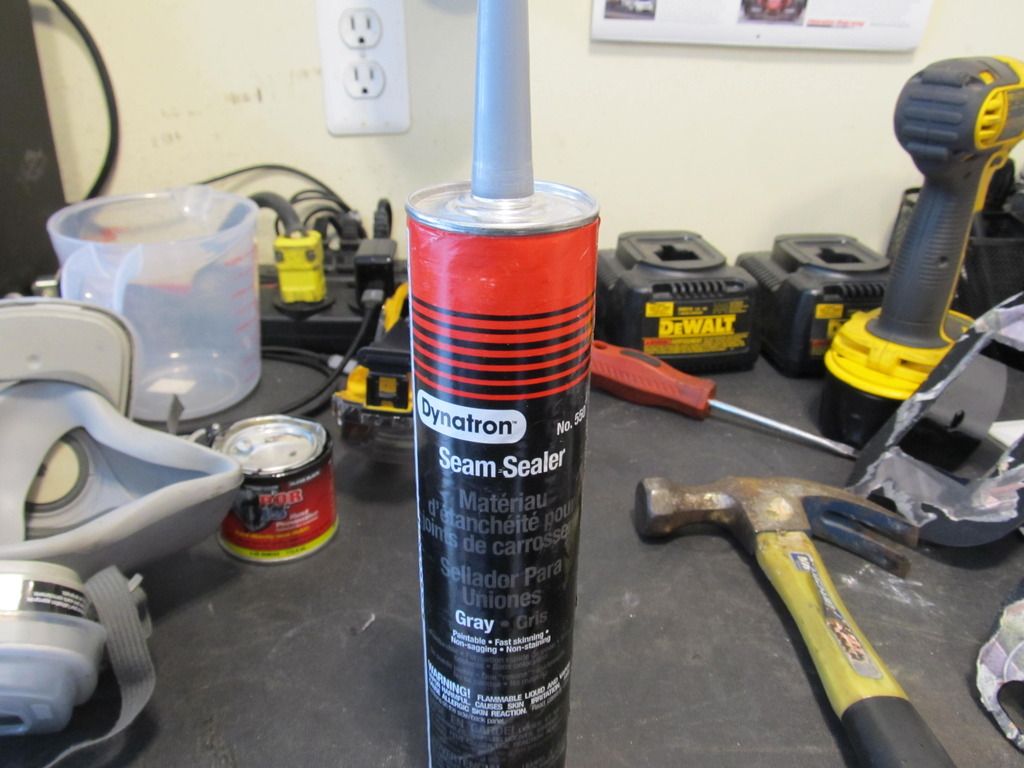
After lying inside the trunk curled up into unimaginable positions and getting blasted by seam sealant, paint, etc. for hours, I eventually got things clean enough to see what was really going on.
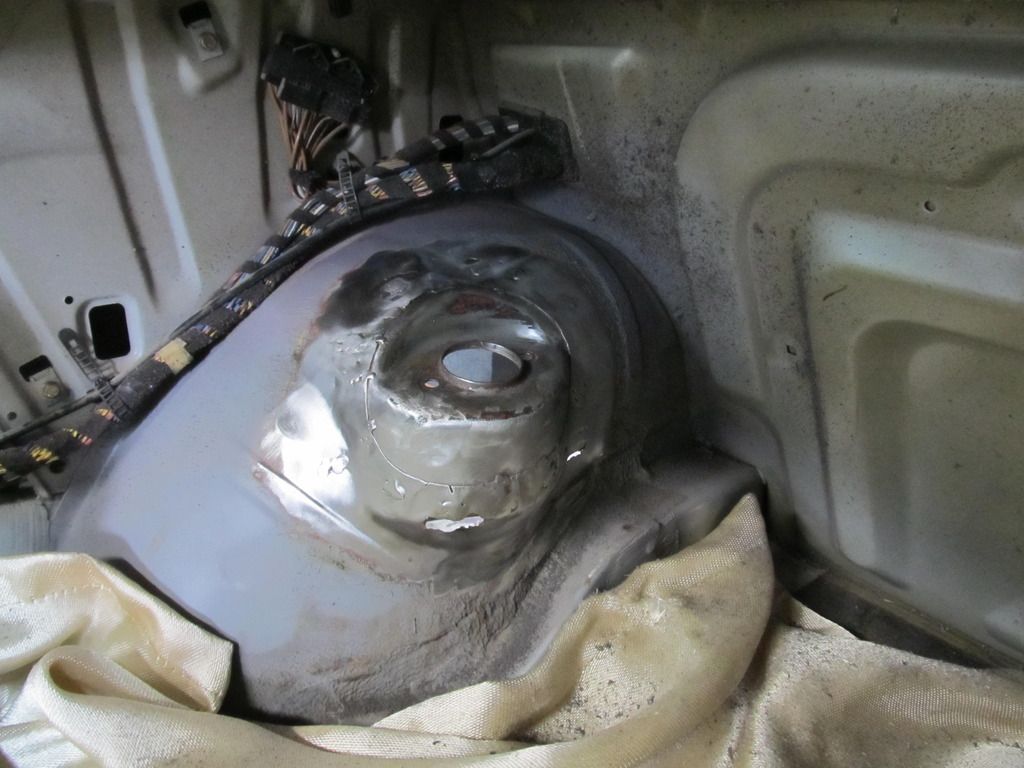
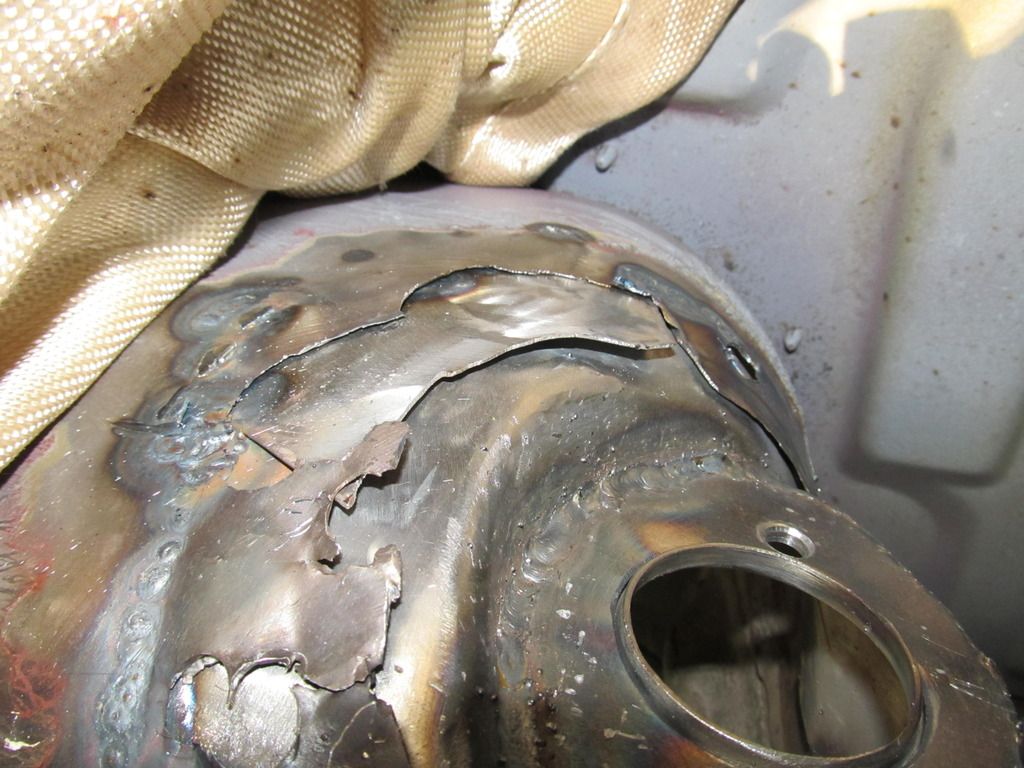
The PS tower was looking pretty good, with only two tiny cracks, but the DS was really rough. Any far more hours of being contorted in the trunk, I got most of the spot welds out. Even with the extra special lube/lard with the drill bits, they were very tough. I think each fancy bit only did like 5 welds each!
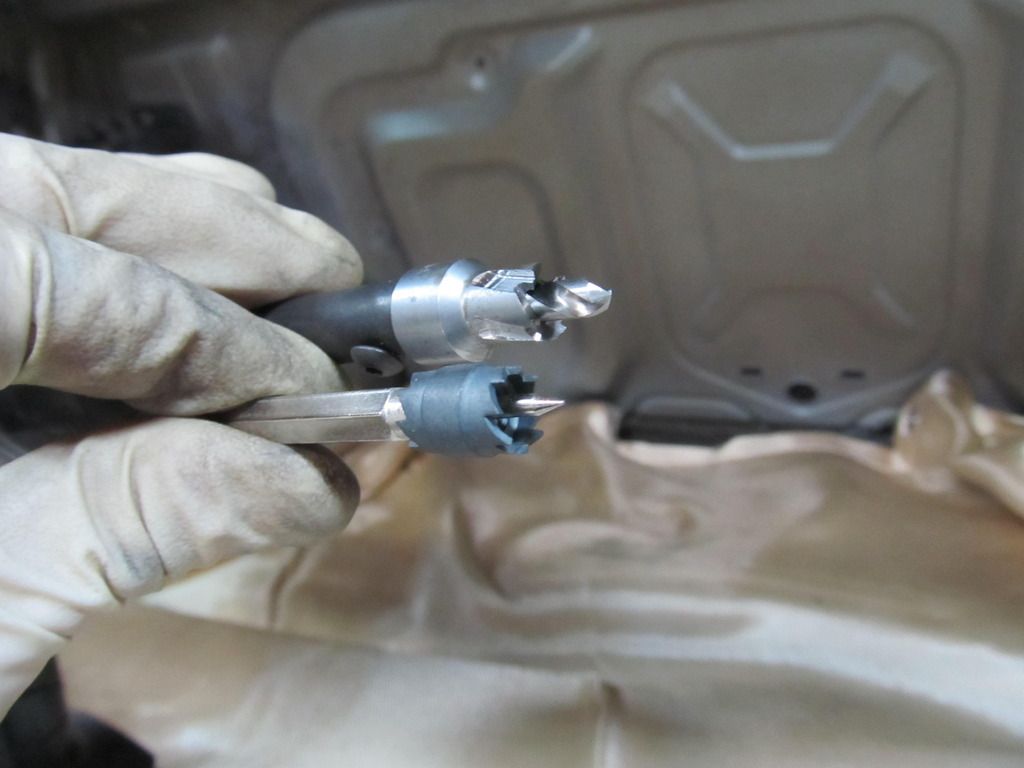
The HF ones did slightly less, but I went though about 6 of them. Eventually I just went to regular drill bits, and finished up the holes that way.
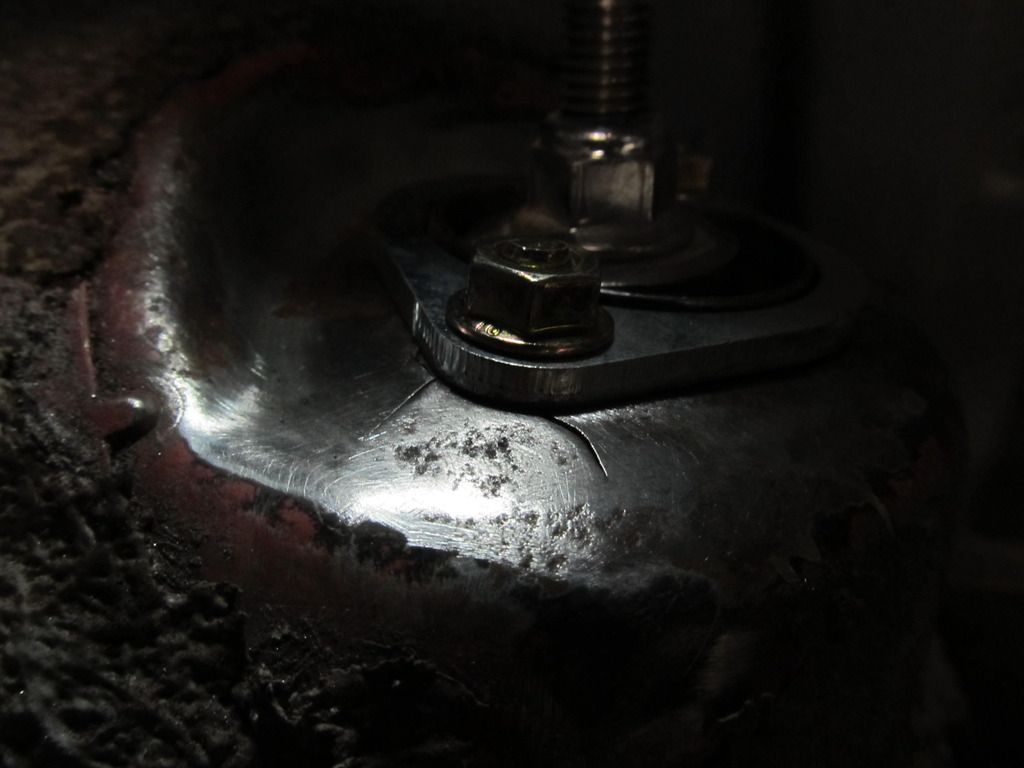
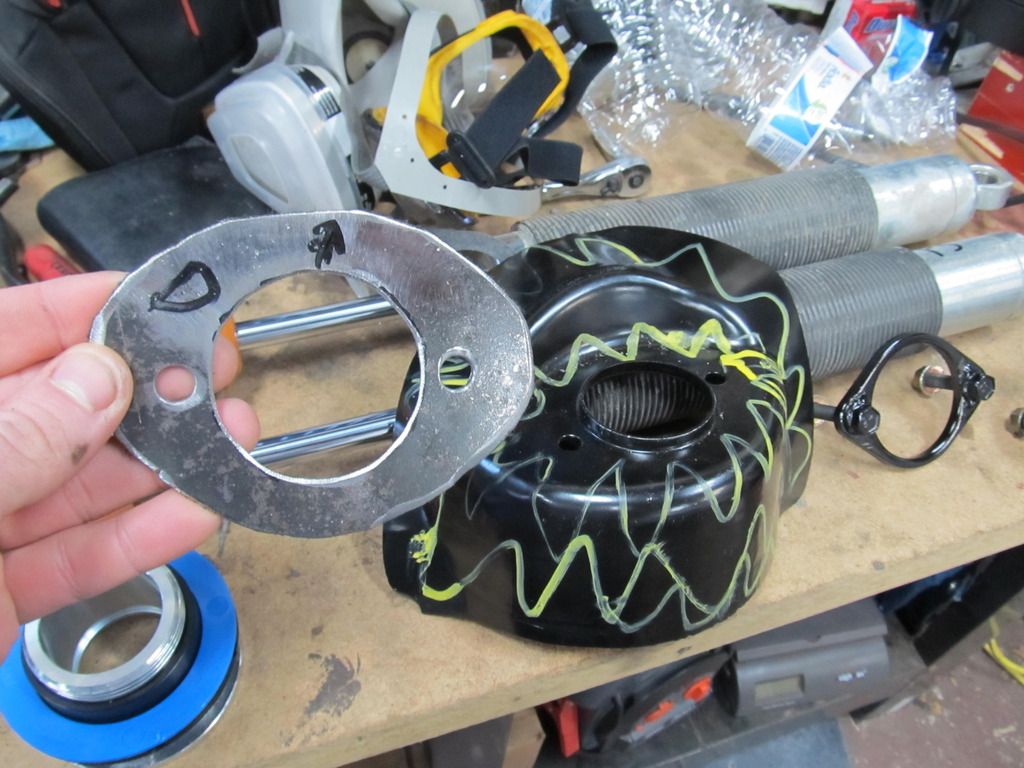
While I was doing that, Brian was busy modifying my rear shock mounts. Since he was going to be welding a new piece of metal on top of the towers, the bolts needed to be longer, so he got the old ones out and put in some longer ones.

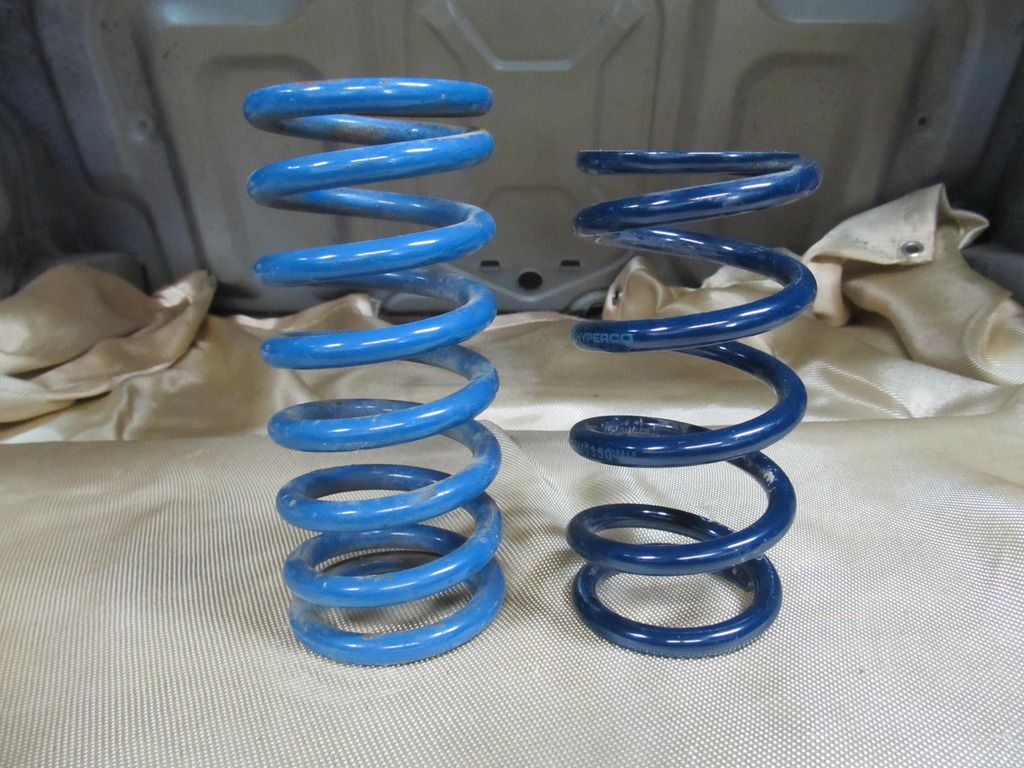
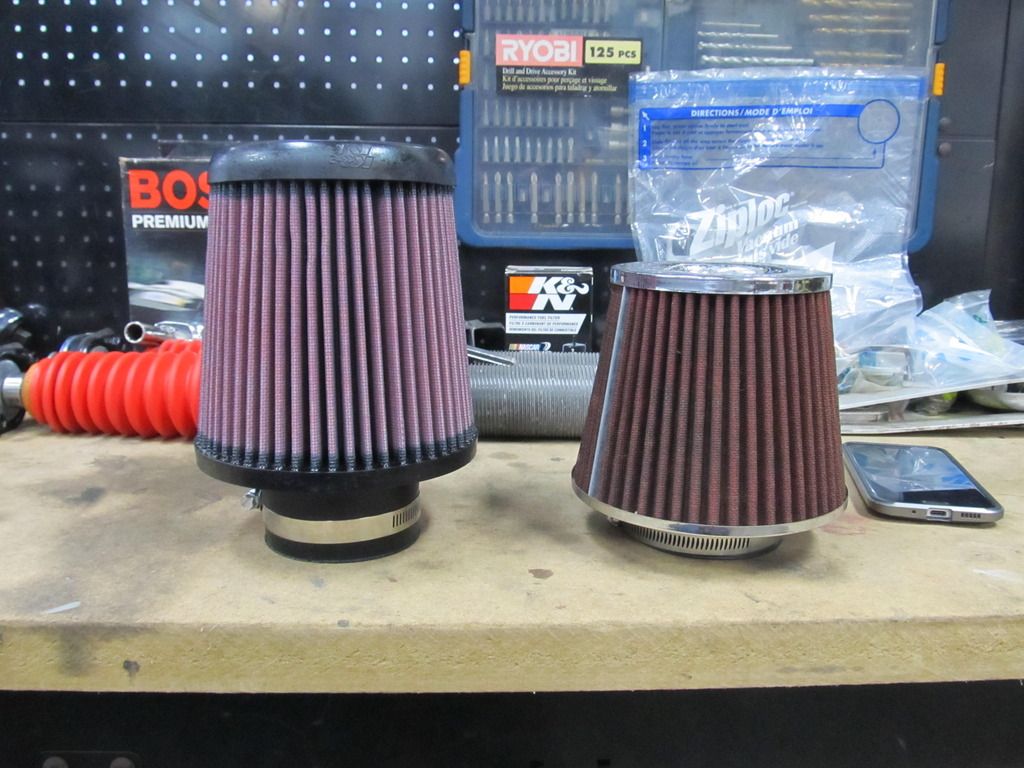
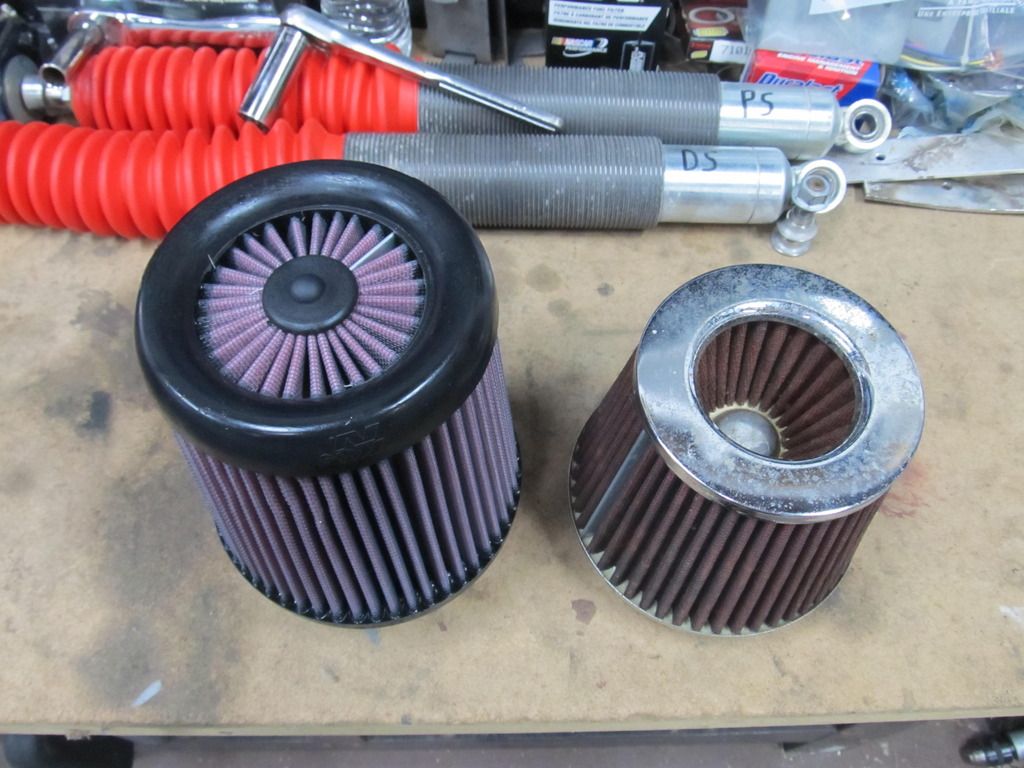
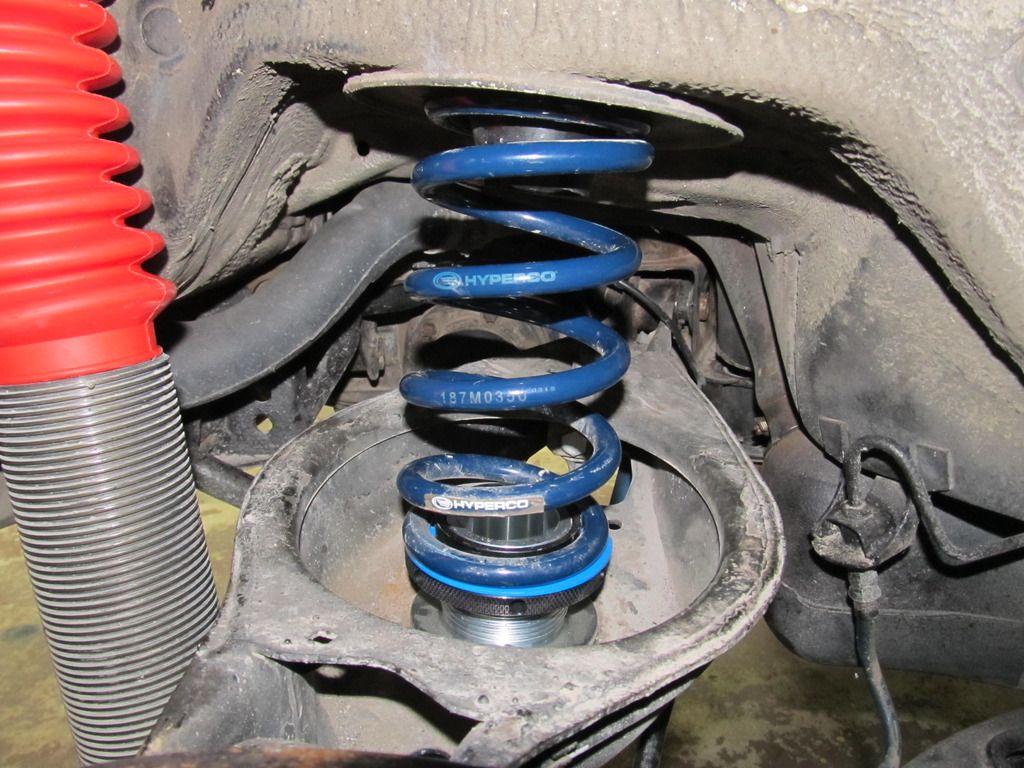
I think this is an interesting comparison between TurboJosh's 8" generic brand 300-350 lb spring on the left and my 7" Hypercoil 350 lb on the right. The spacing on the coils makes me feel better about paying the premium that I did, because coil bind sucks.
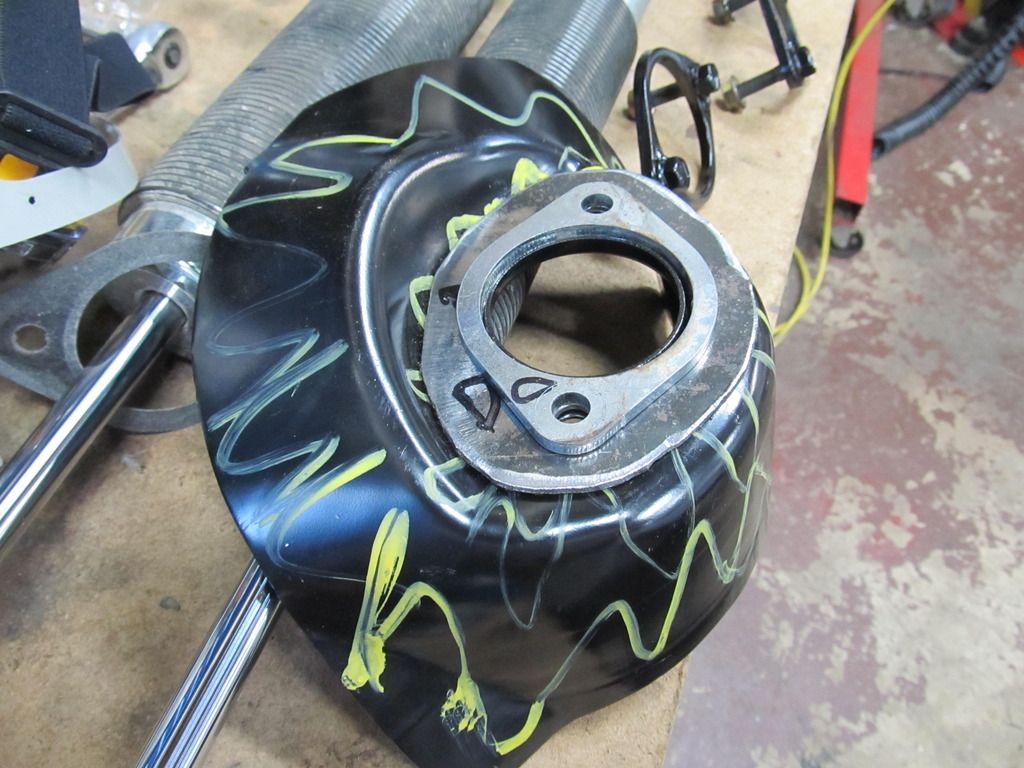
Here are the plates Brian made to weld on top of the tower:
Like so
So I cleaned up the towers and Brian got to welding!
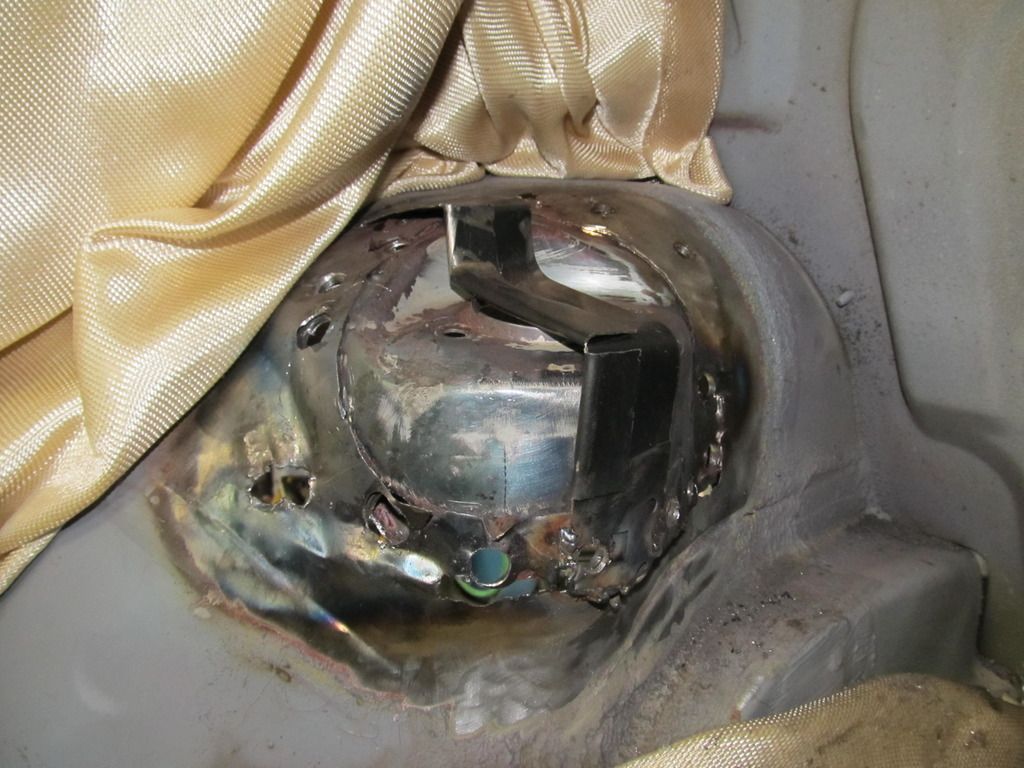
To make sure the new tower goes exactly where the old one was, Brian made a cool little bracket thing to mark its place. Then, he got to cutting, and eventually, it looked like this:
There was so much rust damage, and the remaining metal was so thin, something had to be done before we could weld in the new tower. So Brian got some sheet metal, cut it up, and made some reinforcement patches!
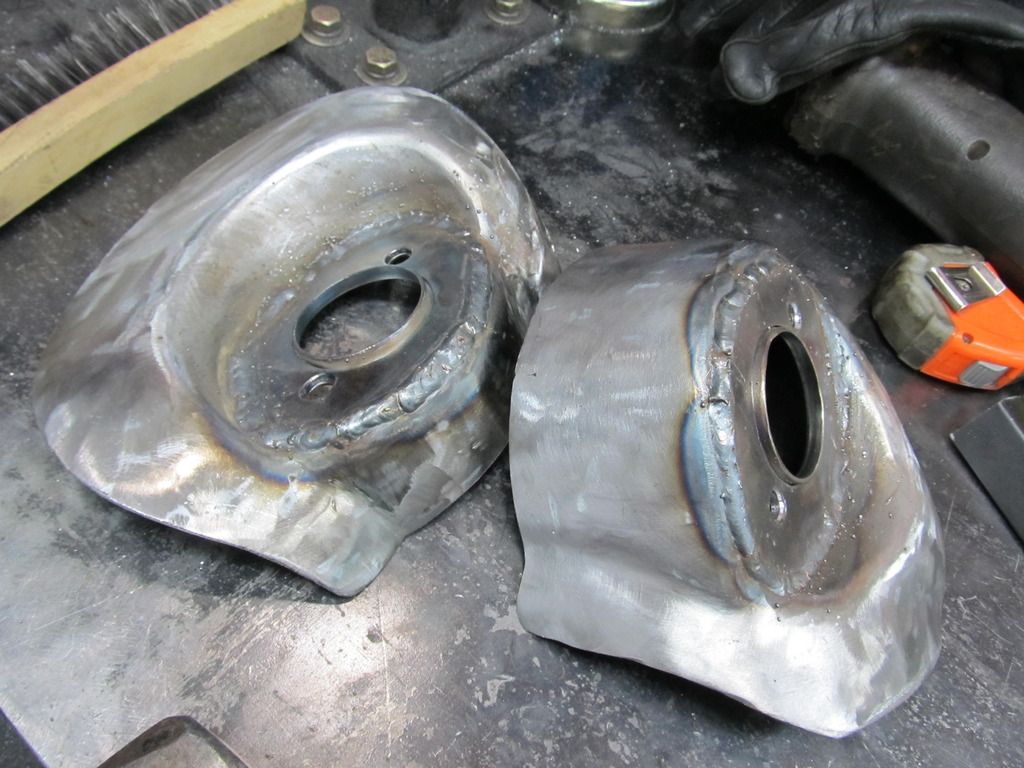
After many, many hours, Brian emerged from this seam welded beauty. It's not pretty, but it's not supposed to be. But this E36 M3 is strong! Compared to a non-reinforeced tower with the original 14 spot welds, this is awesome!

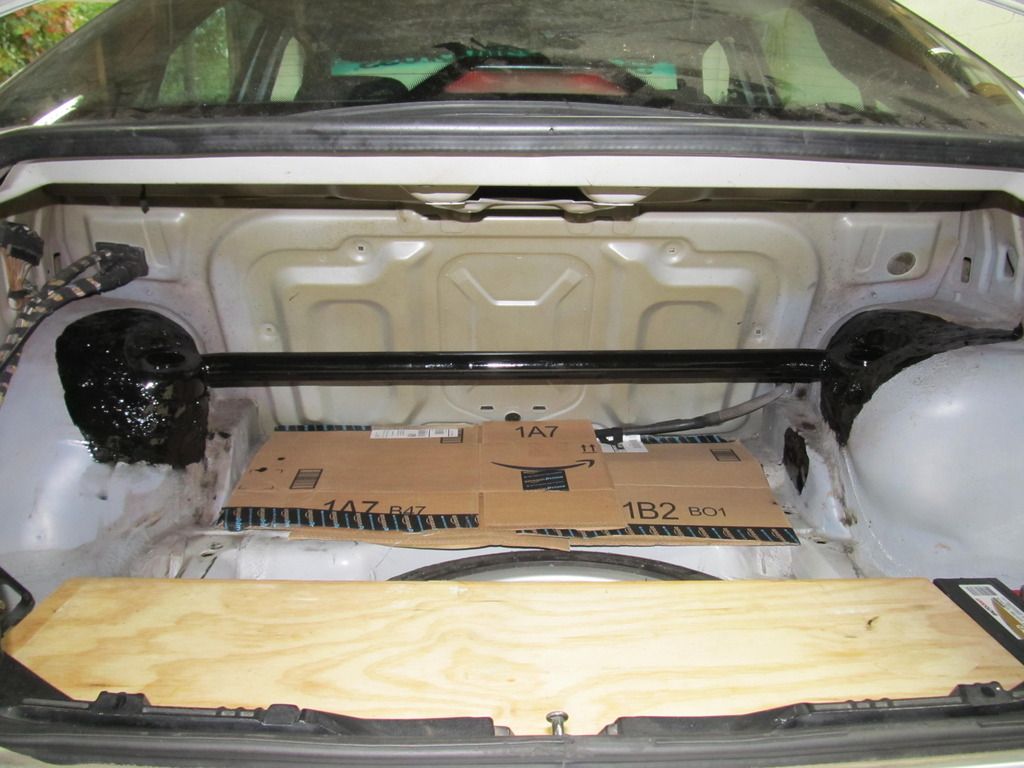
Thankfully, the PS was in much better shape, and no new panels had to be welded in. To top it all off, I picked up some roll cage tubing from Chris and Brian welded that sucker it. Due to some bends it came with, it ended up fitting perfectly aiming towards the back seats, and doesn't take up too much room.
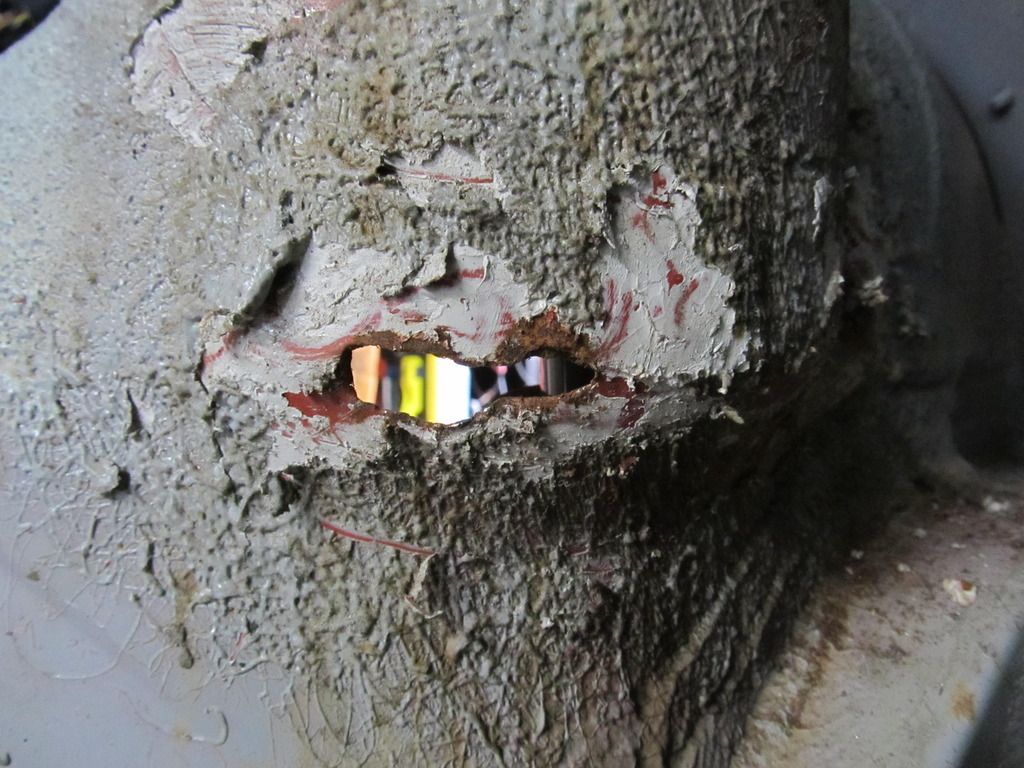
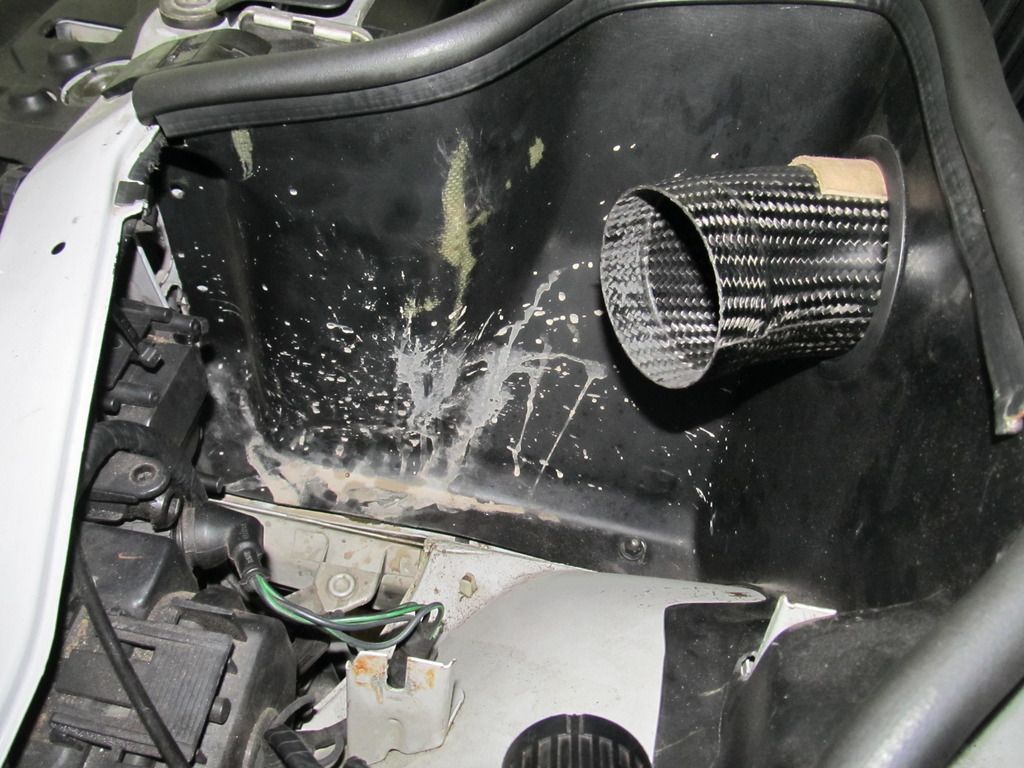
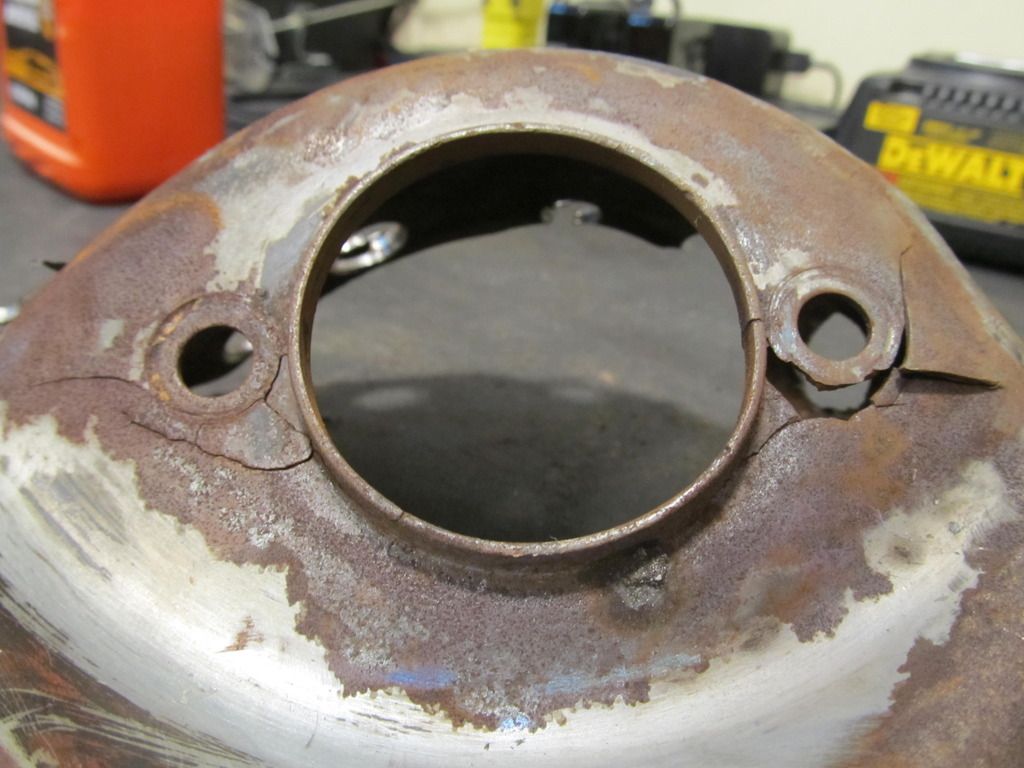
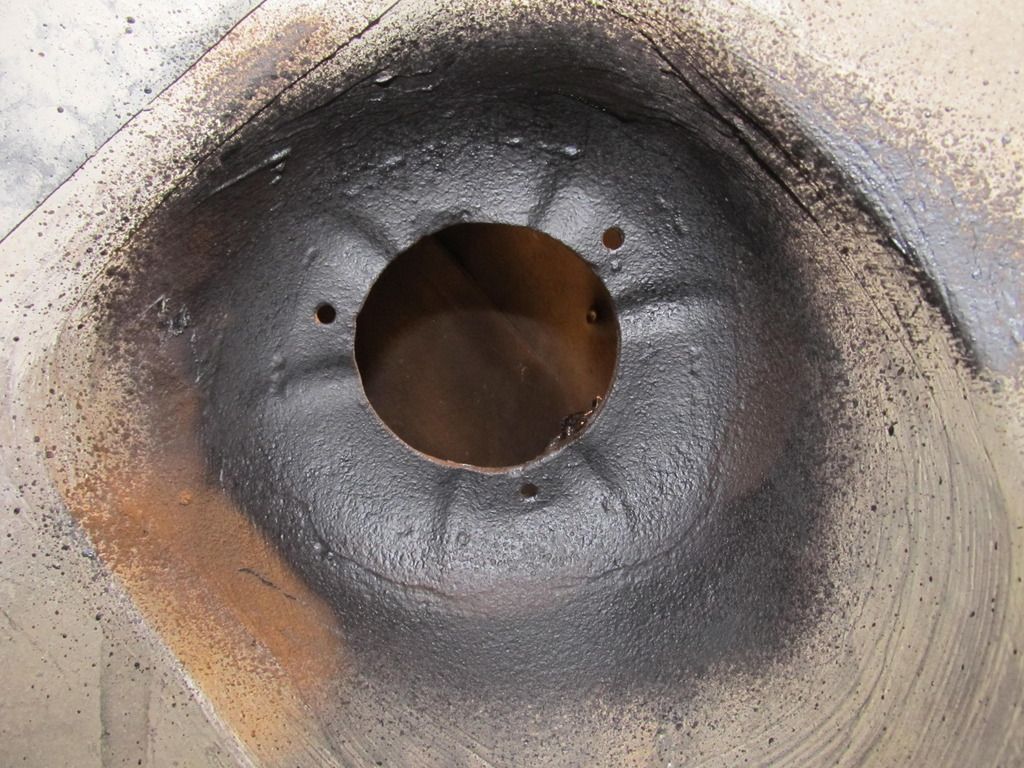
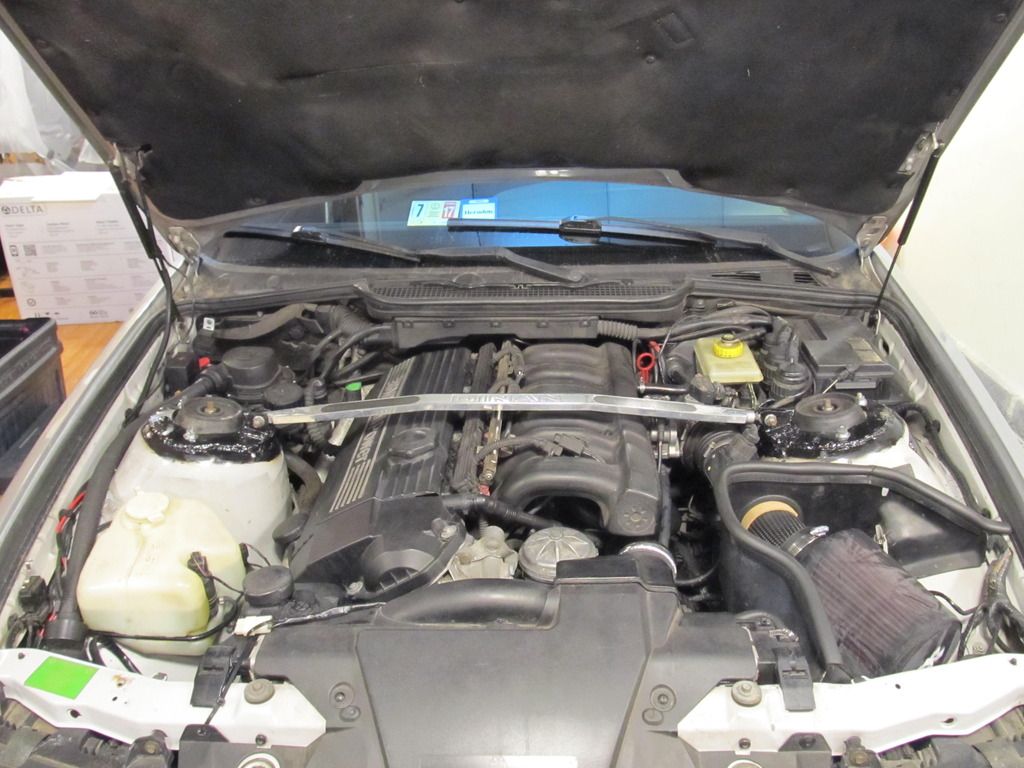
So while I was poking around the engine bay, I stumbled across this:

Oh, that's bad. Like, real bad. Well, at least I only got like 5 runs total in the car in the dust so far. But I need something better before the next event, which at this point is quickly approaching. So I looked around for the biggest K&N filter I could find, and was promptly a little surprised by its size.
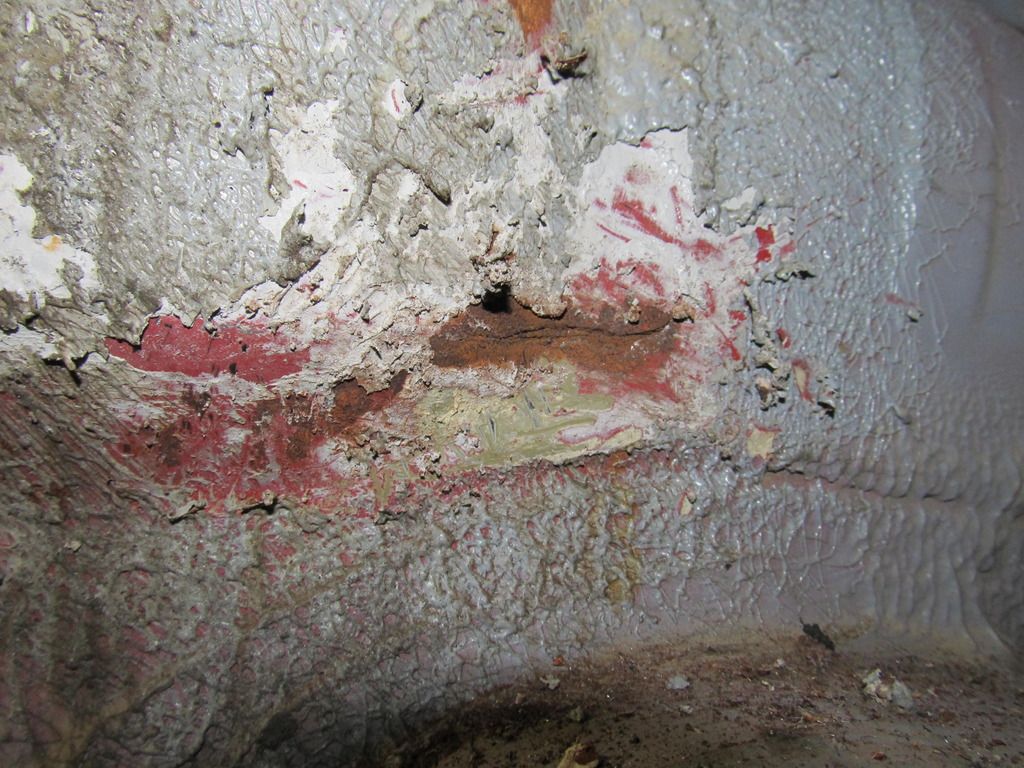
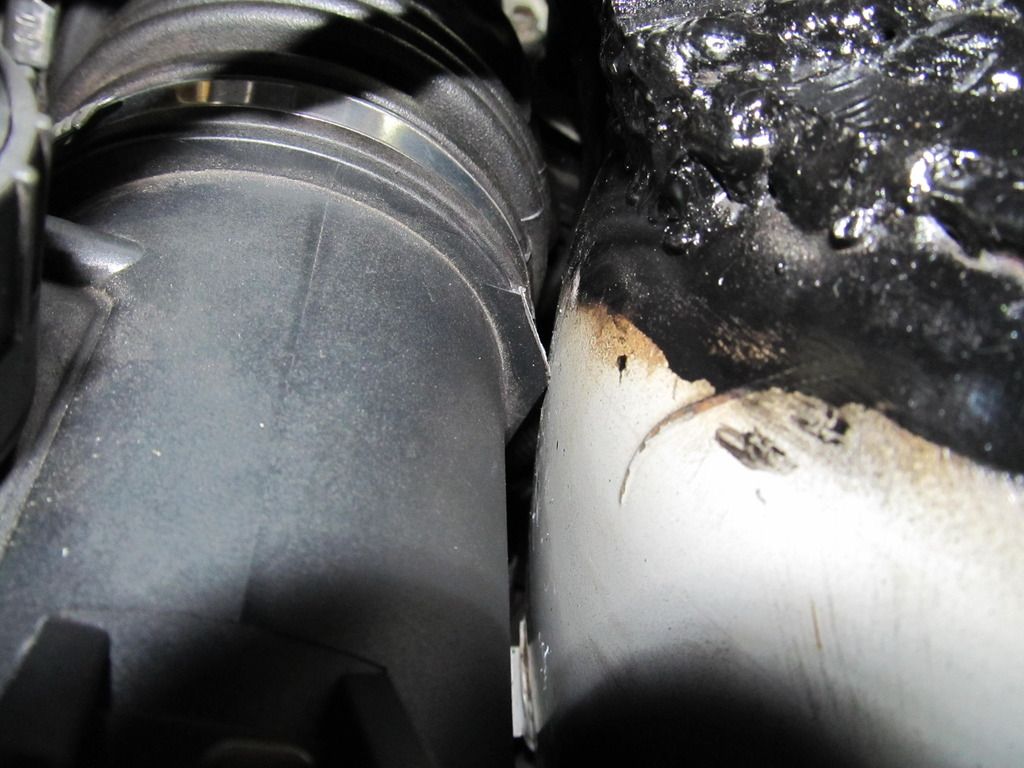
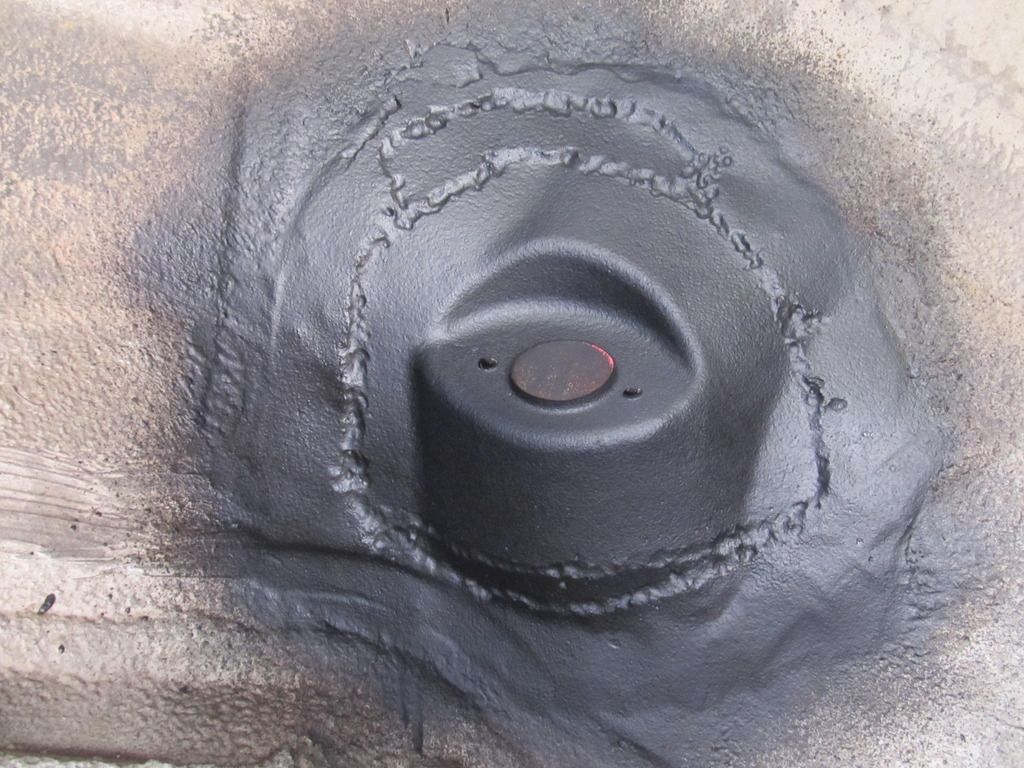
I also really needed some extra protection, since even after I installed a bunch of underbody plastic to keep water out of the engine bay, this happened within 5 runs:
Yeah, that's bad too. So I said berkeley it and splurged on the waterproof pre-filter bag. After some cutting to the headlight plastic and a tab on the MAF....
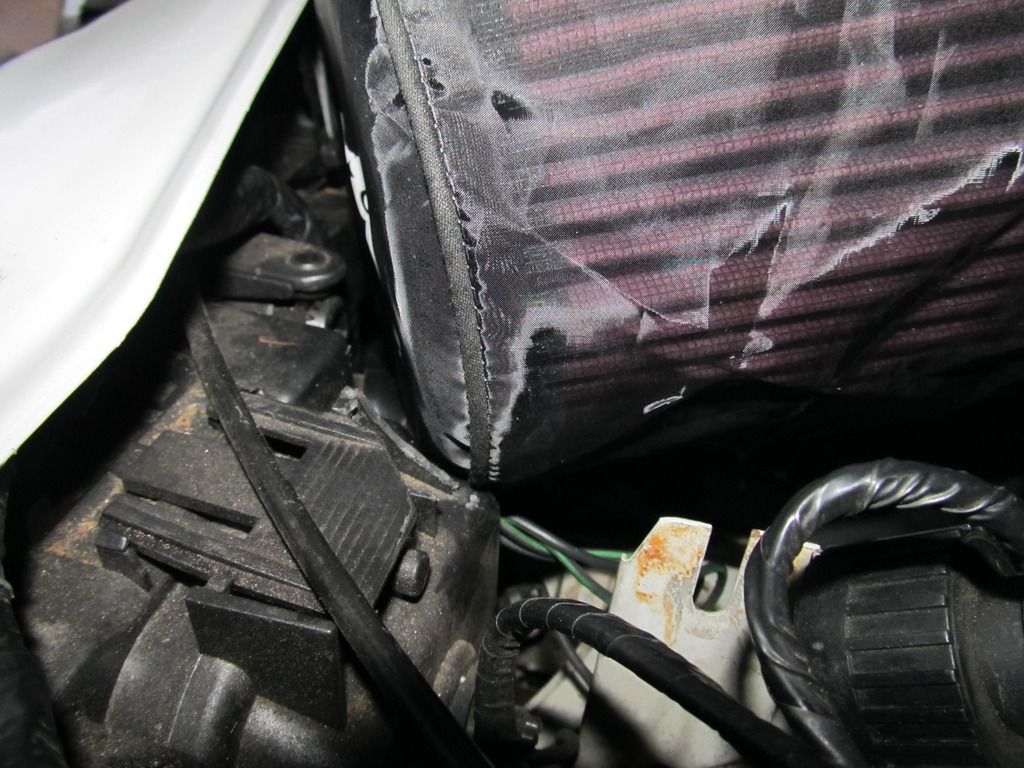
I got that sucker in there!
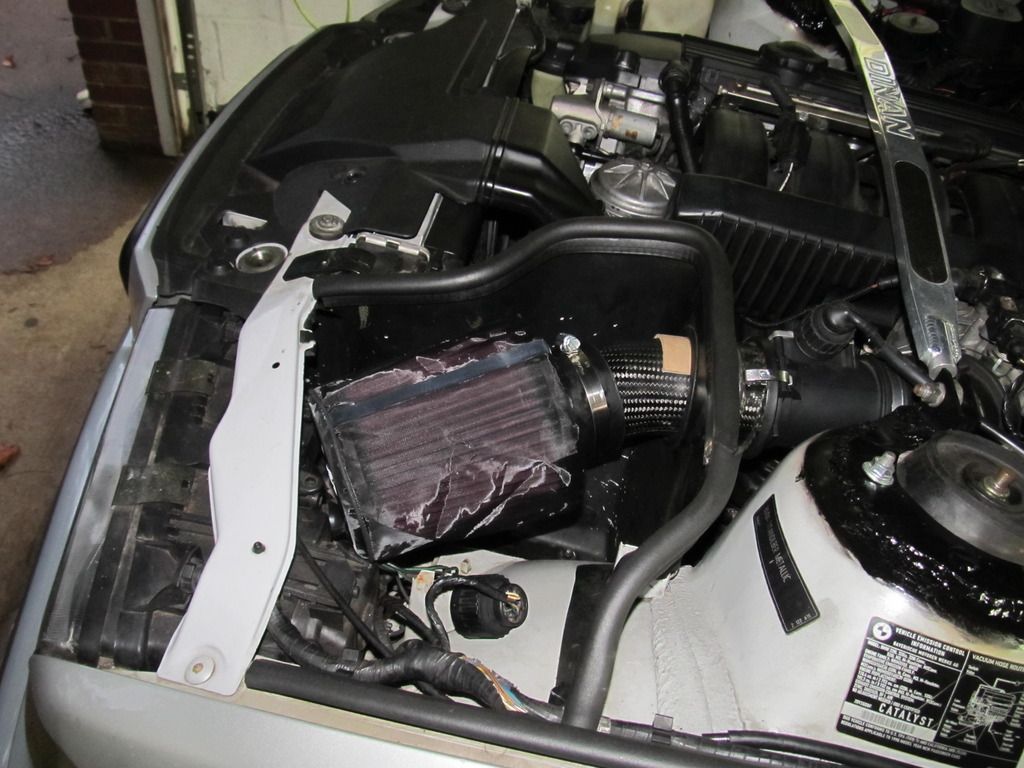
And while we were in there, we threw on the new all-steel Bilstein rear spring adjusters. Goodbye Rogue! You have a great idea, just make it stronger!
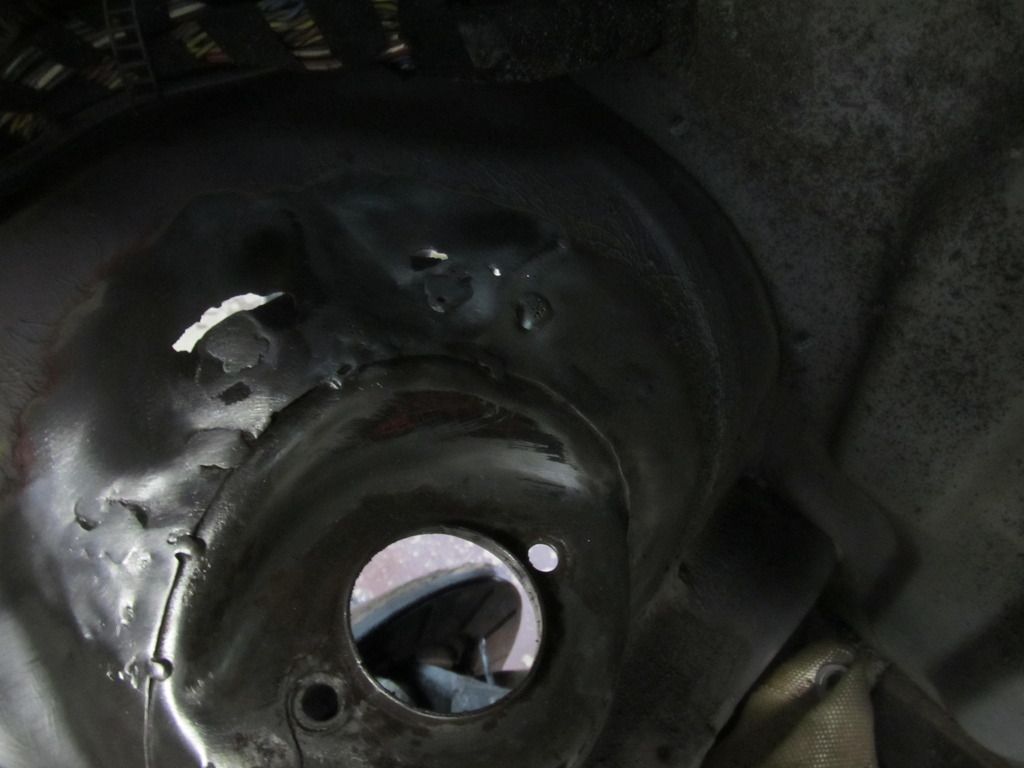
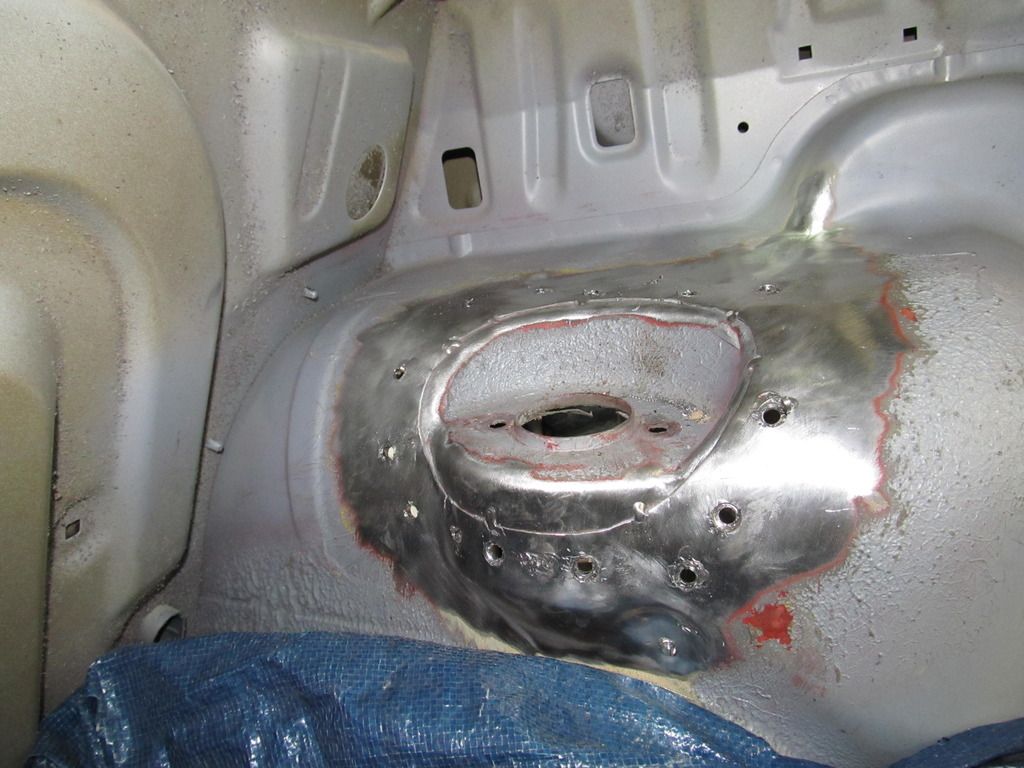
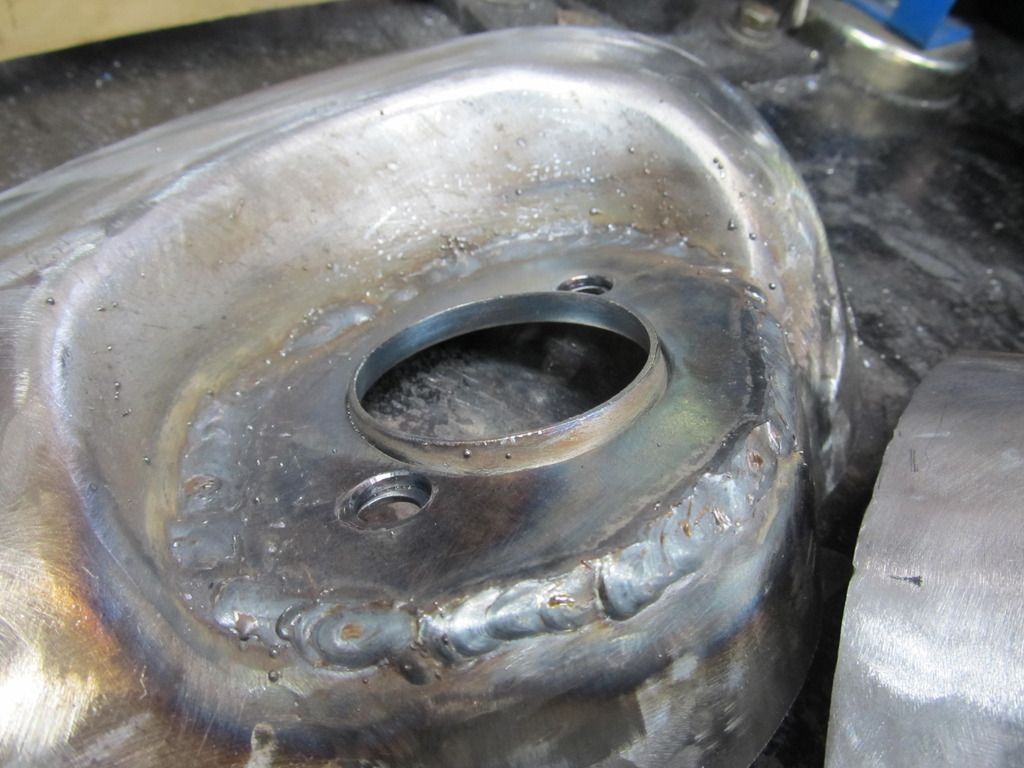
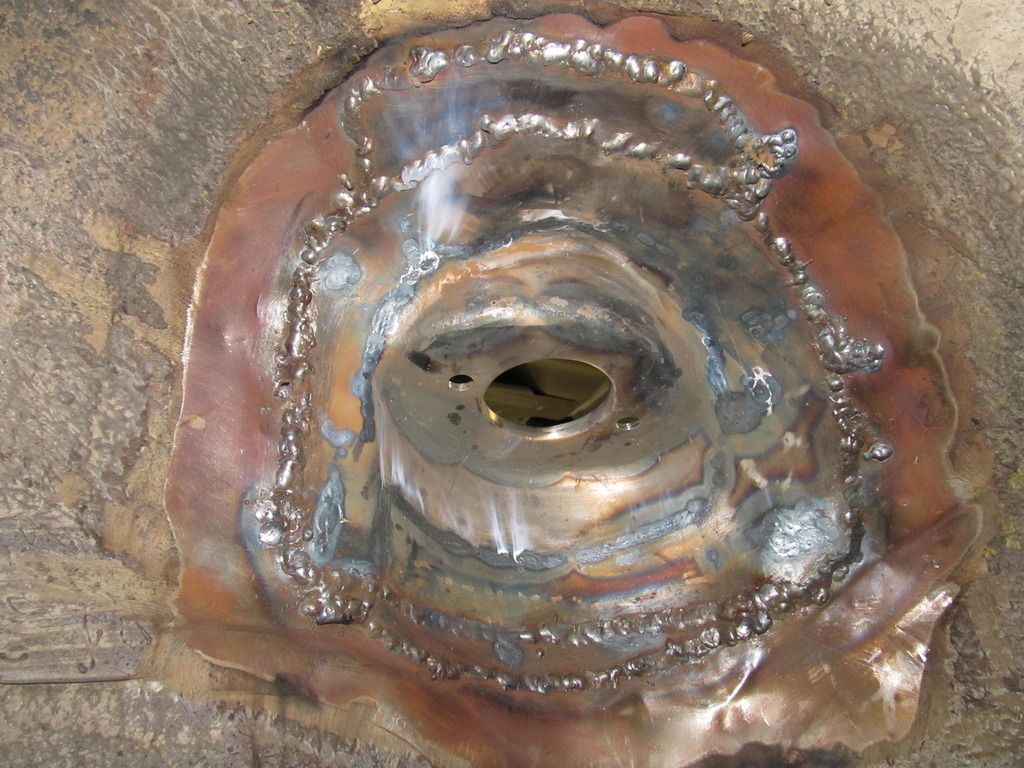
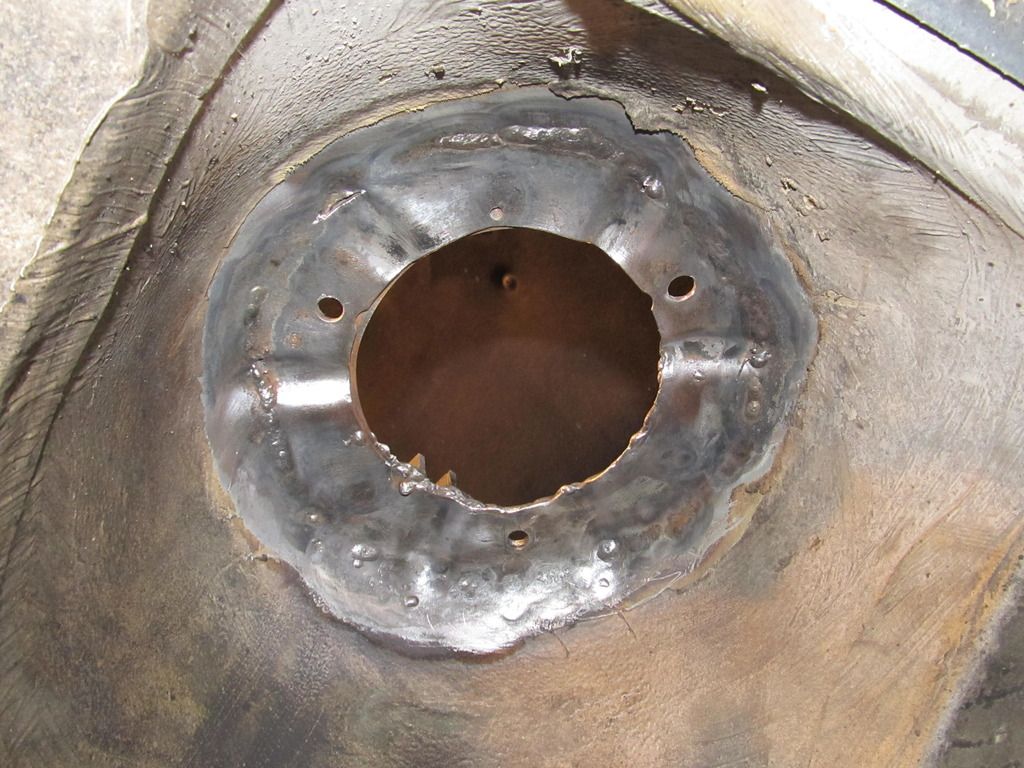
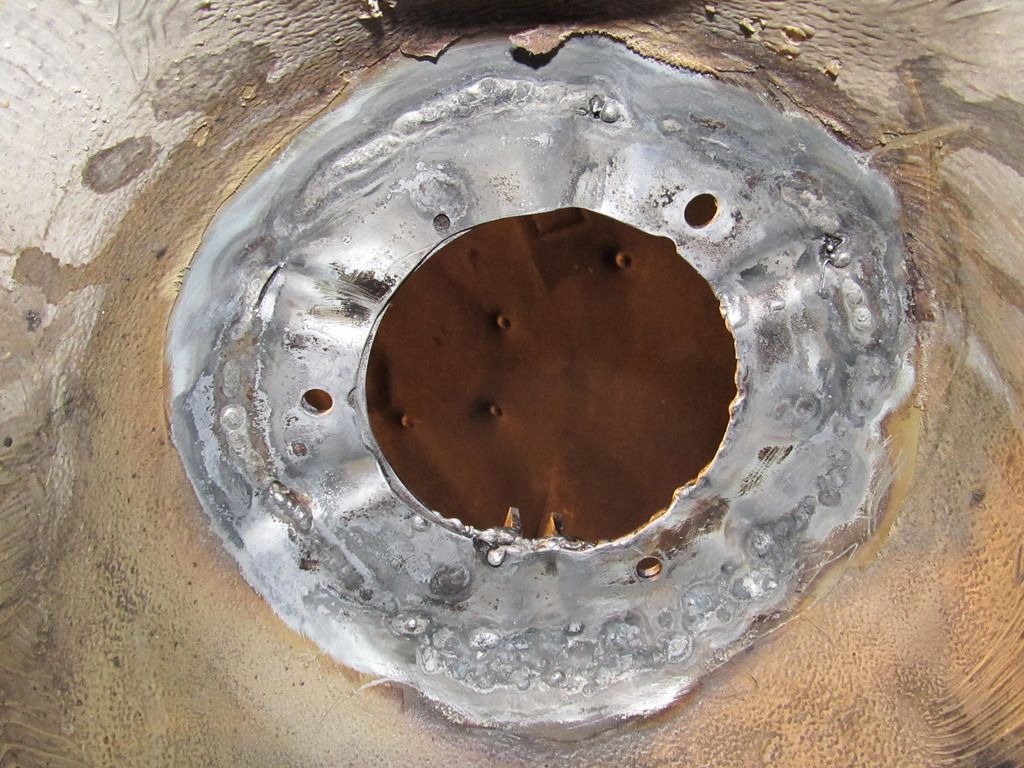
I then admired my old DS shock tower
And breathed a huge sigh of relief that this awful project was over. I think those rear shock towers are damn near indestructible now, but it didn't come cheap, even with Brian giving me an incredible deal. Now I just need to find the NEXT thing that's gonna break....
Holy E36 M3 that is one hole-y E36 M3! ![]()
Yikes. That car was hammered!
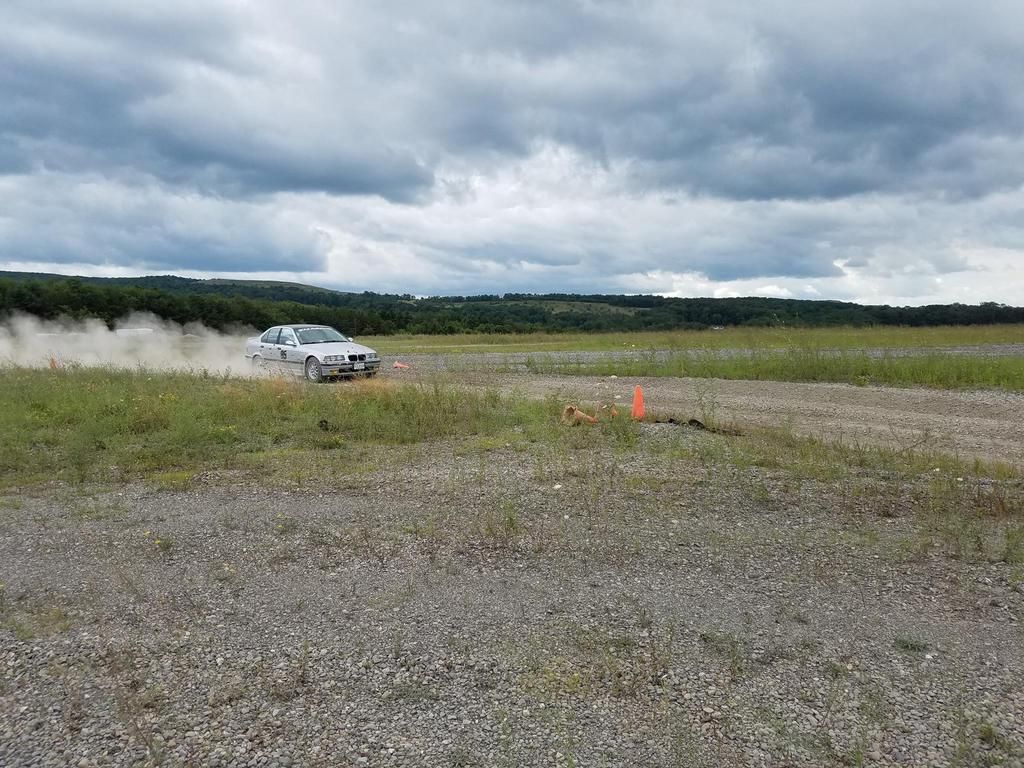
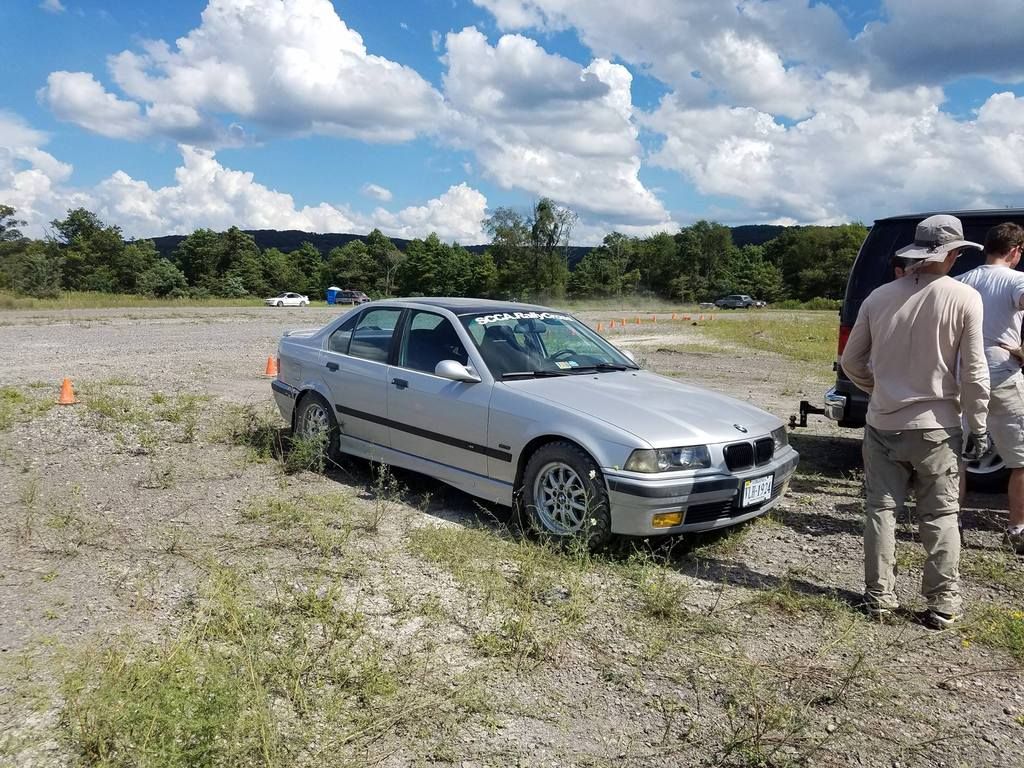
I got some pics of the car in motion in the few moments between breakdowns from the one pathetic race it attended, so here they are!
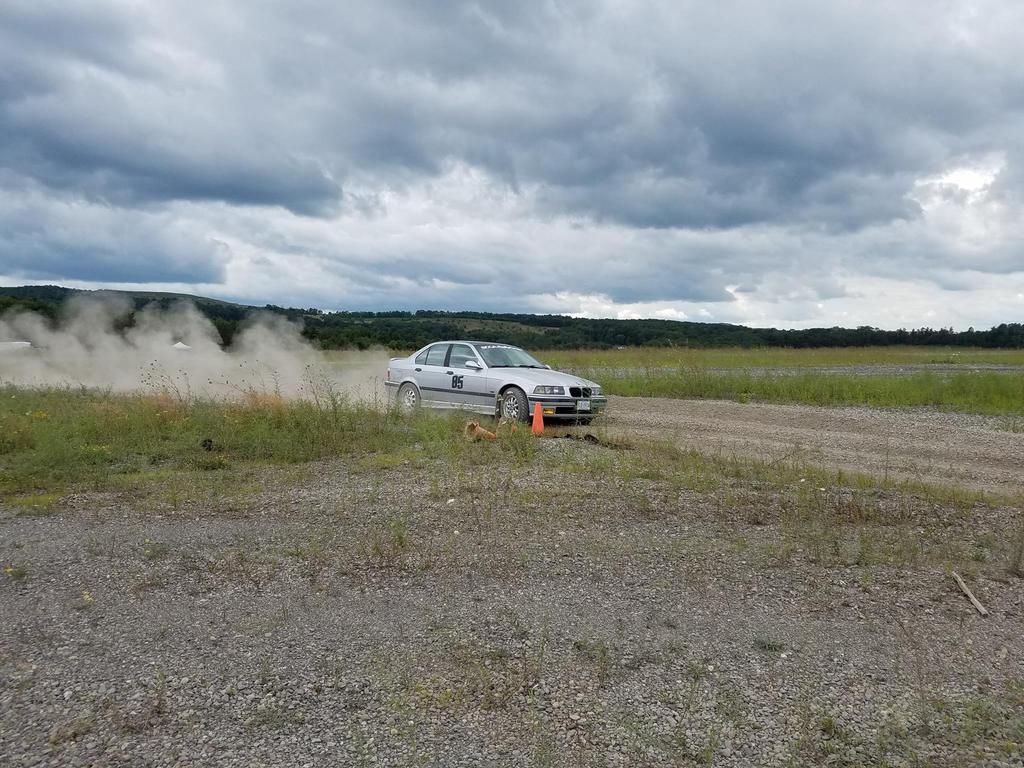
I think this was when the cooling system exploded:
Anyways, back to more recent times. So when the car was over at Brian's to have the rear towers done, he also fixed a couple other things for me. First off, he got the electric fan to work by fixing a bad ground. Then he completed the welds around the front strut towers that Eric missed when he did the initial install, probably about 10-20%.

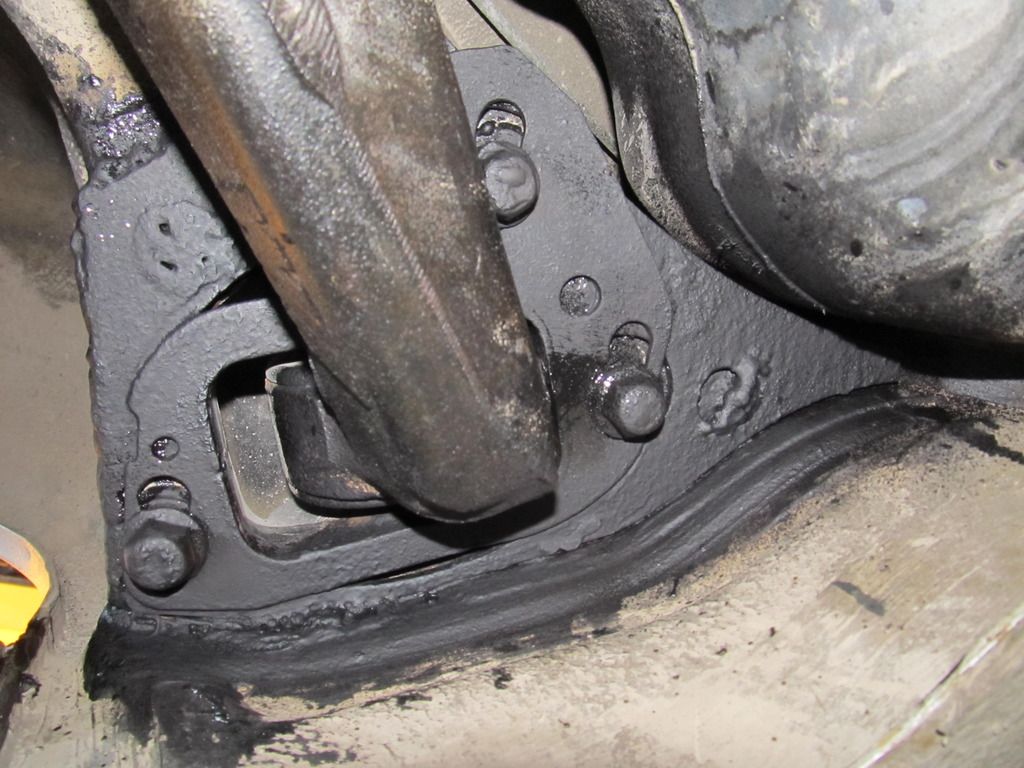
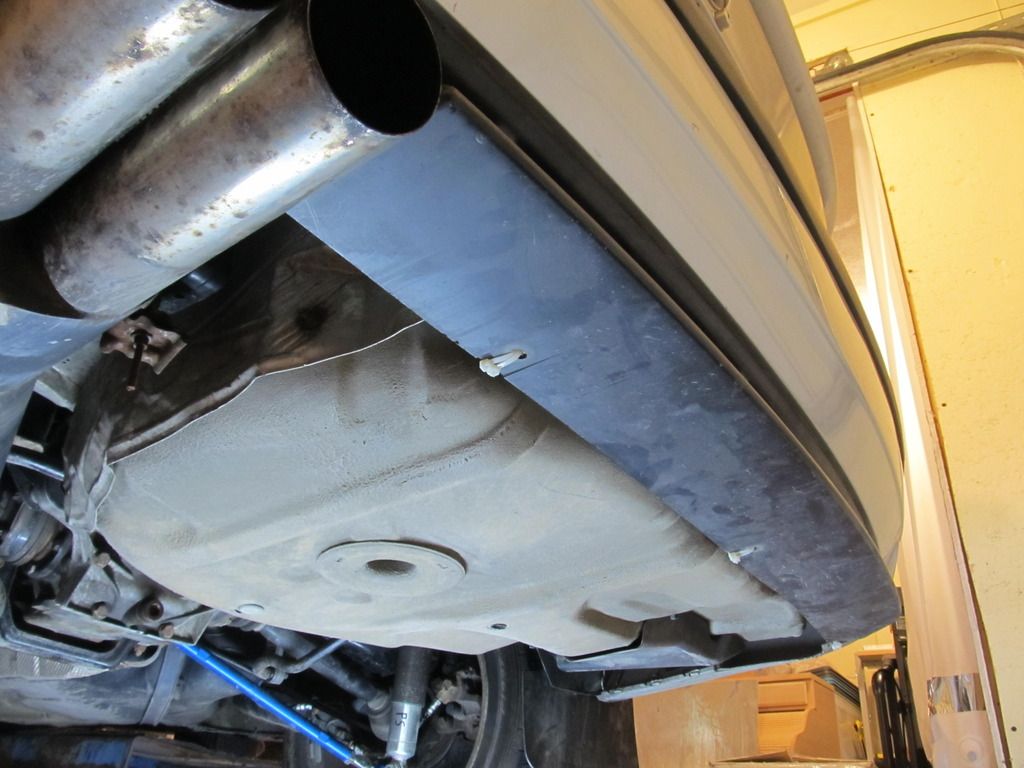
Then he got the rear half of the fuel line skid plate installed.
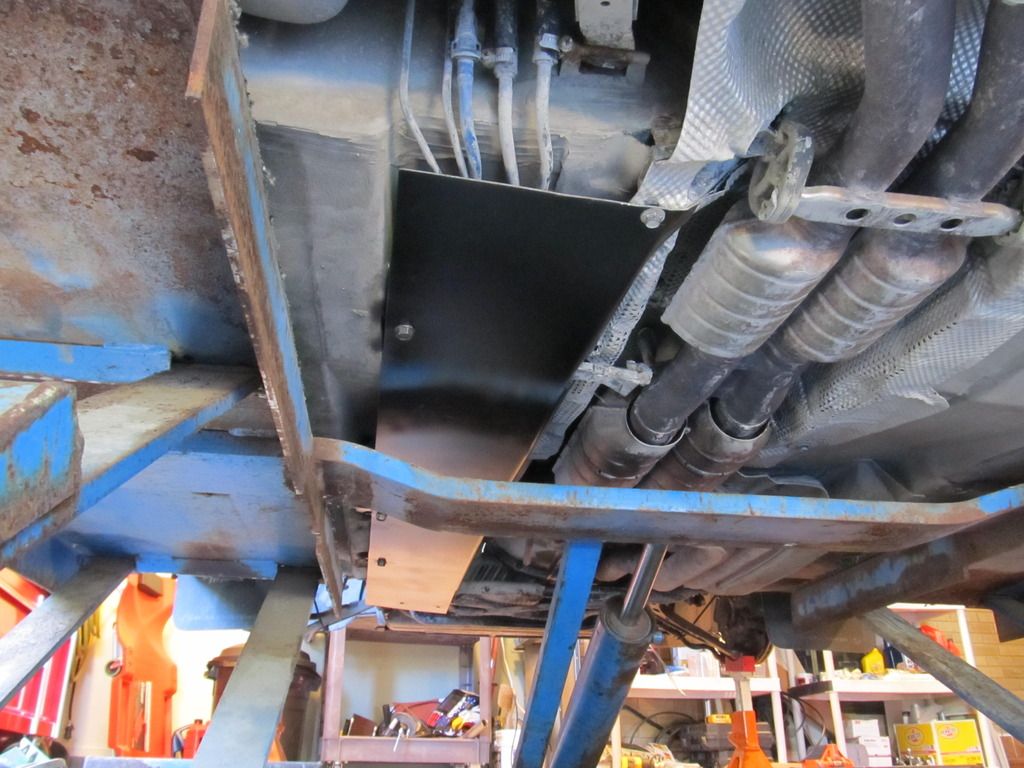
Sweet!!!
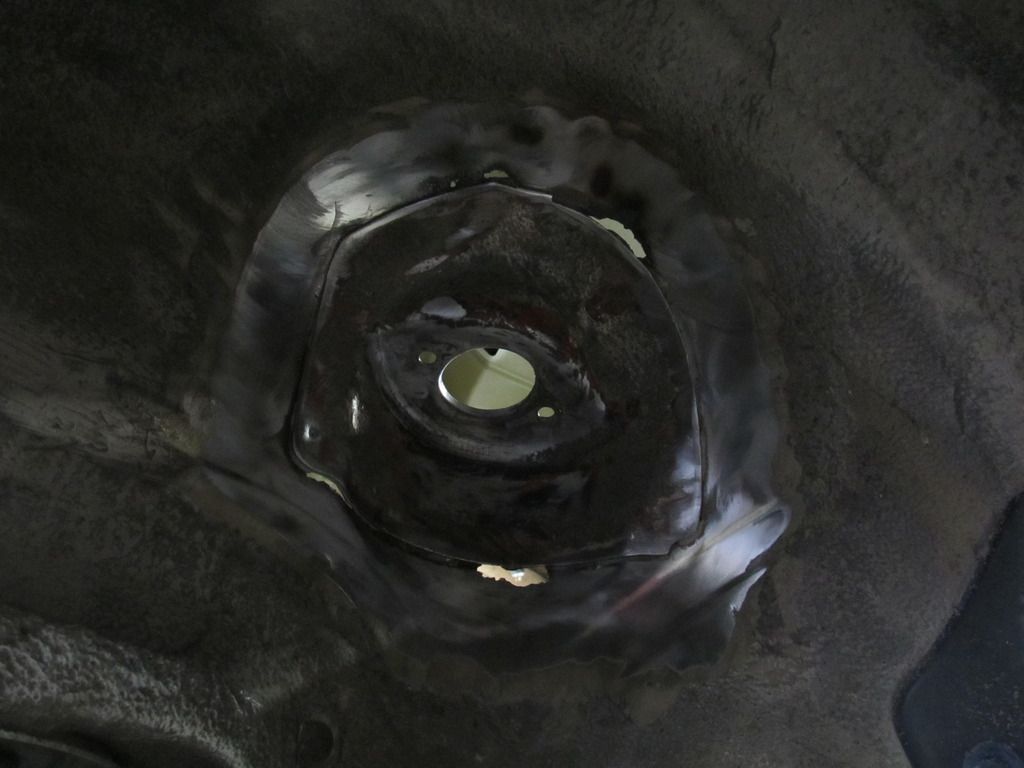
Then I had to do something which I had been avoiding for about six months, which was get some paint on under side of the front strut towers, due to all the welding above burning the paint off. I figured I might as well put on some extra elsewhere, like the top of the front strut tower, the rear trailing arm pocket area, RSTB, and another small area. So I dropped all the suspension and got busy with a wire wheel....
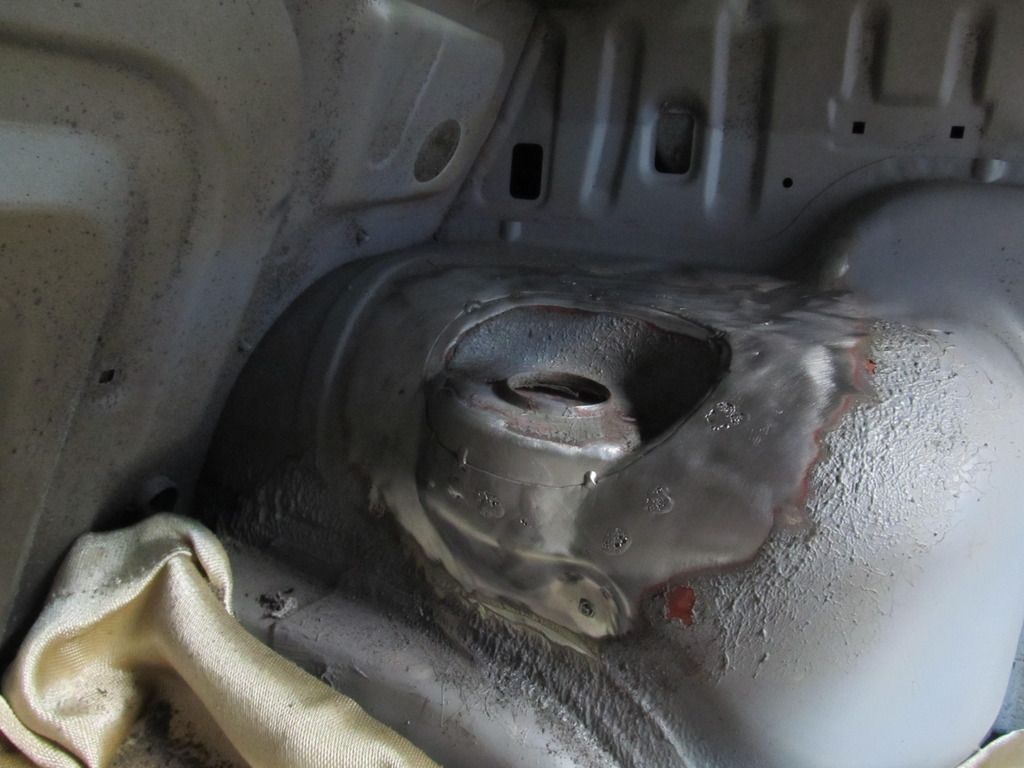
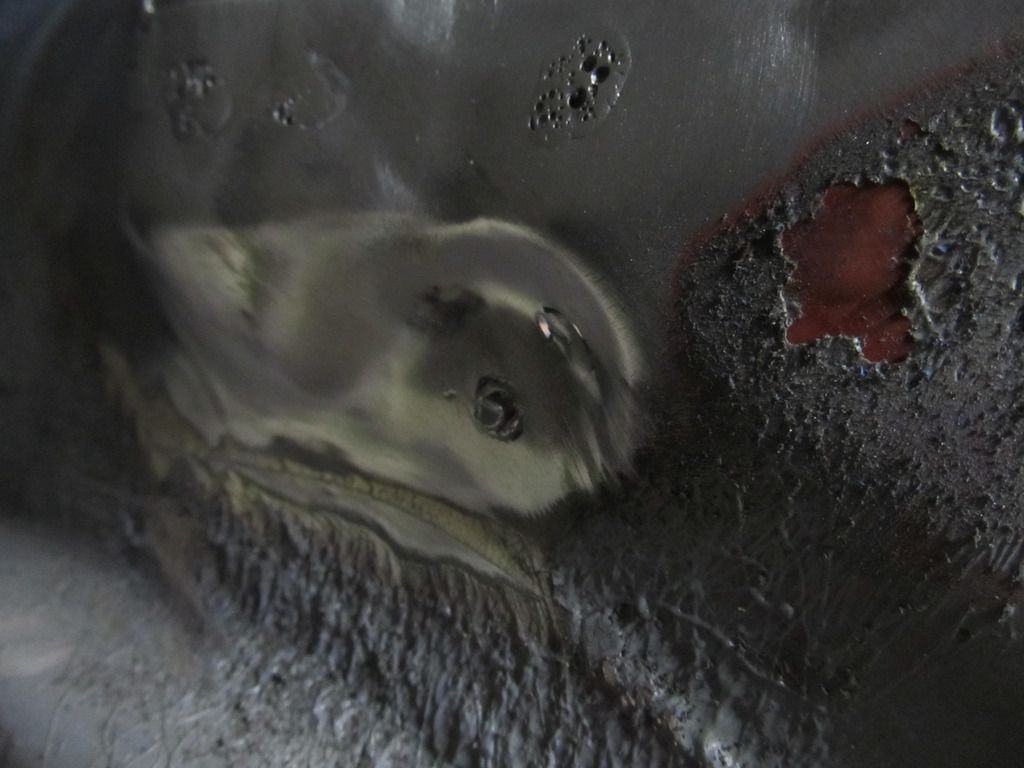
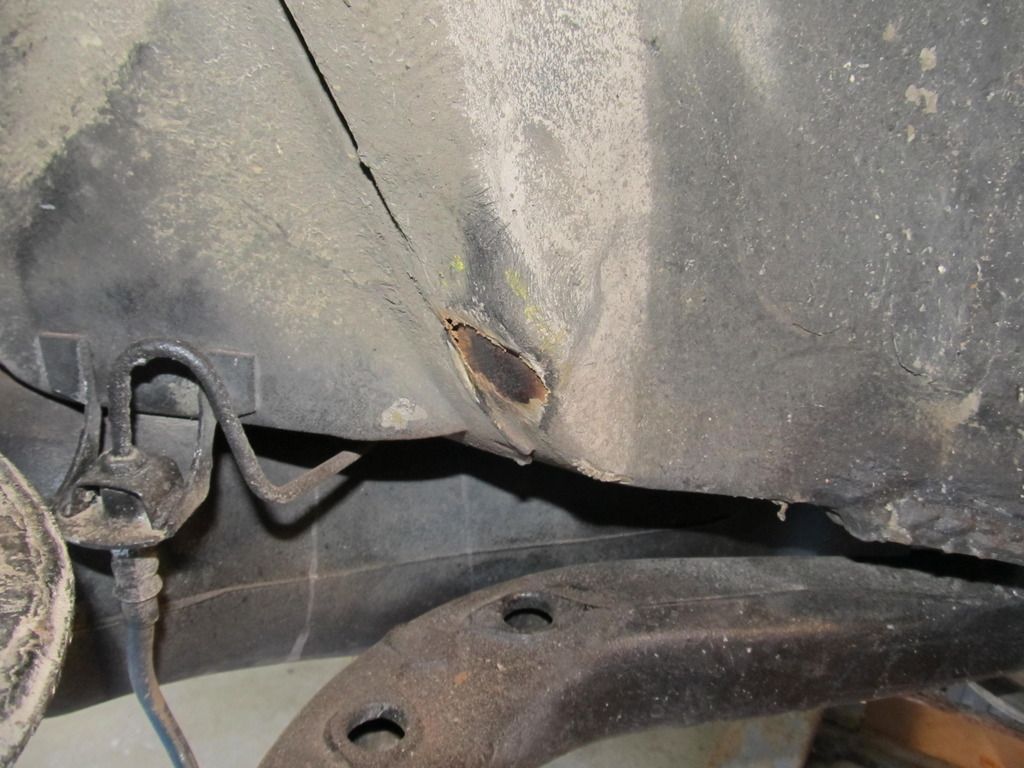
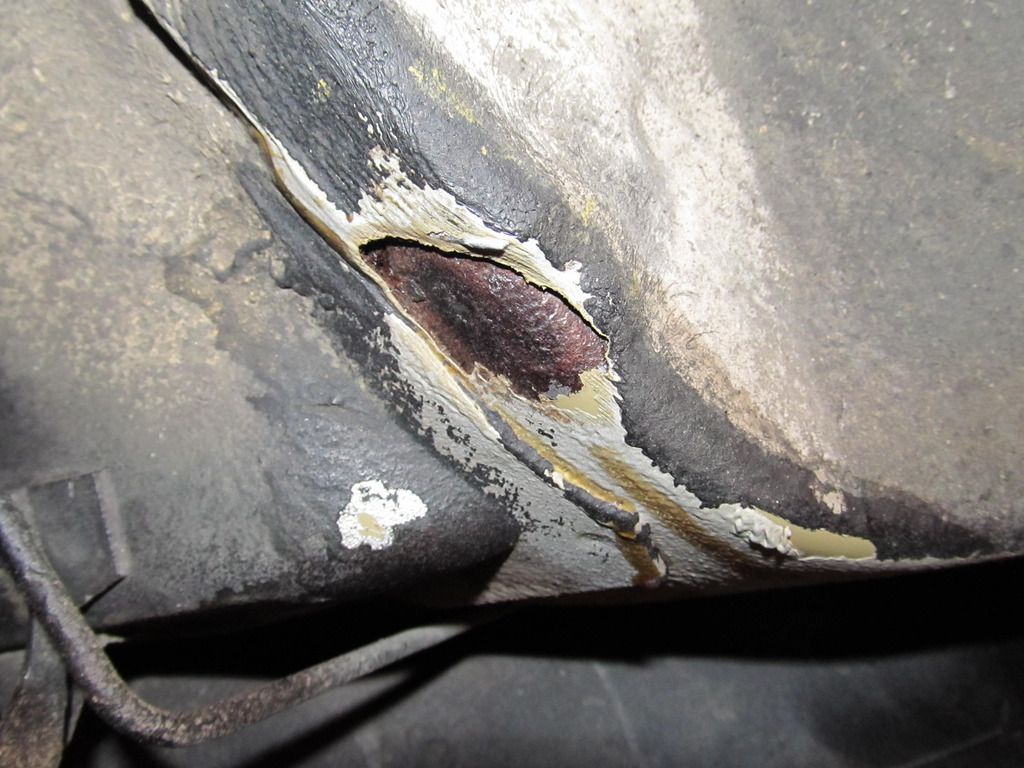
 This little damaged area is in the rear passenger side wheel well. I'm guessing it's related to the bent frame!
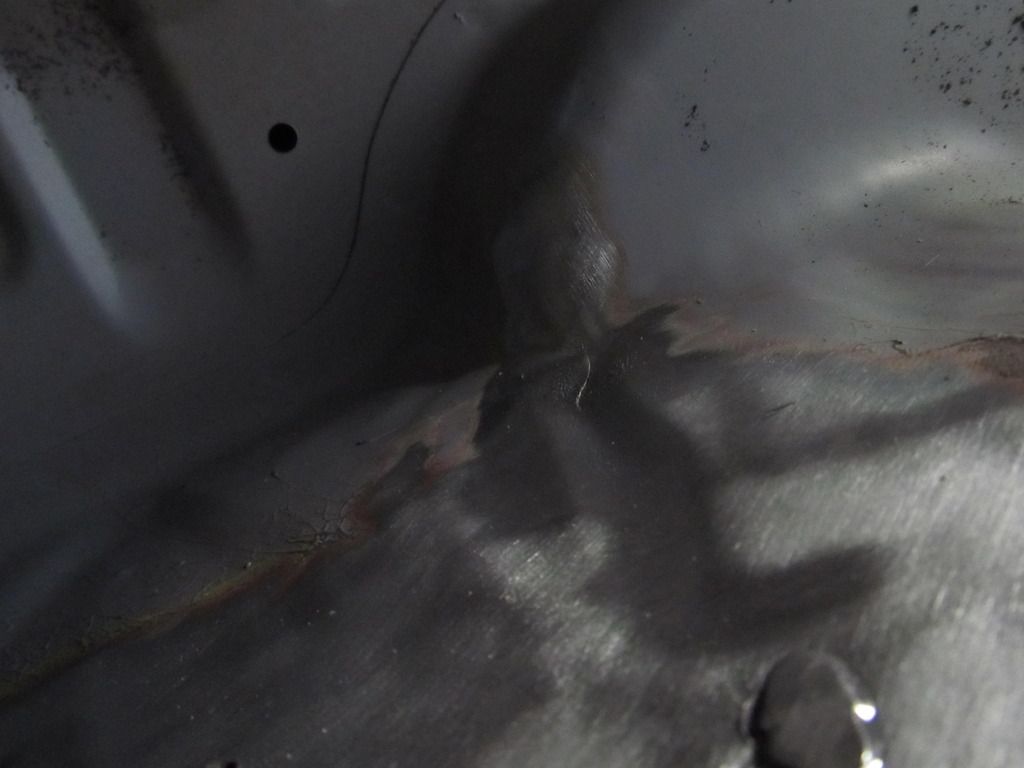
I could see a little surface rust around the trailing arm pockets:
Then I was a good boy and followed all the POR15 instructions, which was a huge pain in the ass. Phrasing?
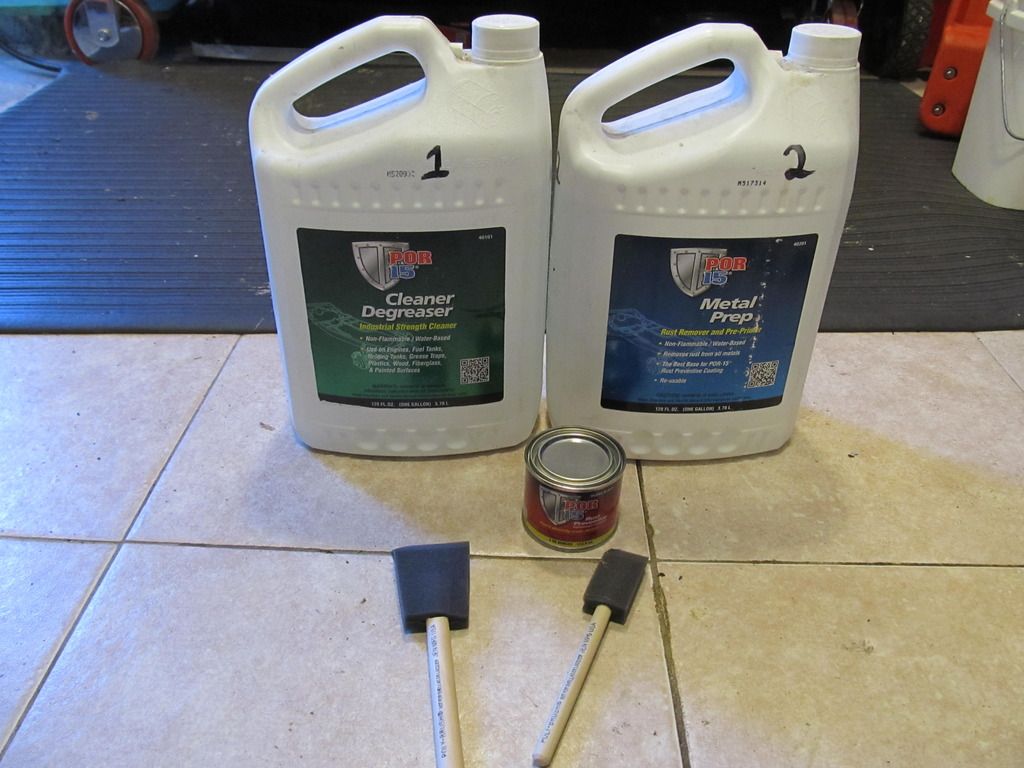
Prepped and ready to go!
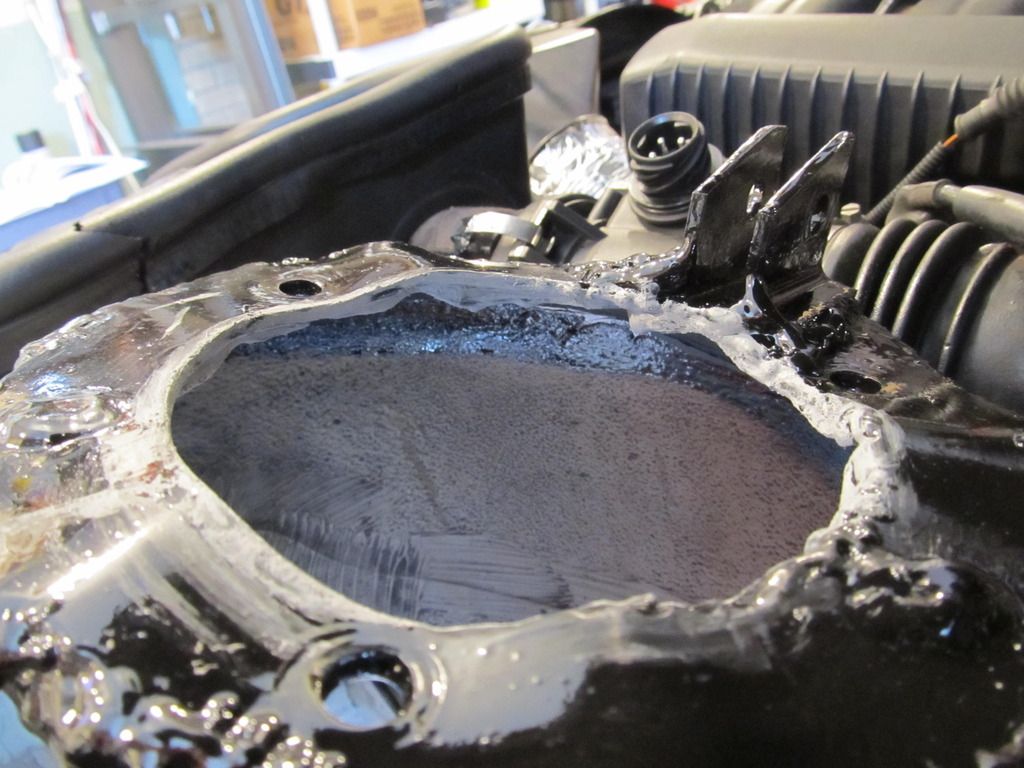
After getting a few coats between the two pieces of the front strut towers, I figured I should probably fill the gap with some seam sealer to keep debris from getting trapped in there and holding moisture.
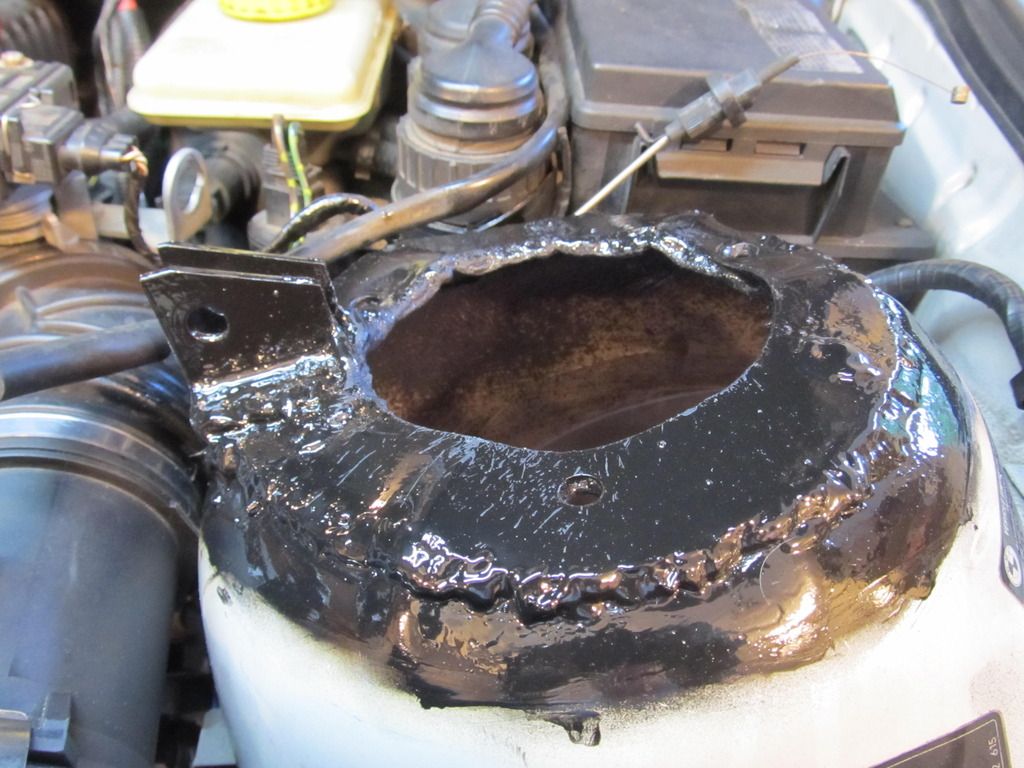
When it was all said and done, I think most areas got four coats of POR15. Then, I hit all areas under the car with two coats of rubberized undercoating:
Close up of the former gap
Rubberized undercoating
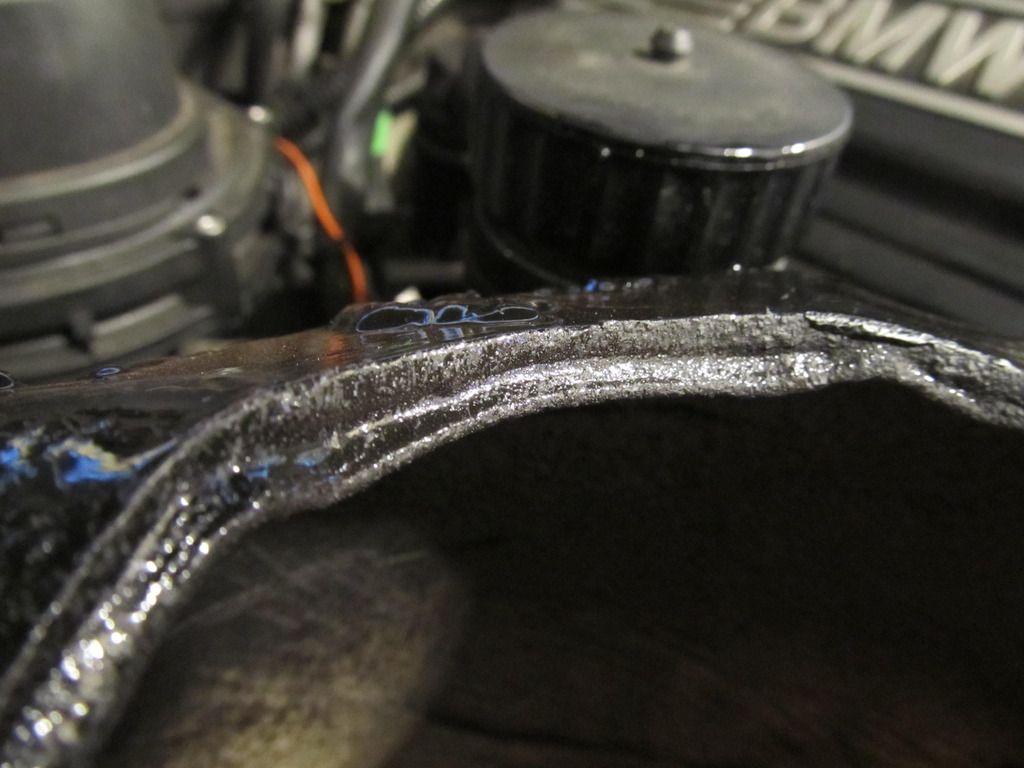
When I went to reinstall everything, the front coilovers just did not want to go back in the car. I also noticed that one of the JVAB welds was kind of interfering with one of the bolts/nuts, so I ground it down:
I then reattached my "diffuser" that got ripped off on one of my practice runs. Seems it was held in place with two clips, and one broke. So I drilled a hole, and now it's held in place in four locations, with two zip ties in most holes.
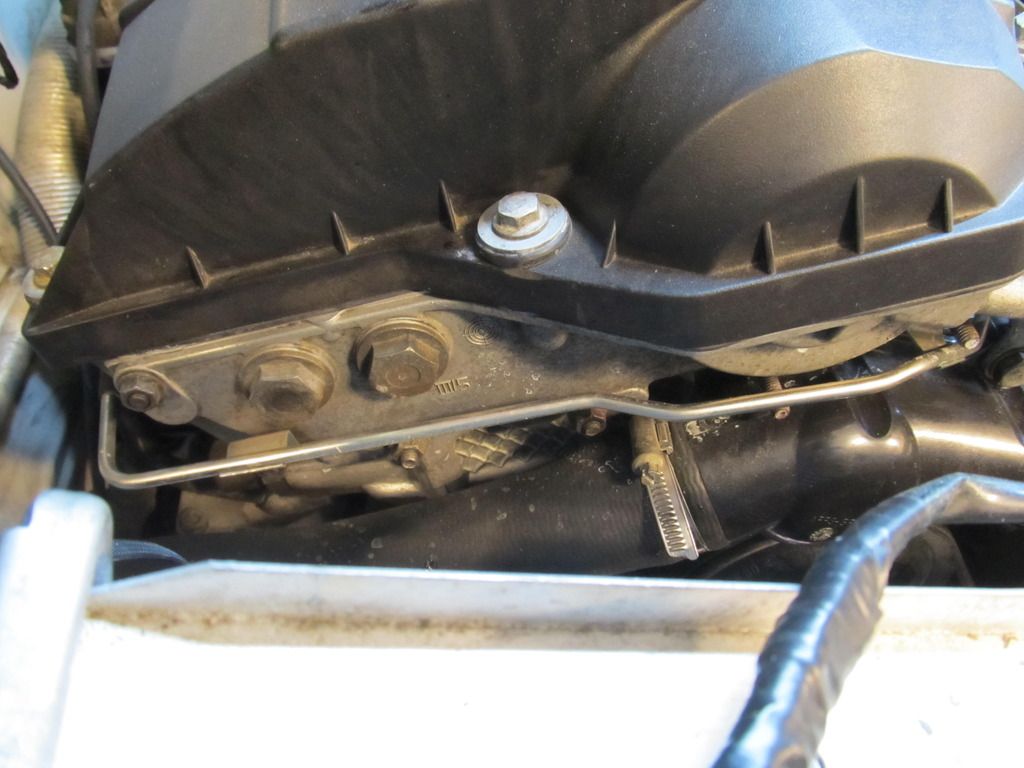
I also tore the cooling system apart to fix a slow leak coming from the overflow tank, which I'm pretty sure the PO fixed. I put a new hose clamp on, snugged it up real good, and put it back together.

While I had things apart, I snapped a pic of the area under my valve cover. This whole area used to be caked with oily crap. Looks like my VC job is holding up!
When it was all said and done, this is what it looked like. Pretty much the same.
What will break next? I'm taking bets now. Find out on the next installment of "Nick is getting sick of this E36 M3."

Sorry to hear about the frustration, man. Hopefully the next outing is more successful.
lol....well at least next weekend is on the grass at the Farm and not the gravel :)
I can honestly, truly say that after all of this, I really hope this car turns out to be fast - even if it's faster than me. Because if it's not, I fear for your mental heath ![]()
So you remember that slow coolant leak I fixed in my last post? Yeah, turns out I didn't fix it, and I needed to take the whole damn thing apart again before rally-x #7. I hate draining coolant!!!
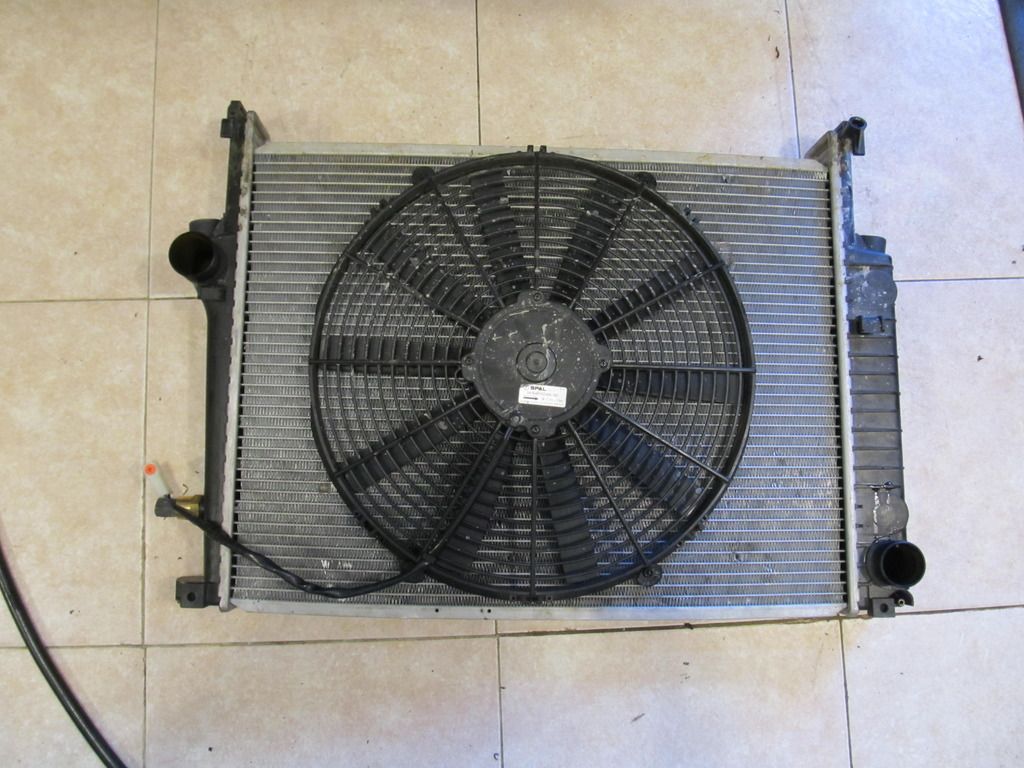
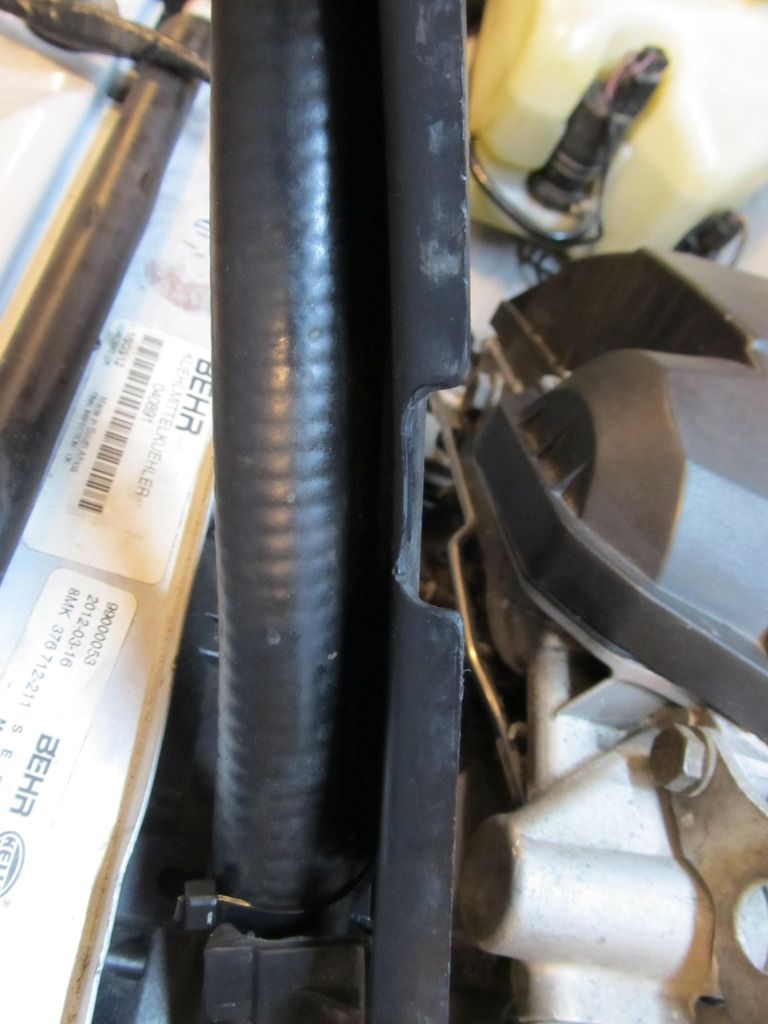
I wasn't sure where the leak was coming from, except that the top of the overflow tank was soaked, so it had to be in that area. The cap seemed to seal fine, as did the bleeder screw. What else could it be? Ahh yes, the small hose on the top of the tank! Turns out that the hose clamp was a tad loose, probably because I had tightened it up with a screwdriver instead of a ratcheting socket that day when I hastily reassembled it at the race venue. While I had it all apart, I figured I would clean up a few things that were bugging me. First up was relocating the electric fan on the radiator. The whole setup had been used in an E30 before I bought it, and the hose that runs along the bottom of the shroud/radiator didn't seem to be in quite the right location with the fan offset from center. Time to center it!
Before:
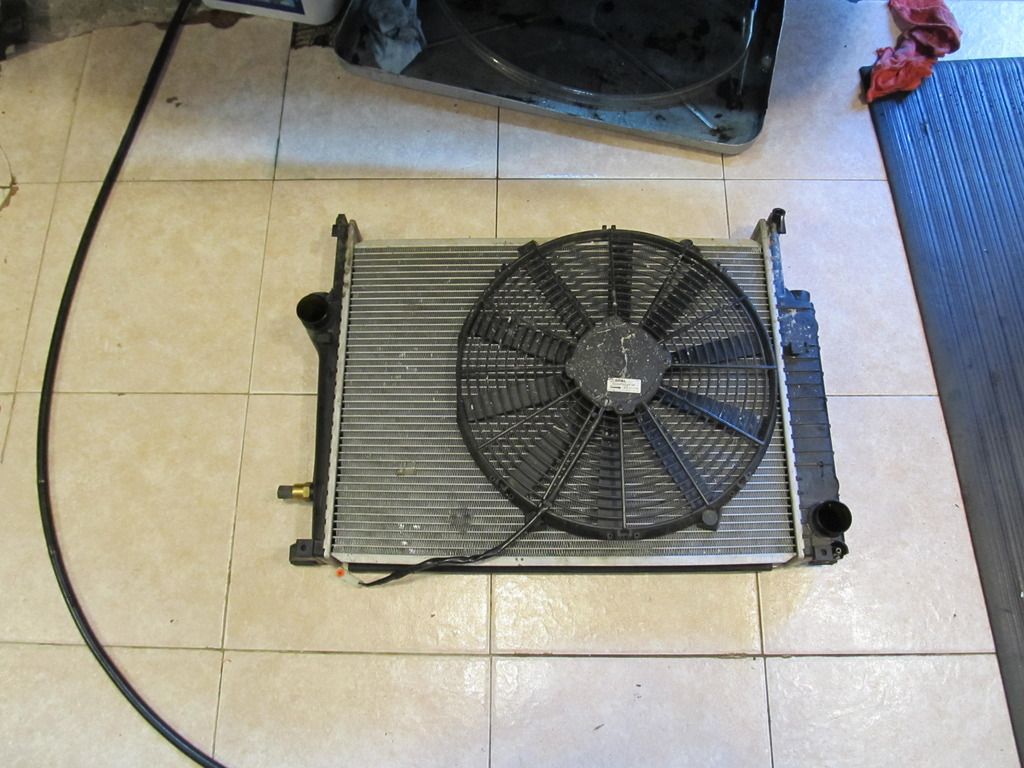
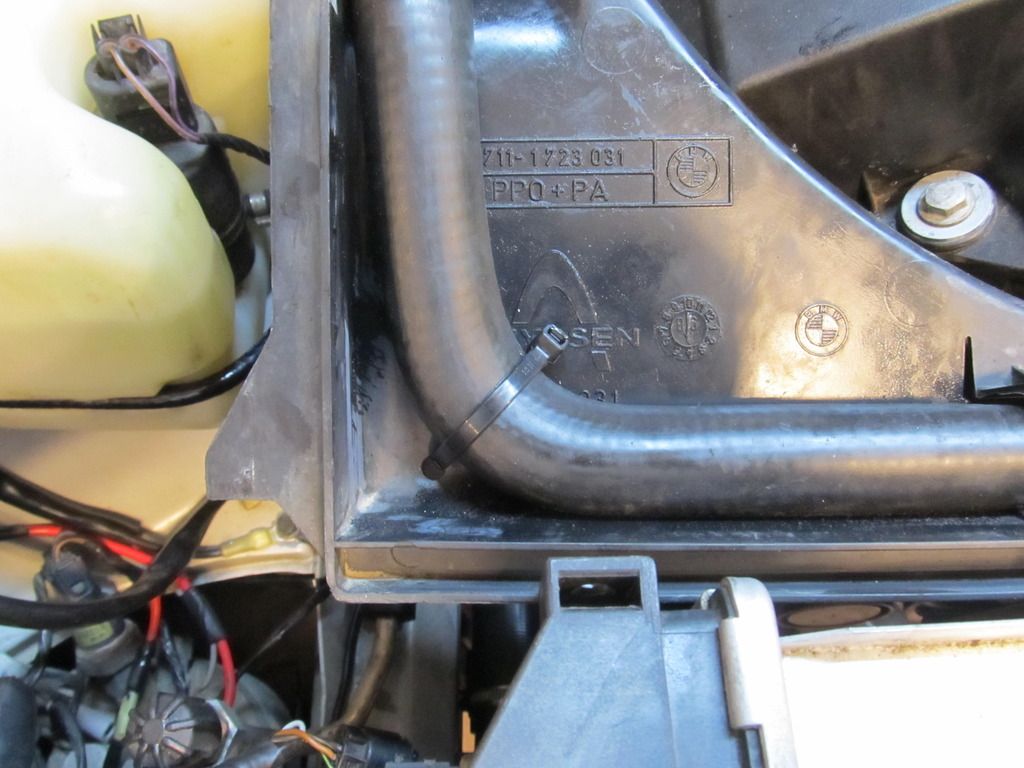
After:
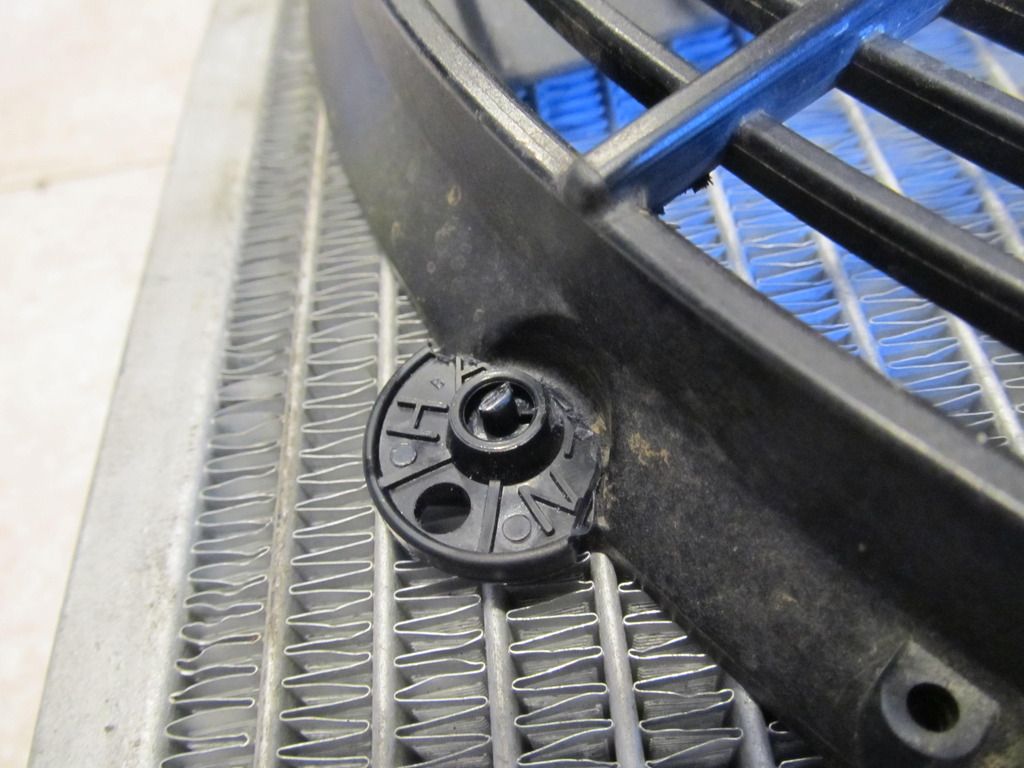
I had to trim down the mounting zip tie things since they were too big and didn't sit flush up against the fan:
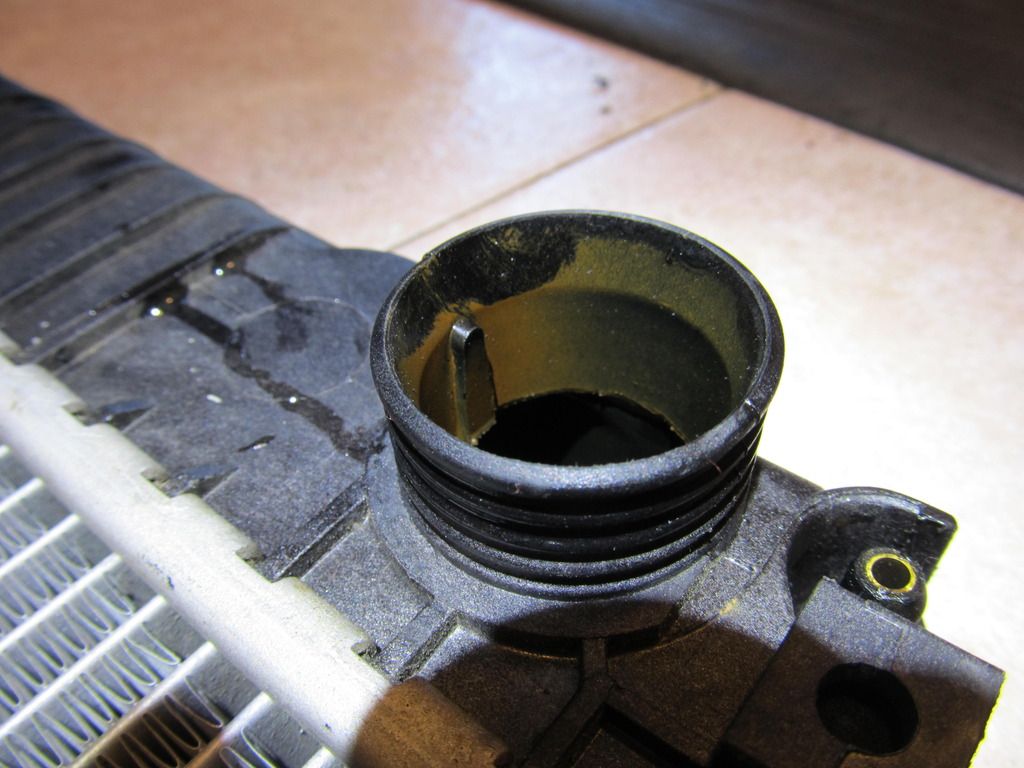
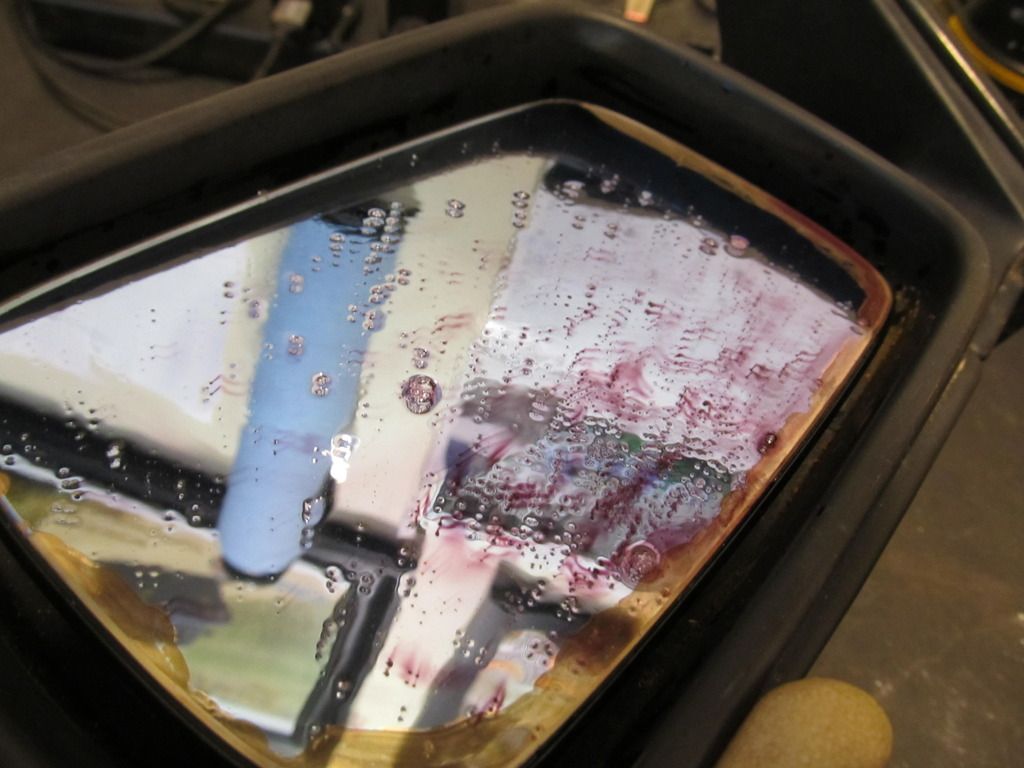
And just like when I rebuilt the system initially, there is this goo all over the place. WTF is this stuff??
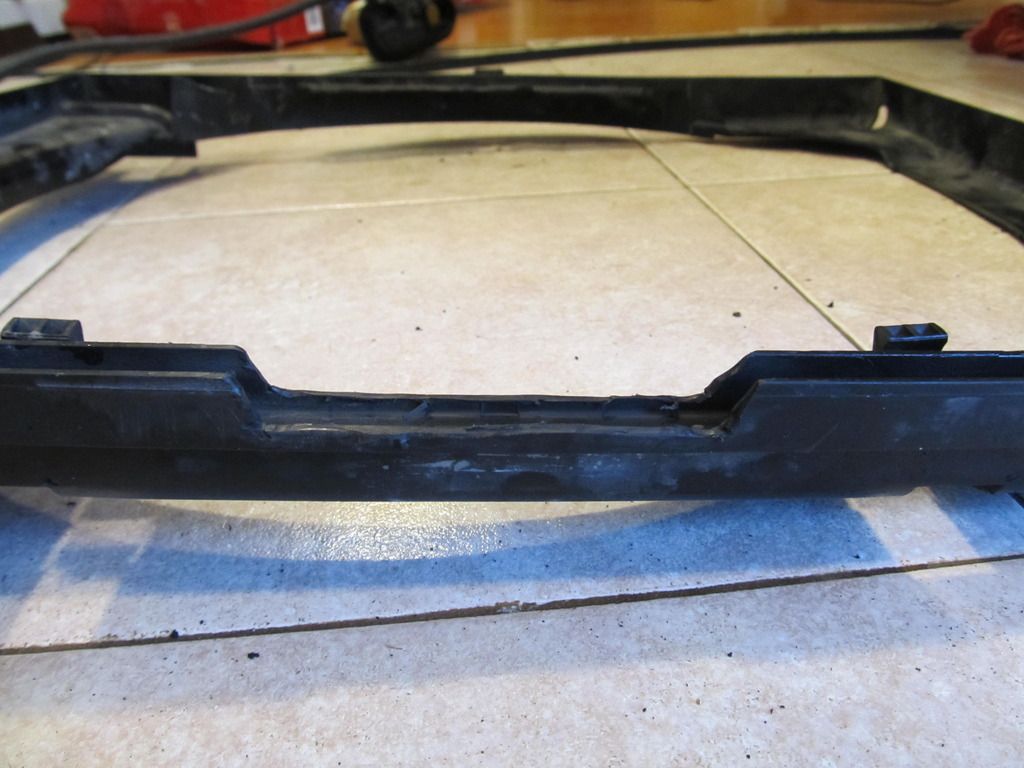
With the fan now mounted in the center, the shroud no longer had room to slide between it and the motor, so I trimmed the shroud:
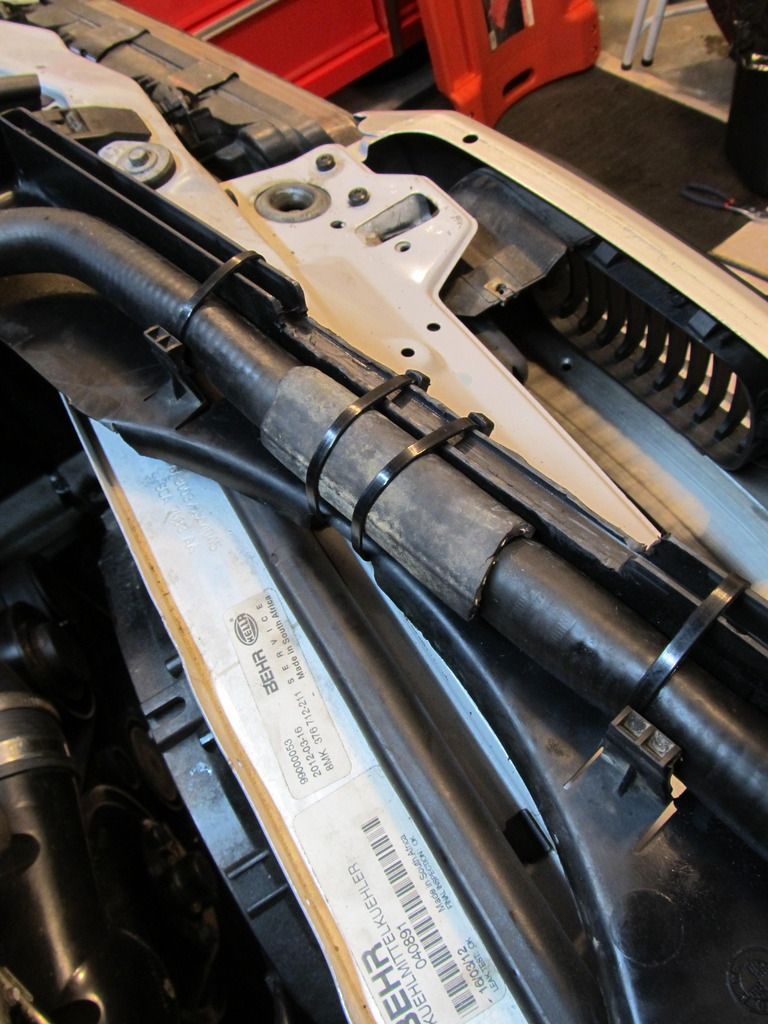
I added a zip tie to make sure the lower hose didn't move around too much:
And I added some spare hose around the center of the bottom hose since it looked like it might rub against the bottom of the fan housing:
And with that, I finally had a reliable cooling system that held pressure. Hooray!
Now I could turn my attention to more frivolous projects, such as installing the non-M side mirrors. I couldn't stand the tiny M side mirrors when I bought the car, and I haven't gotten used to them since, so it was time for something that actually functioned as a mirror. These used ones I got had a few problems though. One was that one of the caps had come off and all the tabs were broken, so I couldn't just clip it back on. So I mixed up some JB Weld, spread it around the lip of the cap, and waited. A few days later, it appeared to be nice and strong, so it was time to install it. Then I realized a bunch of metal had been embedded in the glass and made the mirror look like E36 M3, so I used my awesome Iron-X spray to "dissolve" the metal particles:
After a couple applications the mirror was much smoother, but I sensed it was never going to be perfect, so I cleaned it up and threw them on the car. Great success, I can now see what is next to my car!
I then played with the zoom on my camera to see what my very neglected other car is up to. Not very much it seems....

I need to find a few days so I can do the oil pans, rear main seal, and transmission stuff, because this car is leaking like a sieve.
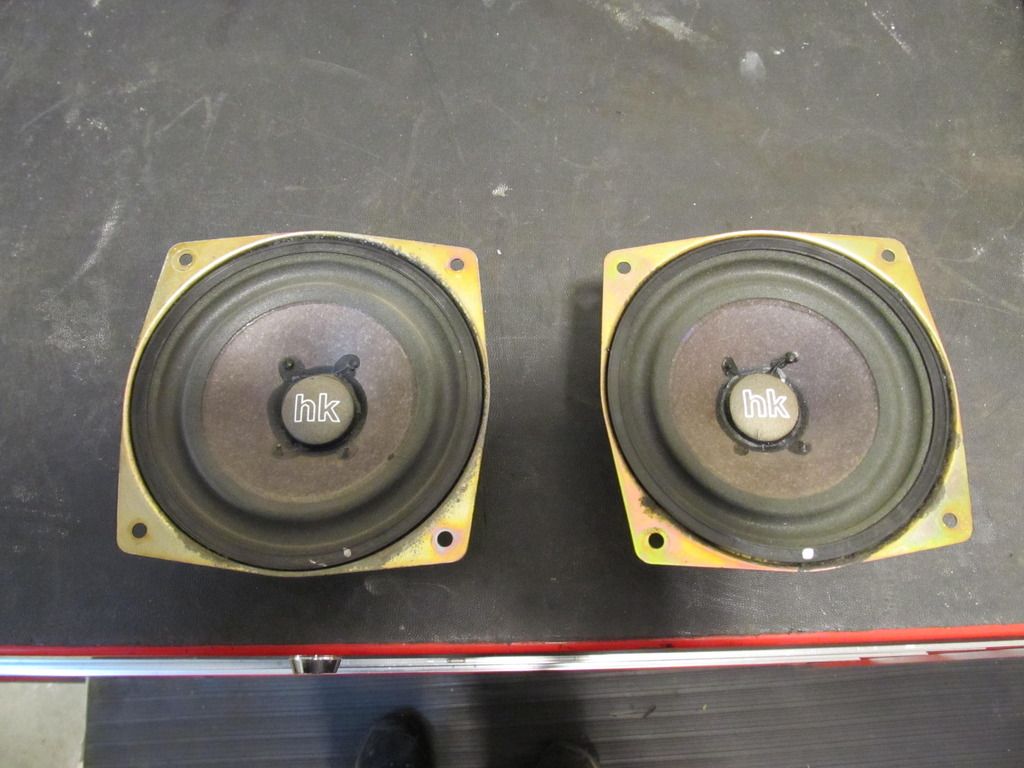
I've been pretty fed up with the blown out HK speakers in this car, and can't afford the BavSound upgrade yet, so I've been on a mission to find reasonably priced HK replacements. First up is the PS 5" kick speaker.
Yeah, I'm pretty sure the surround is dead....
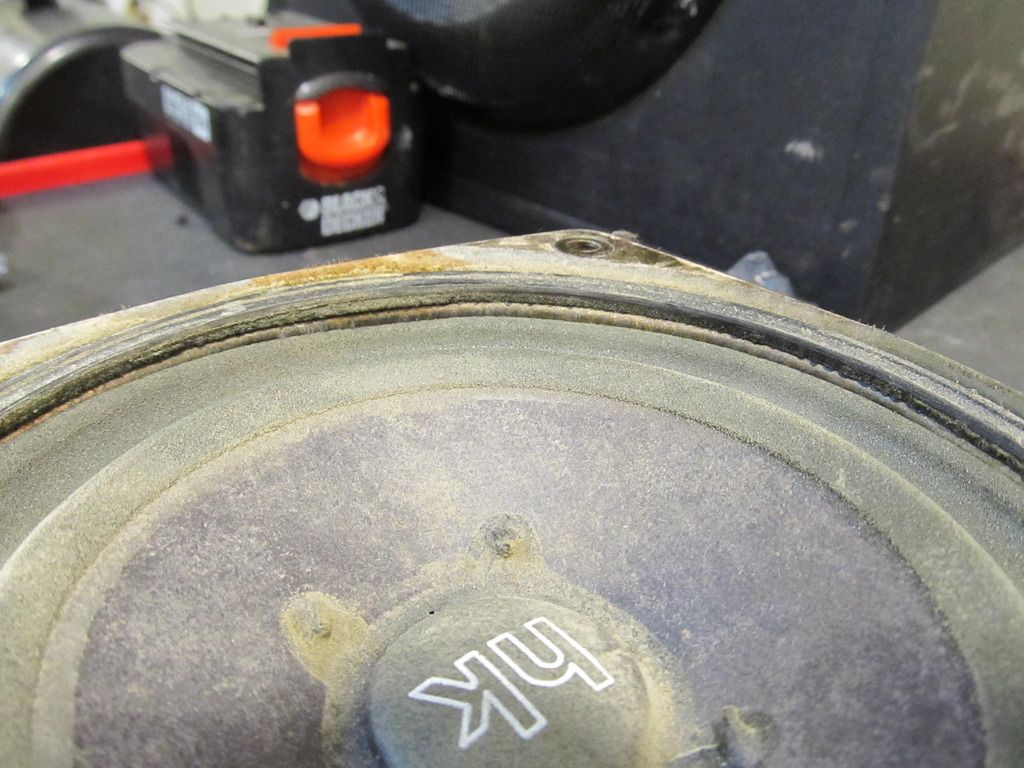
With the new one installed, it's sounding much better, but the PS tweeter is blown too, so I'm now on the hunt for a good one of those.
Race results coming soon!
Time for more overdue updates!
The car survived two rally-x events so far, but for now I'm just going to summarize some of the work I've done. First up are the rear shock mounts. At a race a month ago I heard a lot of clicking noises from what sounded like the rear shock mounts as soon as I started driving in the dirt. I don't think I ever really heard the noise when driving on pavement. It didn't get any worse throughout the day, but I figured I should probably take a look at it.
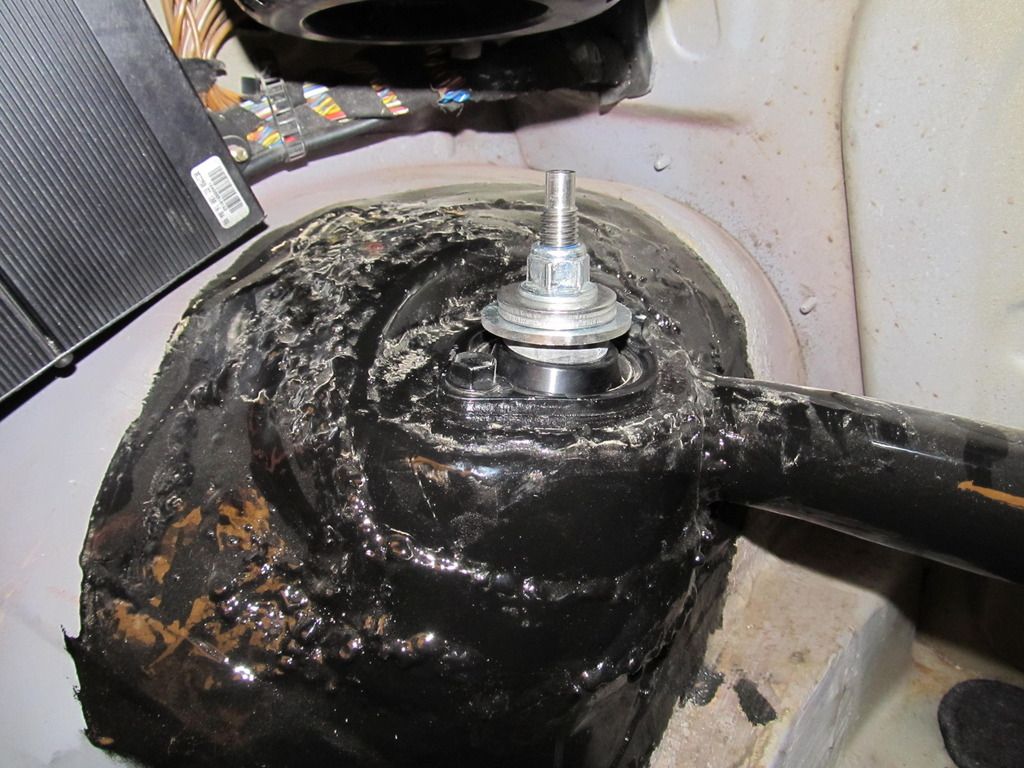
It turns out I was using unnecessary parts and also not putting enough preload on the bushings. This is how I had it mounted, with reinforcement plates on the top of the towers:
But also on the bottom (under the mount):

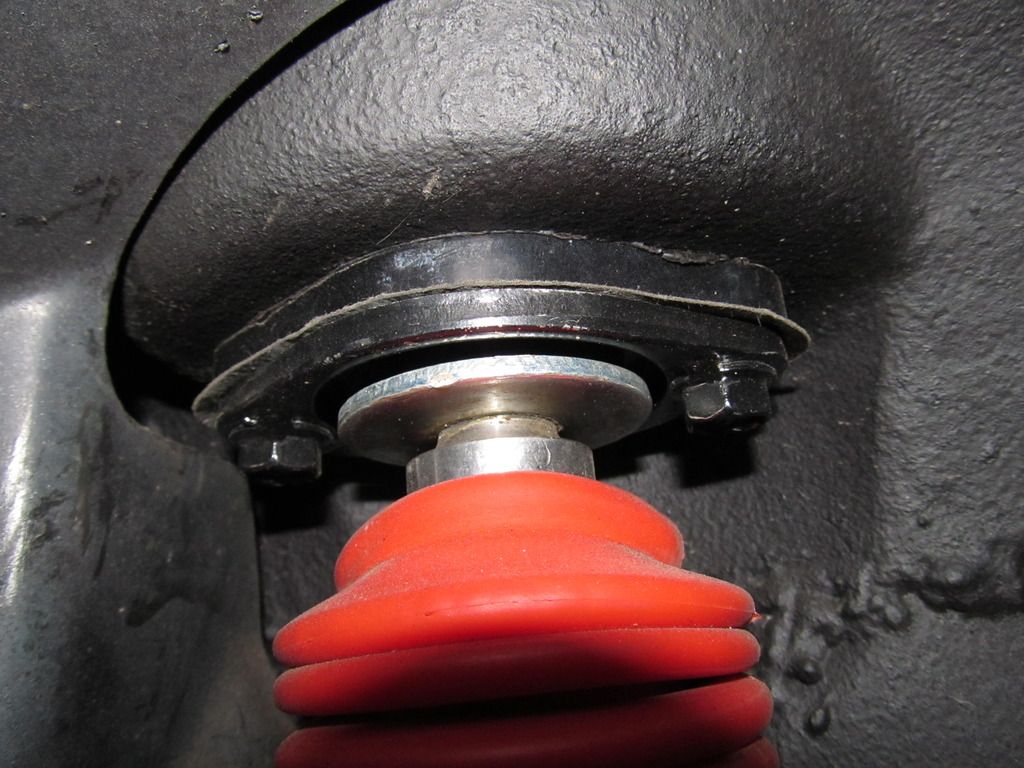
Oh, and while I was working on all that, I noticed some oil around the top of my rear DS shock, the one that got abused when the rear spring perch gave out and the car dropped to the ground while I was racing. Looks like I should probably get this rebuilt....great!
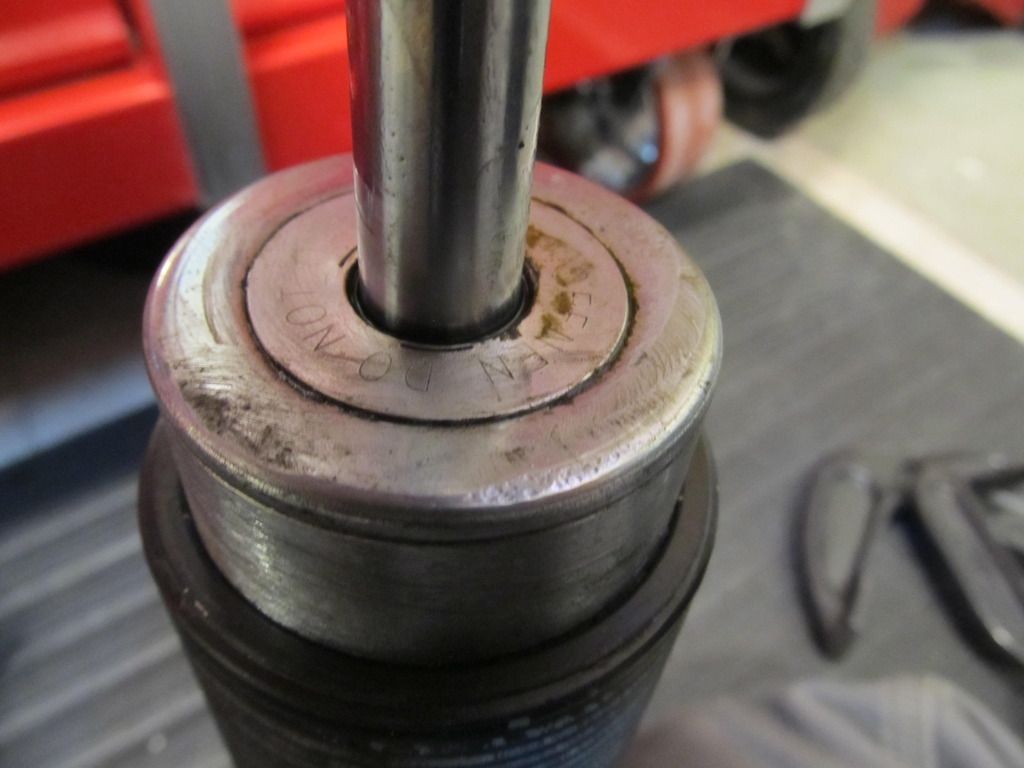
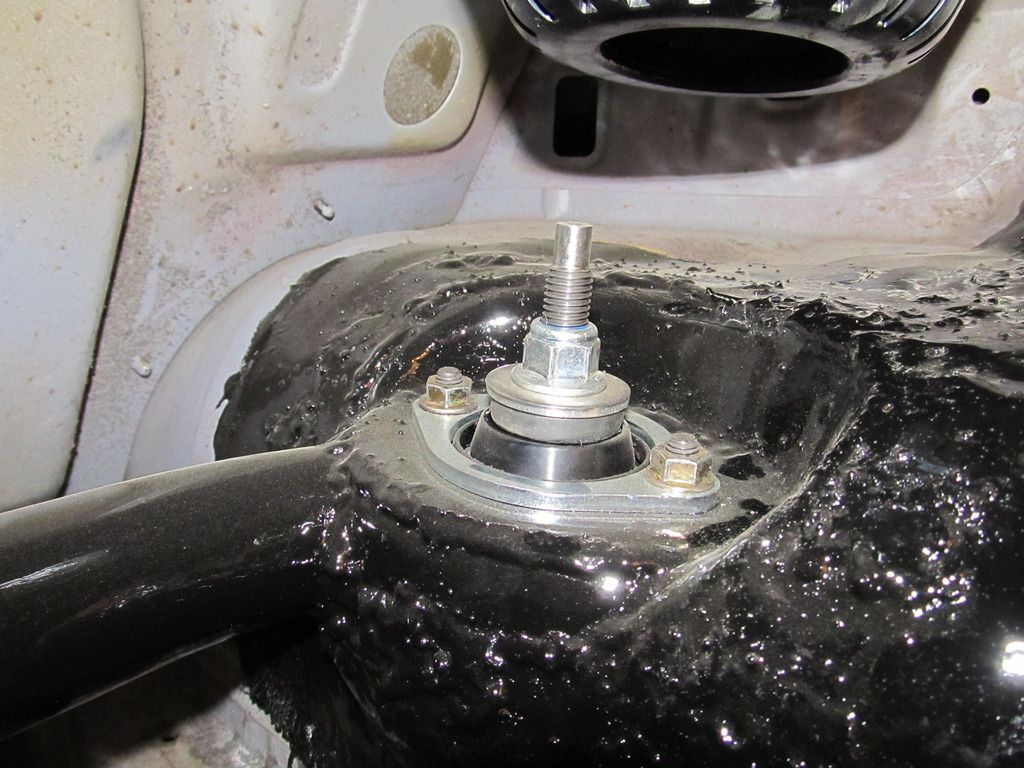
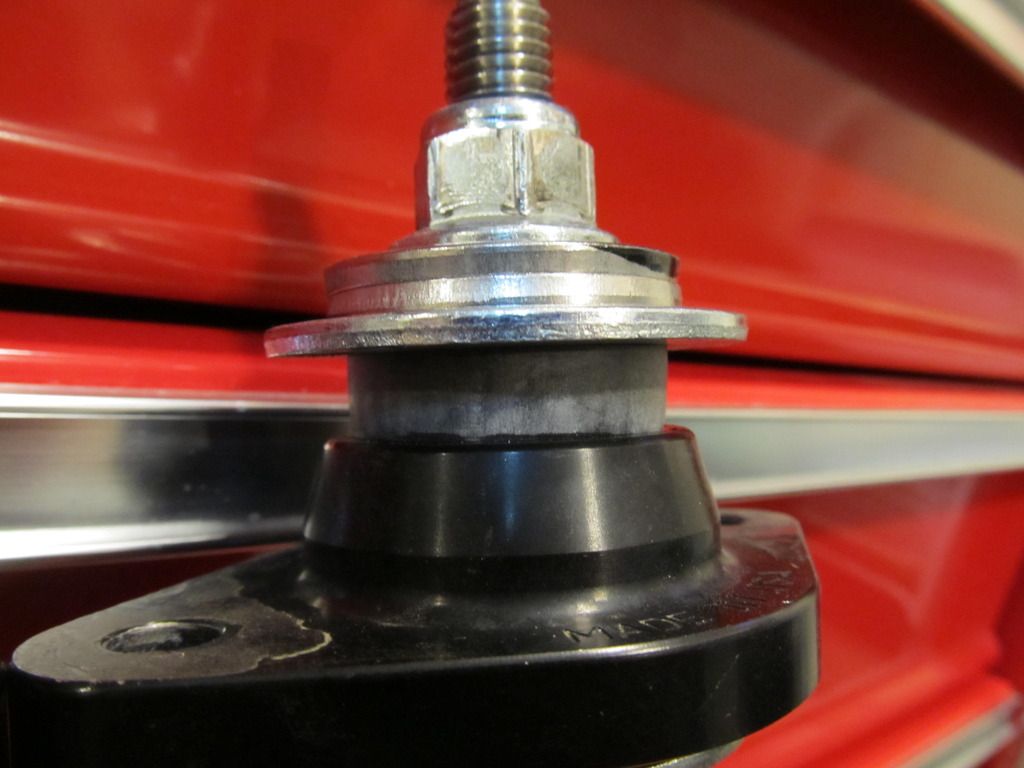
Regarding the preload, here's the problem:
The shaft was too thick for the upper washers, so they couldn't exert force on the bushings:
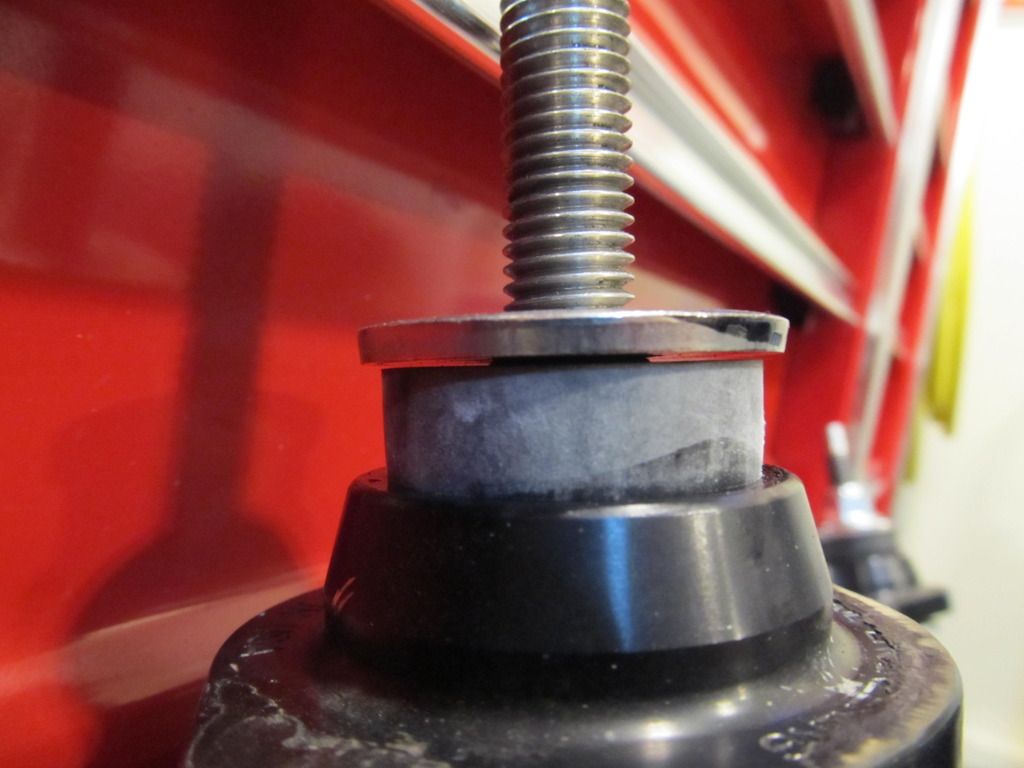
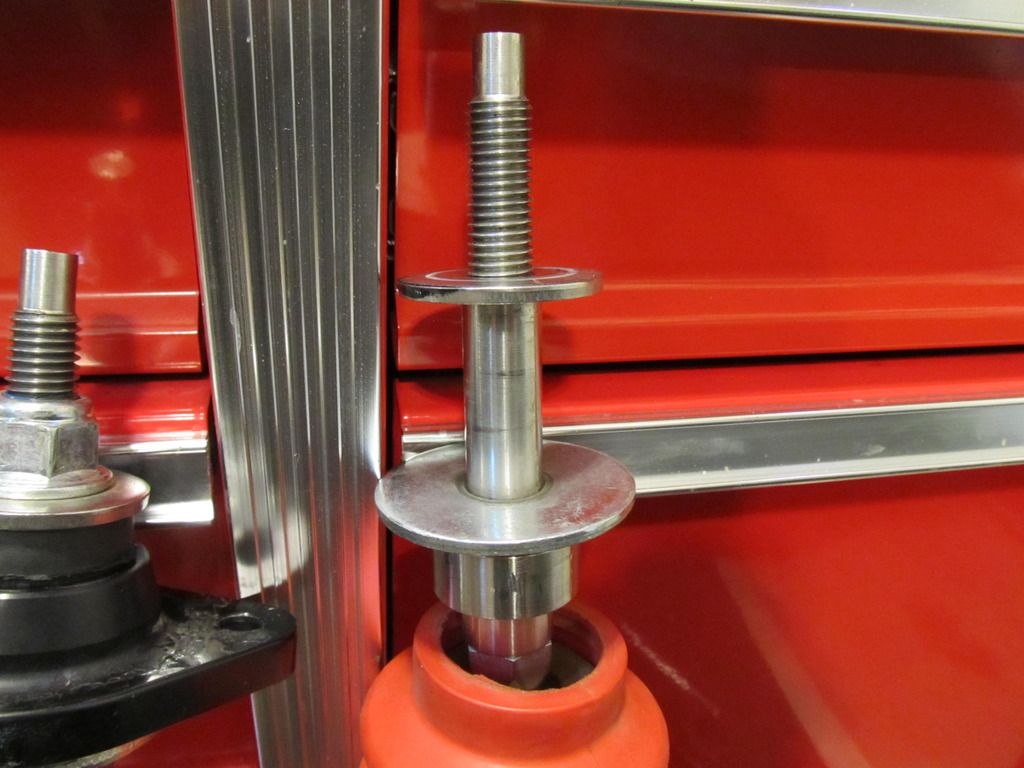
I found some big washers that would fit over the bottom part of the shaft, but it wasn't quite enough, so I drilled out the hole in two more washers, which got me the preload I was looking for. I had a spare set of bushings lying around, so I installed those as well since the ones that were in there were looking a little chewed up from moving around so much.
Installed again, but this time in the manner Rogue recommends:
https://rogueengineering-com.3dcartstores.com/assets/images/shock_asm1.gif
https://rogueengineering-com.3dcartstores.com/assets/images/shock_asm2.gif

And with that, my clicking noises have vanished. Hooray!
You'll need to log in to post.


