1 ... 7 8 9 10 11 ... 20
Lof8
Lof8 GRM+ Memberand HalfDork
5/17/17 7:54 p.m.

I feel your pain. I've experienced lots of wasted time, $, and effort trying to get my v8 Ranger swap going only to find out that my engine is quite tired inside. Had to shell out for another engine too. I hope both of our projects are running well soon!

95maxrider
95maxrider New Reader
5/18/17 9:37 a.m.

With a motor replacement on the horizon, I'm trying to plan the best way to get the engine in and out of the car. I've read plenty of threads about doing that for these cars, and found some similarities between all the threads: -Remove the engine and transmission as one piece, do not separate -Removing the radiator support makes things much easier

I read a few people talking about how dropping the engine from the bottom is easy, but my lift only goes up 2' and I think that's going to be a tight squeeze getting the motor out underneath the car. Not to mention I don't really want to deal with taking the whole front end/suspension apart.

That leaves two possibilities- remove the engine from the top, or take the whole front end apart and take it out through the front. I'm not opposed to doing this; apparently removing the radiator support isn't difficult. The thing that concerns me the most is the AC system. I still have AC in my car, and I want to keep it that way. Most people say to keep the AC compressor in the car and not disconnect any lines, but I'm not clear on how this relates to the radiator support and condenser. Can I just remove the radiator and support while leaving the condenser and lines in place? I really don't want to deal with AC evacuation and recharging. Does removing the bumper and headlights make things easier, or is that required to remove the radiator support?

Also, most people mention having to remove the intake manifold to get to the rear lift point, but some people say it's not necessary. Can anyone provide any confirmation one way or the other?

There's one more thing to consider, and that's the layout of my garage. There's a decent amount of room in front of the car if you pull in normally, but that area is a cluster of fake wood flooring, broken tiles, concrete, and the hydraulic line for the lift. The area at the back of the is generally flat concrete, but it's much smaller. I'm having trouble deciding if I should pull the car in normally and hope that I can maneuver the engine hoist around the obstacles, or back the car in and deal with a tighter, but flat, work area. Here are some pics to give you a better idea of what I'm working with.

An overview:

If I remove the shop press and plastic cart, there is 60" between the car and the wall. Note the condition of the floor and the transitions between materials. Not smooth at all.

There's about 32" between the rear bumper and the garage door. If the door is open, there's another 10" of flat concrete, then the driveway starts sloping down pretty quickly. The engine hoist would have to stay on the garage concrete; if it gets out in the driveway it's gonna roll down into the street.

This shows how much room I could pull the car in before the wheels start going up on the lift. I need to take into consideration the engine hoist legs and how they can be positioned and moved around the front of the car.

So, if you were in my shoes, how would you proceed?

¯\_(ツ)_/¯
¯\_(ツ)_/¯ SuperDork
5/18/17 9:42 a.m.

What does the middle of the lift look like? If you can't pivot the back of the trans down far enough, no way is it coming out the top. My vote would be to back the car in, moving a loaded engine hoist on a rough surface is no fun.

95maxrider
95maxrider New Reader
5/18/17 9:55 a.m.
¯\_(ツ)_/¯ wrote: What does the middle of the lift look like? If you can't pivot the back of the trans down far enough, no way is it coming out the top. My vote would be to back the car in, moving a loaded engine hoist on a rough surface is no fun.

Good question! The piston for the lift is pretty much directly under the transmission if I pull the car in normally. When I replaced the trans brace, I had to back to car in to get access.

Here are some pics of the lift. It's 30+ years old and super heavy. It's not going to be moving any time soon.

bluej
bluej GRM+ Memberand UltraDork
5/18/17 10:11 a.m.

Having been in the space, I'd do the "out the front" option, but w/ a bit of a twist.

First, you're absolutely going to have to remove the bumper/headlights. Not even sure how you'd get the radiator support out w/out doing so.

Be ready w/ lots of zip ties and cord (shoestrings?) to tie the AC bits out of the way.

I would prep everything for the engine to come out the front. once you're at the point where you would normally pull the engine out the front, w/ the engine supported by the hoist, I'd back the car away from it instead. then once the motor is out, swing it over towards the side w/ the wood floor, and put it on the stand.

Probably want to have the other motor ready over on that side as well.

Are you going to attempt this weekend's event w/ the old motor, or start the removal in hope to not miss the june 10/11 events?

95maxrider
95maxrider New Reader
5/18/17 11:49 a.m.
bluej wrote: Having been in the space, I'd do the "out the front" option, but w/ a bit of a twist. First, you're absolutely going to have to remove the bumper/headlights. Not even sure how you'd get the radiator support out w/out doing so. Be ready w/ lots of zip ties and cord (shoestrings?) to tie the AC bits out of the way. I would prep everything for the engine to come out the front. once you're at the point where you would normally pull the engine out the front, w/ the engine supported by the hoist, I'd back the car away from it instead. then once the motor is out, swing it over towards the side w/ the wood floor, and put it on the stand. Probably want to have the other motor ready over on that side as well. Are you going to attempt this weekend's event w/ the old motor, or start the removal in hope to not miss the june 10/11 events?

Check out the discussion in my other thread regarding getting the motor out, there's some good info in there.

https://www.bimmerforums.com/forum/showthread.php?2270173-E36-M3-RallyCross-build!&p=29712728#post29712728

Regarding racing the car this weekend, I'm considering it. If the HG totally fails, I don't think it will do any more damage to the motor than there already is, so I think I'm willing to take that risk. The only problem with that is it takes away one good day of work that I could use (the day before). Here's what my schedule is like between now and the back to back events in June:

Sat 5/20- ?

Sun 5/21- Rally-x #3, race the car?

Sat 5/27- Remove engine

Sun 5/28- Install new engine?

Mon 5/29- Tidy up loose ends

From 6/2-6/5 (the whole next weekend) I'll be out of town.

The weekend after that has the back to back events (6/10 and 6/11).

So if I race the car this Sunday, that only leaves the memorial day weekend to do EVERYTHING. I'm not sure if that's wise given that I'm going to need some help along the way. Most people are busy that weekend, which makes me nervous....

95maxrider
95maxrider New Reader
5/27/17 7:48 p.m.

Hey guys, I'm about to get started with the motor swap and I have a quick question: If I crack the AC system at the condenser (forgive me EPA), will I lose just refrigerant or refrigerant plus oil? I've got a gauge set and cans of refrigerant, but I can't do anything about oil. Do I need to bite the bullet and just take it to a shop afterwards, or can I fill it up myself and not worry about the oil level? Thanks!

95maxrider
95maxrider New Reader
5/31/17 11:44 a.m.

Hey guys, I'm in the middle of swapping motors and I need some help identifying my flywheel and choosing which bolts I need to use to attach it to the motor. According to the previous owner, it's some aluminum single mass unit, but I don't see any markings on it to identify the brand! It doesn't look like anything UUC, Turner, or Bimmerworld sells. Since it's not dual mass like the stock one, I'm not sure which flywheel bolts I'm supposed to use either. Can anyone help me out with either question?

I'm also trying to figure out how much life my clutch disc has left, but I can't find a minimum thickness listed in the Bentley manual or anywhere online. How does this look to you?

Thanks in advance!

¯\_(ツ)_/¯
¯\_(ツ)_/¯ SuperDork
5/31/17 11:53 a.m.

Poking around in google images, I think you have this JBR flywheel. That sure doesn't look like aluminum to me.

I'd replace the clutch disc regardless, they're not terribly expensive compared to the work it takes to get in there to access it.

95maxrider
95maxrider New Reader
5/31/17 11:55 a.m.

I just realized I just need to weigh this thing and that should help me figure out what brand it is....

95maxrider
95maxrider Reader
5/31/17 6:31 p.m.

Alright, I could use some more expert advice!

I just weighed the flywheel and it's 16.6 pounds. There are absolutely no markings on it to indicate the manufacturer. I'm wondering if it's some Ebay special POS. From what I've been reading, the E34 M5 clutch upgrade is completely unnecessary for a mildly modded NA S52, and adds back a ton of weight that a lightweight flywheel takes out. Apparently it also makes the clutch pedal feel lighter. My clutch pedal is much heavier than stock, so I don't think that's what's in my car. There are also absolutely no markings of any kind on the clutch disc, and the pressure plate only says "Sachs Typ MF 240". All this points to some cheap Ebay package, like this:

http://www.ebay.com/itm/FX-STAGE-1-CLUTCH-KIT-CHROMOLY-FLYWHEEL-BMW-323-325-328-525-528-i-is-Z3-M3-E36-/161265676312?fits=Make%3ABMW%7CModel%3AM3&hash=item258c2ef018:g:ENcAAOSwaB5XpSNn&vxp=mtr

That doesn't look exactly like what I've got, but the PP is the same blue, and I can barely see that it's made by Sachs.

I'm now in the position where I think I would like to reuse the flywheel and get a new clutch and PP, but I'm unclear if I can combine a stock unsprung clutch with this flywheel. Can anyone offer guidance?

bluej
bluej GRM+ Memberand UltraDork
5/31/17 11:48 p.m.

Get a sprung hub clutch, like the one that was in there.

Flywheel needs resurfaced, too.

95maxrider
95maxrider Reader
6/1/17 8:21 a.m.
bluej wrote: Get a sprung hub clutch, like the one that was in there. Flywheel needs resurfaced, too.

Yup, definitely gonna resurface the flywheel. After looking around, I found what appears to be a good deal on a sprung Sachs clutch and PP:

http://www.bimmerworld.com/Sachs-Clutch-Kit-BMW-E36-M3-S52-and-MZ3-21212228289-1996-1997-1998-1999.html

I think I'm gonna go with that unless someone can give me a good reason why I shouldn't.

95maxrider
95maxrider Reader
6/1/17 9:41 a.m.
95maxrider wrote:
bluej wrote: Get a sprung hub clutch, like the one that was in there. Flywheel needs resurfaced, too.
Yup, definitely gonna resurface the flywheel. After looking around, I found what appears to be a good deal on a sprung Sachs clutch and PP: http://www.bimmerworld.com/Sachs-Clutch-Kit-BMW-E36-M3-S52-and-MZ3-21212228289-1996-1997-1998-1999.html I think I'm gonna go with that unless someone can give me a good reason why I shouldn't.

Well I sure am glad I called before ordering, they have the wrong picture up on their site and that kit is unsprung! Looks like my next two cheapest options are either the E34 M5 clutch disc with a new E36 M3 PP for about $435 or the Clutch Masters FX100 kit for $475. Am I correct in understanding that the M5 disc will make my pedal feel lighter than stock, or does that only apply when combined with the E34 M5 PP? The guys at BW said the E34 M5 disc works well with the stock E36 M3 PP, but can anyone here confirm?

95maxrider
95maxrider Reader
6/16/17 8:20 a.m.

Update time!

Before the motor swap began, I took the car to a rally-x event. I burped the cooling system as best I could, and prayed it would hold together for a day of racing. We're only racing at the farm this year, which means all dirt, all the time. I have a feeling the more wide open surface of Frostburg would have probably been to my car's advantage, as the courses we have at the farm seem to be a little more tighter and technical. Oh well, gotta learn to adapt!

I removed the FSB in an attempt to get rid of some understeer, but since it had been like 6 months since I had last driven the car at a rally-x event, it was tough to really compare. All I know is that I was rarely frustrated by understeer at this event, so I guess it did something! I was hitting cones left and right, and I think I need to remove the RSB as well, but it's the only thing keeping pressure on the rear springs, and I'm worried they might pop out if a rear wheel goes to full droop when on course. I may have to revisit the droop/limit straps again in the future....

Overall the car felt and ran great, but I need to relearn some car control. I think I ended up in 6th place out of about 12 people, averaging something like one second slower per run than the top guys.

Steven Phillips took some great pictures of the event, so I hope he doesn't mind me posting them here. Thanks Steven!!!

I also made a little video of my best AM/PM runs, so check it out!

https://youtu.be/18pw7LA2Kzg

Anyways, with that out of the way, I'll start documenting the engine swap process!

95maxrider
95maxrider Reader
6/16/17 8:24 a.m.

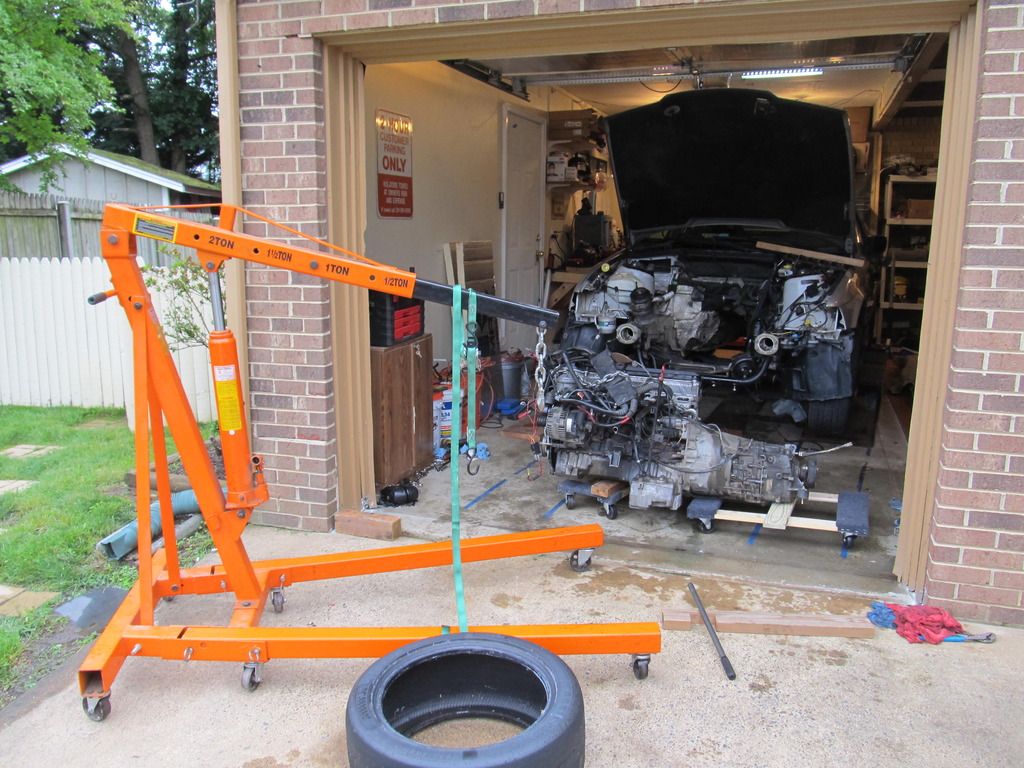
Due to the layout of my garage, I had to think very hard about how to best do an engine swap. Normally I just pull the car straight in, but the area where the front of the car would be is a mess of intact tiles, broken tiles, concrete, fake wood floors, and the hydraulic line for the lift. Not exactly the ideal place to be messing around with an engine on a hoist. That meant I had to back the car in, which didn't leave much flat space in front of the car due to the driveway sloping away from the house. I definitely didn't want my engine to roll down the driveway on the hoist either! With that now clear, it should hopefully make a little more sense why I chose to pull off the whole front end of the car, minus the condenser.

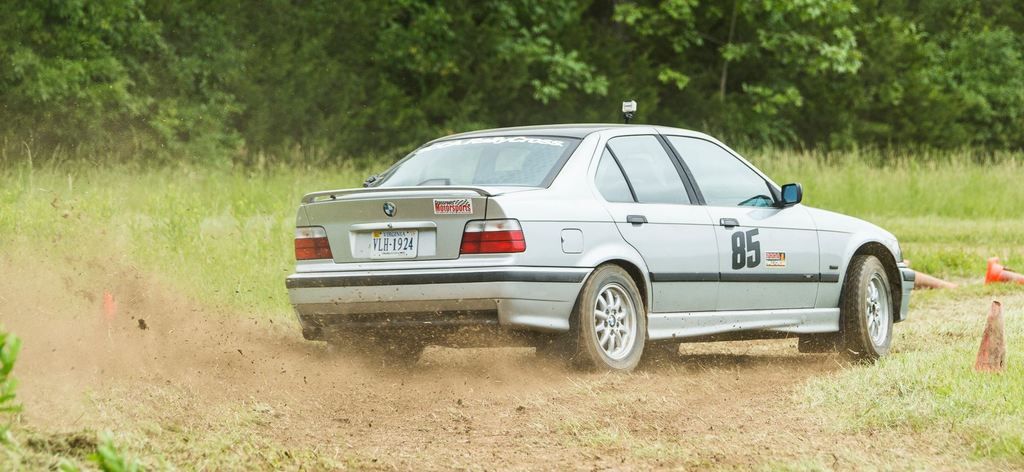
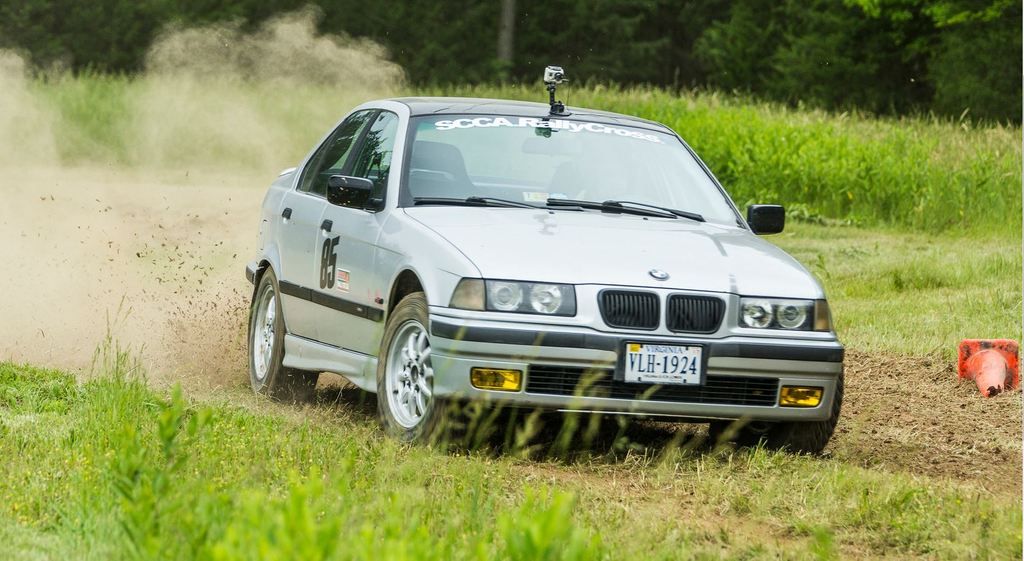
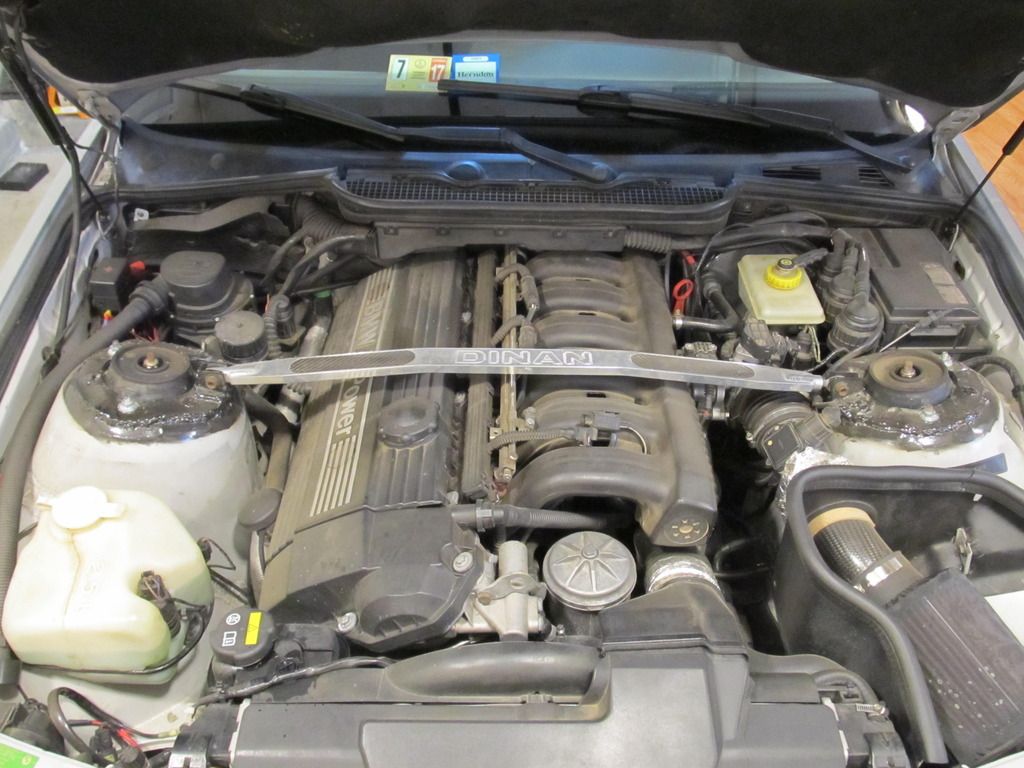
Last shot of the old motor intact in the car:

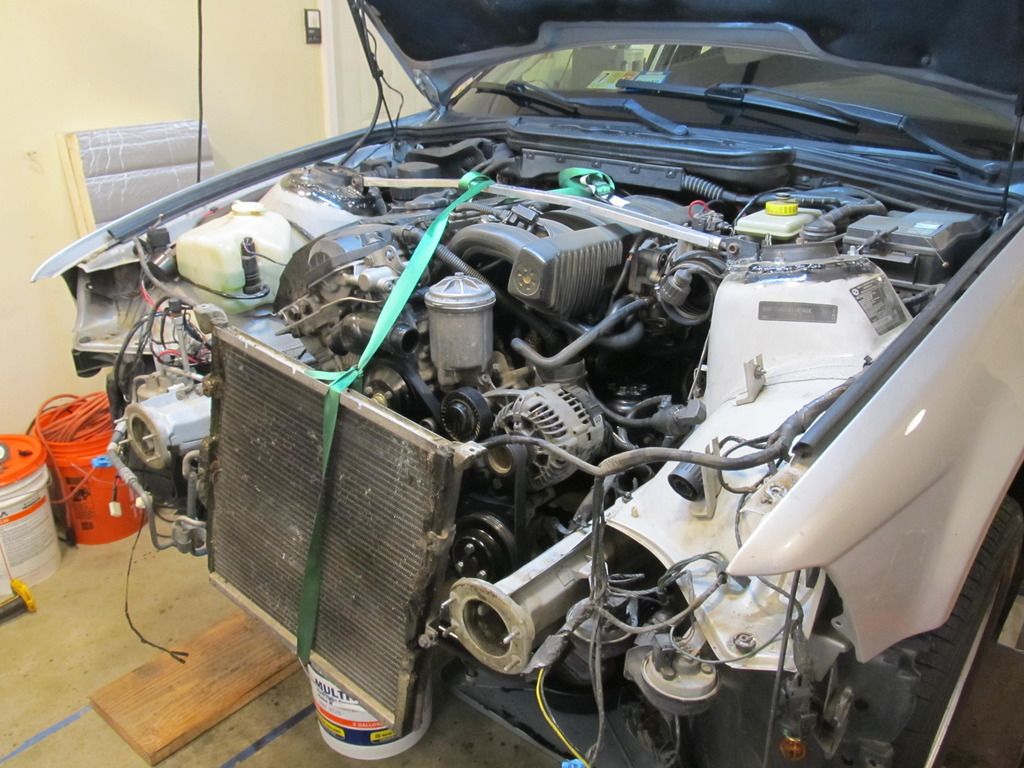
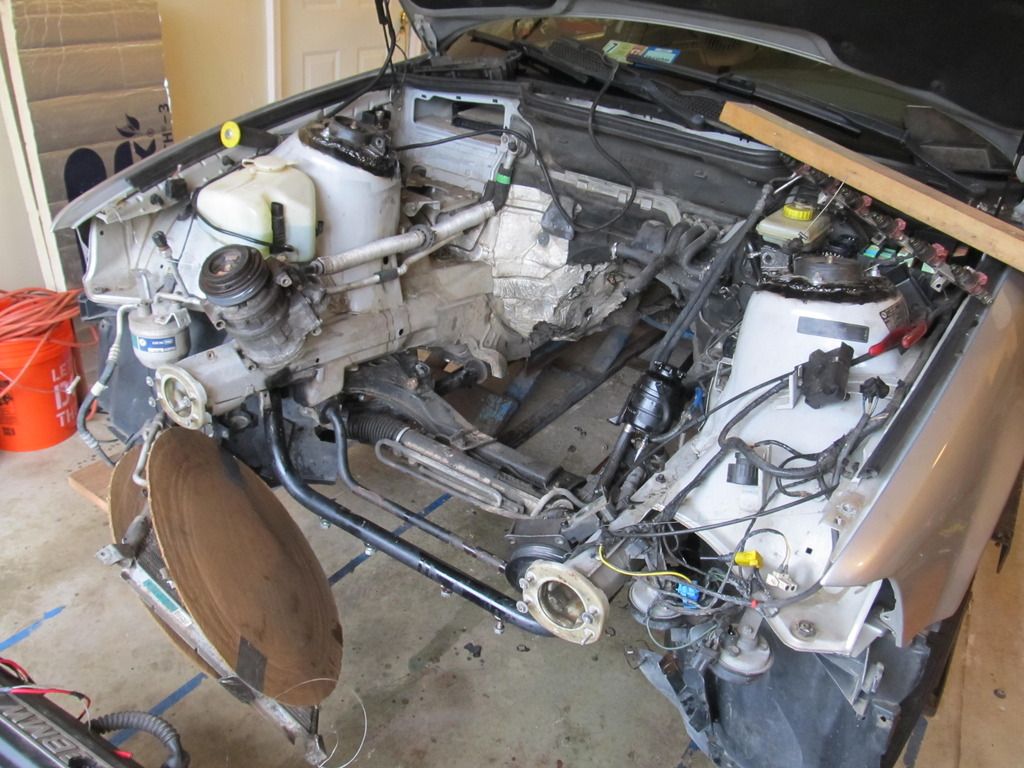
Most of the front came off pretty easily:

Thankfully Josh came over to help with the extraction, and I'm so thankful he did, because manuevering around the steering shaft was quite a pain. We had to use a ratchet strap to pull the motor towards the PS to get it to clear:

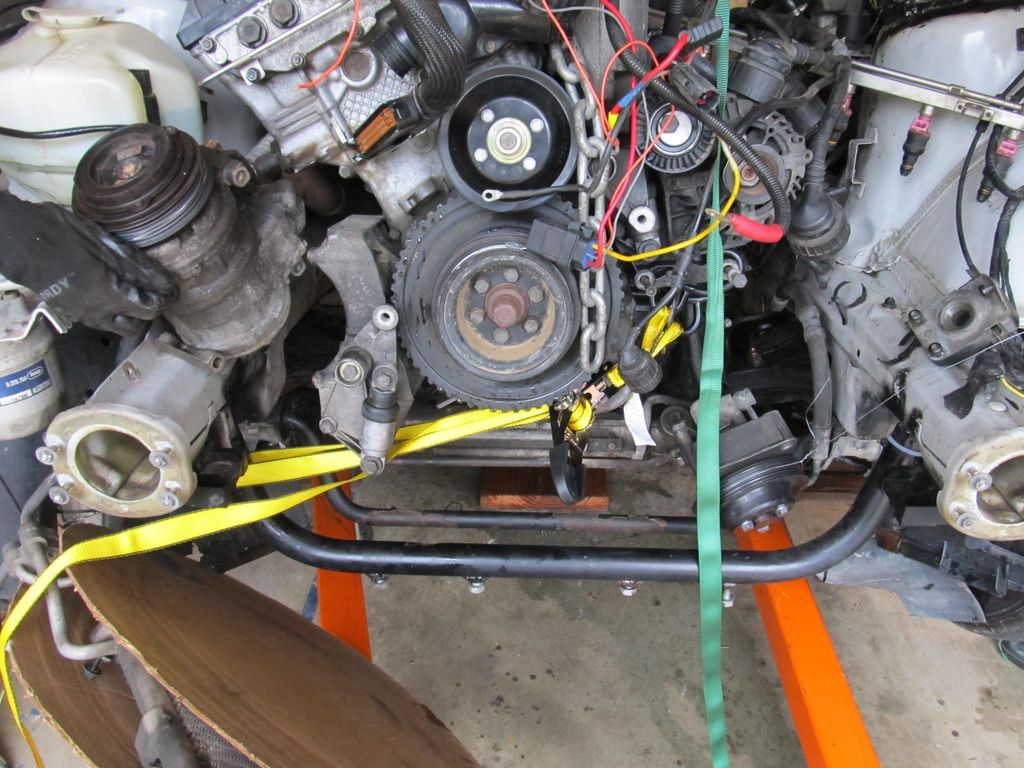
But it finally came out. Success!

Ok, now the real work begins....

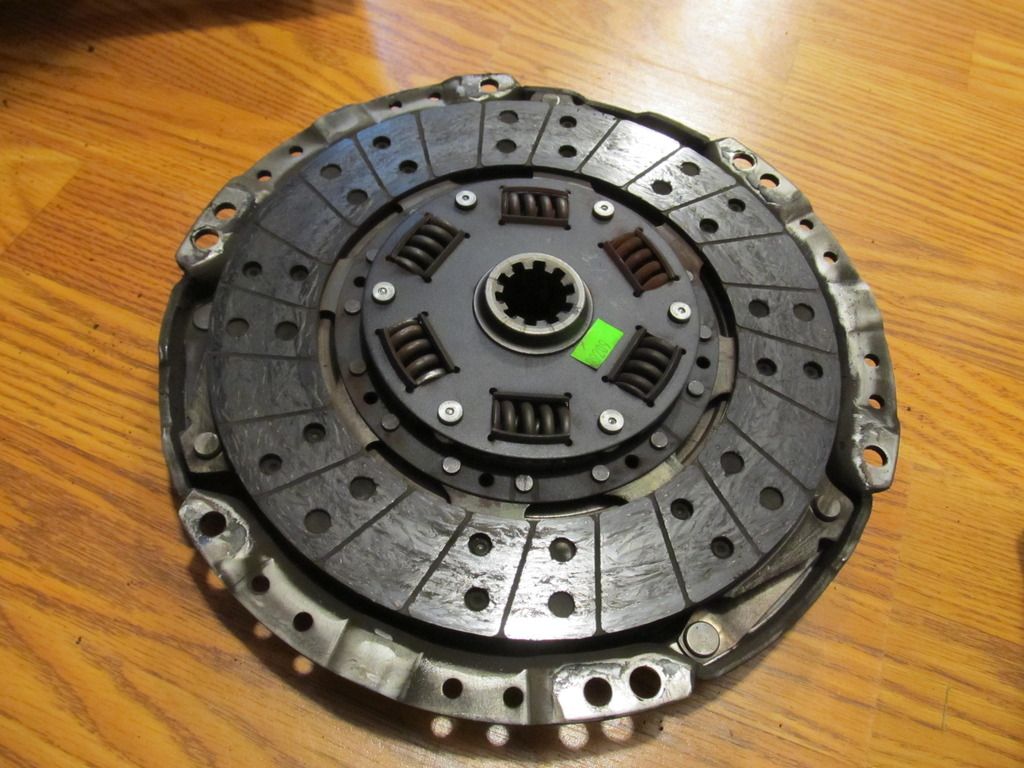
One of the first things I did was separate the trans from the motor. I was greeted by what appeared to be a nearly worn out clutch disc...

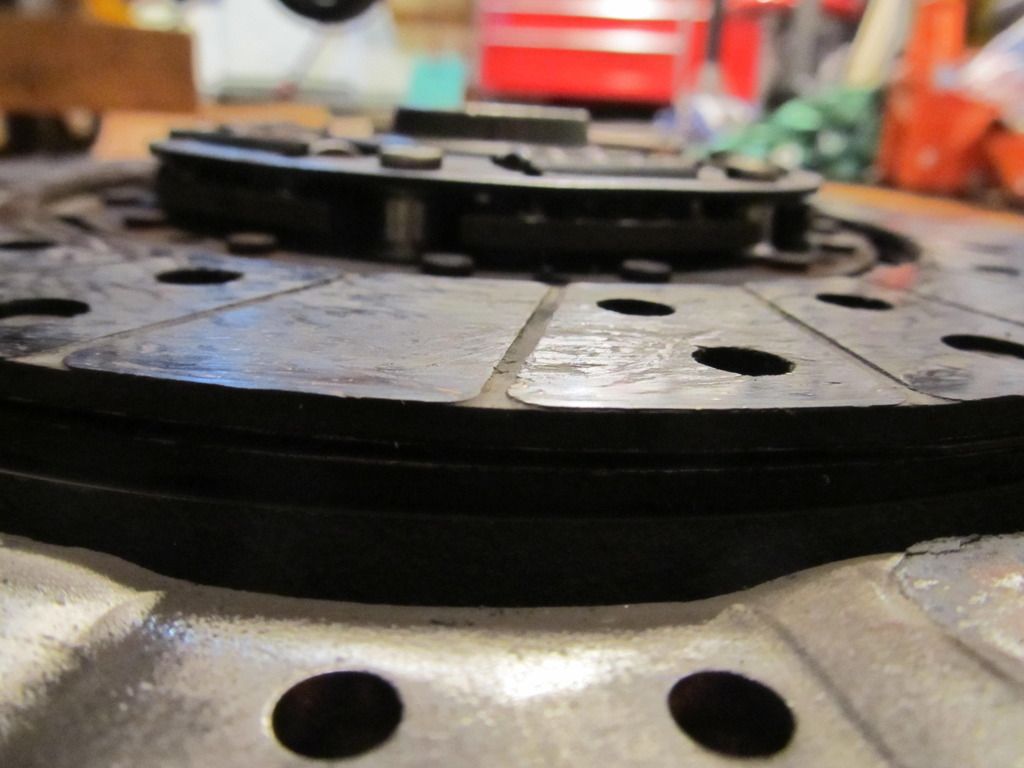
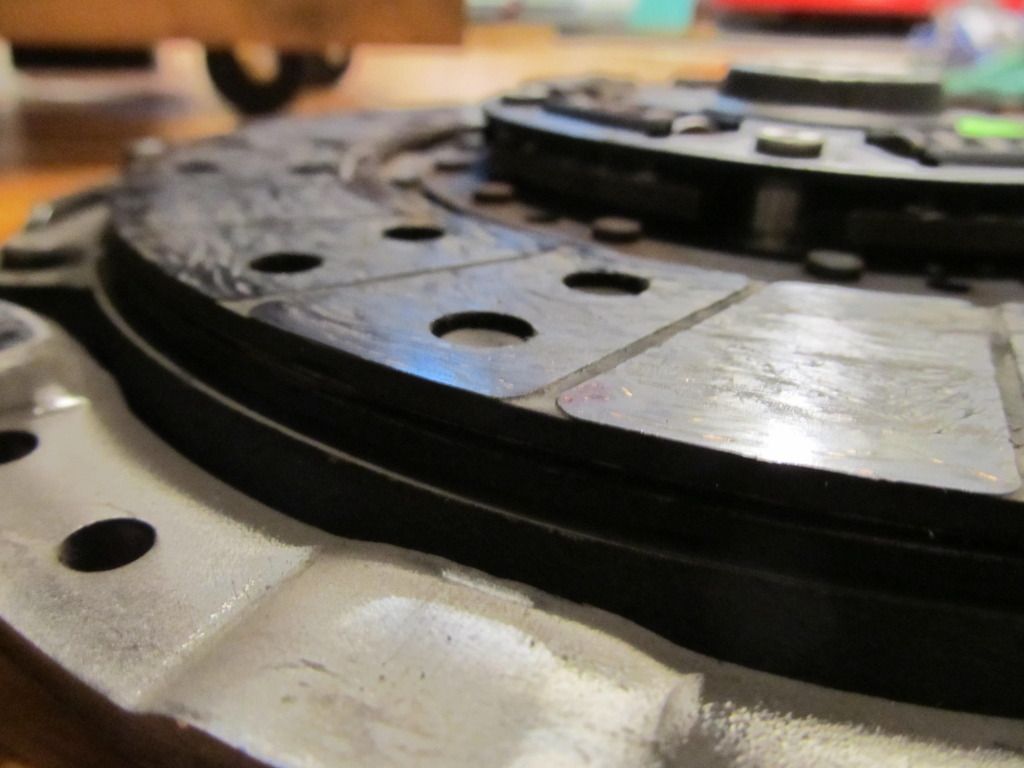
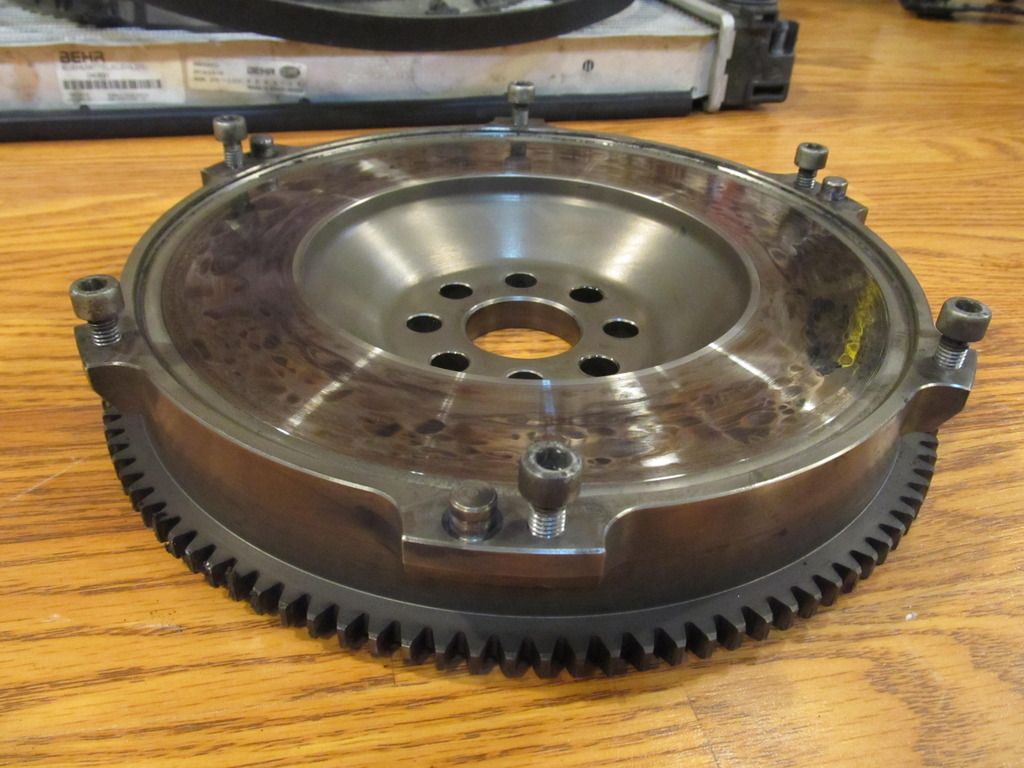
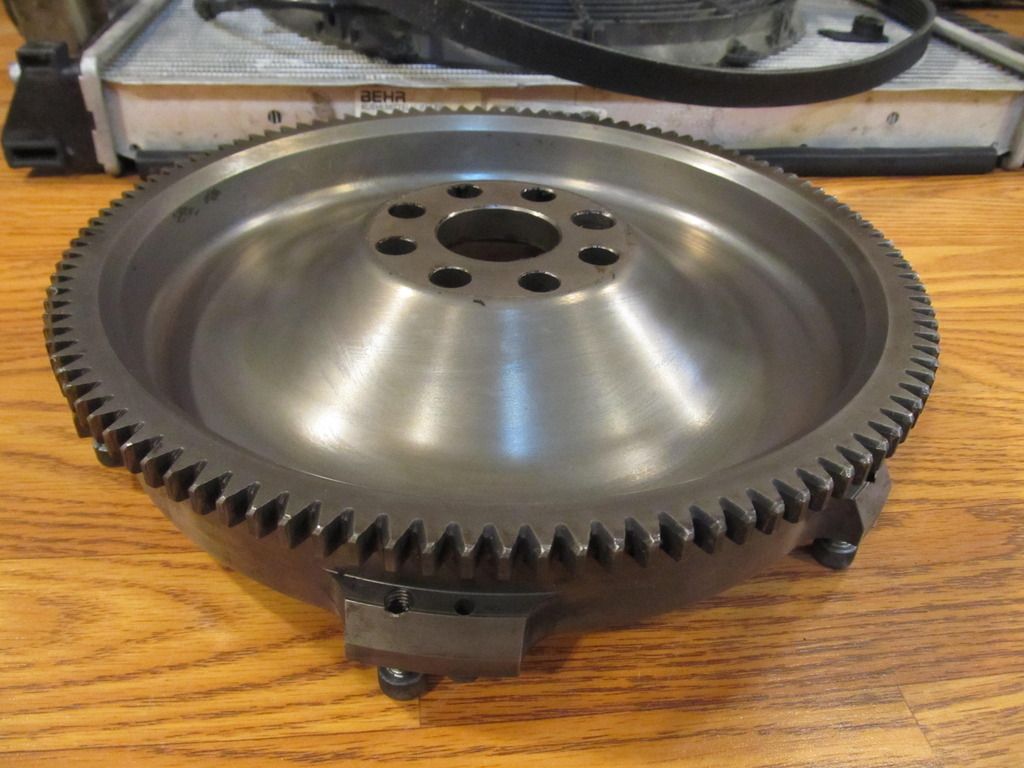
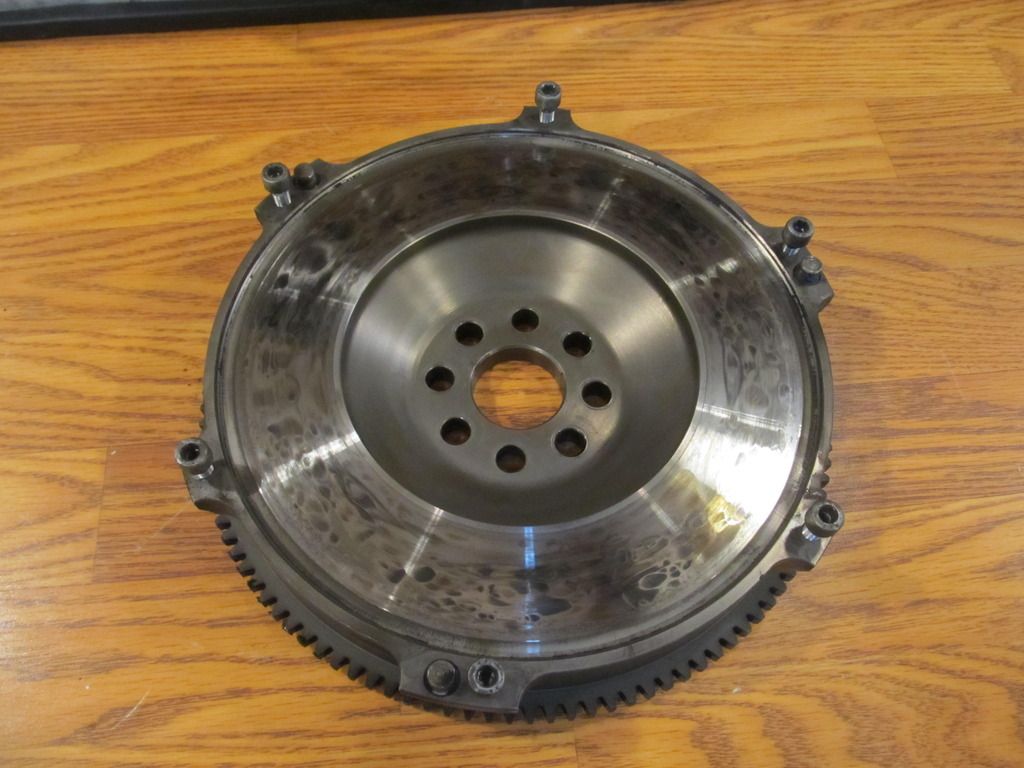
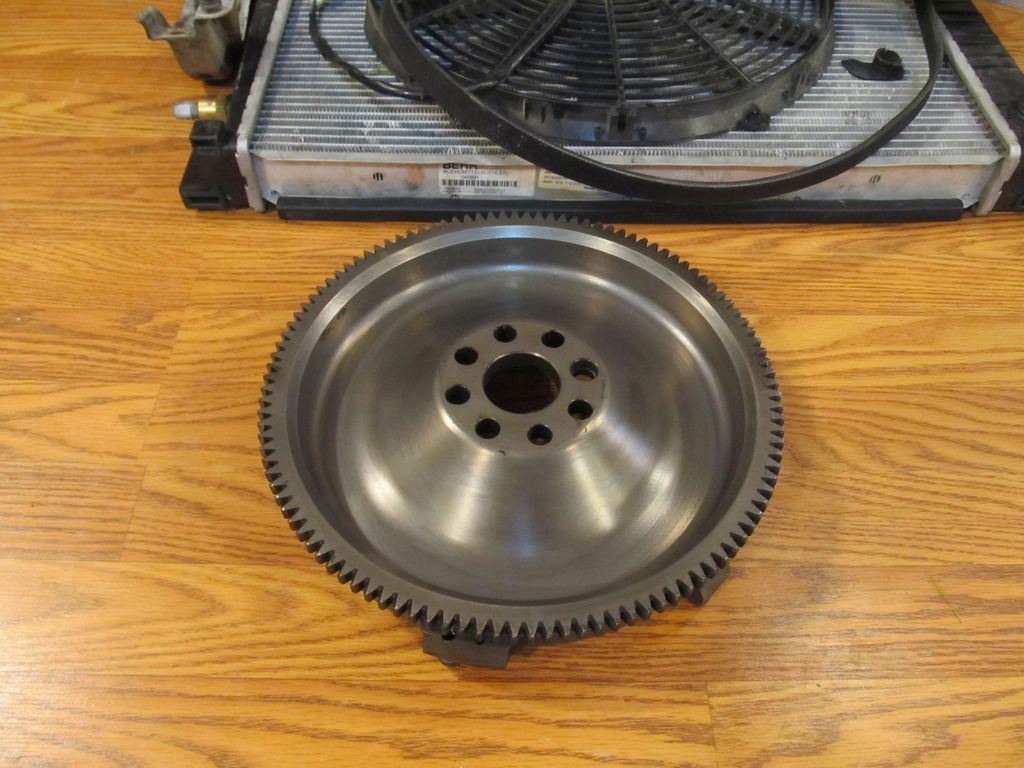
And a mystery flywheel that needs to be resurfaced:

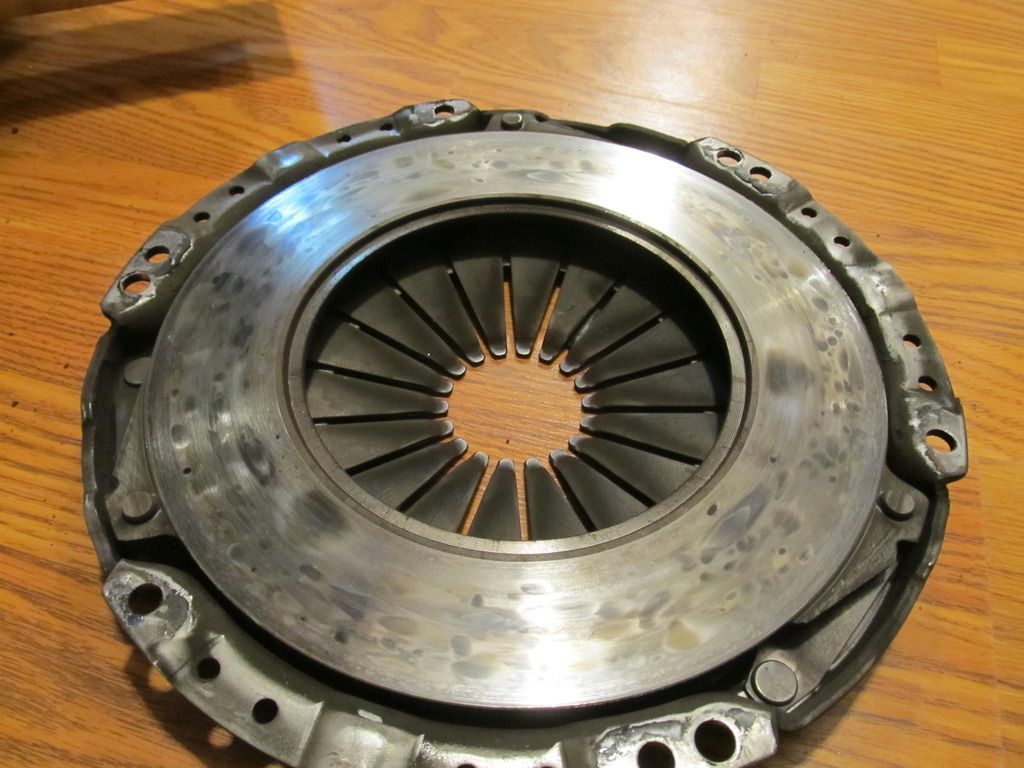
The pressure plate also looked a little tired...

Since this was an unexpected surprise, and I'm still reeling from buying a used motor, I've been scrambling to figure out the cheapest, but still reliable way to get this thing buttoned up. At this point, I'm pretty sure that I have an Ebay/GripForce Stage 2 kit in the car, and after all I've read, I'm thinking about getting the same setup, just new. They're cheap as hell and seem to get good enough reviews, at least in the E36 application. I considered the E34 M5 clutch route, but could never be sure it would work with my flywheel. I considered the UUC setup for about five minutes before I started reading reviews. The stuff on BW is all out of my budget.

As of right now, I still haven't even ordered all my other parts, because I keep finding more things I want to "do while I'm in there". Famous last words. Because if I keep going like I'm inclined to, I'll never come out. I was this close to ordering new rod bearings until I read more about doing them properly, and I just don't think I'm up for it. I will probably be installing a baffled oil pan since my pan gasket is leaking real bad on the new motor. Oh, and of course the reinforced Z3 oil pickup tube, because I'm in there!

The input and output shaft seals for the trans look dry, and I'm not super interested in replacing them if they're fine. Is that foolish? The PO of the new engine said he replaced the rear main seal, and it appears pretty dry, but again....I'm already in there. But $100 ain't chump change either. Too many decisions.....

95maxrider
95maxrider Reader
8/27/17 6:58 p.m.

Hey everyone, I just got done installing a fresher S52 and after a spin around the block I've got four codes:

P0170- Fuel trim bank 1 P0173- Fuel trim bank 2 P1188- Fuel Control Bank 1 sensor P1189- Fuel Control Bank 2 sensor

The car also refused to crank or turn over with the hood shut, but it started right up with the hood open!

Here are my questions-

I'm concerned that I might have hooked up the pre-cat O2 sensors to the wrong plugs. Since I think the wires for them are the same length, I assume the bank 2/rear header O2 plugs into the front plug on top of the motor, and the front header O2 plugs into the rearward plug on top of the motor?

Also, I removed the secondary air pump and installed Turner block off plates on the stock manifolds. I have not yet gotten a tune to eliminate that function, so that may throw a code. From what I've read though, that only activates when it's colder out, and it's about 70* right now. Plus, wouldn't that throw a more specific code?

The motor has rebuilt/cleaned fuel injectors, new spark plugs, new intake elbow, no vacuum leaks, idles fine, etc. Can anyone give me some ideas of what to look for? Thank you!!!

jfryjfry
jfryjfry HalfDork
8/28/17 4:31 p.m.

A quick note on your rear sway bar.... the shocks are what keep the control arms from over extending and losing the spring, not the bar so you can remove it at will

:)

Good luck with the new engine!

95maxrider
95maxrider Reader
8/28/17 8:05 p.m.

UPDATE: I did a quick look around the engine but saw no obvious vacuum leaks. I didn't do a smoke test because I was pretty sure I smelled fuel and I wanted to deal with that first. While the motor was out I decided to track down the fuel smell that had been going on for a while. Turns out the top of the pump on the DS had been getting all wet and dripping down the tank. I replaced the big round gasket for the cap, along with the hose and clamp. Well, it was still leaking today despite the clamp being on very tight. I'm using HP fuel line and fuel line hose clamps, so I can't imagine how they can be leaking. Maybe the nipple has a crack in it?

I noticed when I was doing the job that the base of the nipple appeared to be chipped (under the hose), and I'm wondering if that could be the source. Is that supposed to be all normal and smooth, or is mine messed up?

95maxrider
95maxrider Reader
8/28/17 8:15 p.m.

In reply to jfryjfry:

Can I damage the shocks by going full droop? And I wasn't concerned about over extending the control arms as much the springs falling out of their mounts and the car bottoming out hard on the shocks only.

95maxrider
95maxrider Reader
8/31/17 6:27 p.m.

Alrighty, well I installed a new/used fuel sender unit after finding a hairline crack in mine, and that seems to have solved the fuel leak. Hooray! I also put on some new/used intake boot clamps since mine appeared to be a little out of round, and made sure they were all super tight.

I then cleared the 4 codes and went for a drive. After an hour they still haven't come back! However, I'm still having the intermittent no start problem. At first I thought it was related to the hood, because the car didn't seem to want to start with the hood closed. Same thing happened today when I took it for a drive. I came home, ate dinner, and wanted to go do some more testing. Now, the car won't start at all. I tried both of my keys, hood up and down, and nothing. No crank, no noises, nothing. The dash lights up though. I'm thinking it's either EWS or started related, but I'm not sure where to start my troubleshooting. The car never did this before the motor swap. The newer motor came with a starter, and I can't remember if that's the one I installed or if I used my old one. When the car does start, it does so quickly and normally. Anyone have any guesses at to what the problem may be?

¯\_(ツ)_/¯
¯\_(ツ)_/¯ UltraDork
9/1/17 5:28 a.m.

My first step would be to get a voltmeter on the starter- if it gets 12v when you turn the key, then it's probably a starter issue. If not, relay, ignition, or some sort of security interlock would be the next things to check.

95maxrider
95maxrider Reader
9/25/17 10:45 a.m.

This cooling system is kicking my ass and I need some help!

I took a week or so off from touching the car to take care of some yard work.  The last time I tried to burp the cooling system it wasn't circulating (the lower hose was cool and not much hot air was coming from the vents) and it just kept overflowing from the expansion tank, so I turned it off and let it sit for a week.  I think I added a bit of coolant to it after turning it off.  Well, some 10 days later I decided to disassemble the whole system this weekend and see if I could find a problem.  Well, I opened up the cap and was greeted by a geyser of coolant, just like when I had my last motor!  It must have spit out at least half a gallon.  I disassembled everything, and it all checked out.  There was no blockage in the radiator, and the thermostat passed the boiling water test on the stove.  The cap is OEM BMW and only has a few hundred miles on it.  The OEM BMW expansion tank was installed by the previous owner and probably has 10,000 miles on it.  I installed the Stewart WP last year and it has less than 5,000 miles on it.

What in the world is going on here?  How did the system pressurize itself so much after I had turned the car off?  Why isn't the coolant circulating???

95maxrider
95maxrider Reader
9/25/17 10:46 a.m.

In reply to ¯\_(ツ)_/¯ :

Turns out the starting problem was due to the new clutch stop I had installed during the motor swap.  It's extra height kept the pedal from depressing the clutch switch plunger all the way, so I glued a bunch of pennies together and stuck them to the back of the pedal.  Starting problem solved!

¯\_(ツ)_/¯
¯\_(ツ)_/¯ UltraDork
9/25/17 11:20 a.m.

Cooling system not circulating does not compute with overflowing from expansion tank- that water is getting pushed somehow.  I think you have a big berkeleying bubble in there somewhere.  How high are you getting the front of the car?  My usual procedure is this:  

  1. Get radiator cap as high as possible relative to other cooling system parts
  2. Fill with water
  3. Jiggle all the hoses until it doesn't bubble or take any more coolant
  4. Start engine
  5. With engine running, jiggle all the hoses some more, make sure you get the heater lines too
  6. Use any available bleed ports to bleed more air out
  7. As a final step, do whatever the manufacturer says to do when filling coolant
1 ... 7 8 9 10 11 ... 20

You'll need to log in to post.

Our Preferred Partners
GZgoK4u9pCeVKS15H9ur4SiLiEke14FZzRwUKxVAuc1YhF1pVF8VTK3ojQrrWQtW