1 2
84FSP
84FSP New Reader
2/10/13 1:50 p.m.

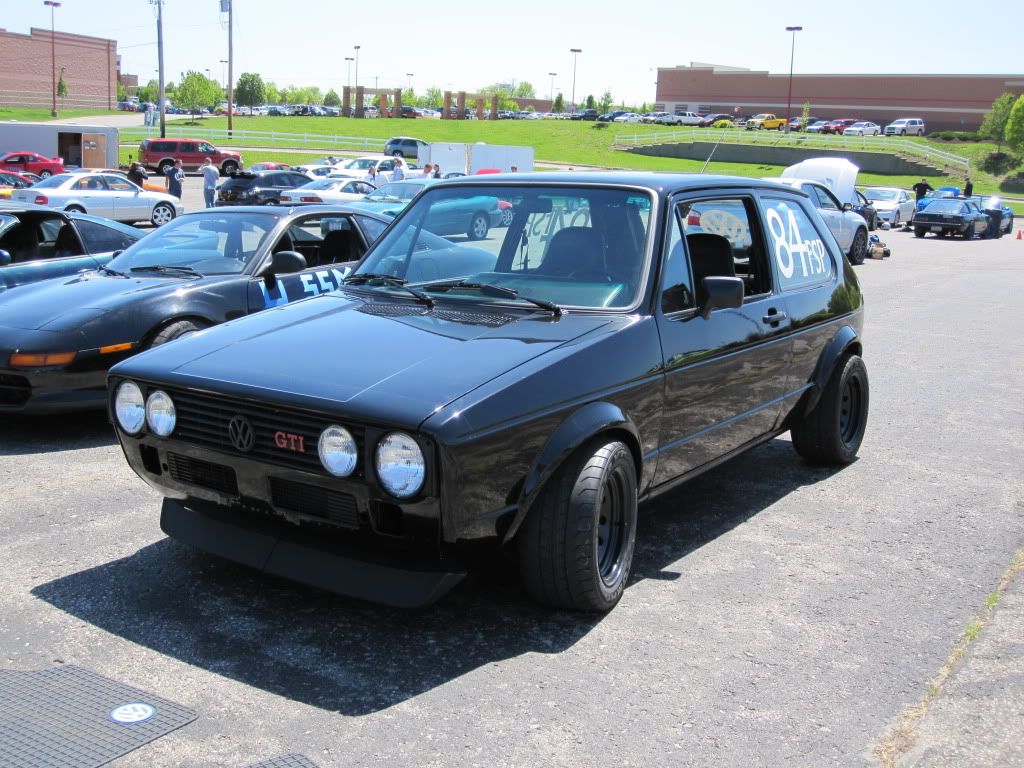
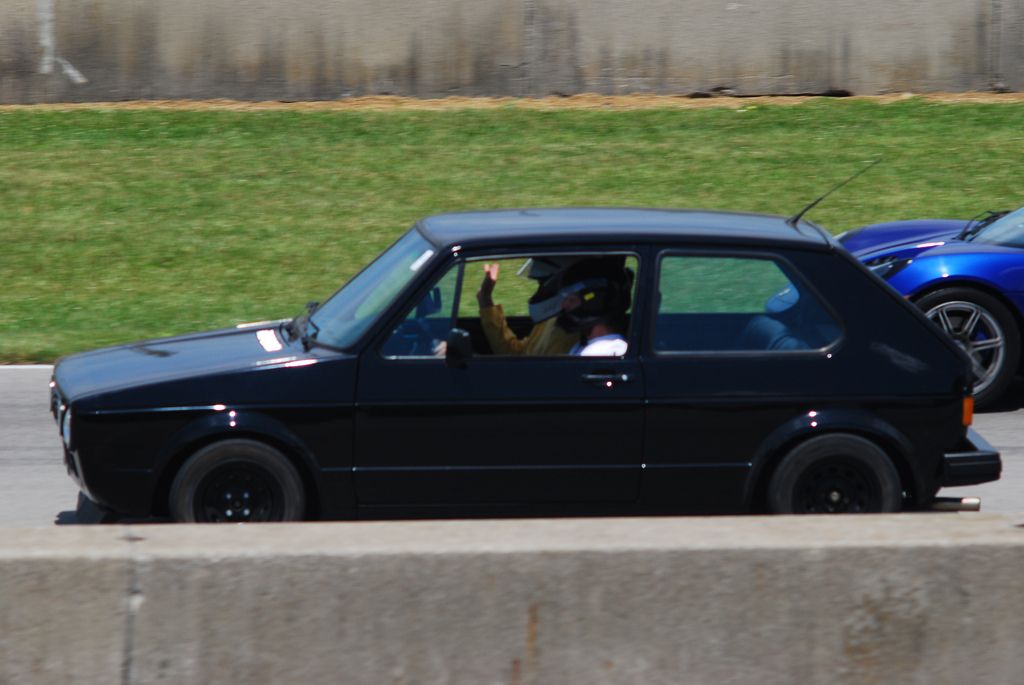
Eagles Canyon raceway here in Dallas had a free lapping day last weekend and I had the chance to bring out El Rabbito for the afternoon. Had a great time running some decent laps. This is finally the motivation I needed to get my suspension upgrade put in.

<img src="

<img src=" photo PartsVictim2.jpg" />

El Rabbito is primarily an autox toy and comes out for weekend runs and the occasional commute to the office. The car has been a work in progress over the last couple of years. It was acquired from my brother who had previously run the car along with another parts car full of goodies. Both beasts were northern cars and thus had lots of rust issues to get resolved. As often happens with body work what was going to be a 7 out of 10 race toy then turned into a 9.5 out of 10 shiny race toy.

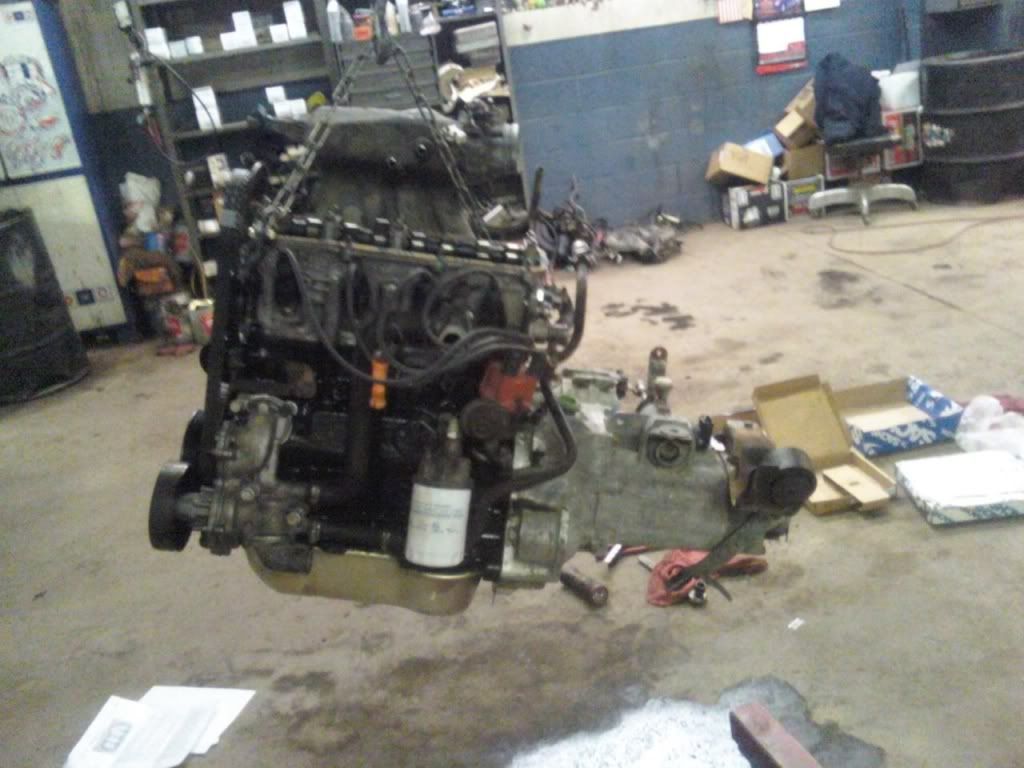
Breezing over that 18 months of rusty resurrection the motor was the next thing to go. I had unfortunately not learned the breather tube issue these cars have at high rpms on the track until after I wasted the rings. In a 20 minute track session it pumped out 4 quarts of oil on the track and munched the rings. The new engine is fairly rowdy for a class built motor and should now be putting down around 95hp at the wheels - woot.

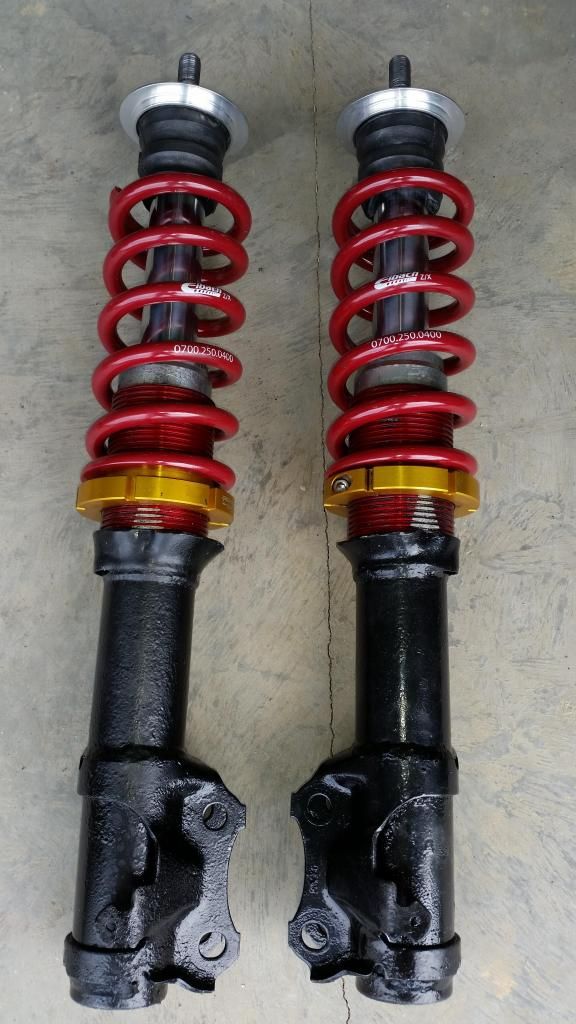
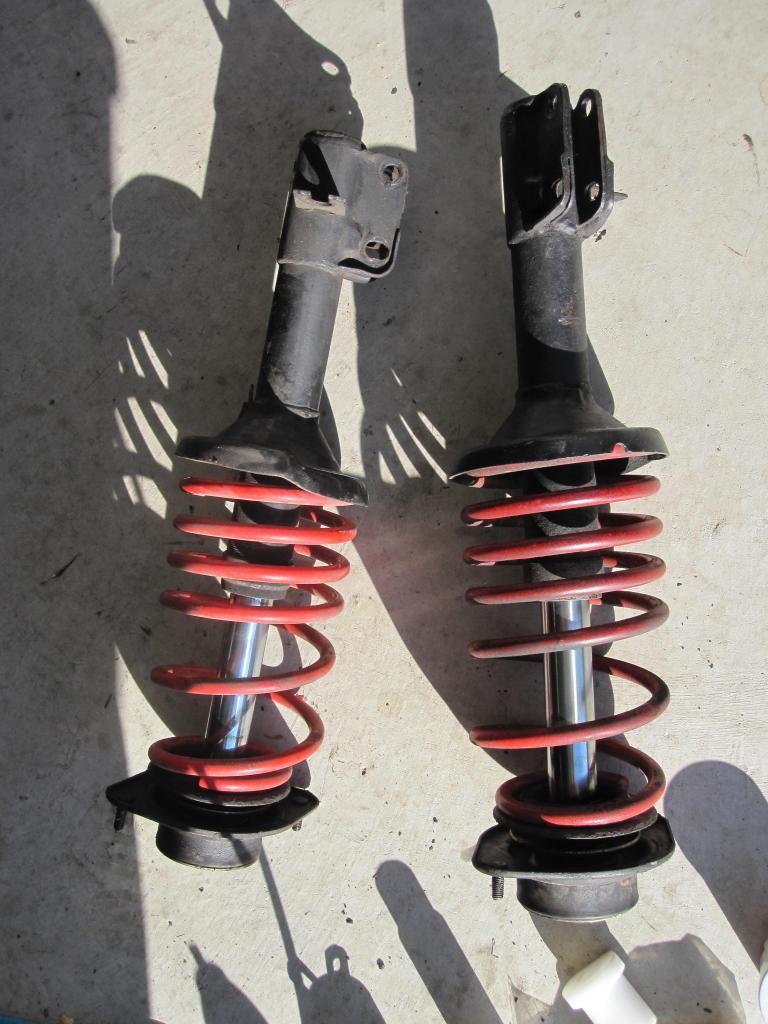
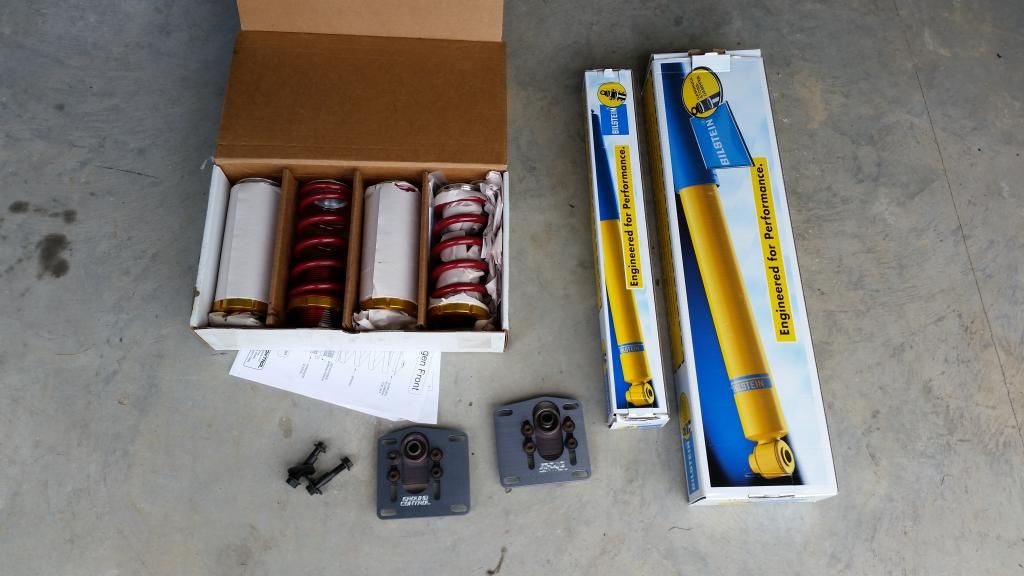
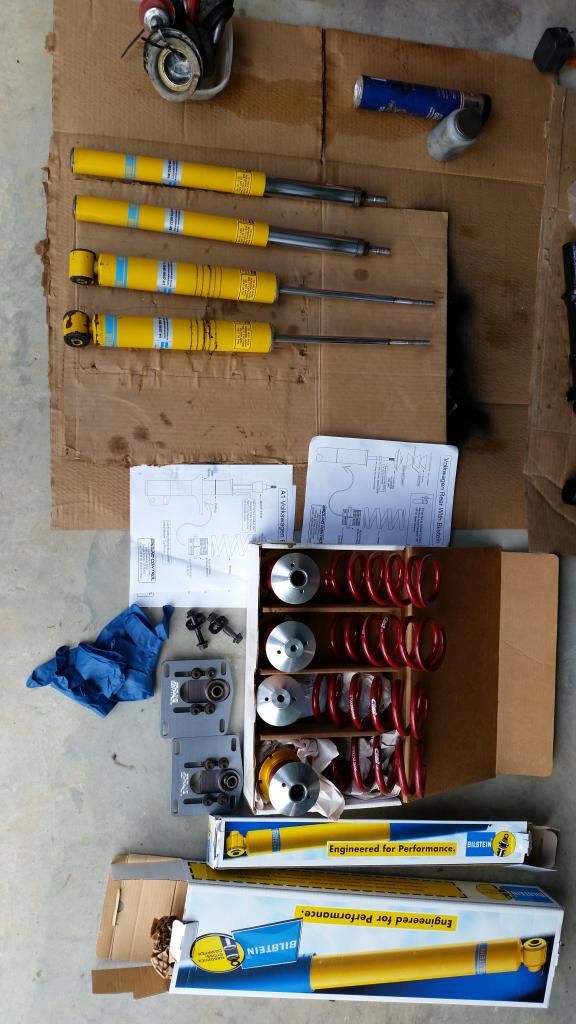
Now for the suspension goodies. 
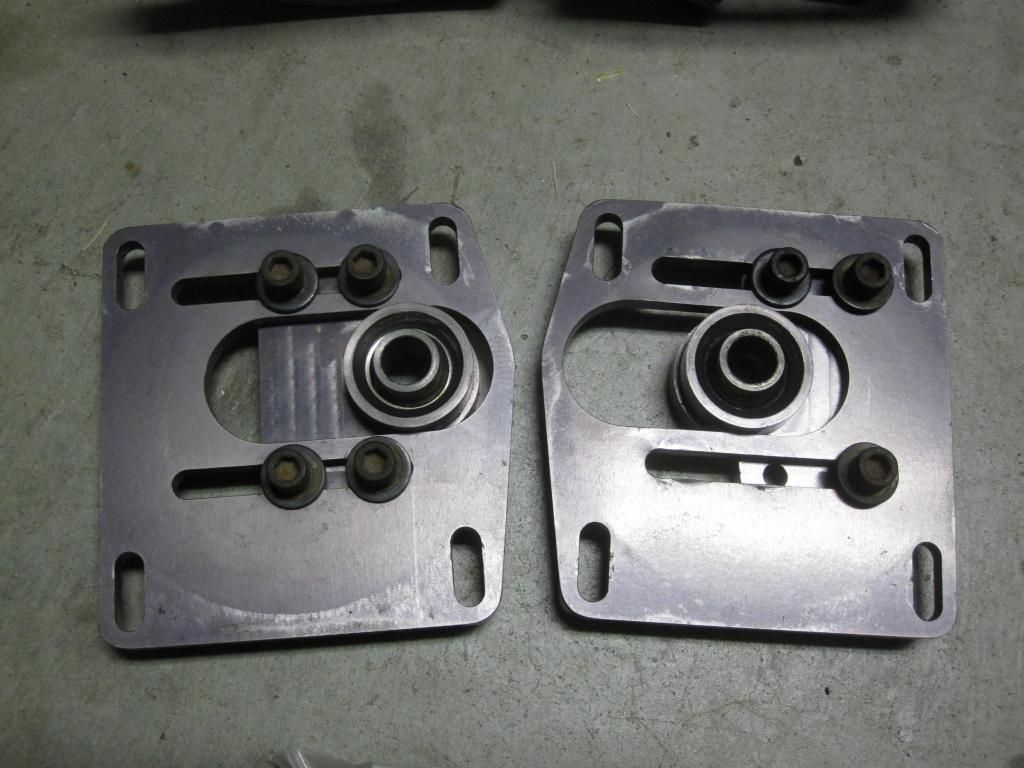
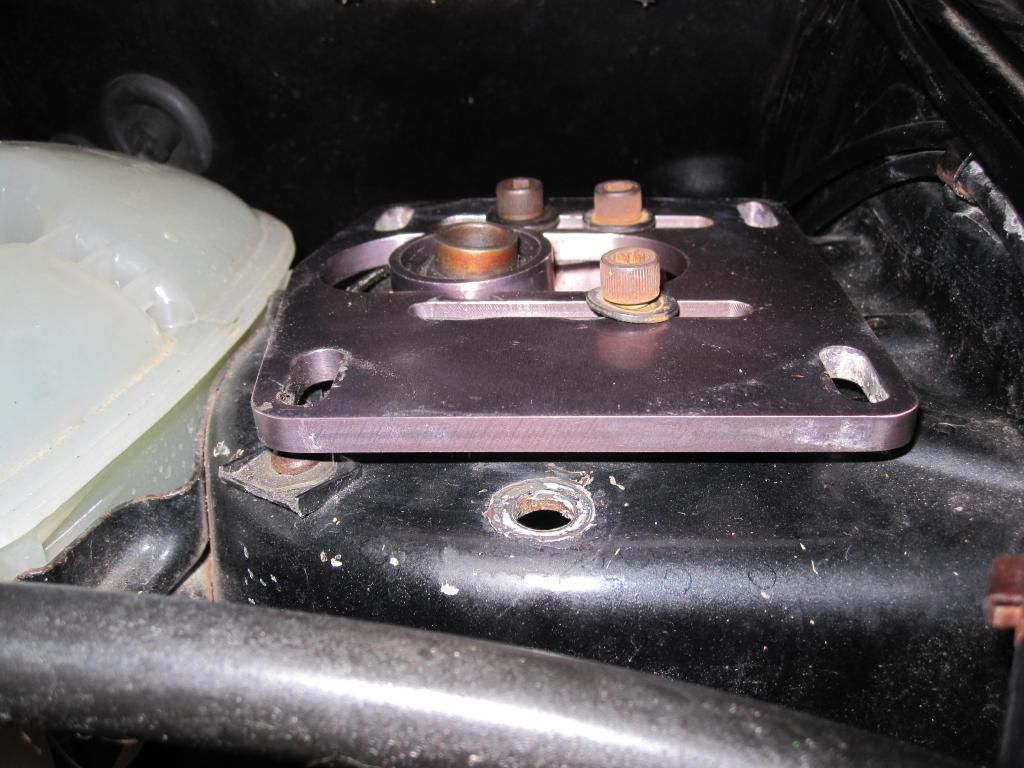
Well used ground control plates Unknown vintage 450 lb. front springs 
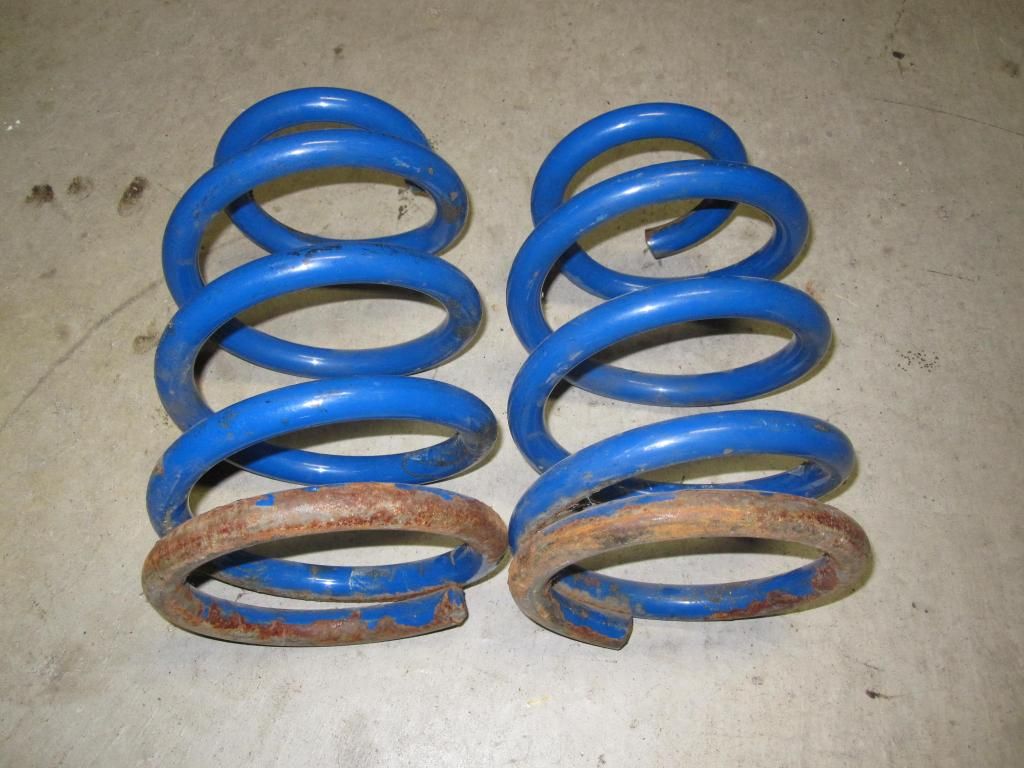
H&r rear 500lb. Spring set 
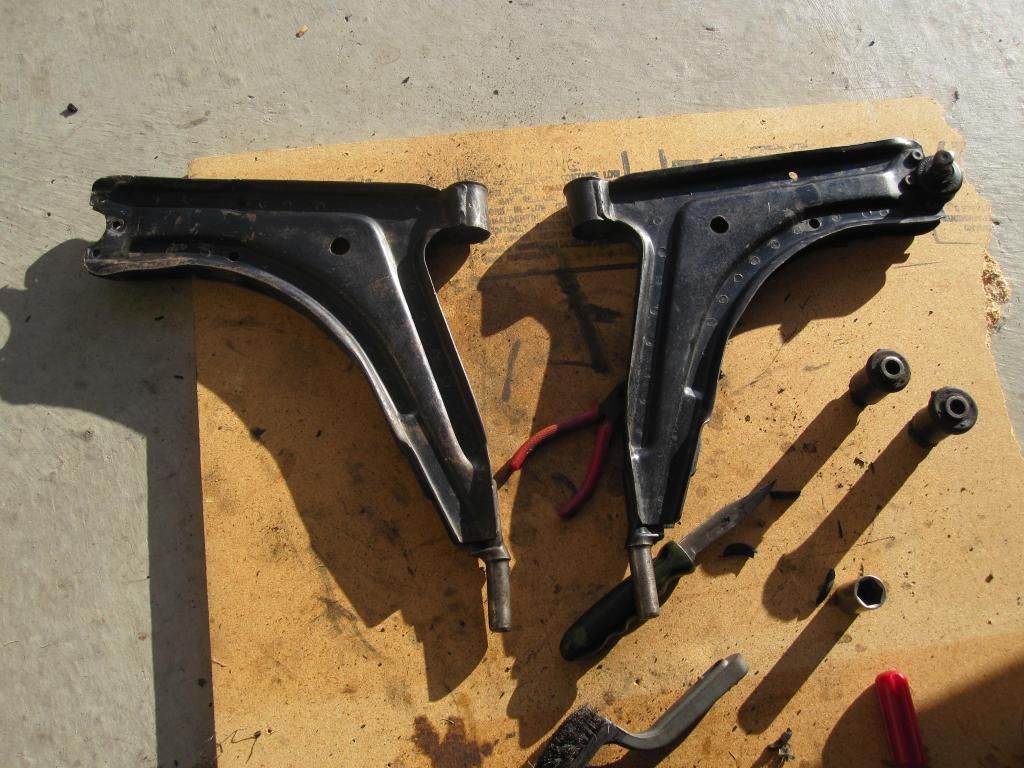
Lella sport delrin bushings for front and rear.

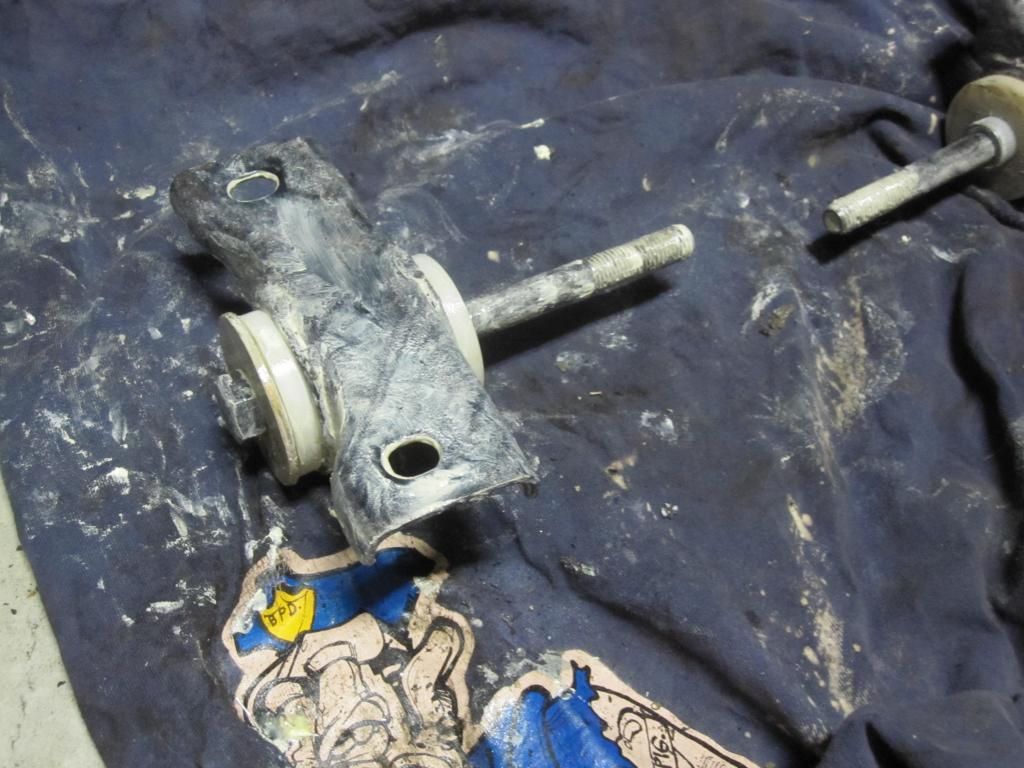
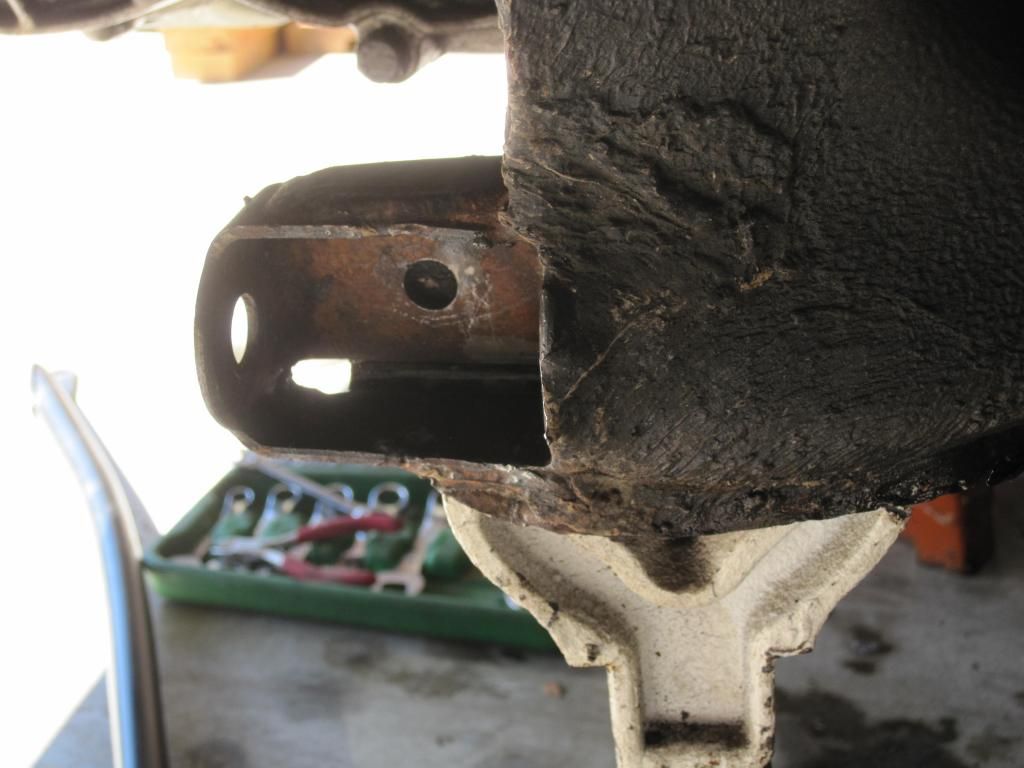
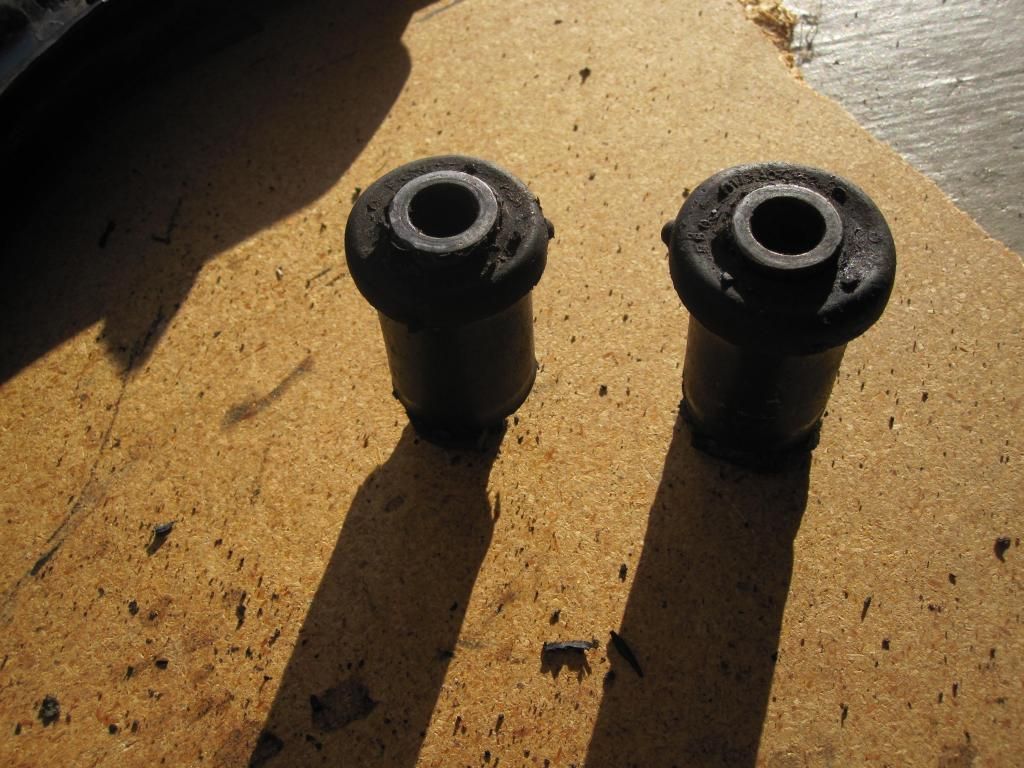
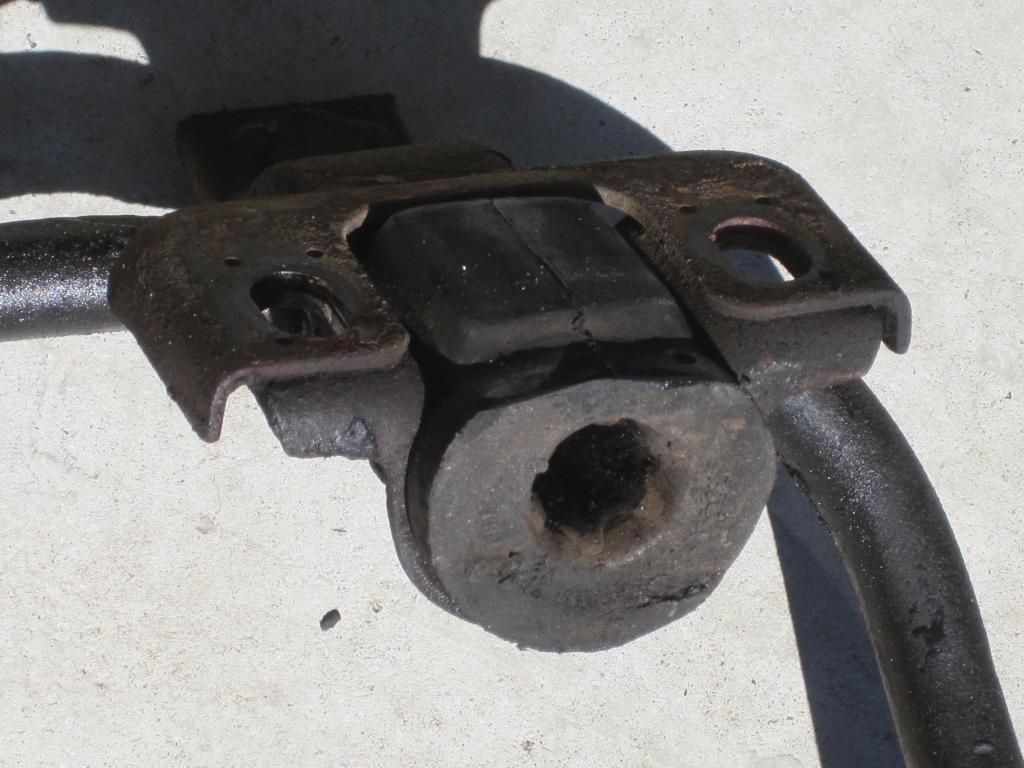
So the first plan of action was to get the rear beam unbolted and dropped so i could get the rear beam bushings in. Surprisingly the didn't look that bad for 30 year old rubber bits. Had to a bit of slice and dice...

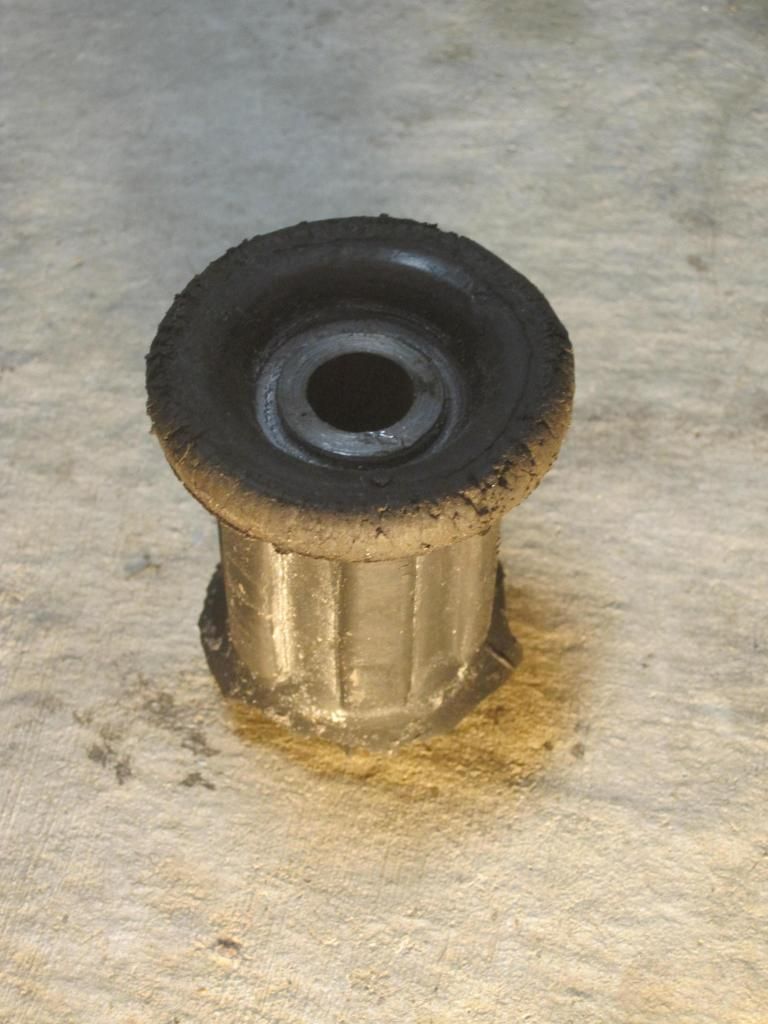
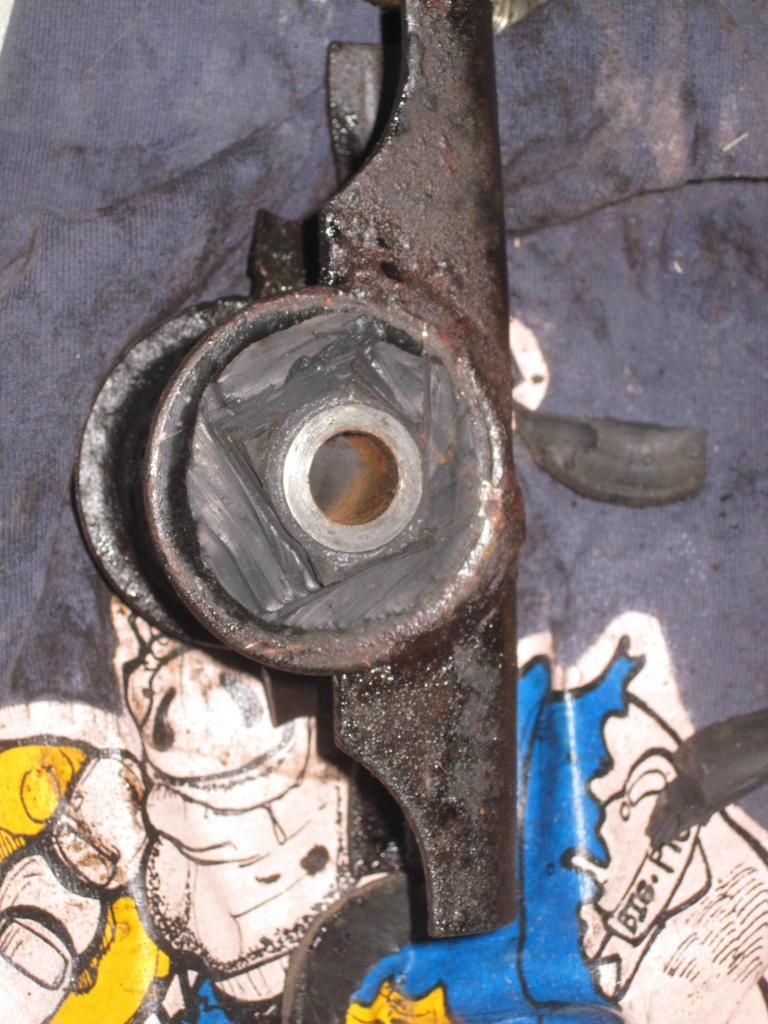
With a bench vise press the old bushings came out easy. With some wire wheel action and lithium grease the new bushings fit nice and snug.

Torqued to the 60 ft lbs and back in we go.

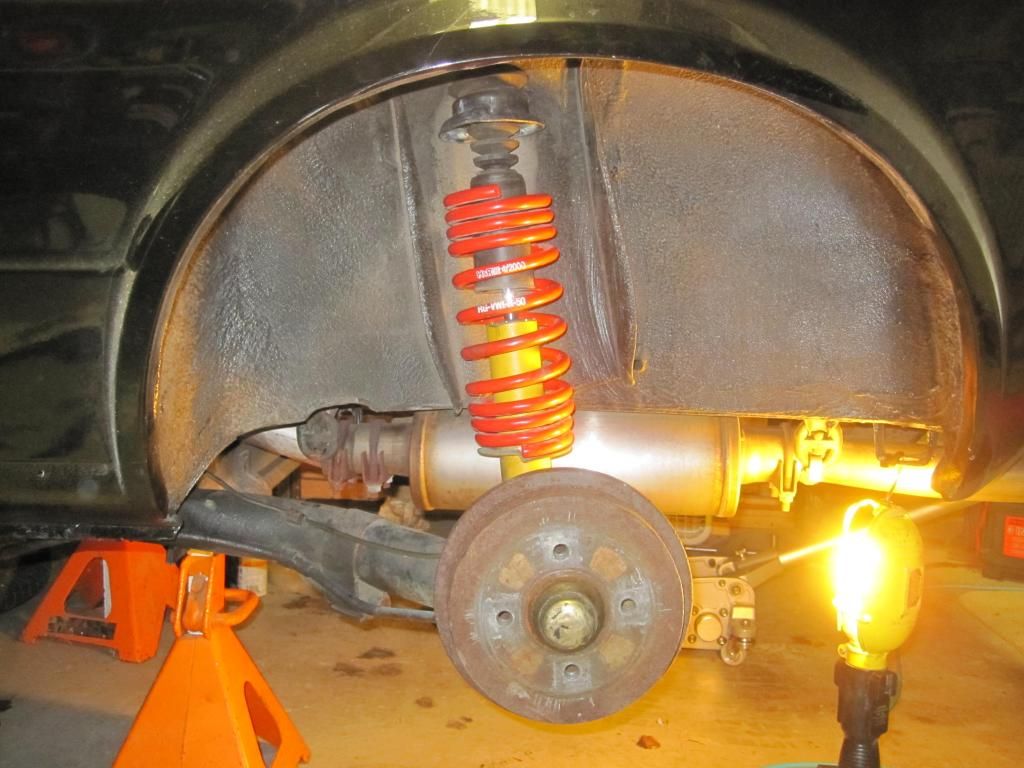
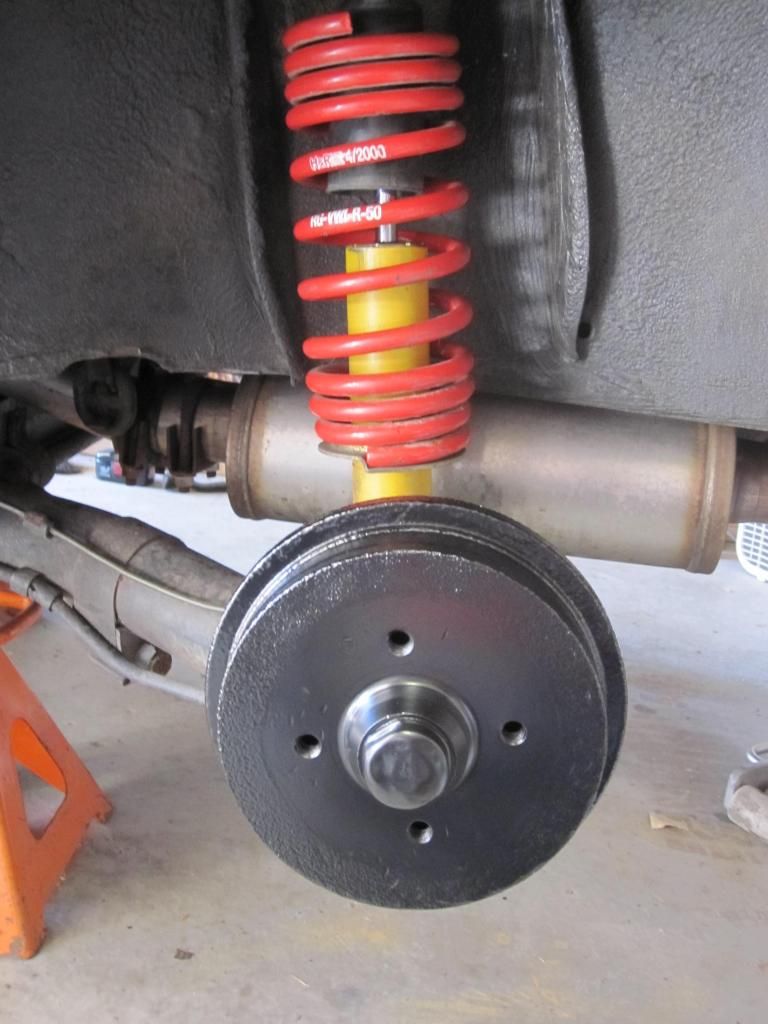
So the rear springs are a bit short... They'll be fine when loaded but a bit annoying when up in the air. I won't know where to set the rear perches until i get it back on the ground with the front setup in. I'd like to do a bit of a front rear balance with the adjustability of the rears as the front will be static. In addition I'll need to get the alignment specs for the rear axle so i can pull and shim up some more aggressive settings with around 2 degrees negative camber and approximately a 1/16" toe out. The last alignment i had with the previous setup showed some side to side variation implying a bit of a tweak in the beam. I'm thinking i should be able to shim for that but haven't decided the best way to handle it.

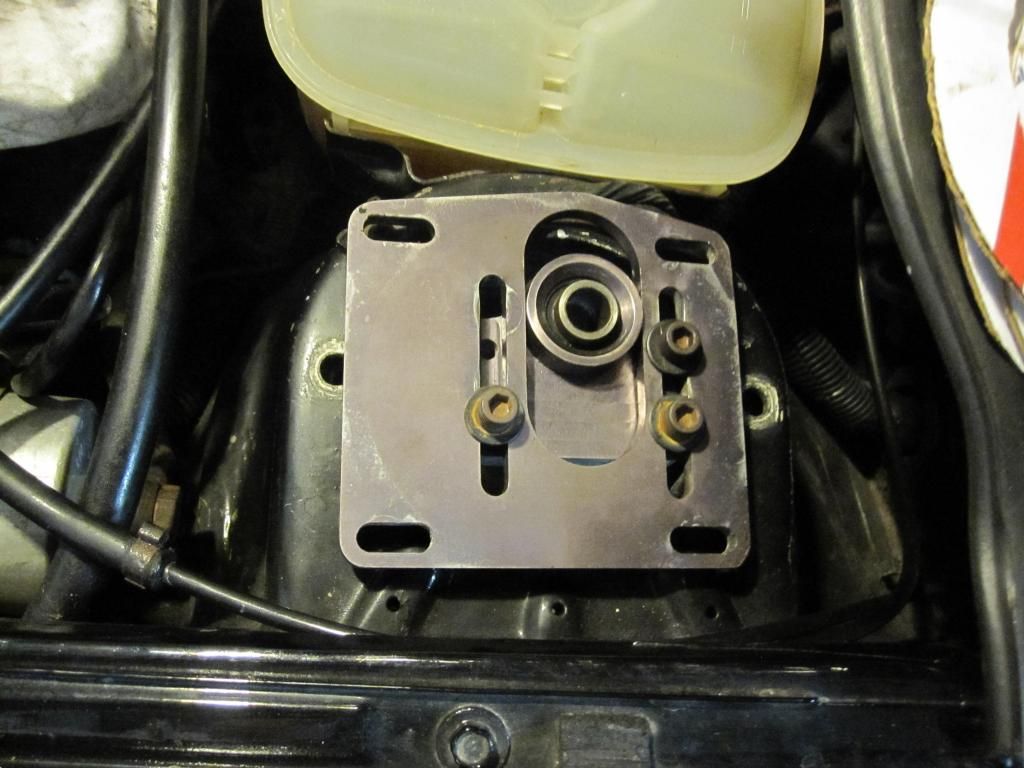
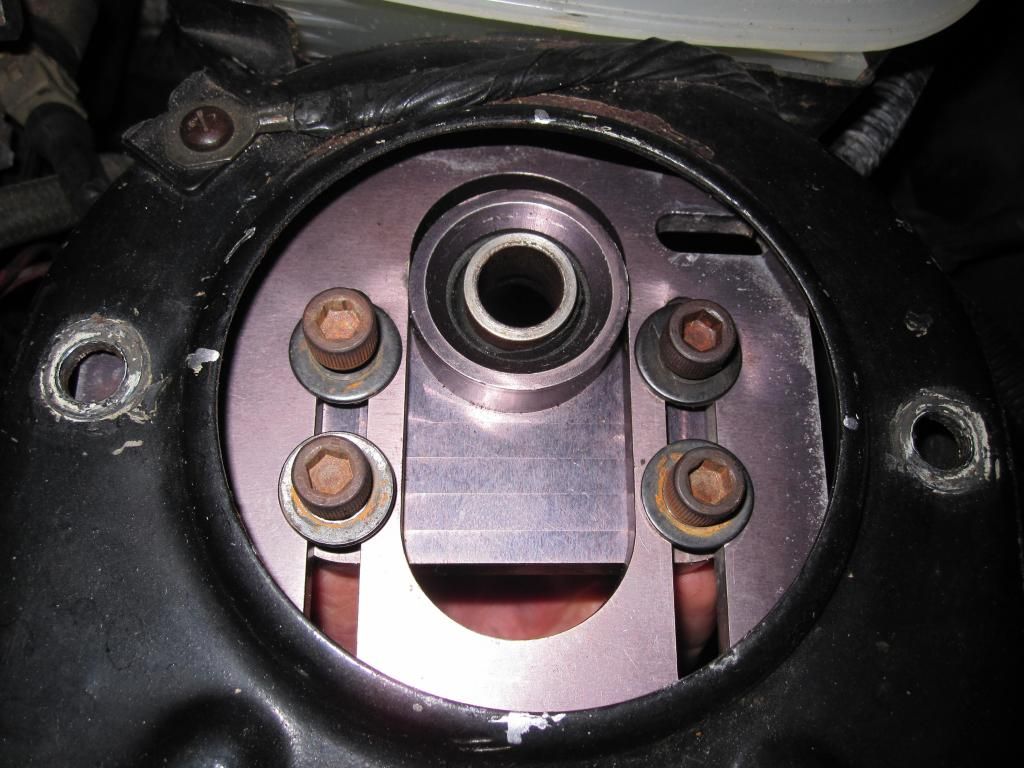
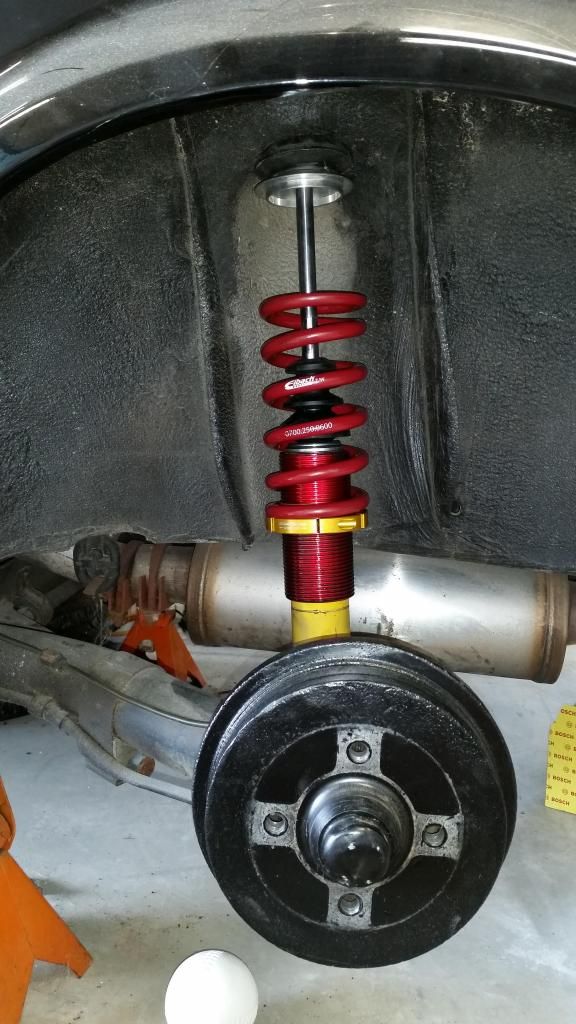
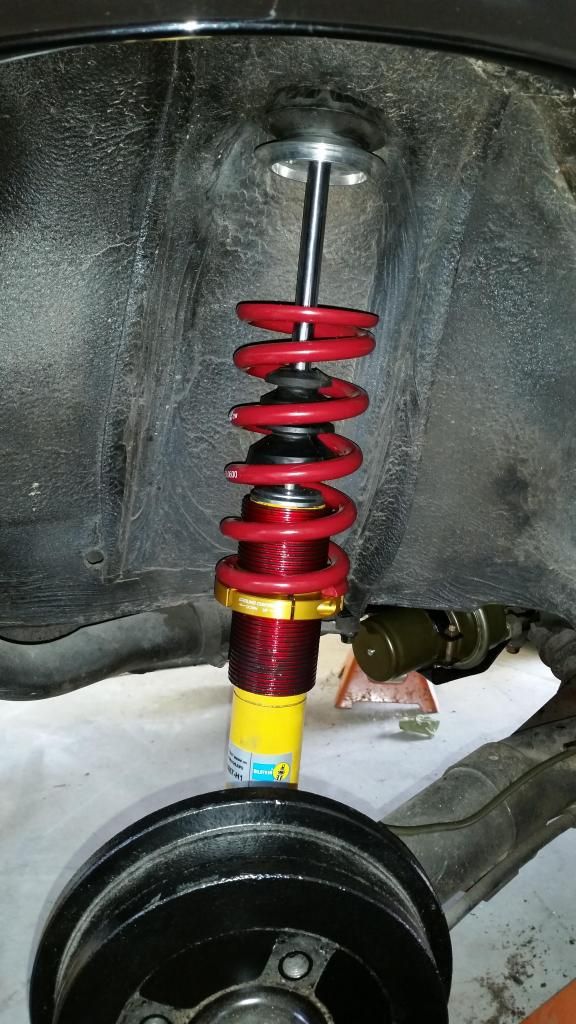
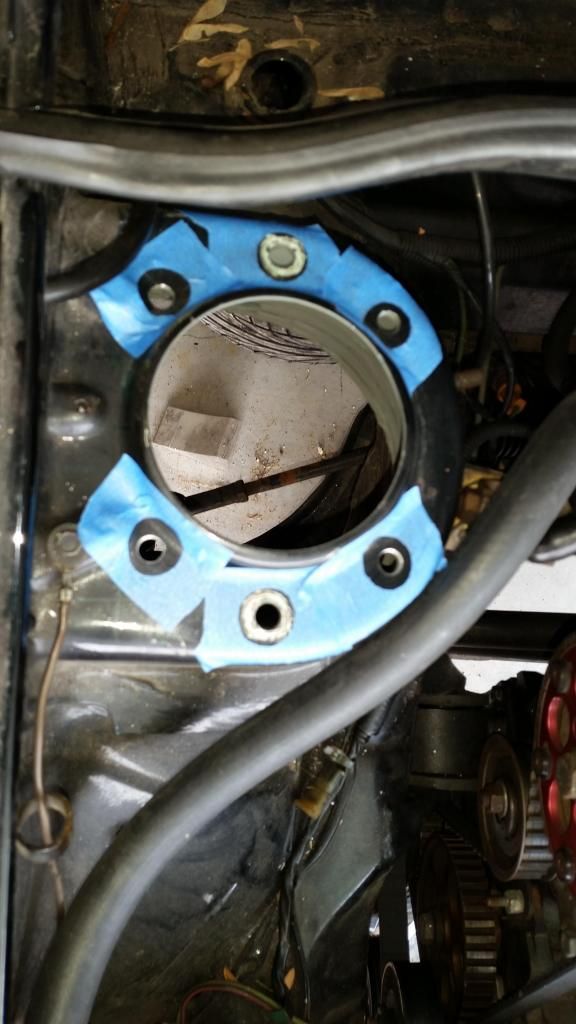
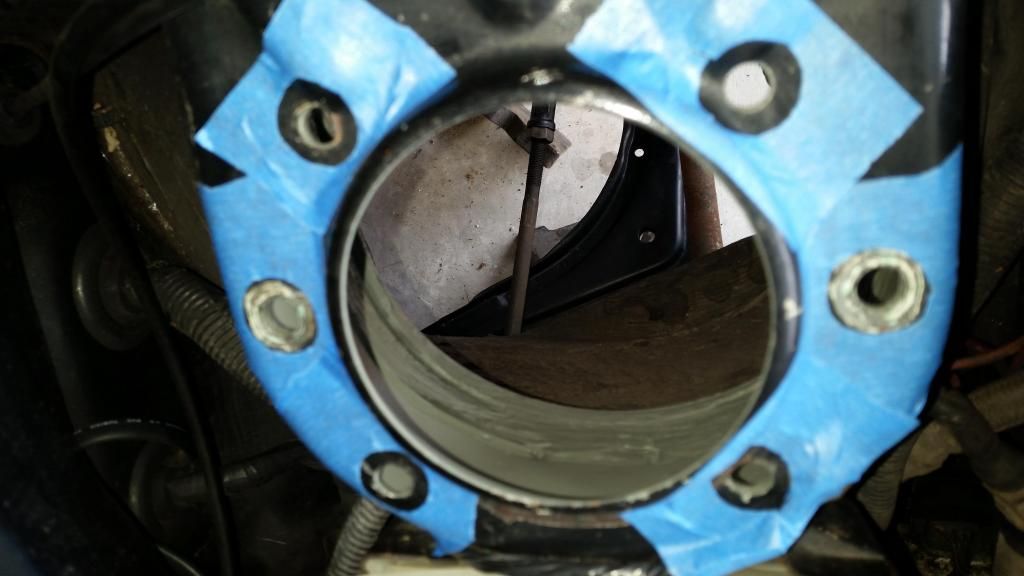
The front end as it currently sits.

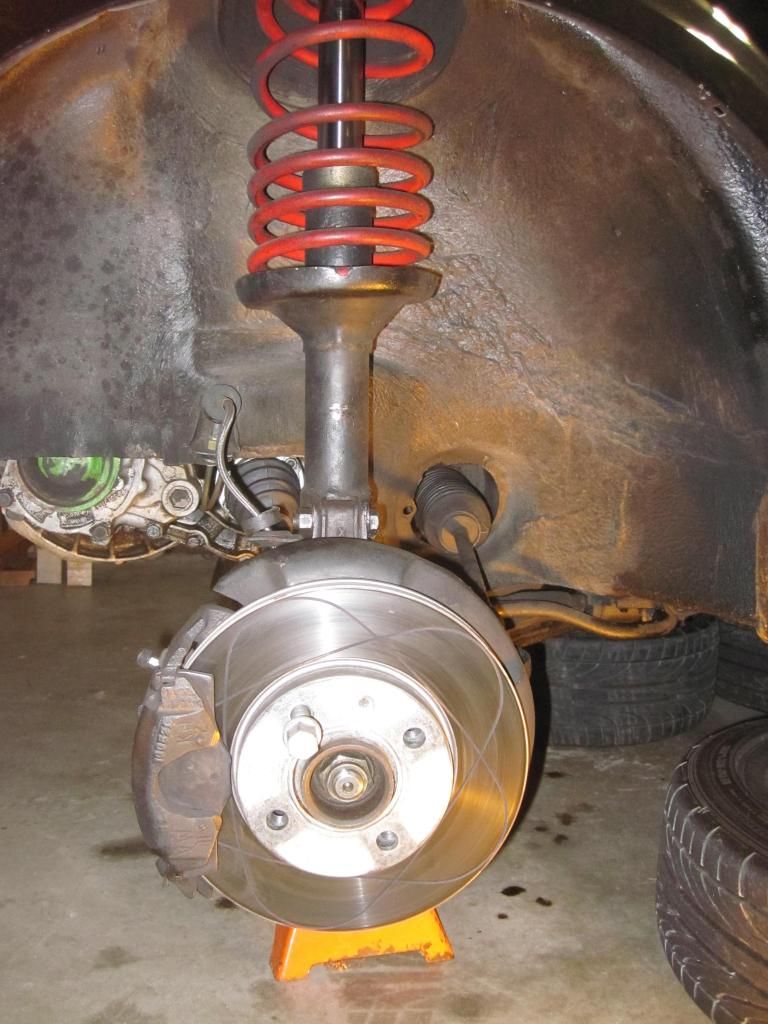
I'm trying to decide the best way to setup a baseline on the alignment settings before making adjustments on the camber plates. The offset delrin bushings for the a-arms are setup to increase caster allowing for something in the range of 2-3 degrees. Guess I'll have to wait and see what they gain me at the alignment.

I also need to dig up the calculation to determine how much the increased caster will affect the dynamic camber and my static camber settings.... Pre caster improvements i was looking for something in the range of 4 degrees of negative camber but that should be reduced significantly by the caster.

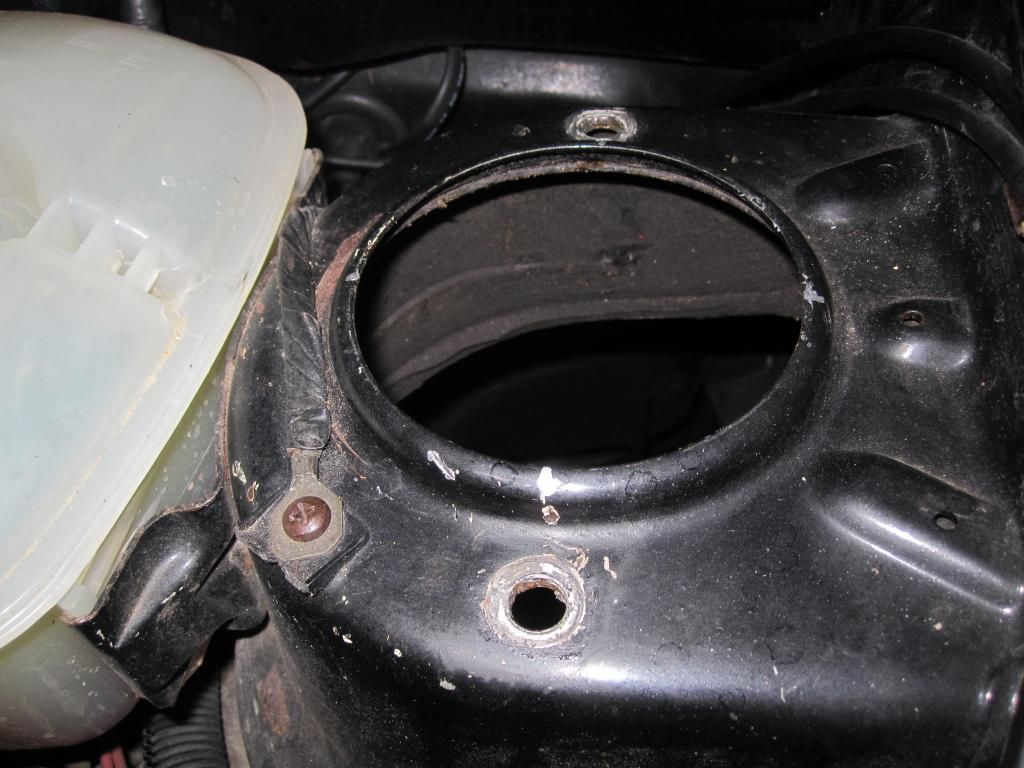
Still thinking thru if if i should try and brace the strut tower sheet metal with additional sheet metal. I have a few concerns about the longevity of the towers given the heavy spring rates and the removal of all the buffers that the factory strut bearings and rubber bushings offer....

I'm interested in any inputs folks have for me - one of the good things about these cars is that there is never a lack of fast settings and different options...

Datsun310Guy
Datsun310Guy UberDork
2/10/13 3:42 p.m.
84FSP wrote: In a 20 minute track session it pumped out 4 quarts of oil on the track........

Then what?

84FSP
84FSP New Reader
2/13/13 9:25 p.m.

In reply to Datsun310Guy:

Had some technical difficulties... Back up and running now though :)

noddaz
noddaz GRM+ Memberand HalfDork
2/15/13 8:07 p.m.
84FSP wrote: In reply to Datsun310Guy: Had some technical difficulties... Back up and running now though :)

I bet that is putting it mildly...

Continue please. I am looking for something to get me going on setting up my 86 Gti for Autocross...

Hasbro
Hasbro Dork
2/16/13 6:28 p.m.

What are your tire and wheel specs?

84FSP
84FSP New Reader
2/16/13 9:40 p.m.

Managing a munchkin sleepover today so no rabbit time till tomorrow...

Race setup is a well loved set of 13x7.5 diamonds with a 4" backspace. Tires are 235/45/13 Kumho V700's. I'm looking for some Rota Rb in the same size to lose a bit of weight but haven't found them cheap enough to manage yet...

I'm still puzzling thinking thru the how to set things up on the front end so feel free to offer advice...

SVreX
SVreX MegaDork
2/17/13 8:17 a.m.

You are awfully close to my setup.

Where did you get the V700's? I can't find anything in a 13" dia.

84FSP
84FSP New Reader
2/17/13 9:54 a.m.

Tirerack had the last of them but you can also check out Phil's Tires as they carry lots of different race rubbers. I see the Hankook z214's have some decent 13 options but i have never run them.

The size seems to be pretty good but there are some folks running 8 and 9 inch setups with the wider Hoosier offerings...

The Hoosiers are undeniably faster but wowsers are the pricey by comparsion...

SVreX
SVreX MegaDork
2/17/13 11:40 a.m.

Yeah, I'm running on a worn set of Hoosier A3SO4's.

I like the Hoosiers (especially in the GTI- they weigh SIGNIFICANTLY less because there are no steel belts, which has a tremendous return in the rotational mass department), but the pricetag is high, and I can't run them at the $2013 Challenge because they blow my budget.

Hankooks would also blow the budget. Kumho's are "free".

SVreX
SVreX MegaDork
2/17/13 11:42 a.m.

Are you running anti-sway bars?

84FSP
84FSP New Reader
2/17/13 2:51 p.m.

Currently the stock swaybars are in place. I'm leaning towards the shine rear bar and no front bar for my next tweak. I've been kicking around making a Shine rear bar as they've recently become $rare$.

SVreX
SVreX MegaDork
2/17/13 4:24 p.m.

You are wearing 500# on the rear, 450# on the front.

I'm kind of reversed. I've got 500# coilovers on the front, and 400# on the rear. But I also had anti-sways both front and rear. Neuspeed 28mm in the rear, 22mm in the front.

It was too stiff in the front.

I have since removed the front bar, and it is behaving much better.

I've got about 150 hp, so I have to react a little quicker than you.

84FSP
84FSP New Reader
2/17/13 8:06 p.m.

Spring rates aren't ideal as I would rather be around 75 lbs softer on both ends. Unfortunately haven't had the extra 400 bucks to do the ground controls...

noddaz
noddaz GRM+ Memberand HalfDork
2/24/13 1:18 p.m.
84FSP wrote: Currently the stock swaybars are in place. I'm leaning towards the shine rear bar and no front bar for my next tweak. I've been kicking around making a Shine rear bar as they've recently become $rare$.

If the A1 has an open beam you could just weld a plate over the opening to stiffen it (or so I understand). It is a shame this isn't for an A1: A2, A3 and sometimes A4

anjaloveshervw
anjaloveshervw Reader
2/25/13 10:52 p.m.

definitely following this thread :) HA! I have the shine rear bar in my rabbit! Since she still hasn't run yet, I can't really comment on how it feels.... maybe in a few more weeks??!

84FSP
84FSP New Reader
3/2/13 11:45 a.m.

Ok - so back to to the Rabbit after a hiatus and some time freezing my butt off for work in Minnesota.

Just couldn't keep staring at the rusty rear drums and had to decrustify them...

After copius cleaning and some high temp black caliper paint....

84FSP
84FSP New Reader
3/2/13 11:55 a.m.

Now back to the front end.

As it sat on some very undersprung ancient B&G lowering springs...

Scuzzy a arms reporting for duty... 
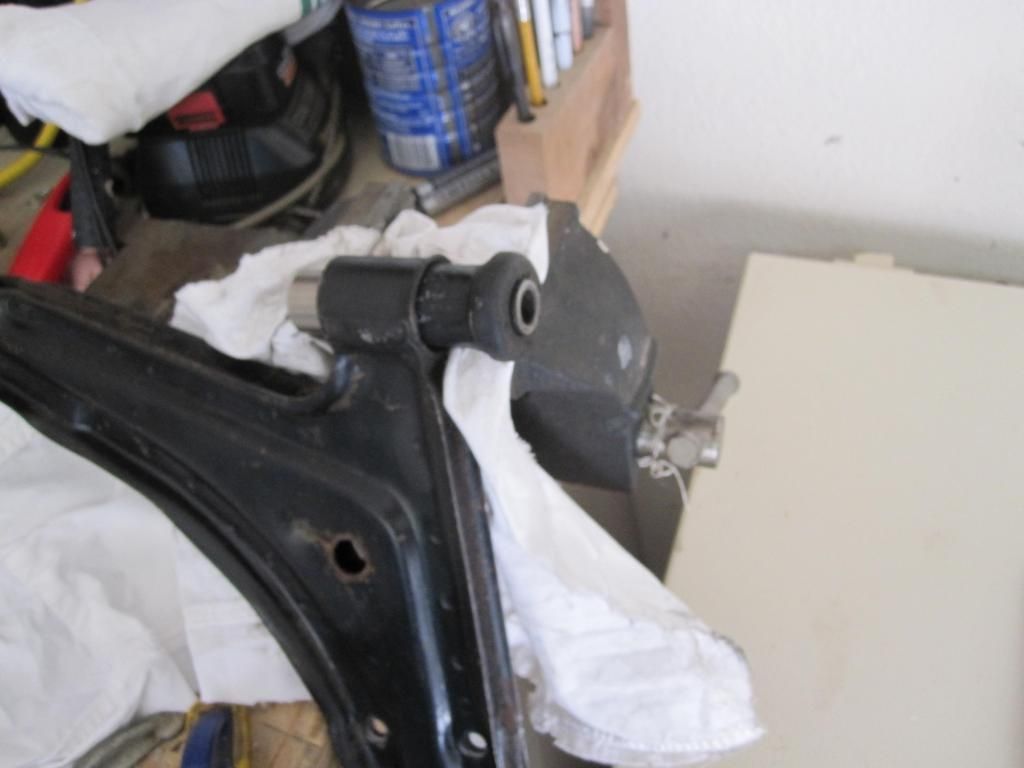
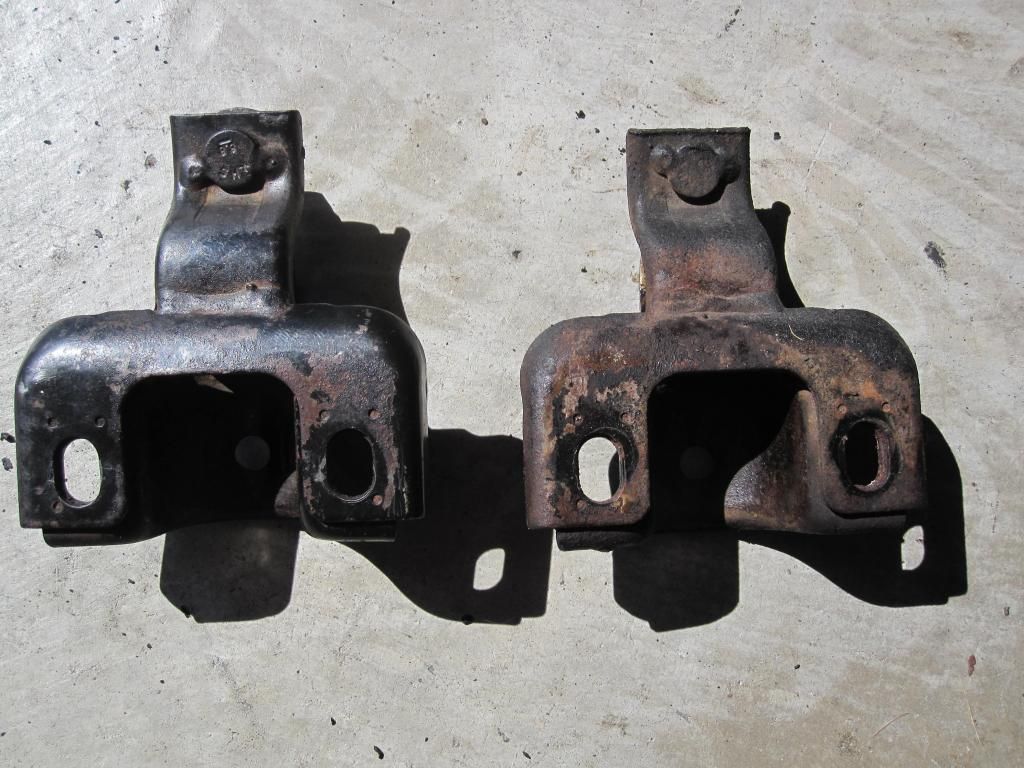
Now with fewer bushings 
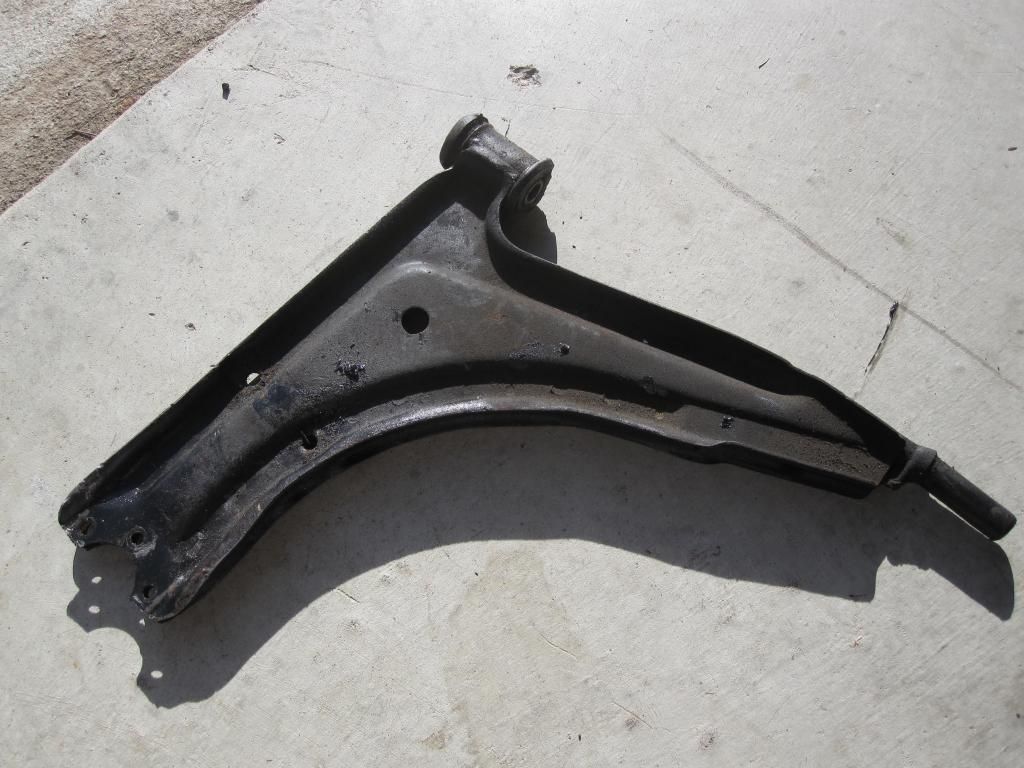
Bushings actually don't look terrible given thirty years of age... 
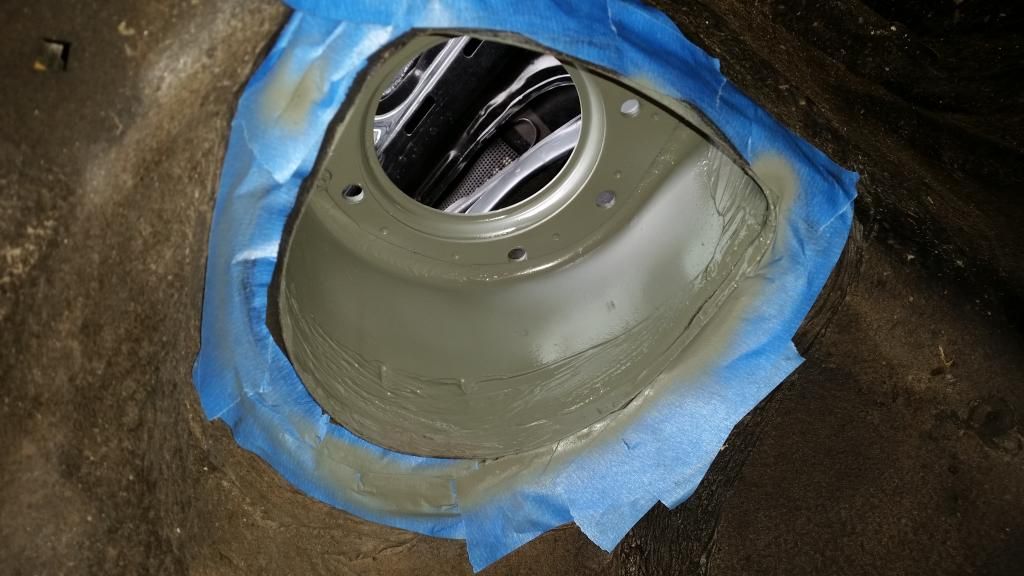
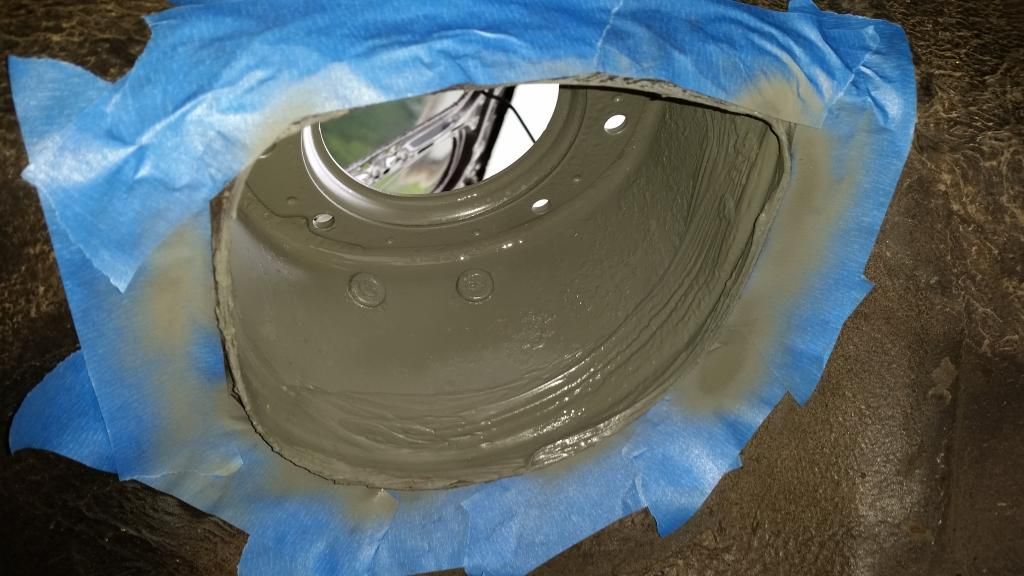
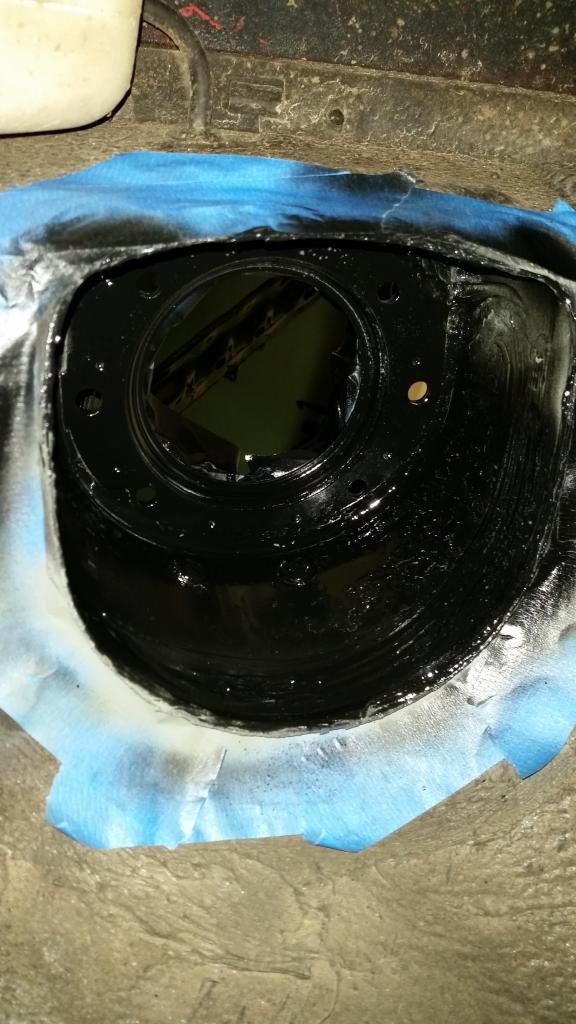
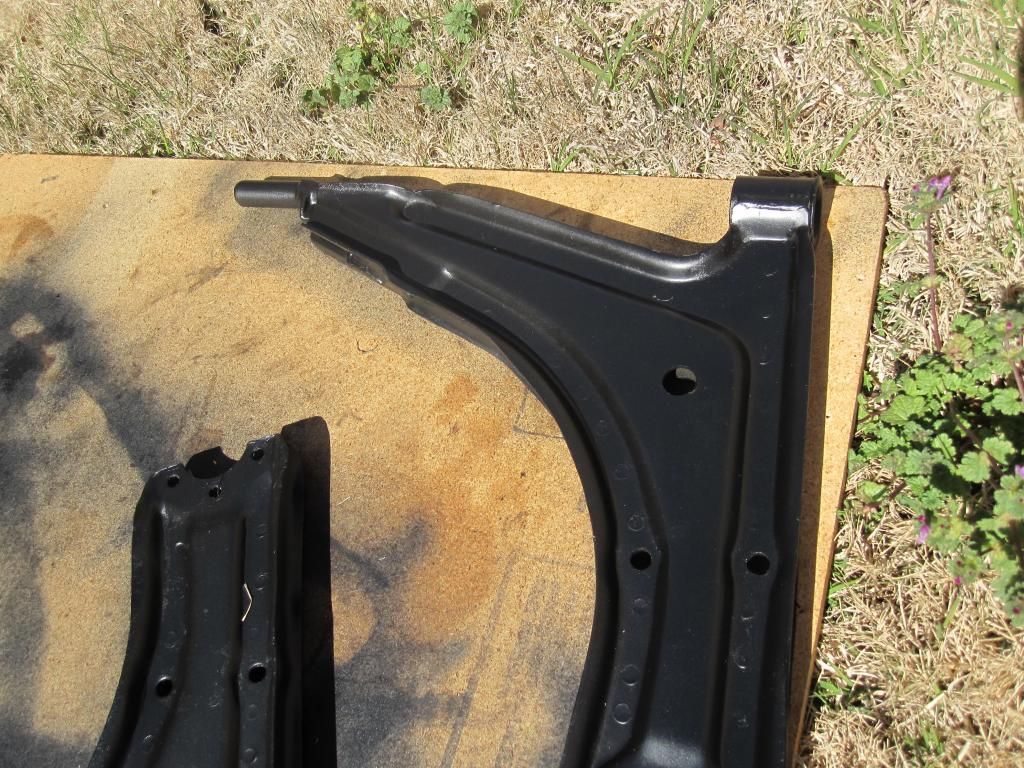
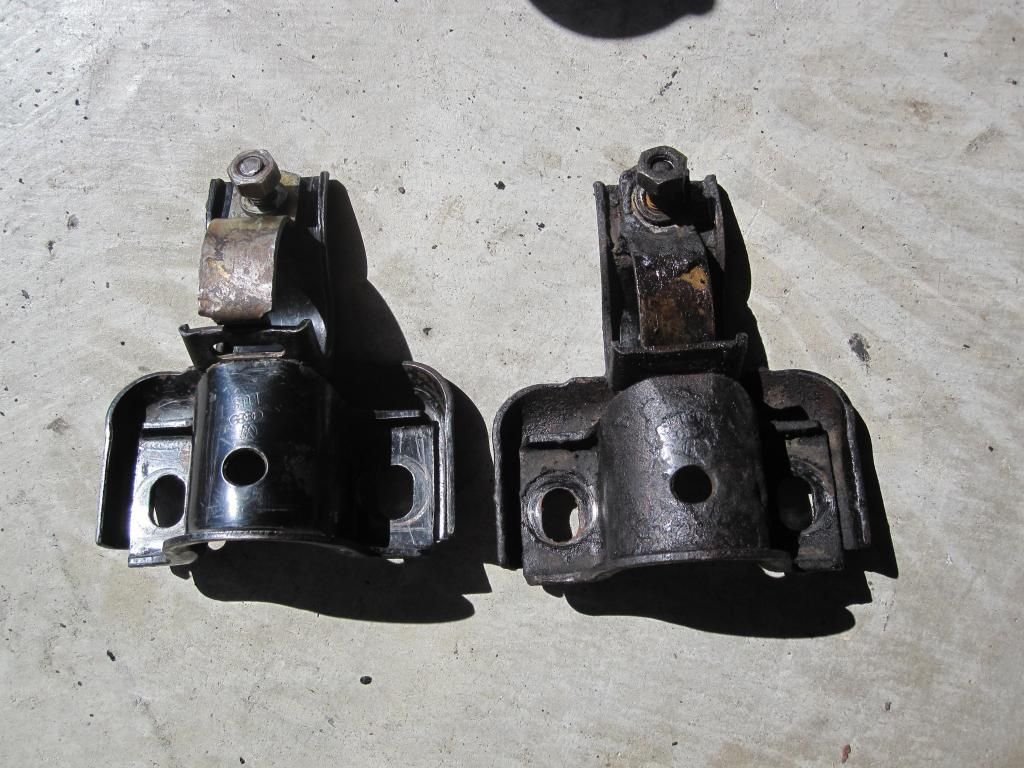
Now cleaned and shot with some fresh paint And off with the front swaybar and brackets.... Going to give it a shot without the front bar given the increased spring rates....
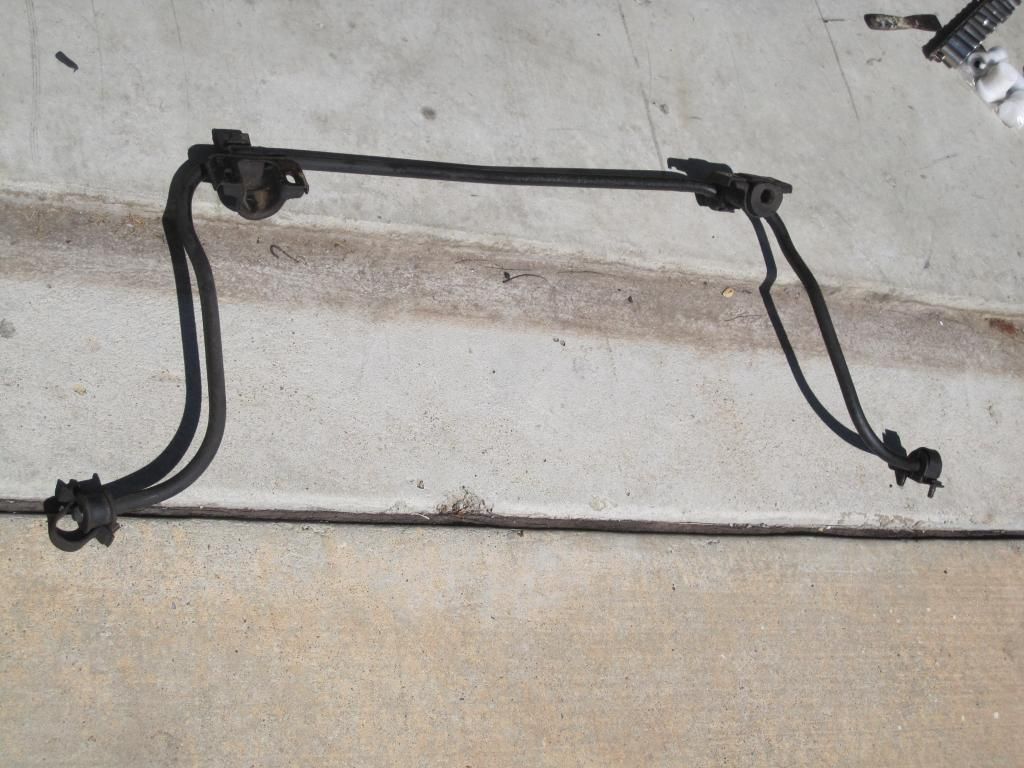
 Crusty brackets 
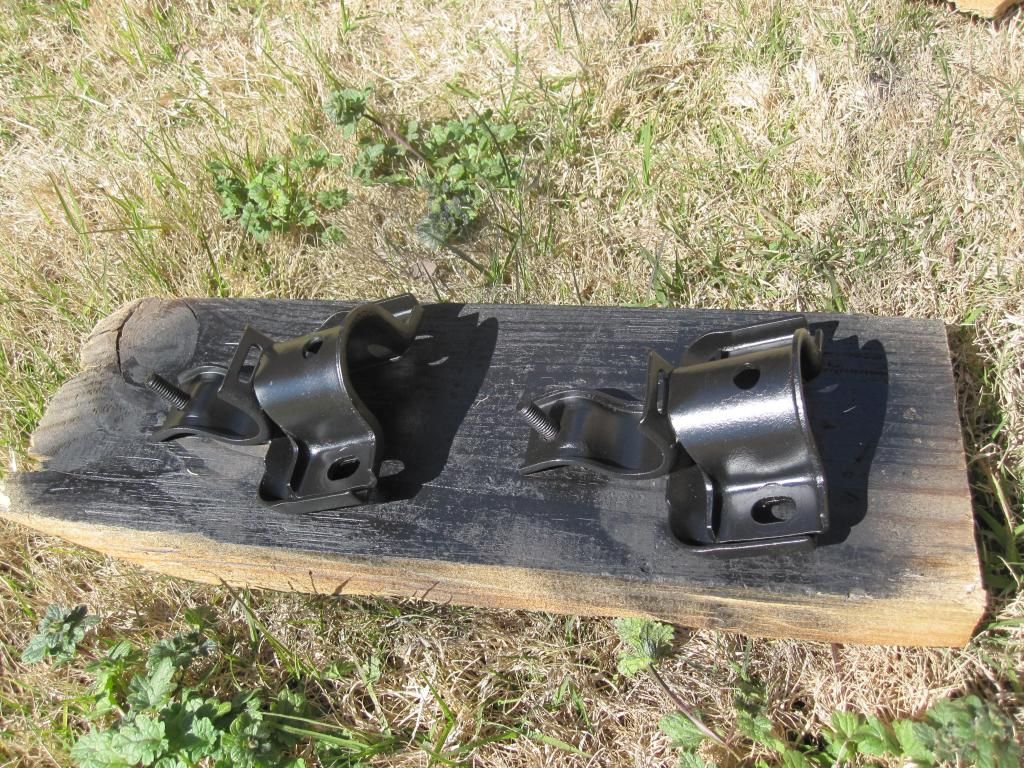
Cleaned with some freshy paint

And now we're out

84FSP
84FSP New Reader
3/2/13 12:07 p.m.

So now it's time for audience participation... Need your thoughts on the best way to install the camber plates....

It seems that the standard install method requires shopping the tops off the strut towers. I would rather keep the formed lip as it would seem to add a fair bit of strength to an area of these cars that is both weak and about to take the brunt of a significant spring rate upgrade.

You can see the gap created by this lip with the plates sitting on top mocked up

So maybe I'm making this simpler than it is but why not mount on the bottom? In theory it should put less stress on the hardware. In addition it should be the strongest as the mating surfaces are all perfect...

The only possible negative would be gaining about 1/4" of ride height in the front due to the plate sitting on bottom rather than on top?

As I think this thru it seems like even if I'm not happy with how it sits afterward I can't do any harm? The mounting holes will be drilled in the same place regardless of which side it's mounted on...

This would be a far simpler solution than the path I was going down with cutting out 3/8" spacer donuts to go underneath the top mounts to avoid chopping the towers....

Need your input on this one folks

sobe_death
sobe_death HalfDork
3/2/13 12:27 p.m.

On bottom, you'll lose the shock travel using coilovers or gain ride height using the same springs.

Don't know if you have a welder handy, but you could always cut the lip and reinforce the strut tower with an additional layer of metal...

SVreX
SVreX MegaDork
3/2/13 12:31 p.m.

I'm gonna sit quietly, because I have the same camber plates sitting on my workbench with the same question running through my head, so I'll wait for some other folks' input.

Winston
Winston Reader
3/2/13 1:01 p.m.

I would much rather have the mounting bolts just locating the camber plate, rather than being the only thing keeping your strut from punching through the hood. Mount it underneath. I speak with zero knowledge of camber plates, though.

84FSP
84FSP New Reader
3/2/13 1:03 p.m.

Just using Bilsteins and heavy duty standard springs for the setup. The bottom mounted plates increase ride height/reduce travel by 1/4" as measured between the stock strut bearing location and the bottom mounted plate location....

84FSP
84FSP New Reader
8/2/14 4:25 p.m.

Ok so 17months later I'm back on task. Since the last update I took a new job that moved us from Dallas back to Cincy near both of our families. Getting settled in the new place and doing a lot of traveling in the new job... So finally back to picking up where I left off for El Rabbito's suspension. The last setup using a mix and match of standard springs without height adjustment turned out to be an impressive failure. Poor baby looked like it had a load of E36M3 in it's pants and there was not enough adjustment in the rears to fix it. So it was perfect excuse for me to pop for the right stuff from Ground Control and Bilstein.

The kind folks at Ground Control worked with me on a mix and match coilover setup using MKII housings in the front shorted (DA Konis at a later date if I land in a pile of $) and the MKI rear setup. The guys were even nice enough to warranty a set of damaged camber plates I had picked up cheap on the web. I was impressed as I made sure they know that these were used web stuff and I was ok with paying for good stuff. So good to find companies that both make good products and stand behind them.

I had hoped to avoid a rebuild on the Bilsteins (found in the trunk of a parts car sitting for 15 years) but the fronts puked oil when I pulled them apart. Off to the Bilstein custom shop in Cali they went. They guys there were great and they worked up a rebuild and custom dampening setup for 100 each. Seemed like a steal to me as you can't buy new ones anywhere near that cheap and they would still have the wrong valving.

Quick motivation pic from a mid Ohio track day

Goodies arrive

So I decided to start on the rear end as I wanted to build the courage to poke holes in strut towers for the front... Came out nice.

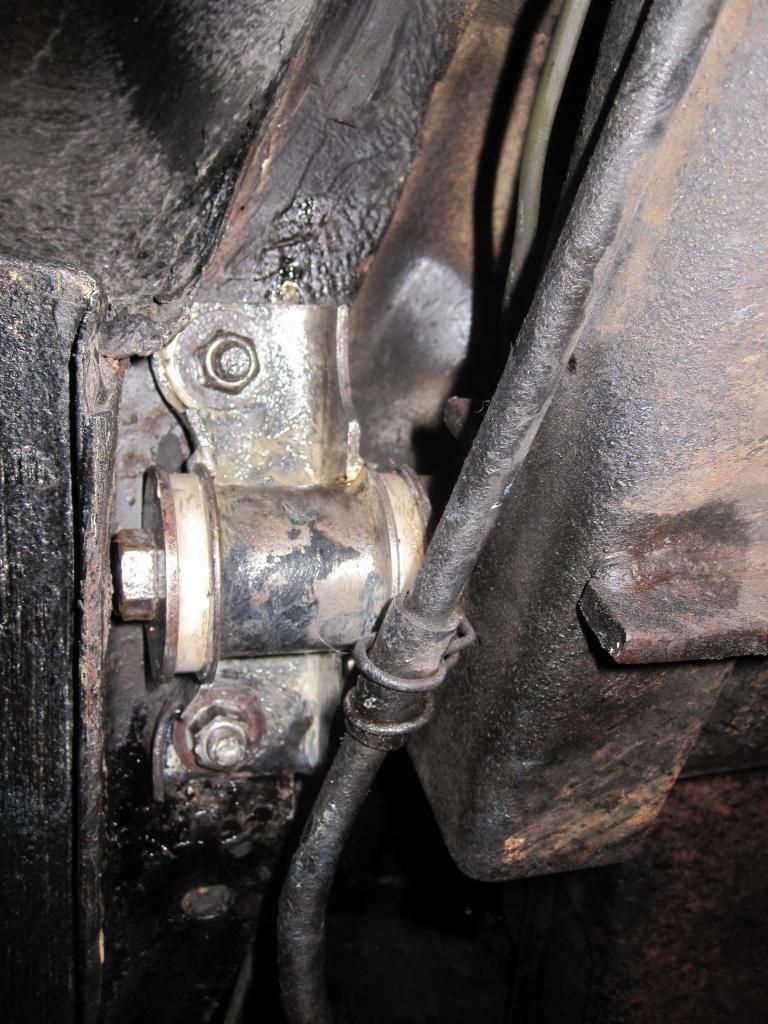
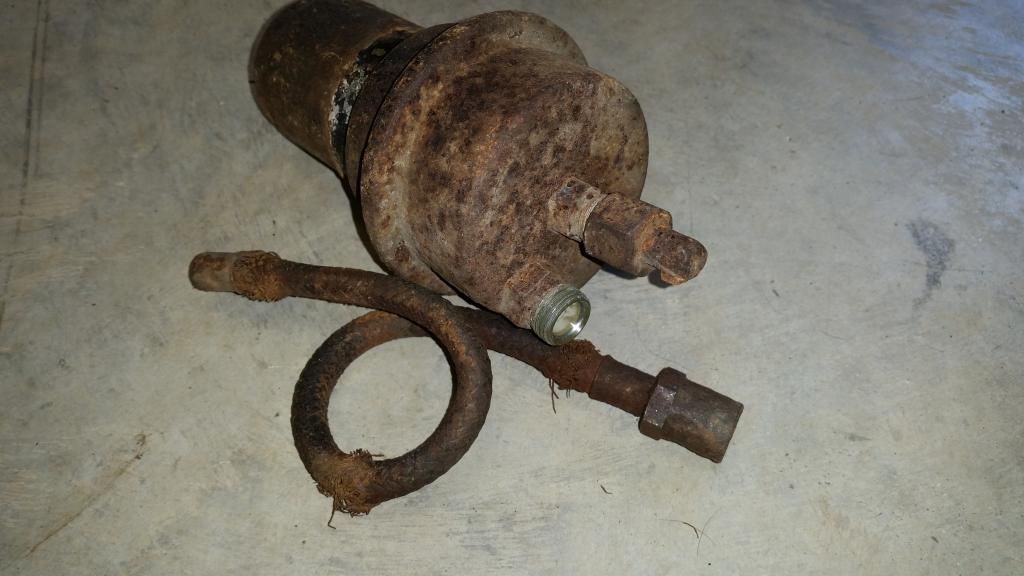
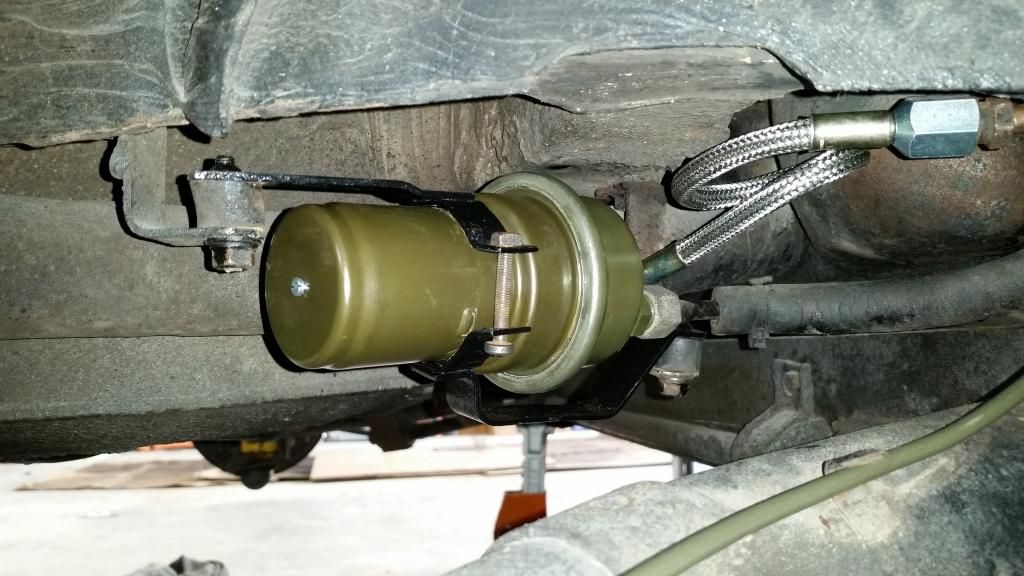
Quick glimpse of the shiny new fuel lines and accumulator as I finally found the cause of my hot start woes... Pretty sure they aren't supposed to look like this...

So on to the front! After measuring and avoidance of the dreaded drill and step bit... 
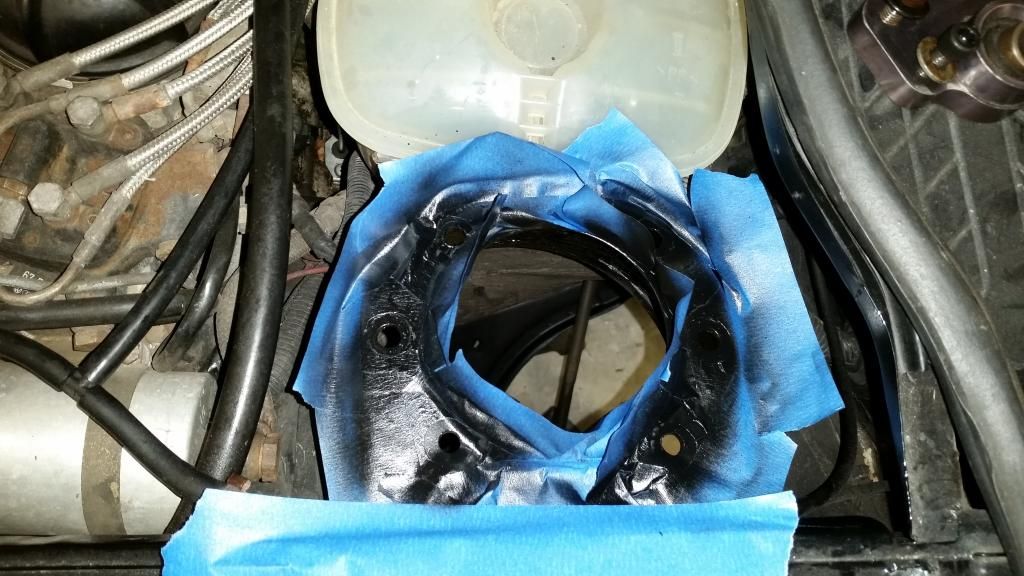
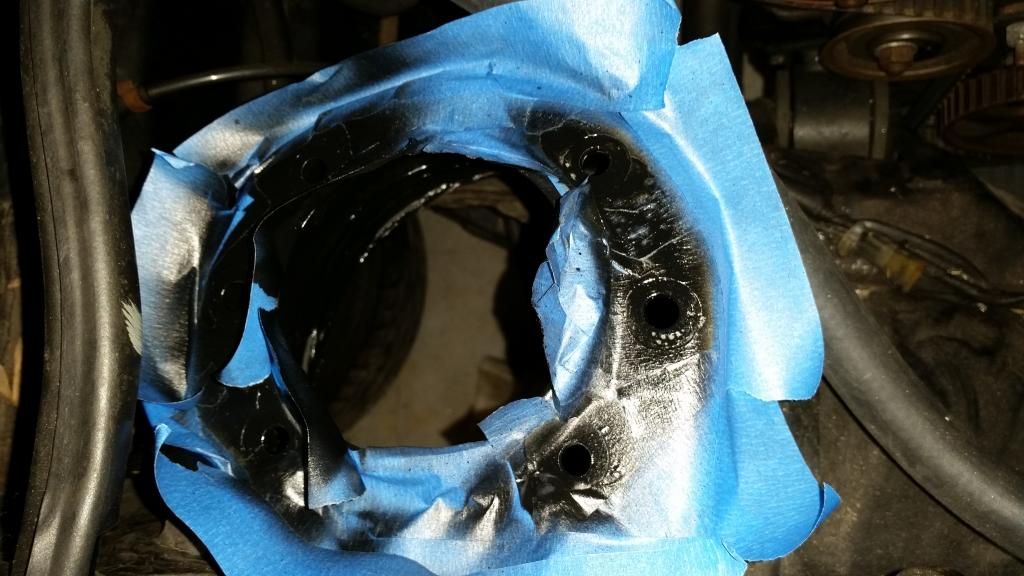
Having caused rust issues on a former GTI from my "Improvements" I have sworn to turn a new leaf. Lots of brake clean, etching primer, black paint, and under coating...

Now just waiting for undercoat to dry... Gotta love humidity.. Fronts are ready to go in after some install and bump stop modification...

noddaz
noddaz GRM+ Memberand Dork
8/3/14 5:22 p.m.

Very nice... Glad to see the progress! Please continue...

jgrewe
jgrewe Reader
8/3/14 6:23 p.m.

A rear bar as big as your arm is the only way to make that car work. You want to make sure you have just enough HP to keep the front end in front as the rear struggles to pass you on the outside of the turn.

Either double up on the stock bar or find something at least 28mm. With the higher front spring rates I doubt you'll need a front bar.

1 2

You'll need to log in to post.

Our Preferred Partners
IrihfWj0oyirSmz1EUINMFmHGOkiVLgiUOygGJ2bBW3YiHLbyYbnei1EqvrPxxnW