1 2 3 ... 5
jerrysarcastic (Forum Supporter)
jerrysarcastic (Forum Supporter) New Reader
4/20/20 1:08 a.m.

This is a project I’ve been working on for a few years now, slowly taking it from stock form to something that handles competently but still has an old school vibe. I do plan to autocross it at some point, but really I’m planning on something that is a solid street car first. A bit of a two way player if you will. The wagon is still a work in progress (will it ever be finished?!?) so my first few posts are going to be a bit of a review, no place to start but the beginning, right?

OK, so about 10 years ago I started to get the itch to have a classic car back in my life again. I had already had a few classic cars to this point (a ‘63 bug and ‘64 Grand Prix) but for a bunch of years in the middle I had a job with a long commute, and a string of spiritless transportation appliances for reliability and fuel cost reasons. But finally, it was time again. 

At the time the economy was still in the toilet from the housing crisis and gas prices in California were through the roof. This was when Cash for Clunkers was still a thing, so there was plenty of classic iron to be found on Craigslist for not much coin since I guess everyone had an “out with the old” mindset .  Me on the other hand, I had an open mind and a few extra dollars in my pocket, so I waited for something to come along that would have the right mix of cheap, clean, and fun.

Admittedly this is not the first thing you think of when you picture a “classic car with awesome handling” and it wasn’t what I was looking for either. That said, early Camaros and Mustangs were out of reach price-wise, and kinda overdone anyway. I knew I needed something different. 

So when I saw this unassuming 1967 Ford Falcon Futura  wagon scroll by while surfing CL it piqued my curiosity for sure. I didn’t set out to get a Falcon (especially the 3rd gen one) or a wagon for that matter, but it looked nice and original, and the price was right. Can’t hurt to take a look, so I called the seller to check it out and go for a spin. 30 minutes later I was putting cash in their hand and it was sitting in my driveway.

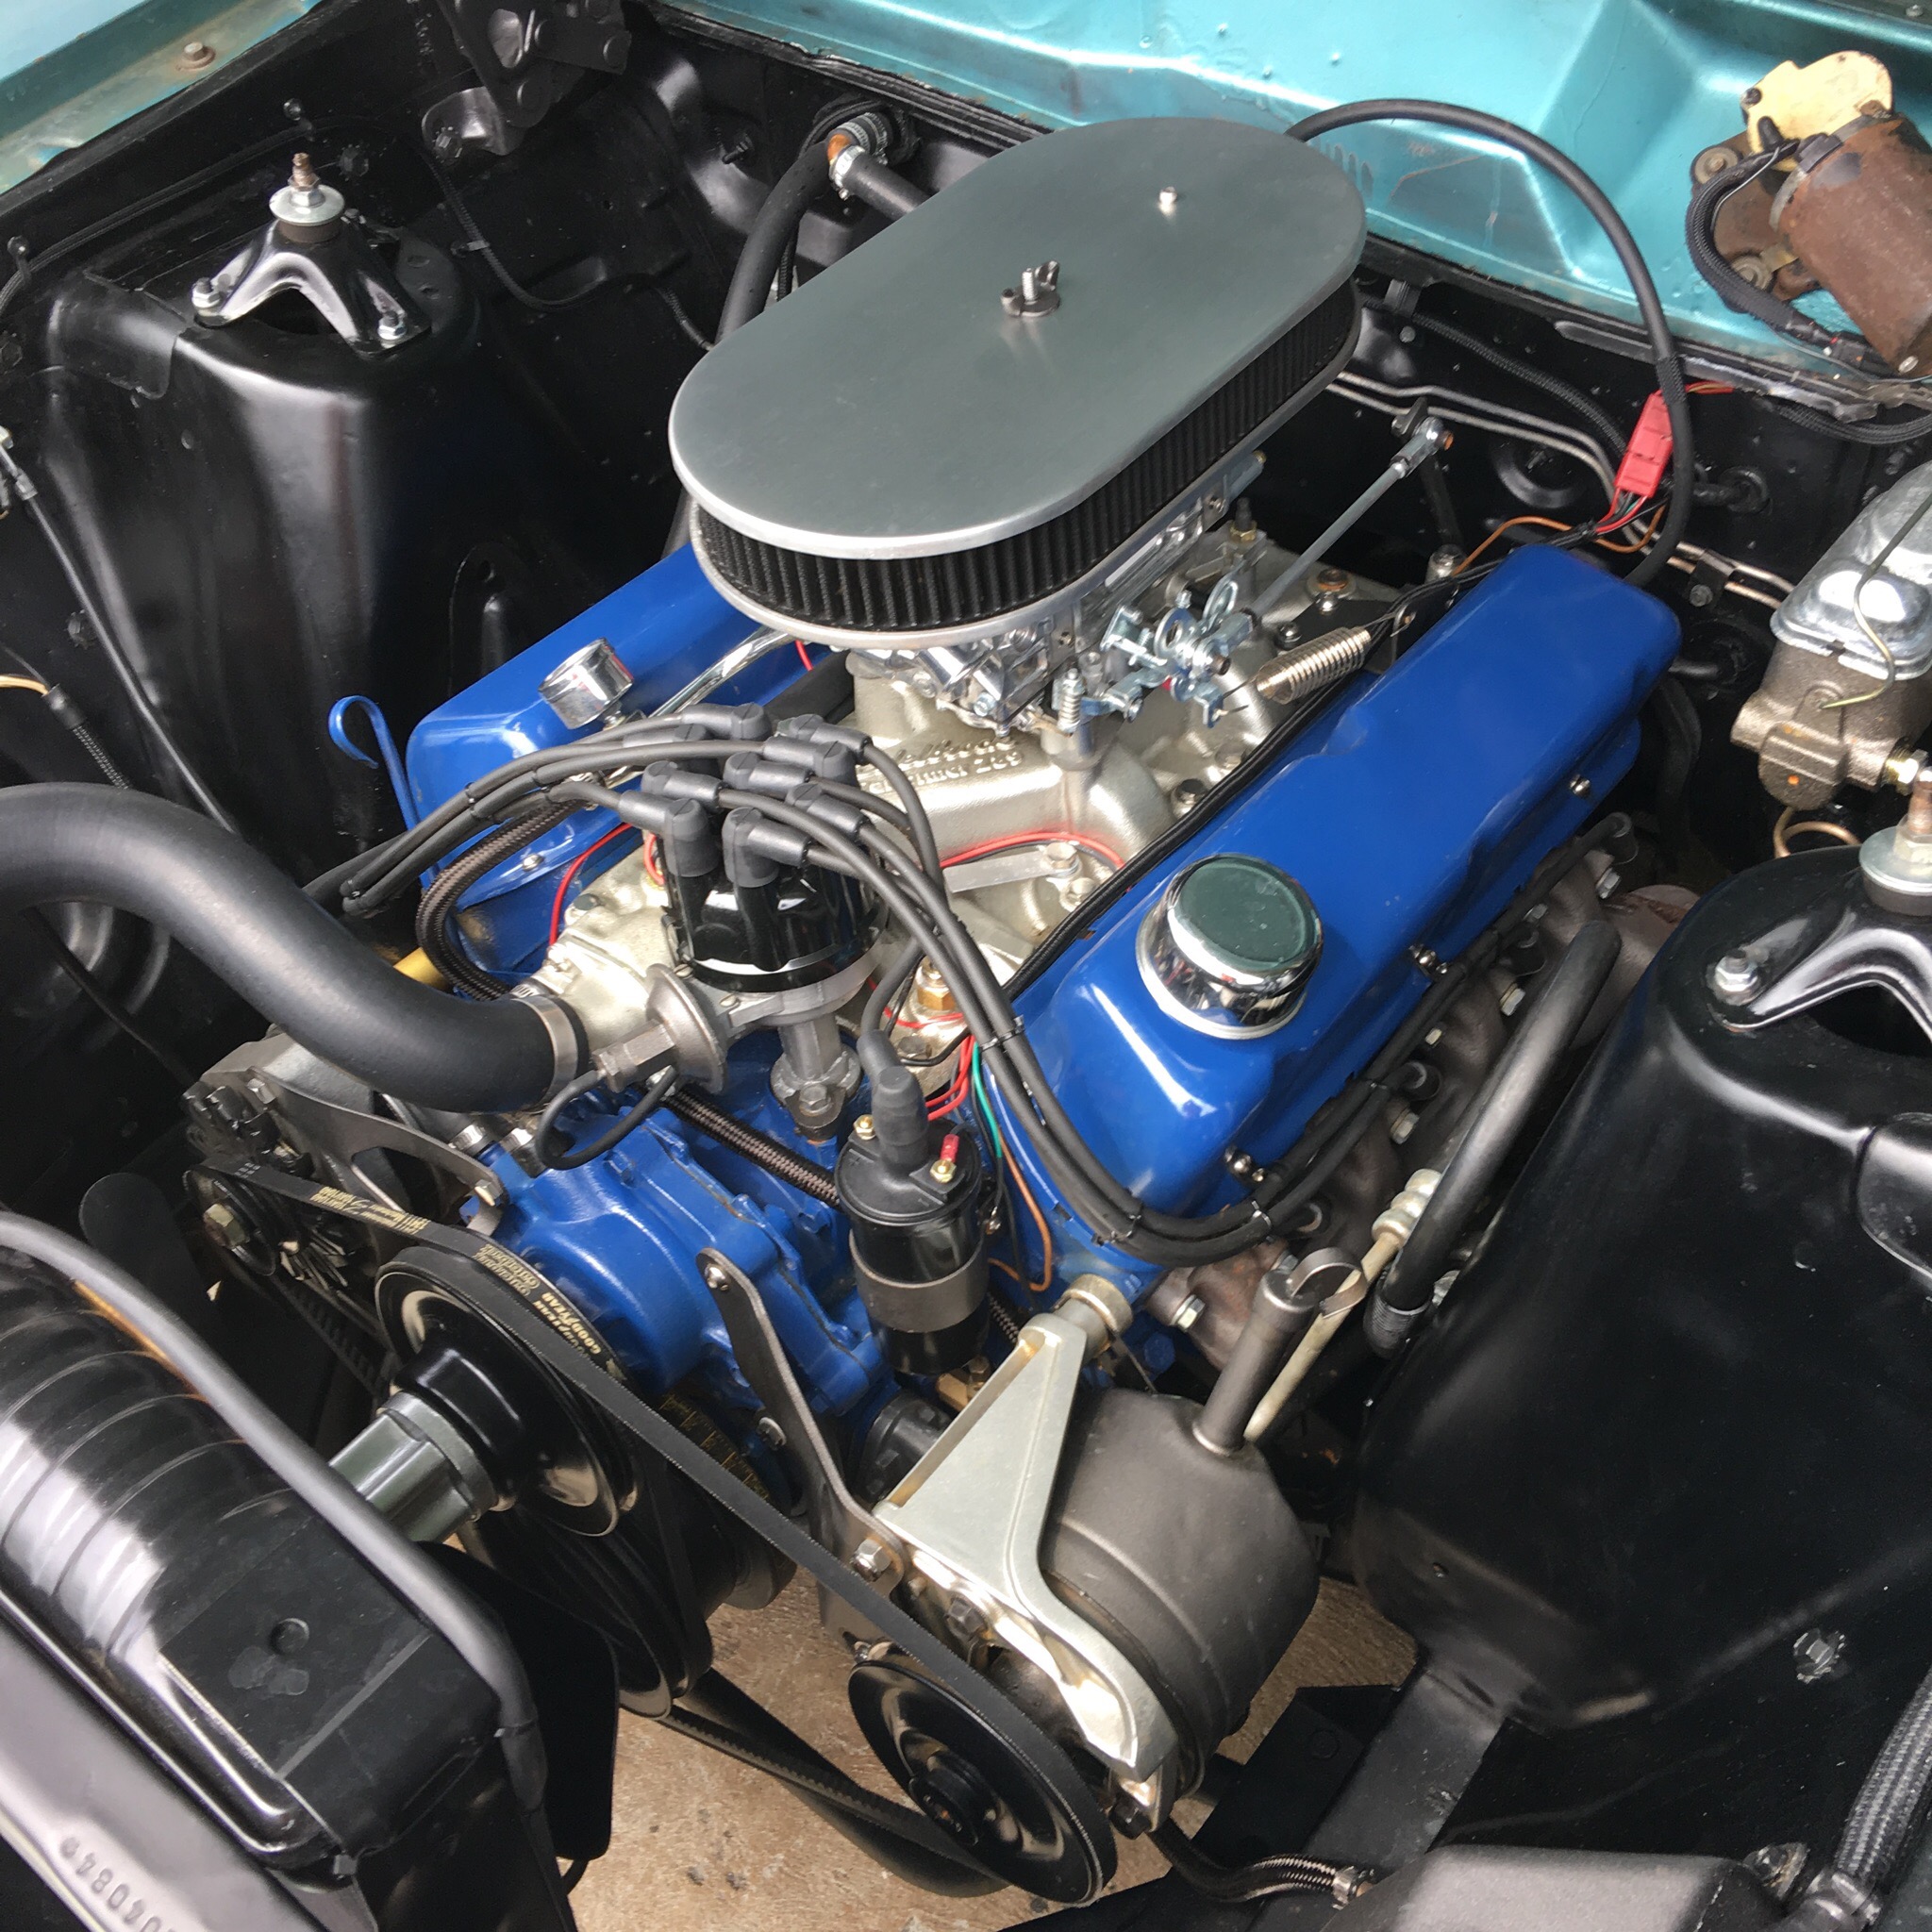
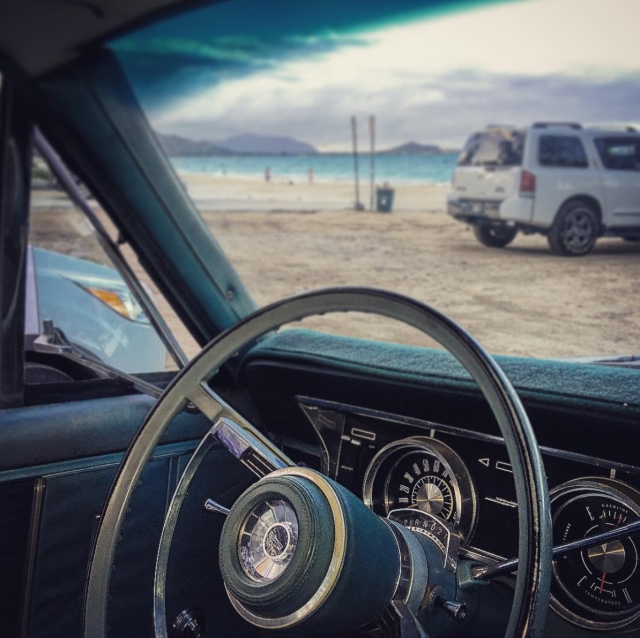
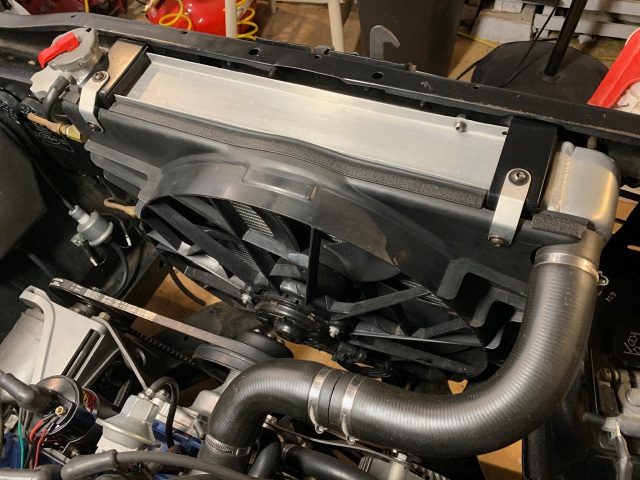
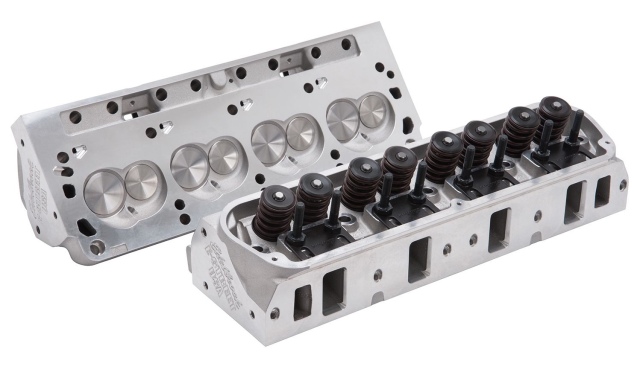
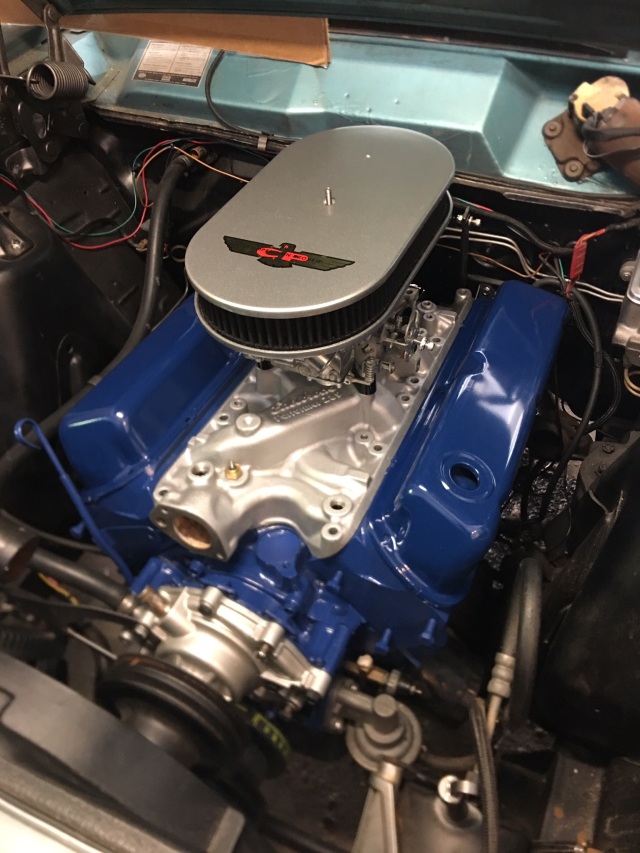
I drove it around like this for the longest time, just feeding it gas and oil. What a dead simple car it was, and as a daily driver it never let me down. The 289 was low performance but started every time, the bench seats were as comfortable as a couch and still wearing the original upholstery, and it wasn’t so shiny that I felt bad about flipping down the back seats to haul crap around. Problem was, the handling was scary at best, and had to change.

jerrysarcastic (Forum Supporter)
jerrysarcastic (Forum Supporter) New Reader
4/20/20 1:47 a.m.

I always reasoned that this unassuming little wagon had decent handling potential when I snatched it up, since it had pretty much the same chassis as you find under Mustangs of the same era, and I knew that most Shelby-inspired performance bits “should” bolt right up. But you’d never know it has any kind of potential considering just how bad the wagon handled in stock form. It would list to the side any time you had to take evasive maneuvers, and the seat belt was there mostly to keep you from sliding across the bench into the passenger side. It was questionable in controlled situations, and in traffic it was downright frightening.

Naturally rebuilding the front suspension was the first big project I wanted to take on, and figured I could make some real improvements even if I kept it simple.  When I had the chance finally after driving it for a few years, I put the wagon on jack stands and I threw some new parts at it to try and take some scary out of it.

Mostly I focused on replacing what was there with quality replacement parts to address the sloppy ball joints, dry rotted bushings, etc.  Beyond that though I did make a few improvements like heavy duty Front springs (with a little taken out of the coils to lower it a bit) and a thicker sway bar.  You know, the basics. I also took the time to lower the upper A-arm pickup points (aka “the Shelby drop”) and added roller spring perches in place of the stock firm rubber bushings, which seemed like small changes at the time, but probably made the biggest difference in how the suspension felt.

I didn’t take pictures while I was working (wasn’t thinking “build thread” at the time) but here’s how it sat after the new parts, and some fresh paint on the original wheels to toughen up the look a bit.

Finally things had improved to the point that I was no longer lurching into the next lane when taking modest corners, and I didn’t feel like I as taking my life in my own hands every time I drove on the freeway. I was even able to surprise people occasionally by keeping myself in their rear view mirror on curvy freeway ramps, 14” tires squealing all the way. Things were starting to take shape.

NOHOME
NOHOME MegaDork
4/20/20 5:14 a.m.

I like wagons and I like this one. Whats under the hood and is there any plans to do anything in the drivetrain dept?


I fully agree with the plan to rebuild the entire suspension to as new with only minor upgrades. I think going for much more G generation past that point is going to come with an abusive ride quality.


Needs wheels.

Dusterbd13-michael
Dusterbd13-michael MegaDork
4/20/20 5:33 a.m.

I like your writing style. Ill be watching!

jerrysarcastic (Forum Supporter)
jerrysarcastic (Forum Supporter) New Reader
4/20/20 5:33 a.m.

Whats under the hood and is there any plans to do anything in the drivetrain dept?

I'm still rolling on the original C code 289 and C4. No big plans in the near term since they are both going strong (130,000 miles without a rebuild) but im sure I’ll need a rebuild sooner than later if I plan to push it hard at all.  Although it has no collector value I’d like to keep the original block if it passes a magnafluxing ok, and use it as the starting point for a stroker. If not I’ll jump to a 351 Windsor as a starting point instead.

I’ll probably keep the C4 a while longer too as I’m trying to keep things simple for now, but I miss having 3 pedals so I’d consider converting to a manual if I get the chance, we’ll see.

Needs wheels

That was pretty much next on my list after a few safety items. Still considering rim choices and measuring for tire sizes.


jerrysarcastic (Forum Supporter)
jerrysarcastic (Forum Supporter) New Reader
4/20/20 5:51 a.m.

After rebuilding my front suspension I didn’t do much with my wagon other than small projects and driving it’s as much as possible. By now I had a good job (that was 100% work from home no less) and could afford to think about projects lasting longer than a weekend since I did not need to commute to work anymore.

The wagon has around 130,000 miles on it at this time, so while it’s a little tired due to age, the old 289 is not really due for a rebuild and still runs well. That said, in stock trim it does not really scream “performance” and the engine compartment overall was kind of a horror show, nothing you’d be proud of.

In the background I was collecting parts for a swap to a 4bbl carb to free up a few ponies while also replacing the old Autolite 2bbl which never ran right, even after a rebuild. I’m not really the type to slap on new parts without also freshening up things in the general vicinity, so I also planned to repaint and rehab the entire engine compartment.

I have no illusions here, other than a few new parts, this was going to be totally a cosmetic upgrade. But I really think it helps if your project has a little shiny in it to help motivate you, and also it makes more sense to Mrs. Sarcastic if she can see I’m actually trying to fix up this rust bucket.

So one fine afternoon a few years back (summer 2016) I finally had the time I needed as well as most of the parts, and I started tearing thing off the top end of the engine. By the end of the evening I had it torn down to the heads, and parts were bagged and tagged and starting to pile up in the garage. There was no turning back.

Since I did not have a good place to pull the engine I left it in place, stripped it down to the longblock, and cleaned/degreased as best I could. This ended up taking waaaaay longer than I planned, but mostly because I was taking my sweet time and getting bogged down in trying to make it look as good as possible.

But eventually things were cleaned and prepped, and I carefully masked and spray bombed everything in sight. Working with the engine in place made it a challenge and everything was more time consuming, but in the end I thought it turned out pretty nice. Not show quality but tidy and fresh looking.

Overall this ended up being a few months of weekends, mostly because I tend to get down in the weeds when it comes to details, but was well worth it. The rest of my car may look like a junker, but when I open the hood it sure is nice to see something shiny underneath.

To me there is some bent appeal to any car that is ratty looking on the outside but has a tidy looking engine.  I also have no love of excessive chrome and billet, so I really enjoy the workmanlike appearance of a 60’s engine wearing steel valve covers and the factory color, with maybe a few speed parts to let observers know it’s all business.

Even with a few years on it, the engine compartment refresh is looking pretty good.  Anytime I’m feeling stalled out and getting those mid-project doldrums, I just lift the hood and stare at it until I feel motivated again. Mission accomplished.

wheelsmithy (Joe-with-an-L)
wheelsmithy (Joe-with-an-L) GRM+ Memberand UltraDork
4/20/20 6:19 a.m.

Very Nice!

wawazat
wawazat HalfDork
4/20/20 7:14 a.m.

This isa  very nice wagon!  I'm following along. 

Carl Heideman's son has a '67 Falcon wagon project on the site.  A few others here have old cars for projects as well.  Michael (dusterbd-13-michael) has a Demon that is very clean.  Mr. Asa has a vintage Mustang.  I'm working on my '69 Cougar convertible.  There are a few more that pop up from time to time as well.

jronald
jronald GRM+ Memberand New Reader
4/20/20 8:00 a.m.

Loving this - Vice Grip antenna is a nice touch. You took your time, and it looks great in the bay. Wish anything on mine was as clean.

MadScientistMatt
MadScientistMatt PowerDork
4/20/20 10:08 a.m.
jerrysarcastic (Forum Supporter) said:

I always reasoned that this unassuming little wagon had decent handling potential when I snatched it up, since it had pretty much the same chassis as you find under Mustangs of the same era, and I knew that most Shelby-inspired performance bits “should” bolt right up. But you’d never know it has any kind of potential considering just how bad the wagon handled in stock form. It would list to the side any time you had to take evasive maneuvers, and the seat belt was there mostly to keep you from sliding across the bench into the passenger side. It was questionable in controlled situations, and in traffic it was downright frightening.

Quite frankly, the same could be said of how a stock Mustang from that era handled, too. Putting these cars on modern radials can make the soft suspension calibration even more blantant since the designers would have expected the tires to run out of grip much sooner, and so you can get into body lean angles the designers didn't anticipate. There's a trick out there for redrilling the upper control arm mounting points for better camber curves, but mostly it's just a matter of modern tires and dialing in your combination of springs, shocks, and sway bars for the increased grip.

NOHOME
NOHOME MegaDork
4/20/20 10:56 a.m.

Have you considered some form of "Frame Connectors" under the car? "Torsional Rigidity" had not been discovered back when the early Mustangs were being built, and the added length of the wagon is not going to help with that.


The above said, you have to be careful because it is possible that at the point you reach the handling you want, you wont want to be in the car anymore. That compliant chassis was there for   reason  and sofa-like ride would be one of them.


The engine bay transformation is inspiring.


Pete

Carl Heideman
Carl Heideman
4/20/20 11:06 a.m.

Great build!  Jack's CAM-T Falcon wagon started with basically the same suspension mods and they made the car way better.   He's since taken it to the next level as he's running it nationally, but the bang for the buck is in the work you've done already.   

You've started with a higher-optioned and nicer example.  Keep going!

jerrysarcastic (Forum Supporter)
jerrysarcastic (Forum Supporter) New Reader
4/20/20 3:27 p.m.
Carl Heideman said:

Great build!  Jack's CAM-T Falcon wagon started with basically the same suspension mods and they made the car way better.   He's since taken it to the next level as he's running it nationally, but the bang for the buck is in the work you've done already.   

Heck yeah, Jack’s wagon is one of the things that got me thinking about switching from a lurker to a contributor.  I’ve been haunting the forums for some time (I love the community here) but I was never sure the build I had in mind would fit in here until I saw I was not the only one trying to make a falcon wagon handle decently.

For sure I did not feel like I fit in on the classic mustang or pro-touring forums, which tend to feel pretty tribal at times.  Seems like around here everyone is more into letting you run your own crazy program without too much “that’s wrong, you should have done it this way” or “Ford made it perfect from the factory so why change it” mentality.

I don’t have aspirations of competing nationally (good to know these old wagons have that potential though) but more of a cool old car that no one expects to go around corners fast... until it does.  :)

You've started with a higher-optioned and nicer example.  Keep going!

Sometimes I worry it’s too nice.  There is something to be said about Jacks wagon, it really gives you some permission to thrash on it.  But I like nice things so I’m happy to figure out how to strike a balance. Not a show car, not a track weapon, but somewhere in the middle... we’ll see how it goes!

jerrysarcastic (Forum Supporter)
jerrysarcastic (Forum Supporter) New Reader
4/20/20 8:35 p.m.
NOHOME said:

Have you considered some form of "Frame Connectors" under the car? "Torsional Rigidity" had not been discovered back when the early Mustangs were being built, and the added length of the wagon is not going to help with that.


The above said, you have to be careful because it is possible that at the point you reach the handling you want, you wont want to be in the car anymore. That compliant chassis was there for   reason  and sofa-like ride would be one of them.


The engine bay transformation is inspiring.


Pete

I'd say it's something I want to consider but low on the list of priorities. I think chassis stiffness is never a bad thing, but since there is nothing off-the-shelf I can use from the mustang world I'll need to work on my metal fab skill before I feel up to creating my own solution. 

Im also thinking the extra roof structure of the wagon helps compared to a Mustang. Probably in the near term I will work out some shock tower stiffening (which I am sure it needs) but leave it at that for a while. 

jerrysarcastic (Forum Supporter)
jerrysarcastic (Forum Supporter) New Reader
4/22/20 3:40 a.m.

Rehabbing my engine bay was definitely rewarding when it was done, but I left out that it was also pretty stressful because in the background we had also made the decision to relocate from San Jose CA to sunny Hawai’i. As it turns out Mrs. Sarcastic has parents the live in Honolulu, and while they still live on their own, it was becoming clear they’d need help sooner than later. We decided it was better to be close to them than worrying from afar, and pulled the trigger.

Moving to Hawai’i is not like your average move of course, since it involves packing a container (and a whole bunch of arrangements and jumping through hoops) and shipping your vehicles. It also requires an intense amount of packing, downsizing, and careful scheduling to be absolutely 100% packed and ready when that ship you booked months ago goes out to sea with (hopefully) all your stuff.

And I had just torn my engine compartment down and committed to taking the car off the road until it’s done… FFFFFFFFFUUUUUUUUUUUUUUU...


So long story short I was trying to do the best job I could in the least time possible, while also packing away everything in my life to this point. And there is no shipping a non-running car, so no room for errors. Now you also know why I didn't focus so much on taking pictures when I was tearing my engine apart and putting it back together.

I won’t lie, it was down to the wire and I barely made it. I had the car running and driving with just days to spare, with a painfully rough tune and a bunch of untested parts.

I barely had time to do a shakedown cruise, double check nuts and bolts, this and it had to run well enough so that a total stranger could start and drive it without me there to coach them on getting this beast on or off the boat. Those of you with older project cars know how hard that last part is.

I still sweat thinking about it. I was sure I'd missed something in my haste and I was gonna get it booted off the boat. But I had no time to worry about it in the moment and I couldn’t dwell on it because I was busy doing this:


So here I am, 20 days before Christmas 2016 with all my stuff in a container, two cars on their way (shipped the week previous) and everything literally and figuratively up in the air…

jerrysarcastic (Forum Supporter)
jerrysarcastic (Forum Supporter) Reader
4/22/20 4:17 a.m.

I’ll spare you the cliffhanger, it all worked out! A few days later we were in an empty house just outside of Honolulu, with nothing but our pets and a few small bags. A short while later our stuff and cars also arrived. Before you know it I’m parking the old wagon down by the beach. 


I’m honestly still tired and sore in places from this move. It was that exhausting, but dangit, we made it!  

Edit:  Now that I see how to post videos, here is a little cruise I took up the H3 to Pearl Harbor.  Sure is a nice view to take in from the wagon!


jerrysarcastic (Forum Supporter)
jerrysarcastic (Forum Supporter) New Reader
4/24/20 11:52 p.m.

When I still lived in California the cooling system on the Falcon is what I would describe as adequate (barely) for most of the driving I did.  As long as I kept things moving and did not get stuck in heavy traffic, I was pretty much good to go. But like any classic you kinda have to drive with one eye on the temp gauge, so it was hardly relaxing.

Let’s face it, 60’s passenger car designers didn’t exactly engineer robust cooling systems, but Fords of the era have to be among the worst. My Falcon had a tired old downflow radiator with the inlet and outlet on the same side, so pretty much it was using only 40%-ish of the core at best. What were you thinking Ford? ಠ_ಠ

Anyway, fine for NorCal, but it became it abundantly clear that I was gonna have to upgrade if I wanted to cruise around in the heat and humidity of Hawaii. I had hoped I could get away with spray bombing the original radiator but my first few cruises around the island proved that this would end up being a nope. A big fat nope.

At this stage the expected thing would be to wimp out and get an stock-styled radiator in aluminum, or switch to a late model crossflow radiator and call it good. But that’s just not my way of course. Someday I might want “stupid horsepower” I reasoned to myself, and along with being functional I wanted it to look cool, because vanity. So next thing you know I’ve ordered (I hope) the last radiator I’ll ever need.


I didn’t take a picture at the time (too busy drooling) so this crappy catalog shot will have to do, but I got a Griffin dual-pass crossflow aluminum radiator with a core that is waaaay thicker than the factory unit it replaces. It probably supports more horsepower than I’ll ever throw at this thing, and should keep it cool no matter what kind of hooning I get into. And it’s purty, real purty!

It didn’t take long before I had my tape measure and cutoff wheels out, whittling away at the core support to try and get this thing to fit. Here I am working out rough placement. 


I don’t have a welder (we rent and landlords aren’t cool with sparks and fire for some reason) so I kinda had to get creative with mounting but I was able to work out a few brackets to capture the top of the radiator. Rivet nuts were definitely my friend for this project.


At the bottom of the core support I cobbled together a channel for the rad to sit in as well.


I used rubber at all the mounting points (not shown) to cushion the radiator and allow for some chassis flex.  It’s not pretty, but it’s functional and out of sight so no one will notice. I’m sure once I get a welder I’ll revisit these but for the time being I’m calling it good.

Nothing succeeds like success! \o/

Nitroracer (Forum Supporter)
Nitroracer (Forum Supporter) UltraDork
4/25/20 9:45 p.m.

I'm enjoying these posts about your Falcon Wagon!  It reminds me of the 68' Fairlane I bought when I wanted an old car to tinker with.  

dropstep
dropstep UltraDork
4/26/20 12:07 a.m.

I love all things carbureted and wagon so I'll be following along.

jerrysarcastic (Forum Supporter)
jerrysarcastic (Forum Supporter) New Reader
4/26/20 3:53 a.m.

As you can imagine, a radiator as aluminum-y and magnificent as the Griffin is going to create a bit of a scope creep. So it’s no surprise that the factory mechanical fan is one of the first things that needed to go in the bin. I mean, look at how agrarian the stock program is, like the Ford engineers were trying to cool an old tractor instead of a modern (for the time) V8.


In stock trim my wagon didn’t even have a fan shroud, just that puny 4 blade fan hanging out in the open. so it’s exactly as you see it above. No wonder the temperature would spike anytime I found myself in stop-and-go traffic. 

I’ll say up front that I admire the simplicity and old school look of engine driven fans, and if you’re building a ‘32 Ford, spiritually speaking it’s your only choice. But if you plan to drive in traffic (I definitely do) you can’t afford such nostalgic hang ups so I decided I’d have to go electric.

I started searching around on the net and pretty quickly decided to adapt an OEM fan, and after a great deal of window shopping on Amazon I came away with this 90’s era Ford fan. It seems to get a lot of love on the internet and fit my rad pretty well after some trimming :


For those of you looking for a nice affordable electric fan I highly recommend this one, which has really worked out well in my project. Here’s the deets:

  • Ford part number: F4SZ8C607D
  • Fits 94-97 Ford Thunderbird
  • 18.5″ tall by 21.5″ wide by 5.5” deep (measured from back of the fan motor)
  • 2 speeds: 4300 CFM max
  • Approx. $75 on Amazon/Rock Auto

I ended up taking about an inch out of the shroud overall to get it to fit between the water pump and the radiator, so it’s about 4.5” deep (fan is about 3/8” from the core) but it does not seem to affect cooling negatively.

I also had to carve up the shroud a bit to allow for the inlet/outlet and trans cooler fittings but I got those sealed up with some pipe insulation I epoxied in place. A little welting around the rest of the shroud also helped close up any gaps and finish off the trimmed shroud surround.


It took me a little noodling to figure out how to hang the shroud on the radiator but in the end I settled for a few hand bent aluminum tabs to bolt the shroud to rivet nuts in the radiator mounting brackets.


When all was said and done the fit was nice and solid and (I thought) did a decent job of adding a modern fan and radiator without totally killing the vintage vibe I’m after.  


It’s fairly unobtrusive when you look at it from the front (for example when lifting the hood) and does not call a lot of attention to itself.  Although anyone paying attention can clearly see it’s much more robust than a stock styled replacement. Just the way I like it.  :)


jerrysarcastic (Forum Supporter)
jerrysarcastic (Forum Supporter) New Reader
4/27/20 4:46 a.m.

Getting the radiator and fan mounted up was what I’d call a fun challenge. Admittedly I’m no fabricator, so anything beyond a simple bolt-on is going to be outside my comfort zone, but electricity on the other hand is a complete mystery. So of course I decided to build my own fan controller from scratch. Oh boy… 

It didn’t start out like this naturally, as I was really hoping to find some off-the-shelf solution I could just slide into my online shopping cart. From there I imagined I would just pony up some hard-earned money, wait a while for stuff to arrive, install per the instructions, and go on with my merry life. The problem is that no such miracle product exists.

After a few evenings of diving down internet rabbit holes though I decided it wouldn’t be so bad to make my own after all, and I found this map to follow:


This is a two speed fan controller schematic I found on the fan projects page on turbo240.com and it served me pretty well. You can find a PDF of more schematics inclined the one I used here. Credit where it’s due, this site was a huge help.

I don’t have a ton of 12v wiring experience, so while I had a plan and a pile of parts from Amazon, I wasn’t really sure what a proper wiring job should actually look like. Also I had never worked with relays before, and knew I wanted at least some weather sealing so I could put this in the engine compartment and not worry about driving in the wet (plenty of that in Hawaii) so back into the internet wormholes I went yet again.

In the end I found a way to squeeze everything into an aluminum project box that everything fit into (and for which I had room on the core support) and started cutting and crimping. Here I am somewhere in the middle of it all.


I have two Hayden adjustable thermostats mounted to the front panel, and fuses and 80 amp relays (two on the high side for redundancy) mounted inside the box. I ended up mounting this on my core support, in the place the external voltage regulator used to live, so I sealed it up as tightly as I could, and used vibration isolating mounts for an extra measure of protection.

As a final conceit I added a reproduction regulator label and I think it helps the new fan controller to blend in, but car guys will surely scratch their heads a bit when they spot it.. You can see it here squeezed in between the overflow tank and washer bottle.  Some authentic engine compartment dust (snapped this photo tonight but the FMB is due for a bath) completes the stealth look.  ;)


Other than that I ran the thermostat probes to the radiator in a spot hidden by the fan shroud so you don’t see, then ran power through a 50 amp breaker to the fan, added a manual override switch in the dash, and it was all set. 


In practice this system has worked out nicely (after a few years in service) and I’ve got no complaints. It’s nice to be able to fine tune the temperature points and while it’s probably way easier to add a modern temperature switch to the manifold, I kinda dig how analog it is.

Maybe some day I’ll upgrade to EFI and let a computer control all of this, but it’s reliable and I’ve yet to overheat since adding it, so the peace of mind has been more than worth it.

jronald
jronald GRM+ Memberand New Reader
4/27/20 9:50 a.m.

Since I'm working on the cooling system on mine now, I wish I had known about the OEM ford fan you found - half the price of the SPAL I ended up going with, and included a shroud that would have been perfect for my core (17 3/4 x 23) SPAL also makes a 30amp fan relay kit with Thermoswitch (with different temp targets), that threads straight in on the spare port on the radiator return neck. And I know you built your box, but I ended up picking this up: https://www.amazon.com/gp/product/B07MR64XK1/ - Will do for now until I redo the wiring harness.

I can't tell in the photos (assuming you have AC for that in Hawaii), did you slip the condenser in front of the radiator between the radiator support, or leave an air gap?

jerrysarcastic (Forum Supporter)
jerrysarcastic (Forum Supporter) New Reader
4/27/20 3:24 p.m.
jronald said:

 SPAL also makes a 30amp fan relay kit with Thermoswitch (with different temp targets), that threads straight in on the spare port on the radiator return neck.

I had considered that one (and a few like it) but decided to roll my own controller when I found that the OEM fan can spike to 50 amps briefly when the high speed kicks in. That gives you an idea of how powerful the fan is, though to be honest I’ve never needed it; the low fan speed (which is nice and quiet) has been plenty at this point.

When the high fan speed kicks in it sounds like a hovercraft at full throttle so this fan is definitely overkill to make up for how small the grille openings are on T-birds of the day. I’d consider selling the SPAL fan and get one of these if I’m honest. It rocks.


I can't tell in the photos (assuming you have AC for that in Hawaii), did you slip the condenser in front of the radiator between the radiator support, or leave an air gap?

No AC from the factory on mine, but I may add it someday. In any event I have a ton of space between the grille and hood latch support, so adding a condenser will be a non-issue.


jerrysarcastic (Forum Supporter)
jerrysarcastic (Forum Supporter) New Reader
5/2/20 4:11 a.m.

After I got the cooling system nailed down on the wagon I decided to lay low for a bit on projects. Truth be told I was looking forward to just cruising around in it for a while, but as is often the case with old cars, problems can develop out of the blue.

In my case, despite having relatively low miles for a 60’s car (130,000-ish) the engine definitely feels a little tired. Compression is even across all cylinders, but on the low side (125-130 psi) and it definitely burns a bit of oil. In a perfect world I’d pull the engine for a rebuild, but I’m not in a great place to do that at the moment. Not impossible if I had to, but something I’d rather avoid for a while longer. You know…

But with that said, I was getting pretty tired of fouling plugs and things just not running right. Some of that was due to tuning issues with getting the Holley dialed in, but combined with some valve sealing issues, the rough running was hard to ignore.

So about a year ago (yep this thread still has not caught up to realtime yet) I decided that if I couldn’t pull the engine I could at least improve things by rebuilding the top end in the form of a set of shiny new aluminum cylinder heads. Here’s the standard catalog shot since I can’t be bothered to take pictures of this stuff when it arrives.

Since my car is not about ultimate horsepower I went with a set of low end Edelbrock (E-street) heads instead of going all out for now. If the internet is to be trusted these flow pretty well as-cast, and it’s the hardware (springs specifically) that holds them back to 5500 RPM and flat tapped cams or else. That’s plenty for where I am at now, and leaves the door open for an upgrade to the spring package down the road so they have some room to grow.

That said, I’m a believer in doing what you can to improve any part I’m bolting on, so before I slapped them on I did take the time to disassemble the heads and smooth out the casting flash in the runners. But by far the bulk of my time was spent in port matching my intake and exhaust manifolds.


Here’s the ports on the intake side. This is an early Edelbrock 289 manifold I scored on Craigslist back in the day and it’s not exactly performance oriented in the way more modern Performer intakes are, so there was a good amount to remove here to match up to the head.

I also opted to keep the factory cast exhaust manifold for now since I’m planning on addressing the exhaust system as a whole at some other time. Also I’ll admit I just think they look more old school than tube headers so I kinda want to hang on to them by now.


But the size of the factory ports are pretty hideous (and done with emissions in mind since this was a smog pump equipped CA car) so I definitely couldn’t leave them alone. I mean, just look at it!


Cumulatively you can imagine this took a ton of time, and I’m sure there’s arguments to be made for all this effort not amounting to any real difference in power. But it’d keep me up at night knowing I bolted this stuff up, sloppy ports and all, so I’m sure that peace of mind alone is worth 10-15hp, right?!?

jerrysarcastic (Forum Supporter)
jerrysarcastic (Forum Supporter) New Reader
5/4/20 3:54 a.m.

Along with the porting and blending, I also opted to upgrade the stock style stamped steel rockers to roller rockers, which again is probably more than I need given my otherwise stock engine. But I figure this is good future-proofing, since I can use them with a cam upgrade down the road.

Also, they look nice, so even if no one sees them, I sleep better at night knowing they’re in there.

I forgot to take a picture of them going in but here is a picture of it all in place when I was rechecking lash after a run-in period.


I also spent a lot of time agonizing about what kind of valve covers to run. I think it’s most peoples instinct to slap some bitchin’ aftermarket valve covers on their new aluminum cylinder heads and call it a day, but that idea was not floating my boat. I’ll confess I grew rather fond of the painted steel covers and painted heads of the factory engine, which I think looks appropriately old school. 

Also there is something really appealing to me about a stock looking motor that is more than it seems. To make that work though I had to trim the internal oil baffles to clear the poly locks on the new valve train, even though I have “tall” steel valve covers. It kinda turned out to be a pain.


But in the end I think it was worth it to hack up my stock valve covers a bit. After painting both the heads and valve covers in a fresh coat of Ford blue, I was pretty much back where I started.


Yep, shiny new aluminum heads, new roller rockers, and hours of work with a grinder blending it together, all hiding in plain sight. If you look close you can see the Edelbrock name milled in the heads, but other than that it’s hard to tell it’s not stock. Just the way I like it!

1 2 3 ... 5

You'll need to log in to post.

Our Preferred Partners
l7N4wQKsSoms9qI1c0nuPuTdYOU0XETOkyaAzA3xgNtG8C2TXp9EVE4S664zSZNY