


wearymicrobe wrote: Please bolt the model T up to this in some fashion.
It will fit........

wearymicrobe wrote: Please bolt the model T up to this in some fashion.
It will fit........

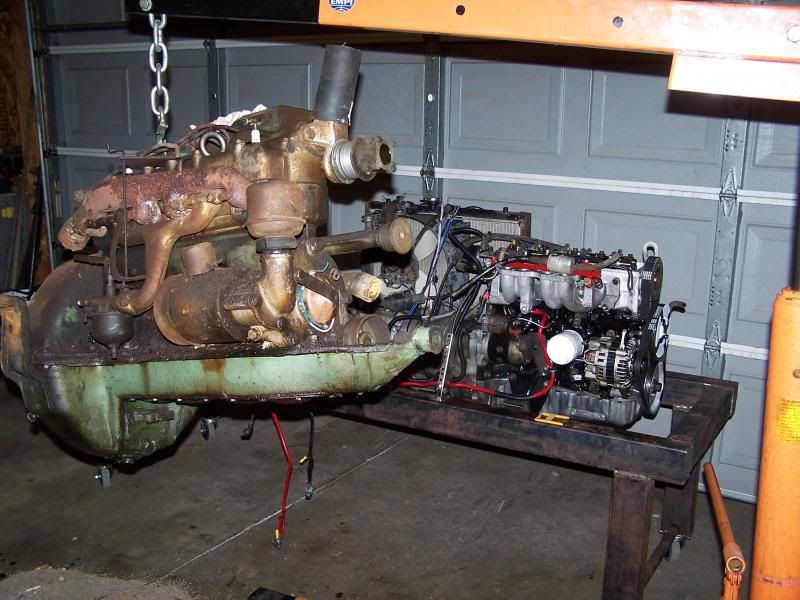
This project is way to big to pull off in a few weeks, but progress is being made daily. My goal of having the engine running by the second week of July is not going to happen, but it will be running within a few more days.
Bringing this project to completion will happen in several stages in order to keep the momentum going.
Stage 1 will be the successful start of the engine and validating the cooling and electrical systems work as designed.
Stage 2 will incorporate the PAU on to the test stand and I will work out the "watchdog" system. The watchdog system will independently monitor the RPM and load of the PAU and it will punch the E-STOP relay if it detects a fault. Punching the E-STOP relay will pull power from the injectors and cause the engine to immediately halt. A fault message will appear on the watchdog display.
Stage 3 will be putting a new roof on my house and will delay stage 4.
Stage 4 will include the servo throttle control
Stage 5 will include servo dyno control
Stage 6 and up will be integrating the software for all the sub systems.
The good news is I'll be able to do some rudimentary load tuning as soon as the PAU is connected. bla bla bla....
Let's look at the progress .......
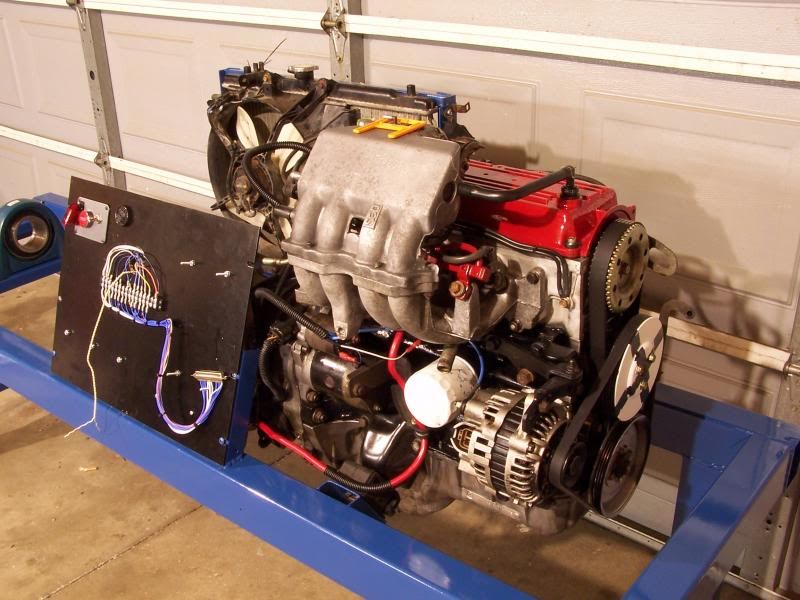
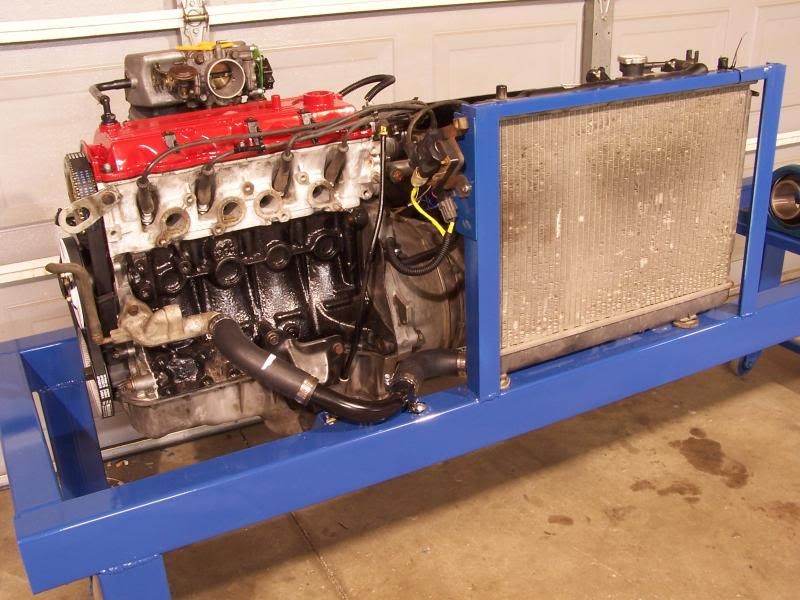
The cam cover was painted red to add the illusion of a more powerful engine.

This is the basic control panel used for starting the engine. It is wired for a Megasquirt II but it can be reconfigured to run other ECU's
stay tuned!

I really admire the work you're putting into this dyno. As an engine break-in/test stand, it is hard to beat! Especially nice for getting some of the engine management kinks worked out before putting it into a car.
Thanks!
This should be a pretty cool toy for testing out ideas and getting results fairly rapidly.

Had a very productive weekend and got the little B3 engine running. It more or less started right up and settled down to a nice idle. The engine ran for about an hour without issues and appears it be in excellent condition. The short block has 170K miles on it and although it was disassembled, it was not rebuilt.
Take a look....
http://youtu.be/825MuP8JZd8
And of course some progress photos.
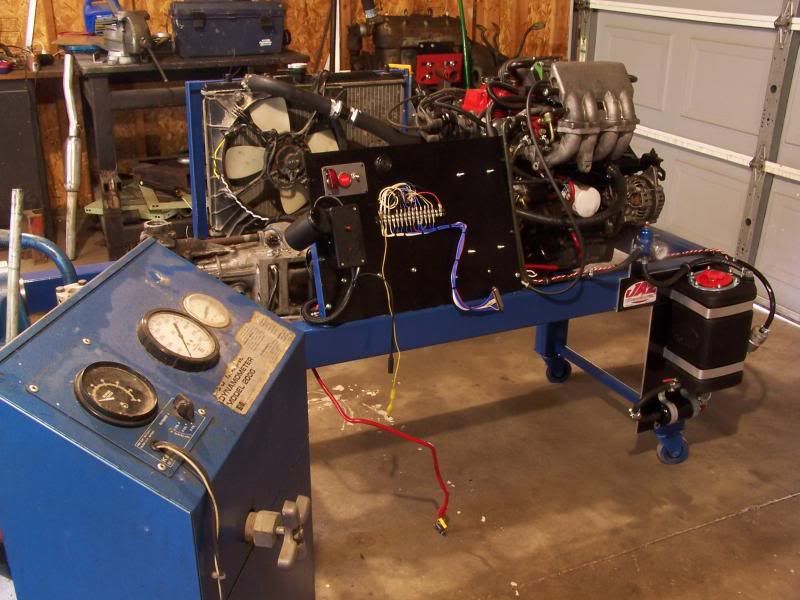
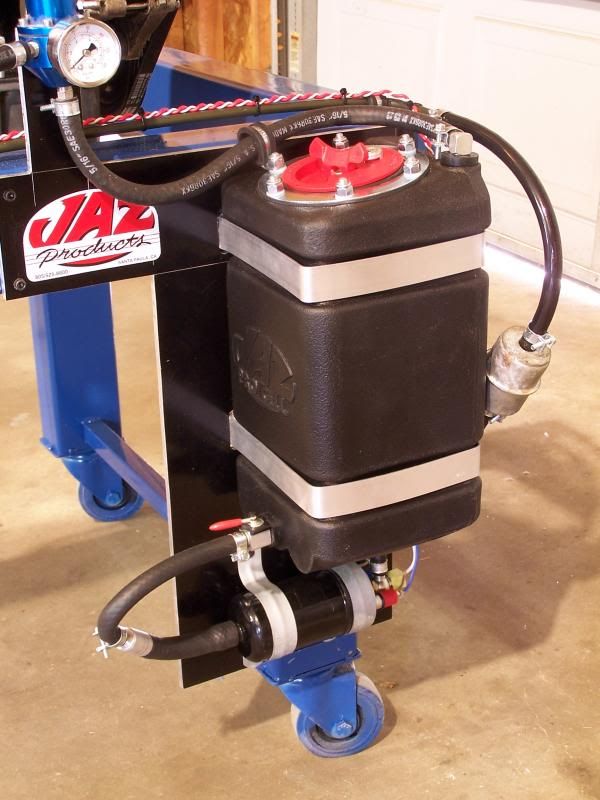 The fuel cell is from a Jr dragster and holds about a gallon. This engine will run a long time on the small tank.
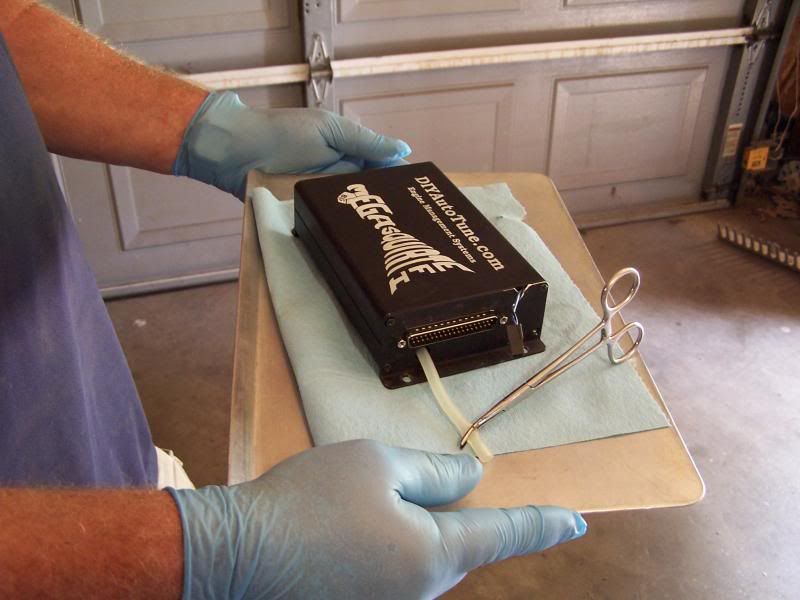 The Megasquirt was surgically removed from the B3 Miata and successfully transplanted into the dyno. The dyno engine ran great on the Miata tune.
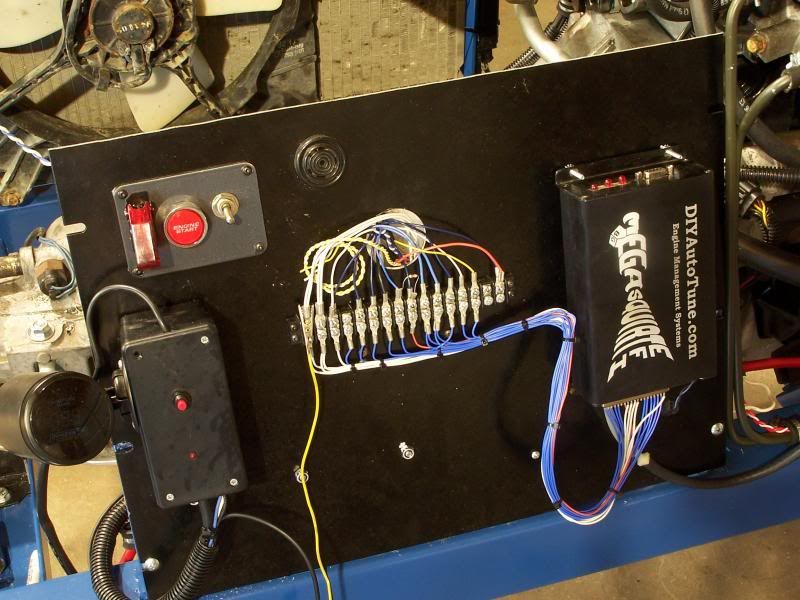
 Mission control center shortly before launch.
Stay tuned!

As an engineer, I think I've had less explicit dreams than what you're doing in your garage.
LOL,
Just having fun making a big toy![]()

fujioko's status should be changed from "Reader" to "BOSS"

awesome
lol, I'm not even a DORK yet..... although BOSS does sound kinda cool....![]()
Standby while I deflate my ego...BRB
![]()
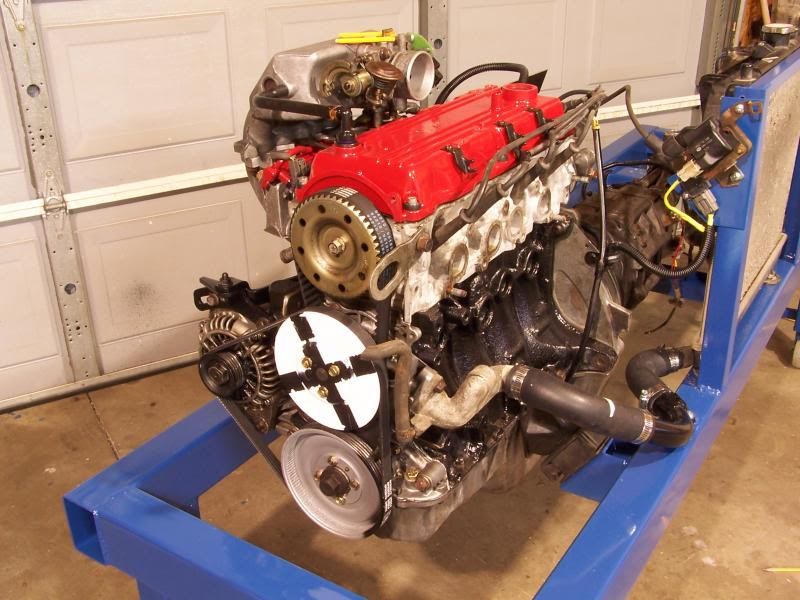
Worked on some details this weekend. The transmission mount is vintage Chevy Nova and seems adequate but a torque bar was added to ensure driveline alignment under load. Originally I wanted to use something from the junkyard but nothing jumped out and said take me home. I rooted through my scrap metal pile and junk box until I had enough crap to fabricate something that might actually work.
The B3 Miata and the dyno engines are close to identical, however there are some uniqueness to both engines. The engine in the Miata uses a coilpack ignition while the dyno has a distributor. Megasquirt doesn't care because the trigger signals are identical... time will tell if the performance is the same. At some point I'll upgrade the dyno with the coilpack ignition. I can gloss over some major details because this project is getting expensive. I'm $300 something dollars over budget and the spending is still going on It's a nice fantasy, but something like this can't be built for a grand....but it can be done for challenge money.
Pictures tell a better story.
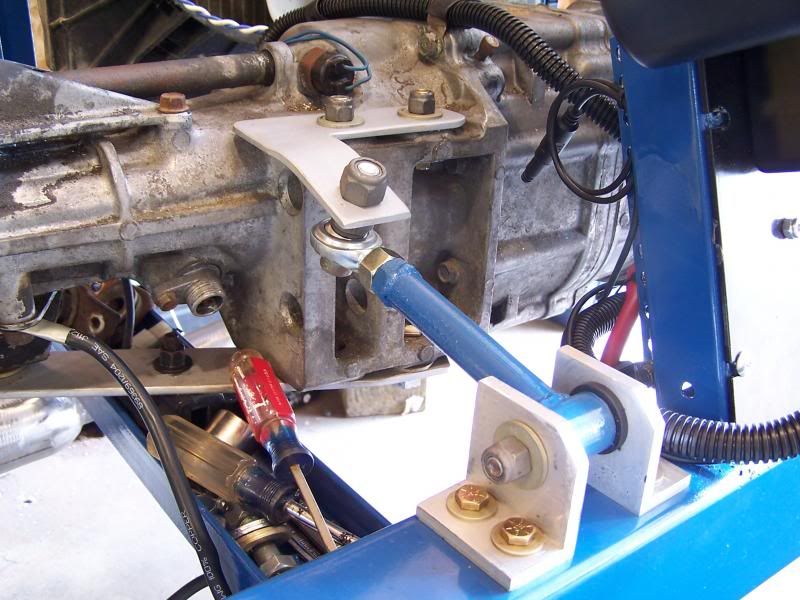 Transmission torque bar will hold back a freight train.
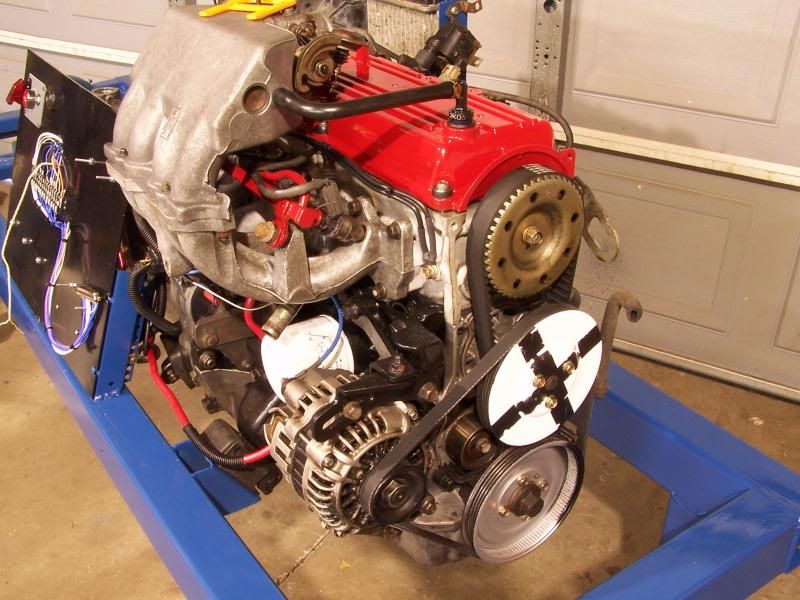
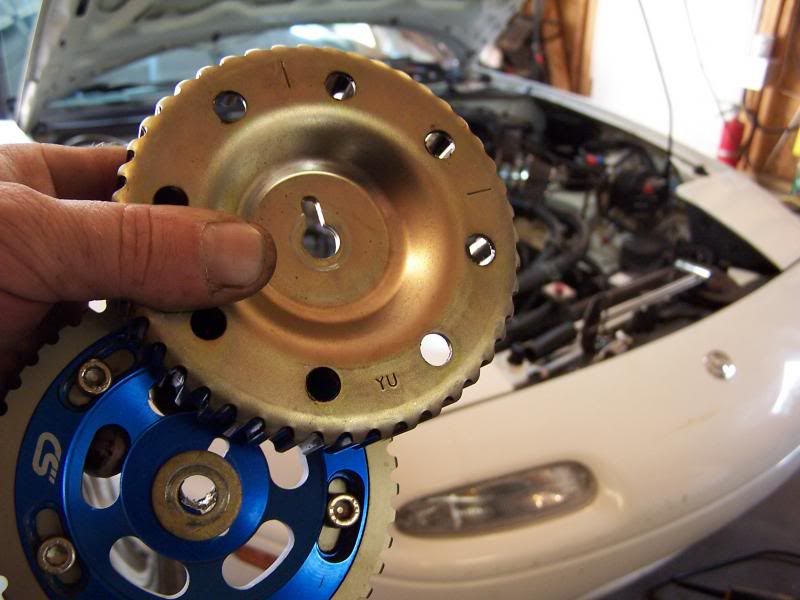 The highly coveted Cork Sport cam sprocket on the B3 Miata was swapped for an OEM unit. This had to be done for baseline data gathering. The Cork Sport will be tested at some point in the near future.
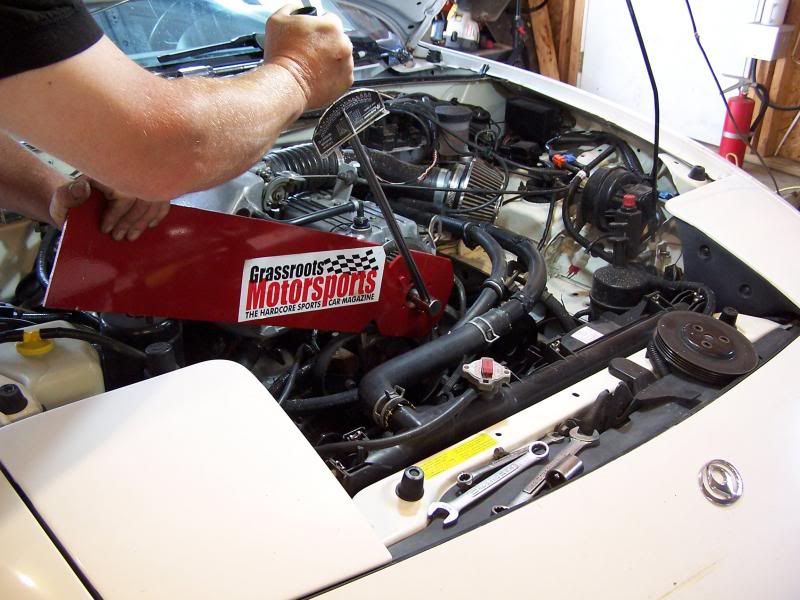 Nothing says Grassroots Motorsports like a homemade Cam/Crank tool. This is not a blatant attempt to get into the magazine....really.
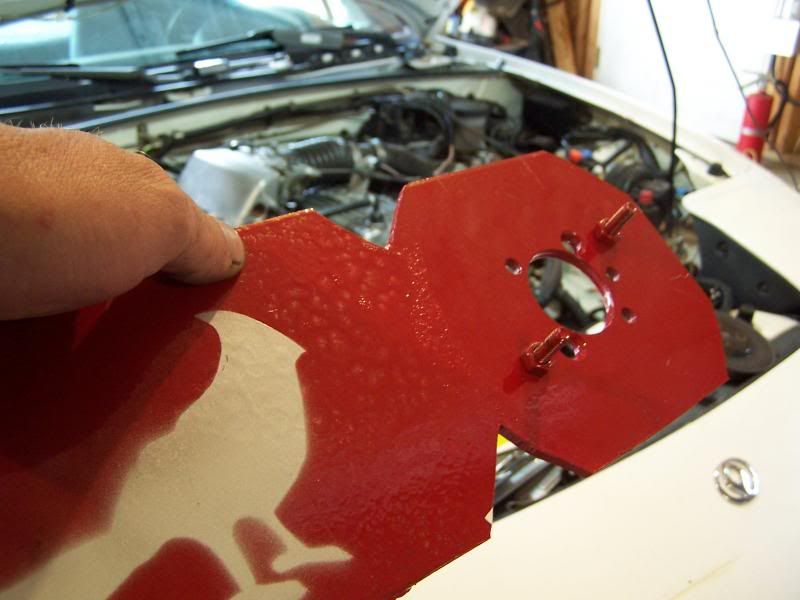 "put a bird on it"...
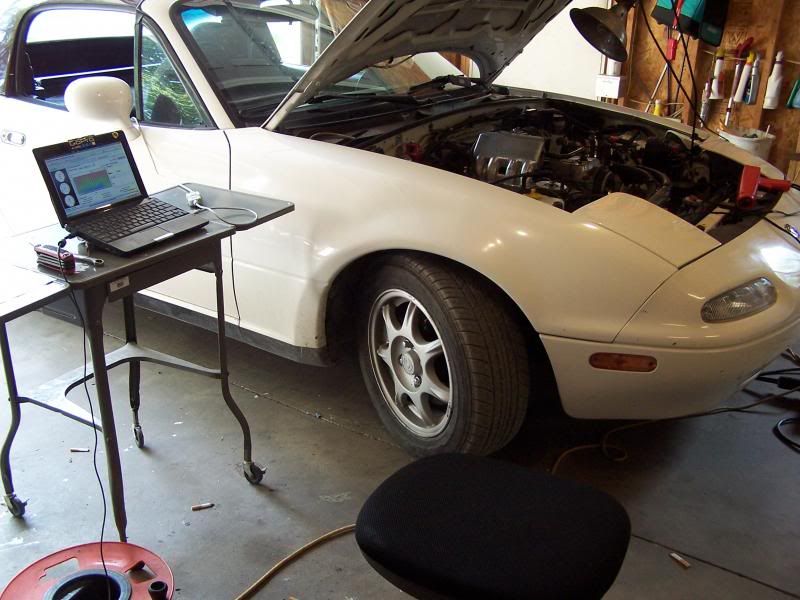 The Miata gets an electronic tuneup. This week I'll datalog my travels to build a profile that I can use on the dyno.
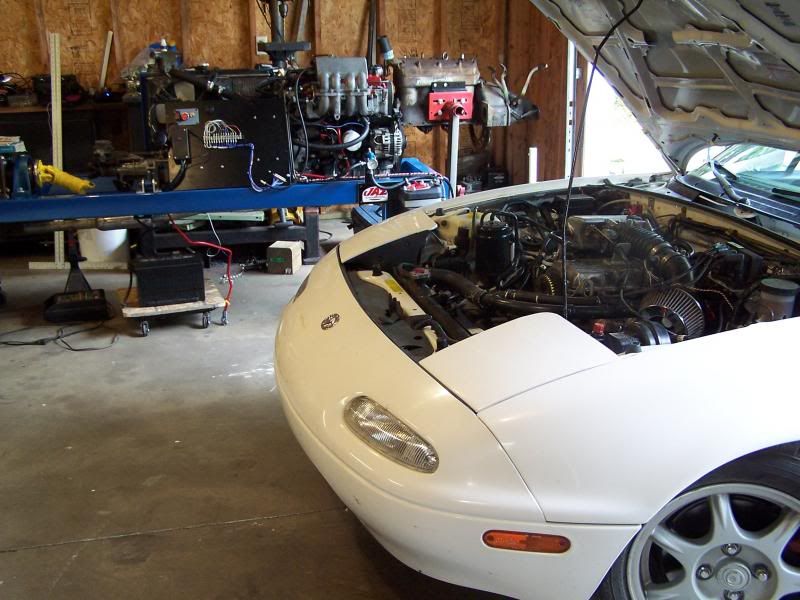 So sad, three engine, twelve cylinders and the combined HP is less than 150. I need a LS6 in my life.
Stay tuned!
Took a temporary break from the dyno project to put a new roof on my house. The roof project created chaos in the garage and absorbed most of my time. Thankfully the roof is complete and its time to play in the garage again.
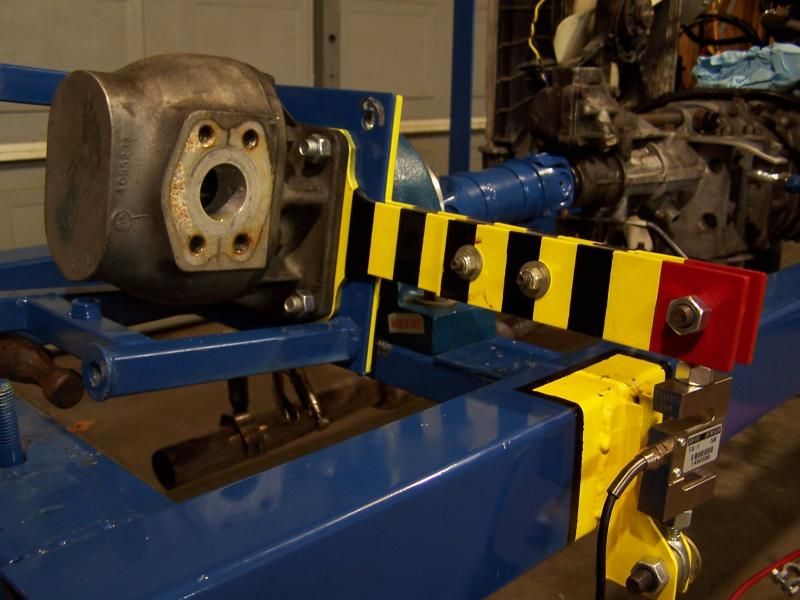
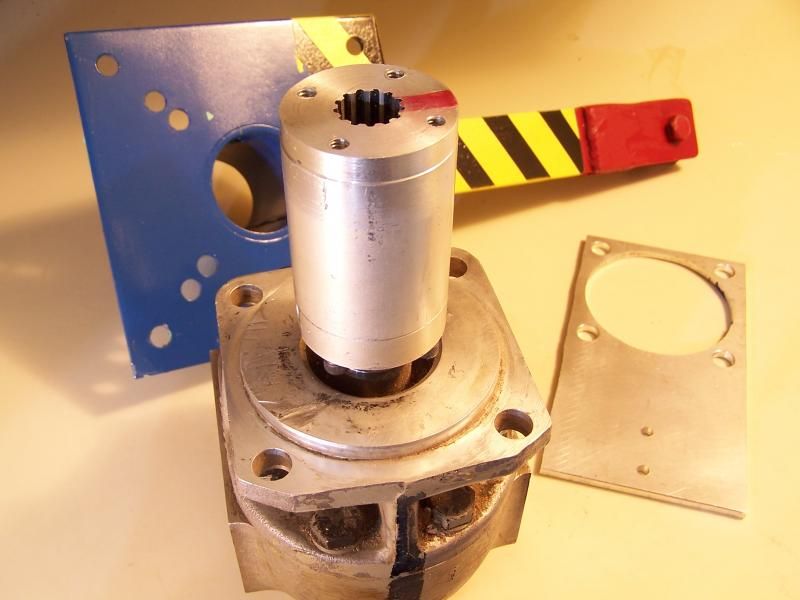
The power absorber unit (PAU) needs to be fitted with a torque arm, load cell and speed sensor for the data acquition system. This stuff can get spendy for professional equipment, but there are hobbyist grade parts available on the cheap.
 The torque arm measures about 13 inches...crap! a foot long would have made the math easy. Anyway the computer will be doing all the calculations and it really doesn't matter how long the torque arm is. The load cell was $42.00, it's rated to accurately measure 220 Lbs of force. It is physically the same size as units rated for much higher loads so it has a very high burst rating. I think the torque are would fail before the load cell burst. The load cell needs to be connected to a $25.00 ebay amplifier before it can be read by the data aquition equipment.
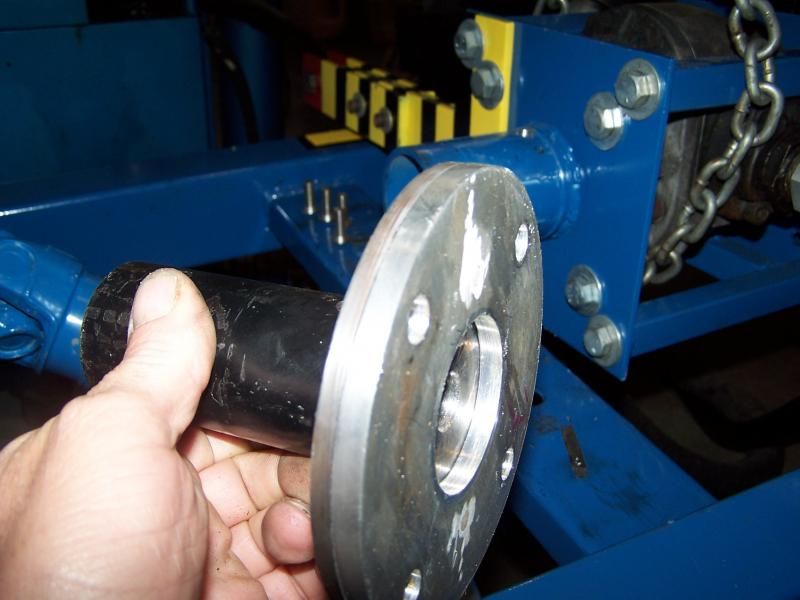 The driveshaft to PAU adapter that was originally fabricated had to be scraped. The trouble with the adapter was it was impossible to install and to lock into place. It sort of was like painting yourself into a corner.
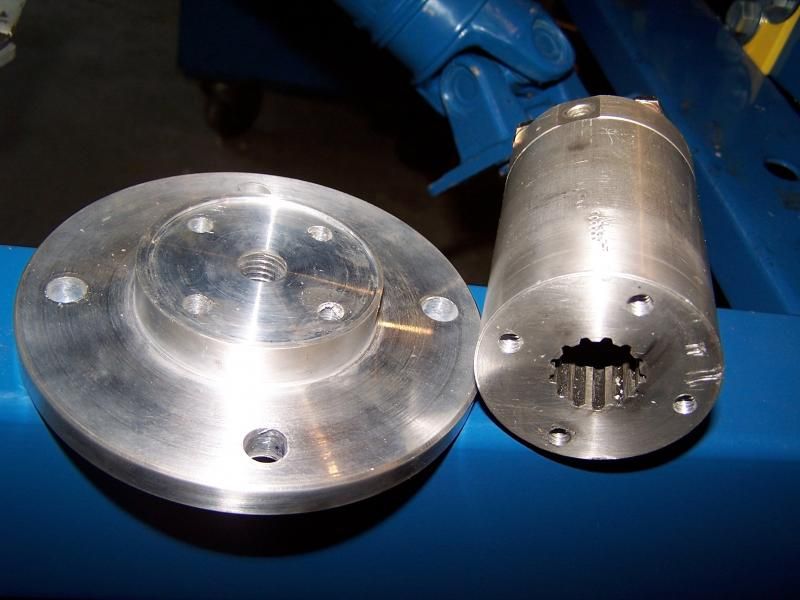 A three-piece adapter was put together in order to solve the assembly issues. The chunk of aluminum that mates to the pump is a re-purposed marine adapter that came with the dyno. This marine adapter holds a rating of 200 + HP but is certainly de-rated after it was modified. Overall it should be just fine for my application.
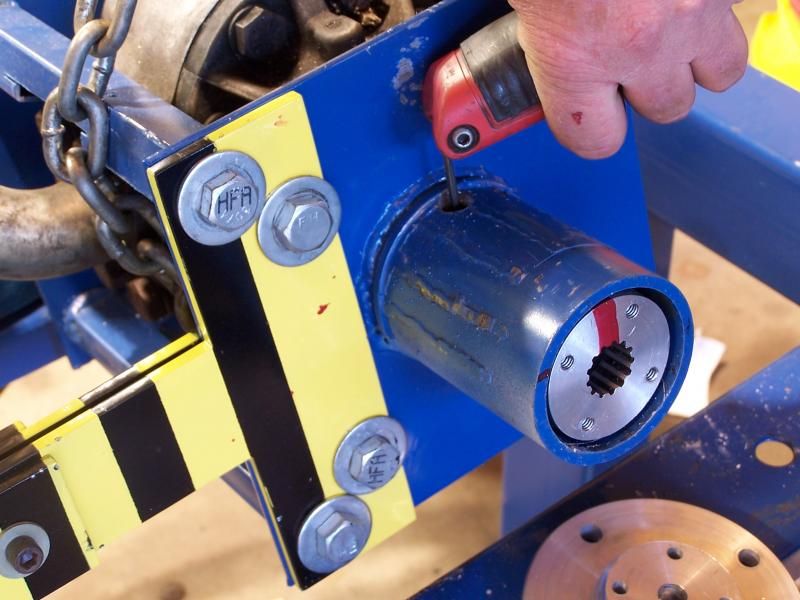
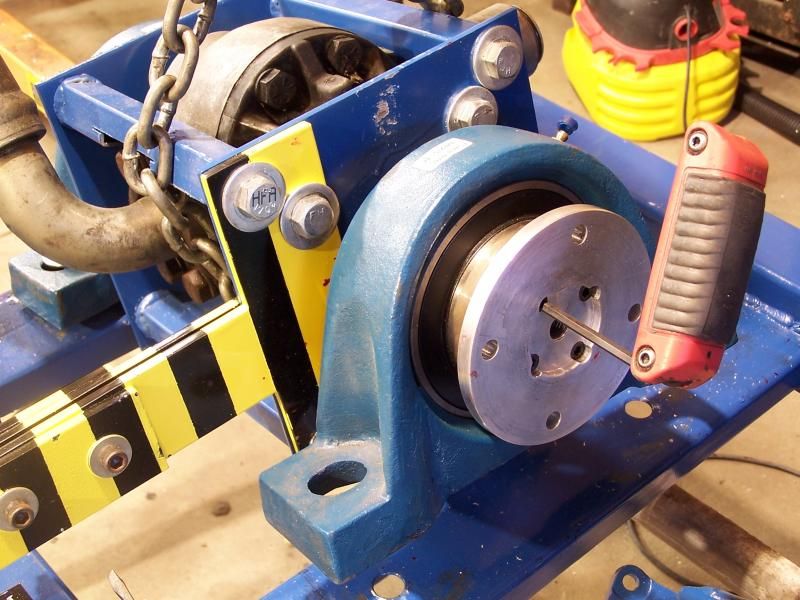
 An access hole was drilled into the snout of the PAU cage so the set screws on the pump shaft can be locked down. Once the shaft is locked in, the pillow block bearing slides into place and the rest of the hub is assembled.
 The new shaft adapter is slid into place and locked down.
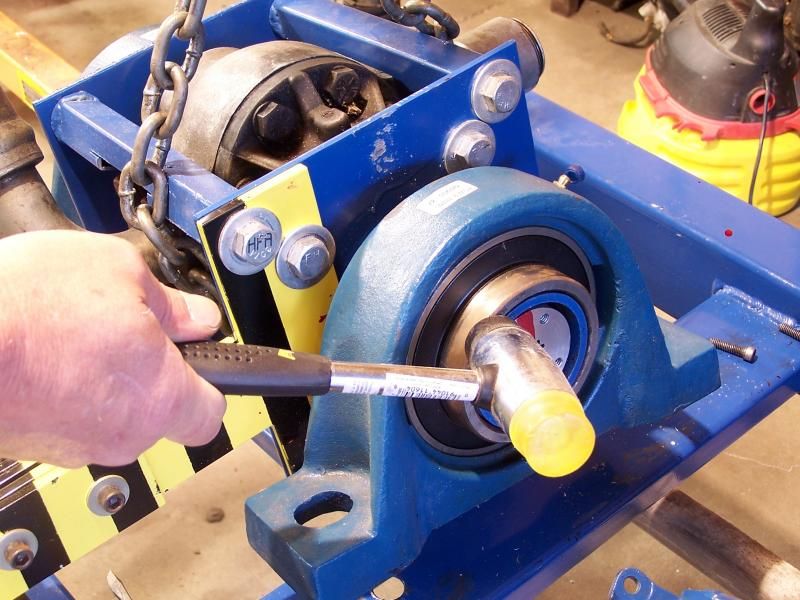 The pillow block bearing is lightly hammered into place.
 Next, the flange is bolted up.
 Driveshaft is connected for the last time...
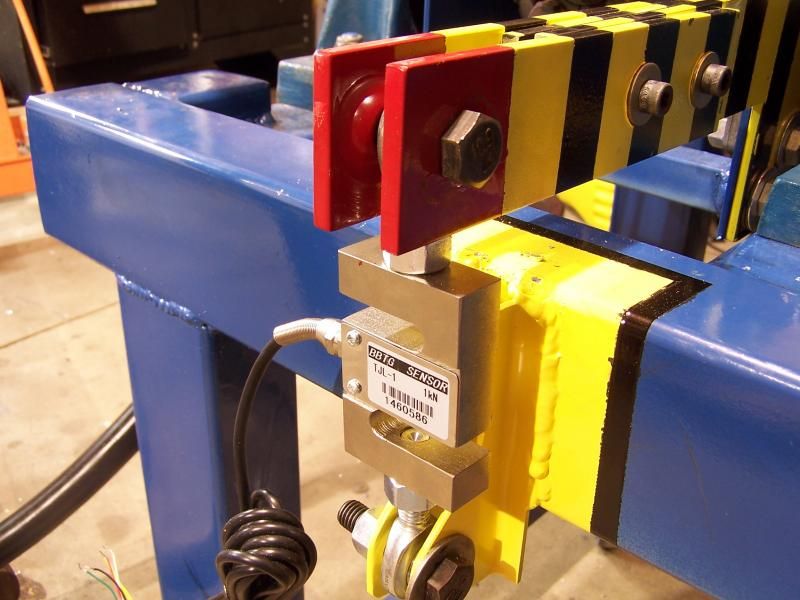 Close up of the load cell.
At this point I'm ready to prime the pump and dial in a light load. Hopefully no more surprises.
Stay tuned!

Holy Updates Batman! I wanna see dyno results now! haha! Great job!![]()
Thanks!
I should have the dyno running again in a few days. Let the fun begin!
Having used one of these on boats I thought, "load cell?, that's what the pressure gauge on the dyno is" but I guess you can't log anything off an analog gauge.


We will be watching you with great interest.

mfvmx wrote: Having used one of these on boats I thought, "load cell?, that's what the pressure gauge on the dyno is" but I guess you can't log anything off an analog gauge.
But you CAN attach an electronic pressure sensor. There are lot's of different ones out there.
That said, I prefer fujioko's solution, as it directly measures the actual torque.
I'd consider a damper attached to the torque arm, would need to be awfully stiff though, unless the arm was extended to at least twice it's length.
Well, I finally got all my ducks in a row and it was time to start the dyno and test the power absorber. The pump was primed by lifting the tank assembly with an engine hoist and the fluid trickle down into the pump. Everything went as planned.
The transmission was engaged, engine started and the pump spun for the first time ! A slight wobble in the pump to driveshaft adapter but nothing to be alarmed about. After a few min to let the fluid circulate I attempted to increase the pressure and that is when my perfect day went to hell. Long story short.... the pump is spinning the wrong way. OH E36 M3! This is a huge berkeleyup.
The pump is a gear type so it wasn't damaged by spinning backwards, but it also won't develop any pressure. I did a quick experiment and put the transmission in reverse and the pump developed some pressure but it wasn't spinning fast enough.... Crap.
The good news is the dyno sort of works... the bad news is the dyno wasn't finished ...
Ebay to the rescue!
After an extensive search on ebay a clockwise spinning pump was located. The seller got $150 plus shipping and I got a usable pump. Folks, this was a narrow escape and luckily everything worked out..... well almost. The new pump had a smaller mounting flange so the whole PAU had to be altered. Mostly an annoying delay , the modifications were fairly simple but took a week of evenings to get done.
Today was the turning point in this project. The last screw was jammed into place and all that was left to do was to start the dyno and see if it worked.
Check out this short video of the dyno pulling a light load. http://youtu.be/aDjlQ_dsOOU
Now, let's look as some pictures...
 Old pump being removed... it is a counter clockwise pump
![]()
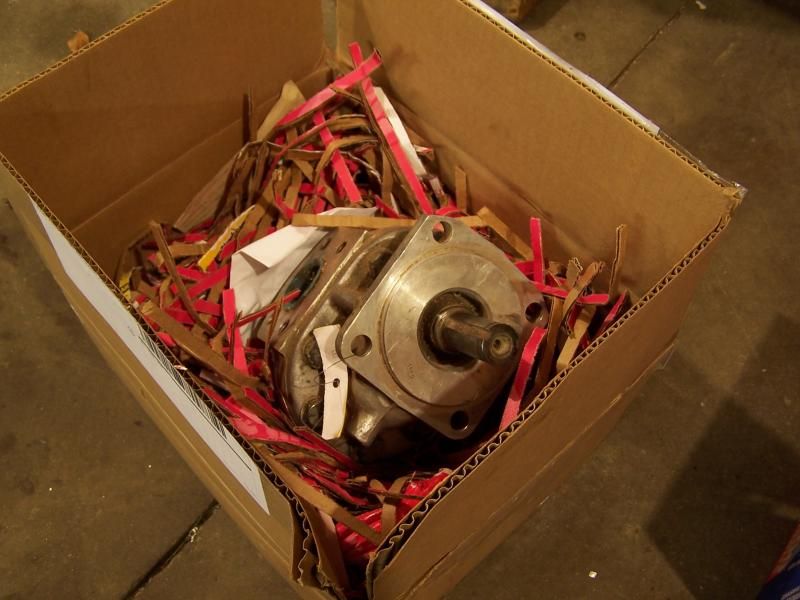 New pump arrives.. this one spins clockwise.
![]()
 A few odds and ends had to be modified for the new pump to fit.
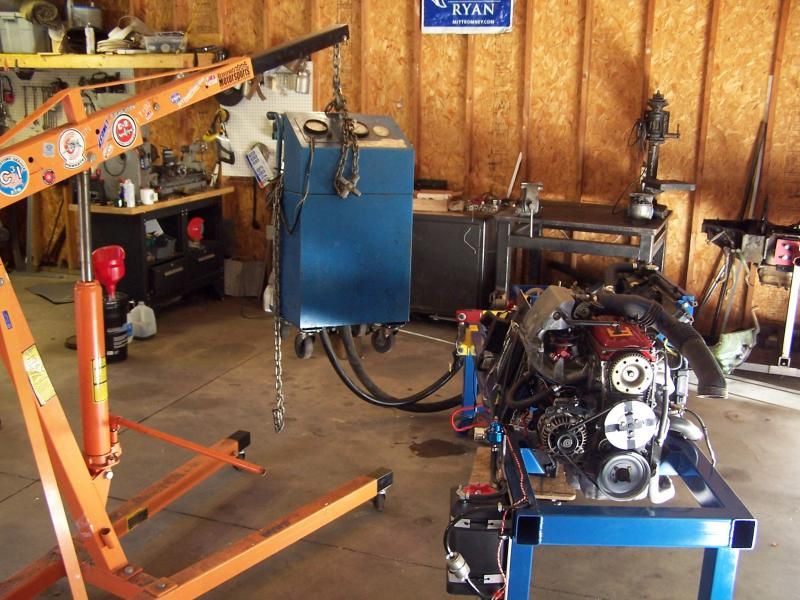 Pump being primed by lifting the the tank assembly with an engine hoist.
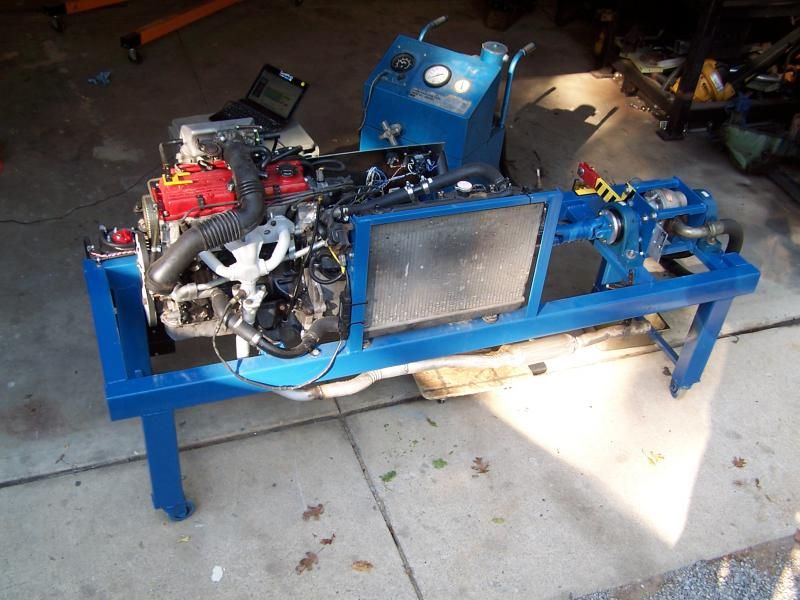 Dyno rolled outside and ready to start
 Looking good, time to test it!
Stay tuned!
That is so cool ...

This is gonna be so good for the 1.3 project - you can test tuning changes in a controlled environment now rather than having to drive each tank of gas exactly the same in workday traffic in the Miata.
I hope it works, sucks about getting the wrong pump.

We'll I'm not worthy... I need to go get off my rear and get to work on something after reading this.![]()
![]()
In reply to ssswitch:
Hell yeah! I definitely enjoy driving the Miata but its a lot of work keeping track of all the tweeks and it takes forever to get results. Not only is this dyno a cool toy, it will provide years worth of data in a short amount of time.
Sunday I ran the dyno for about 45 min under different loads to get a feel for how fast the hydraulic fluid will heat up. Looks like I can get 15 to 20 min of load testing before I have to let the unit cool off. This dyno is equipped with a heat exchanger so I do have the option of running a garden hose to keep the fluid cool. I may rig up a closed circuit cooling system in the future.
This week I'm building the servo throttle controller and ordering the parts for the servo load controller. I should have the dyno controls automated fairly soon.
Stay tuned!
I hate how easy you're making this look. I am so incredibly envious of having your own personal dyno for all the steady state tuning you could ever want. What are your plans for after you get the 1.3 all tuned? Rent the thing out to your GRM buddies? ![]()

Hey, if it doesn't work out, you can probably empty swimming pools and basements in about an hour......A really interesting thread.
Possible stupid question: Couldn't you just spin the original pump around 180 degrees and get the proper directional flow?
Jerry From LA wrote: Hey, if it doesn't work out, you can probably empty swimming pools and basements in about an hour......A really interesting thread. Possible stupid question: Couldn't you just spin the original pump around 180 degrees and get the proper directional flow?
If you look at this pic, you'll see that there is no exposed shaft or flange at the opposite end of the pump.
You'll need to log in to post.


