
jh36
Reader
11/28/20 6:55 a.m.
In reply to NOT A TA :
Ok, that's good to understand and keep in consideration. The only structural metal to fiberglass I foresee are mounting brackets on the roof. I was going to epoxy and rivet pieces of aluminum "L" to the roof (maybe 3" lengths) on either side of the halo center bar to align the body, left and right, and also provide a clamping attachment point for the roof. I could just rivet it and not use epoxy.
Other than that, it should be outriggers and tabs attaching the body. To X19's point, I may need to stiffen the trunk and hood panels, but I'm not sure yet about that. Deren had fabricated a piece of aluminum bar stock that spanned the NASCAR hood to keep it from pushing down and locking the throttle open. That happened at VIR on the back straight. I don't really need to experience that.
As a point of interest, the NASCAR body was largely held on by rivets locking metal (both aluminum and thin sheet steel) to the body. At least on this car, that's the way it was done. It wasn't bonded, but it was riveted.
Since the Camaro body is being designed to detach, anything bonded to the body is just a support structure to hold a fastener.
For the upper mounts how about using something like these, with the "L" bracket welded to the cage and a button cap through the body? https://www.mcmaster.com/mounts/mounts-feet-and-pads/general-purpose-vibration-damping-sandwich-mounts-with-stud-and-insert-6/ This accommodates any thermal stress issues which are very real as NotaTA noted.
jh36
Reader
11/28/20 8:29 a.m.
In reply to TurnerX19 :
YES YES YES! You guys are good. Holy Cow it's nice to have you guys along for the ride.
OK, I lose the "auto locator" doing it this way, but the mounting holes would line everything up nicely. I like everything about this, but especially like the vibration dampening element.
What do you think about using standard buttonheads and just adding neoprene or rubber washers to both sides? Which brings up another thing I've been wondering......would you use loctite on the buttonheads, lock washers, or locking nuts?
jh36
Reader
11/28/20 8:31 a.m.
Also, because this shell is very lightweight, I may double up the thickness at all the attachment points using pieces of scrap body material that I had to trim away.
I like the sandwich mounts TurnerX19 linked. I use plastic washers I get from McMaster's for stuff like that where I don't want to make marks in or wreck paint. I'd just use them on the outside for your case. Blue Locktite would be my choice.
jh36
Reader
11/28/20 3:28 p.m.
Using everything you guys have said, here is a recipe I have going..go the button head rout with a plastic washer on the exterior, a rubber washer between the top and bracket, a bracket welded to the roll bar and a nut with blue thread locker finishing the dish.
Or, I could use the shock absorbing threaded piece suggested by TurnerX19. That wouldn't have the tendency to squeeze out the a washer like my theoretical assembly might.
Whatever combination I end up using, I think this is an assembly that can be universal to the main body mounts. Again, thank you!
I use the mounts I linked in many applications. Do not use loctite! The thread class is sufficiently loose to make them nearly self locking, and if you do use loctite they usually get destroyed on removal. Plastic washer on top, or the rubber/metal bonded type if you are concerned about water ingress. A little reinforcement of the bodywork is a good idea. The plain rubber washer technique will be troublesome. I forsee the bolts fretting through if it is done loose enough for any flex/ vibration damping. Take a hole saw a little larger than the mount diameter to the scrap material and make round reinforcers. Bond on with a thin layer of glass cloth and the same resin the body was made from. Probably cheap polyester.
jh36
Reader
11/28/20 7:46 p.m.
In reply to TurnerX19 :
Making sure I'm interpreting the data correctly...the "Thread dp" is the internal thread the button cap would thread in, correct? It seems the thread depth is fairly shallow, (1/4 for a 1/4-20). I suppose it's well engineered, but it seems shallow. Does the bolt "bottoming out" lock it in sufficiently with this amount of threads? Thanks!
jh36
Reader
11/29/20 8:50 a.m.
I woke up in the middle of the night and spent a couple of hours on the McMaster-Carr website. It is a wonderful thing. I used the old catalog in the early days of our business, before the WWW's. I'd forgotten how amazing a place it is.
In reply to jh36 :
Bottoming out the screw is a poor idea. It puts internal pressure on the bond area that may be already loaded by application. One diameter of thread engagement is standard practice during machine design.
jh36
Reader
11/29/20 12:54 p.m.
Ok, the order is placed. I threw in some weld nuts for good measure. My course for the week is set.
jh36
Reader
12/6/20 2:48 p.m.
I've attached the rear in a couple of spots using sandwich mounts and one of my bar mounts. I also reinforced the rear a bit with some scrap I cut from the door 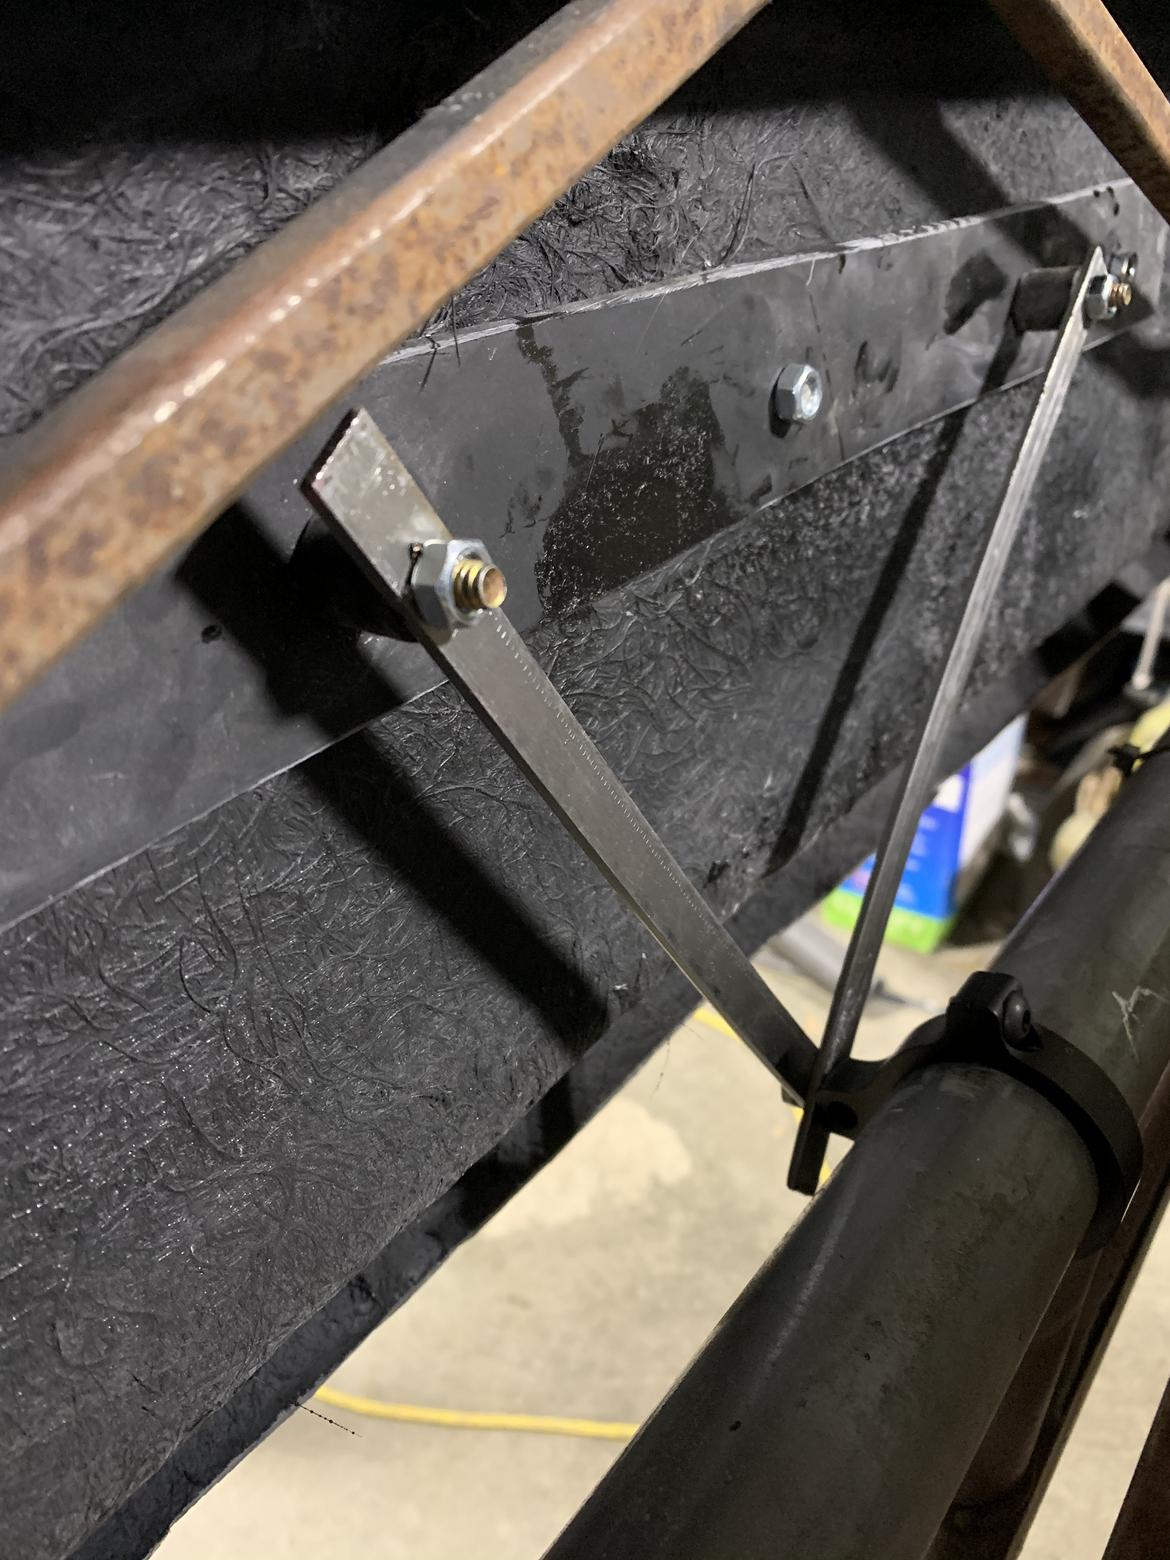
jh36
Reader
12/6/20 2:55 p.m.
I cut a section out of the body to put the exhaust back on, then made a metal box for some heat protection. 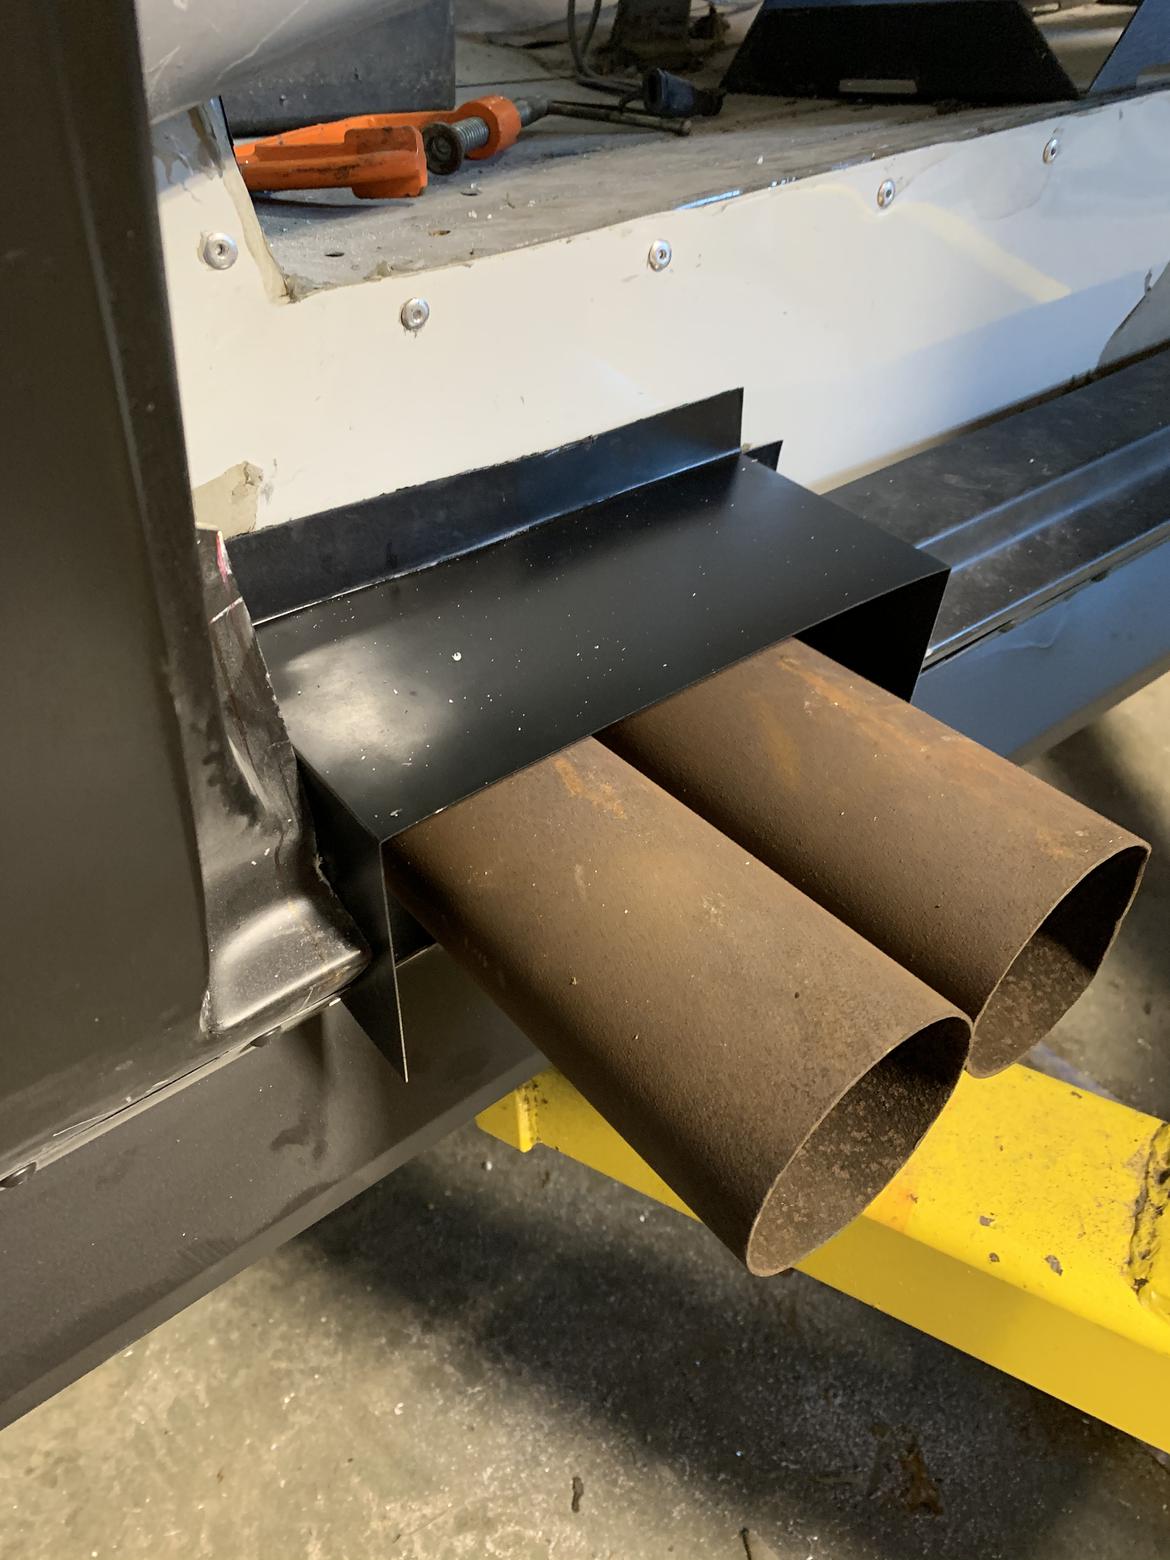
jh36
Reader
12/6/20 2:59 p.m.
The roof is going to be attached with these. These sandwich mounts are great...thanks for the tip. 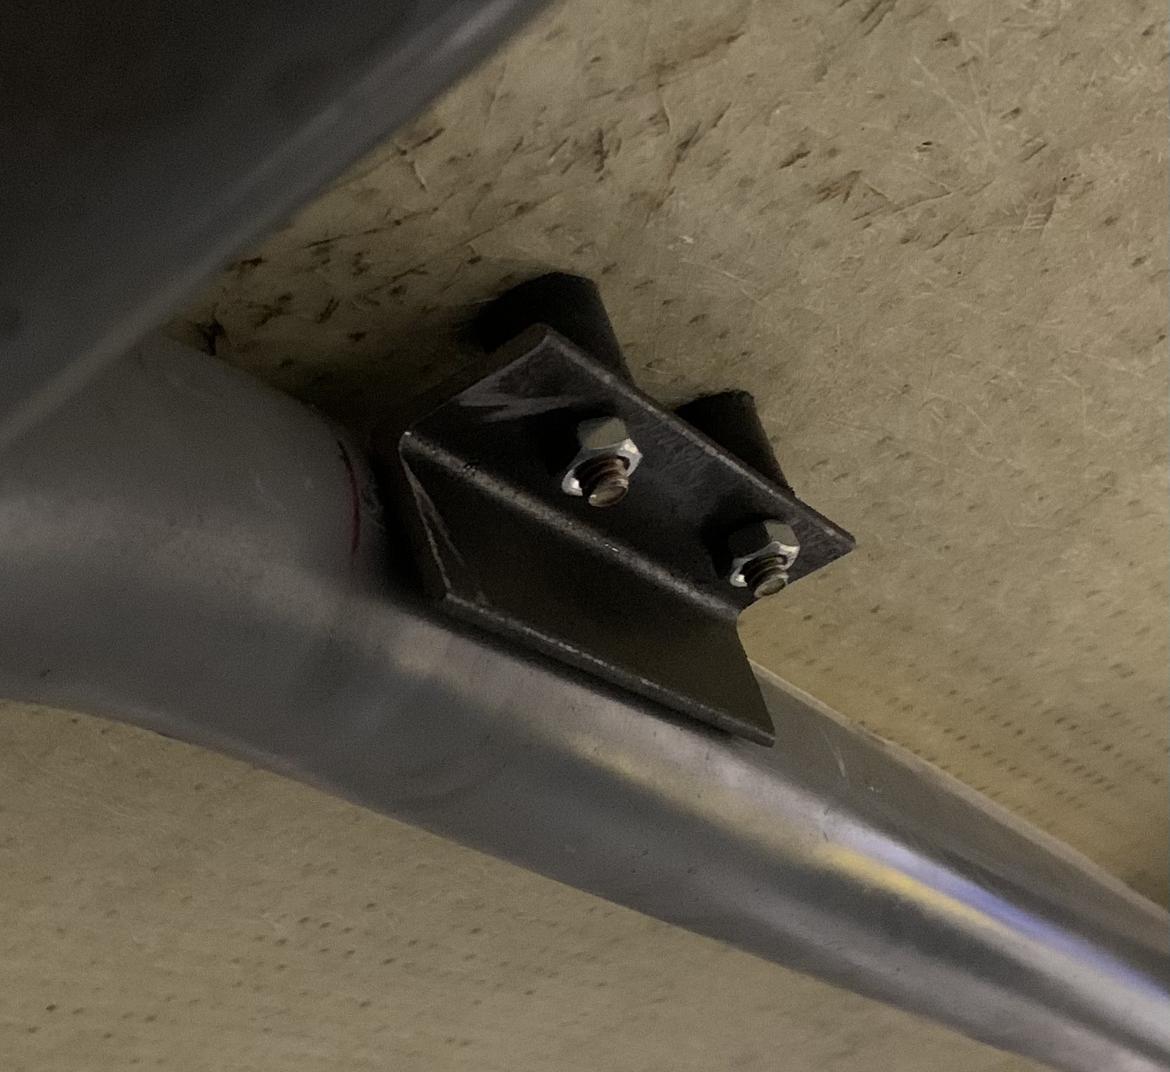
Glad you like them! I would reduce the mass of the brackets a lot. A fold of 16 gauge would be strong enough, or cut the pieces you have down to be the same width as the mount diameter. Every ounce counts, even with 400 HP.
jh36
Reader
12/6/20 4:19 p.m.
In reply to TurnerX19 :
I did bend my first round with sheet metal but liked these more. This body is phenomenally light. I may be overly cautious, but I am going for peace of mind with these. I will be grinding off excess before welding.
In reply to jh36 :
As Bill mentioned those roof brackets are serious overkill, heavy, and up high. I'd consider one in the middle to keep the roof from bowing up.
jh36
Reader
12/6/20 6:04 p.m.
In reply to NOT A TA :
My plan is to sculpt them. It may seem like overkill, and maybe I am a little overly cautious, but this body is extremely light has a lot of flex to it. I might use my sheet metal versions on the middle brace to run along both sides.
jh36
Reader
12/7/20 5:41 a.m.
John, you mentioned your 1967 Camaro (btw, I found your old thread..love the car). When you have a chance, could you measure the height of the windshield and post?
This body is made with a wide flange around the windshield opening. I can see where the top and sides are located, but the bottom is hard to determine.
I don't need to be exact with the measurement as I am using Lexan, but I want to be in the ballpark.
Windshield opening is 18 3/4" tall at the A pillar and 20" tall in the center. That is measured from the bottom of the lower windshield trim to the top of the upper windshield trim.
A pillar is 1 1/2" wide and windshield trim is 7/8". Looks a little different in pic because of the curve and needing three hands to get a better pic.
[URL=https://app.photobucket.com/u/NOTATA/a/4084bbc8-1e50-4486-872e-fbce3ed87549/p/9a7547a9-8a66-4d8e-bd7d-ea915ba81439]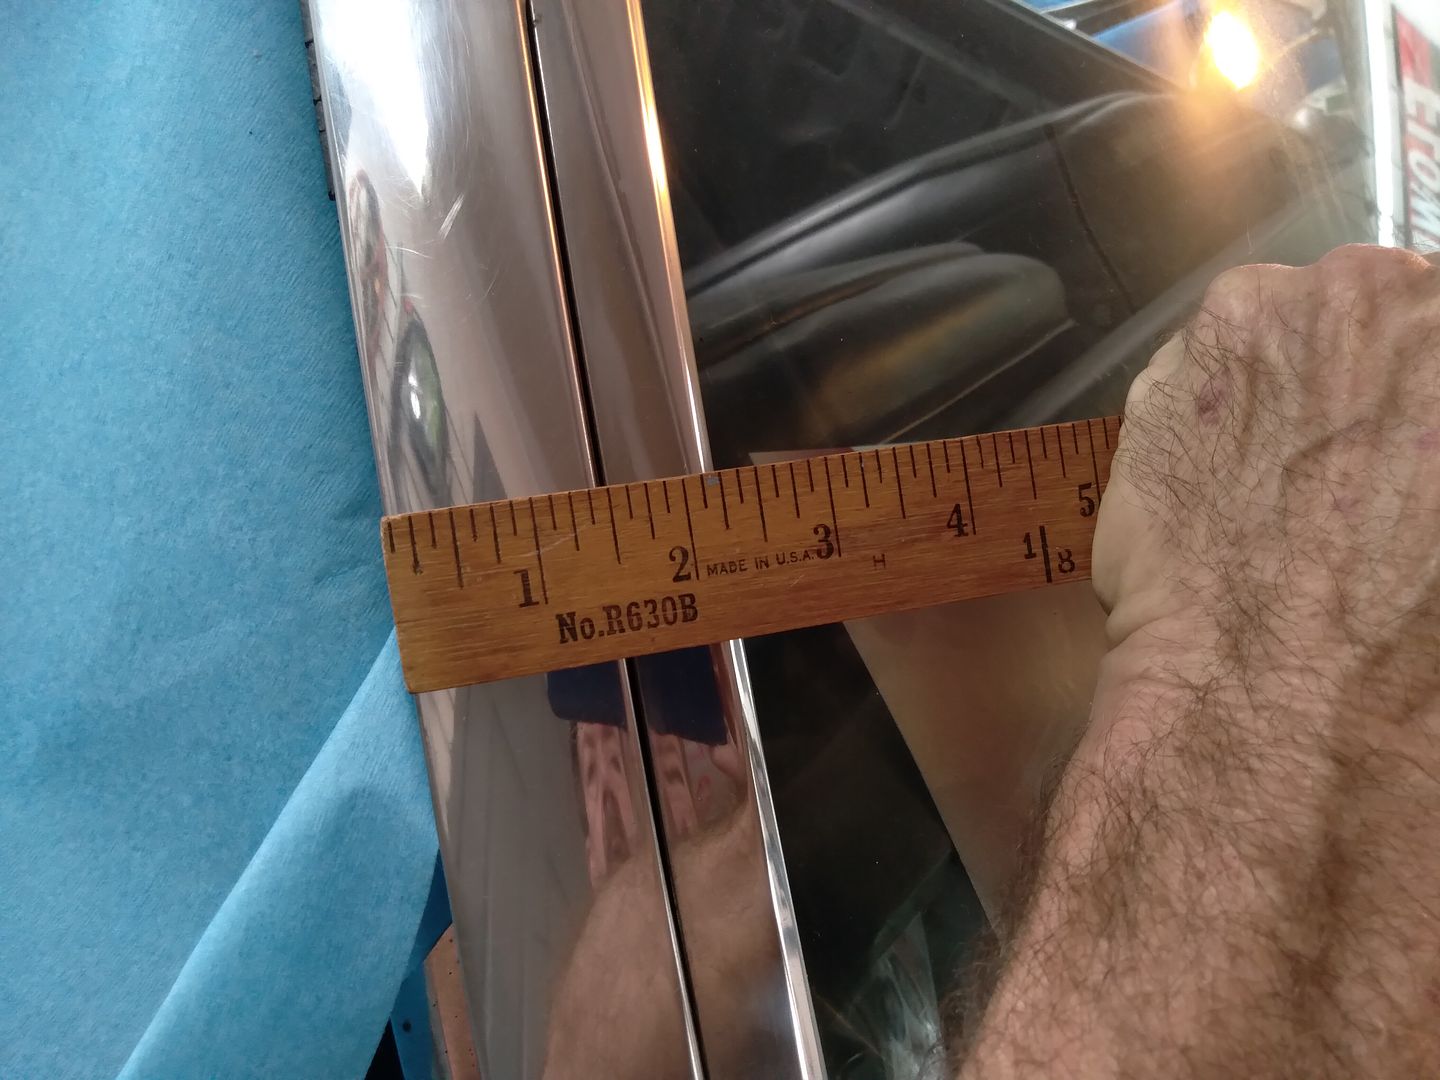 [/URL]
jh36
Reader
12/7/20 11:44 a.m.
In reply to NOT A TA :
That is wonderful information. I appreciate it!


