1 ... 3 4 5 6 7 ... 15
Rufledt
Rufledt Dork
2/19/13 7:52 p.m.
nicksta43 wrote: Quick question about selecting a board. I stopped in two different Lowe's yesterday and while I was there I took a few seconds to look at the red oak boards they had. Didn't find anything that really stood out but I noticed something. Most of the boards had a very tightly spaced grain pattern when viewed from the side of the board. However a couple boards in each store had a much wider grain pattern. I tried to illustrate it to make it more clear. Would either one be more optimal given no knots or runoff?

Is that sketchup? I use that for furniture stuff, i didn't make the connection for bows... kinda seems obvious now

The most important thing is ratio of early to late growth wood. In red oak, early wood is porous, late wood looks solid. The ratio is more important than number of rings, though on red oak i've found that fewer rings generally means more late wood. This would be the best choice, though I've made a bow out of red oak that was 50/50 early/late. It wasn't too high in draw weight, but it hasn't died.

More late wood is almost always recommended, except in a couple of woods. I think it was sassafras wood that seems to take less set (more on what set is later) when there is more early wood, but I can't confirm that. Also, hickory early has some tension strength, so it's not so bad. You still want as much late wood as you can get, but early wood isn't as bad on hickory.

The best place to gauge the early/late ratio is to look at the ends of the boards, not the sides. Also, don't limit yourself to red oak. Maple makes great bows, as well. I haven't found a single good maple board for bow making since i moved to Massachusetts, but they do exist. On the other hand, i've seen some pretty wicked figured maple at lowes/home depot prices, and figured maple usually costs more.

Rufledt
Rufledt Dork
2/19/13 7:59 p.m.

Also, I see you're in Tennessee. I assume it gets pretty humid there, right? You may experience an unusual amount of 'set' during the summer months (too much set is bad). Maple seems to take less set due to moisture, at least in my experience.

nicksta43
nicksta43 Dork
2/19/13 8:05 p.m.

Yeah it's sketchup, just getting started with it and this is the first thing I did on it

No maple at Lowe's. I'm gonna check HD and we have a lumber yard near work I'm gonna check as well.

Thanks for the info.

Rufledt
Rufledt Dork
2/19/13 8:11 p.m.

no maple? That's weird, ours always had some. Lumberyards are great, they have much more selection. They may even be able to help you out. They usually have rough sawn lumber, so reading the grain can be more difficult. You can bring a small pocket magnifying glass to look at it. They also can plane the wood for you (for a reasonable fee, usually) and square up one edge, cut it into 2" wide planks, etc... Like I said before, if you have the option, you can expand out from red oak. Go for hard maple (also known as sugar or rock maple) or hickory. Or oak if you really want. I used to prefer maple, but I couldn't even find straight enough maple at our lumberyard for unbacked bows.

also, I can't believe this has made it to page 5 and I haven't even started bending wood yet! It's just been a board build a long so far. FYI almost done with trapping the back, and I filed string grooves today. I got nothing done this weekend because of a bachelor party/wedding thing that literally took all saturday and sunday until bed time. The wedding was short, the food was awesome, and the video games were endless. It was awesome.

Rufledt
Rufledt Dork
2/20/13 9:55 a.m.

More on wood selection: if you are using split staves, you don't have to be so picky. Observe!

Those are possible because split wood always follows the wood fibers, and you work the back down to 1 growth ring. If you see a weak spot (like a knot) you'll notice the rings form a hump. The tree already compensated by adding more wood! you can get snaky wood bows, bows with knot holes in them, bows with humps, etc... because the wood fibers follow that path. Don't cut the fibers, and the bow will be strong.

Boards, on the other hand, are cut into a predetermined shape, cutting right through the fibers. This is why you must choose good boards. If there is a knot, the extra wood around it will have been cut off. Now, you have a hole in the wood and a bunch of cut fibers. Not cool.

fromeast2west
fromeast2west Reader
2/21/13 11:03 a.m.

I'm officially jumping on this bandwagon. I picked up two red oak boards at the hardware store last night and plan to follow along w/ the build.

Is it OK if I post questions along the way?

JoeyM
JoeyM UltimaDork
2/21/13 11:34 a.m.

I'll be watching this, too.

Rufledt
Rufledt Dork
2/21/13 11:37 a.m.

Absolutely! Questions let me know people are still with me! Nice avatar btw. Have you ever watched a show called black books? Its by the same guy as it crowd. Its not as funny but its still pretty good.

Ill try to post a picture of the rough out shape today because I barely described it before. There are also a couple links I should post with info that helped me out at first. That is assuming they are still around.

Beware, it is addicting. You might end up with more bows than arms. If, however, you want that, then have fun!

fromeast2west
fromeast2west Reader
2/21/13 12:44 p.m.

There seems to be a good group of people in the Grassroots Archery crowd (a bit like here I'd say).

While watching this thread I've found some other builds over here: http://poorfolkbows.com/

I'll probably be following your process with my build, but sometimes it's good to have more pictures and things to look at.

Rufledt
Rufledt Dork
2/21/13 1:01 p.m.

Nice! that's a good website. You can also look at paleoplanet.net, more specifically here: http://paleoplanet69529.yuku.com/topic/47638/Tim-Bakers-Wooden-Bow-Reposted-Tims-Permission for a good turorial as well. Not as many pictures, but that guy is seriously one of the top wood bow makers ever, so listen to what he says. There's another website very similar to poorfolkbows that i'm thinking of (but by a different guy) that I can't seem to find, but I"ll keep digging.

Here's the plan that I told you about in the first page:

It's a little different than the poorfolkbows guy, but not by too much. If you're really getting into it, definitely buy those boywers bible books. They help more than any online tutorial ever could.

Rufledt
Rufledt Dork
2/22/13 5:40 p.m.

Bow update time!

Yesterday I spent some time at my friend's house working on his bow. We did everything similar to how I backed mine, except for this:

I assembled all of my clamping might (and a couple of his). Is this enough? I probably won't know for a week or so. My friend is spending the next week with his new wife, so no work on his until after that. We layed out the clamps as so:

This time we focused on spring clamping the edges. this way when the hickory curls, the clamps will hold the edges down. The curling action will force the middle down against the walnut. That's the theory, anyway. We have the pieces for making it sortof a recurve, but we have to do that after the backing.

Anyway, in preparation of tillering, I have done a few things to my bow (or board, currently. Not a bow, yet). First, I used a mix of tools to trap the back. I made lines on the back a small percentage of the way in from the sides, tapering to no trapping at the tips. I also made a line 3/8" down the sides from the back. Connect the 2 lines, and you get a plane (sort of) for the shape of the trapping. It's hard to say what is a good amount of trapping, since it's really different depending on the materials/bow design. I've only trapped a few bows, since I usually prefer the safety of a flat back, so i'm not totally sure I know what's a good amount either. A trapped back means there is less back wood surface area, so the wood that is there has to work harder. A full width back is less likely to break. A full width hickory back, however, would crush a walnut belly.

The narrowed back is not finished, however. During tillering, the back fibers will be under a lot of strain, just like when the bow is firing. Back fibers that are over stressed cause the bow the break, regardless of when they break. The belly fibers may be stressed, but you will be shaving them off during tillering, so it matters less. The biggest worry is this:

I drew a line there tracing the early wood in this peice of hickory. It makes a dangerous V shape on the edge. Here, a splinter can lift and then BANG!!!!

There is something called the Poisson Effect. Imagine a bow limb exactly rectangular in cross section. Flat back, flat belly. Perfectly flat. Place a straight edge on the back, and it will be flat. Draw the bow back, and you will see the back is slightly concave. The edges will lift slightly. This would put extra stress on the edges, which would cause the splinter above to lift. Because of this, the corners must be rounded. This means there is no corner that is lifted, because the corners aren't there anymore. You may even wish to ever so slightly arch the back (like lower the rounded edges 1/32" below the center) but i've never found this neccessary. A rounded belly causes the back to be convex when bending, though, so that's an option. Not on this bow, however, and rounded bellies have their own problems.

You can round with files, rasps, spoke shaves, block planes, just be careful. You should sand the back (and these rounded edges) smooth, like finishing smooth. Make sure there are no scratches or nicks on the back, these are weak points. I even round the back into the handle. Tension stress does not limit itself to the limbs alone, it's spread along the back. A splinter can lift near the handle and travel up the limb. This can, and does happen, especially with arrow shelves cut into the handles. People don't think the shelf can cause a weak spot because the handles on these bows don't bend, but the forces are still present.

I'm still worried about those corner splinters, and that whole limb has grain run off. The other backing has a knot (though the grain is straighter), and they are thinner than they once were. I'll likely not buy these from 3rivers again, they used to be better. It is hickory, after all, and that is the only reason I still think i'll be ok. In bend tests (read the first bowyers bible book for that stuff) hickory is nearly unbreakable, only beaten by white oak. I would imagine bamboo would be stronger in tension, but it wasn't used in those tests.

Another useful tool is the scraper:

These look like sheets of metal, like saw plate metal (people sometimes make them out of old sawblades). They are flexible, and there is a certain way of sharpening them. You turn a slight burr, and use that to scrape. youtube videos abound on them, and they really are quite great for very light scraping. They are cheap, too, unless you have any old saws around you don't mind cutting up. Then they're free. They even come in various shapes, and they are flexible, so you can bend them to shapes. They do get hot, though, so be careful.

You also need sting nocks on the tips. If you glued on tip overlays like me, you will have to shave them flat against the sides of the bow now that the glue has dried, and mark where you want the string.

Again, what tool you use is really up to you. I used my block plane. A good sign that the blade is sharp and the glue joint is strong, is if the thin, clean shavings that come off stay glued together:

At this point you can pencil mark how you want the tips to look:

This is kinda useless, since the shape comes about later in the process. The walnut plus the hickory is 3/4" in thickness, much more than required for tips. The cherry wood overlays can be cut to shape, though. You can cut the string grooves with anything that works, but I use this:

It's a small round file available at, you guessed it, harbor freight. Don't buy their furniture clamps, they literally kill themselves during the first use, but their files work just fine.

You wont' want just a groove. Round the edges, since sharp corners can cut into the string. There are many ways to make tips, just like I said. I'm sure if you google it you'll find any number of options. Mine work, but so do others, i've never had or seen a bow tip break.

You'll also need the following:

That is a tillering stick and string. The string is nothing fancy, just a bow string that is extra long. The stick is just a board with a slot in the top for the bow. There are notched cut in every inch from 6" below the bow slot to 31" below. I nailed it to some scrap wood for a base, though only recently. In the past I didn't use the base, and I will never go without it again.

If you're looking at that and think "hey, I bet I can make that" you're right. I made my first one, but it was kinda crummy (I was a kid, gimme a break). There are plans out there for them, but you can probably whip one up that works just as well. As for the string, I'm gonna make one up tonight and post a build along (hopefully tonight as well). Then, let the bending begin!

Rufledt
Rufledt Dork
2/22/13 8:01 p.m.

Now for the string! I told you I'd do this tonight.

Strings can be made of many things, and in many ways. First, the material. I use Dacron:

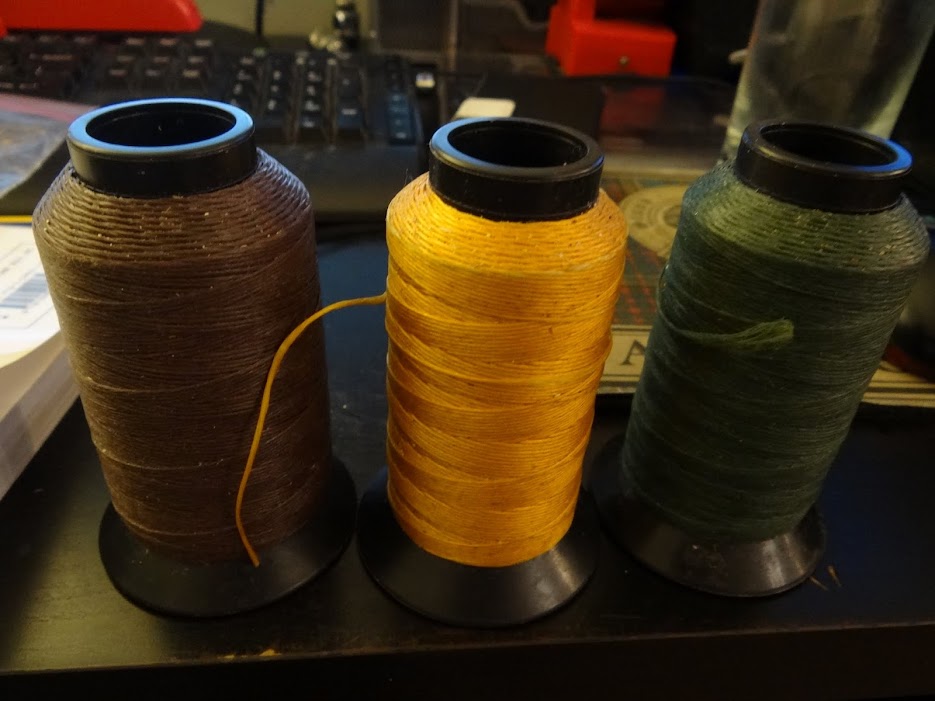
It's fairly common for bow strings. It comes in many colors, and it performs fairly well. It is about equivalent to a very high quality string made from flax performance-wise. The best performing strings are very light, and have no stretch. There is a string material known as "fast flight" and others that are stronger and less stretchy than Dacron. If it is stronger, you can use less of it, meaning there is less mass. Less mass to accelerate means more energy is available to the arrow. Less stretch means the string absorbs less energy, making the bow more efficient. You have to be careful, however, as a string with no stretch is like a car with no suspension. Ever gone over a pothole in a gokart? Your spine has to absorb the energy. The bow will always have energy left in it after the arrow leaves, and a stretchy string takes some of that. If the string doesn't stretch, the wooden limbs must take it all, and this can damage them. Stick with dacron, it's safer and WAY cheaper. You won't notice a speed difference unless you use a chronograph.

There are many other materials as well. Rawhide, flax(linen), sinew, hemp, human hair, etc... The main consideration is amount of stretch, strength, and weight. Human hair would have to weigh too much to be strong enough, rawhide and sinew stretch a lot (though they 'break in' and much of that goes away), and hemp is somewhat difficult to grow without some legal troubles. You may be tempted to use artificial sinew, as well. All the cool looks without the stretching, humidity, and processing troubles. Don't. It's made of nylon, and nylon is crazy stretchy. You'll have to make the string too thick to resist the stretchyness, and it'll weight too much. I say use dacron, or use high quality linen twine. You can grow your own pretty flax flowers, too, if you're interested. Bowyers Bible book 2 has TONS of string stuff in it, like 80 pages if you're interested.

There are many types of strings. Many purchased strings are either 'flemish' twisted or endless loop. Endless loop strings aren't that twisted, and therefor perform better. More twist means longer string fibers (because they aren't going point to point in a straight line) and they stretch more. I do the twisty kind. A flemish loop on one end, and an adjustable knot on the other. That way, they can be adjusted (duh).

You must first gather up your string pieces:

I use 8 pieces, 4 of each color (yellow and brown, in this case). The number of pieces is very important. Too many, and it'll weigh too much. Too few, and it'll break. There are 2 tricks to choosing. One is draw weight at full draw times 4, the other is draw weight at 10" times ten. I use the first one. I don't know the breaking strength of dacron. I have heard from 35 to 50lb for a strand of B50 dacron. My goal here is a 50# bow, so I need a string with a minimum breaking strength of 200# to be safe. if B50 dacron breaks at 50lbs, then I need 4 strands. If it breaks at 35lb, then I need about 6. With very few fibers, an arrow will have trouble "clicking" onto the string (modern arrow nocks will click and stay on while you draw as a convenience, and old school self arrows can be made to do the same). It can also dig into the arrow tips. 4 would be too thin, 6 might too. I'm not making a flight bow, so the extra fps won't really be notices. I also choose 8 minimum because it's more than I need. More means it won't break. I don't like things that break. I cut the pieces about 7 feet or so long. Again, more than I need, but i've made bow strings that were 1" too short before, and that SUCKS.

Take the fibers and separate them into 2 bundles of 4 (by color in this case) and hold them about 9" from the end. I do this with one of those spring clamps. You can use like 3 or 4 of them to make this process a lot faster, and use them as drop spindles to twist quickly, but my whole arsenal is currently at my friend's place. I only have 2.

Now, twist both of those bundles like so, in the same direction:

Do this for like 3 inches or so, leaving the rest (6") untwisted. Now, twist those 2 bundles together in the opposite direction, like this:

This is called reverse twisting. Ever twist some string and let go? It'll untwist. It's not stable. Ever twist a string a lot and watch it do this?:

That is the string trying to achieve stability. It reverse twists itself, we're just using those forces to make 2 reverse twisted strands hold themselves together. Now, fold that 3" of reverse twisted thread back on itself and clamp the ends together, with the untwisted strands gathered together.

At this point, you may be thinking i'm going to knot it somehow, but that's not true. I will be using this, however:

String wax. Get some. It lubricates the strands in the string so they don't rub up against each other wear themselves down. It also holds the strands together when you are twisting the string, so that's a plus. Dacron comes waxed, but more can't hurt.

Now, you'll notice you have 4 long and 4 short strands of each color. Group them together, waxed, and twist. Do it to both, and then reverse twist them. You'll see this:

A couple strands stick out of the last half inch or so, but the 5 1/2" before that are twisted together. When the string is on a bow and the bow is strung, the sting will be under a lot of tension. This makes the strands try to straighten, but since they are twisted, they tighten against each other. The stronger the pull, the stronger they clamp together. The friction keeps the short strands from pulling out of the bundle. I've never had one of these pull out, and it wont, unless you untwist the string. Now, just keep going. Twist and reverse twist until you reach the end:

If you let go, the string won't straight up unravel on you, but it would stay together. At this point, I tie a knot before unclamping

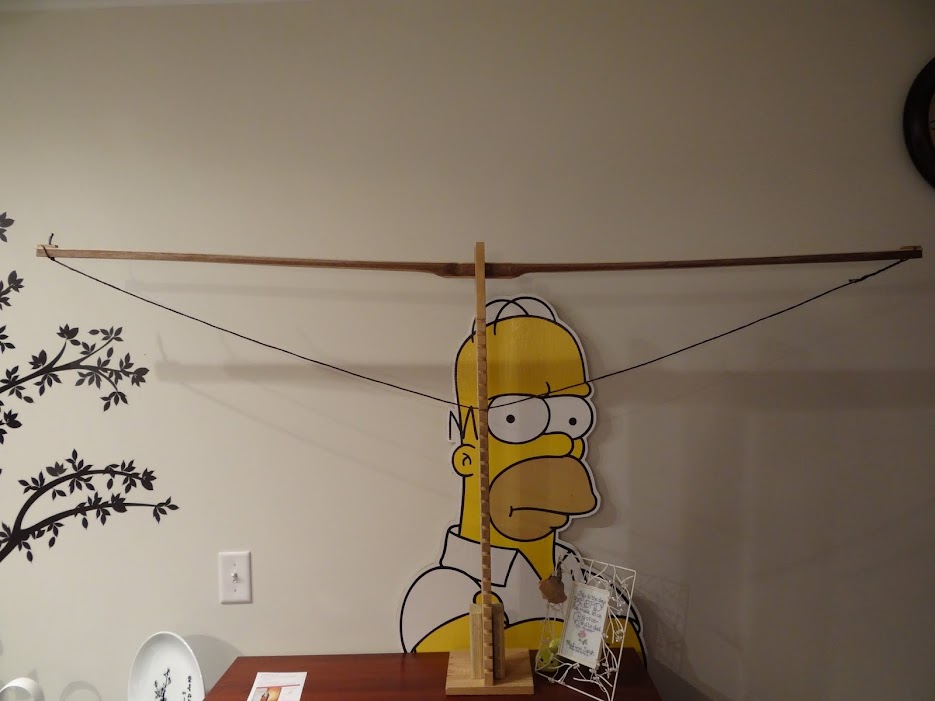
Now, you can unclamp, and you have a string with a loop on one side!

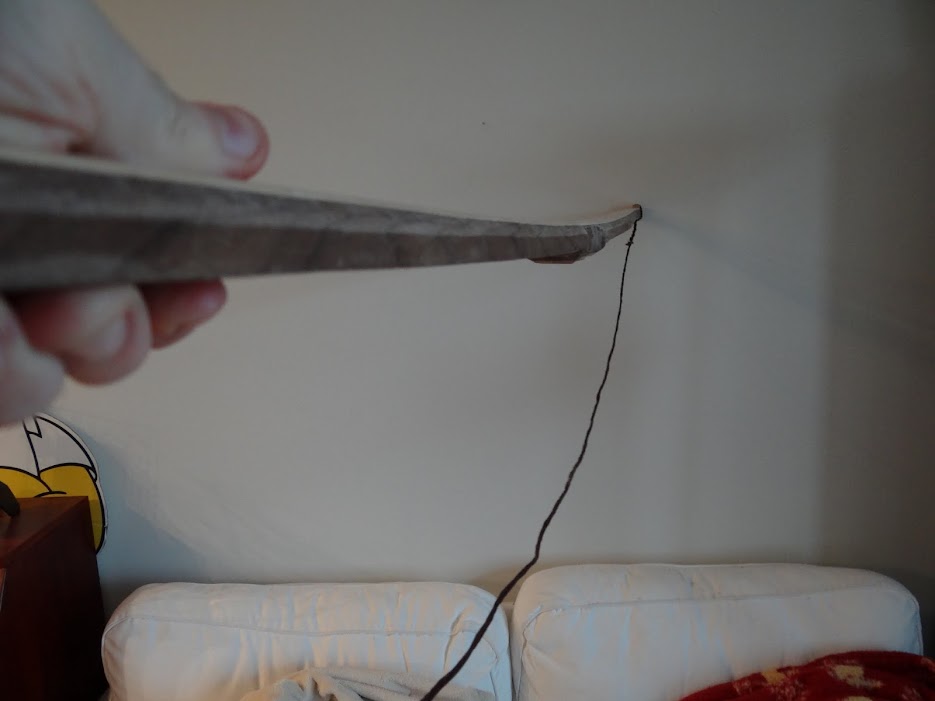
You need the knot on the other side. It's called a bowyers knot, or a timber hitch.

First, do this:

It's hard to explain knots, I hope the pictures will do. Now, do this:

See how it's working? around the string, then twisted back on itself. Do this a few times

When it's tightened, it'll look like this:

This knot will tighten onto the bow. Remember how the tension holds the short strands together in the loop? That's what holds this knot tight. Move the knot, and the string will be a different length between that and the loop. Use this to adjust string length when it's on the bow. You can make the string extra long and use it for tillering, and then cut the extra off when it's on the strung bow. A knot works on the end, or you can use a lighter to melt the fibers at the end together.

The string isn't totally done yet, but it is for now.

Rufledt
Rufledt Dork
2/22/13 8:20 p.m.

A word on purchased strings, they are almost always far overbuilt. They don't want to get sued. One I found is 15 strands of B50 dacron. If the breaking strength is 50lb a strand, then the string will hold 750lb before breaking (not quite, but lets pretend). Divide by 4, and that's a 187.5# longbow. Very rarely has a human pulled that. It's possible, just rare, and totally unnecessary for a 50# bow.

This guy could pull that bow:

Howard Hill. He killed an elephant with a longbow in the 170's# range. There are a good number of trick shot videos on youtube with him. Keep in mind, he isn't using an olympic target bow, he's using a wooden longbow and wooden arrows. Also of note is Byron Ferguson (who's still alive, unlike Hill). His most impressive trick shot (IMO) is shooting an aspirin out of the air.

Rufledt
Rufledt Dork
2/23/13 4:05 a.m.

I think I forgot to mention to you red oak board guys that you have to round the back edges, too, even if you don't have the same grain issues that I have. ALWAYS round the back edges. If you are making a bow from a split stave, then no worries, the whole back is already arched. Sometimes people de-crown an arched back if the wood is from a small diameter tree, or if the wood is particularly weak in tension. Most woods are stronger in tension than compression (oak certainly is), so that isn't usually needed. Some woods (like cherry) can be de-crowned AND backed, because they tend to be a bit break-happy. Supposedly, though, they take less set and tend to shoot quite fast if they survive. Walnut is supposed to be the same, but with less chance of breakage.

Before tillering starts, I want to fill you in on a few things to keep in mind. Your board won't like to bend at first. Mine is 3/4" thick the entire length of the bending area, and just straightening it out (from the 1.5" of reflex I glued in) is like 20# of draw weight. Obviously you'll have to remove a ton of wood by the end, but don't rush, or you'll have a 15# bow at the end.

Here are some basic rules:

1: remove wood where it doesn't bend enough, leave alone places where it bends too much.

2: Never pull it down the string unless the bow looks balanced when braced. Never pull it beyond half the final draw weight until the limbs are balanced (bending the same amount) and there are no problems, even if this is reached at 10". Problems would be stiff spots or hinges. A stiff spot is self explanatory, you should remove some wood there. A hinge is a weak spot, meaning you have to remove wood everywhere else. Don't get a hinge. 
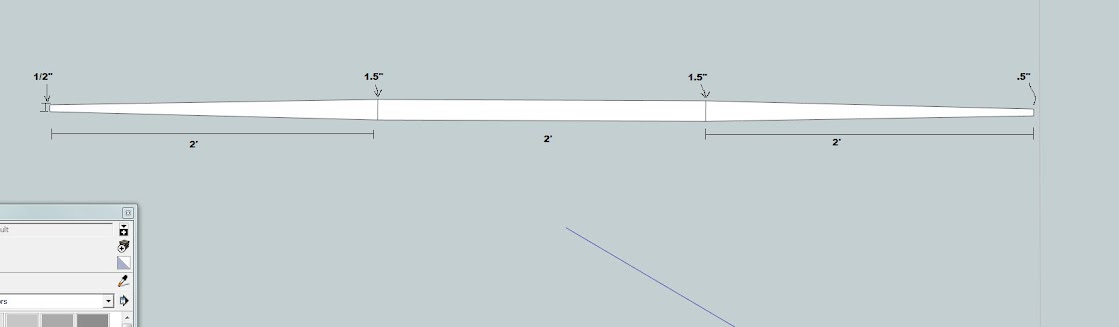
The limb on the left is hinge city. A hinge must be corrected before pulling the bow any farther, or permanent damage to the belly fibers there will result in set. Once it is bending balanced with no hinges at half the draw weight, pull it another 10lb or so, and check again.

  1. Never pull it beyond the final intended draw weight, even if everything is balanced. Ever.

  2. If everything is perfectly balanced and your final draw weight is achieved before reaching final draw weight, remove wood evenly from both limbs (but only a little, go slow) and then repeat.

I'll go over these some more in depth when I do the tillering how-to. You also can't just remove wood and check the bend. You have to exercise the wood a little to get it used to bending. Pull it to where you want to check and then relax it a hand full of times, then check the bend.

The italicized word above was 'set'. Set is basically a permanent bend that the limb takes on. Remember how limb reflex can result in more draw weight at lower draw lengths, making the power curve fatter? Well set will take that away, because it is introducing deflex. This is unavoidable, and it is an indicator of how stressed the limbs are. Naturally, more set closer to the handle will result in the tips being set back farther than if the set takes place near the tips, since the 'lever' effect of the long limb magnifies set near the handle. You don't want set near the handle. You want the near-handle wood to bend not too much, so it doesn't produce set, the mid limb wood to bend more, and the very tips to be stiff, and light.

Set WILL happen. If it doesn't happen at all, then it is a good sign that your bow is overbuilt. An overbuilt bow may not have set, but it will have lots and lots of extra mass, ultimately slowing down your arrow. The bowyers bible seems to suggest that a good indication of maximum efficiency (the least set with the most energy stored in the lightest limbs) is when the limbs take 1 1/2" of set (measured where the string pulls on the bow tips) for a longbow around 66-68". This bow, if well tillered, would take the set evenly throughout the length of the limbs, with less near the handle (because near handle set is bad).

The bow will take set where the limbs are most stressed. Take a look at this bow:

Absolutely no bend in the handle, and therefor no set. However, there is only a small section of limb that actually is bending. This means most of the limbs are doing nothing, and a small section is being over stressed. This is called 'whip tillered' since only the outer limbs bend. This bow would take massive outer limb set. Even without this set, whip tillered bows store little energy per maximum draw weight. All is not lost, however, as only the outer limbs are moving- less moving limb mass means less energy wasted moving the bow limbs forward. It still shoots slower than a well tillered longbow, though, and will likely have long term reliability issues.

Further reading on the thread revealed that the bow did indeed break after about 500 shots. If a bow makes 1,000, you're usually in the clear. before that, it could blow (or slowly take set) if you screwed up the tillering. You'll want to see tiller like this:

That bow is many years old and hasn't broken. It's far from perfect, but it's easily achievable if you are careful and have some patience (I wasn't careful, and I still managed to do it. You adults out there will have more sense, and probably faster shooting first bows). It also hasn't taken excessive set, (about an inch total) so it isn't overworked. Set can be caused by improper design or even rushing the tillering process, overstressing the wood before it's ready. Don't rush tillering. I can't say that enough.

Set can also be caused by excessive humidity, so don't use super wet wood. Kiln dried boards at the store will likely be good enough to get working on, as they are dried to a certain moisture content (MC) based on where they are shipped. If the boards are at equilibrium, they are less likely to warp and crack upon arrival to the store, and therefor sell better. Perfect.

That said, any of you in arid climates (Arizona, for example) may have trouble. I've known a bowyer who broke 4 or 5 red oak bows that were wide/long enough and tillered well. If you are in a dry place, try hickory. That wood tends to shoot well in dryer climates, likely because dryer wood has more bend resistance (higher draw weight compared to limb mass) and has the tension strength required to not blow up.

Rufledt
Rufledt Dork
2/23/13 6:47 p.m.

I started tillering today. If you are following along, you will find that putting your long string on the bow (such that the string hangs loosely) will not allow it to bend. It is simply to stiff. One way to spur this process along, is to take a pencil and mark some of the belly wood to remove. on the sides of the bow, mark of the middle foot or so (starting 2.5' from each end of a 6' board). Leave that alone. On he tips, mark 3/8" (about halfway) down from the back of the board. Now, connect the dots. Cut off the belly wood below this line. You will have a center foot that is full 3/4" thick, and then a straight taper to 3/8" thick at the tips. I used to make sure the tips were 1/2" just to be safe, but this may not be necessary.

I have an uphill battle to start with, because my bow is reflexed, and has to bend somewhat even to be straight.

That is a tillering string on both nocks- 'strung' in a way, but the tillering string must be too long to start with, because you won't be able to put a short string on this board. At this point, the string is pointless. I just put it on to see what kind of draw weight was required to straighten the board. Turns out it's about 30#.

First up will be floor tillering. Here's how you do that:

Put the tip on the ground and try to bend it (pic isn't me, FYI). It will likely not want to bend, so you'll have to remove some wood. I usually clamp it to something with the belly up. You'll want to remove wood evenly across the limb's width/length, to make it bend without hinges/twists. What I do is mark the thing up with a pencil like so:

You'll also want to mark where you want to stop removing wood near the tips:

You can remove wood with a rasp, scraper, pocket knife, whatever. Since the belly is convex due to the reflex, a block plane will work, too. Just make sure it's a good block plane, one with adjustable depth and an adjustable mouth. set it to take of the finest possible shavings. If you're using a rasp, use a light touch. While you remove wood, you'll likely see this:

One problem with the block plane is that it won't remove wood closer to the handle. Here I have to use a rasp, and you can see the distinctive difference between the surface left by the two different tools:

Don't worry about the rough surface. I prefer my tillering tools to leave a smooth surface, so I don't have to do as much sanding/scraping in the end to clean it up.

You'll want to remove all pencil marks without removing excessive wood. One pass won't do, it'll only remove a thin layer of wood. Take half a dozen light, even passes or so, and check the limb's bend. If it still won't budge, do it again. Eventually it'll be bending a few inches, but you'll still need to use a good deal of force. When both limbs are bending, then it's time for the long string.

I may have been a bit ambitious (I never liked floor tillering) but I stuck it on the tillering stick with the string

Notice how the tip on the left limb looks slightly deflexed. If you noticed, then good eye. That was another problem I created through clamping. The string there isn't tight, it's just hanging there. Here's me pulling it a little bit:

It takes a surprizing amount of force to get it to bend, but that does not necessarily mean there is too much wood (although in this case that's exactly what it means). Look at the angle the string is pulling on the tips. It's what, 30 degrees? If you were to put a shorter string on there such that the bow would be braced at 1" high (string being 1" away from the handle) the tips would be similar in their location, but the angle would be more like 5 degrees. If I pull on this long string, it will be very difficult. If you pull the 1" high braced bow, it would feel easier. Why? Leverage. When the string angle is higher, the limbs have to move farther for the string to travel the same distance. This is why short bows "stack". If you look at the force/draw curve of a long bow, it will be fairly straight, like a spring. Every inch increases the resistance the same amount. A short bow will have higher and higher string angles as it is pulled back, so the curve will look exponential. Every inch will increase the resistance by more than the previous inch, like an increasing spring rate. A long bow will do this too if it is pull back far enough.

Because of this leverage, people have been known to end up with a light bow immediately after putting the normal string on. People will use a long string (maybe not as long as the one pictured) until it can draw to 30", and then put the shorter string on. They use the logic that the limbs aren't bending very far, yet the scale is showing 50#. Obviously, a shorter string will make the limbs bend farther, thus increasing the weight. Not so, the shorter string has better leverage, and they may find it only pulls 45# at full draw, only now it is uneven and they can't remove any wood without reducing the draw weight even more. Whoops a daisy. Because of this, you should only use a long string until the limbs appear to bend far enough to be braced, then brace it with a normal string.

A good way to check for bending characteristics is to look down the length of the limb, like this:

And the other limb:

Notice the second picture shows the limb doesn't really bend near the handle. This is an indicator that more wood should be removed here. Do that, then check, and then continue bending. Remember, you don't want to continue EVER unless the thing is balanced.

Now, this isn't really a big deal with this bow. Remember how this is reflexed? well, most of the reflex is nearer the handle. For everything to be bending evenly, the near handle wood has to bend straight, while the straighter outer wood will bend slightly down. Just think of the wood bending the same percentage at every point. This gets even more complicated with recurves, especially working recurves. For those of you using simple boards, just make it all bend a similar amount, with slightly less at the handle.

More to come when I do more work.

Rufledt
Rufledt Dork
2/23/13 8:46 p.m.

I forgot this trick:

Place the bow on a tillering stick drawn somewhat. Then, place a board across the top (make sure the board is straight, this is an oak 1x2, much like what some of you have). You can measure from various points across the board to the back of the bow for an idea where the limbs are bending more or less. It also gives you a straight edge to help you eyeball the curve. Remember, no hinges, no stiff spots, and both limbs should bend the same before you proceed to bend the bow any farther. Also, always bend on the scale, and keep track to make sure you never exceed final draw weight. With the wood bending so little it isn't much of a problem now, but later it will be.

In this case, the tip on the left limb is 2" below the straight edge, while the right limb is more like 3". The right limb seems to be bending more closer to the handle and straighter near the tips. Easy solution, remove some wood on the left limb to balance it out, and remove a little on the outer right limb. It's a little less easy in this case, since the limb on the right has the slight tip deflex, but i'm gonna choose to ignore that. Usually, you have to make the limbs match stress levels. if one limb is slightly deflexed, it means that one should appear to bend farther, because it started bent. In this case, the reflex and deflex is glued in. All of the stresses this causes are at the glue joint, not at the belly surface. If both limbs are pushed straight, the left one will be pushing back harder, but the belly wood on both would be under equal strain. My ultimate goal is a balanced shape, because that would mean the belly wood will be under equal strain. This means no area is over stressed, so it won't take excessive set, etc... It's just better.

This reference board trick works all the way to the end of tillering. It's kindof interesting to see how far the limbs bend. You'll need a tape measure, but i'm sure all of you have a few. I have, like, 7 in my apartment (not counting the 2 on my garage work bench) and i still have trouble finding the stupid things...

Don't just measure the tips. mark on the reference board where the middle of the limbs are. I used to to it every foot, but that proved to give no more information than tips and middle of limbs.

You can also use this board to measure set when the bow is unstrung. Remember, 1.5" (on a straight board longbow) is about normal. In my case, the bow was reflexed 1.5" or so, so i'll be aiming for a straight board when i'm done. I wouldn't be upset if it kept some reflex, as this would make it store energy, but this would also mean that the wood isn't being stressed enough for maximum efficiency. I don't shoot for distance, so I don't care about 2 fps give or take, and that would also mean the bow isn't stressed enough to break. Like I said, I like bows that don't break. They're my favorite kind.

Rufledt
Rufledt Dork
2/23/13 9:01 p.m.

I said before to make the bow bend enough on the long string to brace and then put the short string on (or shorten your string) but I didn't mention how far that is. Use the board trick above and get both limbs bending such that the tips are 6-7" below the board or so. Make the string short enough for a 5-6" brace height (measure from the handle to the string). This is generally 3" shorter than the length from string nock to nock (ntn). A fresh string will keep stretching a bit, but it'll settle in and stop doing that after a bit.

When you first brace the bow with the short string, the limbs may be unbalanced or show a different bend shape. This is normal, since the bow is under different stresses. Even it out before you continue. Hopefully i'll have mine braced sometime tomorrow, i'm done for tonight.

Toyman01
Toyman01 GRM+ Memberand PowerDork
2/23/13 9:03 p.m.

Very impressive. Thanks for posting this. My kids and I are going to have a blast building these.

Rufledt
Rufledt Dork
2/23/13 10:06 p.m.

And shooting them. I suspect the kids will like shooting them better.

nicksta43
nicksta43 Dork
2/24/13 8:44 a.m.

OK, found a board that didn't scare the crap out of me and got it roughed into the basic shape.

Now I guess I need to think about backing it. How bad of an idea would putting counter top laminate on it?

Rufledt
Rufledt Dork
2/24/13 10:53 a.m.

If your board has good straight grain you wont have to back it. I didn't back my first few, and I still prefer not to do so. I've never heard of using counter laminate, but I would suggest something else. Those arent designed to withstand tension forces and might let go. If you're worried about a splinter lifting you can use fiberglass reinforced drywall tape, or some have used titebond glue to attach denim or thick brown paper. These wont add any bend strength (denim might a little) but can prevent a splinter from lifting. Did you go for red oak or something else?

Oh yeah and canvas works too

Rufledt
Rufledt Dork
2/24/13 11:09 a.m.

Come to think of it, some more mass produced longbows sold for reenactments are canvas backed red oak with rounded bellies. These will not break, but they have crazy string follow (another name for set). When selling to the masses, sluggish bows are better than busted ones. Canvas is often linen (flax fibers) which has crazy tensile strength and can overpower an oak wood belly. If you do back with that, make sure to make the belly flat.

nicksta43
nicksta43 Dork
2/24/13 12:32 p.m.

Red oak with pretty decent looking grain. I don't really want to back it anyway. Just a thought as I saw some at Lowes.

I'm still looking for maple but have yet to find any. So far out of six stores I've only found this one board that I felt comfortable enough to use.

How thick do I need to make the handle and how long should I go there?

Rufledt
Rufledt Dork
2/24/13 12:33 p.m.

Do you want a bendy handle or a stiff one?

Rufledt
Rufledt Dork
2/24/13 12:38 p.m.

Bendy handle, just leave it. The maple bow above is just a board with nothing glued to it. For the stiff handles, I usually glued on 2 small boards 1/4" thick, one maple and one oak (for the color effect). I once used poplar instead of maple, big mistake. It's hard to sand/scrape the oak smooth without going deep into the soft poplar. It does hold glue well, though.

For handle length, it varies from 6-8" on average. A longer handle means you have more leeway for placing an arrow pass (i would suggest you narrow a stiff handle a bit so the arrow passes closer to center) but a shorter handle allows for more bending limb.

Sorry for artificially increasing number of posts again, I'm trying to roll over to the next page because this one has too many pics on it.

1 ... 3 4 5 6 7 ... 15

You'll need to log in to post.

Our Preferred Partners
Z2B7luyHSSyEJr84Qby1StYua4wYQSWhBjXdpLp2oOLKZzHFWXunsjAOoaTnHbg2