You move quick. The car looks great!

You move quick. The car looks great!

In reply to Slippery:
Very quick! Super impressed!

I've got the driver's side strut/spring/caster/camber plates installed finger tight. I decided to call it quits tonight but will finish the install tomorrow, then head over to a friends house to set the camber - he's got a camber gauge, and set the toe.
First, I assembled everything on the workbench.
[URL=http://s7.photobucket.com/user/smokindav/media/gti/C93AC96D-6E3F-4BFA-A345-3A6B5C70AA5F_zpsjz6eys21.jpg.html]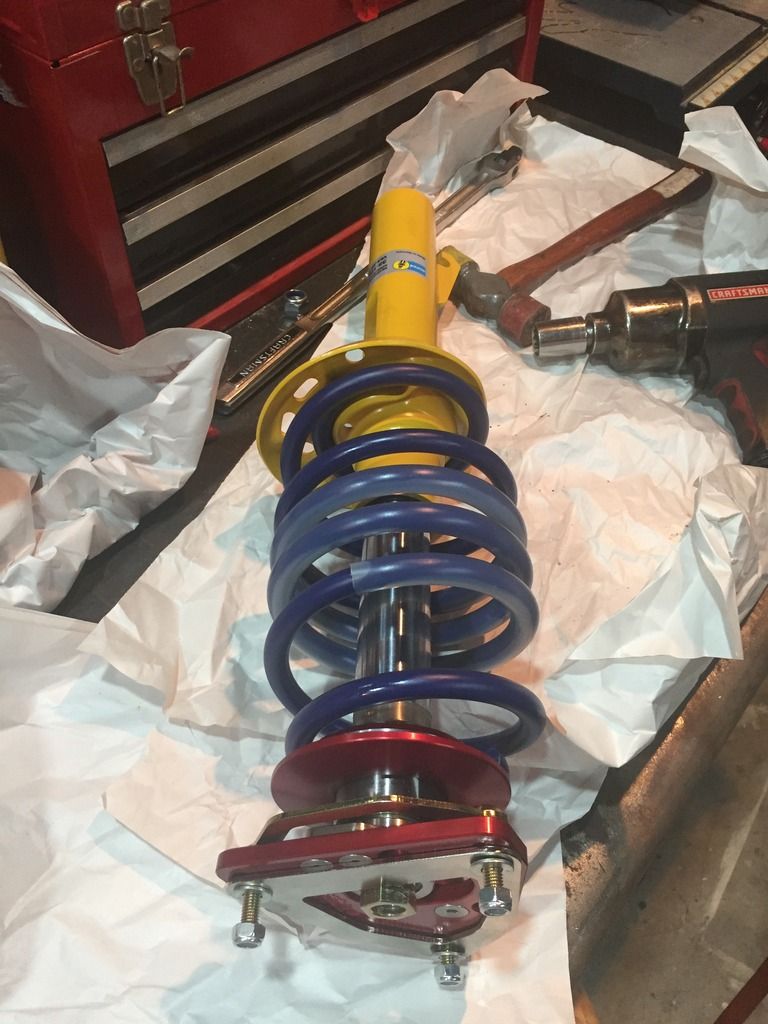 [/URL]
[URL=http://s7.photobucket.com/user/smokindav/media/gti/E888E423-B5AB-4B51-8180-FAB8F4677EE8_zpswxep8ufd.jpg.html]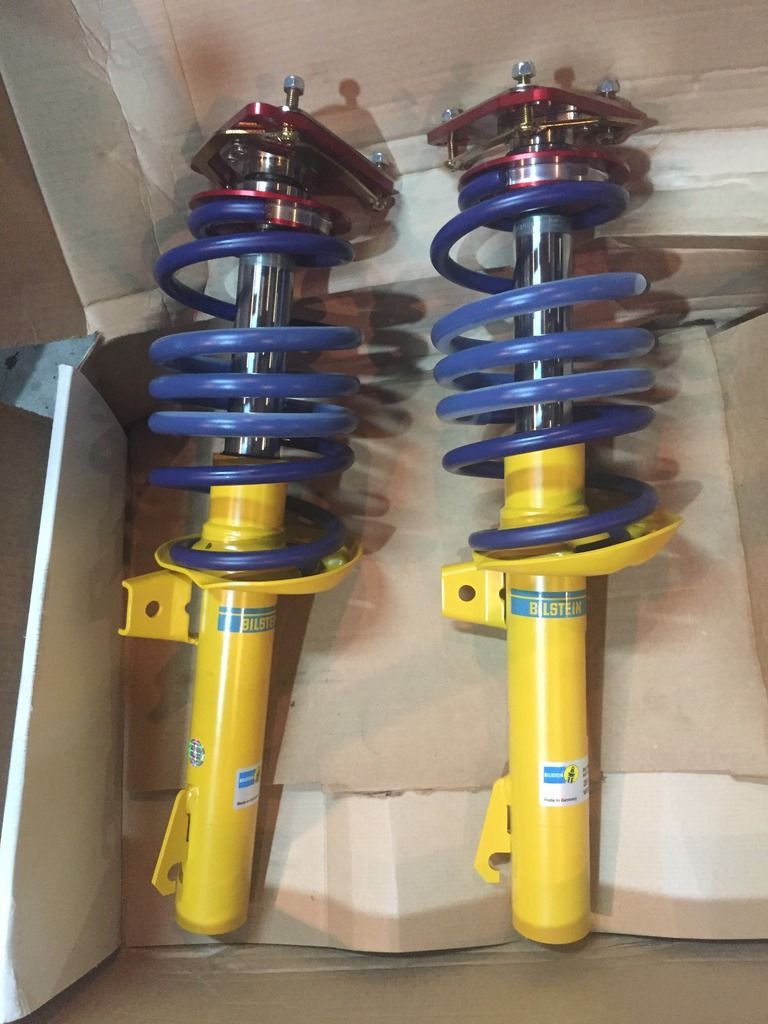 [/URL]
There's lots of how-to's on the innerweb about how to remove and replace a front strut on a GTI. Briefly, remove hub bolt - this must be done while the car is on the ground. Jack car up, remove wheel. Remove tie rod end and lower control arm from hub/upright. Remove sway bar end link from strut, remove lower strut bolt from hub/upright. Pull front hub out until axle falls out. Loosen three bolts on strut mount and remove strut. Installation is the reverse of removal. :)
[URL=http://s7.photobucket.com/user/smokindav/media/gti/C0F3C02D-8307-46AB-A896-365F2C62C827_zps0qwkyvyd.jpg.html]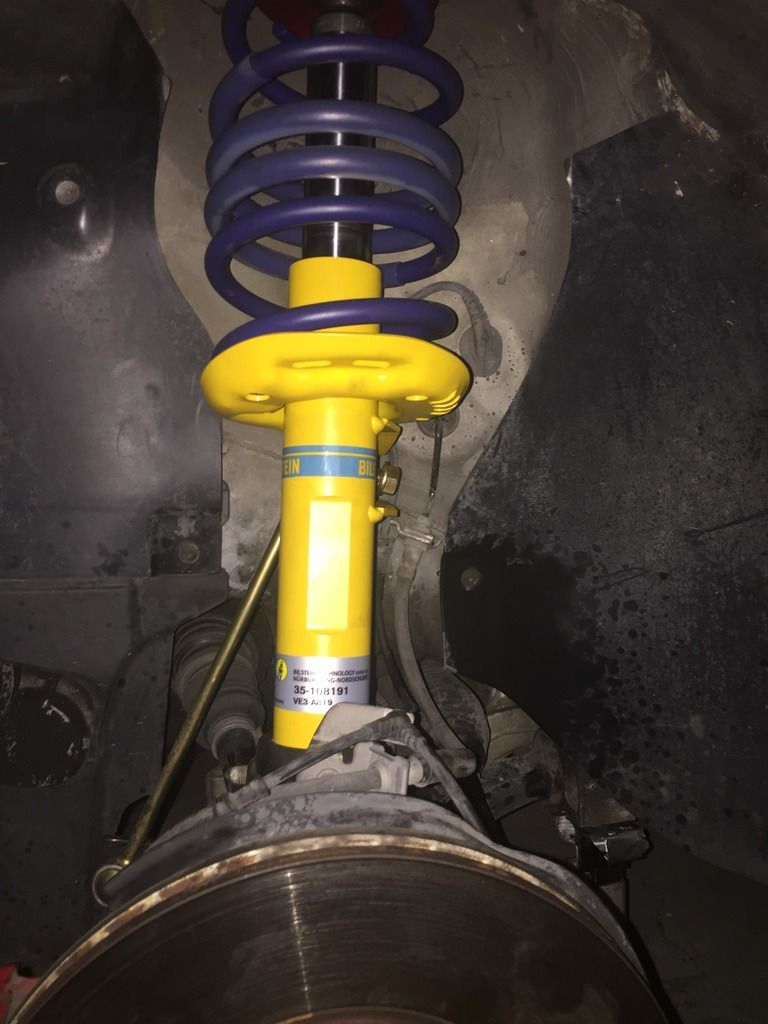 [/URL]
The bad thing about GTI's and these Vorshlag caster / camber plates is that, while you can adjust the camber from the top of the strut tower, it's not ideal. And caster changes must be made by taking things apart. :(
[URL=http://s7.photobucket.com/user/smokindav/media/gti/4FE0C01B-65ED-44FD-B0D1-3821952EBAD2_zpslfkchbzu.jpg.html]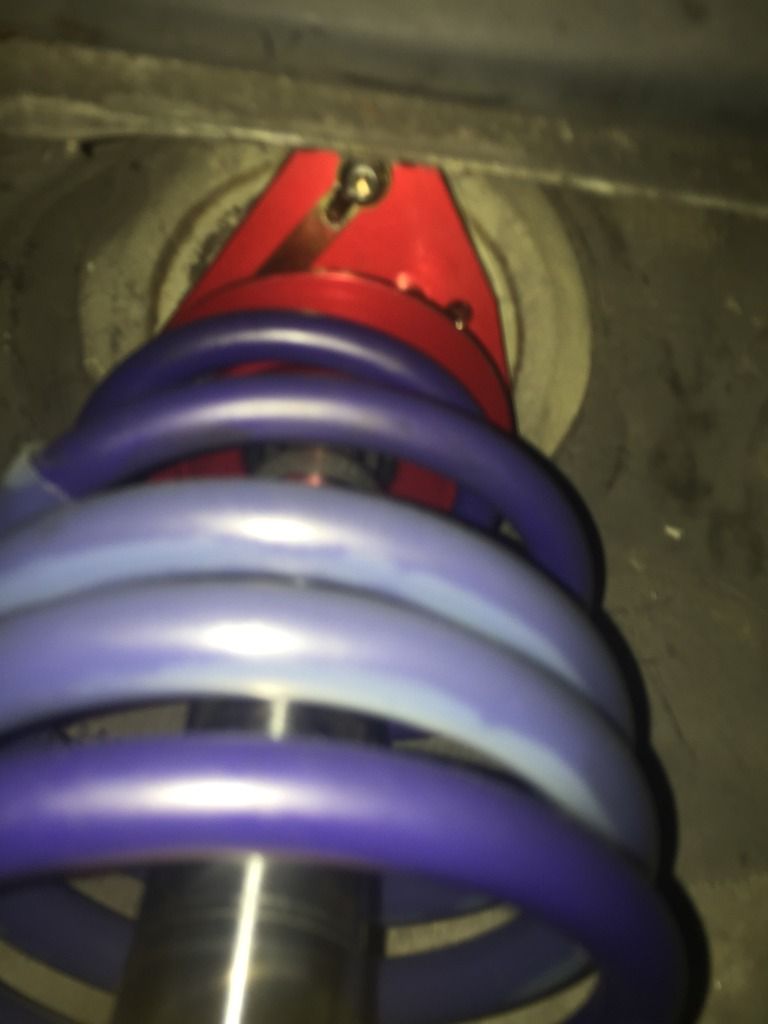 [/URL]
I got the passenger side strut/spring/cc plate installed. Buttoned everything back up and too her for a ride. Ride quality is much improved. Can't comment on handling as I only went around the block, plus it's wet out right now.
[URL=http://s7.photobucket.com/user/smokindav/media/gti/91CE7A71-B6FF-4066-B22C-1714F6F7AB4E_zpsblntpu0t.jpg.html]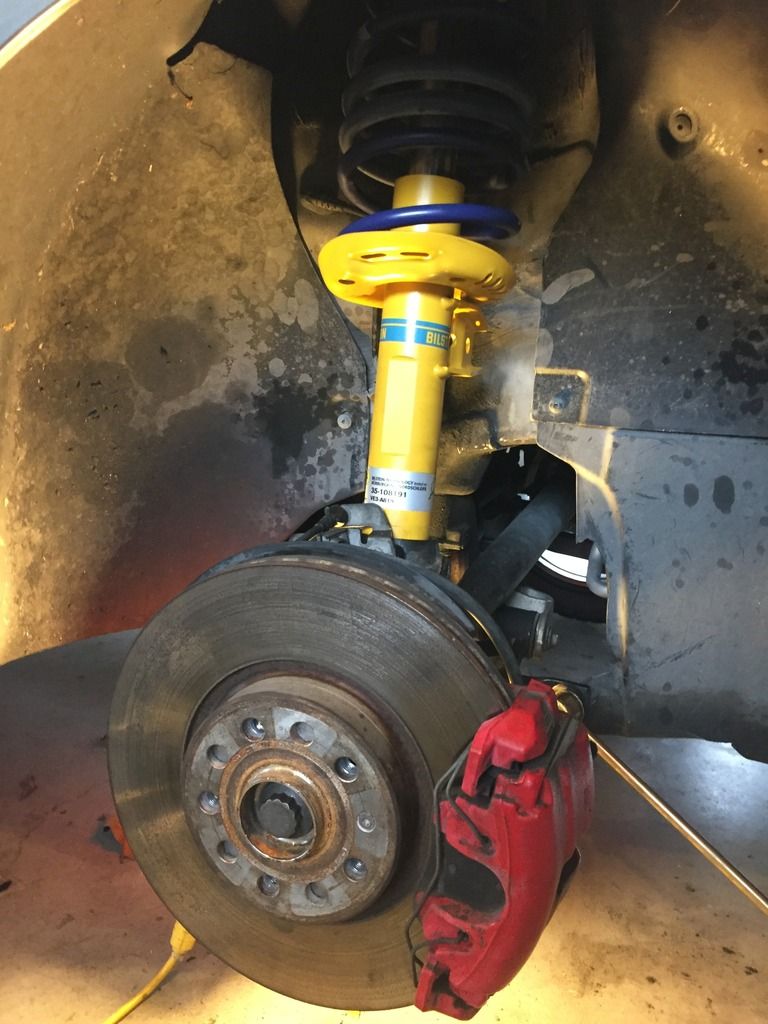 [/URL]

Looking great! Should be a ton of fun to drive with that much more suspension and tire under it.
Looks great! One question: I know zero about VW, so maybe this is typical, but I noticed there's no lower spring pad. Is it an optional kind of thing?
They always run a small notch for the end of the spring but otherwise no pad.
Department of Complaints Department
First, it was just a trickle. But recently the complaints (from me) have been flowing in about the lack of forward lighting from the headlight department. The complaint department (also administered by me) finally got sick of hearing about it and investigated.
Now you must understand that VW HID Bi-Xenon headlights are highly praised, so I knew something was amiss since mine sucked. (The factory also offered as standard a halogen headlight, but my car was ordered with the HID Bi-Xenon upgrade).
Primary complaint was that the passenger side high beam was not working, and the low beams weren't very bright. There were also occasional complaints about the driver's side as well. Upon inspection it was discovered that the passenger side bulb and retaining rings were not installed properly. Upon further inspection it was discovered that the retaining ring was, in fact, broken and unable to properly hold both the bulb in the socket and the igniter/transformer/HID magic box onto the bulb.
In typical overengineered fashion, Bosch I believe is the supplier, has created a lovely Rube Goldberg setup. First there is a projector housing in which the bulb is first placed. Then, the black retaining ring in the picture below is installed over the bulb. And finally, the high voltage igniter or whatever it is called is fastened over both the bulb and the retaining ring, and then plugged into the wiring harness.
[URL=http://s7.photobucket.com/user/smokindav/media/gti/IMG_5137_zpsg3bu5xa5.jpg.html]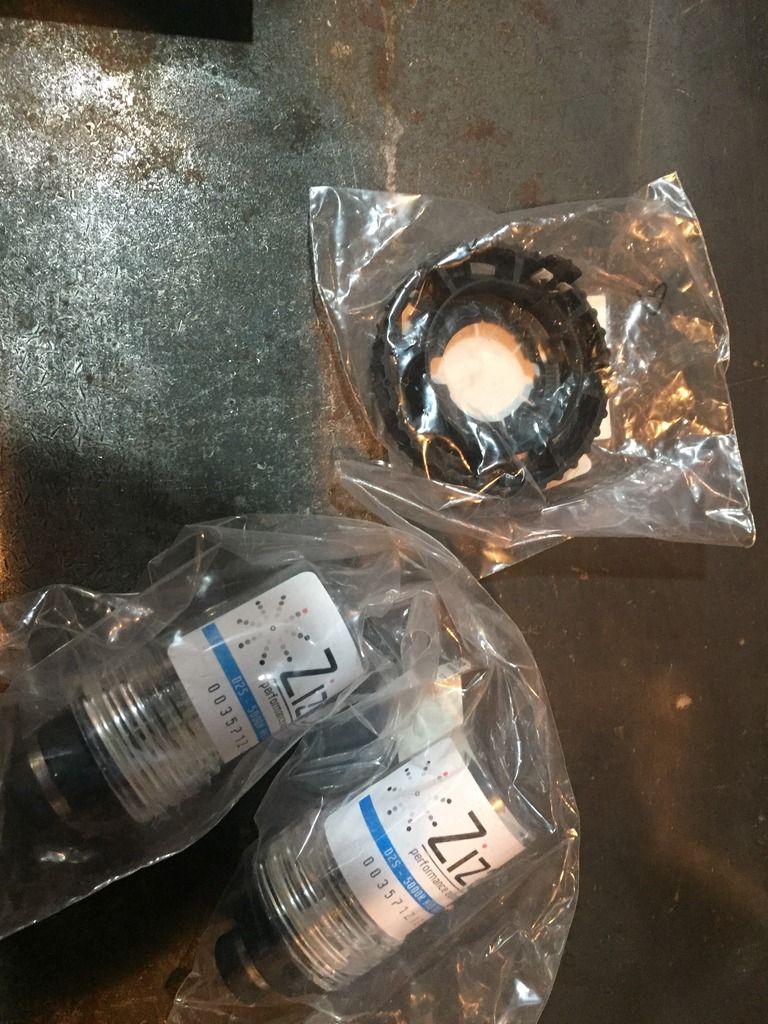 [/URL]
Since the bulb that came out looked pretty bad I decided to order a new set. I went with 5000k bulbs (I think the stock ones were 4200k). I think these are supposed to be more white/blue than the orignals and maybe brighter? Whatever. They aren't cheap as the pair is $100. Crazy.
[URL=http://s7.photobucket.com/user/smokindav/media/gti/IMG_5138_zpsyetmebex.jpg.html]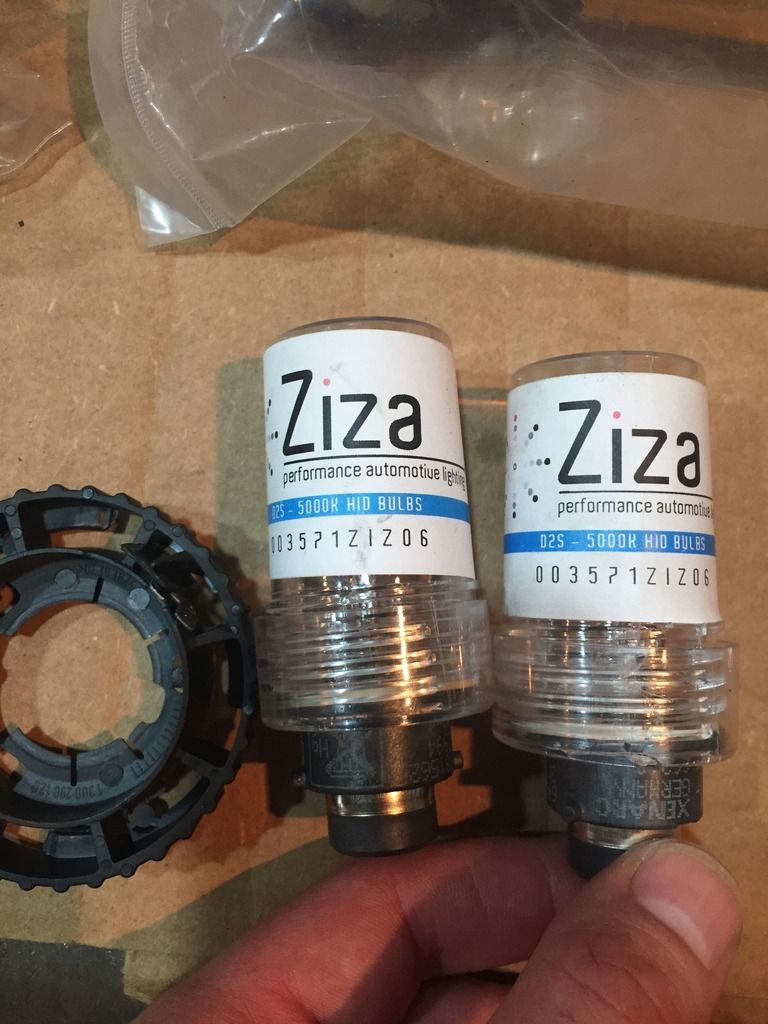 [/URL]
I got the passenger side installed and moved on to the driver's side, which seemed to work ok but once dug in I realized they weren't installed fully and properly either. Thankfully, the retaining ring was not broken so all I had to do was install the new bulb and put everything back together properly.
Low beams with fogs:
[URL=http://s7.photobucket.com/user/smokindav/media/gti/IMG_5140_zps0052yozq.jpg.html]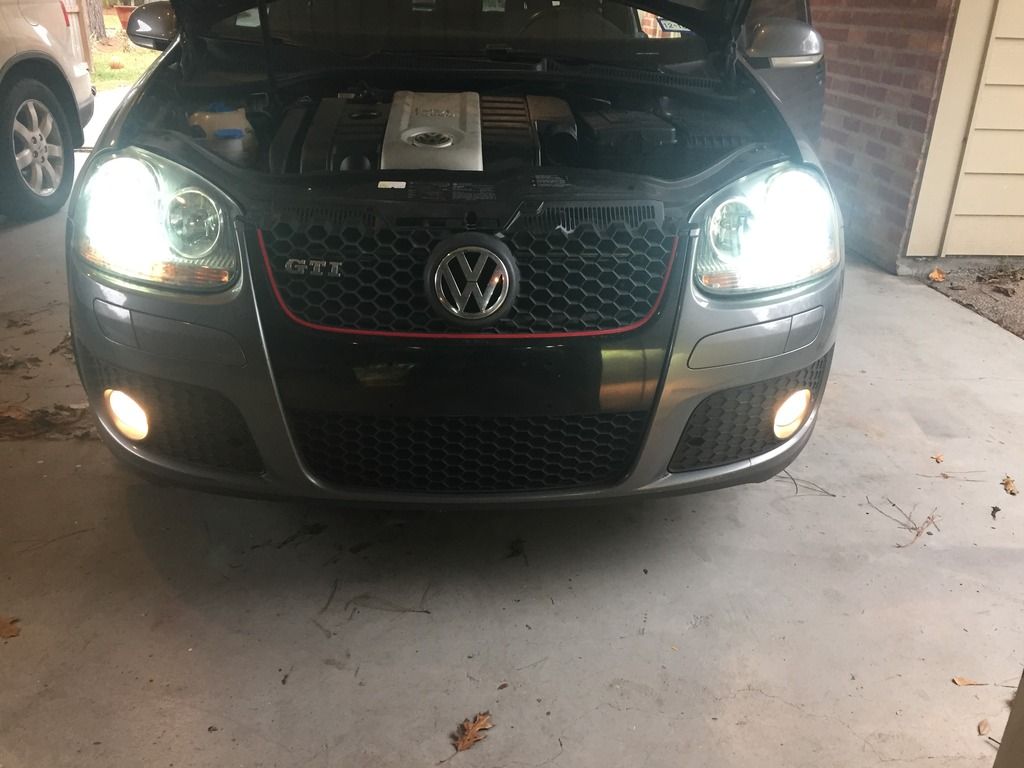 [/URL]
I was worried because I thought the hi/low beam shutter wasn't working, but it is!
High beams:
[URL=http://s7.photobucket.com/user/smokindav/media/gti/IMG_5141_zps0pfo5fej.jpg.html]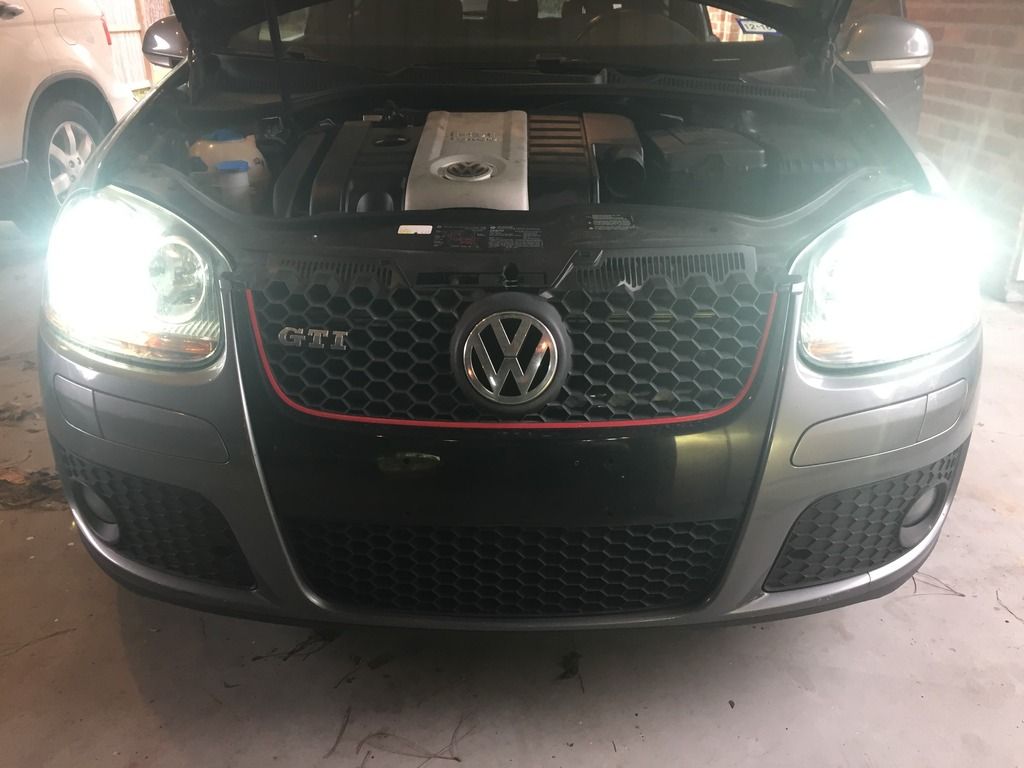 [/URL]
One bad thing is that the driver's side headlight housing has a broken tab. I have heard there is a repair kit but I'm saving that for later as you have to take the front bumper off, natch, to get the housing out.
[URL=http://s7.photobucket.com/user/smokindav/media/gti/IMG_5143_zpsuptc9tn6.jpg.html]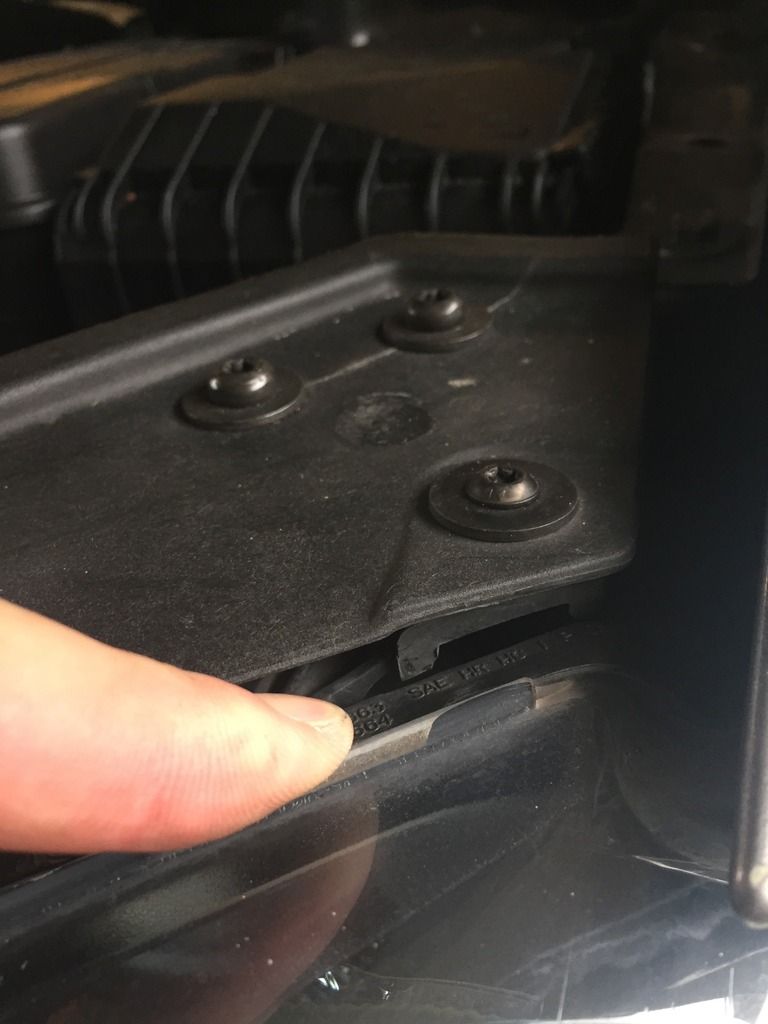 [/URL]
[URL=http://s7.photobucket.com/user/smokindav/media/gti/IMG_5142_zpsniqmpqfb.jpg.html]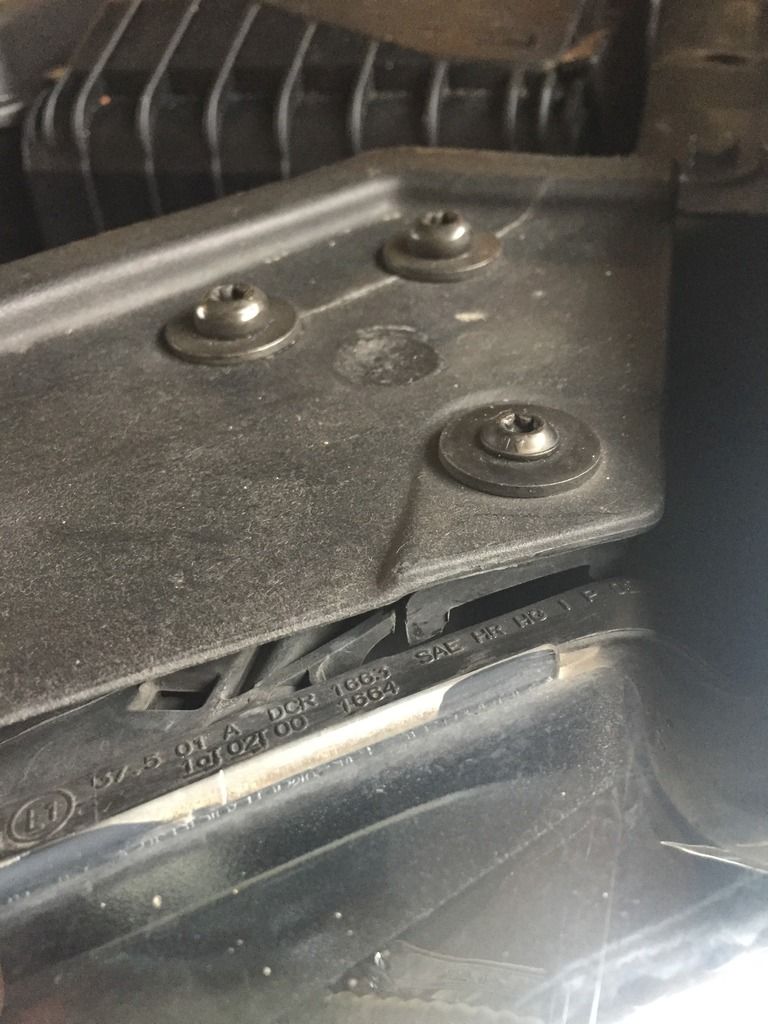 [/URL]
Other fun this have also been happening with my wife's Honda CR-V and that complaint box is overflowing!
Mouse nest!
[URL=http://s7.photobucket.com/user/smokindav/media/gti/IMG_5118_zpsidkxijvo.jpg.html]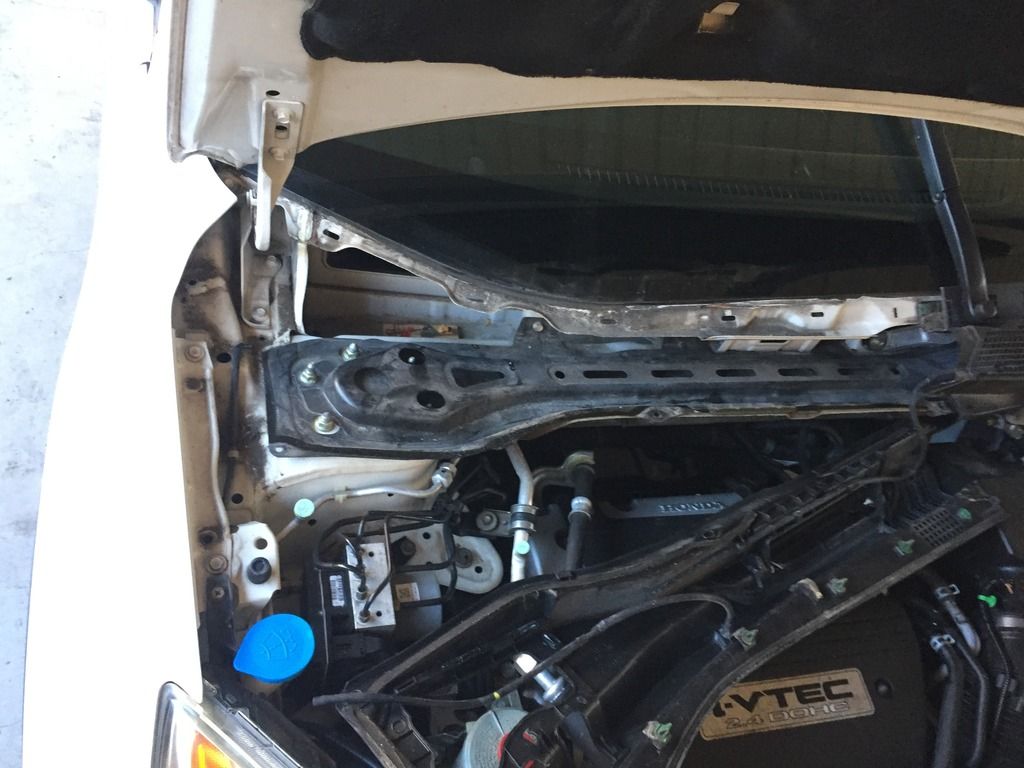 [/URL]
[URL=http://s7.photobucket.com/user/smokindav/media/gti/IMG_5115_zpstzzk5fkp.jpg.html]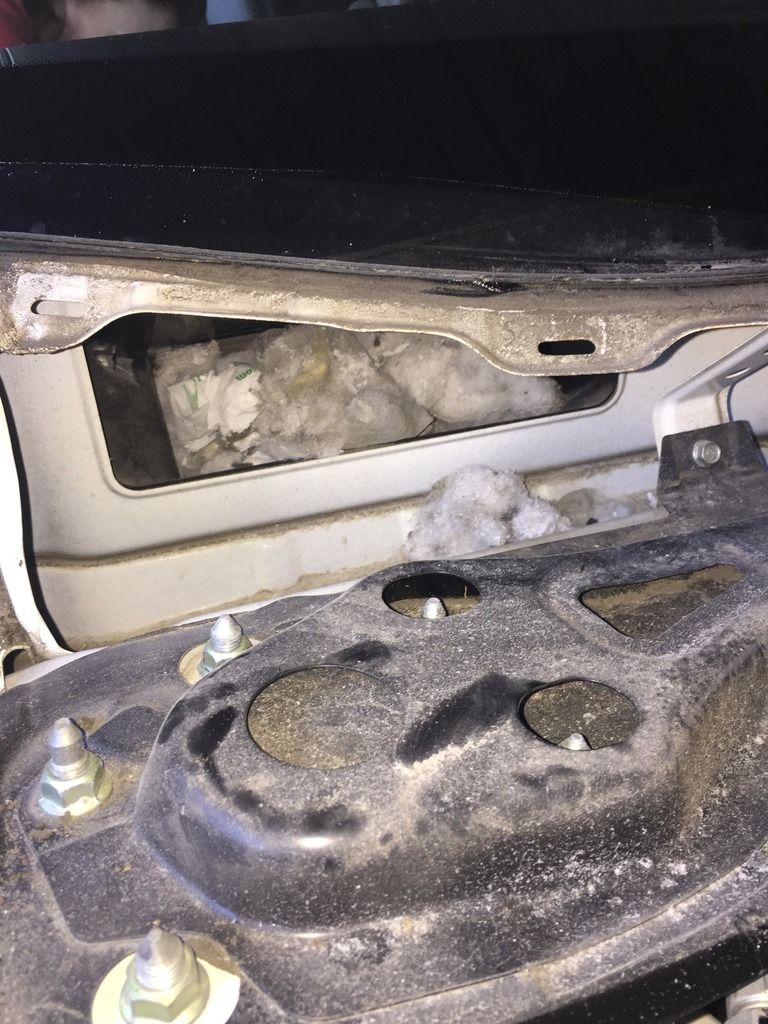 [/URL]
I cleaned that out, set a few mouse traps in the car but I think the mouse left.
I also had to replace a door lock actuator in that car as the right rear door wouldn't lock. A known Honda problem. Good thing I have so much experience with these on an BMW X5 (extra V8) that we used to own.
[URL=http://s7.photobucket.com/user/smokindav/media/gti/IMG_5100_zpsag1fs6by.jpg.html]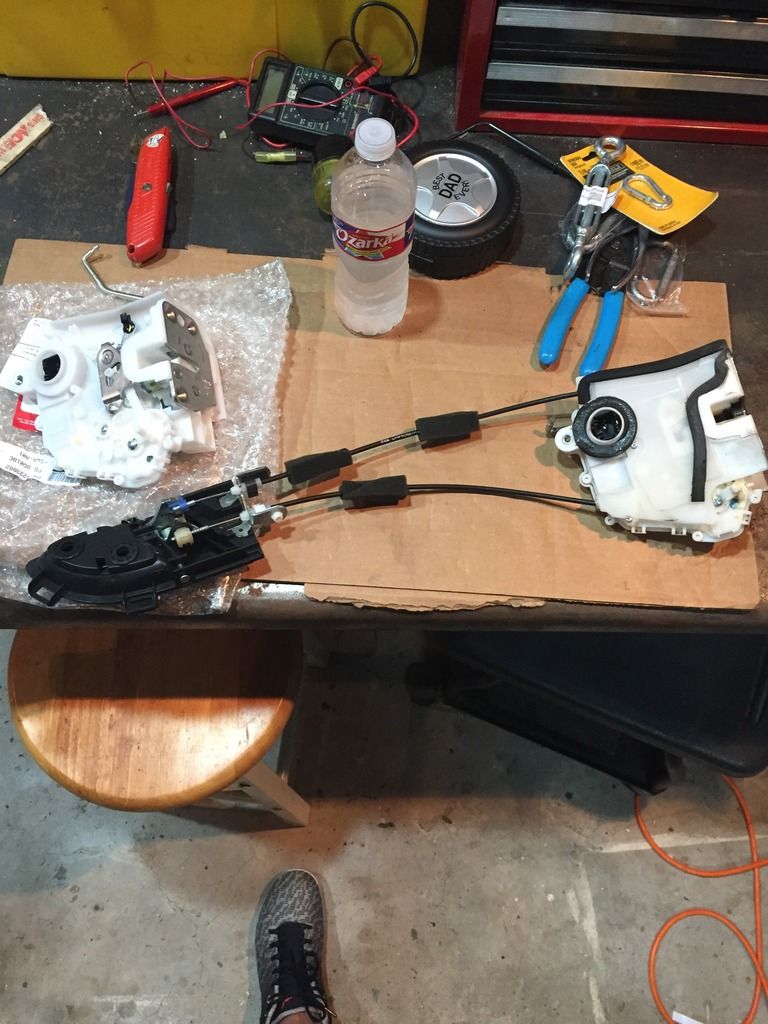 [/URL]
Enough about Hondas. Let's talk about Elvis's food. We've been busily working our way through his cookbook. Eggs Benedict with Hollandaise sauce (winner!), cherry pie (loser) and baked macaroni and cheese (winner!).
[URL=http://s7.photobucket.com/user/smokindav/media/gti/435B7192-923F-4D69-9369-434D8B4E6B19_zpsxpfc52i2.jpg.html]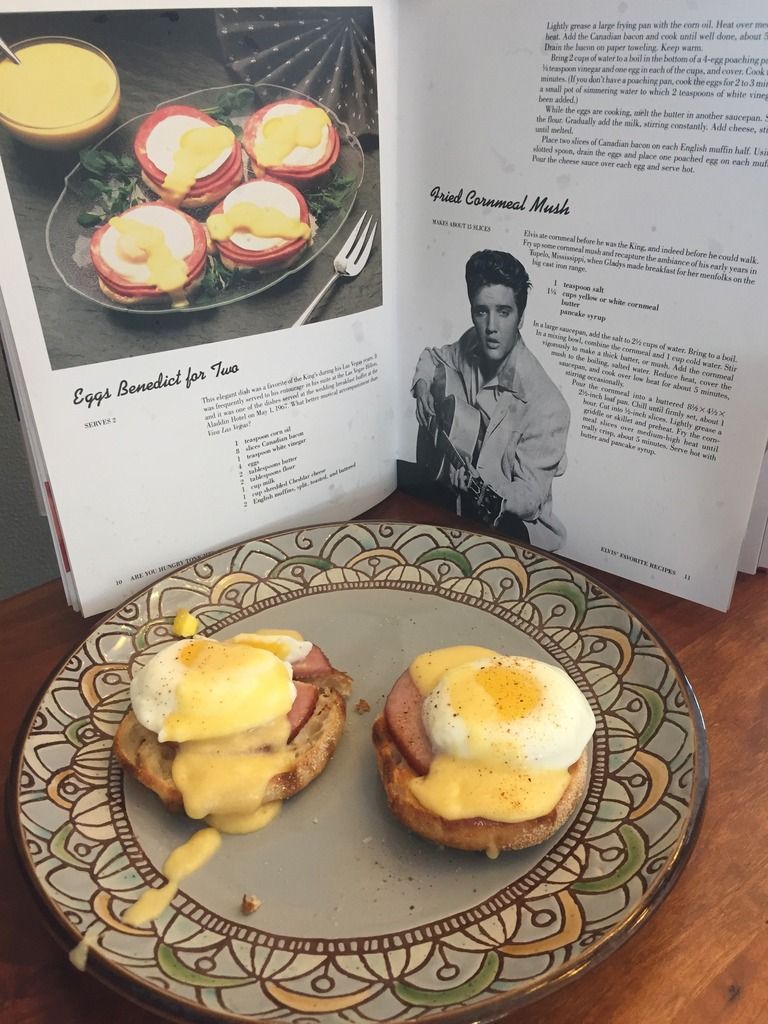 [/URL]
[URL=http://s7.photobucket.com/user/smokindav/media/gti/45CF72B2-3644-4BCD-BD00-B4A5204EA321_zpslrecycs3.jpg.html]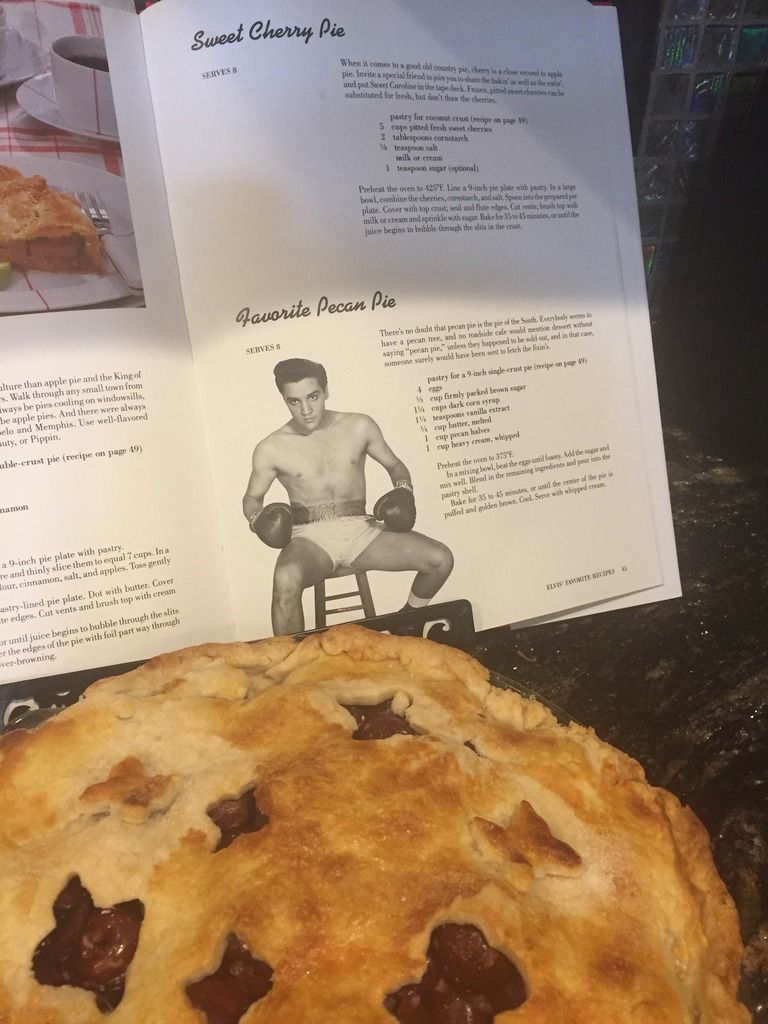 [/URL]
[URL=http://s7.photobucket.com/user/smokindav/media/gti/IMG_5134_zps3plyoivq.jpg.html] [/URL]
Ok, enough of that. Back to GTI. Sold the WRD coilover kit on Facedbook in about 30 mins.
[URL=http://s7.photobucket.com/user/smokindav/media/gti/IMG_5103_zpswdak5dgz.jpg.html]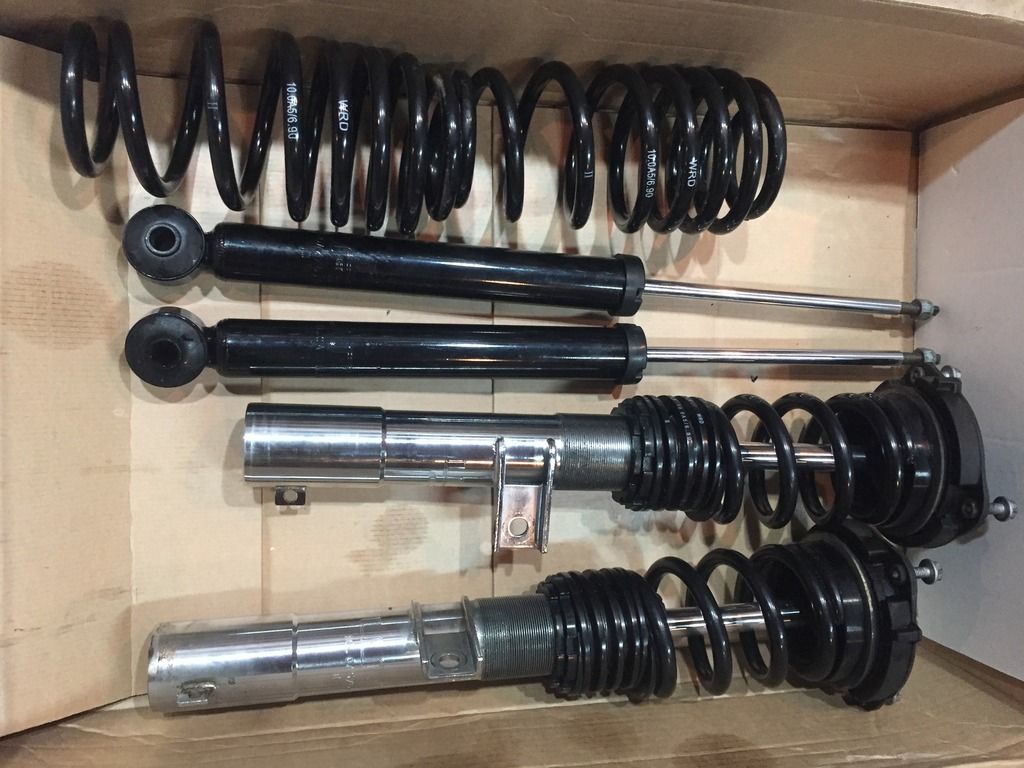 [/URL]
Got this:
[URL=http://s7.photobucket.com/user/smokindav/media/gti/83674A33-0C0C-4BD4-84BD-E8C2DE3DA5FA_zpsb0obqwwz.jpg.html] [/URL]
Used those to buy these:
[URL=http://s7.photobucket.com/user/smokindav/media/gti/IMG_5136_zpsgimgzz61.jpg.html]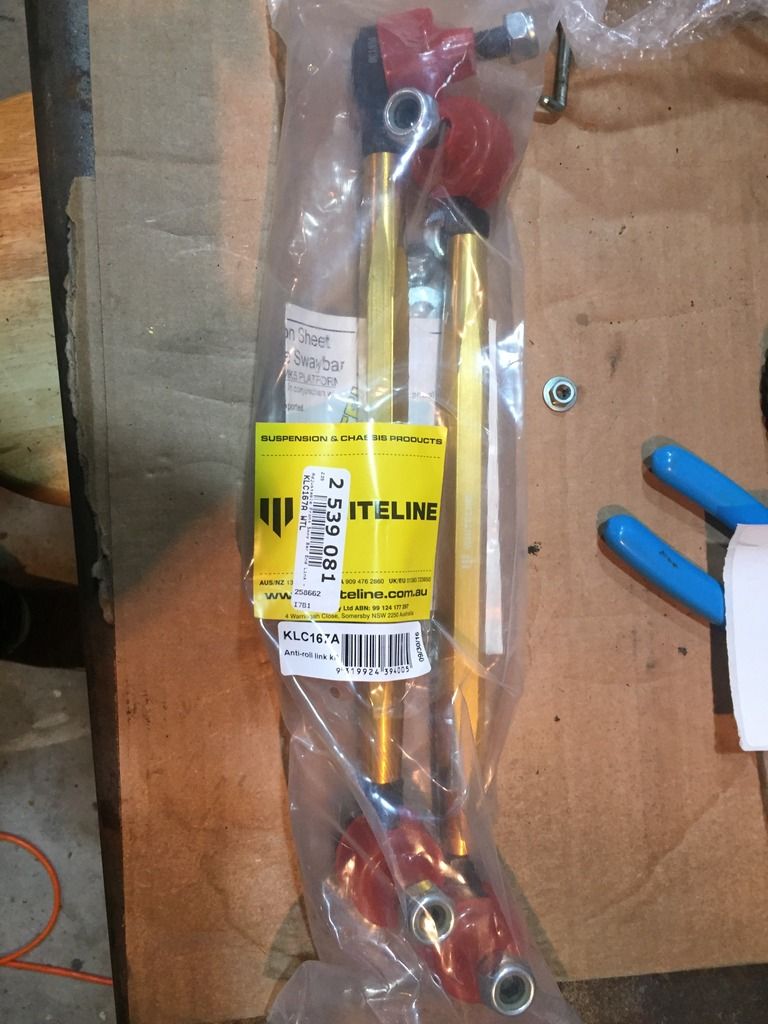 [/URL]
Stay tuned and thanks for reading! Leave comments, enjoy the GTI!

Had the same broken tabs on my passenger side. 2 of the three tabs where broken so I J-B welded them and they've been good for the last 6 months. I check them out every month and nothing has changed with them since I first did it.
How is the new suspension doing? Was wondering if you've tried to adjust the camber yet and how well did it go?
There is no comparison with the old WRD coilover Chinese garbage. I haven't driven a MKV GTI with a stock suspension so I can't compare it to that.
This suspension (Bilstein B8 sport shocks and struts, H&R sport springs) rides nice, not too harsh. Good damping. Springs seemed well matched. I haven't tracked or autocrossed the car yet. I'll report back after that happens.
I haven't aligned the car or adjusted the camber yet as I want to get those adjustable sway bar end links on first. I plan to go over to a friends house tomorrow and set the toe and check the camber.
The tracky VW guys (as opposed to the stancetards) say to just set camber to max and lock it down and don't mess with it again.
brad131a4 wrote: Had the same broken tabs on my passenger side. 2 of the three tabs where broken so I J-B welded them and they've been good for the last 6 months. I check them out every month and nothing has changed with them since I first did it. How is the new suspension doing? Was wondering if you've tried to adjust the camber yet and how well did it go?
Swapped out the sway bar end links that came with the WRD coilover kit and installed Whiteline adjustable links this morning. The boots on the old links are cracking already and they are just over a year old, maybe 6,000 miles.
[URL=http://s7.photobucket.com/user/smokindav/media/gti/67353CDE-AB3C-466D-91BA-E0FEF8C46AB1_zpsszsysgef.jpg.html]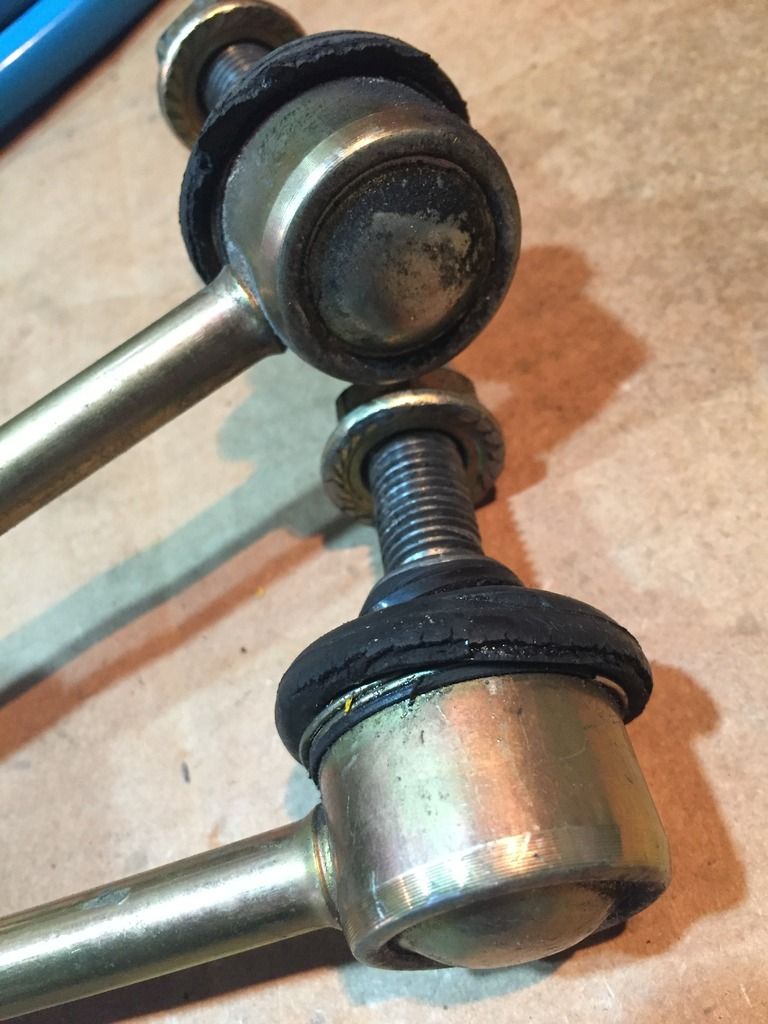 [/URL]
Pretty straightforward. An impact wrench makes this easy. Jack the car up, take the old links off, put the new ones on. You may have to use your floor jack to get the hole in the sway bar lined up with the end link (see pictures, notice USA made collectible Craftsman wrench!). Lower the car, drive around block. Set pre-load to 'none'. Tighten lock nuts. Done.
[URL=http://s7.photobucket.com/user/smokindav/media/gti/5F2F2736-DD27-4630-ADBA-CDE77E504266_zpsjccjnpmz.jpg.html]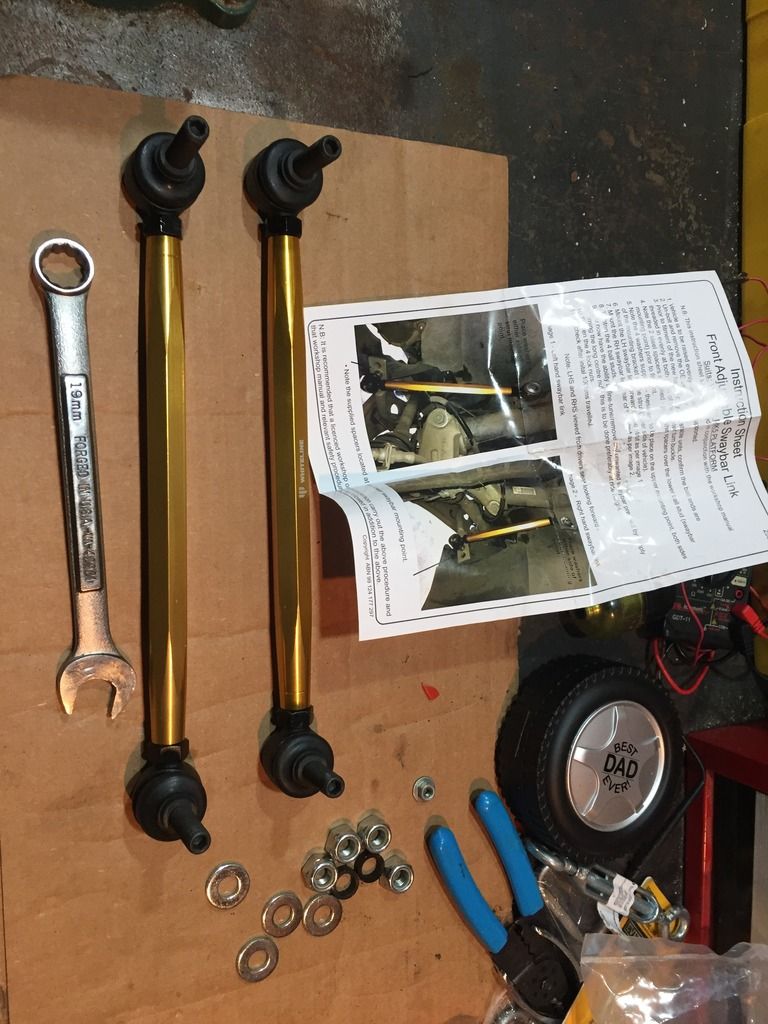 [/URL]
Passenger side first:
[URL=http://s7.photobucket.com/user/smokindav/media/gti/5871F98F-BD06-437E-B69D-27DAD27979B3_zpsijuo0swn.jpg.html]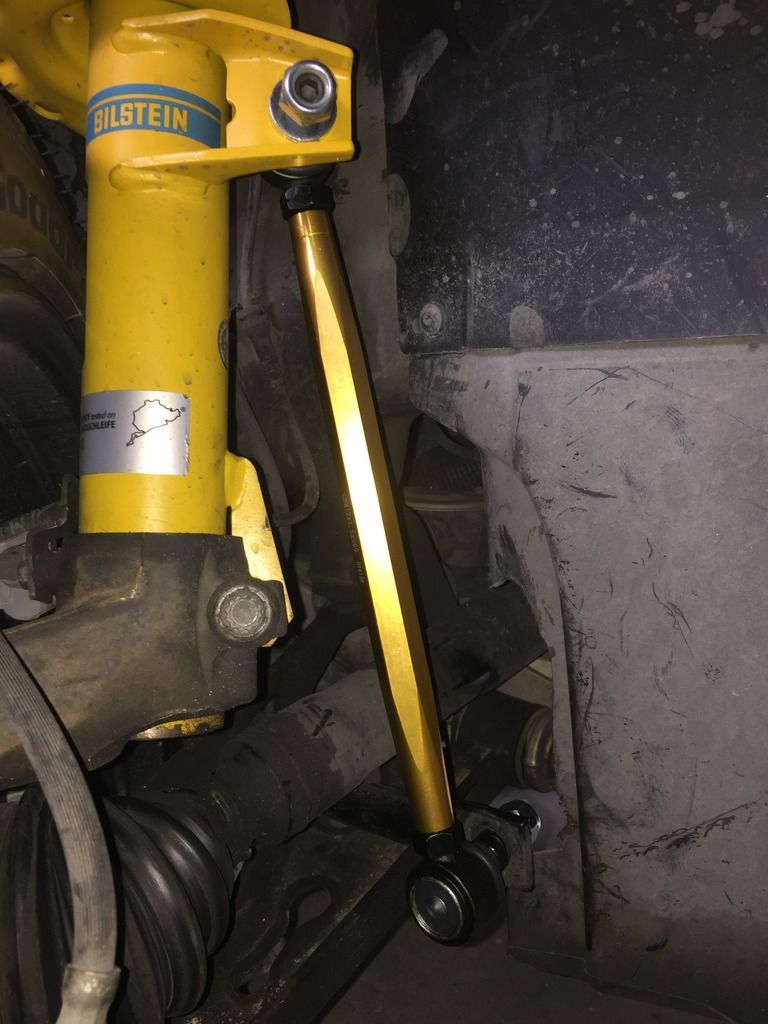 [/URL]
Driver's side next:
[URL=http://s7.photobucket.com/user/smokindav/media/gti/35AA04ED-CC21-4F29-A2A9-28960920ED6E_zpstweb4q3l.jpg.html]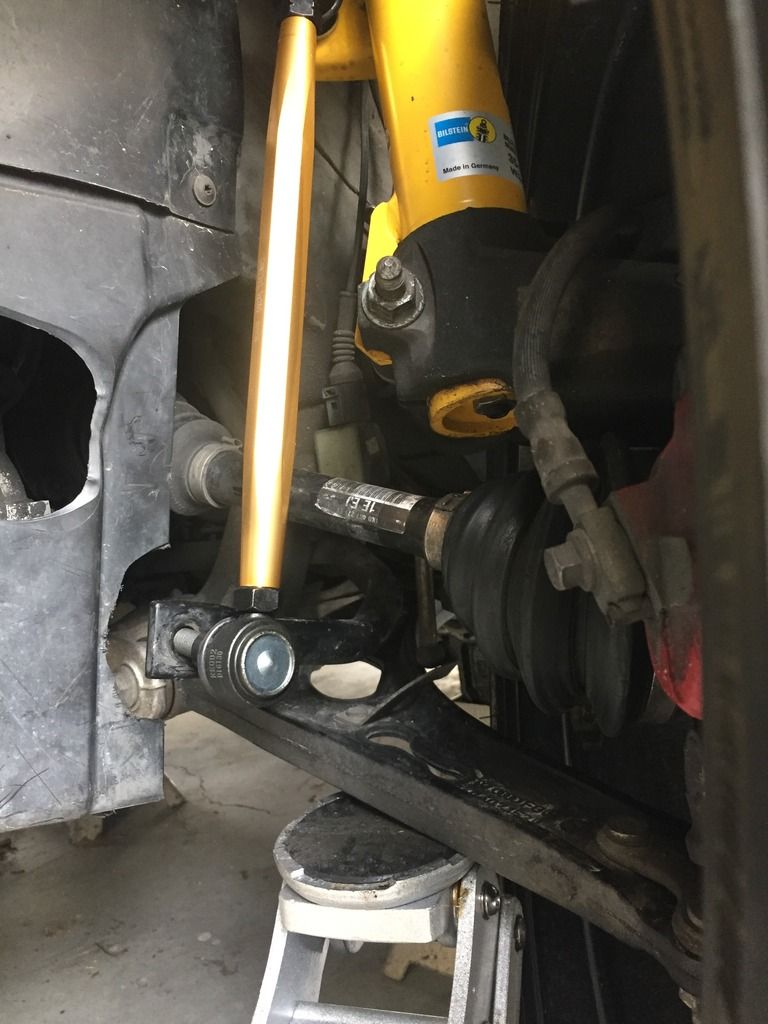 [/URL]
[URL=http://s7.photobucket.com/user/smokindav/media/gti/C71FCB52-E695-49F0-B444-69460501B03F_zpswio3fslg.jpg.html]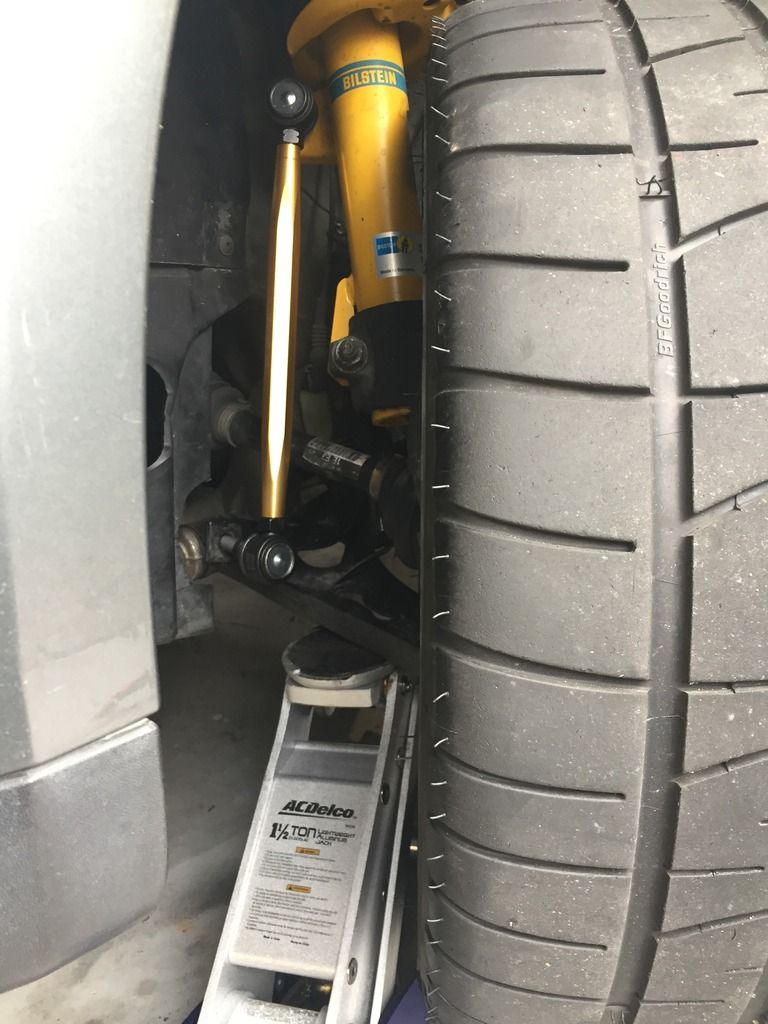 [/URL]
[URL=http://s7.photobucket.com/user/smokindav/media/gti/250C9671-036B-4DF6-AF50-22A2A6FE8861_zpsvu07pzf2.jpg.html]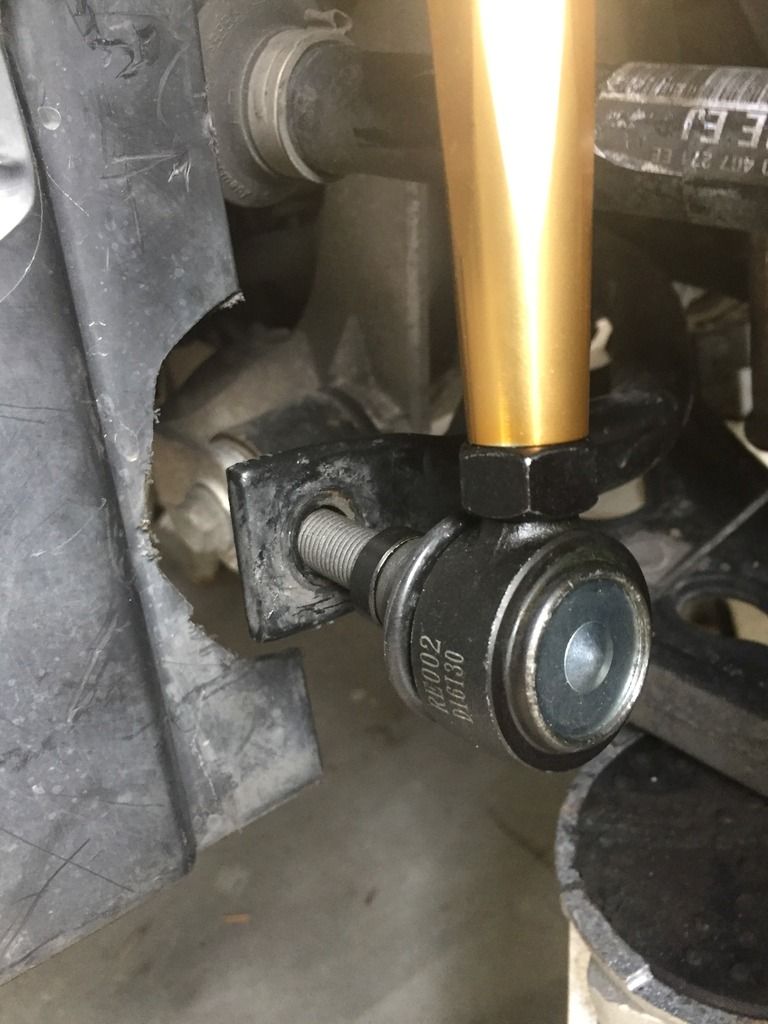 [/URL]
Just got back from a friends house - he's a good friend as he has a camber gauge and some toe plates. I didn't have time to fool with the camber, so we just left it at full negative (whatever that is - I'll borrow his gauge and measure it later).
Before we started we measured the toe and the car had about 1/4" of toe in. Too much! We adjusted to 1/8" of toe out. I'm really loving the car and having a ton of fun with it.
My friend and I are planning a track trip to COTA with NASA in April. He will race his CMC Mustang and I will open track my GTI. But before that there's still a bit more track prep work to do and then a shake down at a local Houston track....

I always run zero toe. It's not the camber that kills your tires, it's the toe
Yeah, 1/8" toe out might be a bit much for the street. I'll probably set it to 0 for the street and 1/8" for track.
docwyte wrote: I always run zero toe. It's not the camber that kills your tires, it's the toe

So I'm sure this isn't really a Q&A sort of affair, but I really like what you're doing with the GTI. Same sort of stuff I'd like to to do my CC. Did you make any progress/diagnosis with the P2181? I installed a cheap water pump (wasn't enough time to get a good one, needed the car) and I'm getting the same code since installing it. Cleared it once and it came back.
I still have the P2181 and the intake air leak code (forget the number, is it P0171?). I plan to do a thermostat, PCV, high pressure fuel pump cam follower and intake valve cleaning all at once. The thermostat should solve the P2181 and I'm hoping to find the source of the intake air leak, as well.
From what I understand, P2181 is pretty much going to be a stuck open thermostat.
lightbrowncc wrote: So I'm sure this isn't really a Q&A sort of affair, but I really like what you're doing with the GTI. Same sort of stuff I'd like to to do my CC. Did you make any progress/diagnosis with the P2181? I installed a cheap water pump (wasn't enough time to get a good one, needed the car) and I'm getting the same code since installing it. Cleared it once and it came back.
smokindav wrote: From what I understand, P2181 is pretty much going to be a stuck open thermostat.
I'm convinced my bargain basement water pump (again, I regret that decision, pretty sure it's been slowly leaking since I installed it) is completely missing the thermostat. I'm looking in to diagnosing my PCV. Have a mild oil leak on the top end of the block somewhere. Also showing what seems like vacuum issues around 3,000RPM under light throttle. Had the PCV replaced at ~62,500mi and I'm at ~94,000mi now. Seems like 2yr/31k isn't much from such a part but what do I know? The latest revision for the PCV is 06H-103-495-AH.
Daily Duty
I'll be driving in to the office 5 days a week now and not working from home office. So, I went back to the stock wheels with the 3 bargain bin Kumho's and one almost new Barrum tire.
They needed a balance though - got that done this morning.
33 miles one way to office - might as well burn up the garbage tires and save the Rival S for autocross and track days.
Oh yeah, the intake leak check engine code hasn't popped up lately. But for sure I'm going to need to replace the thermostat sometime soon.
[URL=http://s7.photobucket.com/user/smokindav/media/gti/A9390501-7490-4DC8-93D0-9CD6713BC117_zpsqe2orzpd.jpg.html]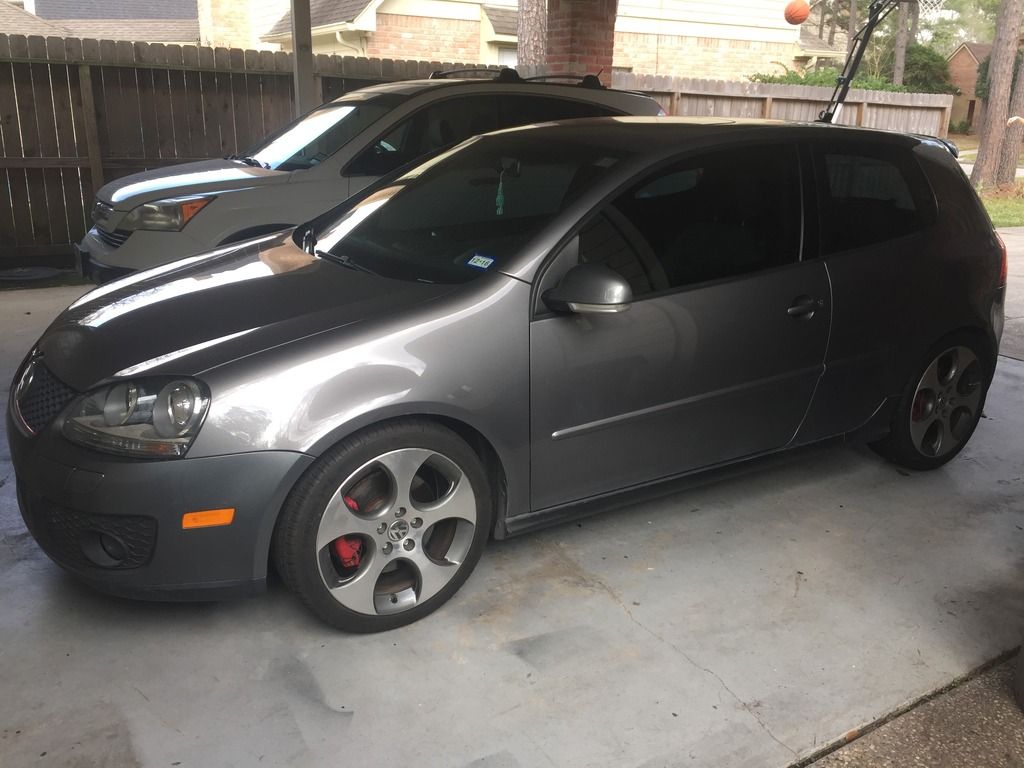 [/URL]
A freshening is coming! Just waiting on the track pads (street pads shown) and stainless steel brake lines.
[URL=http://s7.photobucket.com/user/smokindav/media/gti/2E4D66B8-73B0-4AE6-97EF-722861CCB378_zpsk6edd2m1.jpg.html]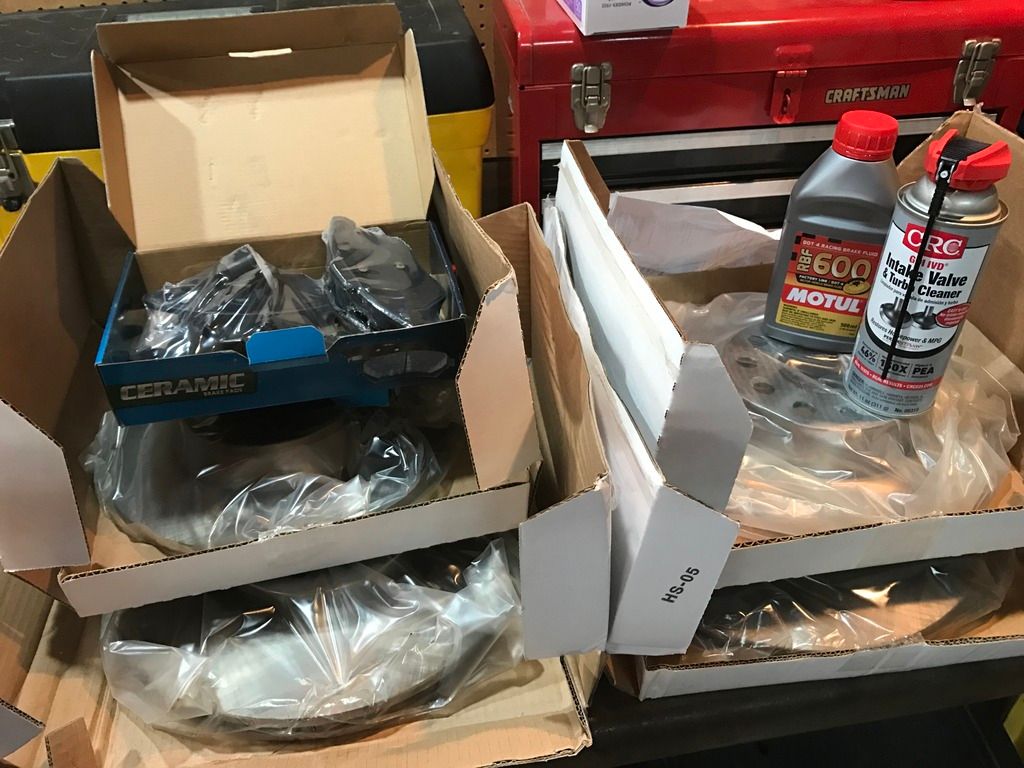 [/URL]

What brand and model pads are you running on the street? My 2011 is due for a refresh and I'm undecided on what way to go.
Street pads are the first thing that popped up on Amazon for ceramic pads - DuraGo. I want ceramic since they don't dust like semi-metallic pads do. Raybestos rotors from Rockauto. Stainless lines are Stoptech.
Track pads are Hawk DTC-60 front and HT-10 rear. Not a lot of choices with the stock calipers.

The title of this thread made me think you bought a Lincoln sport-ute and then beat a GTI in a drag race.
The rest of the brake refresh parts showed up. Now I just need some time to install everything - tonight and tomorrow are shot. My daughter is having her 11-year old birthday slumber party. And tomorrow both kids have sports - daughter soccer and my son has a basketball tournament.
[URL=http://s7.photobucket.com/user/smokindav/media/gti/0727B76B-DA6A-426F-9FF3-8DD11A62582D_zpsymesbecx.jpg.html]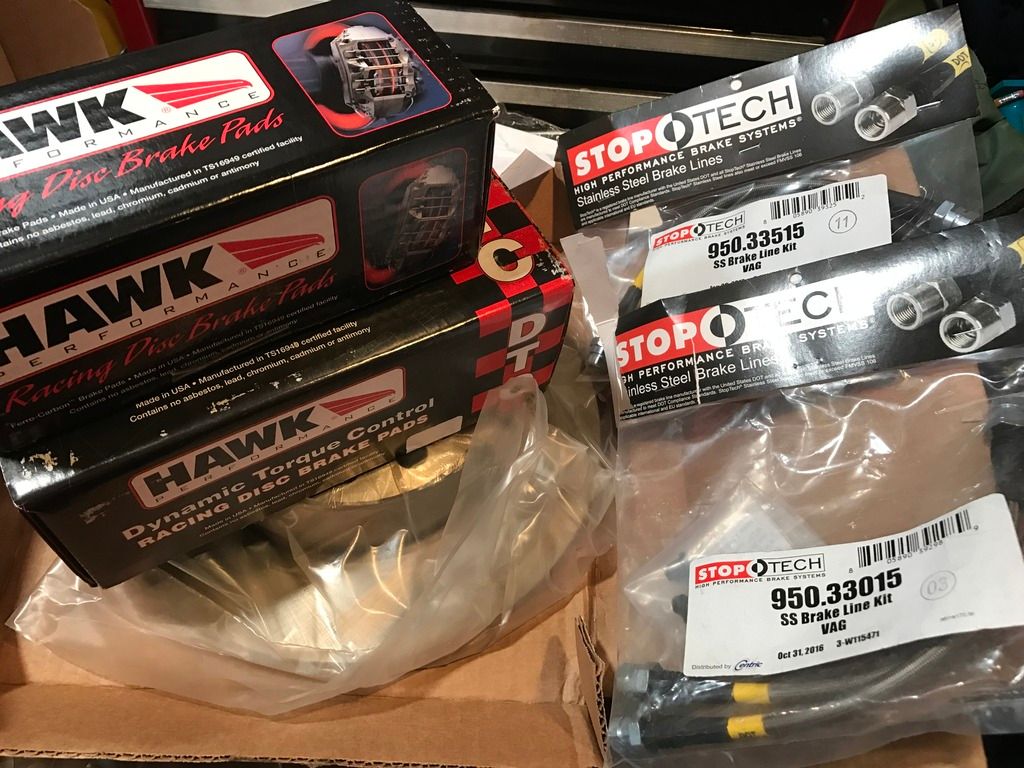 [/URL]
I don't think I have enough brake fluid, though, as I am going to lose a lot (all?) when I install the stainless steel lines.
If you get another container of fluid, you will have had enough with the one you have .... if you don't then you'll be short. Sorta always goes that way ....
I worked on the brakes on my GTI today. Nothing new here, if you've done brakes before. If you've done German brakes, or German anything, there is the familiar frustration at being close to greatness but still falling short yet again.
Like this picture - if you don't have exactly the right tool it is very difficult to get these 6-pointed star bolts (wtf are they called?) out so you can remove the calipers. My solution was an M14 6-pointed devil star bit with a 1/2" universal. Still could barely get the wrench/bit off the bolt when it started to loosen up as this wedged it back into the upper control arm. Dumbkopfs.
[URL=http://s7.photobucket.com/user/smokindav/media/gti/FC4FF613-10C9-4DEE-9A14-68A4373BF335_zpspmgn5uc1.jpg.html]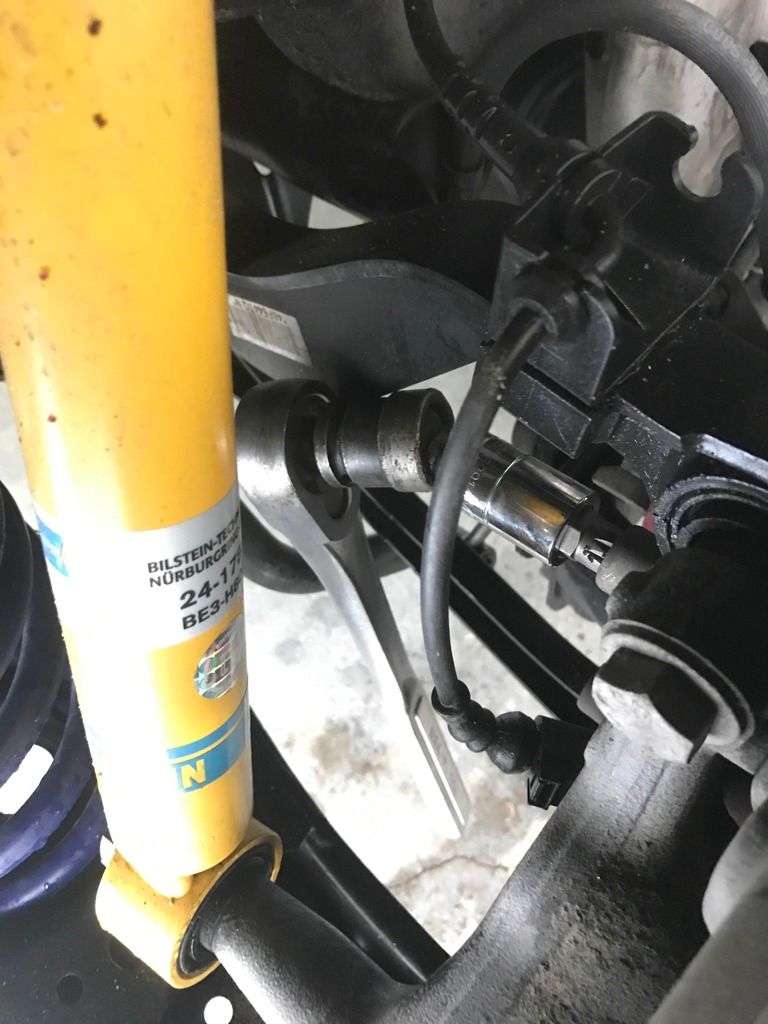 [/URL]
Remove the rotor by smashing it with a large hammer. This is a 1 pounder. Don't forget to remove the rotor retaining screw. Mine came right out because this is a Houston car - been here it's whole life. If you have a car from Northland USA you might need more tools like an impact driver, PB Blaster penetrant and a torch.
[URL=http://s7.photobucket.com/user/smokindav/media/gti/677A3CEF-3BDA-46D6-B335-C0D27A54F964_zpscpzbaqfy.jpg.html]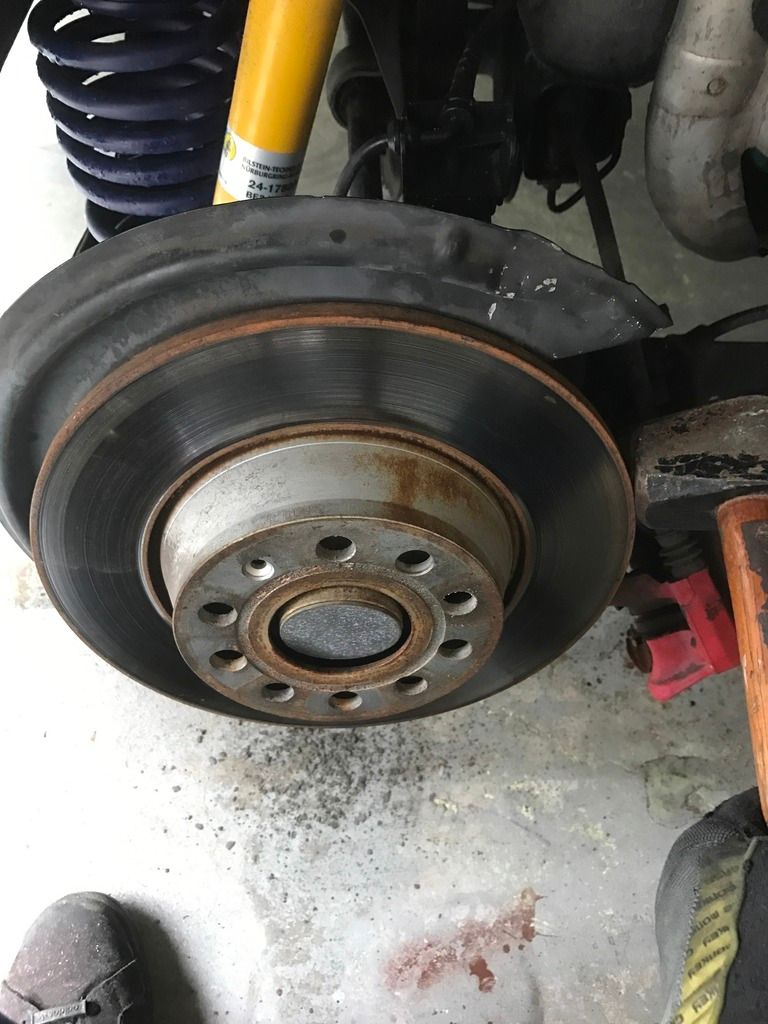 [/URL]
I use my air powered die grinder with a wire brush attached to clean off the hub. If you don't have one you can use emery cloth or a human powered wire brush. Important to get the surface clean so the rotor sits flush against it.
[URL=http://s7.photobucket.com/user/smokindav/media/gti/74BCEE5F-4970-447B-8C3F-30F0A77583B5_zpsp54zrffy.jpg.html]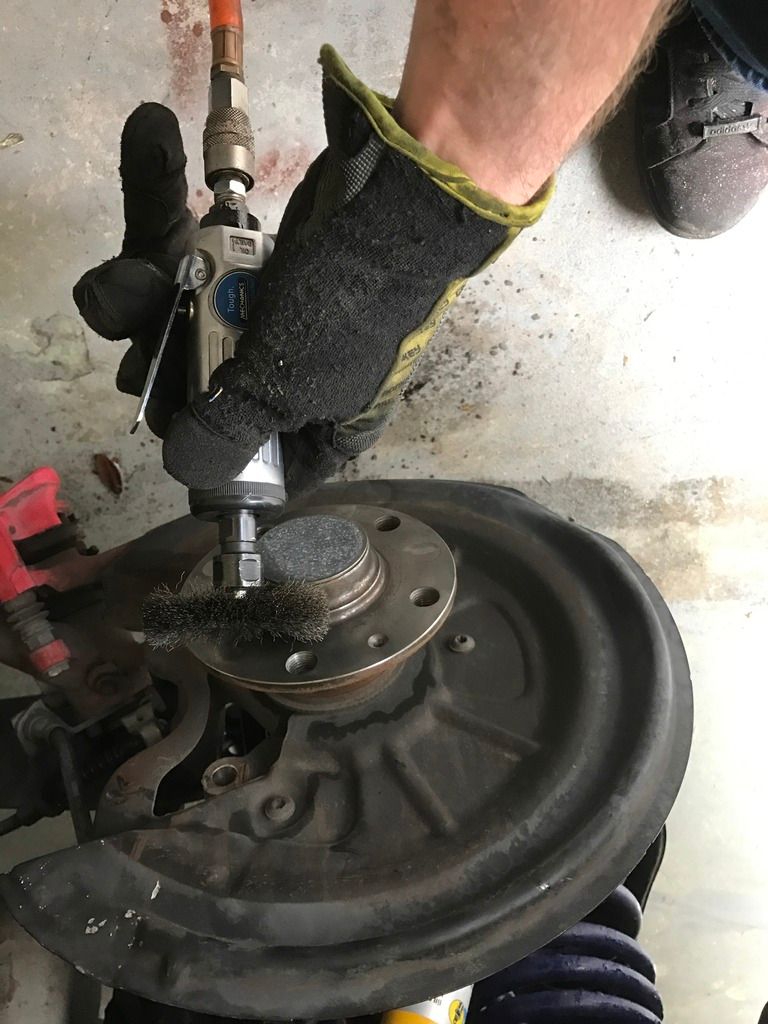 [/URL]
All the innernet track guys say to remove the dust shields to help with cooling. I used a tin snips to cut mine off because of course the Germanic idiotennenens designed it to be installed before the hub.
[URL=http://s7.photobucket.com/user/smokindav/media/gti/389A9EC5-D9CF-4931-B810-D22C094BFBB1_zpsmg7cnhza.jpg.html]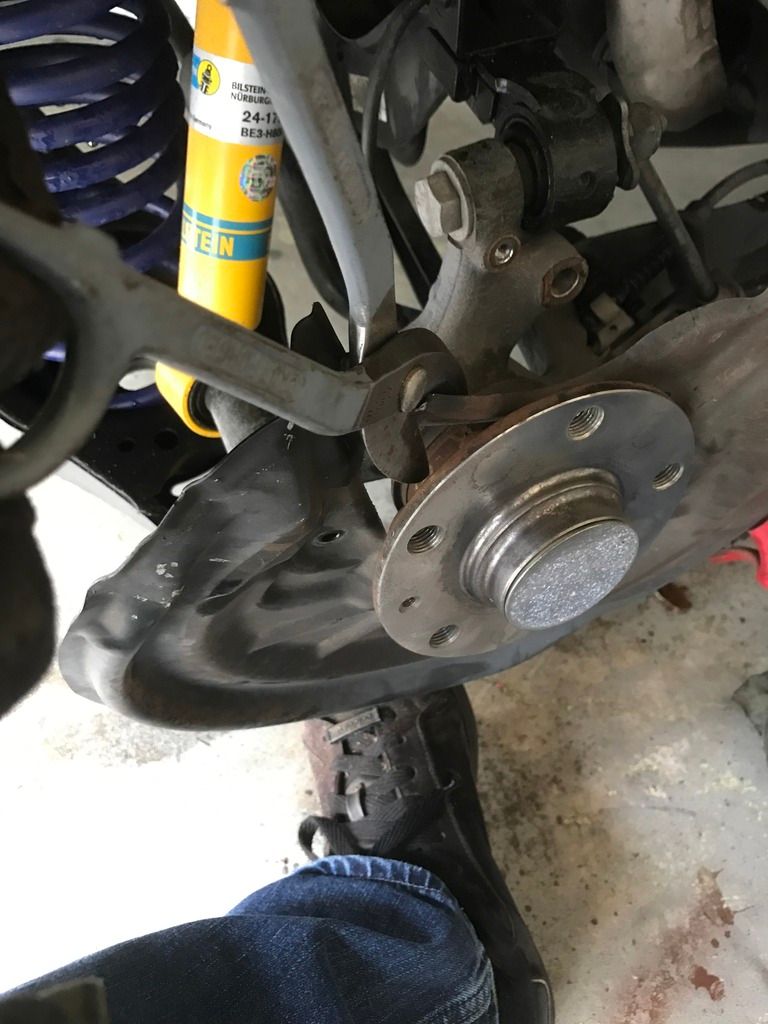 [/URL]
I used the borrowed tool from O'Reilly to turn the rear caliper piston back into the caliper body. You can see how it works in this picture:
[URL=http://s7.photobucket.com/user/smokindav/media/gti/0641F895-DA4F-4A46-9509-61A36916C9A5_zpshhncyudb.jpg.html]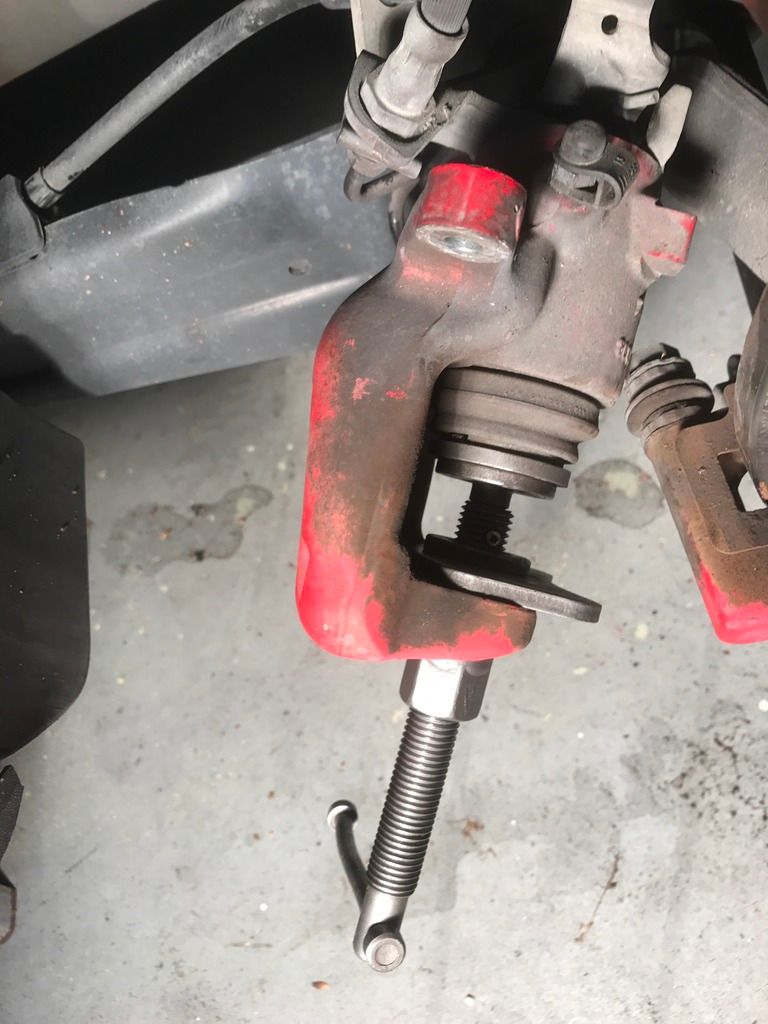 [/URL]
Installing the stainless steel braided hose was straight forward as was the pad install.
[URL=http://s7.photobucket.com/user/smokindav/media/gti/F5AC58DF-47C8-446A-A4A2-691908824A9C_zpsgyfbknhs.jpg.html]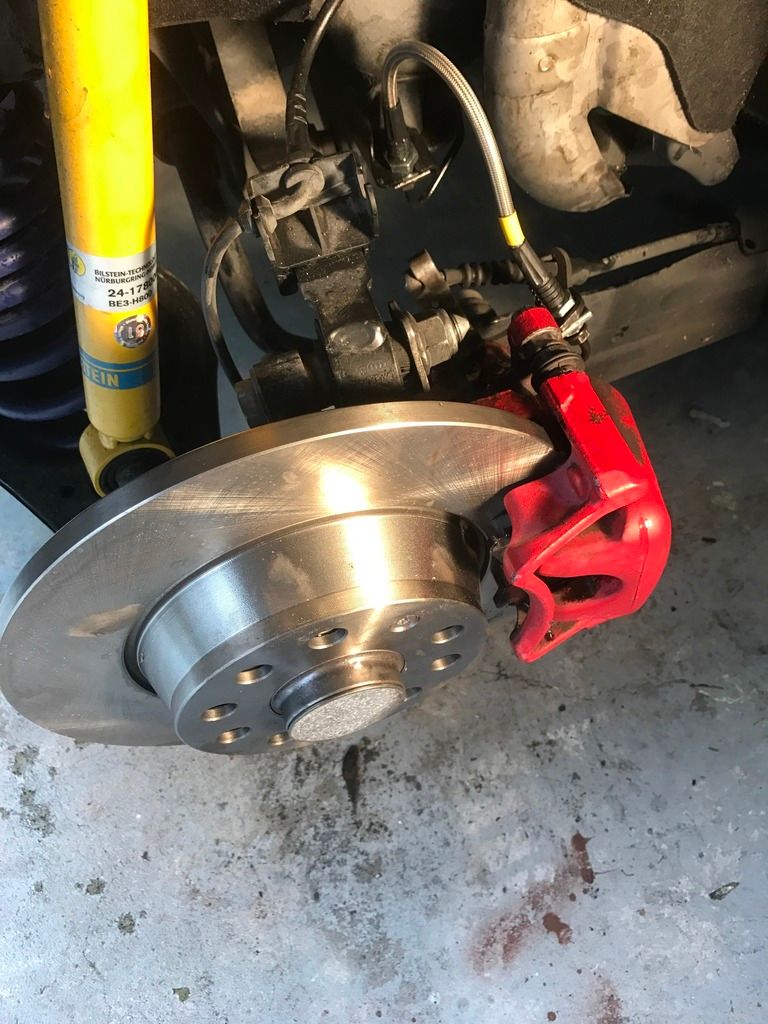 [/URL]
Fronts are next. There is a slight delay because RockAuto sent the wrong front stainless steel brake hose.
You'll need to log in to post.