1 2
mgfoster
mgfoster New Reader
6/15/20 10:41 p.m.

Well, my E39 is up to date on all its maintenance, and I've been spending more money on the Merc than I can count, so whats the next logical step? Another project!!! There is a twist though, I am getting paid fake money called the US dollar to work on this one instead of paying it!

Backstory: A friend of mine and his dad had been working on this van of theirs for about 3 years. They took it off the road to retire the tired old v8 and replace it with an LY6 which is a gen 4 6.0 LS and a 6l80e. The engine and trans are *mostly* mounted, and they have lots of good parts, but it still needs lots of work. He messaged me a few weeks ago and asked me if I wanted to buy the engine and trans, they had decided to part it out and haul it off because it just wasn't getting done. I then counter offered with the idea of letting me finishing it since I have a medium amount of experience from the Wreck Racing E28, youngboomers K5 blazer, and a few family cars that had them. 

The first step was getting it over to my place. That turned out to be a feat in and of itself. The van was parked in their backyard, through a tiny gate. Once I finally got the trailer in place, the next problem presented itself. The trailer tilted towards the truck a good bit and the van had zero brakes. So first I had to winch the van up onto the trailer, and then once the fron wheels got on to the deck of the trailer, we attatched the snatch block to a tree and then brought the winch cable back to the van. I was then able to slowly release the winch to lower the van the rest of the way on the trailer. 

Easy. This 6.7 P O W E R S T R O K E pulled really damn good. The ride home was effortlessly and it was time to unload. 

The thought didnt really cross my mind until it was sitting in my driveway, but holy hell this thing was tall, it dwarfed the Escalade. I got really scared about it fitting in the garage. 

Some quick guestimates, I figured the garage door was 8 ft tall and the van was damn near 8 ft too. So I figured I would give it a shot. If it didn't fit, I would air the tires down. If that didnt work, pull the front springs. But alas, 

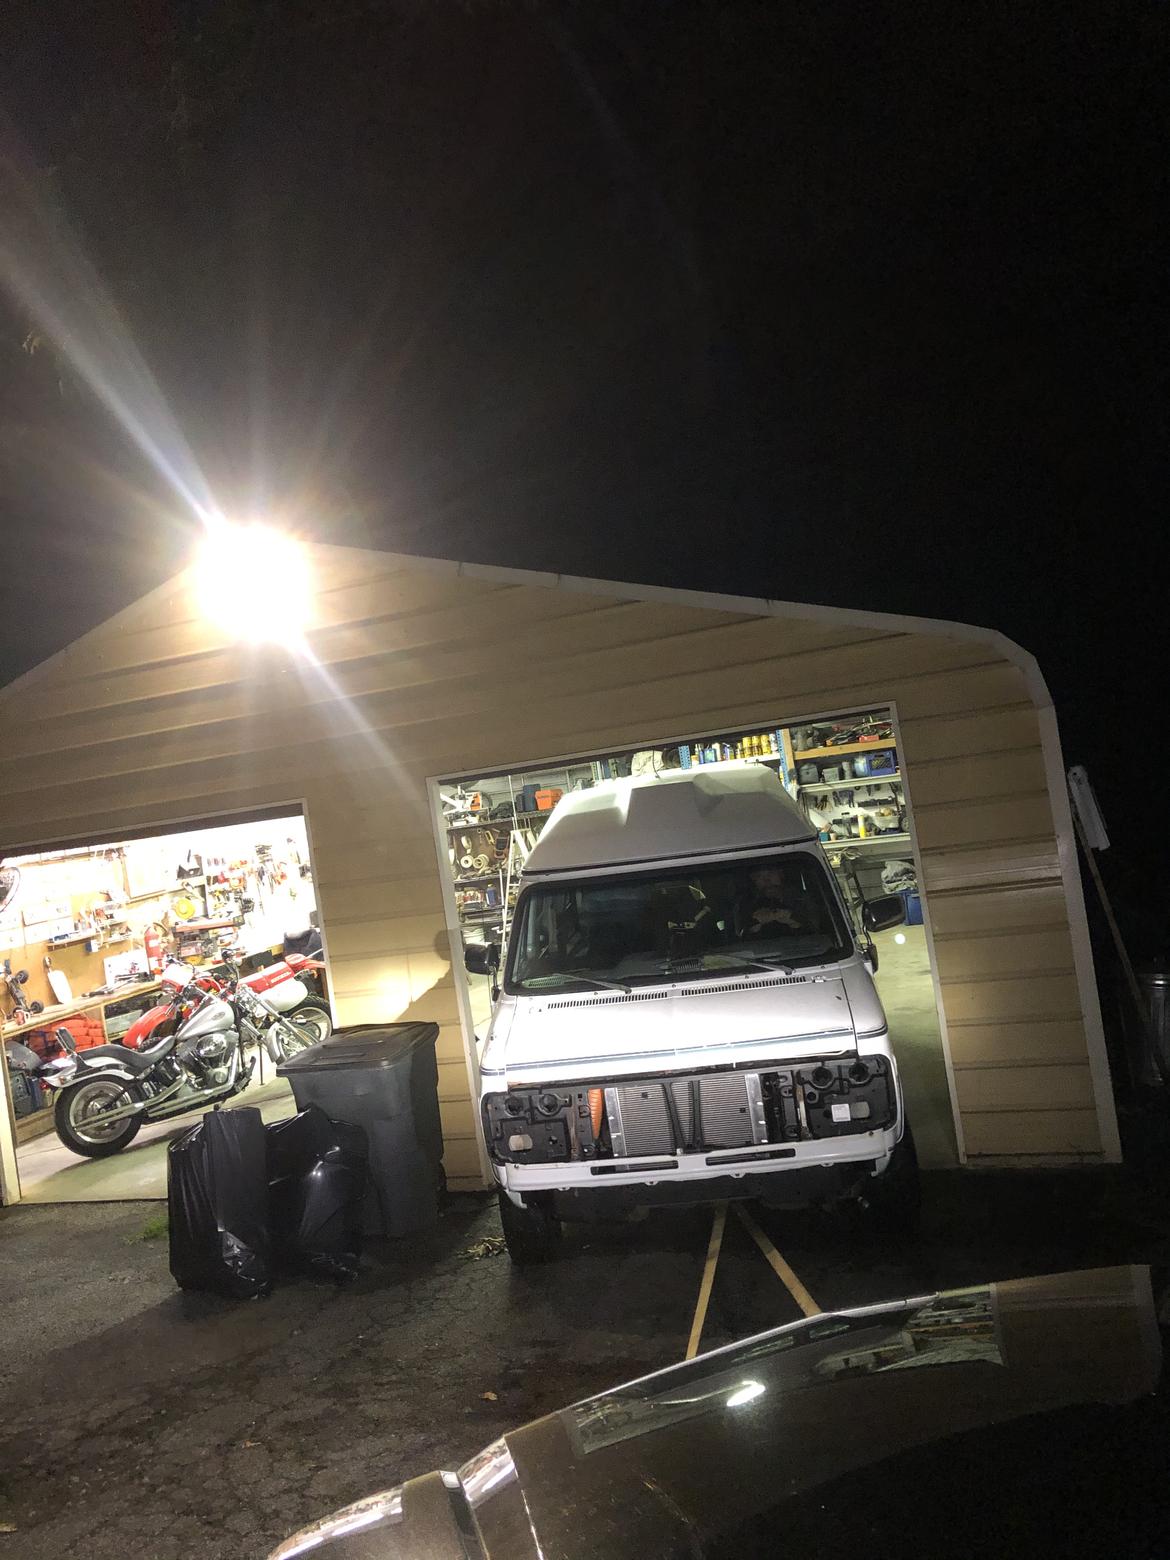
Safe and sound, ready to be torn in to. Ill update when I start diving in to it. I need to come up with a task list. I have a feeling it will be longer than I originally thought... 

mgfoster
mgfoster New Reader
6/18/20 11:13 a.m.

Alright, its in the garage. Step 1: get light so I can see what I'm doing. 

Here's a shot of what it looks like before I touched anything. All the front wiring harness was torn off to prep for paint under the hood. Engine Harness was unwrapped to start thinning out, but it was given up on shortly after that. 

Master cylinder looks rough, but its actually brand new, clean and empty on the inside. Cool. Already has Corvette filter regulator plumbed up, I just don't think its hooked up all the way to the tank yet. Will investigate further once the axles out. Speaking of axles, follow the axle escapades here.

Next: put the truck on jack stands. Get the jack under the axle... doh. Won't lift. Fixed by splurging at Harbor Freight. This sucker weighs 104 lbs!! It rolls easier than the old aluminum jack though. 

Ok, on stands now. 

I went ahead and did a bit of an inventory  of all the parts in the back of the van. Definitely some good stuff back there I will need to use. No throttle pedal though... hmm. Such a plush interior though. 

Easy stuff first. The engine harness is messy and intimidating looking. They had bought a new standalone harness and got the ECU programmed about a year ago. A few minutes later, old harness off. Cleaned out some spider webs and dust with the compressor. 

And new harness on. Pretty nice little fuse block setup. I will have to figure out where to mount the fuse block and ecu. There isn't any room inside the cabin because van foot wells are so tiny. 

Much better. The MAF Harness was pretty short, so the snorkel setup they had wont really work. I like this better anyway. I'll need a silicone coupler to go from the maf to the throttle body. 

I ordered some nice heat shrink connectors and some crimping tools so I can start hooking up this harness with all the stuff on the van that it needs to communicate with. Those will be in this weekend. In the meantime, I'm gonna remove the axle and investigate the damage. I'll look into whats needed to finish the fuel system and cooling systems too. The heater hoses look easy, as well as the main radiator hoses. I just need to figure out what to do with that damned steam port. Either tap in to the radiator, water pump housing, or maybe I can get an expansion tank. 

bgkast (Forum Supporter)
bgkast (Forum Supporter) GRM+ Memberand PowerDork
6/18/20 1:02 p.m.

The LS looks good in there!

mgfoster
mgfoster New Reader
6/18/20 2:41 p.m.

In reply to bgkast (Forum Supporter) :

It really does. But then again, is there anything that doesnt look good with an LS in it??

orthoxstice
orthoxstice New Reader
6/18/20 3:41 p.m.

I will watch this with interest. My girlfriend has a 1991 Vandura 3500 based minibus she converted to a camper with a 200k mile 350 in it that struggles to maintain 65 mph. I dream of a more modern V8 swapped in. 

mgfoster
mgfoster New Reader
6/18/20 3:54 p.m.

In reply to orthoxstice :

Well definitely follow along, I'll try to document as much as the Vandura specific wiring as possible. If this was my van, I would have gone to the junkyard and picked up a gen 3 flavor LS and done it on the cheap. I helped young_boomer on here swap his K5. I think he spent about $800 on the swap and it was night and day compared to the 350. This engine and trans in the van should be just a little extra fun though. 

dj06482
dj06482 GRM+ Memberand UltraDork
6/18/20 6:25 p.m.

Are those Jack Stands from HF the ones that have the recall?

mgfoster
mgfoster New Reader
6/19/20 10:00 a.m.

In reply to dj06482 :

I sure hope not, considering I just bought them 2 days ago after returning my old recalled ones. I have 12 ton stands up front, and 6 in the back. I'm hoping the margin of safety will keep me.. safe. 


Last night was decently productive. I reinstalled (whats was left of) the front body harness that connects to the interior fuse block. Got the front light circuits run. I really need a van specific wiring diagram to figure out what the rest of it is. Anyone have a good source for a 1993 era GM wiring diagrams? I'm sure GM  wasn't creative enough to make the wiring different between the van and trucks. 

Messy. 

Then I got sidetracked by the random cable coming out of the firewall going to the back. I realized it was the shifter cable assembly, and at this point I hadn't even thought about the shifter being a task at all... 

I crawled under and inspected it and realized once again that GM is lazy and doesn't like to change things. Thank you, GM. The van shifter arm bolted on to the 6l80 selector. I found a nut that threaded on, tightened it up, and then I found a spot on the transmission that I was able to c-clamp the bracket to. IT WORKED. 

The detent spacing in the shifter is perfect and I was able to get in to every gear. My brother was able to give me a hand though so I could crawl under and make sure it was engaging park. Looks like a 1/4-1/2" spacer in between the trans and the bracket gives it the perfect length to reliably engage park. WHEW! That's easy, just a little cutting, welding, and trimming away from a finished shifter. 

It looks like the fuel system is also done, flare to AN fittings and then AN lines the the vette filter regulator. Just need to find the wiring for the pump and test it. I'm not sure if this pump is meant to run at the 54 psi fuel pressure or not.

A few fancy parts that need plumbing: 

I also removed the axle so I can start figuring out what I need to go buy at the junkyard. It's confirmed a 8.5" 10 bolt, definitely nothing special. 

I also need to add trans mount re-fabrication to the list. This angle is a y i k e s. 

mgfoster
mgfoster New Reader
6/22/20 11:13 p.m.

Finally got access to some wiring diagrams so I could actually tell what the cut harness was for. It was all stuff for the old engine and ecu. Was able to locate the fuel pump and starter wire.


Got a pedal from a Monte Carlo SS and it fit without any modification and has full travel. Even used a factory mounting bolt  


mounted to the ecu to the spring frame that holds up the firewall insulation. You can still unplug the connectors, so I figured whatever.

Fuse block fits nicely here and is highly accessible if you have the clamshell off. Not the most visually appealing, but functional.

elhartspeedshop
elhartspeedshop New Reader
6/23/20 11:38 a.m.

Oooooh I like this alot.  Always dreamed of a LY6 in my G30 but it didnt have the bubble top.  That should probably be a requirement for a camper.  

mgfoster
mgfoster New Reader
6/23/20 10:27 p.m.

Kinda jumped all around tonight. I ordered all the AN line for the coolers earlier, so I wanted to get a head start on figuring out where to mount them. Got the oil cooler mounted.


I think I will mount the heat exchanger for the trans fluid here. This will keep the heater hoses as short as possible. 

hopefully I can figure out something simple for mounting. It will be covering up the back of the lights. Looks like this for reference: 


Then was the actual trans cooler itself. It's a pretty thick unit with the fan and all. I thought about mounting it back by the trans with a neat duct, but I think this will be better. (read: easier)

One issue though, AC condenser. I think that it would have been a tight fit for one even without the trans cooler. If I move the upper radiator bracket like so it should all work fine.


I also took apart the axle. I hate drums. So so much. They are 30 spline though, so I will see if I can swap them into some newer axle to keep the 5 lug.

infernosg
infernosg New Reader
6/24/20 8:44 a.m.

FC RX7 oil cooler? Really efficient units. Plan on keeping the OEM thermostat in it? IIRC, it starts to open around 140 deg F and is fully opened by 150 deg F. Is that ideal for LS engines? Admittedly, I know next to nothing about them.

mgfoster
mgfoster New Reader
6/24/20 8:47 a.m.

In reply to infernosg :

To be honest I'm not sure. I didn't buy it. If I recall correctly its a 12 valve cummins oil cooler? 

Patrick (Forum Supporter)
Patrick (Forum Supporter) GRM+ Memberand MegaDork
6/24/20 9:28 a.m.

I think i have the full 1990 gmc pickup factory wiring book somewhere.  I'll look.  Gm likes to keep colors the same at least 

infernosg
infernosg New Reader
6/24/20 10:16 a.m.

In reply to mgfoster :

It really does look like a RX7 cooler. I suppose it's possible it's not a Mazda design and the Cummins uses the same thing.

mgfoster
mgfoster New Reader
6/24/20 11:08 a.m.

In reply to infernosg :

That is definitely the same one. Even has the little rod on the top right. Good catch.

mgfoster
mgfoster New Reader
6/24/20 11:09 a.m.

In reply to Patrick (Forum Supporter) :

I forgot to update, but the owner ended up having the full wiring book for the van. Not very fun reading material, but very helpful

mgfoster
mgfoster New Reader
6/24/20 11:17 p.m.

Had dinner with the girlfriend tonight so didn't get quite as much done. I was brainstorming all day at work how to mount that trans cooler more securely. Came up with this.

Just a couple bends in the vice with some flat bar and a little weld with the ol Flux core. Few self tappers and she's solid as a rock.

Self tappers are obviously not ideal, but it's great for quickly keeping something in place. It will be very easy to go back and replace another of these with riv-nuts.

I repositioned the radiator mount to the back side and added 2 pieces of aluminum to sandwich the radiator for some extra strength.

Looks to be plenty of room for an ac condenser. 

I went ahead and mounted the heat exchanger to an existing threaded hole in the core support. The bulk heater hose also came in today (next day shipping is wild) so cut up some pieces and mocked the routing.

Picture taken on my new phone using the wide angle lens. Pretty cool because you wouldn't have been able to fit that all in one phot otherwise.

mgfoster
mgfoster New Reader
6/25/20 11:38 a.m.

Got an early morning in Amazon delivery. Everyday is Christmas around here.  I'm quickly converting to all online shopping, I've just had too many unsuccessful trips to the local auto store. Anyway,  

Found these neat 90° 3/4 heater elbows.  Figured it would work better than bending straight tube.  

Semi-pro tip: ditch the razor blades and get a pvc cutter for all the various rubber hoses. Its effortless and perfectly straight every time.

And just like that, trimmed to fit, heater hoses done. Should have a radiator hose to play with in the next few days as well as all the AN lines.

irish44j (Forum Supporter)
irish44j (Forum Supporter) MegaDork
6/25/20 12:44 p.m.

nice build. I appreciate the heavy documentation (much like my own build threads). So what's the ultimate plan for this?

mgfoster
mgfoster New Reader
6/25/20 1:10 p.m.

In reply to irish44j (Forum Supporter) :

Thanks! I figured the owners would appreciate being able to look back and see how stuff was done when working on it in the future. As for plans, they don't have a garage and they do a lot of projects so I think the van is just a great middle ground between a truck and a storage shed lol. Just something that will be a hoot to do burnouts all the way to home depot and be able to hold the lumber you pickup till your ready to use it. 

mgfoster
mgfoster New Reader
6/27/20 12:19 a.m.

Boring night. Took the coolers off, cleaned the spiders out of them. Painted my raw steel brackets, etc. Got lots of parts and stuff to keep me busy though. 

I shopped for a radiator hose on Amazon and randomly chose one that looked like a decent fit and was the right diameter. Uh, score! Didn't even have to trim it.

Dont have much else to show other than my 120° an fitting is going to just barely clear the sway bar. The 90° one dumped directly into the sway bar mount. 

mgfoster
mgfoster New Reader
6/28/20 10:46 p.m.

Spent the whole first half of the day at the junkyard. After hunting for a while, we decided to pull an axle out of a 1500 Silverado that had a g80 locker. It had drum brakes, but I figured it wasn't the end of the world. Shortly after we got the axle out from under the vehicle we realized this:

Probably explains the general looseness of everything.... We found another g80 in a suburban but the whole axle wouldn't have swapped in because it was set up for coil springs. So I decided to just grab the center section and put it in the original axle. This locker is much tighter than the one with the metal flake sludge. 


Then I got home and finished up the oil cooler lines. Turned out really well. 


Then I depinned the pedal plug so I could pass the wires through the firewall. I figured using the hole from the original throttle pedal would be an appropriate place to enter, so I drilled the square hole into a round one. Loomed together pedal harness, interior wiring,  and the fuse box trigger wire. 

mgfoster
mgfoster New Reader
6/30/20 12:15 a.m.

Tonight was motivating for me, electrons flowed through the copper rivers. 

I started by installing the new-used battery cable. I love using the factory gm ls ones because they have provisions for alternator wiring, fuse box power, starter cable, and starter trigger all loomed together. Even has a nice red box to open if you need a jump start. 

Copper lug added for junction block power. 

All nice and loomed up. I spliced the starter trigger wire to the van harness and loomed it up. Then i installed the negative terminal to the frame rail and i added a grounding strap to the block. No pics of that, but check out these baller interior lights. 

We have Powaaaaa. I was pleased to find that the shift interlock solenoid still worked, locks, windows, interior lights, rear blower, but no front blower for some reason. Turn signals also work, i presume its all mostly working. 

Next I needed a switched power source that is hot in run and start to trigger the ecu fuse block. I found the old wire that powered the ignition coil, but it was about 10 gauges thicker than the wire from the ecu. I added this litter terminal block to aid in connecting the two wires and also serving as a nice spot to get switched 12v from for other relays and such. 

Ring terminals and some loom, looks like it was meant to be there. 

Then I spent a ton of time combing over wiring diagrams to find the wires that I need for the rest of the connections. I think i found most of what I needed, speedometer will require some more research. 

Oh, I bumped the starter and the wiring works.  So after I make these connections, I need to wire up the fuel pump, plumb the rest of the trans cooler lines (waiting on parts), fill with fluid, and test fire. Exciting!

mgfoster
mgfoster New Reader
7/3/20 1:09 a.m.

Alright this post covers 2 days of work. I got excited and tried to test fire 2 nights ago. I had received all the lines and fittings for all the coolers, so I finished all of those and tightened everything. Then I verified feed and return, found fuel pump wiring, and rigged it up to run. No gas in the tank, so to the store to get oil, trans fluid, and stop by the gas station. Found a huge leak in one of the AN hoses, rebuilt it, no leaks. Filled engine and oil filter with oil. Filled trans. Cranked engine over for a while to build oil pressure since its been sitting so long. Reinstalled ecu fuses, and........!!!!!! No start... It would barely kick off then die, every time, over and over. I forgot to change the pedal pinout since I'm using a Monte Carlo ss pedal and apparently 2 wires are different than the truck pedal. Did that and now the throttle blade moves. Then I realized that the giant hole in the top of the intake wasn't plugged. Fixed that. Now it ran a little longer, but sputtered and died. TLDR: I found out the fuel pump is still the 12 psi TBI pump and more than likely just isn't supplying the necessary 58 psi. 

Fun ziptie hose organizer trick: 

Next day: got to work finalizing all the wires. I finalized the fuel pump wiring (for the new fuel pump thats in the mail). Factory fuel pump fuse feeds relay on engine fuse/relay box and ecu controls the relay. Fuel gauge wiring hooked back up, CEL hooked up, ran wiring for fan triggers from ecu, TCC brake pedal wires hooked up, etc. Then I bundled all the unused wires so if something needs to be hooked back up later its easy to splice it in. Loomed everything up, tucked into its final positions. 

Battery hooked up with the LS battery cable. 

The DBW pedal wires go in through the firewall through the factory throttle cable hole lol.

Next up, o2 sensors. Had to rewire them in, they were weird generic connectors. There ready to get bolted in whatever exhaust situation I can make happen. 

Next battle... the lower rad hose. The lower neck is at a weird angle and its 1.5 in and the water pump is 1.25 in, and its just really tight around the ac compressor. A few minutes in the back of the auto parts store I found a hose that expanded from 1.25->1.5 and went into a 90. Then i found one with a tight 1.25 90. Trimmed both up and we have an acceptable solution. Shadow makes it look closer to the clutch than it is. 

I also fully installed the fan relays and hooked it up to ecu triggers, just need to hook it up to the fan itself. 

Once I get the new fuel pump I will hopefully be able to get it to run. Waiting on some rear brake parts and wheel bearings to freshen up the axle. Also ordered a power steering hose to attempt to fabricobble some power steering lines. 

1 2

You'll need to log in to post.

Our Preferred Partners
Ae7D0Ab1zUp1L1UYbhGEDhooYvgMQeE3Omq4W6y0Ozr15Dc5nw6CePUns64KROYR