


Thanks for the update. Nice progress in the midst of another project. Happy 50th anniversary to Mom and Dad, have a safe trip. Have fun!!
Thanks for the update. Nice progress in the midst of another project. Happy 50th anniversary to Mom and Dad, have a safe trip. Have fun!!

In reply to Dirtydog :
Looking forward to seeing the west. Never had a chance to be there.
And ive got 4 large projects going simultaneously. This, plumbing truck build, the drivabeater, a carport build, and getting the duster back on the road.
Im way too busy for my own good.
Then it's time to tap the brakes, and take a breath. You will enjoy your travels, if you are driving. In 2004 I took the family, the dog, my life savings, and 2 months off, when I retired from City Service. Drove from NYC, down South, Rt 66 to California. North through the northern States and back to NYC. It was a blast. Enjoy it.
Exactly. Looking forward to a week of deserts, parks, ghost tows, history, and sharing it all with the family. Well be based out of Delores Colorado. Planned to take 1 day to drive to the grand canyon.
Unfortunately we fly out there and pick up a rental. I would love to drive coast to coast one of these years.
I lied. One more update before I leave.
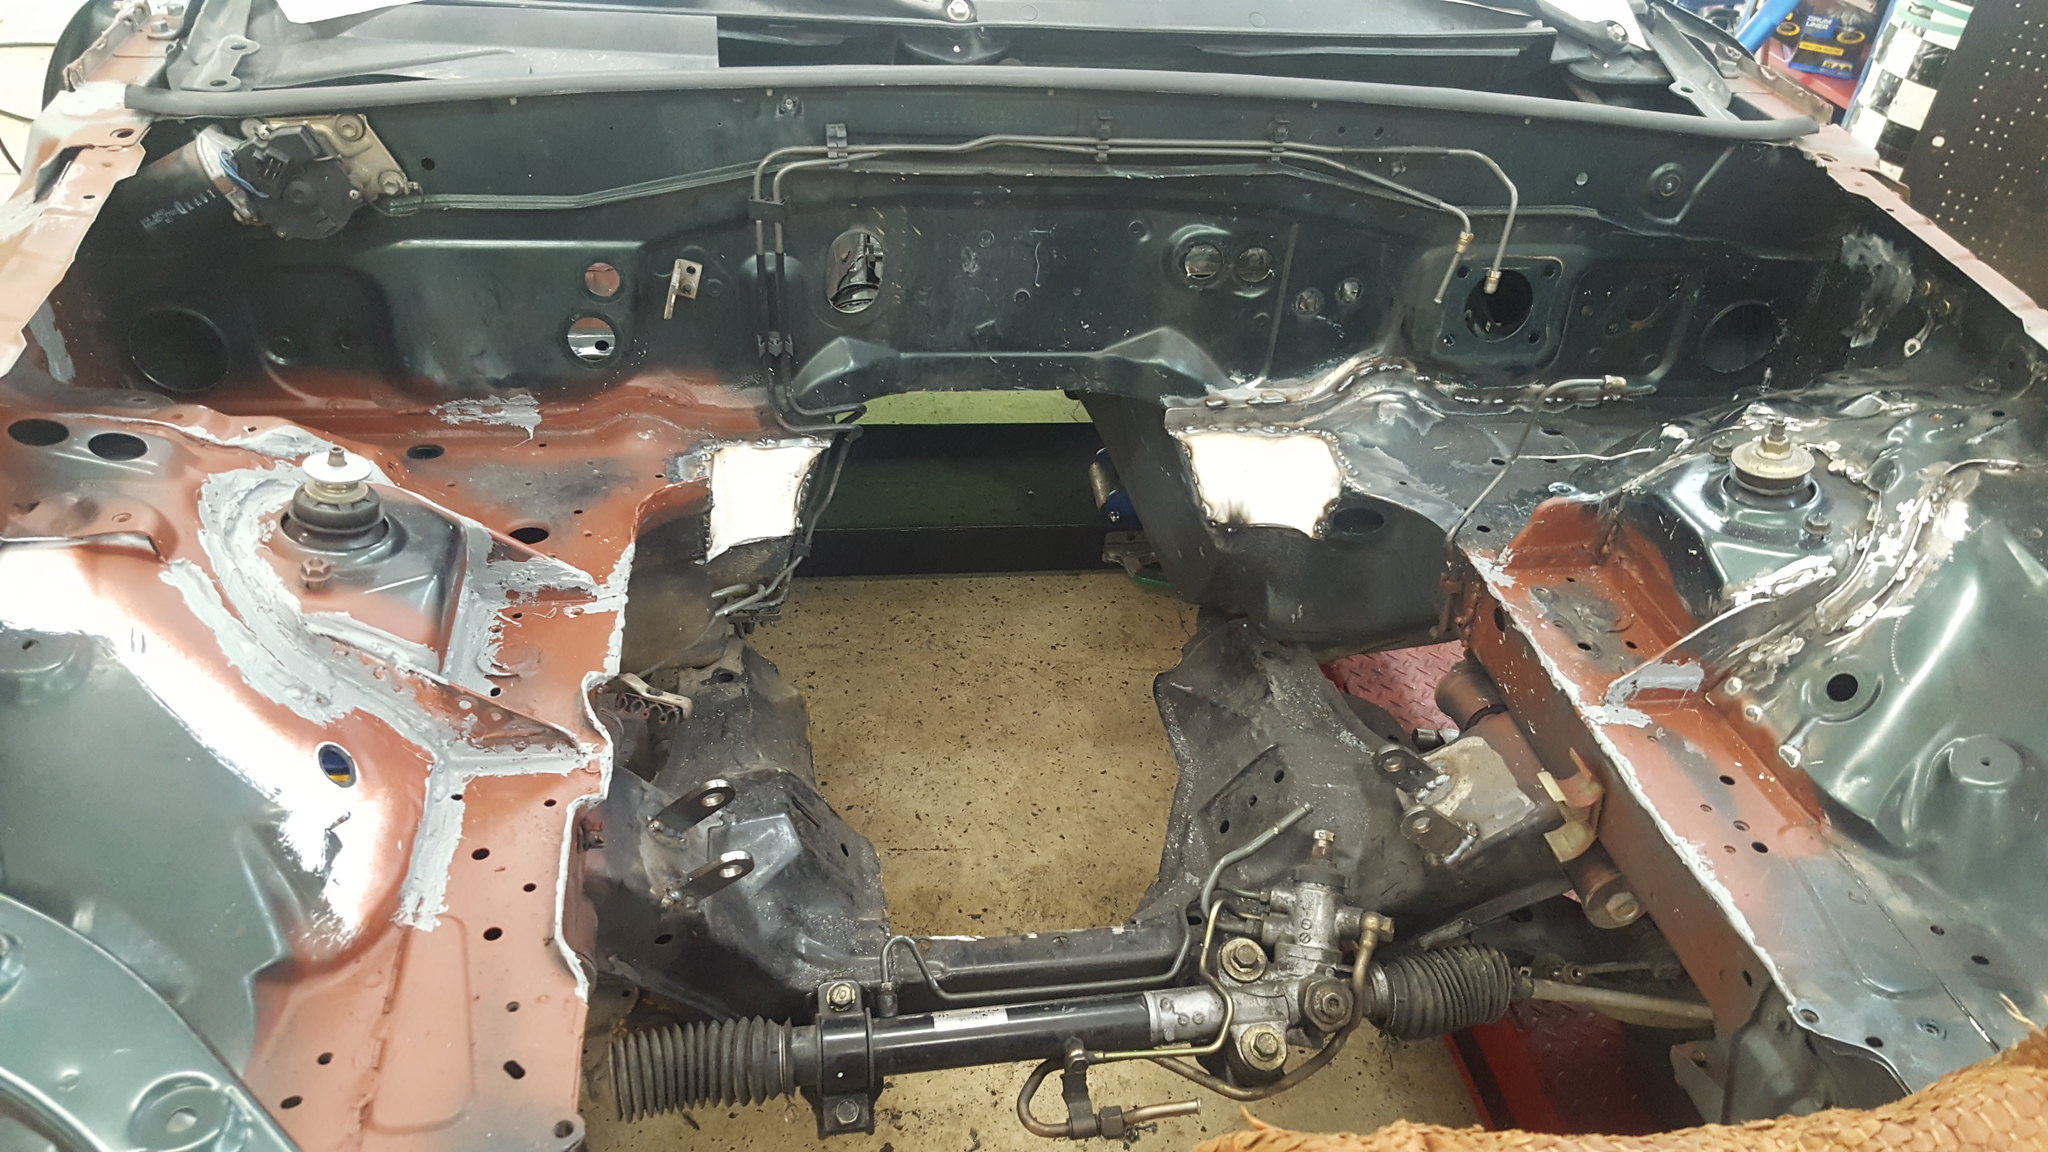
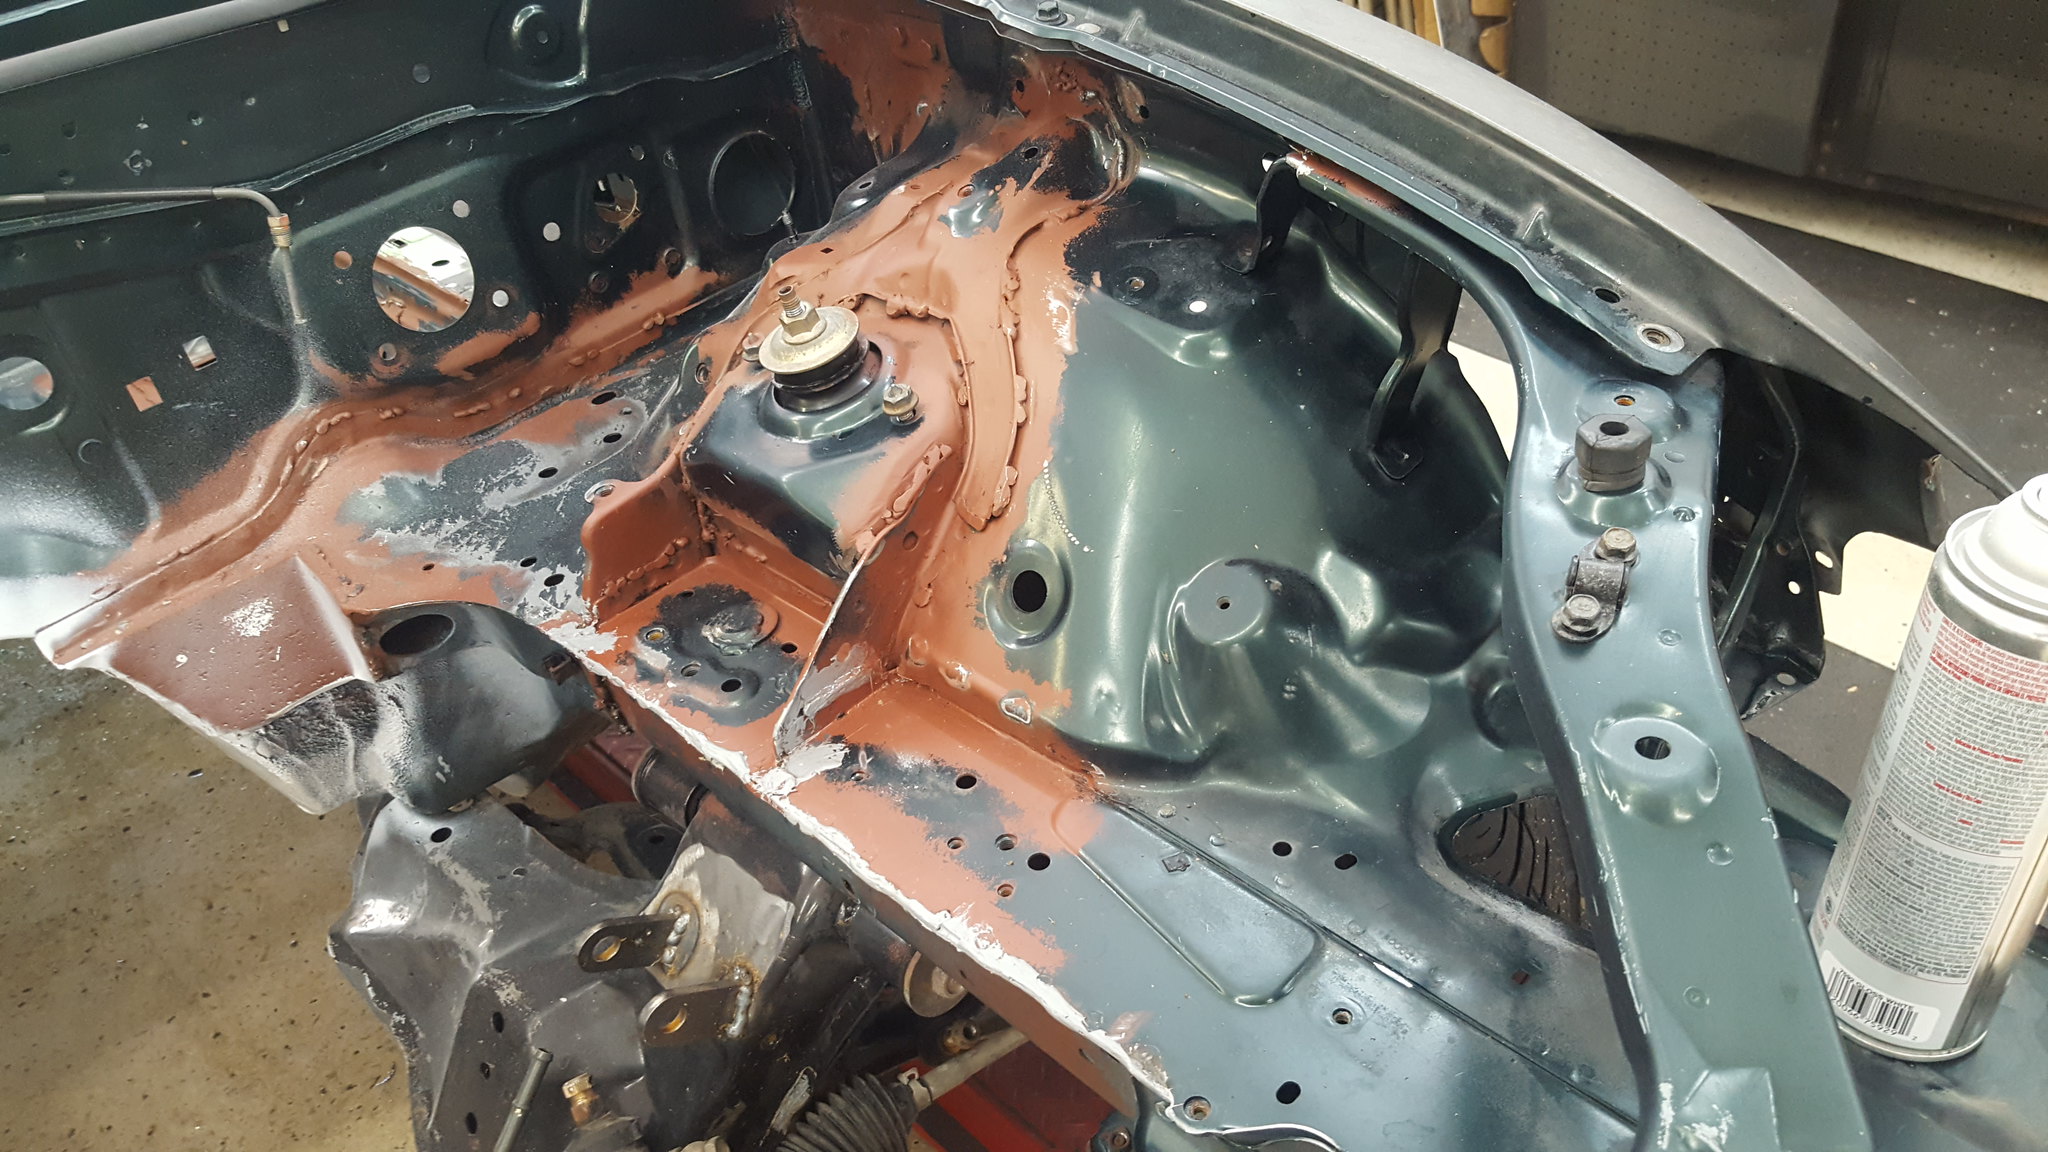
Ive been chipping away on lunch breaks this week. Grinding and cleaning up from the seam welding, then spraying the rustoleum primer on the bare metal. Every bit of brown you see is where we seam welded (that I have final prepped. Lots to go on the drivers side, and still some around the door and kick panel on the passengers)
 20180501_191051 by Michael Crawford, on Flickr
 20180501_191103 by Michael Crawford, on Flickr
 20180501_191124 by Michael Crawford, on Flickr
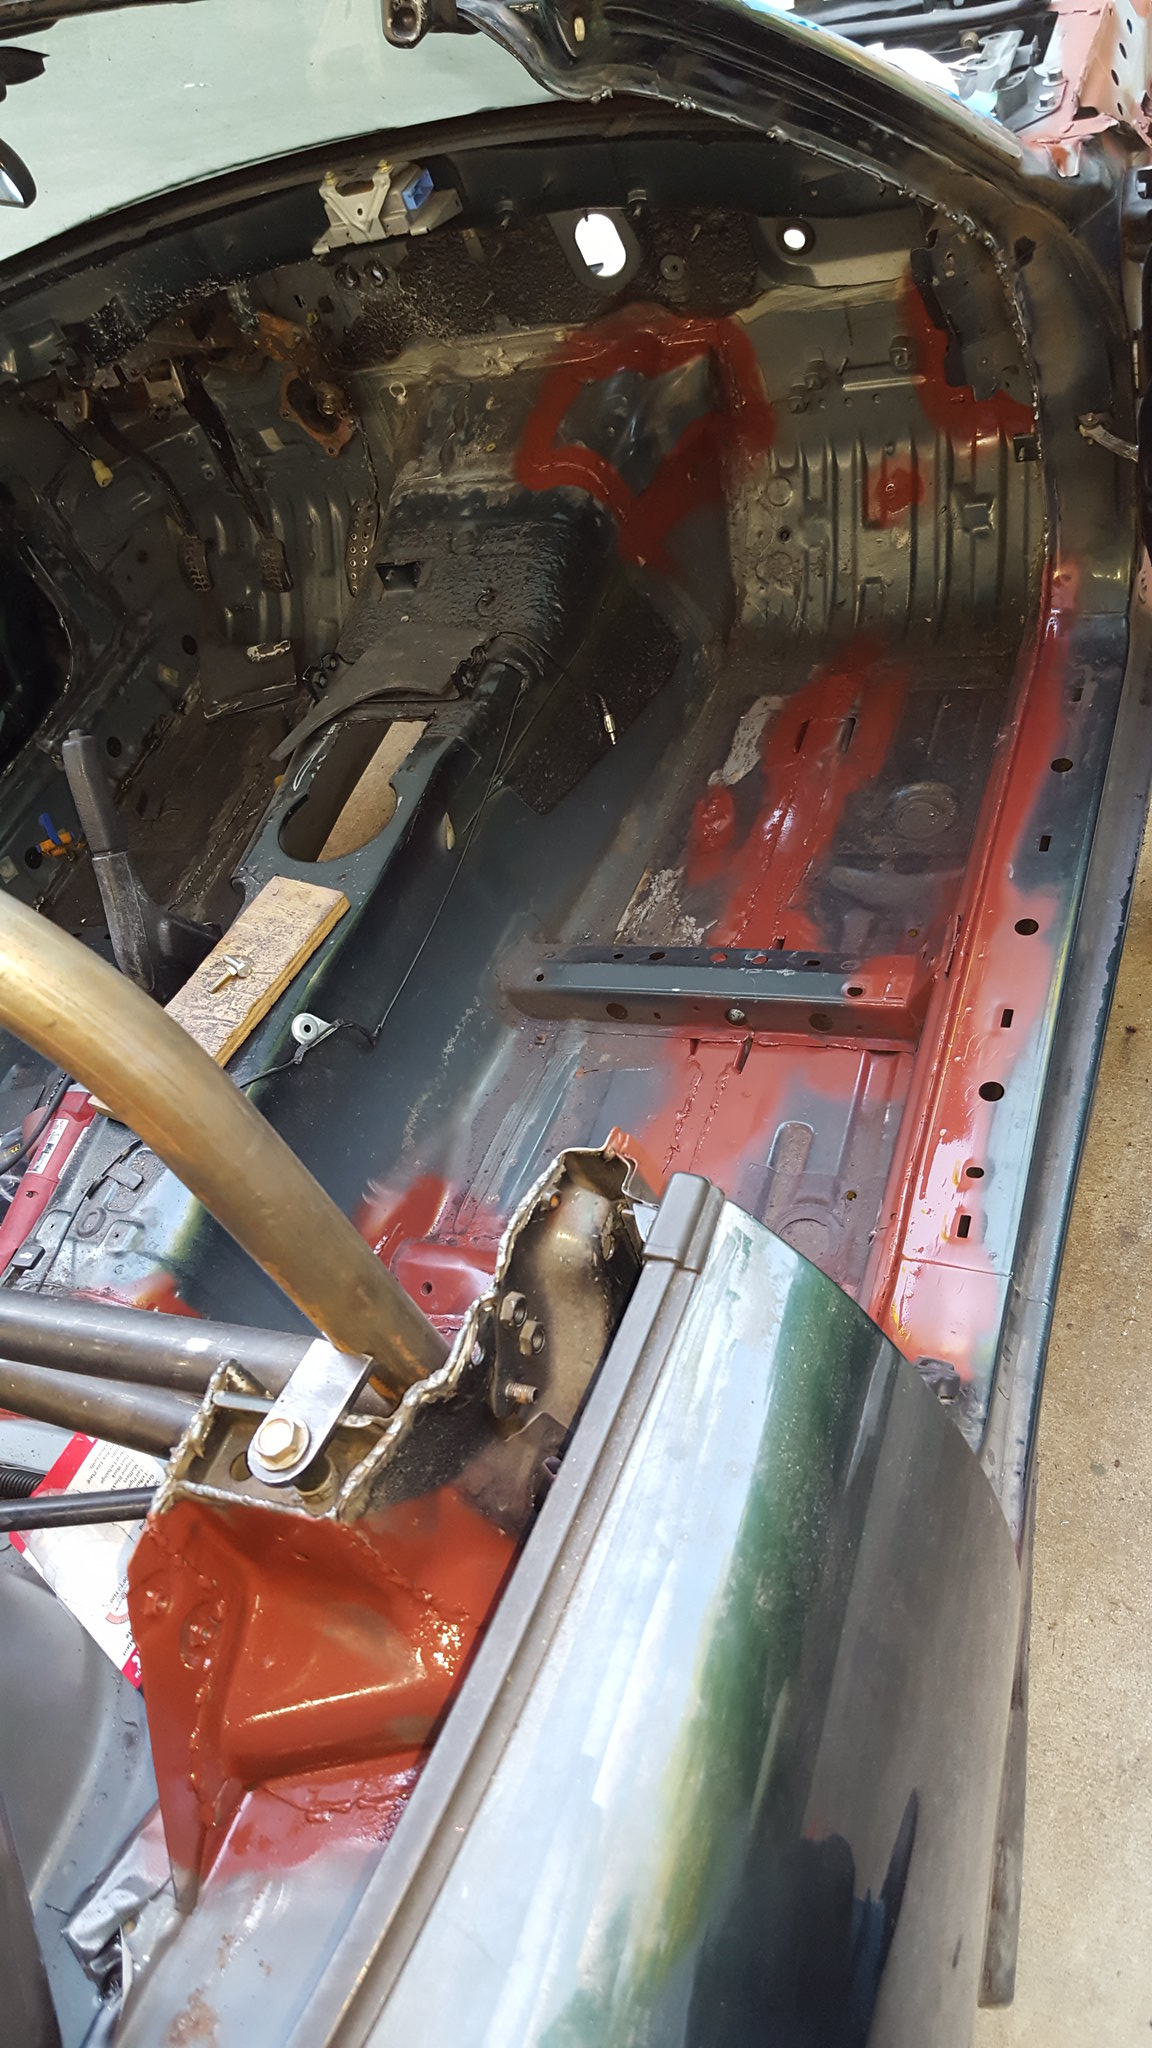
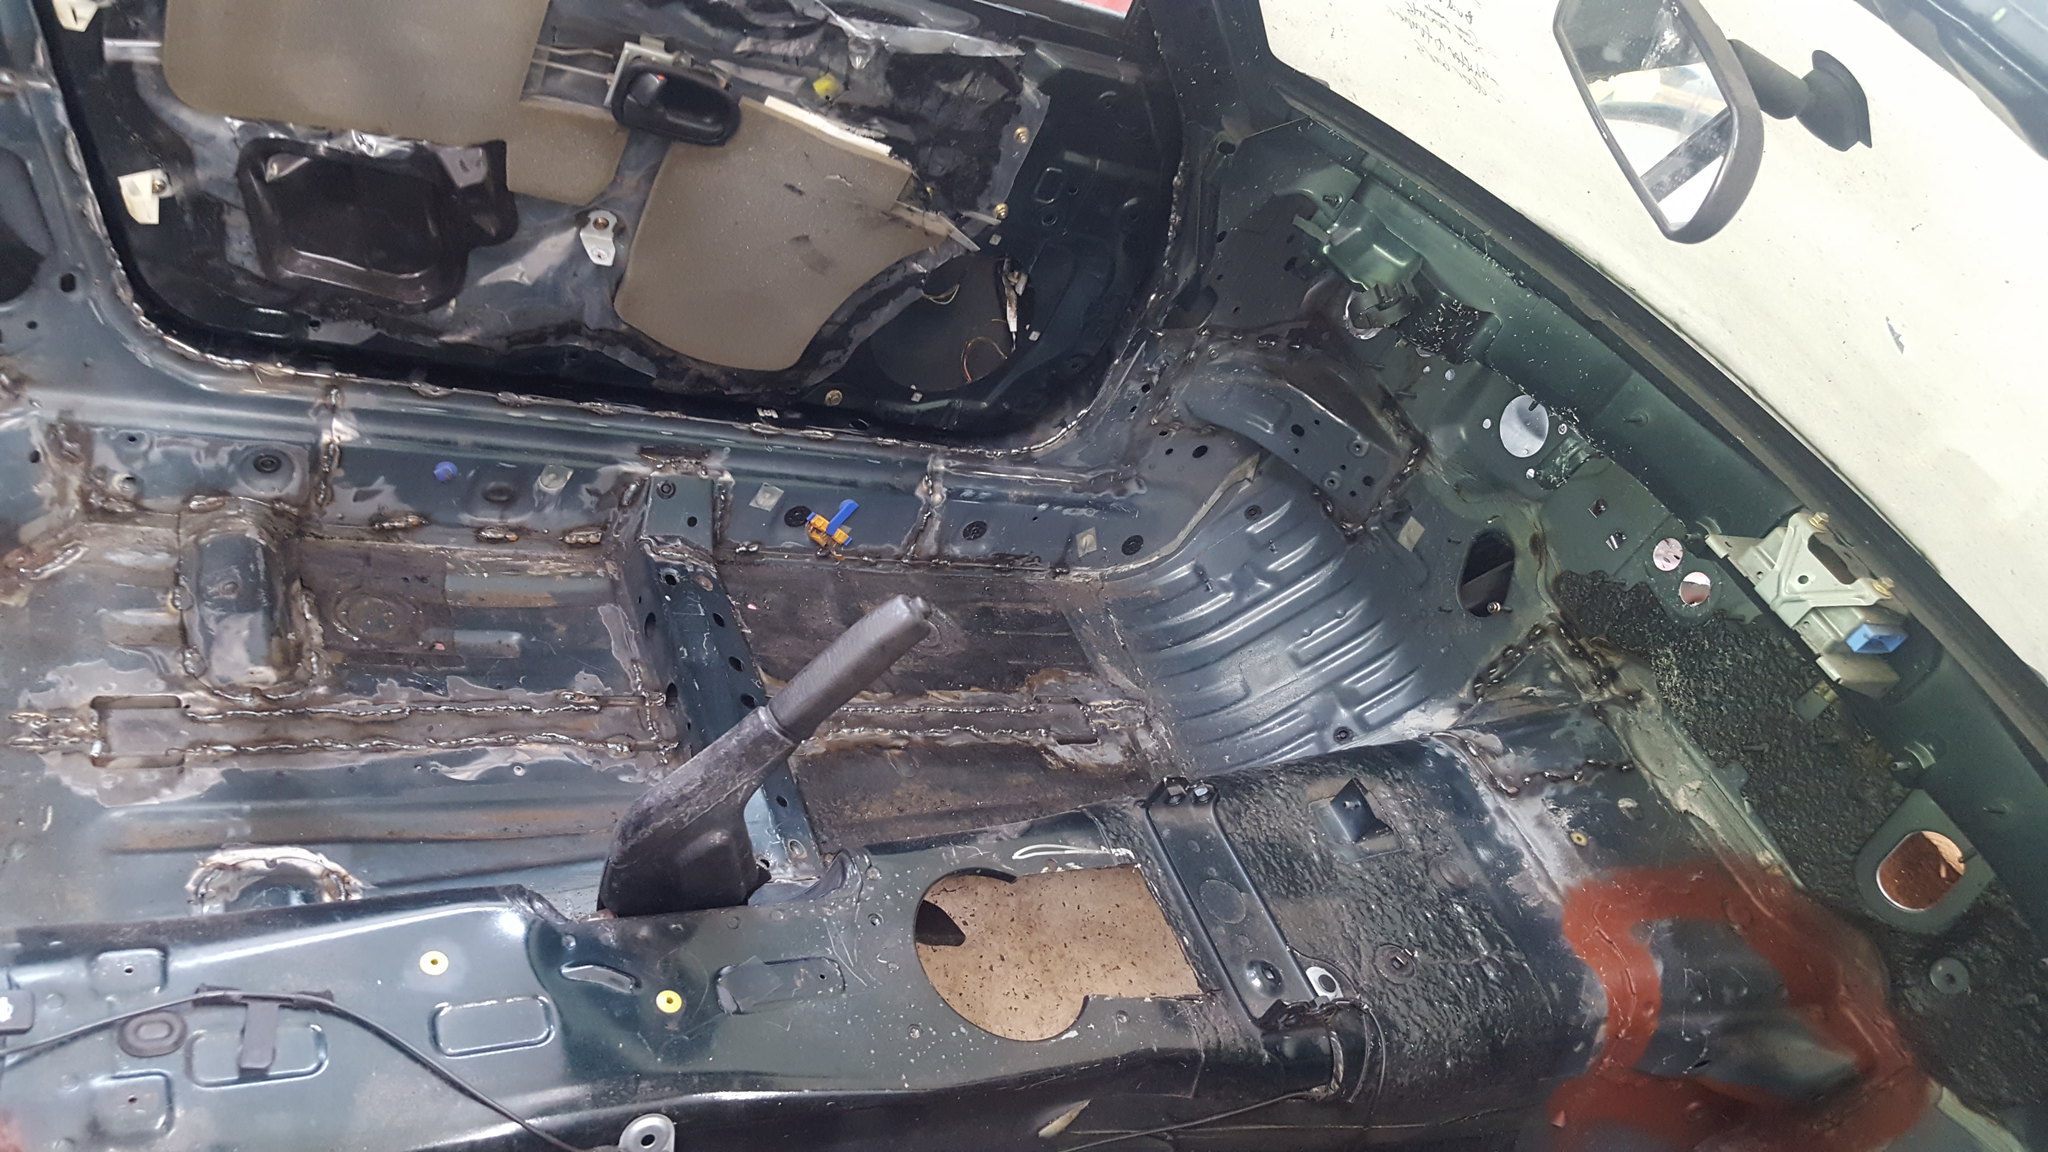
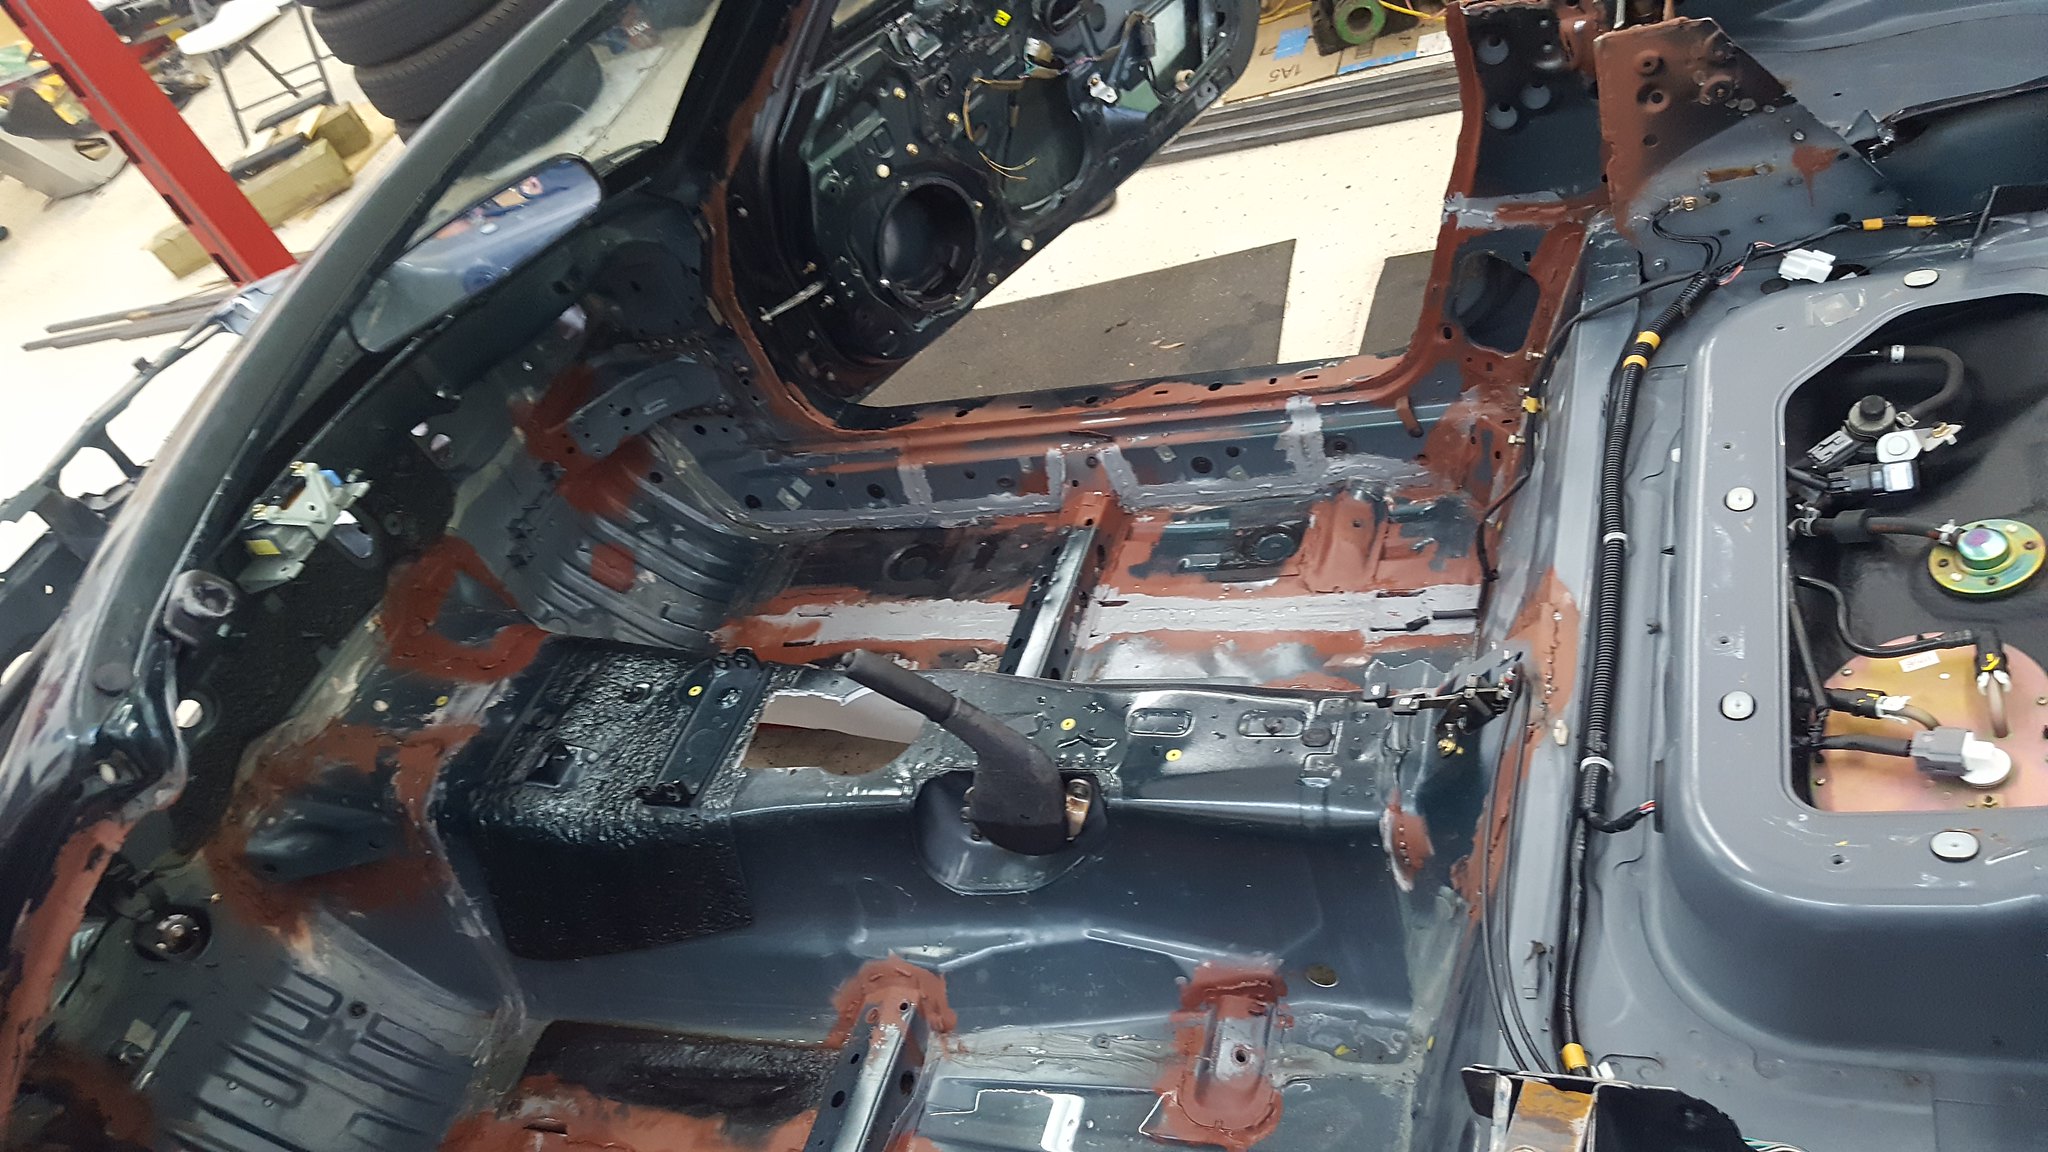
I then moved onto seam sealer. There's only two main areas I want to make sure are “pretty”. The floor, and the engine bay. The rest will never really be seen, and if it is, its either because somebody is buying the car, or I ran them over. Neither of which is very likely.
Remember im using the cheap brush-able seam sealer from amazon. It also looks far better in person than in the pictures. I think this stuff slightly self levels as it dries.
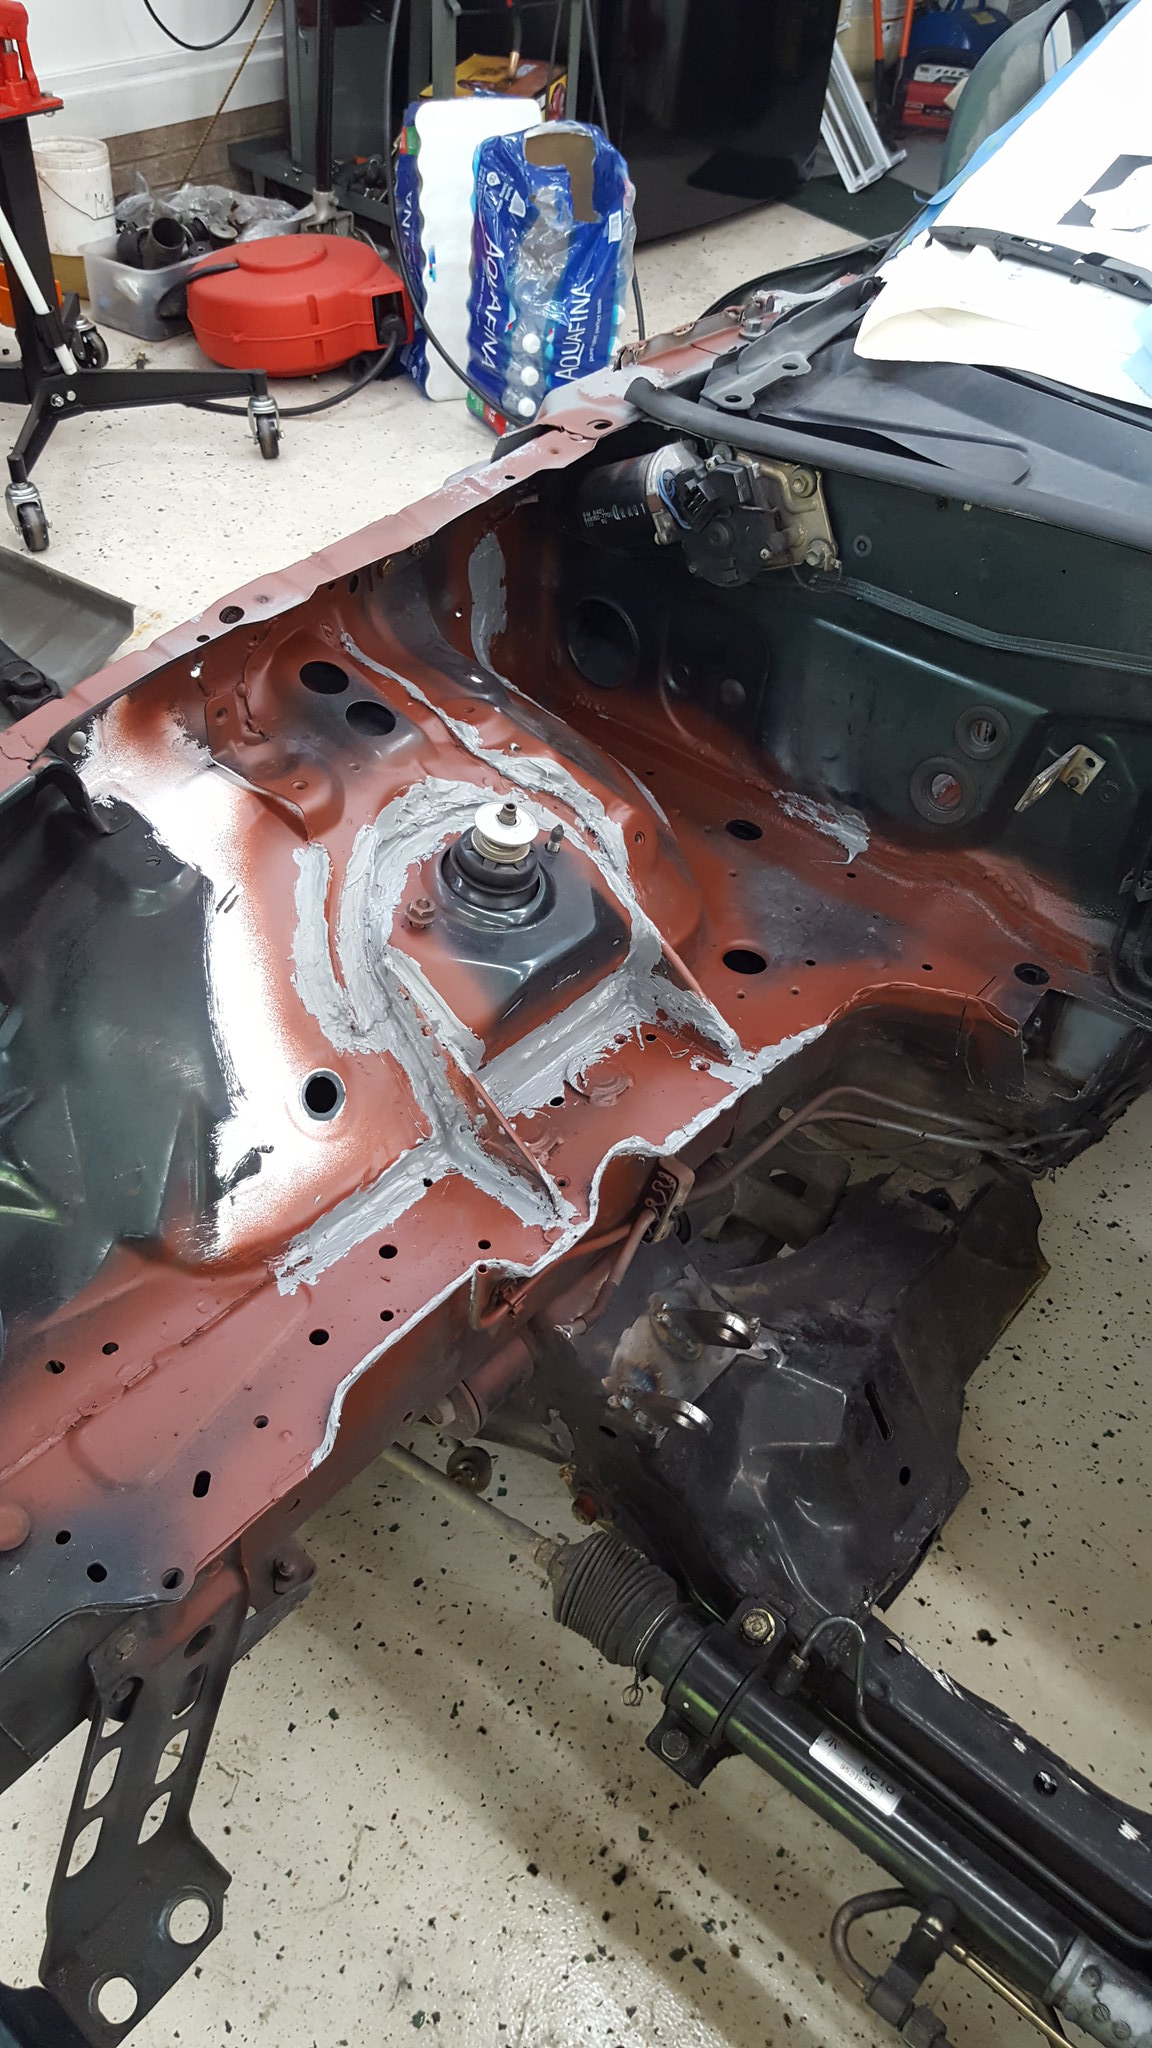
In the engine bay, on the 90-ish degree joints, I wanted a fillet look like you would with bathtub caulk. I could NOT find a way to get it in there I was happy with. In the end, I dipped my finger in the can and worked in it with a finger painting motion. I did wear rubber gloves. The gloves did rip. There is seam sealer under my fingernails on my right hand that got me funny looks at work.
The flatter sections, where the factory did a lap weld seam, I used a 1 inch bristle brush to apply, making sure I worked it into the cracks and crevasses. I smoothed it with a foam brush afterwards, but it really didn't change the cosmetic properties any, if at all. Im still not super happy with how it came out, and hopefully another round (light coating for appearance purposes) makes them come out better.
 20180503_160323 by Michael Crawford, on Flickr
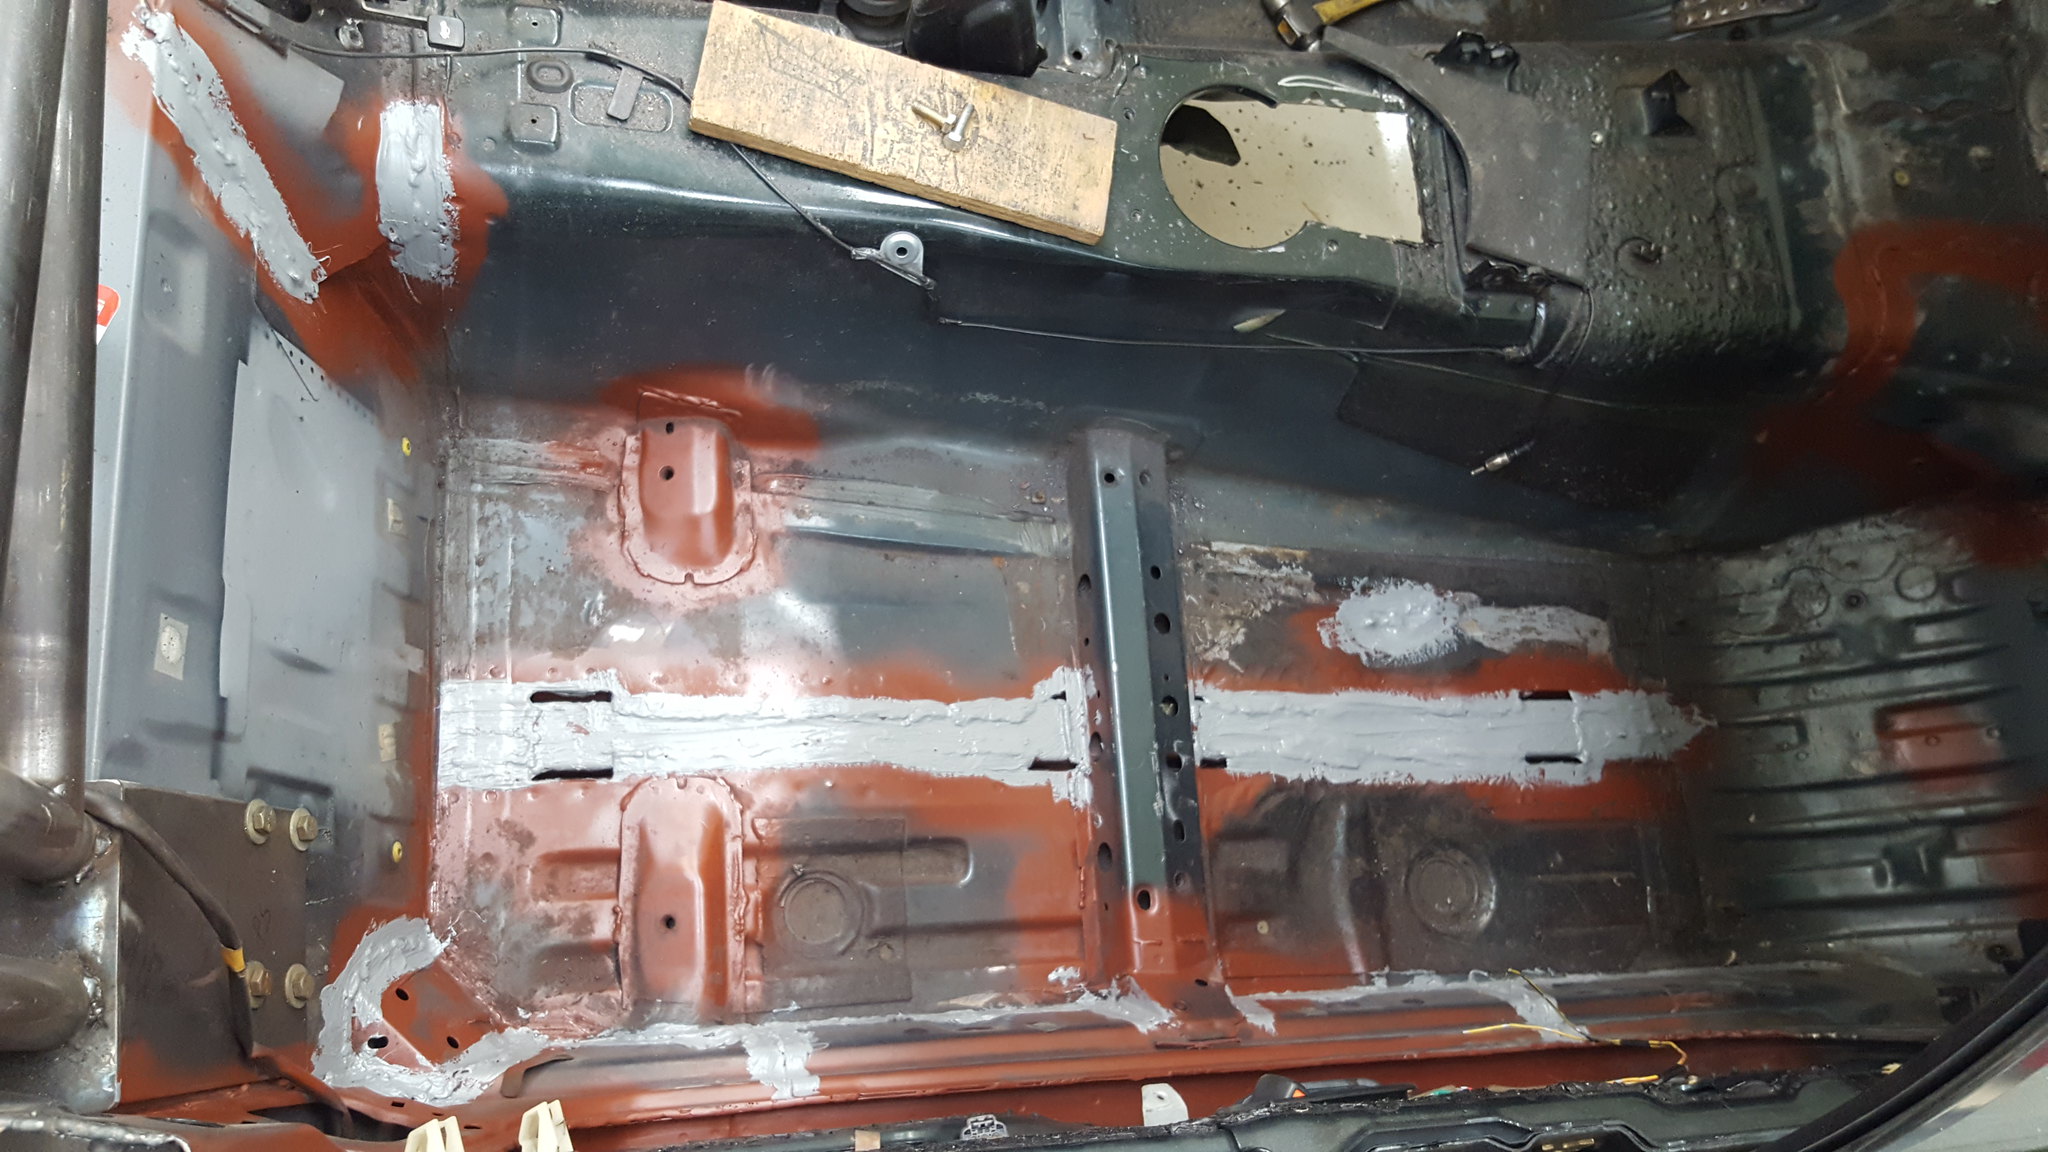
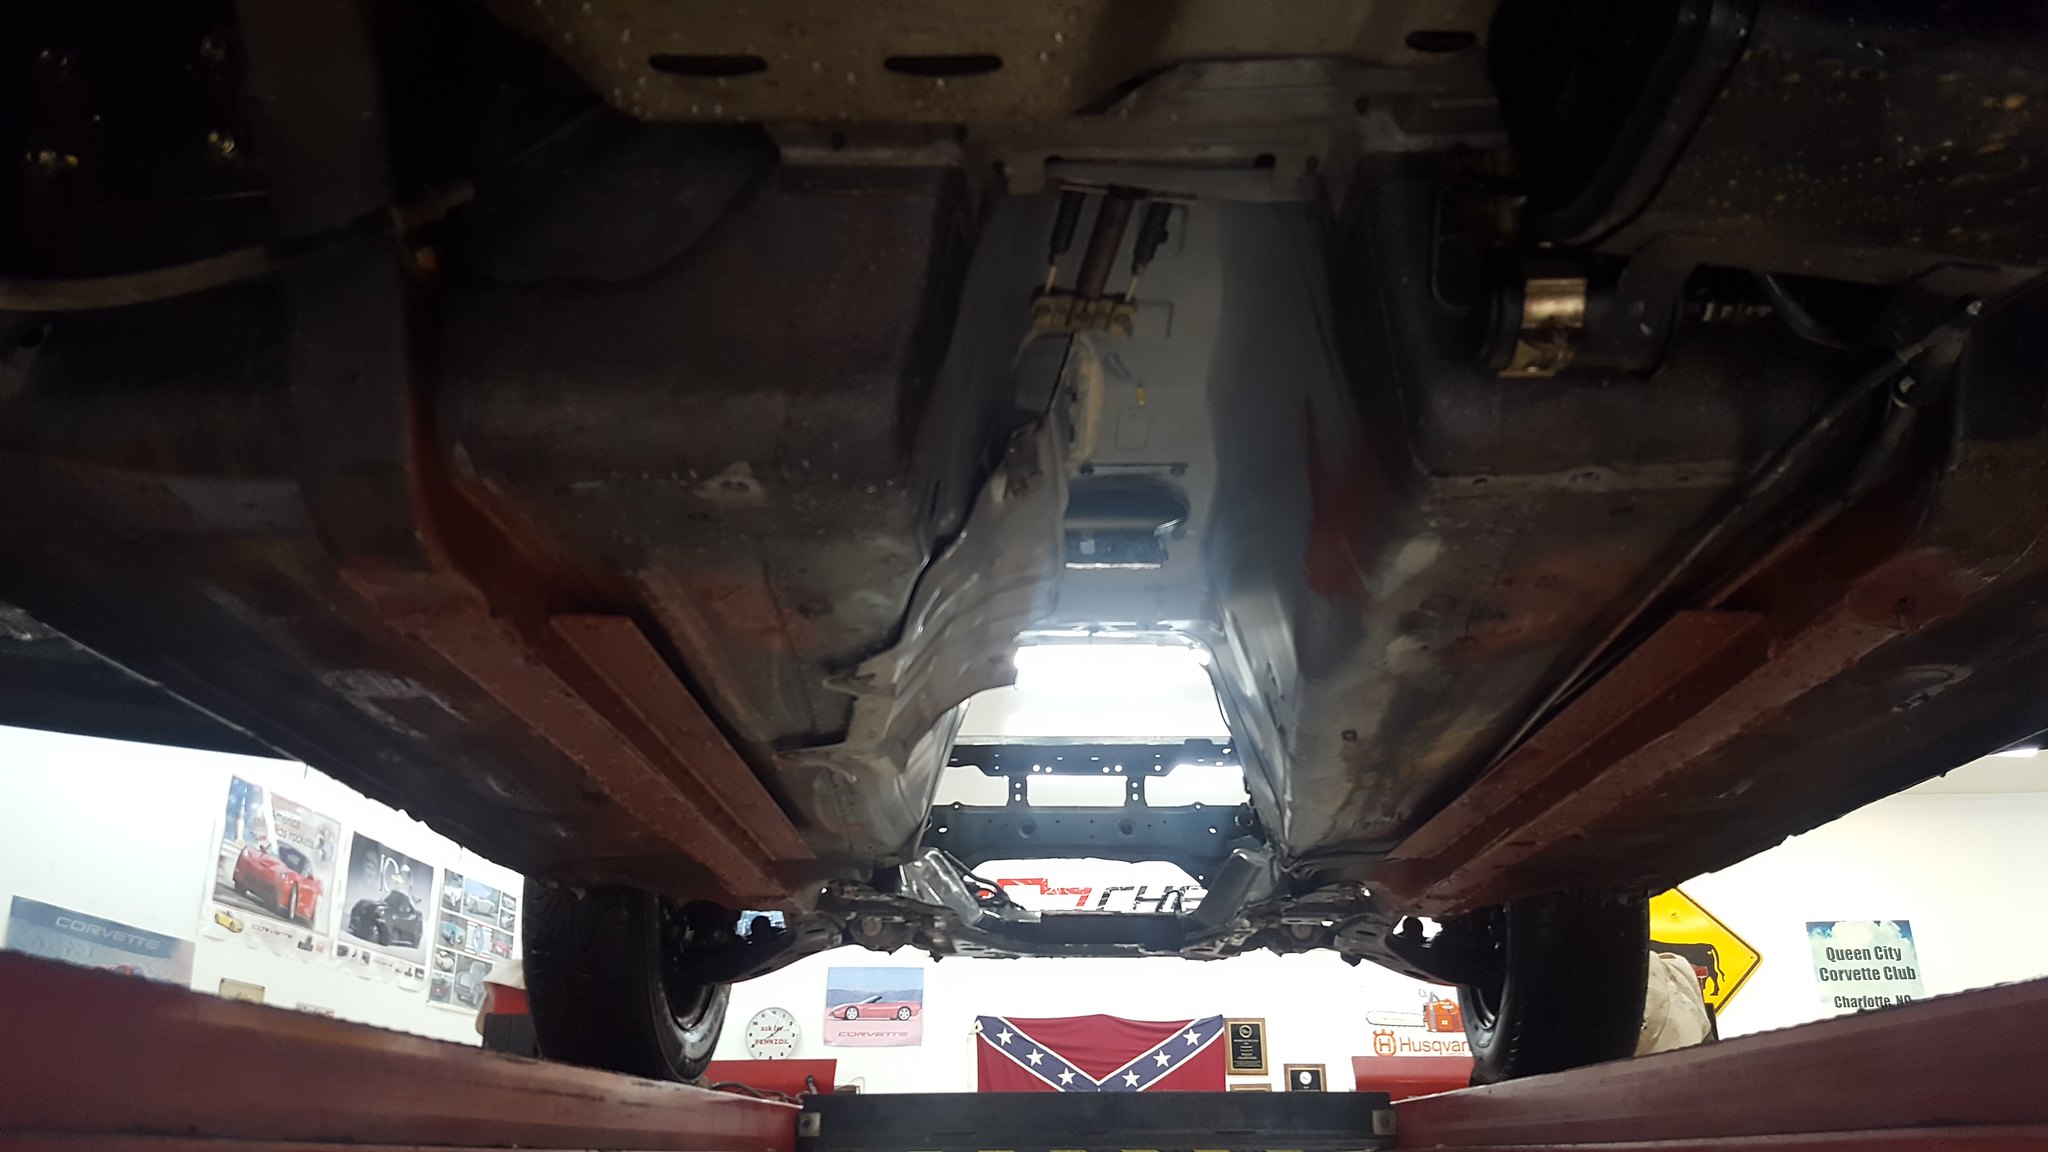
the floors were all lap welds. So all done with the 1 inch brush. I laid it down THICK on the subframe connectors. I need to put something in the gaps where the body plugs were, and do another coat here as well. Im also debating skinning the whole floor with some .030 aluminum to give it a better appearance. Well see what I think after paint and lizard skin. I may do some stucco mesh over the black floor pans for visual contrast and floor traction. Haven't gotten there yet.
 20180503_160340 by Michael Crawford, on Flickr
in the wheel well, where I don't really care about appearance, I could've used a putty knife or trowel. Instead, I used the 1 inch brush and just worked it in. this will be topcoated in satin black and tire marbles, so should disappear pretty quickly. It definitely needs another coat though.
 20180503_160331 by Michael Crawford, on Flickr
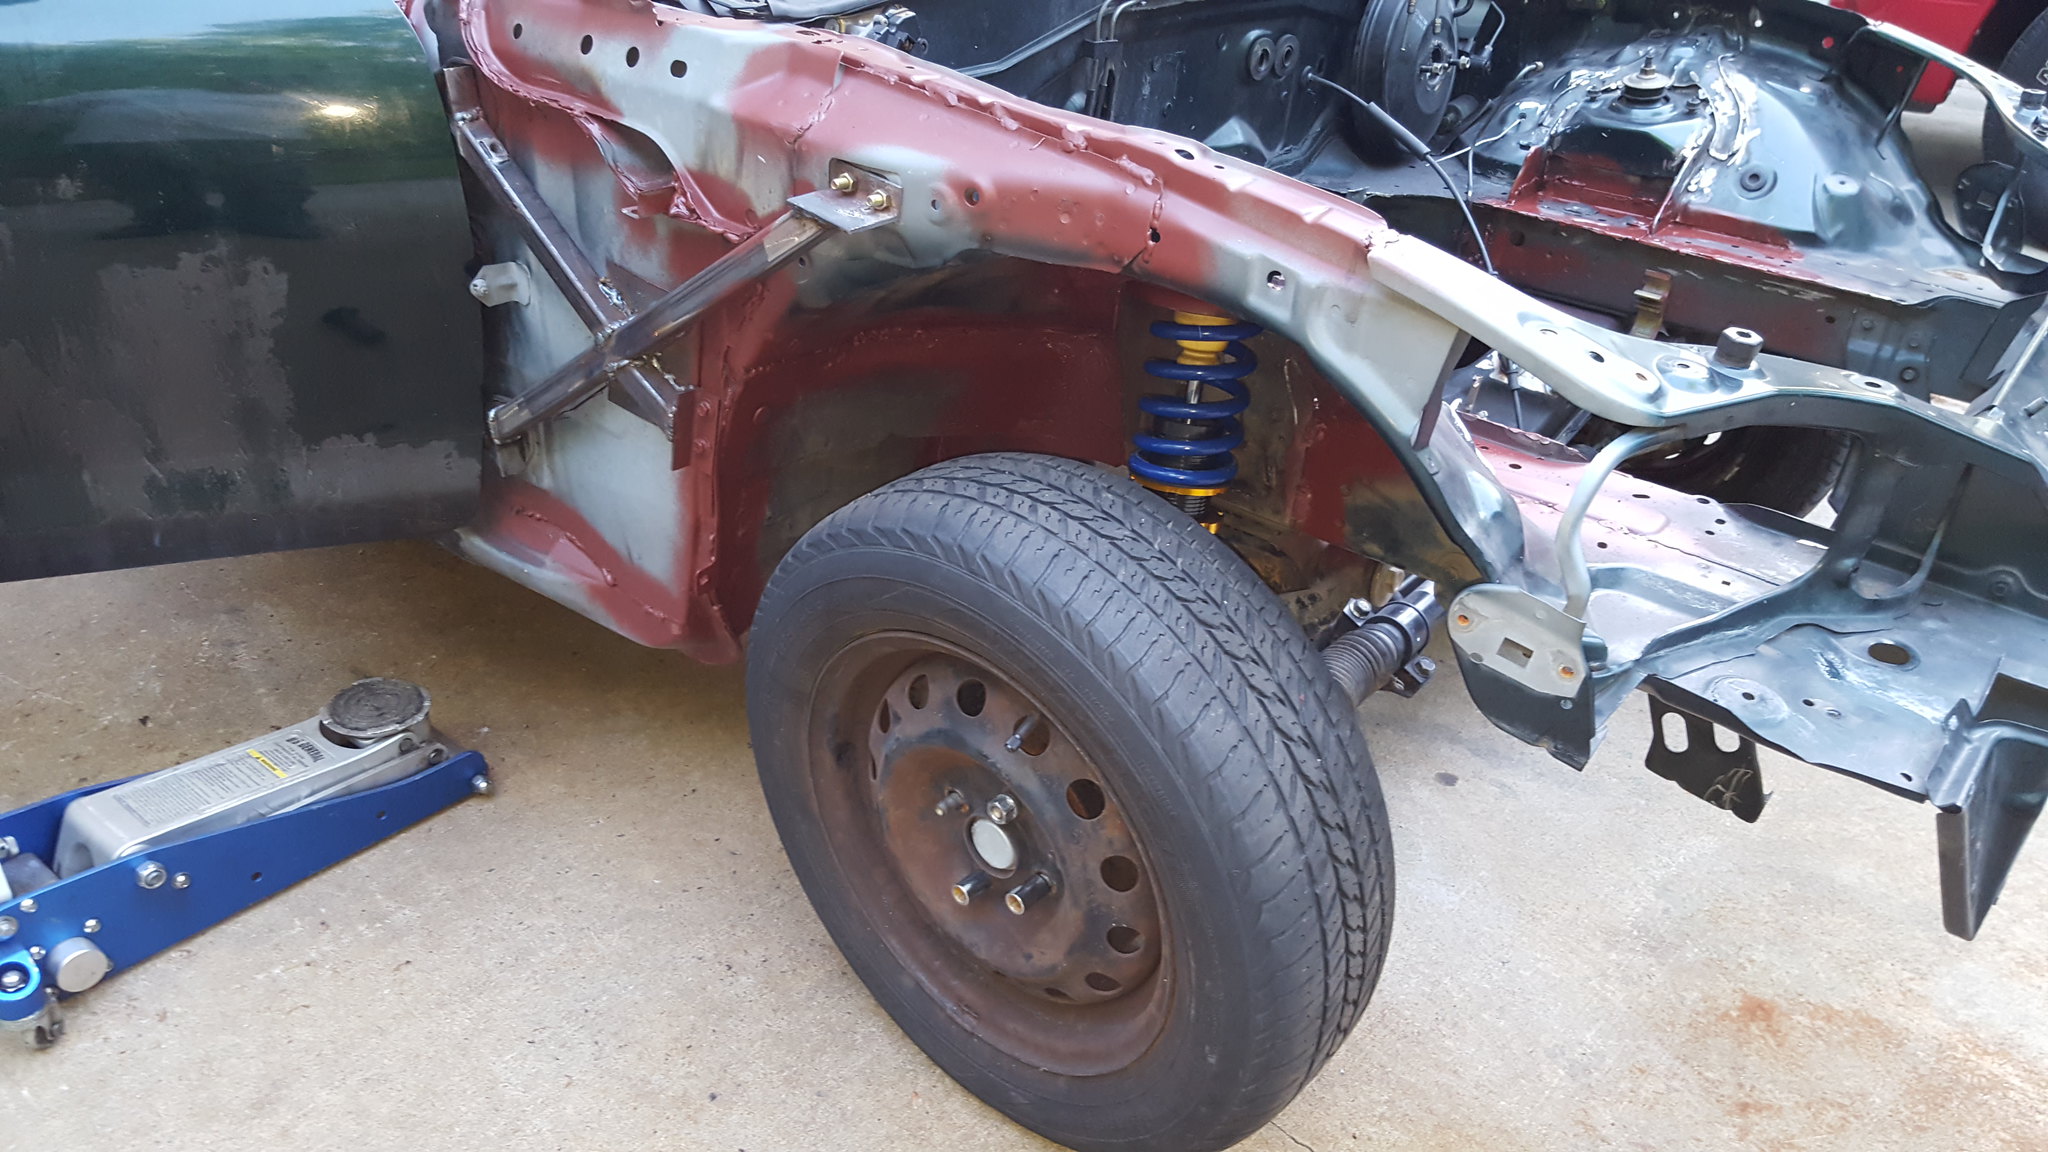
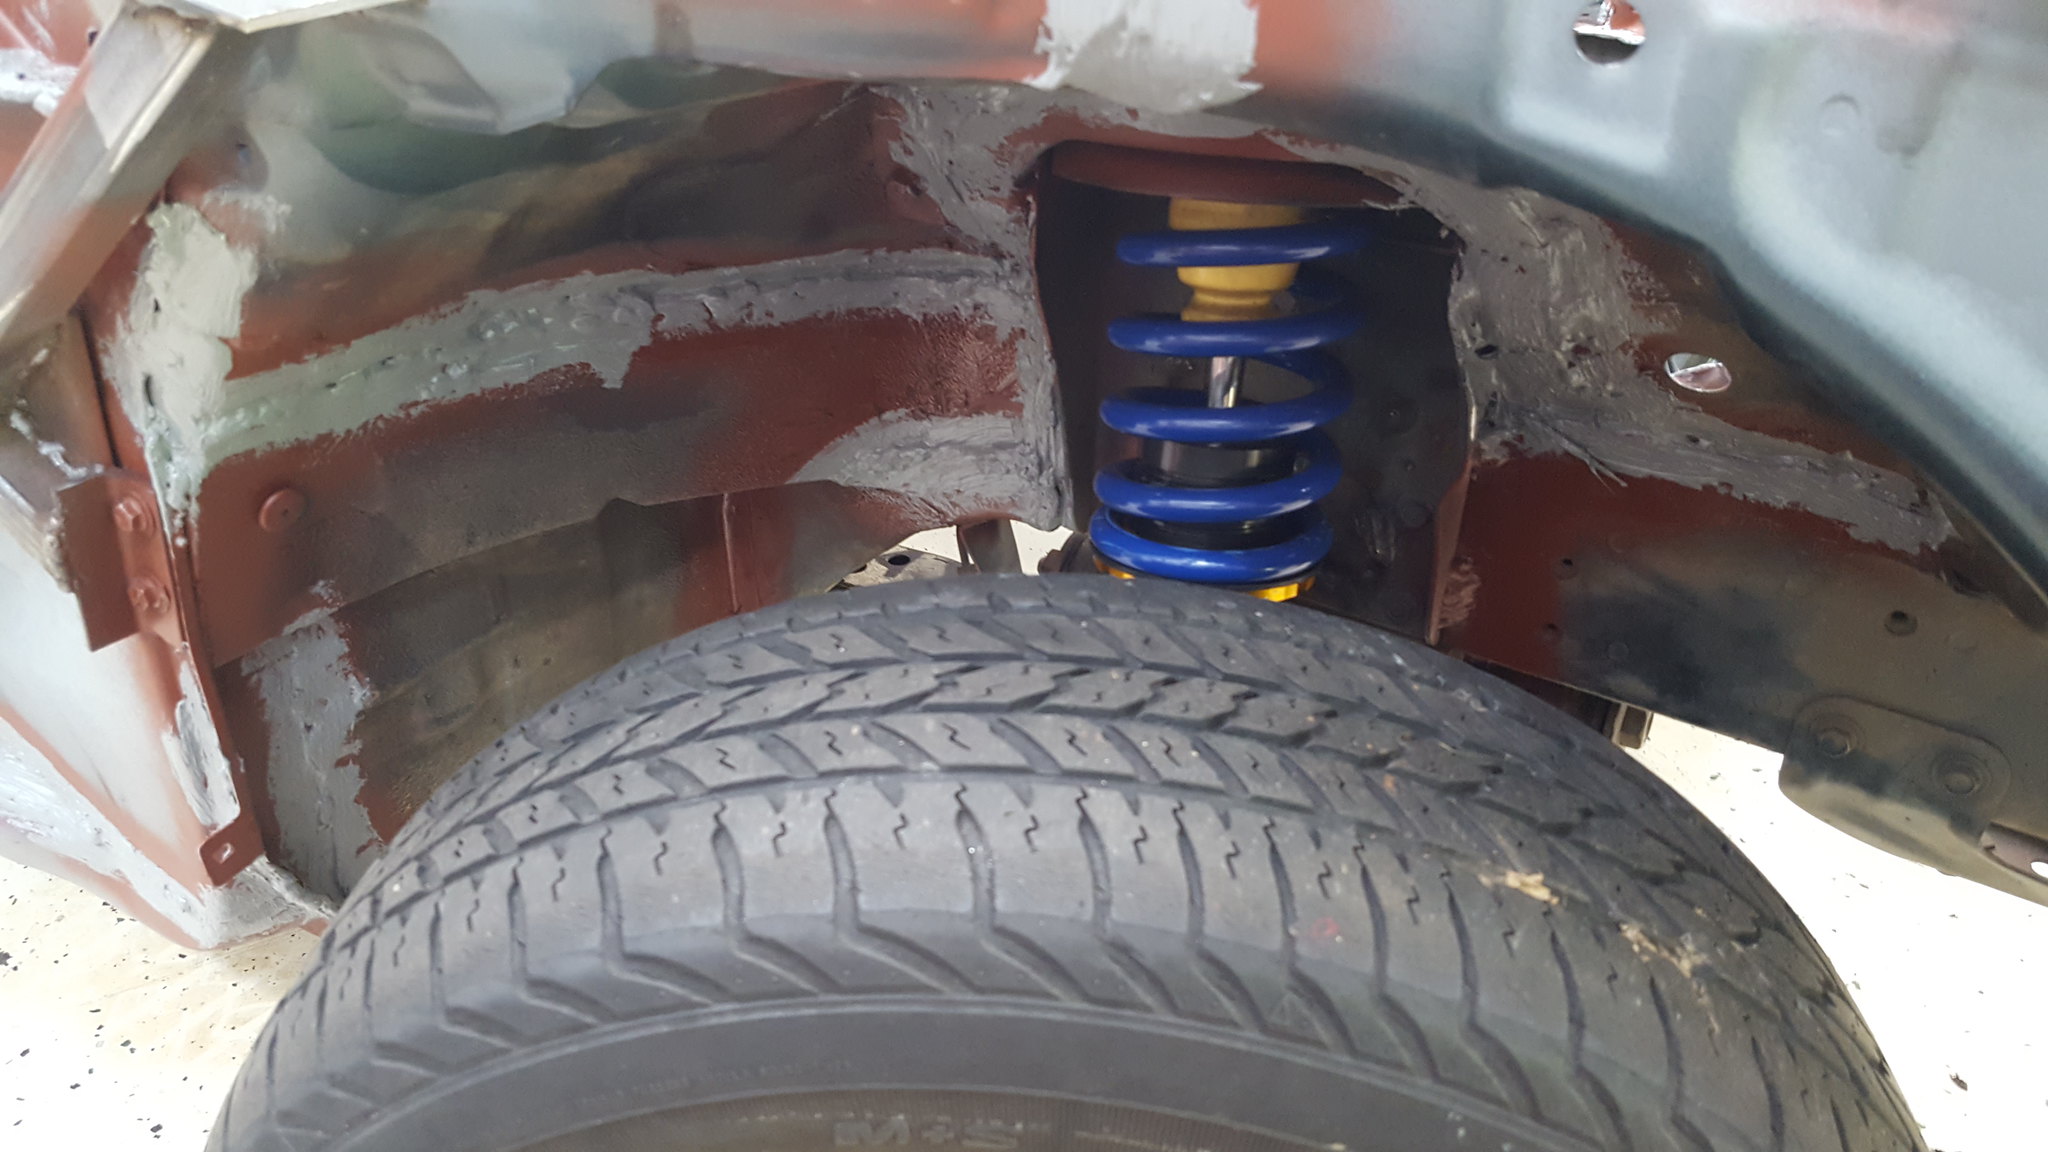
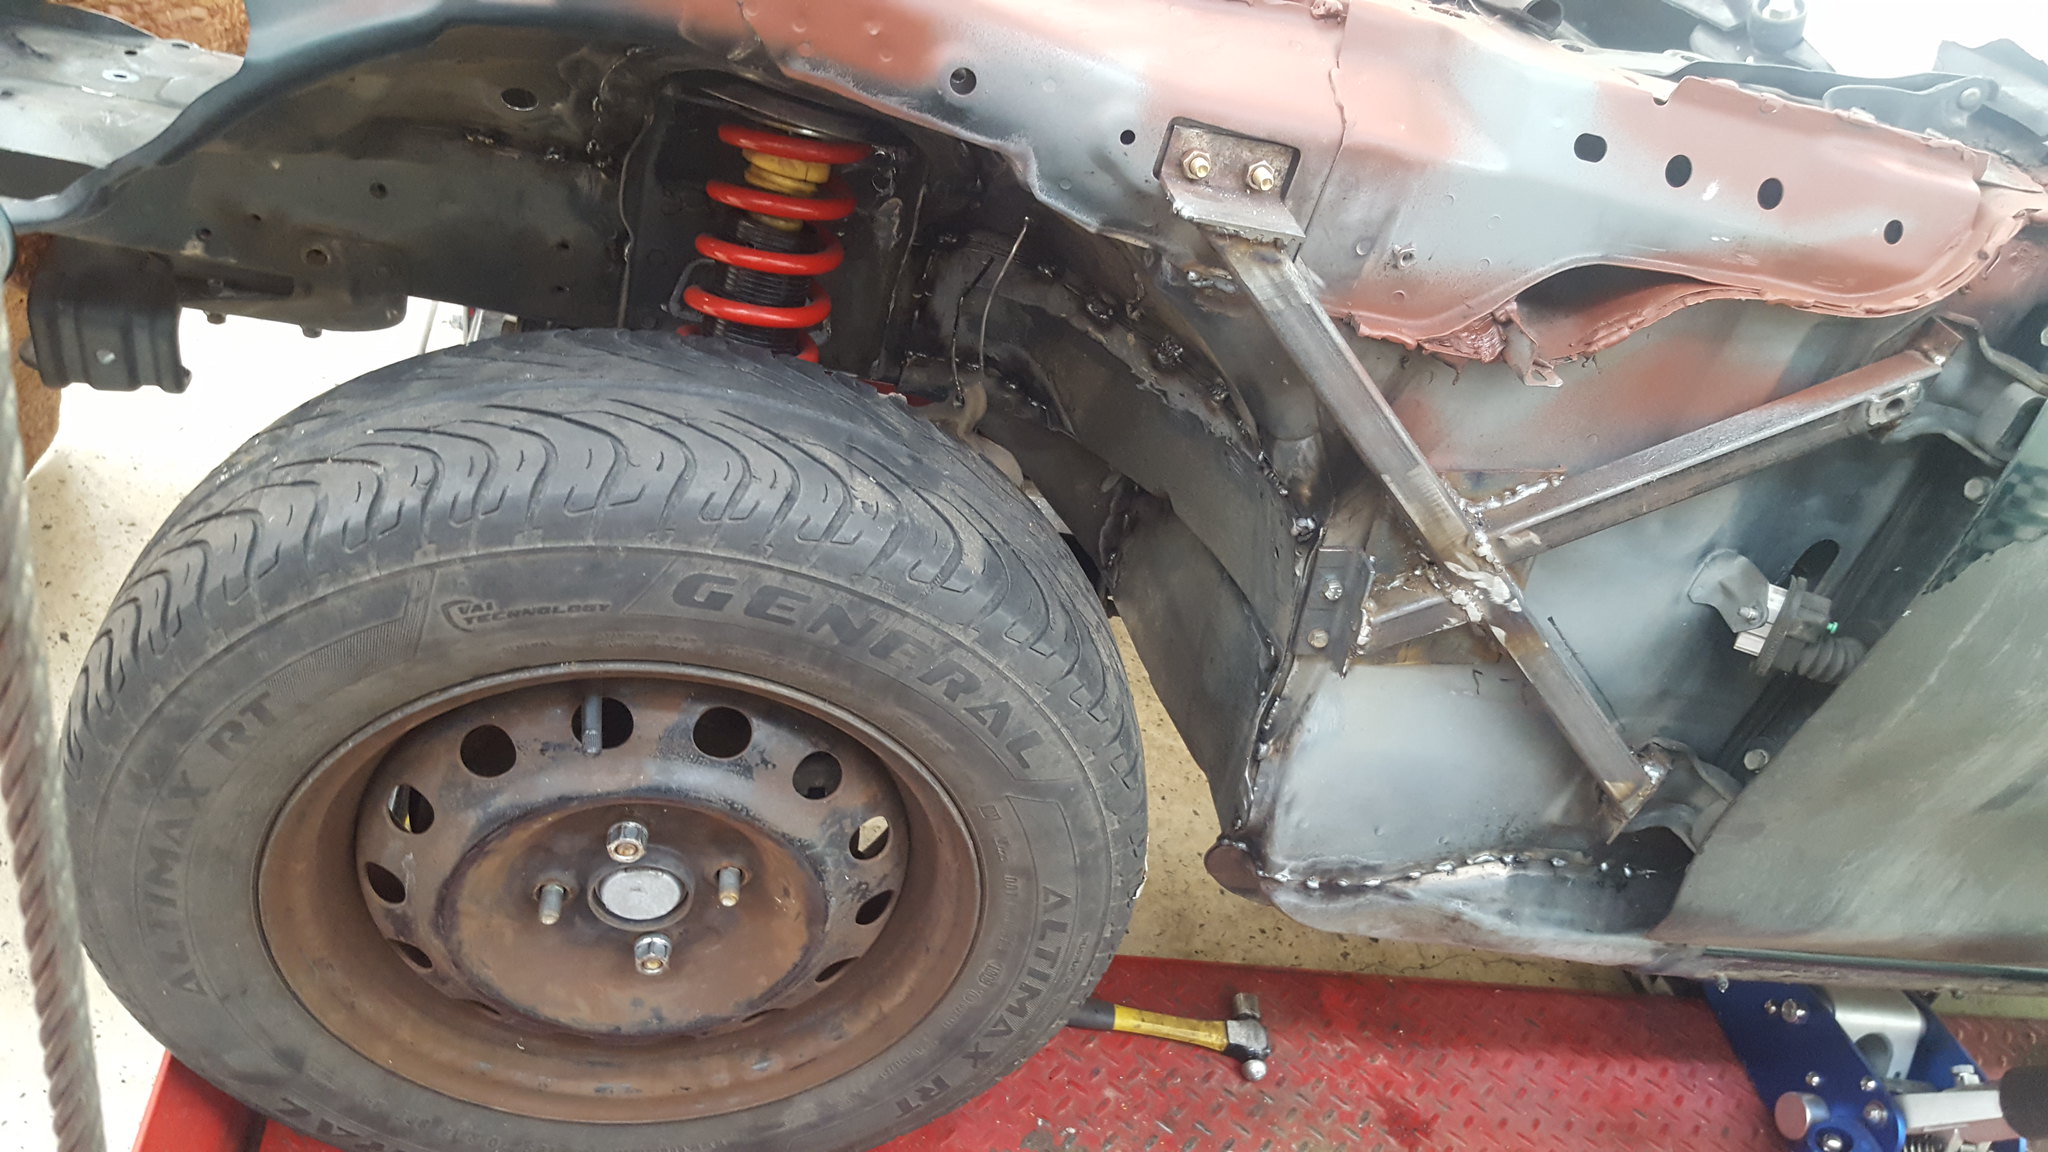
also, I found out just how well all the chassis work is paying off. To grind the welds in the passengers wheel well, I put my floor jack under the rear front lower control arm mount. And picked up 3 wheels. With no sway bars. And the struts not bolted in at the top. And no door bars yet. Freaking STIFF.

That is exactly where I will be tomorrow. I painted the underbody tonight with eastwood's rust encapsulator and will be doing the "finger" trick tomorrow for the seam sealer. Nice job on the Miata, great to see when all your work is paying off with the chassis stiffening.
Thanks!
I wasn't expecting to three wheel. It will be interesting to drive a properly stiff car.
Granted the amc was stiff. But the floor jack test says tge Miata is stiffer.
Good luck with the sealer tiday dherr!
Well, first layer is on. Same as you, the "heavy duty" harbor freight glove ripped and my finger was now grey (lacquer thinner did remove most of it). In regards to the stiffening of the car, my first spitfire was similar as they are normally pretty flexy, but mine had the cage and frame extensions bolted to the floors, you could jack it from one corner and the entire side of the car would go up. Enjoy your trip!
Kind of fun playing with seam sealer, isn't it?

Dusterbd13 said:Kind of fun playing with seam sealer, isn't it?
I think you need to read the can where it says "WELL ventilated area"![]()
Pete
In reply to NOHOME :
I actually laughed out loud at that.
Im just enjoying playing cake decorator/trim carpenter touch up.....

once again i have to say Great Work, duster! your brain doesn't have a "good enough" setting, does it?
In reply to AngryCorvair :
This IS the good enough setting.
You should see anal retentive.....
Body welding is DONE.
finally......
today was my first day back from vacation. So I finished prepping and welding the rest of the car.
Step one was capping the wings in the engine bay.
I had scored 3 pieces of sheet metal that were covers for the ballasts in fluorescent light fixtures. One was used for the caps.
Start out with your pieces.
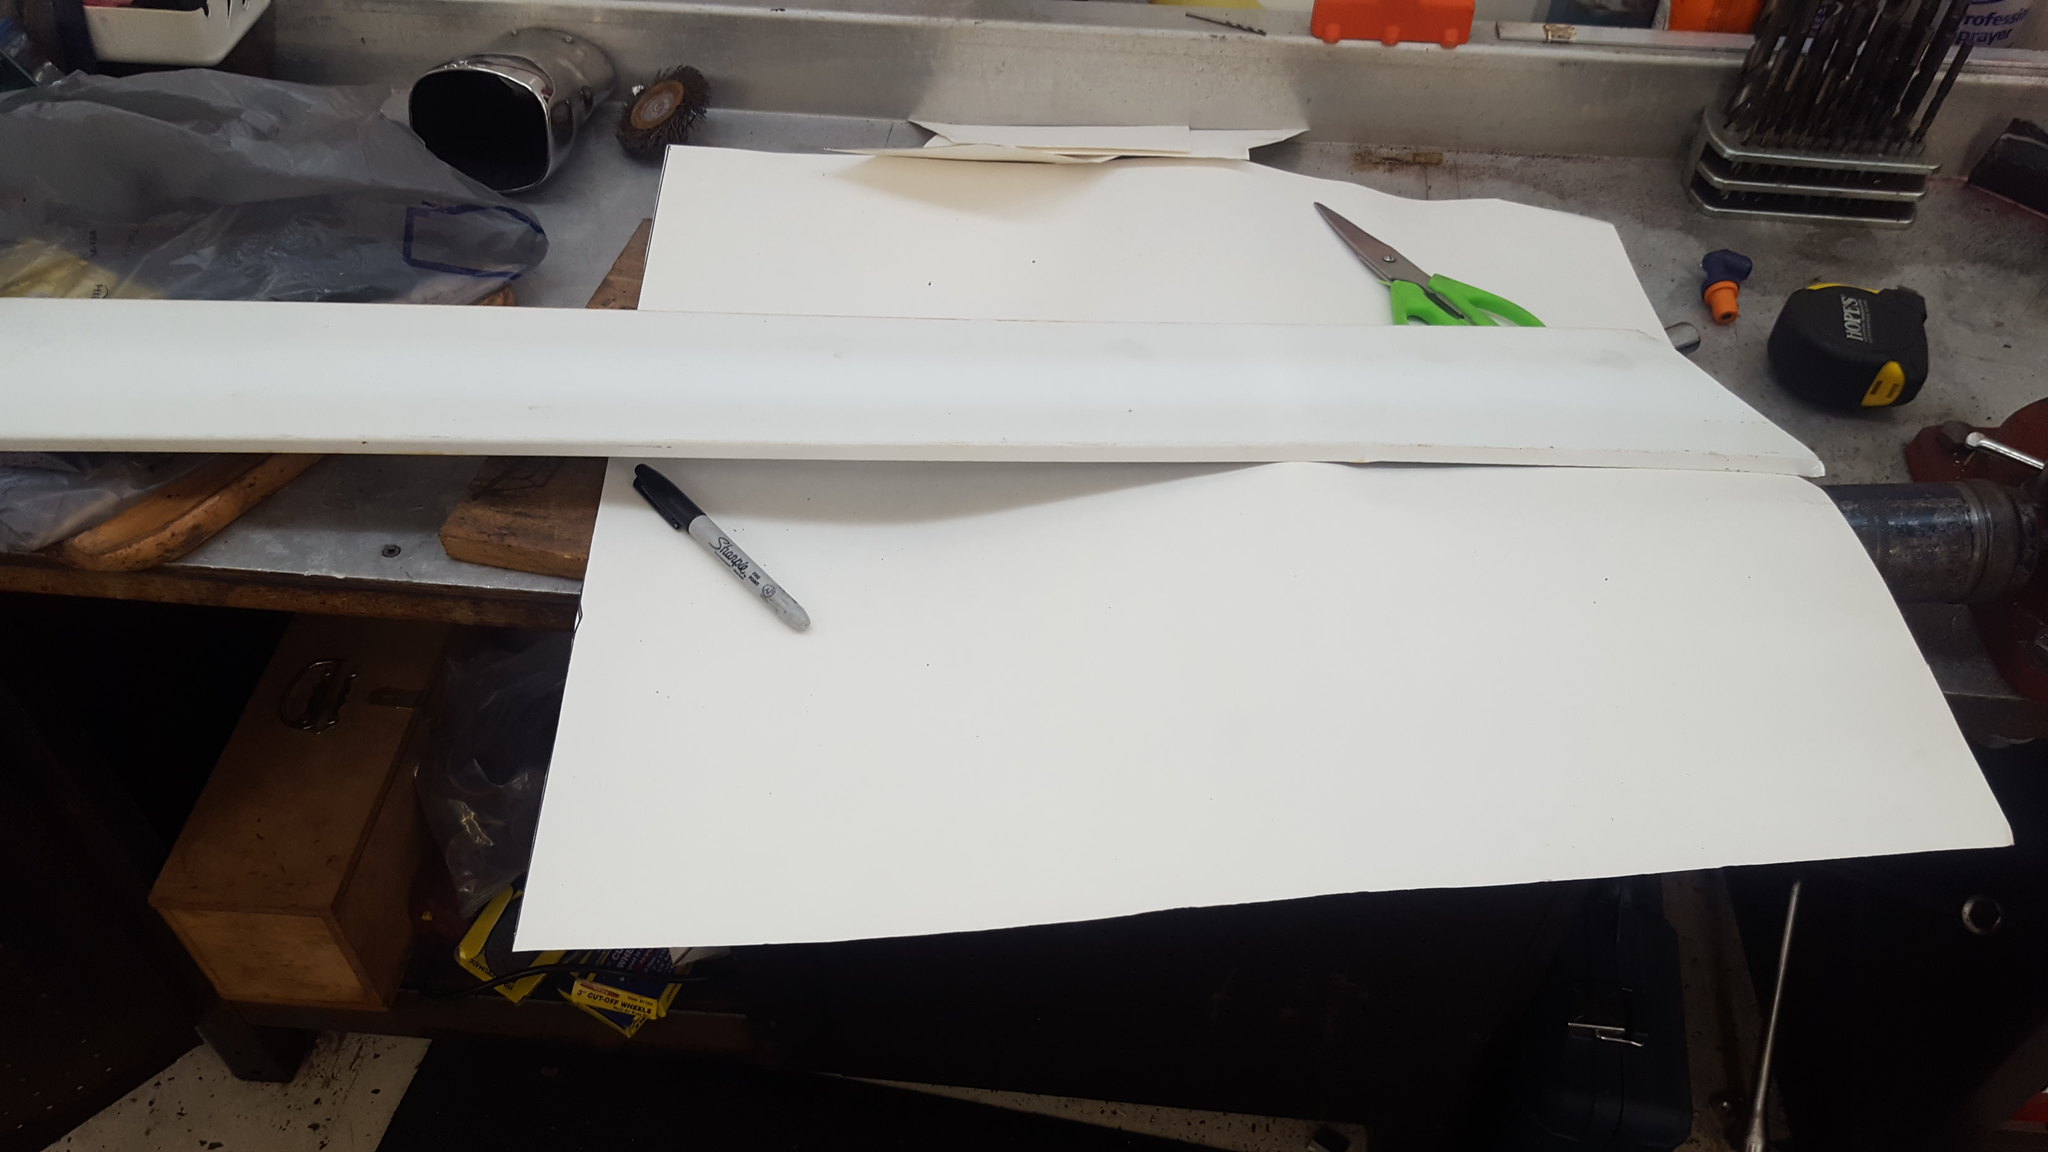 20180513_113300 by Michael Crawford, on Flickr
make a CAD (cardboard aided design) template of what you need, and transfer to metal.
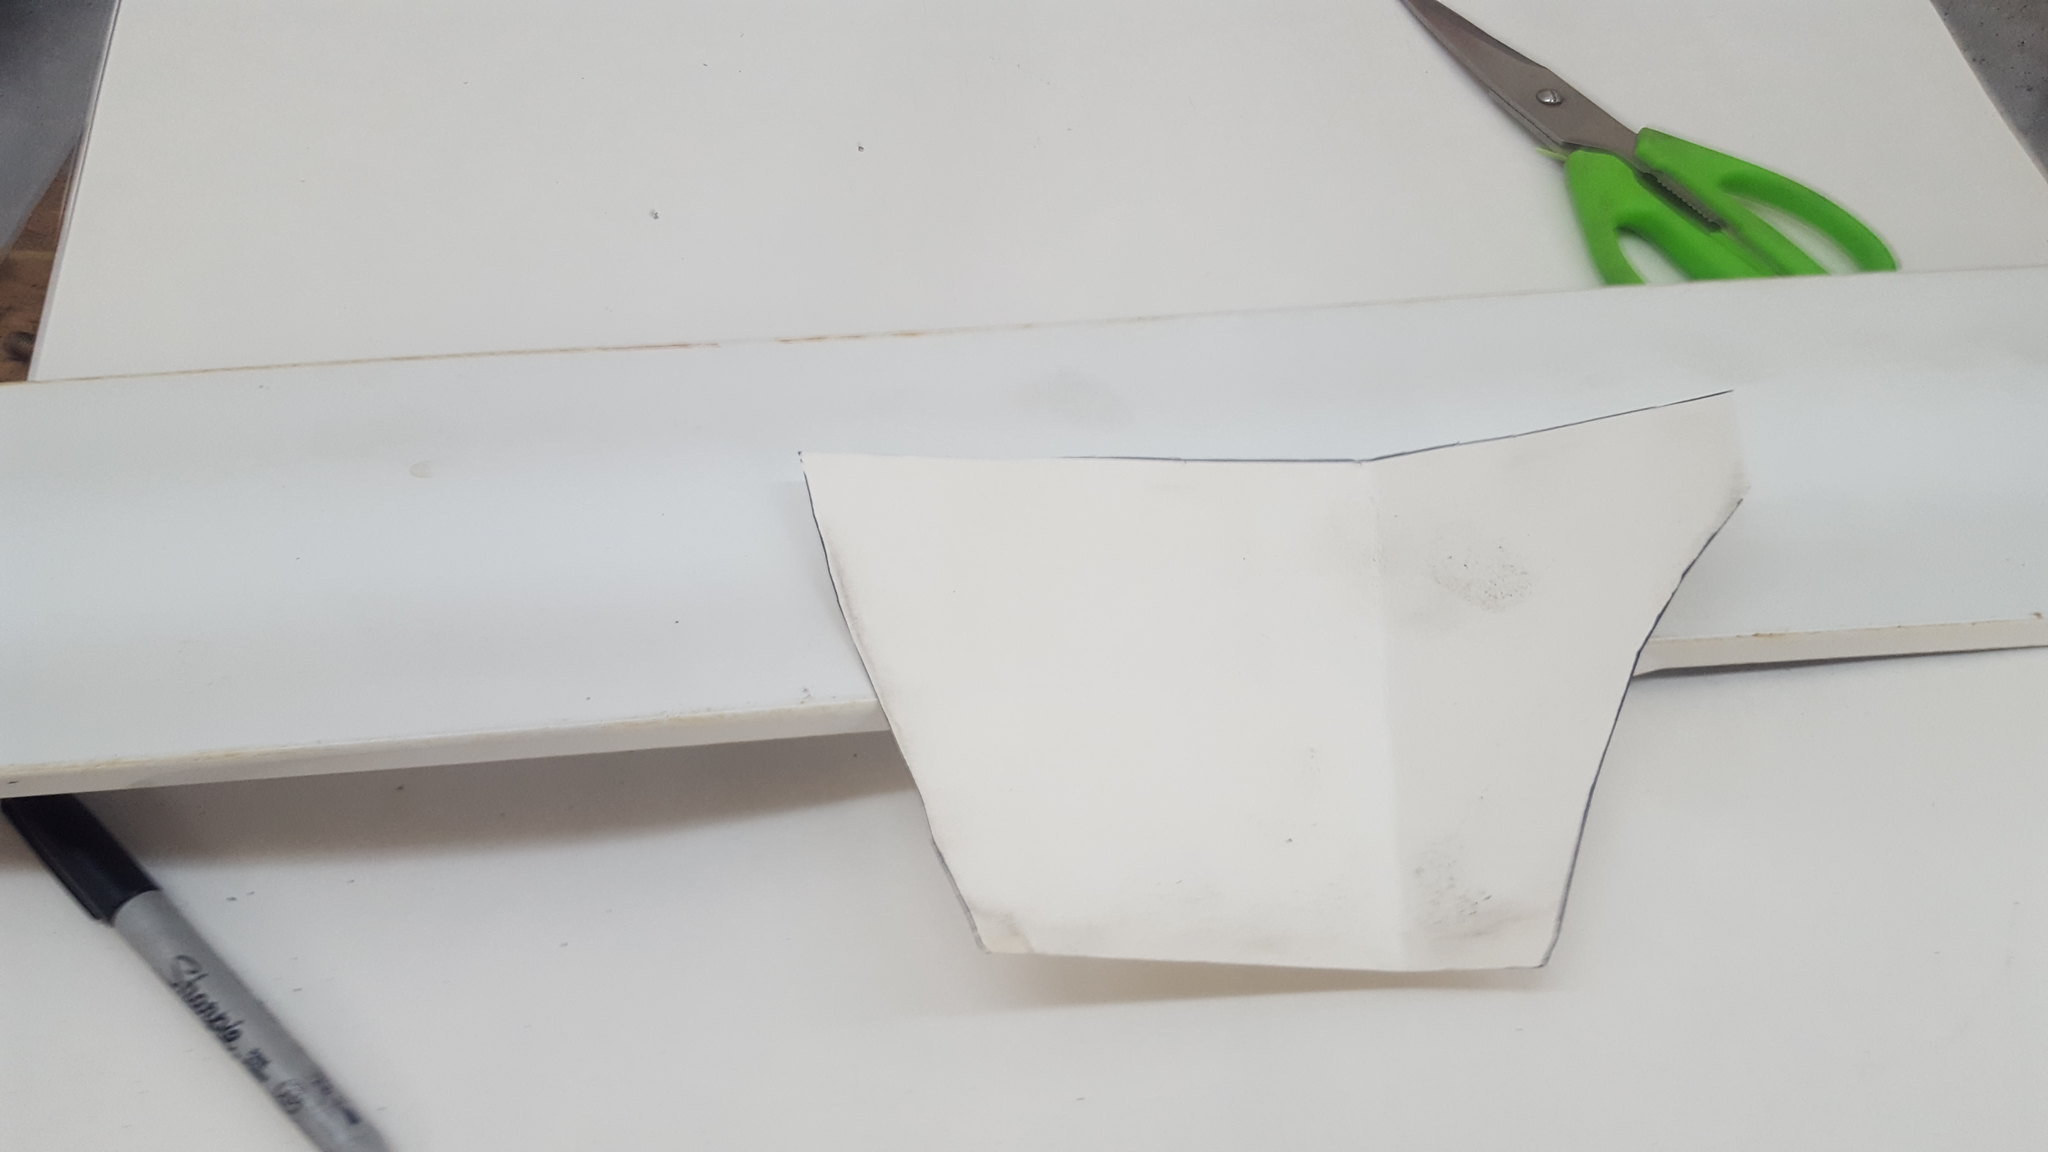 20180513_113304 by Michael Crawford, on Flickr
bend metal and test fit
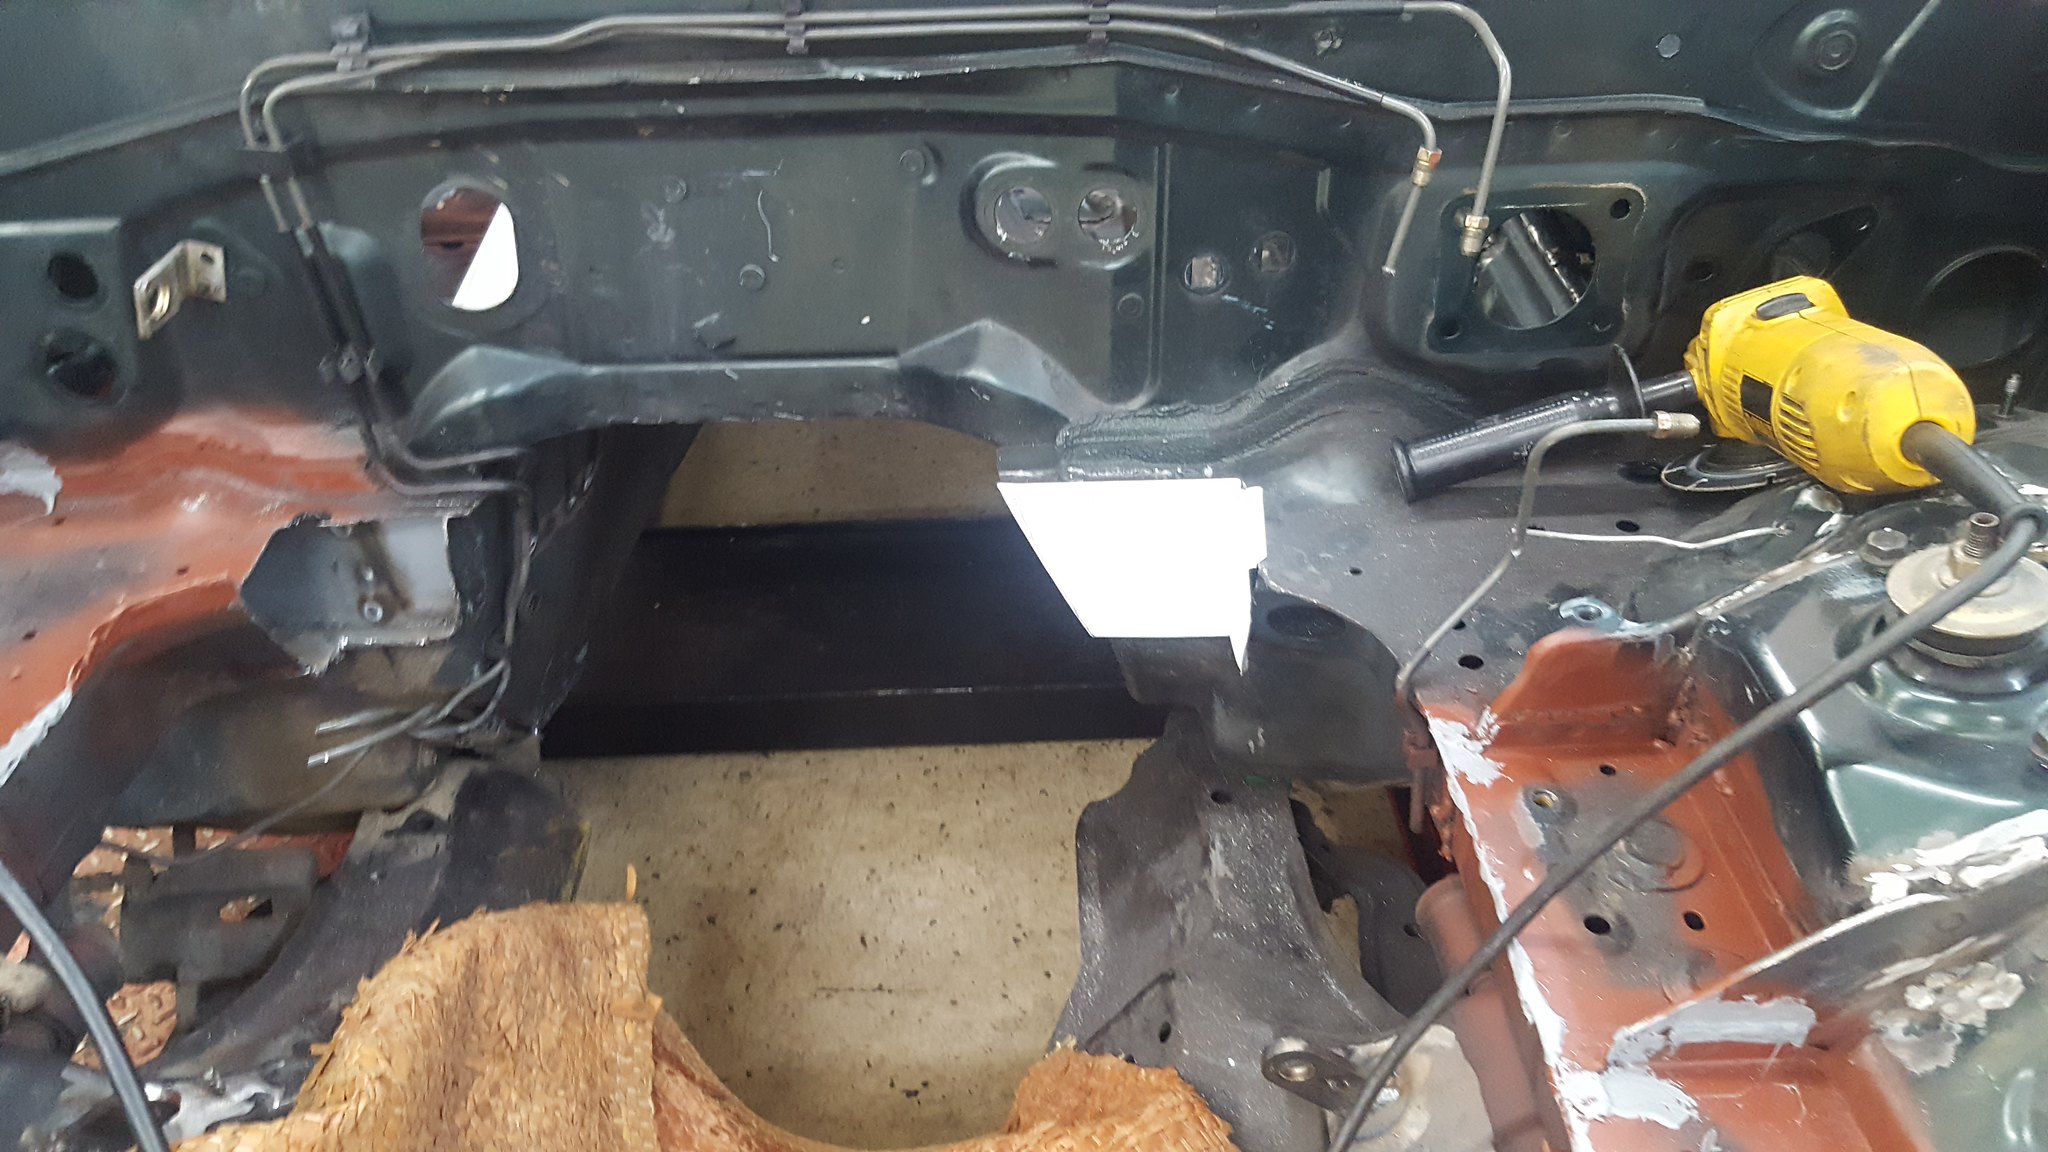 20180513_113310 by Michael Crawford, on Flickr
weld in place, hammer forming as necessary. Finish prepping and seam welding the engine bay while you're at it.
 20180513_135634 by Michael Crawford, on Flickr
finish the rest of the welding, take pictures, go home and watch THOR with the family while updating build threads and drinking tea.
 20180513_135642 by Michael Crawford, on Flickr
 20180513_135627 by Michael Crawford, on Flickr
next up is grinding, priming, and seam sealing.
Until next time friends.

Very cool!
Thank you for capping the corners where the gussets were cut out. Nice job also. Too many V8 converters seem happy to just leave them exposed.
Thanks!
Im currently arguing with myself wether to brush or spray the engine bay. Same with the interior.
Im leaning towards brush due to being able to do a chunk at a time as time permits.
But first i need to grind/prime/seal/pressure wash.
Should probably finish the rear cage spreader plates as well....
On a side note: ceramic microsperes have arrived. Redneck lizard skin will be applied to firewall and trans tunnel.
Given the option, I would always spray. It just looks better. Brushed just always looked brushed and it is not a look I like. Inside, maybe not so much of a factor.
Pete
In reply to NOHOME :
They bothered me. the caps are not structural. Too thin. They also don't fit all that great, but good enough for cosmetics where they are. Nobody will ever see them with the engine in.
I called valspar tech line a few minutes ago. They dont reccomend thinning of this stuff, and had no data on how to spray as the company line is that it cant be sprayed. However, i would have to think that theres a way. Just not experiencedenough with this stuff to know.
In reply to Dusterbd13 :
Dont talk to me about Valspar. I used their automotive single stage paint to do the engine compartment in the Molvo.
Looks really nice up to the point where you realize months later that all the dust that accumulates during a build has permanently settled into the surface of the paint. It all has to come off. I am sure it is something I did wrong, but since I don't know what I would do different, it ain't ever going to be Valspar again.

Id be seriously pissed in your application, nohome.
Lucky for me, this is a race car. Valspar is better than rustoleum for what im doing (equipment paint, not real paint), and i haven't experienced that issue with the lowes mixed stuff ive used.
However, i havent tried spraying it.

I don't think I would put it in a Good Spray Gun But If it will Pour through a Strainer even a Pasta strainer I bet it will go through an Electric sprayer, You Know the Holmes DePot type Aka, Cheepo throw away.
Challenge budget so far:
previous challenge budget: 1692.37
recoup total: 800
new money:
white rustoleum spray: 3.98
also went through the budget sheet and pulled stuff that im not using to clean up the total to a more accurate number
sold the cruise/ac compressor/alt bracket from the 3400 for 20
new total: 1612.35
recoup: 820
lots of progress, but not photoworthy....
Dallas and I spent part of yesterday grinding welds. And doing more grinding. And cleaning. And grinding. And.....
we sprayed the last of the rusty metal primer on the cleaned and ground welds. Today, I pushed the car outside, and pressure washed every square inch. Except the underside at the rear end. LOTS of dirt came off. Lots. Then I went ahead and sprayed a can of white rustoleum on the underside of the trans tunnel. Im still debating weather or not to use the redneck lizard skin under there, but im leaning heavily towards yes. My stock miata gets blistering hot through the sides of the trans tunnel, and it has extra insulation. And carpet. And a much smaller engine, with more clearance. And.....
anyway, heres where I got today. Tomorrow while the wife and daughter are at girl scouts, I hope to get the rest of the seam sealer done. Then on to painting!
 20180520_130619 by Michael Crawford, on Flickr
 20180520_130552 by Michael Crawford, on Flickr
 20180520_105825 by Michael Crawford, on Flickr
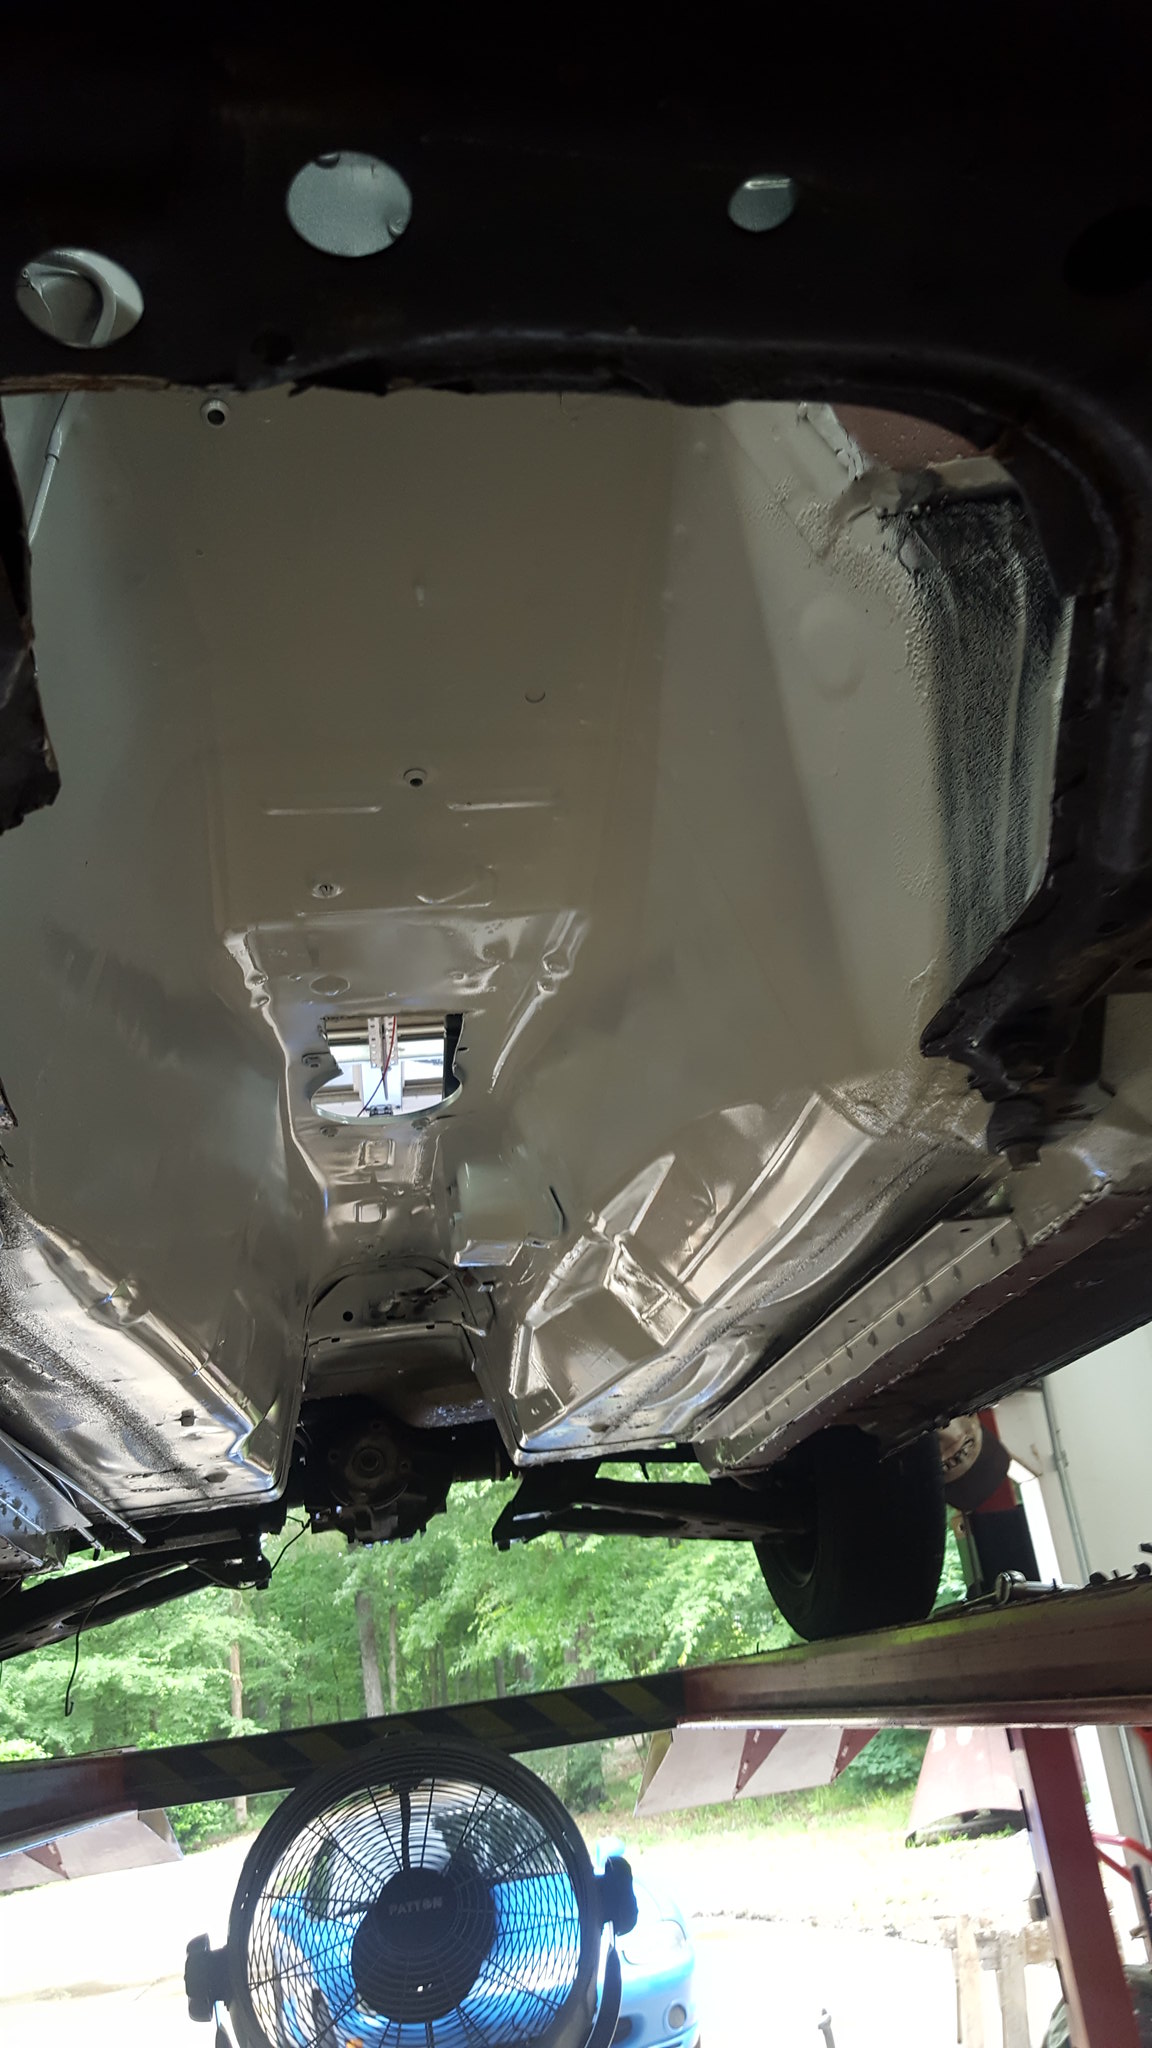 20180520_125241 by Michael Crawford, on Flickr

Really looking good.
You WILL make the challenege....
You WILL....
You'll need to log in to post.


