1 2 3 4 5
bigdaddylee82
bigdaddylee82 Dork
11/18/14 1:17 p.m.
MrChaos wrote: just go with the 8.8 as they are significantly cheaper than the xj/mj d44 and people think they are worth their weight in gold. And since you already have it and it is already set up for an XJ sans ABS you should go ahead and just put it in. could you not adapt the rear abs set up from an Exploder ti get abs working properly in the truck?

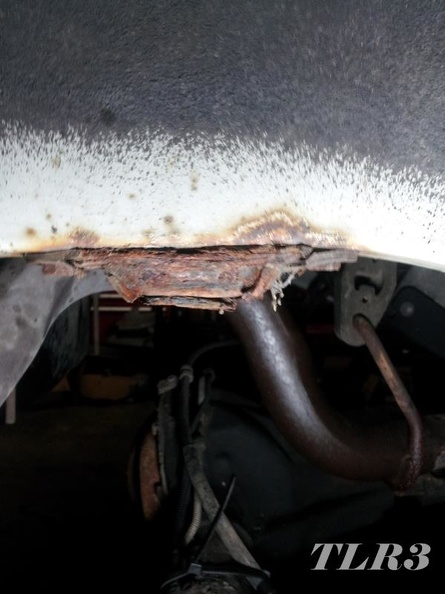
I found a complete '89 XJ in decent condition with a rear D44 for $1800, but it was in Kansas, seemed like an awful lot of trouble at the time to drag it home just to harvest its axle. Would have likely gotten every bit of the $1800 back reselling it after swapping an 8.25 in place of it's D44. Looking back on it, that's probably what I should have done. If ifs and buts were candies and nuts...

As for the 8.8 ABS question, yes you can, but no I won't.

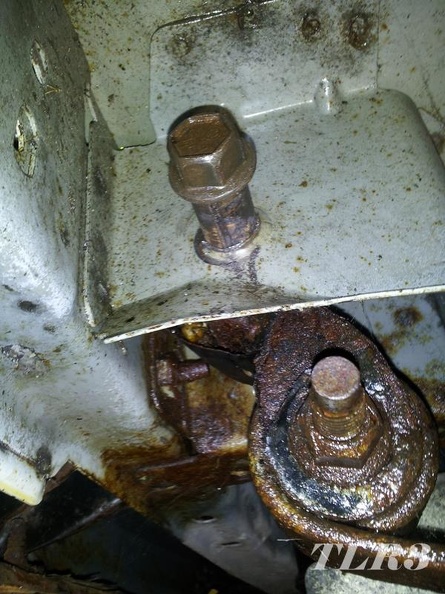
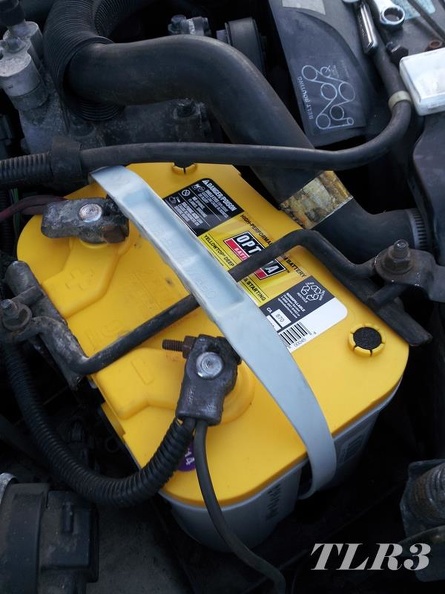
The late model XJ Cherokees have a 3 channel, 4 sensor ABS system, i.e. there's a speed sensor at each wheel, a separate brake line to each front caliper, but the rear brakes are a single channel, one brake line goes to the rear axle, and it's then split to each rear drum via a T on the axle.

The 8.8 from an Exploder has a single ABS sensor on top of the pumpkin, and one single large tone ring attached to the ring gear/carrier of the differential. I'm guessing Explorers/Mountaineers use a 3 channel, 3 sensor ABS system, since there's only one sensor for the rear, and a single brake line going to the rear axle.

What allows the 8.8s ABS sensor/tone ring to kind-of work with the XJ ABS system is the fact that the 8.8 tone ring has exactly twice as many teeth on it as the XJ tone rings. Some folks, the ZJ folks I mentioned earlier, removed every other tooth from the 8.8 tone ring, and wired the single 8.8 sensor in place of both of the wheel sensors on their Jeep (ZJ ABS is like the XJ ABS). This actually fooled the ABS computer to an extent, no ABS light on the dash, brakes still work, but it often caused low speed unwarranted activation of the ati-lock brakes during everyday driving.

My working theory on the ABS activating all the time on the 8.8 swapped ZJs is due to the fact that the 8.8 tone ring is so much larger in diameter than the Jeep tone rings. So the speed sensors will be showing a big enough discrepancy in "wheel" speed between the front and rear that it activates the ABS when not needed. Tangential Velocity?

I think there's room to fit a tone ring and sensor kind of inside of the hat between the disc and dust shield of the disc brakes on the 8.8, parking brake shoes and doo-dads might be in the way. However most of the Ford cars that have ABS and 8.8s use a wheel sensor at each end, but their axle widths don't match the XJ, and they're usually smaller spline axles, so there may be some other differences I don't know about.

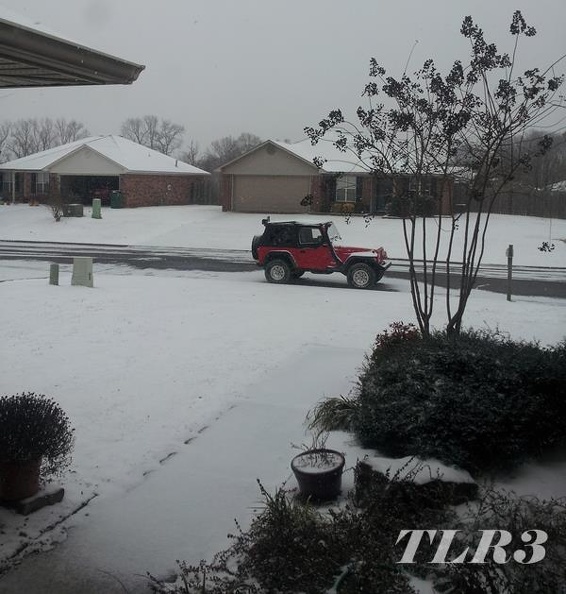
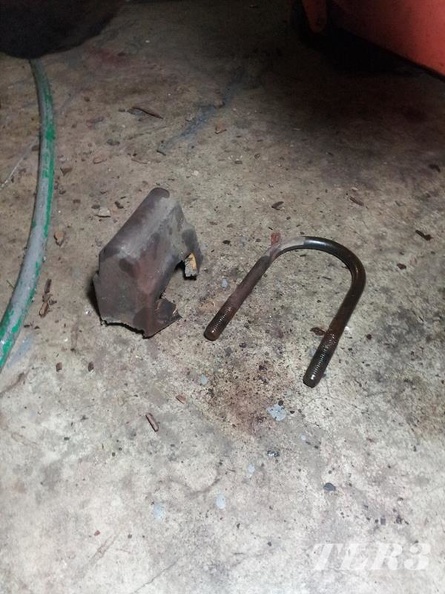
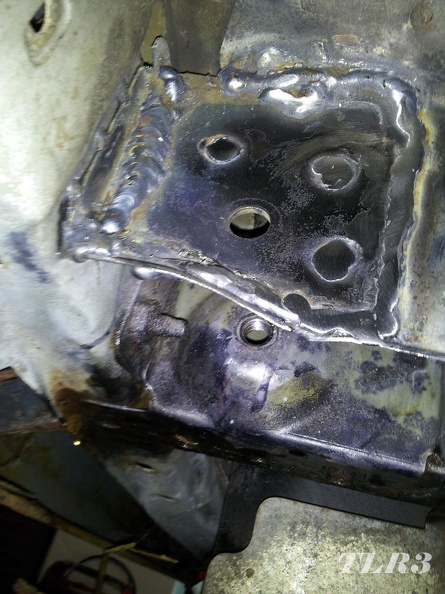
Back to Jeep axles, the buddy I helped pick up the parts MJ a few months back, mentioned it earlier in the thread, turns out it has an AMC 20 axle in it, I didn't see that coming.

MrChaos
MrChaos GRM+ Memberand Reader
11/18/14 4:59 p.m.

In reply to bigdaddylee82:

that must be a really early metric ton package or a swap.

Also look at the Honda/Isuzu Passport/Rodeo they have D44's with disc brakes and iirc slightly wider(iirc 3" total wider) than a 8.25(avoid the ones with 4.78 gears(iirc a special option on the 4cyl versions) as Isuzu is the only usage of that gearing)

bigdaddylee82
bigdaddylee82 Dork
12/2/14 12:20 p.m.

So, I failed to meet the self imposed Thanksgiving deadline.

Our Jetta got totaled weekend before Thanksgiving, so I got to deal with insurance and rental car nuisances in addition to unplanned car shopping during my usual Thanksgiving week juggling of family obligations.

SWMBO's brother was supposed to take his XJ Thanksgiving day, but that didn't happen. I replaced the entire front end steering, and track bar. Upgraded to V8 ZJ tierod/TRE, new front shocks, new steering dampener, and even new front upper control arm bushings. Yes I did another set of those dreaded bushings, I've got it down now, last one I did I had the old one out and replaced in less than 30 minutes. Though I don't think I'd want to tackle them if I hadn't removed the steering linkage and track bar first.

So whole new front end on the other XJ done, then we got to the rear, and it's just a solid crusty, rusty, mess. I fully expected to break the heads off of the rear shock bolts, but they were so rusted that the heads rounded off. There's at least 1 broken leaf in each rear spring pack, and it's just a mess.

We gave up on doing the rear suspension because we had an appointment to get new tires (Cooper Discoverer AT3s) mounted/balanced and the new front end components aligned, we didn't have time to tackle the rear suspension before the appointment.

SWMBO's brother was going to go ahead and take the Jeep the next day, and bring it back down when he had time, and I had the stock leaf springs off SWMBO's XJ ready to swap into his. However, we decided to replace the bulgy brake hoses and flush the used motor oil looking "brake fluid" before he took it on the 2 hour road trip to his house.

Bad idea, the rear brake lines fought us, but we persevered. Then we got to the front, the calipers are so corroded, we couldn't get the banjo bolts to seal. No amount of brake cleaner and wire brush helped. We finally threw in the towel at 1 AM Thanksgiving morning, and SWMBO's brother left without his XJ after Thanksgiving breakfast.

I ordered some Centric rotors, and some loaded Raybestos reman calipers, last of the parts should be here today, but I really need at least 1 new banjo bolt, the calipers come with new crush washers but not banjo bolts. It seems that they're a dealer only part, that the local dealer is telling me is discontinued. The local NAPA has some old timers there that can probably hunt one down for me especially if I've got the old one there to compare with, but finding the time to do that, working, and car shopping has proven to be a little difficult.

TLDR,

SWMBO's brother's XJ is the devil, and still hogging my garage, SWMBO's XJ hasn't been touched since the last update. I hate rust, and XJ brake caliper banjo bolts are rare as unicorn farts.

Junkyard_Dog
Junkyard_Dog SuperDork
12/2/14 3:11 p.m.
bigdaddylee82 wrote: XJ brake caliper banjo bolts are rare as unicorn farts.

No Pull-A-Part or other junkyards nearby? Whenever I need something like that I go to a yard without fixed prices-its usually a freebie since the receipt paper would cost more than the part.

bigdaddylee82
bigdaddylee82 Dork
12/2/14 4:05 p.m.
Junkyard_Dog wrote:
bigdaddylee82 wrote: XJ brake caliper banjo bolts are rare as unicorn farts.
No Pull-A-Part or other junkyards nearby? Whenever I need something like that I go to a yard without fixed prices-its usually a freebie since the receipt paper would cost more than the part.

There are 2 Pick-n-Pulls in the area, neither are exactly convenient to just hop in the car and head over to. The closest one to work is closed by the time that I get off. There's a smaller indy, might be a franchise, called U Pull It, in the town I live in but they generally have crap inventory, and worse hours than Pick-n-Pull.

Though I just checked and U Pull It has a single XJ and 2 ZJs as of 11/14, I might be able to snag one on Saturday.

NAPA failed too, couldn't come up with anything. Though I found a Ford banjo bolt with the same dimensions (thread, pitch, and length) as the NLA Jeep bolt. NAPA has 6 on hand, if the shoulder and hole match I might have a winner.

The Jeep part number is: J4006700 for any of you parts monkeys that might be reading this. FSM description is: "BOLT, Hex Head, .375-24x1.03 Grade 8"

Everything I've come across is "unknown quantities available," overseas, or from shady merchants.

bigdaddylee82
bigdaddylee82 Dork
12/3/14 9:45 p.m.

I dumbed down my search and found what I was looking for. Proper terminology and the actual part number got me no where, none of the parts stores or dealers could find what I was looking for or cross reference the part number, but a Google search for, "Cherokee brake hose bolt" turned up this: Omix-Ada 16736.03 Brake Hose to Caliper Bolt

Autolex
Autolex Dork
12/8/14 1:58 p.m.
bigdaddylee82 wrote:

and it's even season/holiday appropriate!

ebonyandivory
ebonyandivory SuperDork
12/9/14 8:52 p.m.

I swapped a D44 for my D35 in one of my XJ's (I won't tell you the JY pulled it for me and loaded it it in my Cherokee for $100).

I immediately put a spool in it with 31" Super Swamper LTB's and LOVED it. Dry, wet, snow whatever it was never an issue and really only chirped under power around corners.

2wd in snow was the most pleasant drive ever. That spool was so predictable I could just hold a slide and steer with the gas pedal.

Swank Force One
Swank Force One MegaDork
12/9/14 9:01 p.m.

That sounds like fun. I want that.

ridinwitcj73
ridinwitcj73 New Reader
1/9/15 9:03 p.m.

I do not know how to subscribe to threads so I just comment on them so I can find them easier. This is me commenting on your thread.

bigdaddylee82
bigdaddylee82 Dork
1/10/15 11:46 a.m.
ridinwitcj73 wrote: I do not know how to subscribe to threads so I just comment on them so I can find them easier. This is me commenting on your thread.

At the bottom of the page is a row of icons, one of them is a heart, if you click the heart it adds the thread to your watch list. The forum software GRM uses is... "unique."

I haven't done a thing to Moby, my grand plan of finishing the lift, new brake hoses, front pads/rotors, and new tires over the holiday break didn't happen. I wound up sick and lived on the couch most of the time.

Good news is, I only have 1 XJ at our house now! SWMBO's brother's Jeep made the 2 hour journey to his house New Years day. It'll eventually be back, needs some work still, but it's road worthy for the most part, will do what he needs it to, and give him something to tinker with on his days off.

bigdaddylee82
bigdaddylee82 UltraDork
3/6/15 12:26 p.m.

Believe it or not I've done stuff.

After the other XJ got shipped off to its owner's home, I kind of let the garage get out of hand, junked up with clutter, and I'd guess we've got at least a full Hobby Lobby's worth of Christmas decoration plus two trees, that found their way into the garage post Christmas, and stayed there for far too long before I lugged it all to the attic.

After I finally cleaned up and reclaimed the garage for automotive tinkering, I backed Moby in and started working on the rear suspension in spurts.

We've had about 3 weeks now of cold, snow, sleet, ice. Winter finally hit, I work for the state and they've closed the office due to poor road conditions 5 days in the last 3 weeks. You'd think that I'd get something done with all that time off right? Well I soon ran out of propane, and I'm not so motivated to work in the cold.

I'm a pansy I know. This is some of what we've dealt with, this week's ice storm was actually worse than this, but I didn't get a picture of it. This is accumulated sleet, not snow from last week.

Last weekend I finally got my propane bottle exchanged, and got back to work. SWMBO has been hounding me a little, the bad weather we've been having the past few weeks, is one of the main reasons we bought the XJ in the first place.

The front suspension lift has been "done" short of tightening some jam nuts, and getting the steering aligned since ~October. Moby has been parked in our driveway nose high since then. I was neglectful in taking any photos of the front end work, but I'll snap some installed pictures, and show what we did.

Now that I've been working on the rear end, I've hit snag, after snag, primarily due to one issue, RUST! I inspected Moby fairly thoroughly pre-purchase, I knew there was some rust in the rear bumper, and door bottoms, but the worst was the rear bumper and I intend to toss it anyway, so that didn't stop me. As I continue working on Moby, I've started to second guess purchasing it. While the front end put up a little bit of a fight, the rear suspension has been a full on brawl every step of the way.

I knew the rear bump stops were a bit crusty, but didn't think they were THAT bad, figured I'd eventually replace them, but it wasn't a priority. The RE lift I'm installing doesn't require a rear anti sway bar, so it get's removed. While snaking the anti sway bar out from under the Jeep, I tapped the right bump stop with it, and the bump stop literally FELL OFF.

I now have a pair of Daystar's finest overpriced extended polyurethane bump stops to replace them. It's highway robbery what they charge for those things. Maybe I could have re-used it?

More to come...

bigdaddylee82
bigdaddylee82 UltraDork
3/6/15 1:40 p.m.

The biggest headache so far has been removing the bolts that mount the leaf springs/shackles to the body. I spent an entire afternoon, 5+ hours removing just the right leaf spring. I've soaked everything I knew I had to remove with PB Blaster countless times, several times a week, for about a month before I actually started removing stuff, all in anticipation of the coming struggle. I'm not so sure that did anything other than waste PB Blaster, and slick up the floor under the Jeep.

First leaf spring issue, the bolts attaching the shackles to the body have become one with the inner sleeve of the shackle bushings. Both sides have this same problem. I'm replacing the crusty original shackles, with some JKS little boomerangs, so they needed to come out. Since the bushing sleeve and bolt are rust fuzed together, not only did the bolt come through the bolt hole in the rear spring hanger (shackle mount) of the body, but the bushing sleeve did too. So now the bolt hole is too big, and the spring hanger is distorted. Looks like I'll be adding some plate, and beefing up the rear spring hangers.

Second leaf spring issue has been the front bolts, same issue as the rear, the bolt and bushing sleeve are rusted together as one. The front spring hanger isn't as robust as the rear though, so instead of the bushing sleeve forcing its way out through the bolt hole, it simply spread the spring hanger opening as wide as there were threads on the bolt. I fought, and fought, and fought, until I finally broke out the gas axe. I knew I'd set the bushing on fire, and wanted to avoid that, but it was inevitable.

Torching the head off the bolt wasn't ideal. I filled the garage with acrid burning rubber smoke, and then burned the hell out of the palm of my left hand when I placed it on the torch I'd just turned off and laid on the ground, when I was getting up to get some water to put out the flaming rubber bushing. Also a blob of molten flaming rubber fell onto my air hose, and it instantly sprang a leak.

With the head removed from the bolt, I still couldn't get the spring out. However between the mount being spread open wider, and the rubber being burned away I could then get the reciprocating saw between the bushing and body. Spring successfully removed!

Notice the black rubber soot covered spring mount, peppered with yellow flakes from a Dewalt blade, and what was left of the bolt still in the threaded hole.

I dreaded getting what was left of that bolt out of the hole, I saw it turning before cutting its head off, but still I feared the worst. I grasped what little bit of the bolt still protruded in my fingers just to see if it was indeed loose and free of the threads in the mount. I pulled what was left out by hand. All that work, and this is all that was still holding me up.

That's one spring down, and as I write this, I currently have the shackle bolt removed off the other spring. I've got some head scratching to do on repairing the rear shackle hangers, I have replacement bolts, and proper sized washers, I could simply straighten everything up with a bolt and big washer, weld the washer in place. I think I should probably scab plate the mount though, that's going to require me scrounging up some steel, and take even longer to get this thing back on the road.

In other tragic Moby news, while crawling around, and getting up and down, while working on Moby, I placed my hand on the left rear plastic corner cover enough times that it came loose. I removed it, and discovered this. I'm sure the right rear is just as bad. It's spongy, I could put a screwdriver through it with little effort, so more body work and rust repair has been added to the list of things to do.

bigdaddylee82
bigdaddylee82 UltraDork
3/6/15 2:40 p.m.

Another minor update. While Moby sat derelict (no Zoolander quotes please ) in the driveway, its unknown age, and rather low CCA battery was procured for other means that are now in the auto salvage's hands. Our Jetta had been totaled, and I had just put a brand new $$$ battery in it about 3 months prior, I couldn't stomach letting that battery with full warranty go to the scrapper, so it got swapped.

Initial plan was to put the Jetta's battery in Moby, both are top posts, but the post location of the Jetta battery, and Moby's terminal lengths didn't allow it. Moby will eventually get new cables, and terminal ends, but in the mean time it needed a battery.

SWMBO said she thinks she needs a winch. Who am I to question? Any chance she enables my "condition," I jump at the chance. Since Moby needed a battery, and baby desires a winch, the answer seemed obvious.

I found a heck of a coupon code for Advance Auto's website, I don't recall the exact percent off, but it capped at $50. I ordered a new Optima Yellow Top, dual post, top and side, and got it $50 off, bought online, picked up at the store down the street.

Dusterbd13
Dusterbd13 SuperDork
3/6/15 3:29 p.m.

What state are you in?

And ive had the same fight with leaf spring bilts before. Id rather be kicked in the daddy bags than do that again.

Swank Force One
Swank Force One MegaDork
3/6/15 3:53 p.m.

Those bolts weren't super fun on our blue Jeep either. No rust, but after 200k miles, things just like staying together. They've bonded.

Took a 3 foot breaker bar and some hammering.

bigdaddylee82
bigdaddylee82 Dork
3/6/15 4:29 p.m.
Dusterbd13 wrote: What state are you in? And ive had the same fight with leaf spring bilts before. Id rather be kicked in the daddy bags than do that again.

I'm in central Arkansas. Moby came from, and spent most of its life in the St. Louis area, Missouri.

Swank Force One said: Those bolts weren't super fun on our blue Jeep either. No rust, but after 200k miles, things just like staying together. They've bonded. Took a 3 foot breaker bar and some hammering.

I've only got an 18" long 1/2" drive breaker bar, but I had a 2' cheater pipe on it. Took every bit of lead in my ass to make the first 3/4 turn of the bolts, still quite a struggle after that. I am out of shape, and sore today as a result.

bigdaddylee82
bigdaddylee82 UltraDork
3/23/15 9:26 a.m.

More stuff has happened.

I've been working on Moby in spurts still, not as much when I get home from work on evenings as I should, and I've found plenty of other things to occupy my time. Our first gorgeous day, on a weekend, after all the snow/ice, and 2 weeks of rain, I found myself out at the farm poking holes in paper with my new rifle instead of in the garage.

Work obligations, and traipsing across the state for Craigslist Volvo parts has otherwise consumed valuable weekend garage time.

Regardless, Moby is getting dang close to fully supporting its own weight again.


When I removed (attempted to remove) the bolts that mount the shocks to the unibody, I twisted the heads off of all but one. Apparently this is pretty common, either the bolt snaps, or the captured nut that they thread into comes loose from the panel it's attached too.

In a rare, somewhat out of character, planning ahead, moment, I was actually prepared for this exact problem, I anticipated stripping/breaking these bolts.

Most of the repairs for this I've seen involve punching/drilling out whatever is left of the captured nut and bolt, then snaking a new bolt in through the top with a piece of wire. That seemed like a frustrating, infuriating, swear jar filling, episode of futility for me to attempt. Threading a wire blindly from the top into that hole, and praying that the bolt you wrapped the wire around stays attached on it's journey between body panels and through the hole, was sure to activate Hulk mode rage, and send tools/parts flying. Not to mention if you succeed there's no way to hold the bolt from turning when threading a nut onto it, I guess you could tack weld it, but with my luck I'd booger up the threads. Definitely not a "Lee" solution.

Instead I ordered WAY more of these than I needed, back when I was ordering all of the other fasteners for the Jeeps. McMaster Carr, 5/16"-18 weld nuts 90596A032.

I stuck my long, pointy, death spear, in my air hammer, stuck the business end against the what was left of the bolt, and pulled the trigger. Voila!

Then I went to town with the knoted (naughty) wire cup brush, and did some beginners level quality, over head, tack, tack, tack, welds to hold the new nuts in place. Followed up with the flap wheel, to try and level out the surface that the new shock's bar pin will fit against.

Swank Force One
Swank Force One MegaDork
3/23/15 9:35 a.m.

I snaked new bolts in mine, wasn't too bad, but i have smallish hands.

There's actually upper shock mount relocation brackets that solve this problem much more elegantly and give better geometry. I'll be ordering those ahead of time for the red XJ.

bigdaddylee82
bigdaddylee82 UltraDork
3/23/15 9:54 a.m.

You'll recall that when removing the leaf springs, the center sleeve of the bushings came out boded to the bolt. Forced their way through the side of the mount, and left me with this lovely, bulge to deal with.

I put a big washer on a bolt, and tried to press it back in, but that just pressed the whole side of the shackle hanger in.

My solution was a piece of pipe 1/2" ID steel pipe, and big washer, pipe cut to be the same width as the new bushing (- the width of the washer).

I stuck the pipe and washer in place of the shackle bushing, put the bolt with a couple washers on it through the pipe, and cranked away until the protrusion was gone.

This left me with a flat, enough, surface again, but the bolt hole was kind of wallowed out, and I don't trust it to support the weight of the vehicle, or any of the unsprung weight moving for long, after having been bent back and forth like it was.

bigdaddylee82
bigdaddylee82 Dork
3/23/15 9:59 a.m.
Swank Force One wrote: I snaked new bolts in mine, wasn't too bad, but i have smallish hands. There's actually upper shock mount relocation brackets that solve this problem much more elegantly and give better geometry. I'll be ordering those ahead of time for the red XJ.

My "friends" give me a hard time, and I don't bring it up in places like GRM much, but I have a tremor, hands shake uncontrollably, sometimes worse than others. I make do, bracing, and timing is key. You should see me with a soldering iron.

bigdaddylee82
bigdaddylee82 UltraDork
3/23/15 1:10 p.m.

After I got the rear shackle hanger more or less back in the proper shape, I turned my attention to the front spring hangers.

The front bolt hole wasn't as deformed, as the rears were. The bushing sleeve came out of the bushing fuzed to the bolt on the front too, but instead of forcing its way through the bolt hole, it mostly just spread the whole spring hanger open wider.

For the front I really just needed to run a bolt through it, and "squish" it back in shape. I ran into a problem though. With all the beating, twisting, cutting, and general mayhem I bestowed upon those stuck bolts, I kind of boogered up the threads of the captured nuts that spring eye bolt threads into.

I made a futile attempt of repairing the threads with just a bolt, but that just flattened the threads of the bolt, it was a hard chromed, 10.9 bolt too.

The next option was to track down a 14 mm-2.0 mm (M14-2) tap, my metric tap set stops at 12 mm. Of course I didn't discover I need one until Friday night. Fastenal, and the local Industrial Supply are closed on weekends. None of the usual parts stores had one, my local old school NAPA that has everything didn't have one, the big box hardware stores are a joke, no luck with local Ace or True Value.

O'Reilly's website claimed that the O'Reilly's about 45 miles away had one in stock, I was going out to the farm that morning anyway, and it's only another 15 miles past my destination, so I called. Counter guy couldn't find it, his inventory confirmed what the website said, but he couldn't find it. He asked for my number and said he'd call if he could find one. About 20 min later he called, still hadn't found one, but said he called the NAPA in the same town, and they had one. Score for O'Reilly's customer service, they didn't have it, but their competitor did, and they called to let me know. Also NAPA's website sucks, for several reasons, but mainly because I checked that NAPA's online, and it wasn't shown to be in stock.

So a trip to the far away NAPA, netted me the tap I needed, and on a Saturday even.

Still not fun.

There wasn't room to fit a tap handle in the spring hanger, and I couldn't fit my tap, ratchet, thingy in there either, so I had to turn the tap with an open ended wrench.

bigdaddylee82
bigdaddylee82 UltraDork
3/23/15 6:01 p.m.

With the spring/shackle hangers straight-enough, I needed to do something about reinforcing those wallowed out, and fatigued bolt holes.

I decided my best bet was to scab some material over the damaged area with a new, clean, ROUND, proper sized, hole. I got some 11 Ga. (0.120") mill finish, mild steel, plate, and I ordered a 14 mm drill bit. Fourteen mm is only ~1 mm larger than a 1/2", I could have made a 1/2" work with a little bit of filing/brake cylinder hone, but I figured I'd be money/time/grief ahead if I just bought the correct size bit to begin with.

I spent a full day in the garage, focused on Moby, I did a lot of work, but neglected to take many pictures. I snapped a few, but it mostly slipped my mind until it was too late.

I did some fine "CAD," cardboard aided designing, of my new 11 Ga. scab plates. A box of Honeycomb cereal was consumed in order to provide, "CAD" material.

I wound up with these for the front spring hangers. I cut the outer shape with an Oxy/Acetylene torch and cut the notches on a band saw, opened some of the notches up a bit with a flap wheel on the grinder, smoothed up the rough cut torched edges, and slag, to a slightly less rough finish. There are little protrusions in the bend of the the stamped steel spring hanger on the Jeep, the notches are cut to fit around those. There's a 14 mm hole for the spring eye bolt, and I put a couple 5/16" holes (might be 3/8" I don't remember) for plug welds.

I covered both sides with some SEM weld through primer, this is first, and likely the last time I use this stuff. It was a pain to weld, it welds better than paint, but not much. I guess it might be worth it to have between the mating surfaces, but I painted the entire scab plate with it, and painted the surface of the spring hangers with it too. Spatter, pop, and wire pushing the gun away instead of arcing. I learned my lesson, after struggling with the first plate, I just stuck the others in place with the plug welds, then took some brake cleaner and wire brush to remove the stuff from the perimeter I was going to weld.

Even without the excuse of the weld through primer, I'm not much of a weldor, I don't practice enough, but still, weird position, over head, with the primer, I had an uphill battle. This isn't pretty, but it ain't going anywhere.

I didn't get any pictures of the rear shackle hanger brackets before I stuck them on. Cut the basic shape with the torch, cleaned up with the band saw, similar holes as the front, etc. I only used the weld through primer on the surface that mated against the shackle hanger on these though.

At some point during the day, I made the unfortunate discovery that my glove has a hole in it. Those little black divots in my finger, are now large blisters. I have a pair of Tillman 50 Mig gloves in route as I type this.

I have the rear extended brake line on, and everything I've welded on has been cleaned, primed, and painted. Dupli-Color's Stone White is a spot on match to Chrysler's, at least close enough no one's going to notice on the spring hangers under a Cherokee.

I would have had the springs on, but I discovered that the RE lift kit expects me to reuse my original spring/U-bolt plates, which were NASTY, and took a lot of cleaning, rust treatment, and paint, before I could justify putting them back on. I also discovered that the RE spring center pins are 3/8", while the original spring pins were 5/16", so the spring pin holes in the perches on the D35 are going to have to be enlarged. I actually read the directions on that one, but only after discovering they didn't fit, of course.

So close now, rear springs, shackles, shocks, bleed brakes, and it could realistically be driven again. Hard to imagine.

I've got some other maintenance stuff planned, new front brakes, longer front brake lines, and I've got a set of 265/75-R16 Cooper Discoverer AT3s taking up a lot of real estate in the corner of the garage, I could potentially get those mounted, balanced, and an alignment done this week.

It's officially Spring, so having our inclement weather rig on the road now makes sense right?

bigdaddylee82
bigdaddylee82 UltraDork
3/28/15 11:57 p.m.

Momentous occasion tonight, Moby's rear axle is now attached again! New rear springs, shackles, shocks, brake hose, and all new hardware (except for the U bolt plates). I'm not so sure this was intended to be a one man job, thank the Good Lord for ratchet straps and floor jacks.

Also RE's instructions are wrong. They stated potentially needing to enlarge the center pin hole in the spring perch to 3/8", I already knew the center pin of the new RE springs didn't fit, so I grabbed my sharpest 3/8" drill bit with the intention of opening the spring pin holes on the perches. As soon as I picked up the drill bit, I knew something was up. The bit was way too small... hmm. Who reads instructions anyway?

I grabbed the trusty dial caliper and figured out what was up. Phone's camera struggled to focus, this was the best one, angle of the picture makes the needle look a few thousandths more than if looking straight down.

The pin is 9/16", not 3/8", so I measured the hole, it was around 17/32", crazy that such a tiny difference could stop a project in its tracks. I don't know if it was a combo of the paint RE puts on the new spring, and a slightly misshapen hole from rust, or if the pin in the RE springs is just a hair bigger? Regardless, a quick spin of a 9/16" bit in the old Dewalt got the springs to fit.

If all goes to plan I'll bleed the brakes tomorrow, torque all the bolts after I get the Jeep's weight on the suspension, and take a test drive. My goal is to have the new tires mounted, and the front end aligned Monday afternoon.

bigdaddylee82
bigdaddylee82 Dork
3/30/15 10:43 p.m.

Yesterday's plan of working on Moby didn't pan out, wound up doing family stuff instead.

I was already planning on taking a half day at work today, I had thought I'd get the tires on, and alignment set today. Instead, I did what I had originally planned for yesterday.

It was another momentous occasion. Moby is supporting its own weight! Everything is torqued, and lubed, 109 ft lbs takes some effort. New brake pads and rotors up front, new longer hoses front and rear, and all lines are bled.

I feared the worse, didn't think I was ever going to get fluid to the rear brakes, my HF vacuum bleeder was struggling. It took so long I was afraid I got air in the ABS pump, from what I read online that's a trip to a dealer or purchasing your own DRB III (and learning how to use it), used ones on fleabay cost more than we paid for the Jeep. Thankfully that didn't happen, I got all the nasty fluid out, and a solid pedal.

I've got a busy week at work ahead of me, but I've got an in-service that's supposed to end at noon on Thursday, if I play my cards right, I might be able to get Moby's new shoes on straight that afternoon.

I'm excited at the thought of having this thing on the road again. It's kind of embarrassing that it hasn't been road worthy since September. I'll try and add remember to add some more pictures later, the Benadryl is kicking in, so it ain't happening tonight.

1 2 3 4 5

You'll need to log in to post.

Our Preferred Partners
WJi9uKgwGcgerIX4wreCZbMR8pZkQHB8gQKIwJRoiQg9FBqlhyuykAoEKM03jy4s