


Magnum 5.9 and auto from a wrecked durango would be the swap i would do.
But im not you.
Nor am i well in the head.

Magnum 5.9 and auto from a wrecked durango would be the swap i would do.
But im not you.
Nor am i well in the head.

In reply to Dusterbd13:
There have been points in mine and Muffin's time together that a 360 and or 318 has gotten some consideration, but Mopar stuff, even the modern Hemi, just doesn't blow my skirt up.
A work colleague offered me a really good deal on an iron block 5.3l long block, basically a core, he pulled from his wife's Tahoe, likely needed a bearing(s). Even at scrap price though, once I looked into the cost of hunting down a harness, ECM, and accessories, I decided to pass.
As much as I think about it, talk about it with a few friends, and have even collected some parts, major work on any of our vehicles, including Muffin drivetrain swaps, just isn't in the cards right now.
We're still in a holding pattern, in suburban, subdivision, Hell. Our garage is full, we have too much stuff for our little house, and can't seem to close a deal on any property we try to buy. That place I mentioned we were moving too back in Spring of '15 fell through, long story, but short version is, lender had some demands after the inspection, seller wasn't interested in hearing about it, so the seller still lives there.
We've made offers on 5 or 6 properties since, so we're really good at making offers, or maybe we're really bad. Someday...
In the meantime, I do just enough to keep the fleet healthy, happy and more-or-less roadworthy, depending on who's driving. ![]()
I had the fan installed, but needed a control solution. I mentioned the different iterations of fan controls I'd used previously, the most recent being the adjustable thermostat with the probe you jam into the radiator fins.
I decided I wanted a little better thermostat, and decided to go with an in coolant thermal switch, so I bought MATCC 185~200 Degree Engine Cooling Fan Thermostat Temperature Switch Sensor Relay Kit way back at the same time I bought the fan. That's roughly the thermal range Muffin's engine runs at, with a 190° thermostat, it had predominantly positive reviews, and was ~$17. Calling that "better" might be subjective, but I figured having the probe actually in the coolant was better than jammed in the radiator fins.
I really didn't know how I was going to mount that thermal switch when I got it, for a time I thought I'd be modifying the thermostat housing on the engine, or maybe adding a Tee for the engine's coolant temperature sensor and the new fan thermal switch to reside in. How I was going to mount the switch was in the back of my mind for a while, but I was focused on making the shroud. Then about the time I got the shroud done, is when I came down with Rocky Mountain Spotted Fever, so I had some time to ponder Muffin thermal switch logistics.
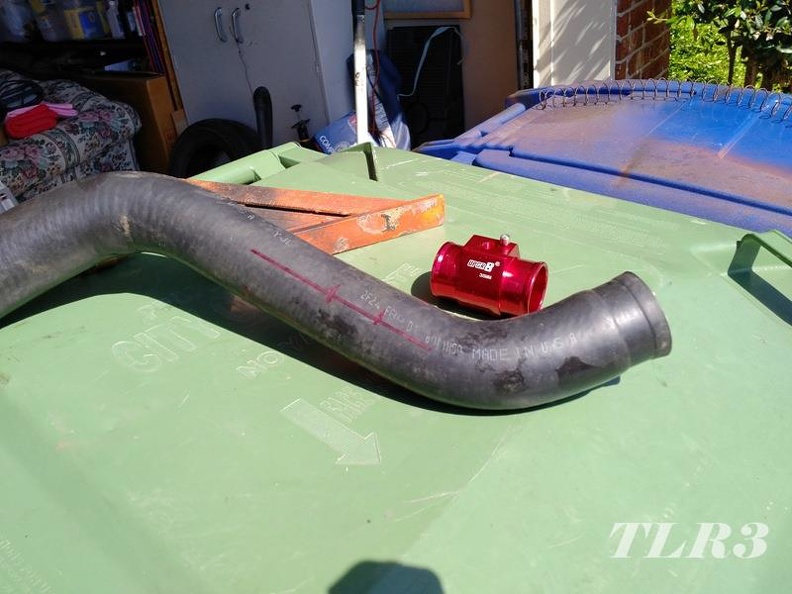
I decided instead of making more work for myself (I do dumb things sometimes) I'd just use an off the shelf solution. I was aware of those temperature sensor adapters you splice into a coolant hose, I'd never used one, but figured that'd be the best solution. I knew I needed an adapter that'd fit in 1-1/2" ID radiator hose, and had a 3/8" port for a temperature sensor/switch. I couldn't find anything that fit my exact specifications that wasn't $50 or more, and if you've followed any of my threads, by know you know I'm a tight ass.
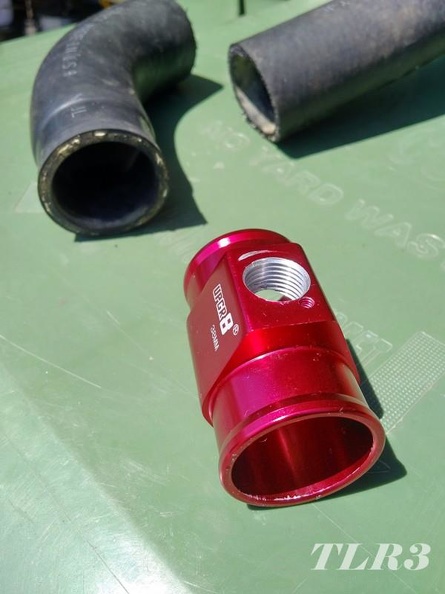
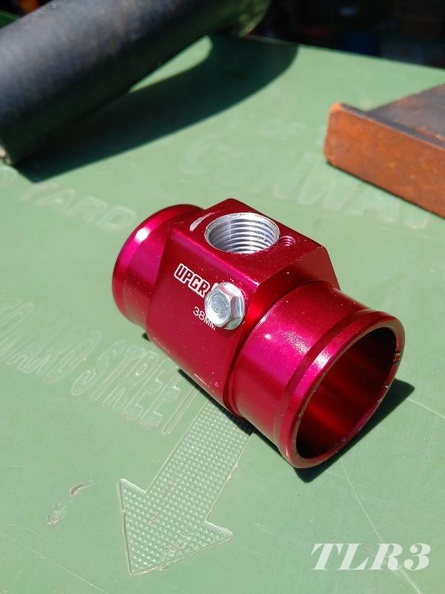
Instead I found a 38mm (just almost 1-1/2") Upgr8 Aluminum Water Temperature Sensor Adapter with a 1/8" port for $13. I read the reviews, one of which showed drilling out the port for a larger temperature probe. There weren't a lot of options the size I needed, that were actually in stock, at the time I was shopping, so I figured I had a drill press and a 3/8" NPT tap, if some random person on the internet could drill and tap the adapter for a larger probe, then I could too. Only other minor problem, it was red.
With the new temperature sensor adapter in hand, I went to work installing it. I decided to put it in the lower radiator hose, which is the cool side, return on Muffin. That was the logical place for it to go in my mind, and a Google search at least anecdotally confirmed my thought process.
Lower radiator hose removed, I made some marks for where to cut, as well as some alignment marks for reassembling the hose when I was putting it all back together.
I figured the best tool I had to get the straightest cut was the little band saw. It made super quick work of the radiator hose.

This started to look like it might actually work.
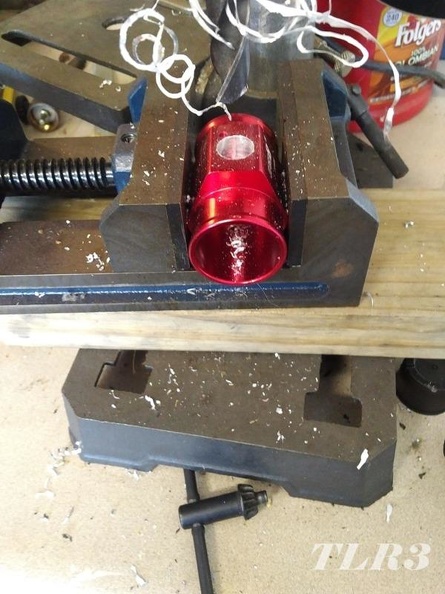
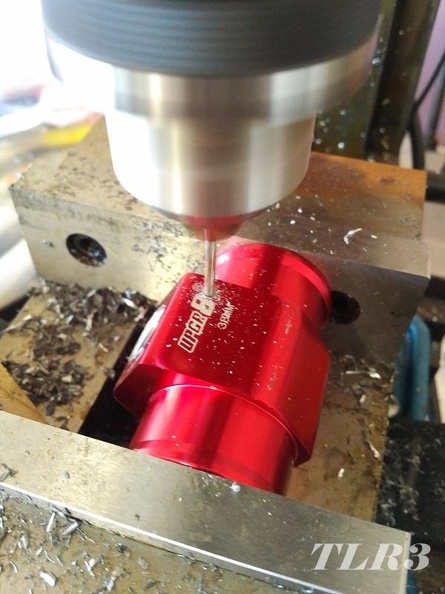
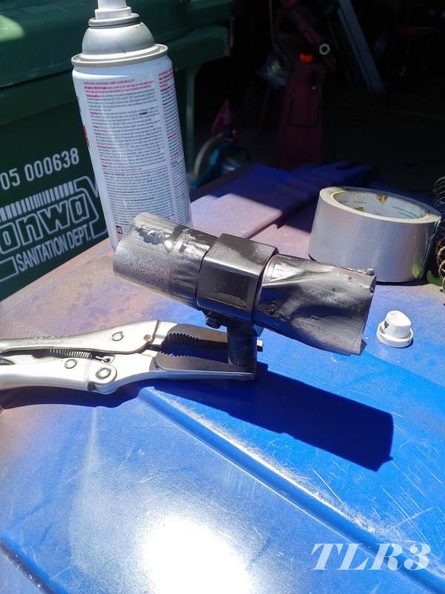
Then it was time to start modifying the adapter. The chart I have says a 3/8" NPT tap needs a 9/16" hole, so chucked up the 9/16" drill bit. Since this was such a super critical operation, but the adapter in my drill vise on my bench top drill's table was too tall for my only 9/16" drill bit, and I would have had to remove the vise from my mini mill for it to fit in it, requiring me to retram the vise later, I decided instead to just swing the bench top drill's table out of the way, and found the straightest piece of scrap 2x4 I had, to set between my drill vise and my drill pedestal's base. Hold vise with one hand, operate drill with the other. ![]()
With the port drilled and tapped for my 3/8" sensor, I had another issue. My thermal switch's base was too wide to allow access to the original ground terminal hole.
So I made a new ground terminal to the side. First I drilled a pilot hole.
Then I ran a self tapping screw in the pilot hole. There, it had a new relocated grounding terminal. After the self tapping screw was in, I removed it and cut the drilling portion off of the tip, so it wouldn't protrude into the coolant passage.
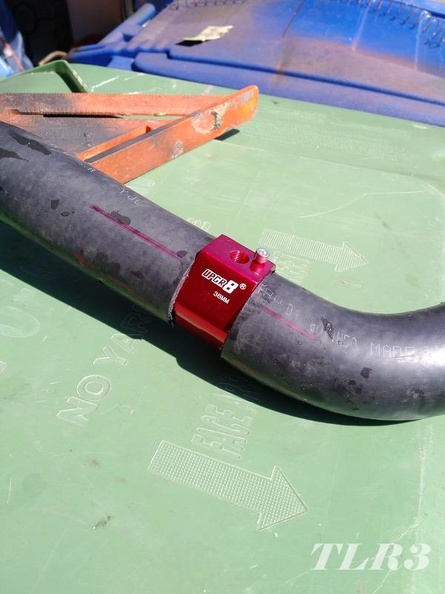
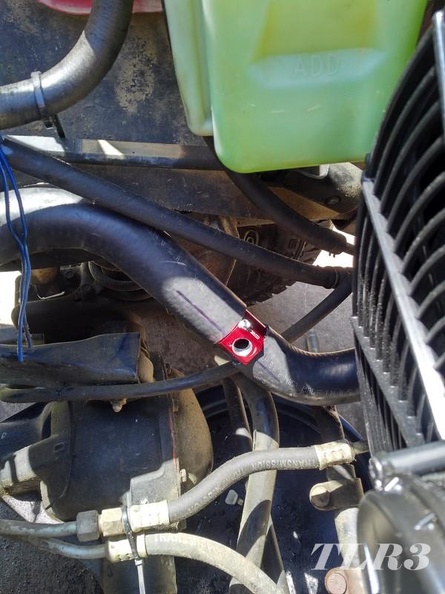
Then I test fit it, to get an idea of how I wanted to clock it in the hose, and how long the ground wire needed to be.
Since I didn't want it to be red, I taped off the nipple ends, scuffed it with some sand paper, and primed it.
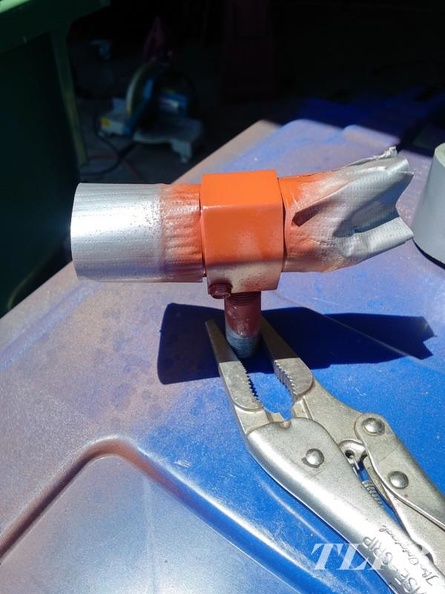
Then painted it black.
Finally I put a little RTV on the threads, making sure not to overdo it and insulate the sensor or the ground wire from the adapter, threaded the switch in snug, and screwed the ground wire on.
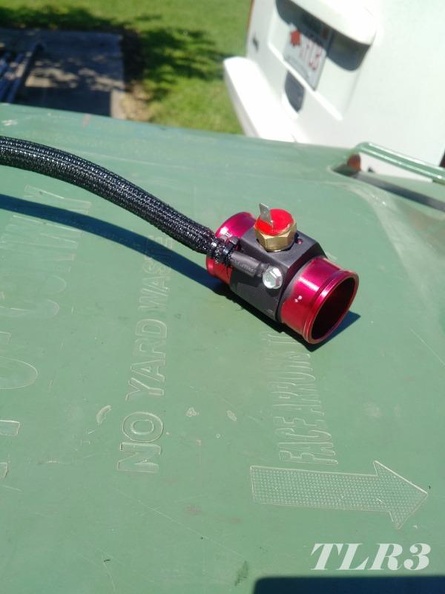
After all that work, to make the cheap adapter work, I probably should have just spent the $50 on the Flex-a-Lite or whatever adapter that was ready made to the specs I needed. Story of my life, spend hours tinkering on something cheap to make it do what I want instead of buying the more expensive thing that does what I want in the first place. If I ever put a value on my time, I'll probably make myself ill. ![]()
The coolant sensor adapter thing came with a pair of hose clamps, but they were garbage. I knew not to expect much from them after reading the reviews, they were right, junk. I picked up some heavier duty stainless hose clamps (worm gear clamps) from Home Depot, but when installed they just wouldn't seal good enough. I had a constant, drip, drip, drip, from the high side of the adapter.
Muffin's radiator hose was a little bigger than the 38mm nipples on the adapter, it wasn't as tight of a fit as I would have probably liked, but it was snug enough it wouldn't just fall out on its own. The radiator hose isn't designed to have anything clamped in the middle of it either, so it doesn't have as consistent of a diameter where I cut it as it does on the ends.
I honestly considered, slathering some RTV on the nipples, putting it back together and calling it a day. Before giving in to my sometimes redneck tendencies, I decided to do a little more research on hose clamps, and see if there was a better solution, that's when I discovered "constant tension hose clamps." Constant tension hose clamps are kind of like a cross between the worm gear hose clamp we all know, and the T clamps all you turbo folks use to keep your silicone hoses in place.
Constant tension hose clamps have a Belleville spring that automatically increases and decreases the clamp's diameter with temperature changes, sounds ideal for a radiator hose. Plus they have an extended tail on the band, which acts as a liner to protect soft hose and tube, from being cut or poking through the slots.
I ordered a pair in stainless, the size I need, from my go-to fastener, and odd-ball hardware source, McMaster-Carr.
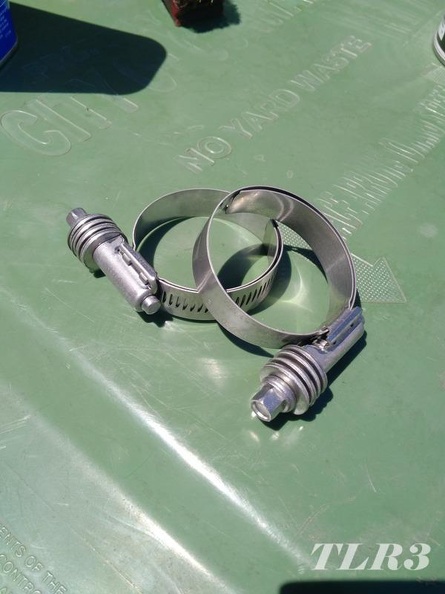
The new constant tension hose clamps worked great, no drips after install, and have kept all liquids in place through several heat cycles. While about 3-4X the cost of the "better" stainless regular old hose clamps I bought from Home Depot, they're well worth the cost, even for a tight ass like me. I wish I knew these things existed long ago.
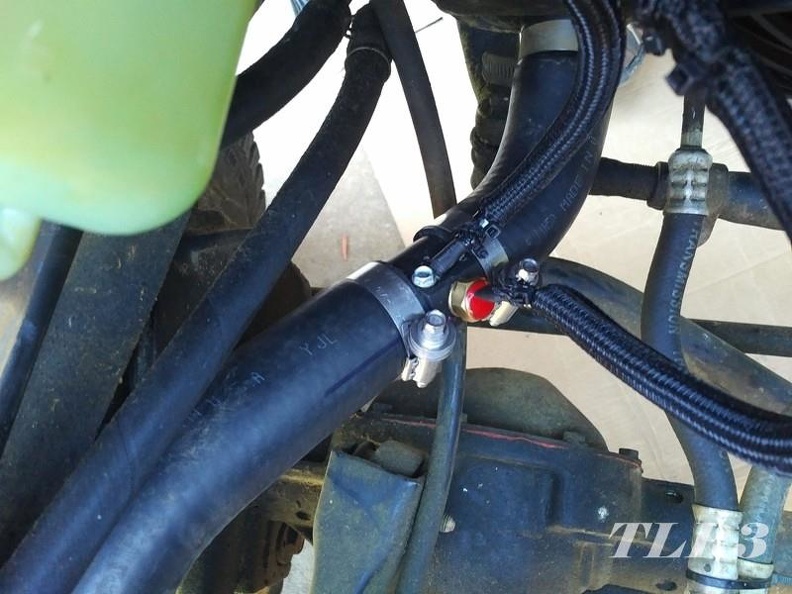
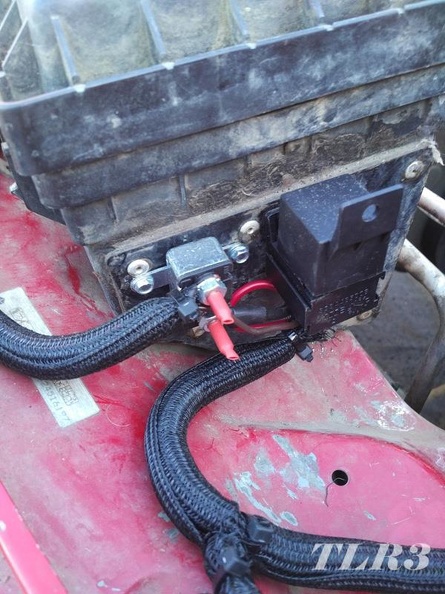
I attached the relay and circuit breaker to the front of Muffin's air filter box. The relay switched power wire runs direct from the battery, through the circuit breaker and relay to the fan. I tapped into a vacant, key-on hot relay terminal in Muffin's under hood fuse box (same one I used for the old electric fan) to energize the relay. When the coolant temperature on the cold side of the radiator hits 200° F the temperature switch closes, grounds the relay circuit and the relay energizes the fan. When the fan cools the coolant to 185° F the temperature switch opens, and turns the whole thing off.
So, thanks to some stupid dirt dobbers (daubers) Muffin's got a whole new electric fan, shroud, and means to control it.
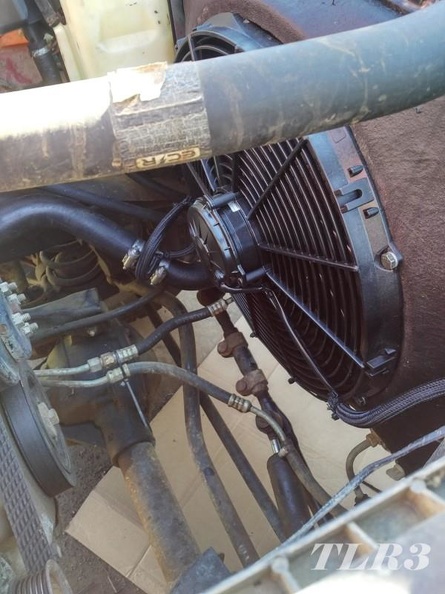
I love it when a plan comes together. ![]()

If you're cheap like me, you can do the same thing with longitudinal engine SAAB parts. The hose adapter is in the upper hose, and it houses a switch that's all wrong - it cuts power to the A/C clutch at 225F.
However, the hose adapter uses the same threads as the fan control switch in the radiator, so it swaps right in to the hose adapter.
When I did the e-fan swap into my Volvo 142, that's what I used. Cost <$5.
Turns out during nearly a year of down time, Muffin's battery decided to give up. I thought I was fighting a parasitic draw, until the same allegedly, fully charged, battery still managed to die within a week, with the battery cables disconnected.
I mean that cheap Autozone Duralast was only 10-11 years old, spent ~4 years derelict in a barn, connected to Muffin the whole time, and had been ran completely dead numerous times in its life. Stuff just doesn't last anymore. ![]()
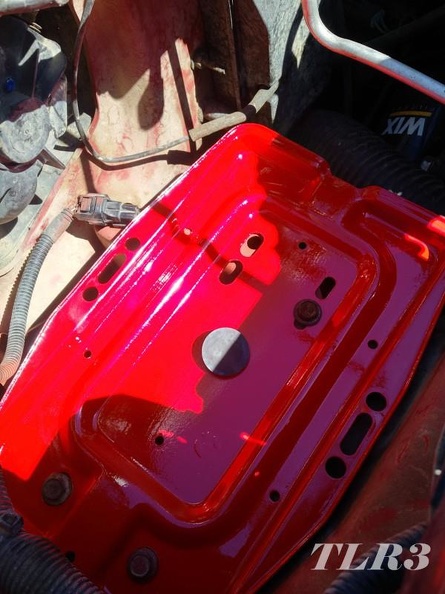
When I removed the dead battery, I discovered the battery tray wasn't in the greatest shape. Not much paint to speak of left on top, and some rust had developed, worse than surface rust, but nothing you could poke a hole through.
So I pulled the battery tray, cleaned it up, primed, and painted it, so it's red again. It's not really Mopar "Flame Red" like Muffin, it's Tractor Supply rattle can, tractor enamel, red instead. The same paint that I used on the push mower way back on page 2 of this thread. It's up against the firewall, and fender, with a battery sitting on top of it, no one can see it, so I used what I had.
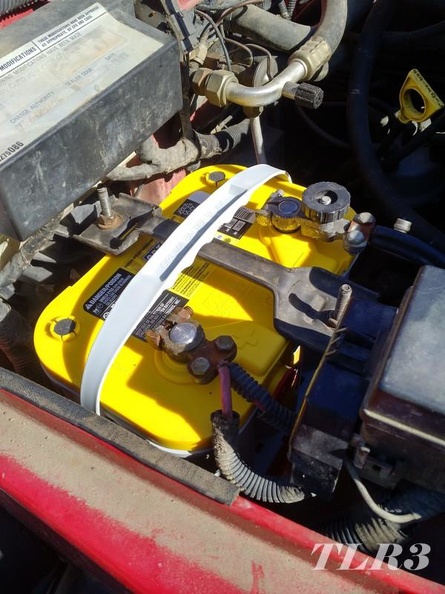
Since there's talks of winches in our future, so far it's just been talk, but still, I went against my nature and shelled out some cash for a Yellow Top Optima. Crazy how quick that little 2.5l cranks over now. ![]()
I shopped around a lot, and wound up buying Muffin's Optima the same place I got Moby's, Advance Auto Parts. They seem to pretty consistently have a 20% coupon code on the weekends, at least when I've been shopping. The coupon caps at $50 off, and you hit the cap with an Optima Yellow Top. Buy online, pick up in store, and they'll credit the $10 core back to your credit card if you bring your old battery in. I looked at all the usual places, even having to pay tax at Advance, I couldn't find a better deal, and I've got Amazon Prime too.
That pretty well has Muffin, up-to-date.
If Muffin and I do something else noteworthy, I'll try and document it. There's several little projects I should probably tackle on Muffin, but there's a pretty long backlog of other stuff in the queue that are higher priority. Getting Muffin driveable-ish again was one of the first of the long list to get checked off.

Jumped to page six on this and now here. Enjoyed the read and will go back and fill in the gaps. I know it's never over till it's over, but look at the LHU bullet in loosecannon's emod 'Pink Panther'.....![]()
In reply to 759NRNG:
Don't think it hasn't crossed my mind. The LNF was already on my radar, I've been following the Ecotec thread on Pirate since the beginning. Loosecannon's thread here brought the LHU to my attention.
I have two Olds 215's sitting around for the MGB-GT, but when Loose embraced the LHU.....hmmmm ![]()
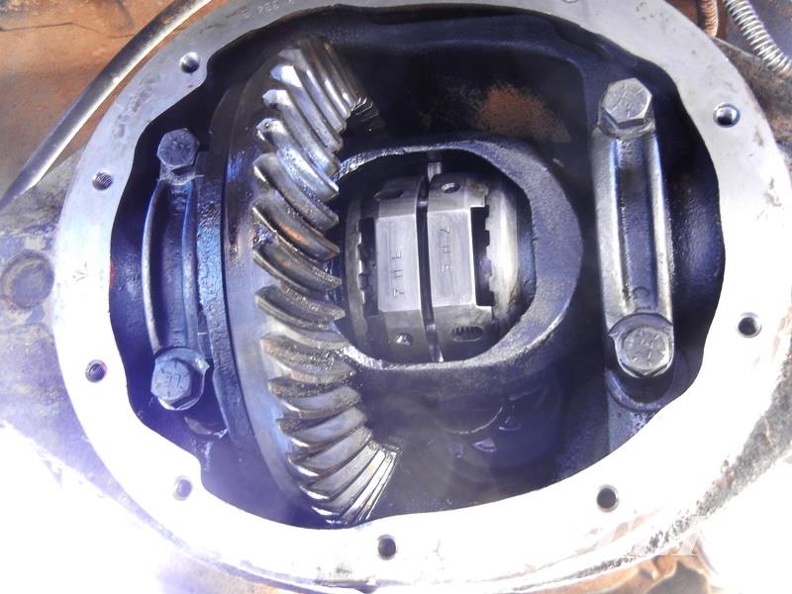
Muffin got a little attention this past week. Oil and filter change, new differential fluid in both ends, replaced the IAC valve, and even put new wiper blades on it. ![]() The IAC valve didn't fix the high idle issue, or the stumble on cold start, it still does the same thing, no codes, and I haven't found any vacuum leaks yet, so I've just been living with a 1200-1300 RPM idle.
The IAC valve didn't fix the high idle issue, or the stumble on cold start, it still does the same thing, no codes, and I haven't found any vacuum leaks yet, so I've just been living with a 1200-1300 RPM idle.
While I had the rear diff cover off, I took a look at the Lock Right, it hasn't seen the light of day in over a decade. It still looks good, and functions great. I took a picture, because, why not.
Muffin got some attention because some friends talked me into going to Rocktoberfest, I used to make an annual trip to the event, I made something like 9 years straight, then moved to Ohio for a few years, and even though we've been back close enough to make the event for 4 years now, this was the first time I was able to make it happen.
Muffin, performed admirably, I drove her the ~2 hours each way, mostly interstate, in the slow lane and cussing hills.
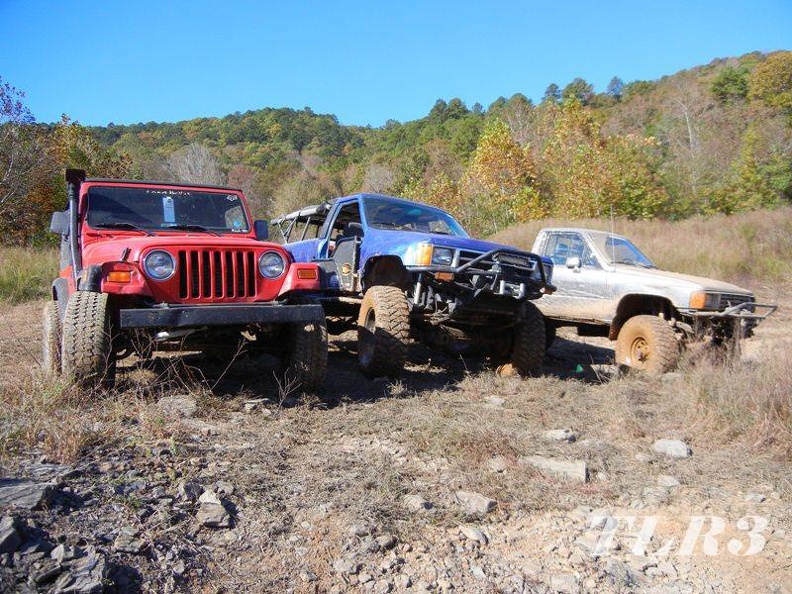
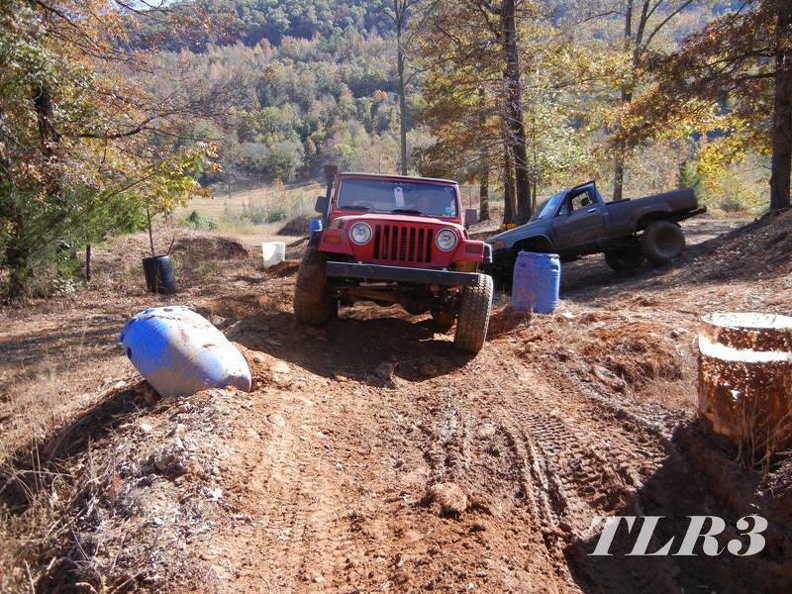
I camped and wheeled with some friends, and a friend of a friend, that are Toyota fanboys. They both had much more capable rigs than Muffin, but with the tires aired down, front sway bar disconnected, 4 low, and a rear locker Muffin makes a surprisingly capable "Barbie Jeep" on mild trails and rock climbs. Even so I avoided the sketchy stuff, I still had to drive the thing home after all. ![]()
We watched some of the competition while there, ran some the same obstacles on our own before or after the competions, but none of us were actually in the competition. We decided since the crowds around the completion events were so large, there must not be many folks on the trails, so we ditched the competition and were rewarded by having the trails mostly to ourselves.
We were a motley crew, two 'yodas and a Jeep.
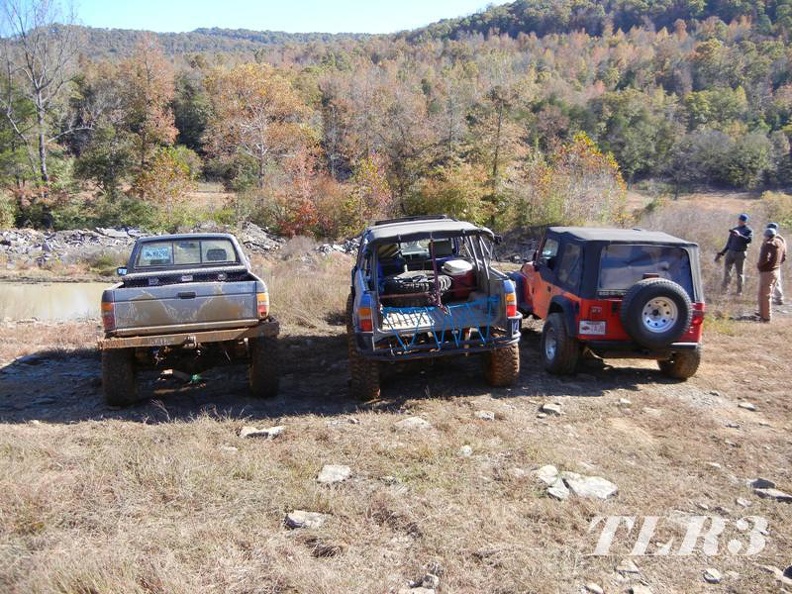
Since I was driving Muffin, I didn't manage to get too many pictures of her, but thankfully my buddy Brian was riding shotgun, and snapped a few for me.
This was the "Trenches," one of the competition obstacles, I avoided the nastiest part of it, not because I didn't think Muffin couldn't handle it, but because I didn't want to get her covered in mud.
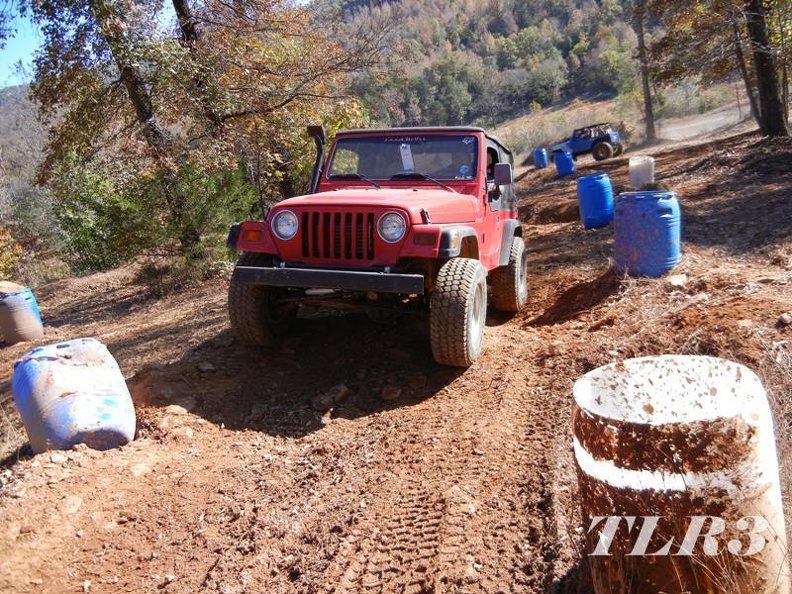
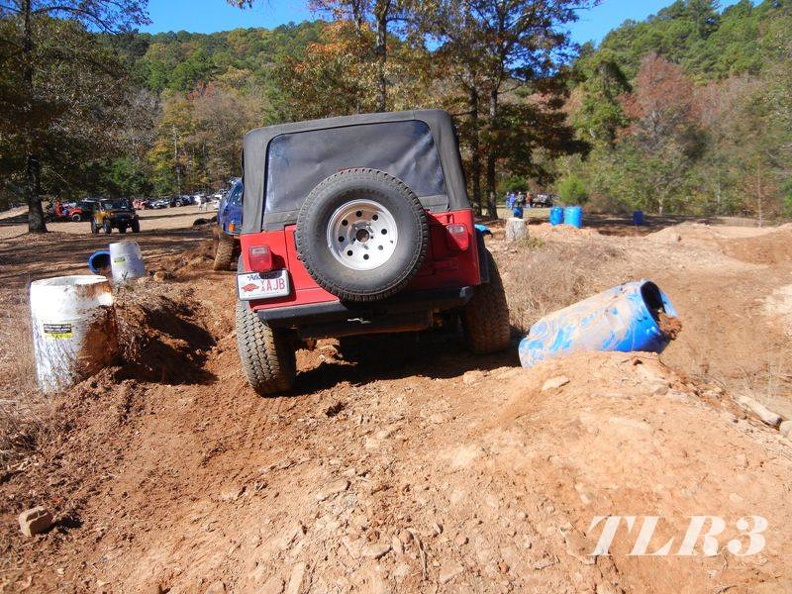
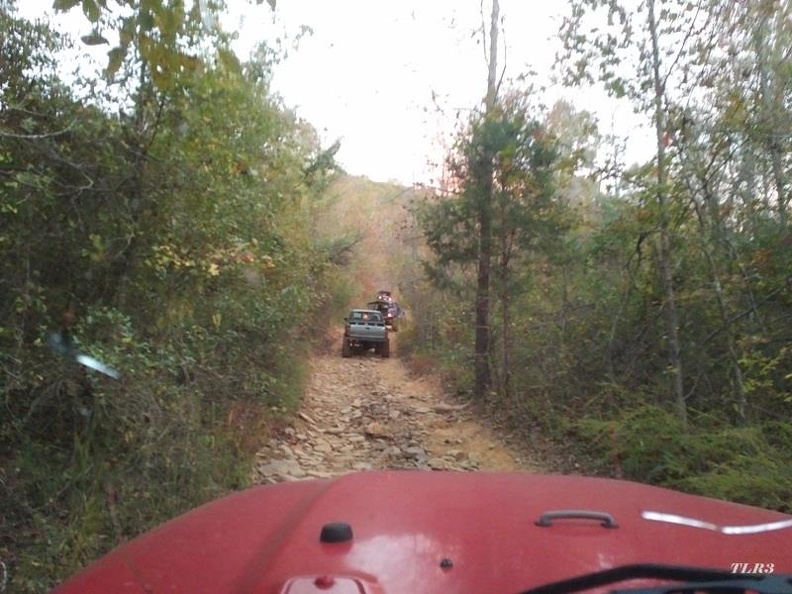
For the most part we avoided mud, and stuck to the rocks, mountain trails, and hill climbs. Pretty good view from the driver seat.
We had a great weekend, about froze my toes off Friday night, but the camp side coffee and breakfast burritos the next morning were almost worth it. I've officially got the "wheeling bug" again, and am bad jonesing to see to some long deferred maintenance and upgrades on Muffin.
If you've followed along with Muffin's journey, you'll know that I've been battling those evil little winged Hymenoptera.
I hadn't really driven Muffin any this Summer until about a month ago. SWMBO and I took the top off and headed out to my folks' farm. It was cool on our return home that night, so I turned the heater on. When the blower motor started spinning, it made a terrible noise, and rattled the dash as though I'd dropped a handful of quarters into a magic fingers bed. SWMBO found it comical, I was concerned I may need a new blower motor.
While prepping Muffin for Rocktoberfest, I knew I'd need heat, so I did some investigating, what I found was a little surprising, however it wasn't dirt dobbers this time, instead one of their relatives were the trouble makers.
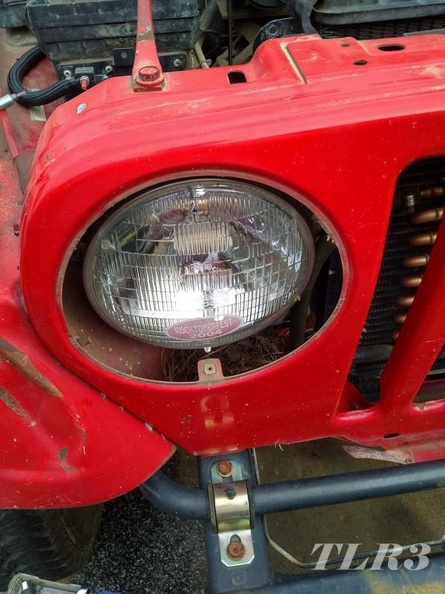
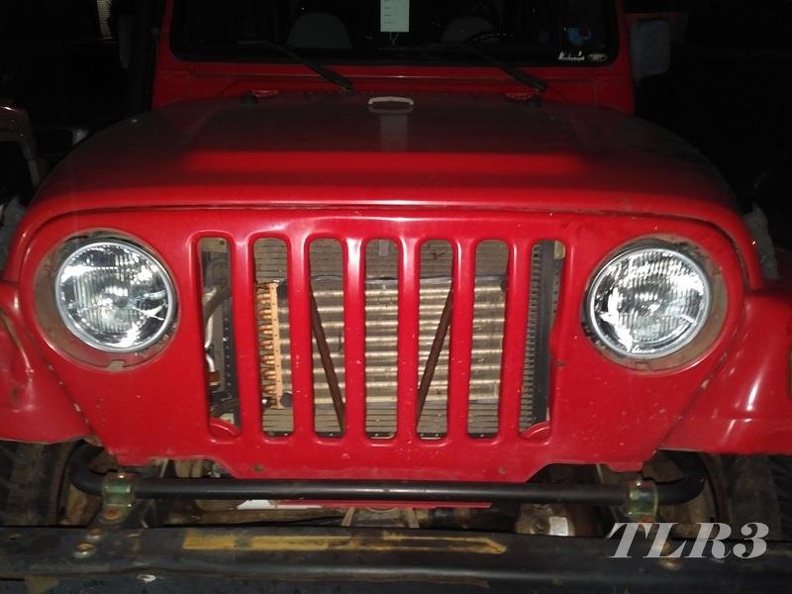
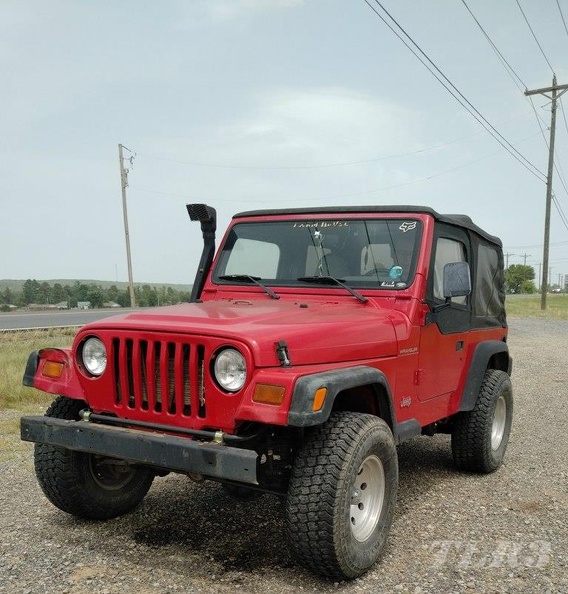
While doing some night wheeling last weekend I realized just how terrible Muffin's headlights are. I mean I knew they were bad, but in the middle of the woods, attempting to navigate up a dry creek bed, at night, I couldn't see squat. I guess the majority of the night time driving I've done in Muffin in recent memory, was all assisted by the city street lights, so I was oblivious to just how bad the headlights were. Muffin's headlights put off a dim orange glow, reminiscent to a carbide lamp. Not good.
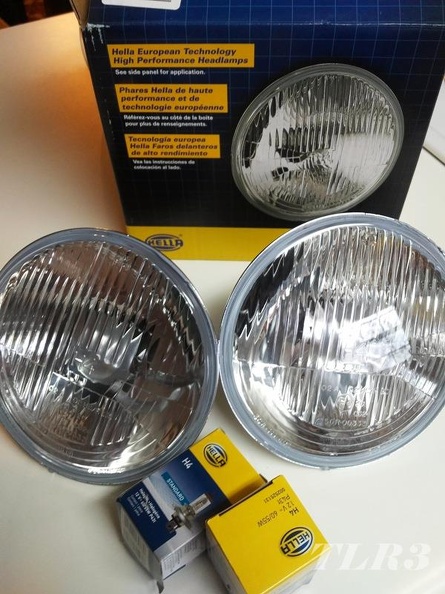
So I decided to do something about it. Jeep TJs were made from 1997 to 2006, but came with the best sealed beam headlight technology that the 1970s had to offer. ![]() Thumb through any Quadratec, 4WheelParts, or similar catalog, and you'll find several options to upgrade and replace the OE sealed beam bulbs, LEDs of all varieties, if you want your Jeep to match your BMW you can even get "angel eyes," and housings for replaceable halogens. I'd had one such replaceable H4 bulb and housing combo in my Amazon wishlist for a long time. Since the time fo new lights was nigh, I finally bit the bullet, and moved the lights from my wishlist to my shopping cart. Added bonus, Amazon just happened to have a 10% coupon for them when I bought them.
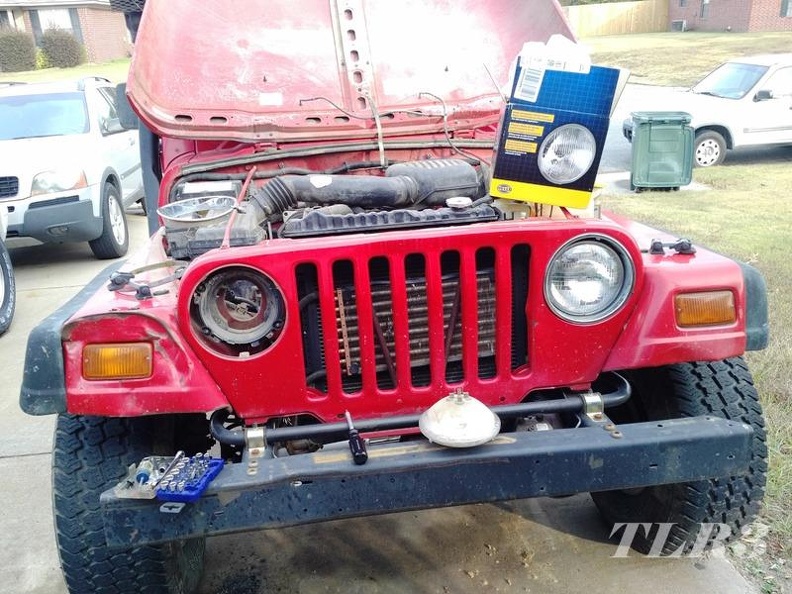
Thumb through any Quadratec, 4WheelParts, or similar catalog, and you'll find several options to upgrade and replace the OE sealed beam bulbs, LEDs of all varieties, if you want your Jeep to match your BMW you can even get "angel eyes," and housings for replaceable halogens. I'd had one such replaceable H4 bulb and housing combo in my Amazon wishlist for a long time. Since the time fo new lights was nigh, I finally bit the bullet, and moved the lights from my wishlist to my shopping cart. Added bonus, Amazon just happened to have a 10% coupon for them when I bought them. ![]()
I purchased the HELLA 002395801 Vision Plus 165mm 12V High/Low Beam Halogen Conversion kit, which is a pair of housings, a pair of light bulbs, and a pair of rubber seals for the rear of the bulb housing.
Here it is in all its glory.
Removing the old bulbs is pretty straight forward, 3 little torx screws hold the trim bezel in place, and 4 more little torx screws hold the headlight retainer ring in place. Say sayonara to my '04 Rocktoberfest pass sticker. ![]()
Muffin's winking at ya.
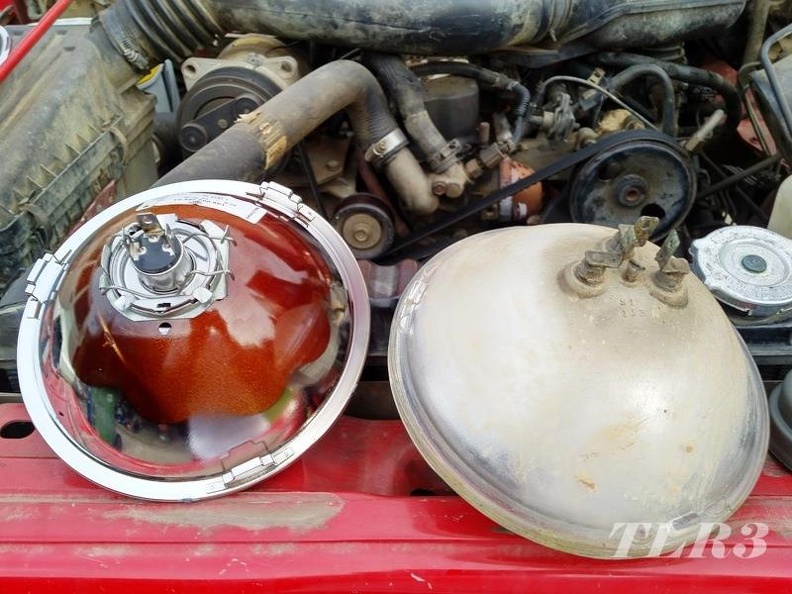
Old vs. new, no changes to the wiring connection are needed. Muffin's headlight terminals plugged into the H4 bulbs just like the old sealed bulbs.
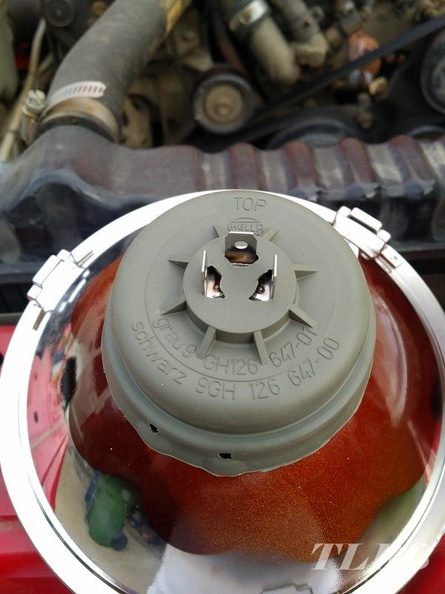
There's a rubber boot that goes over the back of the new bulb, I assume it's to make the housing a little more weather tight.
So I obviously did the passenger side first. I knew that Muffin was a little cockeyed, blatantly obvious when driving through the dusty camp ground, and seeing that the driver side light was shining WAY to the right. So I pulled the driver side bulb, and discovered this.
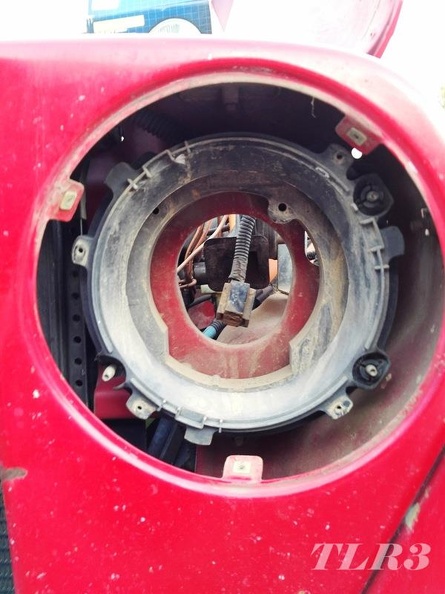
What, you can't see it? Fine I'll zoom in for you.
No wonder Muffin was cockeyed, only 2 of the 3 adjusters on the driver side light were doing anything.
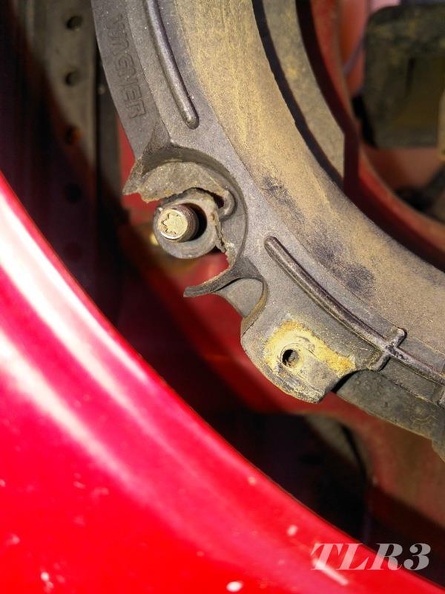
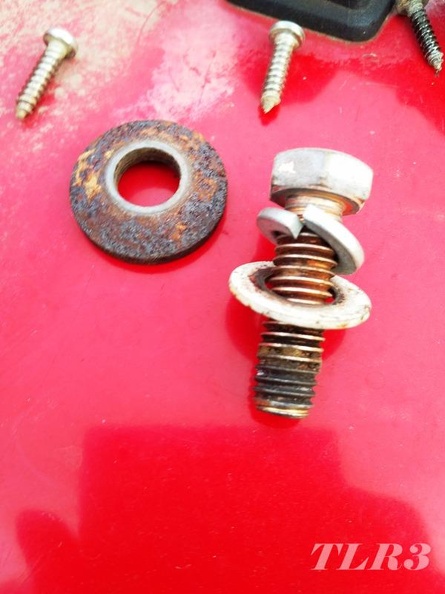
When I discovered the broken headlight bucket adjuster thingy, I instantly went to eBay in search of a replacement. There are a ton of new headlight adjusters listed as "for Jeep TJ," but they don't look anything like the ones on Muffin. There were a few used ones available, but the cheapest one was $50. That seemed like a silly price, I mean my fancy new lights weren't much more than that. Plus, if you haven't figured it out yet I'm kind of a tight ass. After examining the broken headlight bucket for a bit, I figured I could summon my inner redneck and apply some of my world class JB Weld skills to "fix" the busted adjuster. ![]()
I studied how the non-broken adjustment screws mounted to the housing, and got an idea. The good screws had a plastic shoulder washer that clips into the part that moves, and rides in that groove you see in the adjustment screw above. This plastic washer/clip thingamajigger fixes the two halves of the headlight bucket together, and the clip part has enough spring to it, to allow the movement needed to adjust bulb alignment. Clear as mud?
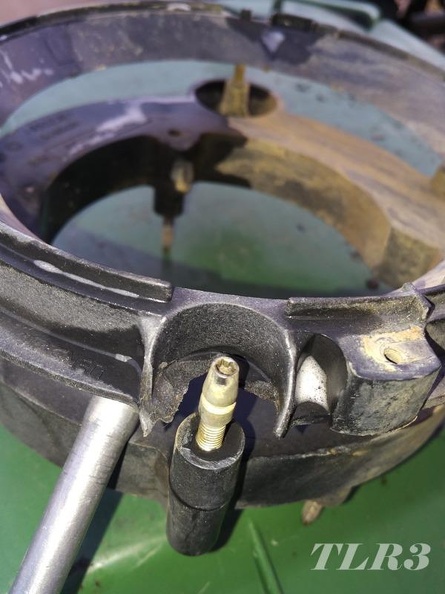
What I needed to do was fix the broken part of the adjuster to the adjustment screw in a way that would allow the adjustment screw to still turn, and be flexible enough to not bind up when aiming the lights.
So I pulled the adjustment screw out of the housing, hosed it down with lectin mold release, I'm really getting my mileage out of that stuff, and after the mold release was set up, I slathered a blob of RTV silicone around the grove of the adjustment screw. The idea was that the RTV would be flexible enough, but that groove would hold it in place, and the mold release would allow the screw to still spin inside of the RTV.

After the RTV set up, I put the adjustment screw back in the headlight bucket, and applied my seasoned JB Weld craft to attach the blob of RTV on the screw to the broken part of the headlight adjuster.
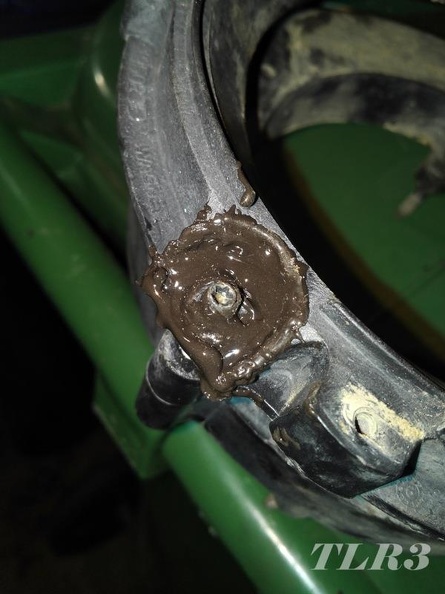
After the JB Weld hardened, I held my breath, crossed my fingers, and attempted to turn the adjustment screw... what do ya know, it worked! ![]() That mold release let the screw turn, and the RTV was flexible enough to allow adjustment. I figure it lived fine-ish so long with only 2 adjustment screws holding it in place, there shouldn't be much load on my redneck repair, it's not supporting much of the light, just pointing it in the right direction, so it should be fine. Right?
That mold release let the screw turn, and the RTV was flexible enough to allow adjustment. I figure it lived fine-ish so long with only 2 adjustment screws holding it in place, there shouldn't be much load on my redneck repair, it's not supporting much of the light, just pointing it in the right direction, so it should be fine. Right?
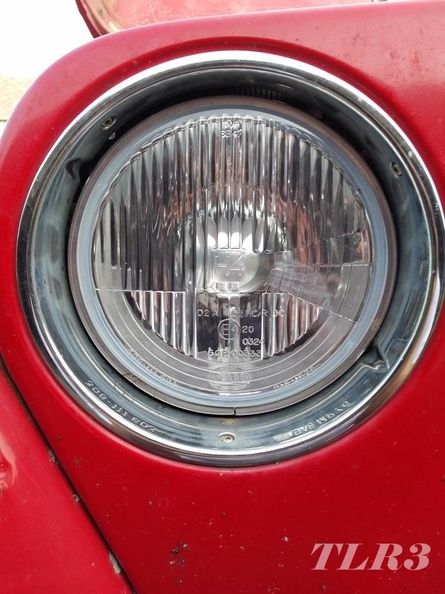
Muffin got a quick headlight alignment on the garage door. I still need to take it down the road, somewhere dark, and see how much better they are.
Gratuitous close up.
Bet you never knew someone could write so much about a broken headlight bucket. ![]()

Nice. I'm interested in your results with the lights, I have a pair of 7" round sealed beams I'd like to upgrade a bit, but don't want the look of the LED ones (or the pricetag...)

I upgraded to these on my Rabbit and was really impressed. Not HID or LED impressed but still impressed. I wanted it to stay period correct looking but not leaving me hurrying home to avoid being out in the dark in it.
Run_Away said:Nice. I'm interested in your results with the lights, I have a pair of 7" round sealed beams I'd like to upgrade a bit, but don't want the look of the LED ones (or the pricetag...)
I will report back. I too don't like the looks or price of the LEDs.
84FSP said:
I upgraded to these on my Rabbit and was really impressed. Not HID or LED impressed but still impressed. I wanted it to stay period correct looking but not leaving me hurrying home to avoid being out in the dark in it.
Good to hear, I could already tell a big difference while aiming them, they put out more light, and it's no longer orange. ![]()
While backing Muffin out of the driveway to turn it around to change the headlights I heard what sounded like an exhaust leak. If you'll recall way back 3 years ago, I replaced the exhaust/intake manifold gasket, replaced all the manifold bolts, and one missing stud. The thought of doing all that again was pretty annoying.
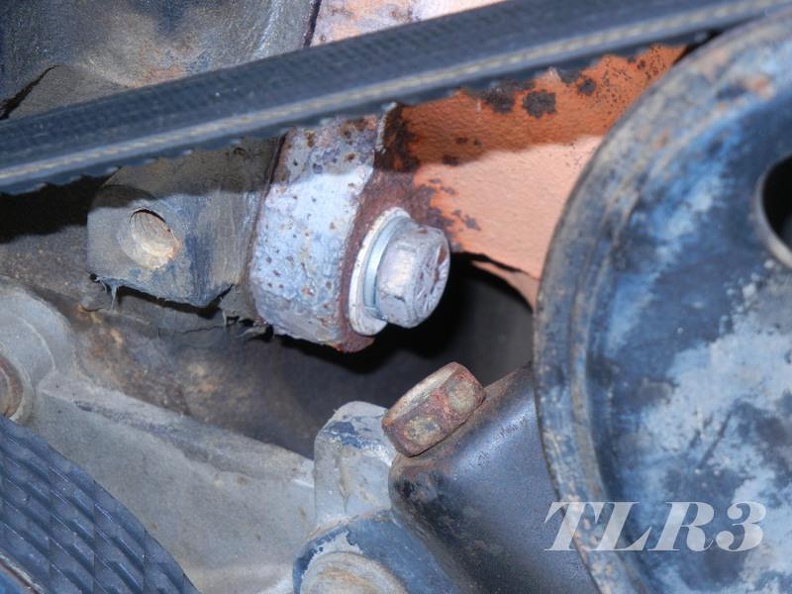
I popped the hood with the engine running, to see if I couldn't track down the source of the noise. I was hoping for the collector donut or something easy. Nope it was the manifold again. However, I lucked out, and it was the front most manifold bolt that had almost completely backed out. The bolt had to have backed out on the ~2 hour drive home from the wheeling trip, I never noticed the noise until I got home. Luckily I didn't have to drive any further than I did or I would have lost the bolt, there were literally 2, maybe 3 threads still holding the bolt in the head.
The joys of a non-crossflow head... ![]()
Real time footage of inspecting the bolt, it was barely threaded in.
I decided to forgo the OE cone washer this time, in favor of a traditional split ring lock washer.
I stuck it back in its home, the power steering pump is kind of in the way, so I didn't bother with the torque wrench this time. I stuck a box end wrench on it and gave it a few good grunts worth of "Lee-Lbs." and called it good. Started muffin back up and the leak was gone. ![]()
I believe I caught it soon enough that there wasn't much if any damage to the gasket. Time will tell I guess.
Muffin's not really done anything special, or hand anything of significance done to her in the ~7 months since the last post. She's still a weekend warrior, occasional run to the farm, errands around town, rig. I've only had the top of once this year, and that was just because I need to haul some 10' PVC pipe, and it was easier to strap it to the roll cage.
Since I put the Volvo 850 "out to pasture," literally, and Muffin is the only other rig we have with a trailer hitch, Muffin gets to be our sole tiny trailer toter.
Recently Muffin drug home a bunch of Volvo parts for another project.
https://grassrootsmotorsports.com/forum/grm/volvo-nerds-help-confirm-my-suspicions/140712/page1/
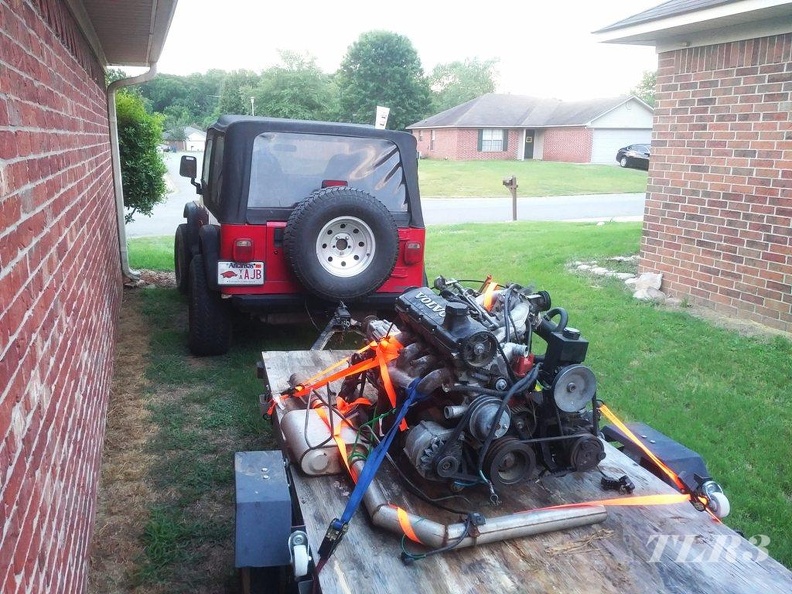
Muffin hauled the new parts out to the farm, where I've been storing the project car, and hoarding the rest of the parts. Muffin was doing alright, got about 7 miles from my destination, when I was greeted with a plume of smoke, that would have made any James Bond spy car jealous. The poor folks following behind me probably didn't have anything nice to say about me as they drove through my smoke screen. I thought I blew a tire at first, I mean these are the original 5+ year old, 12", Chinese "may pops" that came with the HF trailer when I bought it. As that was going through my mind, and I was checking my mirrors, to get a better look at the tires, the volt meter went to zero, and "check gauges" light came on and beeped at me. Then I thought, the alternator must have seized, but that didn't make sense, that was a heck of a lot of smoke for a belt.
I finally got to a spot where I could safely pull off the road, cut the engine off, and got out to investigate. I opened the hood, and everything is coated with oil. No wonder the alternator wasn't charging, the belt was fully lubricated. I thought the worst, but couldn't initially see where the oil was coming from. I pulled the engine oil dip stick and the level was fine. I pulled the trans stick, and couldn't really see anything. Now we're getting somewhere. I ran my finger through the oil that was covering everything, sure enough, it was red. I've coated the entire engine bay and all under the Jeep with ATF.
Since I was so close to the farm, I called dad, and he came to the rescue, unhitched the little trailer from the Jeep, and moved it to his truck. The initial plan was to grab his utility trailer, and attempt to pull Muffin to the farm on it. Turns out Muffin is too wide to fit between the rails on the sides of his trailer. We had a plan B though which included a random hose clamp dad scrounged around and found in among his various piles and parts bins.
The first attempt to drive Muffin out after patching up the hose, was unsuccessful, she'd lost too much ATF and couldn't make the incline to get back onto the road. A quick trip into the nearest little town netted me 2 quarts of generic grocery store, yes I said grocery, ATF. Great thing about the rural, podunk, local grocery store chain, with a gas station, they also have a little section of automotive fluids near the cash register on the gas station end of the store.
Muffin was mobile again, but a fire hazard, being coated with ATF, so the next stop was at the self-service car wash for some serious engine bay, and underside degreasing.
Muffin is doing alright now, and the trip back home was uneventful. Replacing those transmission cooler lines are pretty high priority now, don't want to deal with that again. Especially if I'm further away from rescue.
Apologies to whoever's gravel circle drive this is, Muffin really marked her territory there.

Makes me cast a disparaging eye on the trans lines in my ZJ....
Another year, another Rocktoberfest!
Muffin performed admirably. Minor issues were the power steering reservoir breaking loose from its mount, the P/S pump was already pretty whiny, and the steering box leaks like a sieve, so I should maybe do something about that. I fought with the transmission frequently, it would occasionally decide it just didn't want to go, and several times, it took a lot of throttle input to get going, and when it did get going, it lurched forward. I don't know if I cooked it good back when it blew a cooling line, or if I was just low on fluid.
The book calls for 2.4 quarts, of ATF+4 but it took 4 quarts to get to full line on the stick, I do have a larger aftermarket cooler, so there's some extra capacity, but there's noway that's even a full quart. Maybe the torque converter ran out of juice too? After toping off the trans fluid, again, it started working better, but still slipped on me some. Another possible issue, is that when I was on the side of the road, after the blown hose incident, I just put some grocery store, generic, "universal," transmission fluid in it to get it home.
Was a fun weekend, camping and wheeling with friends. Mostly the same crew as last year, one less 'Yota, and one "new" ZJ in the mix.


Here's a little video of the Mighty Muffin in action, sure wish we could embed videos again, I get a "failed to fetch" error every time.
Also, I won a flippin' Yeti at the raffle!

So I mentioned attempting to buy a place and build a shop, WOW... almost 4 years ago, jeez time flies. I already mentioned that falling through. We've been not so patiently, more or less, just existing in our little slice of low rent, college town, subdivision, Hell for over 5 years now. ![]()
We've looked at so many houses, made some offers, had some counters, wore out our welcome with our realtor, but not had any success.
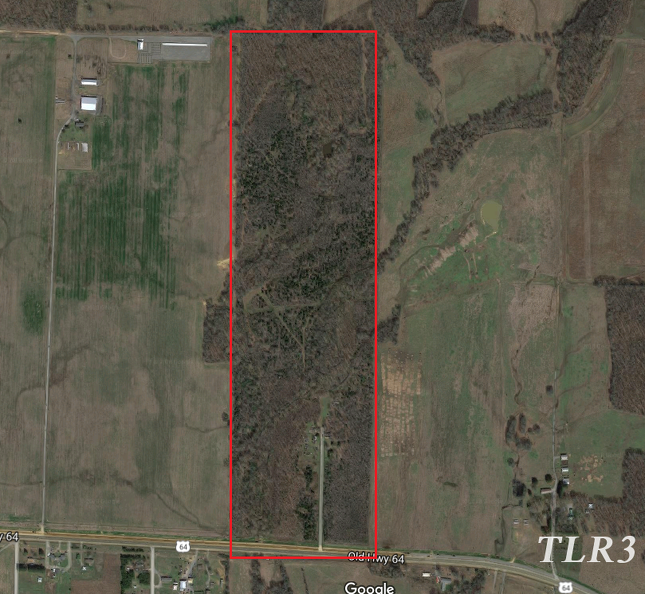
That is until now. Two weeks ago, Jewels and I closed on a nice little chunk of property near my hometown. Never thought I'd be moving back there. It's grown up, had wheat, soybeans, and a little 3 acre strawberry patch on it 30+ years ago, but hasn't been touched since then, it has a bunch of junk on it, some old camper trailers, and a small automobile grave yard on it, but it's ours! ![]() We're in debt up to our eyeballs.
We're in debt up to our eyeballs. ![]() Silver linings, and whatnot, that extra 4 years we had to save after that first house fell through, made this possible.
Silver linings, and whatnot, that extra 4 years we had to save after that first house fell through, made this possible.
All the grown up area in the red rectangle is ours, there's a good fence on 3 sides already thanks to the neighbors, 5 lane black top on the south boarder, our neighbors to all 4 sides are cows, or hay meadows. We've got a lot of trees, a creek, a pond, and a bunch of deer stands. It's deep enough, I can put a legitimate 1K yard rifle range on it. ![]()
The plan is, a BIG metal building, with a modest 2 bedroom, 1.5-2 bath, apartment in it. Live in the apartment for ~5 years, and then build SWMBO's dream home... I may stay in the apartment. ![]()
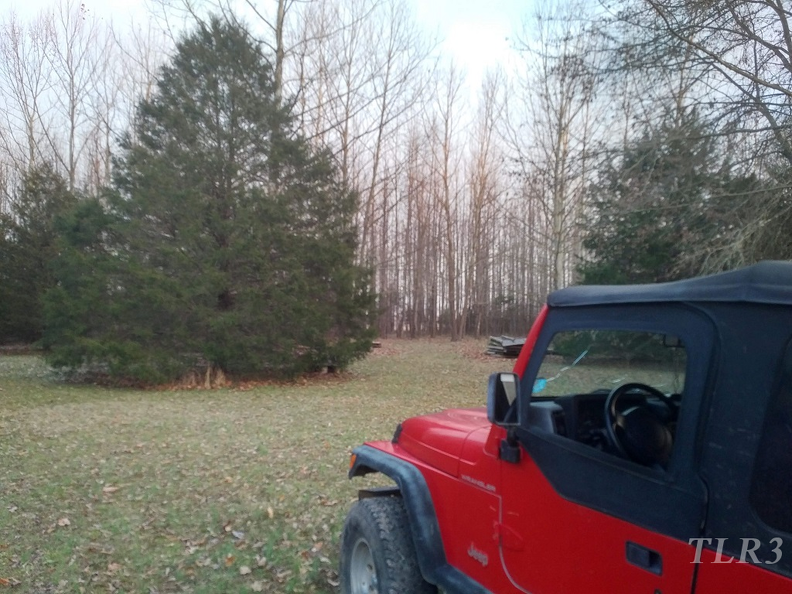
Here's Muffin checking out the new place this past weekend, while Jewels and I went out with a 100' tape and some orange flags to get an idea of where we want to put things and get a feel for their size.
I'm looking forward to a Jeep Grosh of my own!
So, pics of the automotive graveyard on the new property?

That's a legitimate piece of earth. I look forward to seeing the building come together as I'm planning similar silliness in the next decade.
In reply to Dusterbd13-michael :
2 Buses, a few Datsun 720, a 2 Door Cherokee, a few random other things, but most are '70s-'80s GM 1/2 ton trucks in various stages of disrepair.

None of them are mine, their owner is going to be getting rid of them.
mazdeuce - Seth said:That's a legitimate piece of earth. I look forward to seeing the building come together as I'm planning similar silliness in the next decade.
I'm going to be hitting the "easy button" on this one, and having the building built. I've got the knowledge, skills, and ability, to do a lot of it myself, but what I don't have is time, or an overly patient partner. Our goal is to be in it by Christmas '19 (I just wrote that, it's gotta happen now ![]() ), so, as inspirational as you're one-man-construction crew was on the OG Grosh, I don't think I can realistically make that happen while staying employed, and SWMBO happy.
), so, as inspirational as you're one-man-construction crew was on the OG Grosh, I don't think I can realistically make that happen while staying employed, and SWMBO happy.
Muffin is getting some major-ish upgrades!
Here's a taste, an amuse-bouche if you will. ![]()
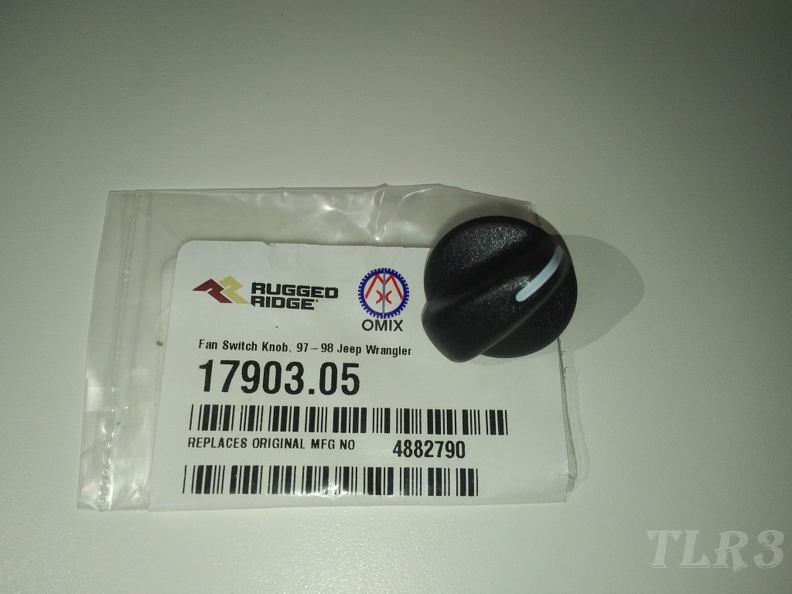
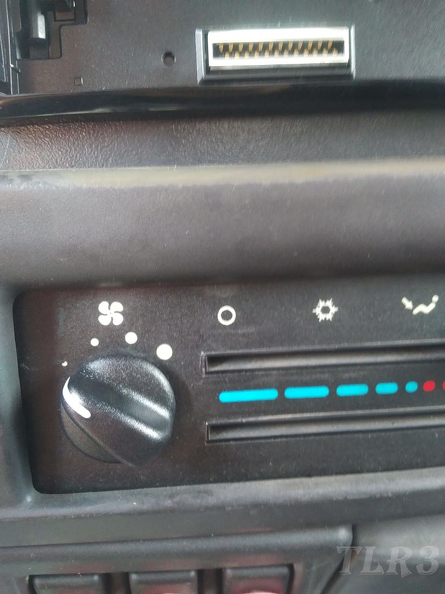
Muffin has a fan blower knob! Do you know how long Muffin has been missing the knob? Well, I don't either, but it's been a long time. If you'll notice the part description on the package, this is a 2 year only knob. Jeep soon ditched the single knob dual slider HVAC controls and went to a 3 knob HVAC control panel, and guess what, none of those knobs from the later panel fit the shaft of the early TJ panel. Smort, real smort...
More to come, hopefully soon-ish.
There's a pile of parts in the garage, and some on Muffin already even. I'm taking off work 3 days this week!!! Stay tuned!
You'll need to log in to post.


