1 2
CGLockRacer
CGLockRacer GRM+ Memberand HalfDork
10/14/12 7:16 p.m.

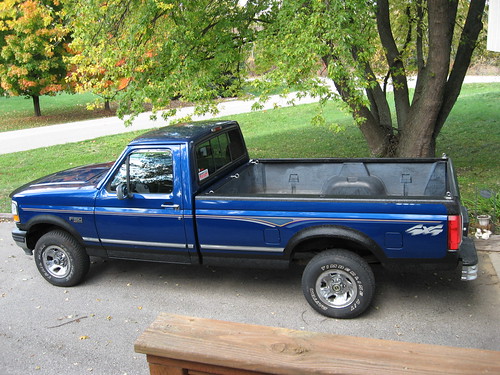
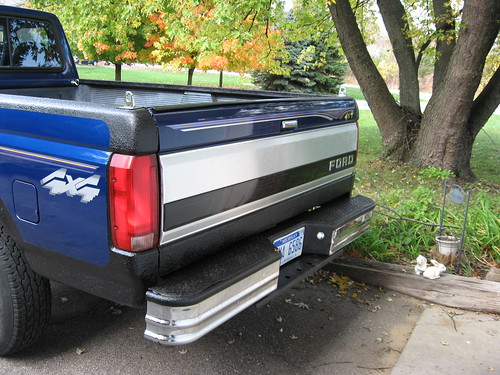
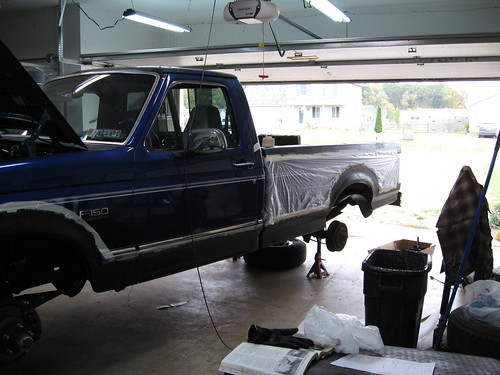
So about a month ago, I pulled the trigger on a nice looking '96 Ford F-150 4x4. Had a friend check it out and he gave it a somewhat clean bill of health. Got a ride to Harrisburg, PA, picked up the truck, and drove back to Ann Arbor the same day. Then I started learning its quirks.

86654-2-large

It had a few things I didn't expect, but for the most part, I was pleased.

I installed new steering linkages, tie rods, and ball joints.

IMG_0903 IMG_0905

That was when I found out the front u-joints were shot. And then I cracked the axle yoke while trying to get them out. Found another set locally though and was able to get back on track. While doing that, found that the front shaft u-joints were also shot.

I also had to replace the front fuel tank (no pictures of that). Getting the fuel lines off (after finding the proper tool, which was a challenge in intself) was a PITA. Rear tank seems OK for now.

I rebuilt the 4x4 shift lever. It was frozen and wouldn't compress to get into 4-low. The rubber boots were torn causing grit and water to get in. I fashioned some new boots out of a bicycle innertube - GRM style (pics later hopefully). I also changed the transmission and transfer case fluid and resealed the diffs.

The truck had very little rust, which is the main reason I bought it. I knew once the deferred maintenance was done, I would have a nice, reliable truck.

This weekend's task was to get rid of the rust and prevent future rust.

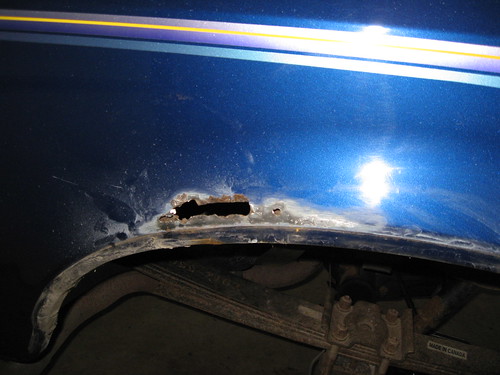
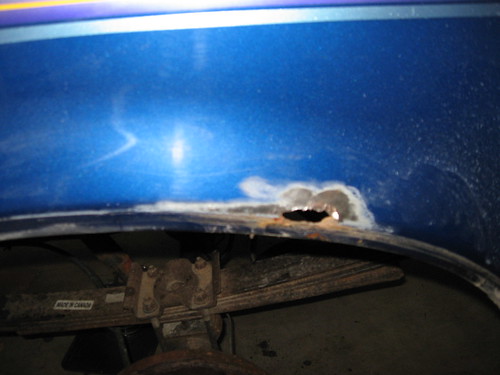
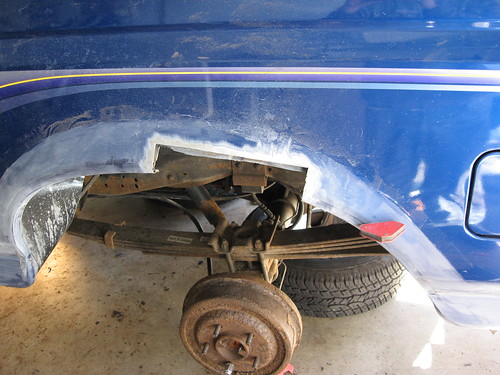
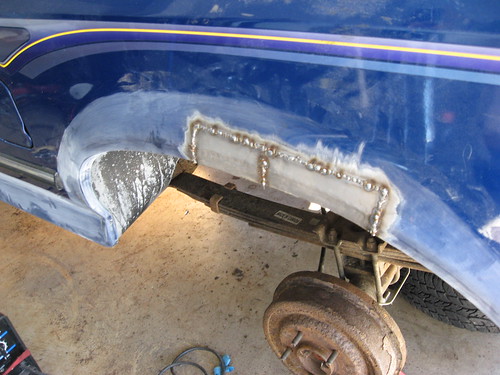
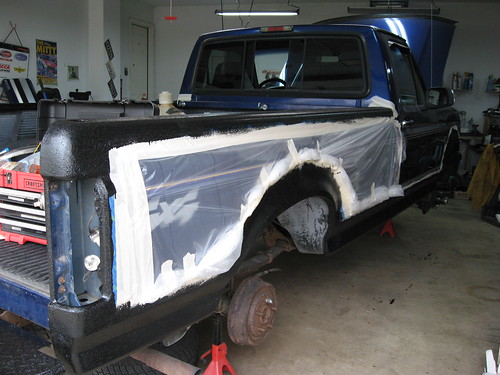
Passenger side rear fender: IMG_0910
IMG_0920
IMG_0922

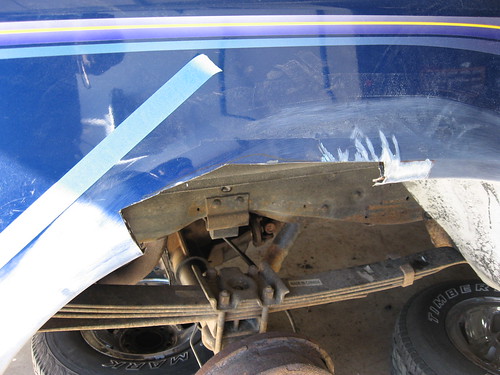
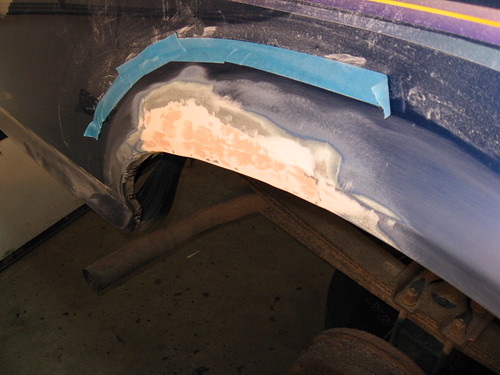
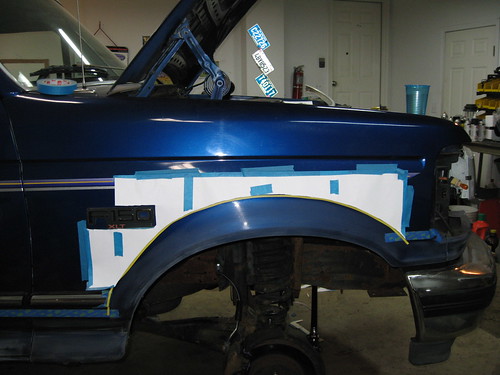
Driver's side rear fender: IMG_0909 IMG_0915 IMG_0917
IMG_0921 
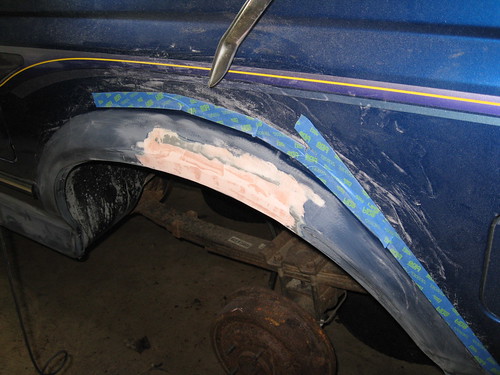
(not final bondo - it was much smoother)

I cut both the inner and outer fender rust out. I only patched the outer fender. I figured I will leave the inner fender open so I an hose it out occasionally to prevent future rust. Only issue I had with the welding was I used the wrong gauge, it was too thin. I also learned I need a lot more practice with sheet metal. However, not too much bondo was needed.

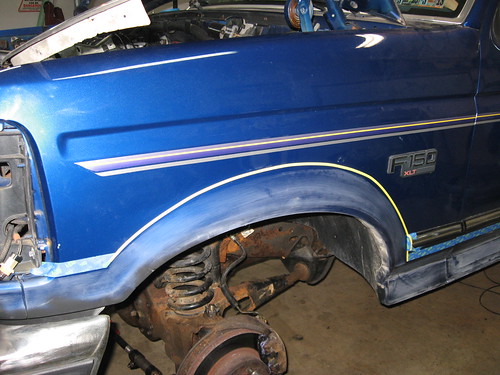
After the fenders were all patched, I masked and painted with bedliner paint. I went with Herculiner after reading the reviews here and others online.

First was masking.
Driver's side:
IMG_0924

Once I got the arc looking nice, I made a template for the passenger side.
IMG_0923

I did the same for the rear.
IMG_0926
IMG_0928

I painted the door jambs and lower inside of the door as well.

And this is where I left it this weekend.

IMG_0932
IMG_0933

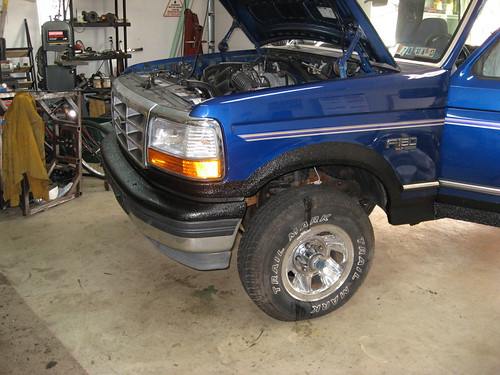
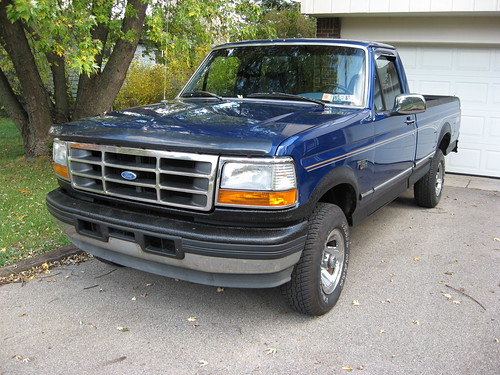
I also put in new headlights to replace the old dull and faded ones. Removed the roof visor (I used stainless steel sheet metal bolts and clear silicone for the time being to plug the holes).

The only thing keeping it from the road now is waiting for the paint to dry so I can close the doors and an aligning the front end! Then I have a bunch of little projects that aren't as time consuming (like new speakers, rewire the stereo, find a small rain leak, etc.). But the big stuff is finally done! Not sure if I'm going to put the brush guard back on or not. It's fairly rusty and would need paint.

JtspellS
JtspellS HalfDork
10/14/12 7:59 p.m.

I like the look of the liner as a 2 tone personally but how do you think it will hold up to sandblasting over time?

CGLockRacer
CGLockRacer GRM+ Memberand HalfDork
10/15/12 6:10 a.m.

In reply to JtspellS:

We'll see. It is a pretty common thing to do around here though and it is bedliner paint which is supposed to stand up to abuse. I will be putting some cheapo mudflaps on though. I removed the aluminum ones that were on it since I didn't like them.

anjaloveshervw
anjaloveshervw Reader
10/15/12 3:49 p.m.

Yeah, the bedliner looks really nice! I did the same thing to my little rabbit. Keep it up :)

fasted58
fasted58 UltraDork
10/15/12 5:22 p.m.

I never seen bedliner used on an outer body panel but it does look good.

nice work

dculberson
dculberson SuperDork
10/16/12 10:23 a.m.

Our work truck has had the outside of the tailgate lined for years upon years and it's held up great. Really protects it from the unloader!

CGLockRacer
CGLockRacer GRM+ Memberand Dork
10/21/12 12:46 p.m.

More pictures All major work completed. Now its onto small stuff, but nothing keeping it from DD service for now. I'm going to drive it this week to find any more bugs then go back to the RX-8 until weather starts to turn bad.

IMG_0936 IMG_0938 IMG_0937 IMG_0941 IMG_0940 IMG_0942 IMG_0943 IMG_0945

DoctorBlade
DoctorBlade SuperDork
10/21/12 1:07 p.m.

That's a nice truck.

VonSmallhausen
VonSmallhausen GRM+ Memberand Reader
10/21/12 1:13 p.m.

I was skeptical of the bedliner, but it looks very good like that. Looks like you have one nice truck there!

CGLockRacer
CGLockRacer GRM+ Memberand HalfDork
11/12/12 7:45 a.m.

New problem cropped up last night. I noticed the voltmeter was dropping last week before I parked it for the nice weather so I could drive the RX-8. So when I swapped vehicles last night, the voltage was at the same level. I figured I'd get it checked anyway. Went to Advance and they said the diode was open. I splurged for a new alternator (they didn't have parts in stock) and drove to my girlfriends, 30 miles away. I drove the last 3 miles with headlights so dim they might as well have been off. No gauges, turnsignals, and the truck was starting to miss. At least it wasn't raining.

Anyway, did a quick alternator swap and charged the battery overnight. On the way to work this morning (about 5 miles), the voltage was dropping again. I was smart enough to bring my charger with me so I can charge the battery while I'm at work at least.

Of note, my battery light never illuminated. I did recently change all the bulbs in the instrument cluster. I've read that if that light is not working, the battery will not charge. Anyone know if that is true? What else could be the problem? Thanks!

EDIT: FYI the BATT light does not illuminate at all, even though bulbs are good.

N Sperlo
N Sperlo PowerDork
11/12/12 8:01 a.m.

In reply to CGLockRacer:

Sounds a bit goofy for a bad bulb to not allow for a charge. When you power the truck and don't crank the engine over, I'll assume it stays unlit. I would fix the bulb (pain in the ass), but assume you have a wiring problem.

How did you get good weld in plates for the wheel wells?

Ranger50
Ranger50 UltraDork
11/12/12 8:15 a.m.

According to my alt/starter rebuild guy, he would love nothing more then to kick whoever at Ford for designing such a chitty charging system. That being said, if you bulb doesn't light up, but the bulb is good, you have a short to ground or a plain old open in you charging system for the idiot bulb. It doesn't cause a system wide failure, but it does suck off enough juice to drain batteries in nothing flat. Once the battery starts going flat, the alternator won't excite it self to charge. So, then you are double whammied with a dead battery and an alt that won't charge.

N Sperlo
N Sperlo PowerDork
11/12/12 8:18 a.m.

K, so i was right and wrong, but i have some rust to fix and yours looks good, so learn me.

CGLockRacer
CGLockRacer GRM+ Memberand HalfDork
11/12/12 8:25 a.m.

In reply to N Sperlo:

I got some sheet metal (I used too thin a gauge, I think 22 ga.) and use a file folder to make templates. Then just tack welded around until everything was welded up. I cut out both inner and outer fenders, but only patched the outer fender so more debris would not clog up between the two and I can hose it out. I also used a light on both sides of the panel to find pin holes before any bondo was spread. The bedliner hides a lot of imperfections. It just took some time and patience and I actually learned some stuff from watching Gearz and Trucks. If I were to do it again, I'd make sure the panel was of thicker metal and fit better before starting to weld.

EDIT: Oh, and for the fender contour line, I tacked in the top part of the sheet metal first, then used vice grips to bend the curved line in, then tacked the bottom in place. I also got rid of the chrome trim strips since they were a source of trapped dirt and were corroding themselves.

Double EDIT: To make sure I had the contour and curvature right and was somewhat flush with the sheetmetal on the sides of the patch, I used those chrome fender trim strips as templates.

CGLockRacer
CGLockRacer GRM+ Memberand HalfDork
11/12/12 8:27 a.m.

In reply to Ranger50:

Any ideas where to start? I'm going to make some new ground straps since I know mine are pretty corroded, but everything was working fine until I had the gauges out.

I am going to pull the cluster again to check everything there too.

N Sperlo
N Sperlo PowerDork
11/12/12 8:29 a.m.

In reply to CGLockRacer:

Sweet. Thanks. I have a sheet metal hookup, so this should be an easy project. I'll use bed-liner too, to prevent rust. Good work there. Gotta love the 9th Gen F-Series.

CGLockRacer
CGLockRacer GRM+ Memberand HalfDork
11/12/12 4:42 p.m.

Well, that was easy...hopefully. 2 loose connectors on the back of the instrument cluster. Apparently the charging circuit runs through the BATT light and the battery won't charge if the light is not functioning. ::fingers crossed:: I guess they unseated when reinstalling the cluster. BATT light works now. Charging the battery overnight. Wish me luck!

Ranger50
Ranger50 UltraDork
11/12/12 5:34 p.m.

In reply to CGLockRacer:

Yay.

CGLockRacer
CGLockRacer GRM+ Memberand HalfDork
11/13/12 6:53 a.m.

Woohoo! All fixed! Battery is 12+V engine off, 14+V engine running. I'm going to leave the new alternator in and keep the other as a spare, or rebuild and sell if I'm bored.

CGLockRacer
CGLockRacer GRM+ Memberand Dork
1/31/13 8:57 p.m.

Well, a small problem that I can't find has cropped up.

Reminder about the truck: 1996 F-150 4x4 5.0, 5spd, Manual transfer case, manual hubs

When I am making tight turns (i.e. into a parking spot), I get a knock/bind from the front end of my truck. This only happens when the front hubs are locked, but the truck is in 2WD. In 4WD this does not happen. If the hubs are unlocked, it does not happen.

It almost seems as if the hub is skipping teeth.

The truck has all new front end parts (outer u-joints, ball joints, front drive shaft u-joints).

I have jacked one side up at a time, turned the wheel all the way, and spun the wheel by hand and can't feel or hear anything.

Any suggestions?
Thanks!

CGLockRacer
CGLockRacer GRM+ Memberand Dork
2/1/13 10:17 a.m.

Post-new server bump. I hope to take a closer look at the issue this weekend. Thanks!

N Sperlo
N Sperlo UltimaDork
2/1/13 10:32 a.m.

You've been an inspiration. my Ranger is getting a 100% bedliner paint job.

The_Jed
The_Jed Dork
2/1/13 10:47 a.m.

Indeed. I am currently pondering slathering a bit of 'liner on the Burban.

CGLockRacer
CGLockRacer GRM+ Memberand Dork
2/26/13 7:31 a.m.

Found an issue this weekend. I installed a hitch to tow around my friend's SpecNeon this year and also did an unplanned mufflerectomay on my truck (suprisingly not any louder...the cats are the restriction). Anyway, while doing that stuff, I found that one of my leaf spring hangers had a rust hole. F#&k! Fortunately, I saw a truck in the junkyard that had new hangers, but I may just order them new since they're <$20 each.

Anyway, my issue is that I don't have access to a lift and I don't think my jack will go high enough. So I'm hoping someone can do a safety/reality check on my plan. I'm going to use my engine hoist to lift the rear of the truck up by the hitch until the springs are extended all the way and put jack stands under the axle, then somehow secure the truck so it doesn't fall on me. I might need to make some 4x4 post stands for that. Then I can remove the leaf spring shackles and move the springs out of the way so I can grind the factory rivets out of the spring hangers.

Anyone have any better ways of doing this? Thanks!

Ranger50
Ranger50 UberDork
2/26/13 8:10 a.m.

I would have everything loose with all the weight on everything and only then would I start to lift and hammer out the bolts. I would also replace the shackles now when you do the hangers or you will be down with a truck needing parts. The shackles rot out just as good as the hangers.

1 2

You'll need to log in to post.

Our Preferred Partners
b3U0I0kmSszPHpeSVgtAX8RQ0iMm6XqsxqXHLMKkX3ul2AZwwR9sph9SxtAVzZLa