1 2 3 ... 8
Rufledt
Rufledt UberDork
12/25/17 12:45 p.m.

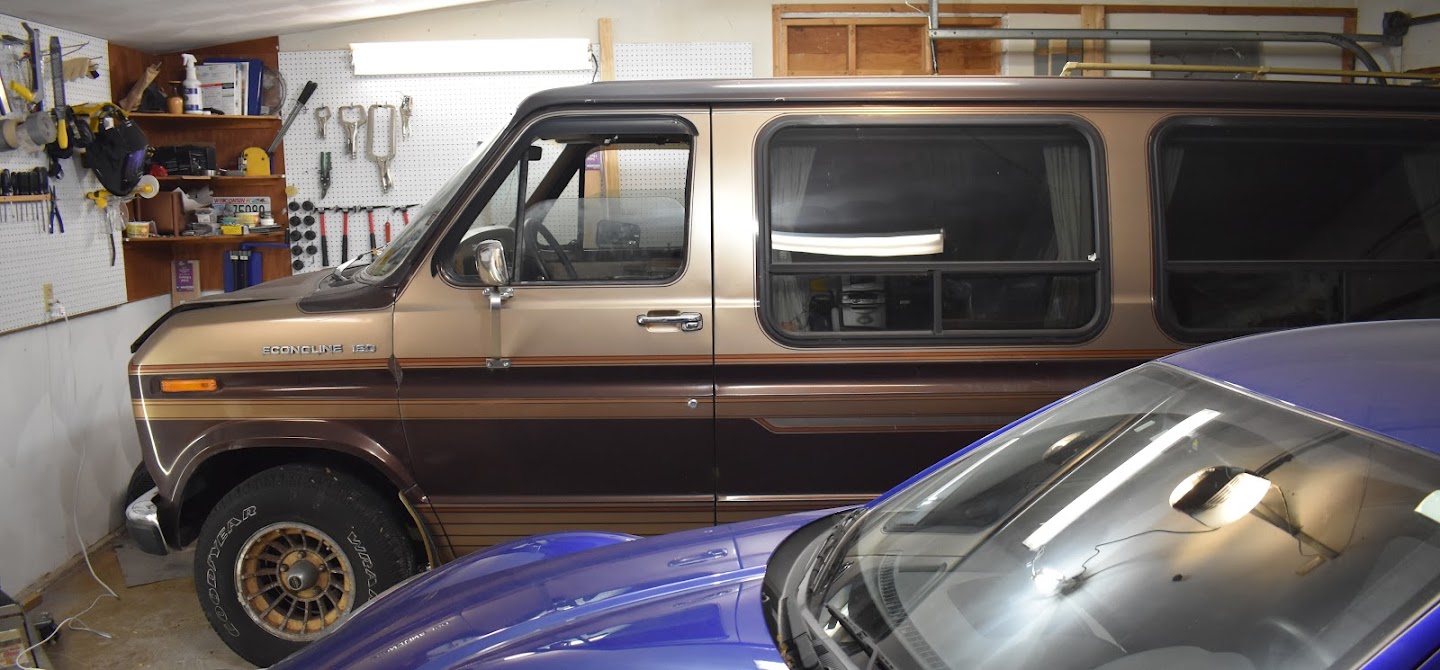
Here I am again.  I've started a 'project' thread on this years ago, it fizzled out.  What's different this time?  Well, now I have a garage to keep it in, I no longer need to use this van ever again, I have a welder, sheet metal tools, an adult job with adult pay, and i don't plan on moving for many many years.  With my jeep sheet metal project pretty much done except for paint (i'll update that thread at some point I promise), it's time to start tearing into cars.  Why this van?  I already own it.  It's free.  It could be a road trip/tow vehicle.  Sentimental attachment out the wazoo.  It's arguably my first car (that's complicated).  Also V8 noises.  Lots of V8 noises.  Basically it's worthless, parts are plentiful and cheap, and I'm not afraid to dive in and screw anything up, because it's a van. Who cares.  So this is my guinea pig project.  I want to do everything to it to practice for cars of the future, which means scope creep is going to be my friend. Anyway, here are some pics as it sat at the beginning of this project:

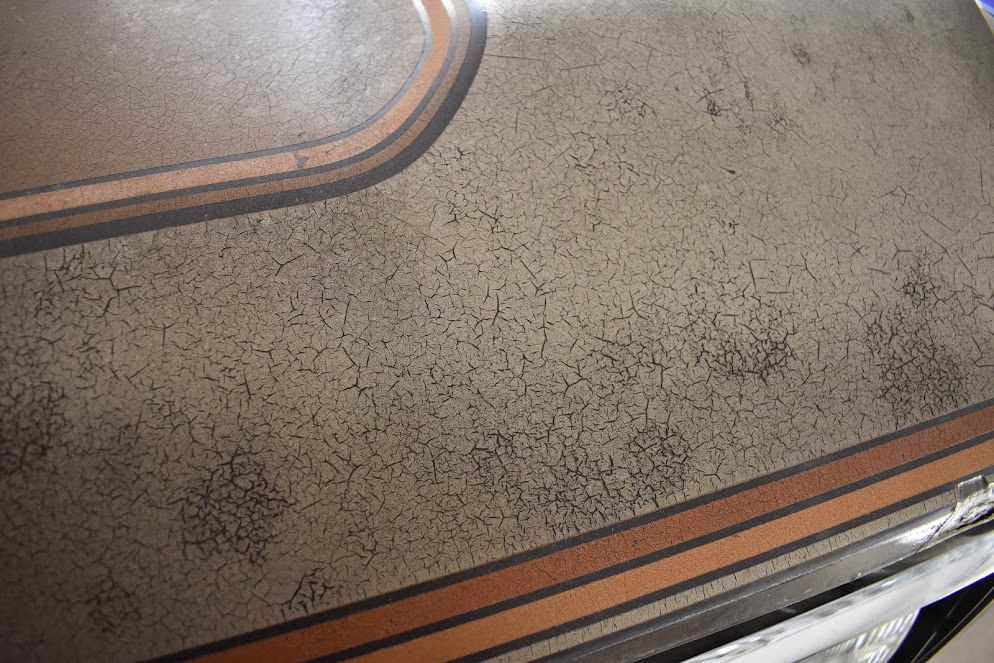
The paint comes pre-ruined in many places: 

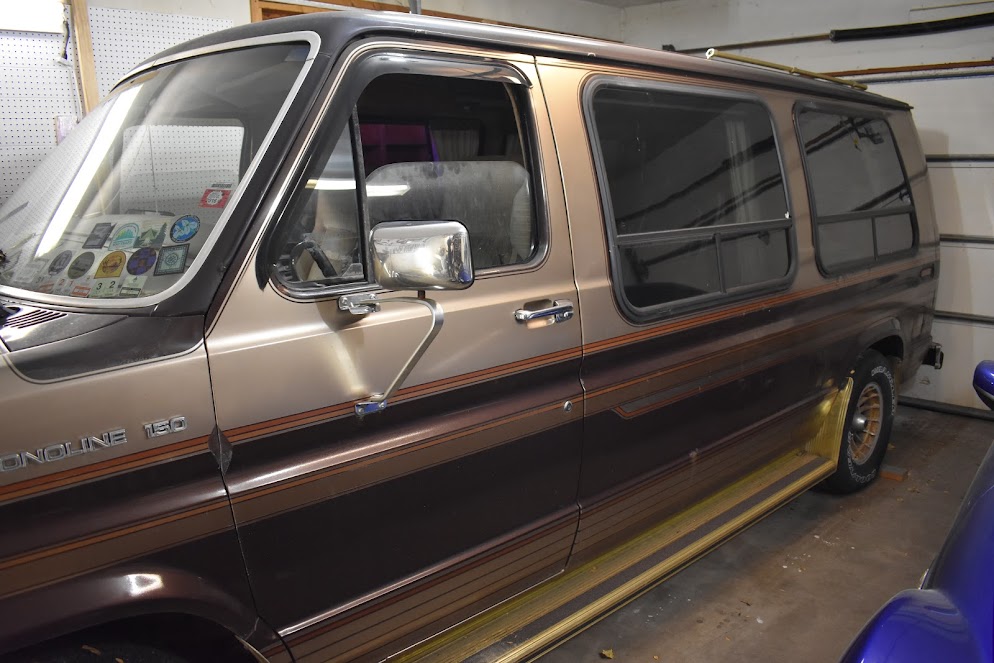
The body, however, is surprisingly straight and not very rusty for a Wisconsin vehicle: 

Note i didn't say "Rust free", just not bad for a 30+ year old vehicle from the rust belt.  I am also 100% certain i'm not going to run into a Tuna-truck scenario where I find all the corners of the body are made out of bondo.  My dad bought this new, they had it my whole life, then I got it.  It's never been to a body shop since the conversion place painted the stripes.  For the most part, the corners of the body look pretty decent:

One of the windows, not so much:

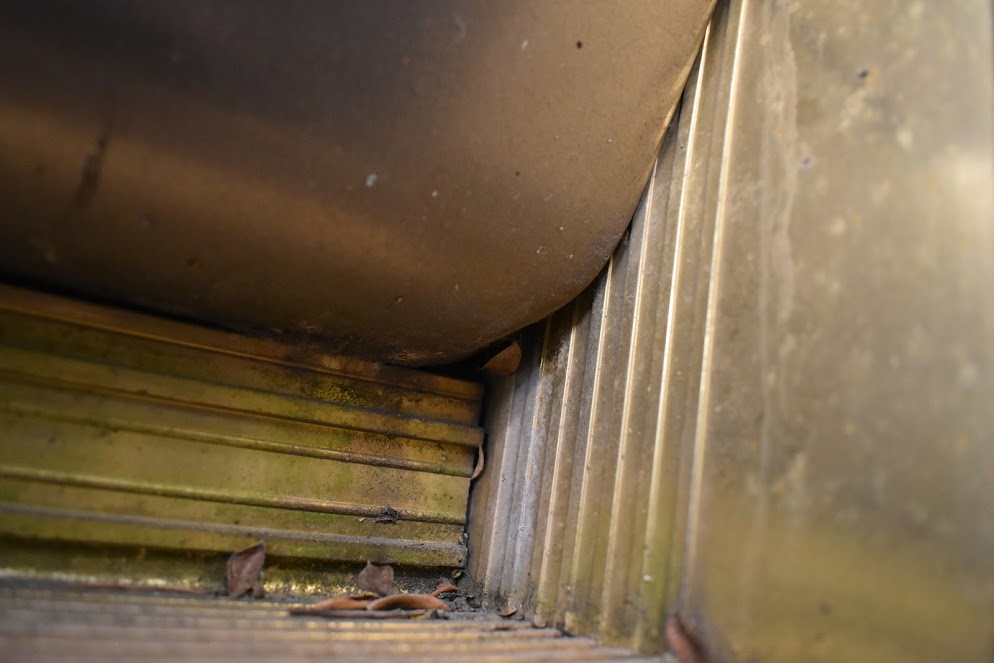
Likewise some rust around the fenders:

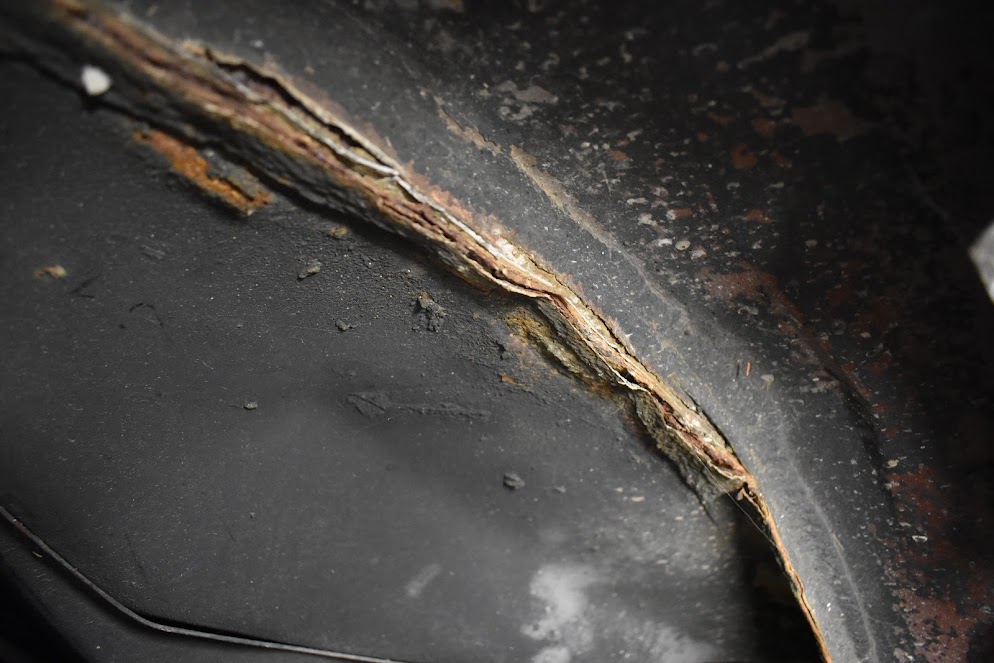
And this is under the drivers side floor:

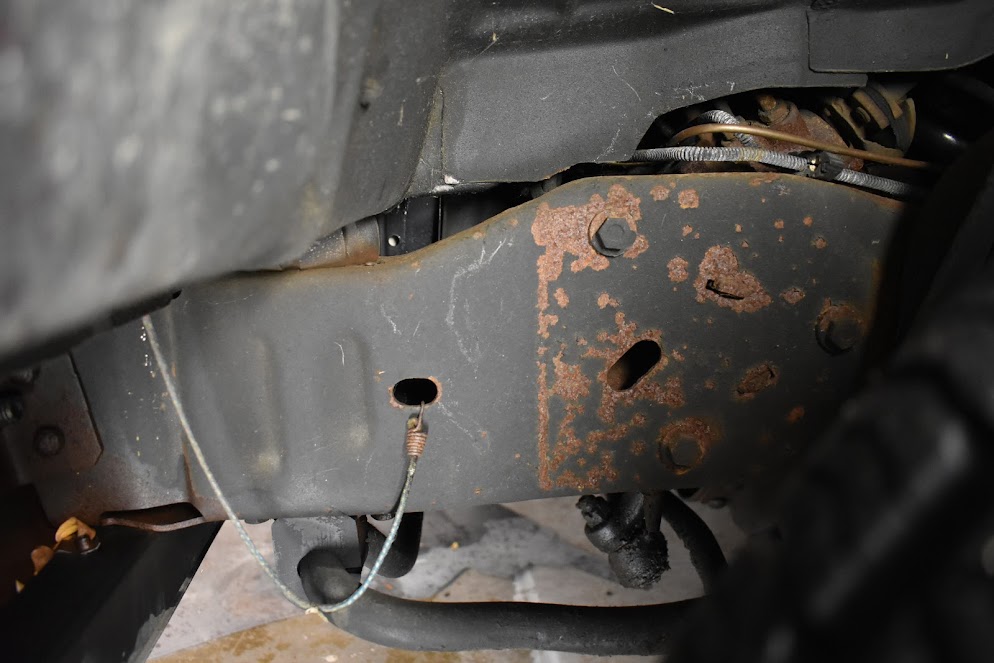
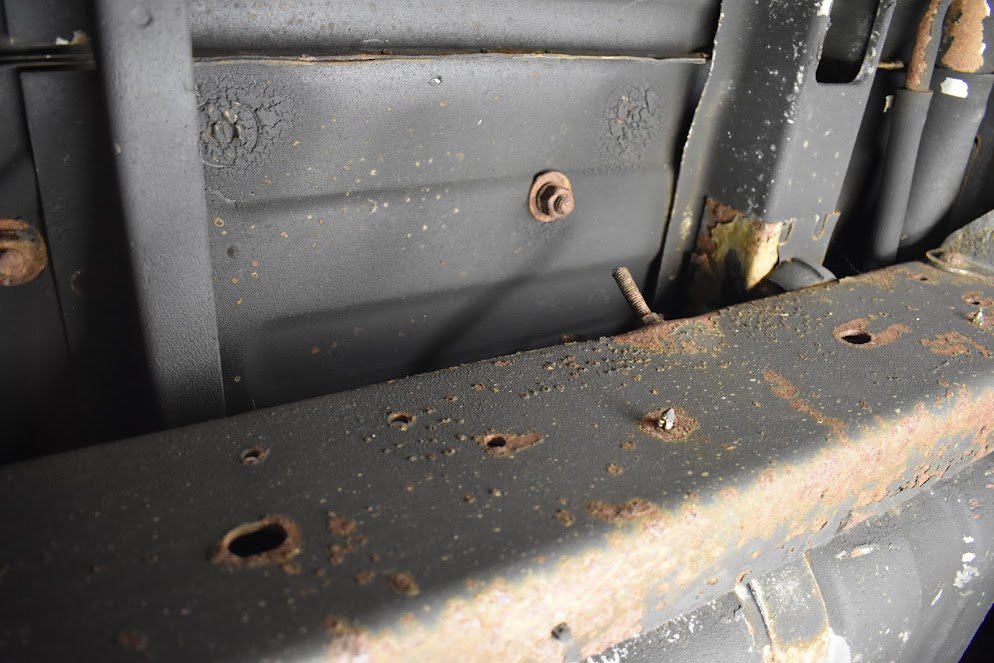
Most of the underside and frame look pretty great, though:

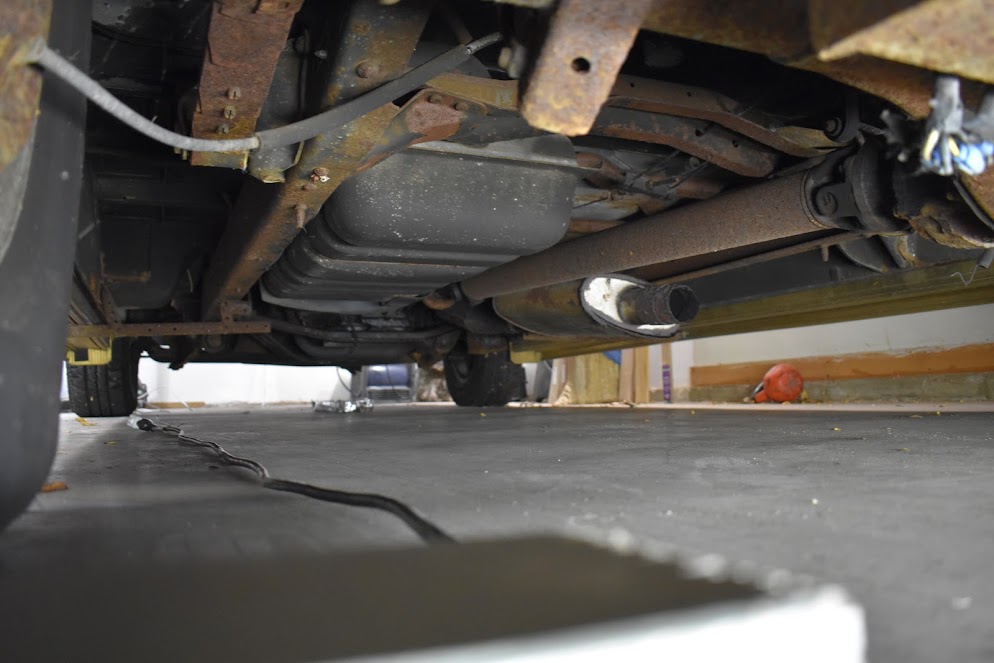
And much of the exhaust is gone.  I suspect it's in a ditch somewhere in upstate NY, but i can't be sure.

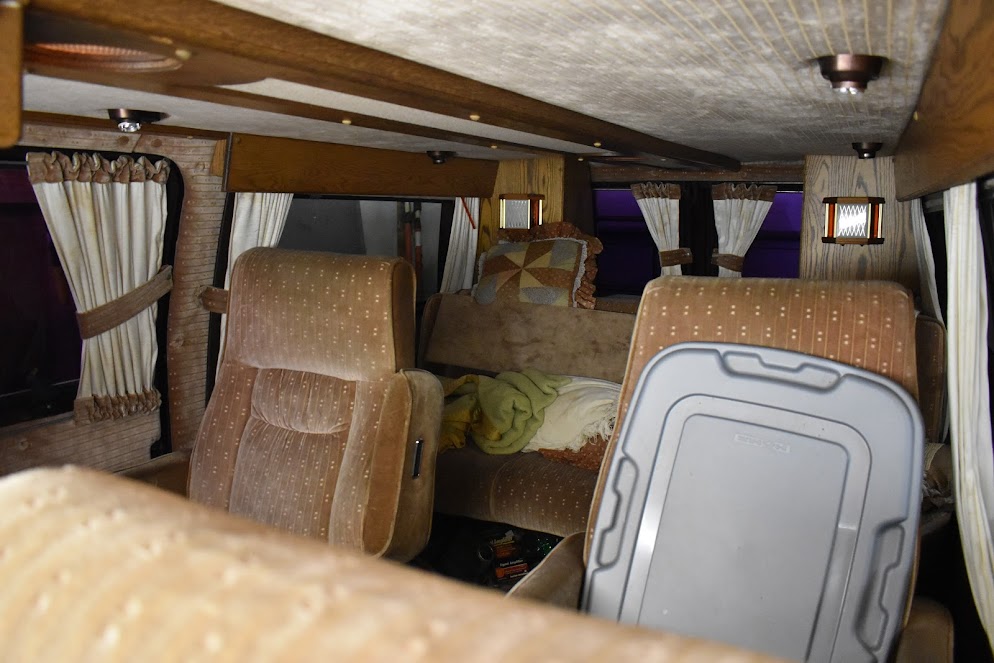
The interior is predictably old looking:

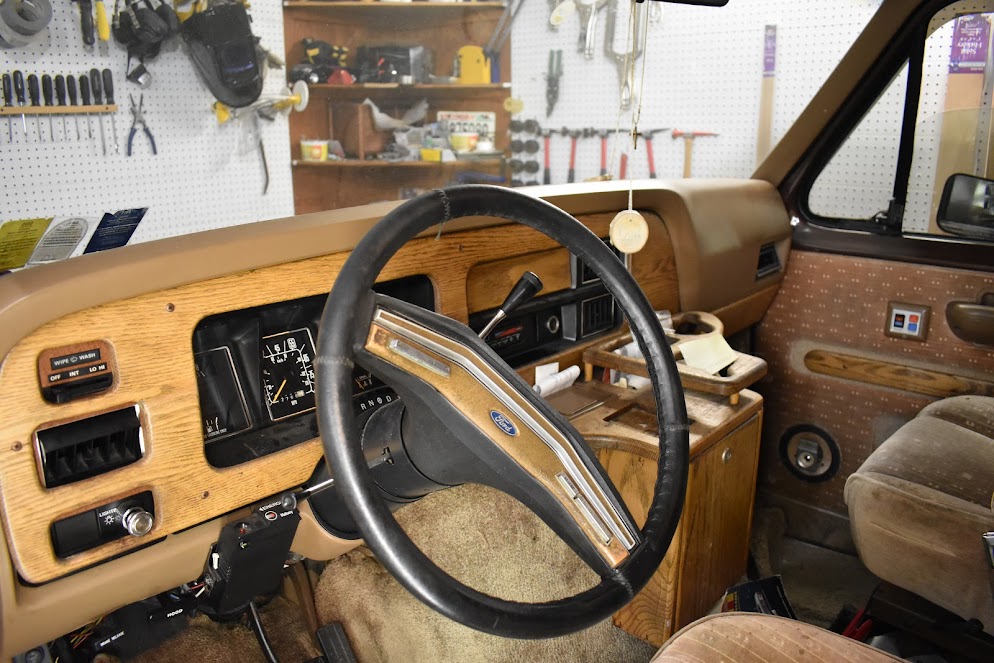
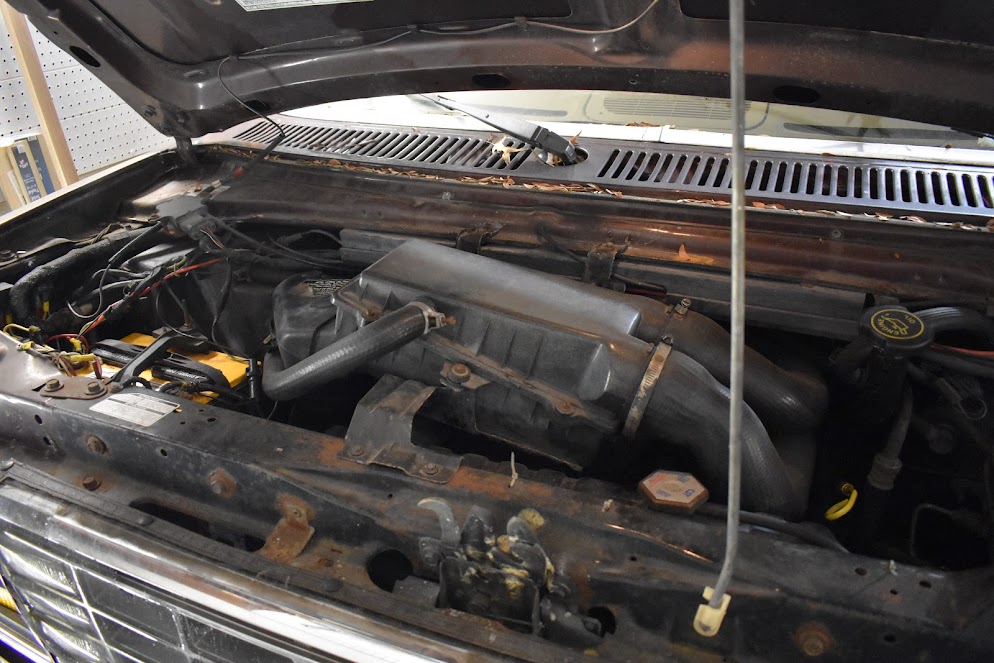
The engine is a fuel injected 302, AOD tranny, 8.8" open rear end. 

At the start of the project it leaked oil, coolant was disappearing somewhere, and it didn't idle great when cold.  Other than that, it ran and drove fine.  Pretty much everything worked except the AC and the temp gauge.  It has 2 gas tanks, a few performance mods from it's days of towing a 26' travel trailer, air shocks in the rear, a class 5 load distributing hitch, and some other goodies mostly related to power/cooling needed to tow a trailer.


I plan to tear it apart and do everything short of frame-off restoration.  I would do that too, but i'm pretty sure I can't get the body off the frame.  The body mounts all look good anyway.  I want to redo the interior, rebuild the engine, repaint it, make it a better tow vehicle (car trailer now instead of travel trailer), road trip machine, and overall just keep my hands busy.  I don't really plan on ever finishing it, im keeping it forever anyway.  You'll say i'm crazy for doing all of this to a van.

Actually no, you'll all enable me.  But someone is going to call me crazy.  I'll try to catch this thread up to the point i'm at right now, but it might take some time.

There a walkaround vid here https://youtu.be/08-bmsIYO_E not sure how embedding works after forum update, but i probably explain as much in the thread as I do in the video anyway.

wvumtnbkr
wvumtnbkr GRM+ Memberand UltraDork
12/25/17 1:09 p.m.

Moar!

Dirtydog
Dirtydog GRM+ Memberand Reader
12/25/17 1:12 p.m.

Overall, nice shape.  The van can be a blank canvas for towing/ camping/work vehicle.  302's have a great support network.  This project can take you as far as you want to go.  Enjoy!

Rufledt
Rufledt UberDork
12/25/17 1:35 p.m.

Did I mention the extra lights? Extra lights rock:

The first thing i took off was the running board on the driver's side.  It's just too big and in the way.  Without it, i can slide underneath without a problem.  With it on there, I need to jack the thing up to get under there.  

Lots of PB blaster...

Some wrenching, one broken bolt..

And it's free!

I took this opportunity to look at the bottom of the body that was obscured by the running board:

not bad, not great.  I later took off the 'mudflap' parts as well. not pictured.  I'm learning i didn't take enough pictures with the camera.  Probably because if i got too dirty i didn't want to touch the camera.

A few more parts off:

Those lights were extra rusty:

Probably not putting those back on.  Other lights, however... Save that for later.

OK a lot more parts off.  The grill and front it all taken apart too, also not pictured...

There's a flap there under the fender, and in it I found a compost pile:

Also what I assume is a chipmunk den:

Some preliminary wire wheeling of the rusty fender, and I found no holes, just lots of bad pitting:

One corner of the hood skin also got rust underneath, and it went nuts:

In layers front to back, aftermarket tranny oil cooler, AC condenser, and radiator.  

Also finding some hidden rust:

More wildlife:

I'm using a "duck tape and sharpie" method for the wiring, vacuum lines, various other hoses and stuff:

Here's an interesting thing, the intake is here, under the grill:

From there, it goes under the battery, 90 degree bend up, 90 degree bend right, through the airfilter box on top of the engine, out 2 hoses, 180 around, then 45 into a dual throttle body.  It goes on a cross country adventure.  I gotta think there's a more space efficient way to package all of that, but i'll get to that later. Anyway, everything from that opening to the throttle body was removed.

Bench is getting crowded, so much of this was later moved to a big bin for storage:

Much of the front end off and the engine is exposed:

I've been bagging fasteners.  Most of these don't go into holes, they go into nut plates. I keep the nutplates with the fasteners that go into them.  Hopefully this works.  If it doesn't, 95% of these fasteners are identical 1/2" bolts, so its not super critical i keep them separate.

Garage is also getting crowded already:

\

some stuff goes in the van:

more to come... still catching up


Dirtydog
Dirtydog GRM+ Memberand Reader
12/25/17 1:51 p.m.

How about a snorkel for the intake ala Jeep xj?

Rufledt
Rufledt UberDork
12/25/17 1:57 p.m.

That would be crazy looking!  Off road vans are pretty sweet, but this will probably stick to the roads.  The throttle body is already about 4’ off the ground, that’s halfway to a snorkel

AngryCorvair
AngryCorvair GRM+ Memberand UltimaDork
12/25/17 2:03 p.m.

Dig the rims!  

Rufledt
Rufledt UberDork
12/25/17 2:18 p.m.

In reply to AngryCorvair :

they are 15" american racing cast aluminum wheels and they look TERRIBLE up close.  So much pitting.  I'm going to try to save them because they look sweet, but I fear I may need replacements.  I really want to keep the retro look, though, and so many wheels now days are 20" and covered in fake hardware.  I don't want that, i want 15" or at most 17" and retro looking.  Fortunately this still has 5 bolt hubs, lots of non-bro truck options.  Current american racing wheels seem to have a weight limit of 1850lbs each, though, which might be an issue.  This thing is 5400lbs as it sits with all the oak interior and everything, hitch is rated for up to 1k lbs tongue weight. if the weight is balanced on all 4 wheels (which it's not, i'm sure) that's 1350lbs per wheel for just the van alone.  That's pushing it if you add tongue weight, even though the load distributing hitch isn't supposed to put all of it on the rears, and with a car trailer and small car i'm likely not going to be at 1k lbs tongue weight.  It's probably doable.  American racing has some cool old looking 15-17" wheels, too.  That's so far in the future, though, not going to worry about it now. 

The FSM seems to suggest much of the suspension and frame is identical from 150-350, so swapping to an 8 bolt set up wouldn't be hard. front suspension has a few differences, rear suspension seems like just the rear axle and brackets to attach it are different. 150's have 8.8"s, 350's had 9" and beefier engine/tranny options.  More non-bro truck wheel options for 5 bolt though.

Rufledt
Rufledt UberDork
12/25/17 2:49 p.m.

I cleaned some of the tar off and i'm find lots of places with bare primer.  No idea what ford used for primer, but it's very tough.  Wire wheel won't even scratch it.

When my dad got this thing he had it undercoated from some place.  Looks like they coated everything with black tar.  Can't complain, it clearly worked.

Anyways, more removing stuff.

That's some of the wiring we added with those extra driving lights.  Each bank of 4 lights had it's own 40 amp 12vDC relay which was triggered by the bright lights.  Low beams were low, high beams came on with all 8 driving lights.  It was like the sun.  Also my alternator died, completely unrelated i'm sure.

Next up, siren removed (not pictured) and cruise control:

Cruise is controlled via vacuum line, just clips over the throttle cable.  easy enough. Then wiper fluid tank removed, and i can see the fender liner:

Some of the most stuck lug nuts later, and the wheel is off. Time to get busy.

I should probably mention my plan of attack.  The way this thing is parked in the garage, i can get to the front and driver's side of the van.  I plan to start at the front and work my way down the drivers side, tearing things apart and repairing rust.  I'm going to go after any and all rust I can see.  If it looks fine, i'll most likely leave it.  when i get to the back, i will turn the van around.  Then i'll do the back and passengers side.  Since the frame looks fine, i dont' plan on doing a whole lot underneath, though I will repaint and re-undercoat before i'm done.  Once i get all the way around the body, i'll turn it back around and take out the engine/tranny.  I'm waiting that long because i still need the engine to turn this thing around.  I haven't decided exactly when i'll tear the interior out, maybe as i'm doing the body so i can get the inside/floors, but i'm not going to do new interior work until the body and drivetrain are done and the thing is driving around under it's own power again.  

Anyways, break out the wire wheel. Frame looks very good under the tar undercoating:

Screw driver pounding revealed some holes:

Wheeling underneath:

The floor doesn't look so good:

More work:

Yes, that is a screw driver.

Houston, we have a problem

More aggressive screw driver-ing and I have a foot cooling vent! it's a feature, not a rust hole!  Ok, it's both.  I caught myself tearing up interior prematurely, so i returned to the main priority, the front end.

I have a cross brace thing here, spot welded in place.  I've never drilled spot welds before.  Lets give it a try.

My lack of skill led to some holes

Some more rust on the passenger side.  I'm sure there is plenty of rust under that panel.  By "i'm sure" I mean i've already seen whats under there.  I also learned since then that those special spot weld cutting bits really work well.  That's the end of the pictures I have uploaded, though.  More to come when I upload some more. 

karplus2
karplus2 GRM+ Memberand New Reader
12/25/17 6:21 p.m.

I LOVE conversion vans. I grew up driving my parents 1994 E150 conversion. They still have it and use it for their vacations pulling their pop-up. I am enjoying this and am looking forward to more.

Trans_Maro
Trans_Maro PowerDork
12/25/17 6:35 p.m.

Just an FYI, you WILL grow to hate vans.

Vans were created by the auto manufacturers as a way to punish mechanics for some unknown reason.

They really are a fantastic vehicle in that they are designed so that every single part of the vehicle is difficult to access.

There are rumours whispered in break rooms of garage everywhere that vans are not built but are actually grown in a vat of chemicals. The starting point is usually a heater core, distributor or some other essential part that will need to be serviced multiple times in the vehicles lifetime. After that is created, the rest of the van is then grown around it.

Rufledt
Rufledt UberDork
12/25/17 6:40 p.m.

In reply to Trans_Maro : too real man.  One of the dash vents is misaligned because it’s a bear to get everything back together after replacing the heater core...


Pete Gossett
Pete Gossett GRM+ Memberand MegaDork
12/25/17 6:59 p.m.

In reply to Rufledt :

That interior is beautiful.

wheelsmithy
wheelsmithy GRM+ Memberand Dork
12/25/17 7:15 p.m.

Rufledt
Rufledt UberDork
12/26/17 11:11 p.m.

No idea why those pictures didnt' show up. lets try that again.

Seems like either i hit the spotweld dead on and it pops out super easy, or i miss slightly and it takes a billion times more work to free it up.  Anyways, under that panel on drivers side:

Passenger side is much worse, though the holes were made quite a bit worse by my violent stabbing with a screw driver:

The panel I removed was basically cut off the passenger side since it was so nasty.  The drivers side was pitted underneath but i couldn't find any holes:

I'm surprised how much scaly rust can build up and not form holes.  Granted anything super duper pitted is probably going to be replaced with new steel anyway, especially the fender since it will be painted and visible.  I'm not looking for the easy way out of filler over the pitting and paint, the point of this project is to practice metal work/welding and everything else, so that's what I'll be doing.

However... Some of this rust will never be seen when the thing is all back together, and lots of it is non structural.  I also have no concern whatsoever that this remain original.  At what point do I replace with good steel, and when should I just remove the rust, paint, and call it a "lightening hole"? 

Also, i've seen tons of car restos where they drill out all the spot welds, and some where they just straight up chop stuff off with a cutoff wheel back to the firewall.  I'm assuming I shouldn't do the latter, because I don't have the skills to put it all back together afterwards.  I'm interested in putting it back together in a way that won't be too hard to remove later in case i need to do more engine work.  Any ideas?

Last question I promise, anybody have a prefered tool for removing seam sealer?  I'm using a wire wheel on a drill.  Seems like they didn't just use seam sealer as a seam sealer, but just let huge globs of the stuff land wherever.  Wire wheel works, but it takes a while and makes it snow in my garage.

Trans_Maro
Trans_Maro PowerDork
12/26/17 11:17 p.m.

If it's not structural and not seen, I would get rid of the loose rust, treat the remaining stuff with a rust convertor, plug the hole if necessary with whatever method you're comfortable with, paint it so it won't rust again and continue onwards.

It's not going to pebble beach or into space. Sometimes "good enough" is what you're after.

Rufledt
Rufledt UberDork
12/26/17 11:41 p.m.

In reply to Trans_Maro :

That sounds like a reasonable plan.  Plenty of bodywork ahead of me in more important places.

 In other news, I have discovered wd40 makes drilling spot welds much easier.

Crackers
Crackers Dork
12/27/17 8:11 a.m.
*The forum editor is being a real pain in the berkeleying ass right now
Rufledt said: 
Seems like either i hit the spotweld dead on and it pops out super easy, or i miss slightly and it takes a billion times more work to free it up. 

That sounds about right.  

Also, i've seen tons of car restos where they drill out all the spot welds, and some where they just straight up chop stuff off with a cutoff wheel back to the firewall.  I'm assuming I shouldn't do the latter, because I don't have the skills to put it all back together afterwards.

If you don't need to save it, cutting out a panel then grinding the spot welds off is easier and faster. That's probably what you're seeing. Drilling spot welds out is the "textbook" way to do it, but in reality, a pro shop is probably going to cut the big chunks out with an air hammer then use the improved access to their advantage in doing the fiddly work. (That's exactly what I'm doing with the wagon.)

I'm interested in putting it back together in a way that won't be too hard to remove later in case i need to do more engine work.  Any ideas?

I fully support this endeavor. I'm doing something similar. Weld some brackets in and bolt it all together. In your case, structural stiffness is probably not a concern. 

I'm hoping to have the bulk of the core support detach from the car with the heat exchangers and grill all still attached. I'm not sure if that's actually feasible though. 

Last question I promise, anybody have a prefered tool for removing seam sealer?  I'm using a wire wheel on a drill.  Seems like they didn't just use seam sealer as a seam sealer, but just let huge globs of the stuff land wherever.  Wire wheel works, but it takes a while and makes it snow in my garage.

Attacking it with fire and a gasket scraper/old chisel will get the bulk off, but wire wheels seam like the way to go. 

Do these have a dog house in the cab? I'd be tempted to make one if it doesn't. 

Ian F
Ian F MegaDork
12/27/17 9:23 a.m.

This gives me deja vu images of my old '90 conversion van. Those EFI engines aren'y the most powerful in the world, but I'll be damned if they aren't stone-reliable and will start almost instantly on year and a half old gas.

Unfortunately, rust was one of the reasons I parted with it and it looked worse than your van.  Good luck!

Rufledt
Rufledt UberDork
12/27/17 10:13 a.m.

In reply to Crackers :

Brackets sounds like a good plan for lots of this.  The front end mounts to the frame on the bottom with 2 bolts, those would probably hold any weight needed.  The rest just holds the headlights up, no critical structural bits.  It would be nice if it all came off with radiator and lights and everything.  Bonus points if it hinges forward like project binky wink but I’m not going to attempt that part. You can, though!

yes there is a dog house.  Last time I removed it was 10 years ago.  btw changing spark plugs in a random church parking lot in the winter suuuuuuuucks.  It wasn’t even Sunday so I couldn’t con any random people into bringing me coffee!

i guess I’ll stick with wire wheels to remove seam sealer .  They work well enough I guess.  I don’t know if my giant blowtorch would be a great idea, it’s a little on the big side...

Ian F
Ian F MegaDork
12/27/17 10:53 a.m.
Rufledt said:

yes there is a dog house.  Last time I removed it was 10 years ago.  btw changing spark plugs in a random church parking lot in the winter suuuuuuuucks.  It wasn’t even Sunday so I couldn’t con any random people into bringing me coffee!


Oh, I remember doing that. The passenger side was really fun - through the wheel well, made all the more difficult by the rear HVAC hoses blocking access.  At least two of them on the engine were R&R completely by feel.

Rufledt
Rufledt UberDork
12/27/17 12:05 p.m.

They do not make it easy, that’s for sure!  You’re right about the reliability, I have always said if the battery has enough juice to crank it over, the engine will start, guaranteed.

Rufledt
Rufledt UberDork
1/1/18 4:06 p.m.

Next task, removing the driver's side panel that holds the headlight, and ties a bunch of stuff together, not unlike a rug in a room. This had spotwelds all up the sides, bottom, across the top, and is spotwelded to 5 other parts.  Basically everything in the front corner is welded to or bolted to this panel, and it's quite rusty.  

A few spotwelds went ok, most needed fighting, like the 1 here that was the most inaccessible with a grinder...

I started using a spot weld cutting bit. Works MUCH better, though I still occasionally missed the center and needed to 'motivate' it to break free.  And then:


Only mangled it a little bit:

The non-black tar covered part was under the joint:

That tells me a few things.  First, there was NO visible rust at all before I took it off.  Now I see rust between the panel.  I might rethink my plan to leave most of it together.  Yes, taking every panel apart is scope creep. I will refer you to the title of this thread.  Second, this panel is actually 2 panels, and the top lap joint was left intact because I didn't see any rust

Might I want to take that apart, too?  I was also wondering why 2 panels? Looking at the front, it clearly had to be manufactured that way, but I don't have to leave it that way.  I don't care if this stays original, I just want it to be not rusty and stay not rusty into the future.

Also, back to this picture from above:

It looks like the majority of rust in this front corner was on the 2 panels i removed.  that fender liner is in 2 parts, however, and there is rust between them (pictured above a few posts).  Not sure i want to remove that part or just patch it in place.  Thoughts?

Also, i like the "attach with brackets" idea from Crackers above, so i might remove a bunch of panels, patch the rust, but  not reattach them until later on when I figure out a plan for that.

NOHOME
NOHOME UltimaDork
1/1/18 5:22 p.m.

These panels you are repairing look like good candidates for POR or Chassis Saver once you are done adding new tin. 


The Minion has been using muratic acid as of late to de-rust chunks of old mustang that he is rebuilding. Seems to work really well as long as you have a bucket of baking soda solution to neutralize the stuff.


Rufledt
Rufledt UberDork
1/1/18 6:43 p.m.

POR or something similar is definitely on my list, but i've heard mixed things about non-epoxy coatings.  I see some places offer epoxy primer/epoxy frame coating products that seem to claim the same final characteristics (color, tough, rust proofing) but there are so many paint products and opinions out there it's hard to make any sense out of it.  What I also don't get it what to do between flanges.  I've seen a bunch of car restorations where they don't mention anything or use anything between the flanges, how do you prevent rust there?  I've seen this advertised:

people say it's good to spray that between the surfaces to be welded, then when you paint the final product at least something is between the flanges.  Looks like the Ford primer was between the surfaces and spot welded through, but I don't know what that primer is, nor do i have a spot welder.

1 2 3 ... 8

You'll need to log in to post.

Our Preferred Partners
elHcoCoPIHKCop7qaL1SaChRGAYfaOF7aWtQJJObjI13c3rAqUi91A2JsGQWeCzs