In reply to GTXVette:
Thanks for explaining the CFM requirements! I wasn't sure if I could include 650's in my search, or if they would be too big.
I've found a used regulator, so I should be set there. The seller I almost bought the Edelbrock from also has a used Holley for $150obo, and I think I can get it for $100. That plus ~$40 for a rebuild kit sounds much more budget-friendly...if it's complete and not complete junk.
+1 for Holley carbs. As said above, I'd prefer a Q-jet to a Edelbrock too. 650 Q-jet's used to be easy to find, but it's been 15+ years since I tried to source one.
But IMO Holley's are the easiest to service/maintain.
not all Holley's are the same,you want a performance carb to start with, 3310 are a good starting point for that, vacuum seconds are good for all but the most all out carb,but I prefer mechanical seconds anyway. center pivot floats are better perf. bowls.than side hung but they(side hung) are good for all but the most all out.Manual choke,for me. I have one like this for sale 150.00. a very nice builder.
In reply to GTXVette:
Does your carb need rebuilt?
It's been sitting and when I shook it a while ago this a m I didn't hear the floats rattle, so likley a bowl gasket set/needles,clean out some spidies,carb looks good. 3310/1000 750 vacuum seconds manual choke center hung floats, won't hurt my feelings to keep it. tell ya what I got a Quick Fuel 780 Vac.seconds Center hung floats needs Everything Its just a shell,send me your address I was using it for trade so it's all Good,Needs lots of love but even has 4Circiut metering plates,B/A Carb,I Need a 4165 w manual seconds/center hung floats.They are both at the max in cfm for you until you make 500 hp, kinda big for 400 hp

Day-37(2.5-hours):
I finished cleaning the oil pan inside & out. However, while cleaning it I noticed this on the rear lip of the pan - it's wrinkles in the metal, distortions from the stamping process, yet was not only allowed to pass QC, it ended up on their brand-new L98 engine in their flagship car. Gotta love GM...

Figuring the oil pan is never going to be any cleaner than it was that moment, I took this...

...and using our garbage can for a makeshift paint booth...

...I ended up with this.

Definitely not show-quality, but good enough for my purposes. So I did the timing cover while I was at it.

What looks like discoloration is the damage fromsurface rust that I sanded down.
Next I dug out the new freeze & galley plugs, and started pondering their installation while consulting the book - but this is where I have questions: there are 3 x 1/2", 2 x 9/16", and 3 x "108". I think the ones labeled 108 are for the front oil galleys, and one of the 1/2" ones is for under rear main cap, but I'm not 100% certain if that's correct, nor do I know where the two 9/16" ones go? Confusing the matter is the manual calls all of the hammer-in plugs 1/2". 

What? Ripples in the stamped engine sheet metal in 1985?
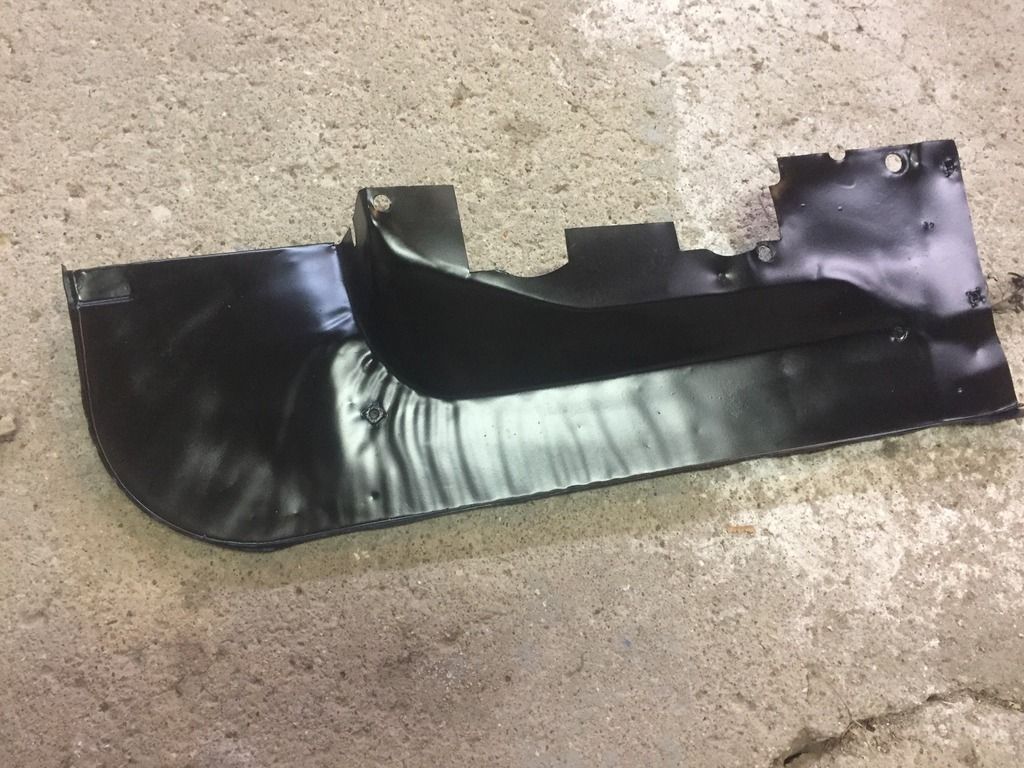
Must have been have been a trend, here's a piece of stamped sheet metal from 1968. 
In reply to SyntheticBlinkerFluid:
Lol! But that part doesn't support an oil seal does it?
Just skimmed the entire thread, what a terrible story about the PO, glad to see it being saved.
I would guess some of the plugs you throw away depending on which block casting you have.
In reply to petegossett:
Oh I'll have to show you a factory oil pan. 
Day-38(2.5-hours):
I installed most of the freeze & galley plugs, starting with the 1/2" galley plug under the rear main cap, which was no problem. Then I moved to the 3 galley plugs in the front of the block, where I realized the manual I'm using is correct - there should be 4 x 1/2" plugs, not the 3 I received in the kit.
So I moved on and was able to install the freeze plugs without incident, except the rear two which I'll do while the block is off the stand for cam bearing installation.
Then I scrubbed all the WD40 off the outside of the block and oil pan gasket surface, cleaned and installed the fuel pump block off plate, and got the bottom end and front masked and ready for paint.

Tomorrow I'll flip it over, get the top & rear of the block masked off, and hopefully get the block painted tomorrow night.
Have you told us what color it's going to be? Something fun?
In reply to mazdeuce:
I'm painting the block the same color as the pan & timing cover. It's sort of a bare steel color, which I thought would be handy for spotting all the leaks. Other than a custom mix to try to match one of the two body color shades of bronze, I wasn't sure what else to do. I didn't think the typical engine colors available in a rattle can would look too good.
I'm actually thinking about painting the heads black for some contrast though.
Bronze valve covers would probably look good.
I have always painted my blocks an Industral Gray so to see leaks at night under Pit/Infield lights.the Vette is a bright a%% Orange that is supposed to be chevy,GAWD AWFUL, But no need for extra lighting,Ha.
In reply to GTXVette:
That was my thought too when I chose this color. I didn't realize it would have a flat finish though, but I'm not too worried - you can't really see much of the block with it tucked back so far in the engine bay, and with all the accessories bolted up front.
In reply to SyntheticBlinkerFluid:
I've thought about that, or maybe something 2-tone incorporating the ridges on the stock valve covers. We'll see...
Day-39(2-hours):
Once again I utilized my Harbor Freight coupons for this build...

I'm actually pretty happy with the results, although it didn't photograph well. Here it just looks like a dirty bare iron block. In reality it looks more like a clean iron block.


I stopped at Napa this evening and picked up a 1/2" oil galley plug...actually I picked up three, just in case I dropped/lost/mauled one.

Fortunately I had no problems and got it installed as easily as the first two.
The cam bearing tool arrived today too, so I tested it out and got the rear four bearings out in a couple minutes - once I took the time to RTFM. I need to drop the block down to acces the last bearing and also install the last two freeze plugs on the rear of the block. Then I'll install the new bearings, bolt the block back up & give it a final cleaning, then I'll be ready to install the cam & crank.
I got a deal on new rod bearings... Speedway Motors had ARP rod bearings on clearance for $1.98, but it wasn't real clear just how many there were...of course I got a single nut & bolt. While shopping for a set of ARP rod bolts, which run about $71-$72, I saw Speedway still had ARP bolts listed for $1.98 - so I ordered 15-more. I'm good with 1/2-price but no packaging. 
I was very happy with that (or similar) color on the small block I put in the Suburbal. Yours looks fantastic! Looking back at the photo above...yeah, I think it's the same stuff IIRC.
Good choice of paint for the engine. Should be easy to see leaks now!
Day-40(2.5-hours):
The last old cam bearing came out easily, and the new ones were pretty easy to install. So I lubed it up and slid it in.  It turns nice & smooth.

Next was the reman crank. I installed the bearings and crank sans rear seal so I could set the thrust bearing, then torqued down the mains and checked rotation. It too turns easily.

I still need to check end-play, then install the rear seal and torque it down for good.
I was surprised to see a set of rod bolt boots included with the crank, but it's a welcome surprise.

Damn, you'll have a running car in no time.
In reply to SyntheticBlinkerFluid:
Just keep your fingers crossed I don't berkeley something up, and it actually runs for a long time.
One of my rookie mistakes the first time I assembled a small block chevy was to ignore that the rod bearings have a chamfer on them. This is to clear the radius/fillet at the edge of the rod journals. Make sure you install the rod bearings in the correct orientation


