


Makes my humble little S13 look like a POS!
I'm just trying to make room in my fenders for 245 r-comps, I couldn't imagine trying to stuff a 275 under my S13.
Nice build![]()

Makes my humble little S13 look like a POS!
I'm just trying to make room in my fenders for 245 r-comps, I couldn't imagine trying to stuff a 275 under my S13.
Nice build![]()

This is a great build. That shop is cleaner than some of the hospitals I've worked in...

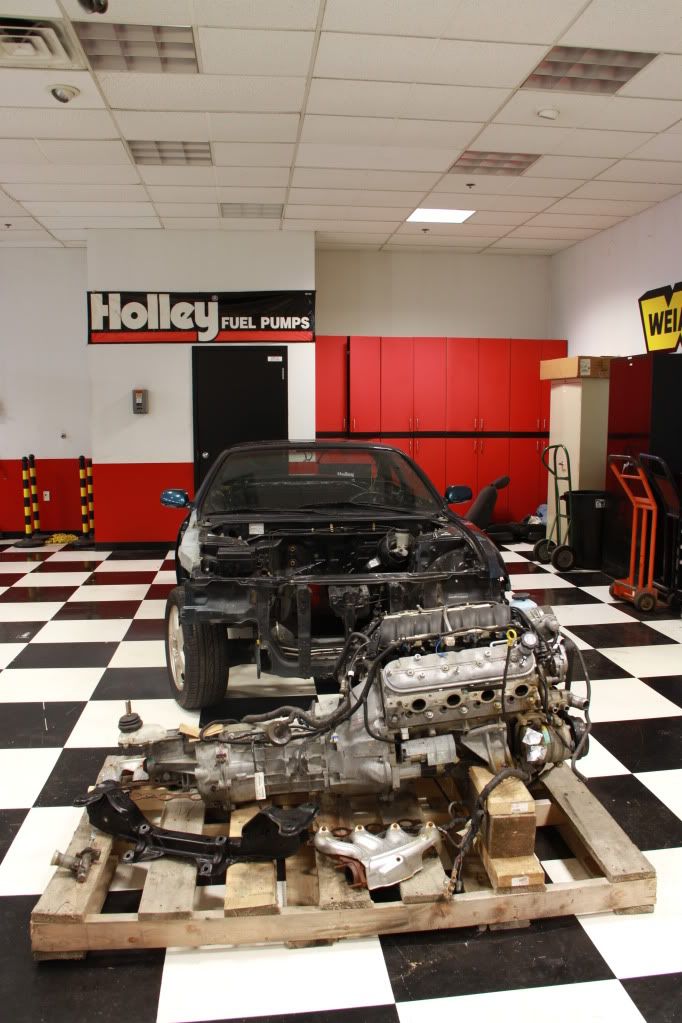
At this point in the build thread, I'll cover the installation of the LS2 into the car.
At first glance, it didn't look like this engine was going to fit at all:
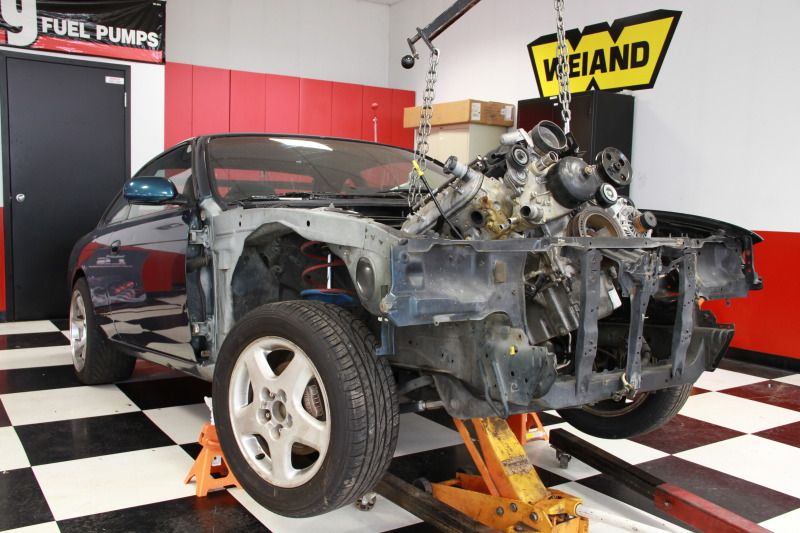
But once you remove the factory exhaust manifolds, hook it to an an engine hoist and get the thing up in the air and positioned in line with the car, you can start to see how it might just work out in my favor:
There are a few things to note before you even attempt this.
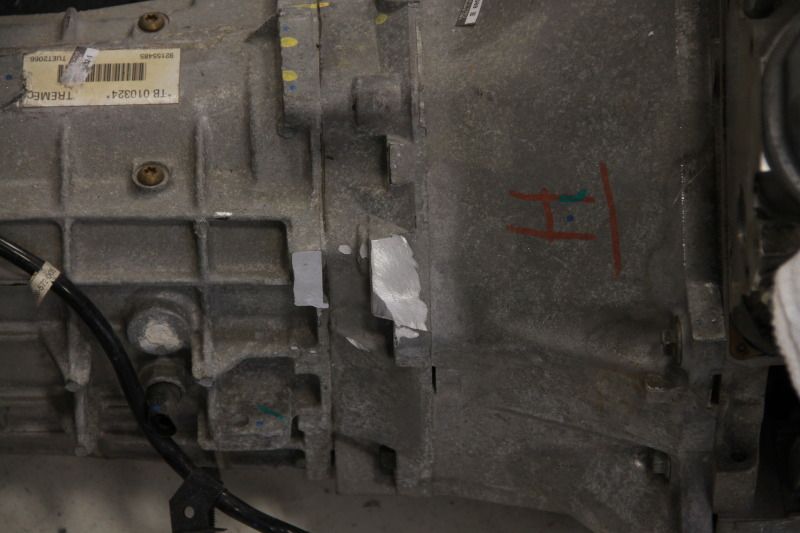
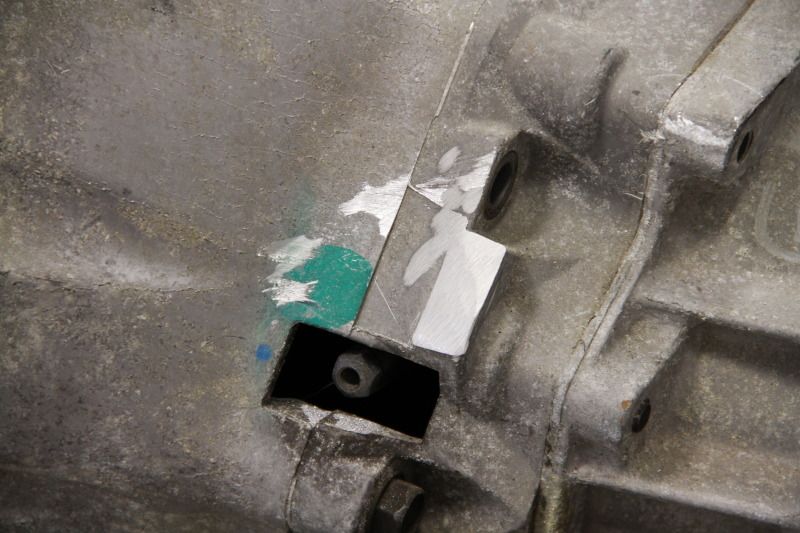
First you have to cut off these some tabs on top of the transmission so it won't collide with the existing trans tunnel. I wish I had taken a photo of them on the trans before I started cutting but I was exciting to get busy.
Then you have to make sure you massage the firewall a bit with a small 5 lb. sledge in order to fit the bulkier T56 transmission. If you're building a car that won't have heat and air then by all means beat the snot out of it for all the clearance you can. It beats taking the engine back out when you realize you haven't made enough space.
Since I planned on maintaining my heater core and leaving all the provisions for air (an install that will rear it's ugly head on down the road), I had to be more careful. In fact, I hit too hard and had to hammer it back down from the interior because my heater core box would not bolt back in after my first massaging of molecules.....
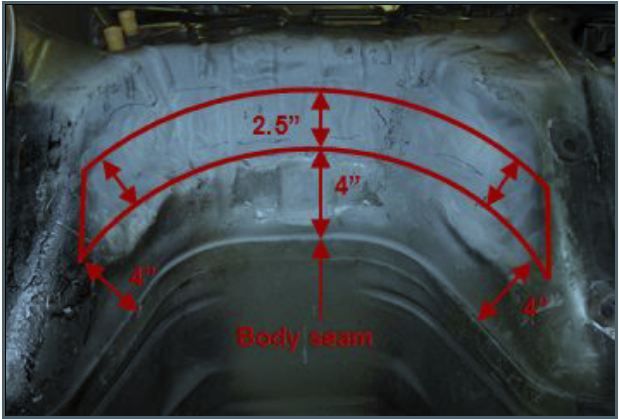
This photo, taken from the instructions of our Nissan 240sx LS Engine Swap Mount Kit, shows where you need to do your damage:
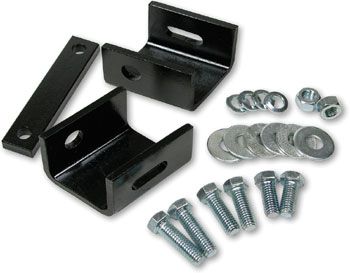
The mounts, pictured below, are a new product from our Hooker line (part # 12654HKR).
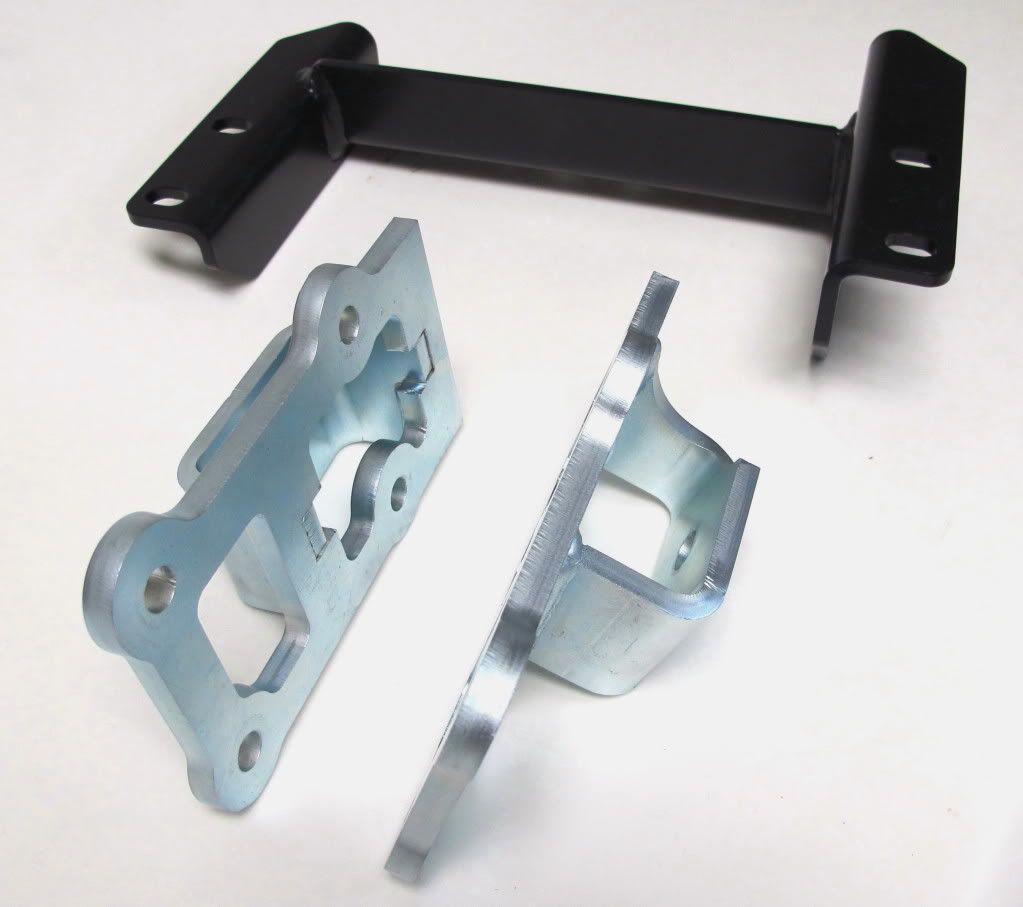
They are designed to be used with already available parts. We don't have an easy away of producing polyurethane here at the plant so we recommend the following parts to complete the swap:
The transmission cross-member is easily installed with Prothane bushing part # 7-1604 (www.prothane.com) . The poly mount inserts recommended for the swap plates are from www.creativesteel.com and are SKU # 6, for a ’97-04 C5 Corvette.
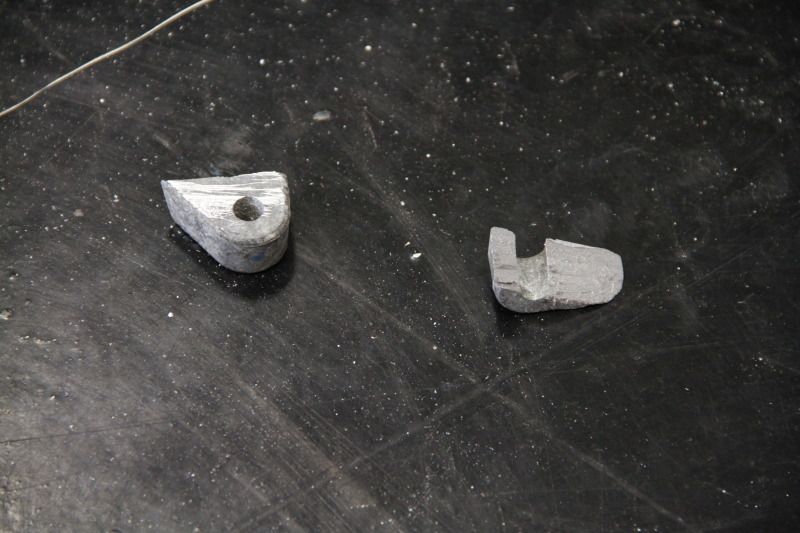
Alternatively, you can also take aluminum bar stock and cut it to the dimensions in our mount kit instructions and make your own solid mounts. This is a good alternative to paying someone $80-$100 to make them for you. The pictures of my engine installation were taken when we had solid mounts installed, but I swapped them out later for the poly from Creative Steel.
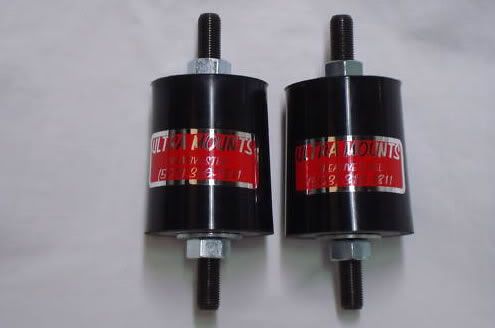
*Photo courtesy of www.creative-steel.com
https://creative-steel.com/store/index.php?l=product_detail&p=6
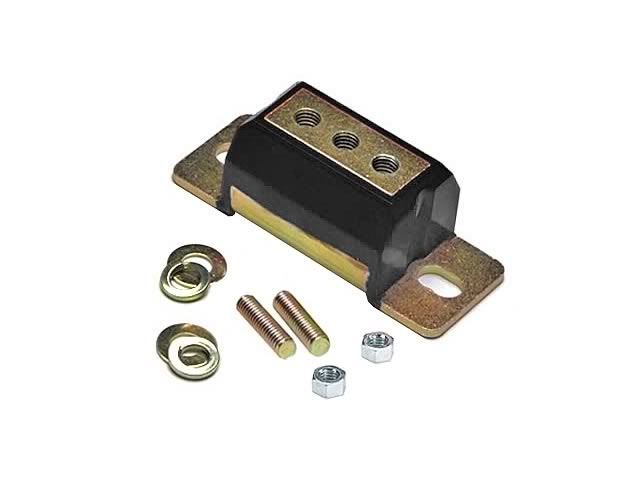 *Photo courtesy of www.prothane.com
http://www.summitracing.com/parts/PTP-7-1604/
Some may be think it odd for a domestic company to be producing a niche product for an import chassis, but it's not the first time we've done this. Until 2006 or so we had a engine mount bracket kit for that allowed for the installation of a SBC into the Datsun 240Z, 260Z, and 280Z chassis. That kit has since been removed from our lineup but the heritage is there nonetheless.
Pic of the old Datsun mounts (not the most high tech or innovative, but allowed for a lot more torque to be had in those lighter cars):
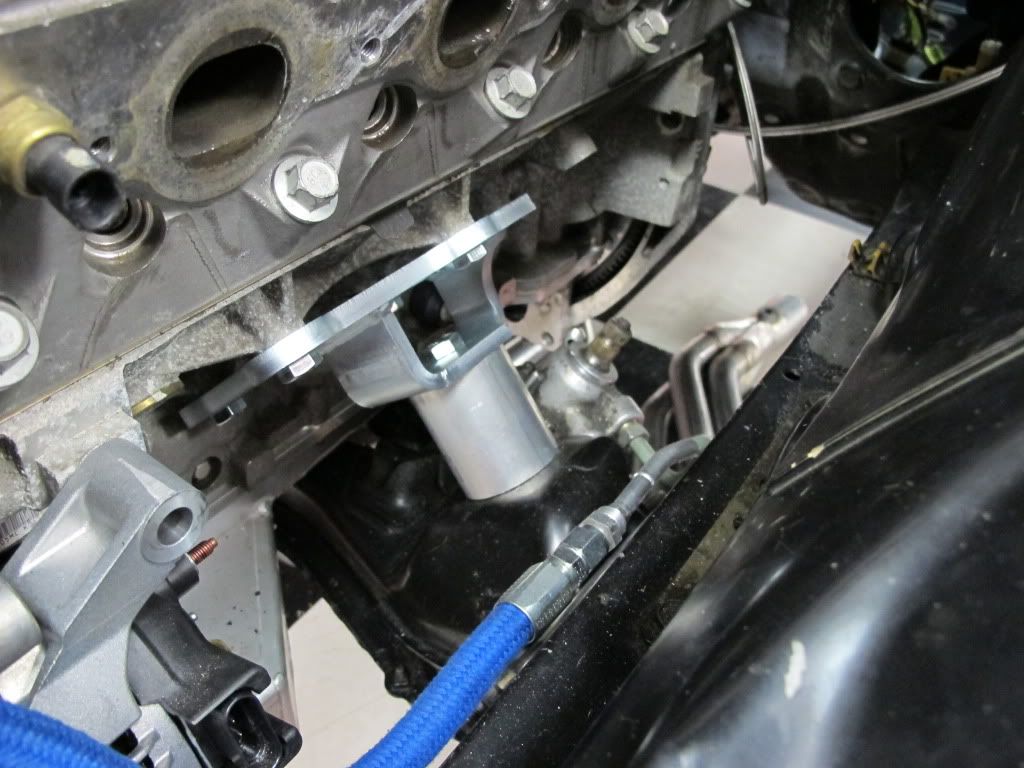
On to the engine installation:
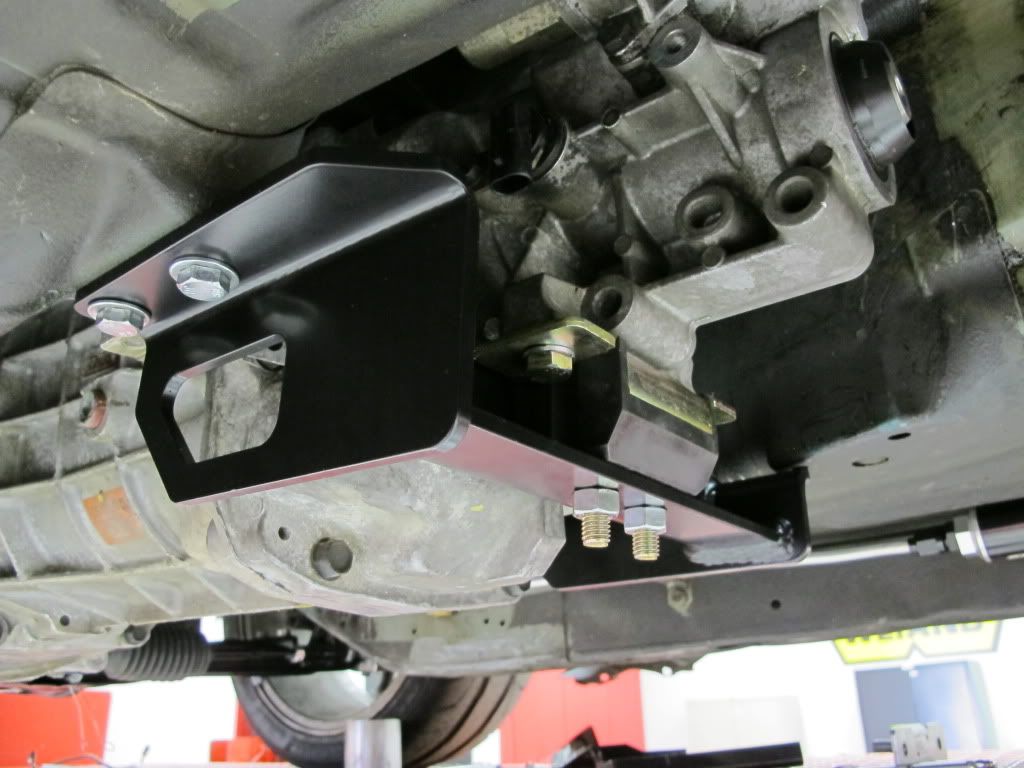
Driver side engine mount:
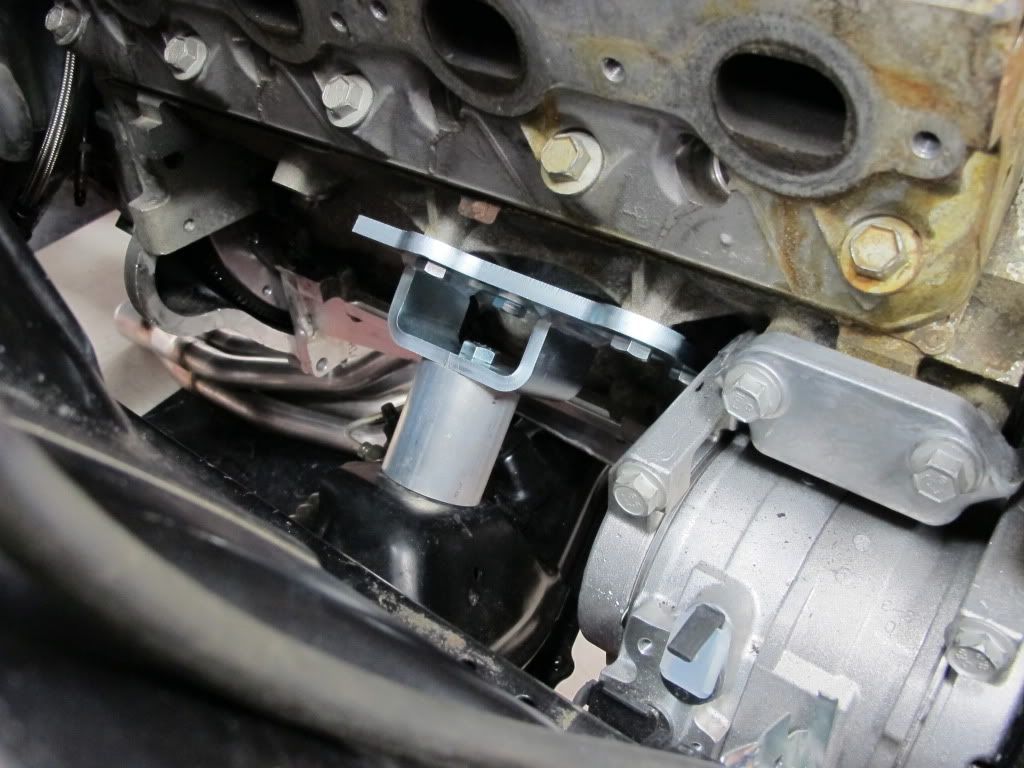
Passenger side with engine installed:
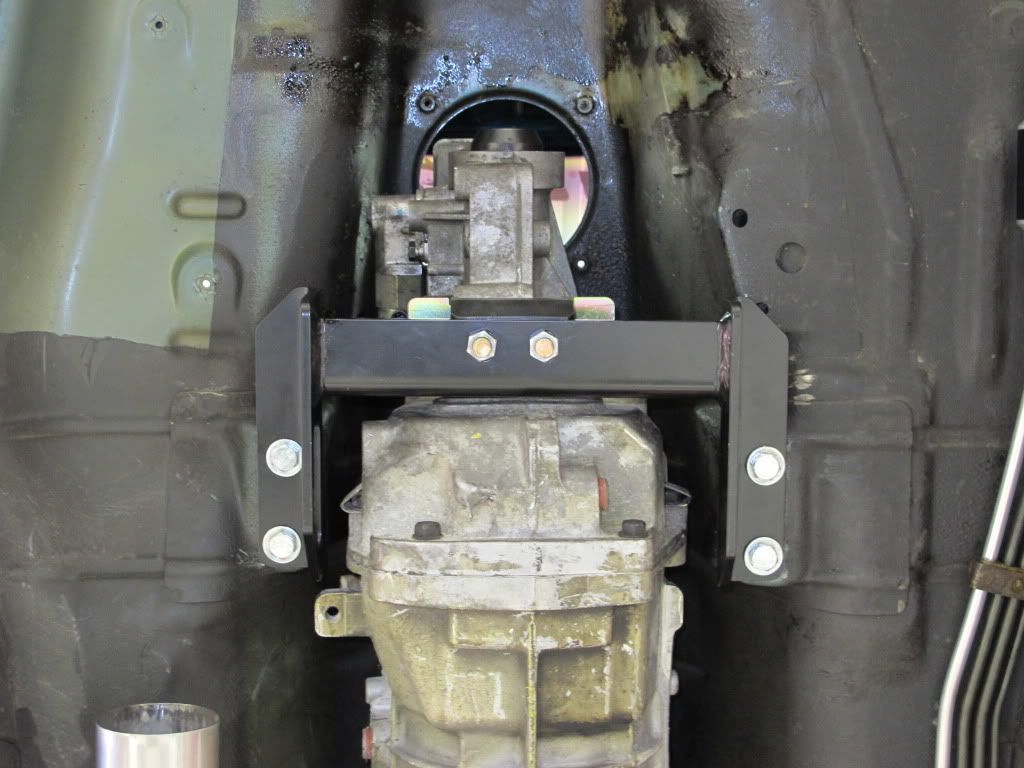
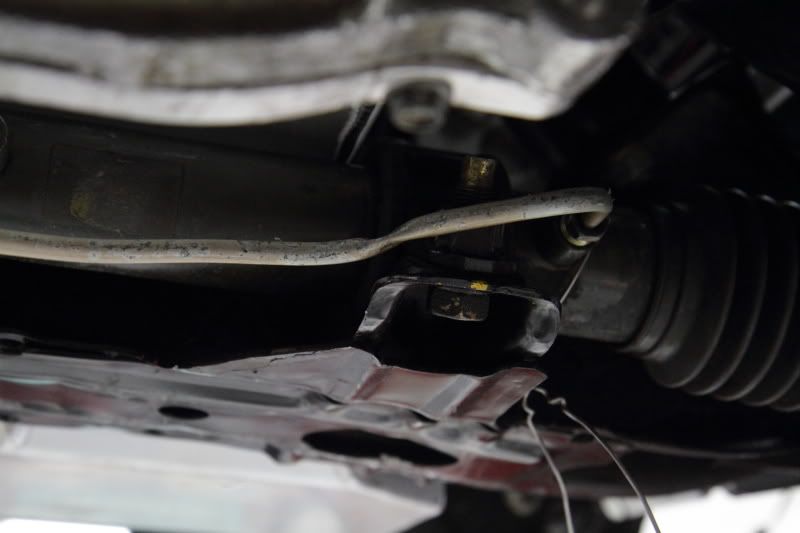
Powdercoated transmission crossmember installed:
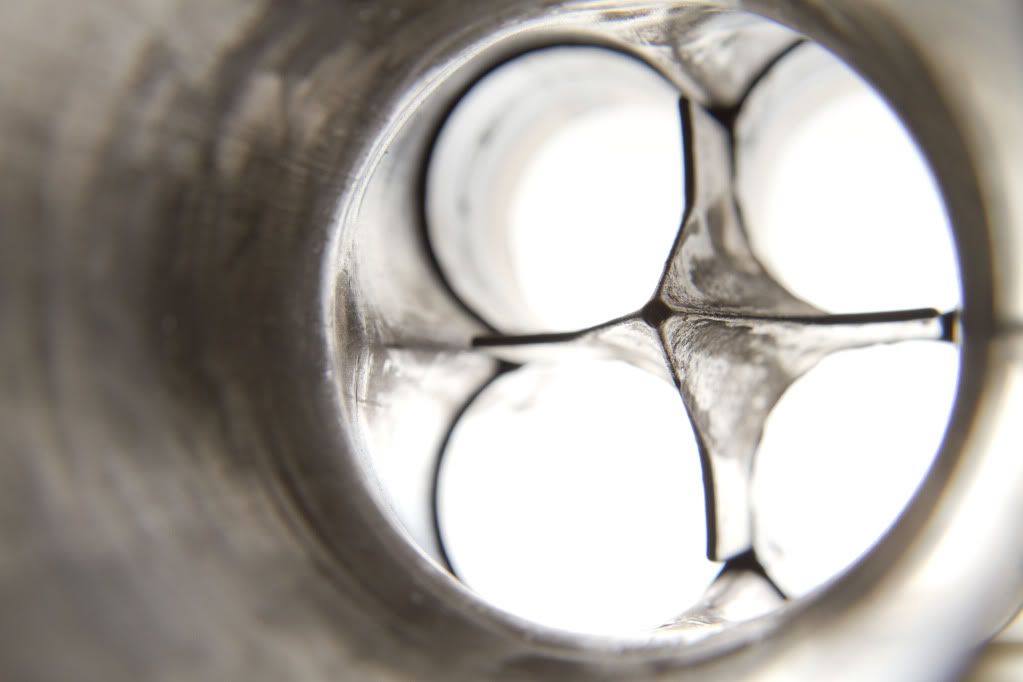
Hooker is now offering header solutions for the the S13 and S14 240sx chassis with LS engines. I am using the stainless version of our S13/S14 swap headers. These utilize investment cast flanges and investment cast collectors with a spear to attenuate flow. These headers are also available in more cost effective materials such as our mild steel swap headers that come in silver or black ceramic, or black painted. The mild steel headers do not feature the investment cast flanges or collectors with the spear.
Stainless headers pictured here:

Inside collector:
Installation of the Hooker swap headers:
I'll start with the most difficult side of the car. The drivers side. On the S14 the steering rack gets in the way and Todd had to design them around that problem. That being said, you must take the U-joint off of the steering rack and and move it out of the way to install the headers. If you wish you can also remove the steering column altogether and it will be a bit easier. This would be much harder to do with one person, so I recommend you have a buddy and pay them off with a drink and/or pizza later.
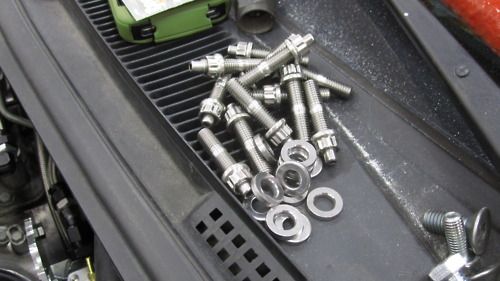
The passenger side is installed with the starter off of the car. Once the header is installed you can easily slide the starter back up through the header pipes and reinstall. I will go ahead and mention that I used ARP Stainless studs and fasteners on my engine. They are NOT supplied with our header parts list, but the supplied fasteners are still very nice.
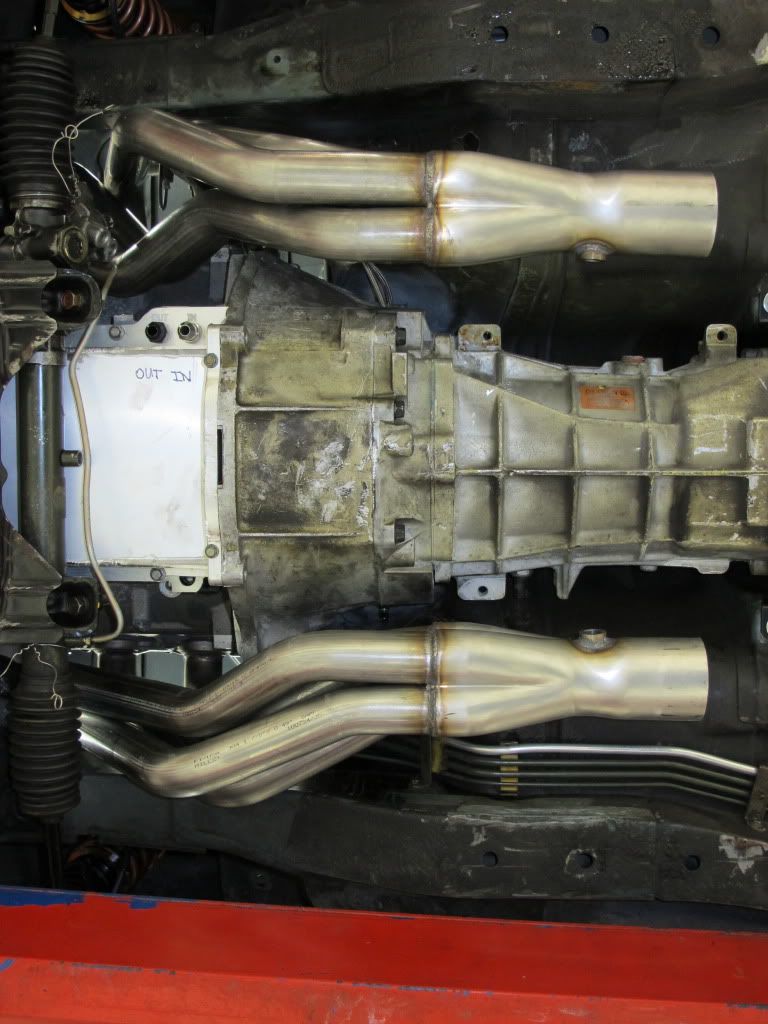
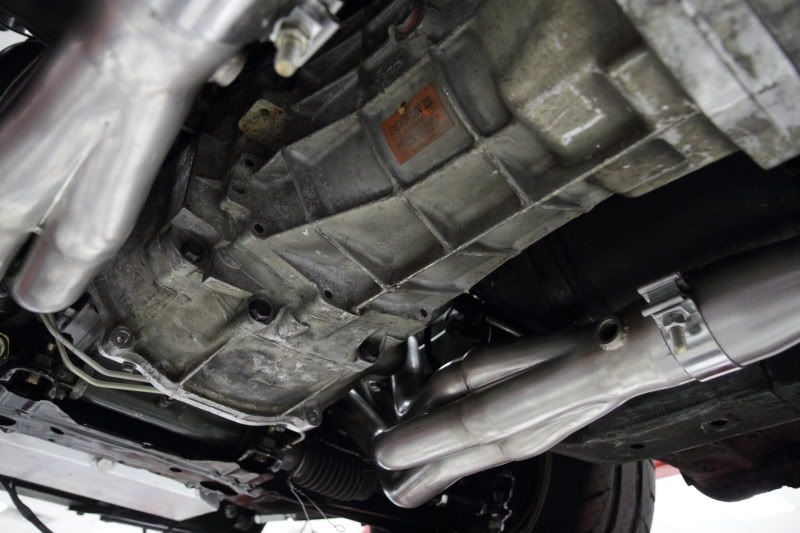
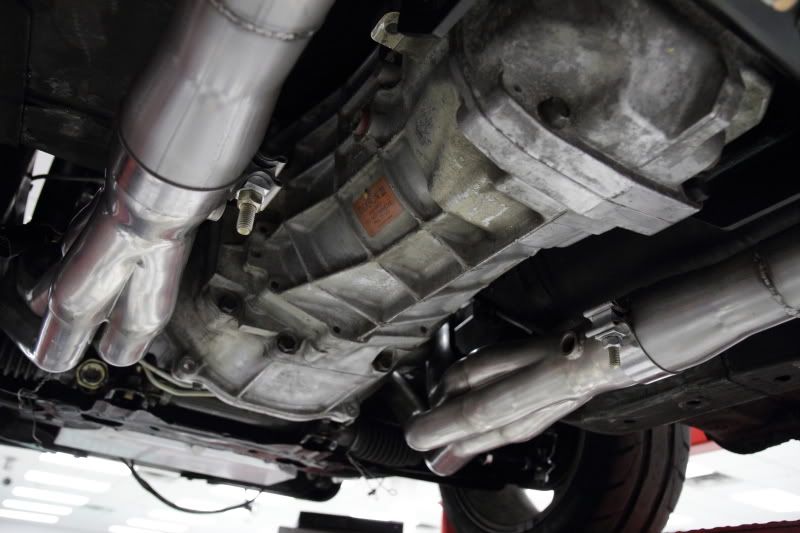
Under car view of headers installed:
Now that the engine is installed in the car, I can move on to some of the smaller stuff that ends up mattering just as much, like building the heater hoses and figuring out where to install the oil filter relocator.
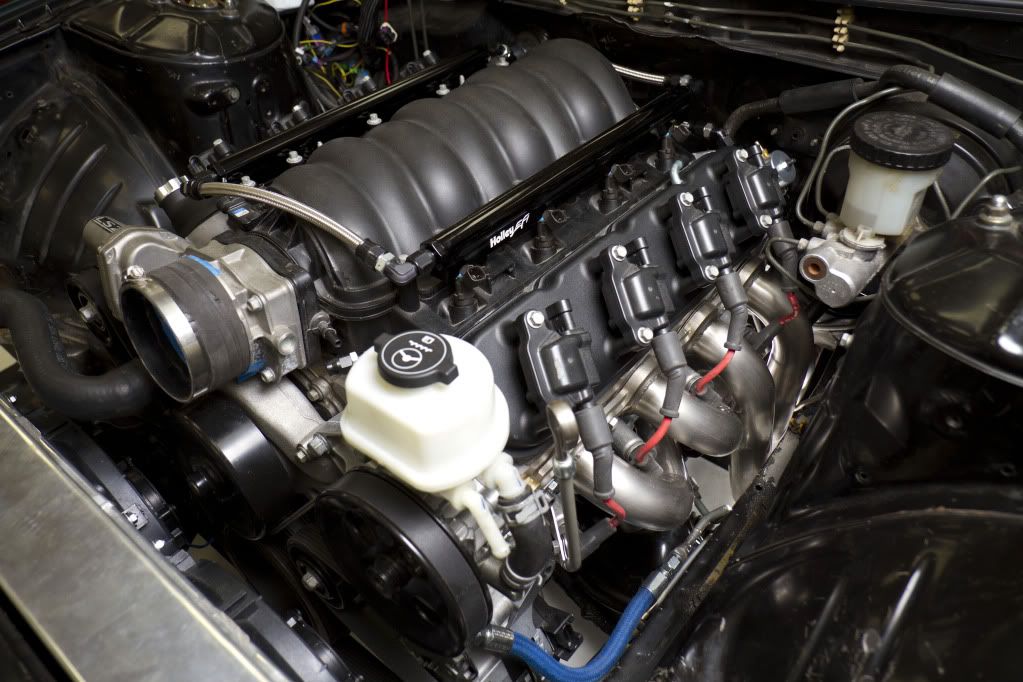
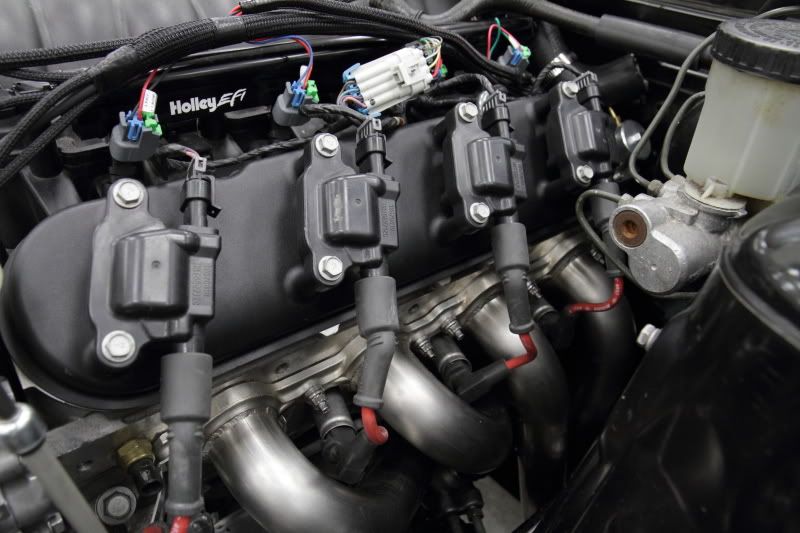
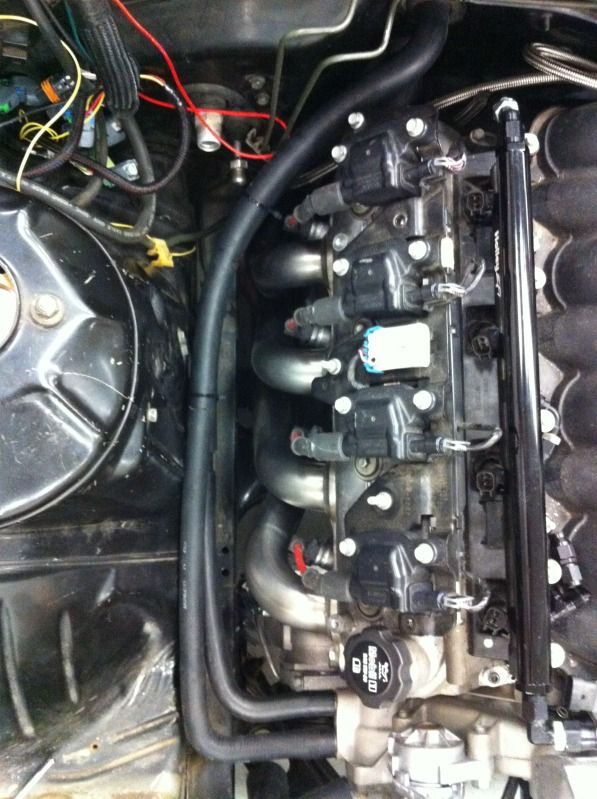
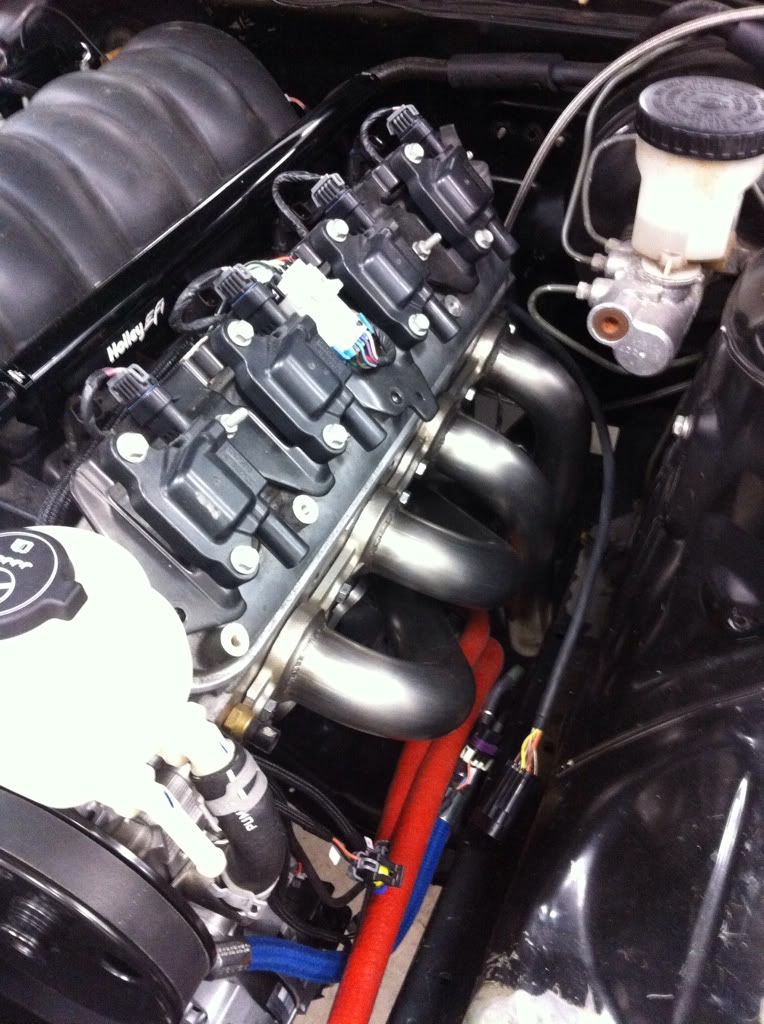
You've seen these on the engine in at least two photos in the thread already but I thought I'd take some good photos of what it takes to install our LS Valve Covers, shown here in "Black Krinkle". They come in raw, polished, satin, or these here.
What's cool about them is that they eliminate the intermediate bracket that is installed from the factory that holds the coil packs, cleaning up the look of the valve cover/coil pack assembly altogether. This saves 2.7 pounds over the factory configuration.
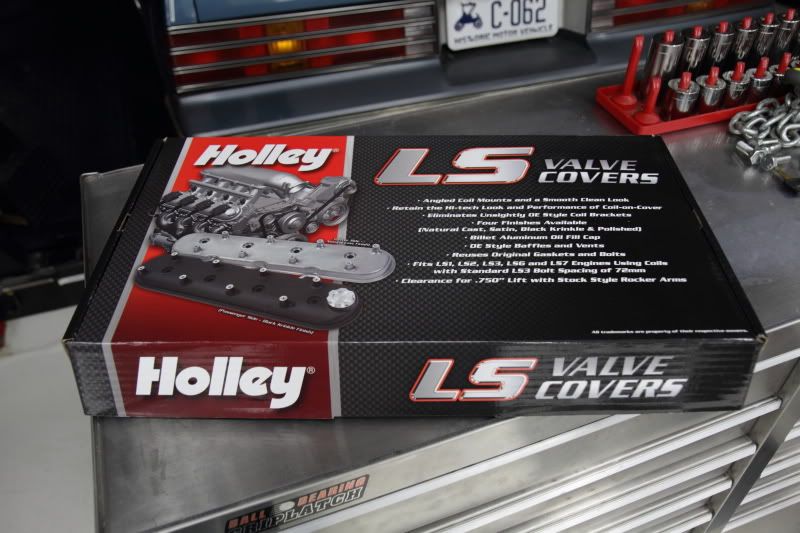
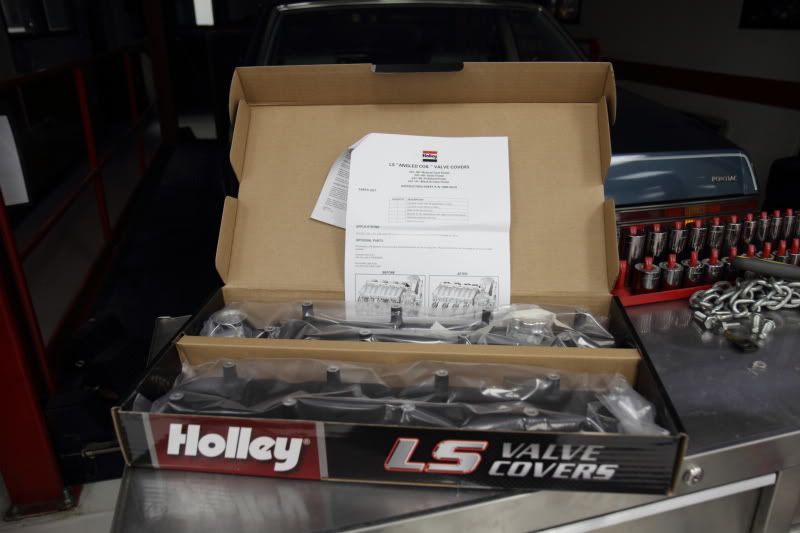
Packaging:
You all have seen LS valve covers before but here's a contrast between ours and the factory piece.
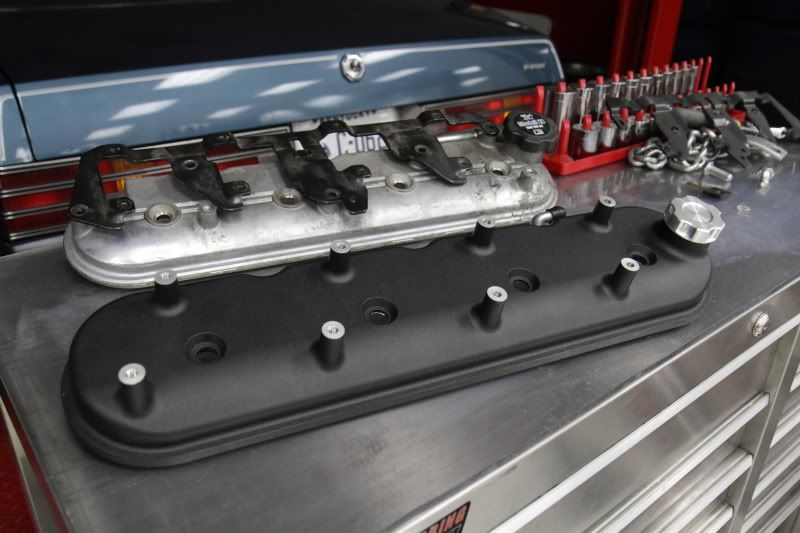
Goodbye brackets!
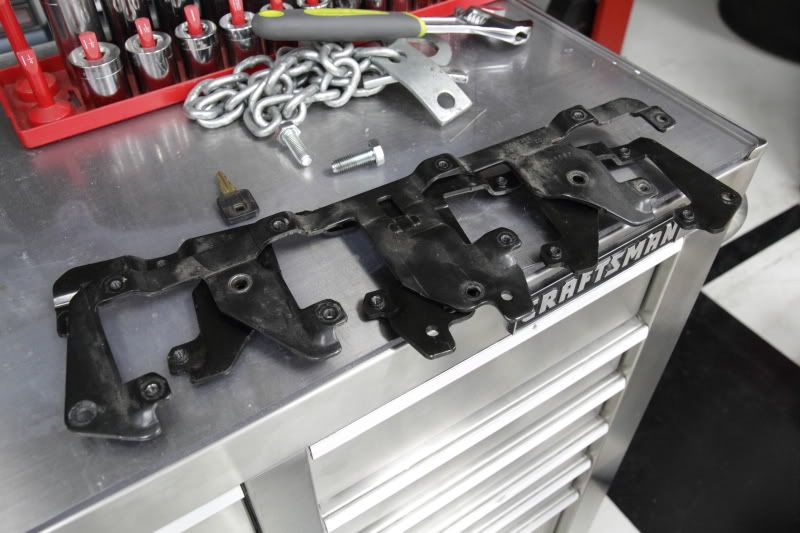
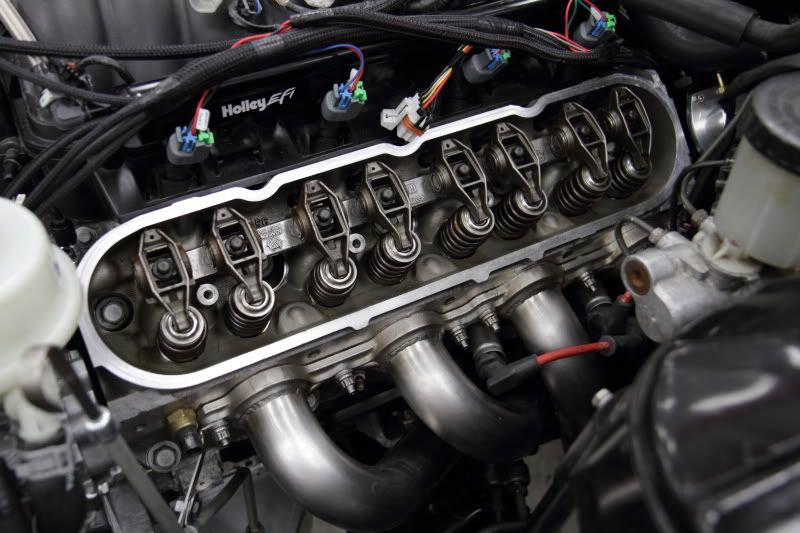
Removal of the old valve covers is cake. Remove the coil packs and spark plug wires from your engine and set them aside. Then uninstall the intermediate brackets and the valve covers themselves. I did them one at a time so that I wouldn't risk getting foreign material in the valve covers.
Pretty clean inside. Very pleased about that.
Our valve cover kits call for you to reinstall the factory valve cover gaskets and once you have them on you're four bolts away from having them on.
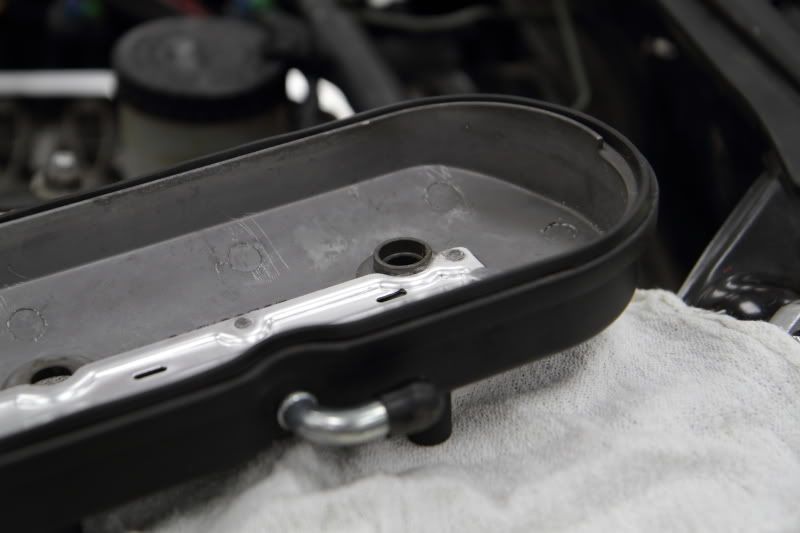
Reinstall the coil packs and spark plug wires and you're done!
I then replaced a couple of the power steering rack lines that I damaged a while back from the numerous install and removal from the development of the Hooker S13/S14 mount kit and swap headers (which are out now btw). I grabbed the ones that I had from my last S14 and that was history.
Like new:
My trans was also pretty dirty as it came from a rear ended GTO that had seen highway use. A scotch bright pad cleaned a lot of it up. I'll repaint it when the engine is back out for the car to get repainted.
Before:
After:
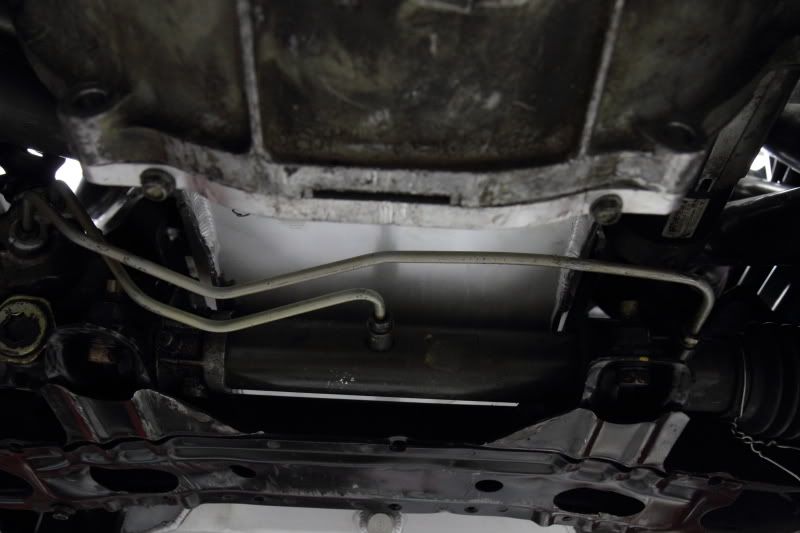
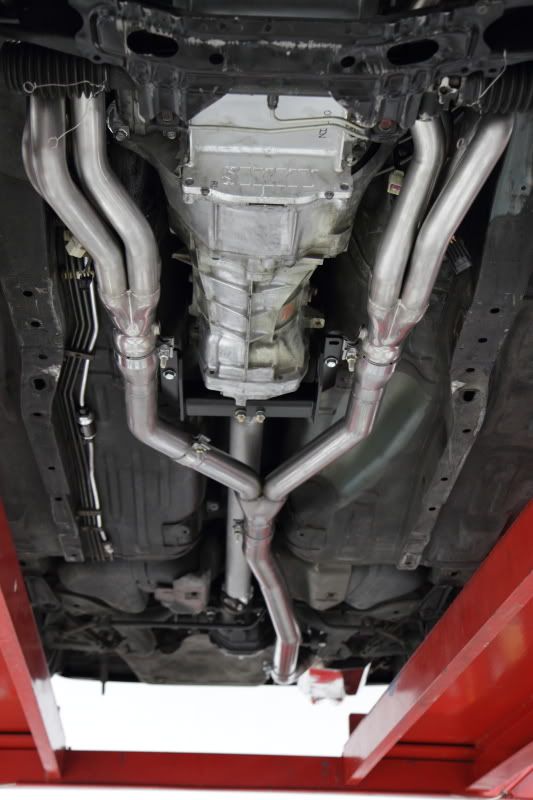
The rest of the exhaust that we've developed is installed on the car presently and I thought I would put up a few photos of that. The kit is stainless for a great look and long product life. It'll be made in the U.S.A. as are all of our Hooke products.
The headers are 1 7/8'' and merge into 3'' collectors, which are joined into a single 3'' pipe directly aft of the trans and run to a Hooker Aerochamber muffler routed in the factory location of the car.
Here's the exhaust routed under the car and a shot of the cleaned up trans post scotch-brite pad:
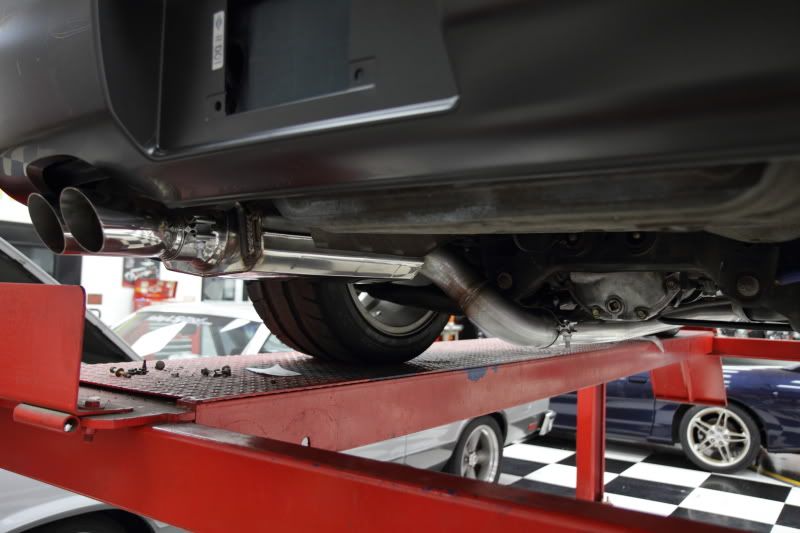
One of the rear with the new bumper and exhaust mocked up:
A wiring update may come later this evening after we get more done!

I love the bracket elimination valve covers! That really goes a long way in cleaning up the look of the top of the engine.

This thread just keeps getting cooler and cooler - please, keep the posts coming!

No cat?
I've been working on a lot of little things and saving up photos for sharing on forums such as this one.
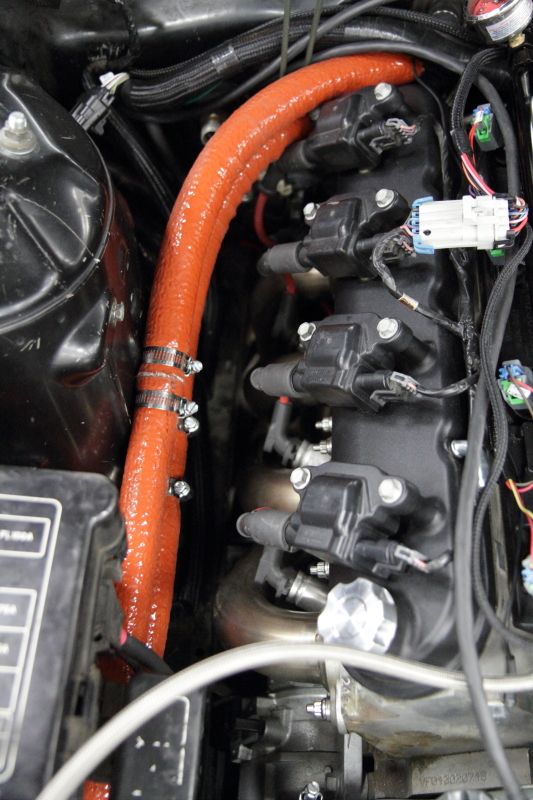
Today I'm covering something small but altogether necessary to complete the swap in a functional manner. Heater hoses installed with locally sourced parts and covered in Earl's flame resistant wrap for protection from the headers.
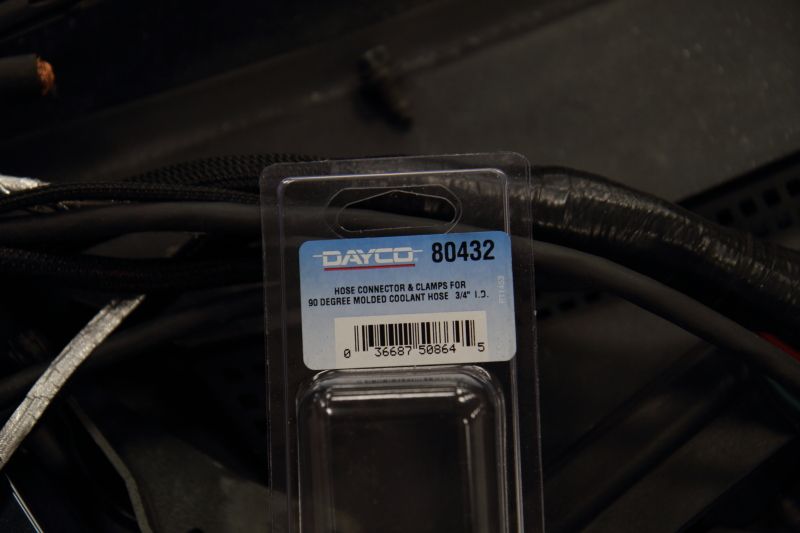
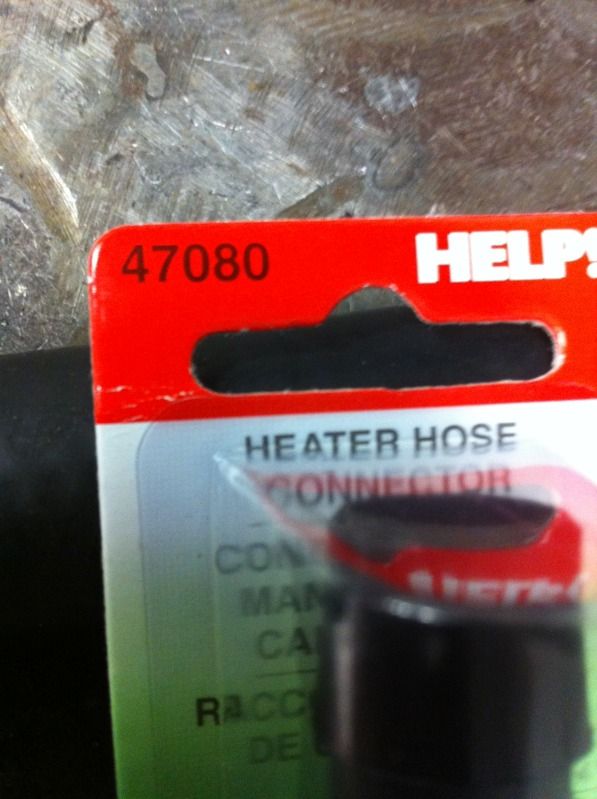
As many others have done, I headed down to Advanced Auto Parts and purchased four hoses that had the bends in them that I needed and joined them together in the middle with unions and clamps. I plan on discovering a more aesthetically pleasing way of doing while the car is in paint, but that will not be until after LS Fest is over.
The two unions I purchased to join the hoses together:
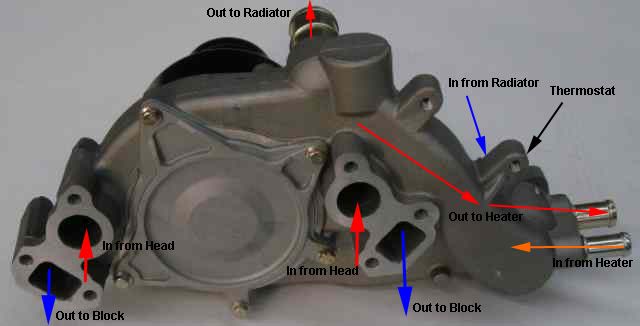
Just a helpful photo that I thought may be of use to others:
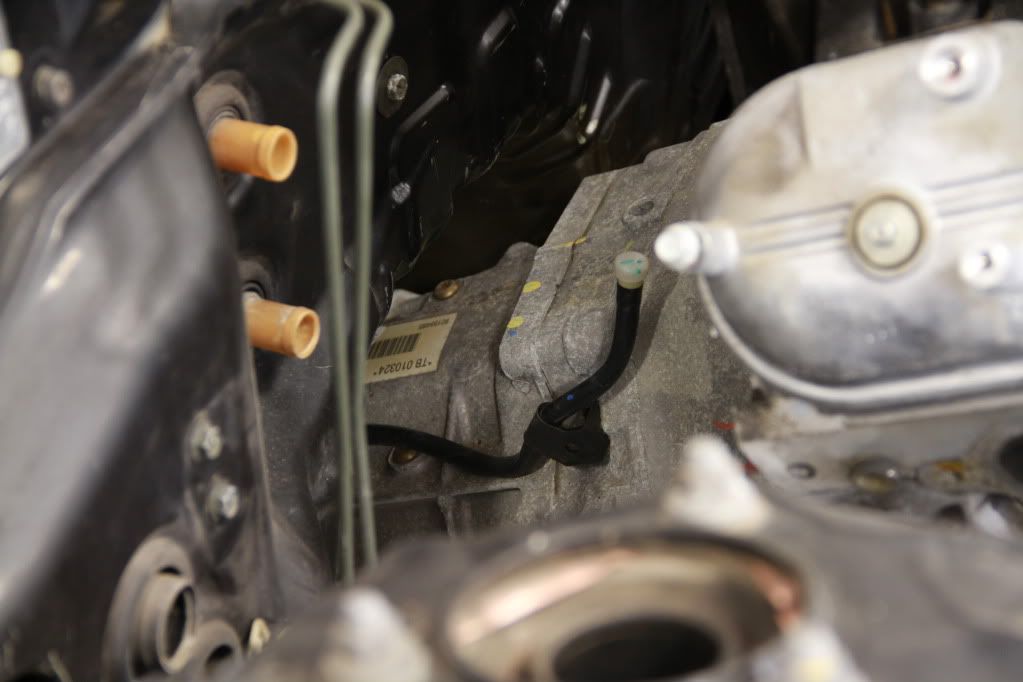
Where your hoses are going on the firewall:
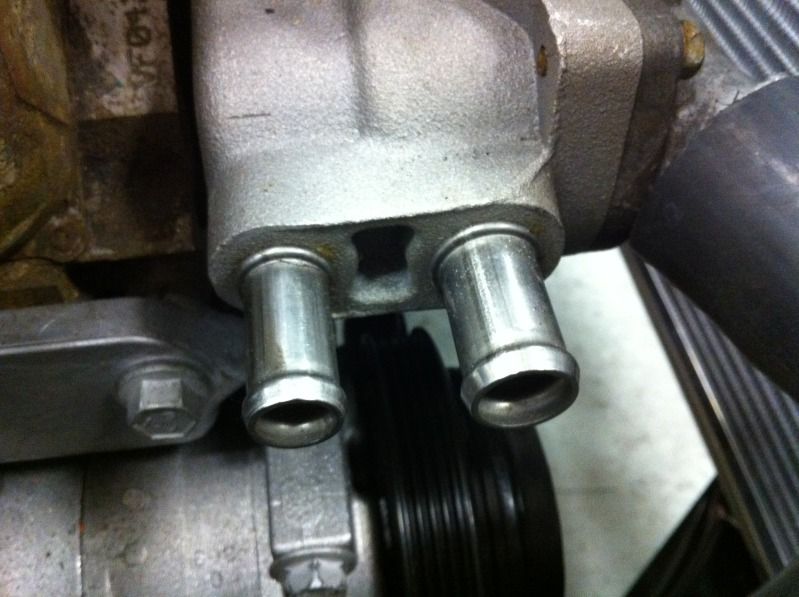
Where they are going on water pump:
How they should be routed when you're through:
After I put these together I took them back off and used some Earl's Flame Gaurd on both sides due to their close proximity to the headers. Here's a final photo of how it turned out:

Great thread. I love those valve covers--wish they were legal for my ESP F-body.

We sell that orange silicone fyre sleeve by the foot. It comes 50' long and I can cut to shorter lengths. I hate to see you piece two short ones together like that.
Are those worm drive clamps to hold it to the strut bracket?
Amazingly enough its the heater hoses that always scream "Motor Swap" when I see an LSx conversion. Two hoses done in rubber draped from the back to the front of the engine bay always look out of place. On an FC the factory used steel tube riding on the frame rail that visually disappears because it looks, well, factory. Did the s14 have something similar that could be reused?
MrJoshua wrote: Amazingly enough its the heater hoses that always scream "Motor Swap" when I see an LSx conversion. Two hoses done in rubber draped from the back to the front of the engine bay always look out of place. On an FC the factory used steel tube riding on the frame rail that visually disappears because it looks, well, factory. Did the s14 have something similar that could be reused?
Unfortunately not MrJoshua,
Reason for that being the SR20 Turbo engine that was in the car before this one had heaters hoses that were much shorter and were rubber as well. They tucked up under the intake manifold which was admittedly on the same side as these new ones but were nowhere near long enough and wouldn't have stretched all the way up to the water pump at all.
To Datsun310guy:
That would've been nice and we sell ours by the foot as well. I actually cut those in half to make it easier to install the hose over the adapters that join the two hoses. The important thing to note here is that there isn't a specific hose for this swap that steps down to the size of the holes on the firewall as they are different on the engine than on the pump.
The clamps are simply holding the hose underneath the Earl's flame guard sheathing tight to the adapters to keep them from leaking.
There are probably a lot of better ways of achieving this, but in planning a course of action I saw some of them as much too expensive and taking a lot more than I had to spend on it. One of the main concerns I had was when I'm on Power Tour and the car springs a leak (hopefully that wont be the case), I'd like to be able to visit a local Advanced or something rather than be stuck on the side of the road with custom AN heater hoses and not be able to fix it from lacking spare parts.
I'm totally open to better options if anyone has some. Being that this is the first car that I've actually built to this extent I would appreciate the experience of others weighing in!
In reply to s14blane:
It is a beautiful swap in a beautiful chassis. I look forward to the continued updates.

I have always wanted to do this swap to hang out with the rat-rod crowd as well, gonna be awesome. I was 90% done with a turbo KA project like this.. ended up losing my ass and selling it for half of what was in it. Wish I would of went this route.
westsidetalon wrote: I have always wanted to do this swap to hang out with the rat-rod crowd as well, gonna be awesome. I was 90% done with a turbo KA project like this.. ended up losing my ass and selling it for half of what was in it. Wish I would of went this route.
You still can brother!

Simply, Bravo!
.....sorry for lack of updates. Had to get ready for our LS Fest event here in Bowling Green, KY. Also spent a ton of my off time on the car, taking photos and getting the car running.
But to continue on where I left off, some safety equipment and power steering equipment came in the other day:
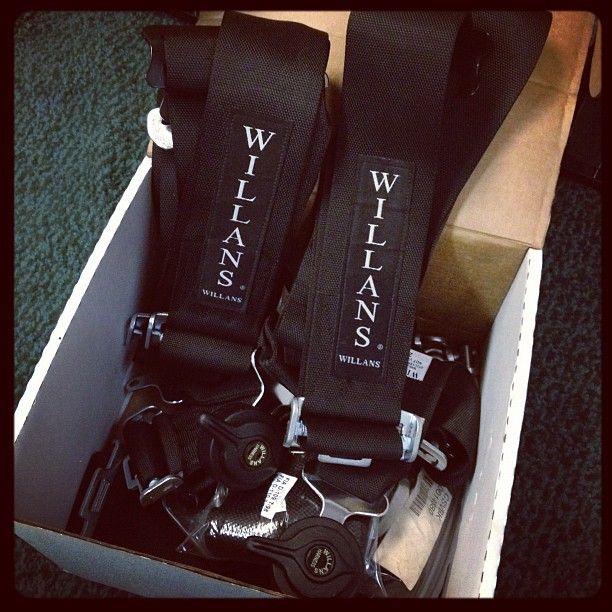
These are the Willans FIA certified saloon five point harnesses, which will definitely keep me more than planeted in my Recaro's in the event things get messy, and they look good in a blue emerald pearl car.
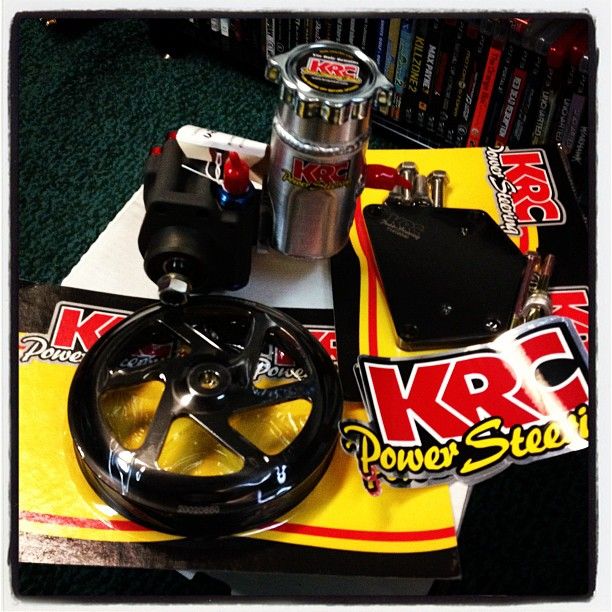
Lastly, I had a bad power steering leak leading up to the event, which didn't look like it was going to get taken care of. When in doubt, buy an insurance policy right? A large sum of money later, and I had this guy setting on my doorstep:
Looking forward to installing these mods and going over my roll bar installation and more very soon.

Good choice. The folks at KRC really know their stuff and deliver common sense tech. I'm working with them right now to speed up my alternator and ditch my fried OE style power steering.
Hey everyone,
Leading up to LS Fest last week, there was one mod that I wanted to make sure I got in the car if I didn't have time for much else. When all was said and done I had the roll bar in, but a friend of mine (Jesse Vaughn, owner of Level 7 Motorsports in Marion, Illinois) was bringing the harnesses pictured above down to me), so I had to roll with the OEM seat belts for the entire event.
Here's was my take on how to make sure the roll bar got installed properly.
Here's the bar as I received it on the docks here at work:
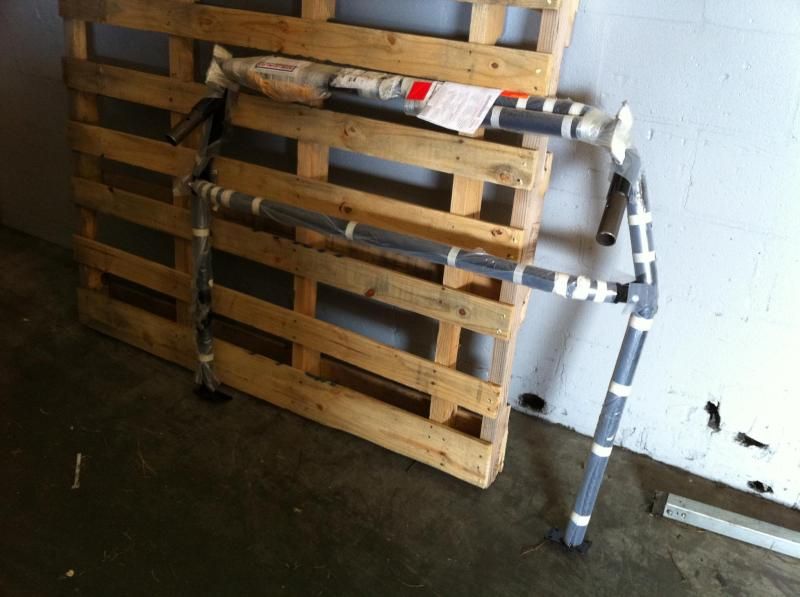
The bar is made of 1.5'' round DOM tubing. I would've preferred chromoly, but hey, i'm allowed to skimp in at least one place right?
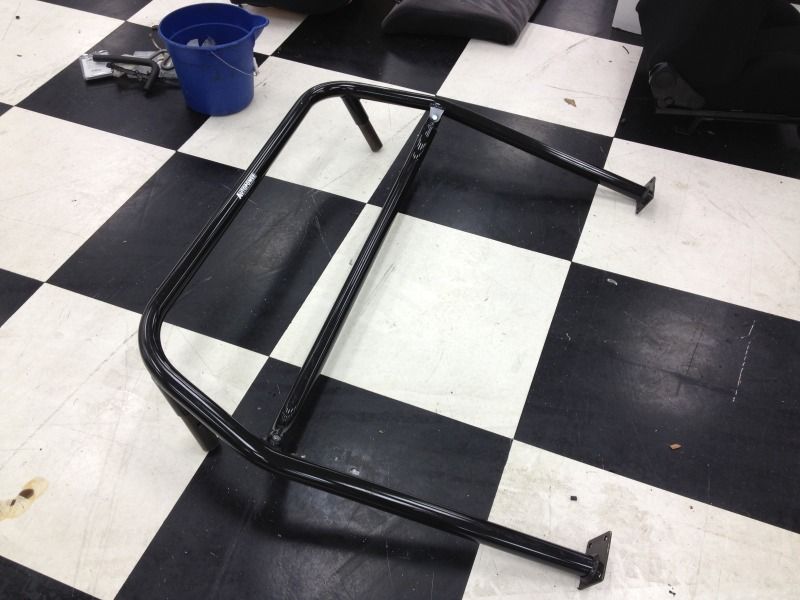
Bar (unpackaged) sans rear support bars:
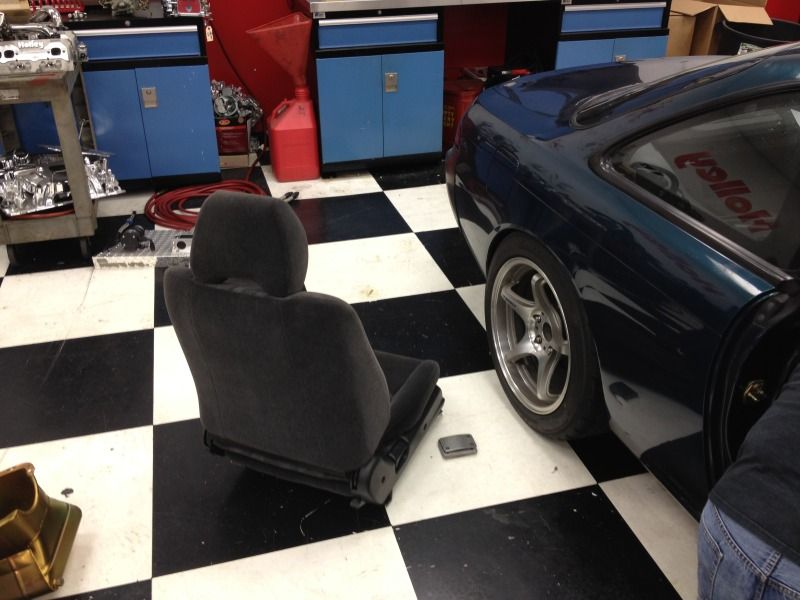
Bar sitting inside car (not in place):
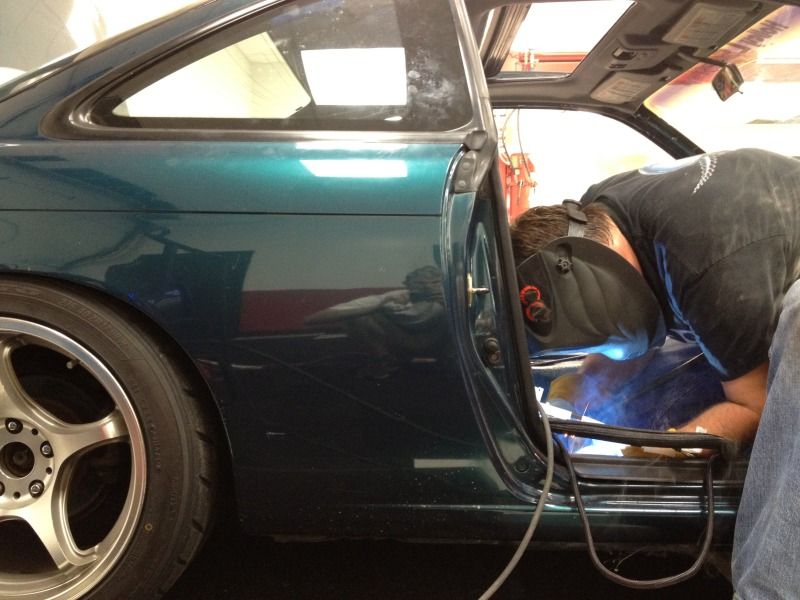
I will say that I did not do any of the welding on this portion of the project. For that I relied on a good friend, Todd O'neill, and he did a great job. He's been a fabricator for a number of years and the results show.
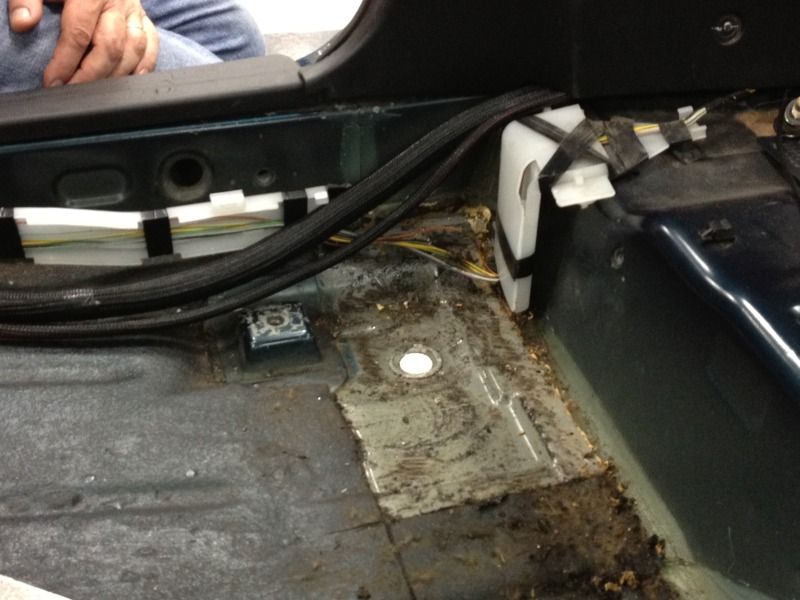
One of the benefits of having a Nissan with a V8 in it is the power to weight ratio that results when the two are put together. But there is a caveat to less weight, and that manifests itself in the reality of thin sheet metal in various places around the car. After looking behind the front seats and determining where the bar was going to sit on the floor, we realized if the car were to end up on it's roof, it would probably push through the bottom of the floor.
Adding more material to the floor to join the sides of the car to the frame rails and to strengthen the rear seat bracket made a lot of sense after seeing what we were working with.
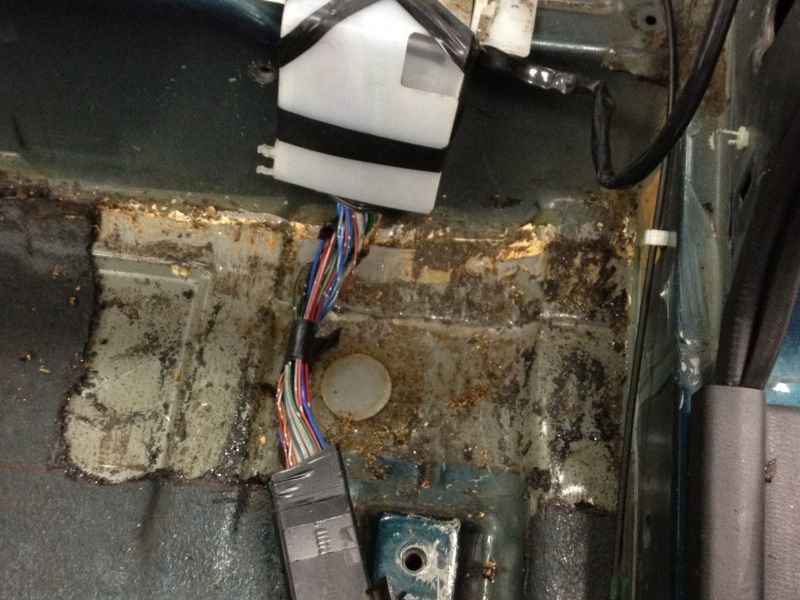
After removing the front seats (I had already removed the rear interior a year back), we started chipping away at the sound deadening material. I didn't see a need to use dry ice whatsoever, as a hammer and a screwdriver seemed to work perfectly. Additionally I called up a local business that deals in metal and fab work and ordered 2’ of 6” x ¼” of flat bar.
Here's what we ended up with after scraping out the sound deadening in the rear:
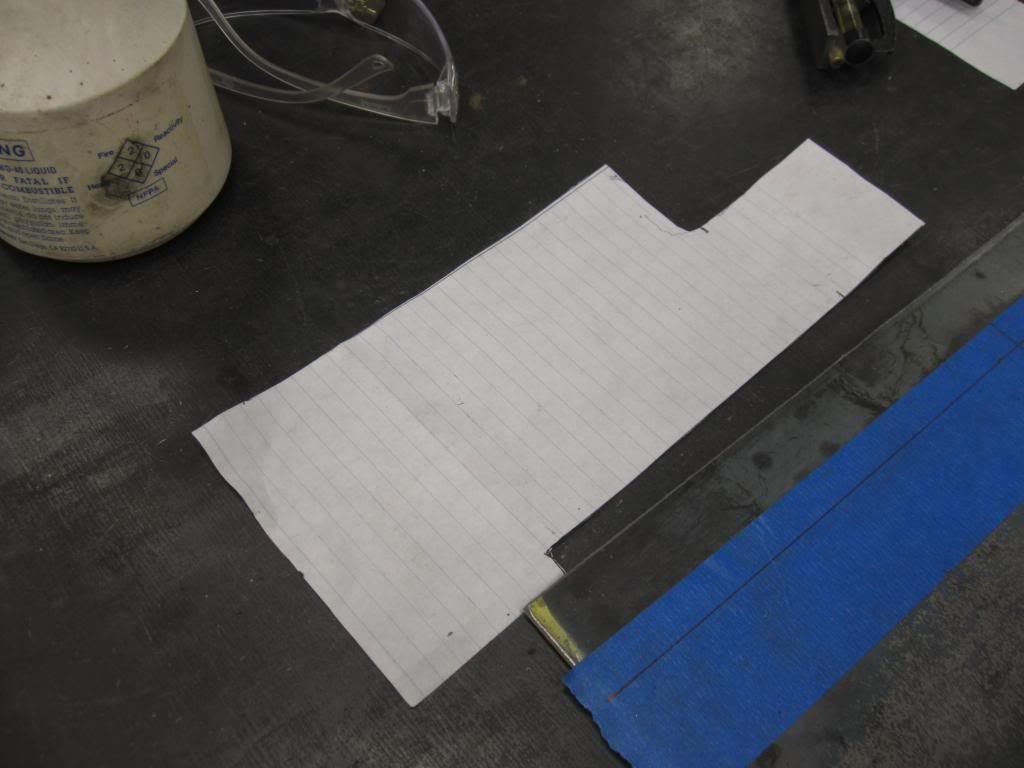
After taking delivery of the material I ordered, Todd got to work on cutting the metal, forming it to fit the area it was to be installed in and welding it together. The floor varies a bit from side to side, so that is why the plates we ended up with differ slightly.
Template for support plates:
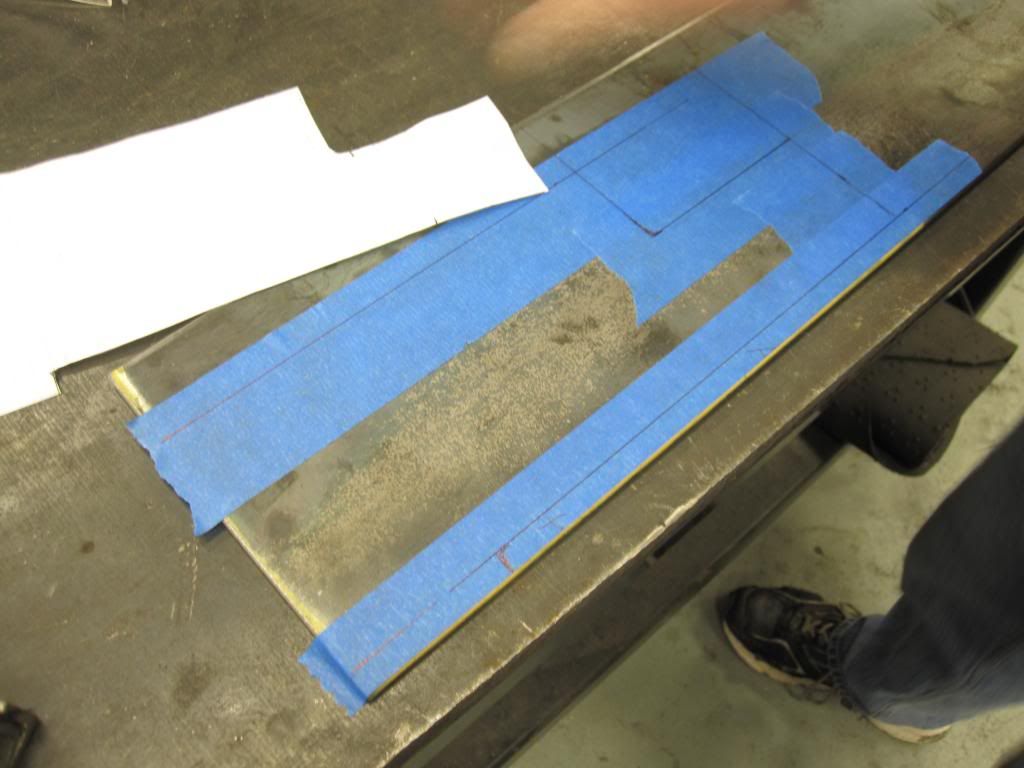
Driver side plate (laying in correct location but not installed):
Passenger side plate:
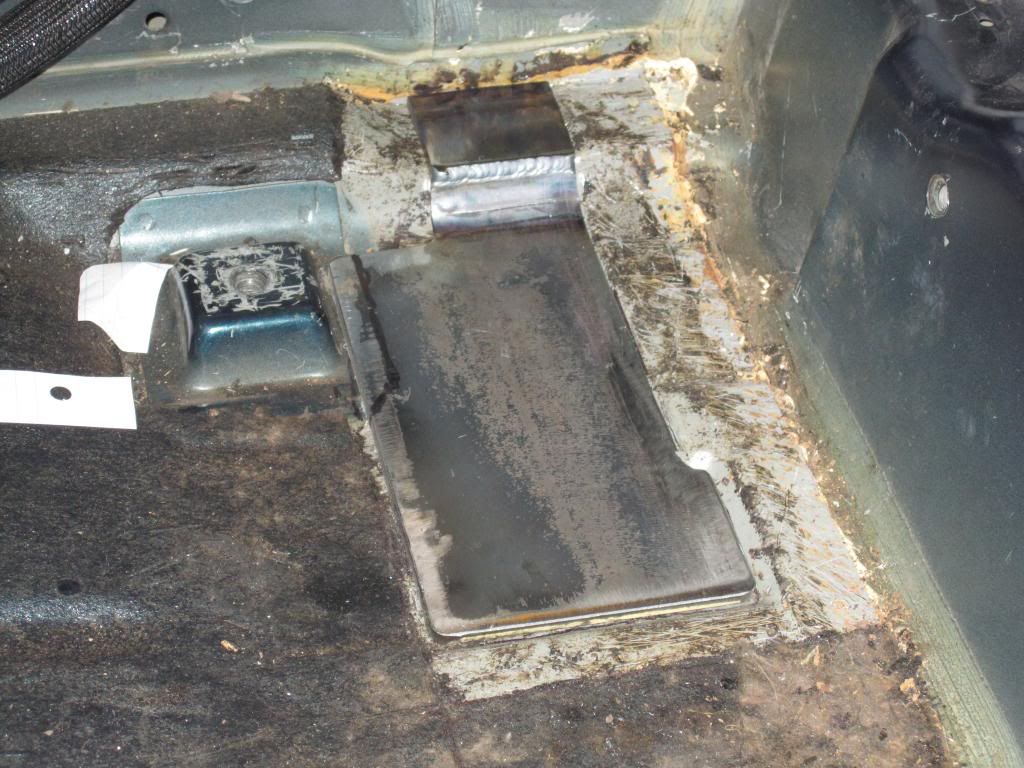
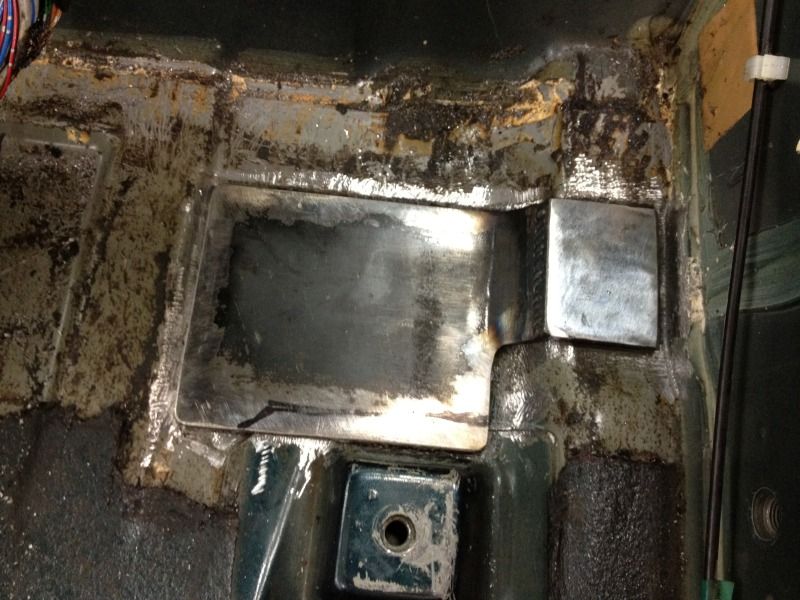
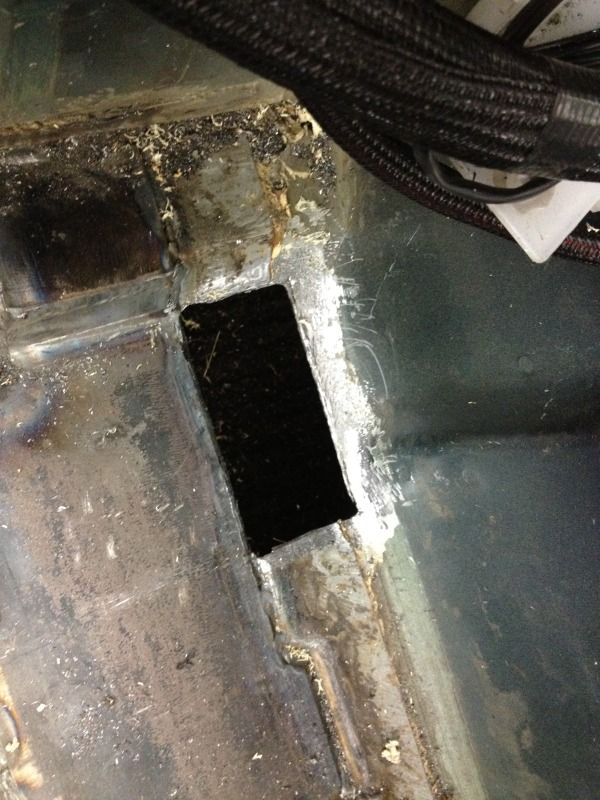
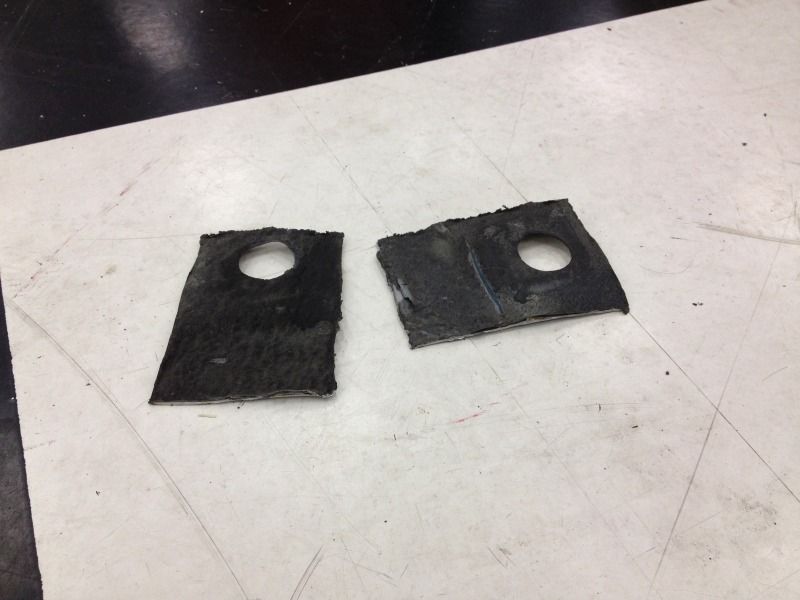
Once those were put together we cut out the squares on the floor where the supplied plates that came with the bar would go. Our suspicions about the meager floor thickness were confirmed when the first plate hit the ground and sounded like tin bouncing off of the floor:

Todd doing work:
Passenger side plate welded in:
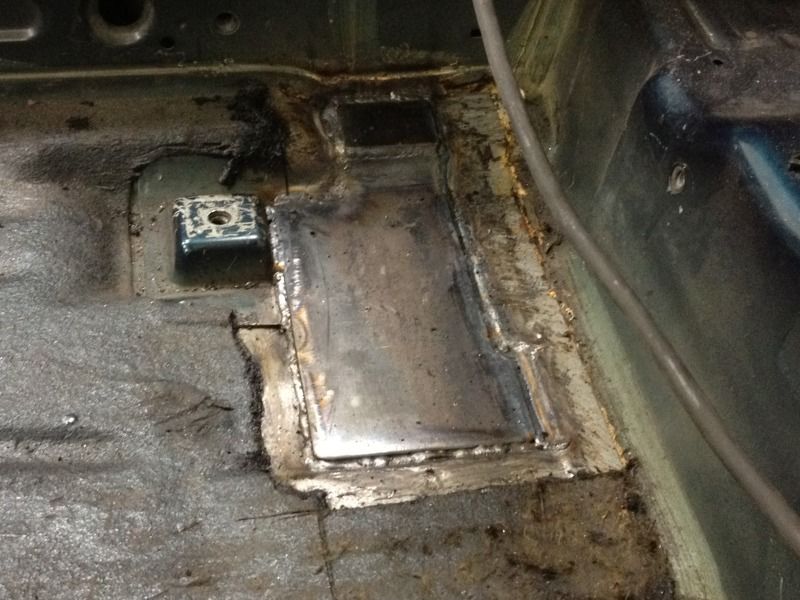
We then tack welded the plate to the rest of the car on the bottom for extra strength.
After that we put the bar into the car and placed it in the appropriate location. the bar comes pre-drilled in each of the four contact points so at that point we only had to hold it in place and center punch each hole for drilling. After that we made pilot holes and then drilled it out to the appropriate size for the hole (exact size is escaping me at the moment).
This is unfortunately where I run out of very many photos as it was getting late, and we both had to get home. After drilling the holes we simply put in some bolts, flat washers, and nylock nuts to keep a good hold on the fasteners and that was that. I plan on installing my harnesses shortly, as well as a small fire extinguisher to the crossbar to make it easily accessible in the case of a fire.
While adding metal and weight to a car isn't on the top of my list, making sure the car is safe for my future exploits of speed preempts keeping the car super light. Besides. I have torque to cancel out any additional weight the car has seen up to this point anyway.
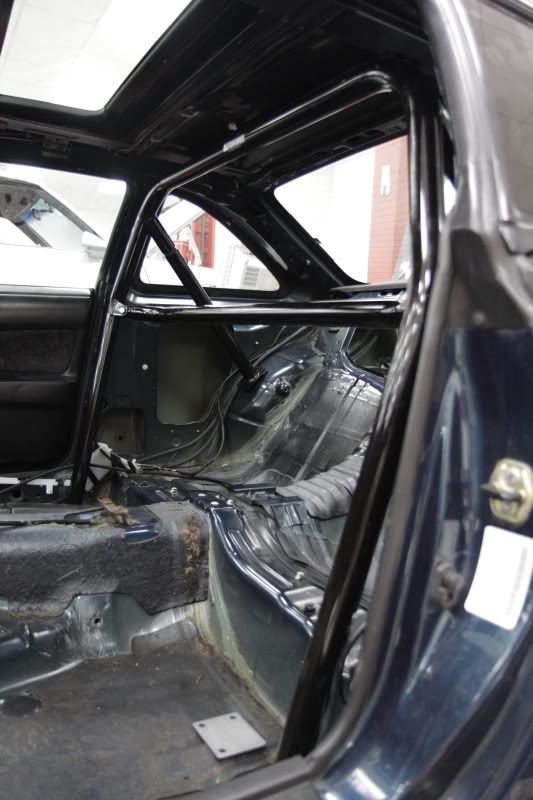
More pictures of the roll bar installed in the car to follow. I'll edit them into the this original post.
Update: Photo of rollbar installed. I need to clean off that rust that is forming and paint, just gotta make the time.
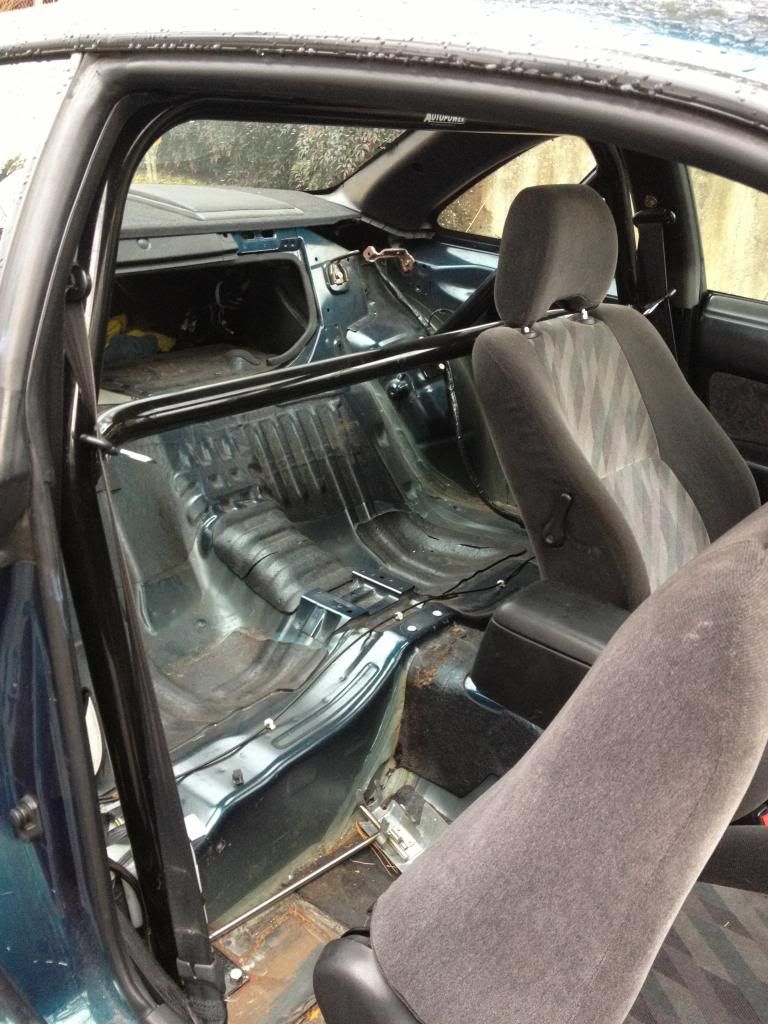
Laters.

Amazing build, definitely doing it the right way! LS2 + S14 sounds like a fun combo, looking forward to seeing the rest of this one!
IT HAS BEEN QUITE SOME TIME:
Trade shows have demanded most if not all of my attention, not to mention before those started we had LS Fest (www.lsfest.com) to attend to, as we put that event on mostly by ourselves. I have to admit at this point that the car IS running and I did put it through some test runs on the autocross to shake it down. I'll cover that at a later point when I cover the rest of what it took to get the car running.
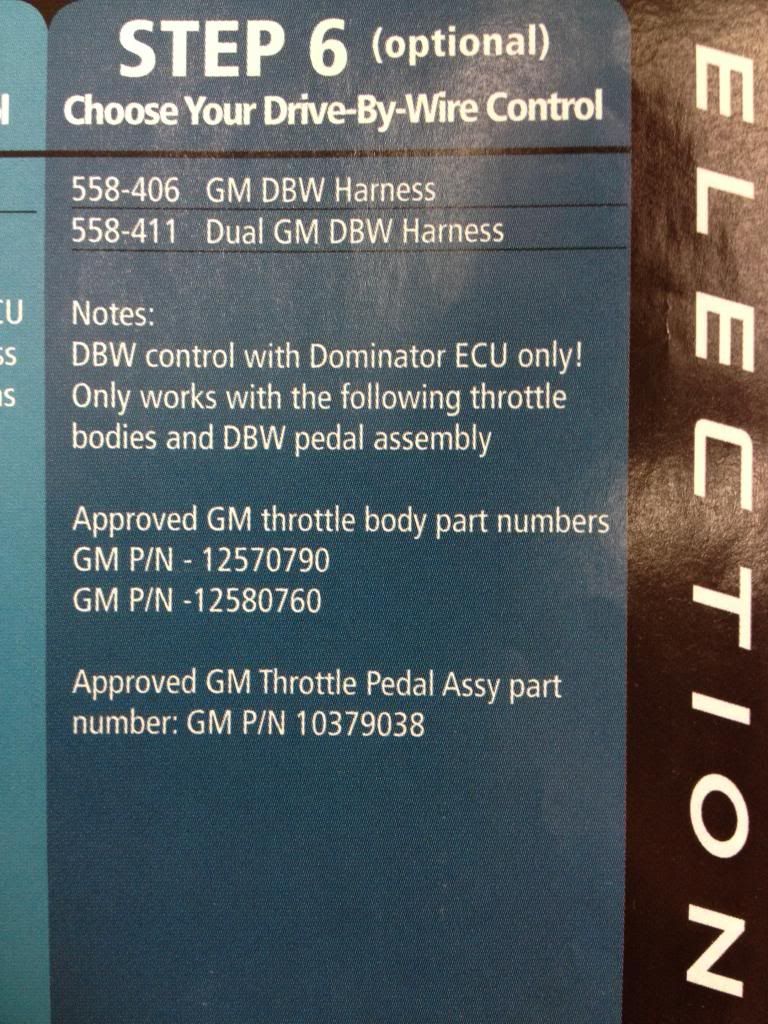
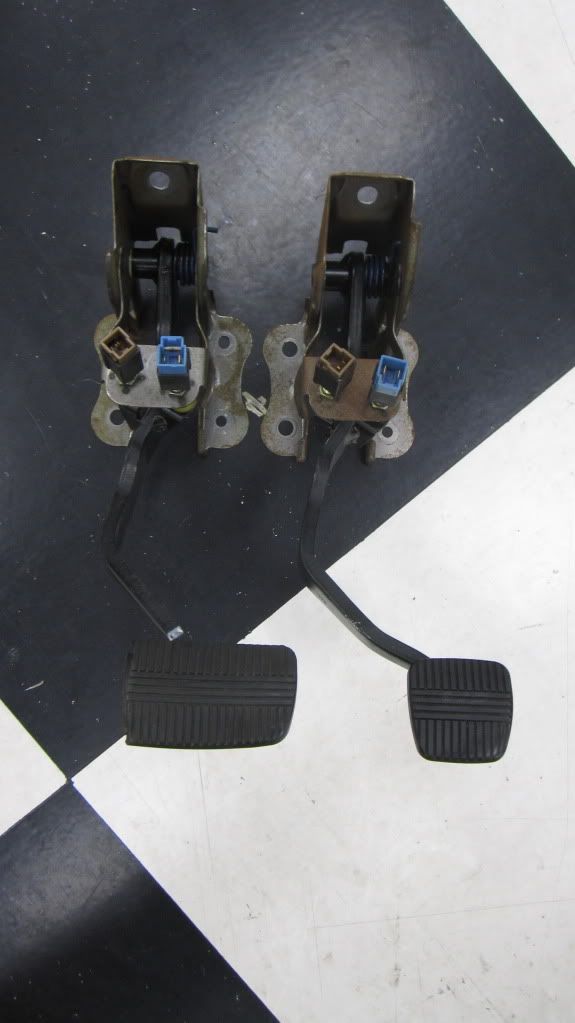
Regarding the installation of the DBW (Drive-By-Wire) pedal:
The Holley EFI portion of the catalog clearly dictates two specific GM DBW throttle bodies and one GM DBW pedal that our Dominator EFI system supports. Those part #'s are included in the image below for your benefit.
I've seen threads where people are making offset brackets and so forth, but all I did was pop the plastic piece off the back of the pedal assembly and drill some offset holes that work for the OEM studs on the car and slapped it in there. Bolted right down and feels good so far.
I ran the wires for the DBW pedal through the body and engine harness hole in the firewall to keep things organized and ran the wire across dash to plug into the pedal.

I'm going to be using our Holley EFI Dominator to control the engine, DBW, and cooling fans on the car.
This ECU is necessary for this project only because I am retaining the DBW throttle body. Other than that, for what I am doing with the car, Holley's HP EFI unit would be more than adequate for mine and most other enthusiasts to integrate into their LS swap. The Dominator features many things I will not be using like Auto Trans control, and a host of programmable inputs and outputs.
The HP is capable of the same boost control and progressive nitrous control features that the Dominator unit is, but it can't do DBW so I had to go with the larger EFI unit. If I want to utilize the smaller box in the future, I will not have to worry about rewiring or changing harnesses, as I can simply install the other box in the car and plug up, reinstall the tune and go from there.
Since the car was an automatic in it's OEM state, I decided to source a brake pedal that wasn't a hacked off automatic version and install it. It's pictured below:
My next update will feature the installation of the remote oil filter setup that I have on the car.

I love this thread, I have always wanted to LS a 240sx, I do not dare to swap one into an rx7 like most people. I just can't do it...
Great work and high quality.

Cone_Junky wrote: Makes my humble little S13 look like a POS! I'm just trying to make room in my fenders for 245 r-comps, I couldn't imagine trying to stuff a 275 under my S13. Nice build
245's fit a stock s13 no problem. I had pretty big 245/45/17 falken azenis 615's under the fenders of my s13 with RSR race springs (don't lower it that much, since the 240 doesn't have much travel it handles like E36 M3 when you slam it), on mb motoring wheels, I think they were the "weapon." 17x9, as far as offset its been a long time so I can't remember. maybe it was +25? But I had no rubbing.
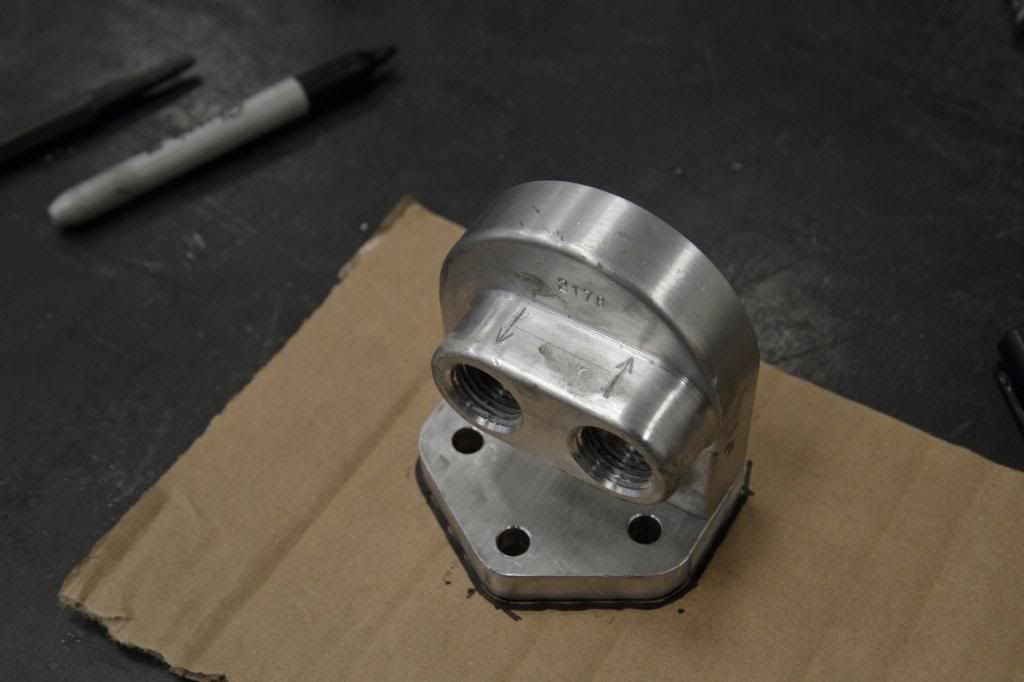
Oil filter setup is complete:
Since I'm using the Sikky oil pan I am having to relocate the oil filter as the pan does not have provisions for the oil filter; but rather holes for A.N. adapters for in and out oil transfer.
I wanted to avoid installing the filter in such a way that guaranteed I spill a lot of oil every time I do an oil change, so I focused on an out of the way area; the drivers side wheel well.
I took the remote oil filter mount and made a template out of cardboard for it:
Then I took that template over to the area I wanted to mount it and center punched those areas: After that I needed a good way to mount the remote filter mount as the other side of where I was installing it was just inside the frame rail, keeping me from putting a nut on the end.
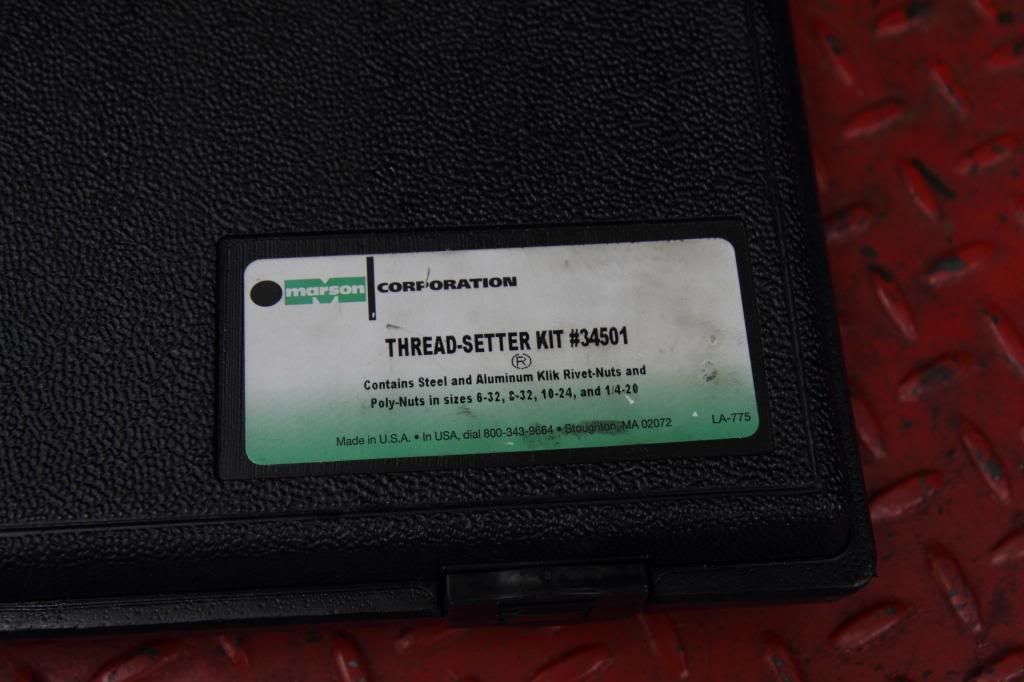
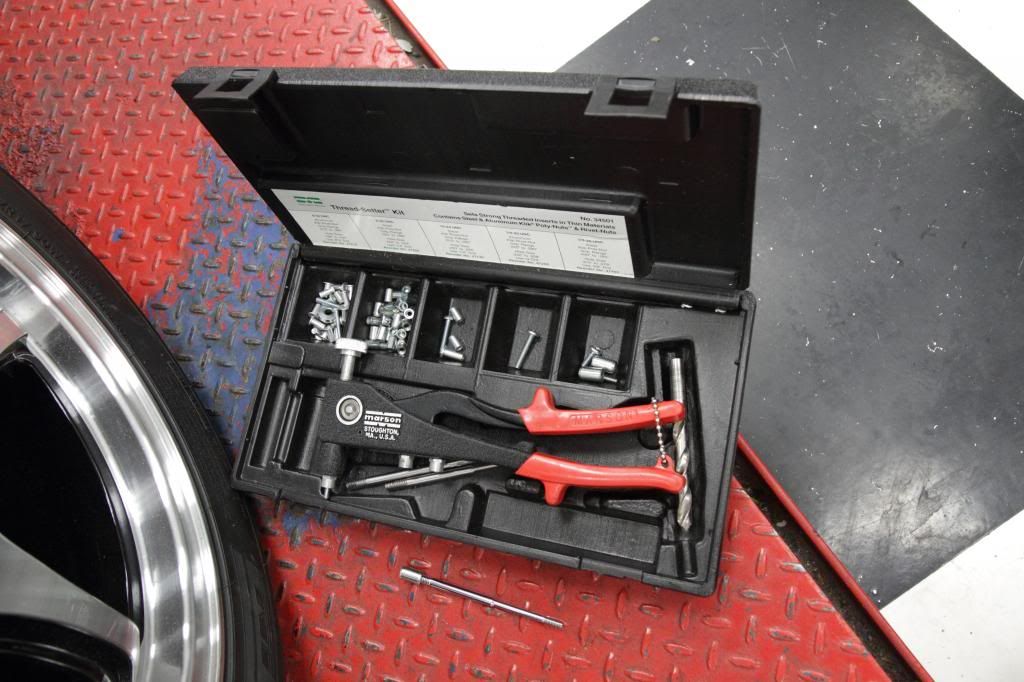
That's when I learned about Threadserts. Threadserts are a tool you can purchase. It comes with various sizes of Threadserts that you can use to do similar things as I am in this situation.
Basically you drill yourself a starter hole and then drill to the size dictated by the Threadsert you are using, and then take the tool and install the Threadsert on to the end of it. Sticking the Threadsert into the holes that you have drilled you can now crimp the Threadsert into place. The result is a surprisingly strong mount location for the remote oil filter, and I learned how to use a new tool.
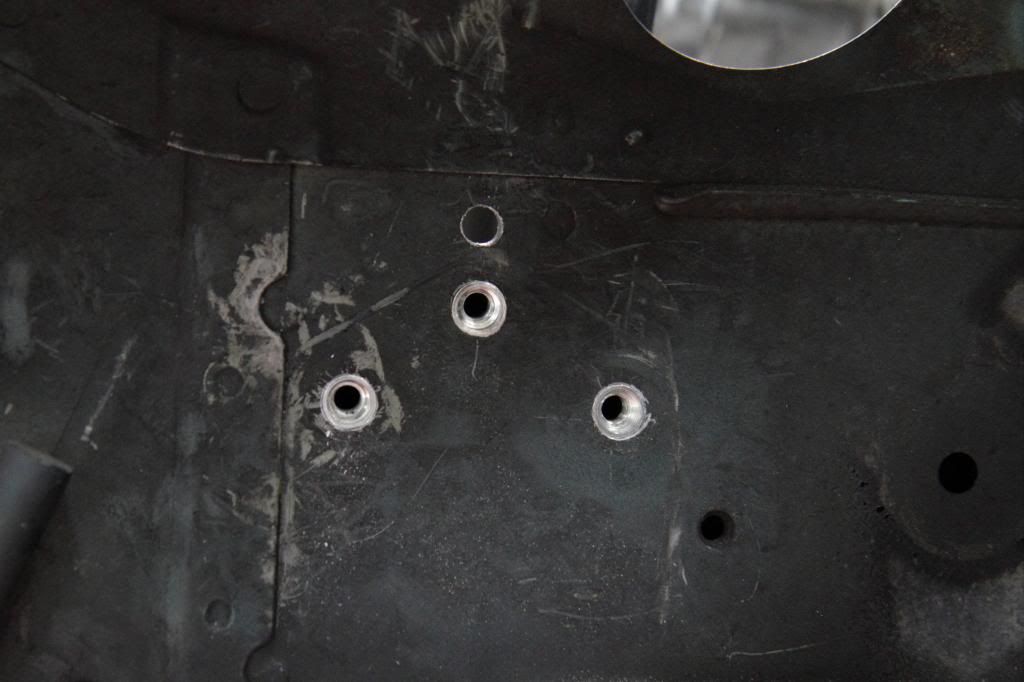
The next step involved removing some of the sheetmetal on the drivers side so that I could run the lines from the oil pan up around the steering rack and drivers side engine mount and through the side of the car to remotely mounted filter.
Enter Harbor Freight "Chicago" brand Hole saw:
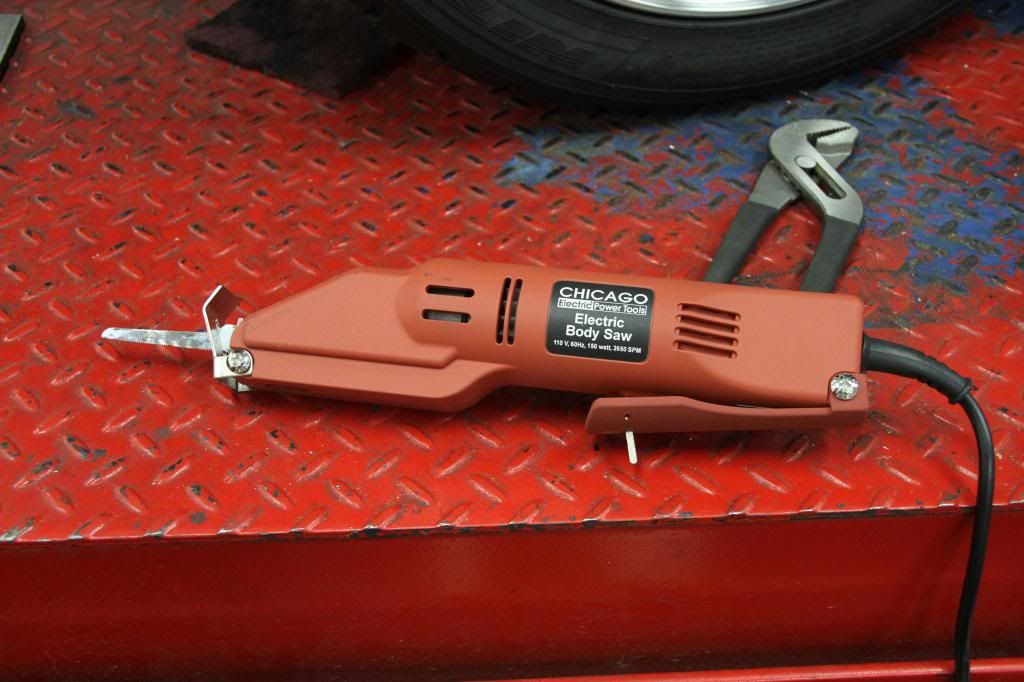
Moments later I had my hole:

Installed the Earl's remote filter mount with filter, and Ano-Tuff fittings and adapters:
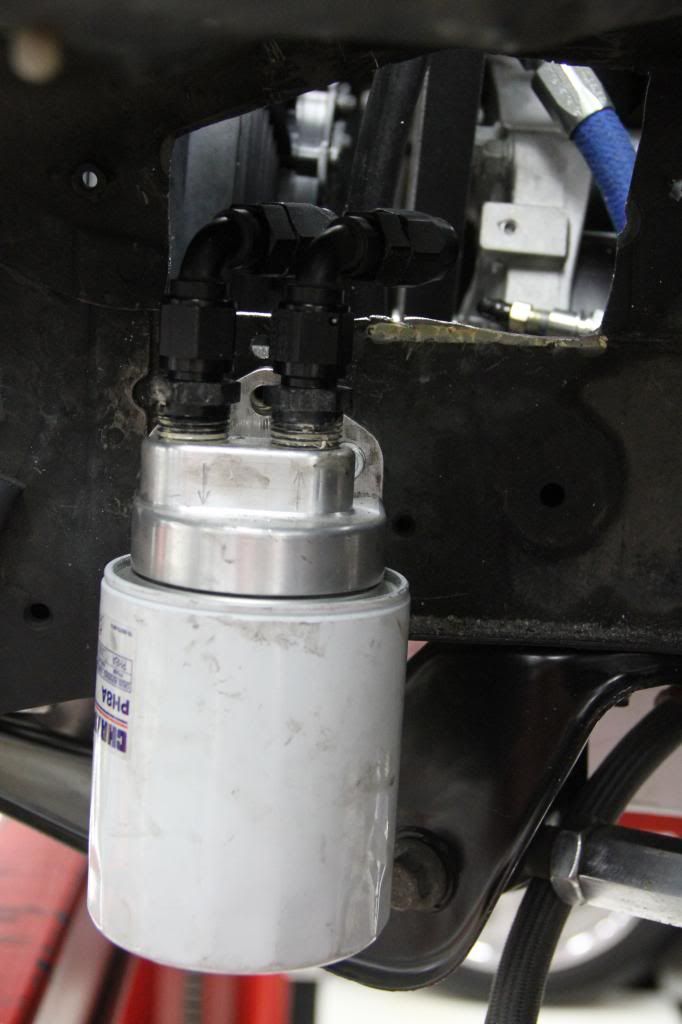
...and then ran the Earl's Pro-Lite Ultra hose up through the engine bay to mate, gratuitously using zip ties and Earl's Flame Guard to ensure that the oil lines don't wear down due to heat from the proximity of the drivers side header.
Much better shot will replace this one soon once I can get one on Saturday (it gets dark here at five o'clock in the afternoon now)....

I have found on the s13 if you lower past where the lower control arms are level the car will push real bad.
You'll need to log in to post.


