


Im a little confused about the Nissan Sentra Manual brake booster.
If it is a brake booster, how is it manual?
I feel like I am missing something here....

Im a little confused about the Nissan Sentra Manual brake booster.
If it is a brake booster, how is it manual?
I feel like I am missing something here....

wvumtnbkr wrote: Im a little confused about the Nissan Sentra Manual brake booster. If it is a brake booster, how is it manual? I feel like I am missing something here....
i could be wrong but i think he is referring to a manual trans sentra brake booster?

wvumtnbkr wrote: Im a little confused about the Nissan Sentra Manual brake booster. If it is a brake booster, how is it manual? I feel like I am missing something here....
Sorry for the confusion @wvumtnbkr , what I mean to infer was as edizzle89 mentioned, the booster is from a manual transmission Sentra.
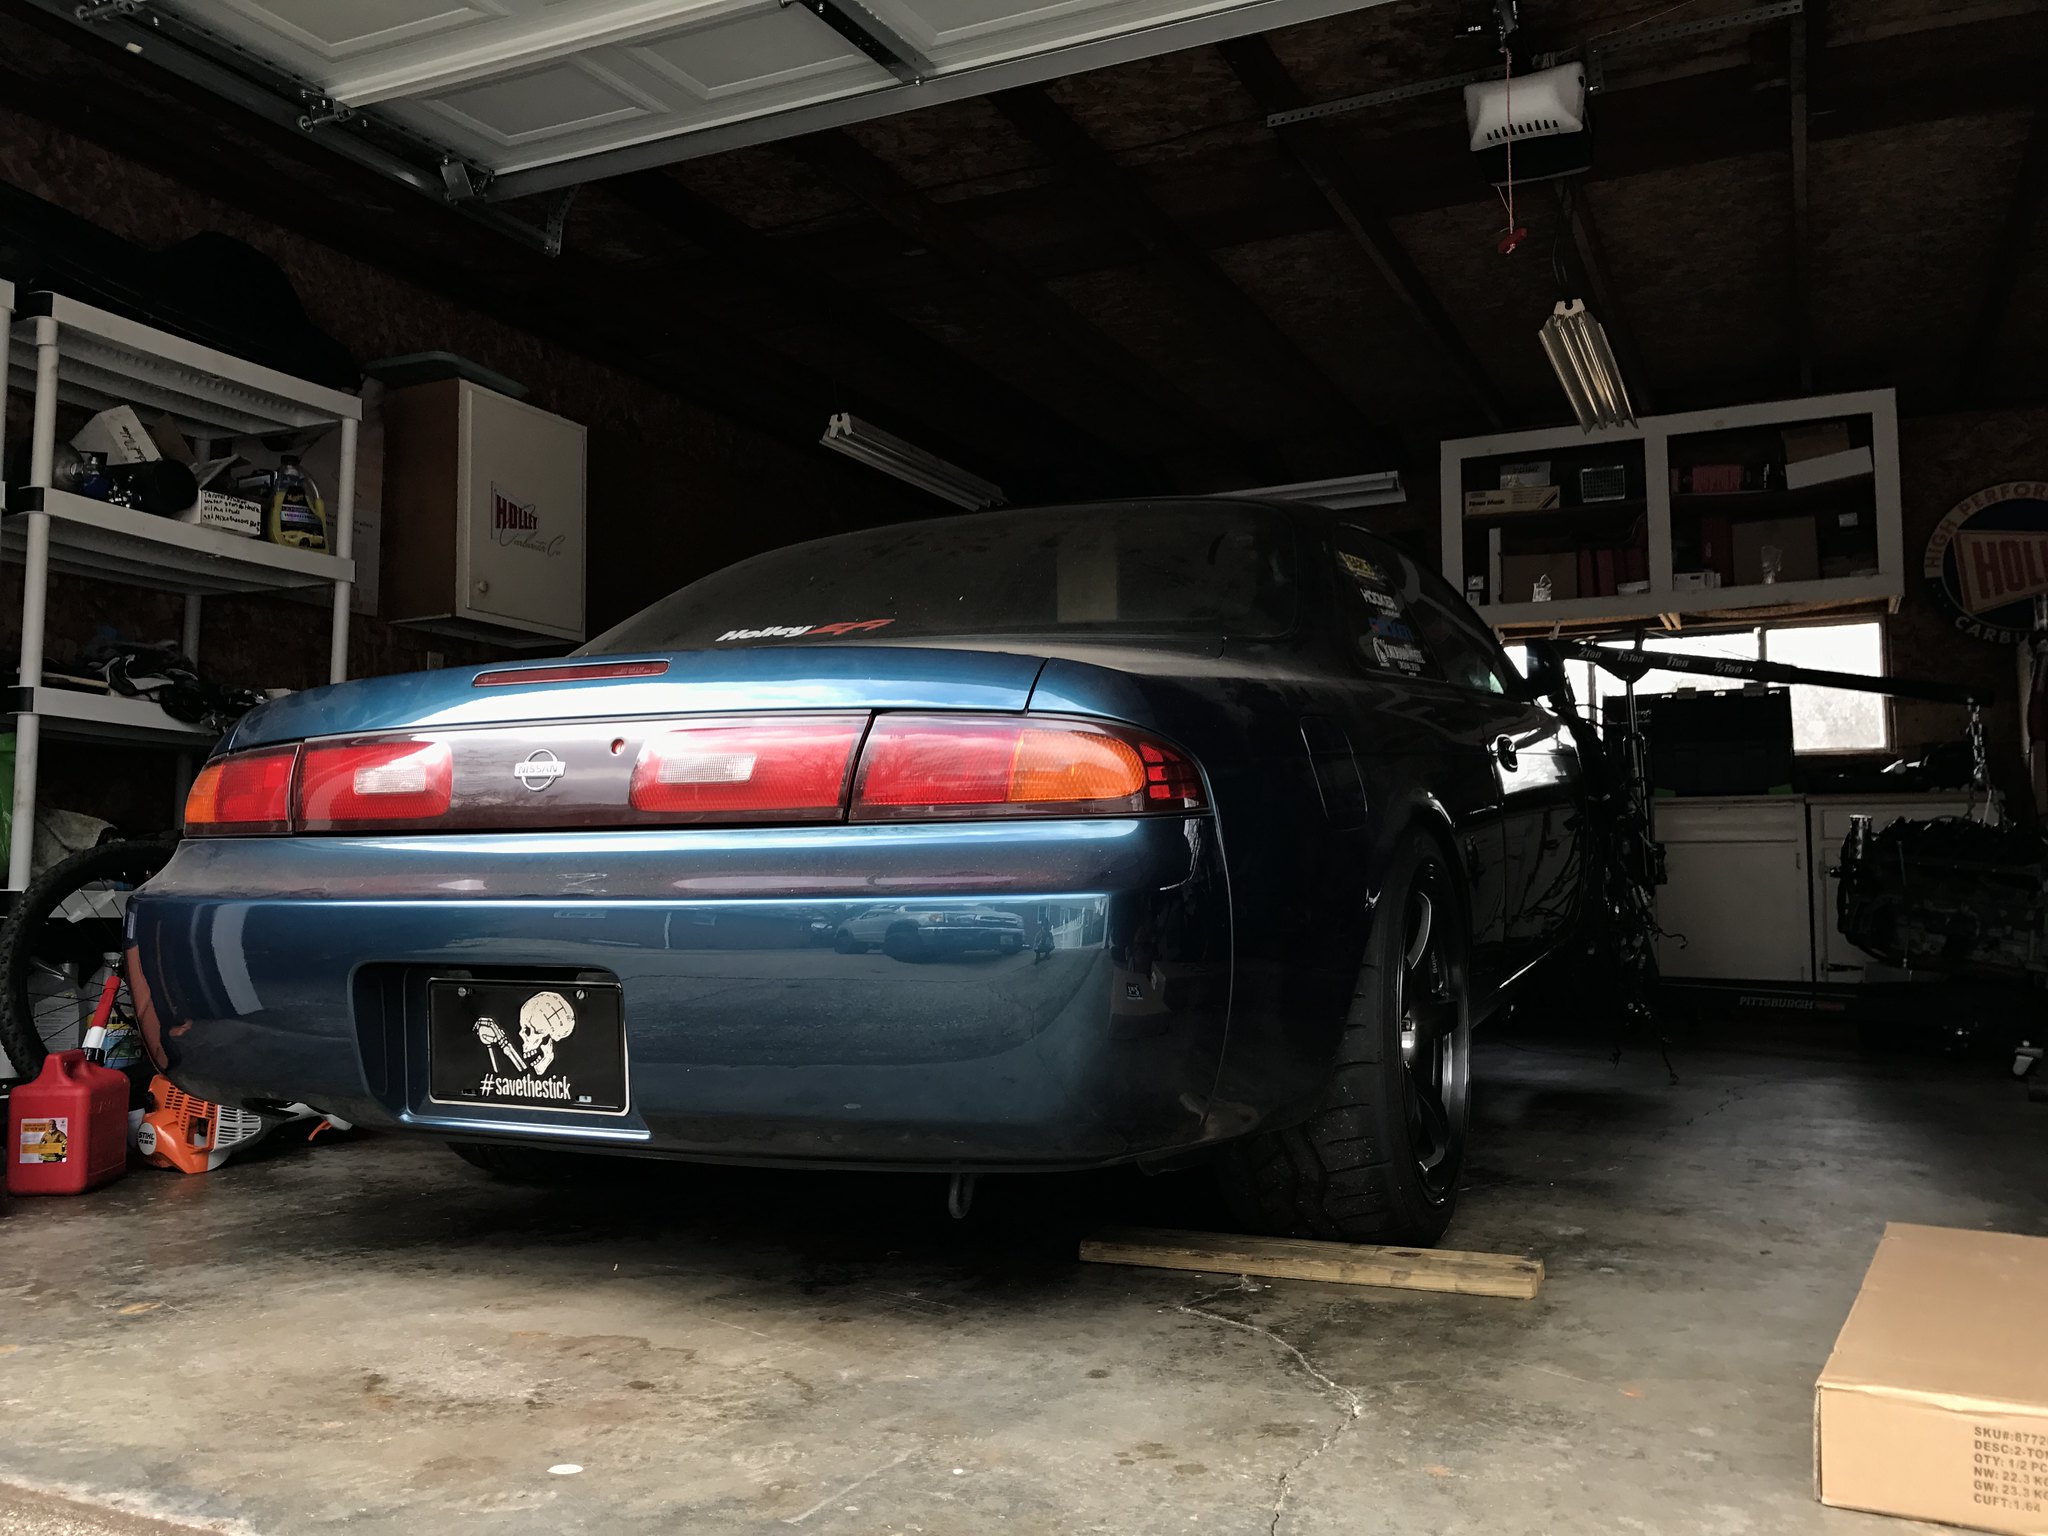
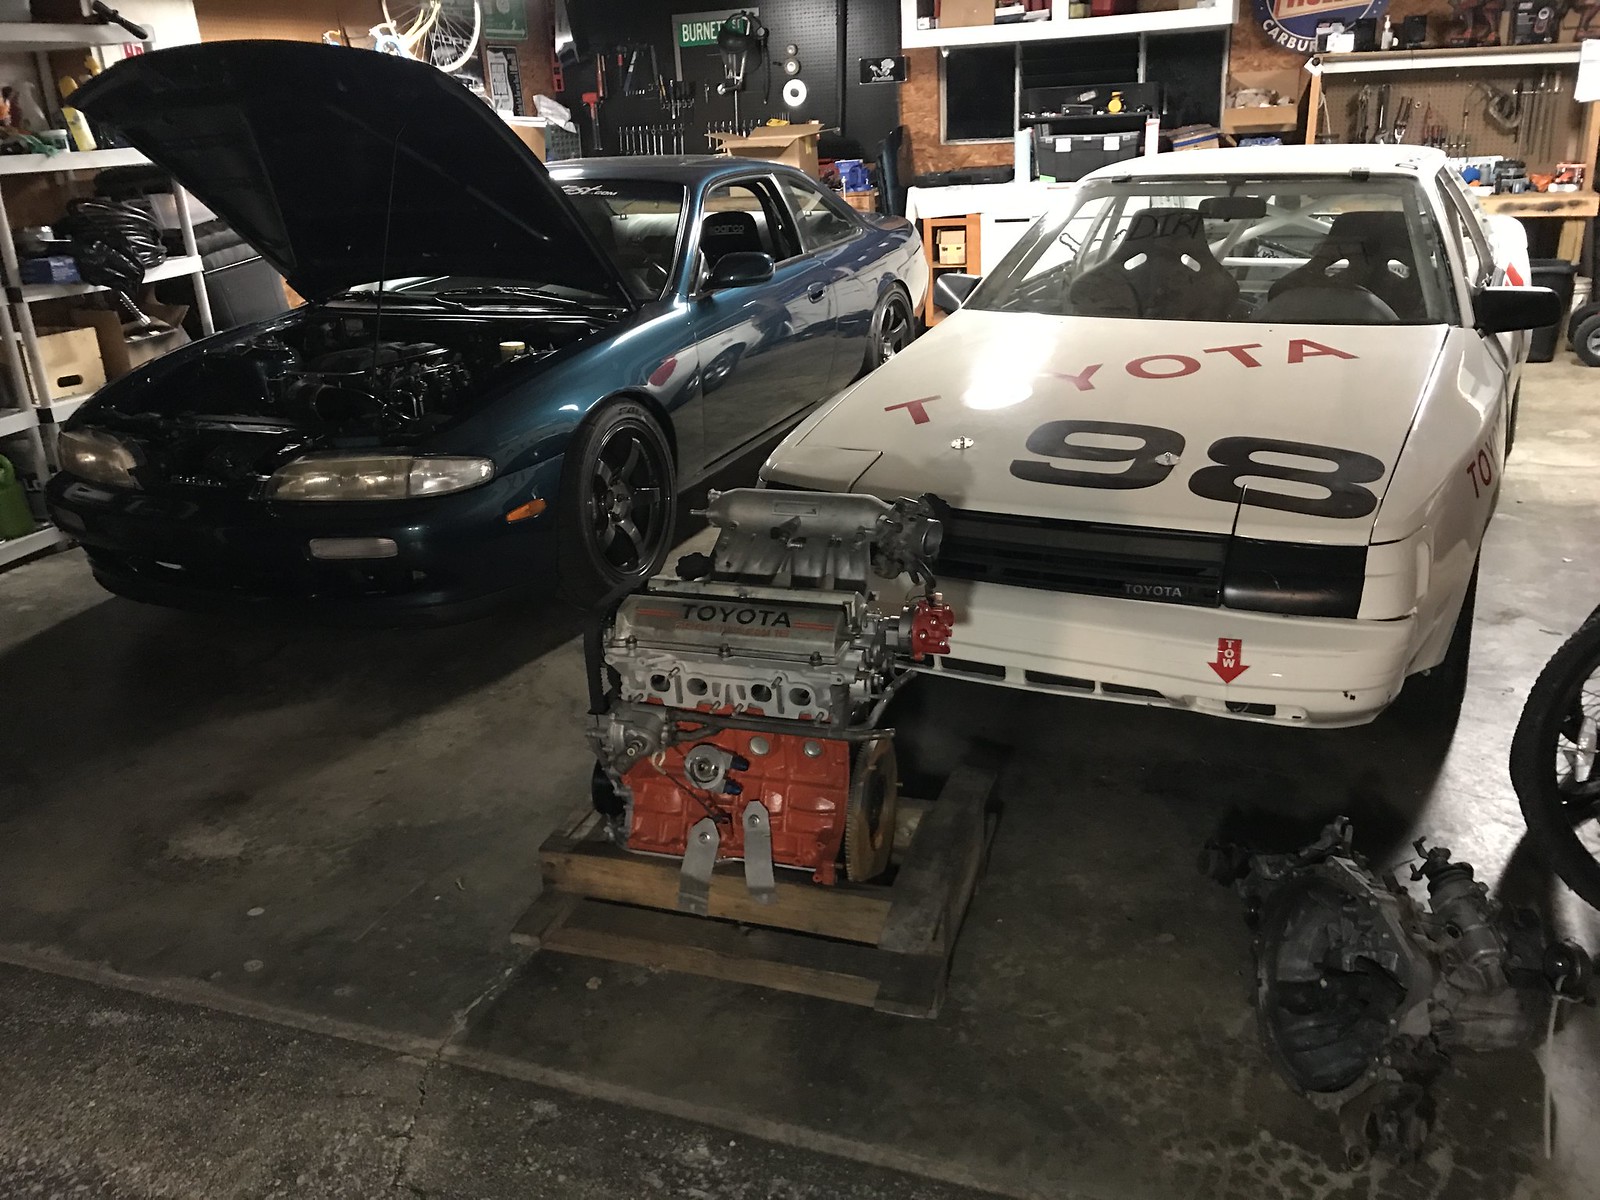
*EDIT: Sorry my bullet points are running together. I can't seem to figure out how to get them to list properly. Merry Christmas to Silvia! 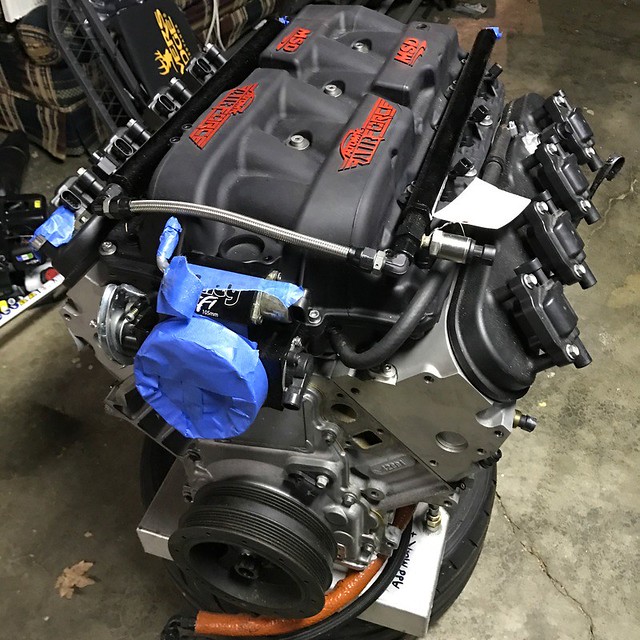 LS2 back in the garage by eric.burnett09, on Flickr
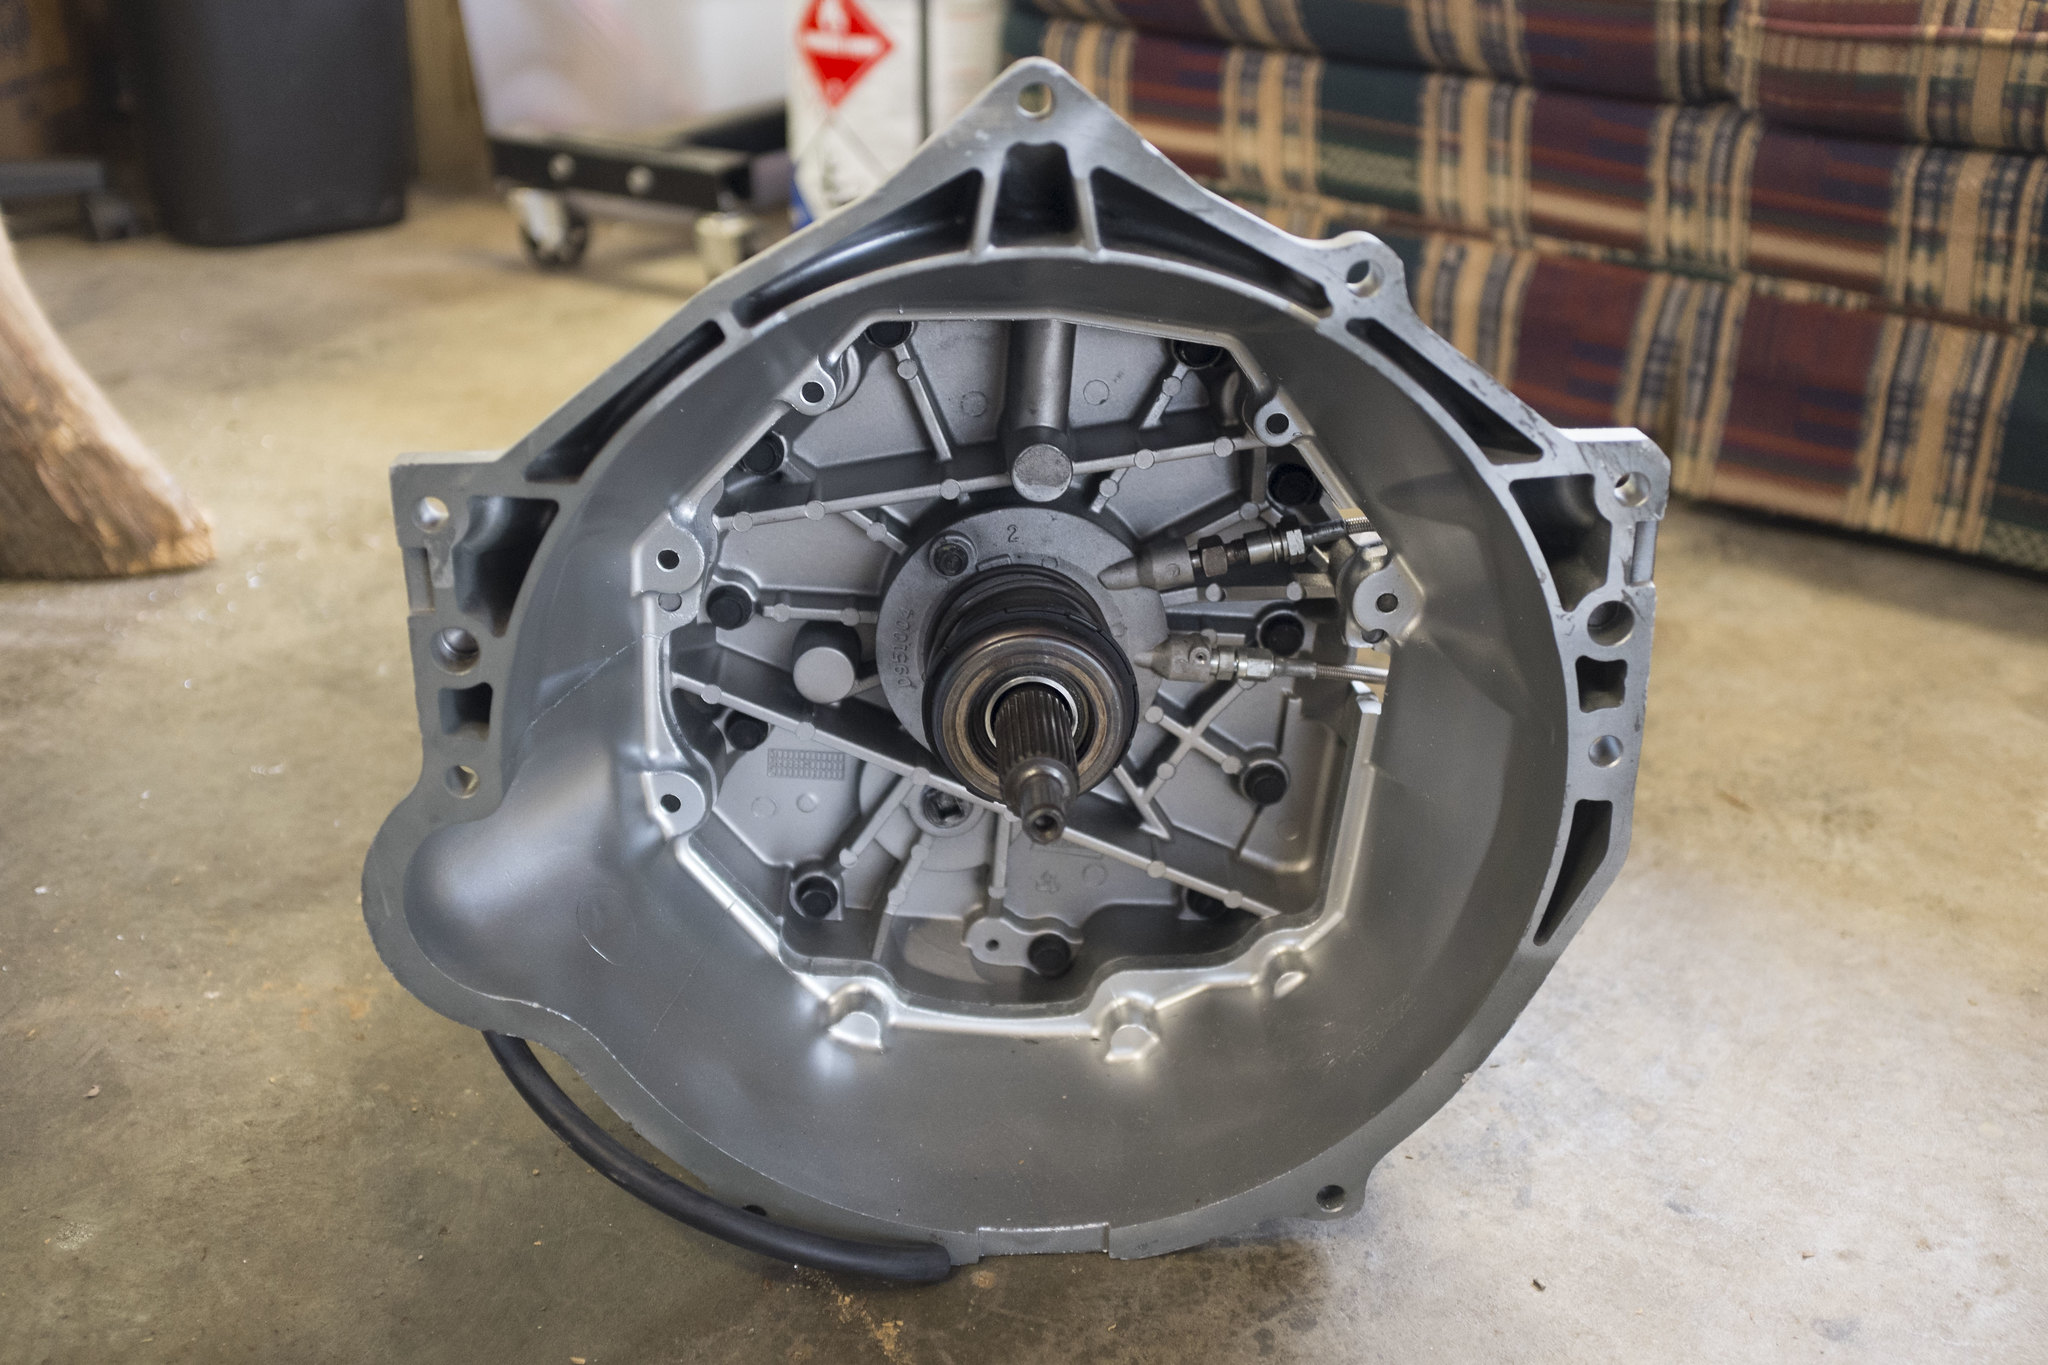
So my engine showed up today. The same one I so excitedly removed from the engine bay of my '96 Nissan 240SX after Christmas last year, thinking I would have it back by April. Funny thing is, without recalling my track record with regard to cars, I actually believed that would happen. So instead of fretting about the fact that things were taking longer than anticipated, I kept myself busy with other things in 2016. All of a sudden I found myself in a serious relationship, went on several awesome trips. To top it all off, I even bought my first house. I made sure it had a garage. That is where Silvia has rested, hood open, longing for its drivetrain to return to its former place so it can propel her down the road to untold speeds and lateral g-forces once more. While the engine was out and about in the land of fruits and nuts, my friends down at American Powertrain told me they would work wonders on the factory GTO Tremec T56 that mates to my engine. It's been back in my possession since LS Fest, and now boasts billet fork pads, new carbon fiber synchros with an improved bonding agent so the material stays where it is longer, all new Timken bearings and seals, heavy duty slider springs and lastly, a tighter tolerance assembly, something they've dubbed their race tolerance based build. They handed the freshened up trans back to me at our LS Fest event earlier this September. Needless to say I was one happy camper.  projectls2s14trans2 by eric.burnett09, on Flickr
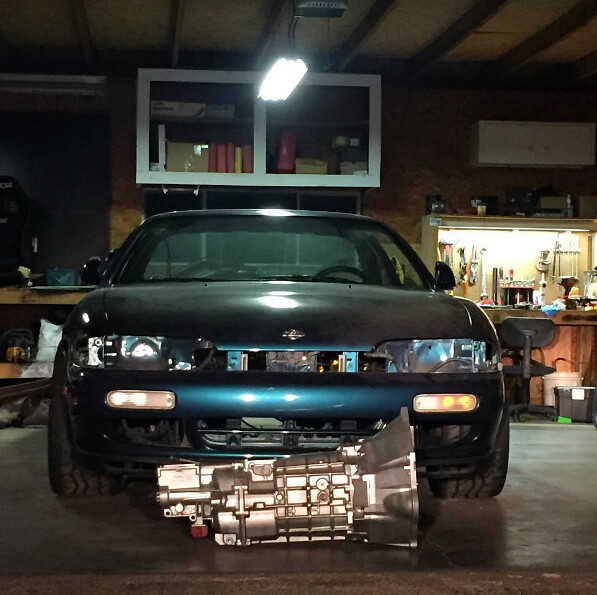 projectls2s14trans1 by eric.burnett09, on Flickr
While the car has sat, I also directed some of my focus this year changing some things up. After much debate, I decided that, in line with the late founder of Lotus, Colin Chapman, that lighter is better. Out came the hammer and chisel and away went the sound deadening (I'm not quite sure what caused me to ignore the positive attributes of dry ice for this task). I also purchased a carbon fiber sunroof delete panel from Northwind Composites. The installation of that component has removed 26 pounds from the highest point in the car. I just need to schedule some time with my friend and we'll finish up the install by sealing it off from the elements.
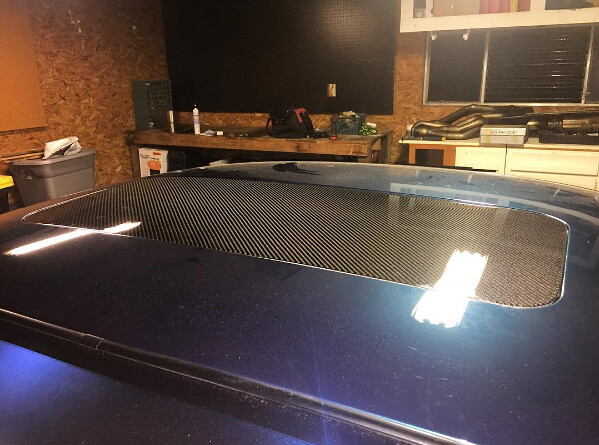 projectls2s14sunroofdelete by eric.burnett09, on Flickr
I've removed other items for the car as well (which I went into more detail about in one of my more recent posts) including the factory fog lights, seat belts, condenser, GTO A/C compressor and bracket, etc. I even found a base model headliner to replacement the one with the hole for the sunroof, as I am attempting to accomplish this project with as quality of a fit and finish as possible. In the coming months, I have quite a bit of work ahead of me before the car moves under its own power again. •Seal the sunroof off.Conduct water test. •Install base model headliner. •Install carpet. •Install rear seats. •Install roll bar and harnesses. •Install front seats. •Purchase and install Racepaks Street Smartwire and IQ3S street dash, relegating my Holley Digital Dash to set up shop where my factory radio used to reside. This Street Smartwire will allow me to further reduce the weight of the car while simultaneously enhancing its functionality with programmable logic. This PDM powers the car sans relays and allows me to delete the fuse box out of the passenger side of the engine at, which will not only clean it up considerably but allow for the installation of other components in the future should the need arise. Racepak has had a more barebones Smartwire on the market for some time, but their Street Smartwire system allows for you to keep thinks like blinkers, etc. They also have a trick new switch panel which I plan to use for actuating various functions on the car. (list contd.) •Reinstall clutch and flywheel potentially with Quick Time bell (weight penalty). •Mate transmission to engine. •Install engine and transmission. •Finish cleaning headers and reinstall. •Reinstall front drive accessories. •Purchase and install one of Holley's new LS AN Steam Tube conversion kits (mine is AN already but won't fit with the extra girth of the MSD intake. •Plumb car with Ultra Pro series plumbing, going AN braided on the radiator hoses top and bottom. •Rework cooling fans/shroud set up on the car. •Purchase and install rear subframe with solid SPL bushings for $150 + trading him my old one. •Replace brake pads with Ferodo DS2500. •Remove brake calipers, tear down, purchase rebuild kits, and have them powdercoated same color, rebuild, reinstall with new pads and then bleed. •Rework exhaust system behind headers. All of these mods will go a long way into completing version 2.0 of Project LS2 S14. I haven't added a lot of additional horsepower, roughly 90 all said and done, but I have dropped almost 100 pounds out of the car in the meantime. The Racepak Smartwire PDM will make for a much more reliable wiring job too, which was in high demand. The sunroof won't leak anymore, because it simply won't be there. Then I'll start working on the suspension again, adding a strut tower bar, and potentially replacing the Stance GR+ Pro coilovers with something compression and rebound adjustable.

Keep sharing your endeavors, please. I like this.

Sweet build man!
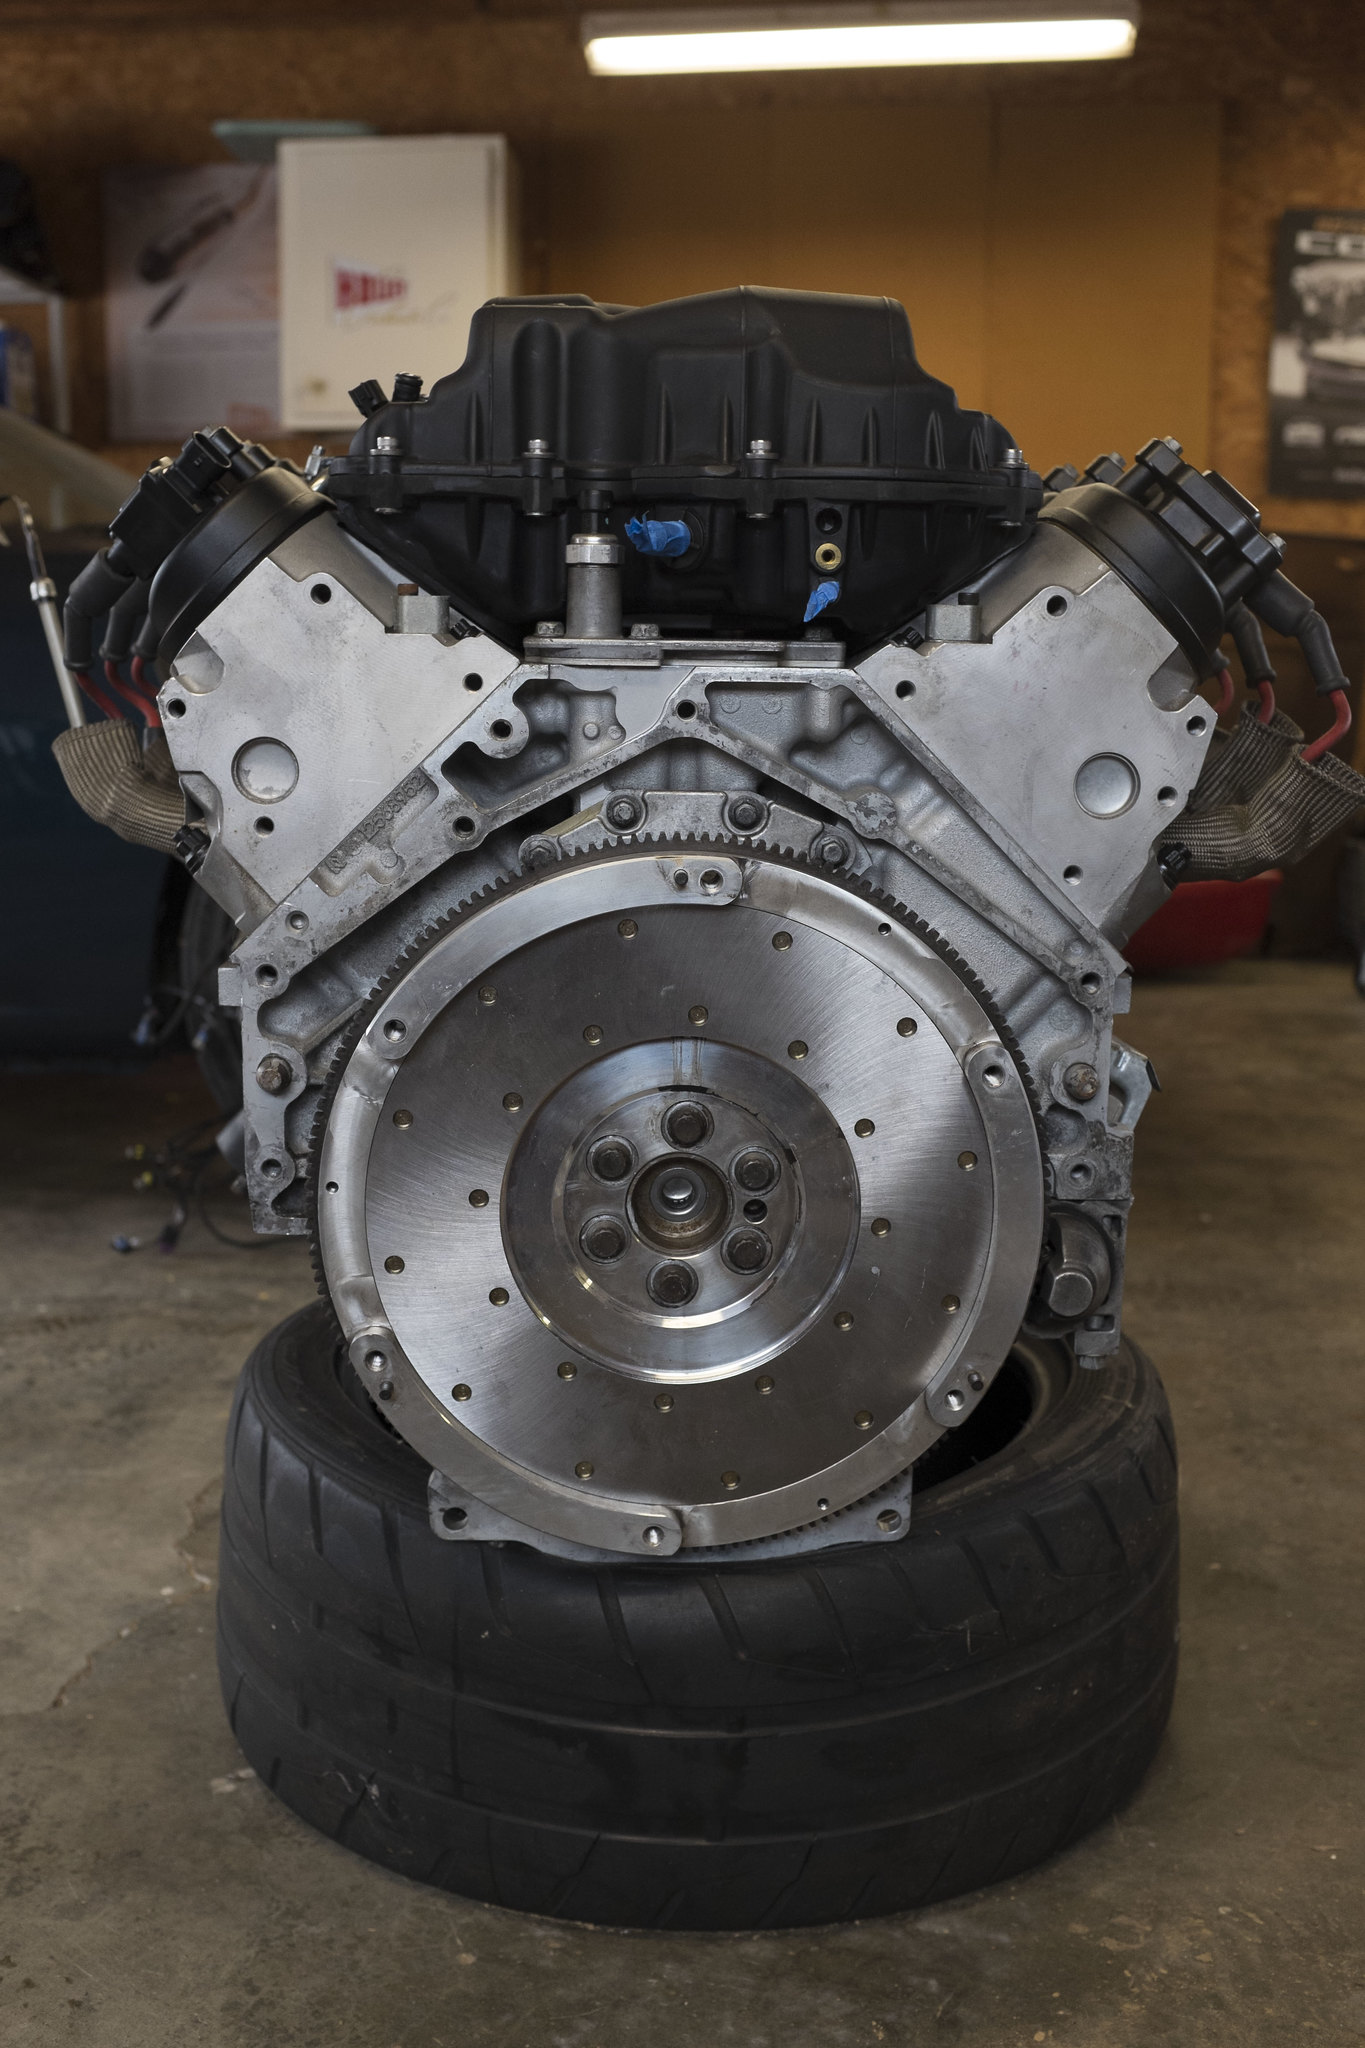
Haven't got much in the way of progress unfortunately at the moment. I just packaged up my flywheel to send it back off to RAM to have a new mating surface installed today. When that comes back I'll be able to install it on the back of the engine, install the clutch, and mate the transmission back up. Then it can go in the car.
It looked to me like it would be a smart idea while the car was still in parts and pieces. I'd rather pay the money now than have to take the thing back out of the car in my garage with jackstands and then pay the money on top of that, lol. Hopefully some of you agree.
Some might say that I should go ahead and beef up the clutch while I am at it, as the power output is now clearly higher than what a stock C6 ZO6 had (505hp). I am confident that with the car having gone on a diet and already weighing around a 1,000 pounds less than the C6 Z06 that I should be in good shape.
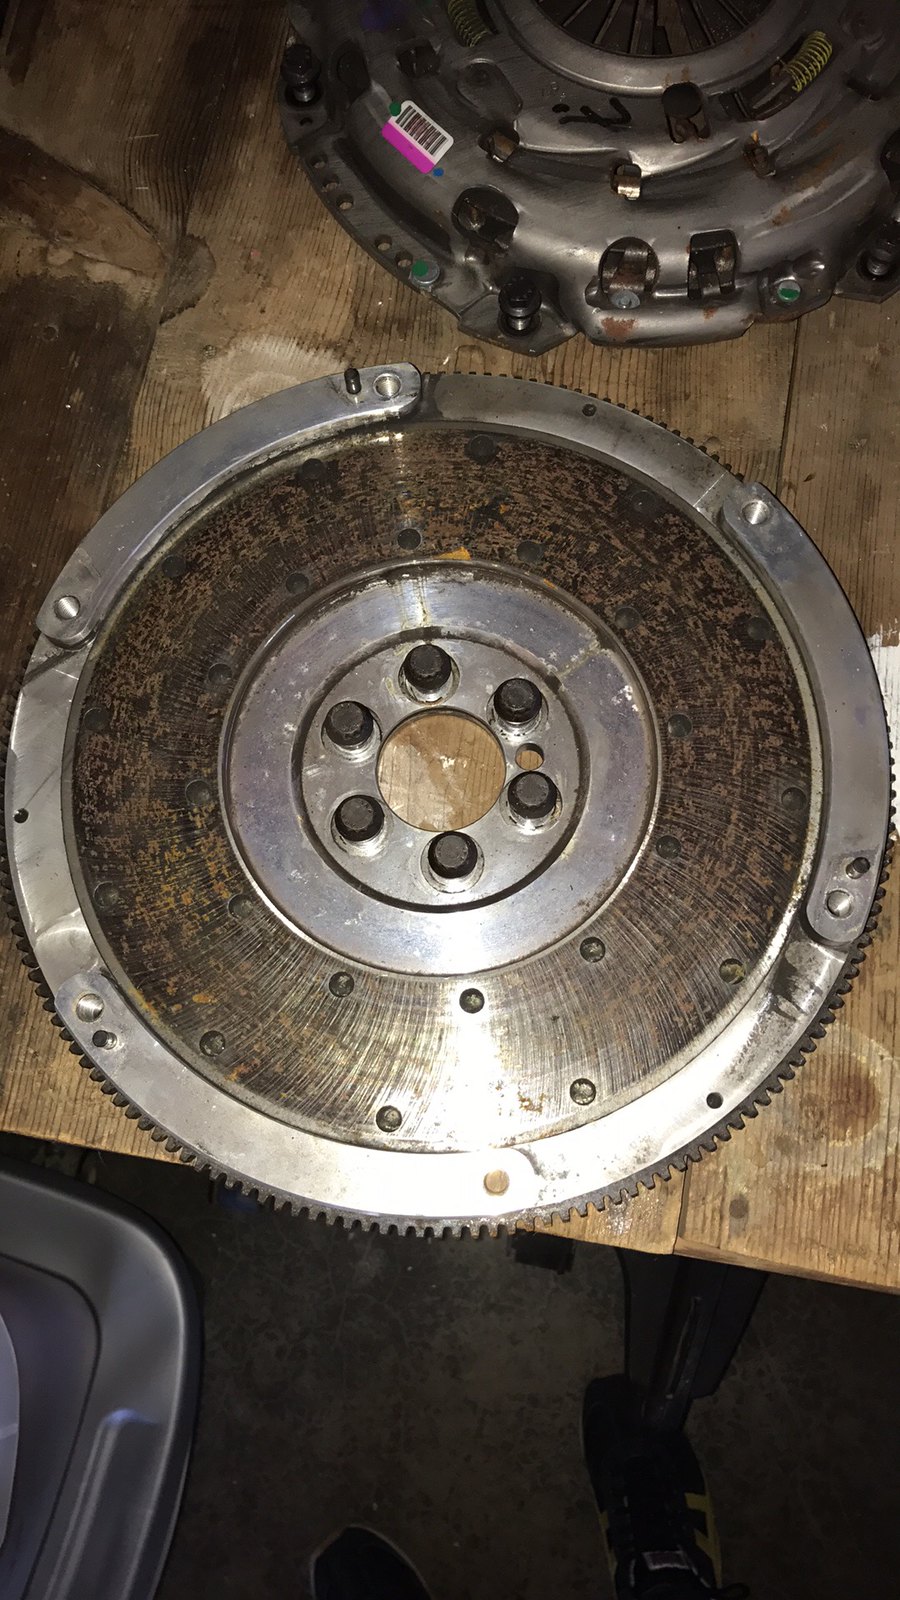 Flywheel needs a resurface. by eric.burnett09, on Flickr

Nice work as always, Blane. Hopefully LS-Fest doesn't conflict with Solo Nationals this year so I can see this thing in action!
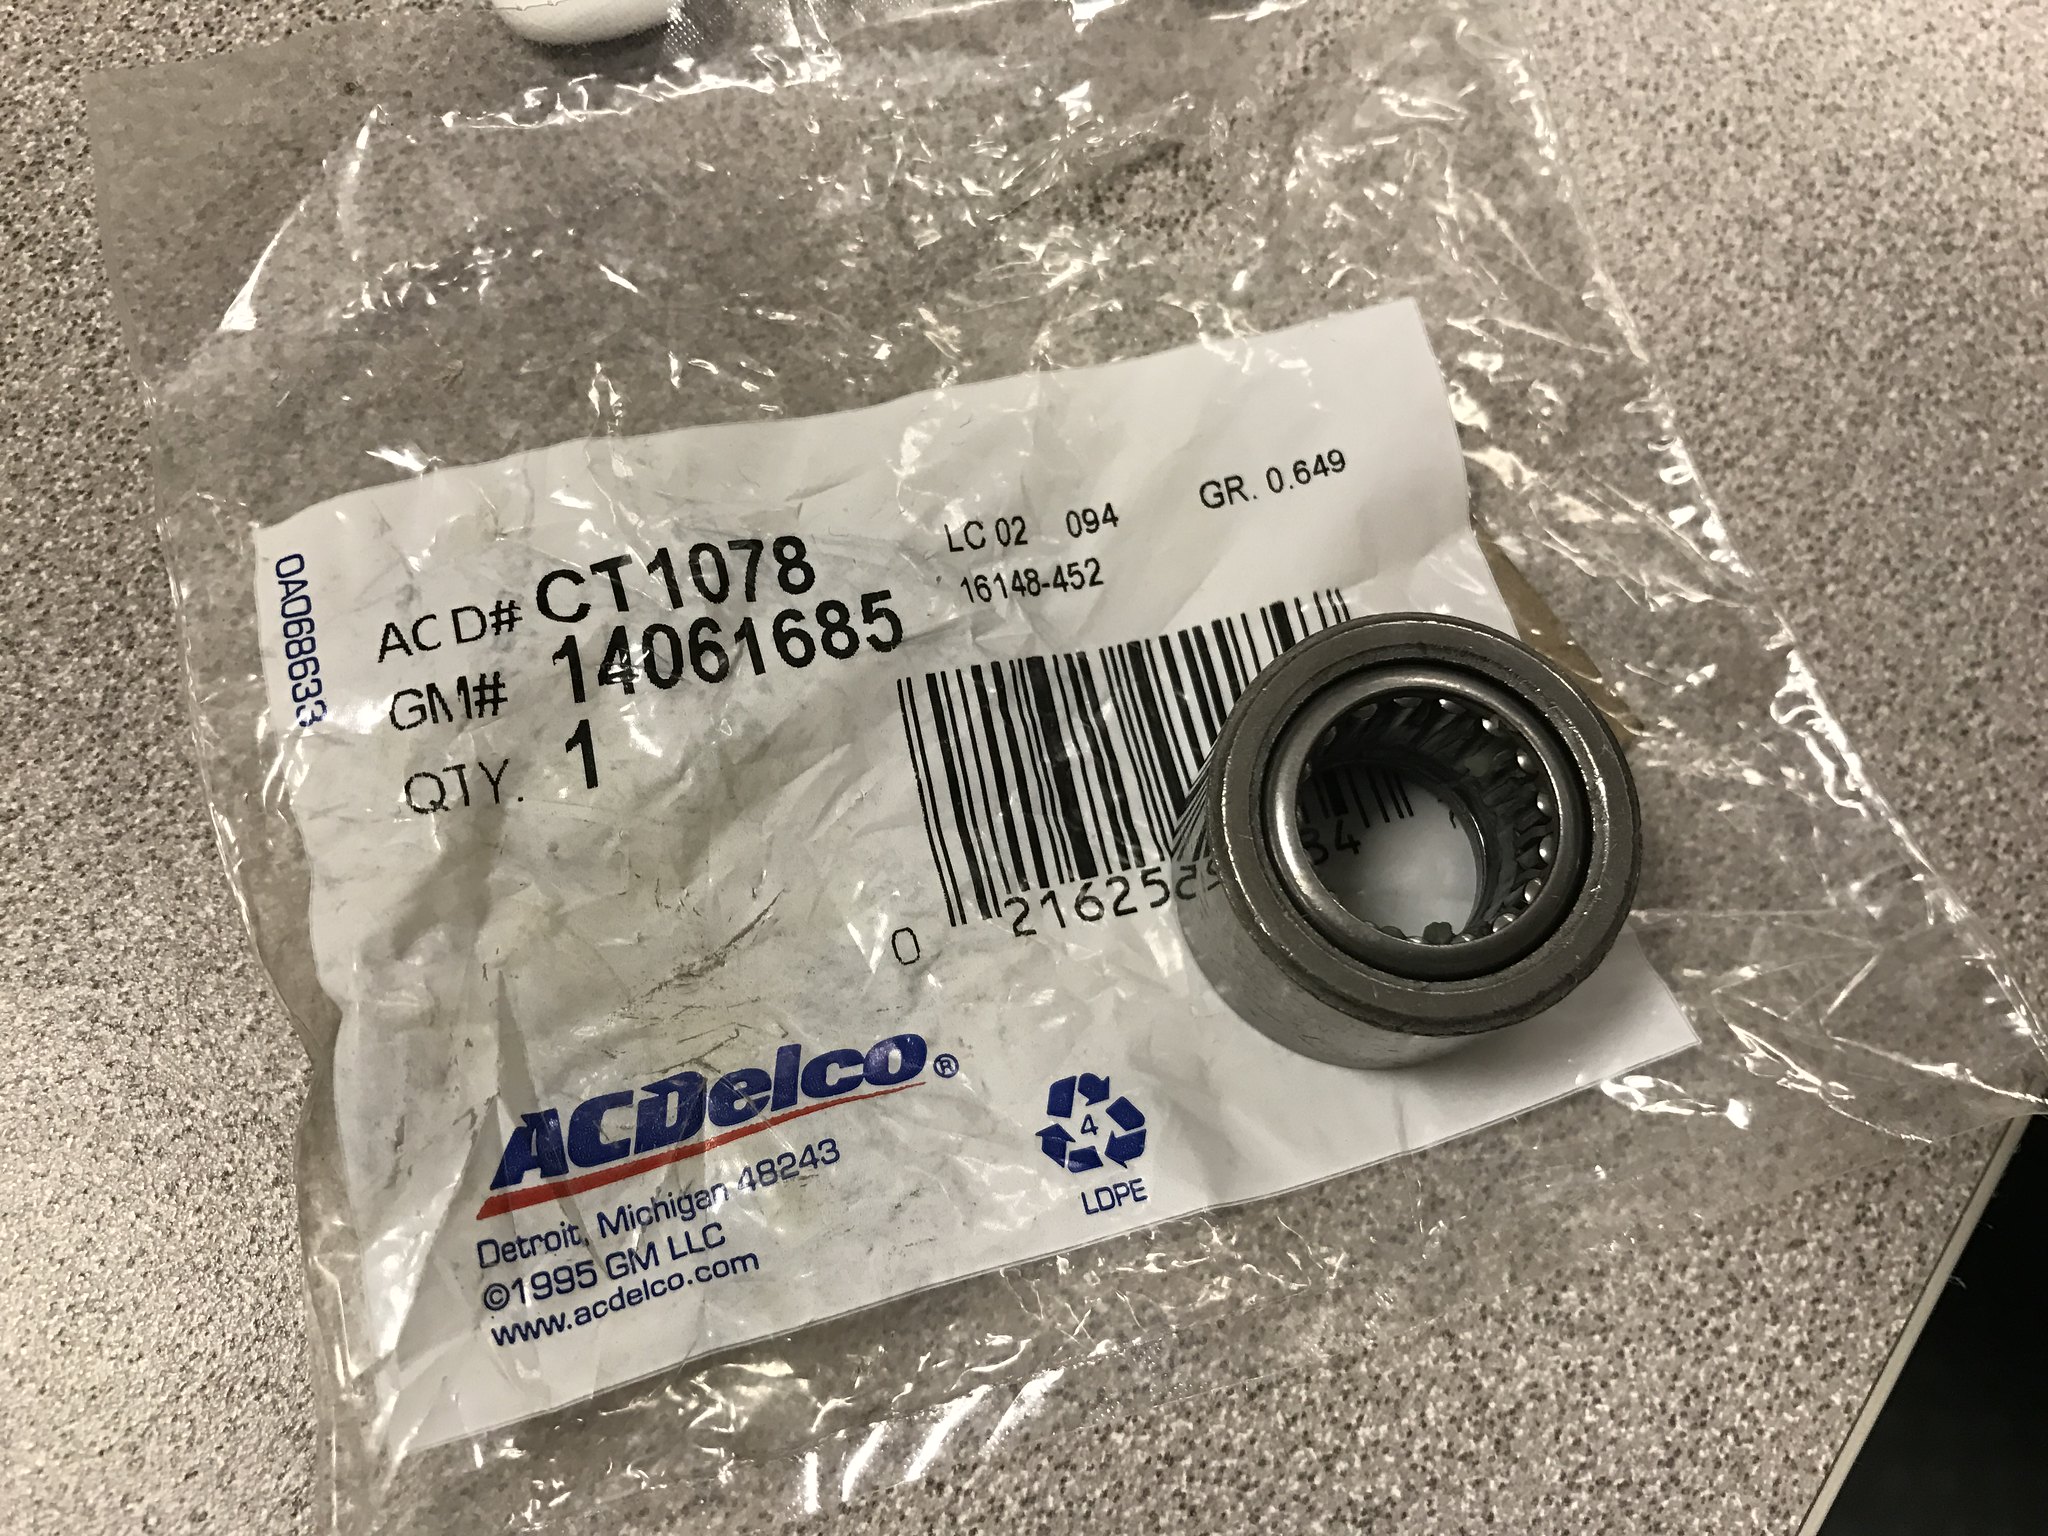
Friday afternoon it occurred to me that we were going to have uncharacteristically good weather over the weekend. Time to put my engine and transmission in the car! But wait....I hadn't thought ahead enough to replace the pilot bearing....Guess I would have to do something else. Called Scoggins Dickey and got one ordered (it arrived this morning).
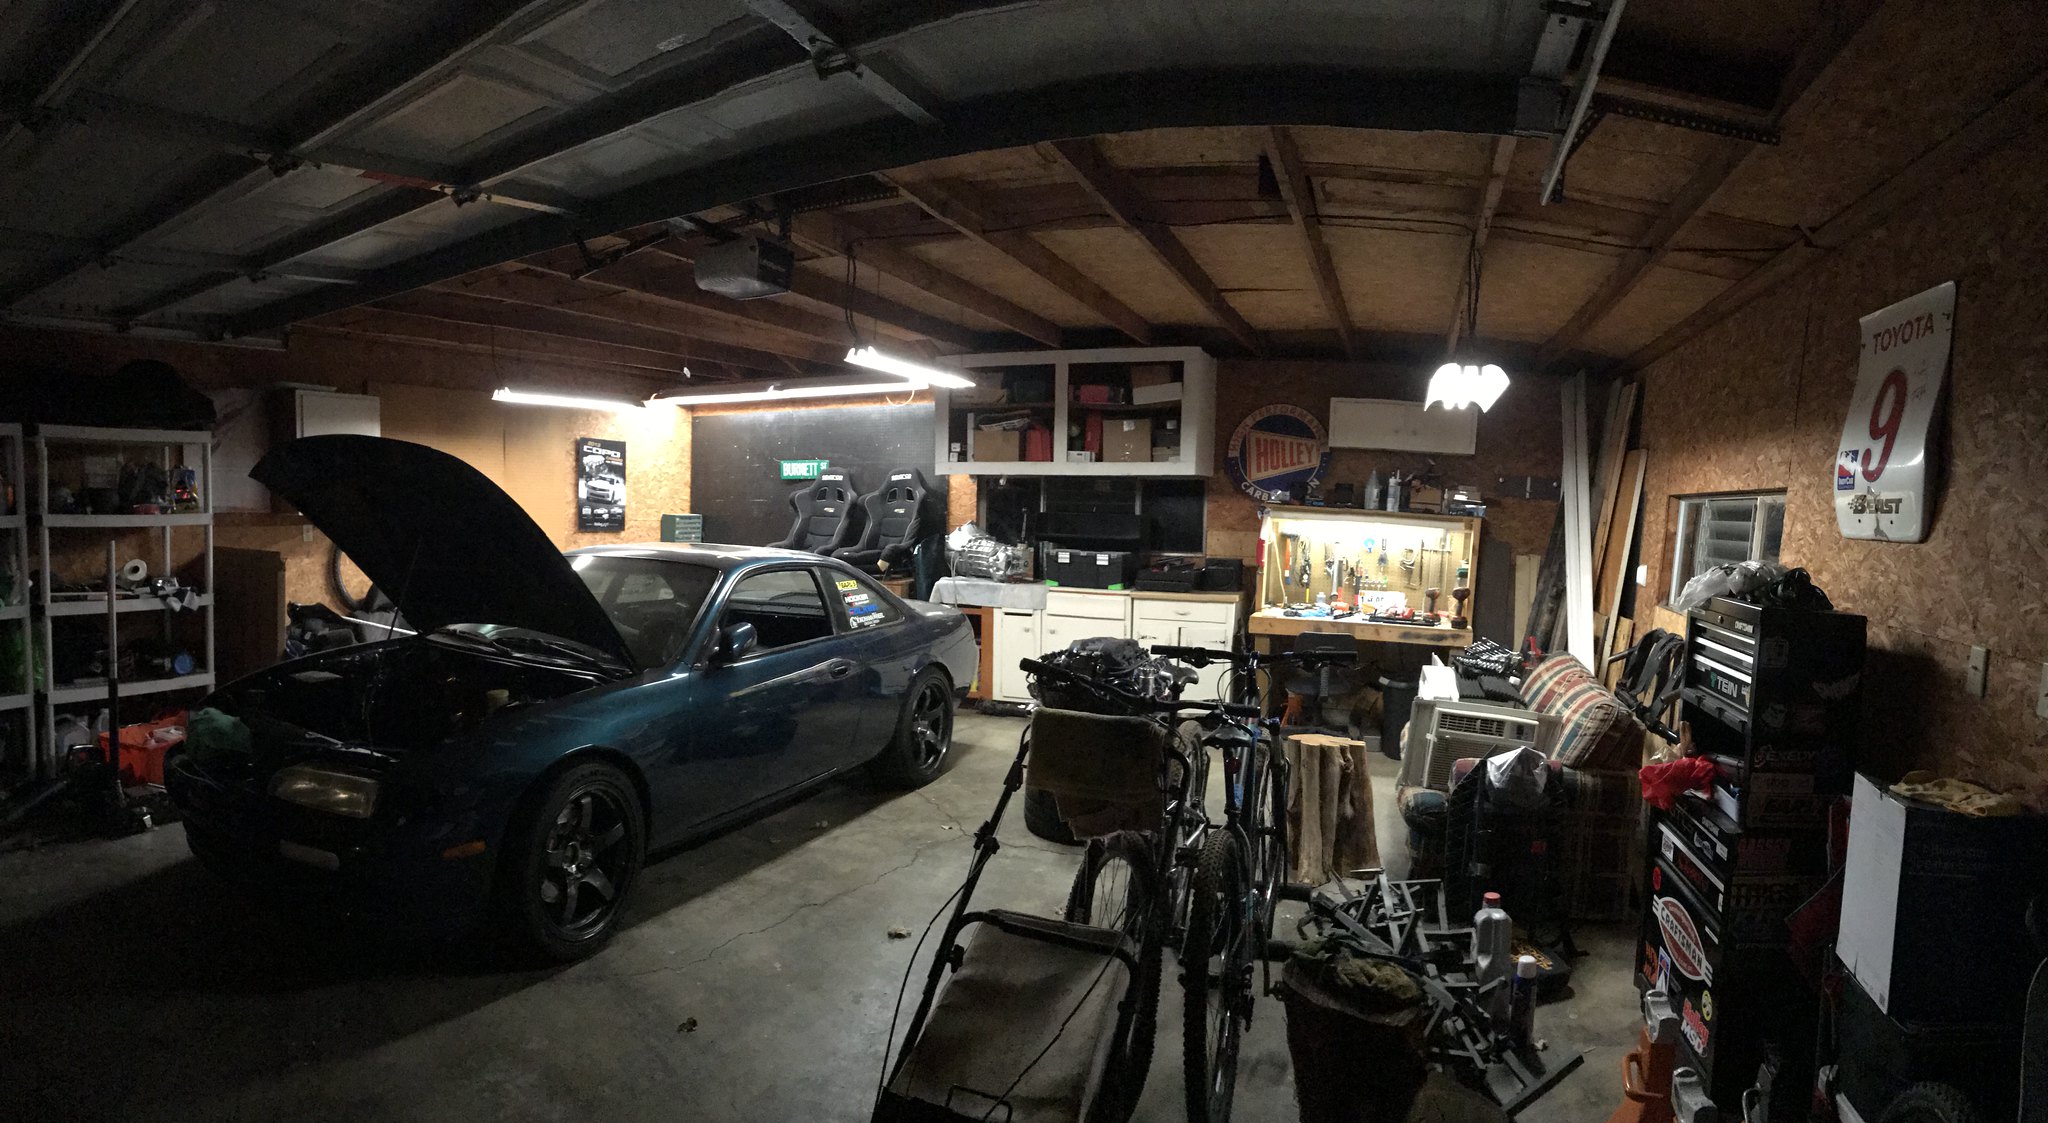
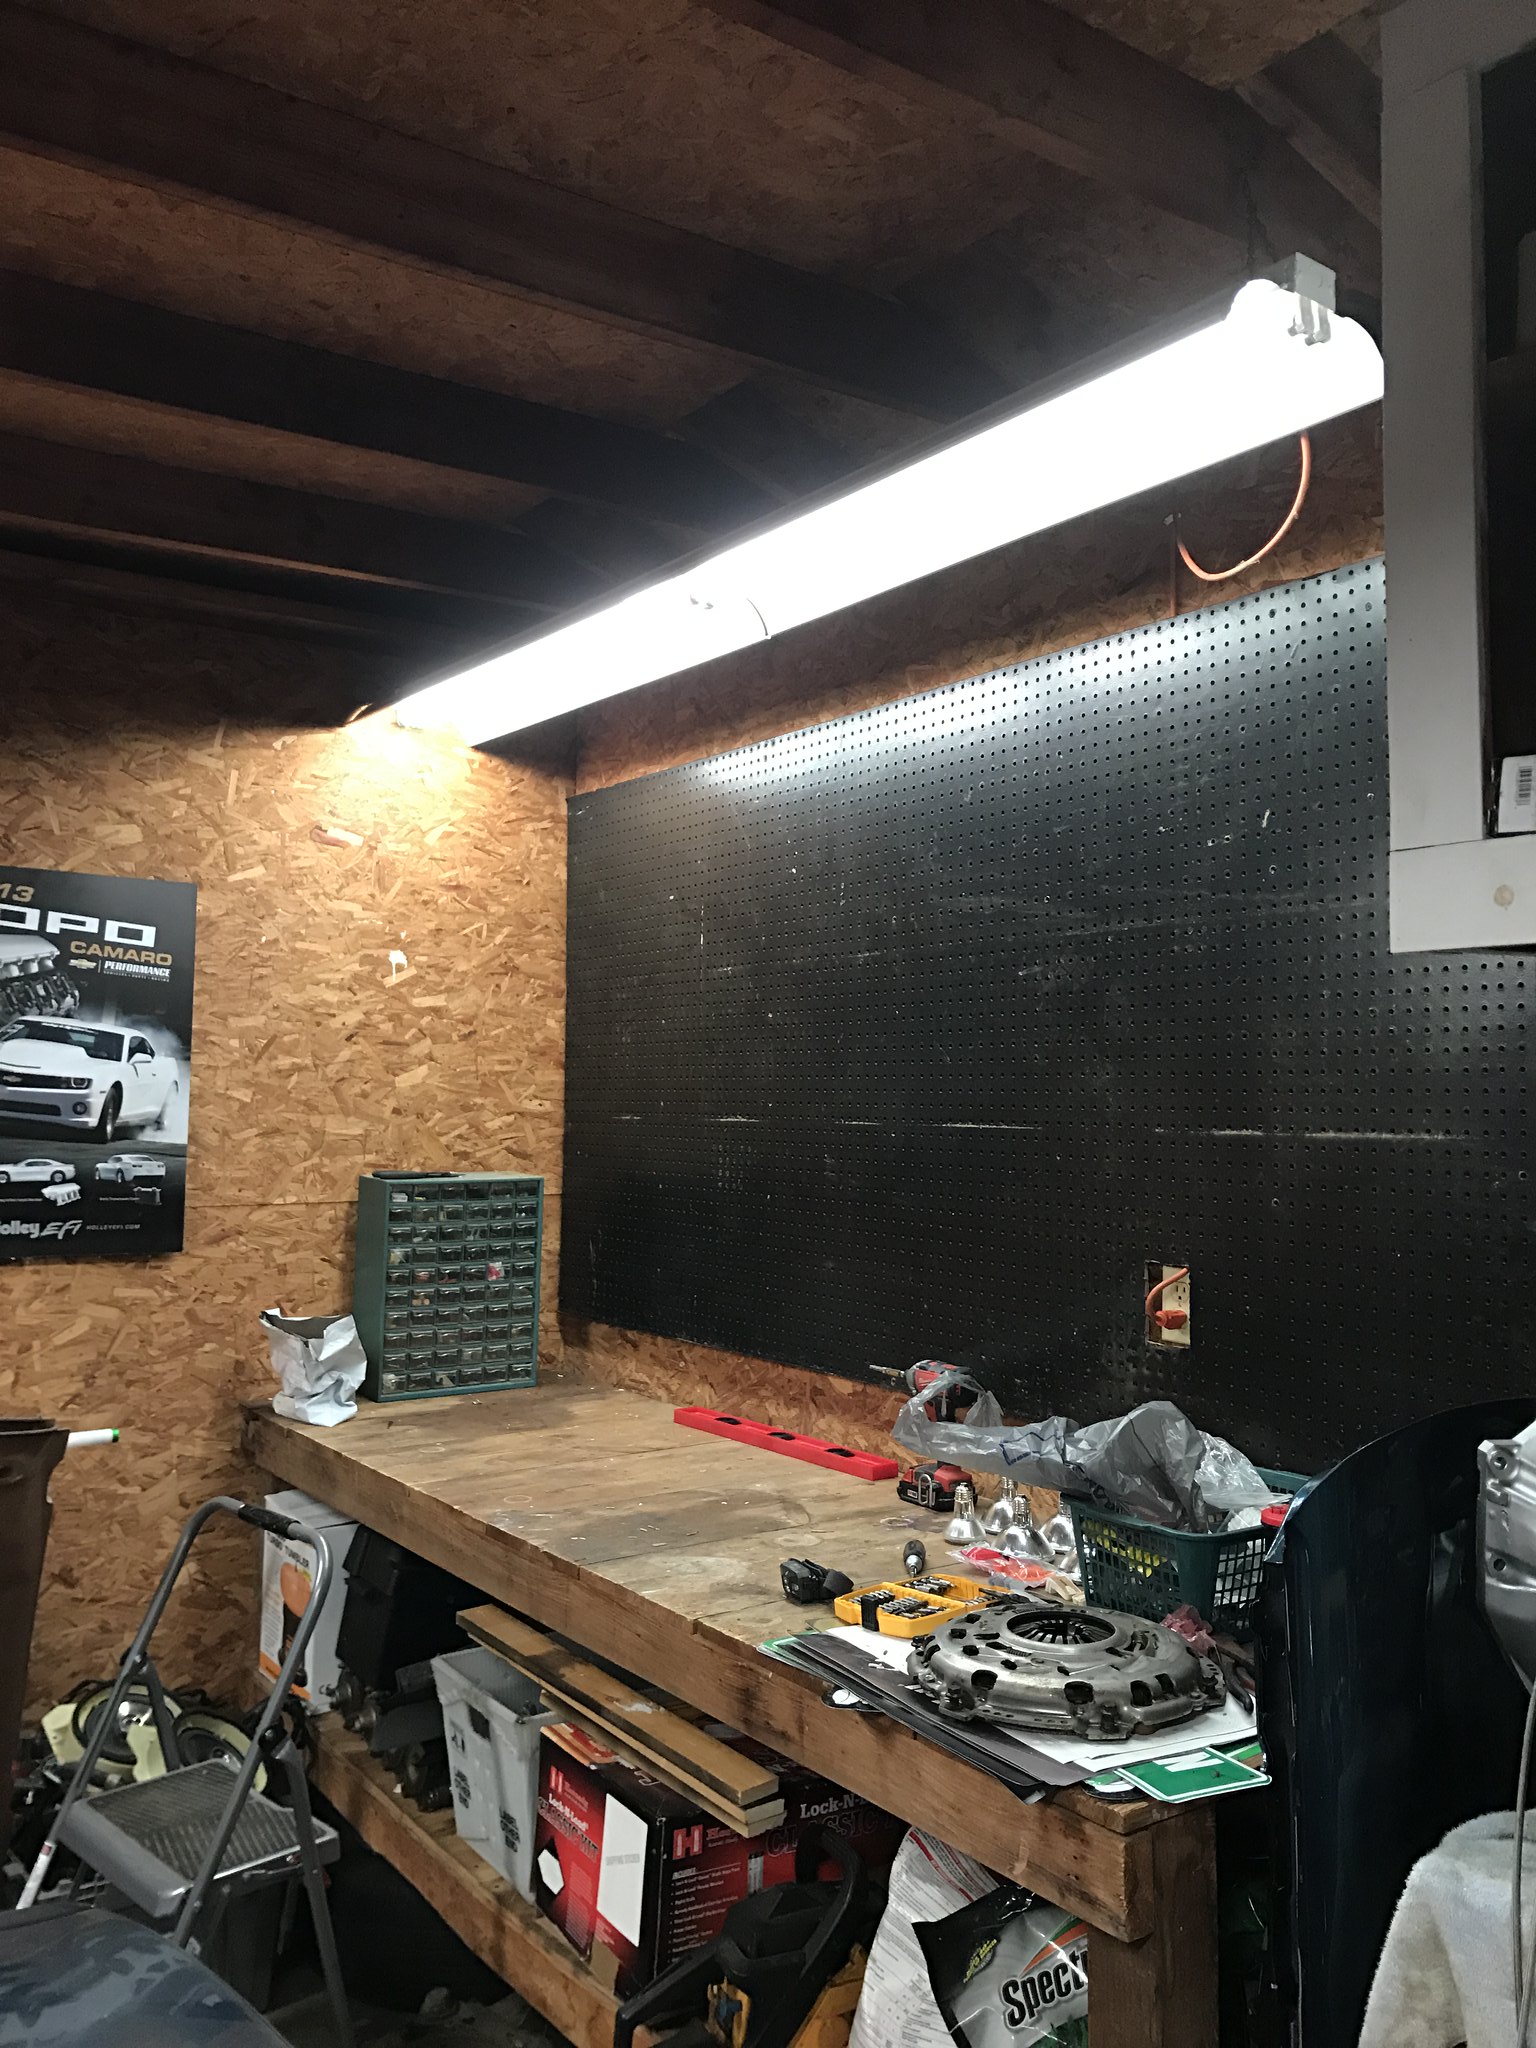
So I decided to tackle something else that needed to be done in the garage. Restore much needed lighting. When I moved in to my house, the garage had good amount of light fixtures installed. One 8' commercial fixture overhead and then three 4' units going across the width of the space. The only one that worked was the 4' in the center and it was running the older more expensive and less bright T12. Sunday afternoon Dad popped over and helped me change out the ballasts on the 4' units to upgrade to T8s. Also went to Home Depot and bought a tandem 4' (8' total)fixture that used T8s (couldnt find 8'long T8 bulbs). Installed all of that in an afternoon and now I'm able to see what I'm doing. All of that ran me $162. Well worth it.
In the future I'd like to put an additional 4' fixture beside the current ones to move add some light toward the front of the garage. Oh well. These things take time.
Lastly, I think I need to break down and invest in an engine hoist. I hope to only need to install this thing one more time before it's in for good. But, with Murphy's Law being very much a real thing, I should probably have one at the ready without having to call a friend and borrow one at a moment's notice.
Supposed to have good weather this coming weekend also. Hopefully things can move forward then.
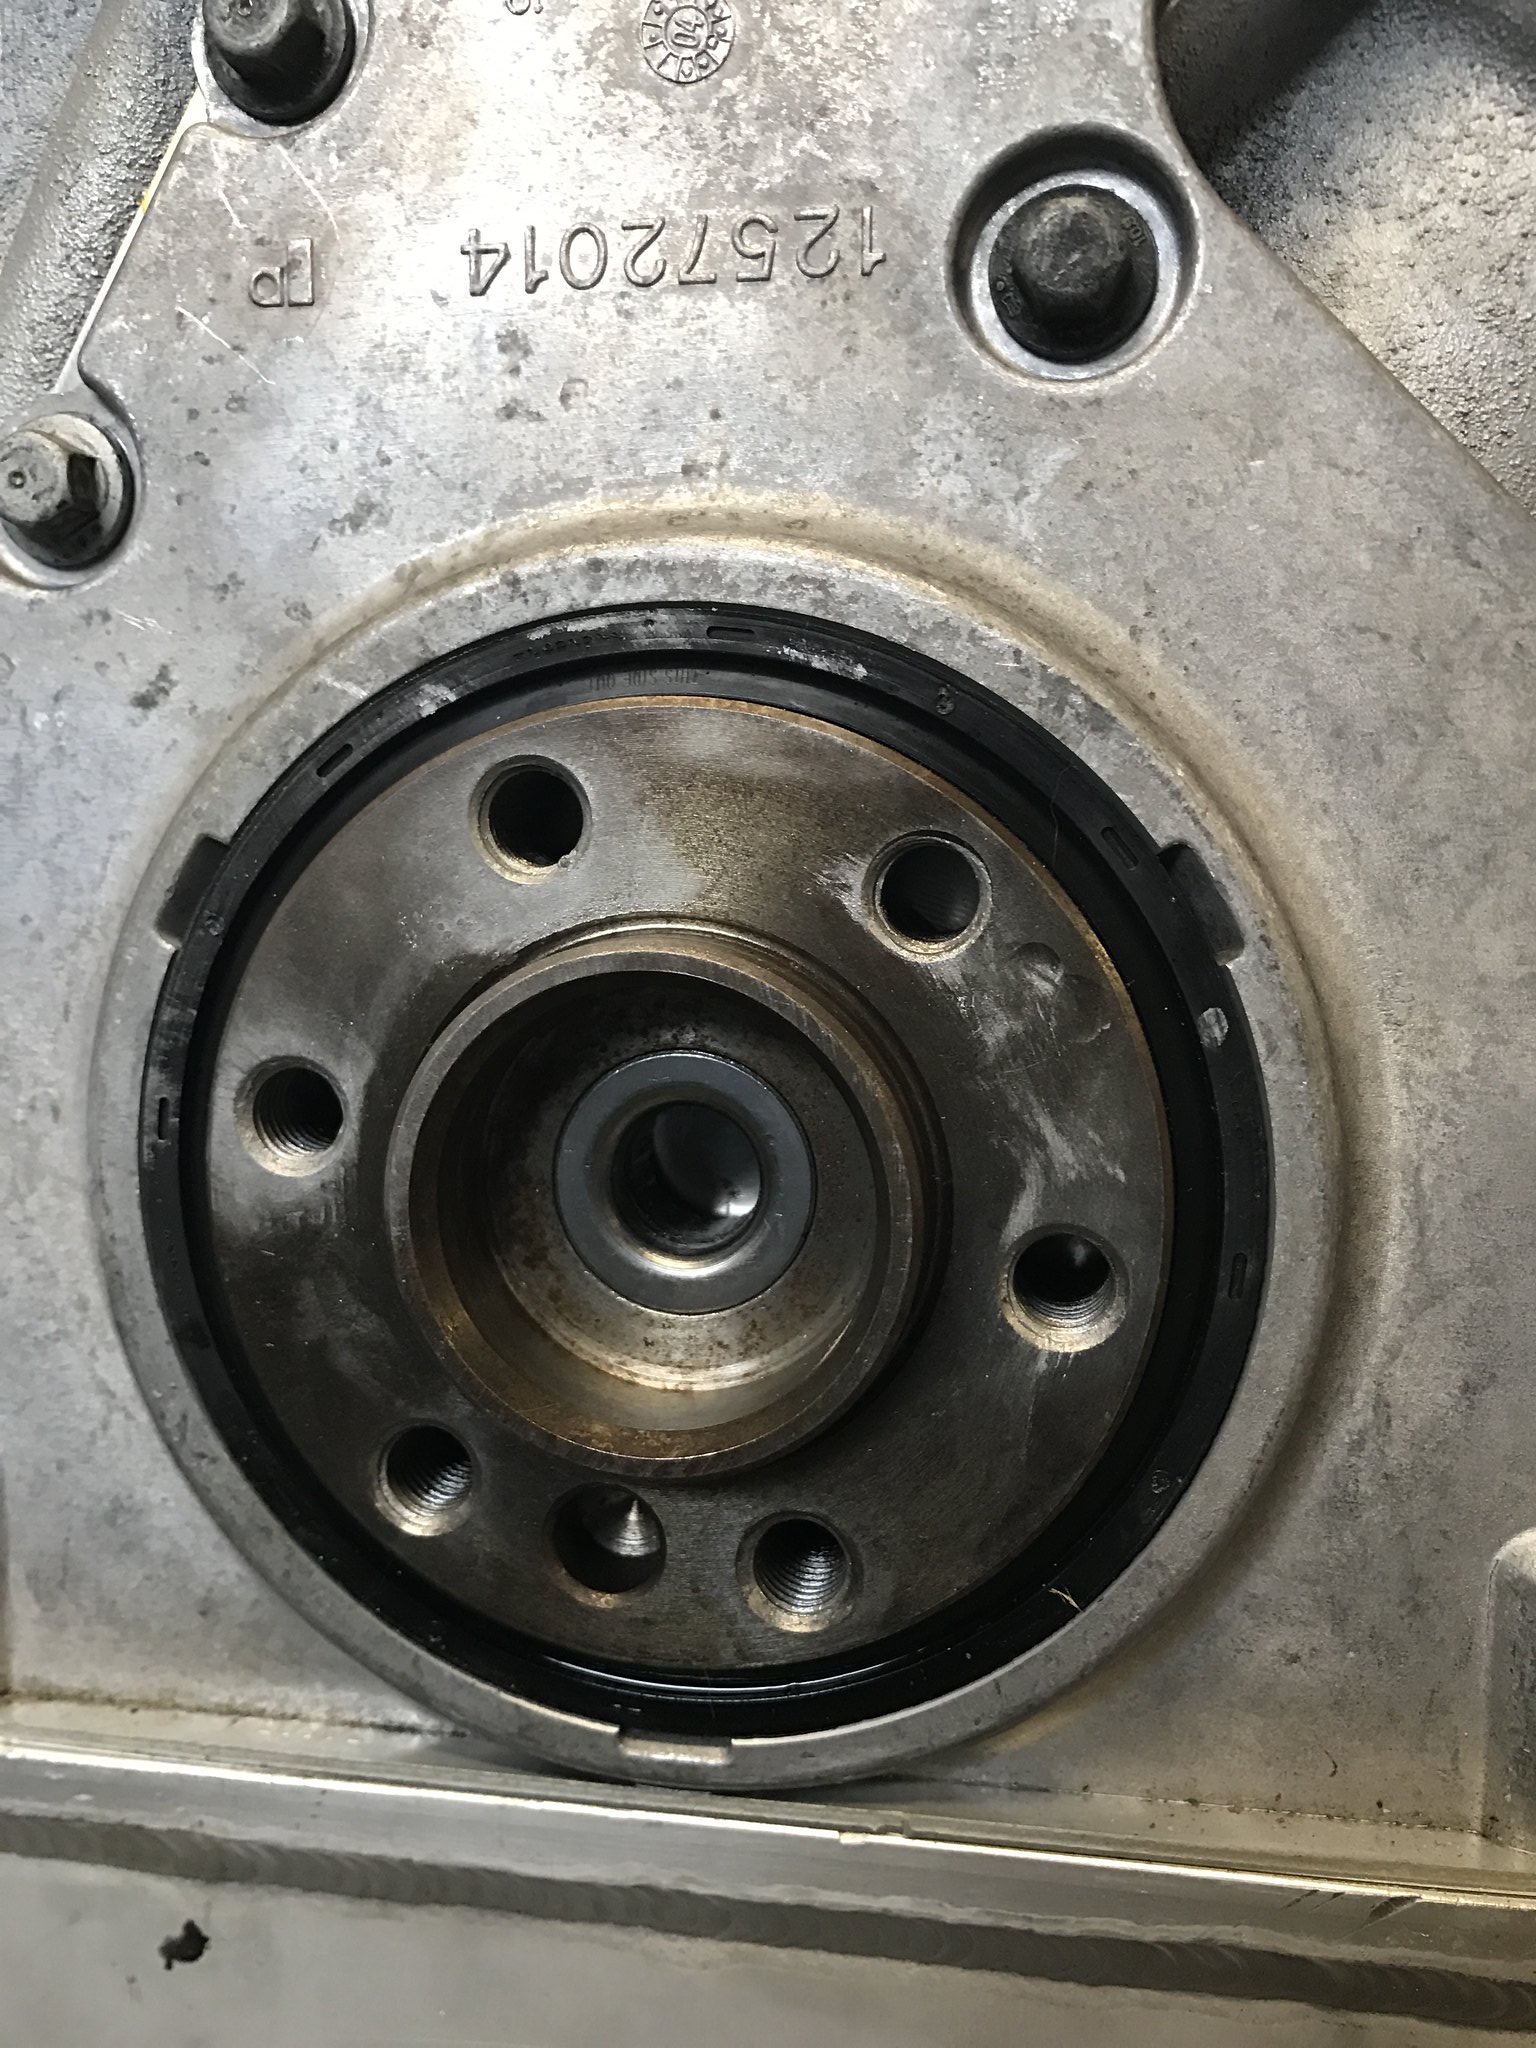
Looks like the pilot bearing would like to continue residing in its current home for the foreseeable future!
Before you start mentioning the grease and bread options out there, it is important to note that these crankshafts have a freeze plug that has a good chance of venting the pressure you'd build up by packing it with either of those two options before the bushing would actually pull out.
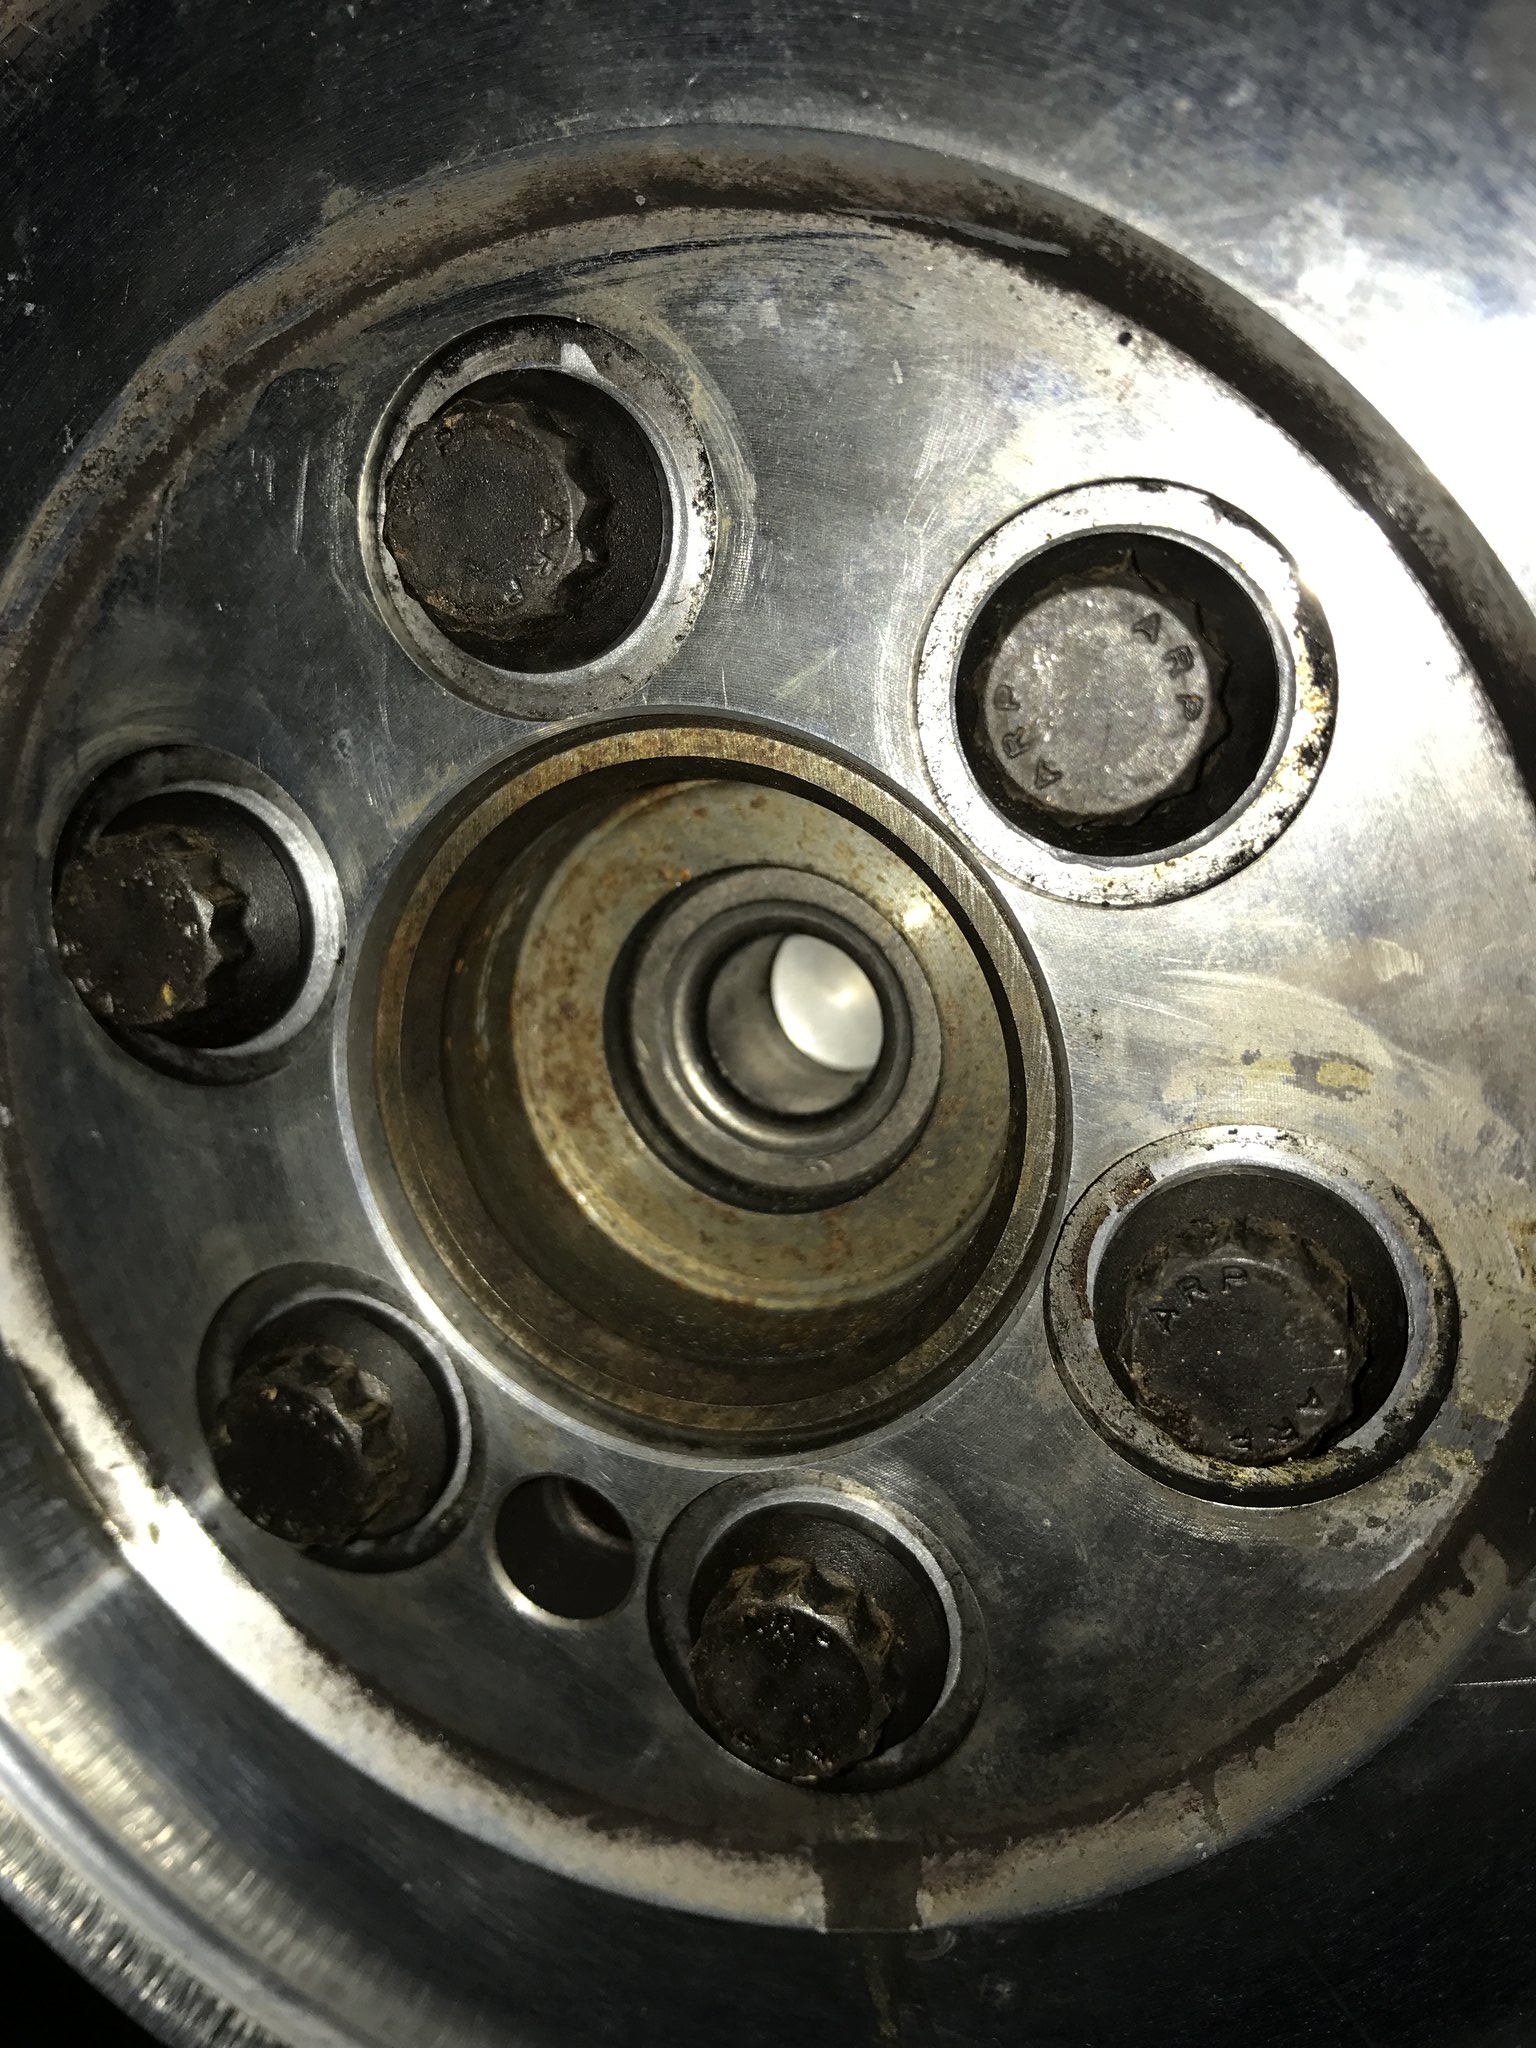
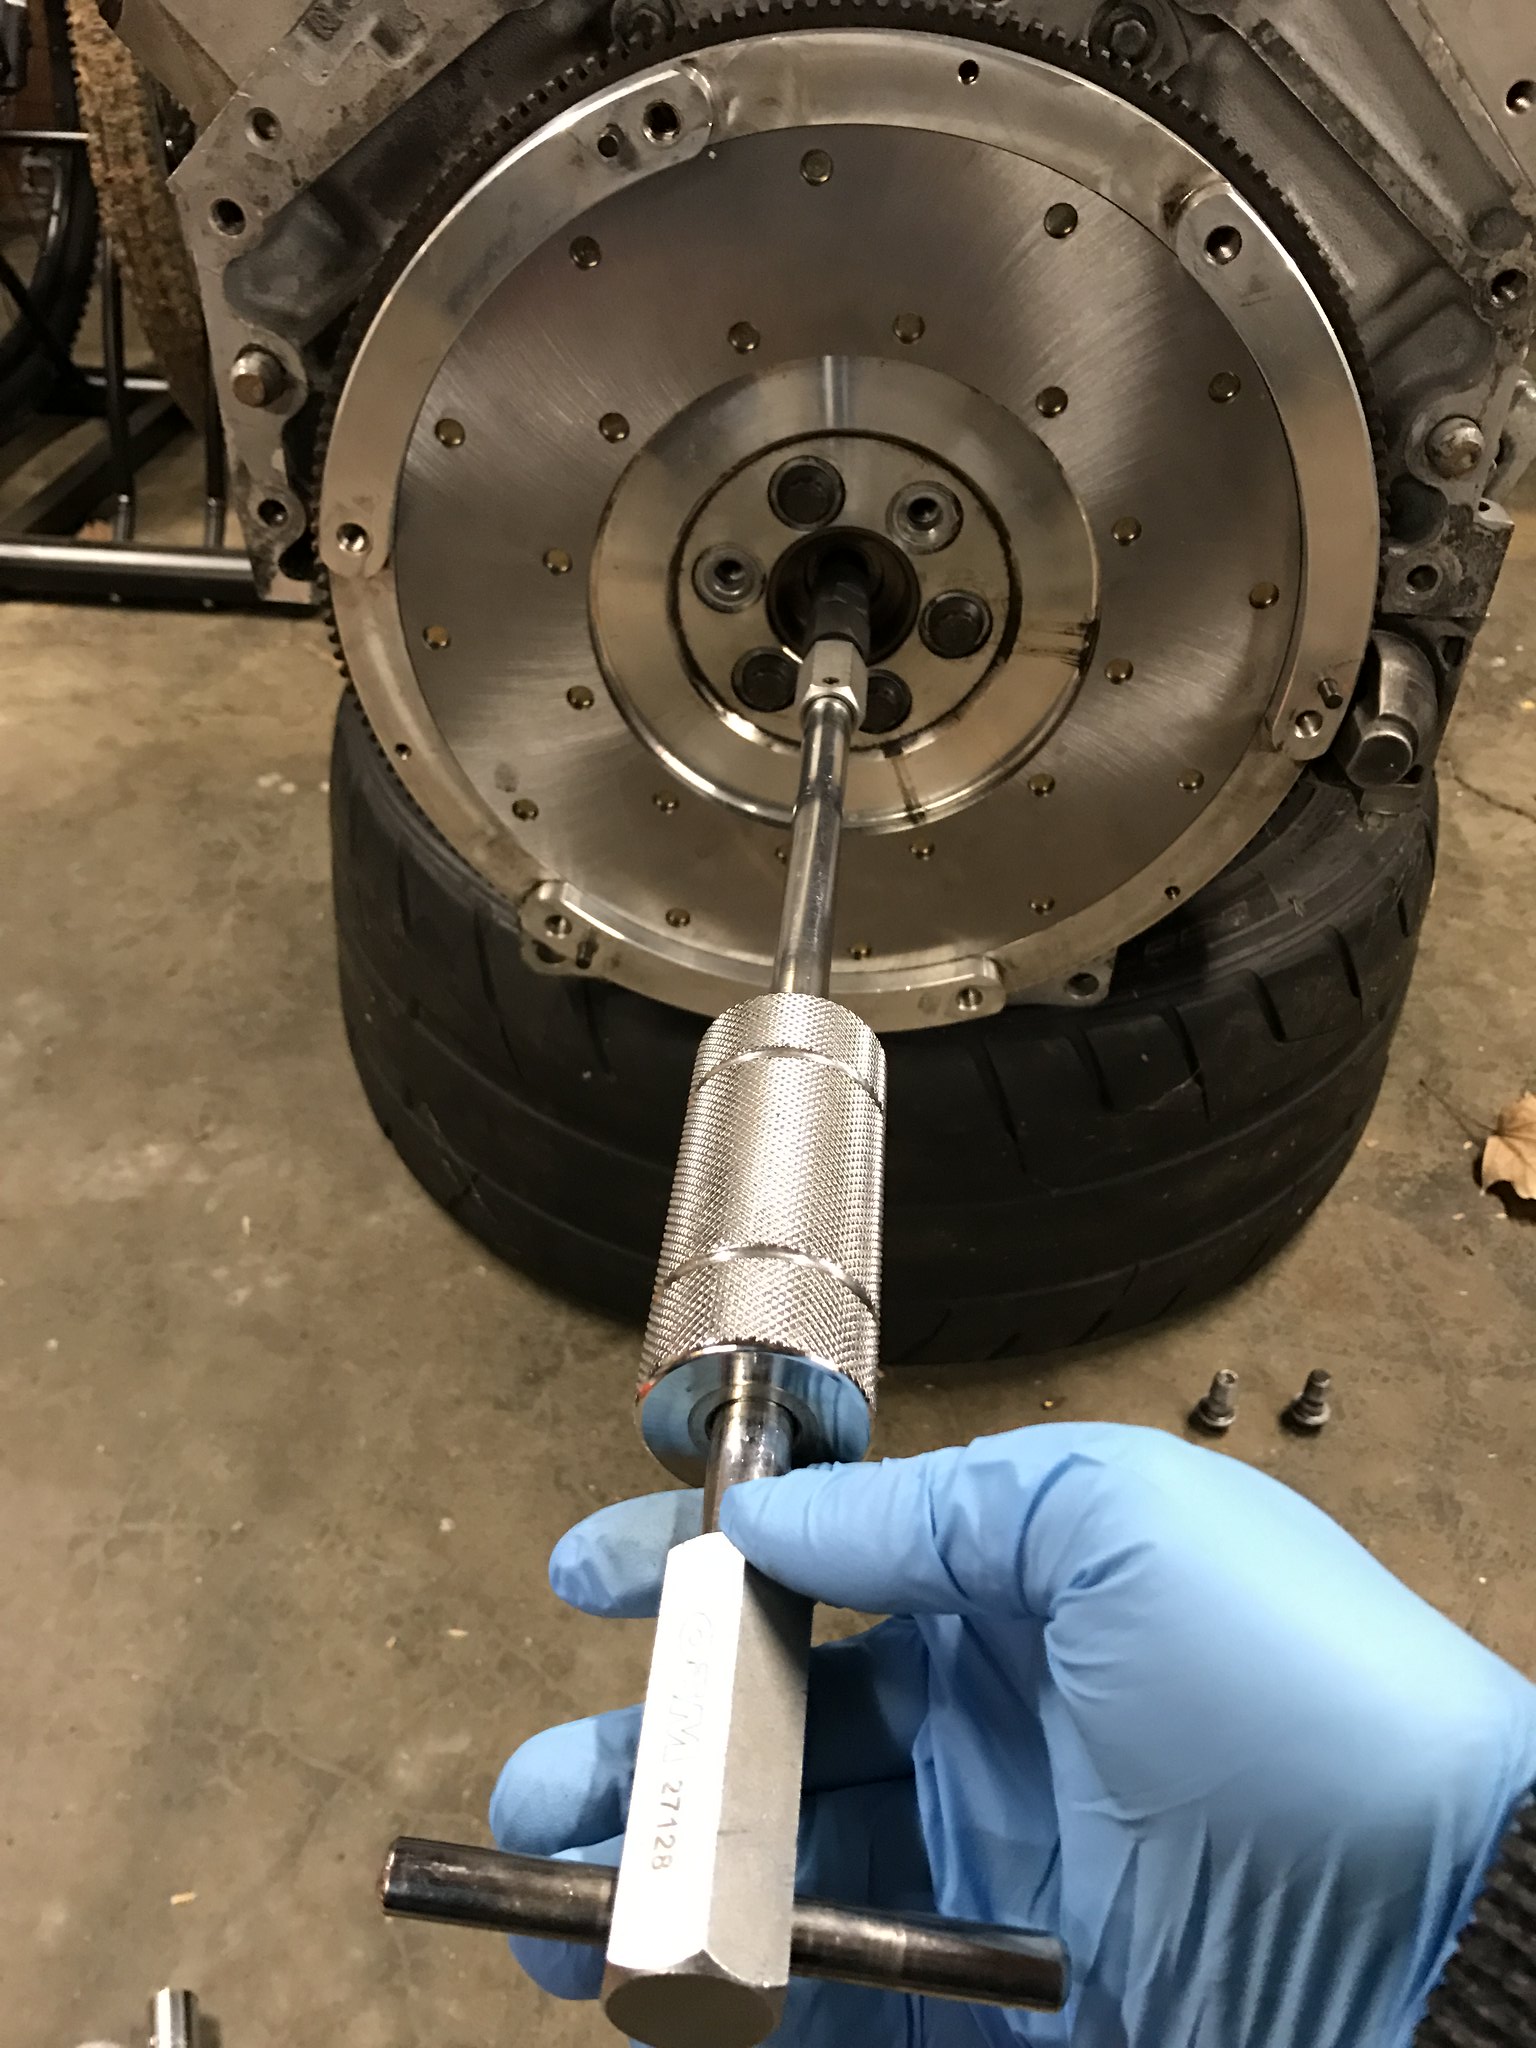
At the present moment I have used three different types of puller with no luck....
I've got another couple of options I'm going to attempt later this afternoon.
The first one involves taking a hacksaw blade and cutting it into a profile that I can tape on one end to turn into a sort of mini-saw that I can cut a section of the bushing out with.
The other option is a friend of mine at work has another type of puller that may or may not do the job as it actually will press on the end of the crankshaft in order to generate pressure. Hopefully one of these options will result in a success and I can actually put the engine and transmission back in the car over the weekend.
If none of those options work, I'm going to see this as an opportunity to purchase another tool for the garage and get a quality dremel that I can use a tough carbide cutter or bit and grind/cut it out that way.

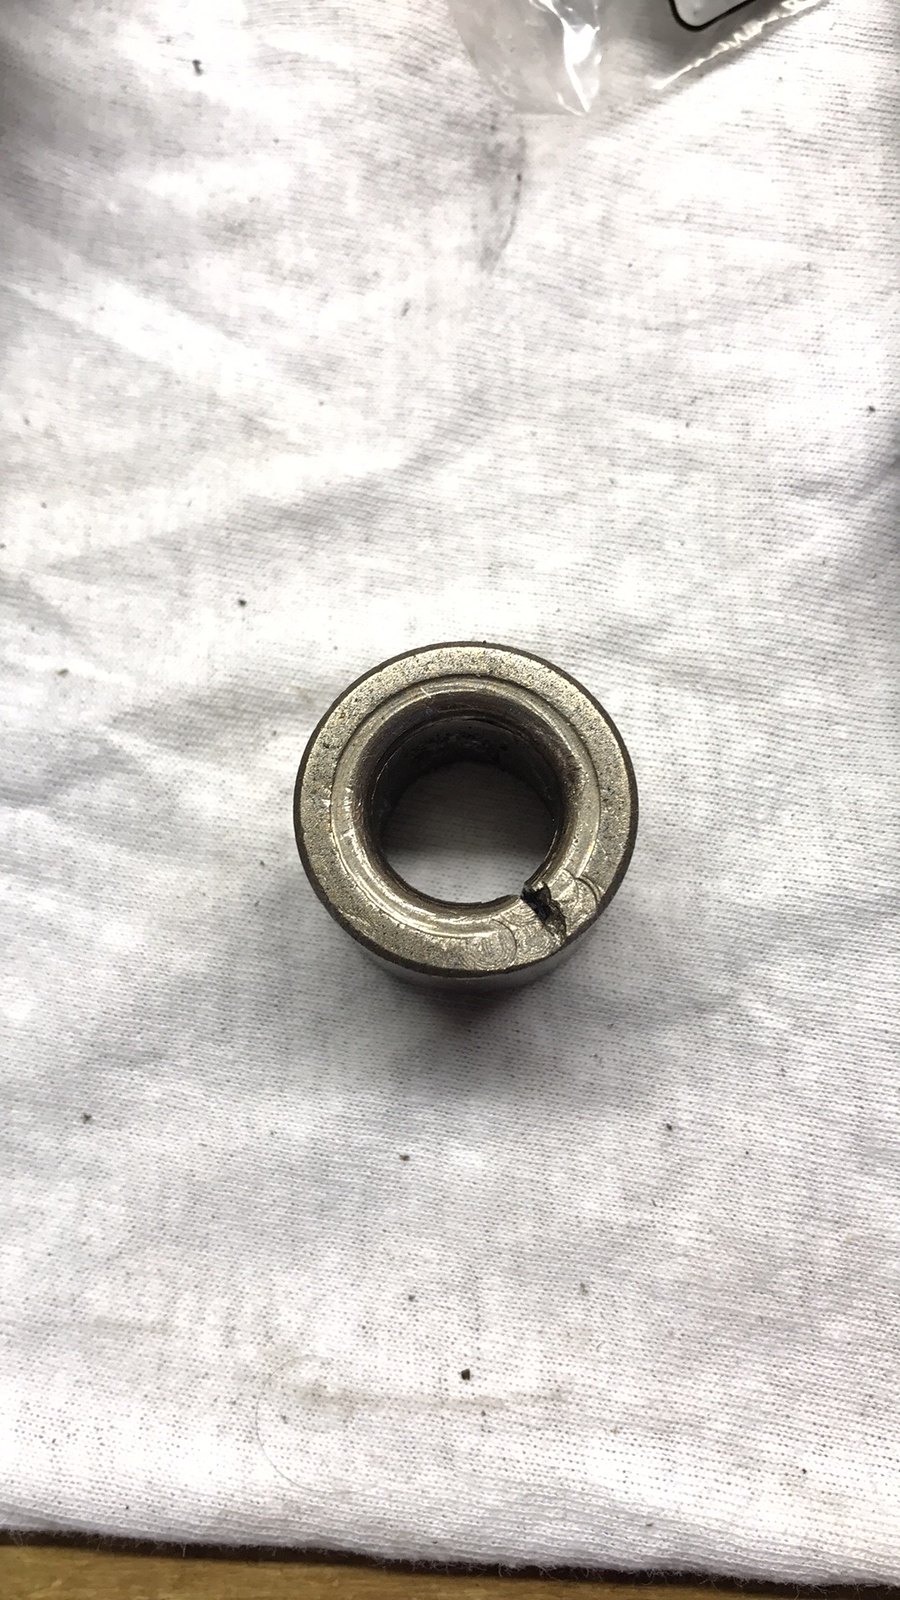
If that's a solid bushing measure the ID, select an appropriate tap and thread a bolt in it? You can either attach a slide puller to that bolt or run it through a plate with a pair of screw jacks between the plate and flywheel.
BrokenYugo wrote: If that's a solid bushing measure the ID, select an appropriate tap and thread a bolt in it? You can either attach a slide puller to that bolt or run it through a plate with a pair of screw jacks between the plate and flywheel.
Good suggestions all around Mr. Yugo.
I actually ended up getting the cutting method to work perfectly. I purchased a small one hand hacksaw at O'Reilly's and a stronger blade designed for cutting harder materials and within a few minutes of back and forth I had a cut almost down to to the outer portion of the pilot bearing. I then reinserted the slide puller that I rented from Auto Zone, the very same one I used on the first page of my thread, and it came out in seconds.
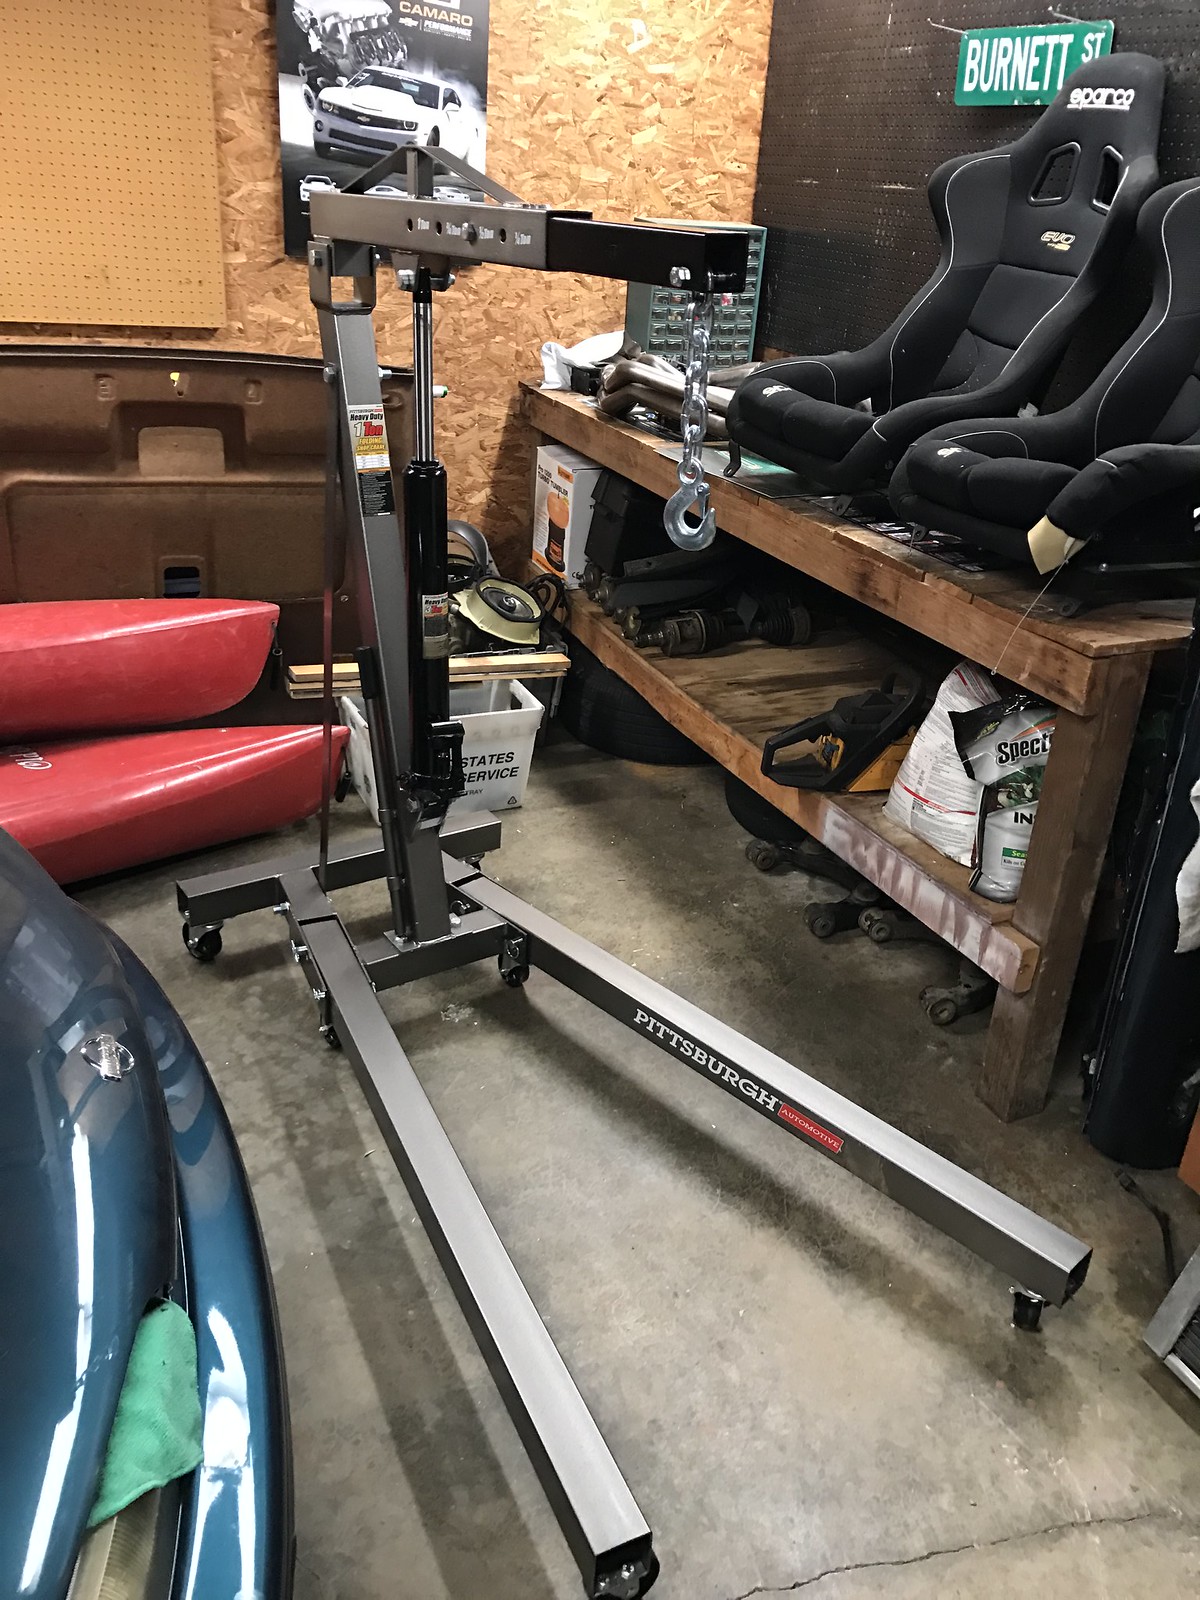
Then I headed down to Harbor Freight and invested in an engine hoist. I had a "super coupon" and nabbed it for $99.99. I could've had a 2-ton for $179.99 but I couldn't justify spending the extra coin for what I do in my garage. There aren't any big blocks or diesel engine swaps in my future that would necessitate the additional robustness so I feel like I can spend the extra $80 bucks somewhere else.
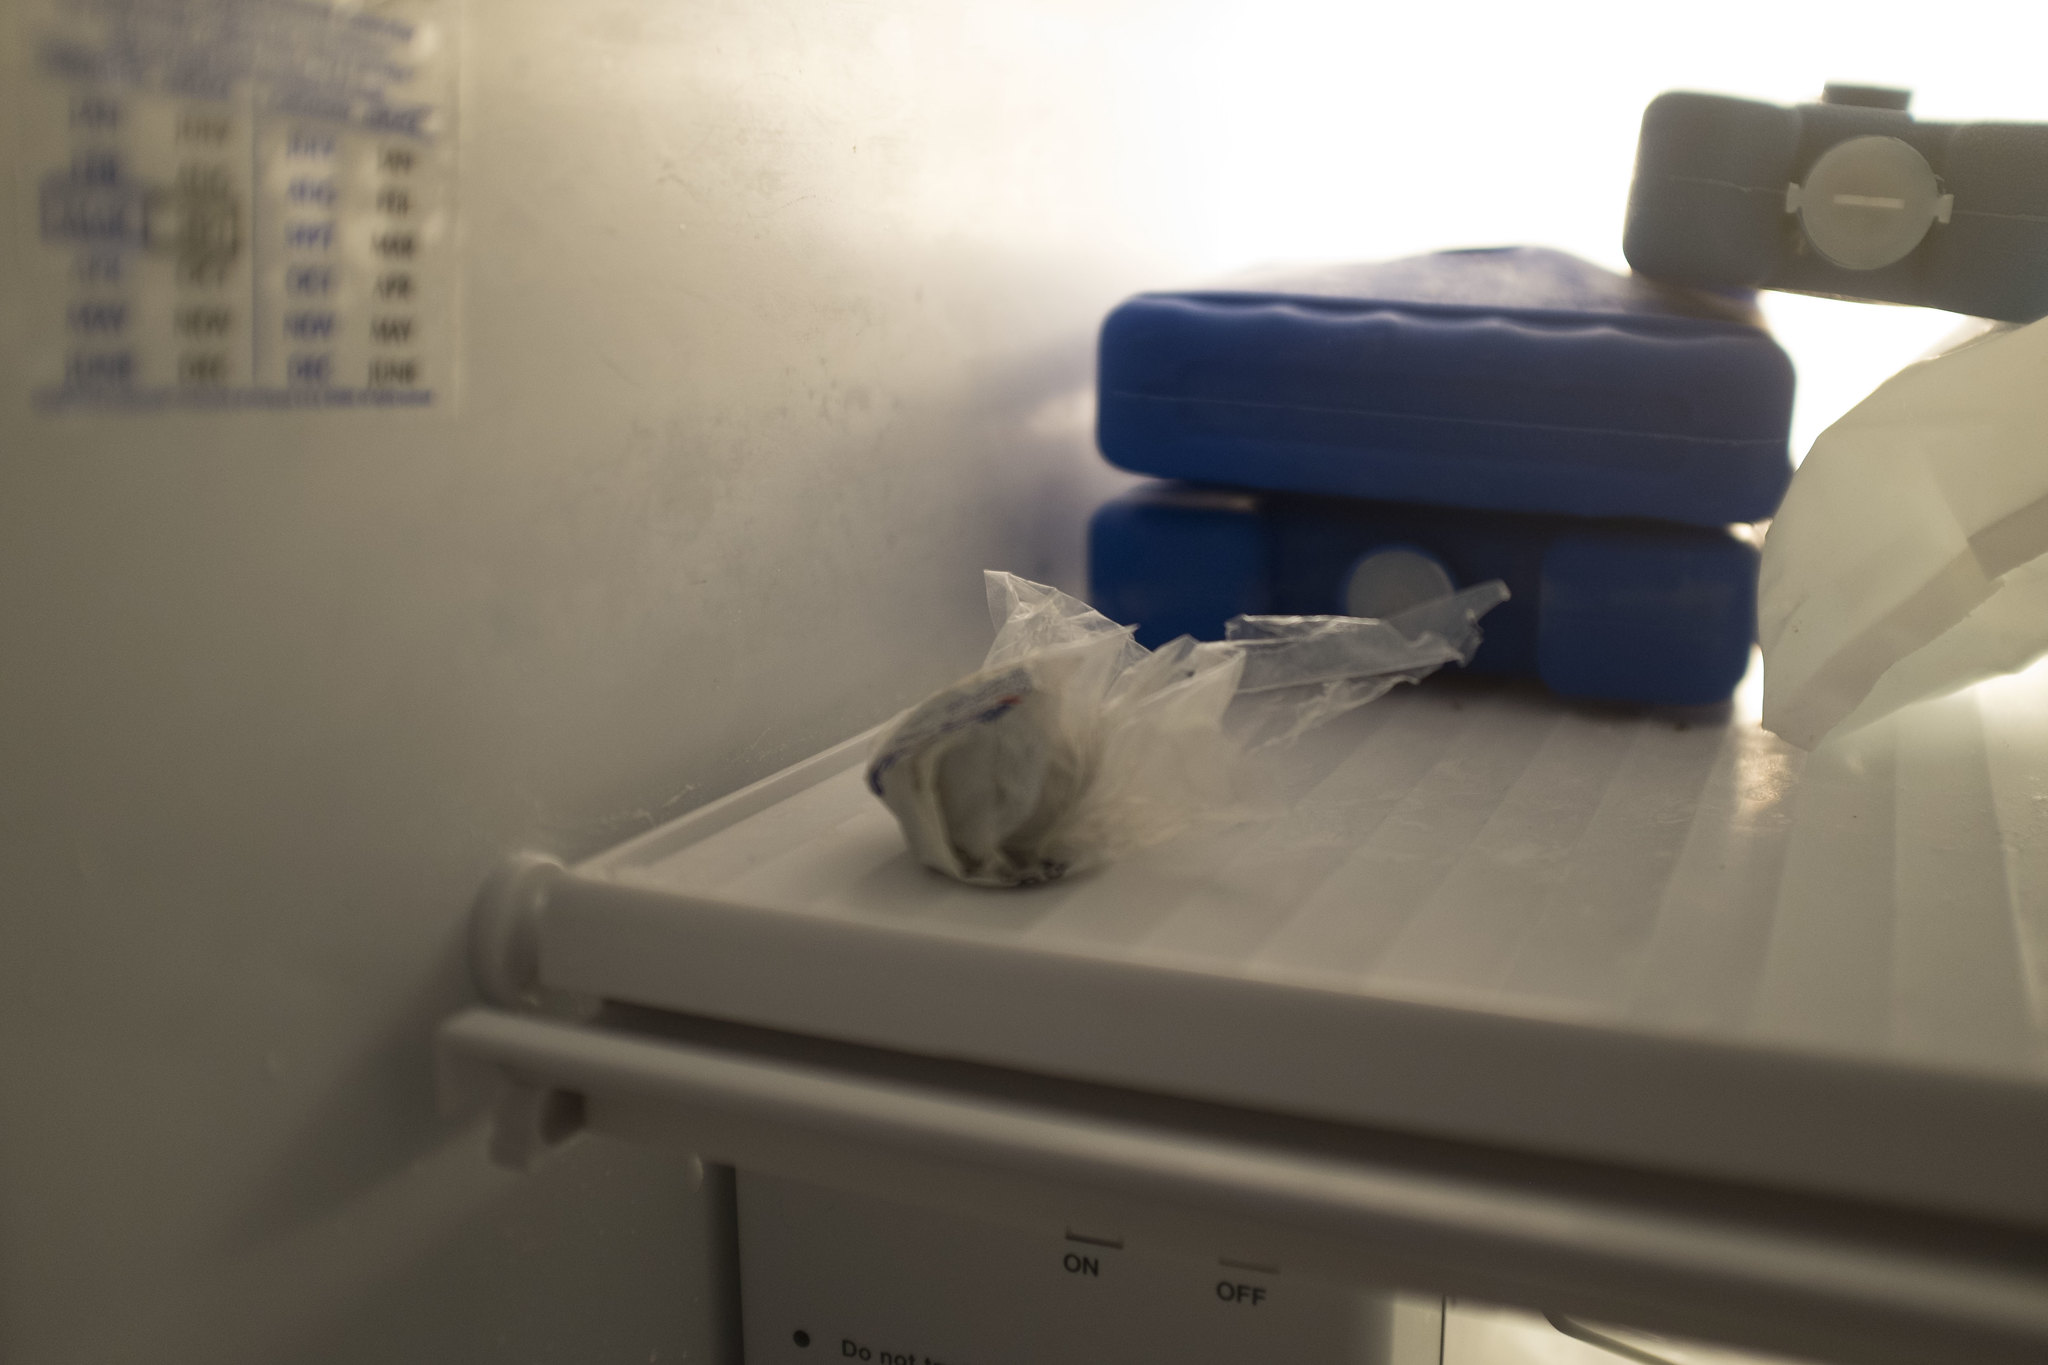
I popped the replacement pilot bearing in the freezer to encourage an easier installation tomorrow morning. I'm using a set of bearing/race installers that I purchased to do the rear axle seals in my 4Runner last year.
And here is where I left things for the evening. The majority of the parts in this photo will be going together like Lego's tomorrow and will also be helping clean up some space in the garage as well.
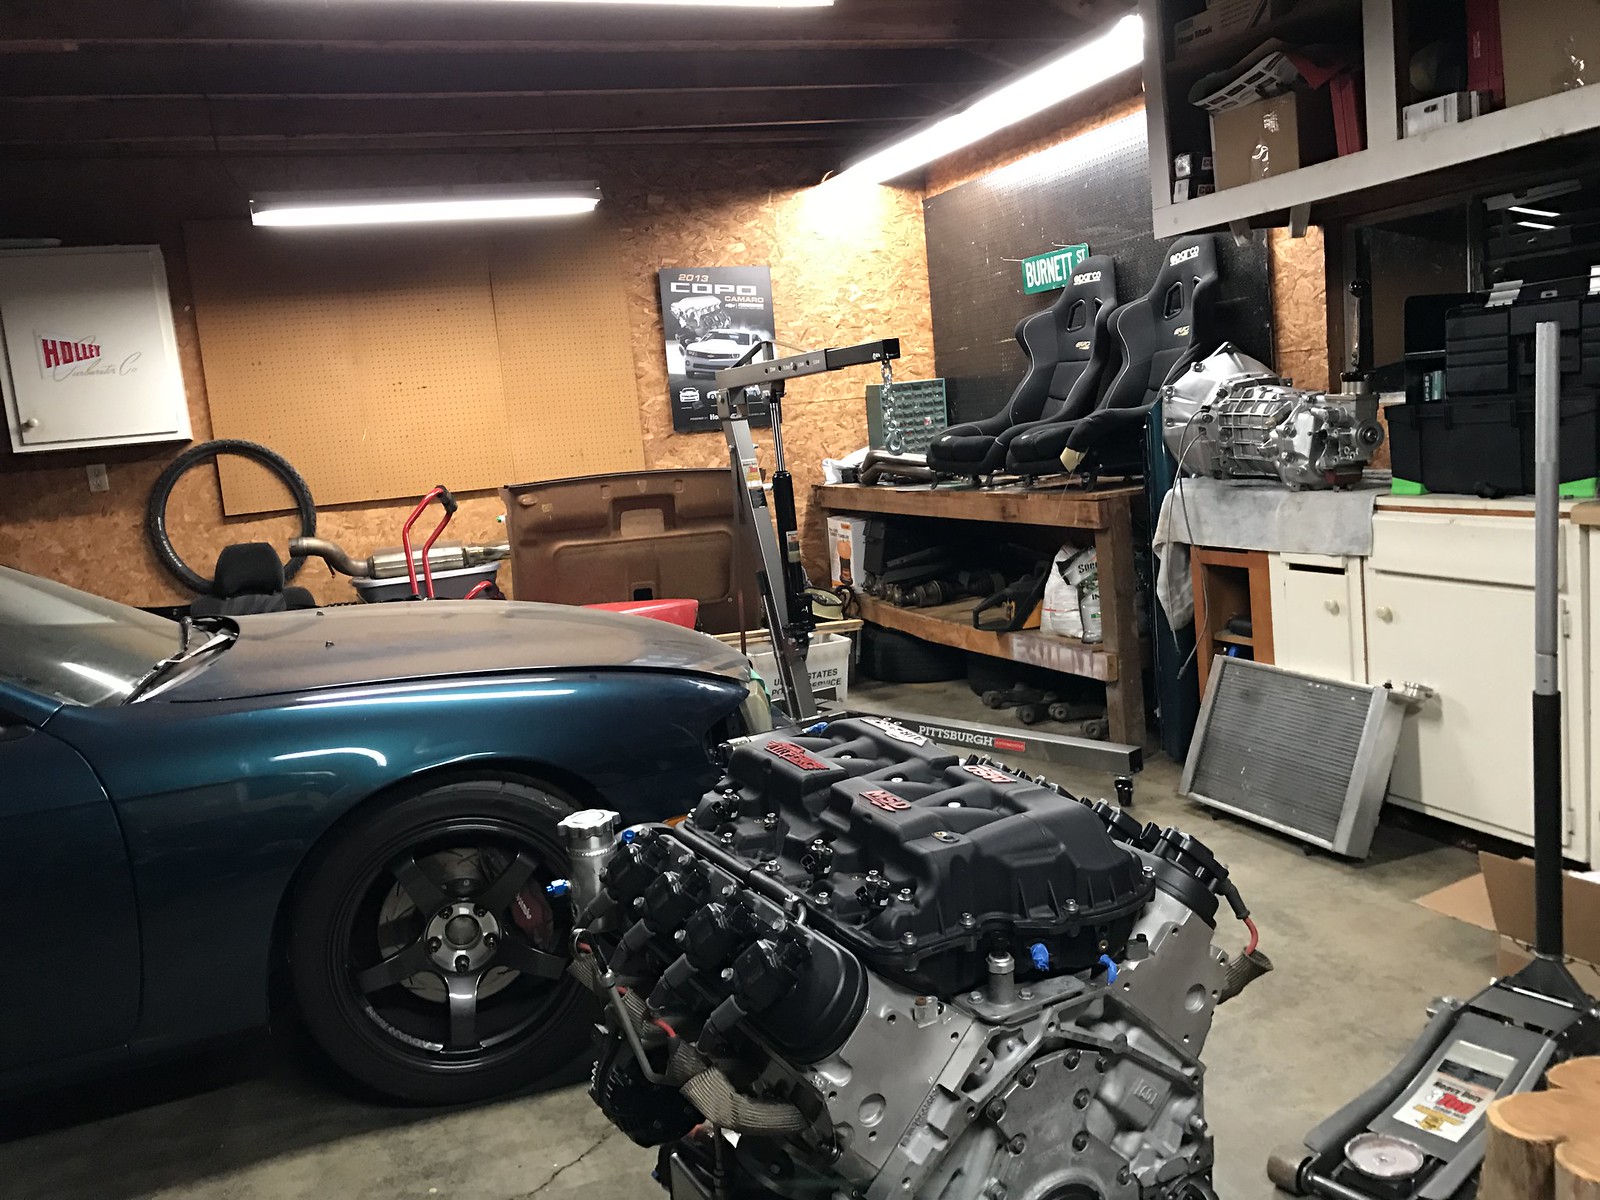
For my own benefit:
-Install pilot bearing -Install flywheel and torque in three stage process: 1) 15 lb ft 2) 37 lb ft. 3) 74 lb ft. -Using clutch alignment tool, install the clutch disc and pressure plate. Torque in two stage process: 25 lb ft. and then at 52 lb ft. -Apply grease to input shaft and install transmission onto engine. Torque to 35-37 lb ft. -Remove shifter and tape up shifter hole. -Clear engine bay of wiring or other obstructions. -Double check engine mount to block torque spec. -Get front of car up on jackstands. -Slide engine into place. -Install transmission crossmember and Prothane transmission bushing back into place to secure the transmission into tunnel. -Reinstall headers (ehh, perhaps i'll go over them with WD40 and a Scotchbrite pad first to clean them up).
Minor setback occurred Friday/Saturday. Made a good amount of progress.
Installed pilot bearing....

....made sure clutch lines were tight on transmission.....
...torqued flywheel and installed clutch.
Then found out that, much to my annoyance, one ton engine hoists are somewhat of a joke. I purchased it operating = under the mindset that I could purchase by tonnage as opposed to how much farther out the boom could extend and maintain a decent amount of weight support on the larger two ton. Ended up trying the one ton just to see and the harmonic balancer was actually rubbing on the engine joist jack pump and not allowing the engine to angle for placement in the engine bay.
So I returned it and exchanged and paid the $80 extra dollars to get the two ton. I would recommend the one ton for people installing engines/transmission in front wheel drive vehicles, but not for vehicles with front/rear configurations.
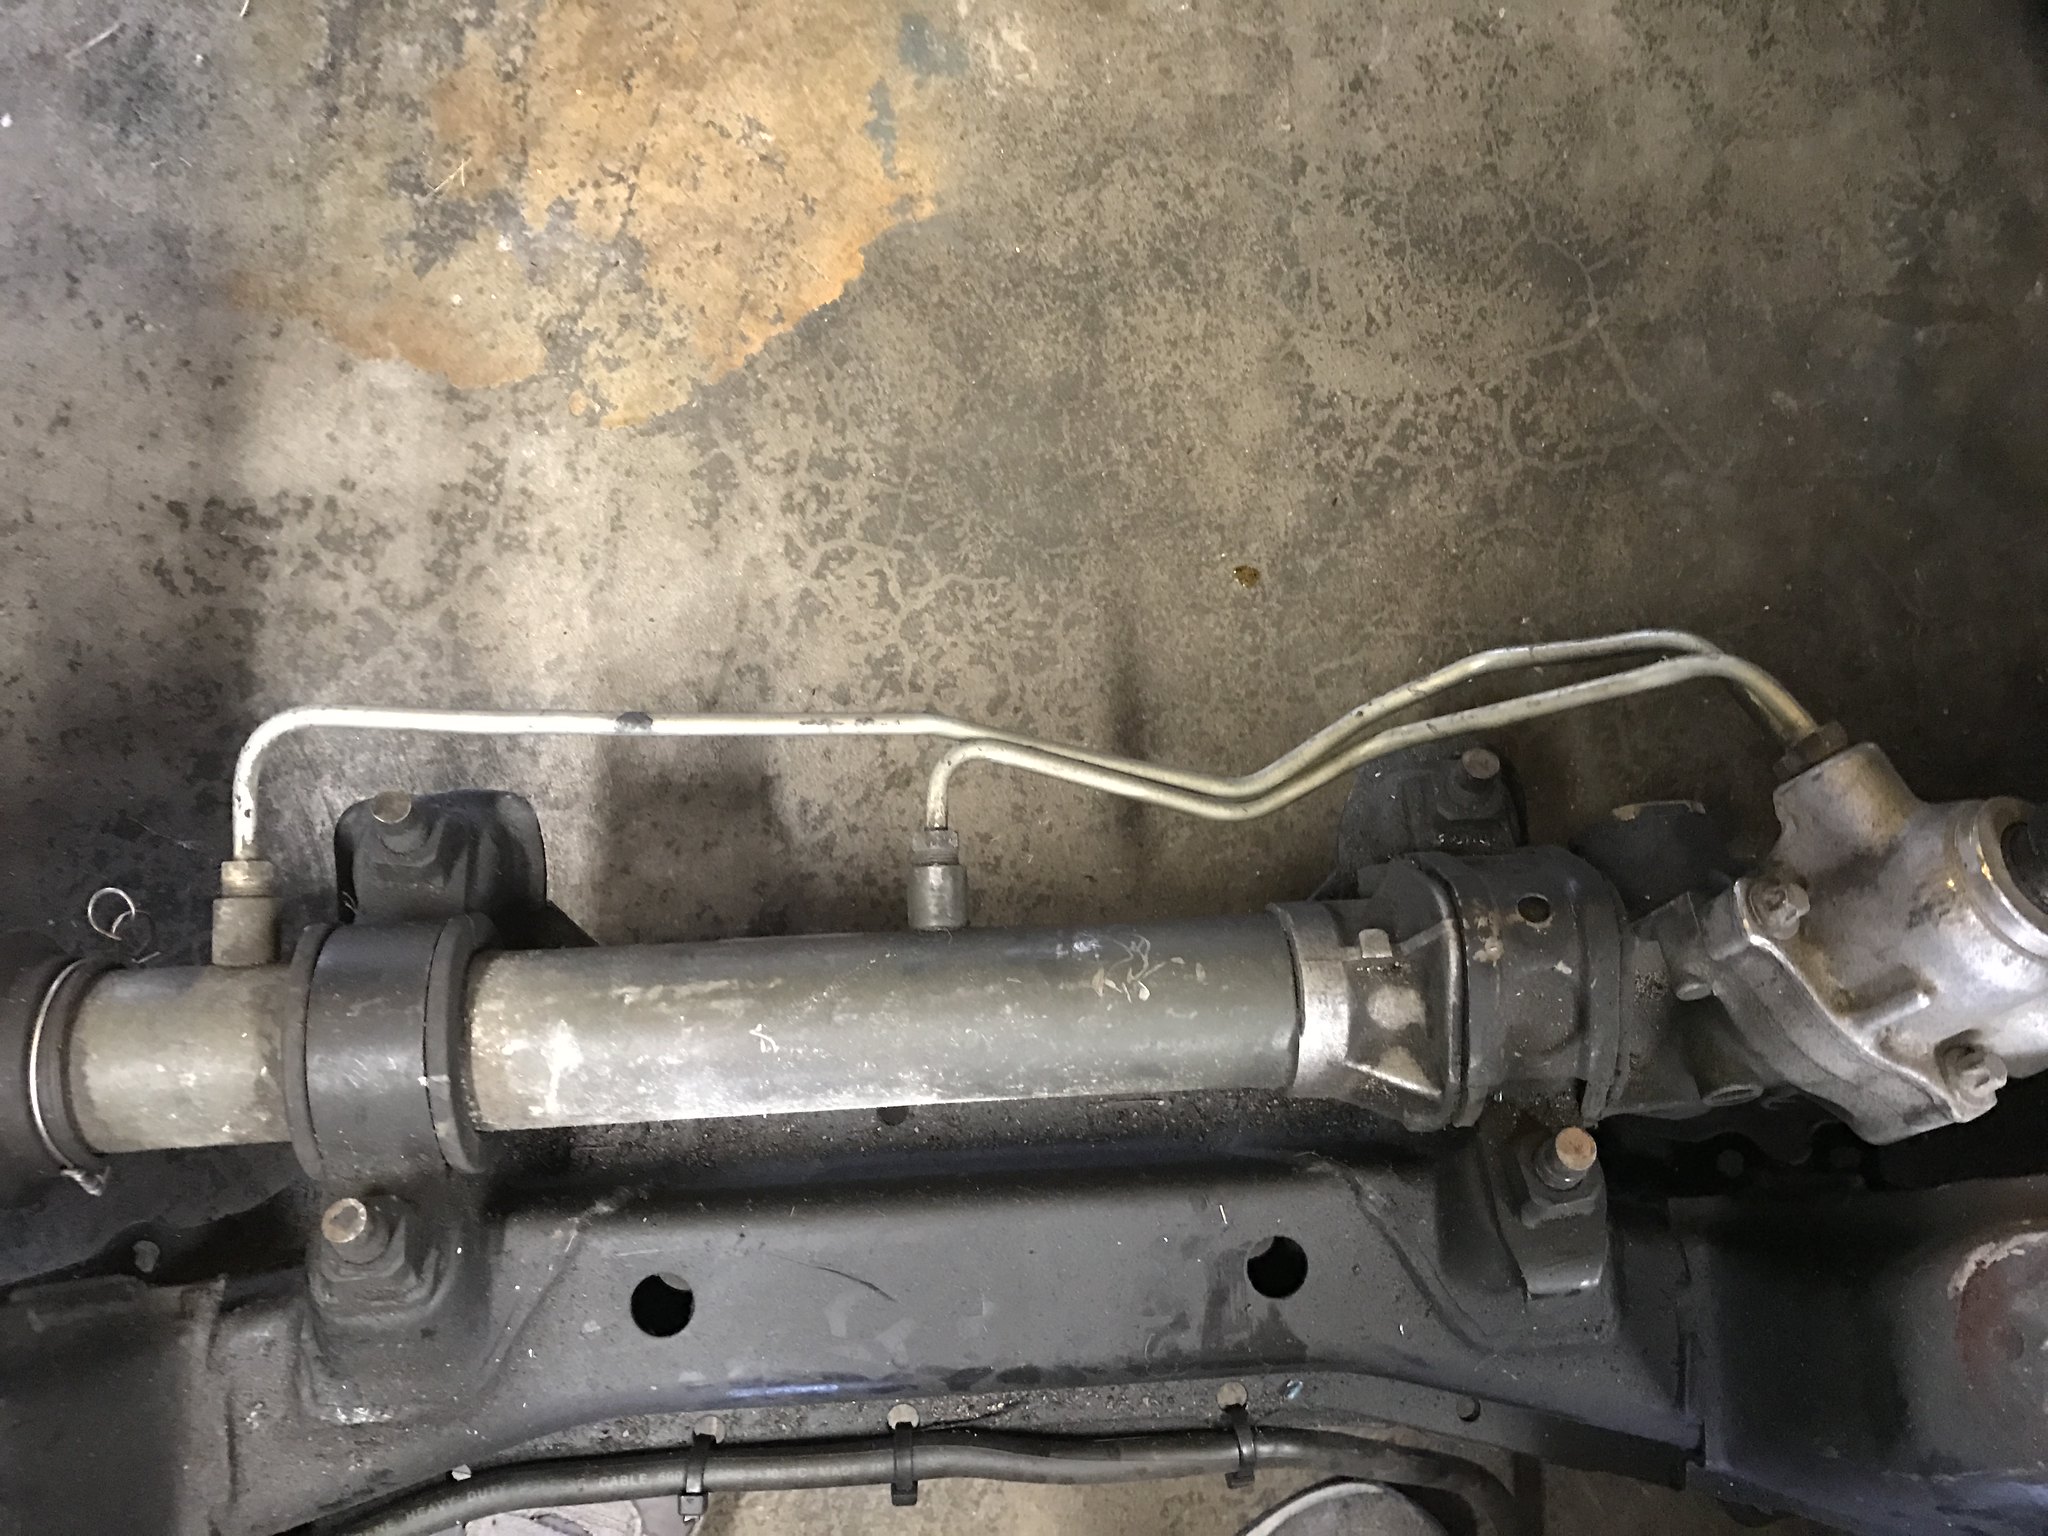
I have more pictures to pull off of my other camera, these are from my phone. It's a great idea to remove the power steering lines off of the rack before dropping the engine in.
Now I'm all set to move forward. Might set her down in there after bible study tonight.
Spent some time on it last night right after work.
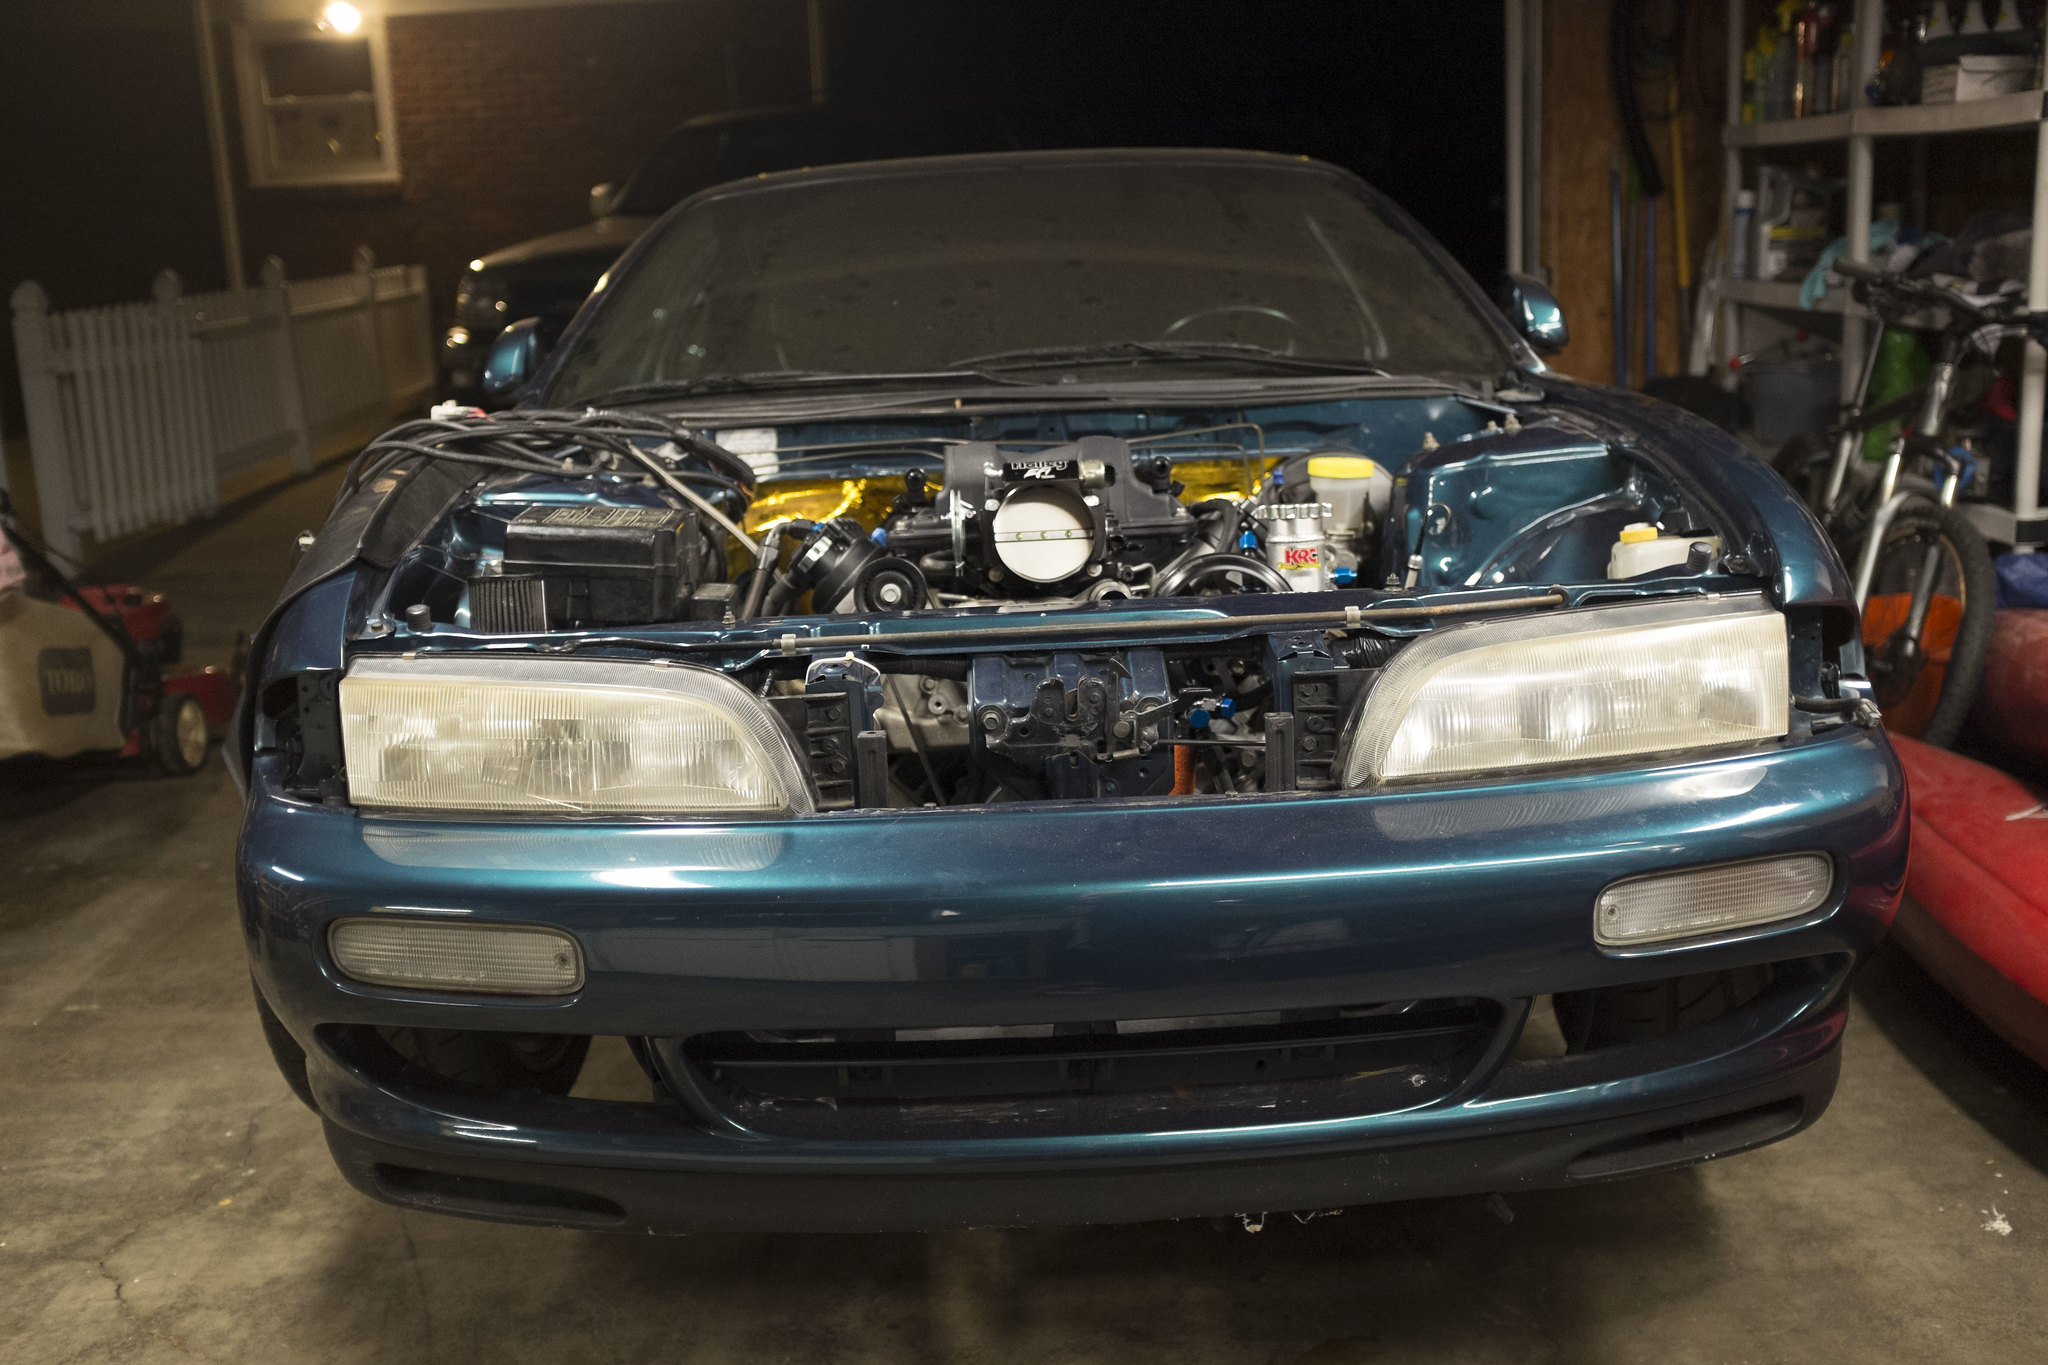
Thanks to the roommates, the engine is now in. No pics of the process, but let's face it. You all have seen an engine install take place before, and I haven't exactly been able to figure out how to snap pics while participating in the actual install itself.
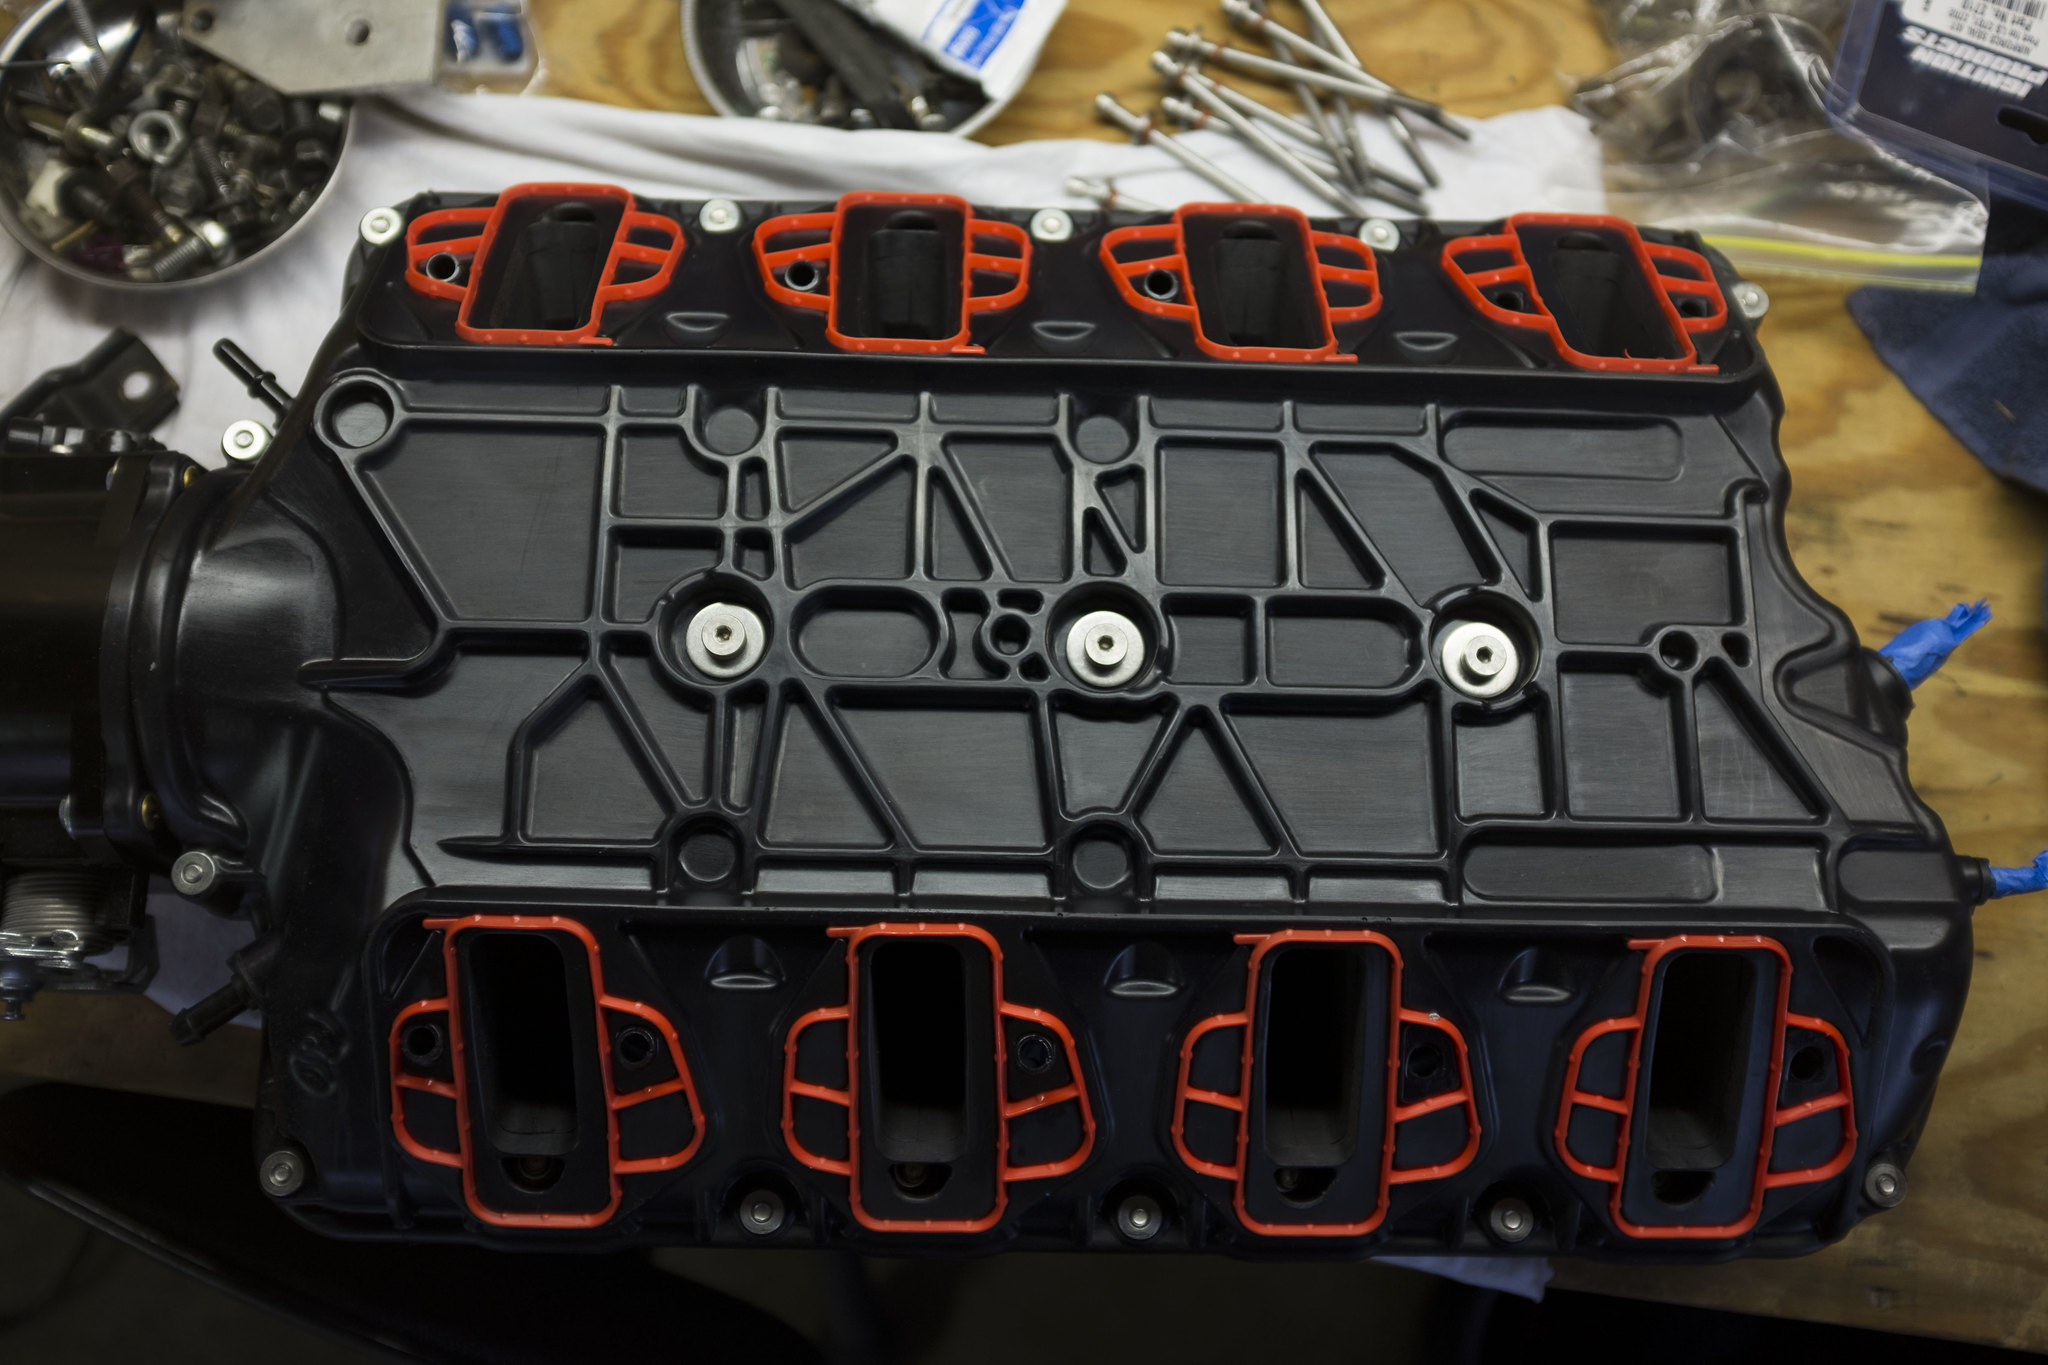
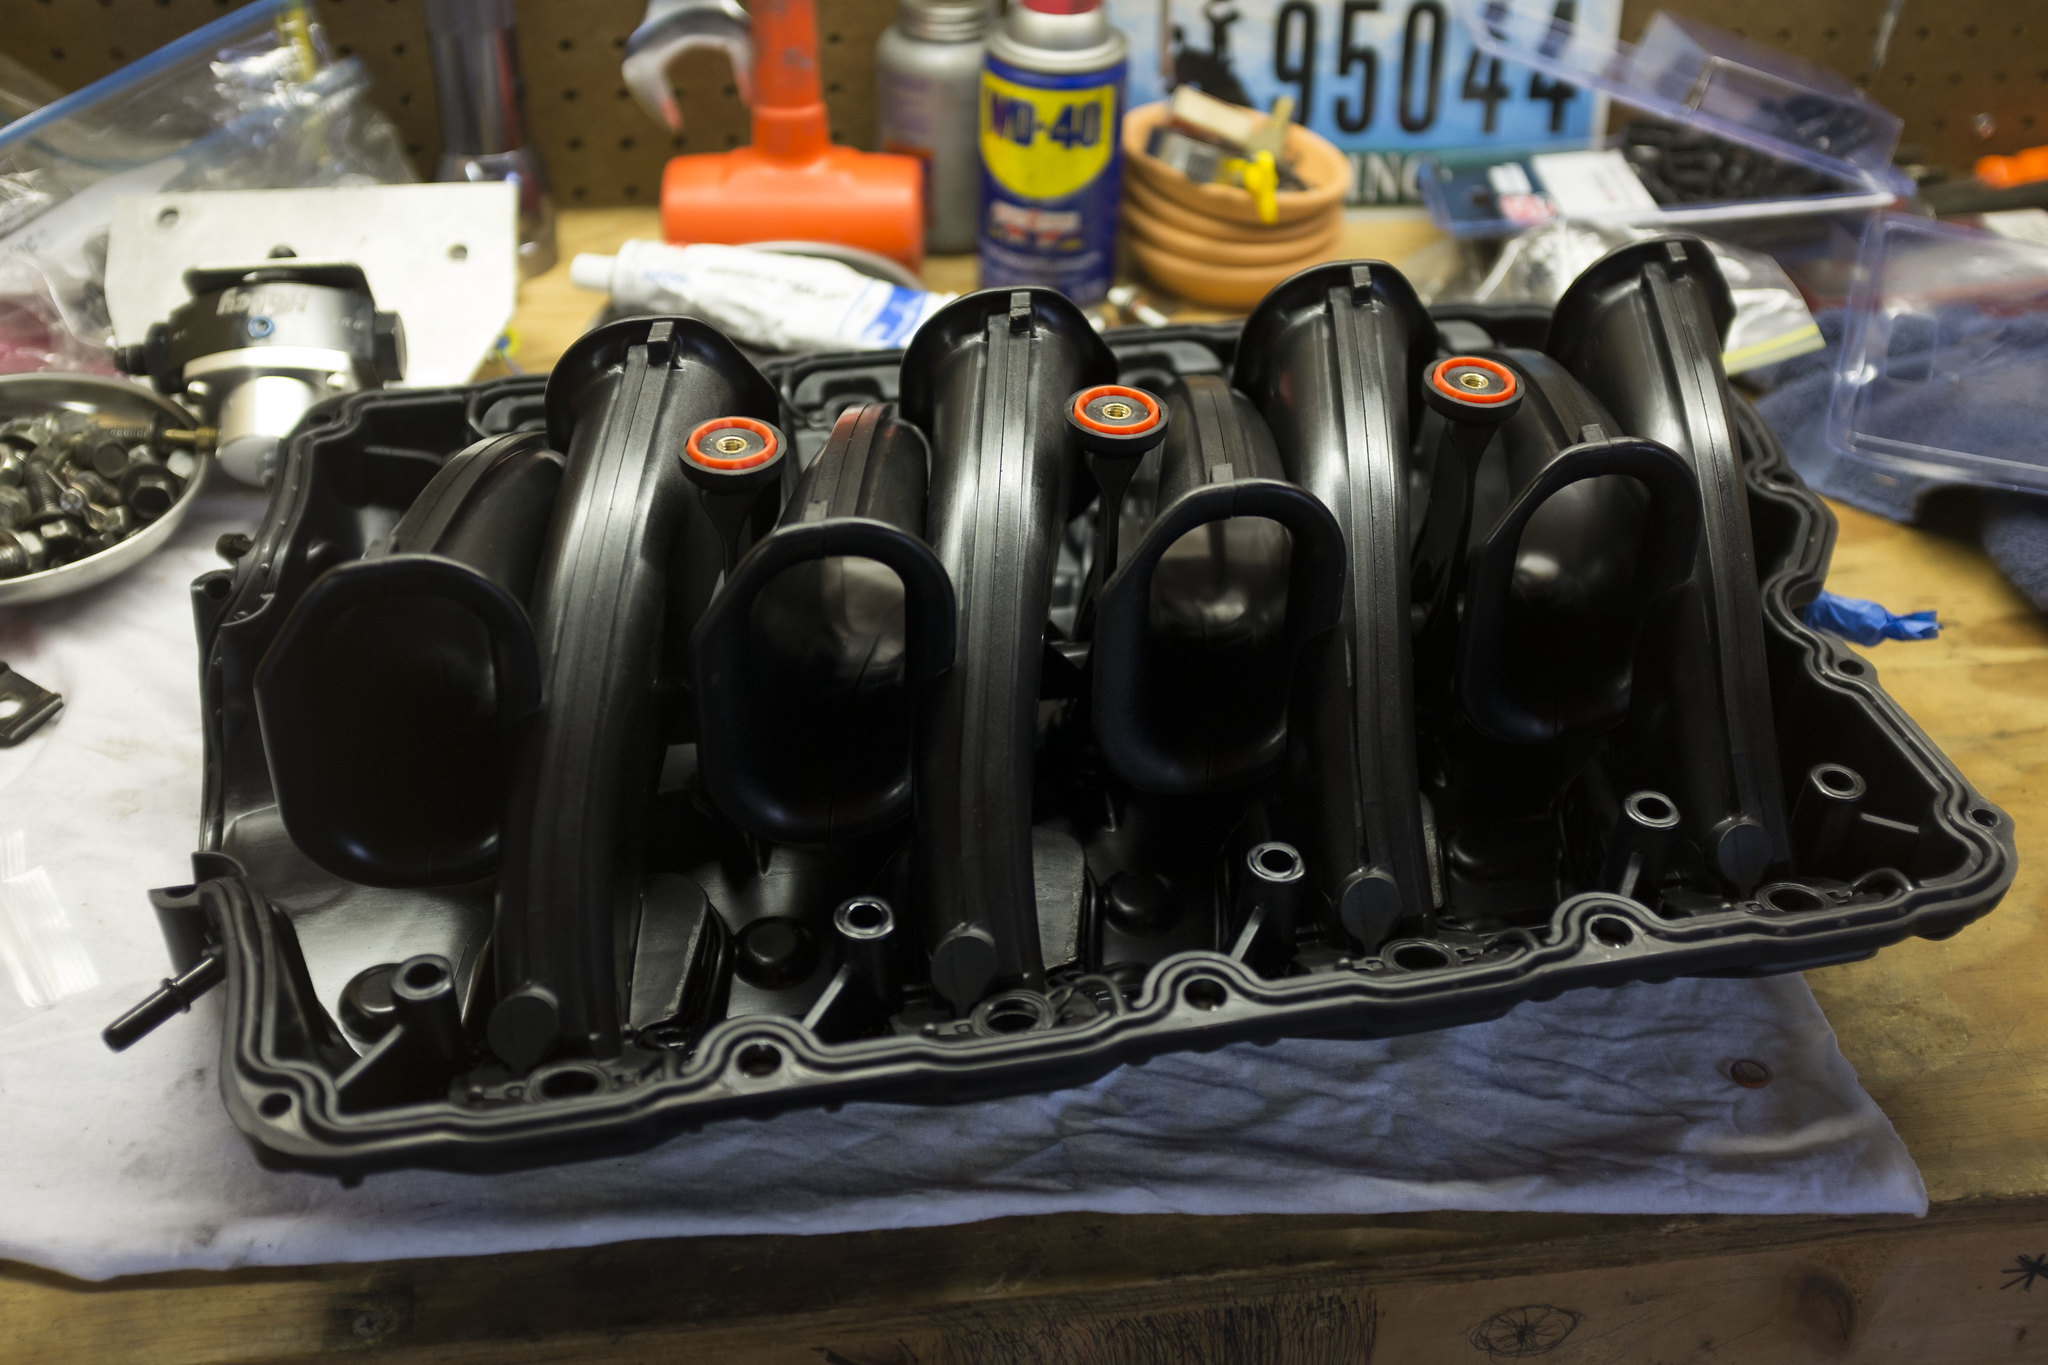
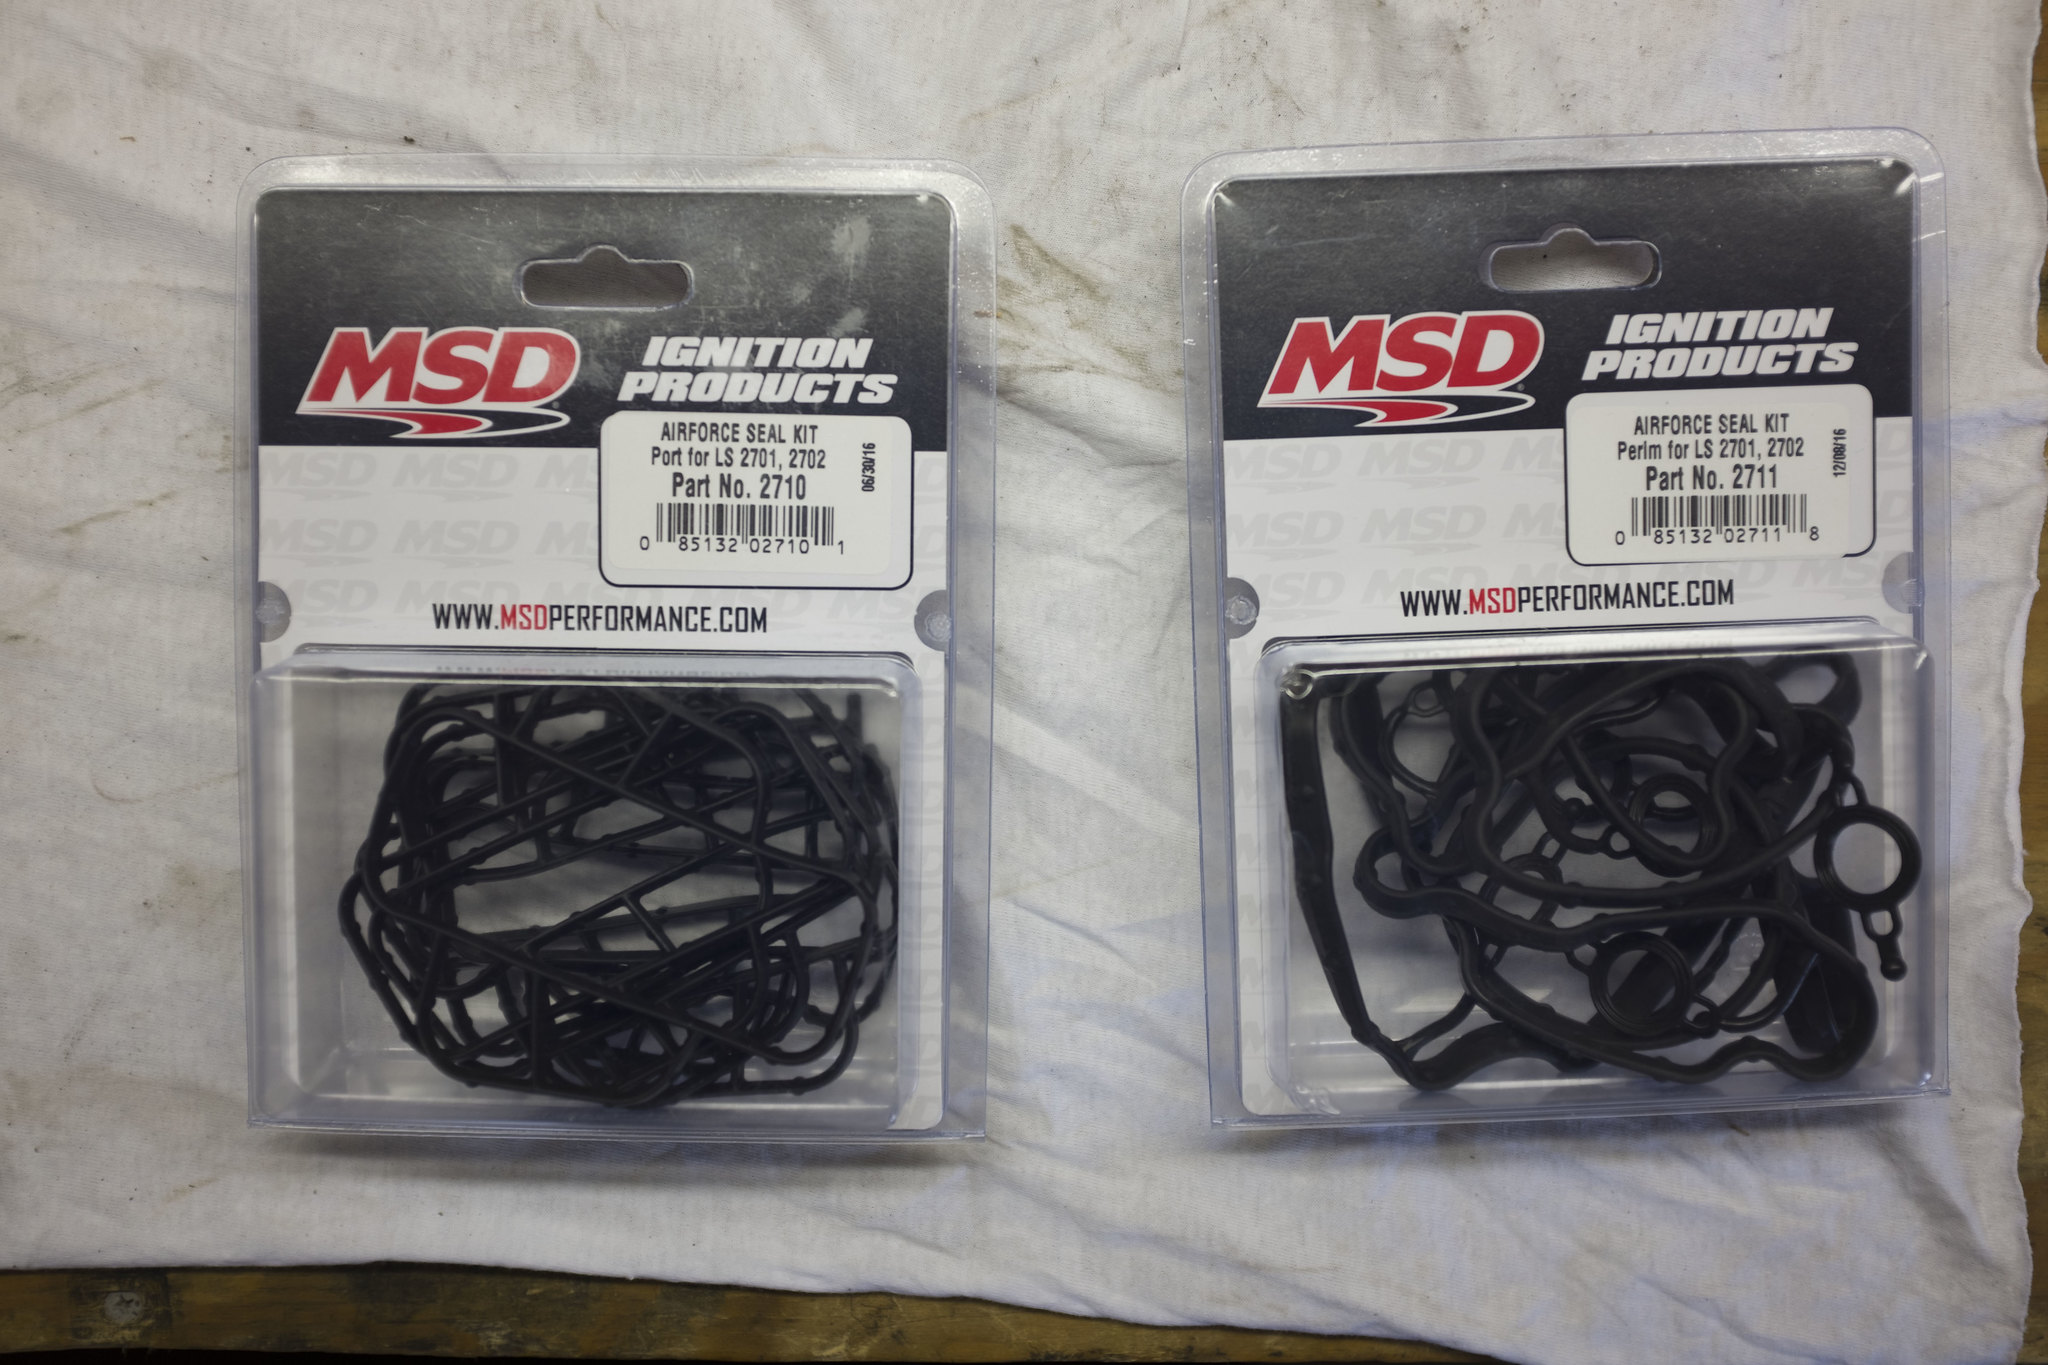
Prepping the MSD Intake with proper black gaskets and installing the fuel rails with taller, higher flowing ACCEL injectors to allow the billet Holley EFI fuel rails to install on the intake.
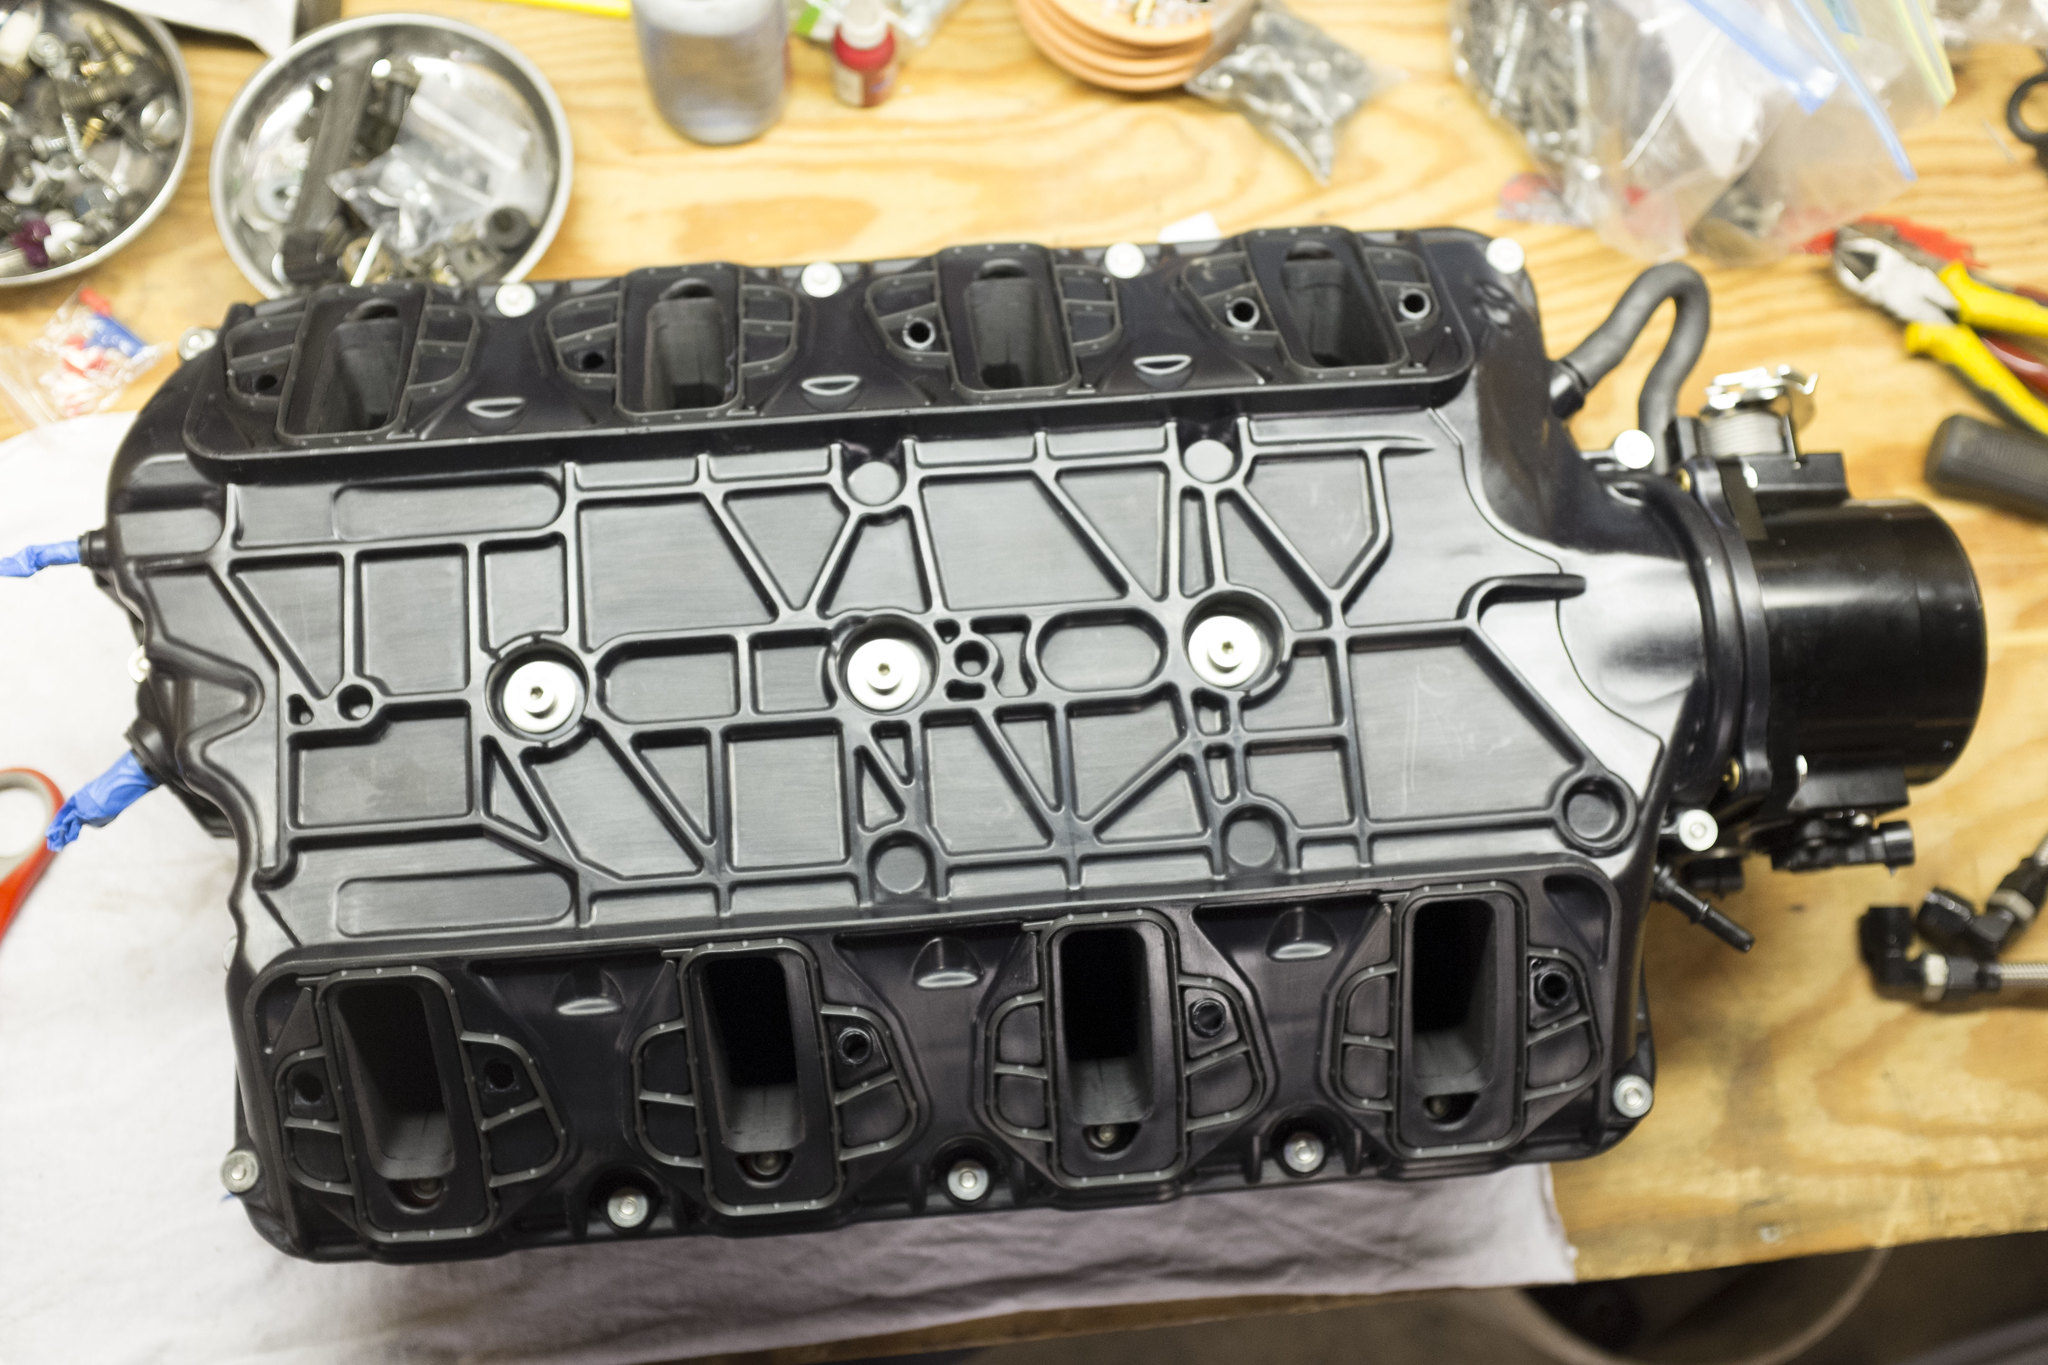
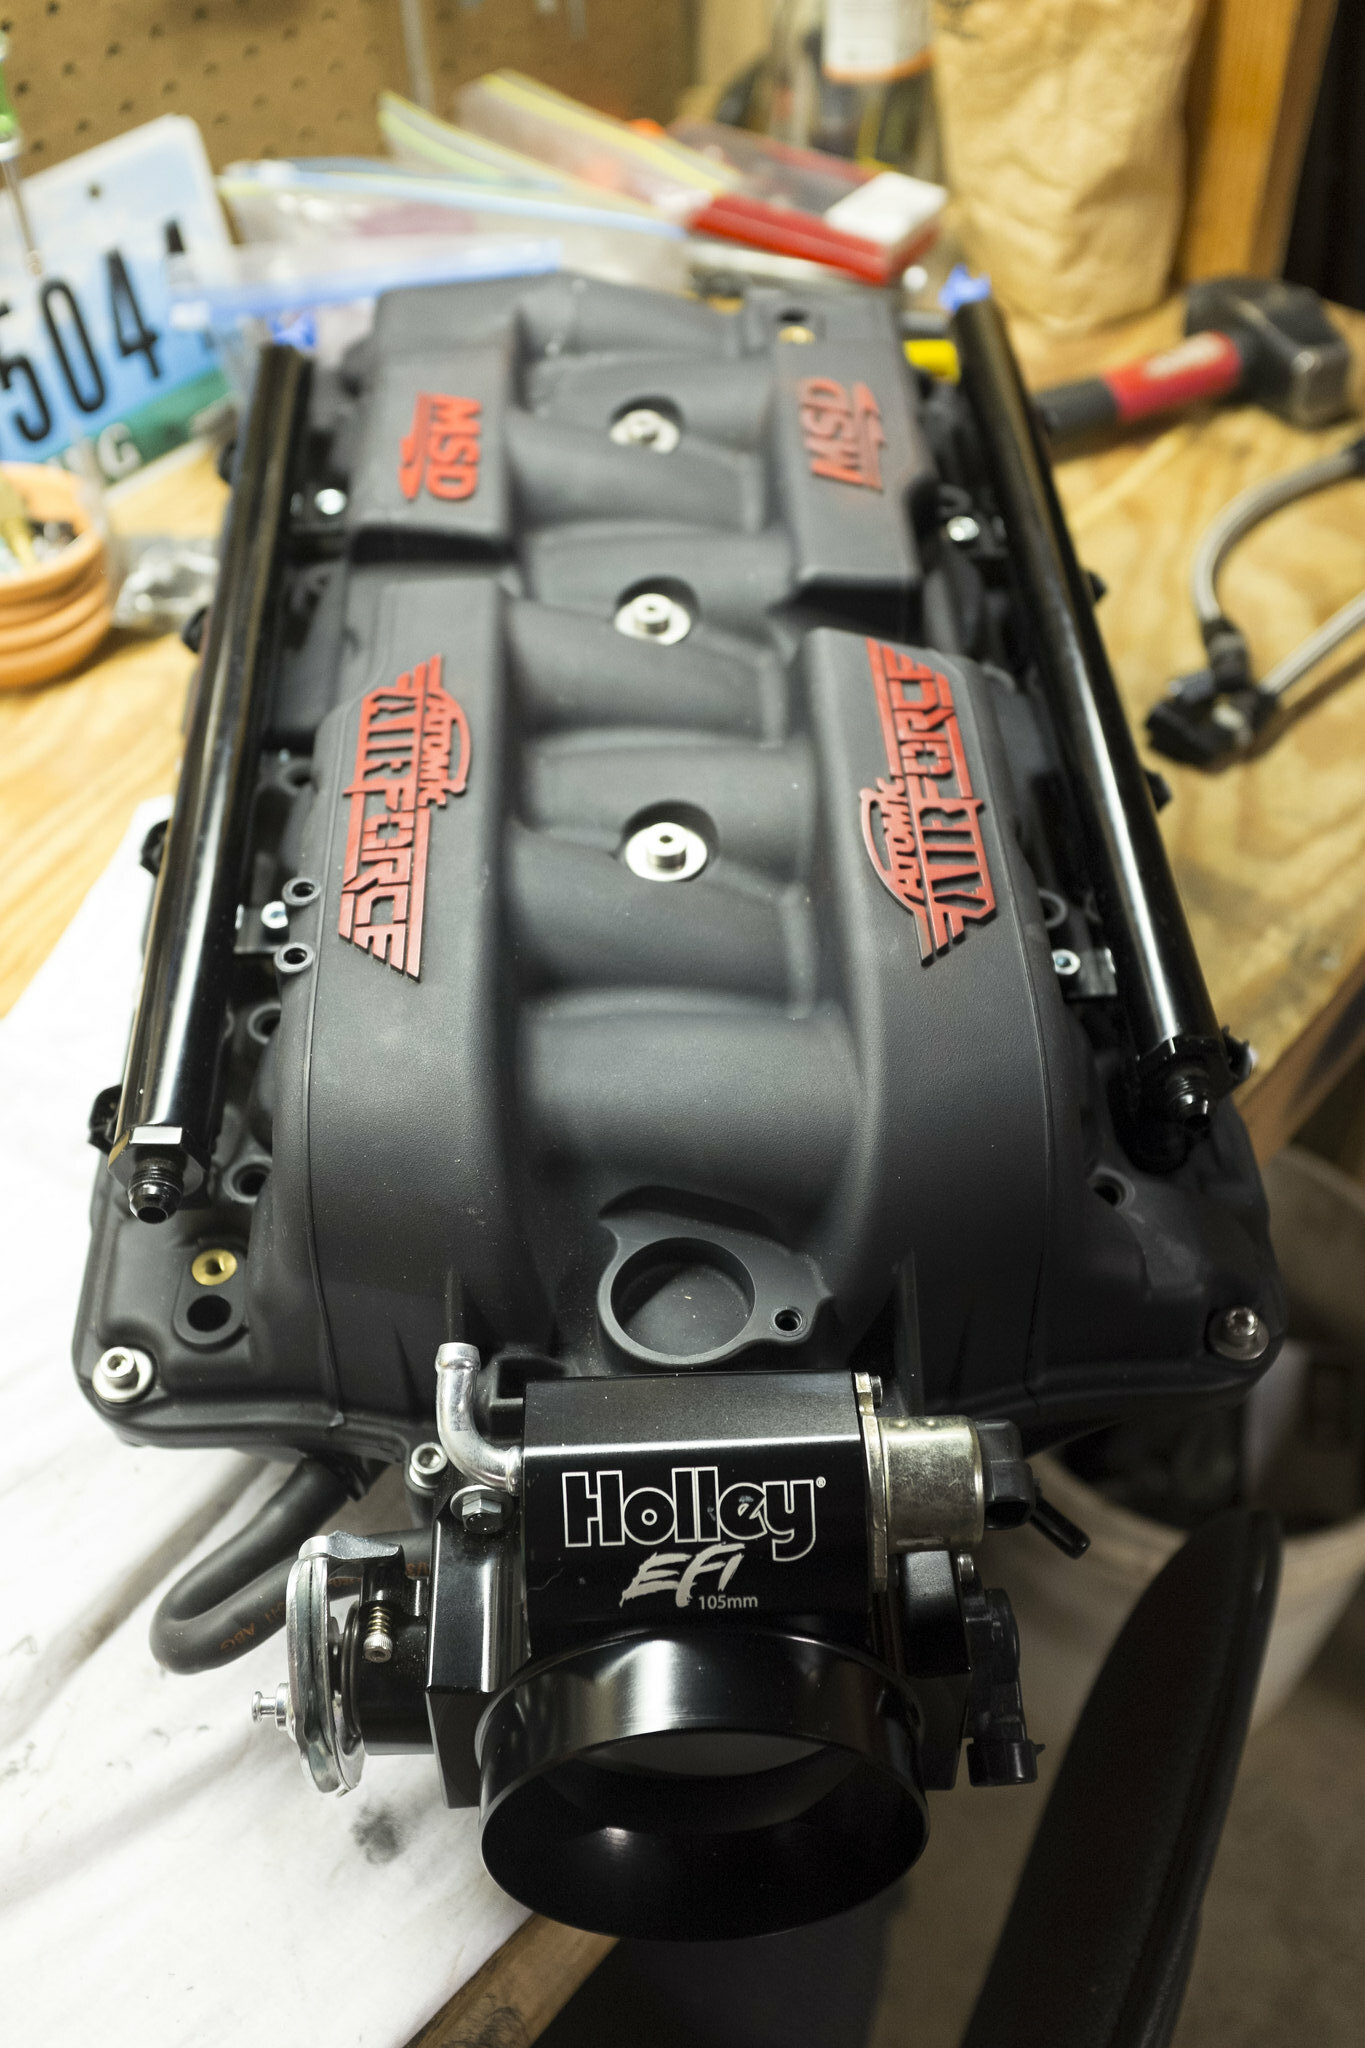
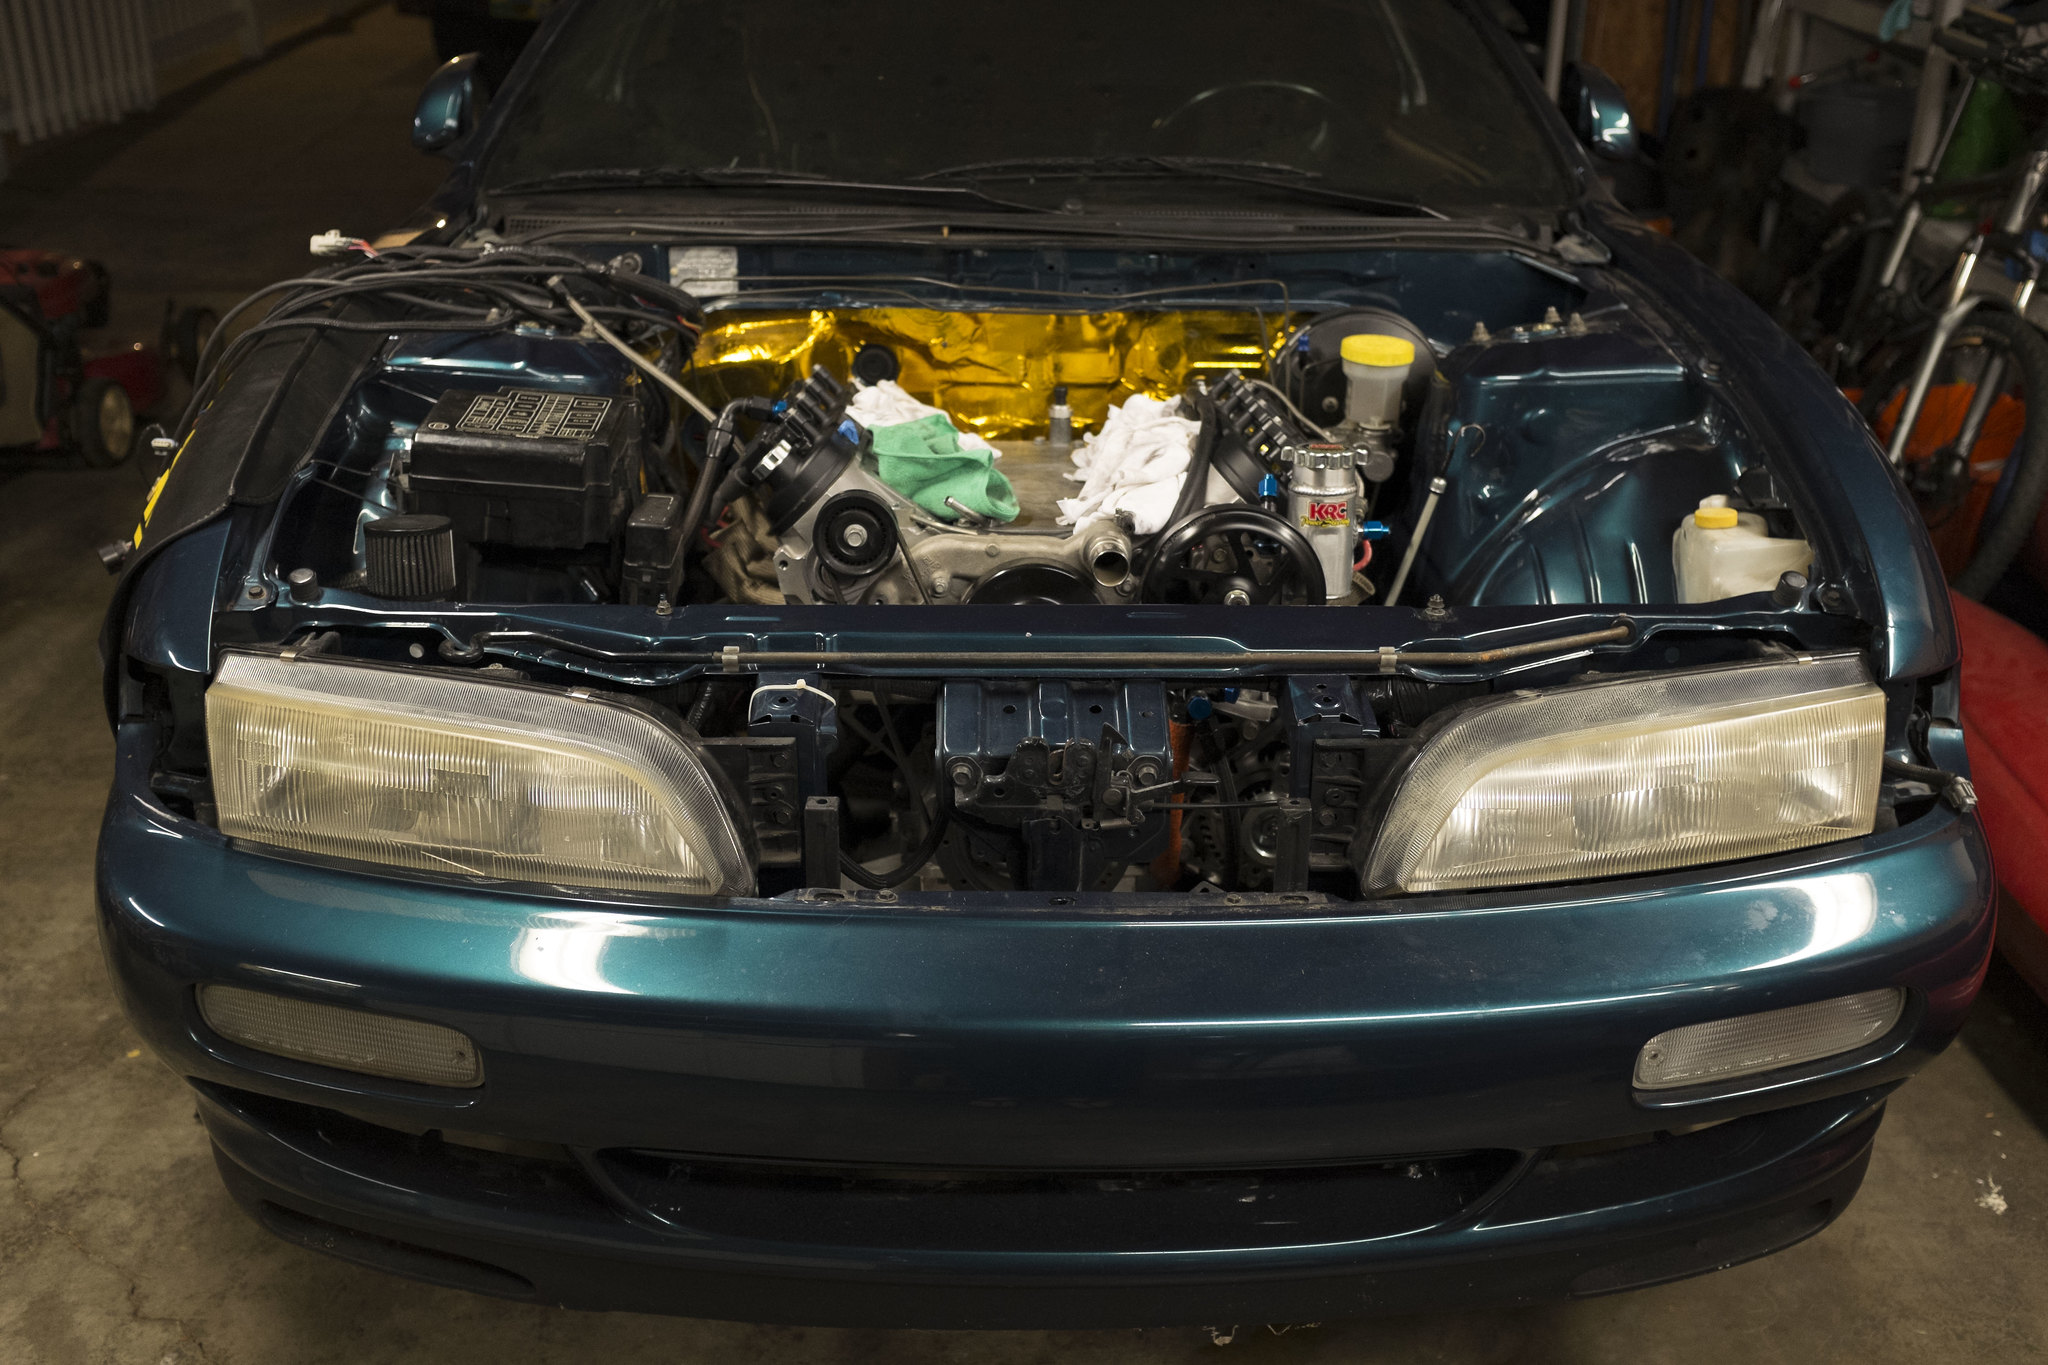
With MSD intake sitting on the engine (keep in mind that I don't have the transmission crossmember installed on the car at the moment and it is being held up with a jack. I'll hopefully be able to work on that tonight and then see if that tilts the front of the engine down anymore.
Then we'll toss the hood on and see what kind of contact we're looking at.
Another angle of test fit of intake:
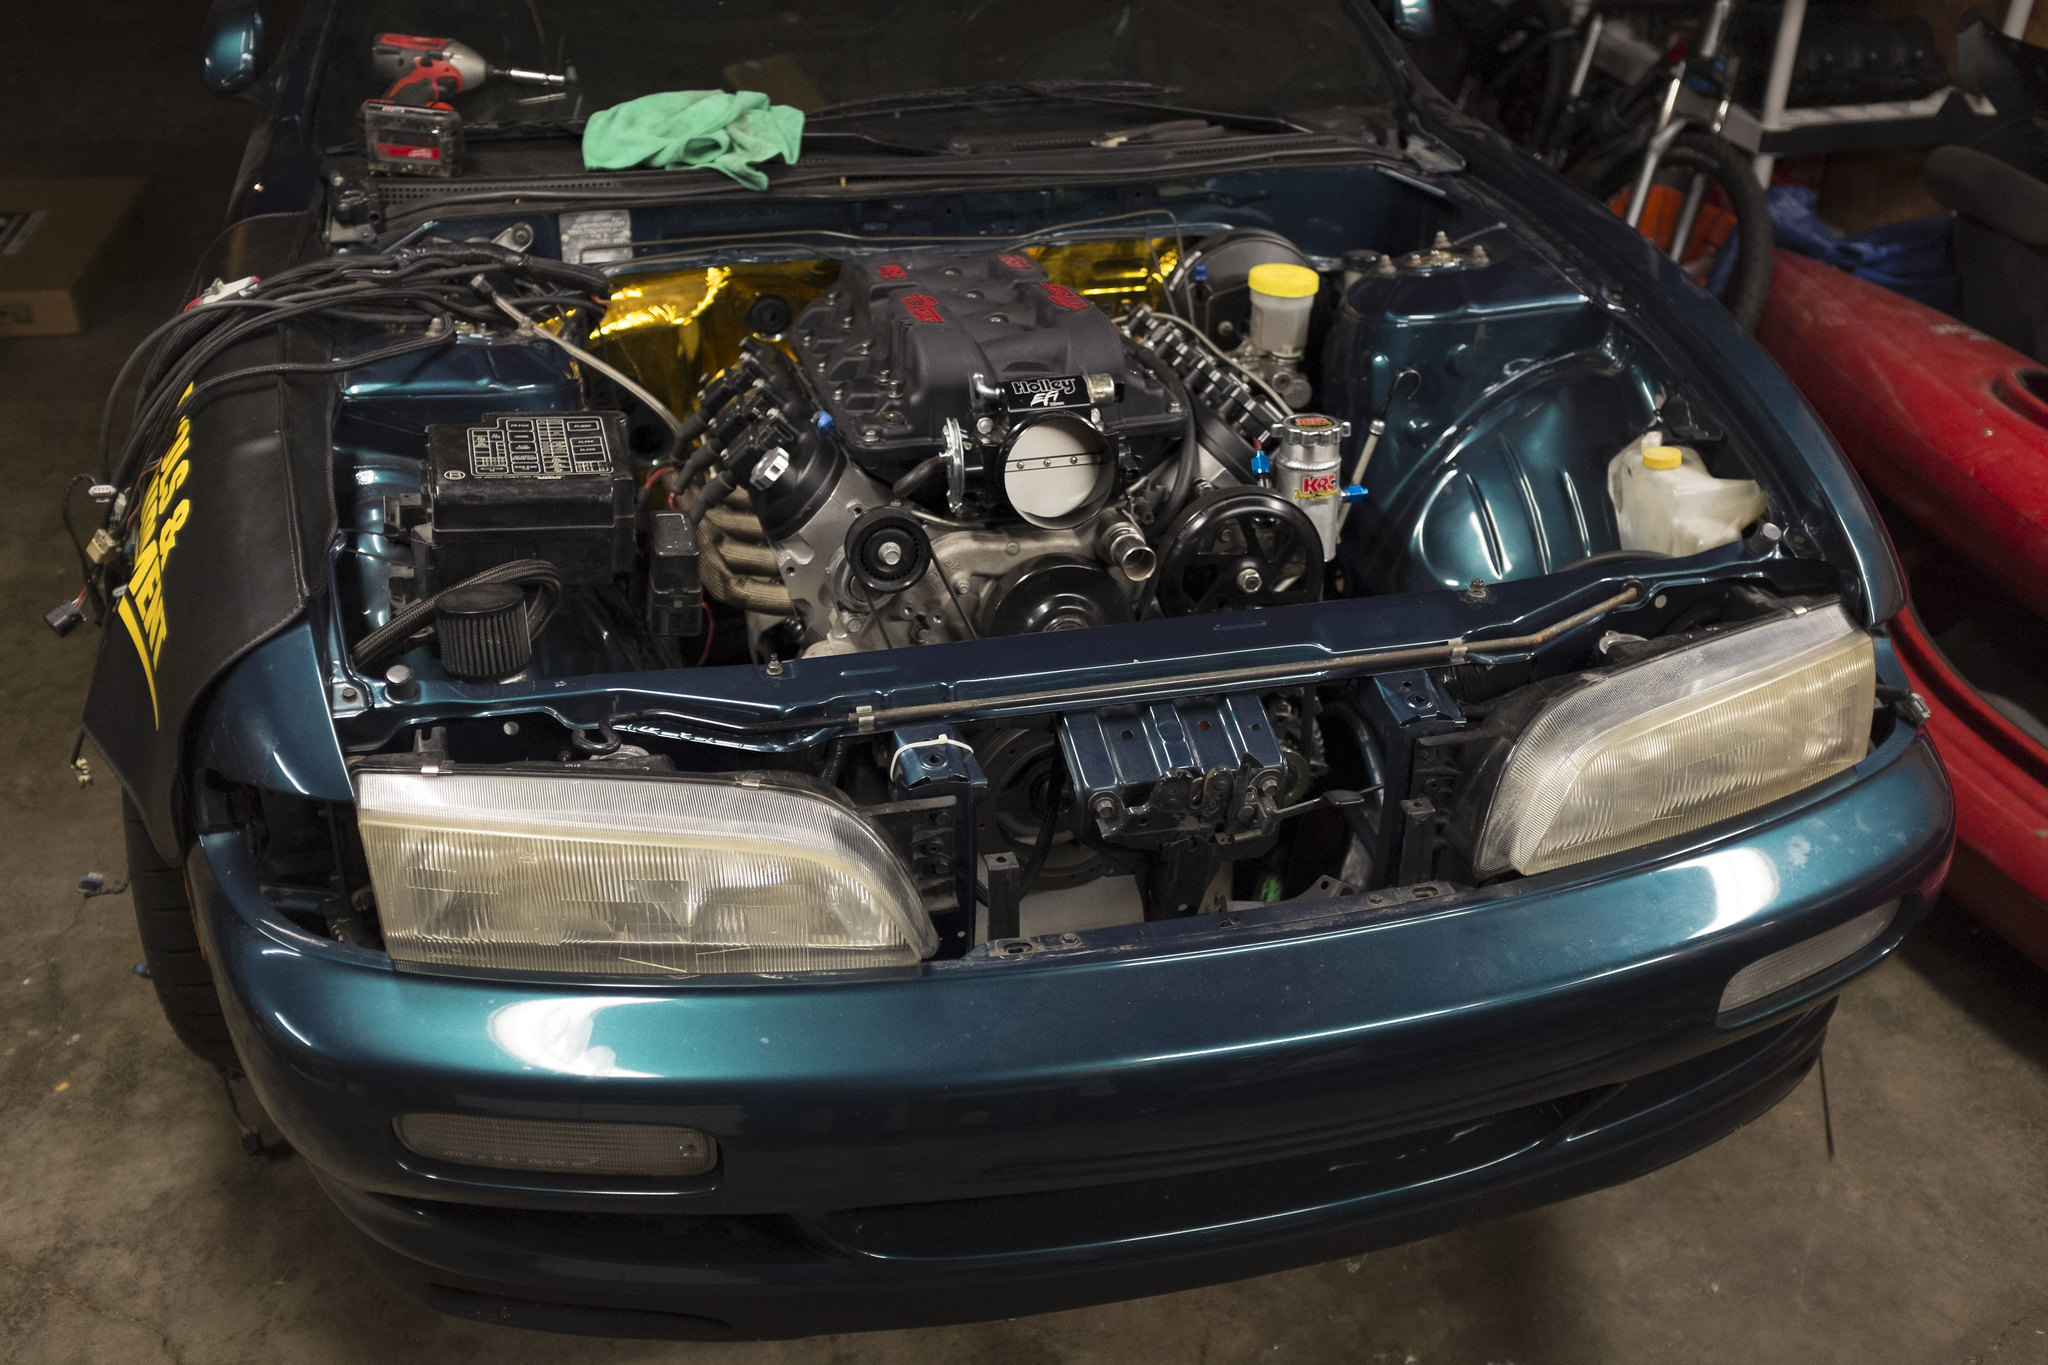
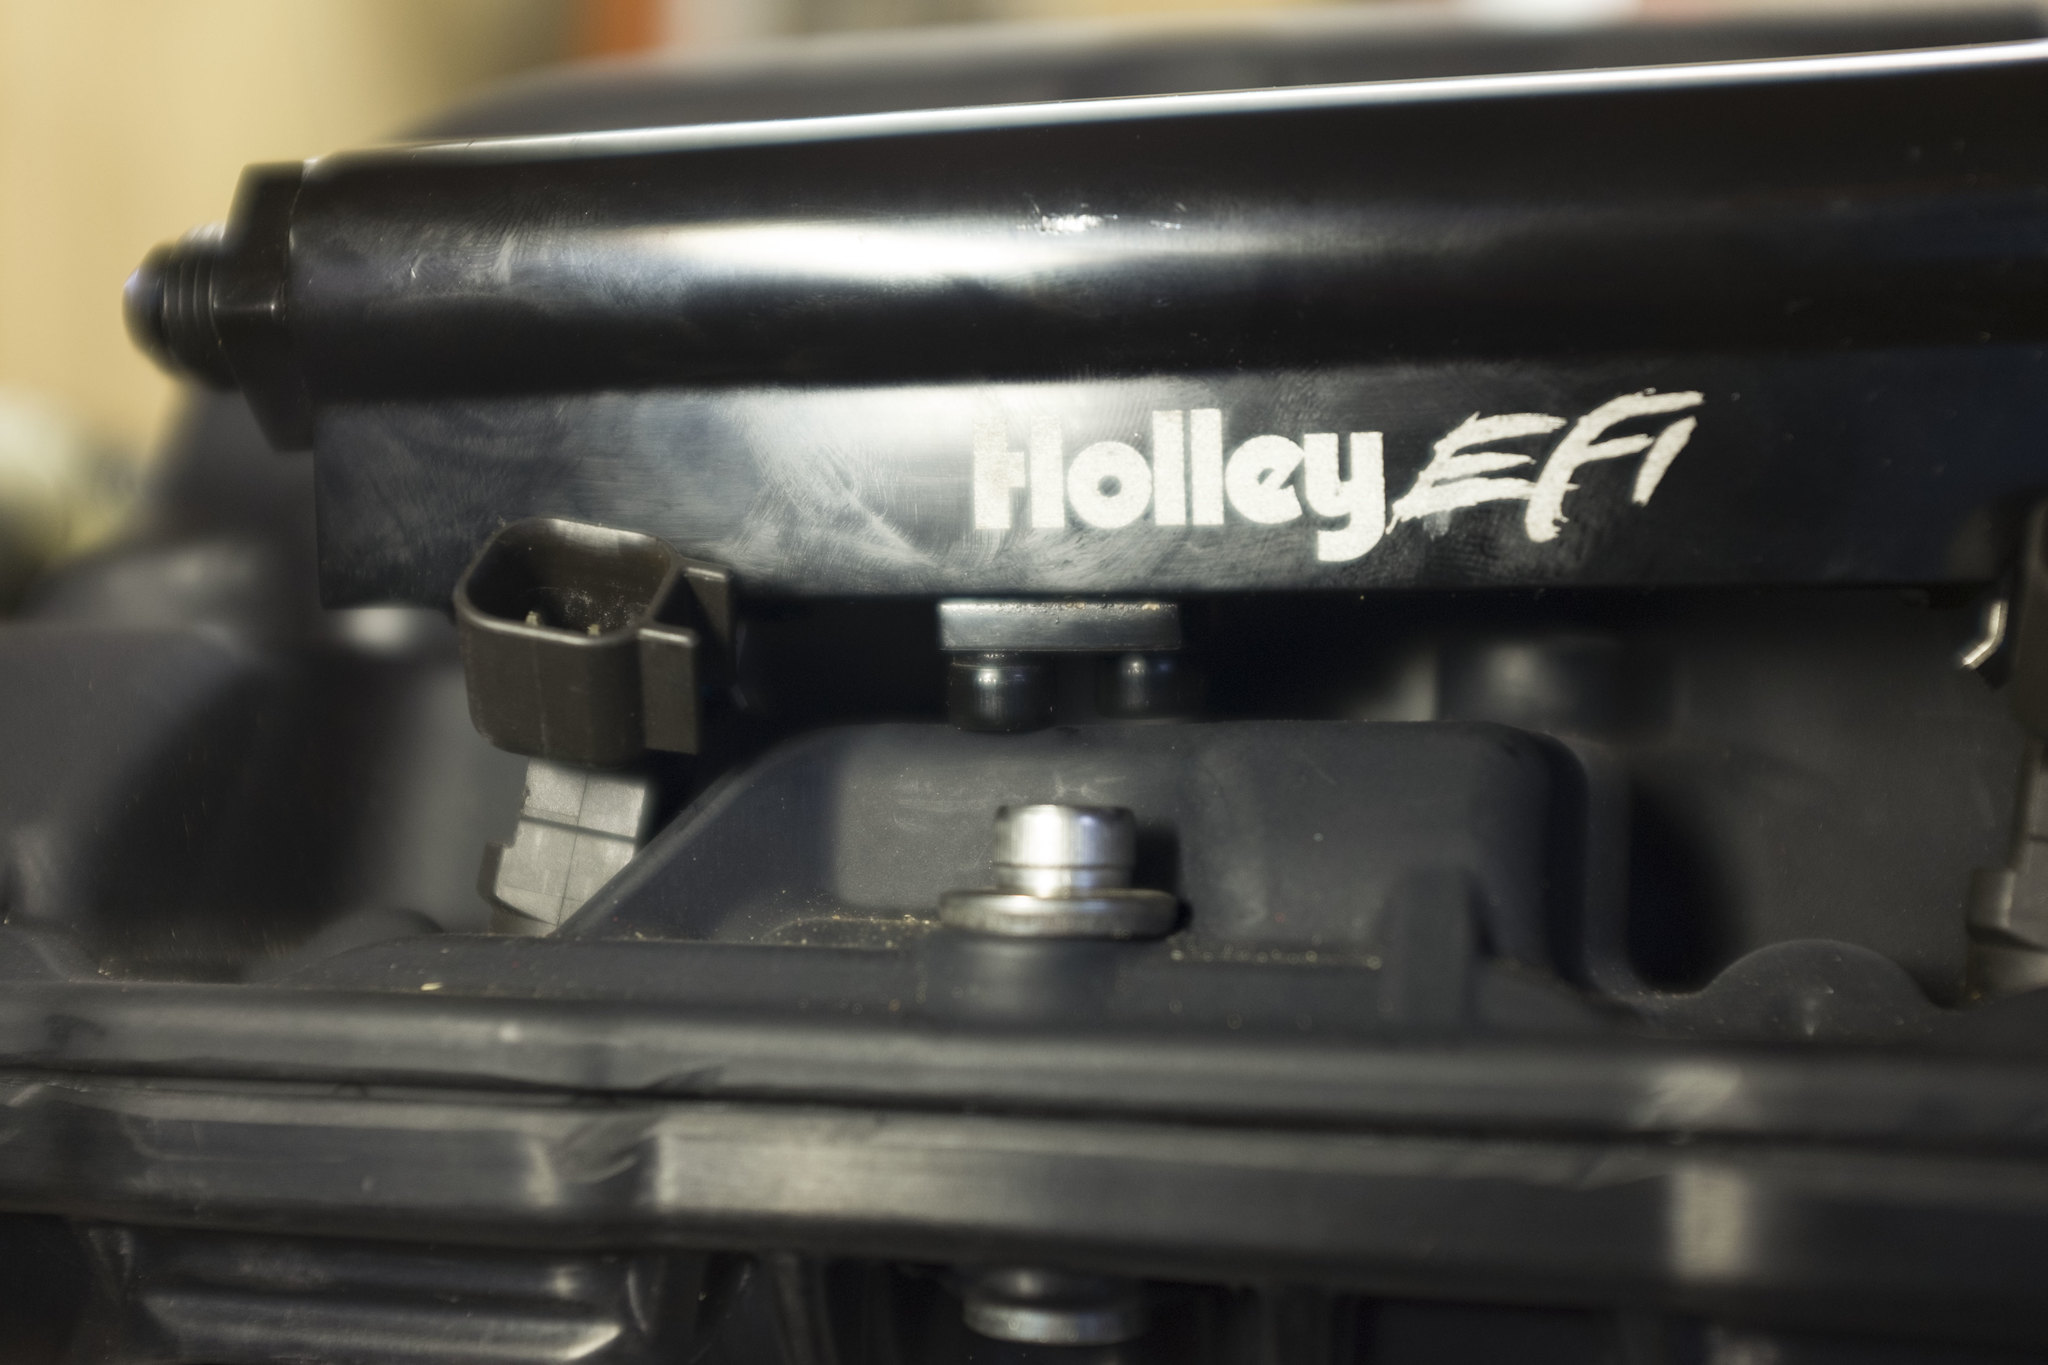
Up close glamour shot of the MSD intake and the KRC power steering pump:
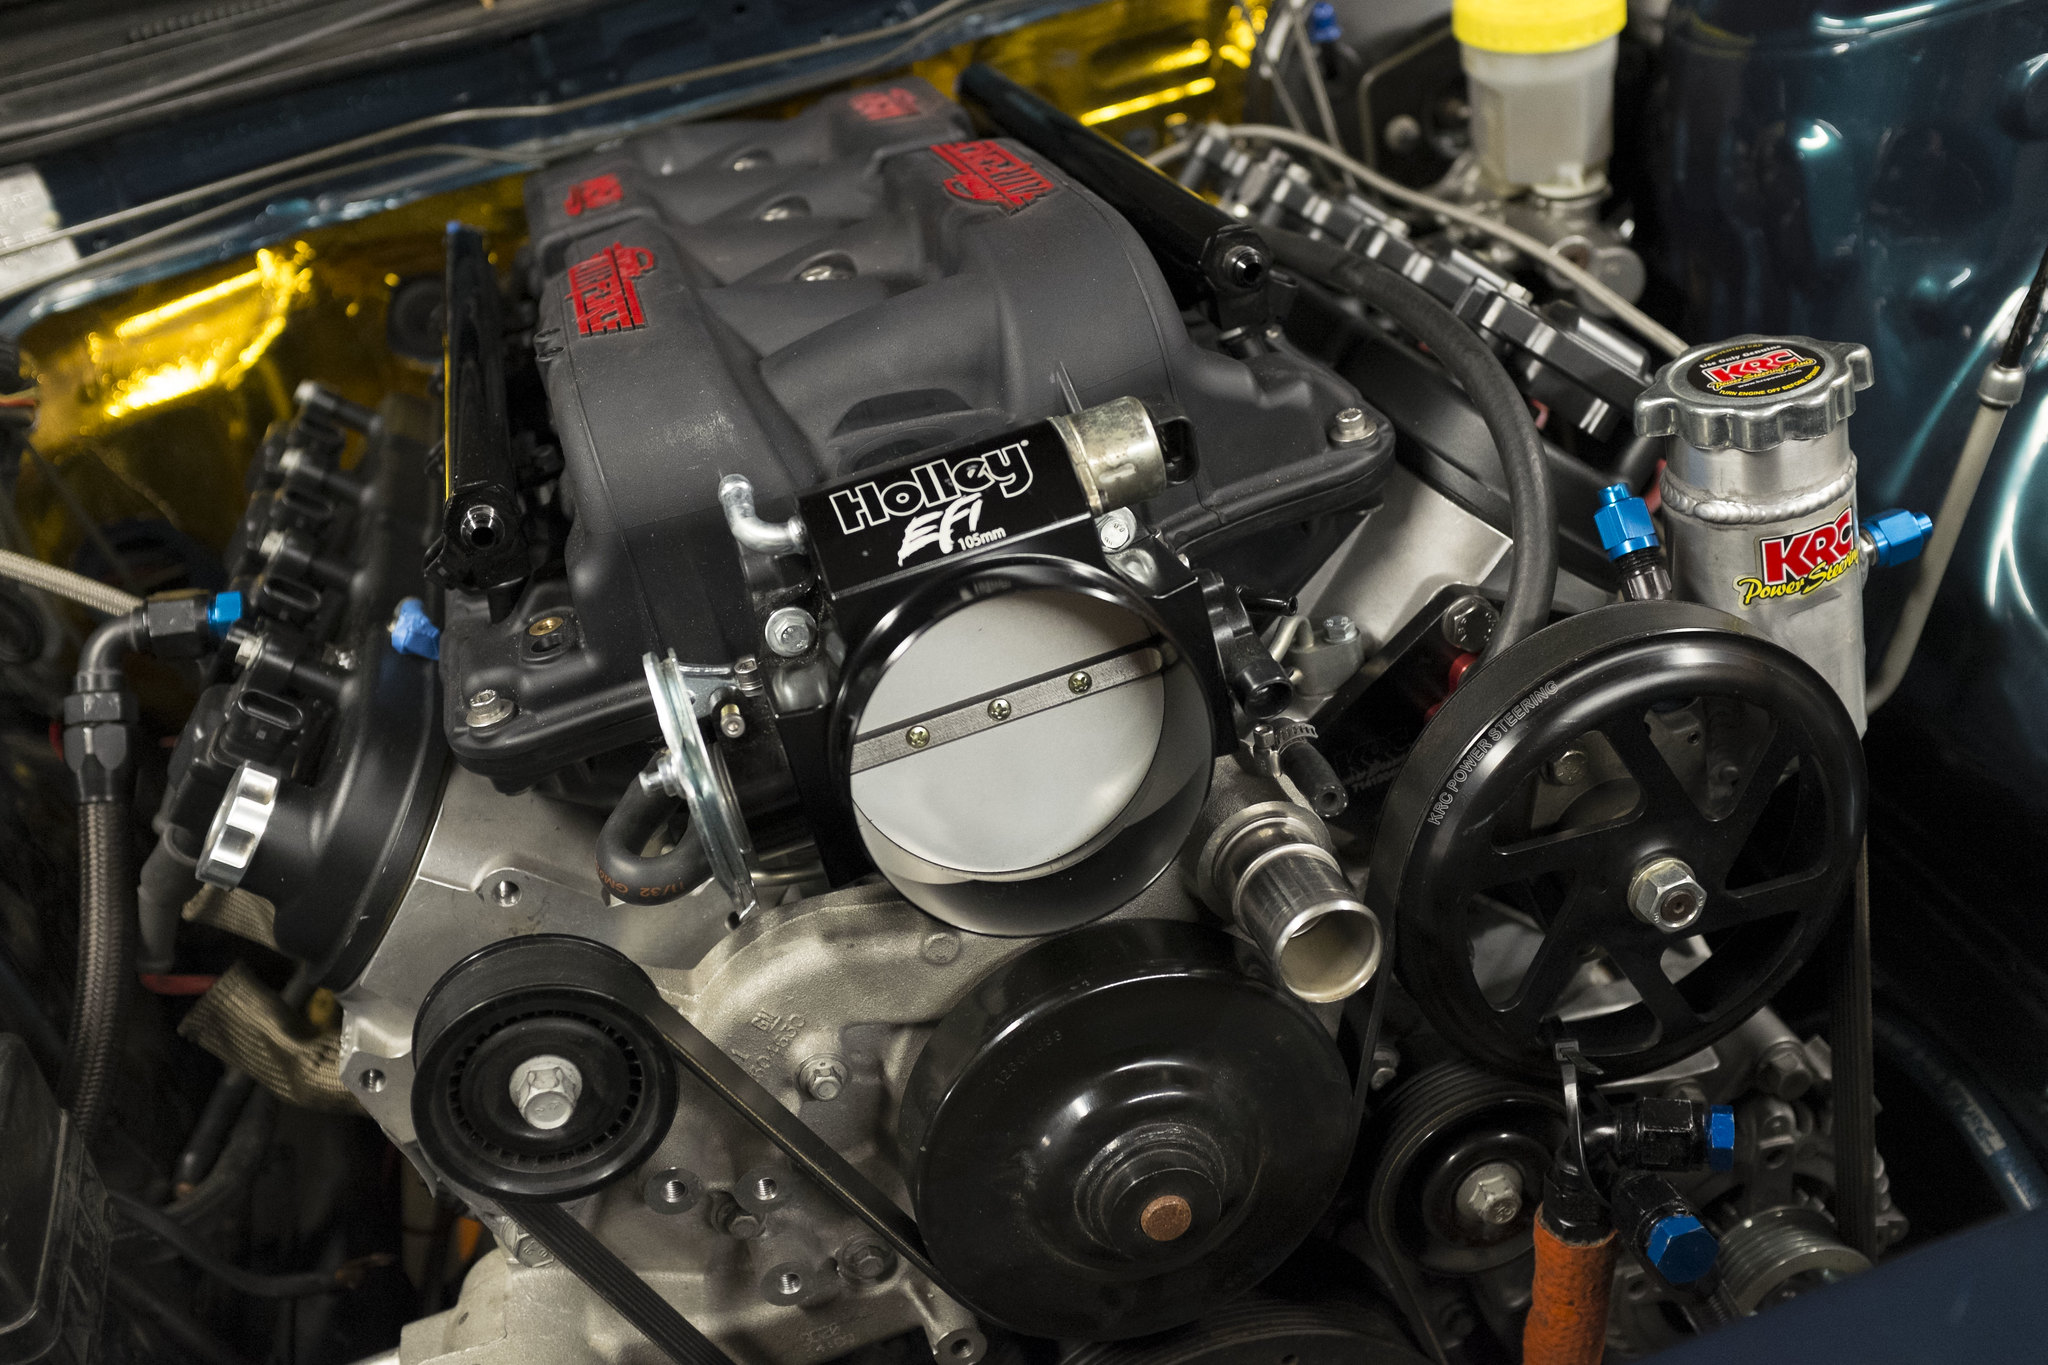

Gorgeous.
Yesterday some more goodies came in for version 2.0.
 Untitled by eric.burnett09, on Flickr
Racepak's IQ3S street dash, and their Street Smartwire Power Distribution Module system are going to aid in making this car a joy to drive, from not only an instrumentation standpoint, but from a reliability perspective also.
For those who aren't up to speed on purpose of the Street Smartwire, the beauty of that system lies in that it allows a user to wire up a car without traditional fuses and relays, or breakers. This capability is achieved through its solid state design. As a byproduct of the fuse and relay elimination, the 240 will benefit from a reduction in weight from its present OEM chassis harness. The Holley EFI system harnesses will of course have to remain in the car, but I will be shortening sections of the harness that can stand to be reduced in length in order to make this as professional as possible.
The Smartwire is capable of powering up to 30 outputs (devices powered by the unit) and I will be hooking up all of the factory components that I had before in order to keep this vehicle as street oriented as possible.
The IQ3S will get its data via CAN bus connection to the Holley Dominator EFI system I've had on the car since the LS2 was installed. With the carbon style gauge backing panel Racepak sells this system will replace the OEM gauge cluster in the car as well as the rectangular design Holley EFI digital dash to provide me with an uncluttered, clean look that fits within the factory dash perfectly.
The Holley EFI digital dash will, if I can swing it, continue to be utilized. It will take the place of the factory double DIN radio unit in order to provide easy access to other instrumentation as well as datalogging at the touch of a button.
More to come as I delve into this in the near future.
UPDATE: Evidently the business model over at Photobucket has evolved somewhat since the last time I checked on this build thread. Much to my dismay I just discovered that everything that has been hosted on Photobucket is now a pay-to-play format for visibility, so I must now make the annoying transition over to other hosting. I'm thinking flickr unless anyone has any other recommendations.
Sorry for the lack of posting lately. The easiest way to say it is that life happens. Since my last update I decided that in order to make my goal of LS Fest 2017, the car needed to go up to a friend's shop to have several areas of work completed. I also got engaged, which I'm actually far more excited about than this car.
So Jesse (owner of Level 7 Motorsports) came down one afternoon and picked up the car. Though sad to see it leaving the convenience of my own garage, it was nice knowing that it was going to start progressing much faster than the last few months.
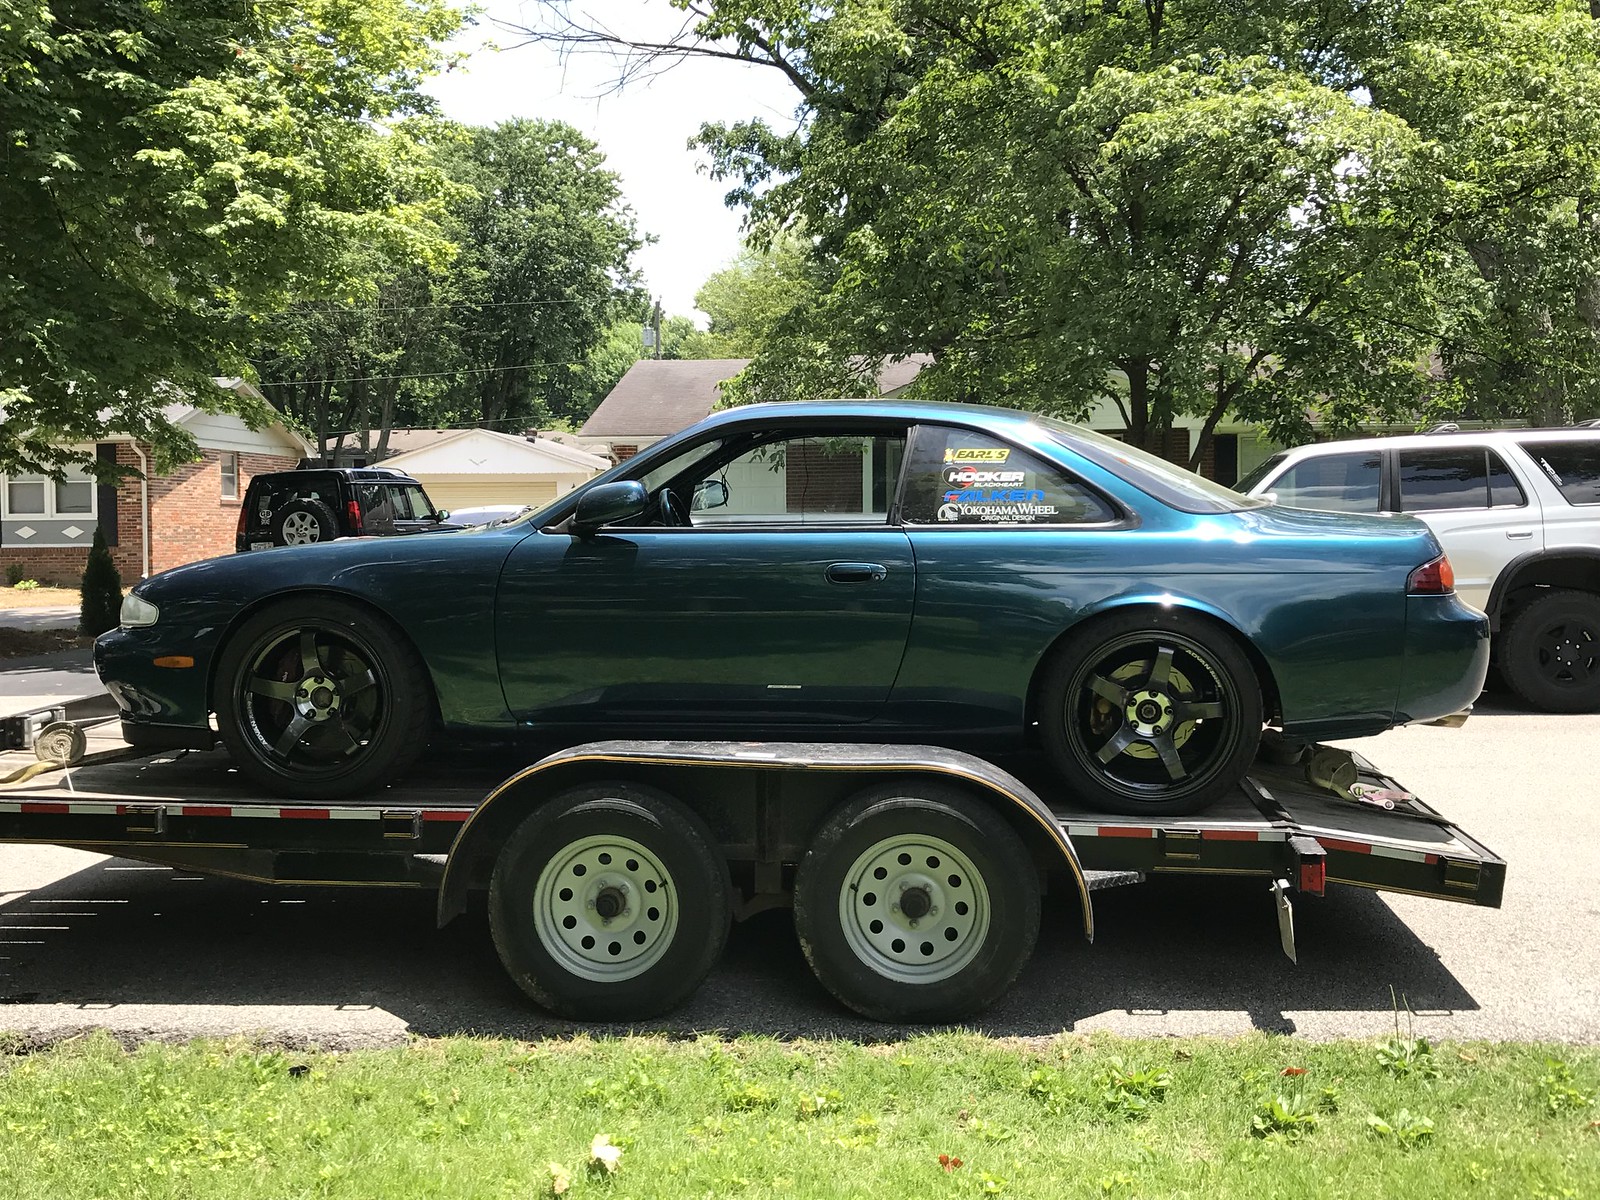
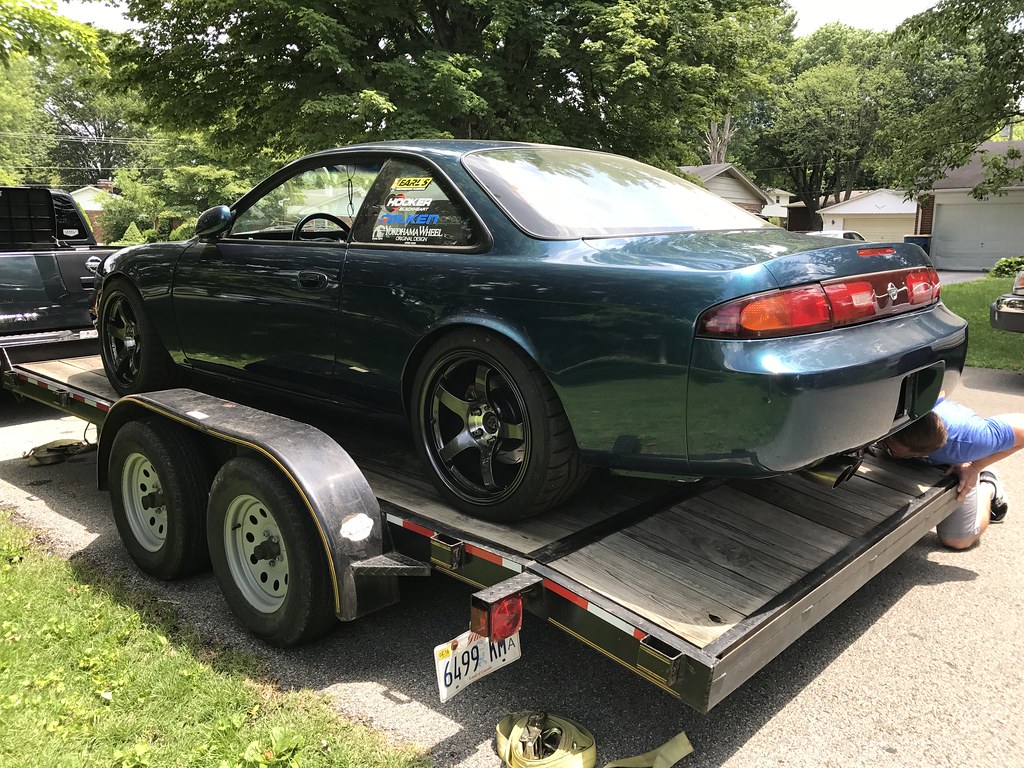 The plan was to simply wire the car up with the new PDM from Racepak. But things kind of took a turn when work got underway, as Jesse pointed out a few other areas where the car's fit and finish could be improved upon, and I couldn't disagree.
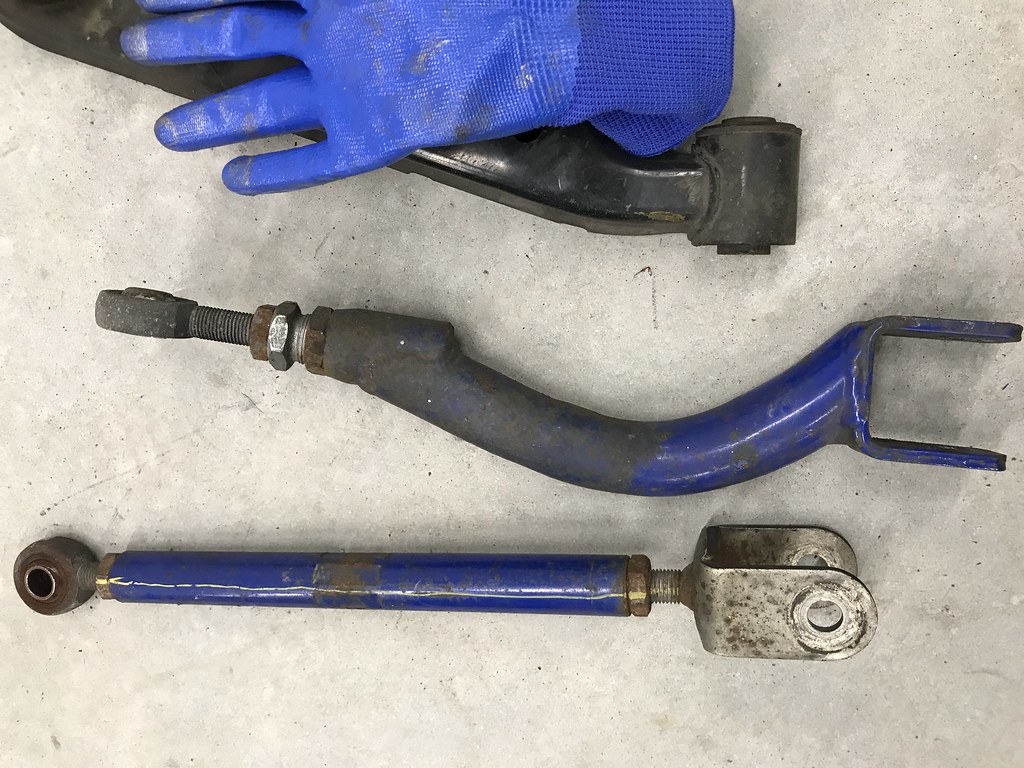
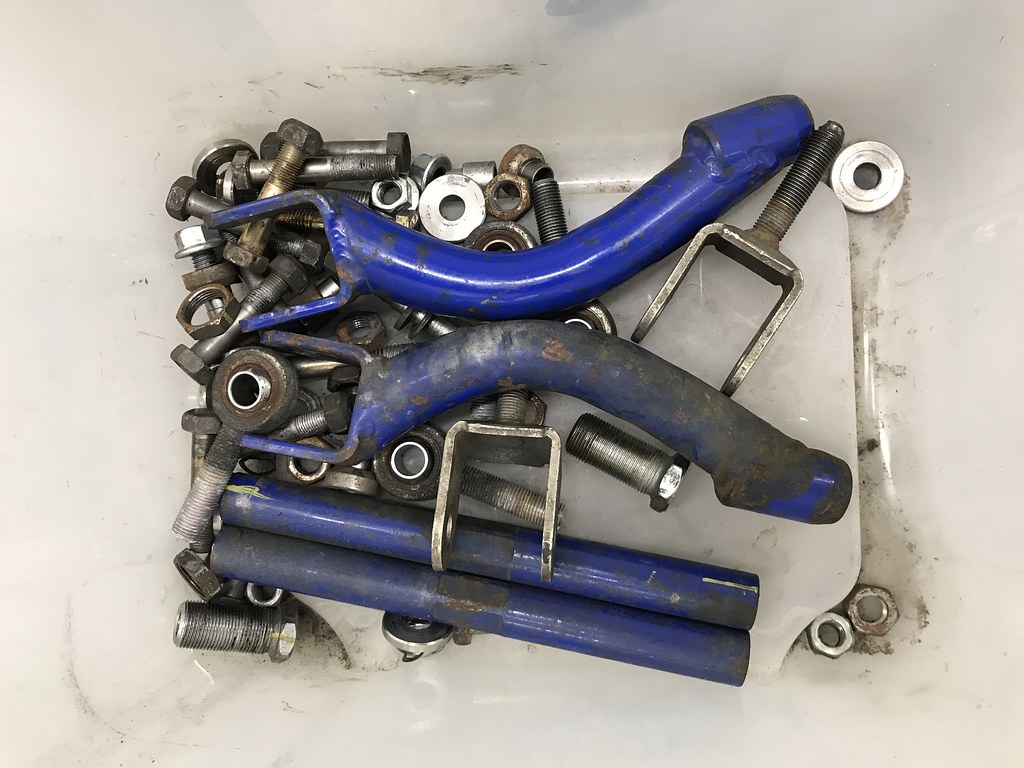
I've spent the past few weekends heading up to Jesse's shop in Marion, IL, to do some other work on the car. The suspension has been almost entirely overhauled. I took off all of the adjustable suspension arms and threw them in a bucket of Evaporust, which works beautifully for those of you who are curious or skeptical. That ate off all of the surface rust that was present. From there we took the arms along with some other parts Jesse had fabricated and had them powdercoated.
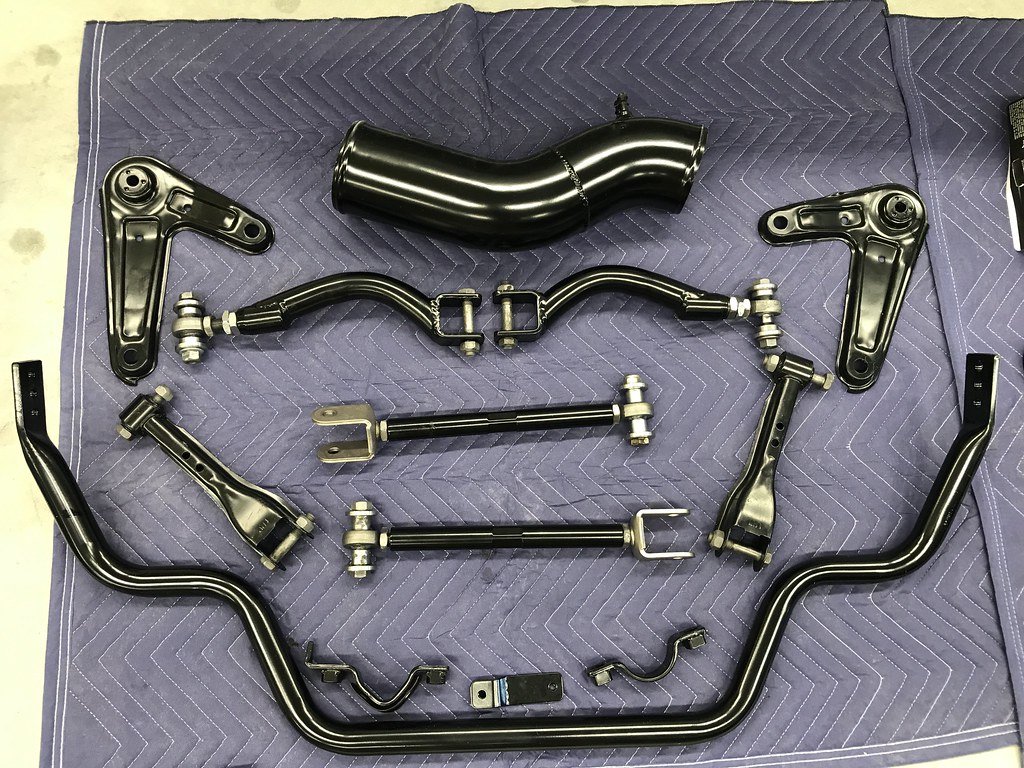
Here's what else changed on the suspension. I took the old subframe out of the car along with the subframe reinforcement brackets and traded it out for another s14 subframe that already had a set of SPL solid subframe bushings installed. This saved me time, and only cost me $150 plus my old subframe from a friend. Don't worry, I made sure to rattle can it before bolting it place.
I had previous mentioned upgrading to a set of rebound and compression adjustable coilovers. Well, those unfortunately cost quite a bit more $$$ and I'm afraid that I would get confused more than I would be able to help the car at this stage. So a set of single adjustables would have to suffice. Feal's 441 coilover system was just the ticket. I opted for their long travel spec in 8kg front spring rate and 6 kg spring rate in the rear.
At first run through, the Feal kit is lighter than the Stance's I'm removing, and I'm excited to see how the change from a 10 kg spring in the front to an 8 helps the car out on the autocross/track.
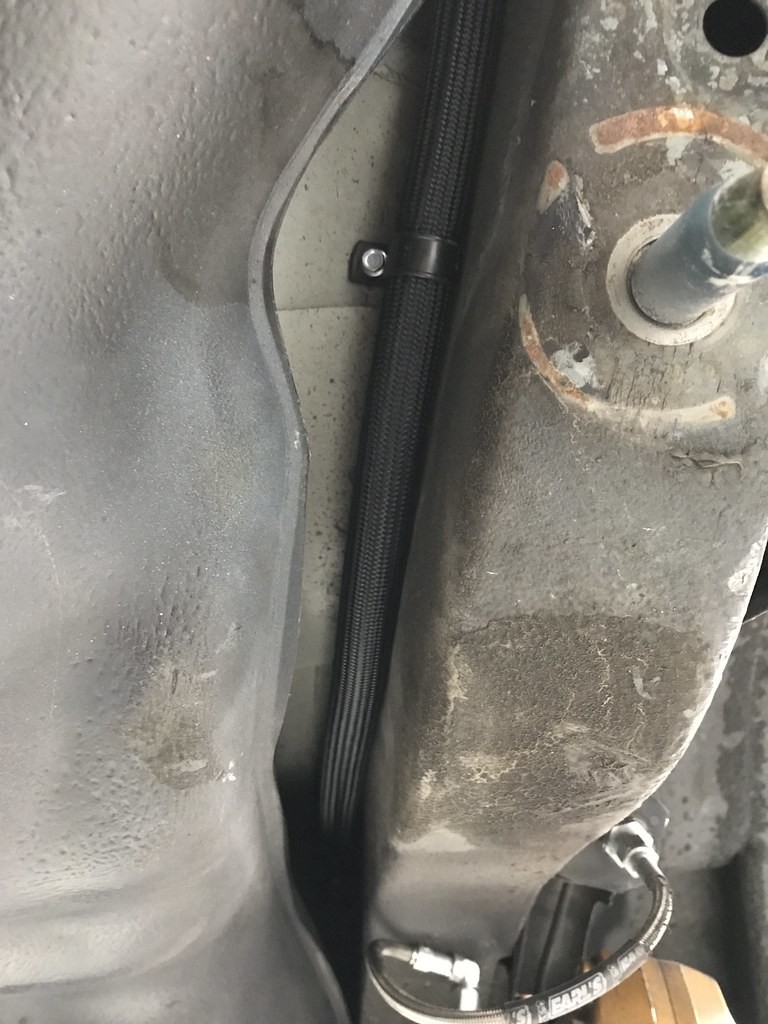
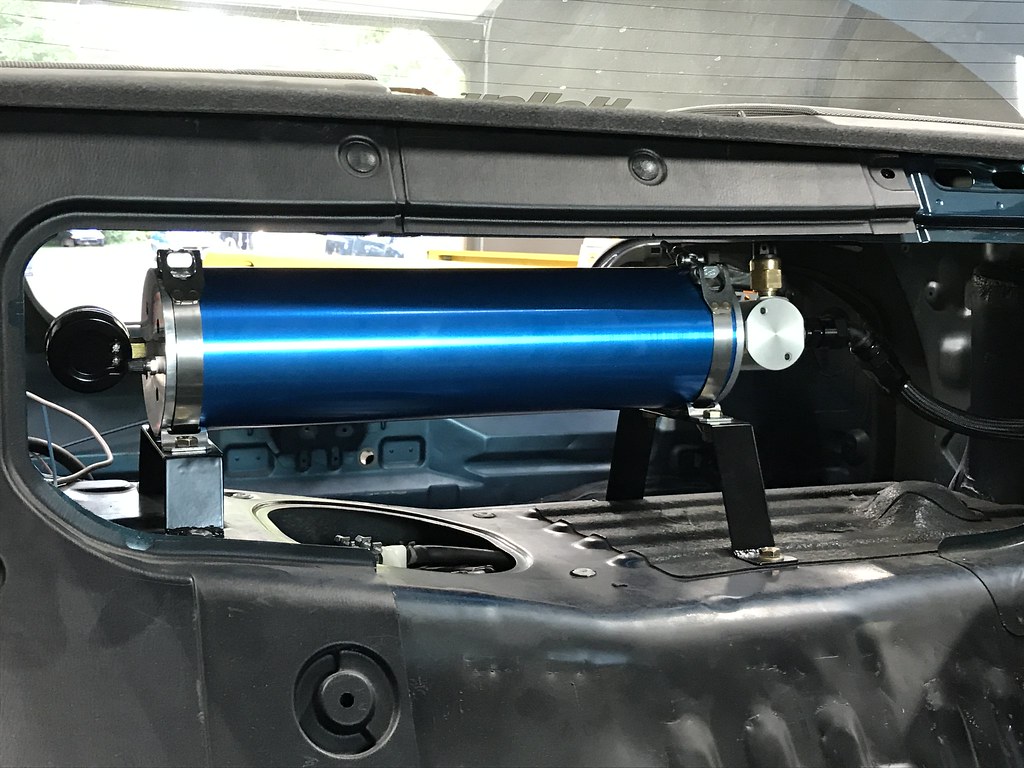
While the subframe was out, we dropped the gas tank and drilled a hole to install a -10 AN bulkhead fitting. This bulkhead would allow oil to pass from the Accusump we installed in the back of the car through an oil line plumbed alongside the driver side of the gas tank. It connects to a -10 Earl's stainless steel hardline where it runs the rest of the inside of the frame rail and up past the headers where it converts back to -10 Ultra Pro. I'll share the rest of the plumbing diagram later.
Well I've finally got the car back in my possession. Jesse dropped the car back off the Saturday before LS Fest, but unfortunately it needed some additional work done before it would be track worthy (and there was no way I wasn't going to run it at LS Fest).
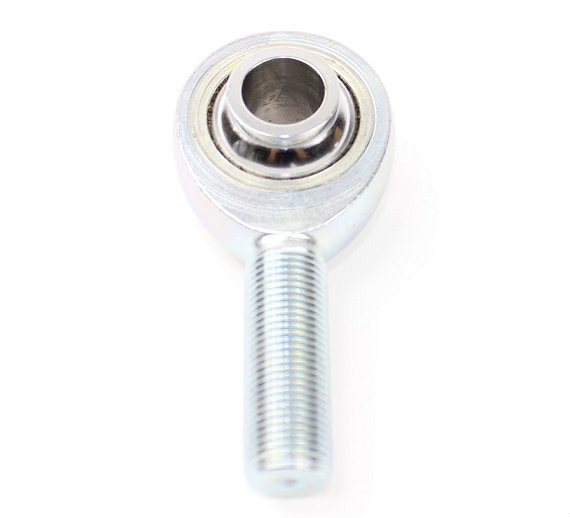
First things first, when Jesse test drove the car, he experienced steering wheel slap, much like you would get on a motorcycle with tank slap where the bike is getiing out of hand. This was caused by the outer tie rods (further abbreviated as OTREs) wearing out. The heims were beginning to exhibit play and it was causing them to go nuts when negotiating small undulations in the road. At the last minute, the OTREs that had to be put on it at the last minute would only thread on to the inners by two of three threads so that had to change if the car was going to be driven, let alone driven in a spirited fashion. I got on the phone with SPL the following Monday and got some of their newer FK Rod end replacements.
Some quick info on these: FK Bearings High Misalignment 5/8" Rod End, are PTFE Teflon lined, and are right hand thread.
Comparing the old version of SPL's OTRE and their new version, they are clearly more beefy and ready to withstand the abuse and rigors that on-track use will put them through. (will add pic as soon as I can run out to the garage and take one).
 OTRE SPL by eric.burnett09, on Flickr
Once I got those installed on the car, I was able to get the car driving straight with a tape measure alignment. If you're not familiar with this process, there are several YT videos you can look up. Basically, once you've got your huge and brake rotor aligned as straight as you can eyeball it (or with a long level) you can put the wheels back on both sides. You then pick a common point on the tire and measure from the inside of that tire to the inside of the same point on the other side of the car.
You want to get a measurement on the front of the tire and on the same portion of tread on the backside of the tire. These measurements need to come out the same. If they don't you have to take your wheels off again and do some more adjusting to get the front hubs pointing forward more accurately. It's a bit of a trial and error process. I was able to get it good enough for what I was after in two tries.
Other things that were somewhat annoying:
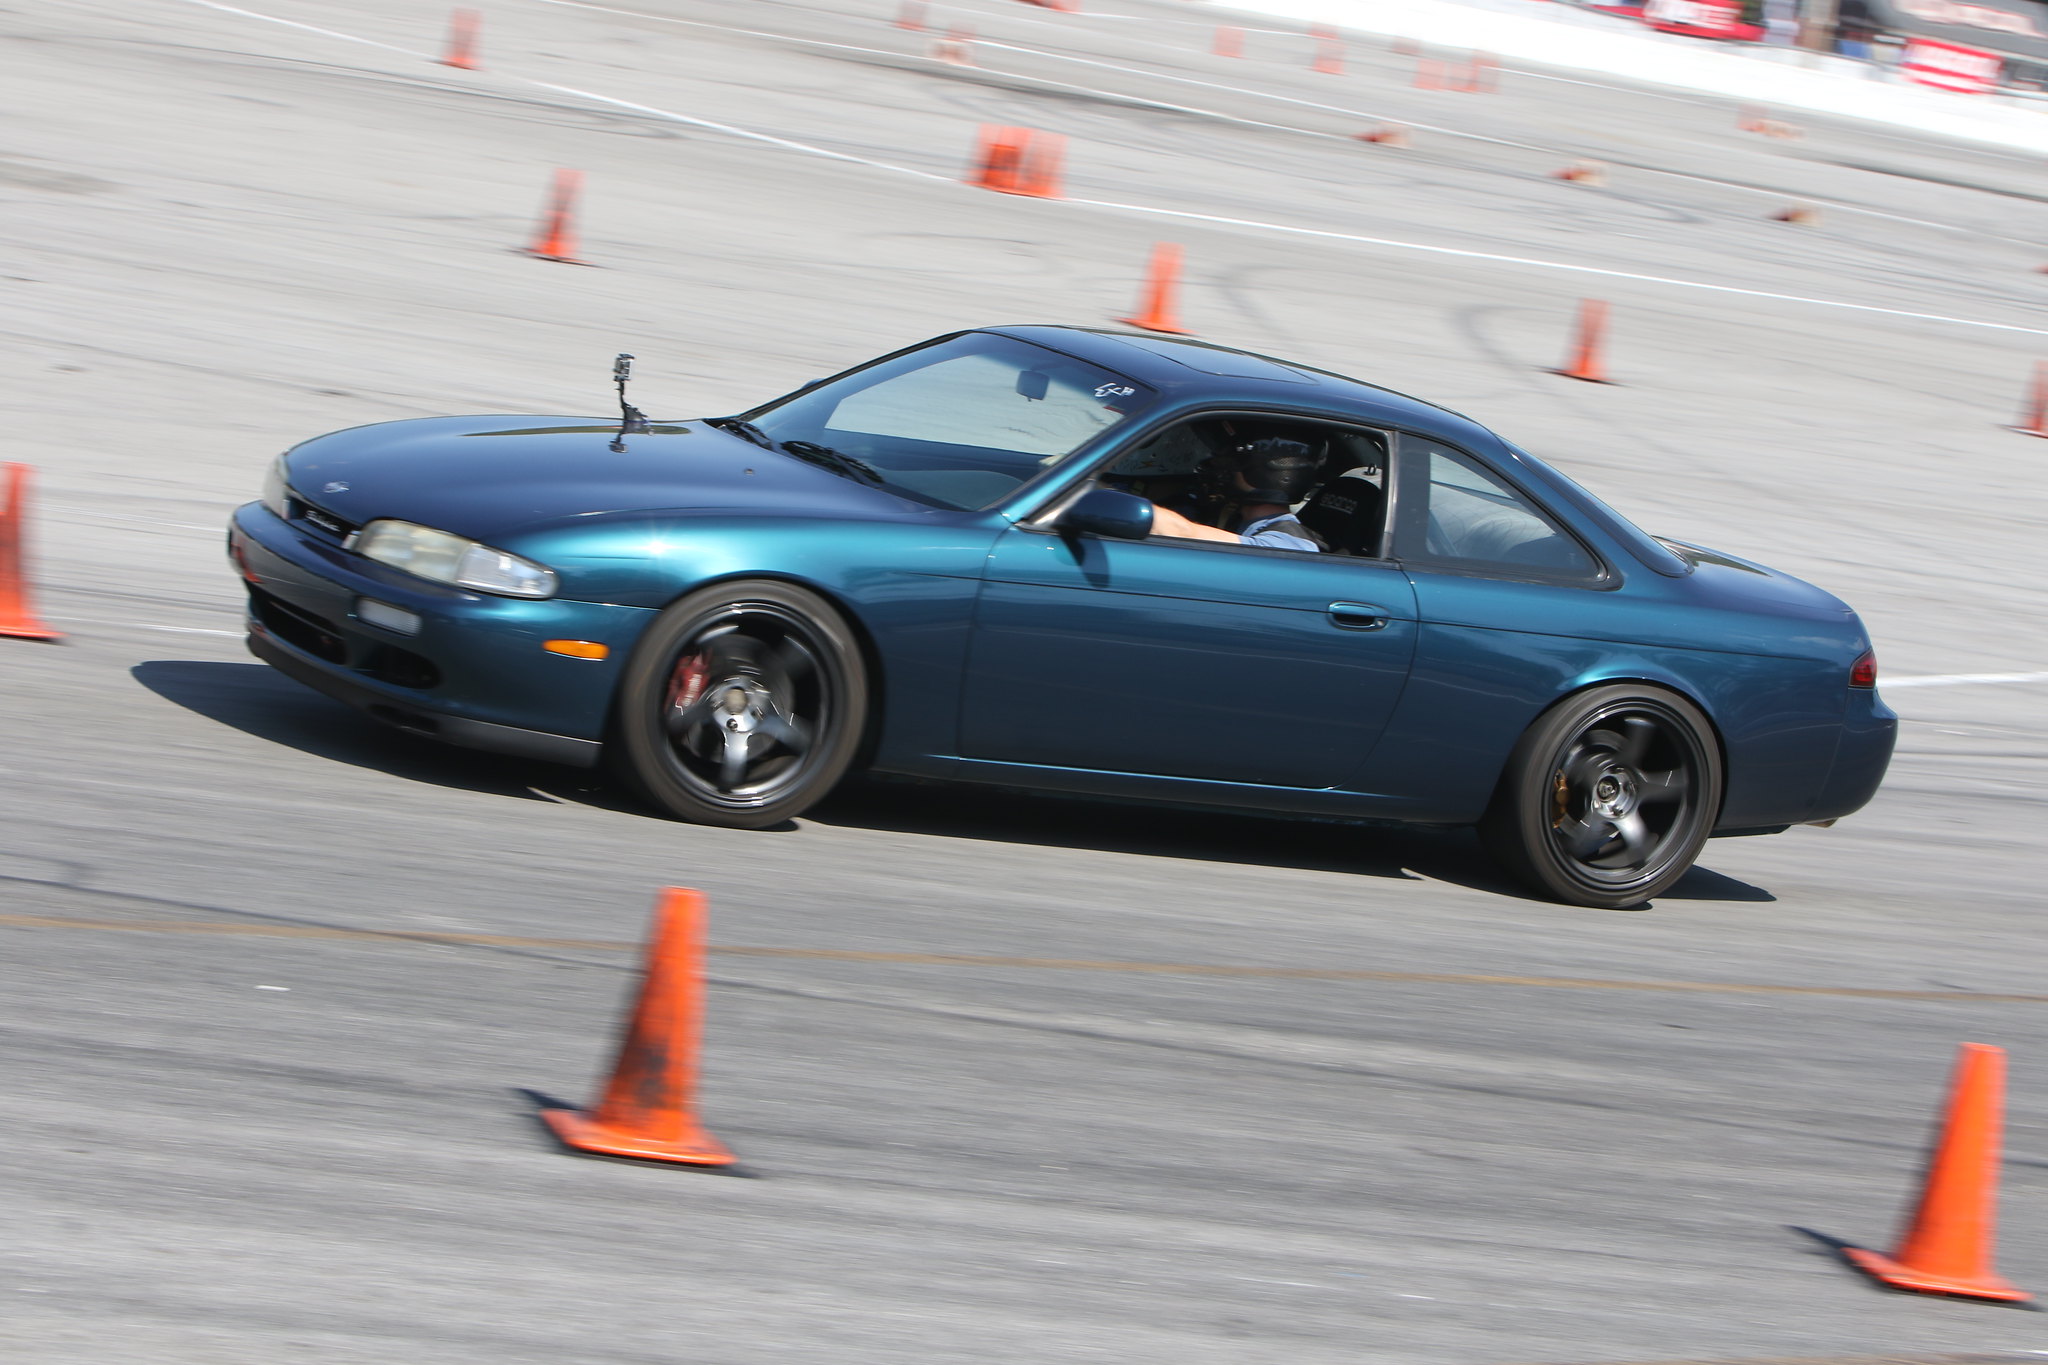
LS Fest is always a difficult time if you're like me. You've got an event to throw, and you're also preparing your car so that, if time allows, you can ditch the radio and golf cart for a few moments for a run on the autocross or drag strip. Thankfully this year I was able to find time to do at least one of those things in order to shake down Silvia in her version 2.0 state.
On Friday, I was able to take the car on the Beech Bend short autocross. I did a couple of runs and was immediately impressed with how positive car felt with the lower spring rate on the front end. I also experienced improved steering feel by the new tie rods and Driftworks Geomaster 3 knuckles up front. The only negative thing that I noticed was that the car wasn't transitioning laterally as I would've liked, and was exhibiting some dissimilar behavior when going from left-to-right as opposed to right-to-left.
 Untitled by eric.burnett09, on Flickr
 Untitled by eric.burnett09, on Flickr
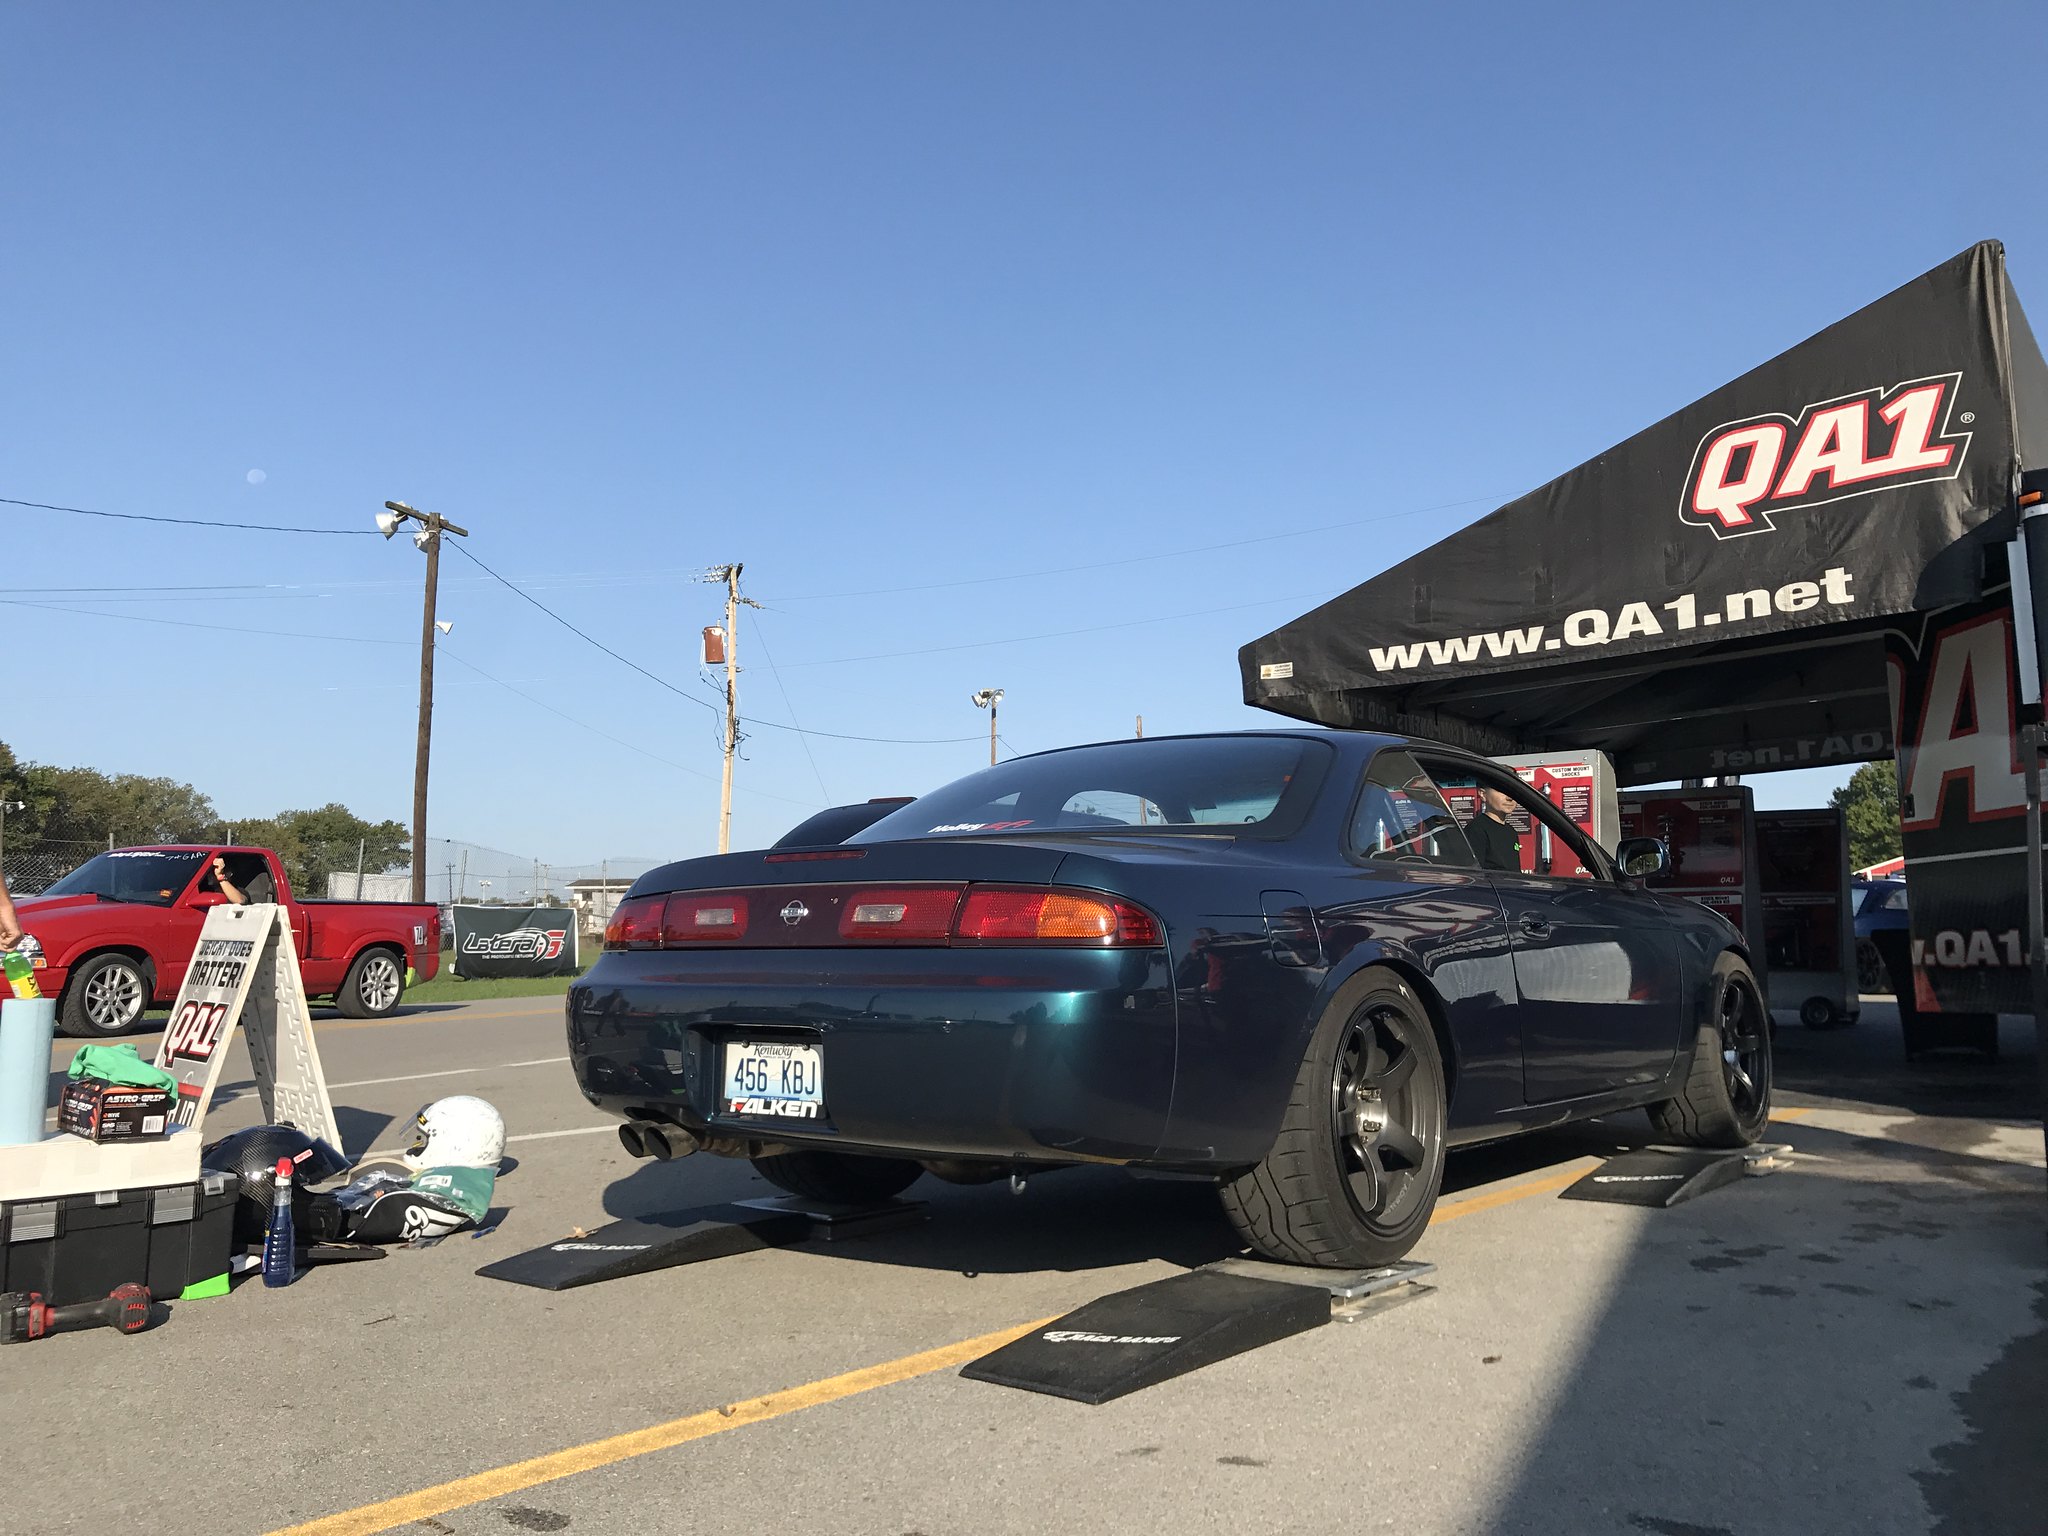
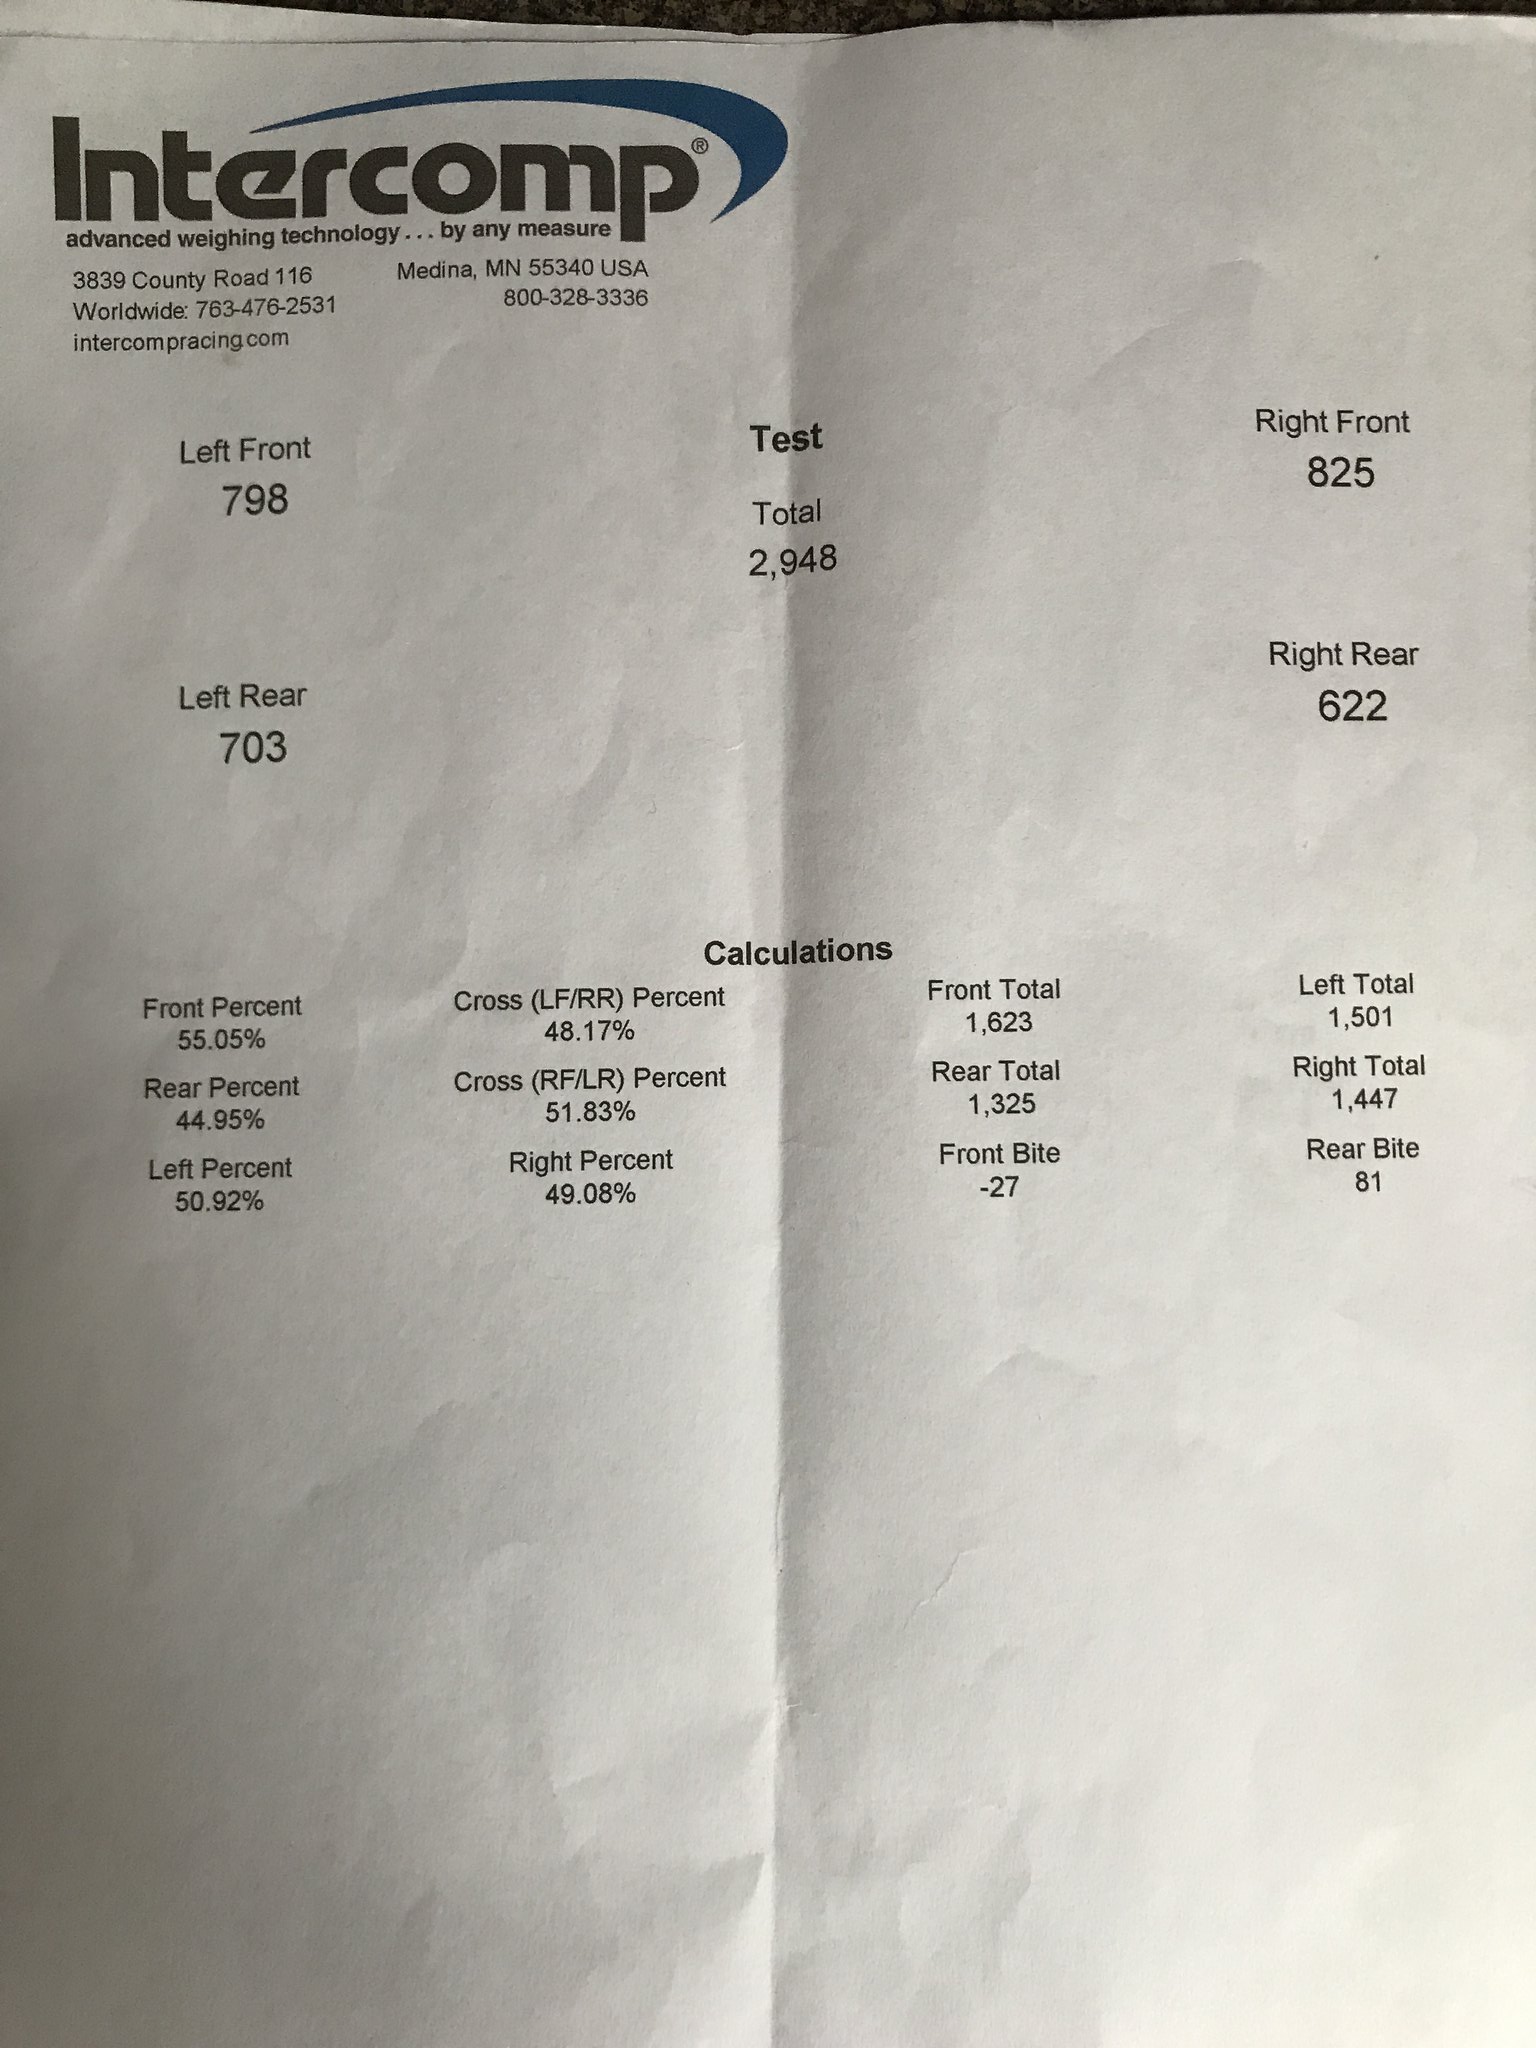
Saturday rolled around and I stopped by the QA1 trailer in the morning to see how much the car weighed post recent upgrades. The car had lost some weight, less than I would've liked to have seen admittedly, but less weight regardless. It weighed in at 2782 with no driver and an almost full tank of gas. The cross weight was off in the back by a pretty substantial amount: 128 pounds. The front cross was off 65 lbs. After raising the drivers rear of the car a little over a 1/2'', I was able to get it closer than it was with me in it. 27 pounds in front and 81 in the rear. These changes were immediately noticeable on course, and helped the car feel more consistent in the corners.
 Untitled by eric.burnett09, on Flickr
Weigh-in prior to messing with raising the left rear of the car:
 Untitled by eric.burnett09, on Flickr
Post adjustment weigh-in:
 Untitled by eric.burnett09, on Flickr
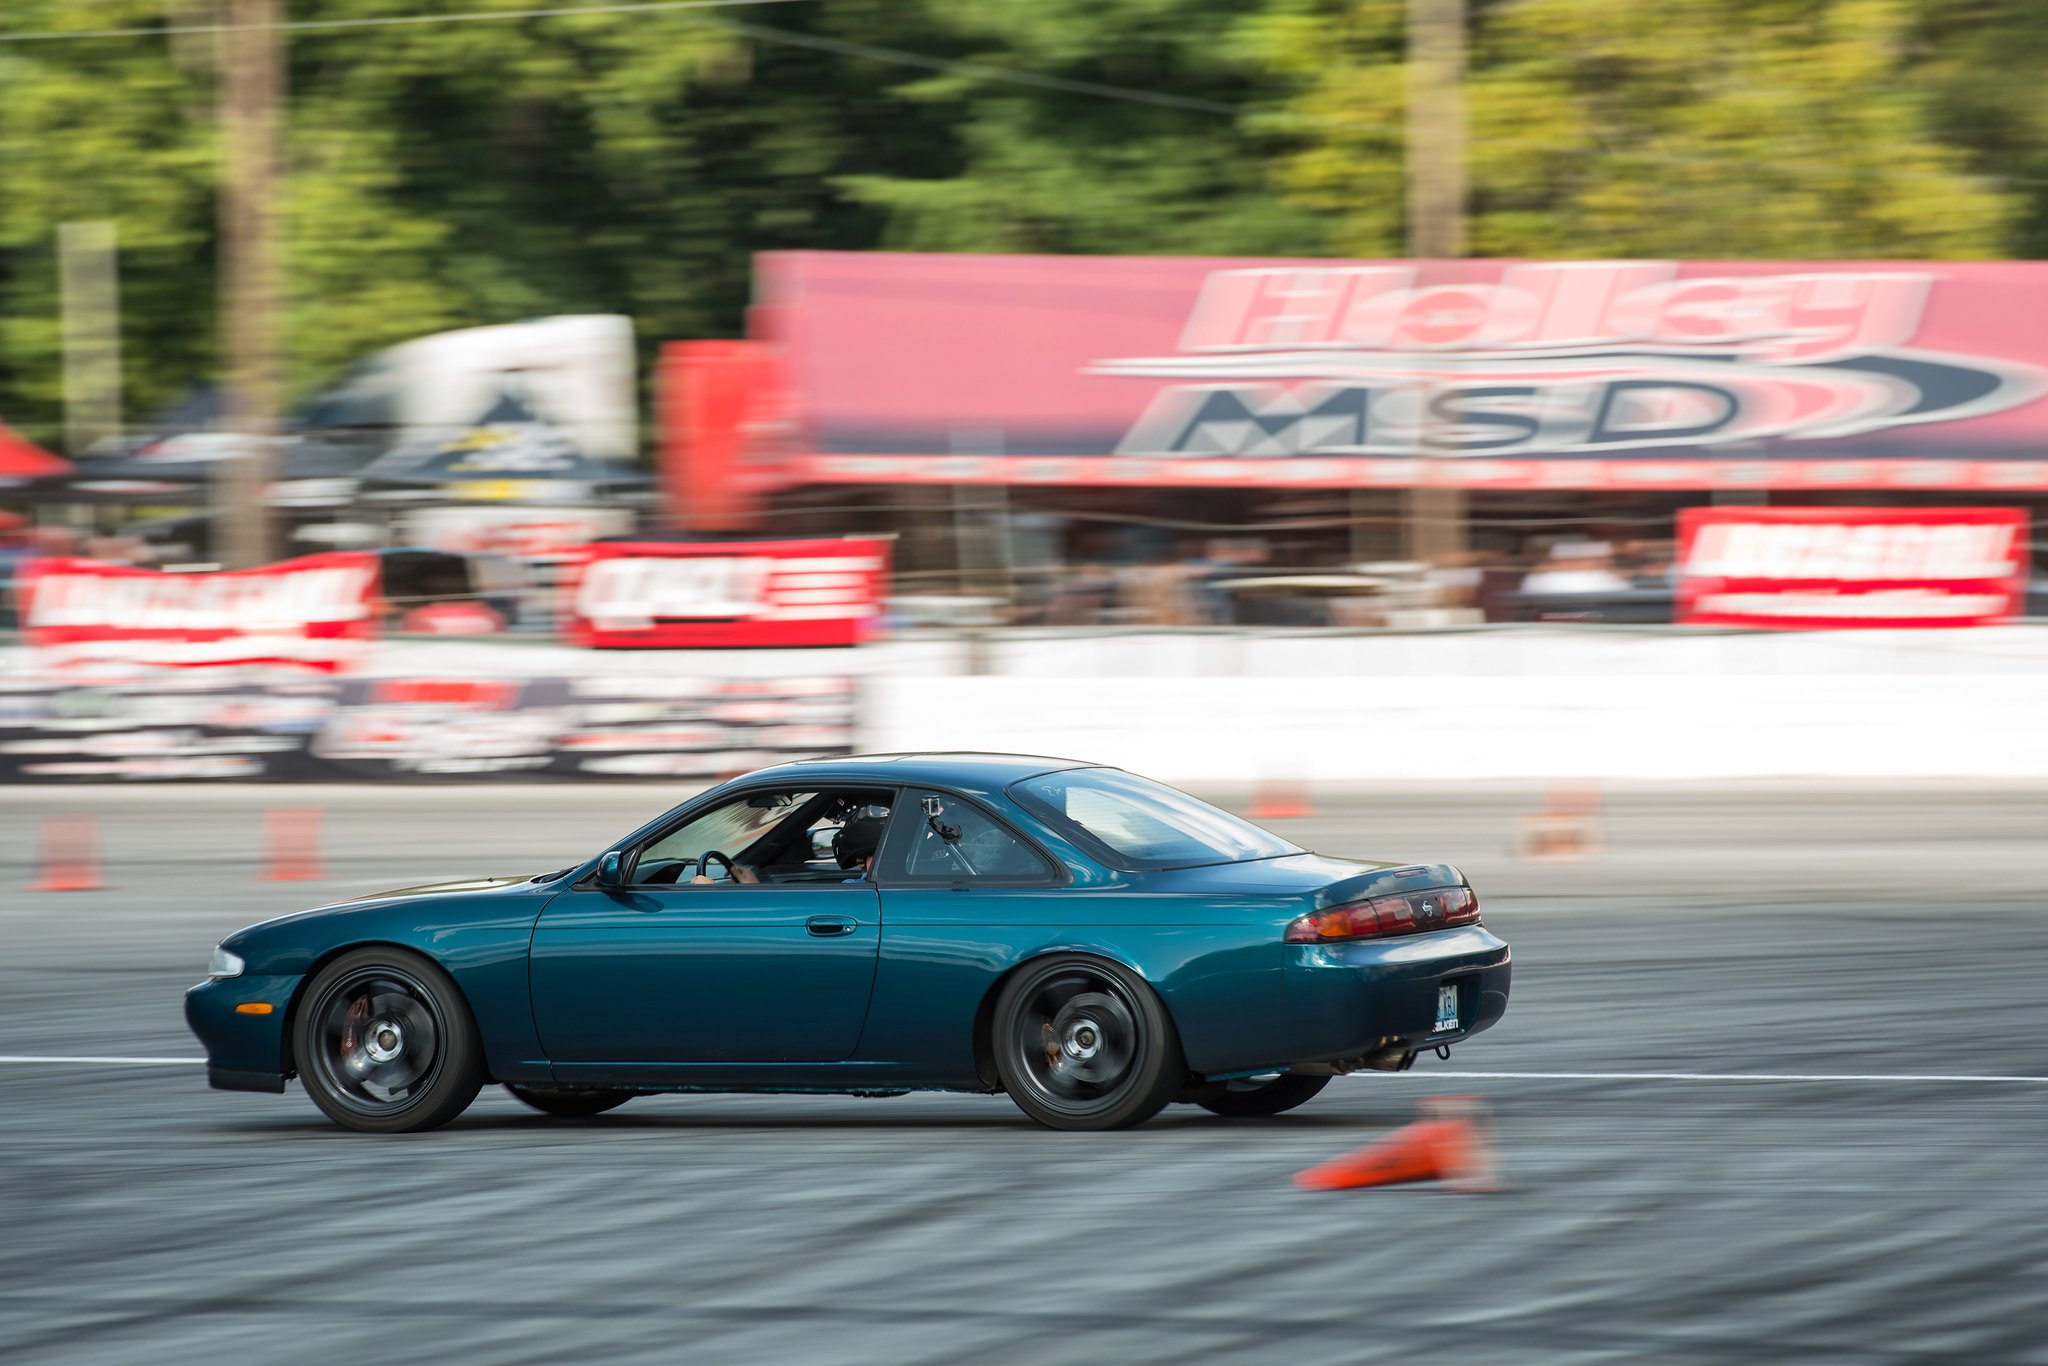
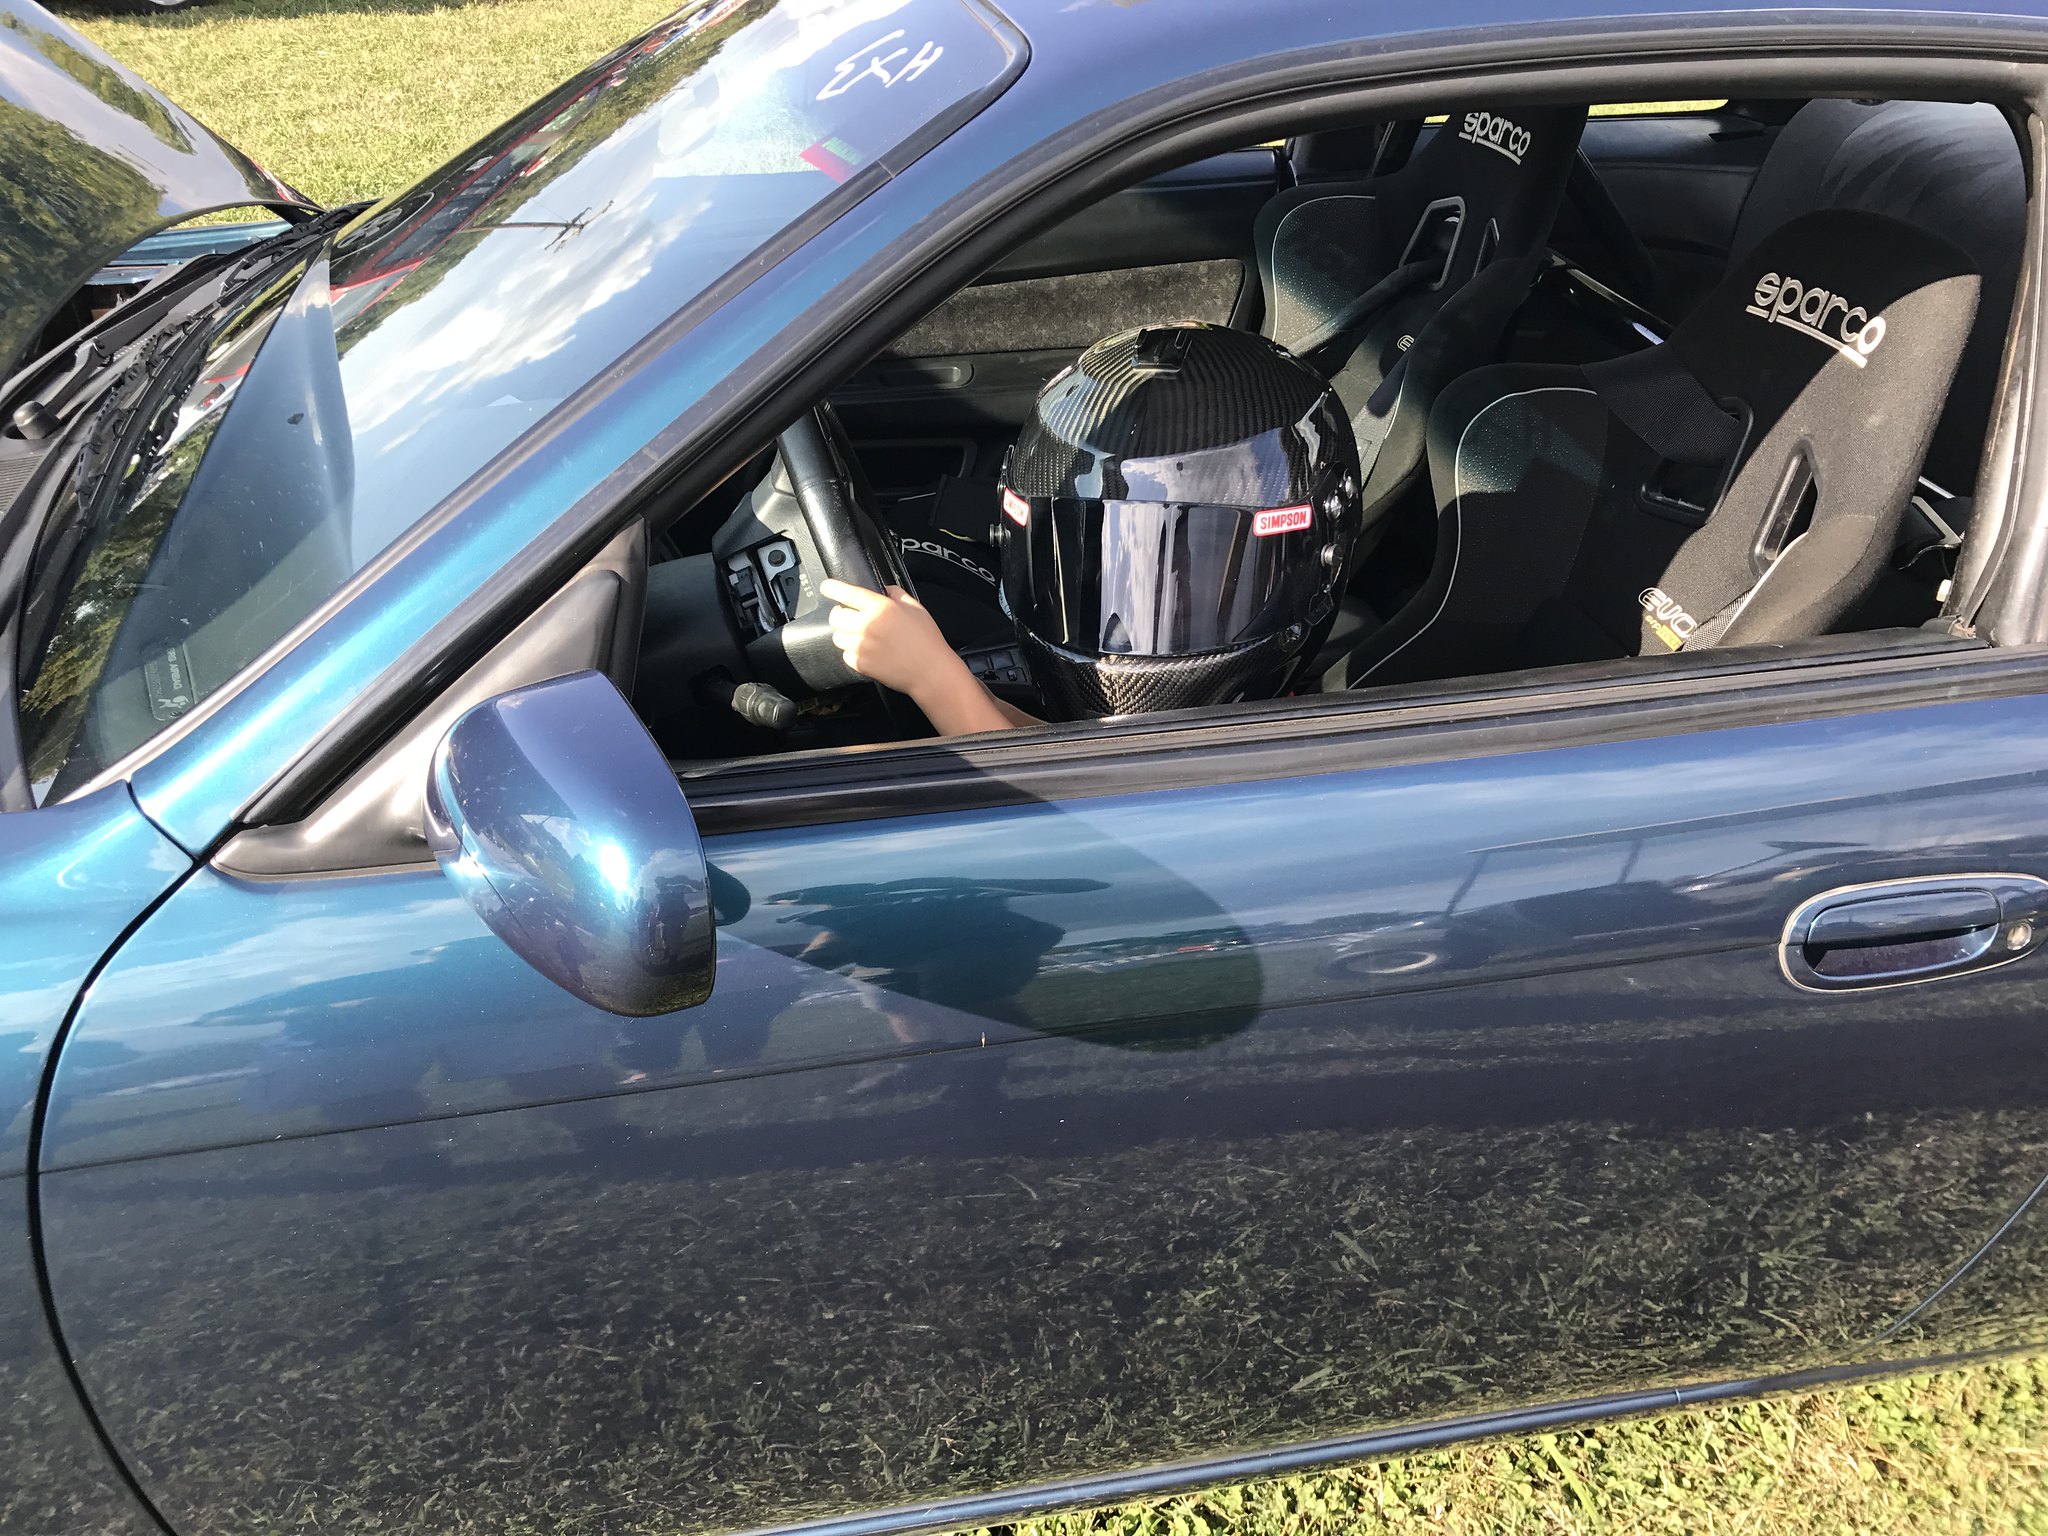
Unfortunately I didn't have much time to mess with tire pressures or shock stiffness whatsoever during the weekend. I was just glad the car seemed to work with what little changes I made. Later that day I was able to take my cousin for a ride in the car (a 250 pound) guy. With him wedged in the narrow passenger Sparco bucket, I bagged a best time of the weekend of 32.677 seconds, 1.57 seconds off the pace of the fastest competitor of the weekend. Not too shabby eh?!
 Untitled by eric.burnett09, on Flickr
I mentioned in the last paragraph that my cousin came by. His little boy is a gearhead to the core. Having just turned five this past month he is already doomed to the addiction of motorsport. Every time I get to see him at a family function he sits in my lap and looks at all the race car pictures on my phone. He is always wondering when the car will be done so he can take a ride in it. Lucky for him, he was able to see the car run and get a chance to sit in it and see what it's like to chill in a performance car for a few minutes. Check him out in my helmet! Ha! Can't see above the steering wheel just yet, but that'll come in due time!
 Untitled by eric.burnett09, on Flickr
Ideally, I'll be able to mess with things on the car a bit more before another event comes around on the calendar. I want to rectify some of the issues that I listed above, as well as a couple of others.
The car didn't overheat, it didn't lose oil pressure, it didn't do any of the things that could've easily have happened on a new build. It simply did what I asked of it, and for that I'm truly thankful. Thanks also goes to Jesse Vaughn up at Level 7 Motorsports. If not for their help and expertise leading up to LS Fest, the car wouldn't have moved under it's own power at the event, let alone any time soon.
In conclusion, Silvia is back and better than ever. Her engine bay has a much cleaner, more mature look to it, churns out more power, and handles better so far. I'm looking forward to getting more comfortable with the updated platform in the coming weeks and months. Now to repair the wallet.....
 Untitled by eric.burnett09, on Flickr
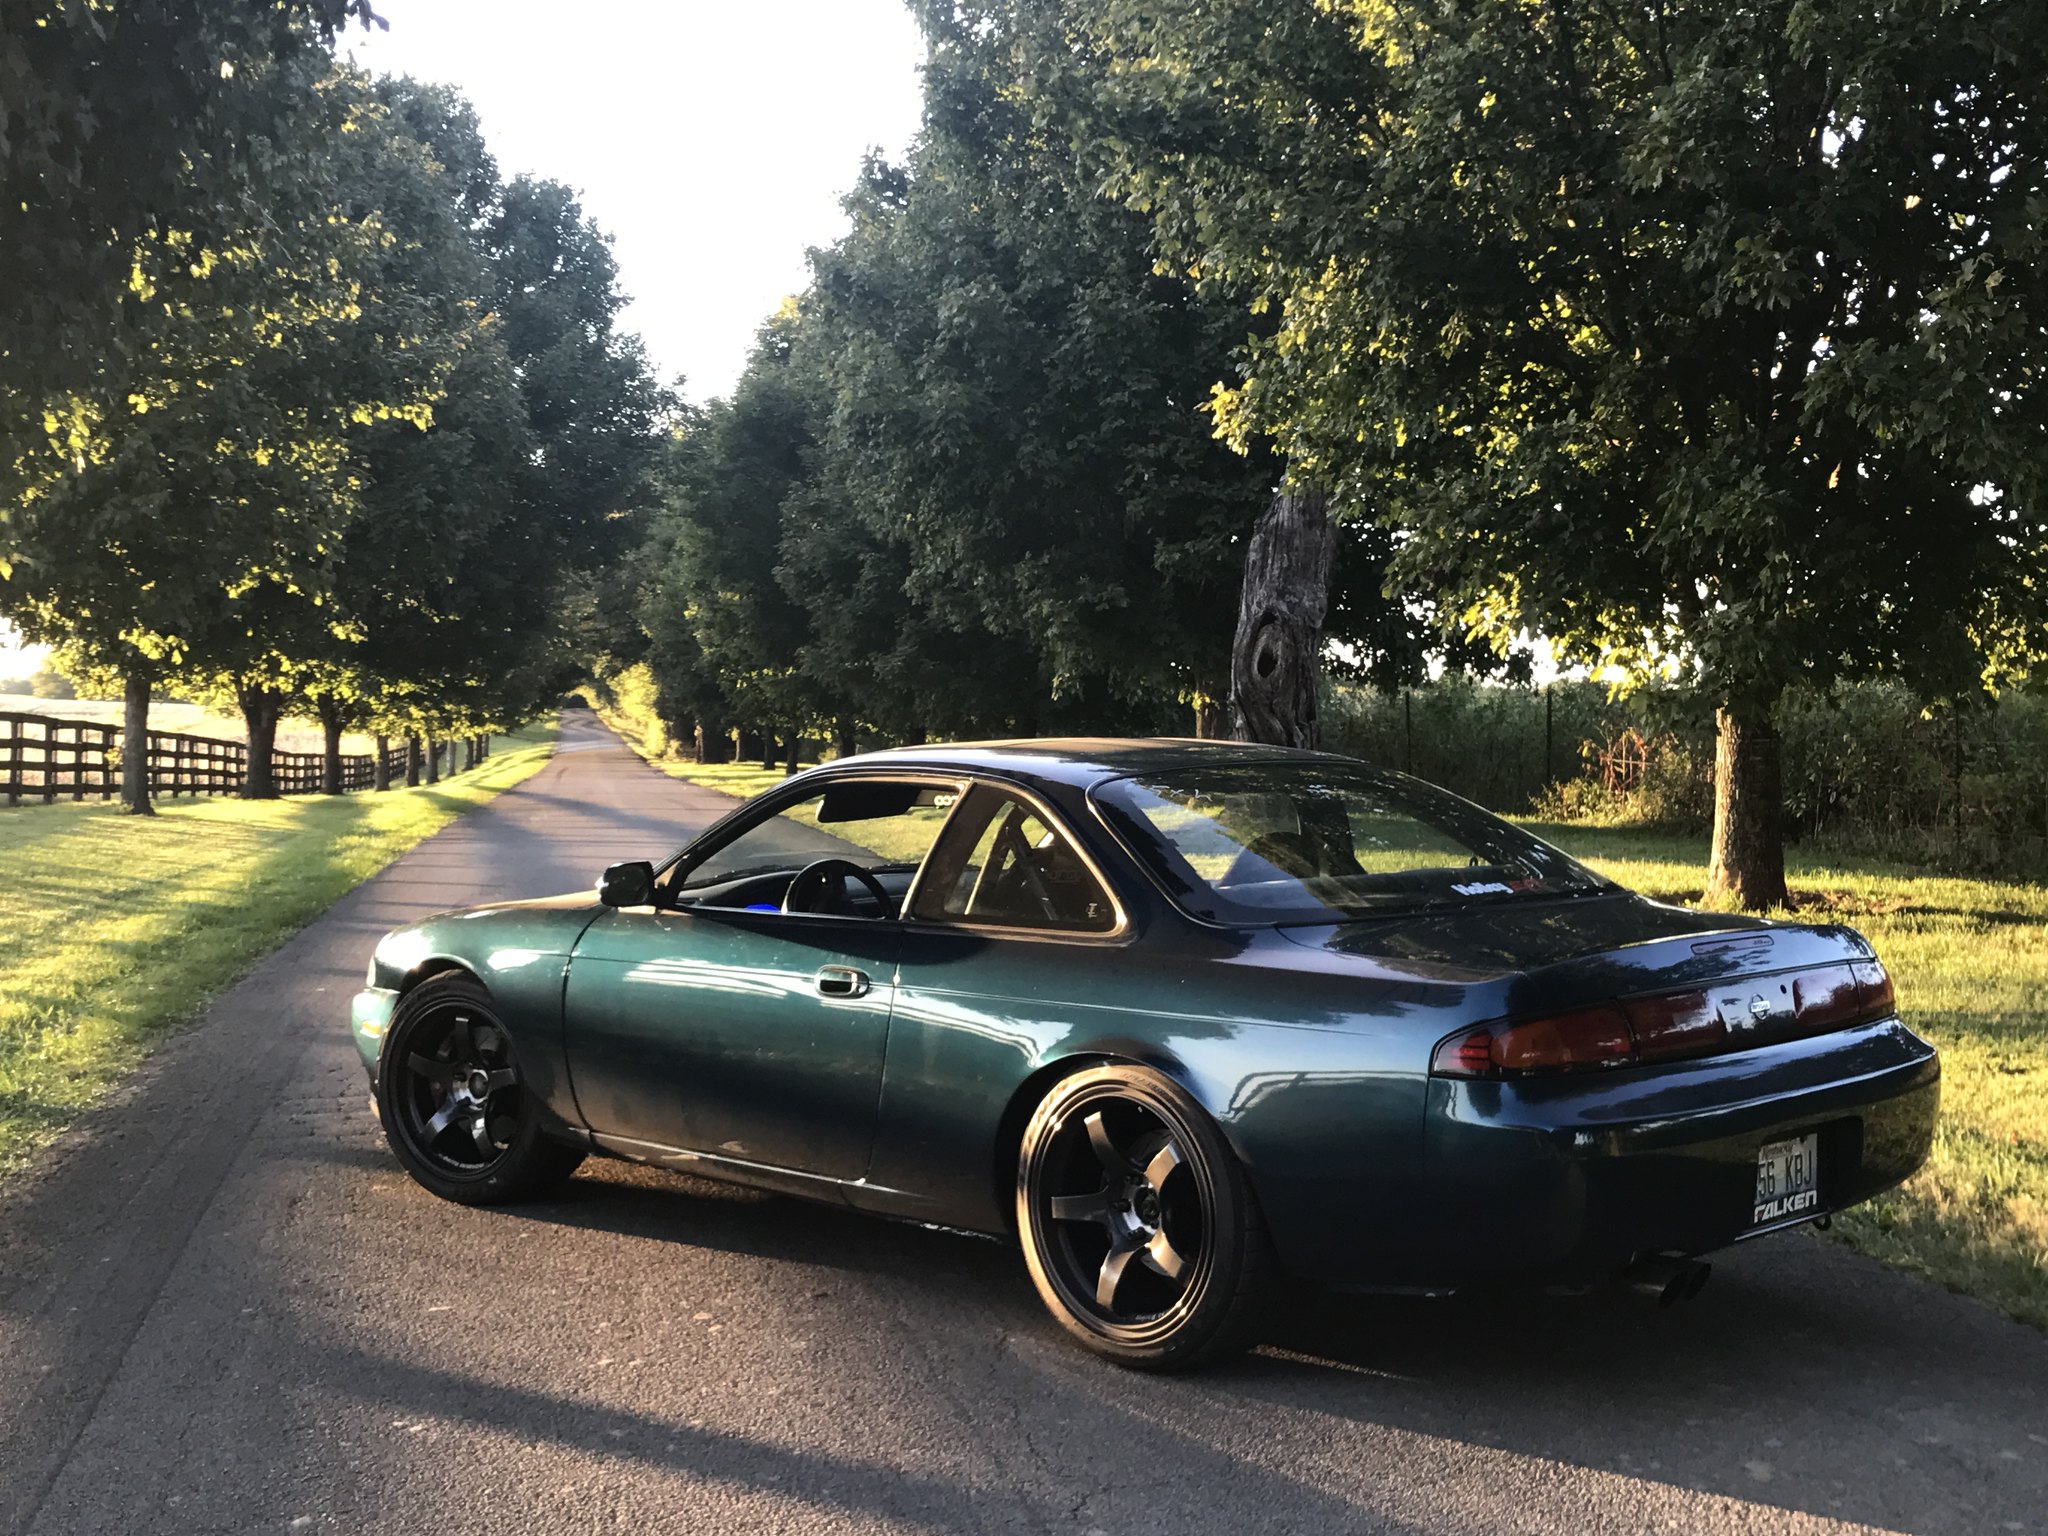 Untitled by eric.burnett09, on Flickr
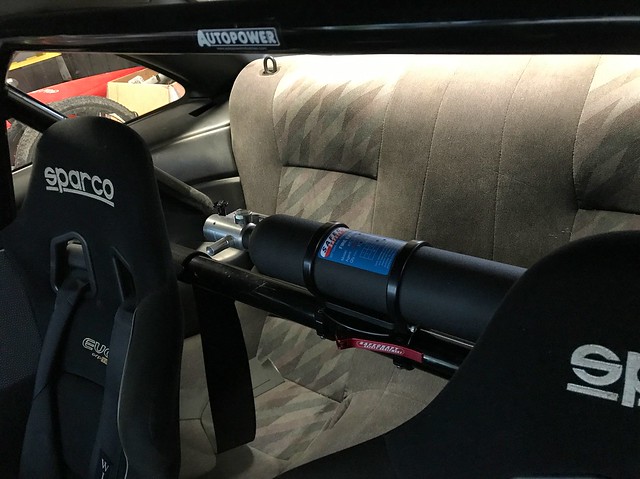
One last little update: Prior to LS Fest, I talked to Tyler McQuarrie, a friend of mine that I've made through motorsport and through working at Holley. He is one of the drivers of Safecraft Fire Suppression Systems's various race vehicles and he was able to help me decide on the proper fire extinguisher for my application. Unfortunately due to the hurricane weather that the country has been experiencing, UPS wasn't able to deliver prior to the event. However, it did arrive this week and I was able to snap a couple of shots of the setup installed in the car. Very high quality, easy to remove from it's mount in the unfortunate event of a fire. Outside of that, an additional benefit is that it has that racecar look as well! Props to Safecraft for manufacturing high quality safety components!
I opted for the black wrinkle finish to keep things subdued in the interior, and went with the 3lb (model "PB3") unit due to the size constraints on my roll bar. The billet roll-bar mounts install in seconds with the proper size allen key and you're off to the races in a much safer way in no time at all.
 Untitled by eric.burnett09, on Flickr
Project LS2 S14 from LS Fest BG event back in September. Forgot to upload this and share.
Does anyone know how to make this appear larger on the screen by chance? Any help is appreciated.
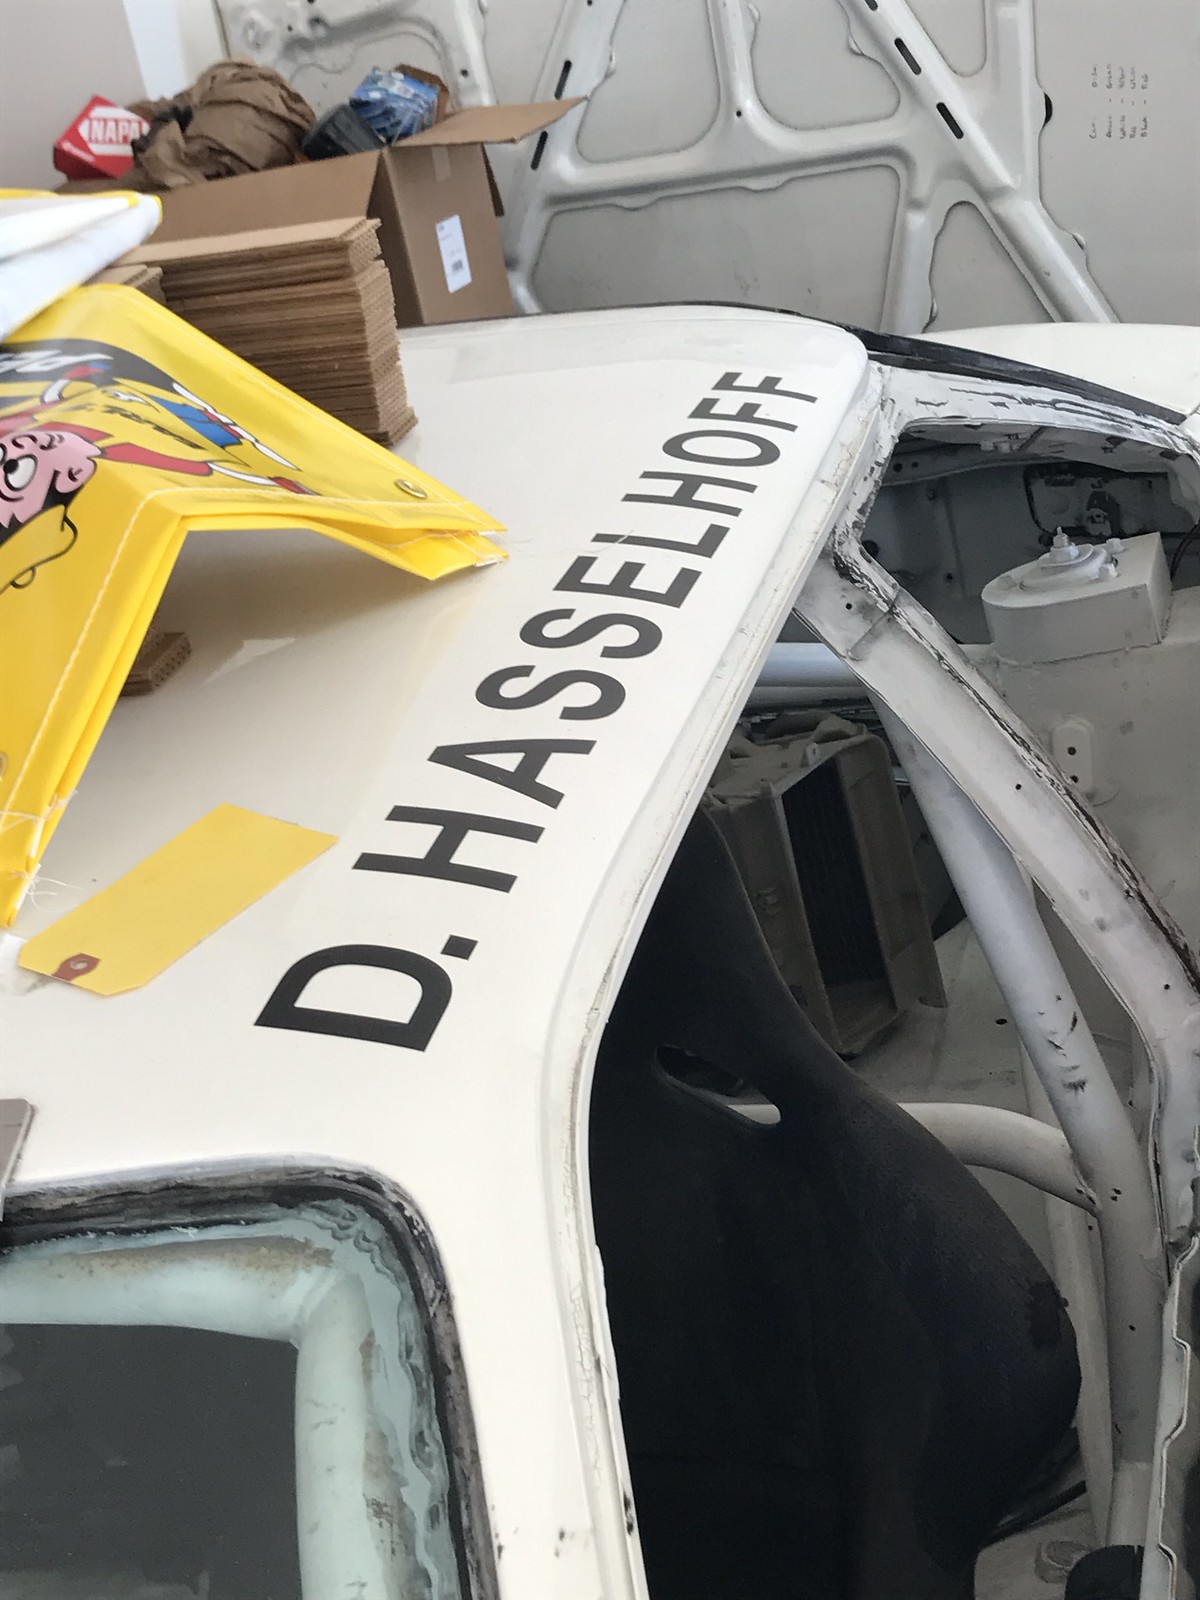
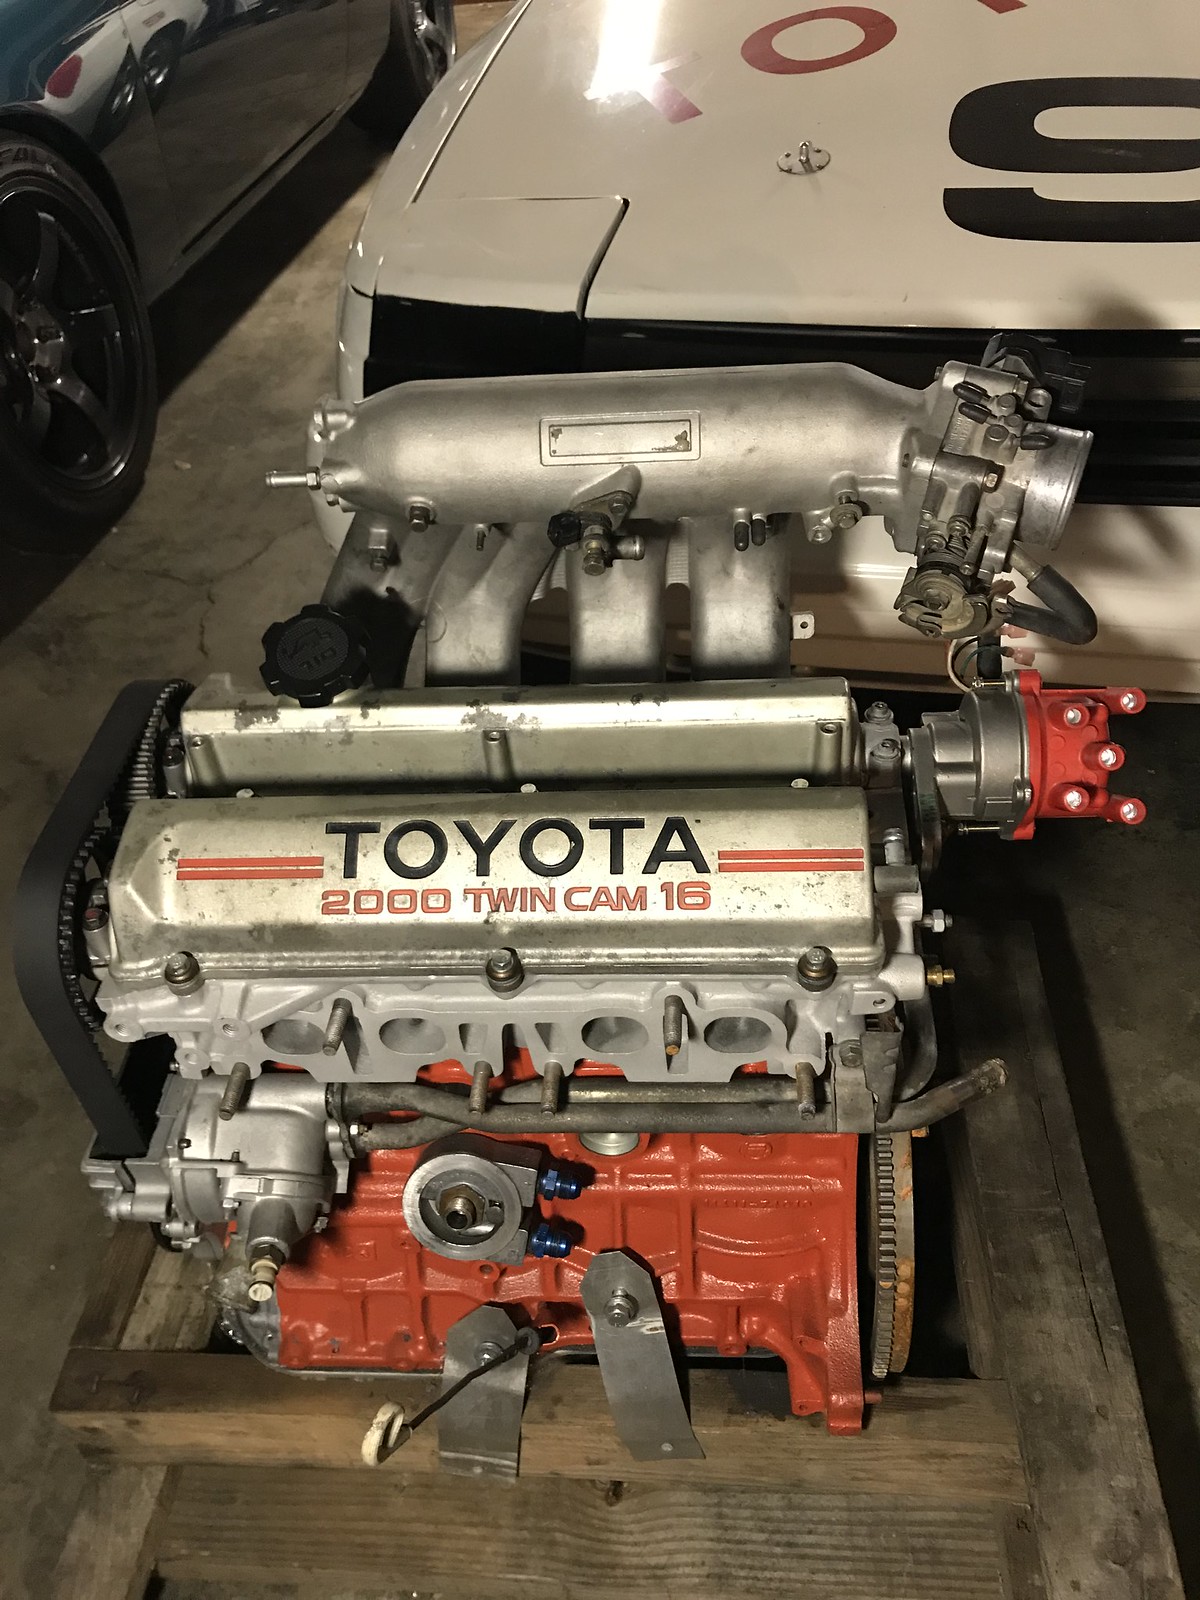
I will probably have to start another thread for this entirely, but a buddy of mine and I recently acquired a new project car we'll be working to get back on track over the next several months. It likely needs a rewire, but all of the rest of the components are there. Introducing, Project Hoff-Rod! You're looking at an '86 Celica GTS that was piloted by Hasselhoff himself in the '86 Long Beach Grand Prix celebrity race. Since those days it has spent time on track as a student car at Danny McKeever's Fast Lane Driving School. It has changed hands a couple of times since then from what I understand and now it is sitting in my garage. The engine has already been freshened up, but we need to add a fresh clutch, and put the puzzle all back together.
We plan on putting the car back through its paces at track days and perhaps an endurance event at some point. Who thinks it needs a red LED light bar in the grill to pay homage to "KIT"???
 Untitled by eric.burnett09, on Flickr
 Untitled by eric.burnett09, on Flickr
 Untitled by eric.burnett09, on Flickr
You'll need to log in to post.


