Thanks, appreciate the comments, I really should be quite fun to drive.
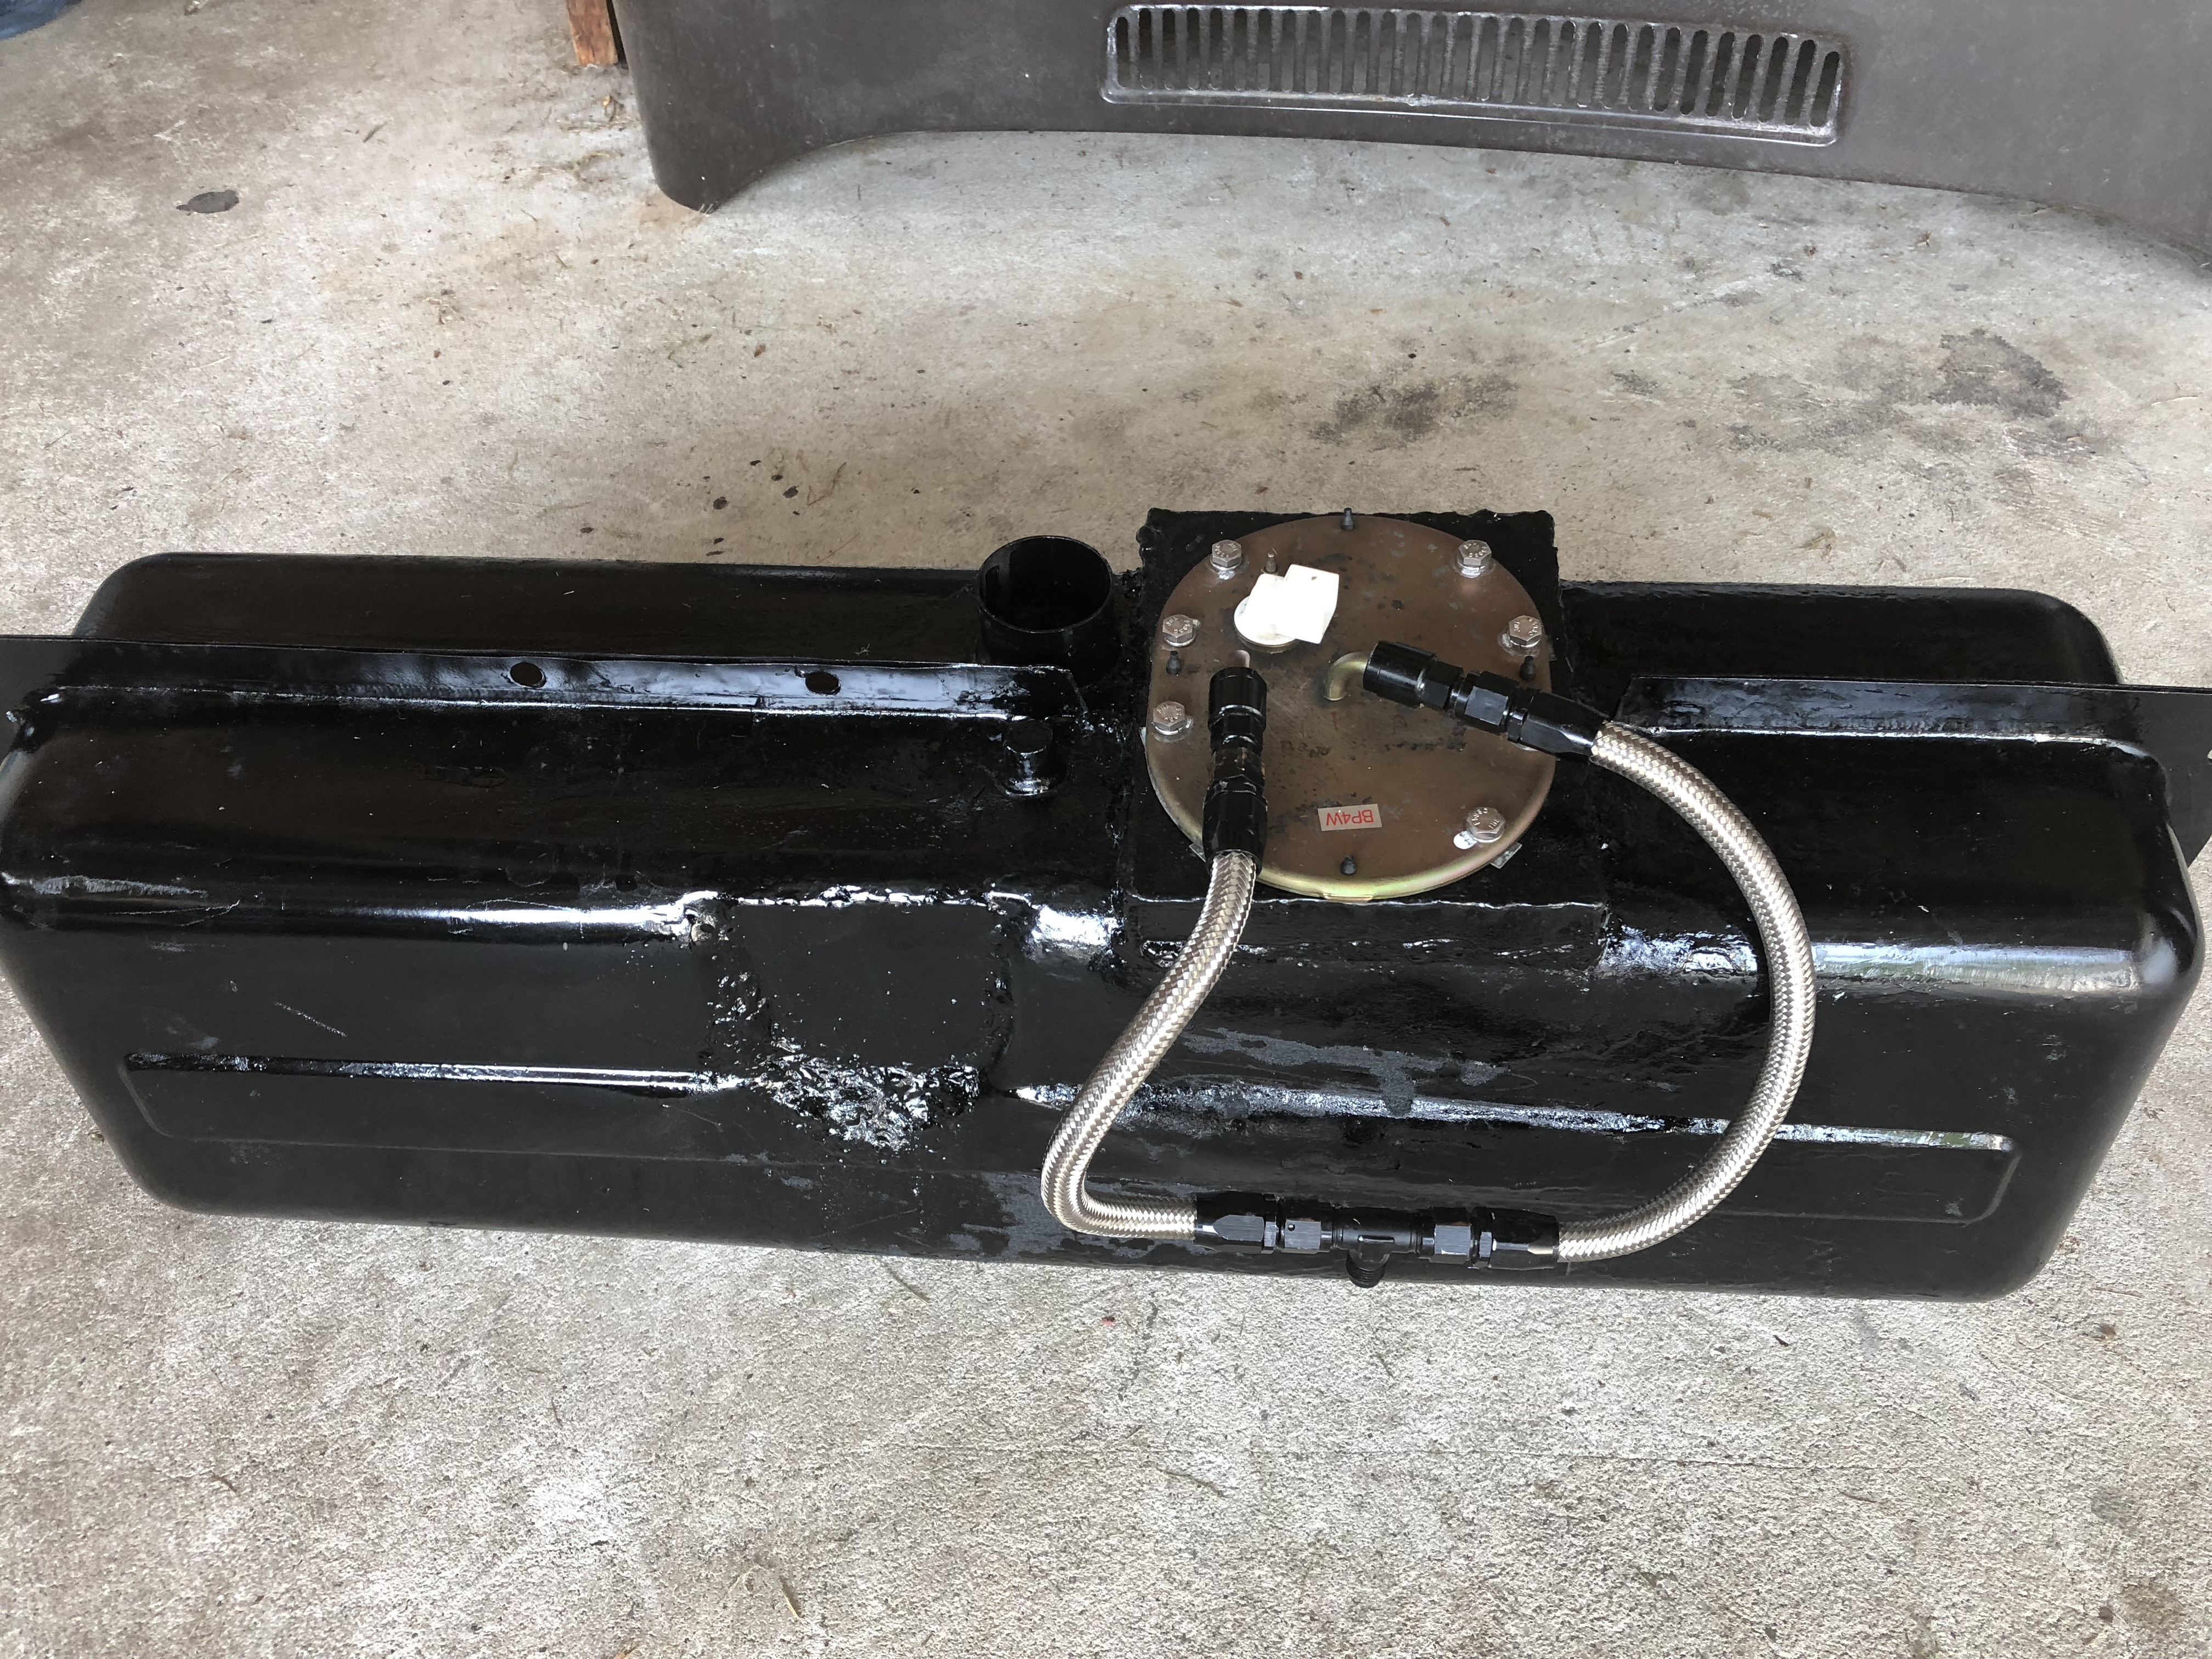
Finished the gas tank/fuel injection system yesterday and installed the tank. Basically welded up the original sending unit access port, and welded in a square section on top for the 99 Miata fuel pump/regulator unit and modified the depth to fit the Spitfire tank. Just needed to bend the float for the gas level and it all fits. Fuel lines are stainless steel with AN fittings from engine to pump. Tank was cleaned and sealed with a KBS coatings kit, with cleaner, etcher and finally the sealant. Highly recommended, the tank looks like crap on the outside, but inside it was bare metal, no rust and with the coating applied is super clean. Next steps are to start working on the front of the car, steering and dash work next then finish the engine so I can start the wiring.
So the KBS coating is on the inside of the fuel tank?
I wish you luck and hope it works well. I did a POR15 fuel tank liner/sealer in my e28 a few years ago an more recently found that the coating flaked up and was clogging my fuel pump... :/ Hope this one works better for you.
Yes, have heard this from other boards. The KBS kit took several days to do properly, the stripper was in the tank for 24 hours, and made it super clean. The etcher, was a 30 minute job and then the sealer takes an hour or so to coat everything and then drain the tank so it is just a thin coat. The result is a hard, smooth surface that feels like an epoxy coating. They say as long as you do the prep right it will stay in place. It probably helped that since I had a large cut out in the top of the tank for the fuel pump, this allowed me to make sure everything was 100% clean and also to see that I have full coverage of the entire inside of the tank. I duct taped the openings once I had every coated, so I could coat the top of the tank and then removed the tape and drained it properly.
Very cool.
Couple questions:
Do you have more details on fuel pump and regulator arrangement?
What diameter tubing is that exhaust? 2" maybe?

Thanks, for the fuel pump/regulator, since I am using a 1999 Mazda drive train, and running an aftermarket ECU (Hydra), I wanted it to be all Mazda, so I had to get a used fuel pump/regulator assembly from the same series (BP4W 1999-2000). This way, we can use the Mazda base maps to get started and the Hydra will just think it is in a 1999 Miata since it is all the same. Plus I am using the Miata gauge pack, so this gives me a fuel gauge as well. The pump has a built in regulator and run a higher pressure (60 PSI) which is ideal for my upgraded injectors. I am looking at low boost (8-10 pounds) and 200+ at the wheels which should be more than adequate for my needs.
I purchased a Spitbits (Bell) dual exhaust kit for a GT6 and then modified with a stainless pipe around my transmission and up to the turbo exhaust flange. It is 2" from the small turbo down to the "Y" where it goes to 1.5 for the two exhaust mufflers (straight thru) and then 2.5" tips. I know 2" is not ideal for my turbo downpipe, but packaging was a consideration and there is very little space to work with. The exhaust fits perfectly and looks great and I can't wait to hear it.

Ian F
MegaDork
7/5/18 11:25 a.m.
It should sound pretty good if the Bell system (full header-back) on my ex's 1500 is any indication.
In reply to dherr :
Hmmm. I wonder if that pump / regulator combo would do the job on a 2.0 EcoBoost. It requires 110 L/hr @ 55 psi. Will need to do some research there.

manana
New Reader
7/5/18 12:05 p.m.
Nice progress Dave.
I considered doing the same to my tank, but went the quick and easy way for now with an external pump. Eventually I'll modify the tank as well (or make a new one), change out to the Miata pump and install an electronic sending unit.
When I cut into an older tank I found baffles that also got in the way of the pump regardless where I would've installed it. I've read that the later tanks had no baffles, did yours?
You've effectively raised the part of the tank that holds the pump etc. was that enough to get the pump arm etc. into the tank or did you also cut the pipe that the pump is attached to?
Steve
There were no baffles in my 1972 MK4 gas tank. Even with the raised section, I had to shorten the pump, but it was pretty easy. Basically just took 1.5 inches off the hard pipe the pump connected to and moved the pump up higher and then just removed the same from the rectangular support and drilled a hole for the pump support and bolted it back together. Also had to cut the same amount off of the regulator return, but that was just a rubber hose. Pretty straightforward overall and mounts just fine in the space below the rear deck with access to the connections.
Damn this car is sweet! Love seeing it on Page 1 again!
manana
New Reader
7/5/18 5:06 p.m.
Awesome, thanks.
One more quickie.... The 1.6 had it's fuel pressure regulator mounted on the engine, and a return line going back to the tank. Your regulator is in the tank you say? is that why the "T" in the fuel line? no return from the engine? If so, I guess it must have an oriphice of some sort to ensure that pressure gets to the engine?
Yes, one of the interesting facts about the NB2 is that there is no return line, made running the system much easier.
AngryCorvair said:
Damn this car is sweet! Love seeing it on Page 1 again!
Thanks Pat, much progress coming, just got the steering sorted today, will be finishing much of the engine pieces so I can start wiring it up next week!
manana
New Reader
7/5/18 5:44 p.m.
Thanks Dave,
Ahhhh, those clever Japanese put the regulator on the return line portion.
I may just have to see if I can do the same to my 1.6.
Although I am surprised that they made the connection outside of the tank rather than just putting a "T" in the first line. Must know something I don't, or just using the same parts from the earlier Miata.

Yup, that is the critter, pretty easy to modify, but I do agree with you, they probably just reused the old top section, rather than make a new part with the "Y" in the pump.
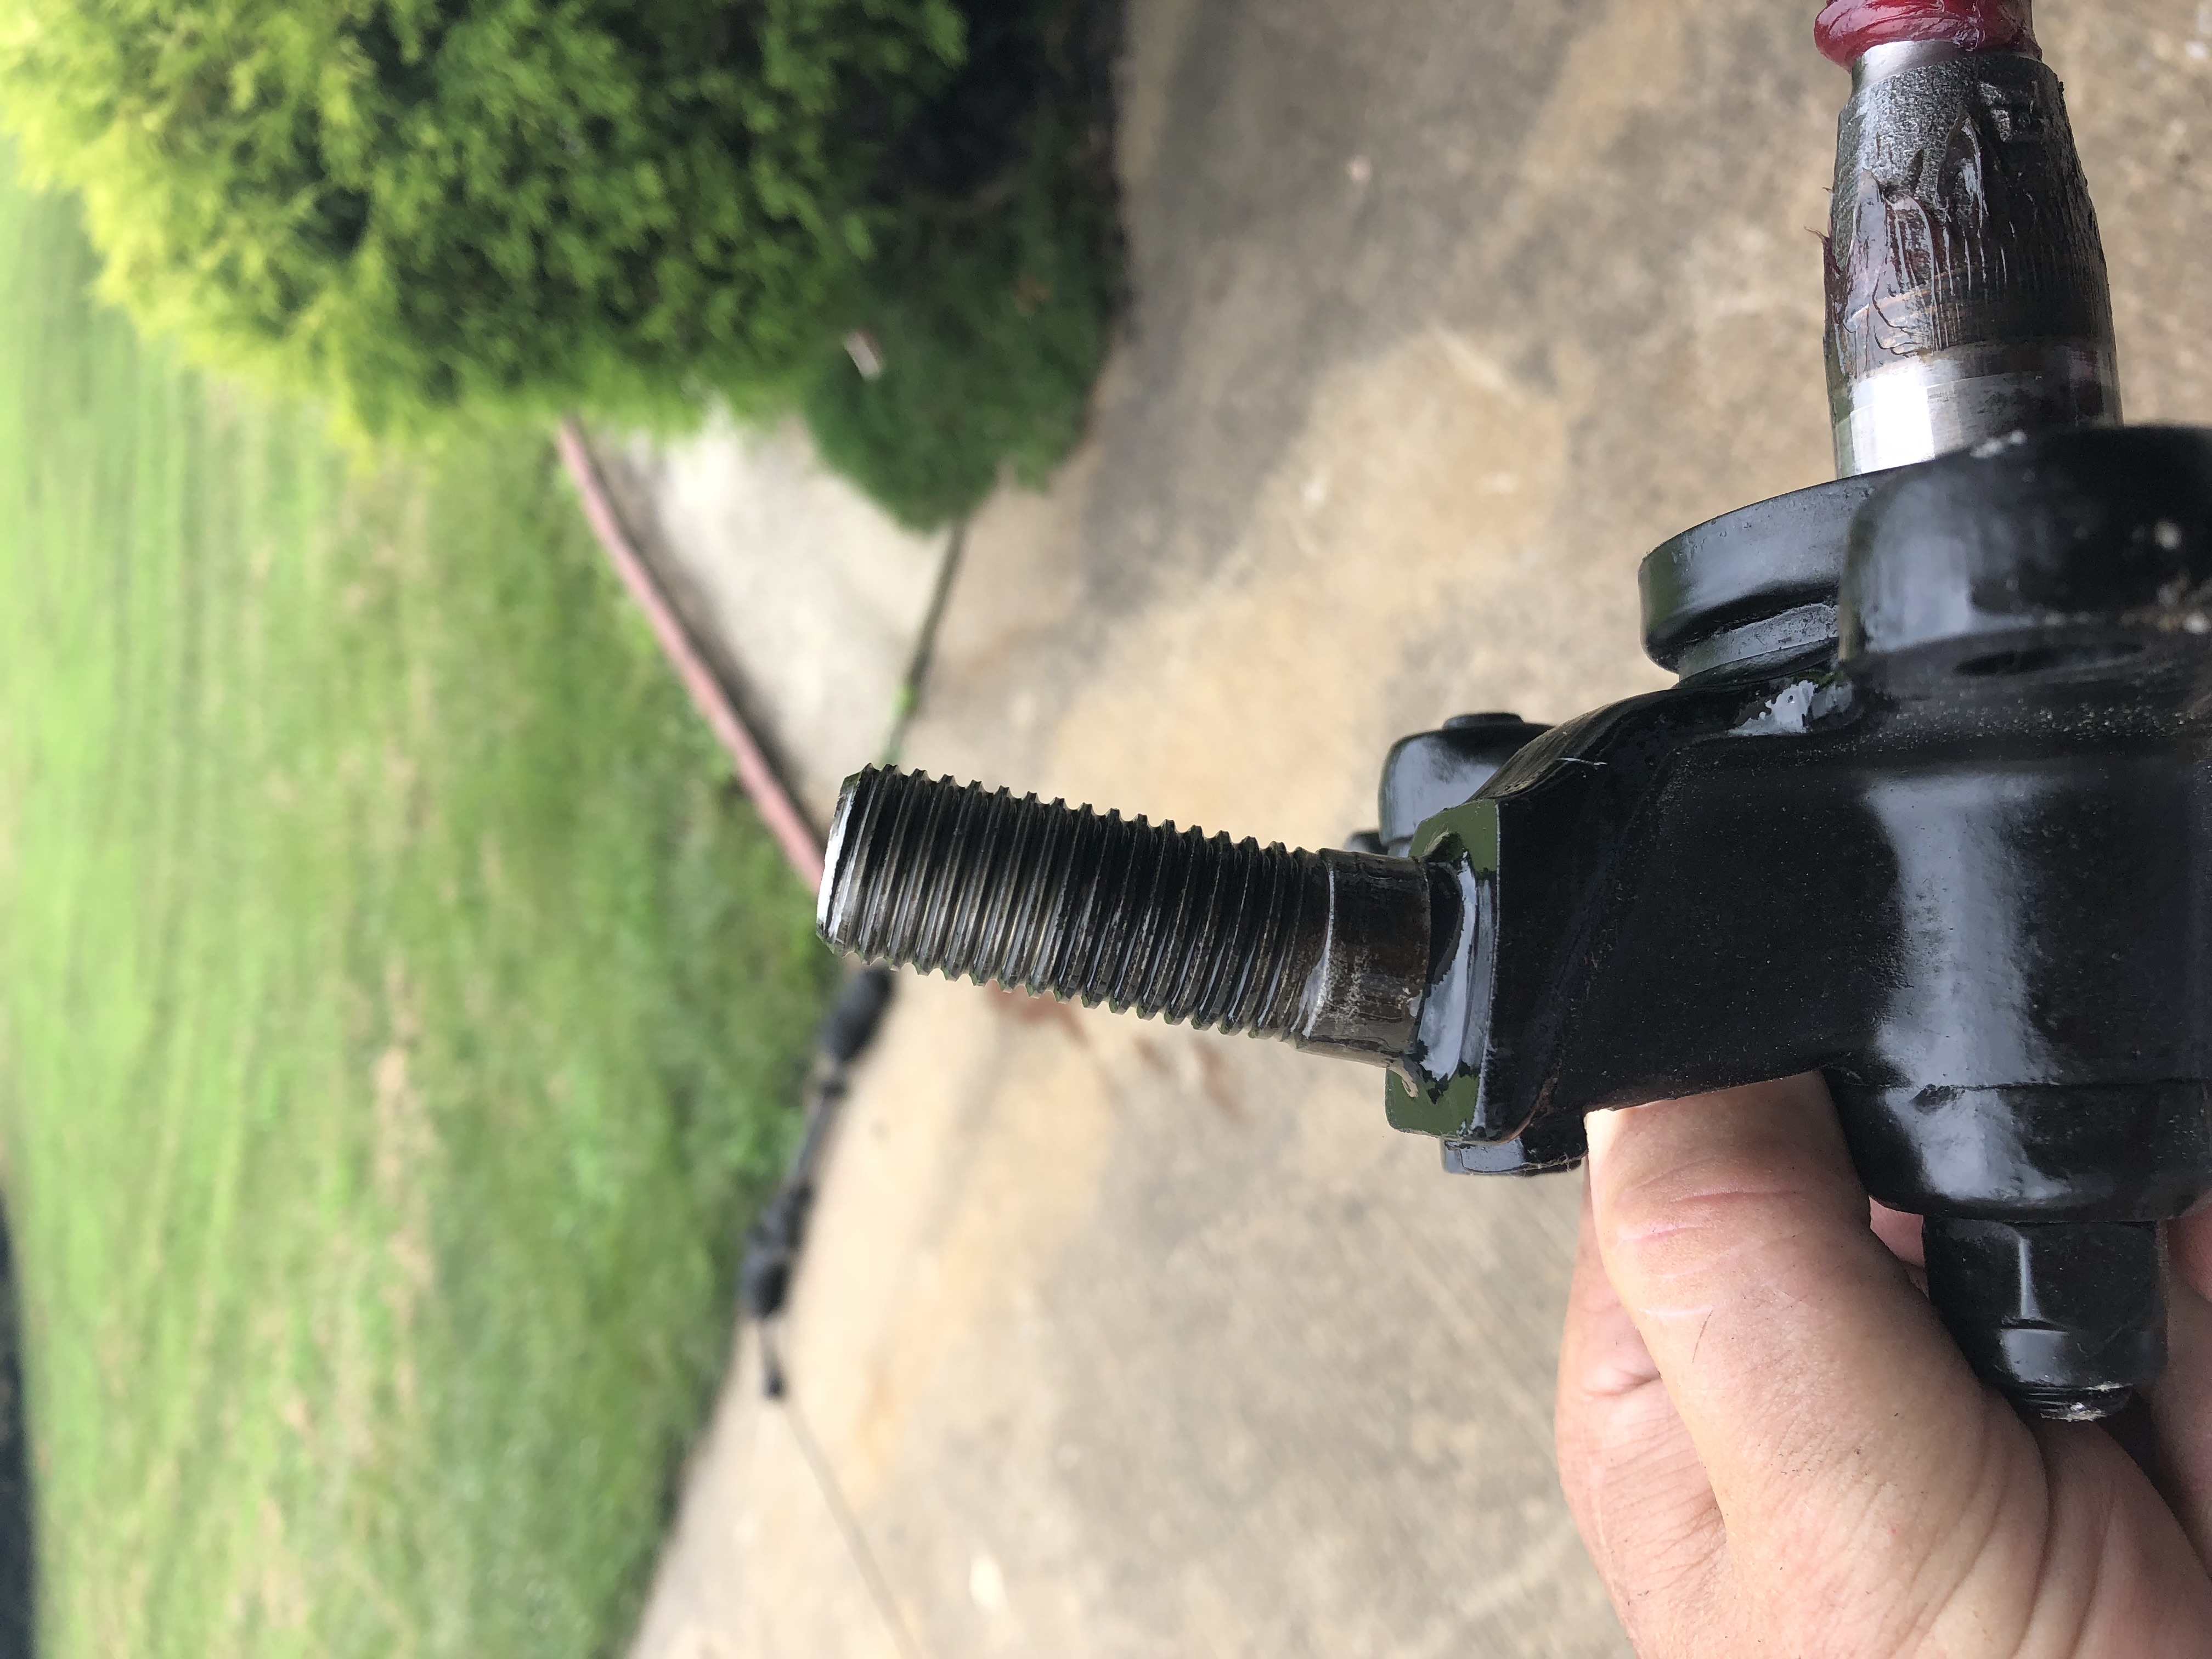
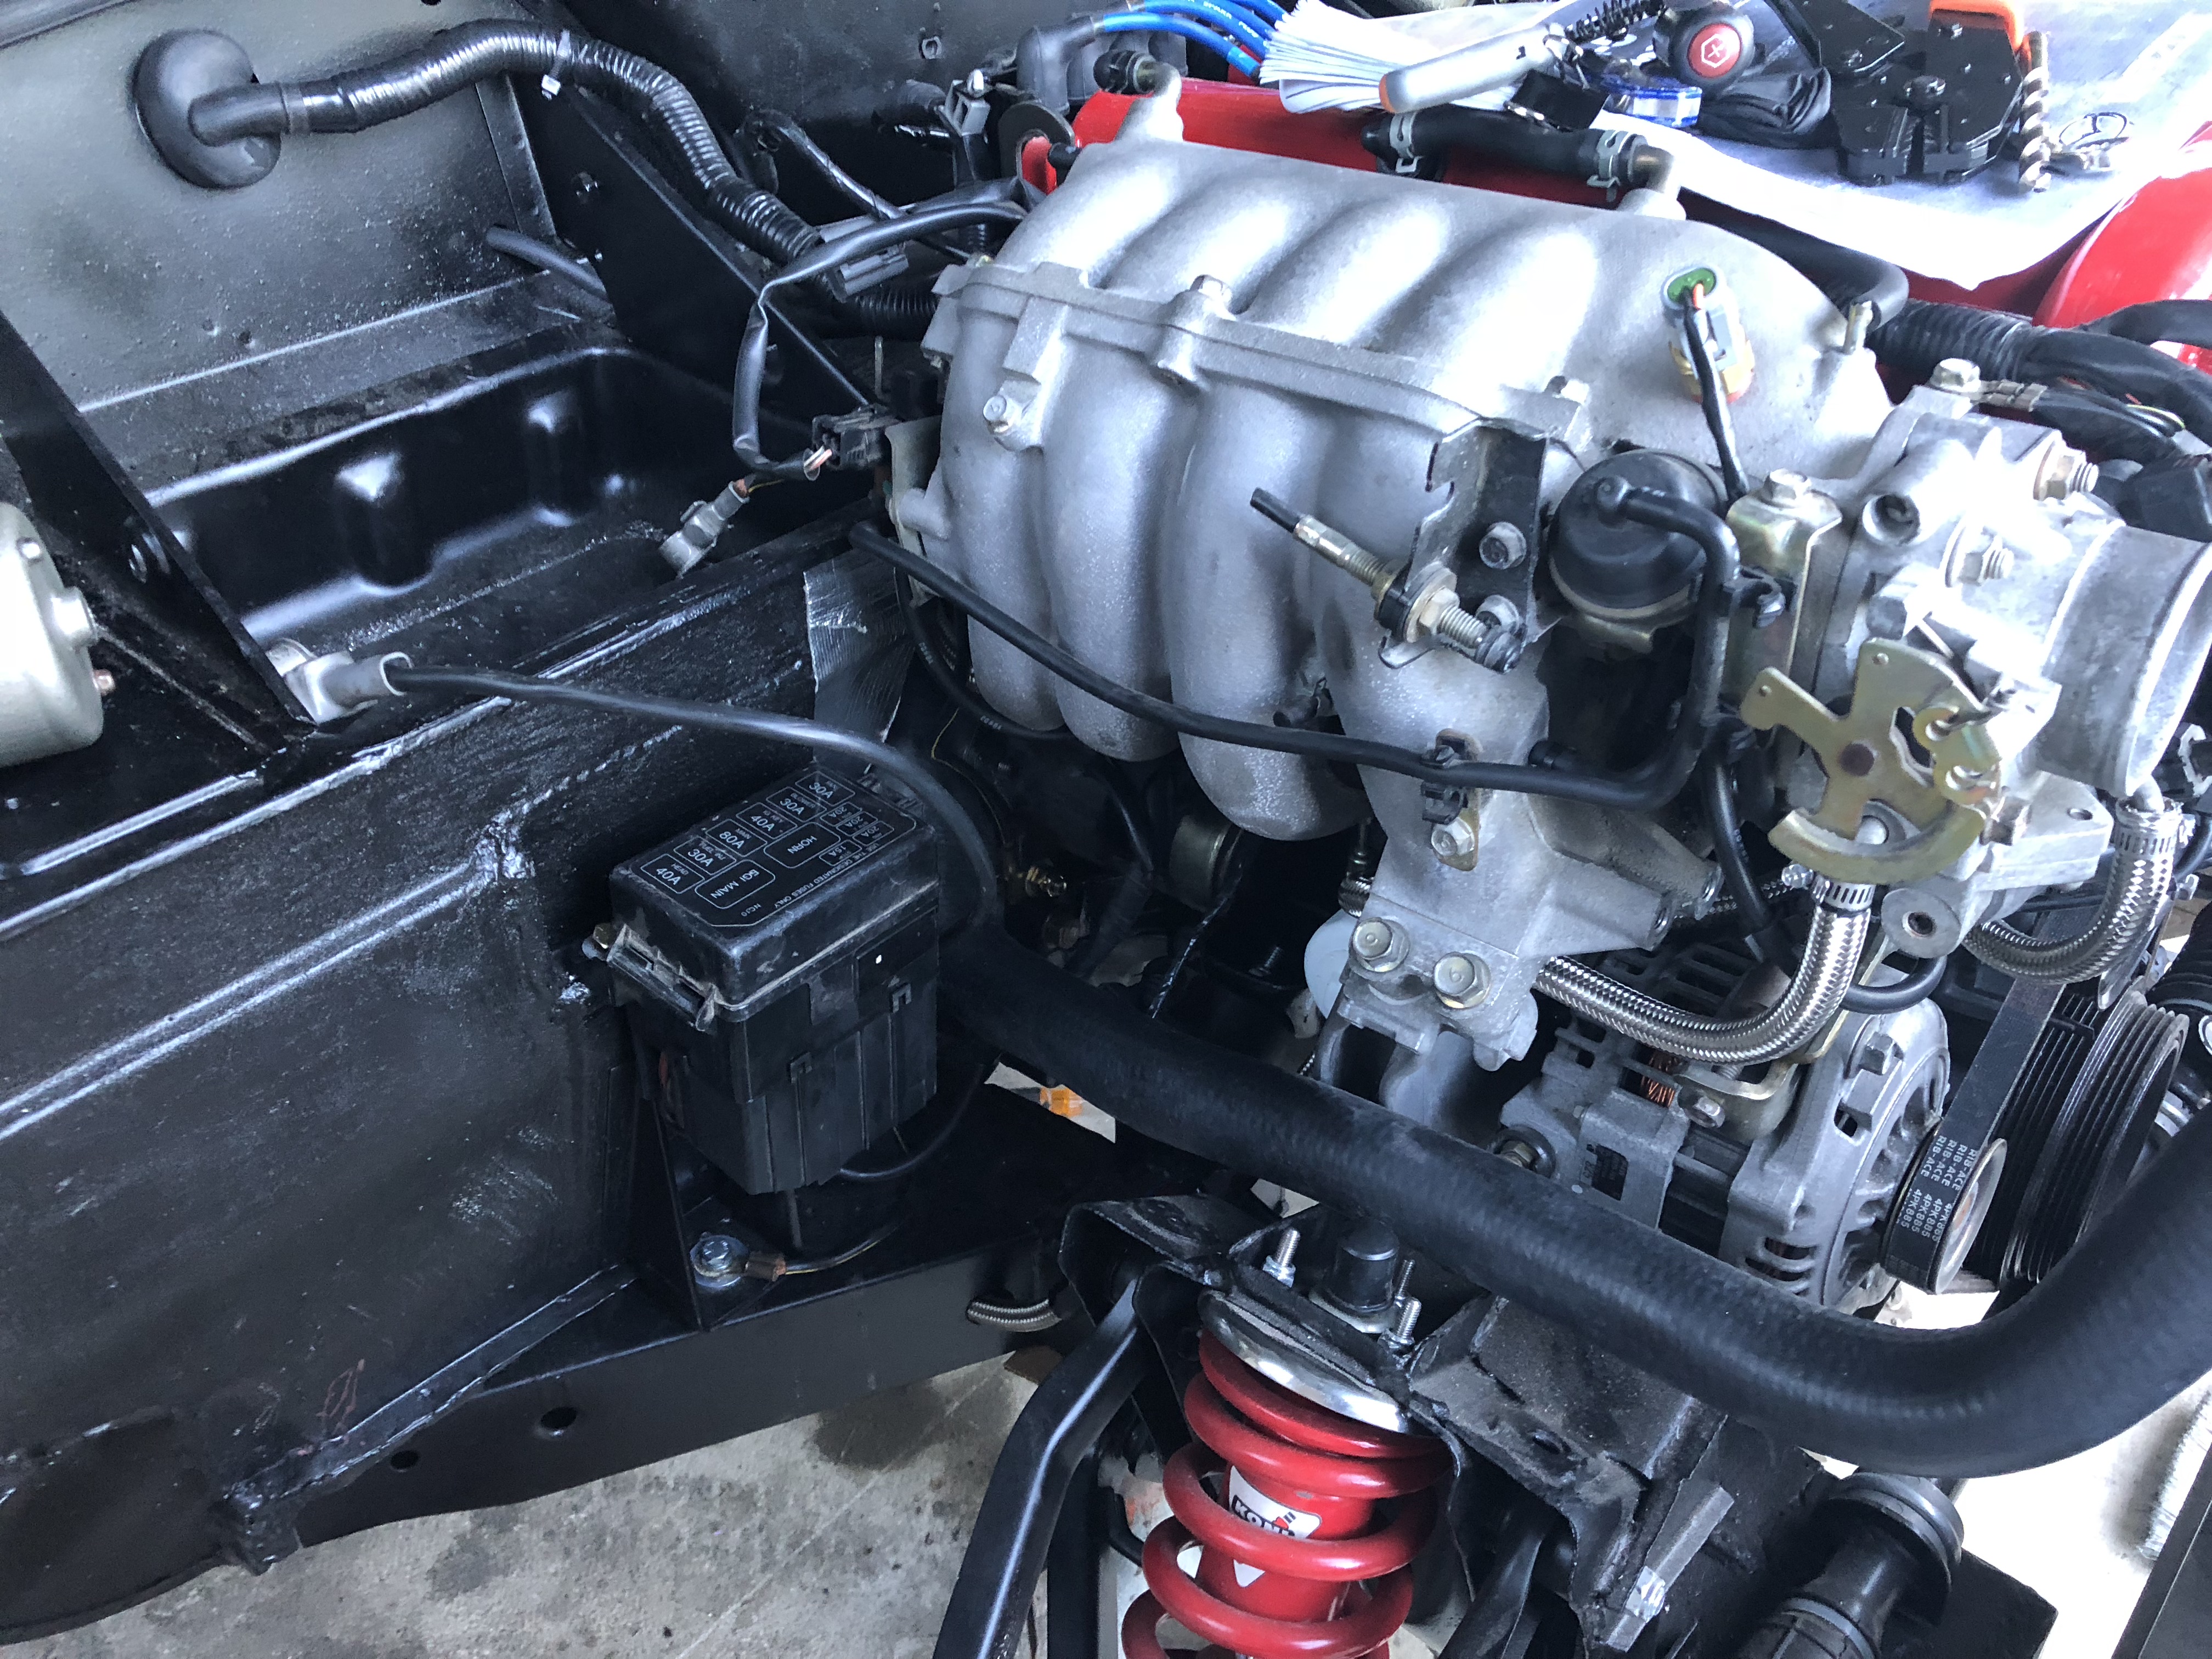
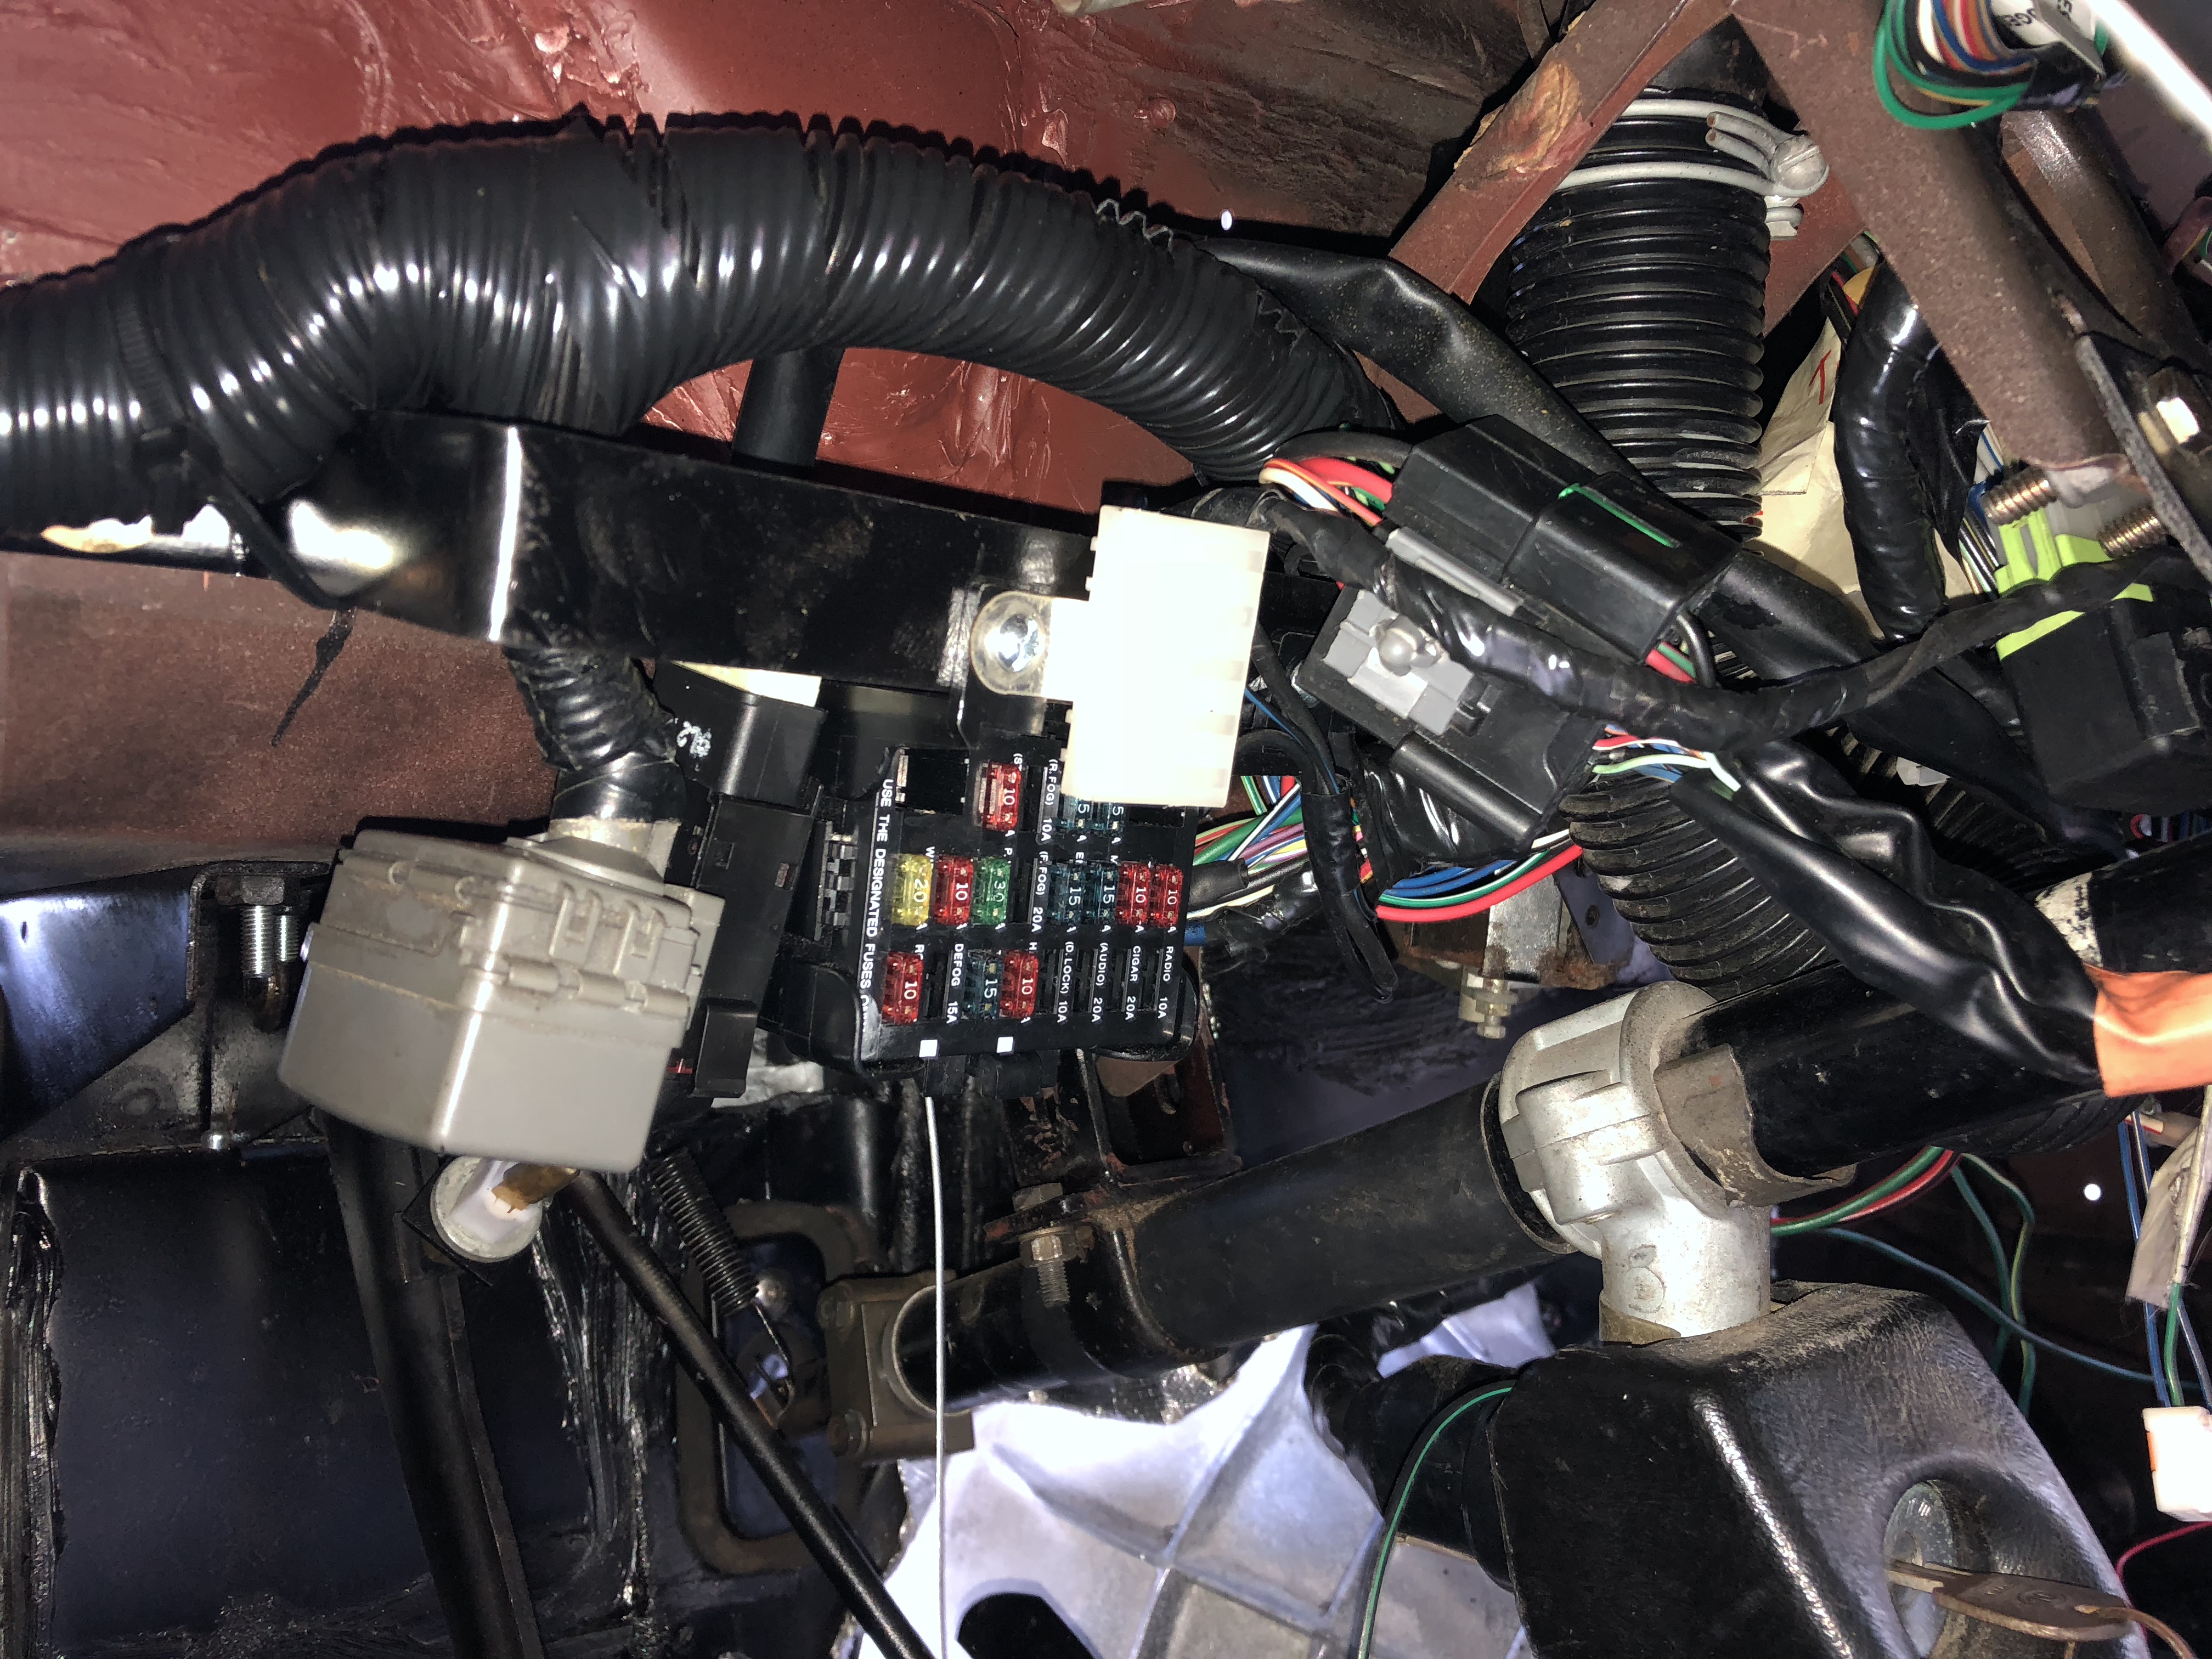
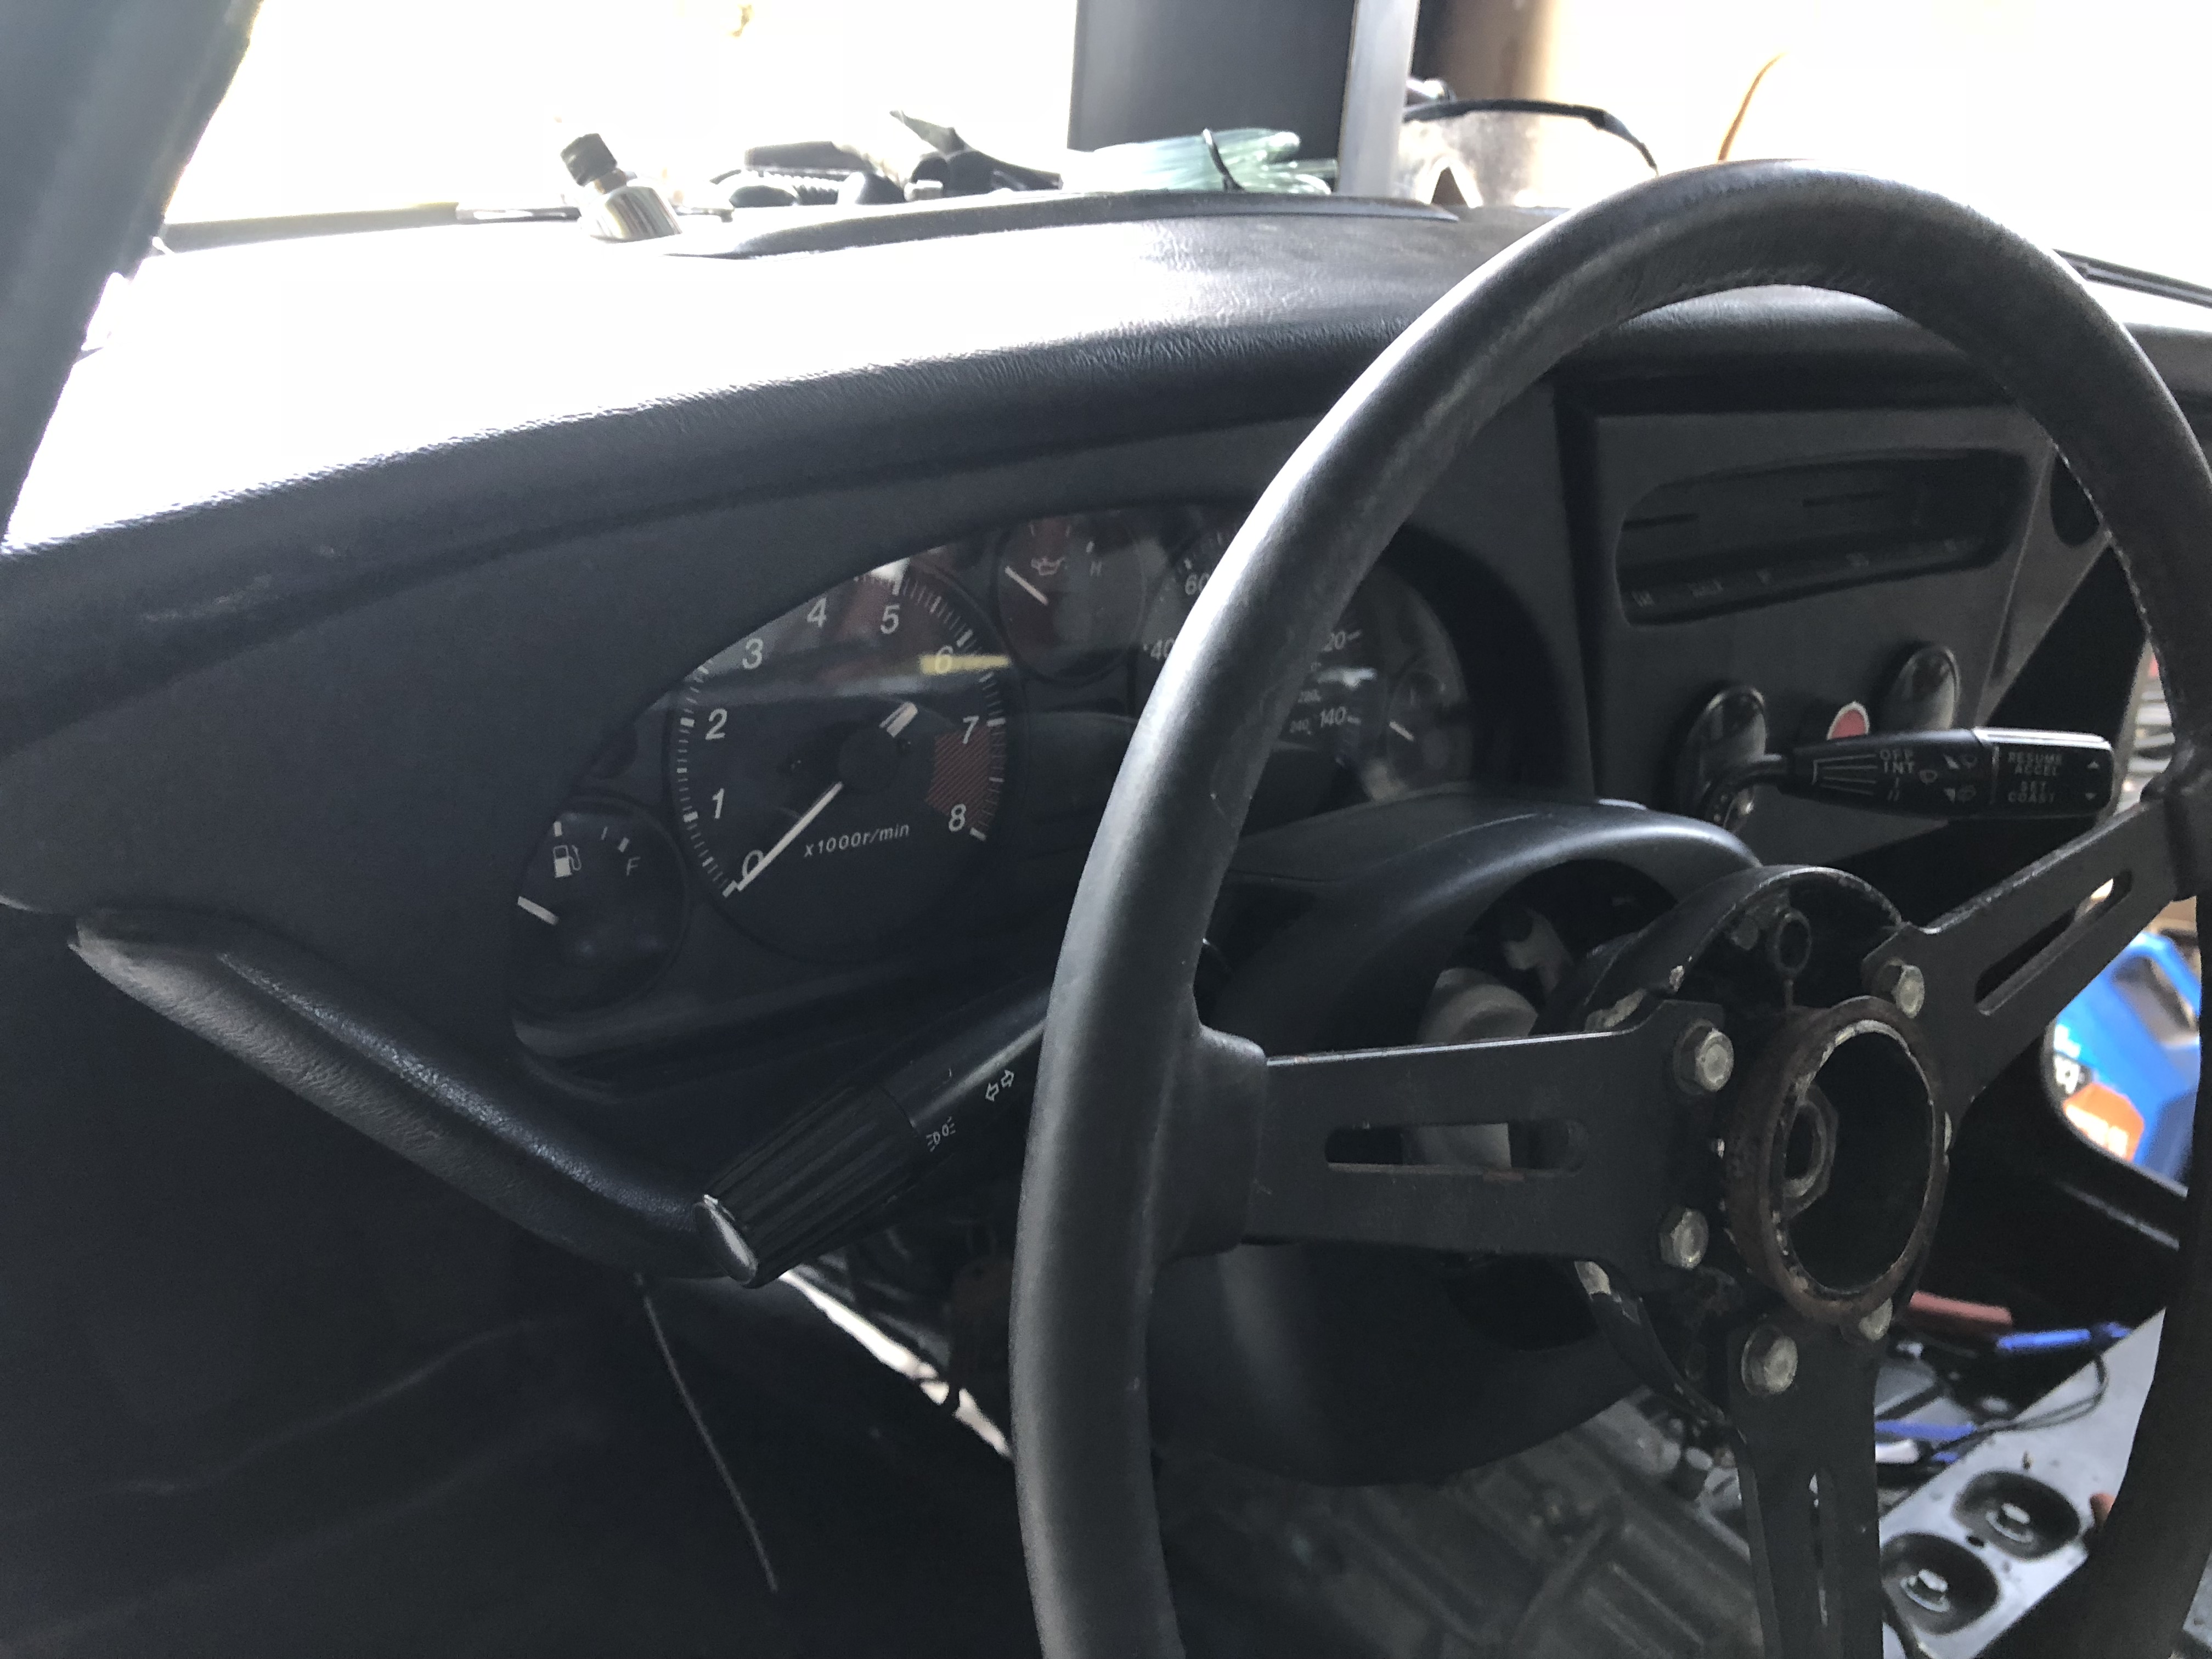
Got my steering sorted today, built brackets for the column mounts (as it is slightly lower due to my Miata dash panel and the lower rack) and replaced the front u-joint with a proper replacement. Also started on the wiring, with a good place to mount the engine fuse box and shortened the power harness. Finally also replaced the bent front drivers side upright. Thanks Carter for pointing this out, is is definitely bent!
Starting on the wiring part of the project, as much of this relates to packaging behind the dash. I have decided to keep the battery located in the stock location, which means I needed to take apart the Miata power harness so that the battery connections can be shortened. After much research, I just ordered a Braille 17 pound 475CCA battery , which will leave me room for my engine relay/fuse box in the stock battery box. Big weight savings verse a Group 24 battery for a standard Spitfire at 41 pounds!
Lots of crimp connections to do...... Looks like my new job will start on July 16th, so need to get a lot done over the next week.
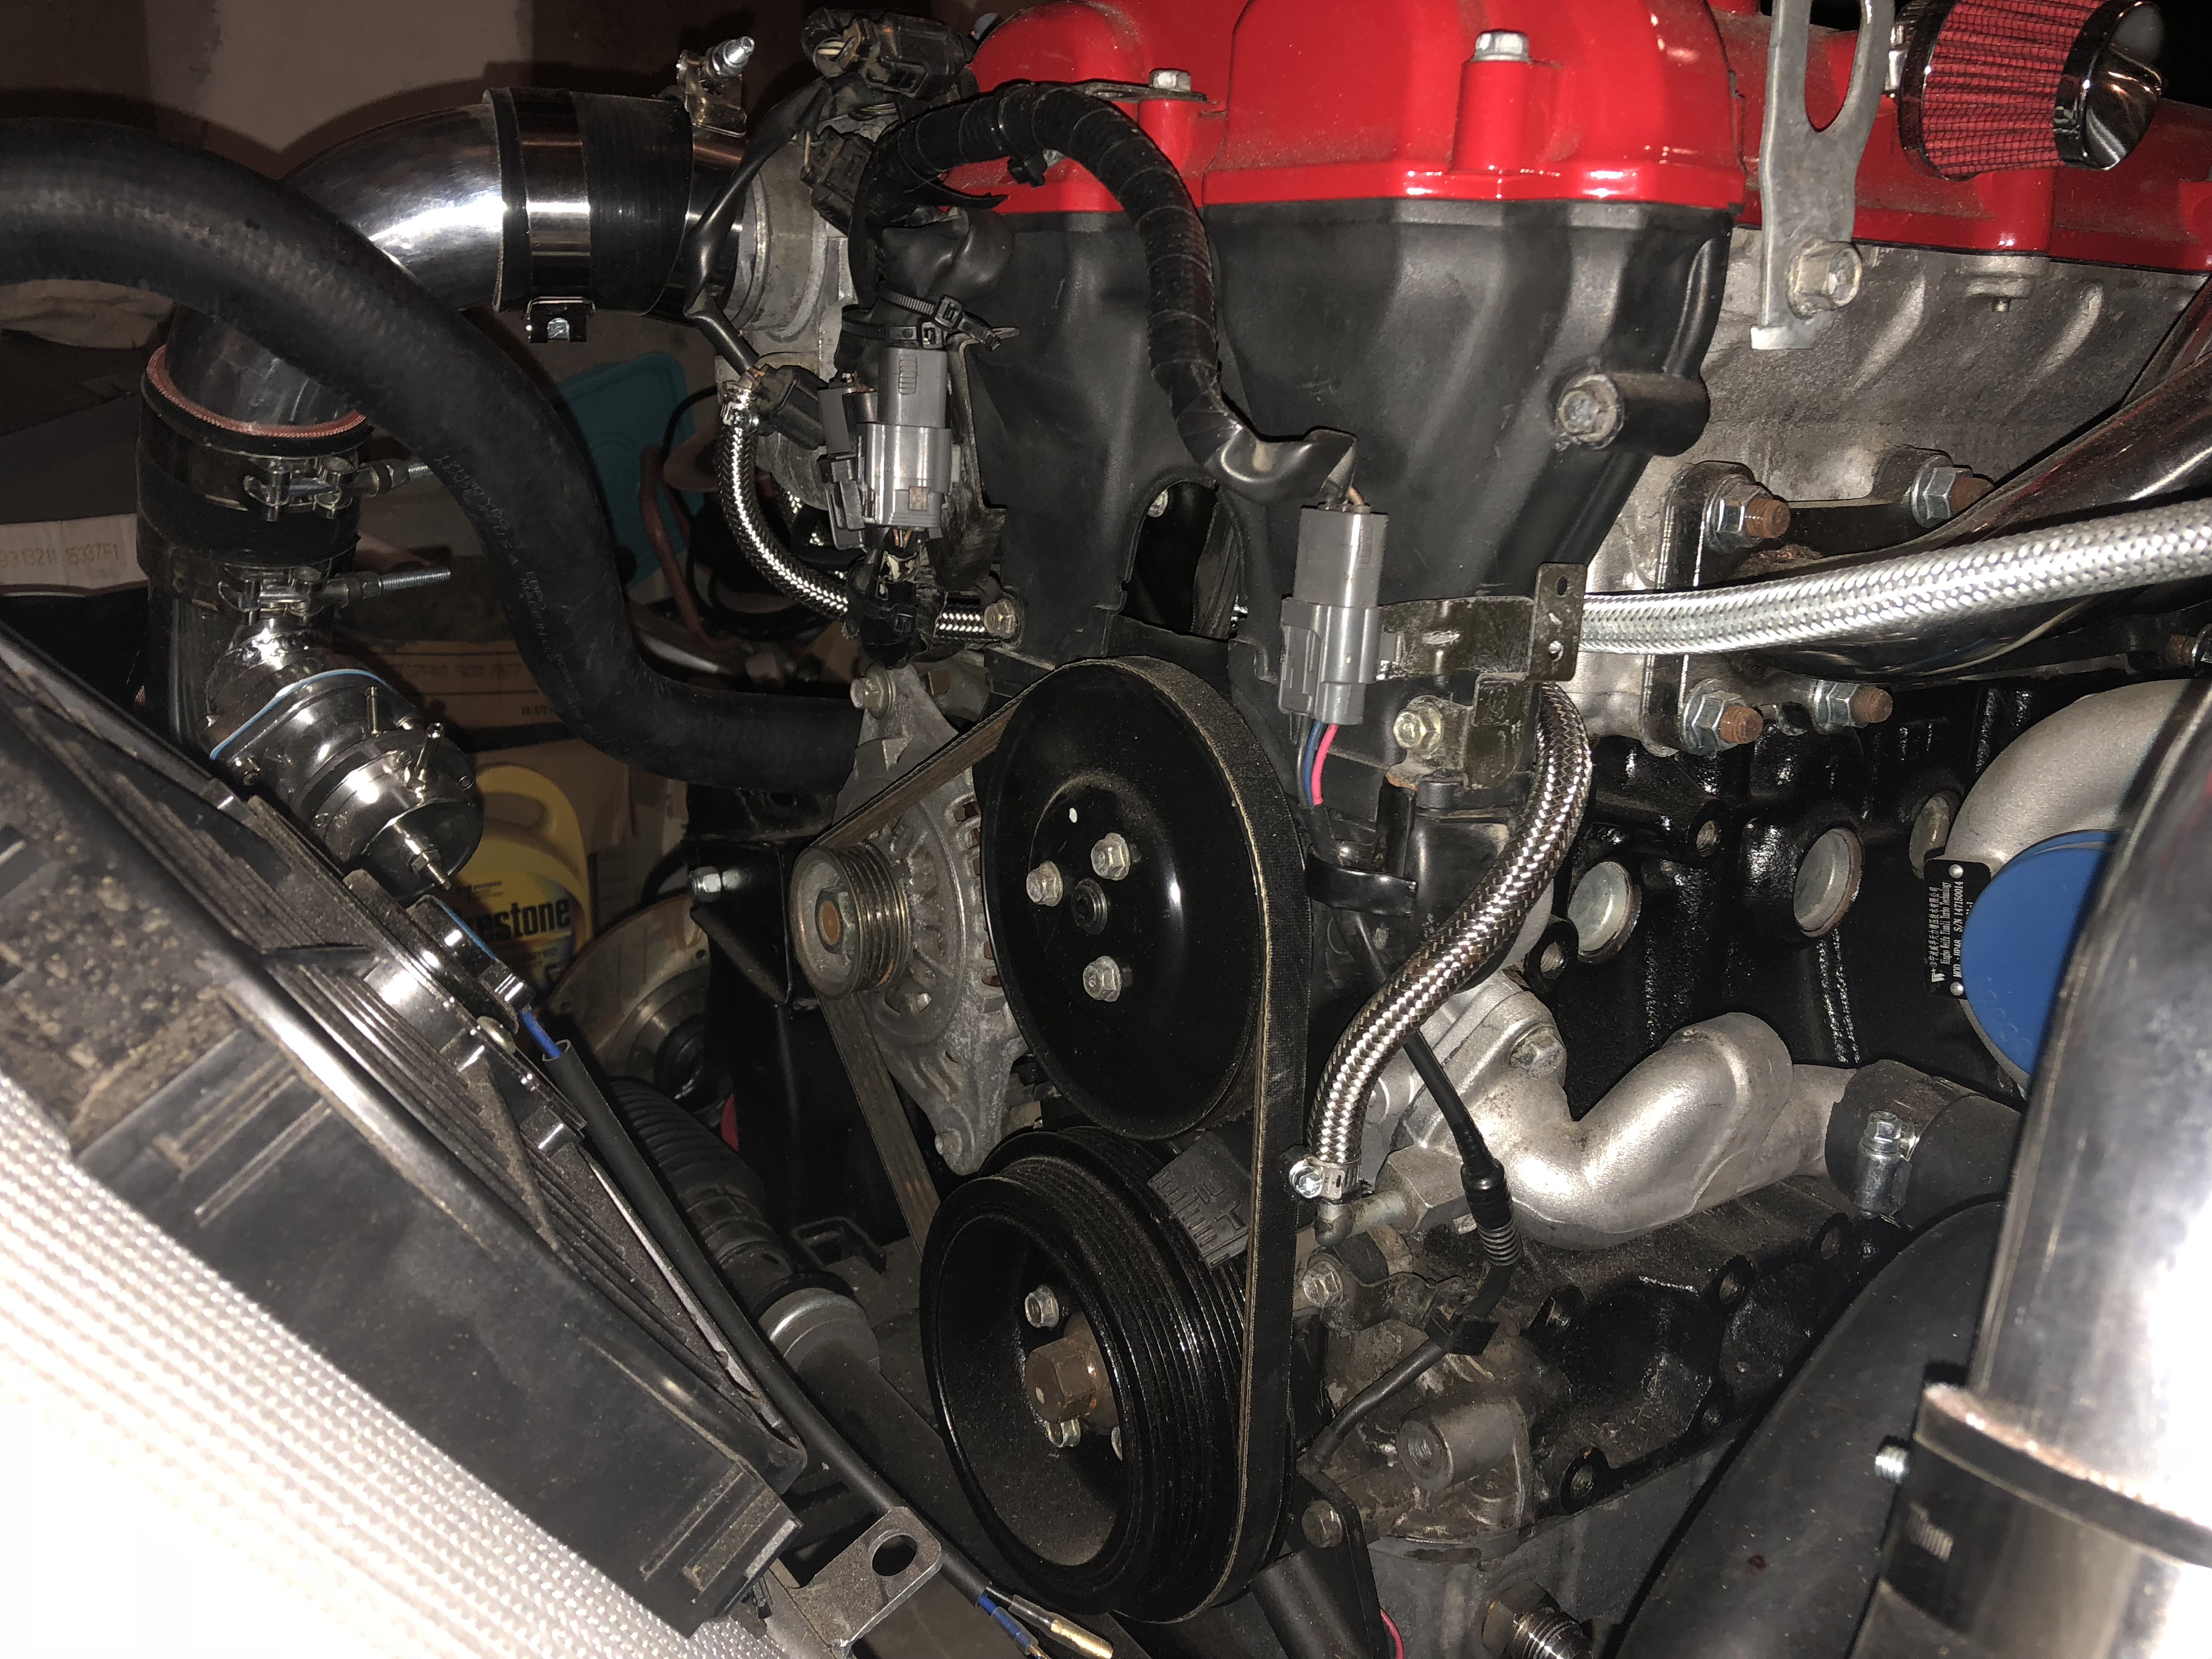
Got lots of "little details" completed today, now that I am routing the wiring and finishing up under the hood. I will need to run my clutch line tomorrow before I finish hooking up the starter and alternator, but have mounted the under hood relay box just below the battery box and shortened the harness and battery cables to work with the new Braille battery that should be in this week. I still need to finish the front brakes, and run the hard lines and rebuild and mount the calipers with the Hawk pads, but that is easy work. The bigger issue will be the 100+ crimps under the dash to connect all the Miata wiring to the various systems in the Spitfire as well as finish the wiring for the wideband O2 sensor and pin it for the Hydra. I also ran vacuum lines and capped unused ports and replaced the remaining water lines for the oil cooler, manifold and return line with new hose with braided Stainless Steel as a precaution. Now all the water lines are complete except for the one under the exhaust manifold. That one will need to have a flange welded on for the Spitfire Heater valve and then I can fill up the radiator. Things are tight under the hood, but much better access than a normal car or a Miata for that matter. I am happy with how it is looking and coming together. One thing I will need to build is a front shock tower brace. There is plenty of room in front of the engine/radiator to run one. Appreciate any opinions on how best to do it, as I was just going to make a front bar and brace across the angles and bolt it to the shock towers either with plate that picks up the shock bolts, or bolt it to the front of the shock towers on either side of the shock in the existing holes?
Car should be ready to start up and tuning next week as I will have all week to work on it. Start my new job on 7/16/18. I figure I can mess around with the seats and interior later, as I am planning to take the car to the Roadster Factory Summer Party in mid-August, so plenty of time if it is running in the next 10 days.
manana
New Reader
7/10/18 3:30 p.m.
Hey Dave, I just spent a couple hours updating my site with info on my Turret Brace.
http://stevew10.wixsite.com/spit16/turret-brace
You can easily simplify what I've done to clean it up a bit. Wish I had something to look at before putting mine together.
The big difference I think will be that your engine is further forward than mine and not sure if you've got anything else in the way for such a substantial brace?
Hope it helps.

Thanks Steve, I knew someone would have done this, I can easily replicate something similar as I have a lot of room and just confirmed that my intercooler pipes do not interfere. Thanks for updating your web site with the details very helpful.
manana
New Reader
7/11/18 10:36 a.m.
No sweat. Awhile ago another guy asked me how I did my accelerator cable, so that's kinda new too. If you haven't yet looked at it, you'll be pleasantly surprised as I think the 1.8 is almost, if not, identical... the easiest part of the build!
http://stevew10.wixsite.com/spit16/accelerator-pedal-and-cable
Wiring going smoother than expected. I have all the harnesses in place now and the main harness wired to the dash panel, ignition switch, starter button, boost and A/F ratio gauges and brake switches. I'll get the dash panels fastened tomorrow and the heater controls in place and then can work on the front light harness and splicing in the rear lights into the Miata harness. The Miata harness has fit surprisingly well, I'll have to extend the rear section so that the connection block is inside the rear fender rather than in the passenger compartment, but it has been really smooth. I am particularly happy that the wiring is all tucked away under the dash and I was able to make a bracket to mount the interior fuse box as well as the diagnostic port (not that that will be used since I have the Hydra), but it is all installed and quite clean. I'll post more pictures tomorrow.
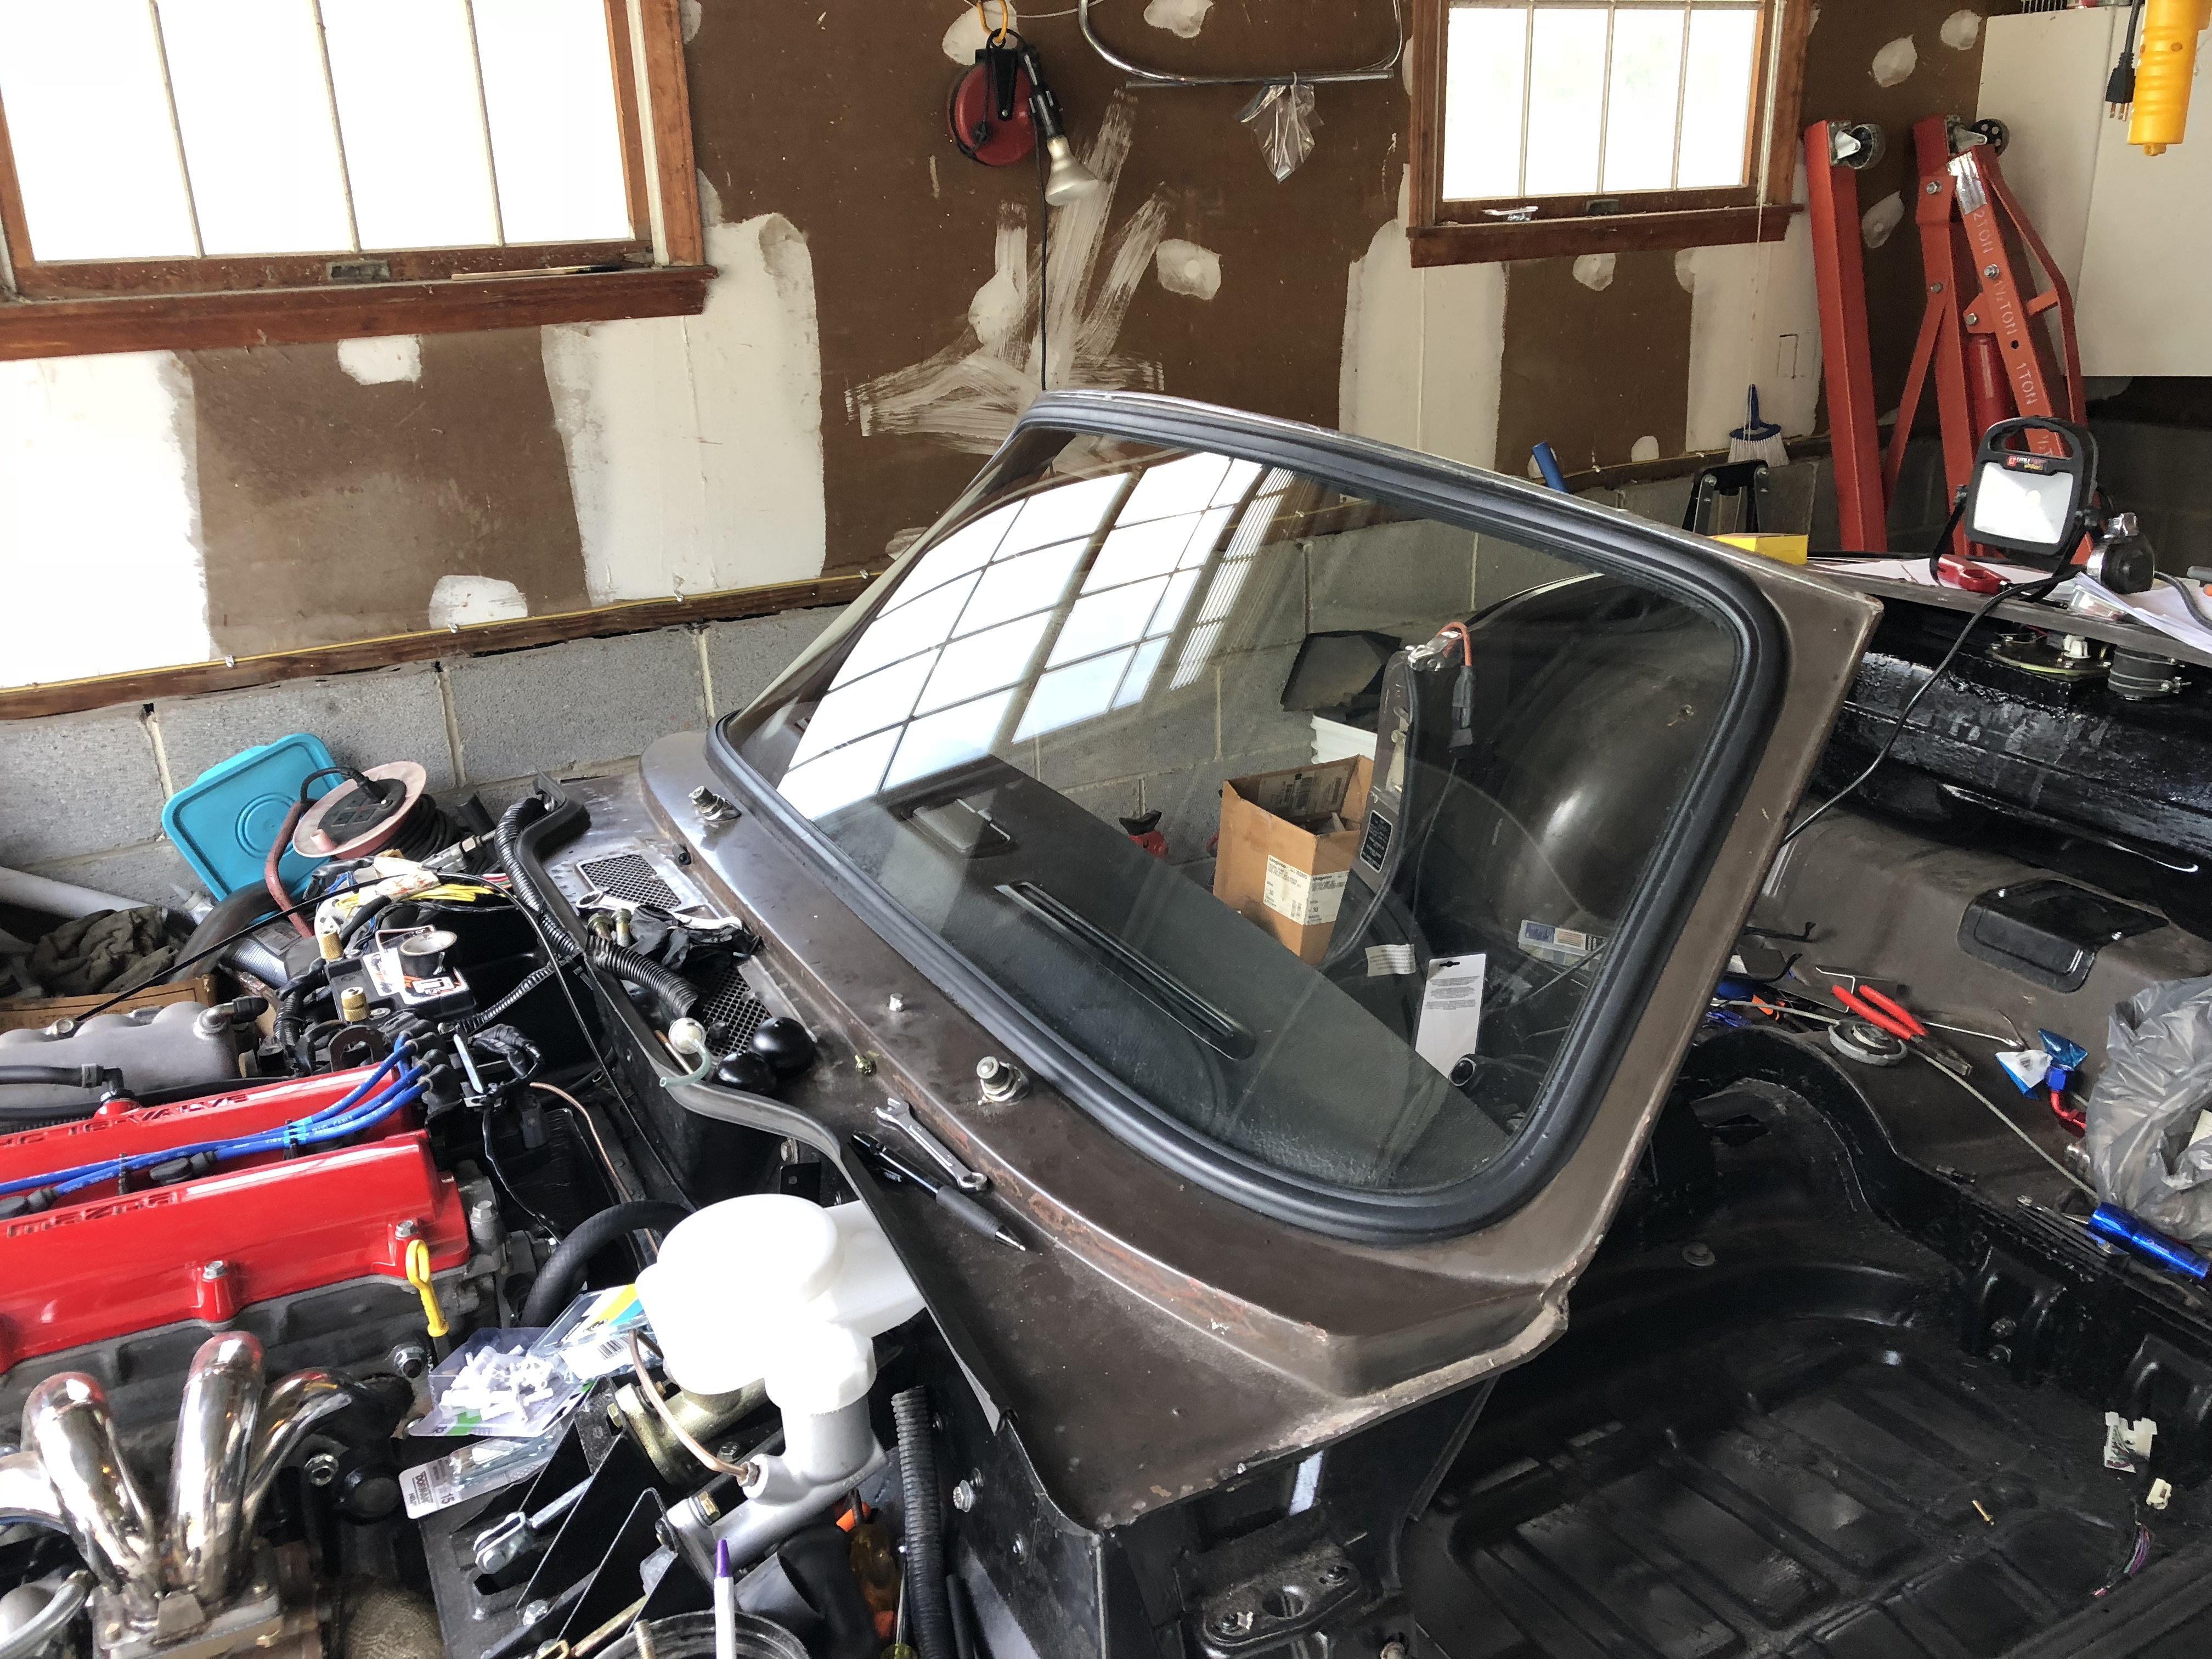
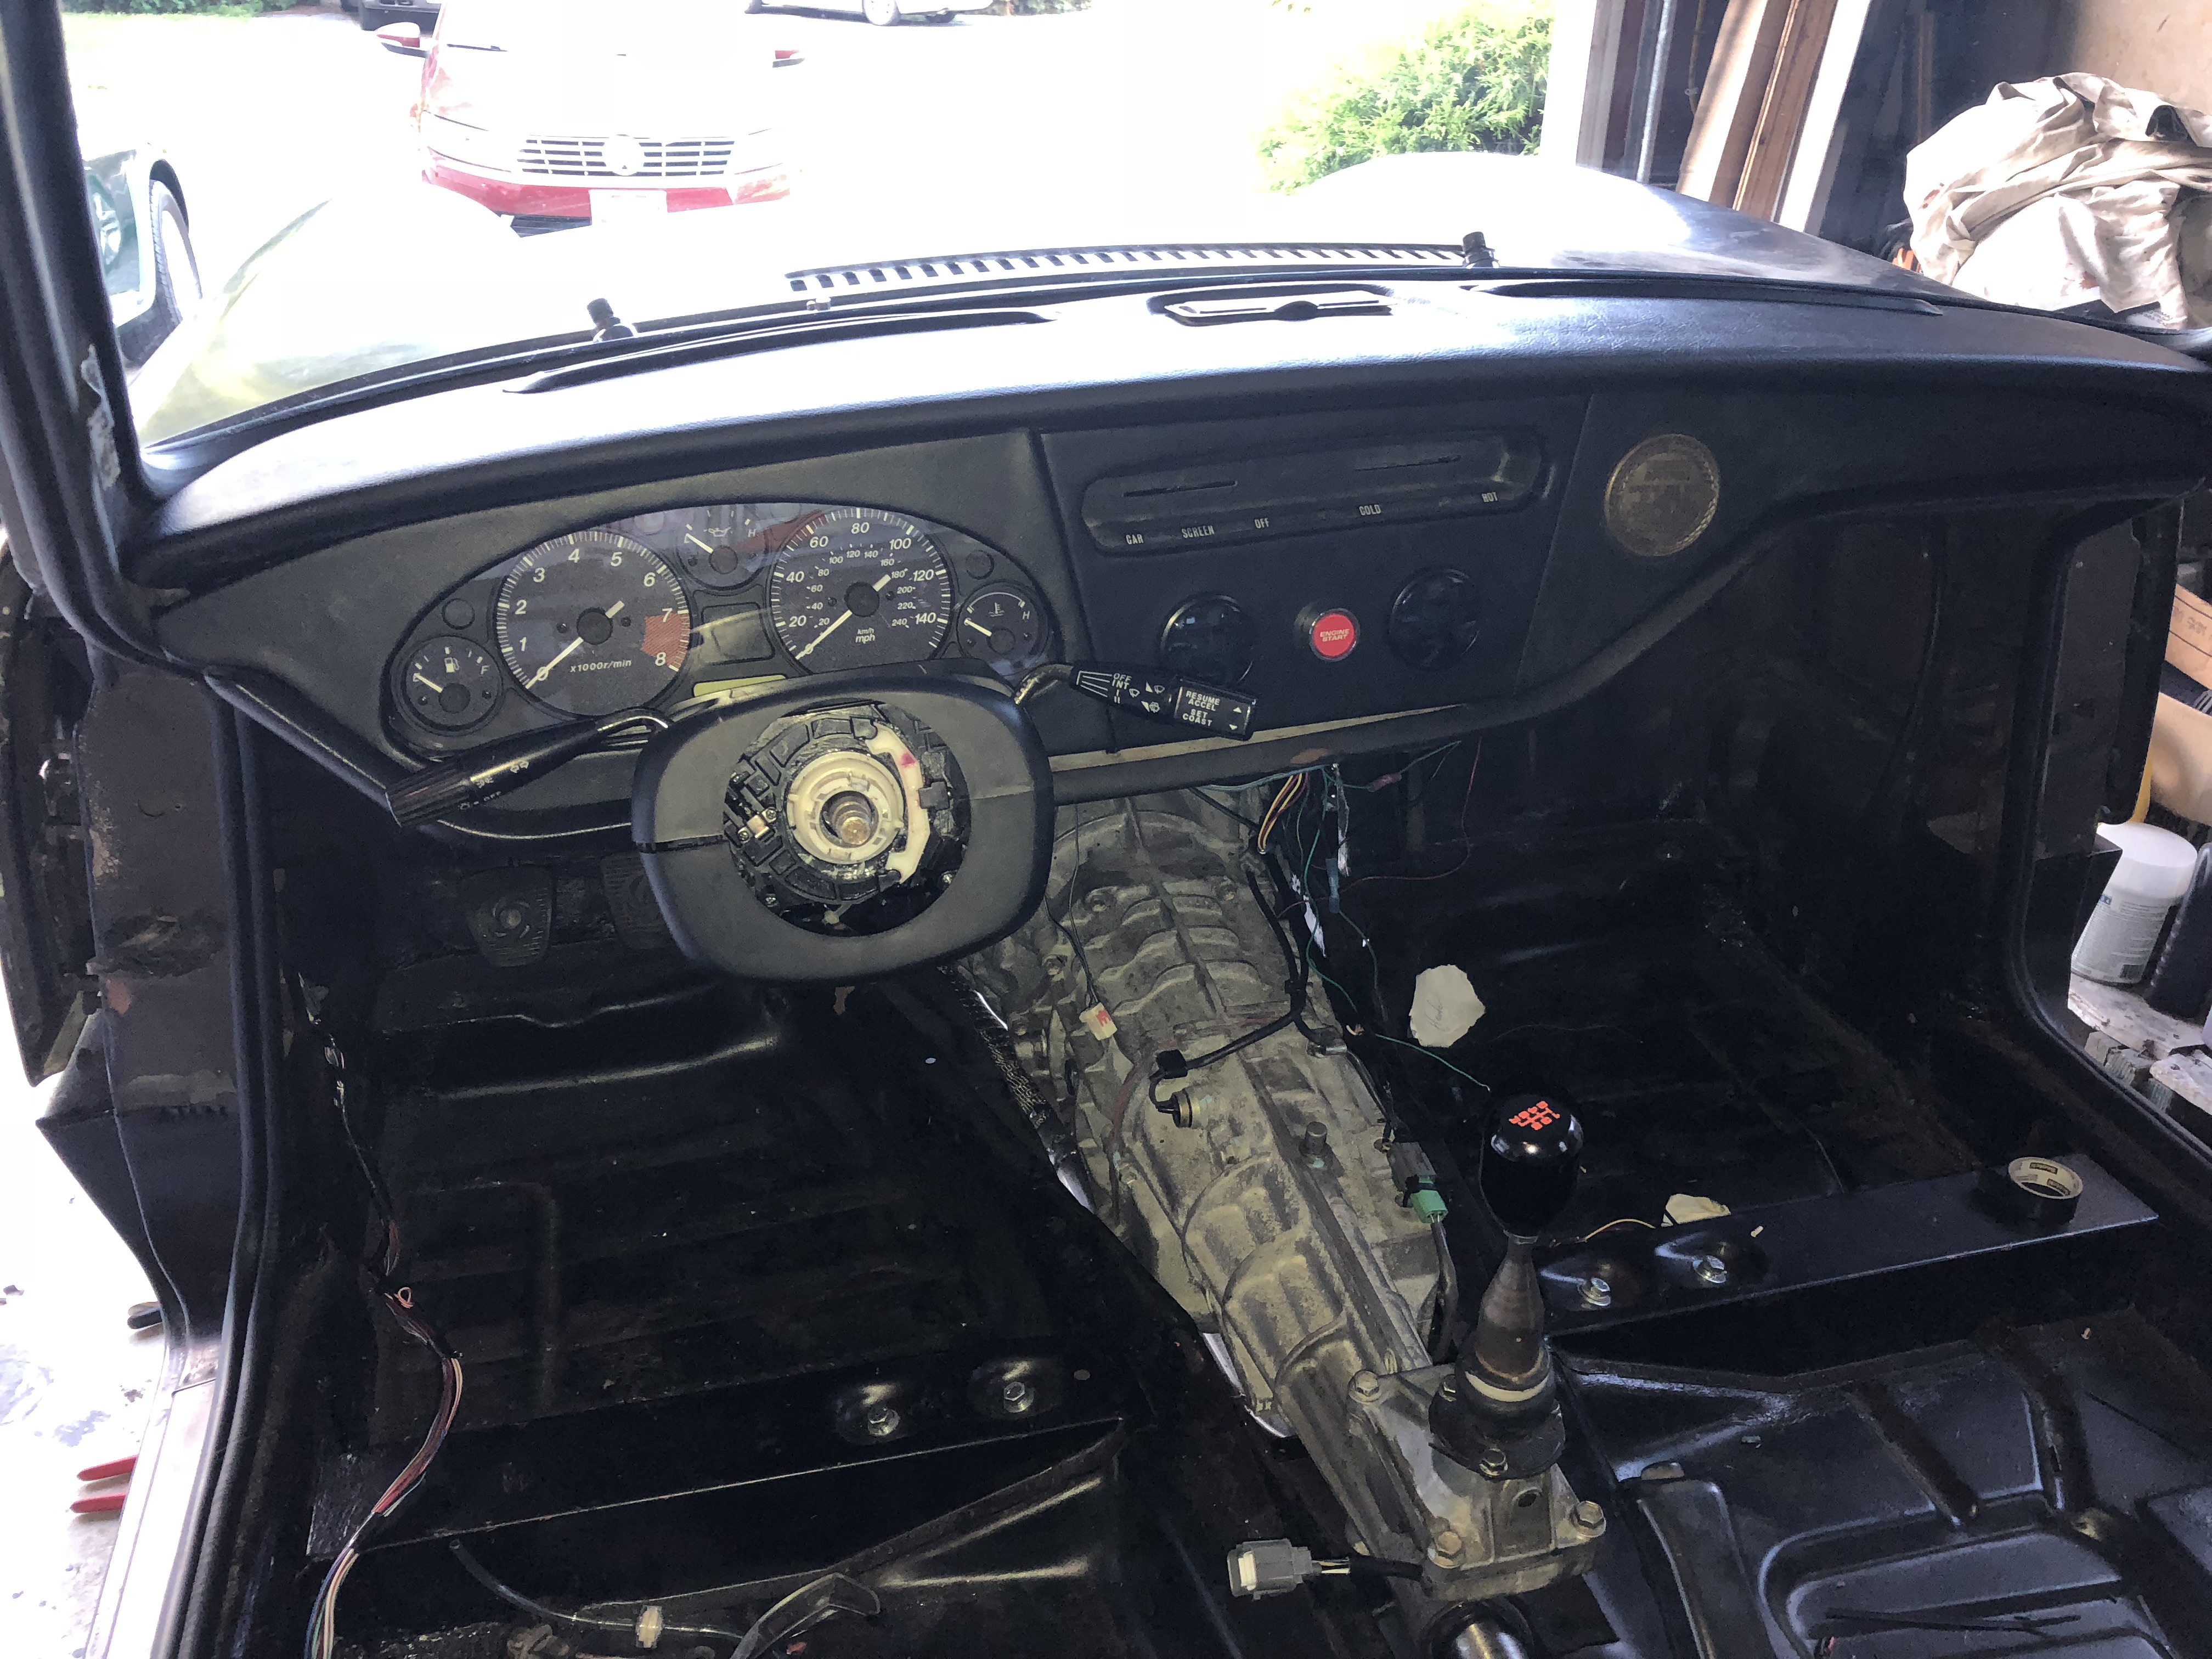
Dash is wired up, will fasten it down tomorrow after I install the Hydra and wiring harness and install the heater controls. New windshield is installed and the hood is back on the car so I can complete the front harness. Wiring is 75% done, basically just lights, horn and cooling fan left, should all be done tomorrow, if I get the USB-Serial cable by the weekend, likely I will be able to set up the Hydra and see if it starts up! Did the wideband wiring to the hydra harness so just a matter of plugging it in and mounting the ECU.
Awesome! That's super-exciting!
Nice work and glad it's coming along so well


