


Going back to the naming for these Triumphs, since I also own a Rover V8 powered Triumph TR4A, I guess I am qualified to start a new one.... perhaps TriumphSpeed or Spitfire1800+

Going back to the naming for these Triumphs, since I also own a Rover V8 powered Triumph TR4A, I guess I am qualified to start a new one.... perhaps TriumphSpeed or Spitfire1800+
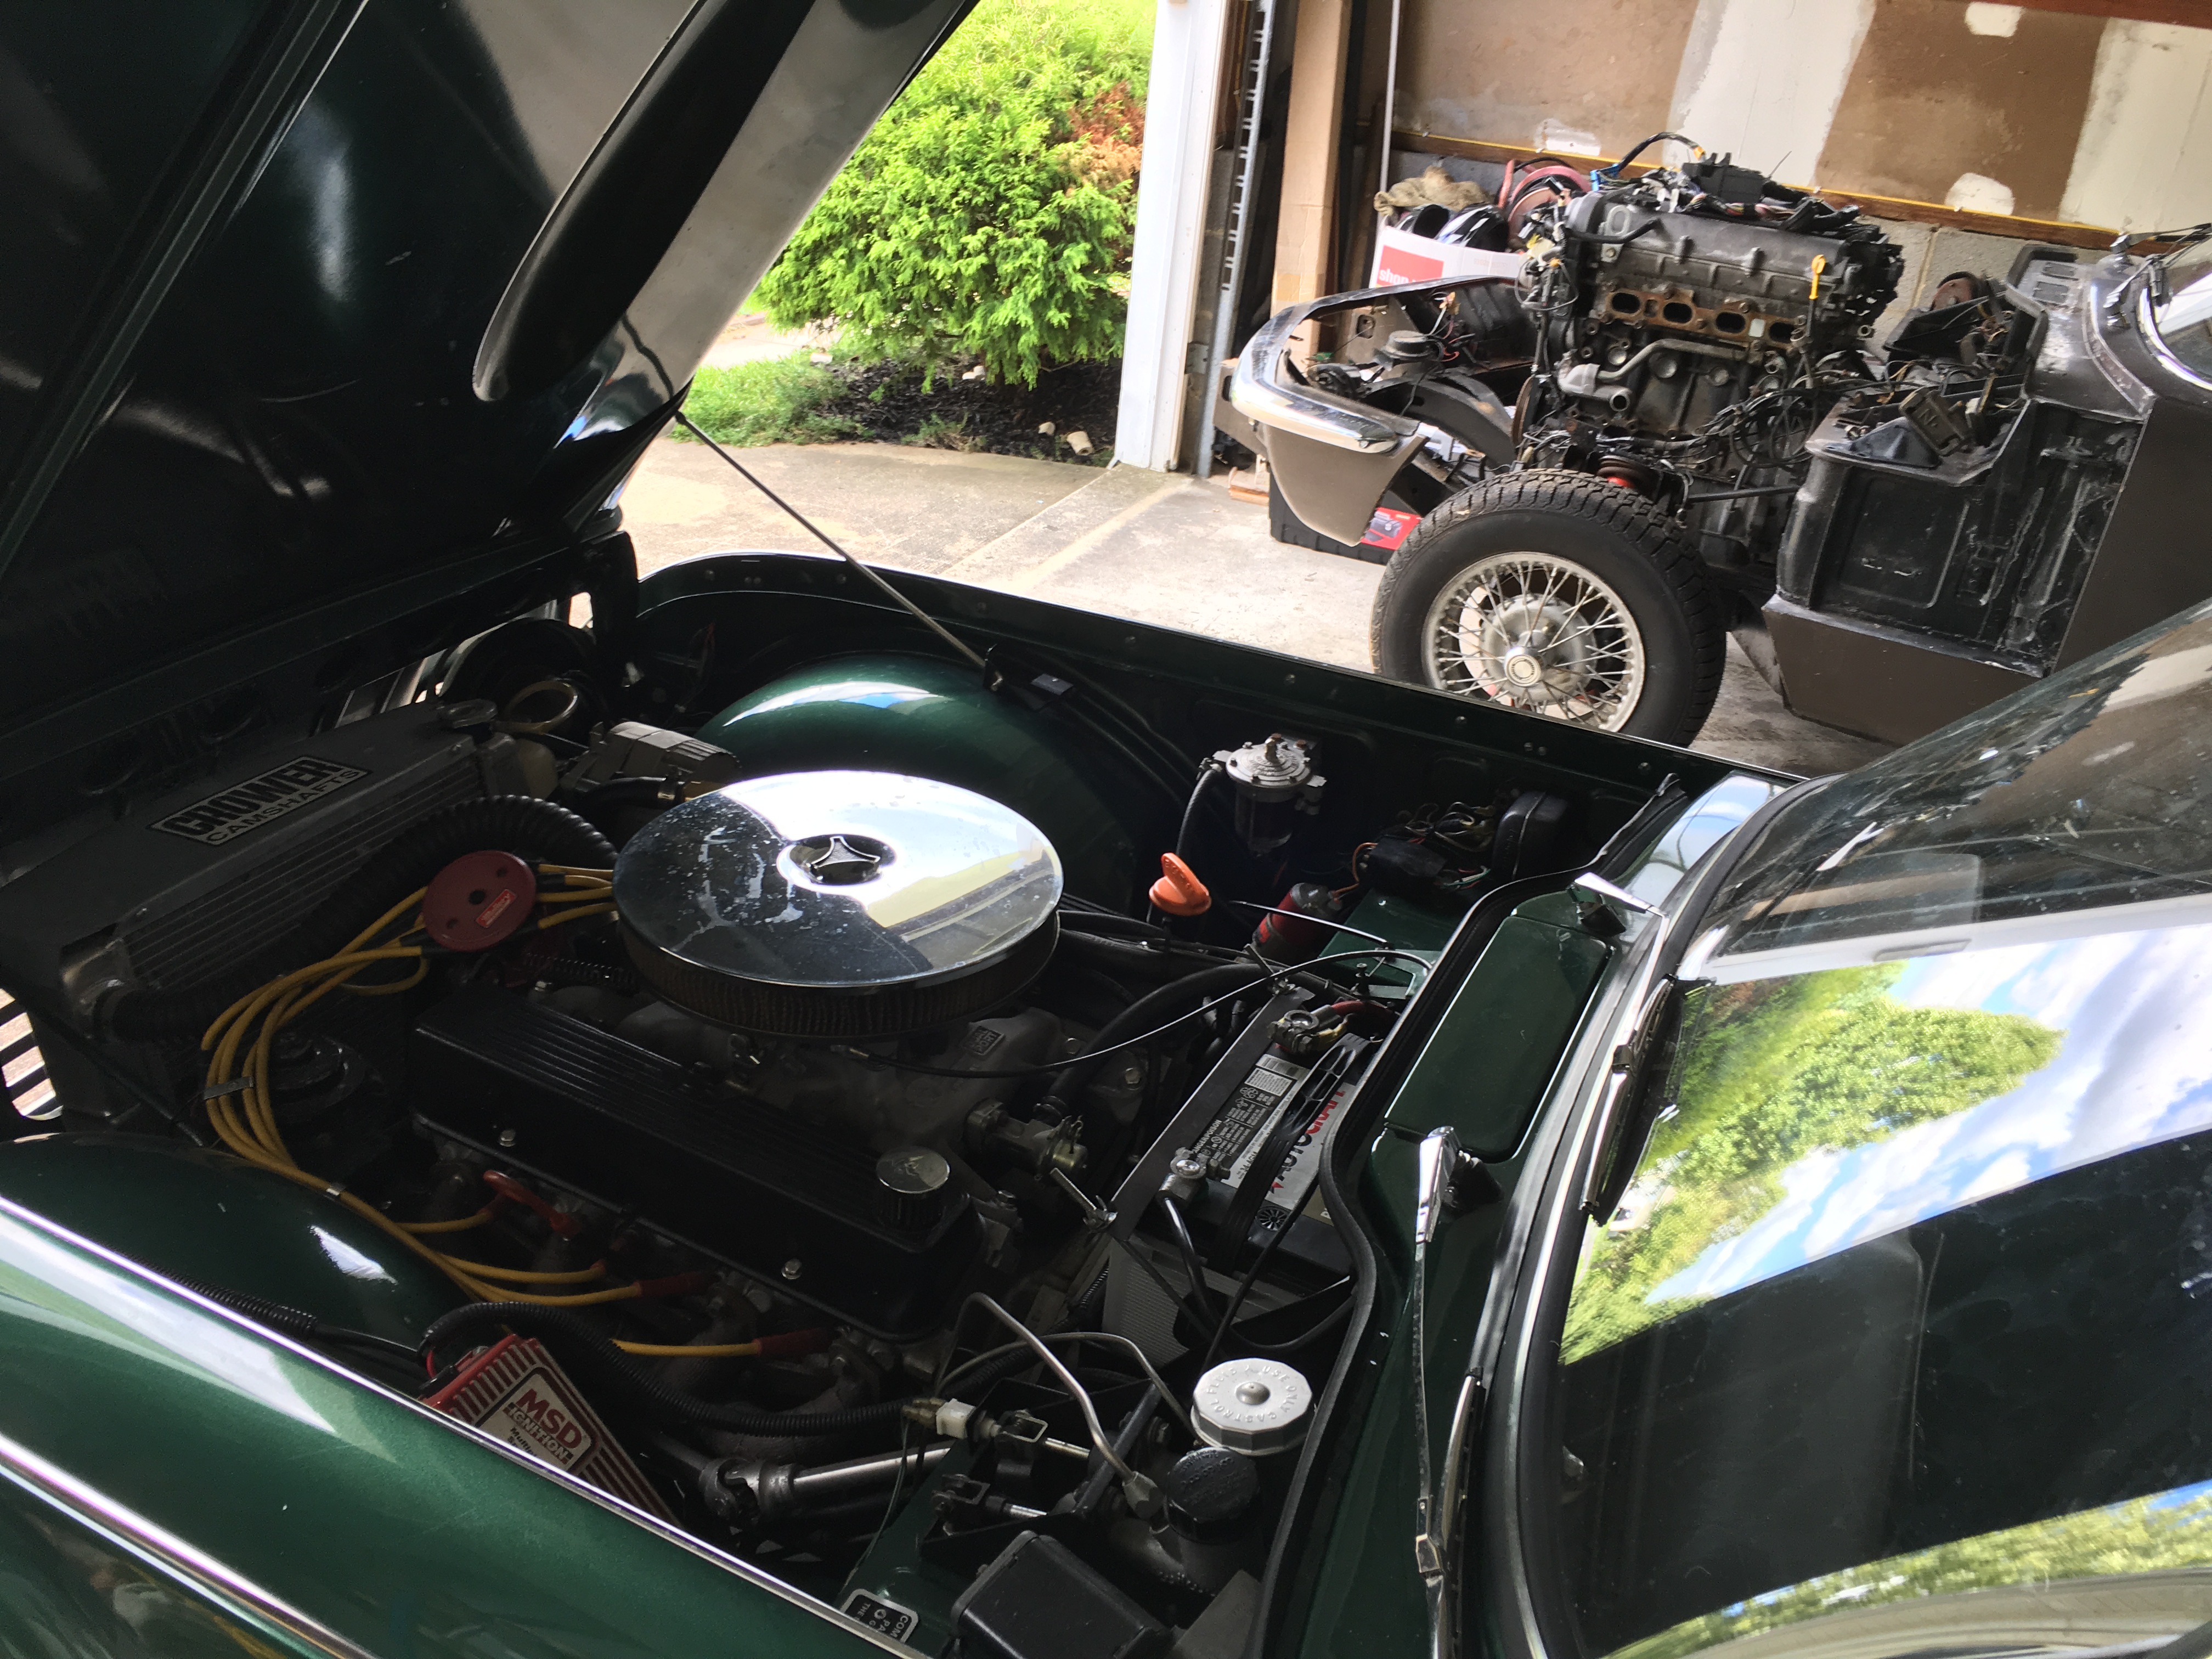
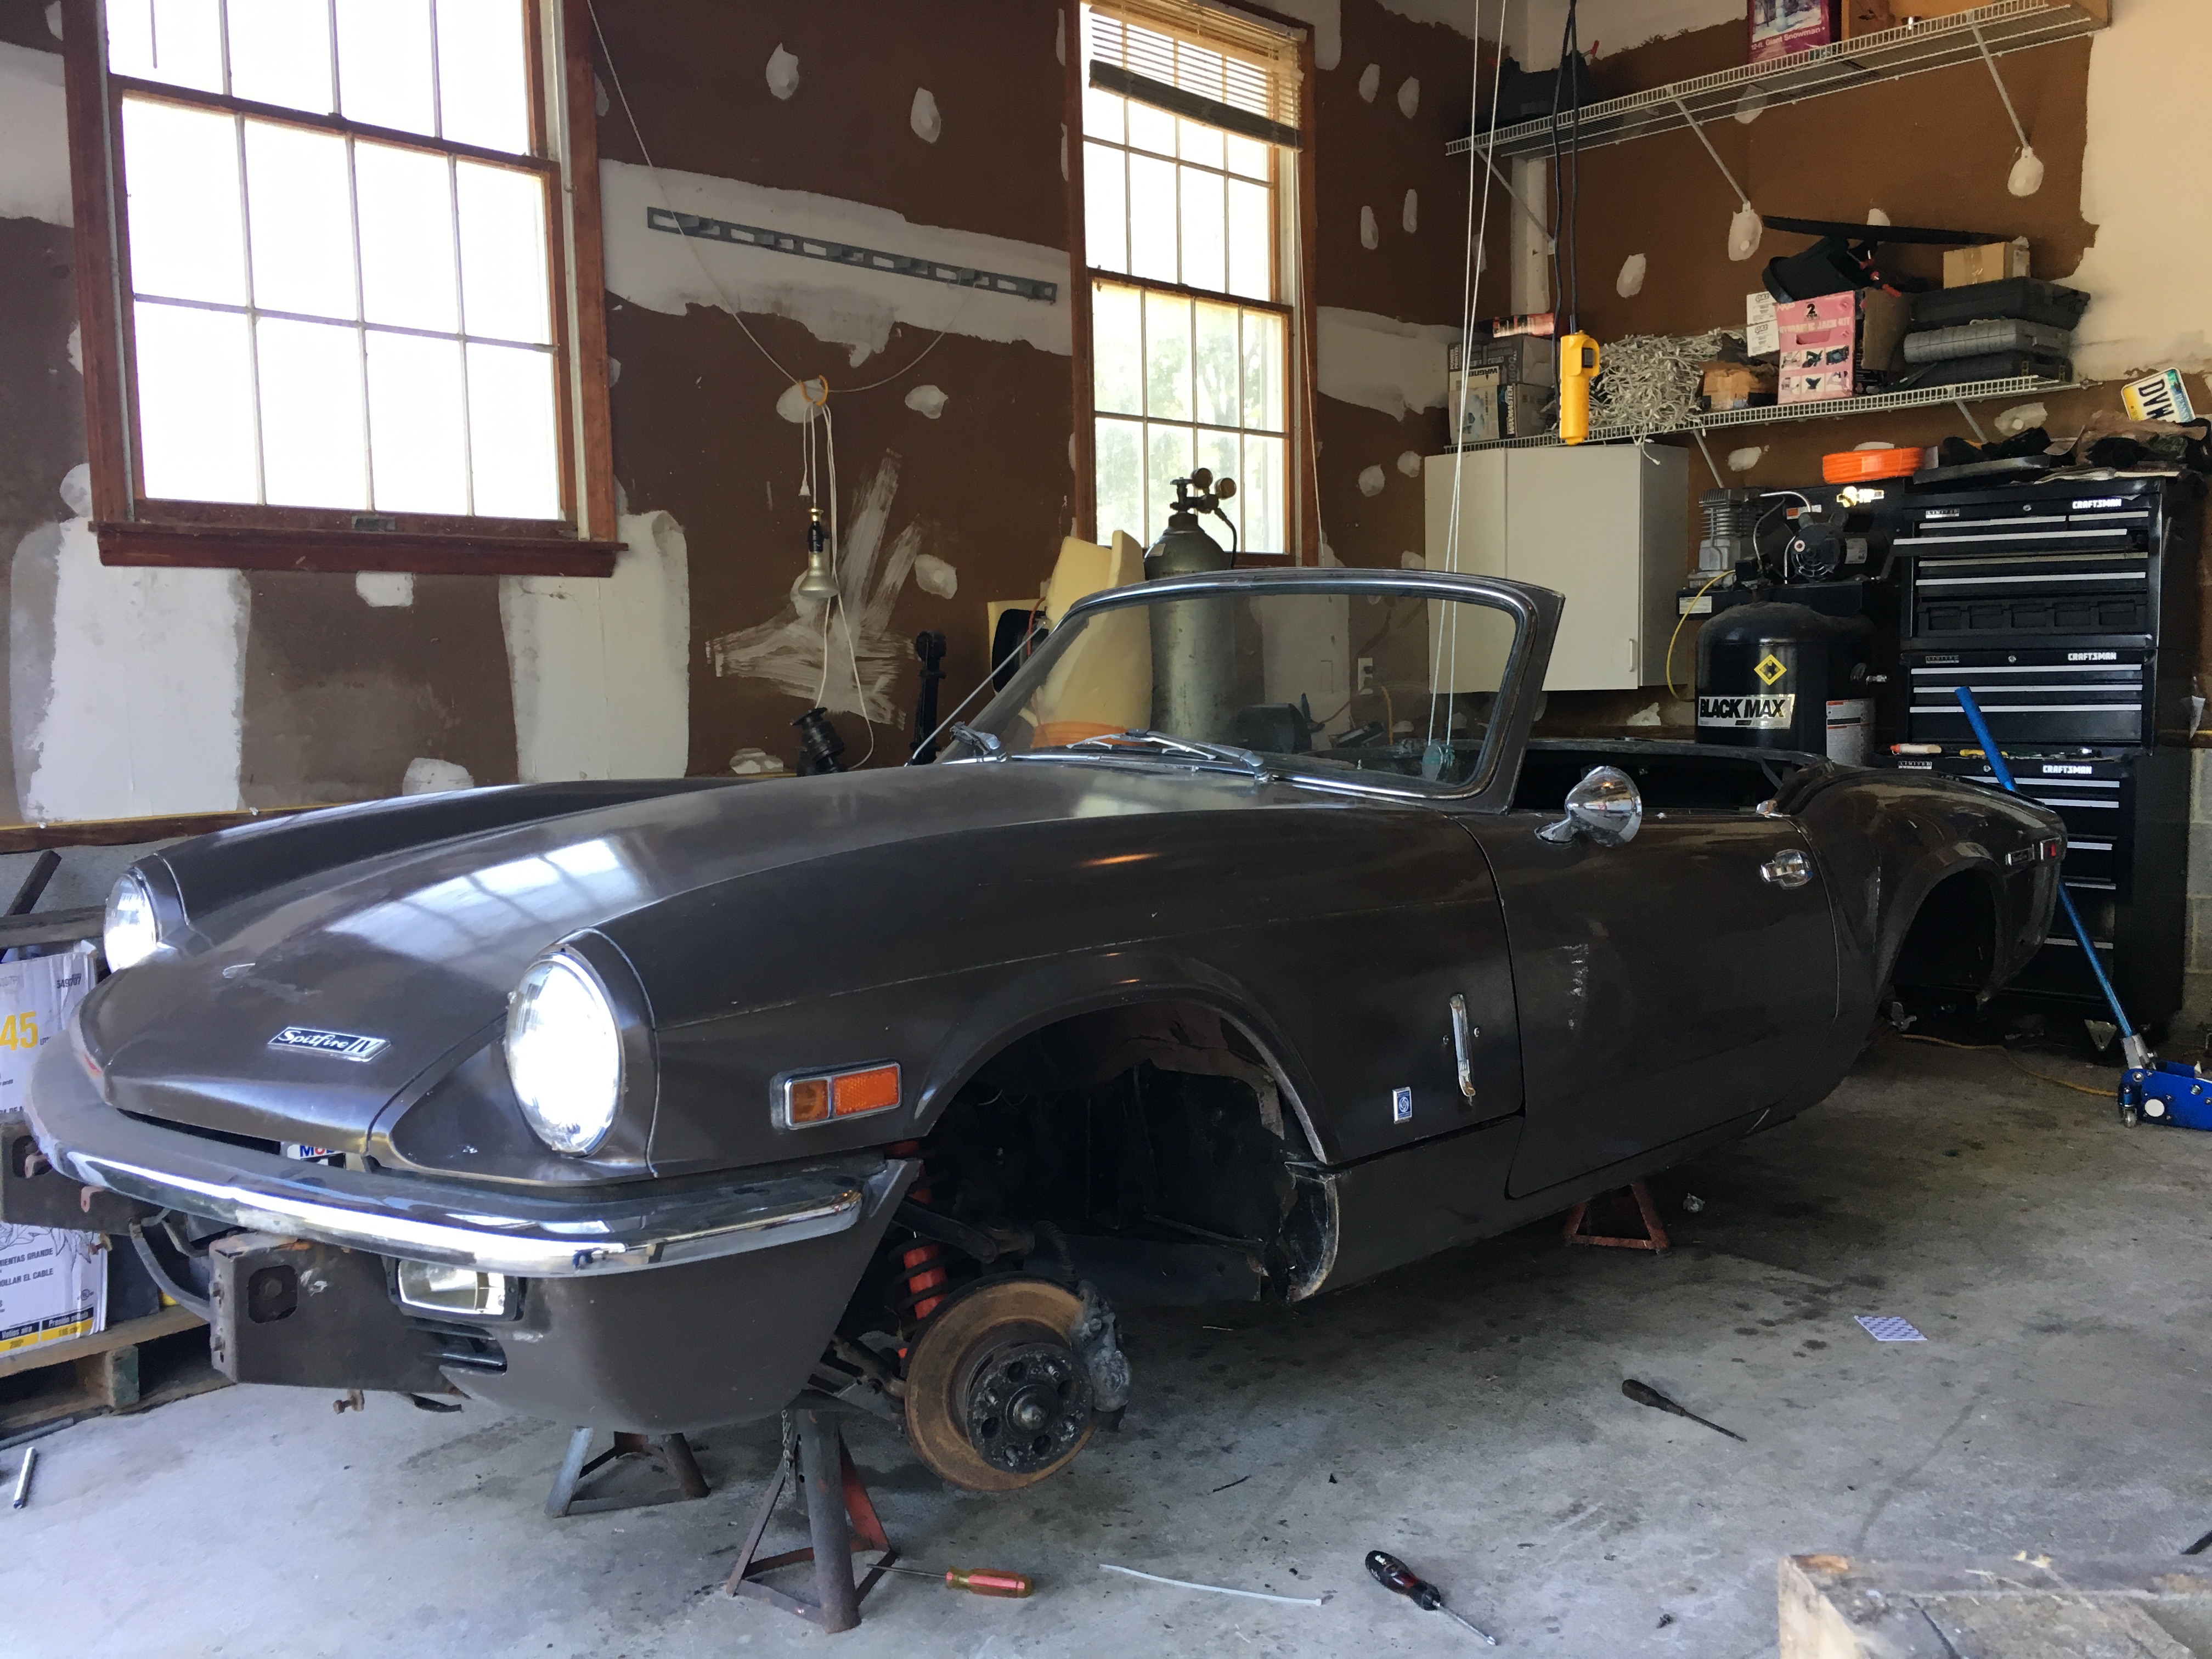
Thanks, yes amazing what sitting in a garage since 1980 does for the bodywork ![]()
And yes, the chassis and underlying car will be completely restored to better than new. I will do the interior and prep the floors and rest of the car for long term use, but won't paint it for now, but it will likely get painted down the road. But I promise it will be a clean build and much less of an actual rat rod, much more of a survivor with some fire under the hood and the chassis to match it!
So my delay in posting progress related to the necessity to go to Harbor Freight and pick this up. Installed it yesterday after I ran two 2x12x10 stringers between 6 of the trusses in the ceiling. Now I can lift the body up or down as needed as I work on the final engine location. I will lift the body off today and get started on the chassis mods needed to fit the 6 speed in between the frame rails and the engine lowered in the front so the bonnet will close. 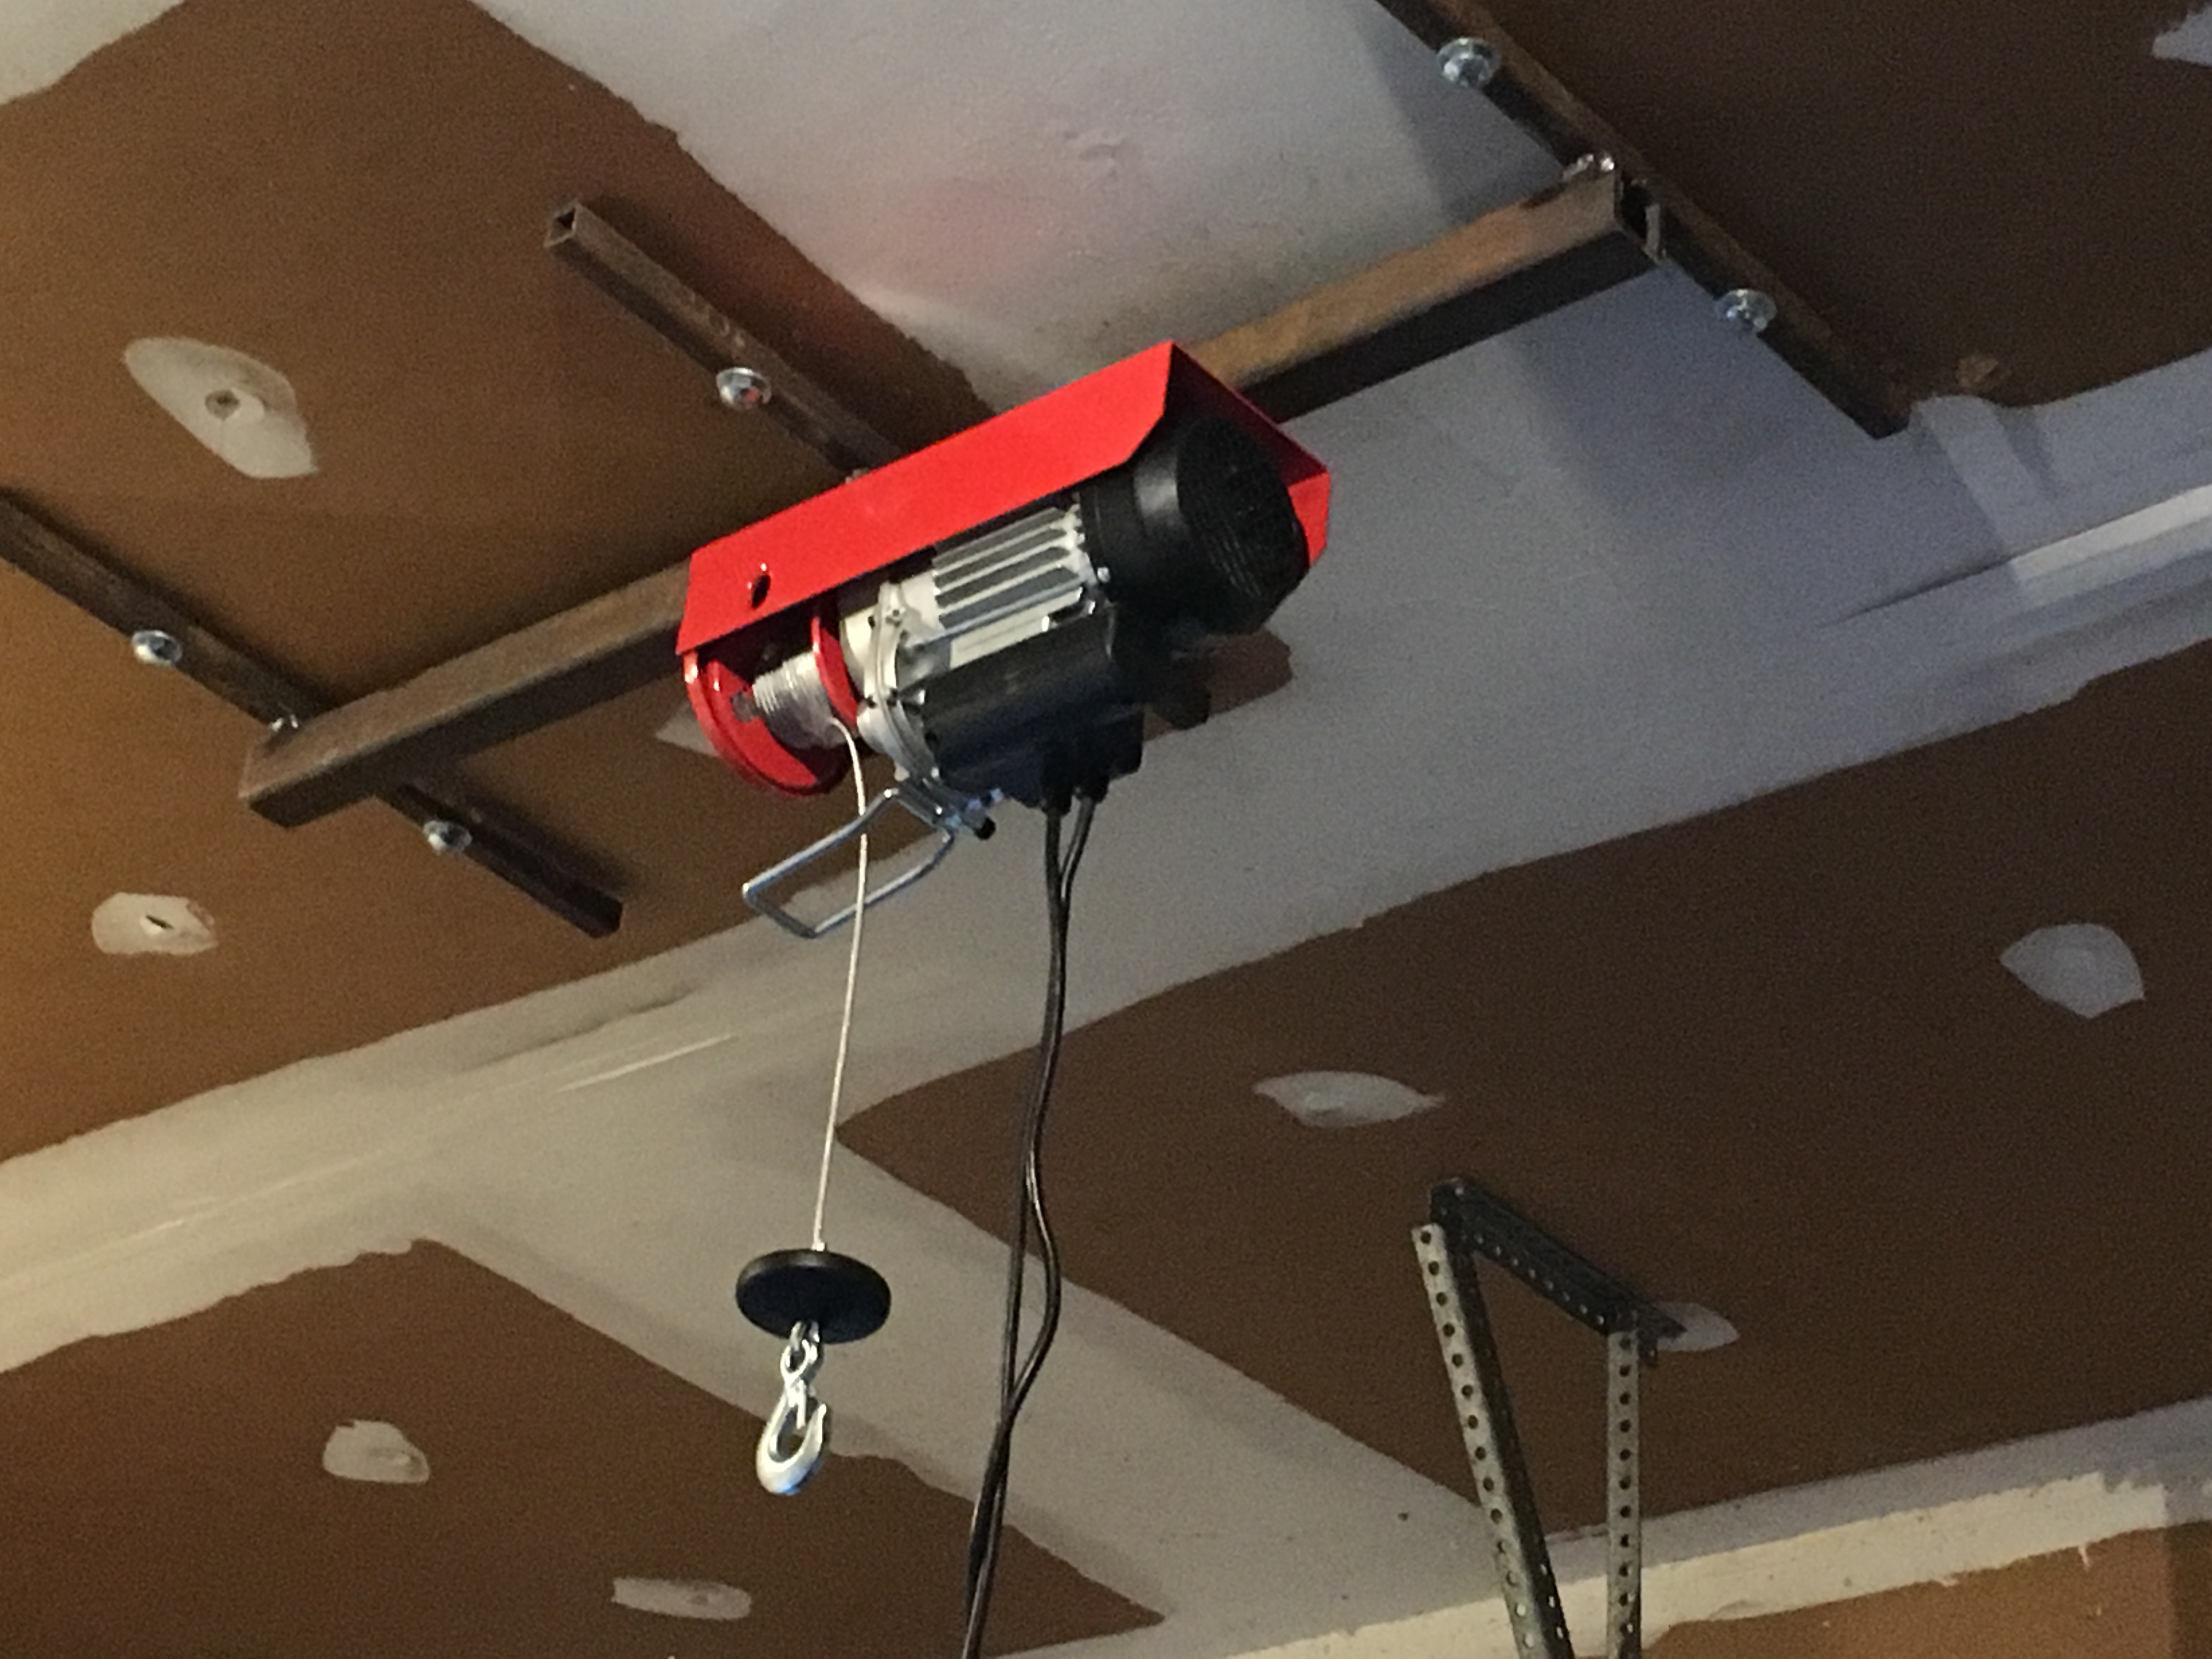

That's a great idea. Does the hoist slide along the steel beam or is it hard mounted?
The hoist can slide along the beam, but is bolted down where you locate it (so can be moved for different jobs but fixed when you use it).
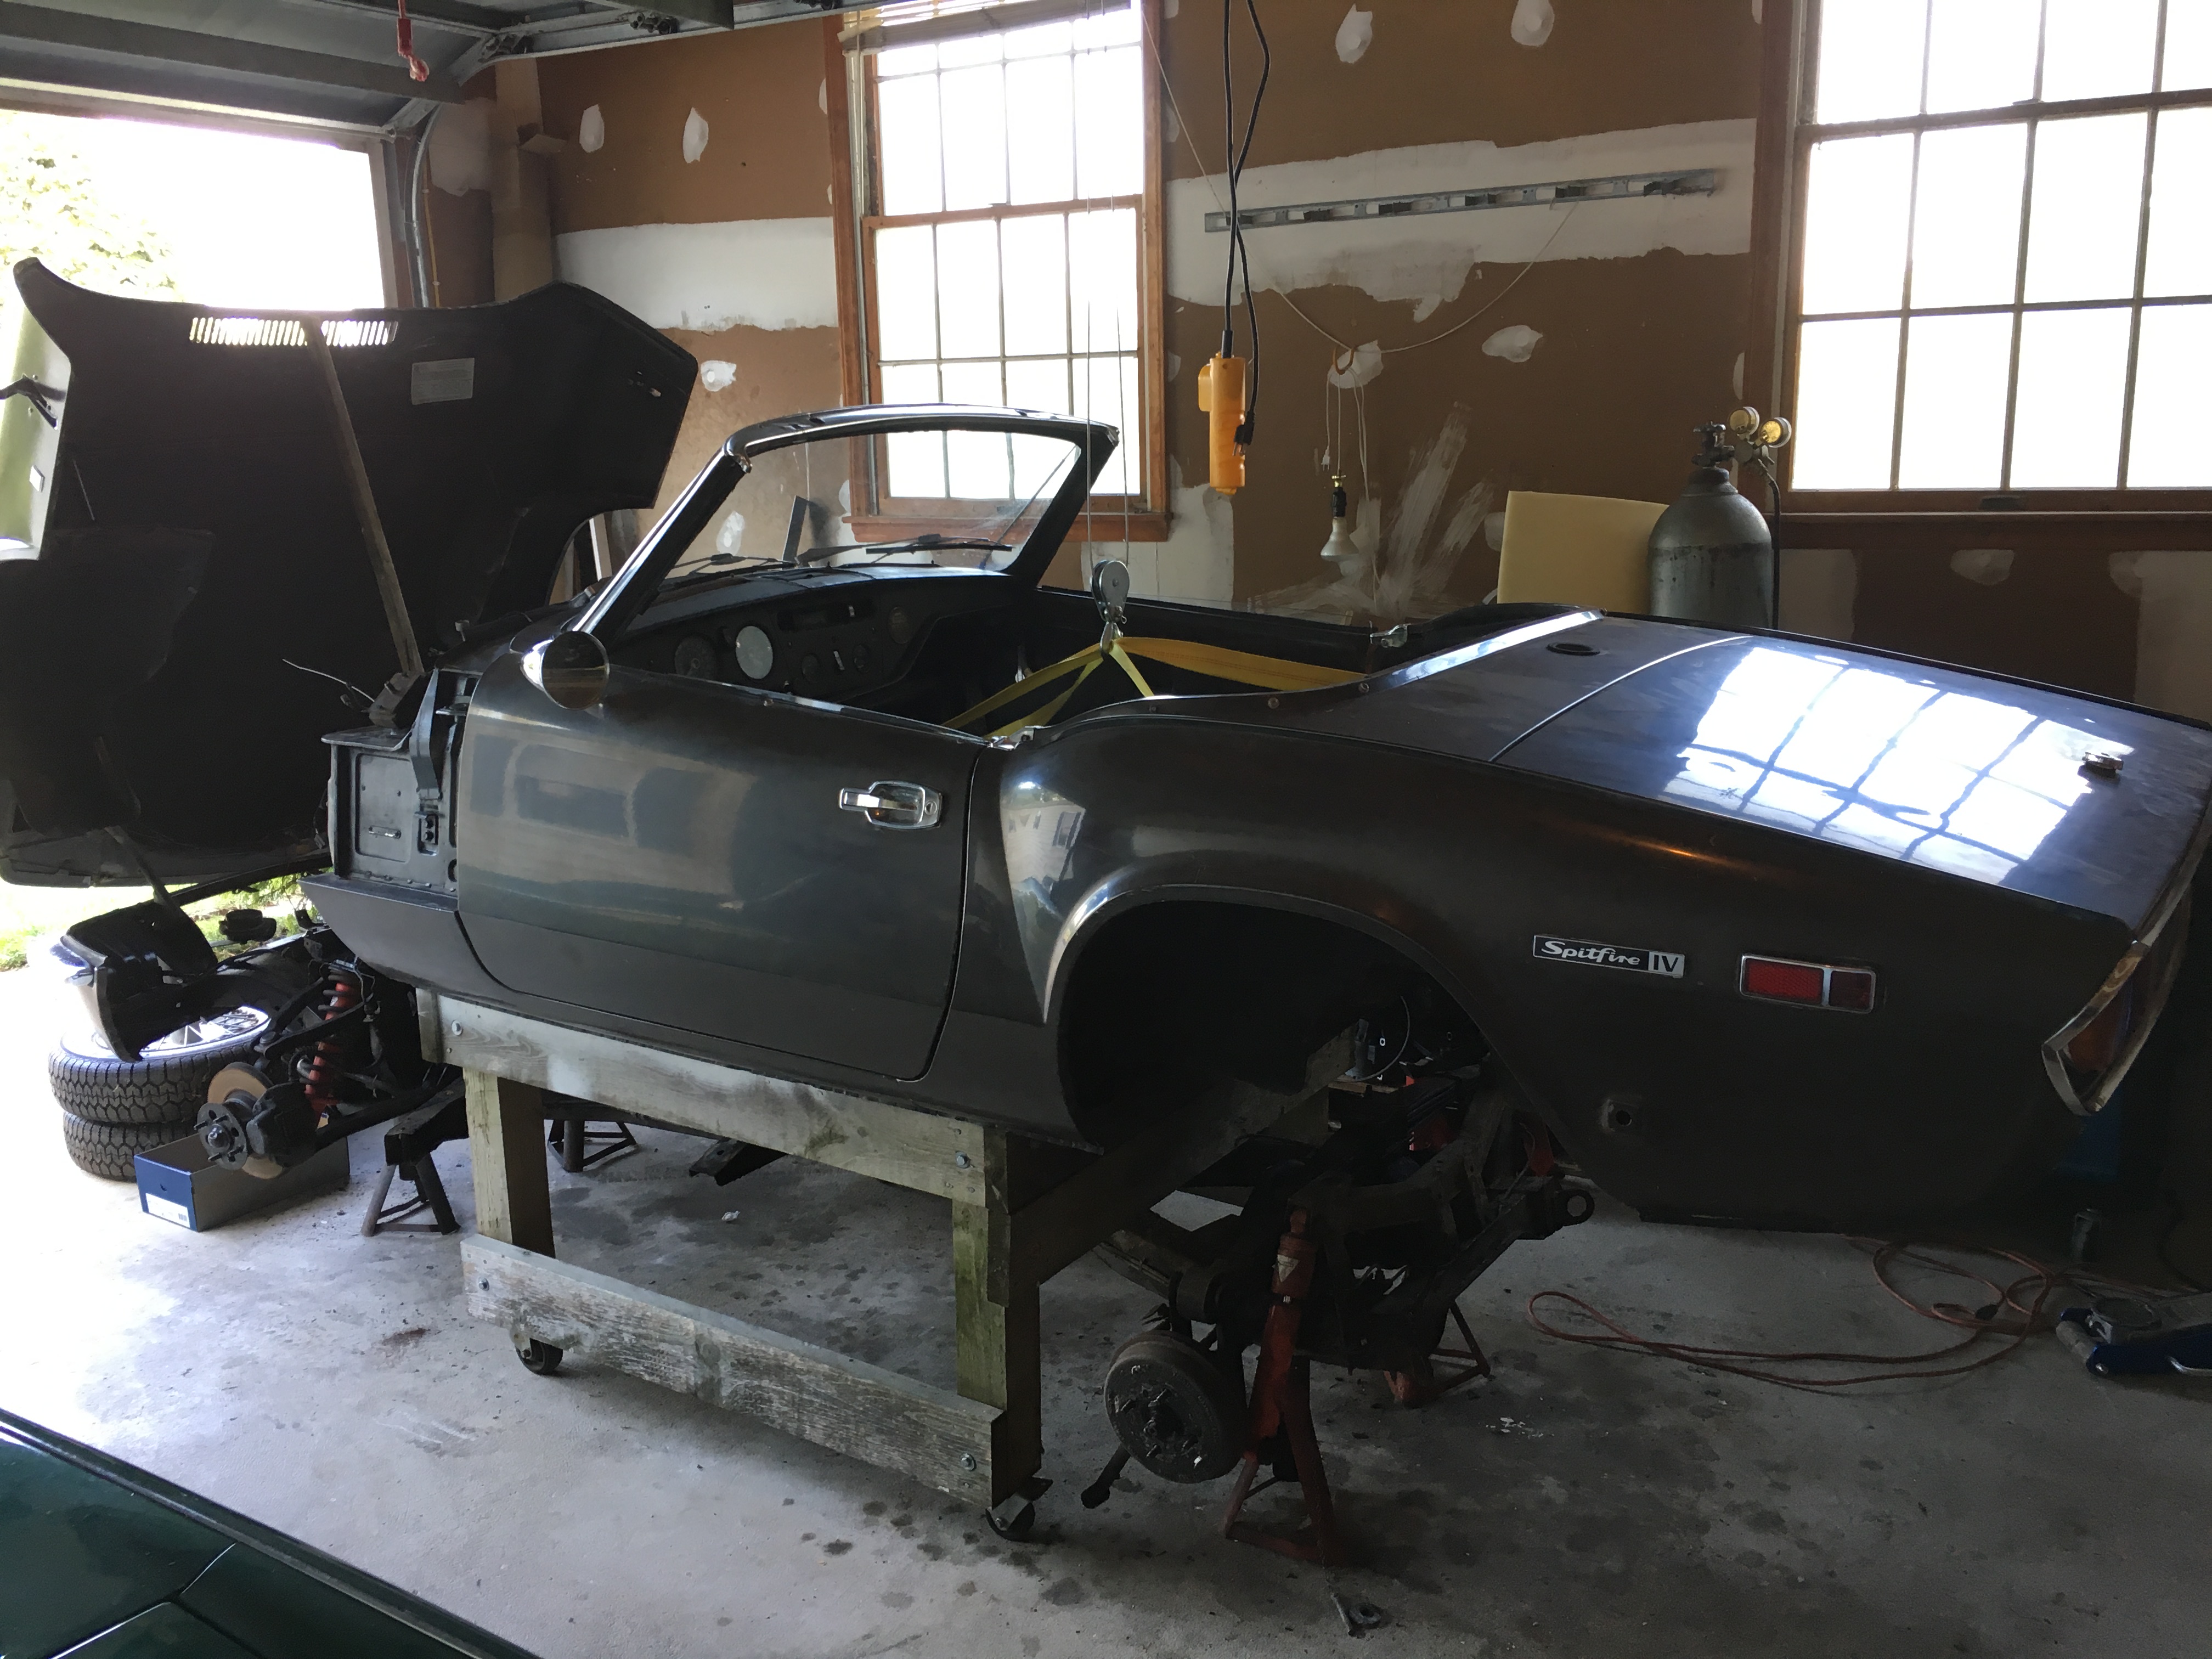
Just tested it today, lifted the body off the car, will remove the steering so I can get it up high enough to start working in the frame modifications. This will save me a lot of time and effort on this project.
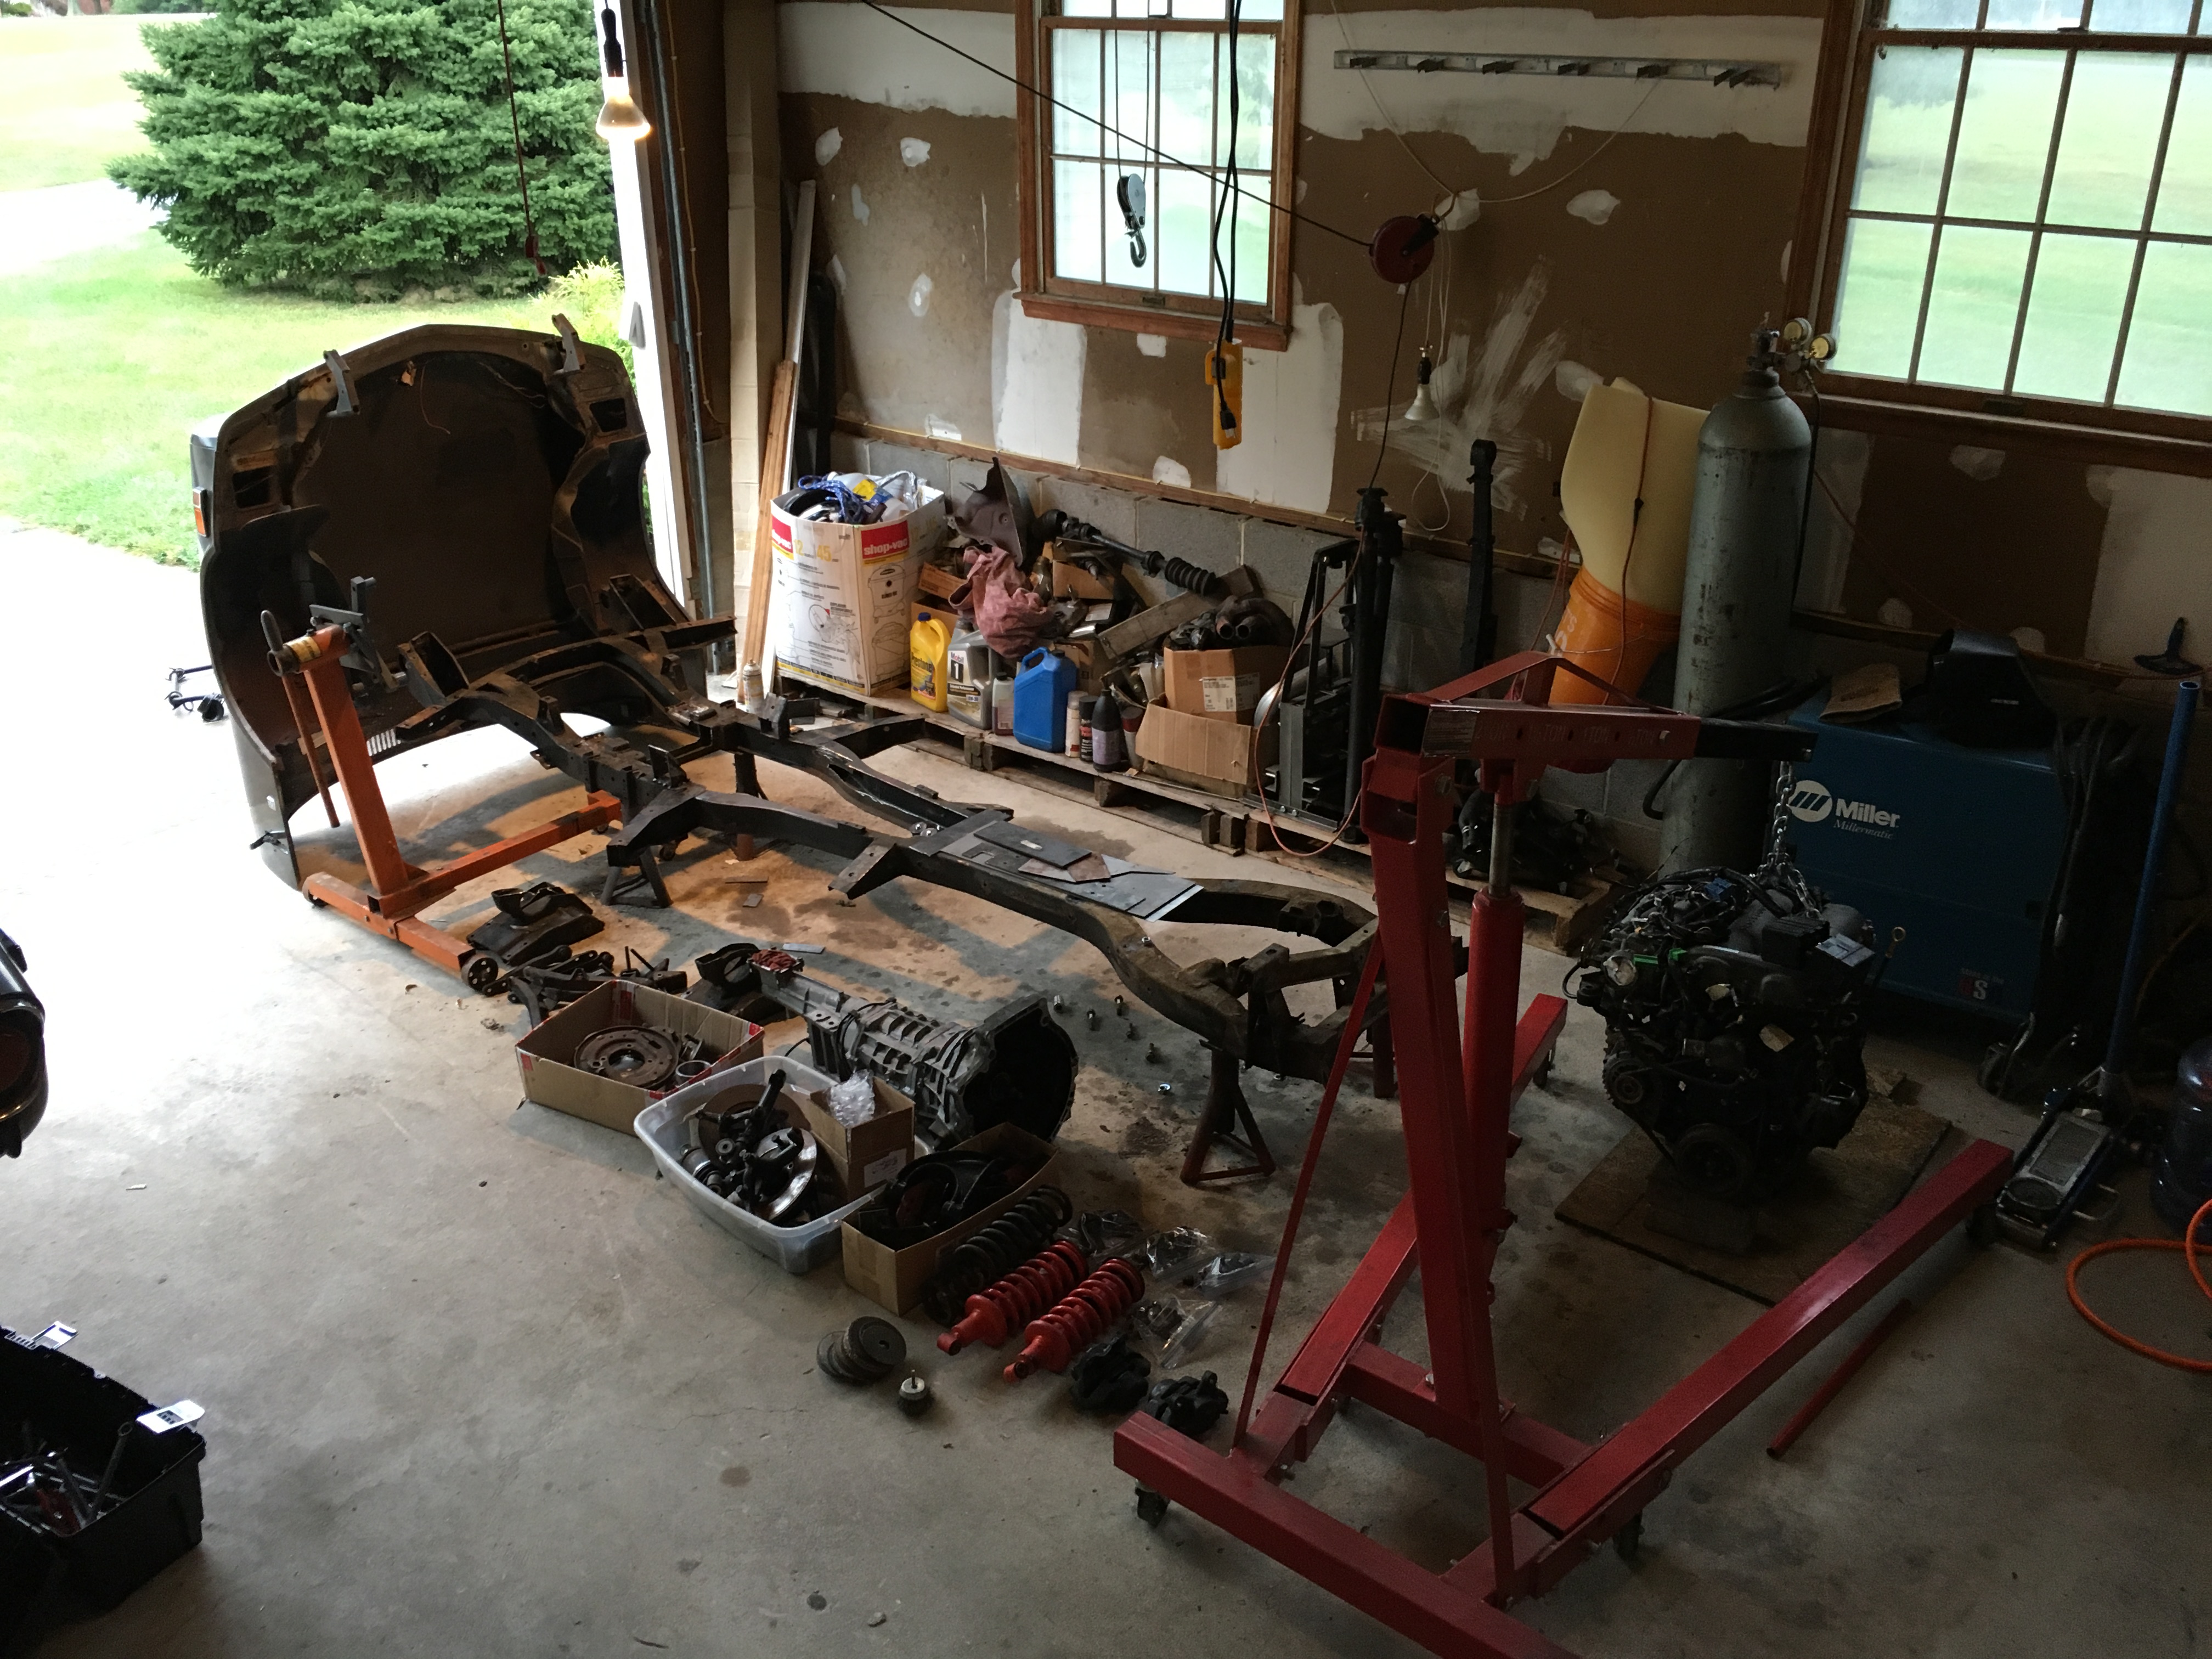
So finished the lift today and removed all the body bolts, forgot about the trailing arm that bolts to the body, but found out the lift is more then capable of lifting most of the car's weight ![]() I put the body down on the old wooden frame I used for my challenge Spitfire so I can roll it around and so lift is not the only thing keeping the body from coming down on me. Now I can finish the mounts for the engine/transmission and frame mods as needed and then do a final test fit and then strip the chassis for finish welding and painting.
I put the body down on the old wooden frame I used for my challenge Spitfire so I can roll it around and so lift is not the only thing keeping the body from coming down on me. Now I can finish the mounts for the engine/transmission and frame mods as needed and then do a final test fit and then strip the chassis for finish welding and painting.

Do i spy vintage koni reds? Score!
Yes, the 2nd owner of the car put on the koni's, new tires and pulled it in the garage and started disassembling it. 35 years later, it came into my possession ![]()
The Koni's will be used in the build as this is for the street and non-competitive autocross fun

I'm curious to see how you handle the exhaust. There doesn't appear to be much room between the engine and the frame.
How do you get the body cart from between the chassis and body? Just raise the body high enough to lift it over?
My plan for the exhaust is to purchase a GT6 sport exhaust from Rimmer Bros (or similar) https://www.rimmerbros.co.uk/Item--i-GRID008014 but flip it over so the mid pipe ends up on the drivers side where the exhaust is on the Miata engine. I should be able to route the exhaust down between the engine and frame and match up with the mid-pipe. Similar to this arrangement http://s6.postimg.org/58831azz5/10612901_358692050963652_914347009771953660_n.jpg I will notch the frame to make sure there is room for either a custom header or turbo downpipe.
Yes, just lifted it up above my old body cart and lowered it back down. now I can roll the body forward or back as I work on it and use the lift when I need to put the body back on the frame to check fitment. The best part is I only am modifying the frame/chassis, I did not have to cut any of the body except for cutting back the transmission tunnel for the shifter and I will need to remove and reweld the emergency brake bracket back 6 inches.
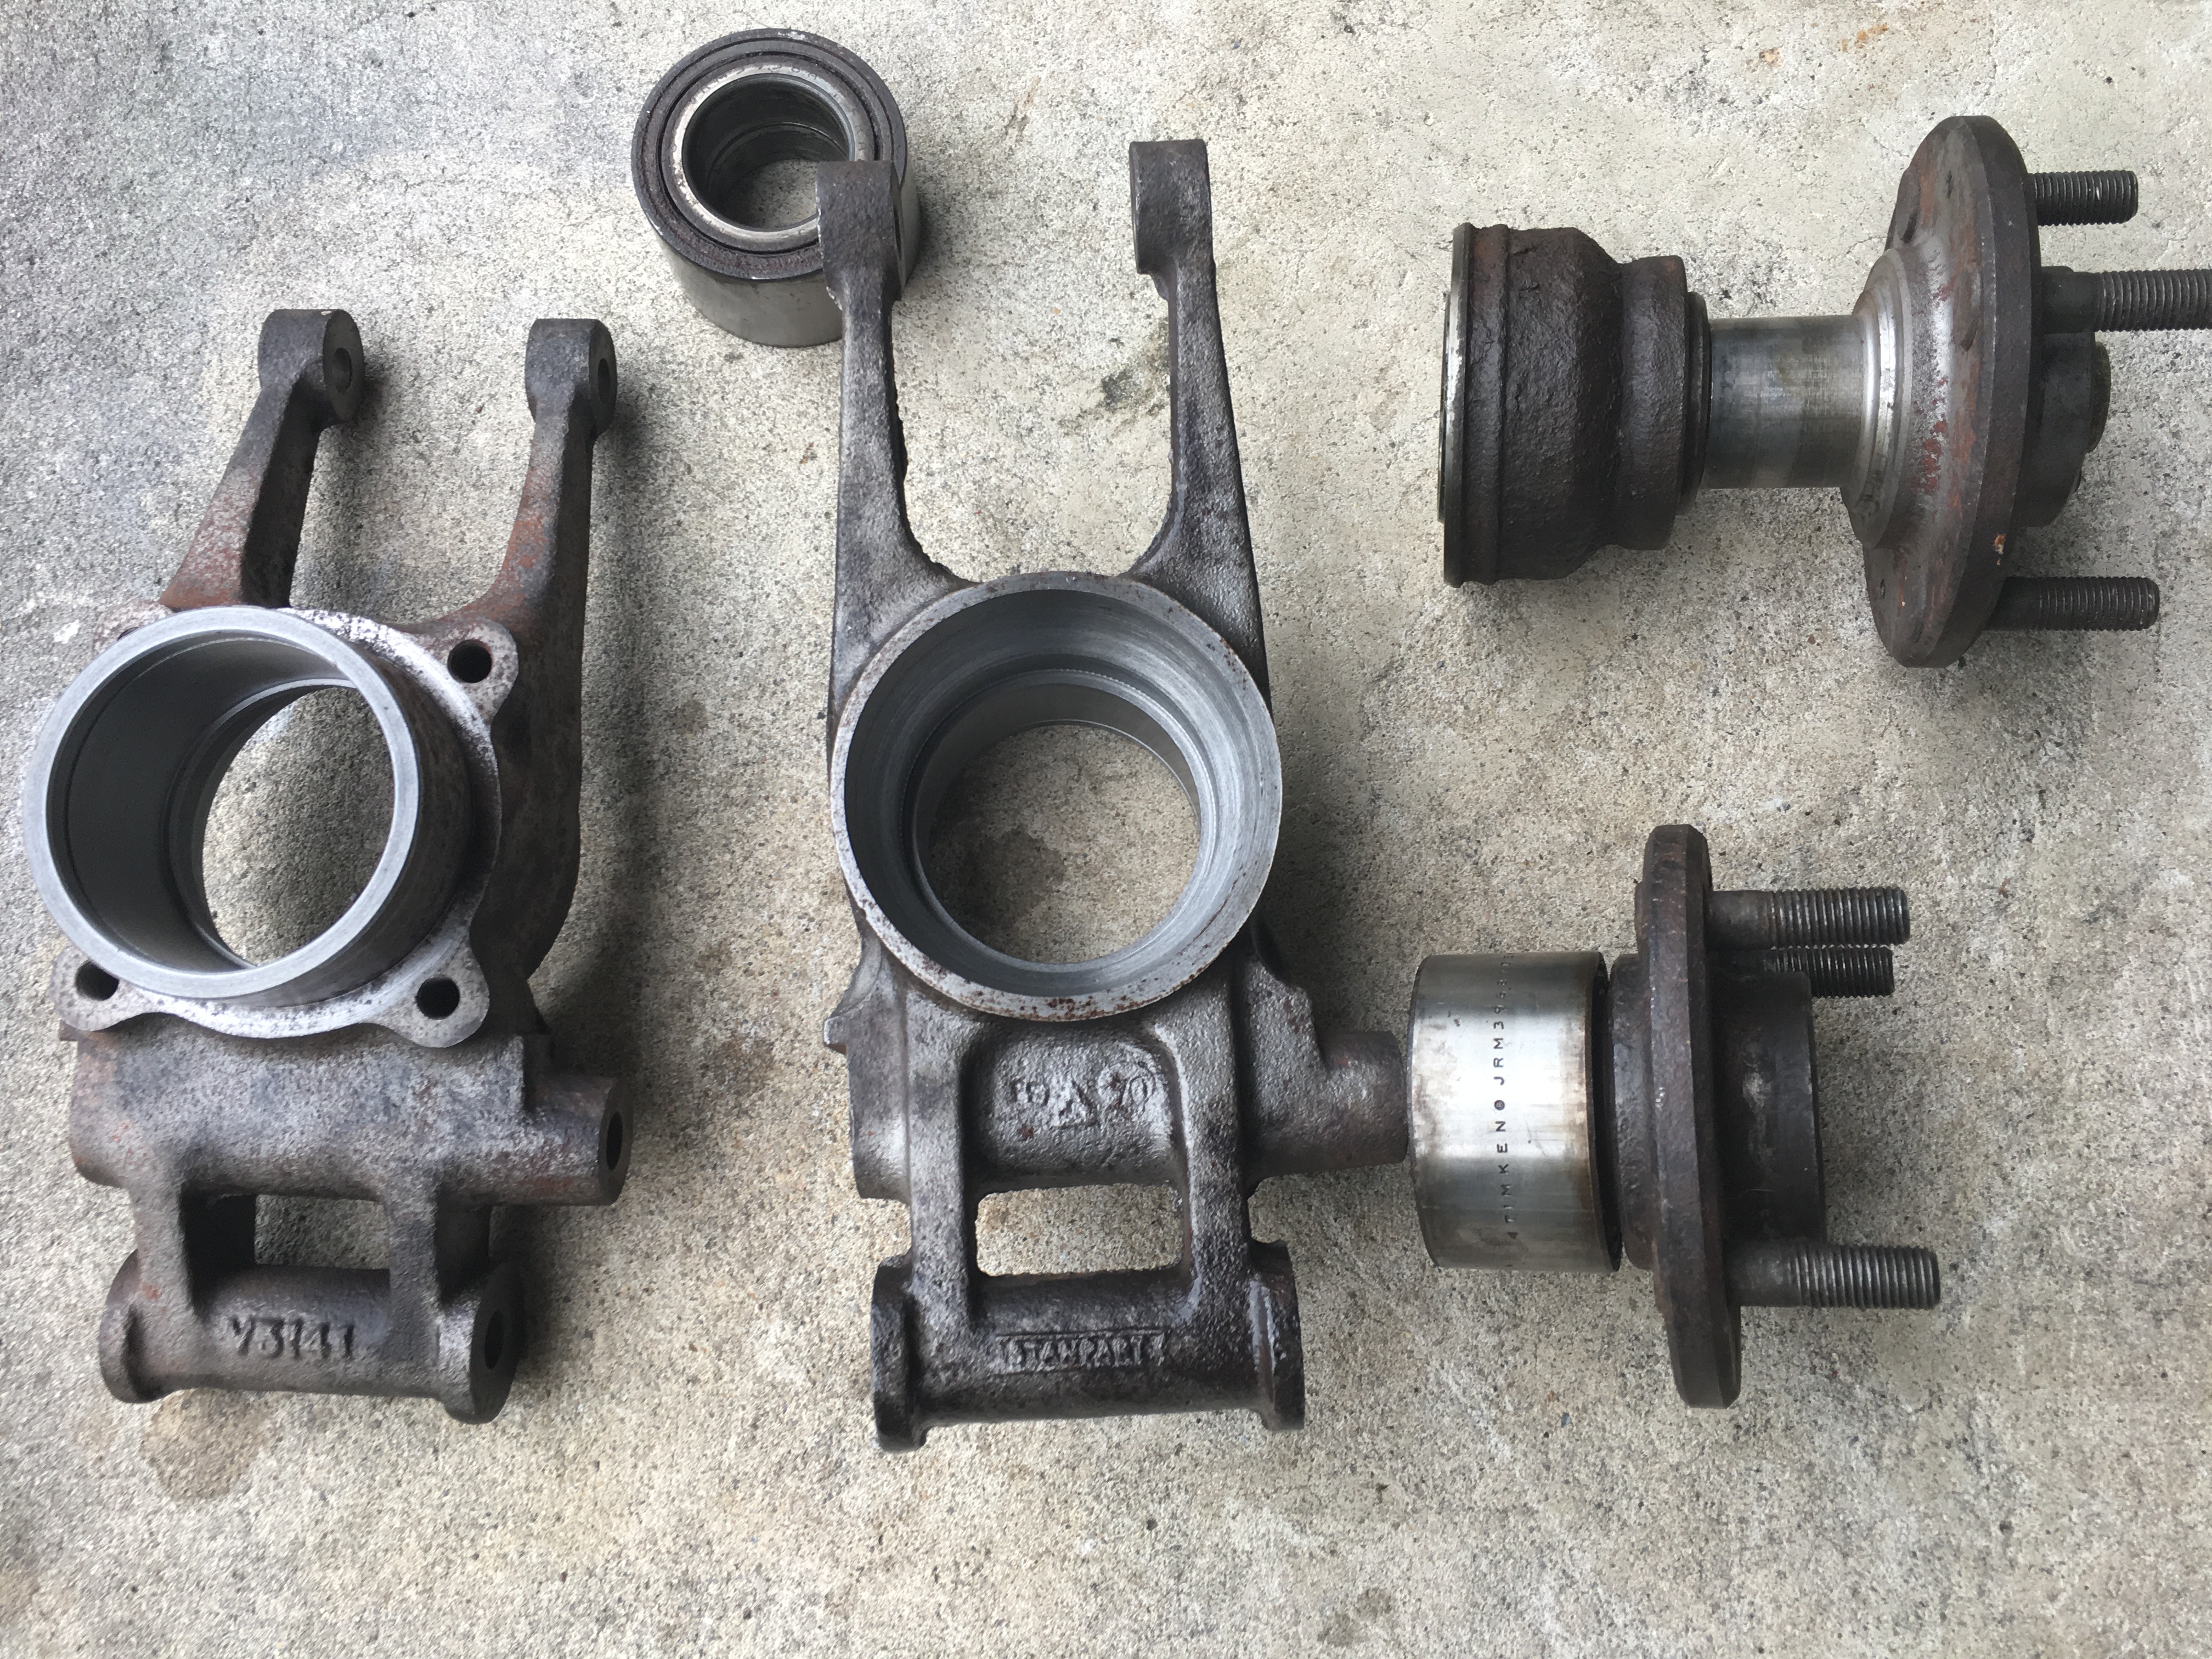
Been ordering parts today and reviewing what will be needed once I lower the engine and transmission into the final location and weld up mounts. The rear diff is being replaced with an R160 LSD from a WRX. I will need a custom drive shaft to go from Miata 6 speed to Subaru R160 and custom CV axles. Since I am converting to a Triumph GT6+ Rotoflex suspension, this entails many other changes. I had to order the Radius Arm Mounting brackets for both sides since the GT6 arm mounts in a different part of the body (but the holes are in the body shell, so it is just a question of bolting it on and then welding on the brackets). Rimmer Bros had them in stock, none of the US suppliers even listed the brackets. I already have the frame brackets for the lower wishbone and will have the hubs machined for the MGF axles and large bearings in the next week. Goal is to bolt it all together by the end of the month so I can order the axles and drive shaft and then pull it all apart to sand blast and paint before I rebuild the chassis and clean up the body before it all goes back together. The CV axles look like they will be relatively simple, just a new axle made up with the right splines for each side.

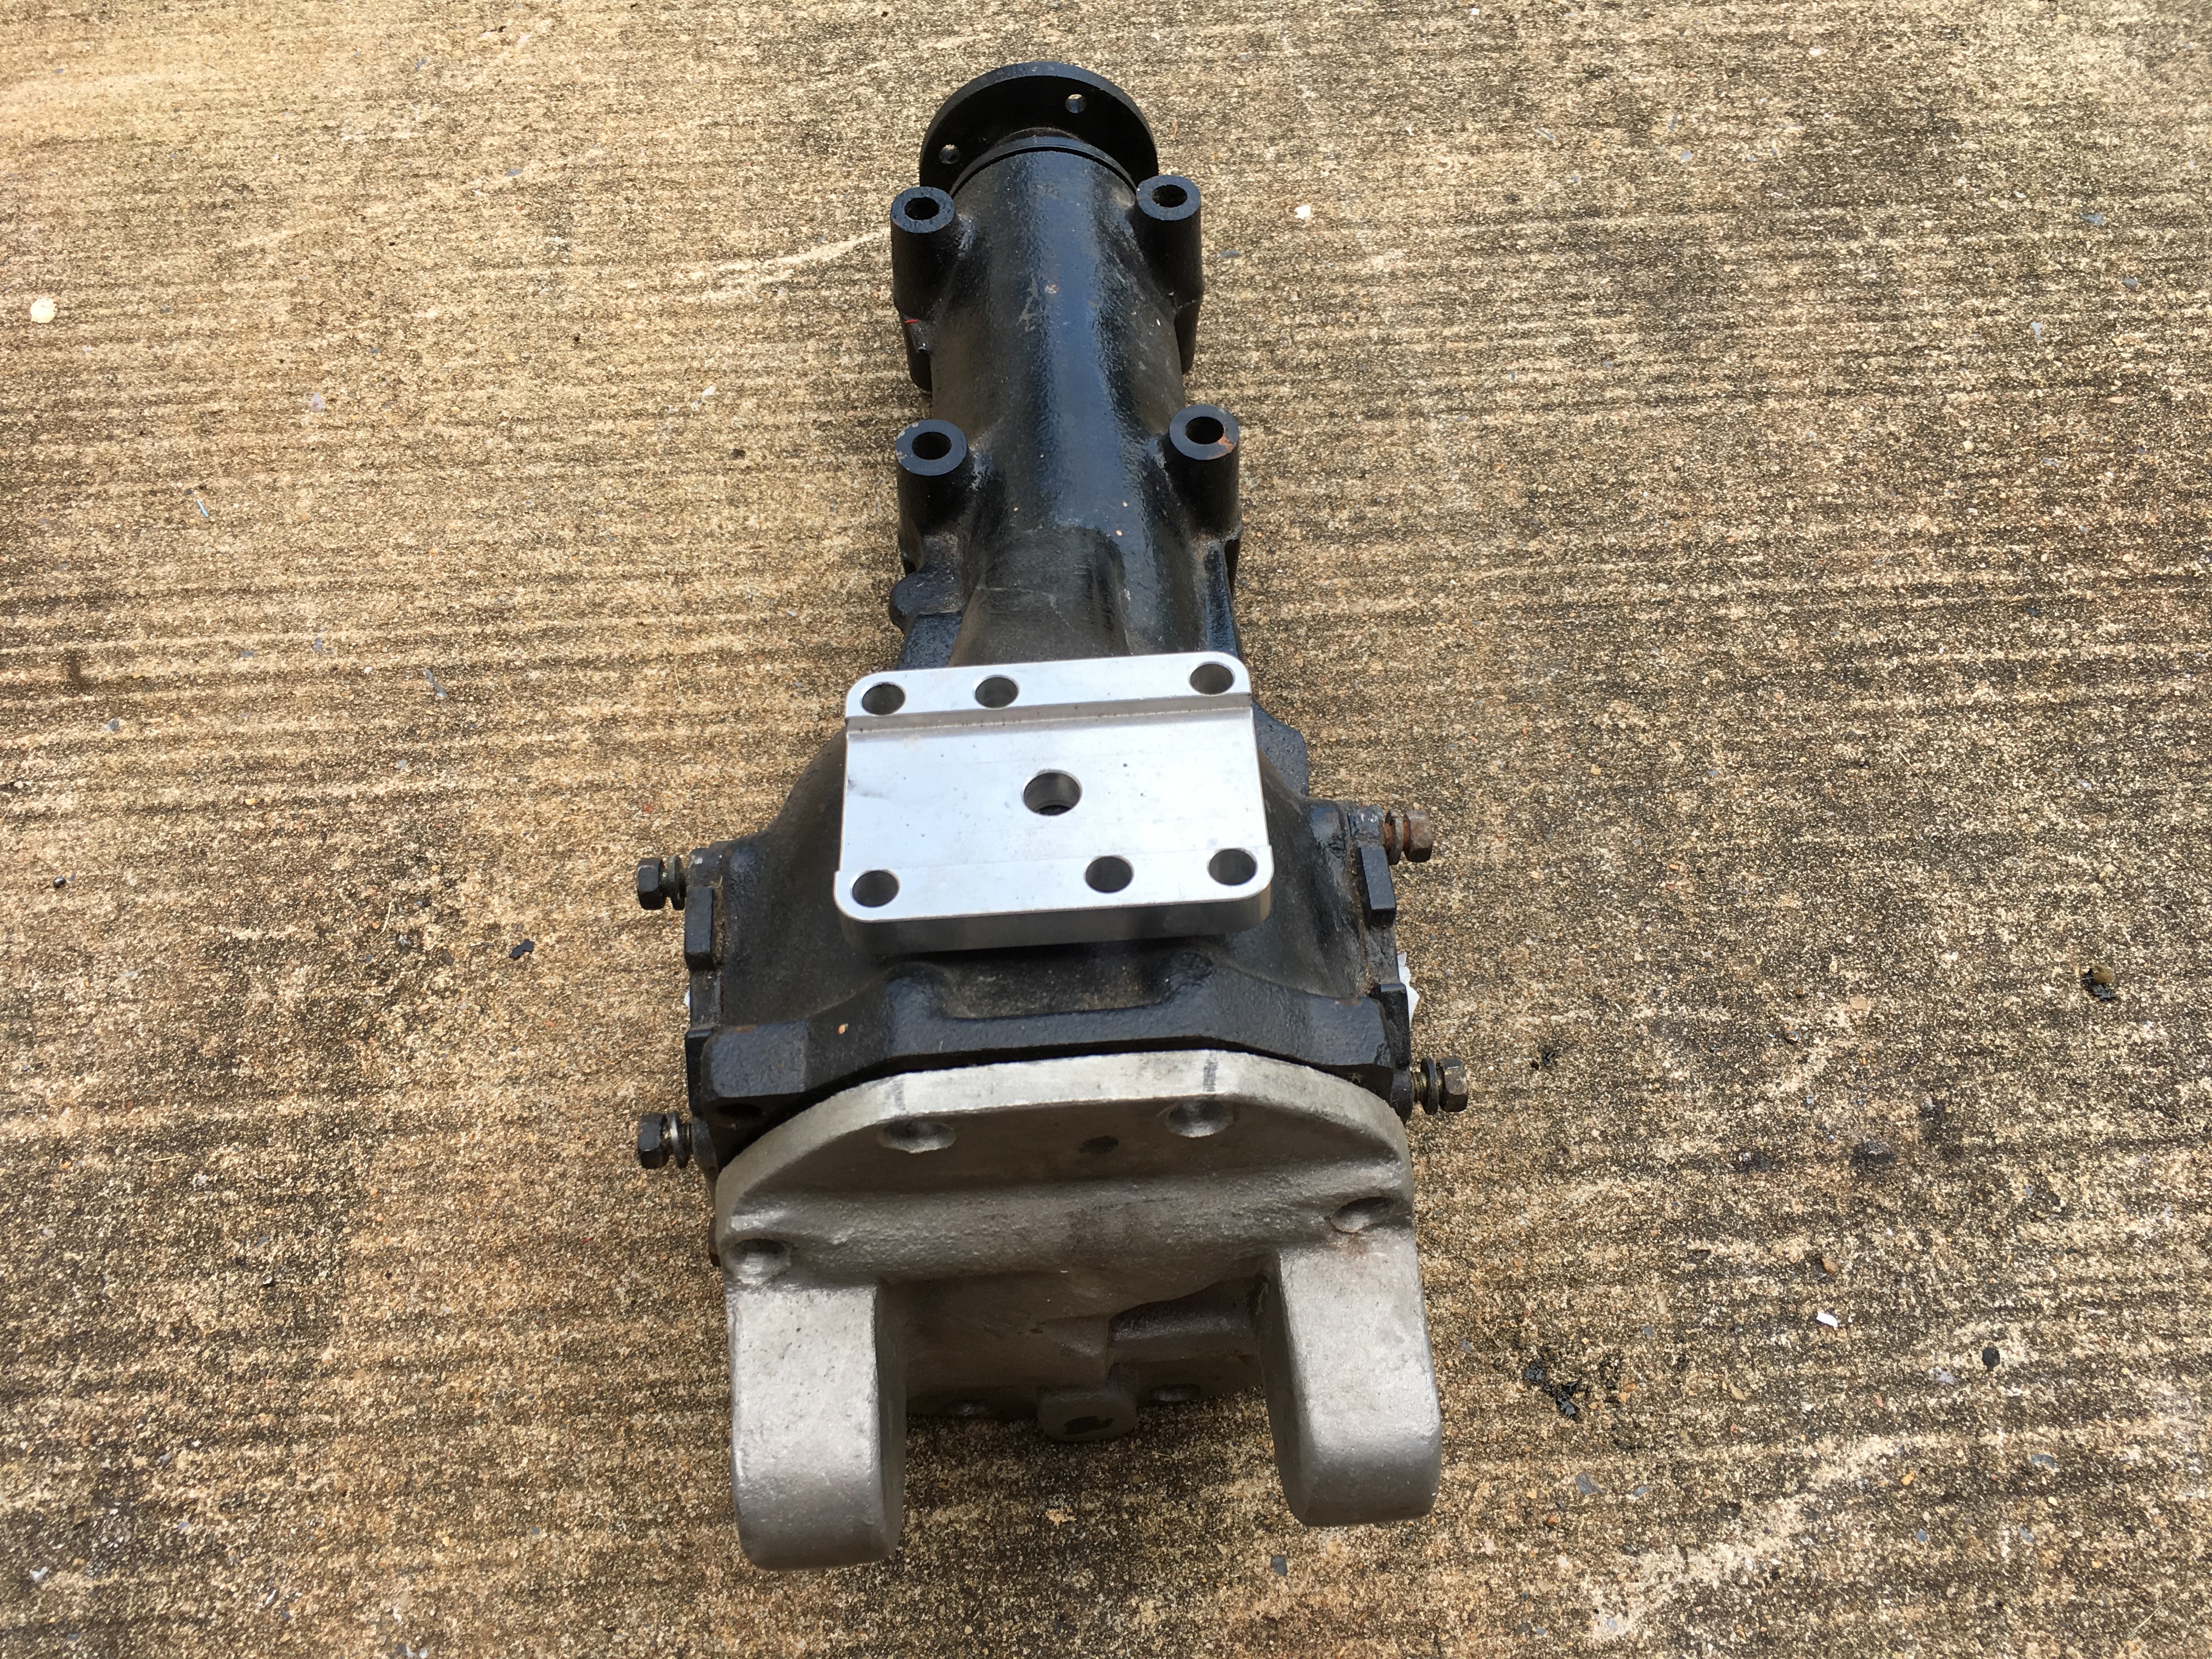
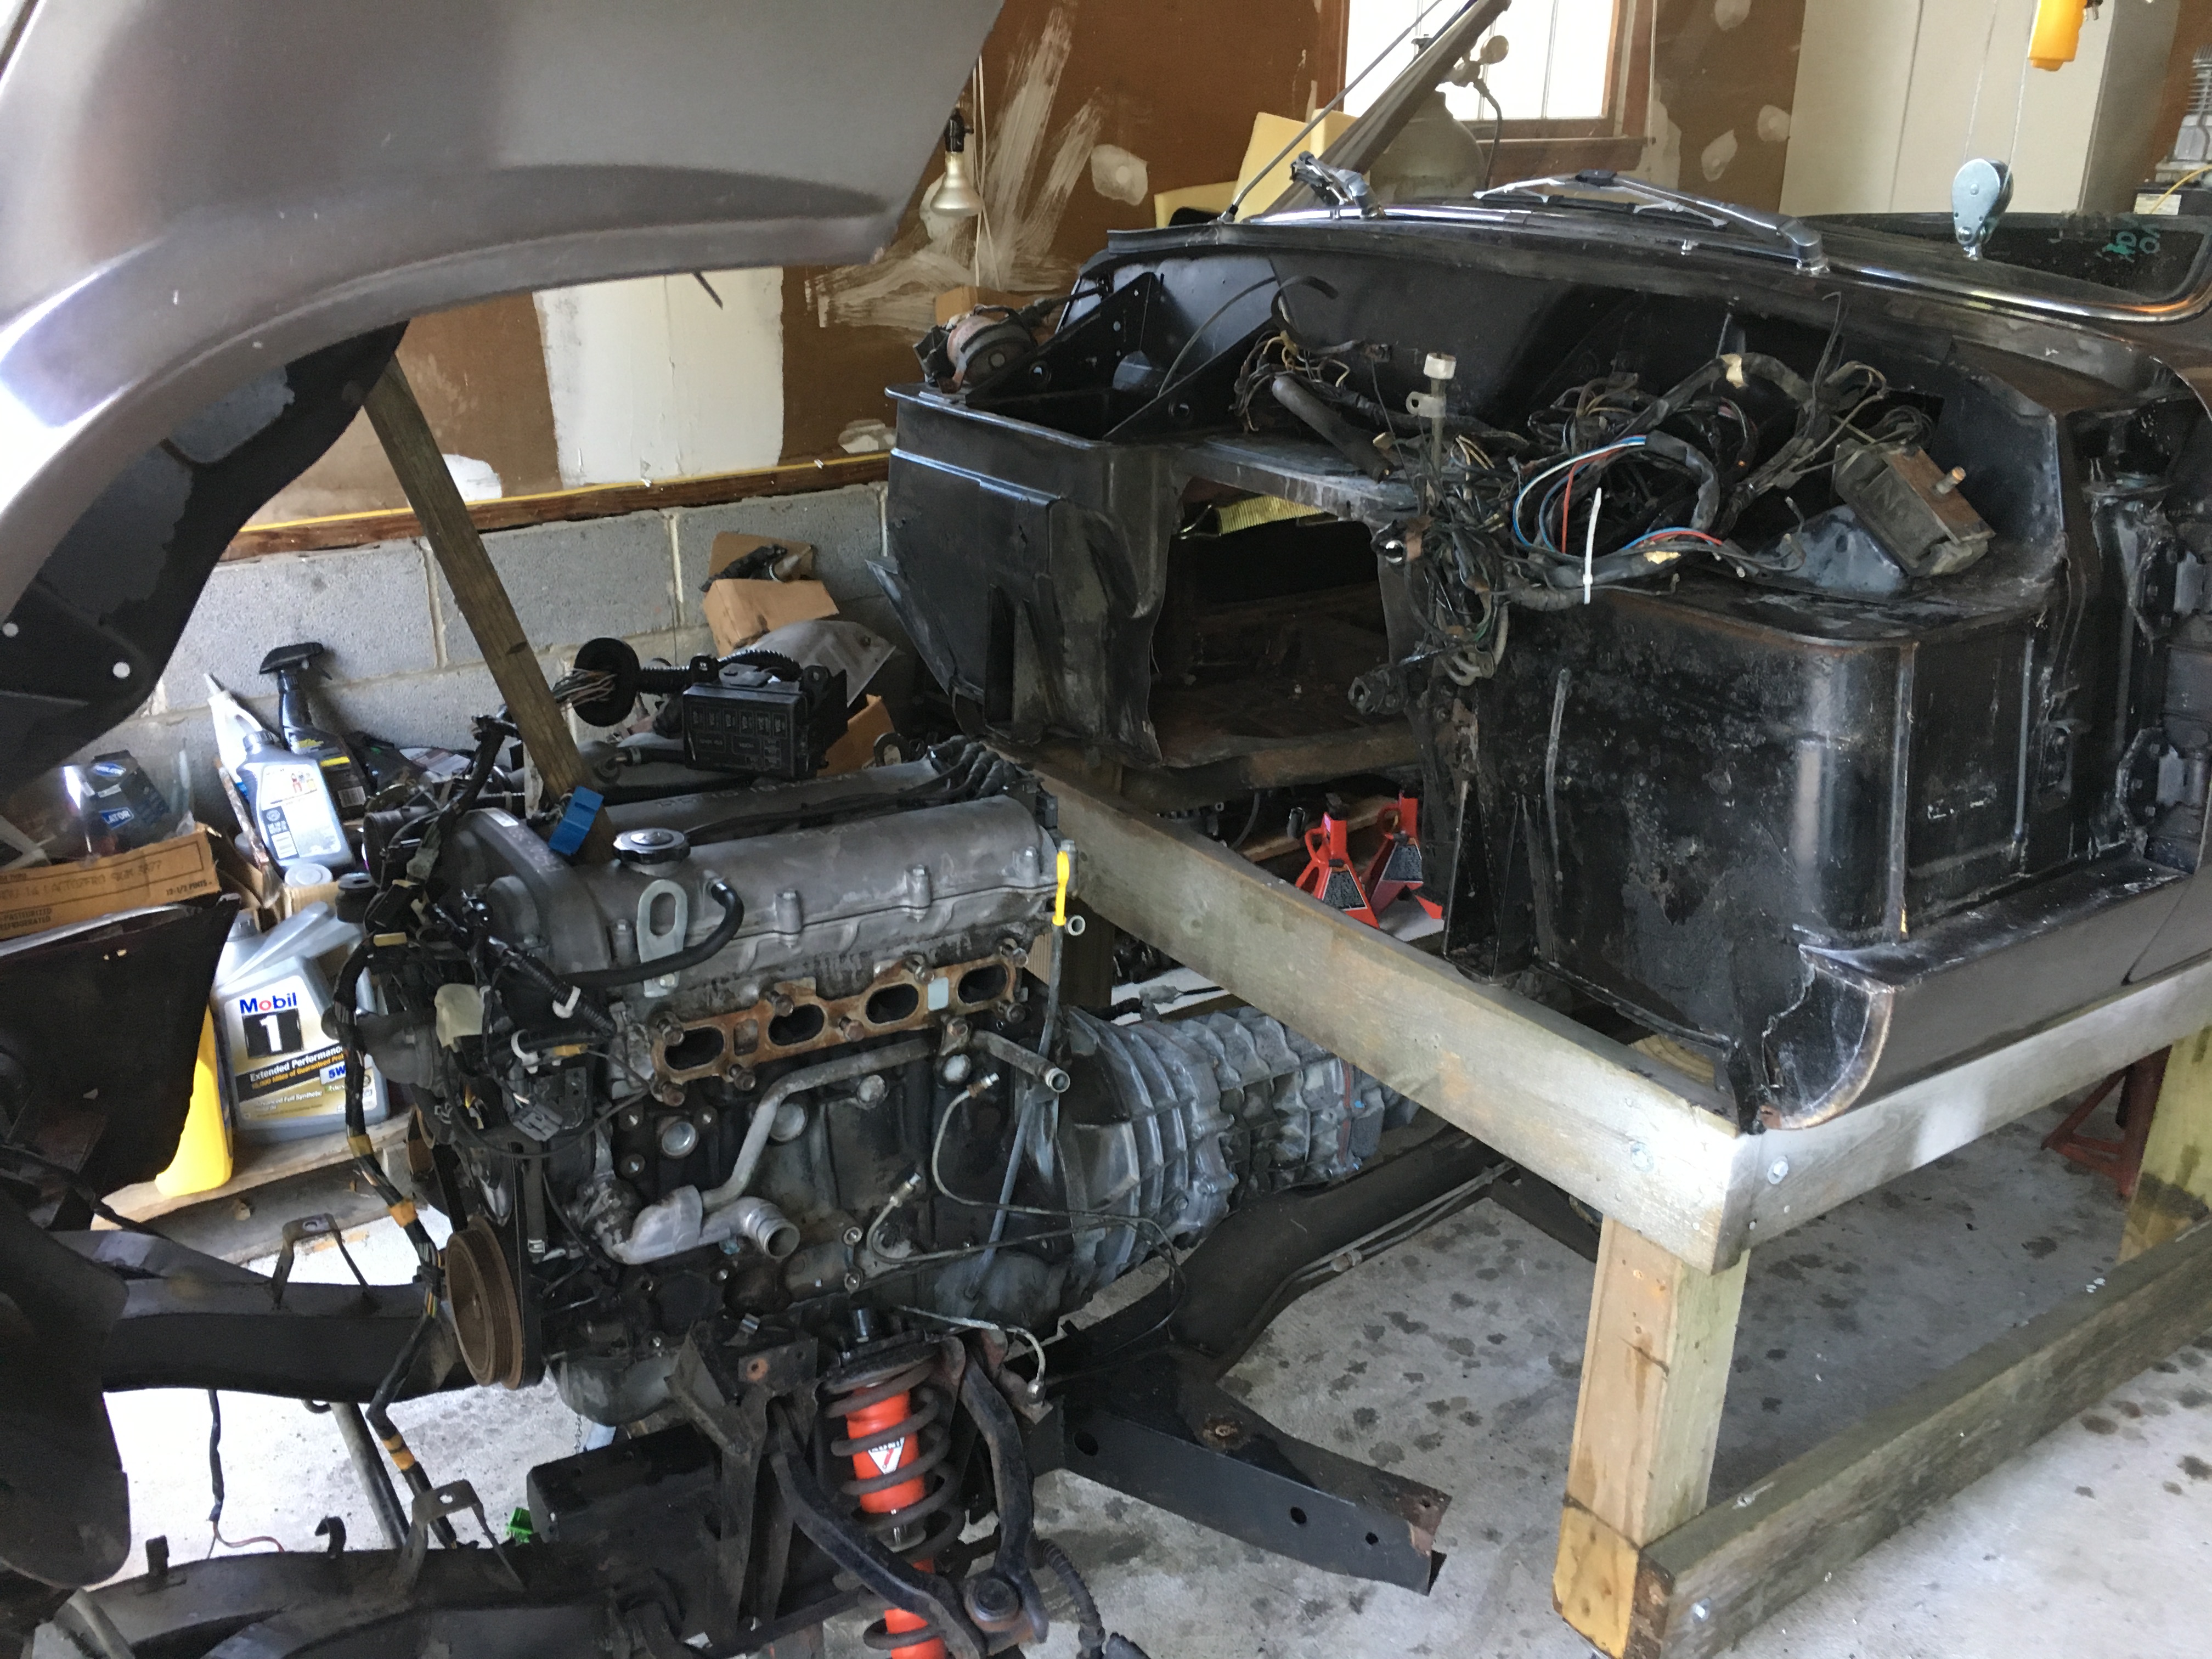
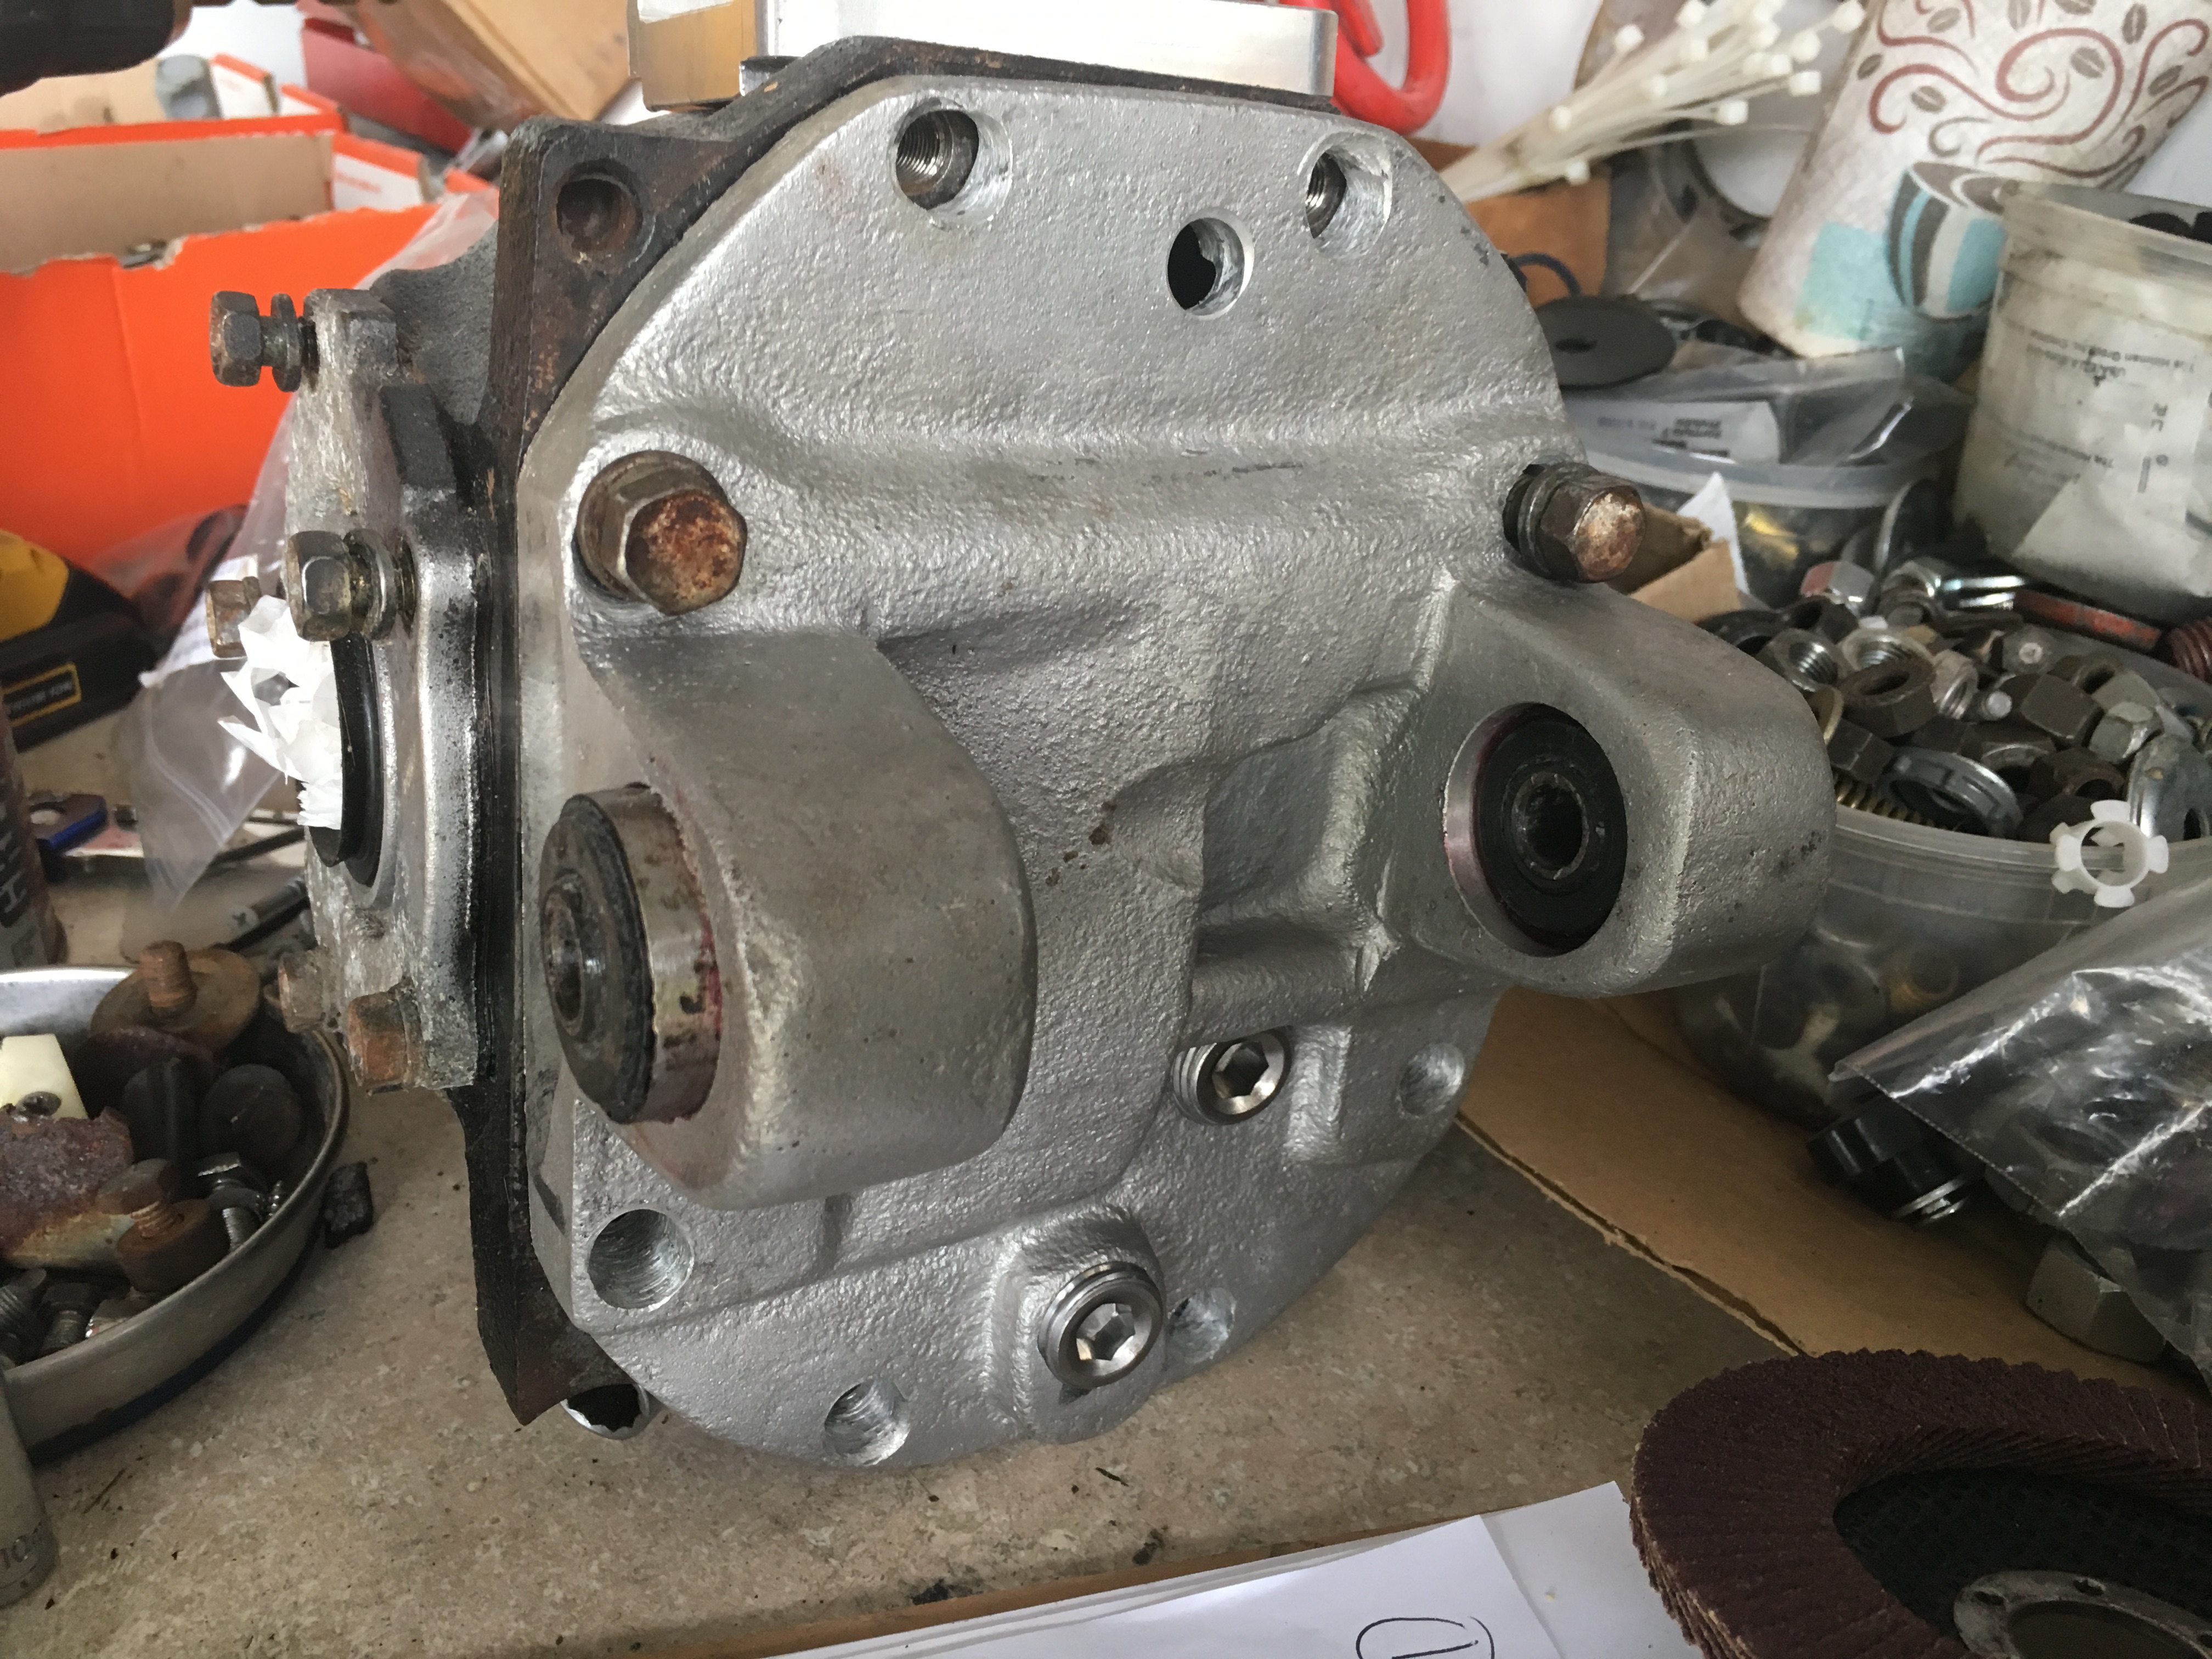
Back to work on the car, got all the parts back from the machine shop, rear hubs are now ready for the bearings to be pressed in (just waiting on the clips), rear mount is machined and just need to press in the bearings and get a gasket to seal it up. Engine and transmission are now in a position for me to build up the mounts. Only issue is the oil pan but a local shop tells me they can weld it up easily, so will remove it and first of all ensure the steering will clear and then cut the pan and have it welded next week.

neat project!
I built a 4AGE head for a client who used a 4AGE and a W58 in his 1969 Mk IV

She manages 0-60 in under 6 seconds!
I would love to see more of that car, that is really cool!
dherr said:I would love to see more of that car, that is really cool!
So finished all my frame/body prep so I can build the motor and transmission mounts. Despite all my efforts, it turns out that the BP motor has the oil pump and pickup tube located right where I wanted to notch my oil pan, so had to scratch that idea and go to "plan B". So that means the engine needed to go back two inches further to the rear so the front harmonic balancer is just above the (lowered) steering rack. So that meant more cutting of my frame than I had wanted to do, and also meant I needed to cut the rear of the firewall, just between the battery box and the brake master cylinder/clutch master cylinder mounts. By moving a few things around, no reason to have to cut the battery box, which will make a transmission tunnel much easier to construct.

Cuts will be boxed in and I will build an extra cross member in behind the engine to help keep it all together and strong.
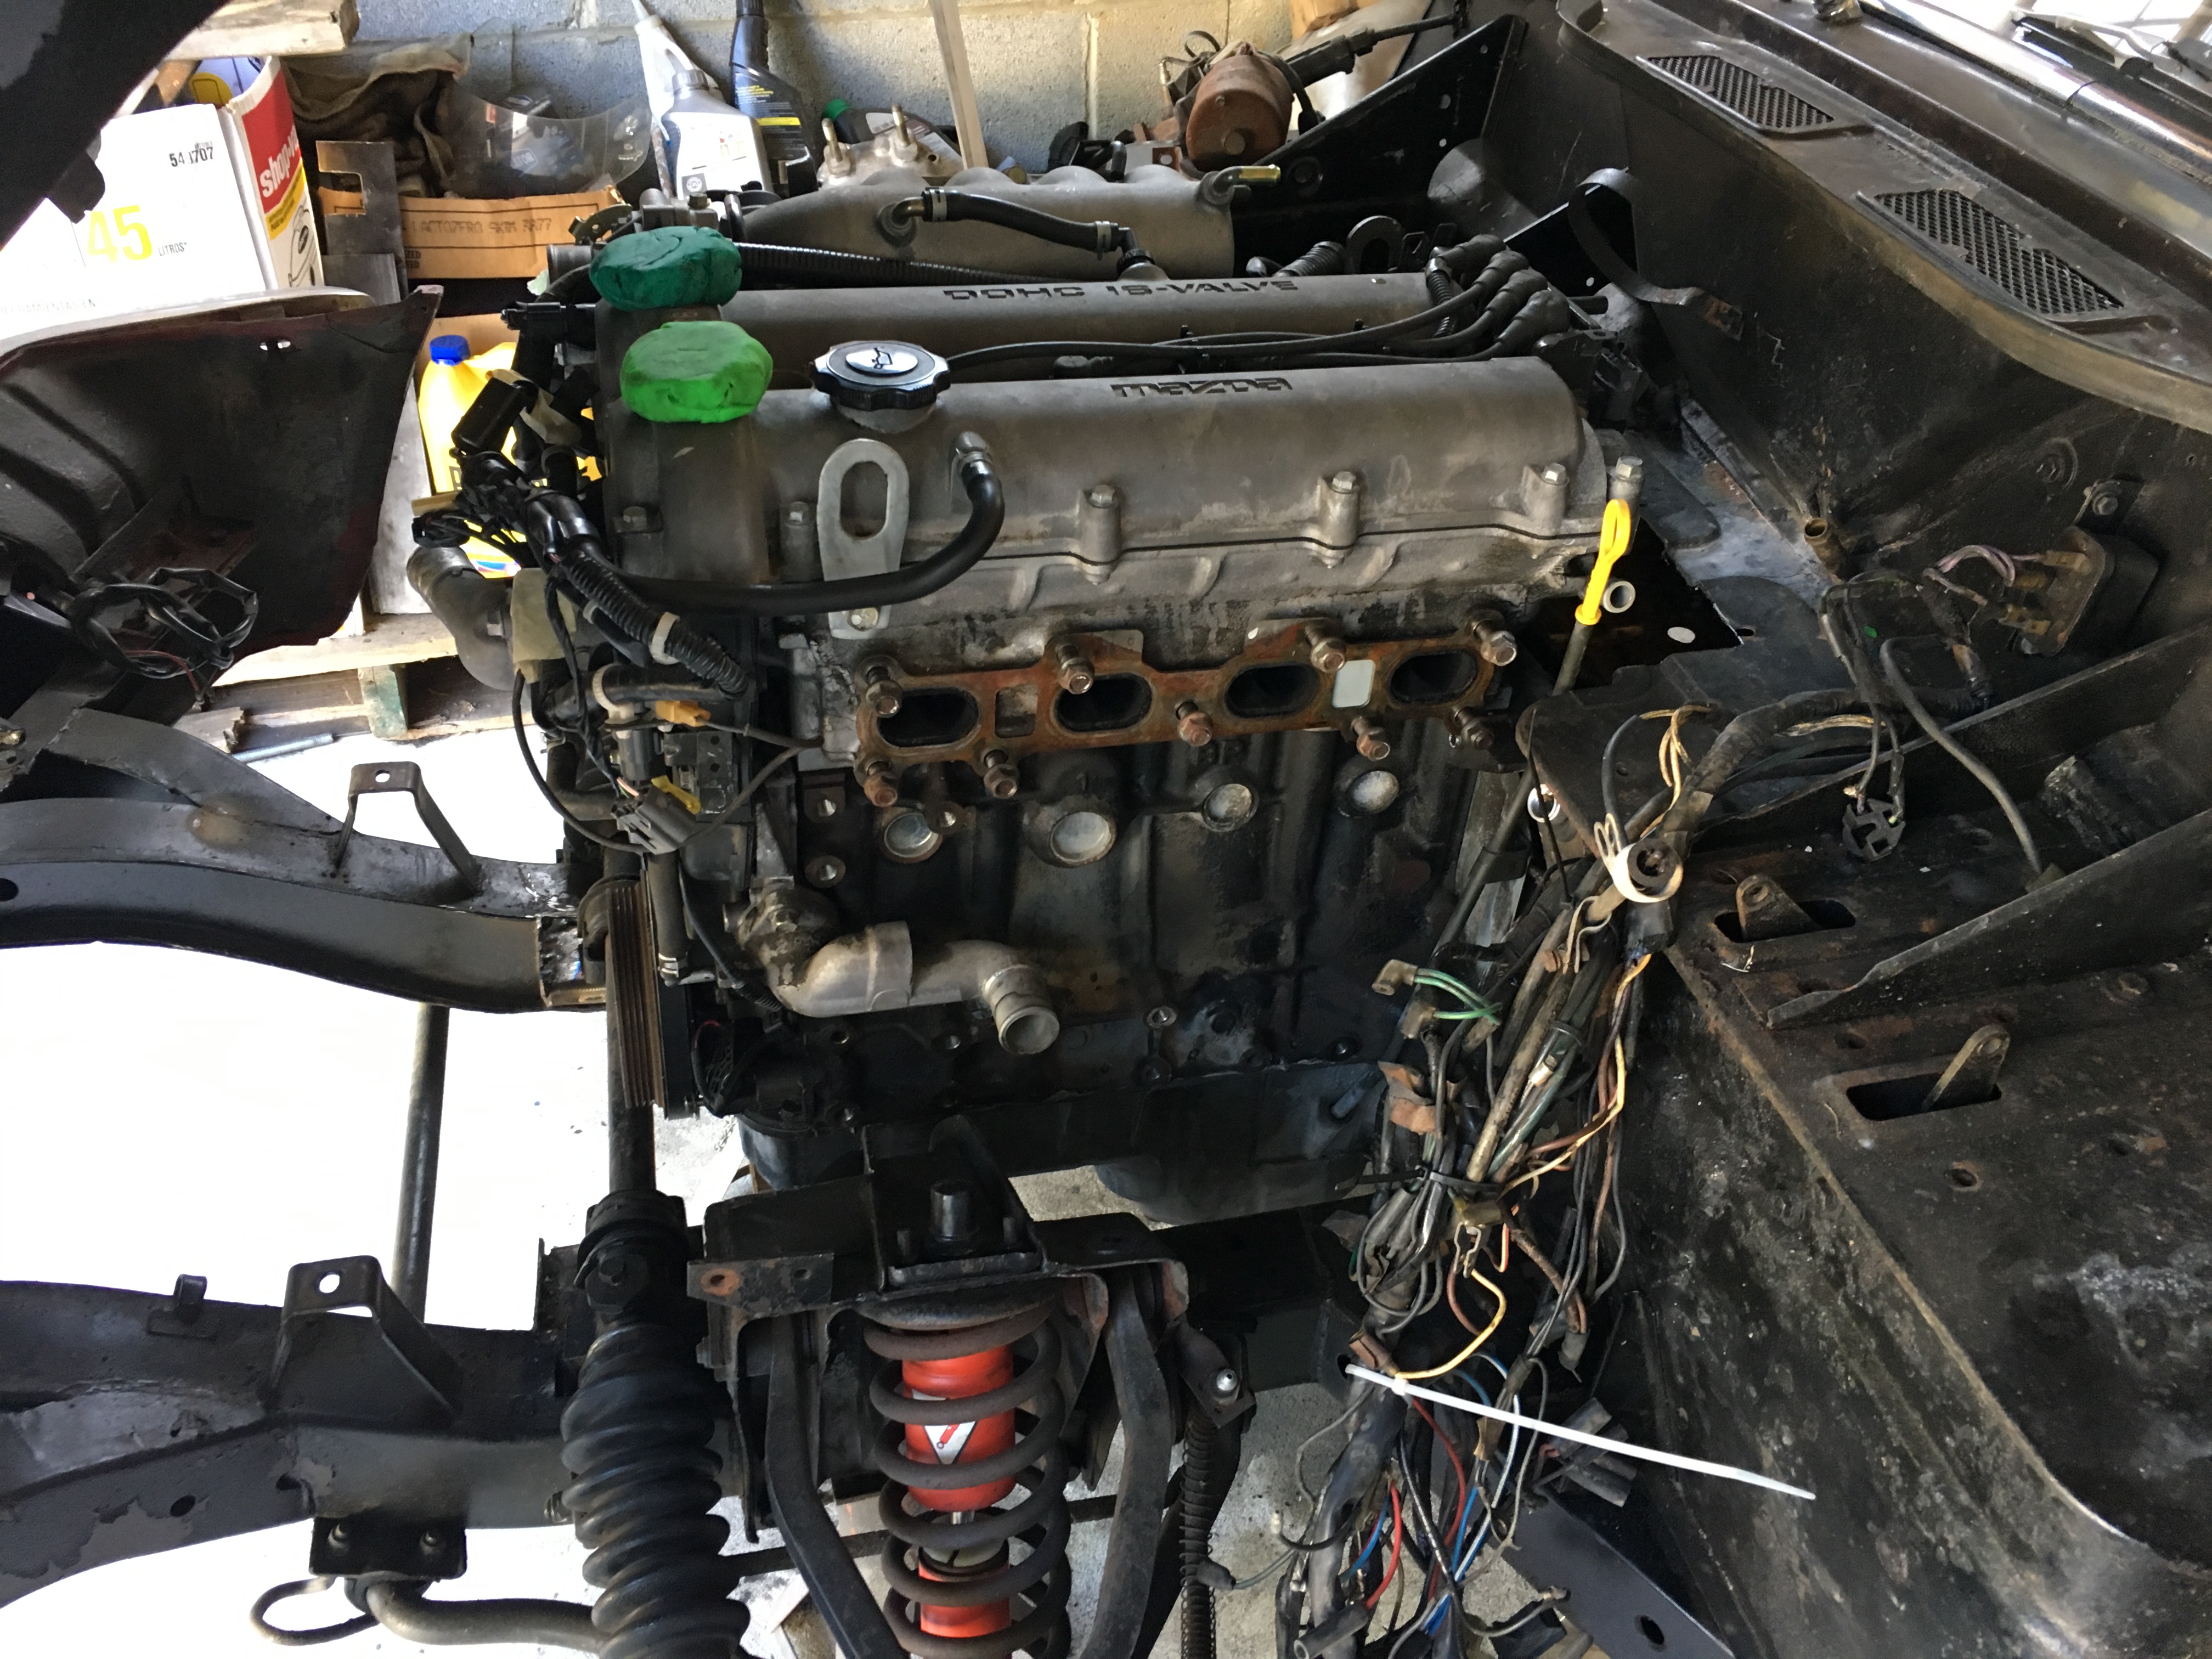
Engine now passes the "play dough" test with lots of clearance at the front of the bonnet when it is latched, so no worries here. With everything now clearing the engine and transmission, I can now pull back the body and build my motor mounts. Passenger side and transmission will be easy as lots of room for the passenger side mount and I am using the power frame mount location with two TR6 Transmission mounts to a crossmember at the bottom the frame for the transmission. The drivers side motor mount will need to clear the steering and allow room for the exhaust.

Hey Dave, great to see this thread and your progress.
I tried posting a few days ago, but having just joined the Forum, GR wouldn’t let me post for a few days.
I had two posts drafted before you put this last entry up, so here they are…..
Electrical….
Sorry I haven’t updated the remaining items on my site, I just put up the electrical diagram we discussed and some other notes and images. Schematic is at the bottom of the page.
http://stevew10.wixsite.com/spit16/electrical
Your 1.8 with OBD2 will certainly be more complex, especially if you want / need the second 02 sensor and actual diagnostics. I suspect that without it the ECU will go into some sort of default mode and work fine. ?
With my 1.6 (OBD1) I will eventually have a “check engine” light and will be able to count the flashes to check the 6 or so systems it monitors (I hooked one up temporarily out of curiosity and the only issue I had was the Evaporation System – which I’ll eventually hook up just like the Miata). Not sure on all the OBD2 stuff.
Next post soon.
Not to highjack this thread, but for those who haven’t seen it, I put together a website for my Spazda 1600. My swap is far from pretty right now, but I was in the feasibility mode; there were no really detailed write-ups on any of this when I began, but lots of general stuff. When life mellows a bit I hope to get on with it, but for now it’s a blast to drive and AutoCross.
I really like Gregg’s swap as well. The 4AGE is sweet but tough to find, whereas the Miata stuff is everywhere.
Back to your stuff Dave…..
It sounds like you’ve made some great progress and if it works out you should have the “Gold Standard” for this swap.
Engine Choice
I went with the 1600 and 5-speed due to its 3/4” shorter length (engine) and ability to relatively easily move the shifter forward. Looks like you are encountering the difficulties I expected. Not sure how bent you are on that 6-speed, but if memory serves the 5-speed bolts up to the 1.8 as well. Gearing is not much different, but moving the shifter forward is way easier. http://stevew10.wixsite.com/spit16/blank-2
Engine Fitment
Dan Patrick had one of the earliest builds, (he allowed me to post his article from Spitfire GT6 Magazine on my site). Dan managed to find a smaller crank pulley that allowed him to mount his engine with the pulley over the steering rack and not have to cut the bonnet up.
I think in a turbo situation that may not be a great idea, but for normal aspiration it could be an option.
The only concern I’d have about lowering the steering rack is increasing the already poor geometry. Mind you, I’ve never seen it as a big problem, but people talk about it.
I’ve chatted with a few guys about the idea of cutting the oil pan, but my preliminary look showed that the oil pump and other bits would not allow it. At about 3:40 into this video it looks to confirm my fears. (old news now I guess)
The cutting you've done to the frame rails looks a lot like what Joe Curry did with his S2000 swap, nice.
Another thing to consider, and I'm not sure it's as big a deal with the 1.8 and 6-speed, but the clutch slave cylinder was right in line with the frame rail on my build. It wasn't until afterwards that I found an internally mounted (inside the bell housing) hydraulic slave. Very cool. It's about 3 images down on this page.... http://stevew10.wixsite.com/spit16/blank-1
Differential
I entertained the R160 as well, but around here I’ve had problems locating one… and then there is the gear ratio consideration. I’m looking for something in the 3.50 range, making it even tougher. Of course if memory serves, the Miata was up around 4.10; too high for me.
For 2 or 3 years now I’ve been running my 3.27 diff (swapped in 17 years ago) but now with the 116 HP the first gen Miata motor has. I’ve managed to keep from blowing it up so far but I think I’m pushing my luck.
I got all the GT6 RotoFlex stuff from a great guy on Spit/GT6 Forum “fgraus” but because of the leaf spring set-up I’m now thinking about doing my own thing.
Richard Peetz is doing something like what I am considering, although I’d prefer to go with simple coilovers; he has a decent log here… Including the R160; use “next post” a few times to see his IRS progress.
The other concern I had was with such a long nose on that diff I’d have to shorten my propshaft even more. Not a huge deal to do that, but I feel my geometry is already pushing the limit with a 6 deg angle between the shaft and tranny output / diff input. Shortening the propshaft will increase that angle.
Depending on how your stuff sits you may not have that issue.
Really happy to see your progress and looking forward to updates Dave. You’ve done more of this stuff than I have and I’m sure will have some better solutions than me. Keep it up.
Steve - this is super helpful, just looked at your site and can see that this will save me much time. Agree on the OBD2, will need to research how to "fake" it out in this regard, have seen where the 2nd sensor is shrouded so it gets less of the exhaust stream so it gets a cleaner reading. But I wanted the 2nd gen 1.8 for the 140 HP it makes stock, so worth the pain. I will have a check engine light as part of the conversion as it will be necessary to know what is going on. My plan is much like yours, so will keep most of the wiring as Miata, with just the lighting, horn, turn signals, brake lights, fuel level and ignition switch from the Spitfire harness remaining. Will be nice to have a real fusebox in the car. I expect to be into the wiring by the end of the year so much appreciated!
Terrific Dave, glad to share.
I know it's a lot to read but I wish I had something like that for mine; I went into as much detail as I could and also mentioned my thought processes before and after so someone in your situation will have an easier time of it and hopefully come up with some better ideas to share.
Wish I had more time to add the other component modifications I made, all of it worked out really well and even 116HP is a massive transformation; what a great car.
All the best.
Had a full day in the garage and took advantage of it to build my motor mounts. I ended up using the stock locations on the block and the existing bracket, but cut off the angled piece as it was too low for the Spitfire frame. I used the old brackets as the template for drilling holes into two places for each side of the engine and then welded the angled pieces to my new plates. This then bolted to the engine on both sides and using the original Miata rubber pieces, I was then able to mock up using cardboard the pieces for lower brackets. This allowed me to set the final height of the engine and then create the lower brackets out of steel. Welded up both sides and tacked them to the Frame for now, will reinforce them and weld them permanently to the frame when it all comes apart after I finish the transmission mount. Happy with the results and I can put my hand between the top of the engine and the bonnet. The exhaust will be tricky, I will have to do what Steve did with his 1.6 conversion and move the collector to space between the block and frame and steering towards the front of the engine, rather than towards the rear as the stock Miata header currently does.
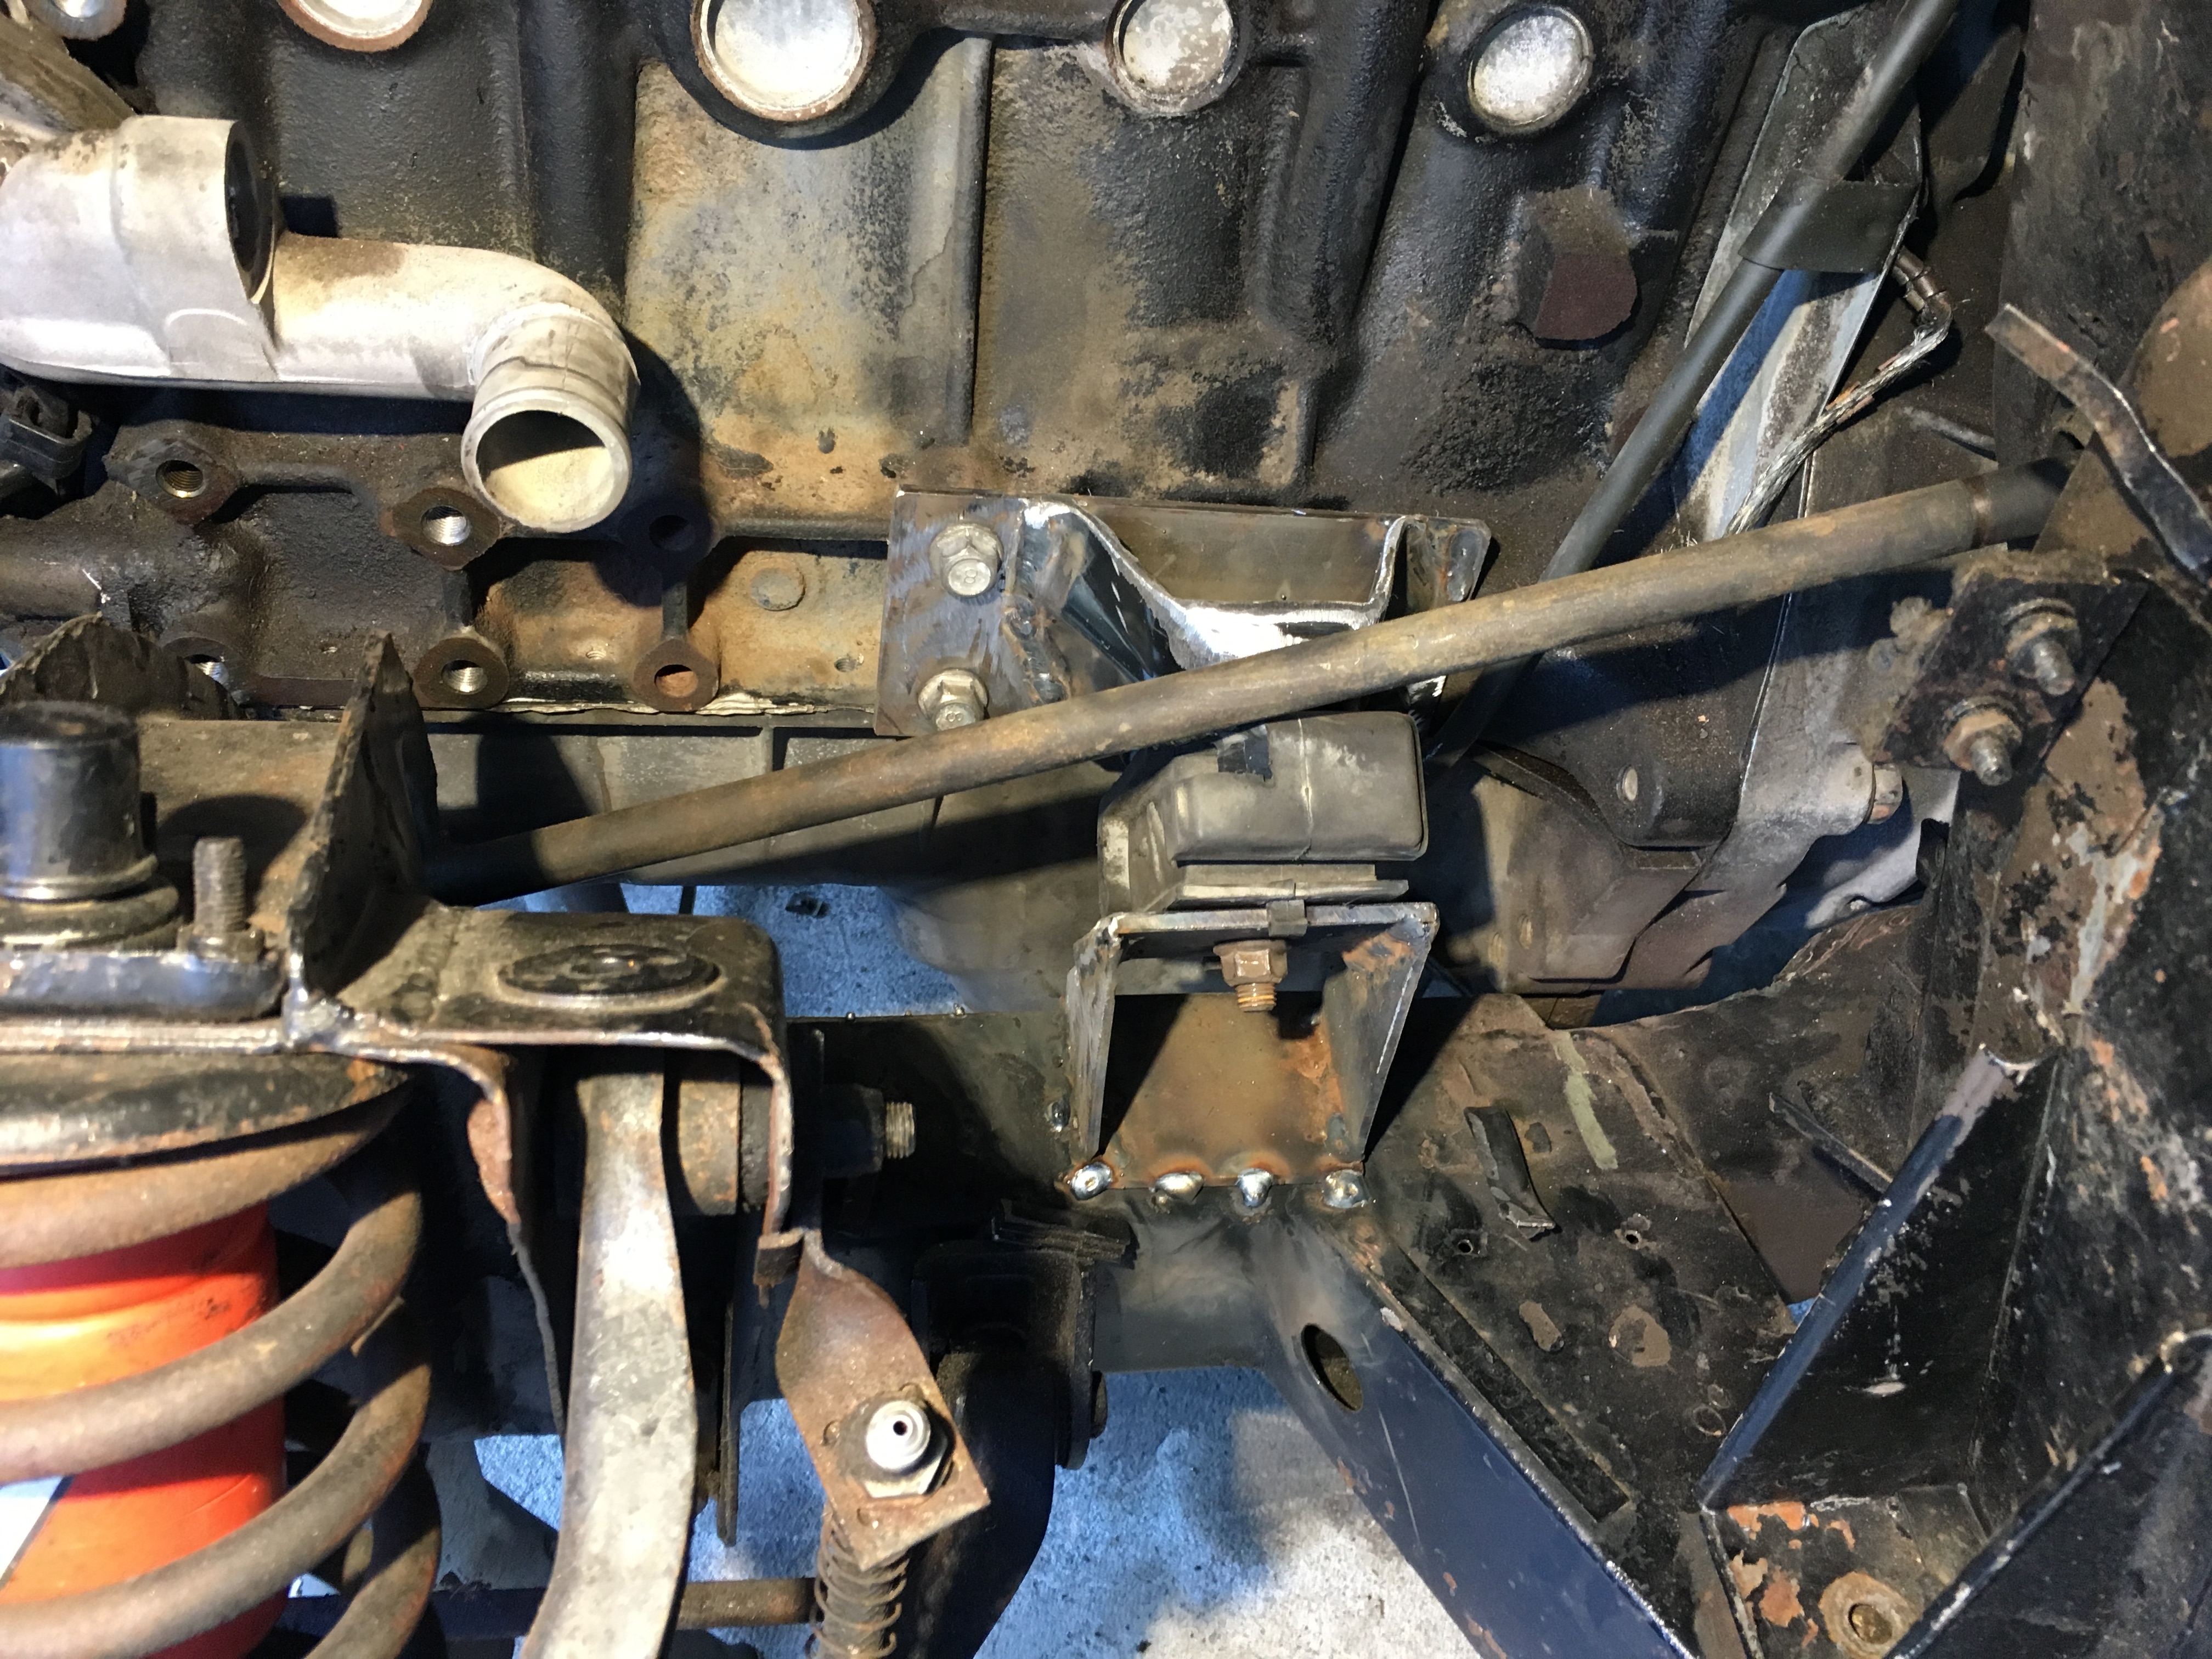
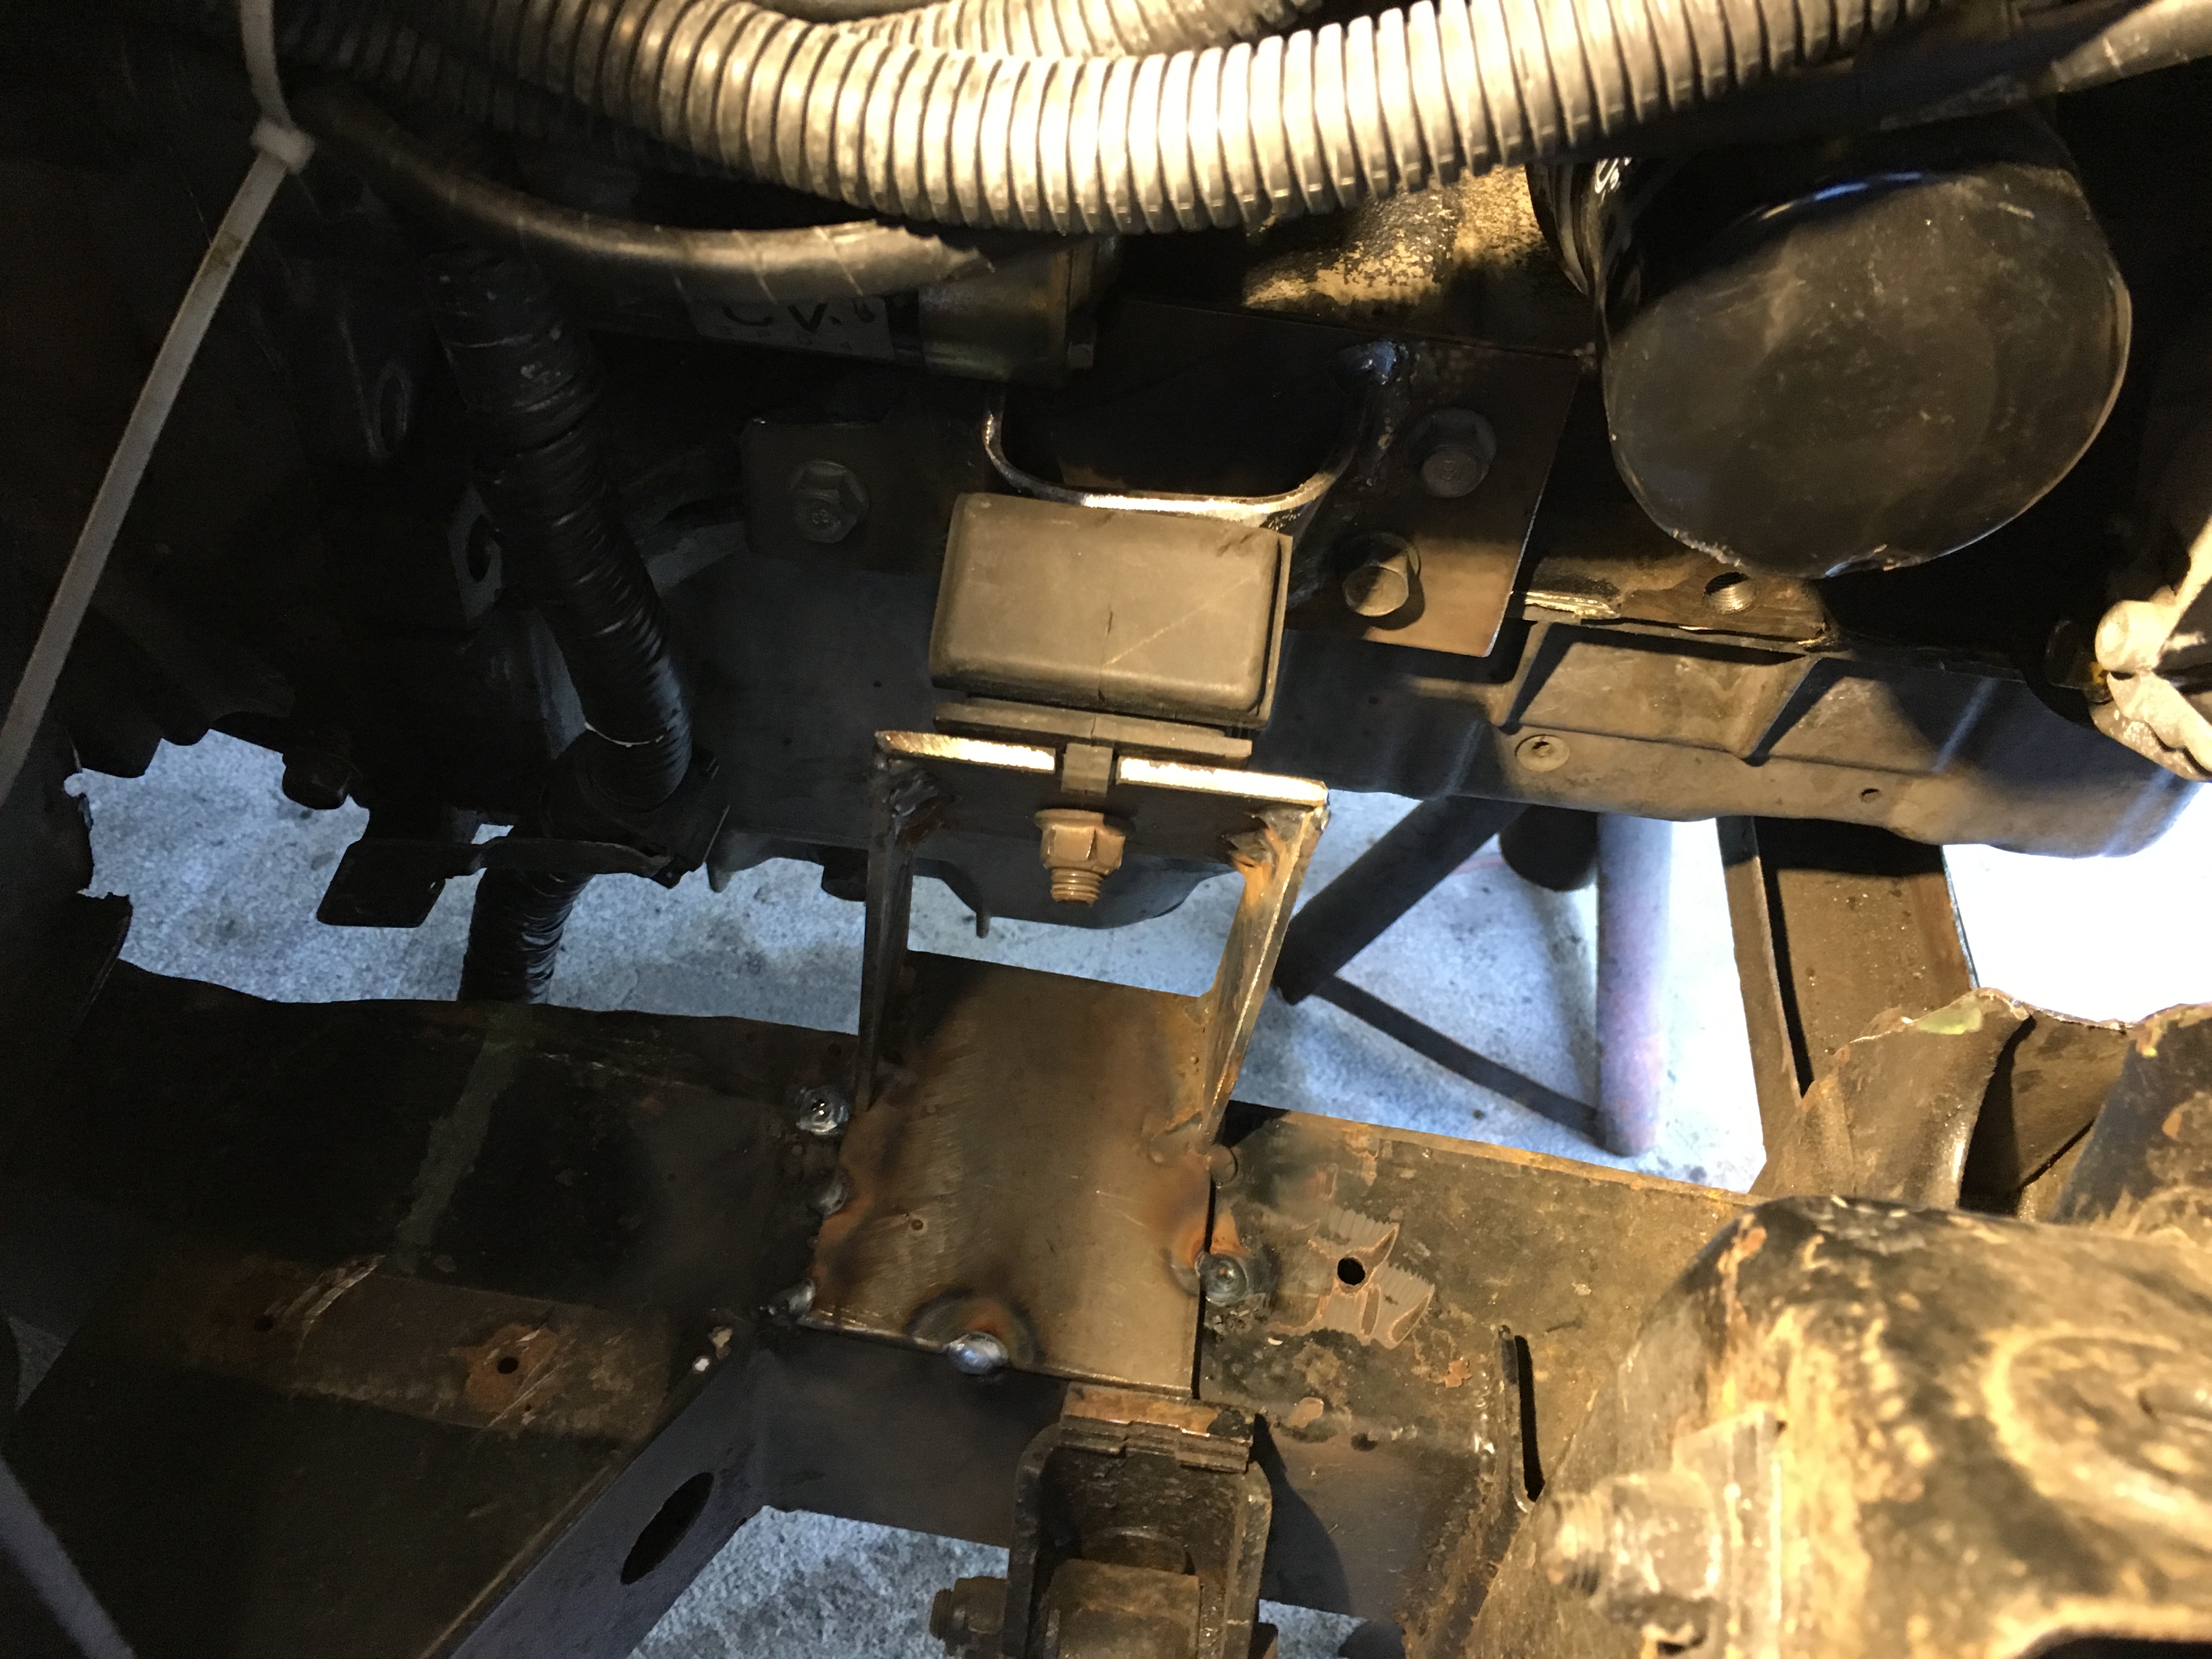
Transmission mount was built today, just used the Miata Powerframe mounting location for the bolts and two TR6 transmission mounts I had handy. Engine and transmission are now firmly mounted and the bonnet clears everything with the bodyshell back on the frame, so we are now going to strip it all down and start the real fun! Next steps are to clean the frame and weld in all the reinforcements and get it sand blasted and painted (or galvanized) or what ever I finally decide to do with it and then can start installing the trick GT6 Rotoflex rear end, new GT6 Front suspension, and the Miata drive train and get it all ready for reinstalling the body. This will take the next several months as it will also mean that I will need to prep the body so that means some minor welding, cleaning and rust proofing and undercoating before it can be reinstalled on the new chassis.
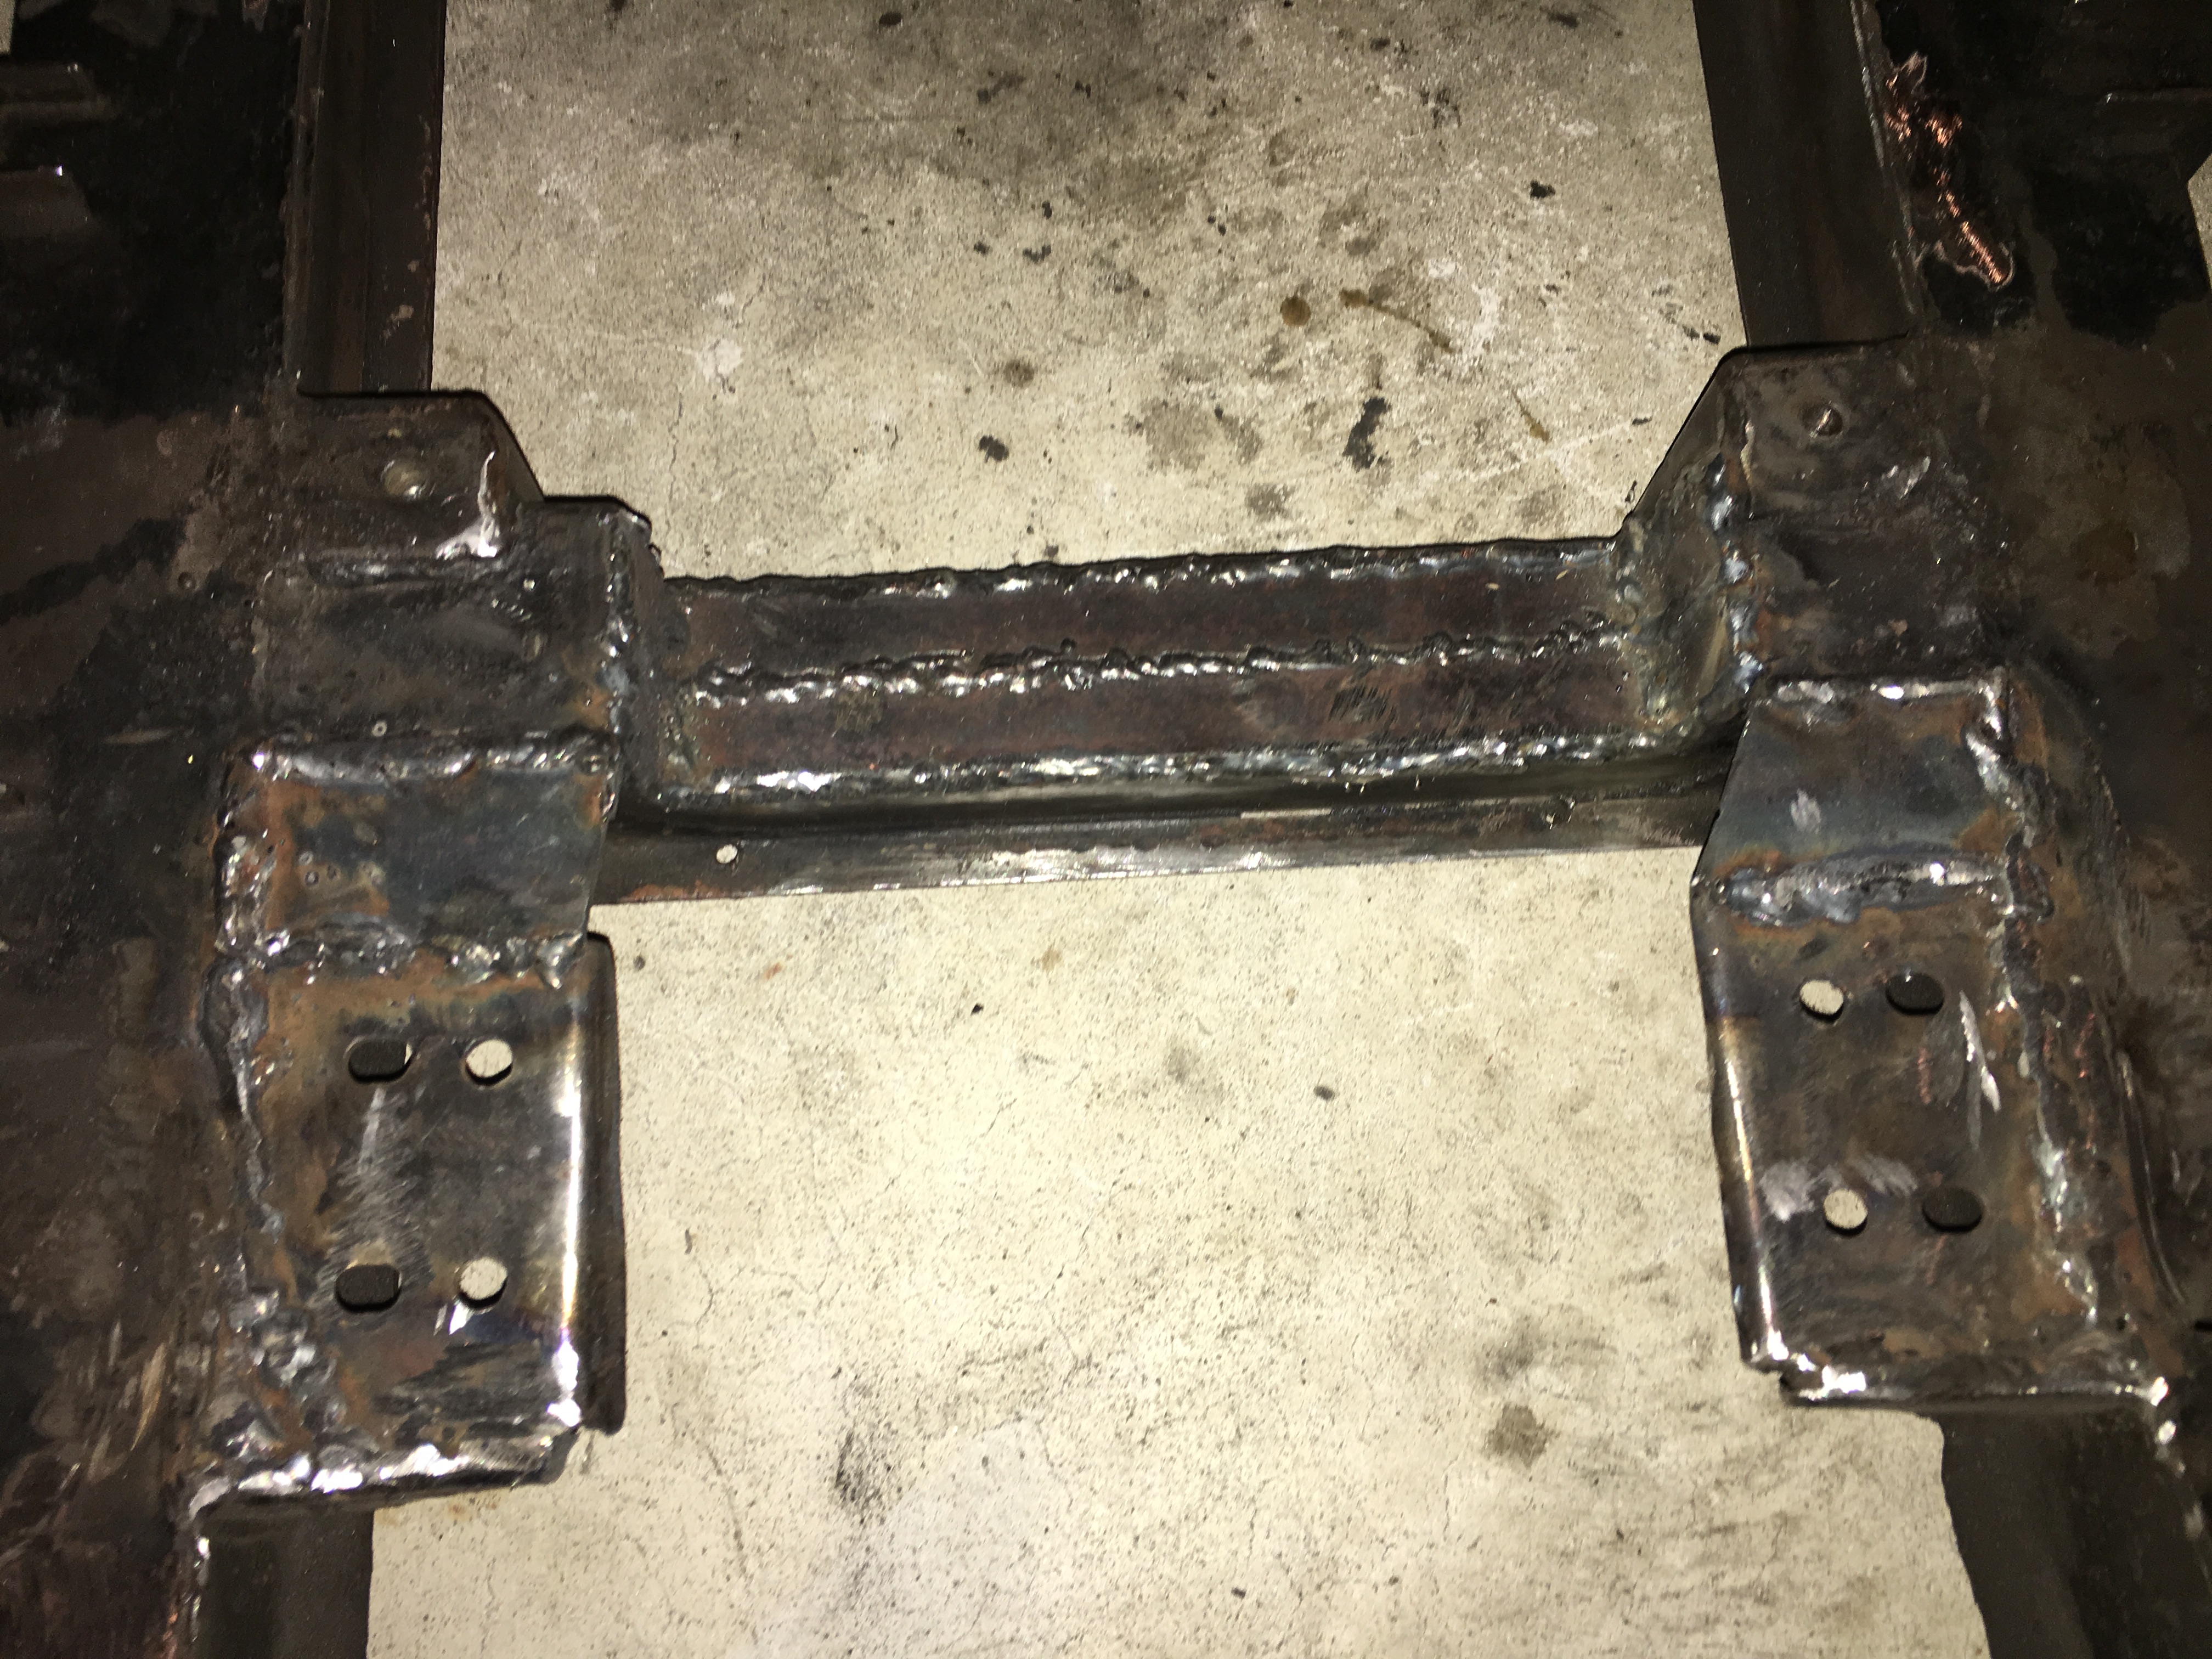
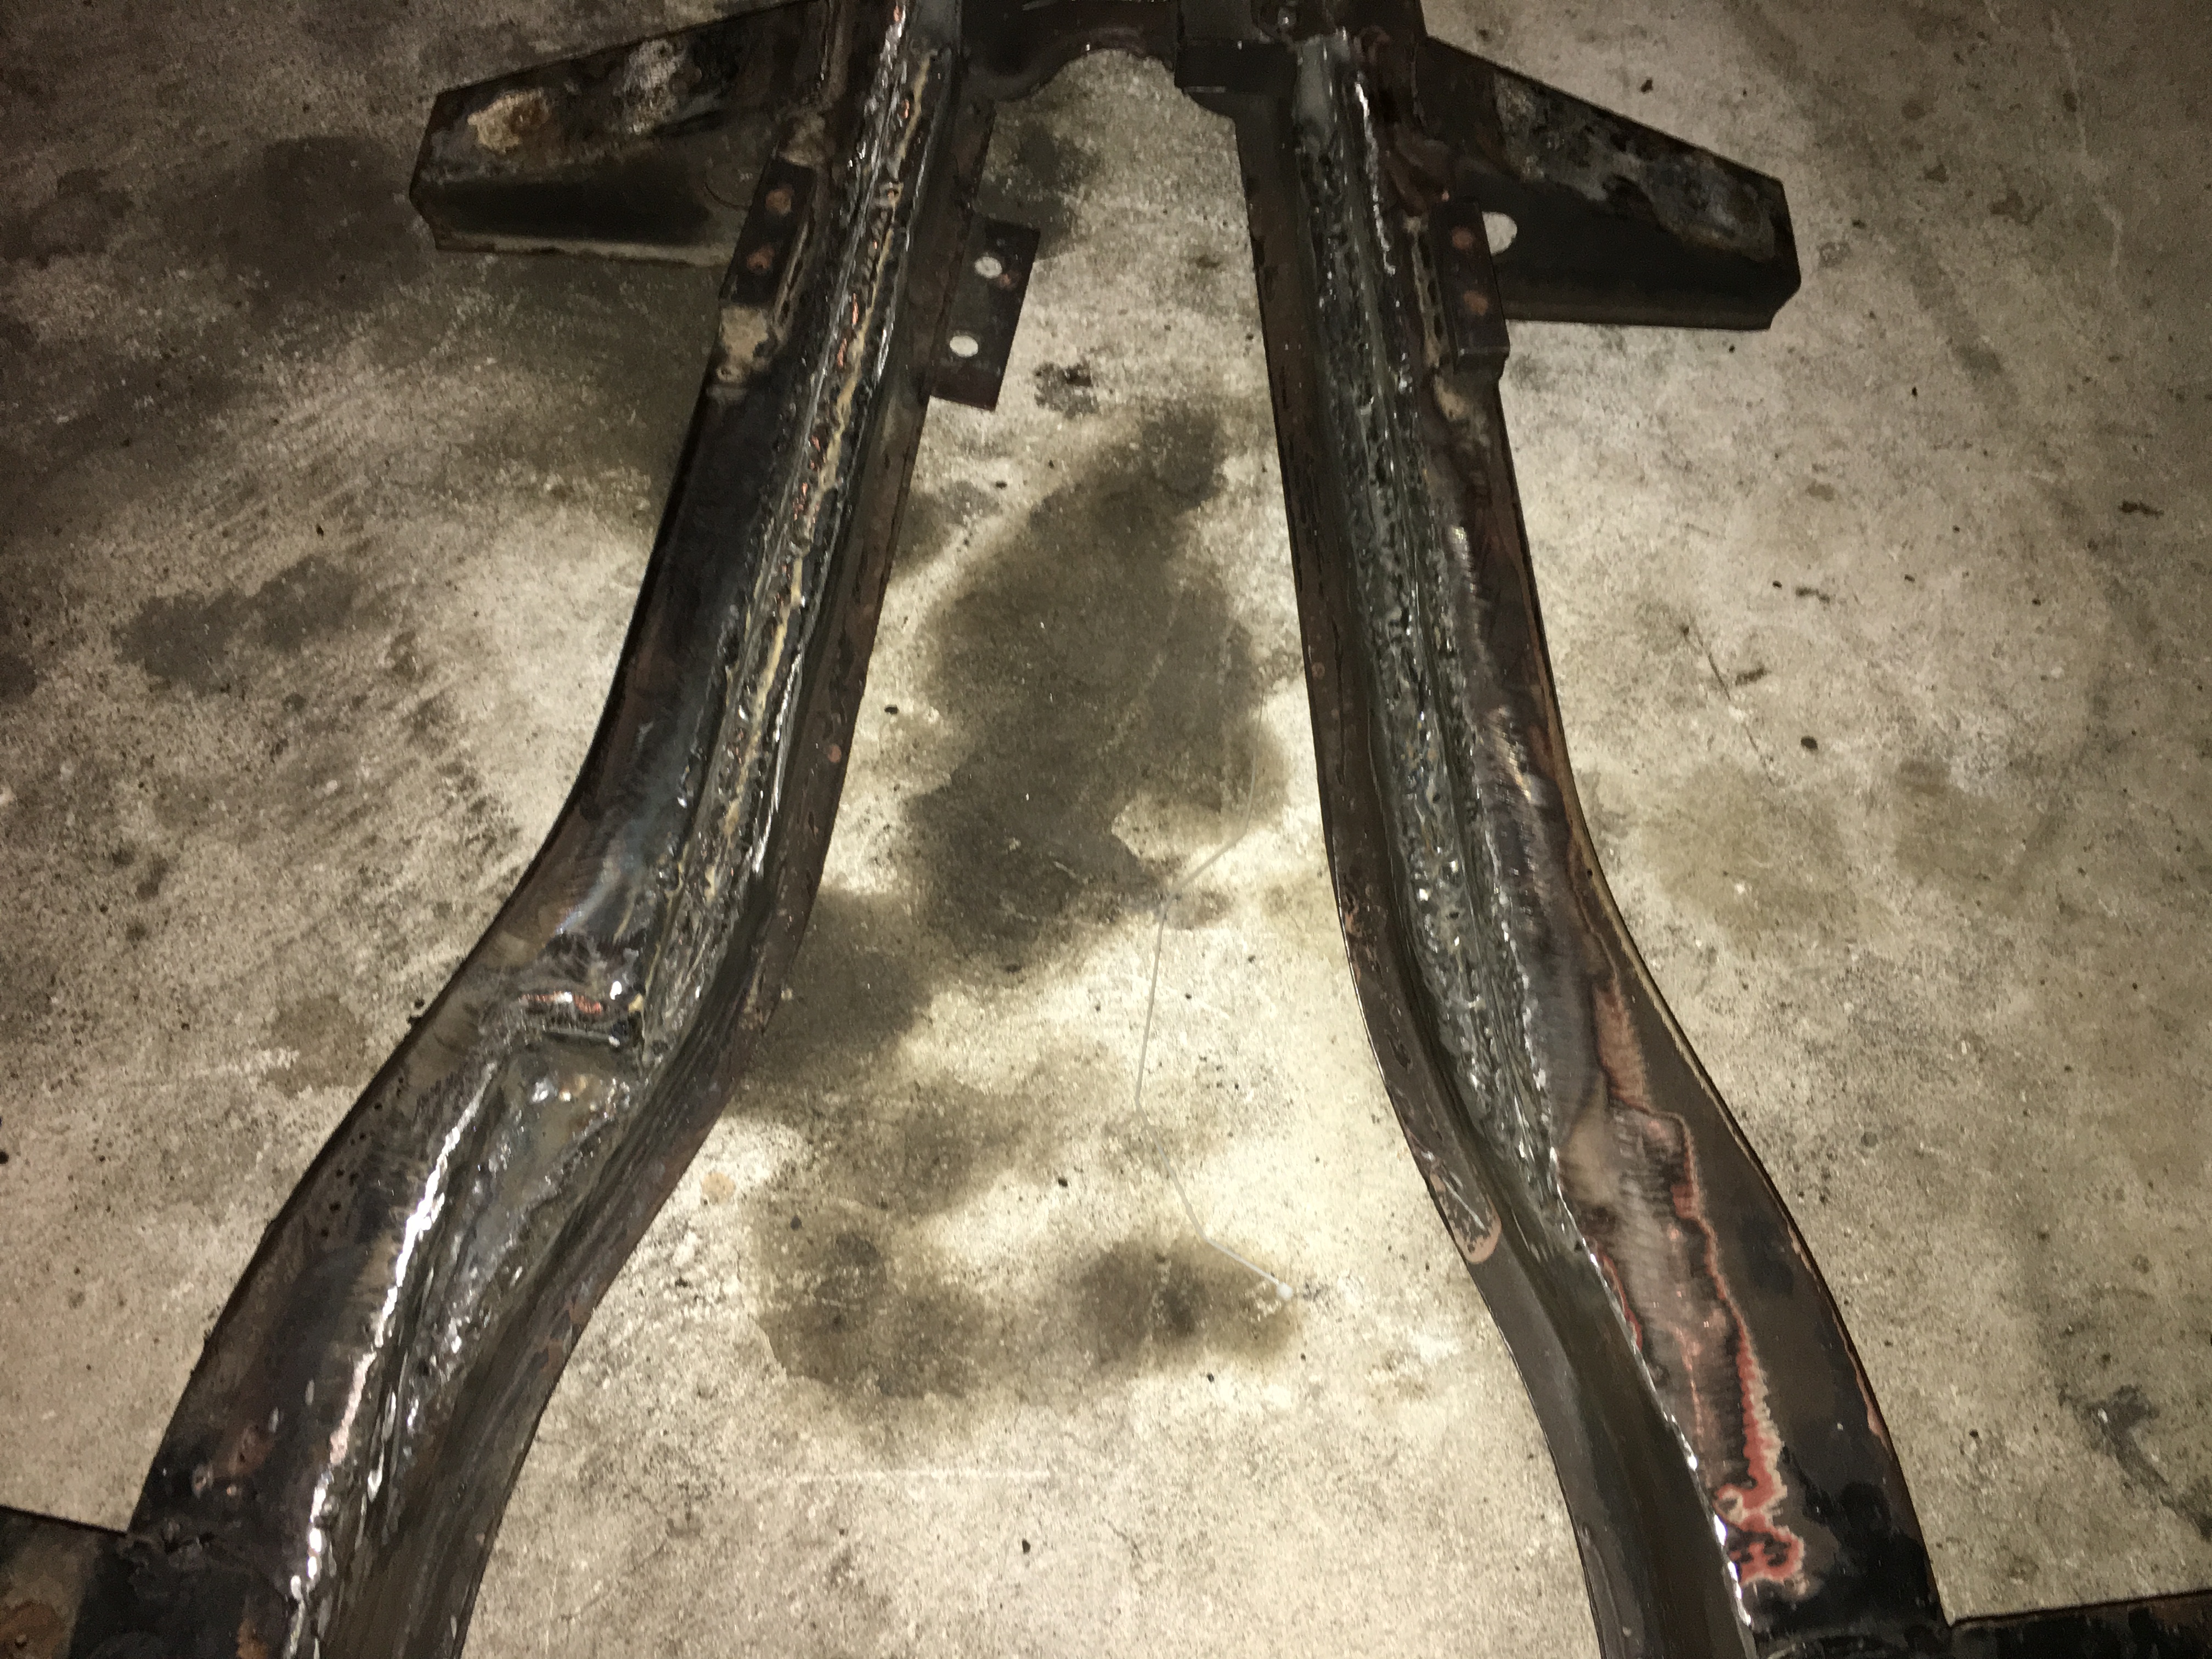
So had a full day today in the garage and took advantage of it. Welded up the frame cutouts, including the lowered steering rack, motor mounts, transmission cutouts and the rear lower wishbone brackets for the GT6 rear suspension. Frame is now 90% completed, I just need to inspect it and clean up the welds and flip it over to weld the bottom areas and then clean it for either the galvanizing or for painting with something like Por15. Still have not decided on which way I will go here, but excited to have it down to the bare frame as the project will now start to go back to building it back up once the frame is painted. I ended up being able to put in two square tube pieces into the cut front crossmember and welded it all up, so it should be stronger than the original crossmember.
So I talked with a local vendor today that does mobile "dustless sand blasting". Did my online research and watched this crazy video and others on the process. https://www.youtube.com/watch?time_continue=2&v=mpEv72FdnDs
So I called to get a quote to "dustless sand blast" my frame, suspension pieces. It was $200 done in my driveway. So I asked them to add in doing my firewall and the entire underneath of the car. This would give me a clean, bare surface to rustproof and primer/paint and undercoat before the body is bolted back to the frame. I have decided that this is a better solution than to have just the frame galvanized. This will save me a ton of time and in watching several of the videos, it really leaves a clean surface ready to be painted. They even spray it with a chemical treatment to keep it from flash rusting once it is stripped. Anyone else done this before? I ordered an Eastwood kit of rust preventative primer and two quarts of extreme chassis black for the frame, so I guess I have made my final decision on not going down the galvanized frame route.
Started working on some frame braces, looks like I can add a small cross member just behind the bell housing as there is a molded section probably to clear something on a Miata, that I can weld to the bottom of the frame. I will also add one near the back of the frame and probably one more near the front shock tower. I am planning on getting everything ready for the dustless blasting before the end of the month.

Only issue I have with the blasting is that you somehow have to wash off the protective coating with water and soap, and THEN you get the flash rust! Same deal with the Readystrip chemical process that I used for the Bugeye restoration.
Not a total dealbreaker, but worth keeping in mind.
You'll need to log in to post.


