


Wow!  Where does the Rat part come in?

Wow! Where does the Rat part come in?

Scope creep..... the rat part was that this was supposed to be an engine swap in my old Spitfire. I will be keeping the old body and paint as part of the project, but the truth is this is a fully restored car under the "patina" of the Spitfire body. The Spitfire body will be rust free and have new floors and be coated with bed liner and bolted back on the restored chassis. So the goal is that this looks like an old "survivor" Triumph with some nice wheels on it. But in true "wolf in sheep's clothing" style, it will be packing over 4 times the power of a stock Spitfire and have a rear suspension capable of handling the power. Acceleration calculators are showing around 4.5 second 0-60 times. It is going to be fun to lift the hood on this at the Import Show at Carlisle this year and see the reaction.

In reply to dherr :
Oh fun! So the goal is driving before Carlisle? My goal is also to have mine running fairly well in time for Carlisle!

That'll be awesome if you can make it to Carlisle. I'm planning to have my GT6 there along with the rest of the area NASS crew. A whole row of Spits with the bonnets up is a fun thing to do. Hope you will join us?
So the challenge has been laid down! Gentlemen, start your engines! Okay, guess I need to get back to the garage and do a little more work. I do think I can get this on the road by May, the chassis will be completely done by the end of the month and then I just need to do the body, which is not too big of a deal since it is just limited to cutting out the floors and welding in the new pieces and then just painting and applying the bed liner to underneath and bolting the body back down. Then I can do the wiring and get it running and then hook up the remaining systems, but the bulk of the work will have been done.
Ian F said:That'll be awesome if you can make it to Carlisle. I'm planning to have my GT6 there along with the rest of the area NASS crew. A whole row of Spits with the bonnets up is a fun thing to do. Hope you will join us?
Yes, I plan on joining the NASS club at the show, It does not appear to be current on the web site?
Cool. Now we just need to talk foxtrapper into bringing his Spit out of the shed and parking with us and we can have a good "GRM-Spitfire (and a GT6)" gathering. I'll see if I can get a friend to drive my Spitfire as well, then Doc Brown will also be represented in a distant way.

dherr said:I was not planning on running a PWDA (don't think they are on a 72?)
In my experience, the PWDA *is* the failure in the braking system.
I agree, I fail to see the benefit, the car already has the dual master cylinder and the PWDA is such a PITA for many people since it leaks and causes other problems. I will build it without and can always add a brake proportioning valve if necessary, but I doubt the upsized GT6 drums will out brake the Spitfire front rotors with decent hawk pads. My weight balance front to rear is still TBD but the Spitfire engine and transmission weights in within 50 pounds of the Miata engine/transmission and is mounted further back so my weight balance should be good. I will be putting the battery in the trunk as well and putting the Hydra in the original battery location.
In reply to dherr :
PWDA was purely adopted to satisfy US NHTSA requirements to illuminate an idiot light upon brake system failure when Triumph switched to dual braking circuits.
No capability for brake balance or proportioning, just useless hardware to check the box on the paperwork and pass.
Very nice work.
The PWDA is great for making bleeding a PITA. Of course, after rebuilding/bleeding the brake system on an Volvo 1800ES, the PWDA on the Triumphs is trivial. The Volvo has one as well, plus oh so much more....
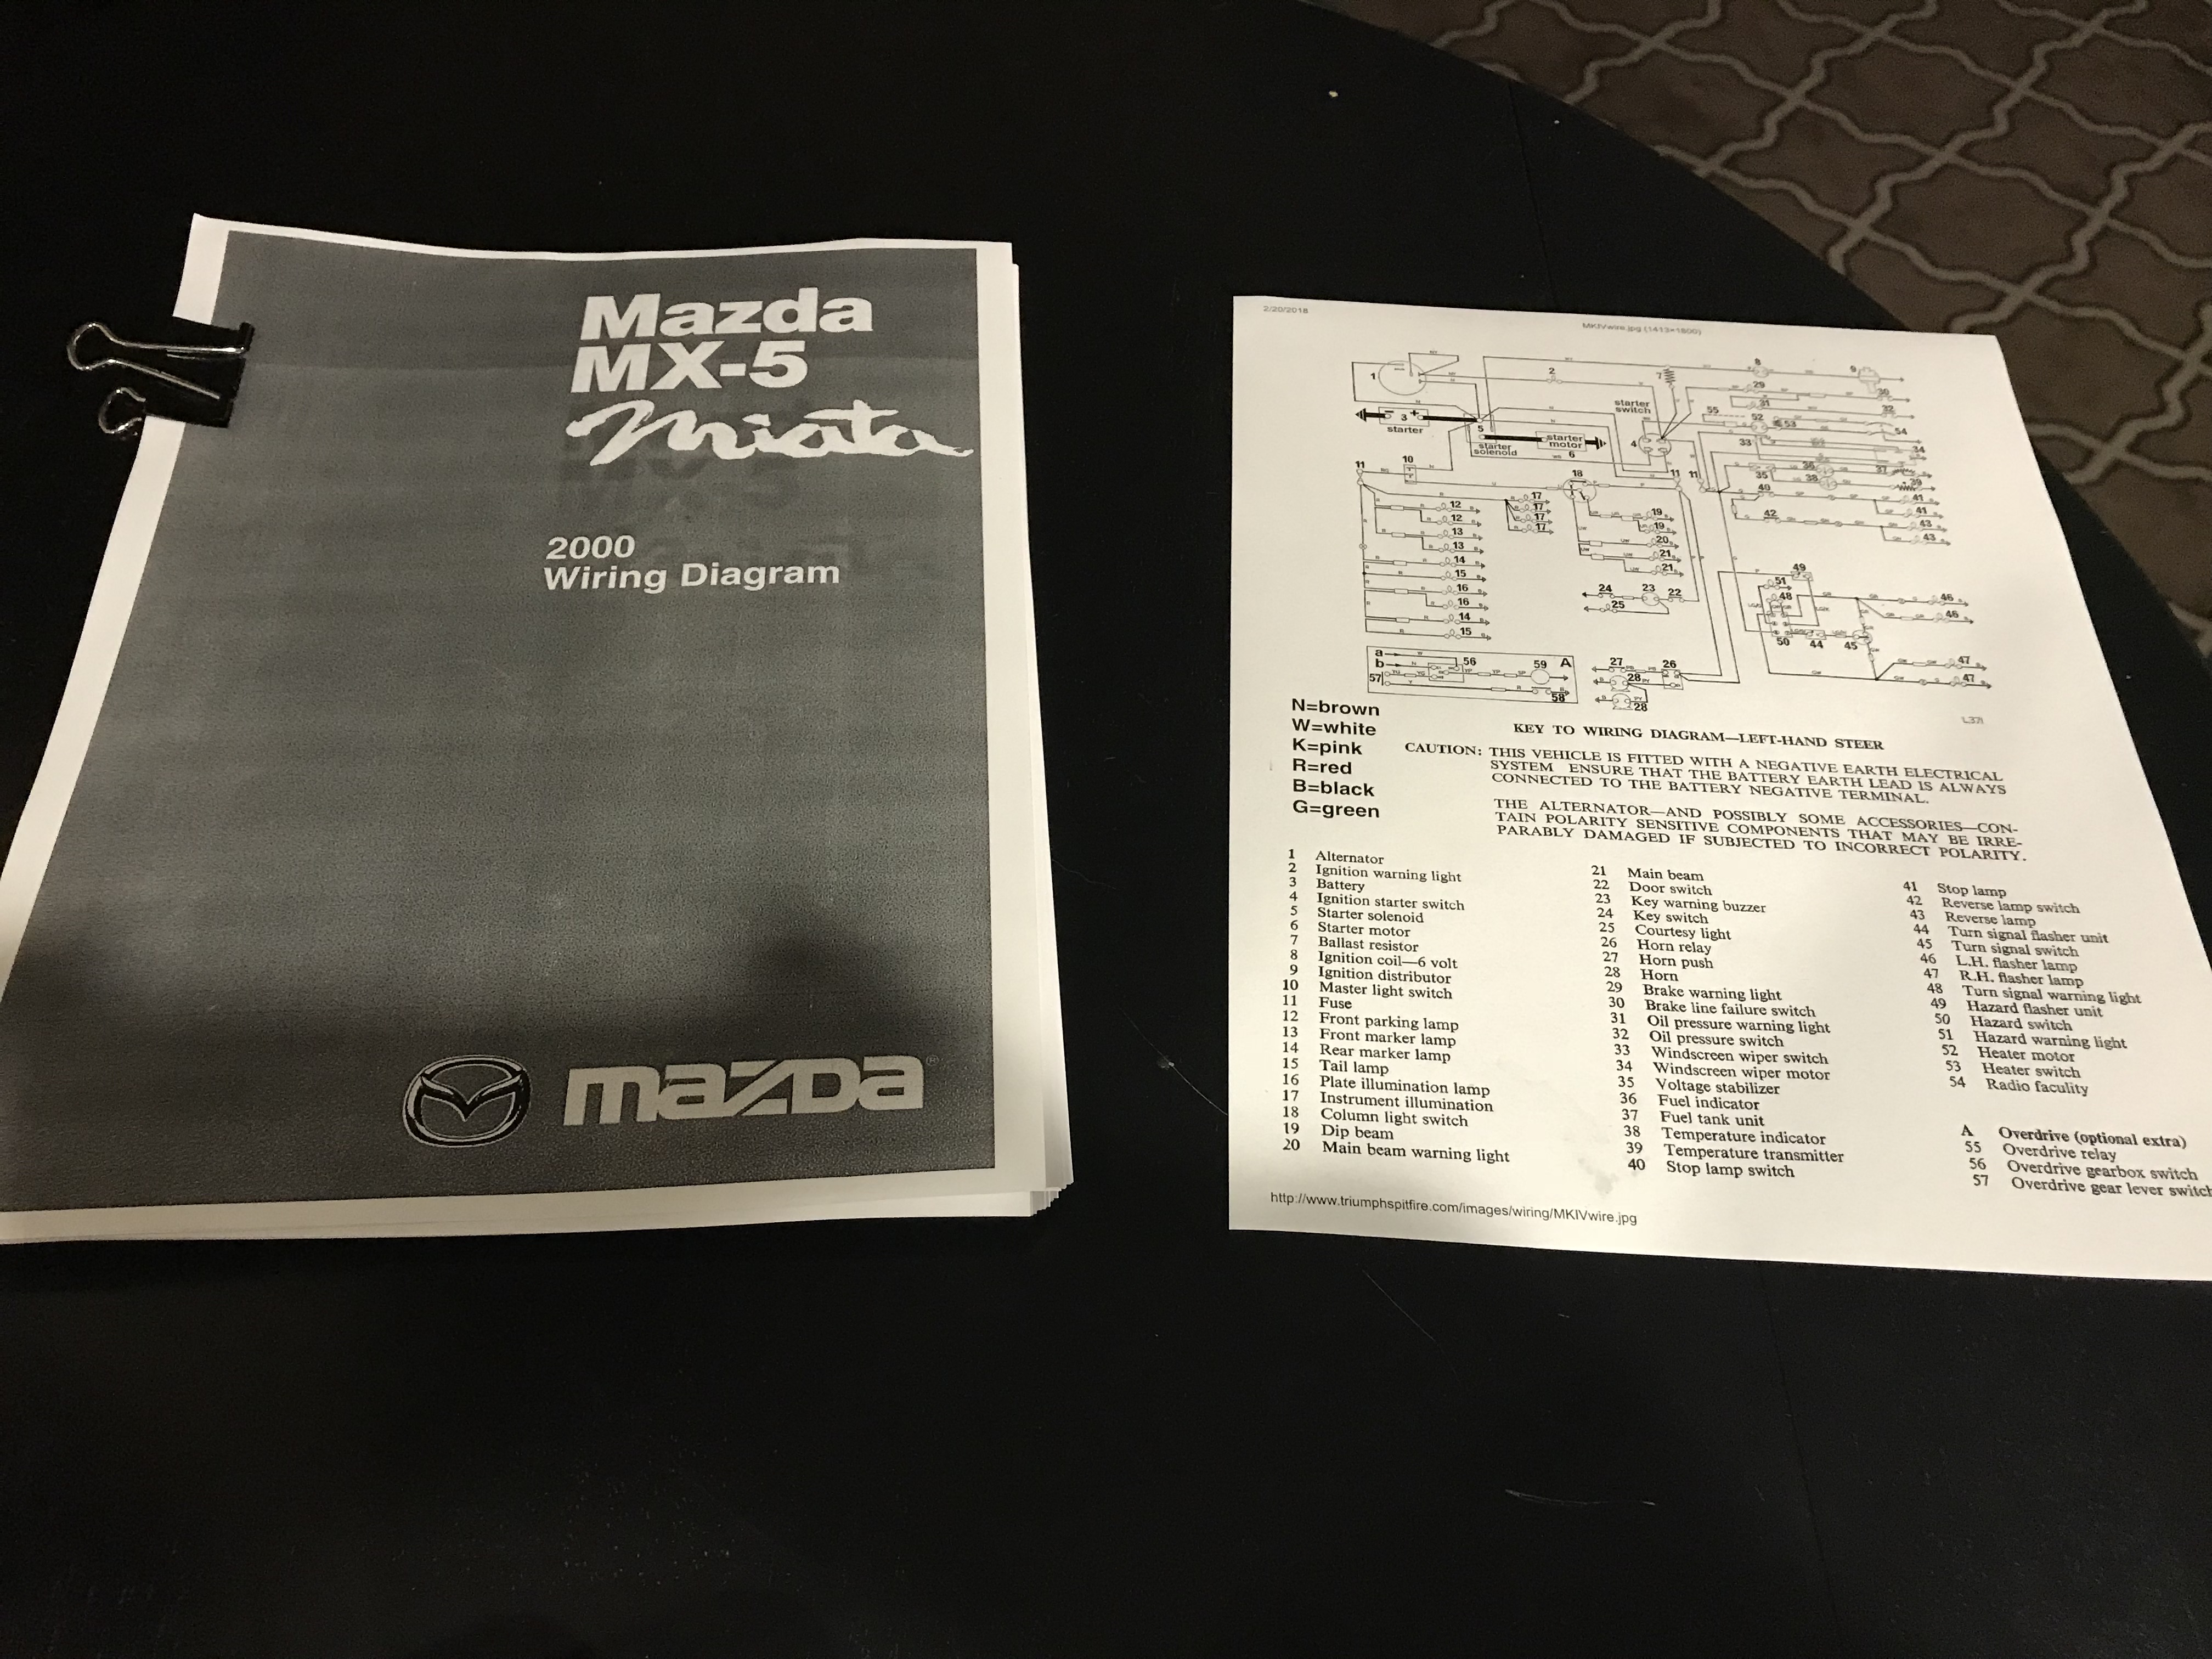
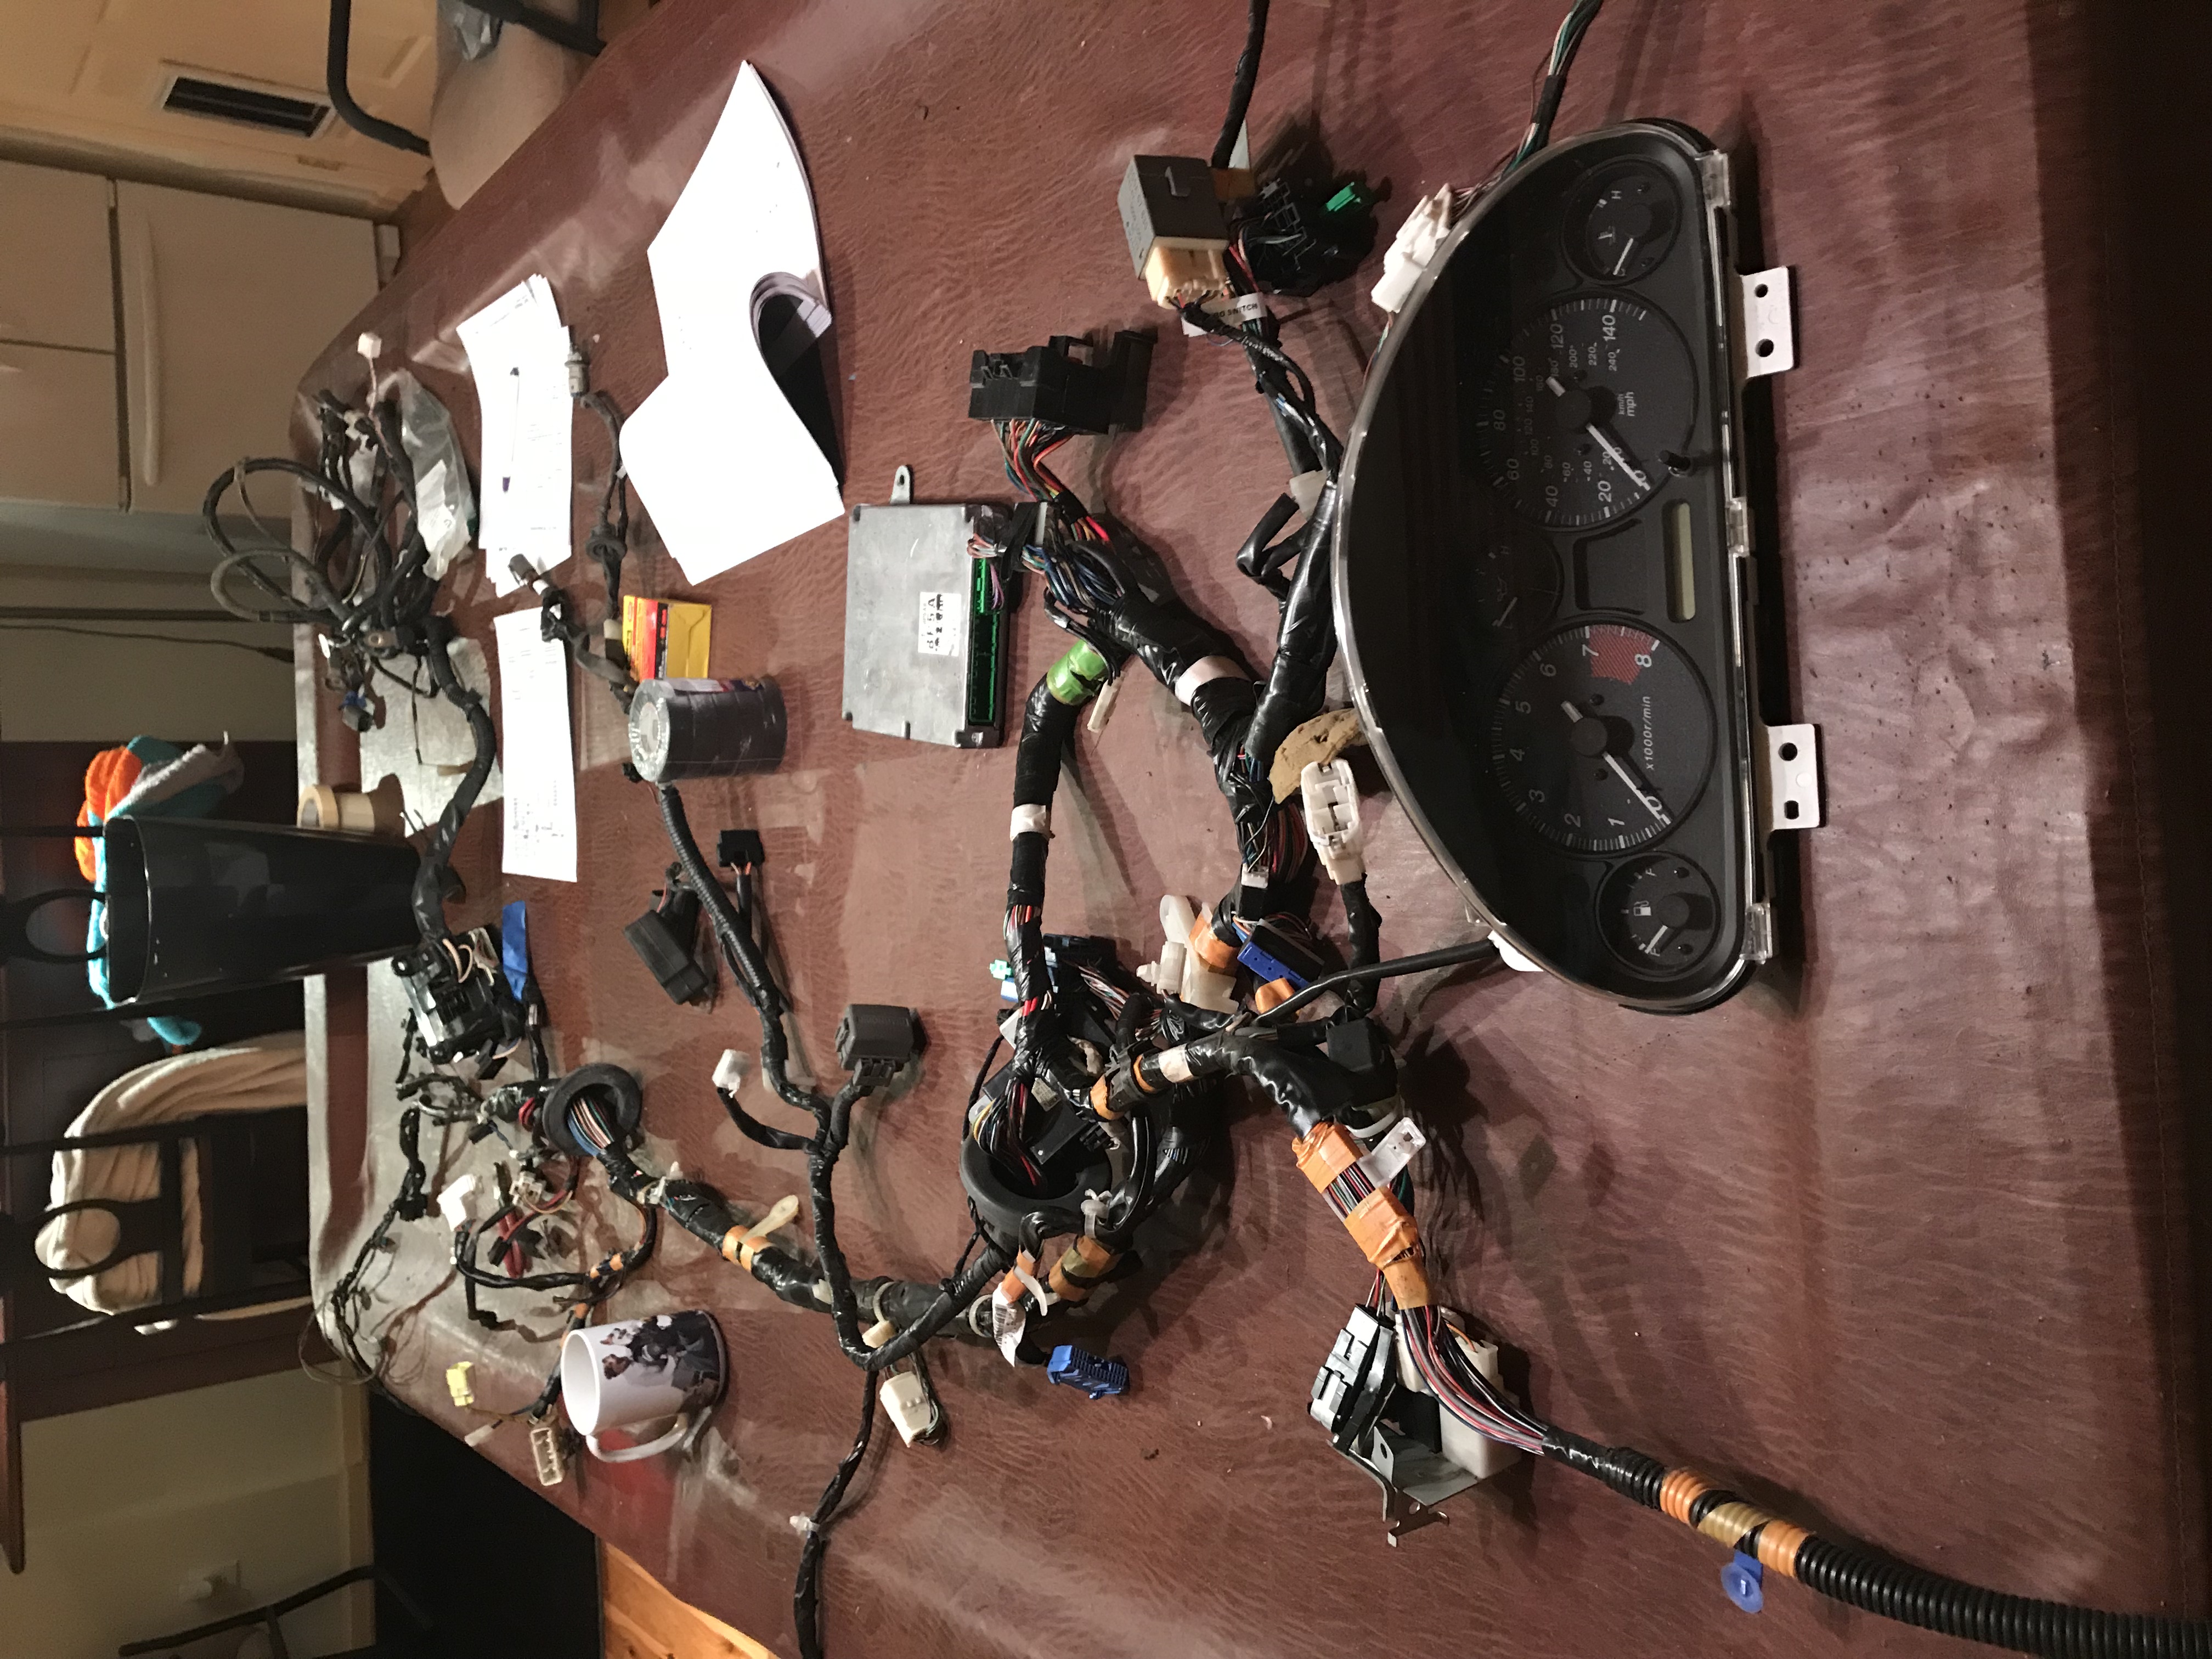
So while I work on one system, I am working mentally on the next, so the electrical system has been on my mind lately. I have been collecting Miata wiring harnesses, but did not have most of the pieces, so I finally bit the bullet and ordered a full 1999 Miata wiring harness. The normal course of action is to add the Miata engine/ECU management systems into a Triumph wiring harness, but I am thinking a better solution is to do the opposite. My car will have a full Miata gauge cluster and the Hydra and a Boost and AFR gauge in a custom dash panel. I am thinking that my best approach would be to pare down the Miata harness to just the circuits that I want to keep. It would be relatively easy to splice in the Triumph harness connectors for the lights, horn and ignition switch and turn signal switch and keep the rest Miata. The other advantage to this is it gives me proper relays and fuses for the circuits that the Triumph electrical system was pretty marginal at best. I think the picture below sums it up well, the Triumph wiring diagram is on the right (all one page of it) and the 89 page Miata manual is on left. Lots of evenings coming soon with the wiring manual and a crimper tool......

I'd agree with your plan Dave, there really isn't very much to the Spit system. Like most guys I did kind of a double system, engine and domestics keeping the Spit Fuse Box. Eventually I'll clean that up as well.
I posted some stuff on my site, and although the earlier electrical system isn't as complex as yours, hopefully you can get something out of my schematic at the bottom of this page http://stevew10.wixsite.com/spit16/electrical took longer than the swap did to put it together :(
That was what I heard from others, it seems to be much more complex to try to figure out what pieces of the miata to keep to splice into the Spitfire. Since I am keeping all the gauges, it just made sense to just splice in the end points for lights, turn signals, etc.... we shall see......
I agree as well. Especially if you plan to keep the Miata wiper and lighting controls. I forget if the car will retain a heater? If so, it should be too hard to pin out a power feed to the primitive Spitfire heater system.
The car will retain a heater. Since I did the reverse cooling trick on the Miata motor, the Spitfire heater valve when closed won't mess up the flow from the cylinder head, so the spitfire valve and controls will work fine. I can just power the fan from Miata fuse box and use the Spitfire switch. I will take a look at the Miata turn signals and light controls as if that can be mounted on the Spitfire column, that would make it even easier as then other than the ignition key, the rest of the wiring is just the end points.
I actually found that part pretty easy, that is, determining which parts to keep; there really was no integrating (although I wasn't keeping the Miata cluster). They are pretty well defined and are easy to separate on both the Spit and my gen Miata. It was definitely easier to do it as two units, but one system will be nice and clean.
So worked a little this weekend, finished up my turbo feed and drain lines (used a kit but ended up shortening the drain line to work better with my chassis. Definitely a tight fit, but it all went together well. I also did my fuel lines, once I learned the tie wrap trick, the lines were pretty quick to make up. So back to my wiring, I have it all on the pool table downstairs so I can work through it slowly. This will definitely take some time as it is hard to identify everything since I did not remove it from the car, but most things are labeled. I removed the first circuit tonight, the door wiring circuits for the power windows, door locks and side mirrors. I'll keep removing systems and labeling what I want to keep and then I can see what I have left.
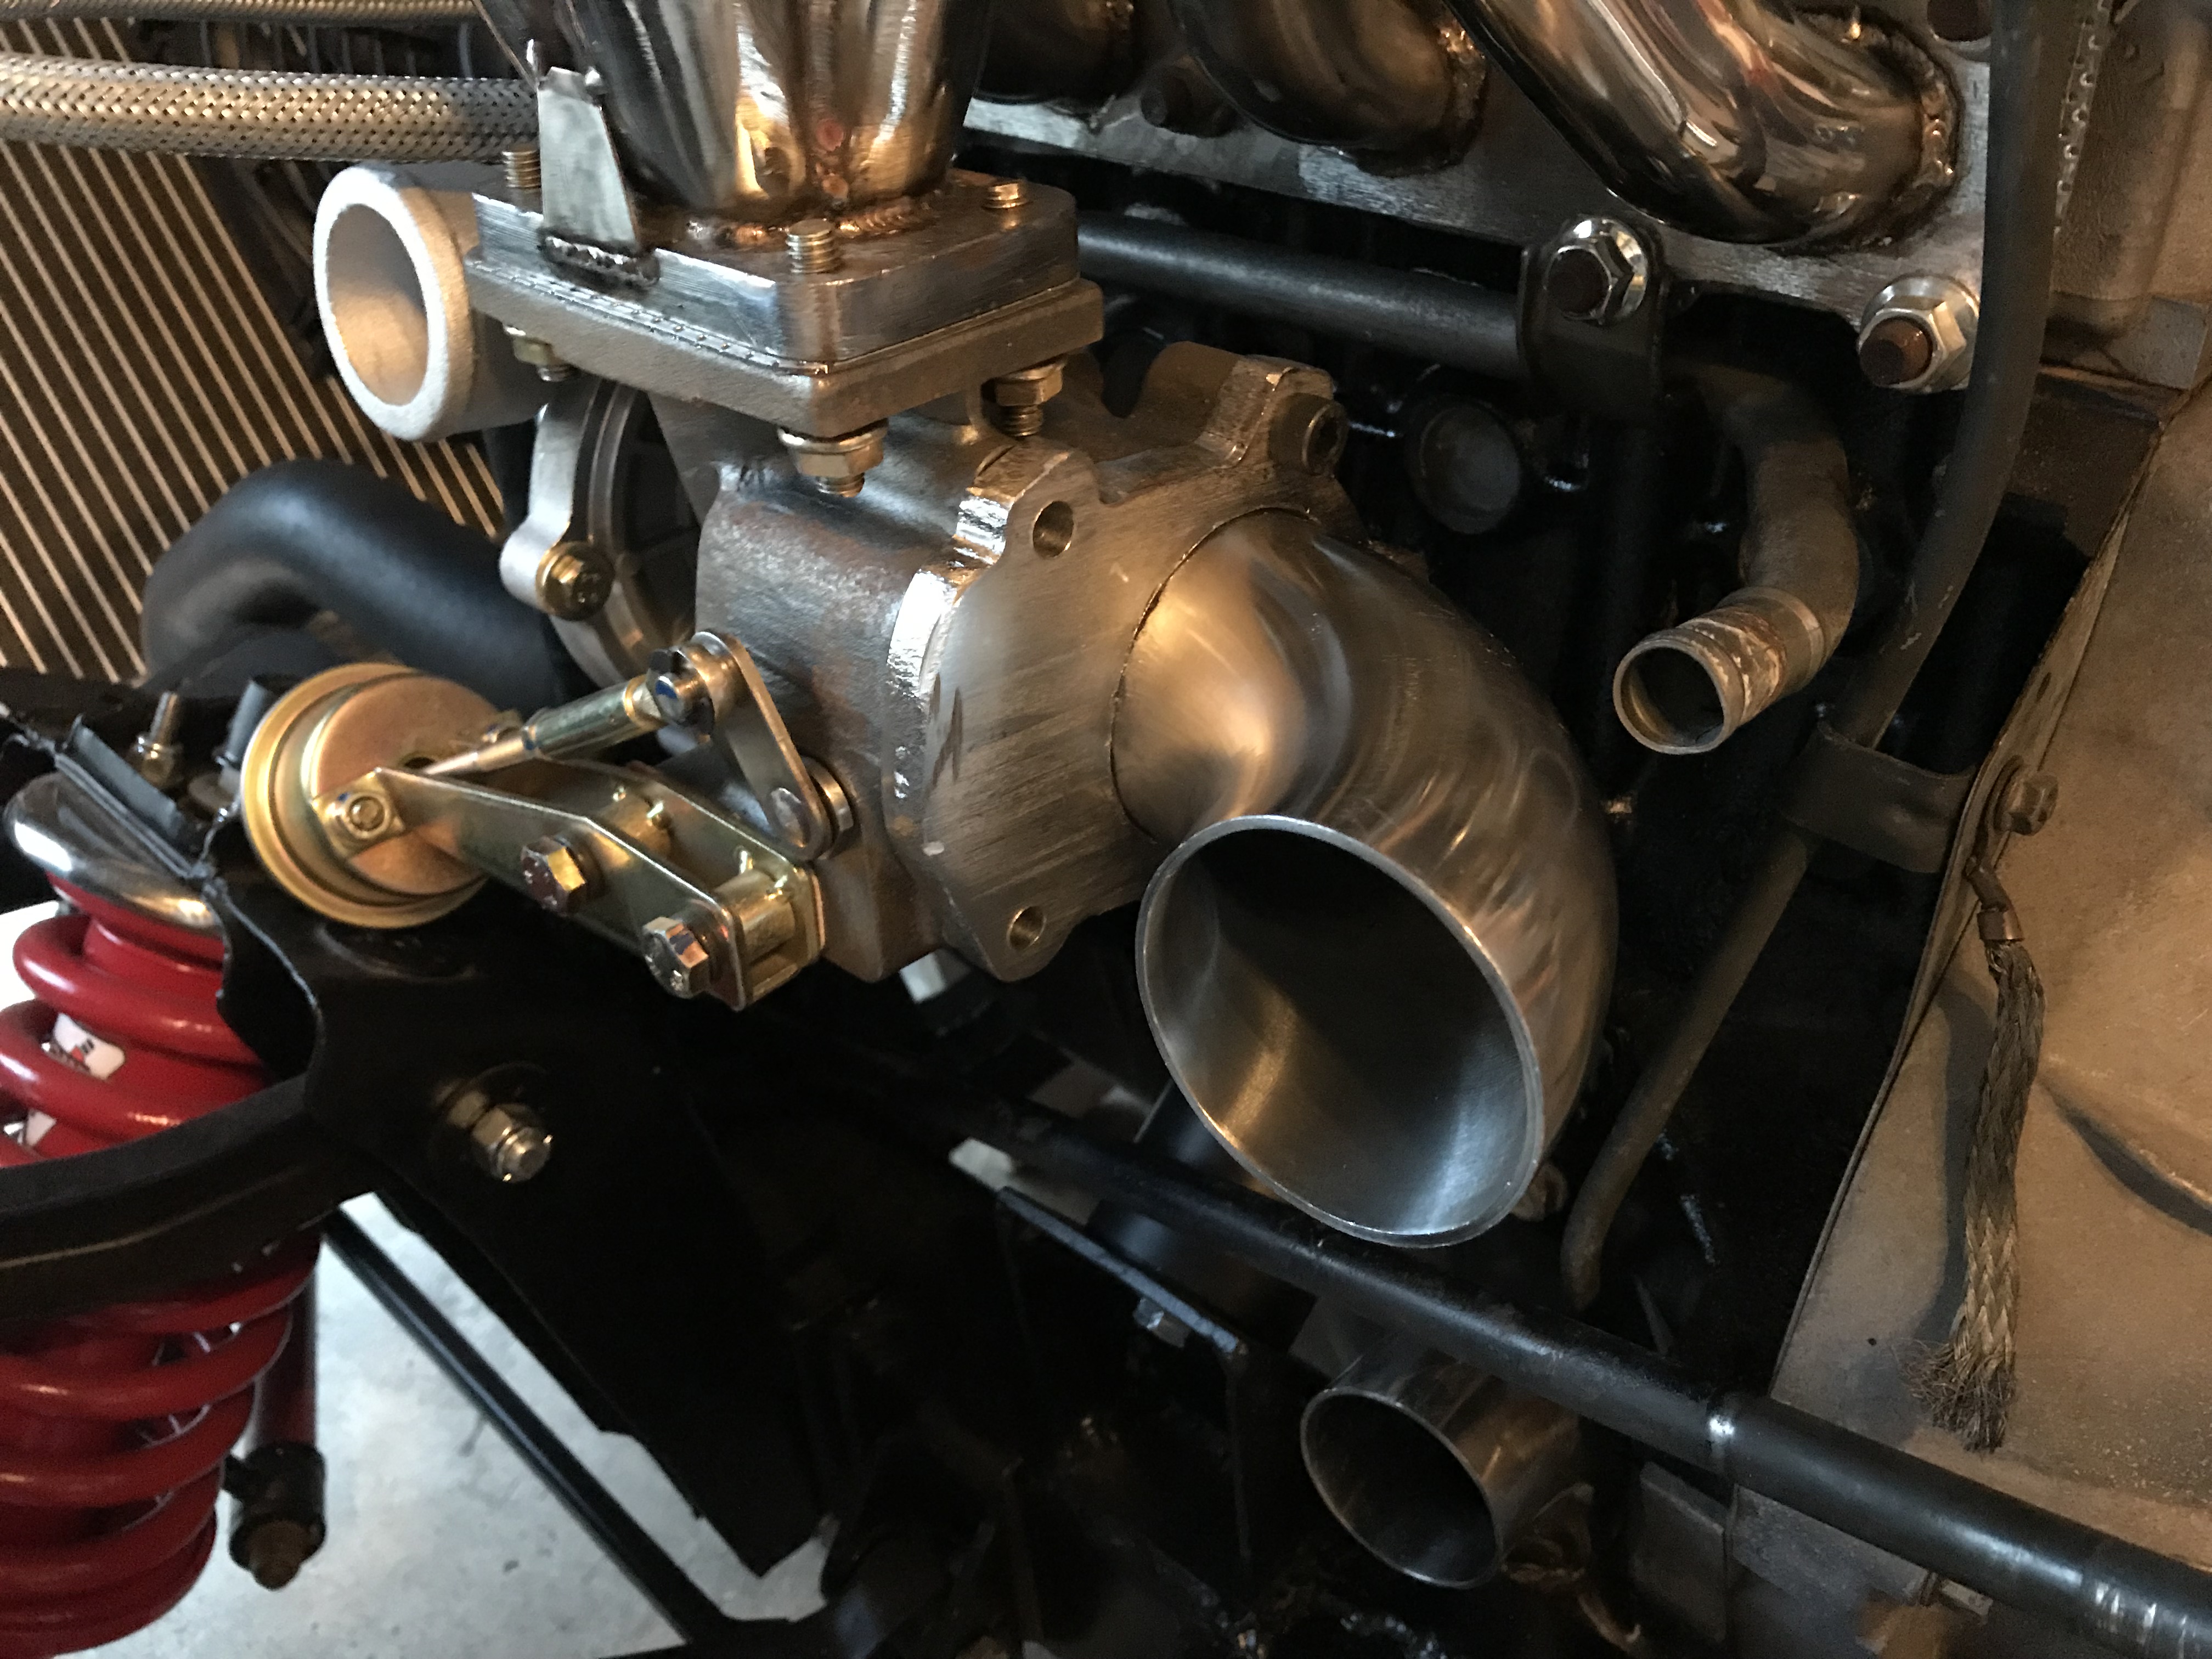
So working on inside and out in the garage projects. While I work on wiring inside in the evening, I have been working on finishing my exhaust in the garage. Since I decided to build a custom turbo downpipe, I ended up getting a 3/8 thick 304 SS plate and a 3mm thick tight 90. I cut it out using the original turbo end plate as the template and drilled the holes and then drilled a 2-1/4 hole for the elbow. I then used a burr grinder to cut out the remaining 1/4 for a tight fit and gaining another 3/8 since it now flush with the inside. Fits nicely, will clean it up and weld it when I finish the rest of the downpipe. This will consist of three 90 elbows and a 2-1/2 to 2 adapter that will then join the exhaust with a band clamp. I will have to re-route the heater return line, but not too much. The exhaust downpipe will basically loop around the steering and should clear everything.

Nice!

This looks all too familiar!
Pete

Fuel line ziptie trick? Care to elaborate?
Also, what year miata are you paring down? Getting close to wiring on my swap.
For cutting stainless steel braided fuel line, if you wrap a tie wrap around the end tightly and then cut off flush with a cut off wheel, you can then clip off the tie wrap and you have a nice neat cut that will go right into the fitting easily. I assembled 8 connections in less than an hour once I discovered the trick . Spent the first hour fraying the end and getting mad!
My Miata harness is from a 1999
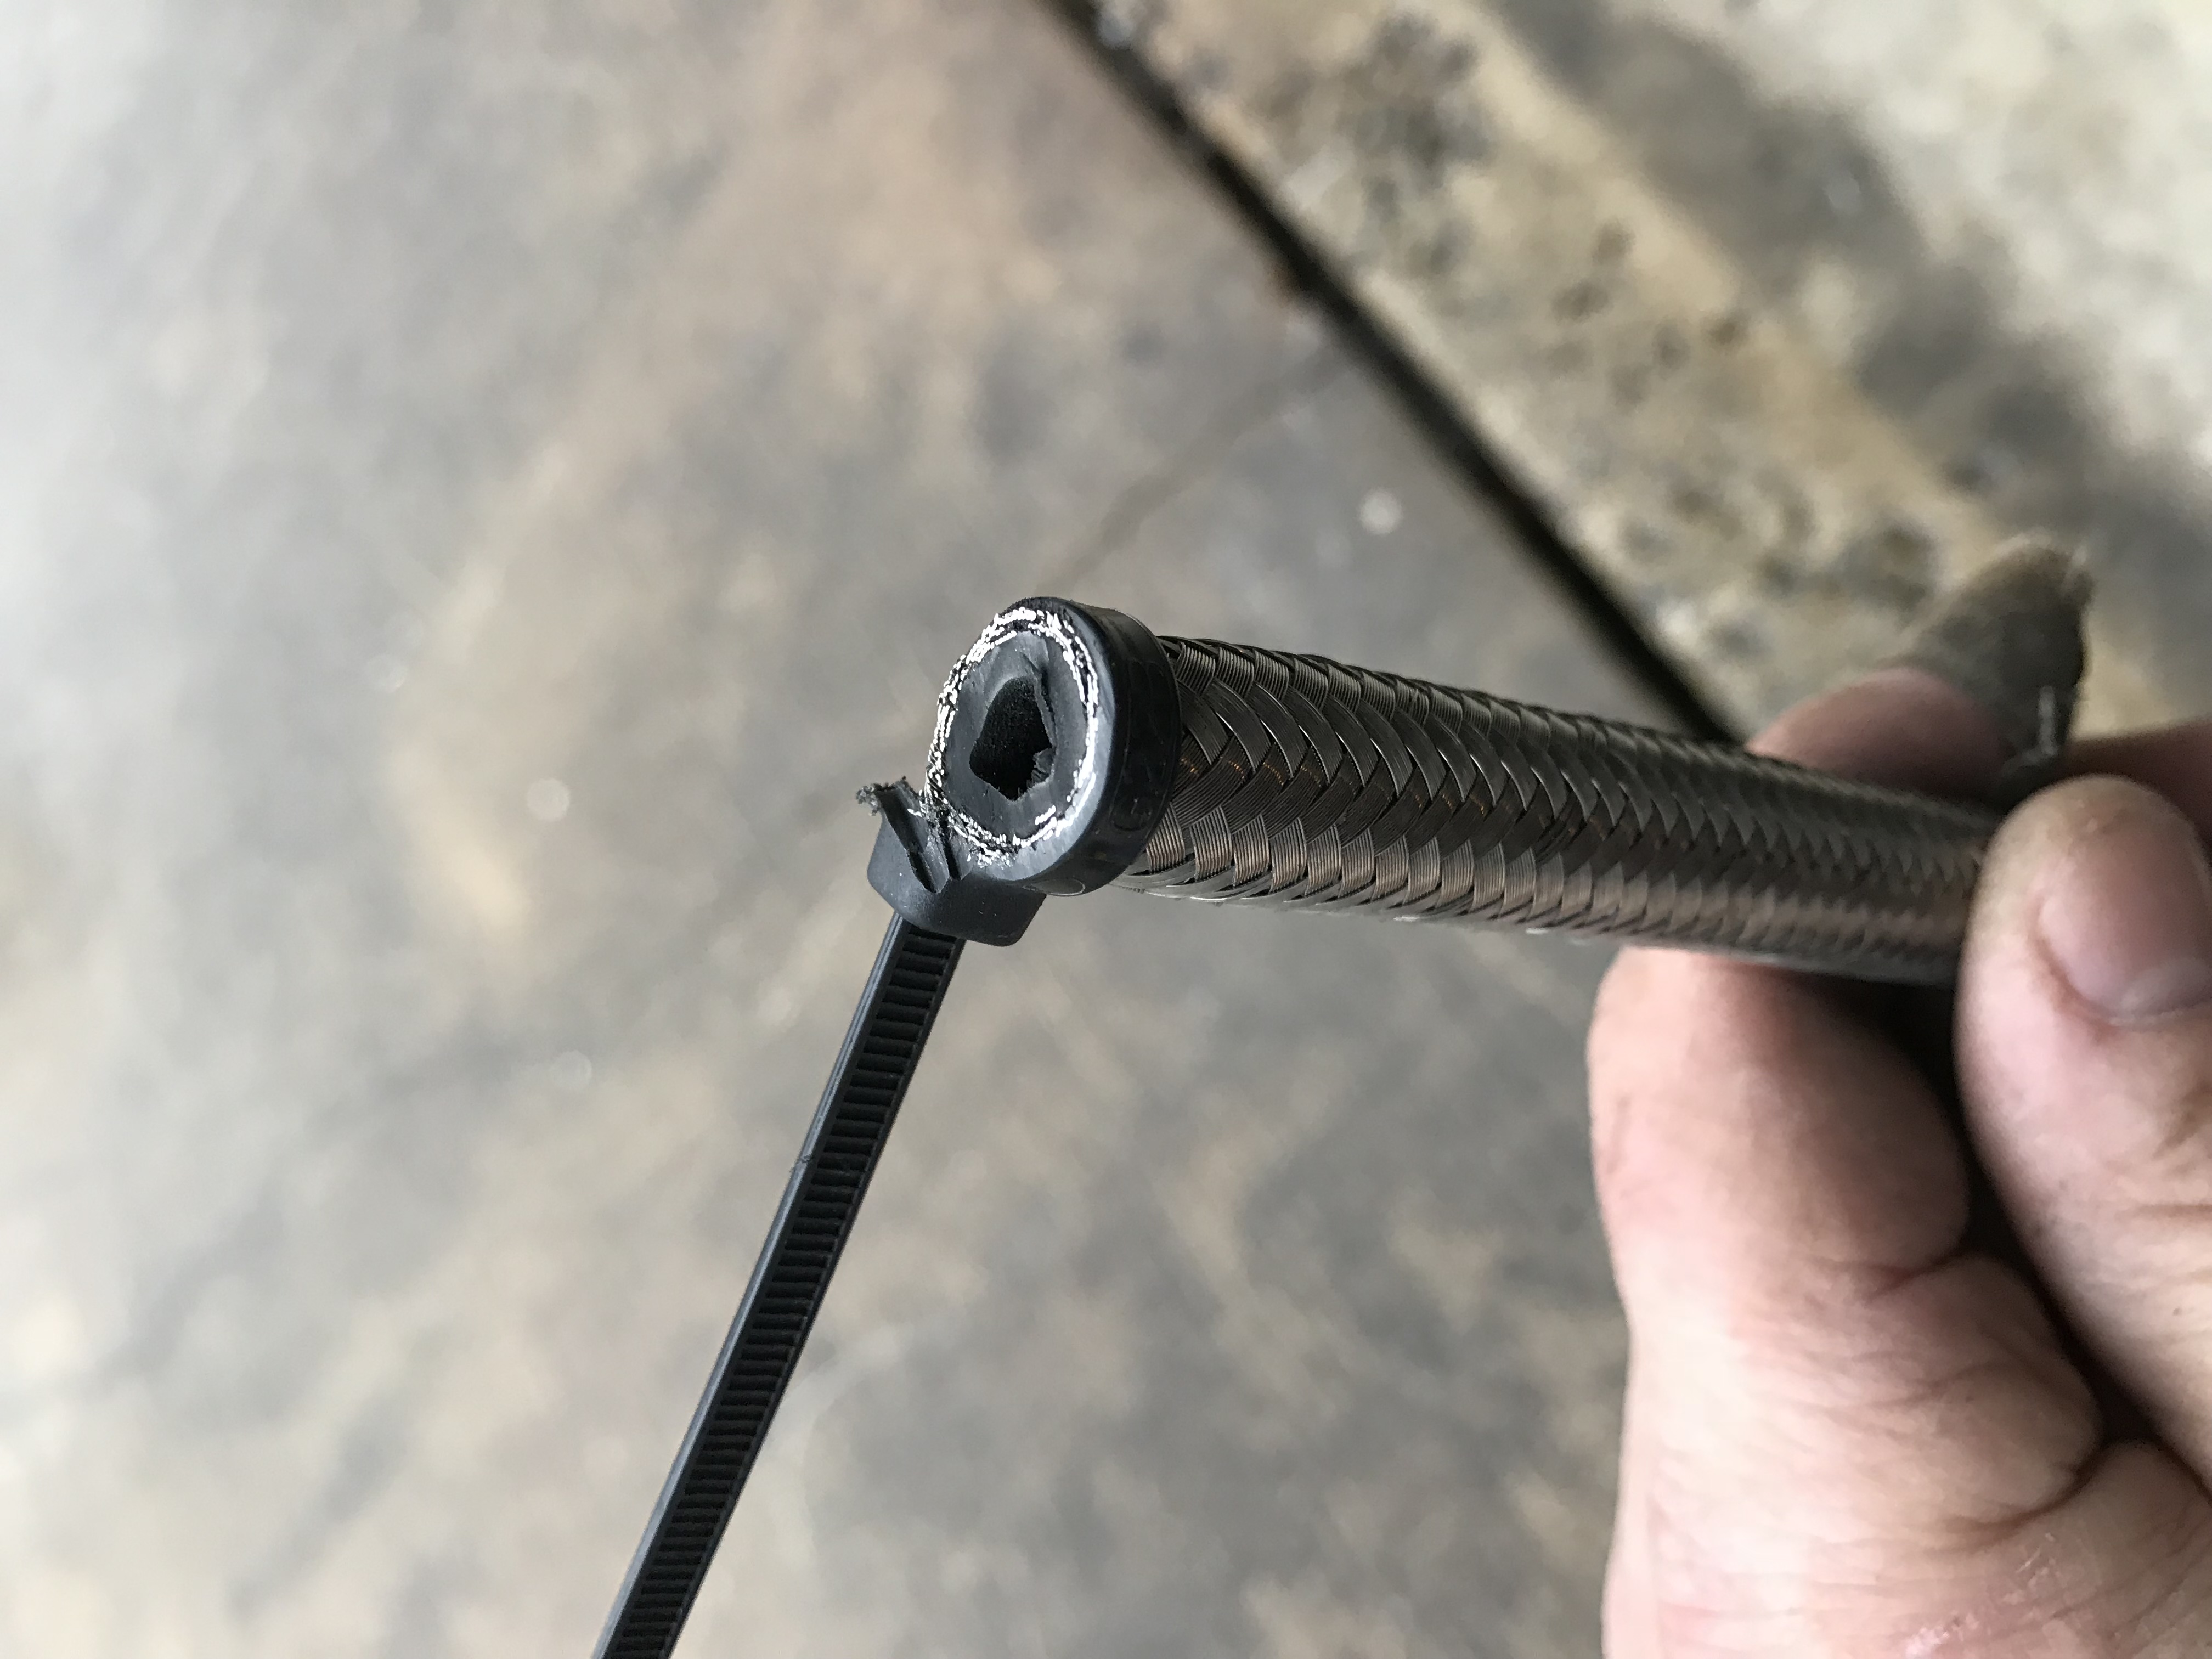

dherr said:For cutting stainless steel braided fuel line, if you wrap a tie wrap around the end tightly and then cut off flush with a cut off wheel, you can then clip off the tie wrap and you have a nice neat cut that will go right into the fitting easily. I assembled 8 connections in less than an hour once I discovered the trick . Spent the first hour fraying the end and getting mad!
My Miata harness is from a 1999
Nice! This needs to go in the garage tips thread.
Indy-Barely Functional-Guy said:dherr said:For cutting stainless steel braided fuel line, if you wrap a tie wrap around the end tightly and then cut off flush with a cut off wheel, you can then clip off the tie wrap and you have a nice neat cut that will go right into the fitting easily. I assembled 8 connections in less than an hour once I discovered the trick . Spent the first hour fraying the end and getting mad!
My Miata harness is from a 1999
Nice! This needs to go in the garage tips thread.
Oh man, that is a good trick. Good to know! I got a bunch of steel braided lines off my parts car and they really are a pain any other way!
You'll need to log in to post.


