1 2 3 ... 7
AWSX1686
AWSX1686 GRM+ Memberand SuperDork
12/31/18 9:01 a.m.

Goal: Drift car. Street legal enough to test drive, maybe the occasional drive to work for fun, (Historic tags likely.) and hopefully 2019 $2000 Challenge competitor. Full cage eventually. Turbo likely at some point.

Basically a cheap, fun car. I can beat on it, drift it, etc, without worrying about hurting it like my nice (ish) e28. It should also allow me to develop my welding and fabricating skills along the way. 


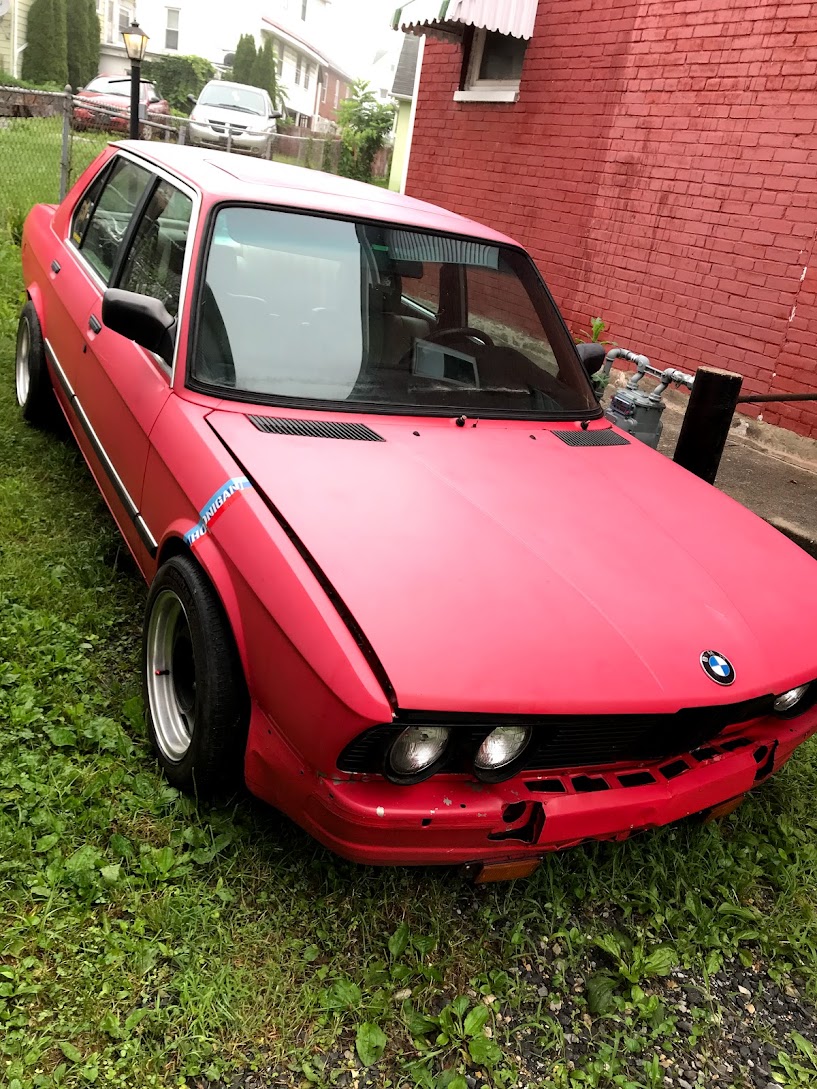
The car is a 1988 BMW 535i, 5-speed manual. I picked it up on July 4th in Ohio for $500. Rode out with a buddy and got it home in good time. Ended up having some title issues that I've gone over elsewhere, I'll likely throw some money towards fixing those soon. 

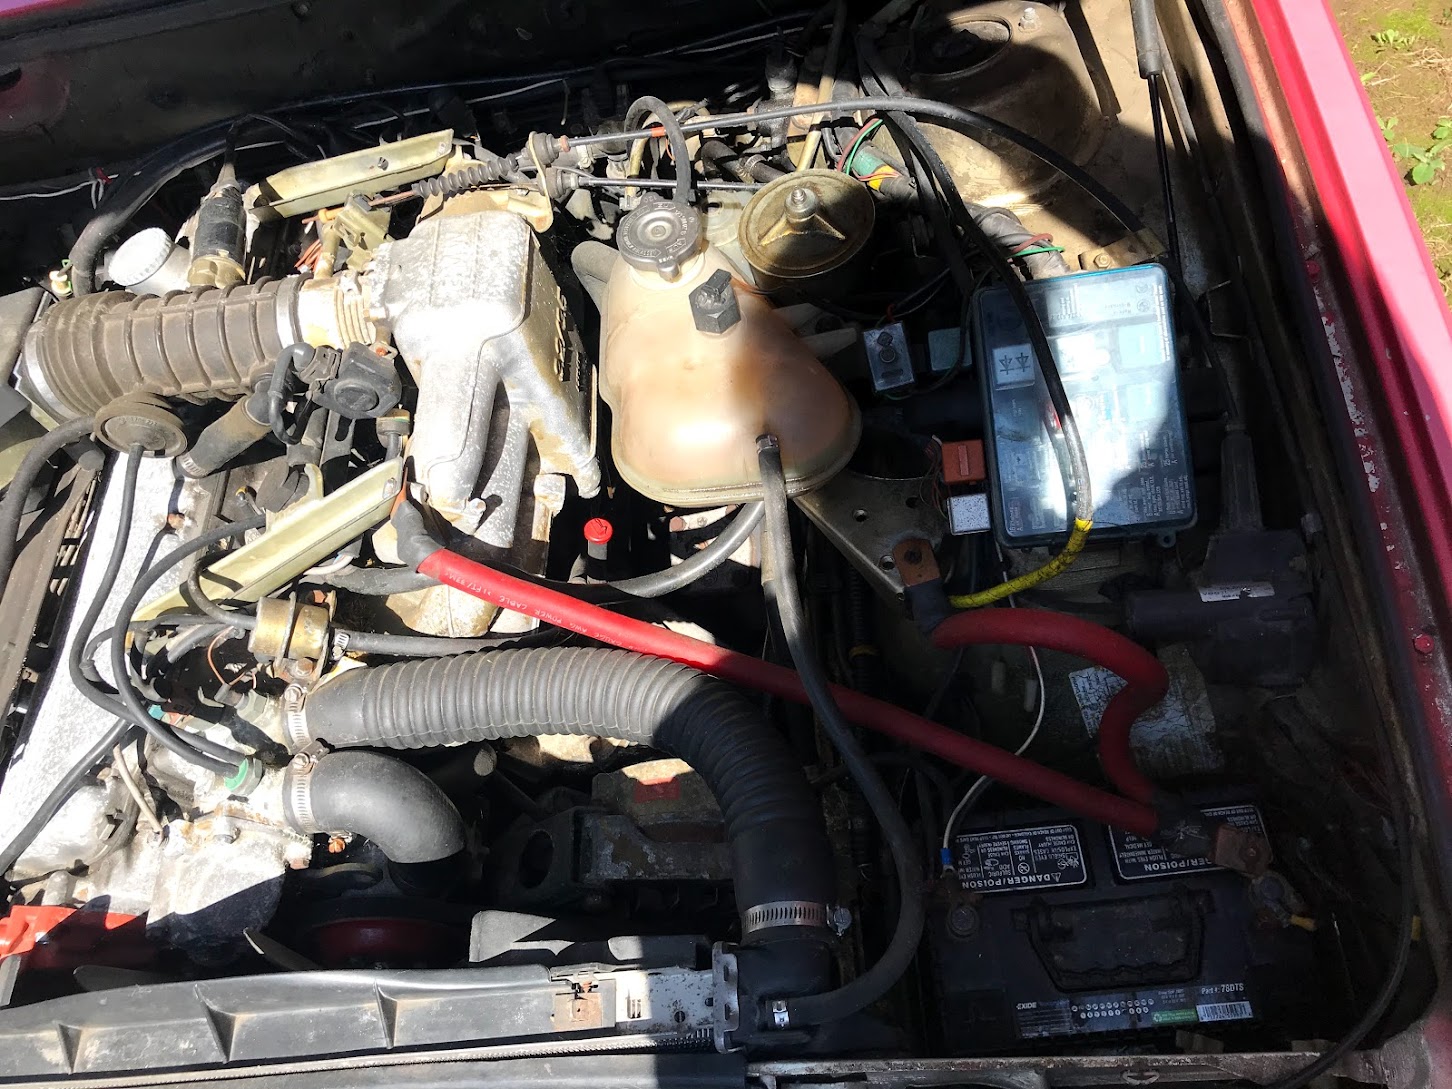
Anyway, when I got it it would not start with the key, but when bump starting it, it started up very easily. I was able to drive it onto my trailer and then off and into a parking spot at the house. Once running it did seem to have a decent misfire under load of some sort. 


Bringing it home:


I knew it would be a while till I got started on it, so I shoved it into the long term parking spot where it would be parked in.


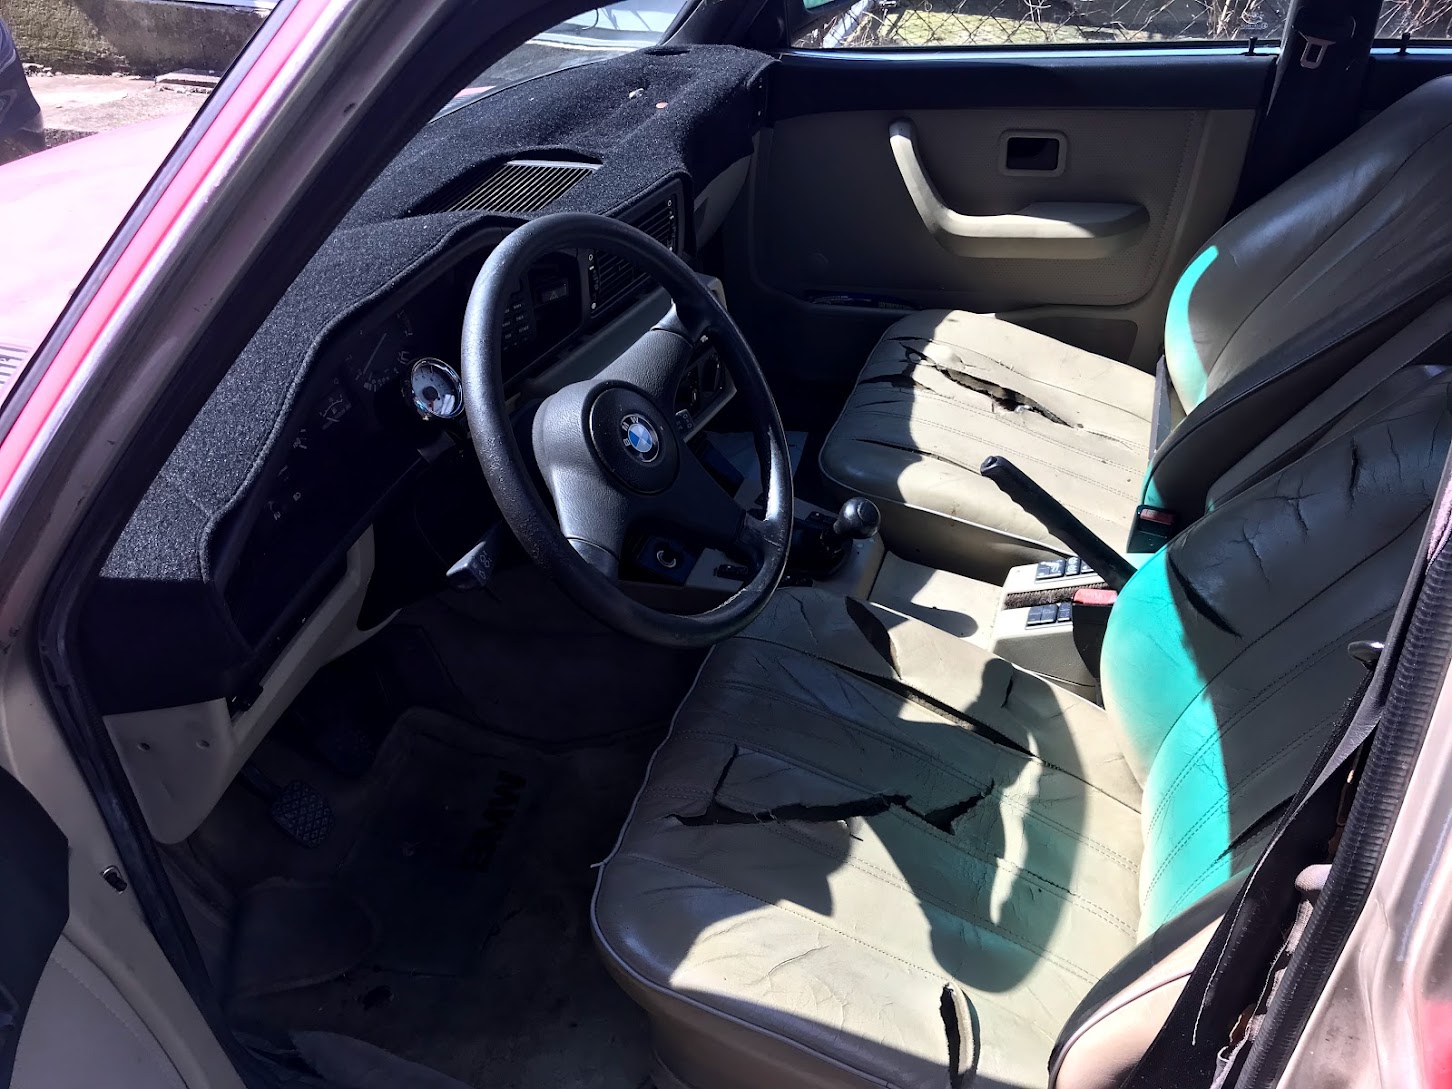
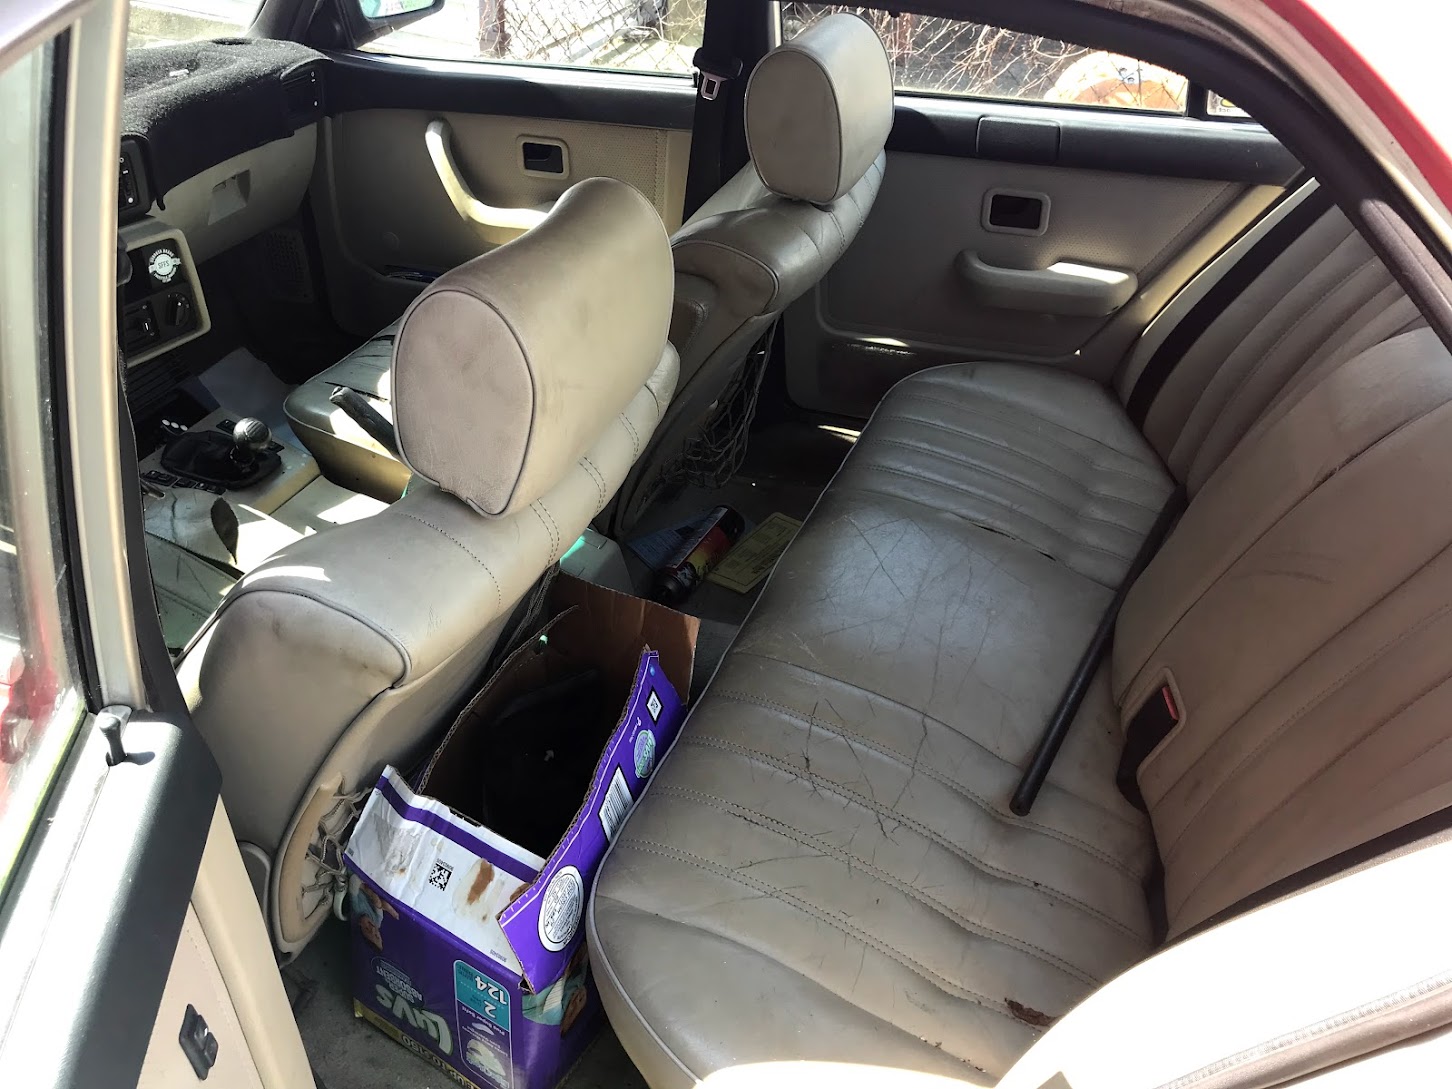
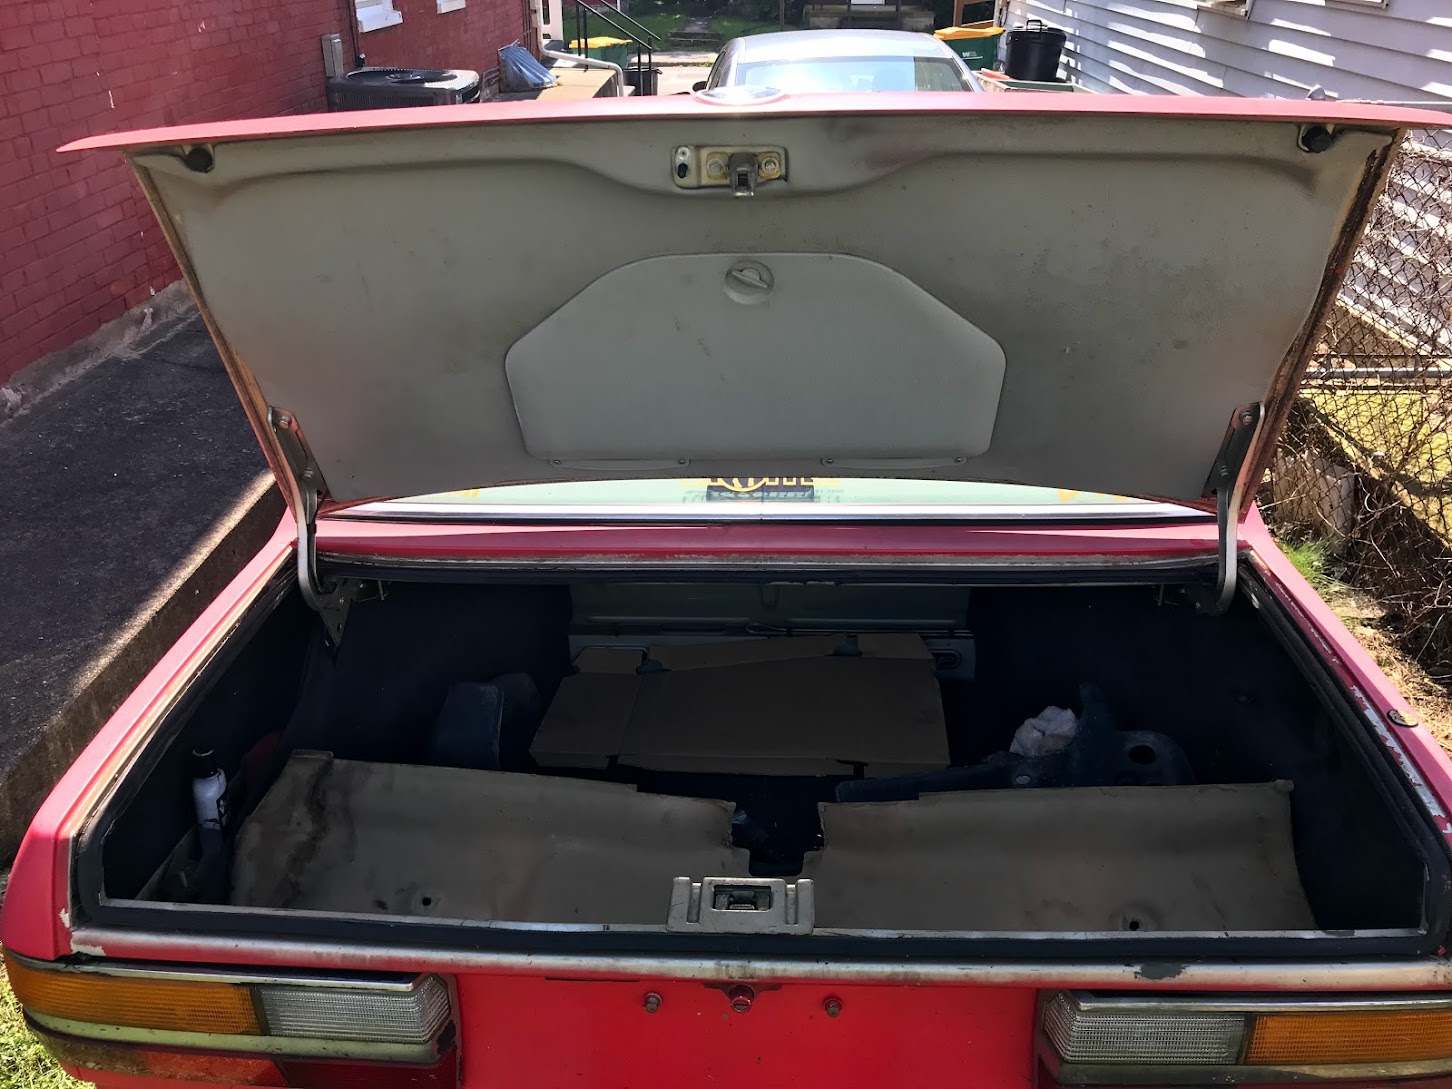
Some more pictures of the state it was in when I brought it home: (Note: I took it to the carwash while on the trailer and power washed it. It was worse before.)


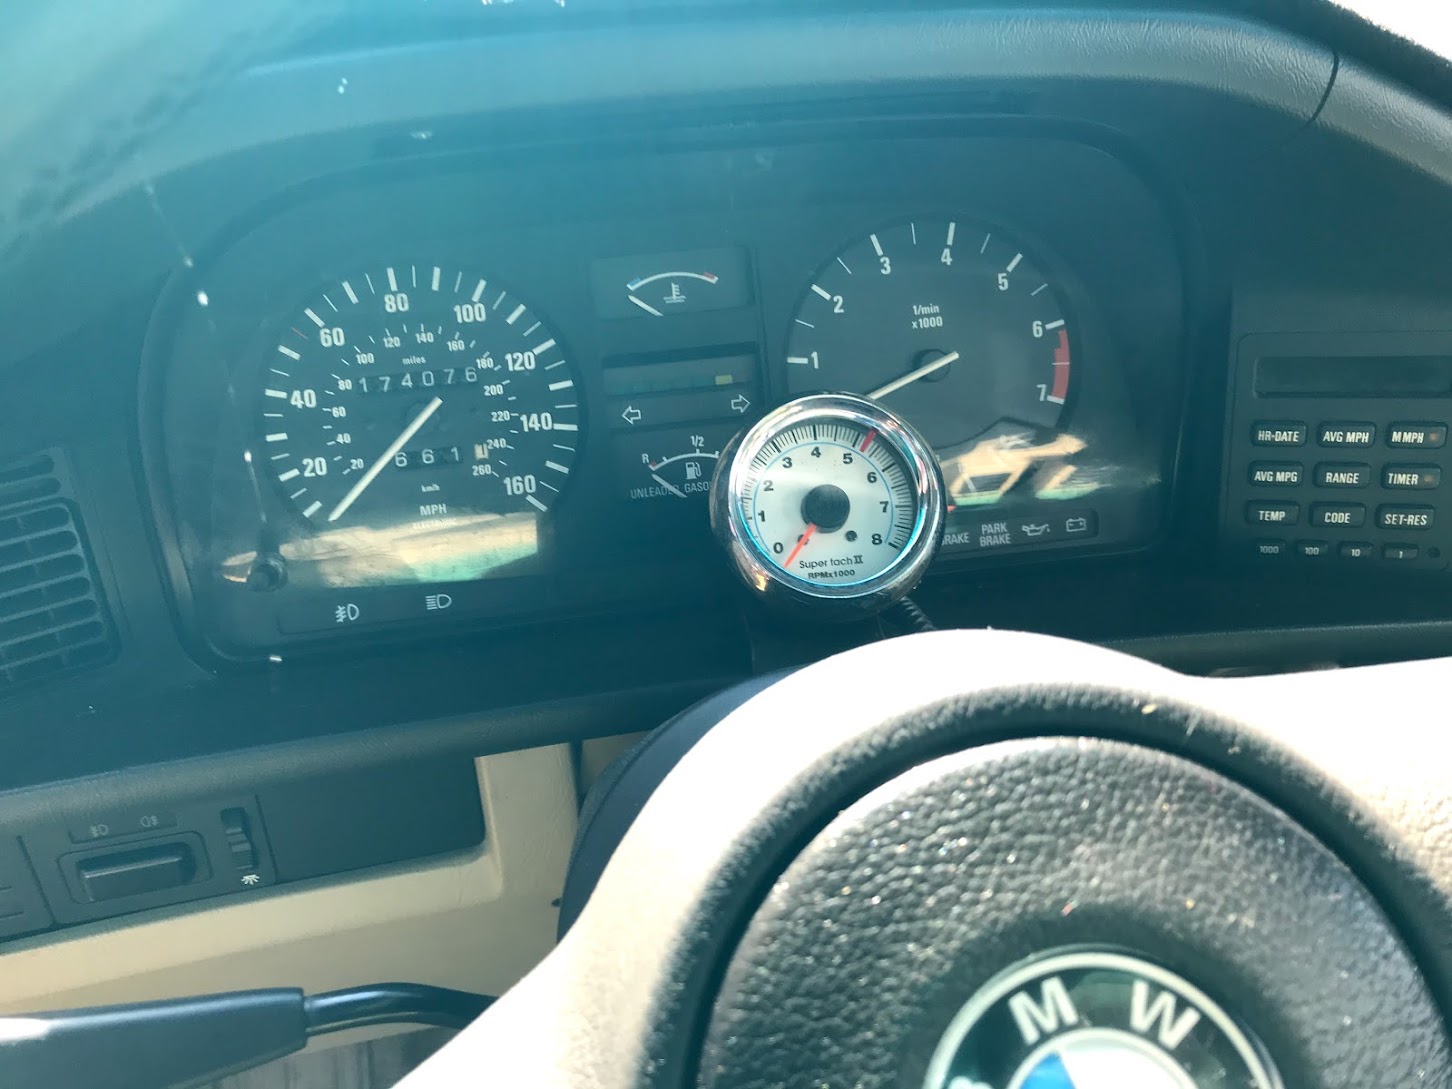
Complete with after market tach that matches the stock tach! (As in neither work! Haha)


Gotta love those nice ground cables...


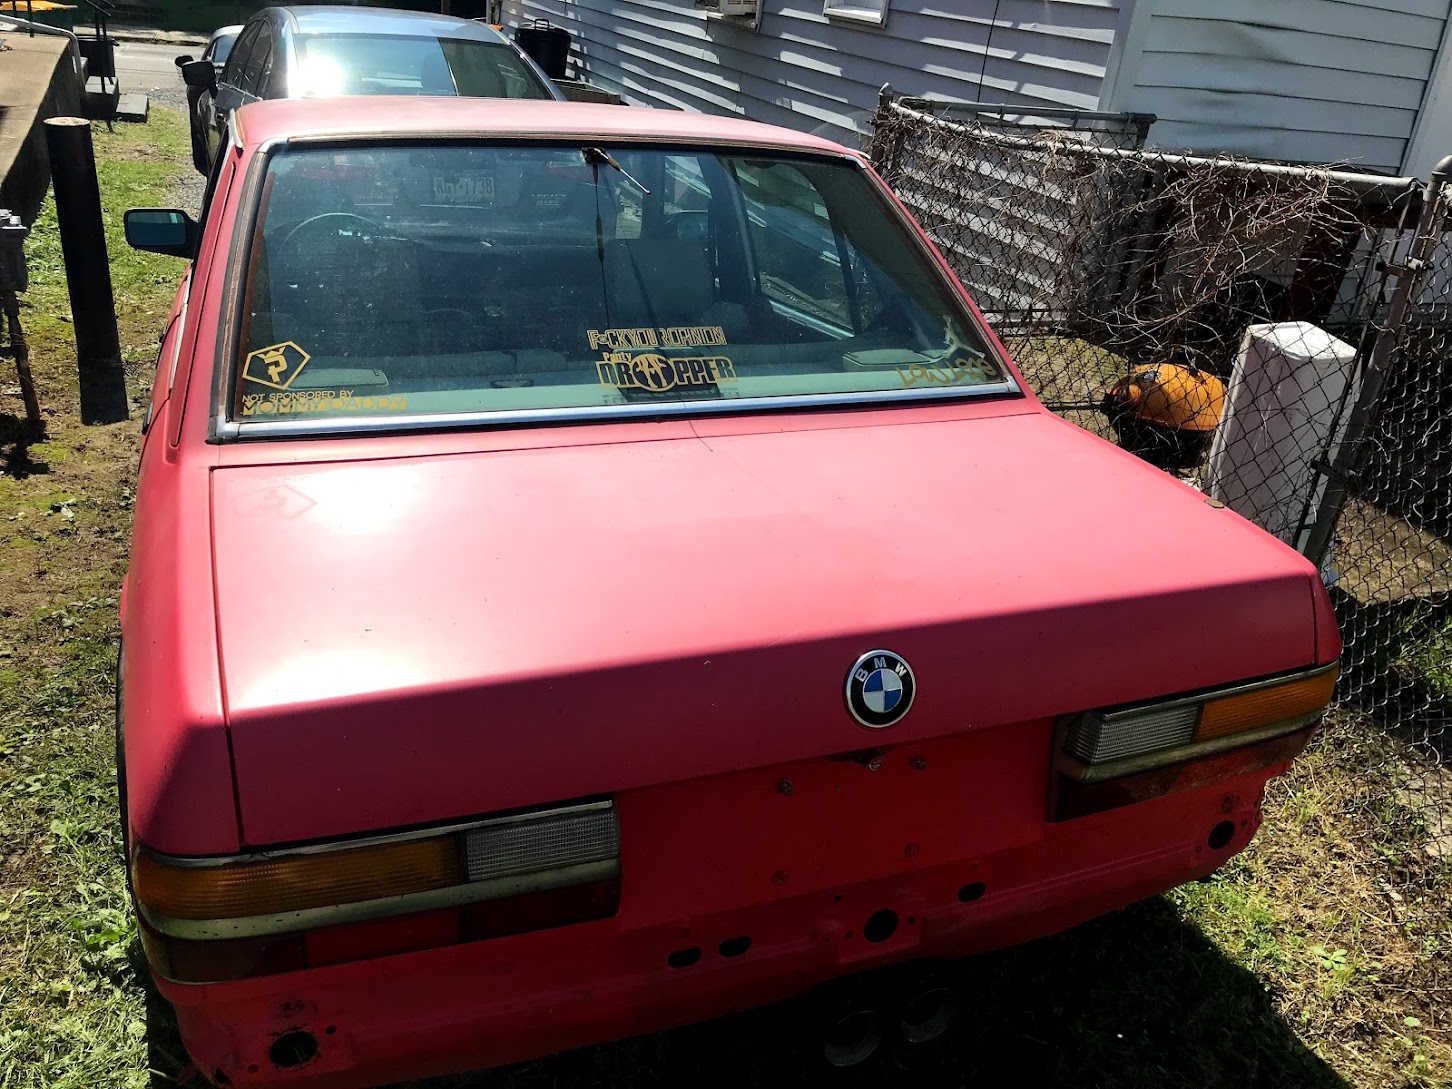
And of course, you can tell a lot about the PO by his choice in stickers...


A couple weeks ago I finally finished up some other projects and had the garage free, and had a little bit of time, so I got it pulled in...

...Then it stat for a couple weeks because I had a side job taking all my free time. But that's done, and I should get paid soon, so work on this thing can now commence! 


Lof8
Lof8 GRM+ Memberand Dork
12/31/18 9:07 a.m.

This looks fun!  I’m in to follow. 

AWSX1686
AWSX1686 GRM+ Memberand SuperDork
12/31/18 9:22 a.m.

So, this weekend:

Goals:

1. Gut the nasty interior.

2. Pull the hood.

3. Remove A/C components.

4. See if I can figure out why it wouldn't start with the key.


Seats and door cards quickly removed, as well as the carpet in chunks cut with a razor blade. Nothing was worth trying to salvage. The carpet was all wet, and everything smelled musty and mildew-y. 

All that is now shoved outside or in the trash so my garage can stop smelling bad. 


Got the dash, and all the HVAC controls, vents, and heater core out. 


Look, you can see into the engine bay!


The hood was actually the first thing removed. The hinges are sticky or bent or something that makes them incredibly hard to move. It'll probably get a 4-pin hood pin stetup later and skip hinged altogether. 


Got the car on jack stands at some point too to assist with assessing the car and removing A/C parts, etc. Everything A/C and HVAC related is gone from the car now. 


Indy-Guy
Indy-Guy UltraDork
12/31/18 9:23 a.m.

Real classy stickers from PO. frown


Was it originally a white car?  I'm in to follow along as it develops.

AWSX1686
AWSX1686 GRM+ Memberand SuperDork
12/31/18 9:30 a.m.

Now, the starting issue. I found that when jumping the starter solenoid the starter would spin, but would not engage. If you turned the key to try and start the car it wouldn't turn the starter at all. Obviously the key part might be somewhere else, but it definitely needs a starter, because beating on it still wouldn't make it engage. 

Let's just roll my spare M30 over here and grab the starter off of it...

(Will figure FMV out later.)


There starter bolts are a pain. Even on my spare engine sitting on a dolly it took 10 minutes to remove because the upper bolt can only move a tiny bit at a time. My brother-in-law was over helping me out and actually did most of the starter job. 

Once he went to pull the starter off of Red Betty he found that someone must have replaced it before because the bolts that are normally a 17mm head bolt, were now allen bolts. Huh! Well, given the tight access, that mostly makes sense as it would be easier to turn. Unfortunately the upper bolt was quite tight. We ended up sacrificing two allen keys to make an allen socket and eventually he got it out. 

Once he got the replacement in he noticed the wire on the solenoid form the key was not the best connection. We tossed a new crimp terminal on, and now it cranks when you turn the key. It even runs!

AWSX1686
AWSX1686 GRM+ Memberand SuperDork
12/31/18 9:31 a.m.
Indy-Guy said:

Real classy stickers from PO. frown


Was it originally a white car?  I'm in to follow along as it develops.

So classy...

Originally tan. Bronze Beige or something.

AWSX1686
AWSX1686 GRM+ Memberand SuperDork
12/31/18 9:43 a.m.

So that covered my main goals of the weekend, and I still had time to work on it, so it was time to start diagnosing the misfire. The PO told me he thought it might have been a broken valve rocker arm as apparently that can happen on these. I'm skeptical as I'm in a few groups related to these cars and I've not seen that very much, but it could be. Guess we'll see.

I already had ordered parts for a basic tune-up. Spark Plugs, wires, coil, cap, rotor. 


To start, let's pull the spark plugs and see what we see:

Cylinders 1-6, left to right. 

First off, these are platinum spark plugs, these engines don't like those. We'll be putting in the WR9LS that I ordered. 

Secondly, something is definitely different about cylinder #4.


I gapped and put in the proper spark plugs and put a little more fuel in the tank, and it seemed maybe slightly better, but still definitely not running right. 

I also replaced the coil as I believe the coil in place was correct, but does not appear to be an actual Bosch unit. Couldn't quite tell if that made much of a difference. 

The plug wires on it look fairly decent, though my new ones aren't here yet. They are still a potential problem. 

The cap that is on the engine now doesn't have the usual black plastic cover, so I'm guessing it was replaced at some point. Will still pull the cap and rotor to inspect at some point, but I need to borrow a fan clutch tool so I can get the fan off for access. 

I don't have a compression tester on hand, but I will be borrowing one soon. 

I also can't run it too long yet as I haven't finished bypassing the heater core now that it is gone. 


Video of it running after plugs and coil here. 


AWSX1686
AWSX1686 GRM+ Memberand SuperDork
12/31/18 9:48 a.m.

I should have time on New Year's Day to get some more work done, and then over the weekend I should have plenty of time as well as my wife will be away. 

Next goals:

-Finish diagnosing/fixing misfire

-Order and install racing seat. (Passenger seat will be added later.)

-Start tracing back wiring to remove everything besides the engine wiring.

-Try to fix stock tachometer.

-Gut doors and figure out a system to make the windows removable. 

-Make exhaust louder.

-???

-Have it running and ready for NICO Fest at the Carlisle Import and Performance Nationals in May.


I also have a lead on a DINAN chip that apparently makes an actual difference on these engines. Should be an easy, cheap way to get some more HP before I get into turbocharging it. 

Nitroracer
Nitroracer UltraDork
12/31/18 10:08 a.m.

Nice project!

I assume you will be taking it to Summit Point for some drifting?  I picked up a big wrench for a my E30 clutch fan awhile back, if it is the same at the E28 you could borrow it.  32mm I think.  I'm just up the road in Shippensburg.  

AWSX1686
AWSX1686 GRM+ Memberand SuperDork
12/31/18 10:29 a.m.
Nitroracer said:

Nice project!

I assume you will be taking it to Summit Point for some drifting?  I picked up a big wrench for a my E30 clutch fan awhile back, if it is the same at the E28 you could borrow it.  32mm I think.  I'm just up the road in Shippensburg.  

First stop is NICO Fest at the Carlisle Import and Performance Nationals. Always a good time. From there, who knows. Summit Point is only about an hour away, so I'm sure I'll make it down there at some point. Also some of the guys I've met at NICO fest do an event called Drift Evergreen in Drums, PA. More like 3 hours from me, but they're cool folks. 

I'll definitely keep that in mind for the wrench. I did the cap and rotor about 2 months ago on my "nice" e28, and borrowed my buddy's kit. Shouldn't be too bad. 

AWSX1686
AWSX1686 GRM+ Memberand SuperDork
12/31/18 10:55 a.m.

Also, taking suggestions for racing seats. 

Trying to stay pretty cheap... And come challenge time the passenger seat will be removed and I may swap to whatever I can find for DIRT cheap for budget reasons. 


Currently leaning towards this one. https://www.jegs.com/i/Scat/942/80-1780-51/10002/-1

I had gotten one of these for my old z3 project and it seemed fairly nice, but it went with the car when I sold it. 

maschinenbau
maschinenbau GRM+ Memberand Dork
12/31/18 12:21 p.m.

Try flea markets near your local drag strip. I just bought an older aluminum Butlerbuilt with liner for $40. 

stuart in mn
stuart in mn UltimaDork
12/31/18 1:20 p.m.

If you haven't been there already, go to the www.mye28.com page.  Most any problem that has occurred with these cars has been solved by someone there.  Check the tech FAQ section, I seem to recall there's one that discusses fixing the tachometer.

stuart in mn
stuart in mn UltimaDork
12/31/18 1:24 p.m.
AWSX1686 said:

Originally tan. Bronze Beige or something.

The door jambs look silver in the pictures, but Bronzit was a popular color back then.  There should be a color tag on the passenger side shock tower under the hood that will say what the original paint color was.

If the repaint was done using the factory Cinnebar red, that color does like to oxidize really bad but it also can be buffed out to look like new again.

ShawneeCreek
ShawneeCreek GRM+ Memberand Reader
12/31/18 2:23 p.m.

When you do the wiring leave the power sources and mark them (always hot, hot in start, etc..., fuse amperage). It will be helpful if you need to add anything later.

I didn't do that with mine and wished I had when I added the wideband oxygen sensor.

adam525i
adam525i GRM+ Memberand Reader
12/31/18 4:07 p.m.

Looks like the perfect car for what you want to do. The #4 plug looks like new without any fuel on it, if that's the case I'd check the fuel injector (mainly its plug) and see if there is anything going on there. While you have your friends fan tools you might want to pop the valve cover off and do a valve adjustment (removing the fan gives you access to the harmonic balancer bolt to turn the motor over), this will let you know if there is a rocker broken currently (hopefully not) and will also help prevent that from happening down the road at high rpm (and if valves are set loose right now due to lack of adjustment it will make the slightest of difference on the butt dyno).  I've done my adjustments on the cam side as recommended by Shawn D. on Mye28.com - http://www.mye28.com/viewtopic.php?t=102378

Looking forward to updates.

Adam

ebonyandivory
ebonyandivory PowerDork
12/31/18 11:06 p.m.

A BMW drift car. 

Most likely my all-time favorite car thing ever!

AWSX1686
AWSX1686 GRM+ Memberand SuperDork
1/2/19 8:49 a.m.
stuart in mn said:
AWSX1686 said:

Originally tan. Bronze Beige or something.

The door jambs look silver in the pictures, but Bronzit was a popular color back then.  There should be a color tag on the passenger side shock tower under the hood that will say what the original paint color was.

If the repaint was done using the factory Cinnebar red, that color does like to oxidize really bad but it also can be buffed out to look like new again.


The current red I am fairly sure was a pretty cheap spray job, almost definitely not the Cinnebar Red. Just to be sure though, I did put some polishing compound on a rag to see what I could get out of a small spot. It brought out a bit of shine. I think eventually I will either be wrapping it or repainting it. It probably will not stay red either. The current name "Red Betty" is just because my other e28 is named "Black Betty". 

AWSX1686
AWSX1686 GRM+ Memberand SuperDork
1/2/19 8:58 a.m.

New Years Day Update: Misfire diagnosis. 

In short, haven't found it yet....


I have now replaced:

-Spark Plugs

-Coil

-Cap

-Rotor

New plug wires should be in today, which would essentially be a total tune-up on the ignition side of things. 


The cap and rotor were definitely old and used. The contacts might be able to be cleaned up to keep budget down for challenge purposes, but I'll mess with that once it's actually running properly. (Condensation from sitting in my cold garage, not existing when pulled.)


I did a compression test. Time was limited due to a weak battery, but it didn't seem like any one cylinder was low on compression. 


Just to make sure it wasn't a broken rocker arm, I pulled the valve cover. I did not do a valve adjustment yet. I have never done one before so I need to look into that process and have a general idea in my head before I try and do that. 


This is how the valve cover looked when I pulled it off! I have never seen a valve cover this clean. Though, it may hve been cleaned sometime recently as it does look like one rocker arm has been replaced...


Nothing too crazy here, everything looks fine. Cylinder #4's intake rocker does look like it's been replaced as it is a slightly different design. 


Close-up of the replacement rocker.

AWSX1686
AWSX1686 GRM+ Memberand SuperDork
1/2/19 9:03 a.m.

New Years Day Update: Heater Core Bypass.

Before I could run the engine for too long I needed to bypass the heater core and fill up the coolant as I lost a good bit when removing the heater core. (Good thing is, the coolant that came out looked very clean!)


I went to AutoZone and Advance Auto and got some 3/4" heater hose, and some 1" heater hose so I could hopefully just make a new hose instead of a coupler, but apparently I needed 7/8" hose, which no one local had. So, I found a chunk of tube in the scrap bin that fit and clamped it on, and for now that works. System is not fully bled yet as I didn't want things to get too hot due to working on the exhaust next....

AWSX1686
AWSX1686 GRM+ Memberand SuperDork
1/2/19 9:21 a.m.

New Years Day Update: Destruction and Mayhem. (Exhaust and Sunroof)


I knew I wanted to fully remove the sunroof, and then the sunroof got stuck, so I knew I definitely wanted to completely remove the sunroof tray. I got a bit trigger happy with this and definitely would have benefited from taking a bit more time to look at what I needed to do, but oh well. 

I thought I was going to have to plasma cut the whole way around the sunroof tray and then clean up the rest with a grinder later. So I started plasma cutting and as it turns out, hot plasma cutting and whatever grease is in the sunroof tracks does not mix well... There was some fire. And fumes. But a little bit of water and everything was ok. Then I took a better look and used the grinder to cut the supports and then pried the tray from the roof. It had that lovely black window goo sealing it up there, and the lip of it was tucked into the roof of the car, so the roof panel is going to need some straightening... It's going to get a cage eventually anyway, and a panel to fill the hole, so there will be metal work happening. Unfortunately for now it's just not very pretty.


I'm kinda hoping I can just "gut" the sunroof panel the rest of the way (there's stuff on the underside) and then weld it in place with some sort of metal "frame" to fill the gap. We'll see.


As for the exhaust, the existing setup was: Stock manifolds > stock cat > 2-1 3" back to a 1-2 tip. So no muffler already, but still wasn't really that loud. I was going to cut the cat off completely, but there is an O2 sensor near there, so for now I'm keeping that section. So I had my buddy cut the cat in half and gut it while I worked on the sunroof. As of right now the exhaust is now: Stock manifolds > half of the hollowed out stock cat. Sound is much better now, and surprisingly not terribly obnoxious. I think I may hollow out the other half of the cat and weld it back together to have a "full" exhaust going all the way to the back of the car. 

No pics, but I do have a video.

VIDEO

AWSX1686
AWSX1686 GRM+ Memberand SuperDork
1/2/19 9:24 a.m.

The next few days I probably won't be working on it much, but should have a good amount of time to mess with it over the weekend. 

Next Steps:

-Plug Wires

-Start tracing back wiring to remove everything besides the engine wiring.

-Try to fix stock tachometer.

-Gut doors and figure out a system to make the windows removable. 

Hoondavan
Hoondavan Reader
1/2/19 9:38 a.m.

Cool build.  Just wondering why you removed all of the HVAC components?  I'd think defrost may actually come in handy if you ever have to compete in an event in the rain.

AWSX1686
AWSX1686 GRM+ Memberand SuperDork
1/2/19 9:44 a.m.
Hoondavan said:

Cool build.  Just wondering why you removed all of the HVAC components?  I'd think defrost may actually come in handy if you ever have to compete in an event in the rain.

Max weight reduction. I want it to be as light as possible. Also, simplicity. To start the only wiring I want in the car is the engine harness. I'll add back lights and accessories myself. The stock fusebox in these is garbage, so I want to re-do everything electric anyway. 

As far as windows fogging up, I'll coat the windows with anti-fog before each event. 

Edit: Also, from my experience with my other e28, the defrost is not the most effective anyway. 

AWSX1686
AWSX1686 GRM+ Memberand SuperDork
1/2/19 9:48 a.m.

Apparently Wreck Racing's 2018 Challenge e28 was down to 2300 lbs if I heard correctly. 
 

I'm not sure I'll be able to get it to be that light, but it will be interesting to compare it to my stock e28 with full interior, HVAC, etc.

1 2 3 ... 7

You'll need to log in to post.

Our Preferred Partners
buiwdXJWRjHAbR0EUJ7G1AICpyuvaOpn2pwRuoqPNcLzdBhAoCJtghHiYfd2gjtD