1 2 3
Mitchell
Mitchell UltraDork
2/25/14 10:01 p.m.

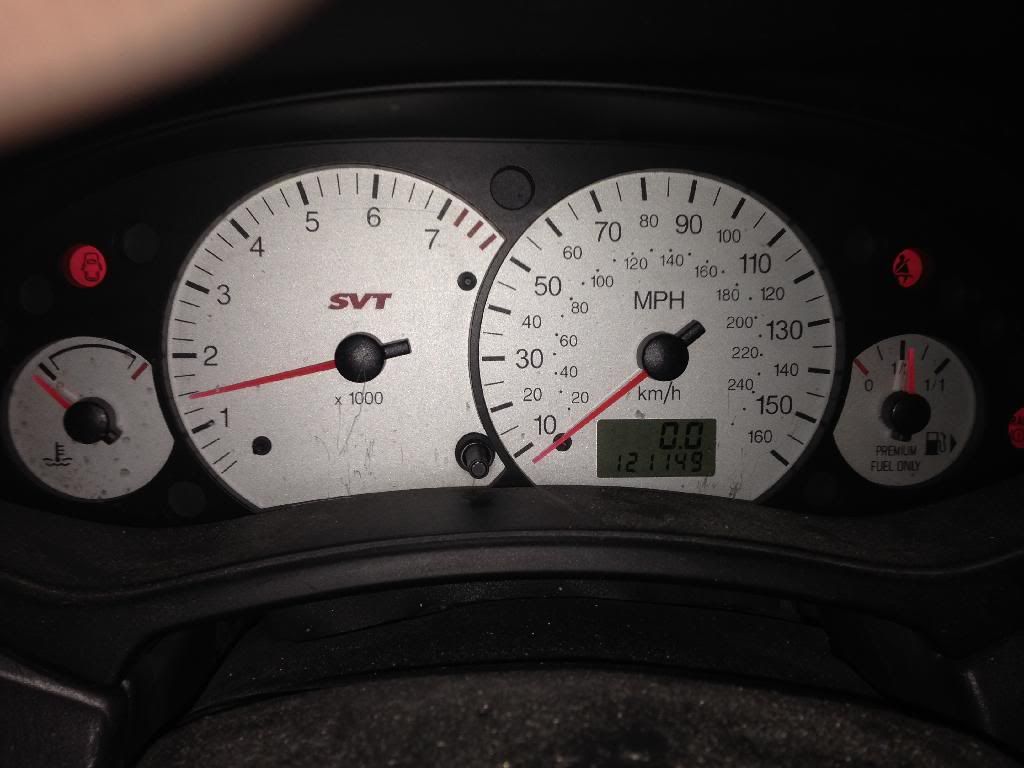
I have had my 2003 SVT Focus since my senior year of high school. It has survived college and the rest of the last 8 years with only a few issues and with even less maintenance. Working on my car was about the last thing I had time and money to do. However, the symptoms of age are creeping up, with 120,000 miles accumulated, so I am spending some time making up for past neglect. Car, will you forgive me?

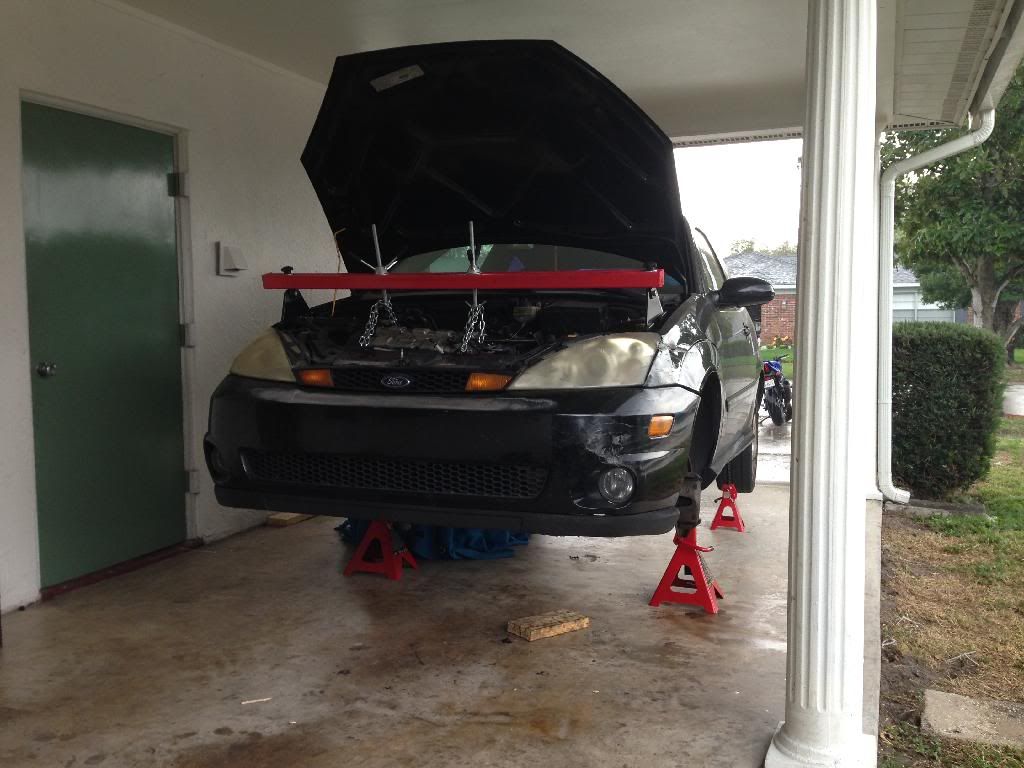
Over the last few weeks, I have been working on an extensive (for me) parts swap out. I am currently in the middle of the process. Here's what I am replacing:

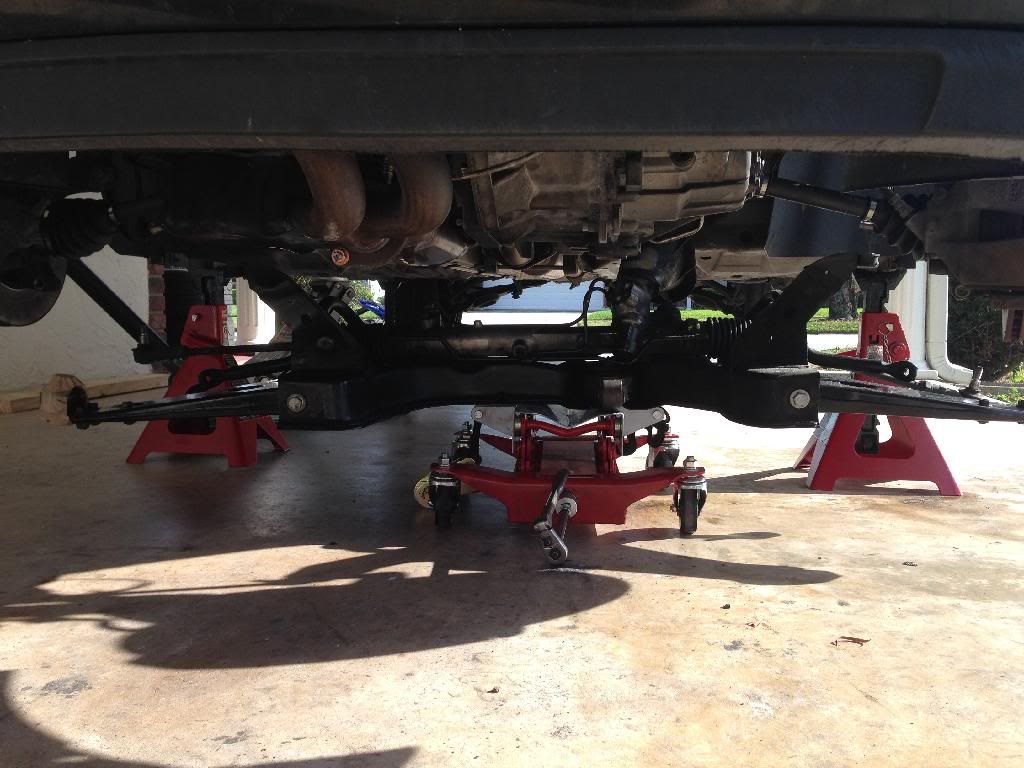
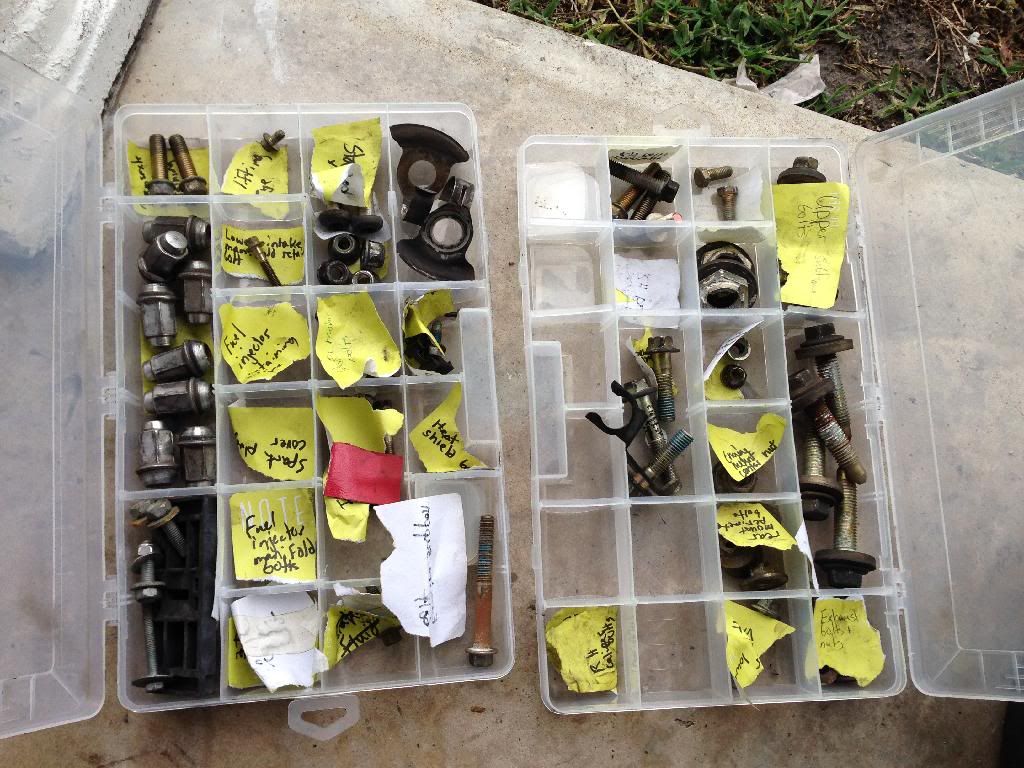
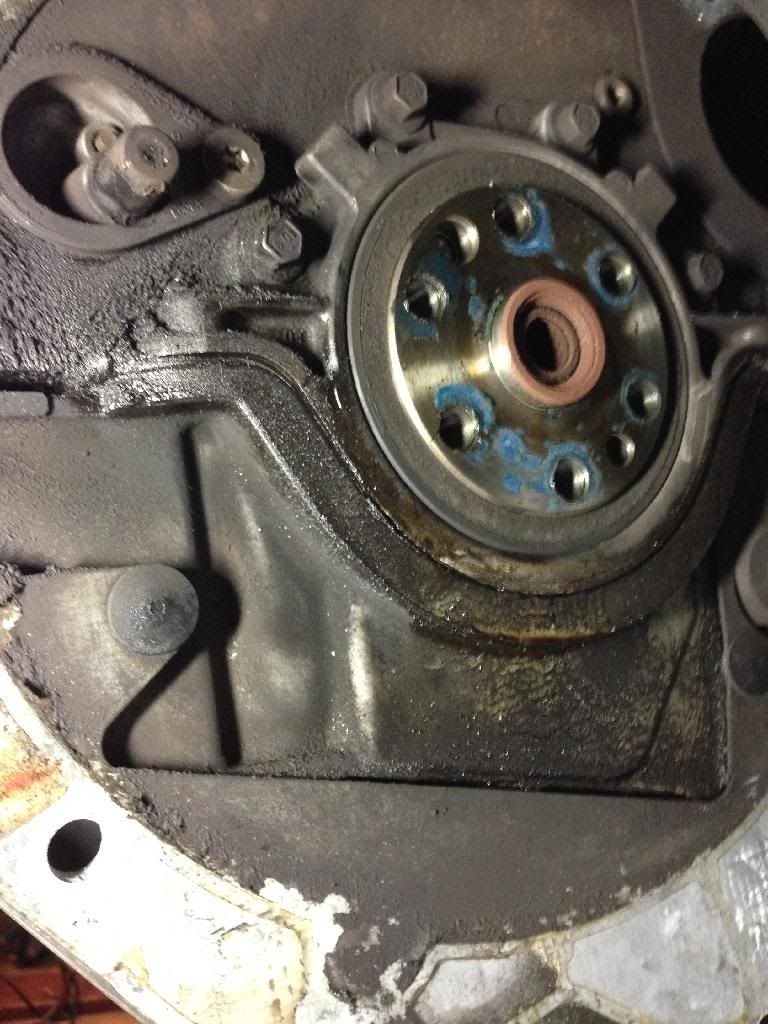
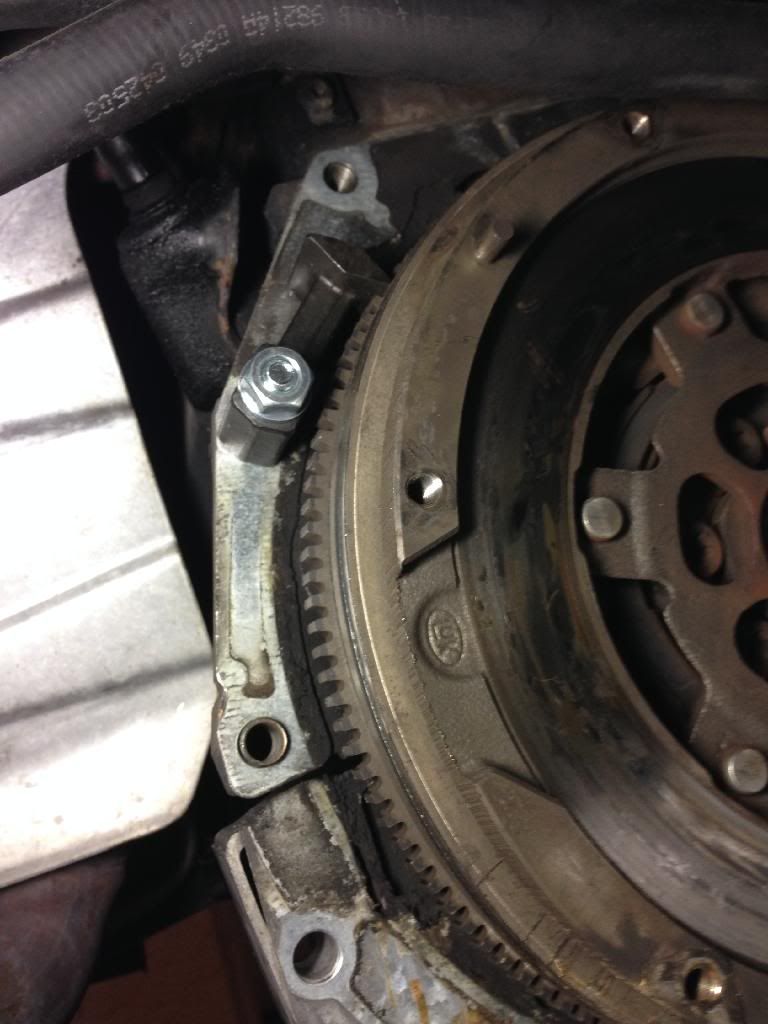
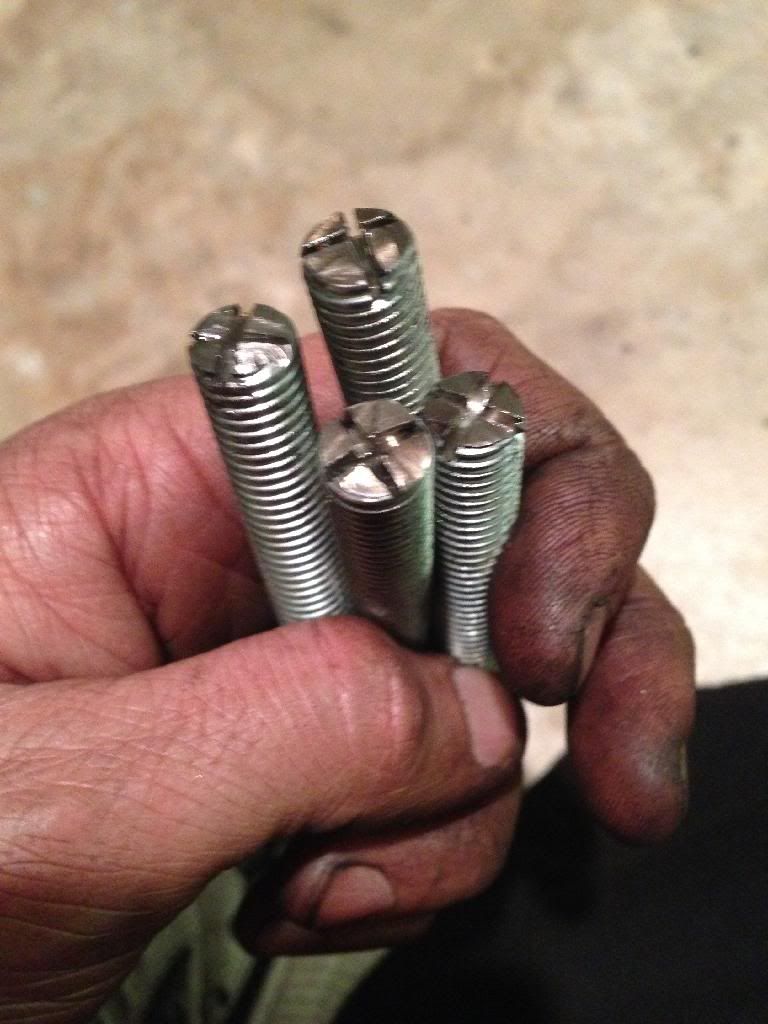
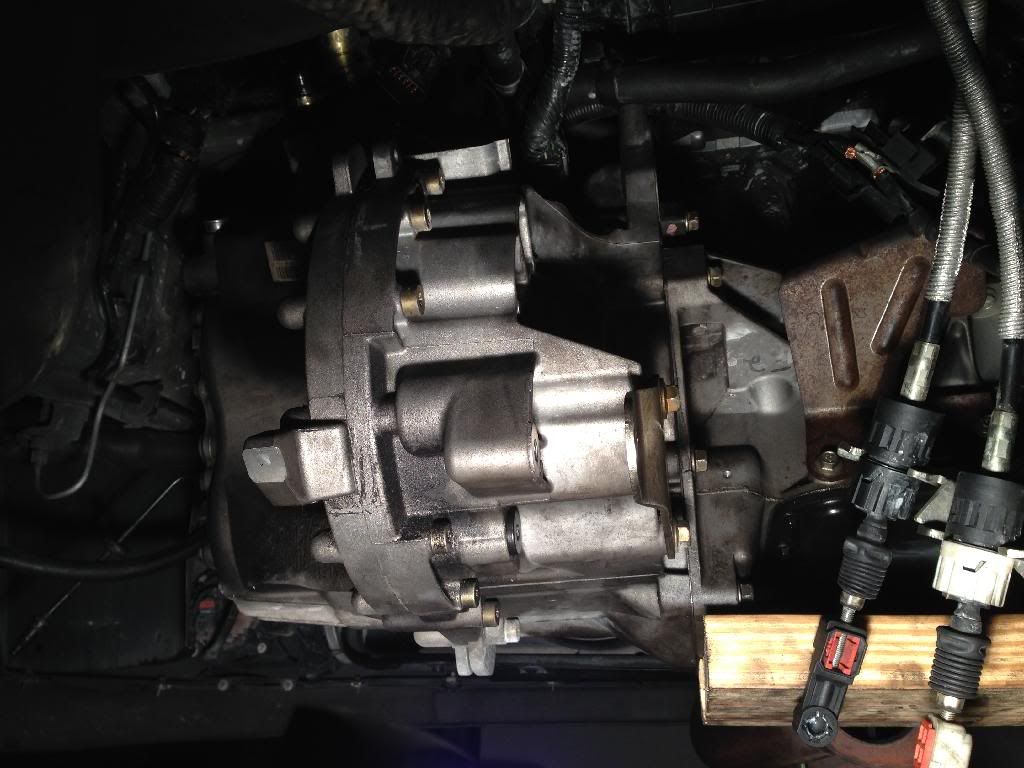
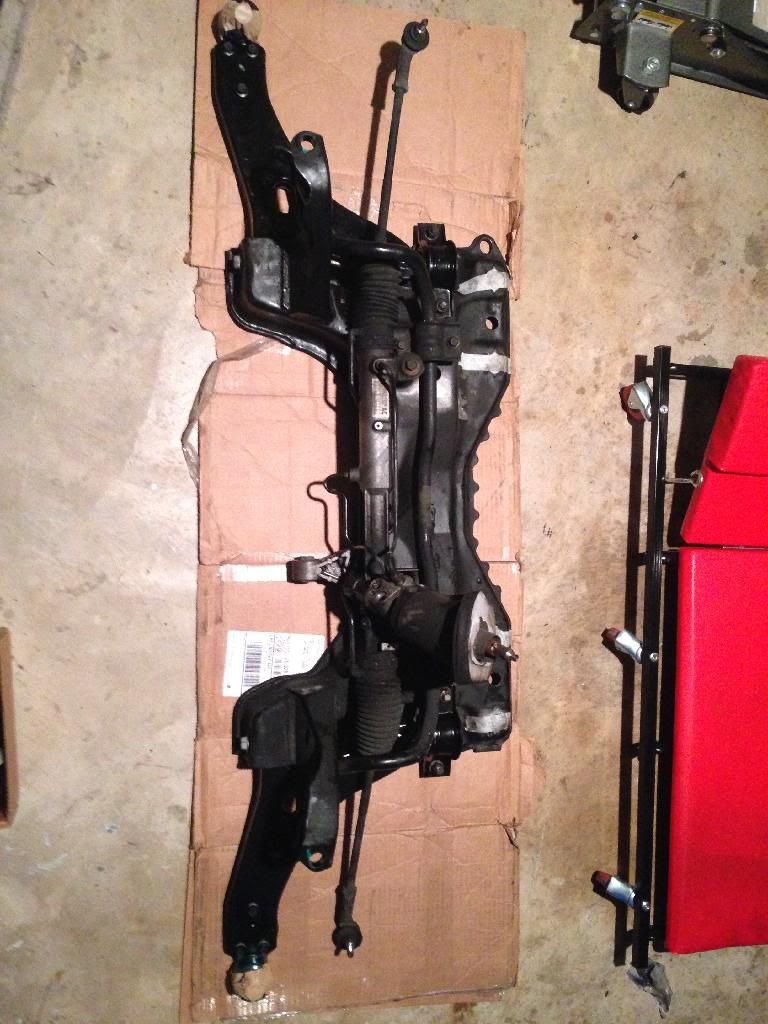
Flywheel, clutch, slave cylinder, pressure plate Starter motor Left and right lower control arms Left and right c/v axles Front O2 sensor (had it laying around) Rear main seal (might as well) Lots of surprisingly expensive one-time-use hardware.

I think that's everything.

I am working as close to the factory service manual as possible. There have been a few places where I deferred, but honesty, these "shortcuts" have so far made my life more difficult.

I'll start with the beginning:

Step 1 - 4 of 100: Remove easy stuff in engine bay. Feel confident. Feel like things are certainly going smoothly. Step 5: book says, "Remove starter motor bolts. Book implies, "Oh, your tools don't click with .05 degrees of movement! Sloppy amateur with sloppy wrench, proceed to step 5's substeps 1-25, remove intake manifold." "Oh, and you need to first depressurize the fuel system, which means doing steps 4 - 1, then 1 - 4 again. Pull the fuel pump fuse, and run the injectors dry. But don't worry, it's not so dry that fuel won't spill all over the place anyway."

My first surprises: I touched a vacuum line and broke it, requiring a fix a bit further down the line, and now I need to change out the injector gaskets. Off to the parts store (herein referred to as "TTPS." It happens a lot.)

When I first began this little project, I thought that I would wrap it up in a long weekend. Hah! How naive I was.

Mitchell
Mitchell UltraDork
2/26/14 2:58 p.m.

Here is how the car sits now:

Northern Tool jacks; 6 ton in the front, 3 ton in the rear. It didn't budge a millimeter from the shake test, and I feel totally comfortable underneath.

See, here I am casually drinking coffee somewhere between the footwell and the engine.

What are my working conditions? 10.5' x 26' carport. One of the many reasons I swooned over this place.

Having an open wall allows it to function like a larger garage, and it also forces me to clean up every night, putting everything back in its rightful place.

Mitchell
Mitchell UltraDork
2/26/14 3:06 p.m.

This is my chosen method of hardware sorting:

They are just cheap harbor freight organizers, but I really like knowing the order in which everything came off of the car. Hypothetically, "assembly is opposite of removal," so I should be able to move backwards in the same order I took everything off the car.

nepa03focus
nepa03focus Reader
2/26/14 4:12 p.m.

Awesome build, I always wanted an svt but the maintenance scared me. My regular 03 zx3 was a great car.

DanielCut
DanielCut New Reader
2/26/14 4:14 p.m.

I like this.

Mitchell
Mitchell UltraDork
2/26/14 4:52 p.m.

As mentioned in ScreaminE's EAP build thread, the first thing I changed was the rear main seal. Mine wasn't bad per se, but it was 120k miles and 10 years old. The "right" way was to use a seal cutter to separate the seal from the carrier. To reinstall, I needed to use a "special tool" that's a $100 cast plastic piece.

http://www.c-f-m.com/performanceparts/pc/Ford-Rear-Main-Seal-with-Installation-Tool-for-Zetec-SVT-71p1176.htm#.Uw5o9Xi9LCQ

Because I didn't know what lied behind the seal carrier, I took the carrier off, which turned out to be a bad idea. The bottom half of the carrier lined up with the seal that separates the bottom and top halves of the crank case. Mounting the carrier back on may have destroyed the gasket, but I won't know until I start the car and the oil is moving around. As a band-aid, I squeezed RTV into the gap.

Before:

No after picture! Whoops.

Here is one of the special tools that I did shell out for: Flywheel holding tool. It worked beautifully, but was unfortunately $40. Hopefully I can cash that out somewhere down the line.

Reinstalling the flywheel, clutch, pressure plate, and slave cylinder were easy enough.

The FSM slave cylinder installation called for sealer (Permatex Anaerobic gasket maker cross-references the Ford part number, and was of course the most expensive sealer on the shelf), but the FSM was very vague on where to actually apply it. I put a bead around the concentric mating surface between the bell housing and the slave cylinder. Let's hope that's right!

Mitchell
Mitchell UltraDork
2/26/14 5:08 p.m.

The next step was installing the transaxle. This was not as easy as it should have been! I looked at all of the tips I could find, and the sum was successful.

First, I re-centered the friction disc. The blow-molded plastic has a bit of slop, so with the tool installed, I moved the tool up and down, left and right, diagonally, and took note of where the center appeared to be.

Second, I made these dowel pins out of M10 bolts:

Cut the head off with whatever you have (I used a fake Dremel with legitimate Dremel cutting discs), and cut slots so that it could be turned with a screwdriver.

I had a floor jack under the oil pan and used it it for fine control along with the transmission jack. When i got the transaxle and engine within about 3/4 inch of each other, I rotated the crankshaft a few degrees. The spline lined up with the friction disc.

I pulled them together (only with my hands -- no bolts or clamps out of fear of destruction). There are two dowel pins incorporated into the bolt holes, one on each side of the engine, that I couldn't get to go in. At this stage, I did decide to use bolts to squeeze the two together, and it was fine; required almost no effort.

This is where I am now:

bgkast
bgkast GRM+ Memberand Dork
2/26/14 6:11 p.m.

Makes me miss my zx3. I got it new about the same time you got yours it sounds like.

Edit: dang it, now you have me looking on Craigslist. Just inquired about one for $800 that is stuck in 3rd gear (manual)

ScreaminE
ScreaminE Reader
2/26/14 8:34 p.m.

Good to know about the RMS and carrier assembly. The RMS kit I got (Fail-Pro) came with the carrier gasket. I won't be removing that unless it is seriously weeping.

Glad to see you started your own thread.

Mitchell
Mitchell UltraDork
2/26/14 8:46 p.m.

Yesterday, I also installed the lower control arms. It was pretty easy with the subframe off the car; probably would have still been easy with the subframe installed.

Each side requires two torque to yield bolts to be replaced. I ordered the largest bolts on each side a few weeks back when I removed them by mistake during subframe removal, but didn't re-read the instructions after deciding to replace the the LCAs. E36 M3, oh well. If my LCAs fall out I will at least have the peace of mind that I saved six dollars.

Tonight, I replaced the starter motor. The bolts are so much easier to access at this stage from underneath. For one of them, I couldn't get a torque wrench in the tiny access area, so I tightened it as much as thought it should be with a Craftsman bendy wrench that I have learned to love (it stays firm in a few bent locations, and it's halfway in length between my normal 3/8ths wrench and my breaker bar).

You know what this means? I can send the first of my core charges back! Hooray!

Mitchell
Mitchell UltraDork
2/26/14 9:19 p.m.

Something else that has helped in the process:

Because there are so many interrelated steps, and I wanted to prevent doing anything twice, I compiled a notebook with every part of the job that I am working on. I took pictures of every page of every process in this project, and then put together a PowerPoint presentation that pieced together all of the processes in the order that I needed them. This prevents me from continually flipping through the thousand page manual that is already in tatters. For example, "remove subframe" is one of the sub-steps of removing the transaxle. So I put all of the subframe removal steps in the appropriate place within the transaxle directions, and the same with the assembly.

This was a few hour job in itself, but at least I could figure it out while watching House of Cards in the living room.

Mitchell
Mitchell UltraDork
2/27/14 7:43 p.m.

I have only worked on the car for a few hours, but I have at least made some progress (knocks on wood).

First, i installed the rear mount. In doing so, I spent about 30 minutes triple checking the routing for the driver side wiring, since the mount would serve as an impassible border.

Getting the rear mount was a breath of fresh air. First, I connected the bracket to the transaxle. There is a little bracked threaded through one of the bolts. I couldn't remember where it went, but finally realized that it serves as a guide to the clutch line.

Then, I put a floor jack under the transaxle using a block of wood I crudely carved to fit the contour of the transmission. I I raised the jack gently, to release pressure from the engine support's chains, and was able to wiggle the main bolt into te center of the rear mount bracket.

By installing (but not completely--FSM says to wait until the end, presumably until after the car is settled on the dogbone mount connected to the subframe), I was able to remove the engine support. Hallelujah, more room to work in the engine bay!

The last thing that worked tonight were the c/v axles. Thankfully, installation was much easier than removal. I only tightened them as much as I could with my regular 3/4" wrench; they are only held on by the strut tower, so they wiggle and rotate quite a lot. I will finish torquing them after connecting the tie rod and stabilizer bar (or whatever it's called), but before connecting te ball joints. Does this logic seem sound?

Shiny new axles in place:

The worse of the two outgoing:

Tomorrow, I want to first get the engine bay sorted out, because installing the manifold will be a lot easier with the catalytic converter and subframe out of the way. Also, once the subframe is back in place, I want the satisfaction of only the easy stuff left underhood.

And before I forget: my brother in law warned me that his spider gears dropped when changing out the C/V axles on his ZX2 back in the day. I don't know if it still applies to the mix-285, but shoving some tightly-wound cylinders of corrugated board gave some cheap insurance:

Mitchell
Mitchell UltraDork
2/28/14 6:52 p.m.

I was able to get the manifold, injectors, fuel rails, and a dozen wiring connectors back in place. I had to remake a few vacuum lines as well. I don't know if I used the right ID (by "I don't know" I mean "I probably didn't,") but it was the closest size I could find locally, out of either nylon or rubber. I made these out of rubber tubing, but saved the old tubing should I have to remake it. The engine bay is looking much, much better.

Here is one of the vacuum lines that I repaired: 
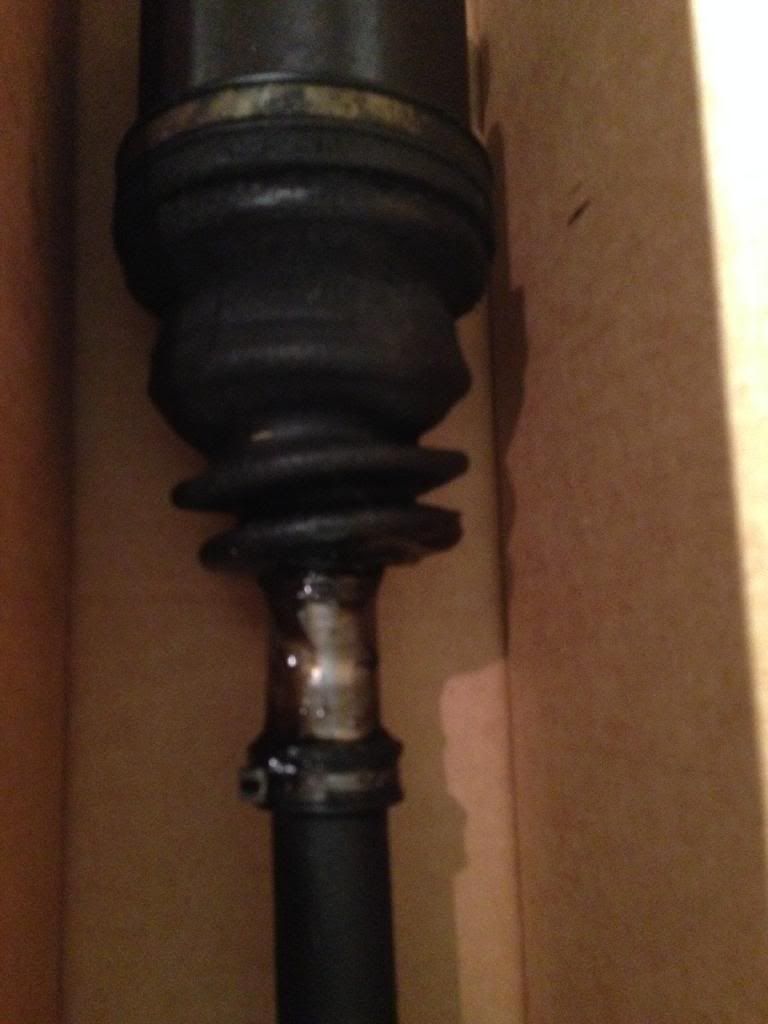
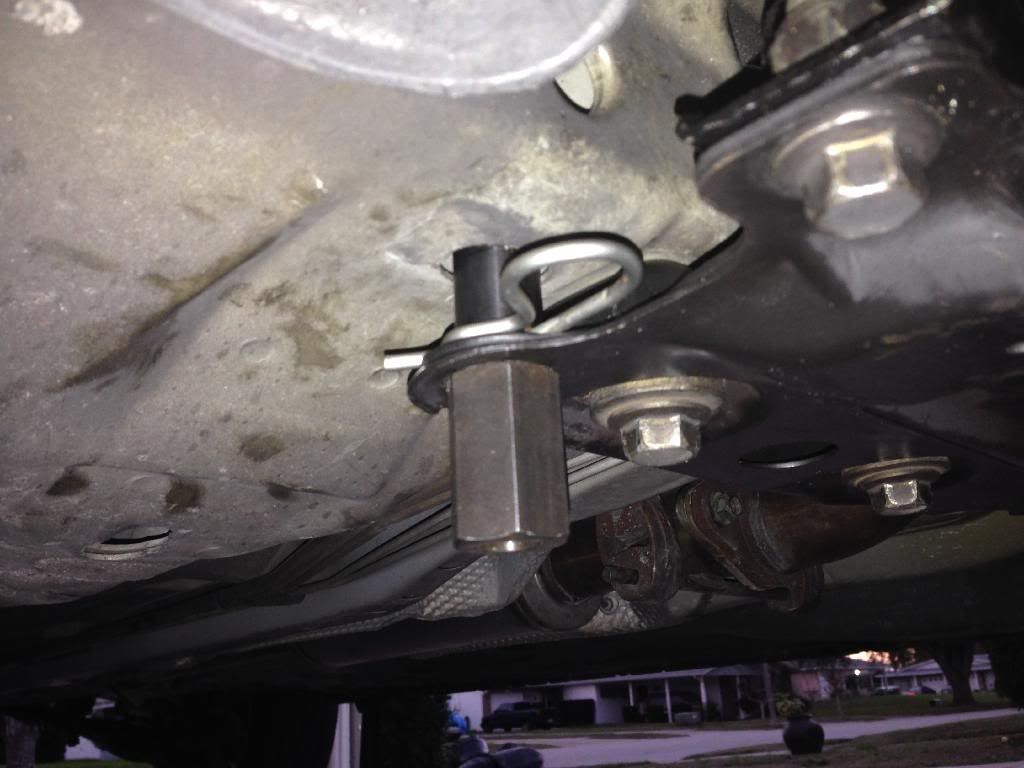
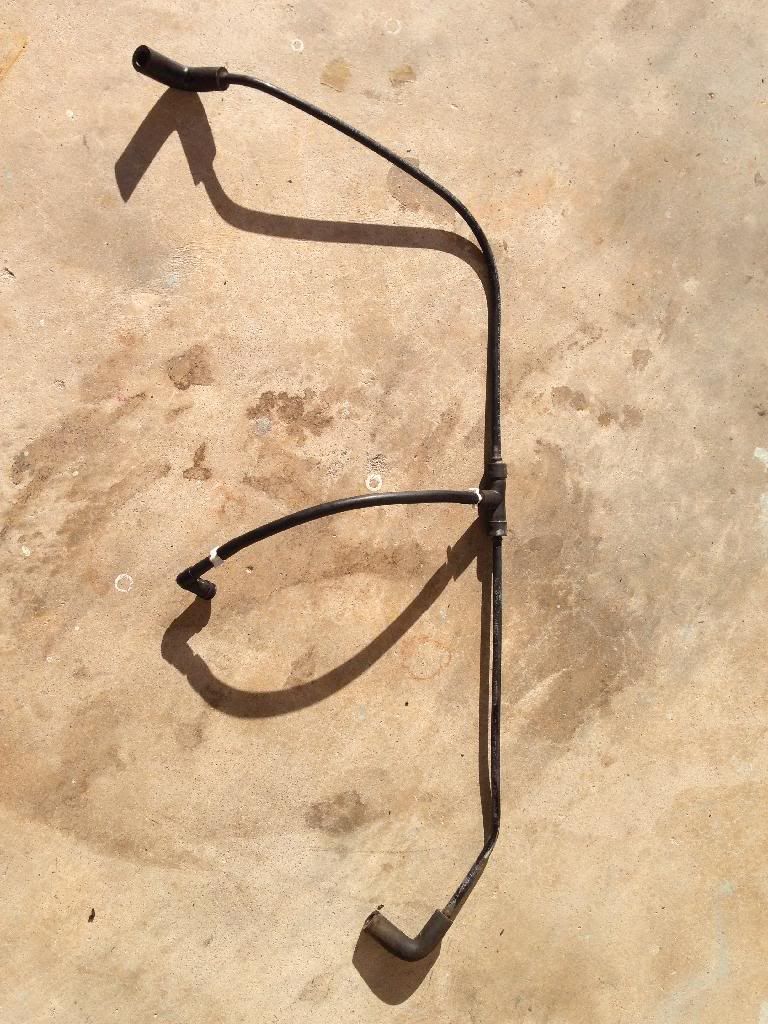
The new portion is the shorter segment.

And if I botched any of the fuel stuff, I bought a token fire extinguisher a few weeks back.

johnp2
johnp2 Reader
2/28/14 7:09 p.m.

Following along!

JtspellS
JtspellS Dork
2/28/14 8:20 p.m.

So is it time for the kinky mistress known as boost?

Mitchell
Mitchell UltraDork
2/28/14 11:04 p.m.

I discovered that the catalytic converter mount is broken. Since it should be accessible with the subframe installed, I won't let it put the project on hold. I also discovered that the O2 sensor I had laying around was the wrong model. I'm glad I didn't throw the old one away!

The Day of Reckoning is getting near! I think my to-do list is just the following:

Install subframe/connect ball joints, steering linkage, and tie rod Tighten front axle nuts Install battery tray/few other little things in the engine bay Fill/bleed clutch Fill power steering system

If anything major turns out to be wrong:

Install for-sale sign

The romance of this job is long gone. I have been dailying the motorcycle since mid-January. It gets old.

Mitchell
Mitchell UltraDork
2/28/14 11:06 p.m.
JtspellS wrote: So is it time for the kinky mistress known as boost?

That's like saying, "Our relationship hasn't been working out lately. We should have a baby."

Mitchell
Mitchell UltraDork
3/2/14 10:12 p.m.

I was able to get the subframe connected today, which allowed me to get all of the suspension bits back in order.

To install the subframe, I first leveled the car out . I have smaller jacks in the rear, so I had to bring down the front jacks. This made the job a bit more difficult, but proper alignment was my priority. I set the subframe on the transmission jack, and maneuvered it into place, ensuring that tenge steering gear didn't get caught on anything.

Ford offers nifty little alignment pins that's "required" according to the FSM. I actually bought these, despite their hefty price tag of $80, used.

The FSM also said to connect the ball joints after aligning and installing the crossmember. Maybe it's just because my lower control arm bushings are new, but mine had no droop, so whenever I raised the subframe, the ball joints would interfere with the outer C/V boots. Not wanting to tear anything, I just let the ball joints go into the spindle. It didn't appear to hurt the process.

When I first got the alignment pins, perhaps two months ago, I checked the subframe while it was still installed to see where the pins go. I remember one side's alignment passage appearing to be just slightly short on clearance. Sure enough, the last step in the alignment process was to simply remove the cotter pins and let the dowel pins fall. The worrisome side was stuck, and I had to loosen 4/6 of the bolts and destroy the cotter pin to get it out.

Here is the offending pin installed on the subframe prior to removal:

After bolting on the crossmember, I connected the last of the power steering lines, tie rods, and stabilizer bar.

Edit: incorrect information about axle halfshaft threaded end removed.

ScreaminE
ScreaminE Reader
3/3/14 8:34 a.m.

What brand are your axles?

Mitchell
Mitchell UltraDork
3/3/14 9:46 a.m.

They were whichever ones O'Reilly had in stock. I'll check for a label when I get home this evening.

Mitchell
Mitchell UltraDork
3/4/14 6:45 p.m.

Let there be life!

It took a few attempts to get it running, which was a bit of a nail-biter. After the third or fourth attempt, it finally sputtered to life! It runs as smooth as it has ever. I still have to finish bleeding the clutch, but as least I know that it runs.

Oh, and turns out that the halfshafts were not longer--I just didn't have the real seated properly on the hub. I guess that I was simply looking for problems.

Here's hoping that I can get the hydraulics sorted out tonight or tomorrow. I took next week off, and damned if I will be wasting it working on the car.

Mitchell
Mitchell UltraDork
3/4/14 10:50 p.m.

Well! I finally got the clutch to a feel that I was comfortable with, and took it for a 15 mile drive. It shifts smoothly, and feels a lot more communicative than before.

The ride is quite a lot different. Having changed so many variables, it is hard to know what components are as they should be. I haven't driven the car in a month and a half, so I am unsure of my memory's accuracy. It tracks straight, and feels a lot firmer than I remember, but it has a squirminess that I can't quite put my finger on. The left ball joint was uncooperative compared to the right, so I am wondering if it is seated completely within the hub.

Regardless, I will get an alignment ASAP.

Mitchell
Mitchell UltraDork
3/5/14 7:17 p.m.

I left work an hour earlier than expected, and found a place that would take me in for an alignment right at closing.

The car feels so much better. The steering was before light and a little jittery, and now it feels like a steamroller going down the road. Just the right amount of effort needed. Major props to the guys at Performance Race Solutions in Sanford. They had GRM in the waiting room, too.

Mitchell
Mitchell UltraDork
3/5/14 7:22 p.m.

Oh, and after looking at the car a foot and a half in the air for so long, I forget how stock, it's at such a nice height.

ScreaminE
ScreaminE Reader
3/5/14 8:32 p.m.

Bravo. I'm hoping to pull the engine out of mine this weekend. I wish mine were that clean underneath. Damn rust.

1 2 3

You'll need to log in to post.

Our Preferred Partners
9gqfdfQddt21hDqkRIDeMNQ6QIYyYe9bceMRIfmSOzTkq2wsXuHNYqFeQuPuZju9