1/13/19:
More progress today.
Got the K frame degreased, blasted, went over welds that had too much undercut, and begun to paint it.
I also reinforced the strut rod plates and the mounting point for the LCA. lots of welding and grinding.
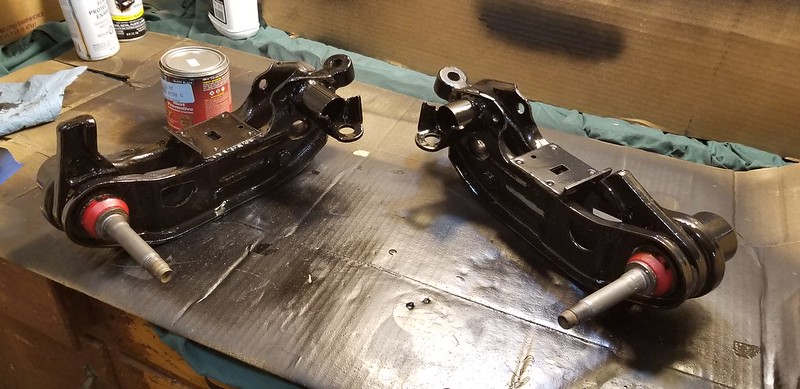
LCA's are coming together too. Getting new bushings pressed in, and lower box plates installed. They are pretty light so I am okay with the weight penalty for now. I made up for it by removing the splash shields.
Hope the FFI sway bar comes next week.
Got The K Frame Painted.
Maybe I will throw one more coat on there.

Greg

¿You Mocking me? 1/20/19:
Well I got all of the K Frame Painted and installed.
Got the new 16:1 Steering Box installed, along with new Pittman arm, 11/16 Tie Rods and Adjuster Sleeves.
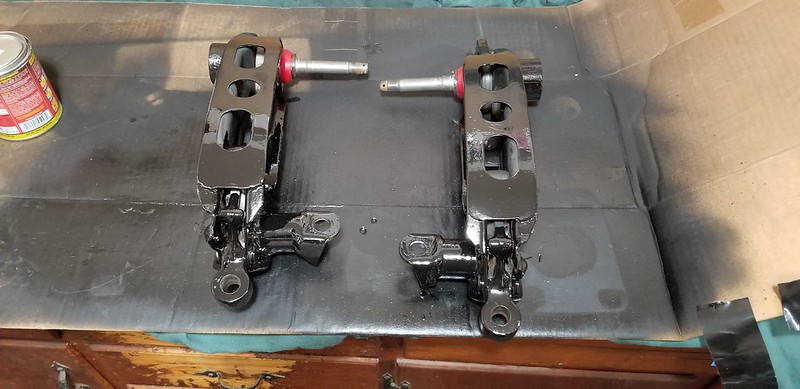
Got the Upper arms, strut rods installed too.
Lower arms are in place for mock up but will need to be removed for paint after the sway bar comes in and gets mocked up and tabs welded in place.
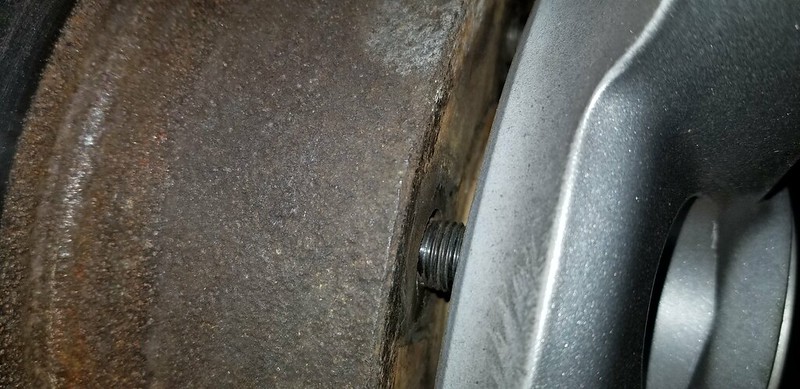
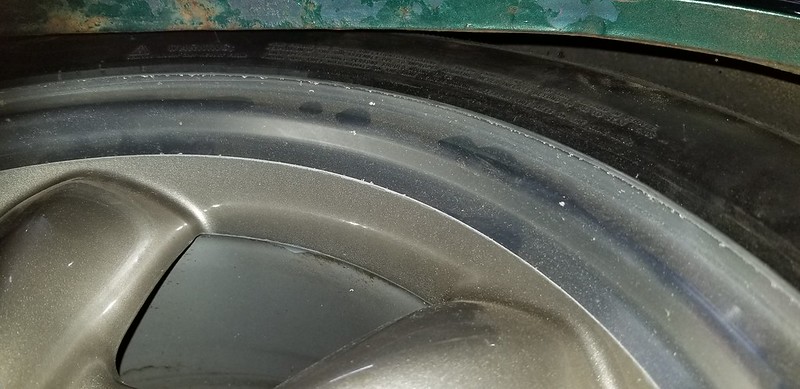
I also mocked up one spindle and rotor, Threw the 17x8 Mustang wheel on with a 245-45-17 Tire on it.
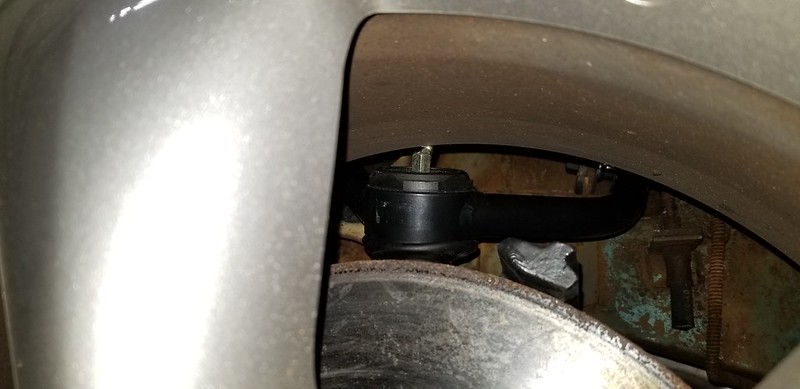
Was hitting the Grease Zerk on Full drop as well as the tie-rod end the entire time.
I was able to bolt the wheel on and determined that a 1/2" wheel spacer along with some quality 3" long wheel studs will help things out here.
Pictorial:
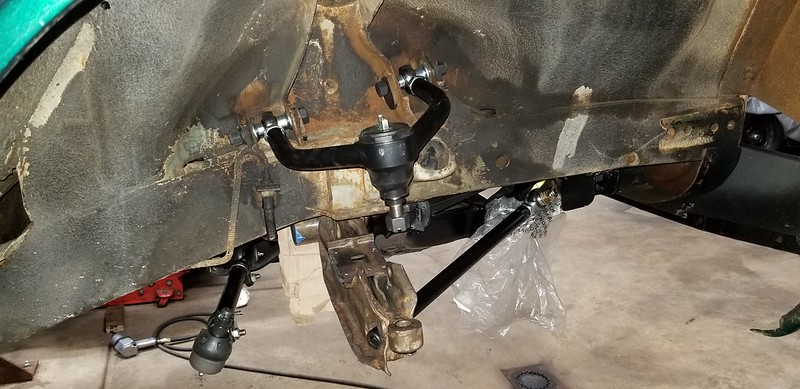
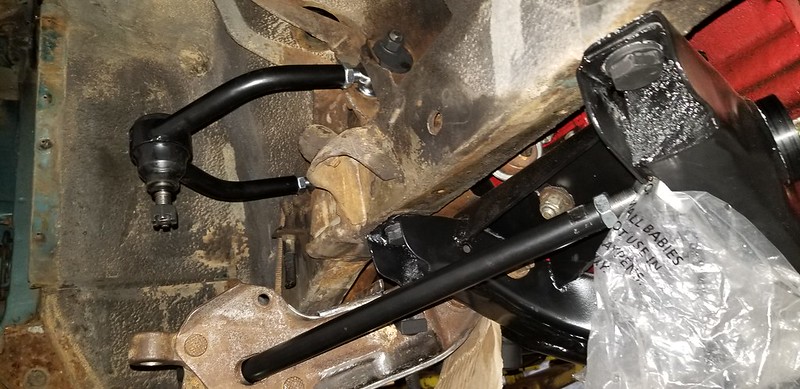
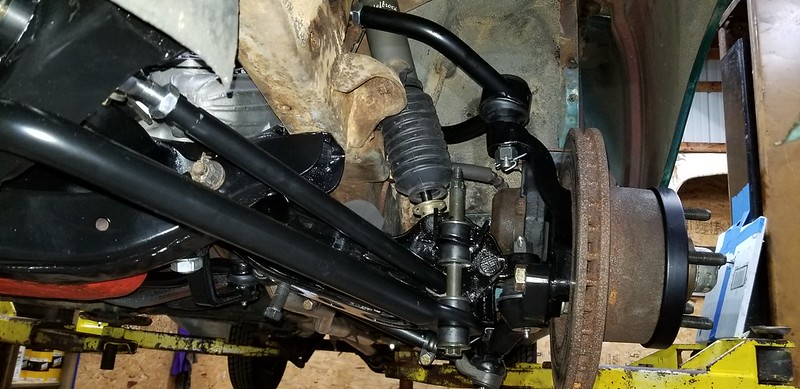
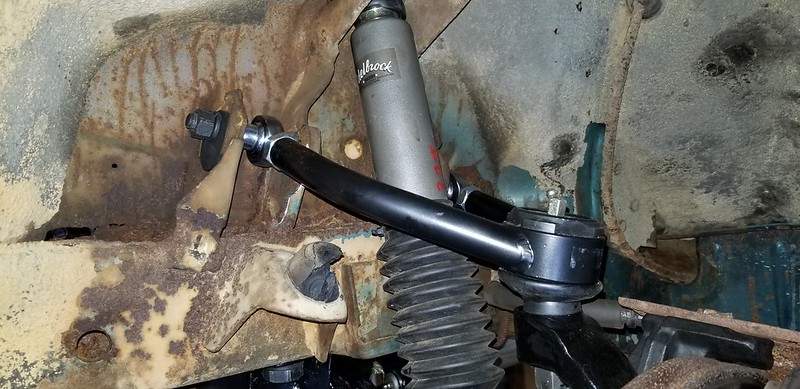
New UCA, Steering Bits and Front Strut Rod. LCA is there for mock up - to be finished soon.
Hits the Zerk :-(
Hits the Tie rod End too! :-(
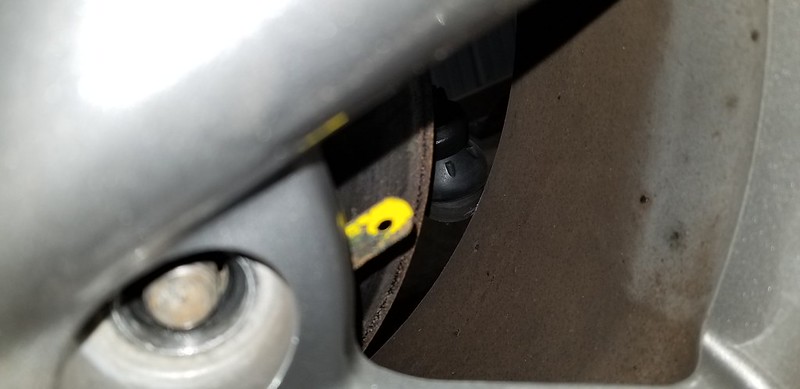
That's 1/4" of space and the wheel is hitting. I hope to get a 1/2" spacer to kick the wheel out toward the edge of the fender some more to clear these things.
Also a set of 3" long studs will help here! :-)
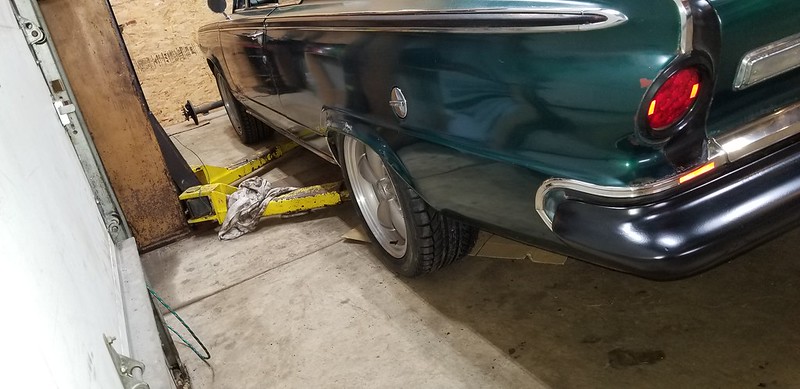
These cars look so much better with a tire filling the wheel well.
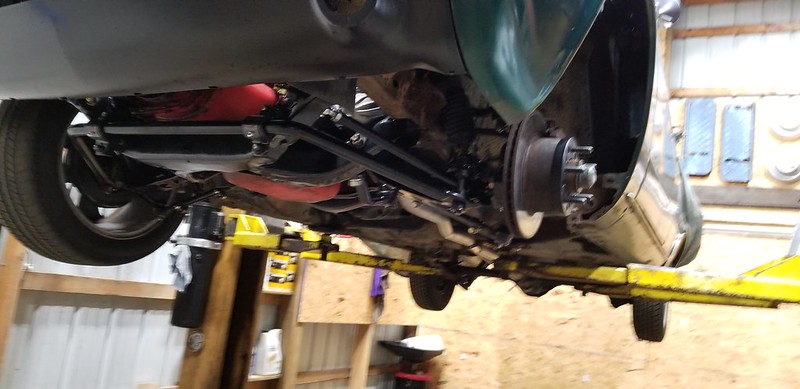
Transformation at ride height: I think the mock up is going well - Time to fit the sway bar!
Cheers!
Greg
1/27/19:
I got the Sway Bar mocked up and the mounts mocked and then welded to the LCA's
The Steering column I now rebuilt and refreshed with new seals and paint, etc,
I found that my 1/2" wheel spacers were not wide enough so I went to 3/4" Spacers.
I started to paint the LCA's with some POR15.

Greg
1/28/19:
I got the other side of the LCA's Painted, the pics will show of the speedway sway bar tab mated to ~2" of round tubing.
Also are some pics of the refreshed steering column.
Greg
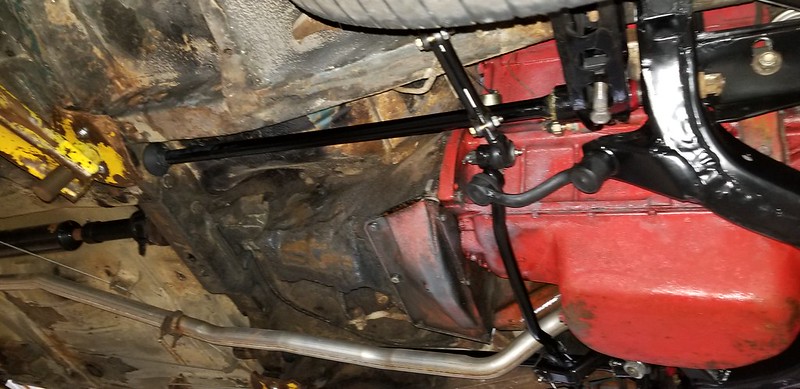
Top / Front of LCA's - you can see the Sway bar tab and tubing connecting it to the LCA.

Grody Steering column refreshed and rebuilt - still a 3 speed for now so I need the tubes an levers inside there.
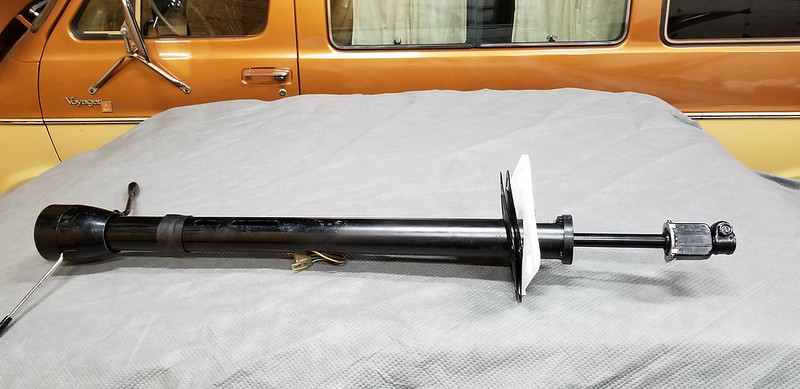


Greg
Great job on all the work.
A while ago there was a guy that added a turbo charger to one of these. I am sure the story is still here somewhere.
2/3/19:
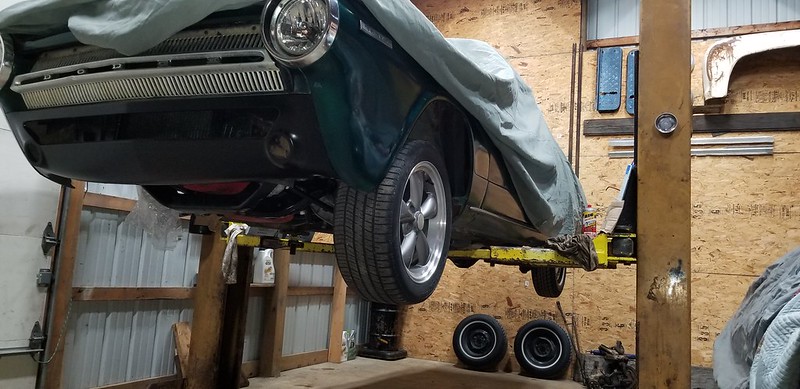
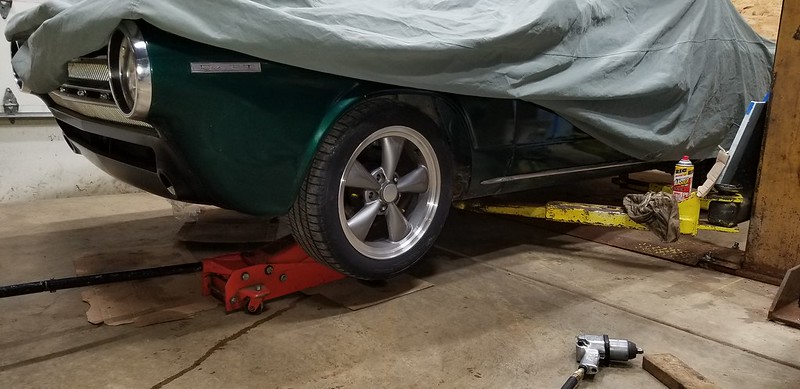
I got all of the suspension installed and checked clearances etc. A bit of fender trimming was needed in front of the tires. I got the steering column reinstalled.
Now the car is back down with weight on all four tires. Even in the corner Jounce test There is a noticeable difference in the Stock 64 Slant bars vs the new 1.03" bars.... WOW. It seems to sit a bit high for my liking but I can always unwind the the T bars when Needed after the car starts to settle the suspension.
Next week's project will be getting the FJM master cylinder rebuilt along with the Factory Prop / Dist. Block. and an adjustable Prop Valve for the rear Bias. Got some brake lines and fittings ordered for that job.
Pictorial:
Crusty Rotors and Calipers that were saved from another project. It ended up getting wilwoods; these brake parts are like a cat, cause I think they lived on 8 cars before this one.

Steering Column Back in.

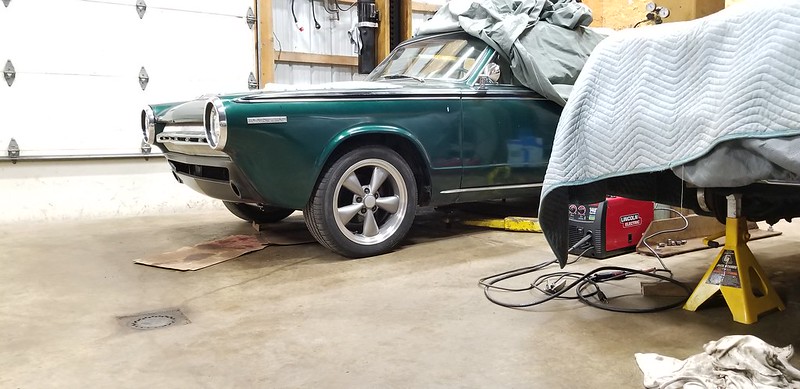
New Stance: (probably has to settle the suspension)
Greg
4/25/19:
I got to do some work over the weekend.
I was able to put a rough alignment on the car (I say rough because even though all of the specs on my gauge are what I want it's pulling Right)
I think I had a faulty Master Cylinder - Replaced that with a new one - Got that installed and bled.
I drove the car for about an hour over the weekend. It can handle corners now and is flat, It feels good. One of the edlebrock shocks is rattling, and if sounds like the suspension is going to fall apart. (might have to get hotchkiss or bilstiens) I have a new Radiator for the car as the original one is now leaking.
Pics of home alignment:


Hope to start jamming on the rear suspension / axle install or the upgreade to 833 or t5!
Greg
5/5/19:
I started Prepping the 68-9 B Body 8.75 Housing for it's new home in the 64 Dart.
It was a part that I got at one of the mason dixon races years ago in preparation for this project.
I started to get all of the rust and grease off the outside and I also put new spring perches on 1/2" further to the inside from the B body location.
I measured the original Perch Angles and tried to replicate the dimensions and then tacked them for now.
I also stared working on installing a new radiator.
Housing before any Grinding:


After getting the perches off and the rust ground down a bit:

Getting the new Perches on in the A Body spots:


Getting closer to getting that Rear suspension in!
Greg
TED_fiestaHP said:
Great job on all the work.
A while ago there was a guy that added a turbo charger to one of these. I am sure the story is still here somewhere.
Thanks! There are a few folks with turbo Builds on www.slantsix.org as well.
and then there's this:
https://www.youtube.com/watch?v=ZPm0POxQuNk
Greg

JeremyJ
New Reader
8/7/19 11:43 a.m.
This is a really cool project. I look forward to seeing the progress.

NOHOME
MegaDork
8/7/19 12:04 p.m.
Nice work. Bur rather than Grüne Hölle it maybe should have bee called scheizer Käse
Seems that Grüne Hölle is also a spot at the Nurburgring.
Pete
In reply to NOHOME :
Hi Pete, Hopefully less and less Scheizer Käse as time permits.. As I understand it the Grüne Hölle is a euphemism for the entire Nordschlife, not just a restruant or a corner station.
5/14/19:
Got quite a bit of small things done over the weekend and last night.
- The stock Radiator was leaking and going bad so I got an aluminum crossflow rad to put in the car.
It required a bit of hacking / cutting of the factory core support and also on the rad itself to get it into the car to work correctly.
I had to order some of that HotRod Slinky type stainless radiator tube to set up the angles for the lower hose, and I used -16 AN with some adapters for the upper hose.
The rad is now in and I just have to let the sealer setup, tighten a few bolts and AN connectors, then fill it with some Coolant.
Pics Below:

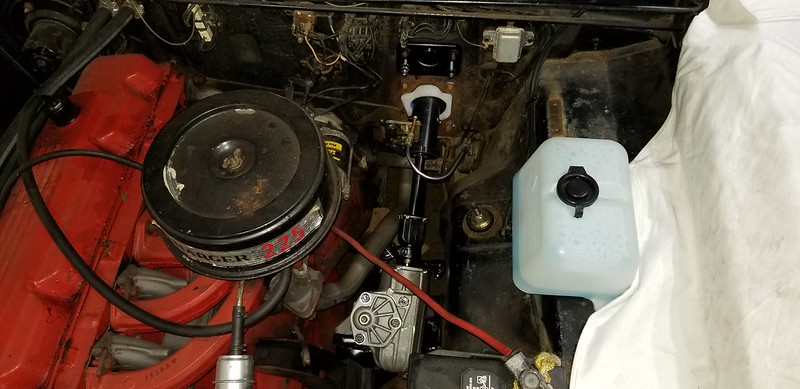
(old F Body Overflow can is just temporary - the Early A Engine compartment is too small for it to fit anywhere yet. (maybe I can pack it up under the fender like a modern car.)

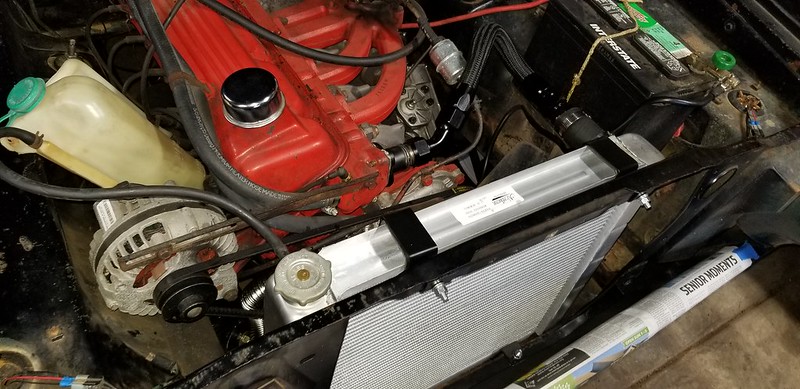
good shot of the core cutting - I might have to paint the front of the rad black - I can't stand to see all that shiny AL behind the grille and valance and hood which will be blacked out.

For now stock fan Remains - electric one will be in there soon after I get an alternator that will support it. Battery will also be going to the trunk.
Top Hose - I decided to go -16 rather than play with all of the fiddly bits of rubber hose.

Greg
A late 80s/early 90s gm 3800 alternator from a bonniville will bolt to the mopar brackets, knock 50 amps at idle, 90+ at 2k, and be availible damn near anywhere. Done that swap on quite a few small blocks, and the slant 6 alternator is essentially the same.
May be the droid you're looking for.
In reply to Dusterbd13-michael :
Thanks for the Tip! Yes the Slant six - LA - B/RB Alternators are universal in their mounting configuration.
I will keep an eye out for one or Just buy a new one. Any suggestion on getting the multigroove serpentine belt pulley on those alt's swapped for a single or double v Belt?
Greg
5/16/19:
The Rad is all in and pieces are getting prepped, blasted and painted.
I mocked it up the other day and filled will coolant and started the car.. It has 2 small leaks where I welded the -16AN bung to the 2.2 style straight thermostat housing... so I pulled that off and reworded and painted it tonight.
Got it all back together and went for a drive - no leaks!
I am trying a get a bit more sinister look from the front end as well... so everything will be semigloss.. and the 64 Dart grille was a but smashed and trashy so It's a wall hanger and the 63 Dart grille will get a coat of semigloss and get put in it's place.
Pictorial:
Rad and one side tank of that rad are painted and give the factory blackout look behind the grille.


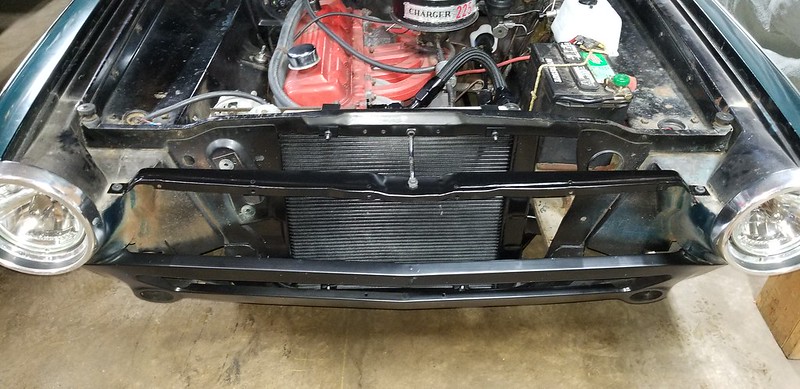

Swap meet '63 Grille eagerly awaits it's turn to be installed on the car.

Up Next: Grille install, New Prop Valve fiddling, Baer Rotors, EBC Pads, then maybe the Rear End Install / mockup.
Greg
slantsix said:
In reply to Dusterbd13-michael :
Thanks for the Tip! Yes the Slant six - LA - B/RB Alternators are universal in their mounting configuration.
I will keep an eye out for one or Just buy a new one. Any suggestion on getting the multigroove serpentine belt pulley on those alt's swapped for a single or double v Belt?
Greg
I use a v belt pully from ebay. Cheapest i can find. Use the spacer, nut, and lock washer from the serpentine pully and it all lines up. Done that on a few of ths conversionz ive done with great success. Avoid the shrome pullies. Ghey are oddly sized.
Man this is awesome. I still have some leftover '63/ '64 Dart parts (I had a '63 Convertible at one point). If you're interested, I'll let them go very cheaply. I know I have a front lower valence (forget if it's a 63 or 64, there's a few differences) and IIRC a box of small parts. Might be a few brake drums and other stuff too.
PM me if interested and I'll get you some more details.
I love me some 60's MoPars.
On the overflow can- Volvo Amazons use a cylindrical one that mounts next to the radiator. It holds about a liter, and it's about 3" in diameter. I have several, if you're interested.
5/17/19
Got to stop at the garage today before dinner. Installed some new modern horns. The O.E. ones were filled with so much sand and dirt that they did not really honk anymore.
I love the sound of those original '64 horns but they didn't work and are over a pound per horn. So modern replacements were ordered and installed. Nice and light too.
I was able to install the grille as well.
Here is a shot of the recycled F body overflow can. It is tucked up under the RF fender. Helps to get some of the weight onto the right side.

Painted 63 grille installed in the 64.
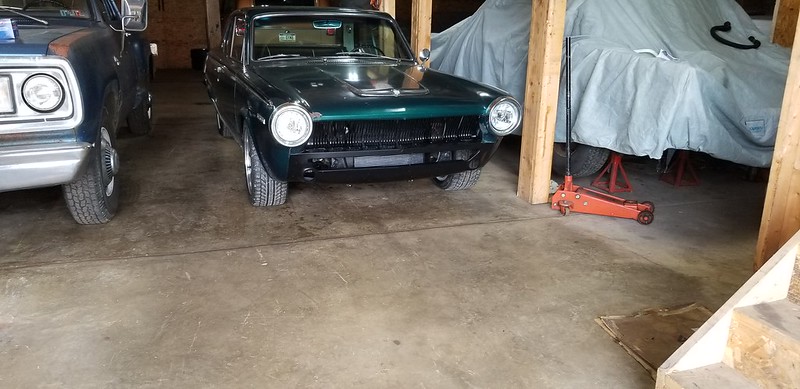

Greg
7/6/19:
Today I began to work on installing the RMS Street Lynx Rear suspension.
I had to remove the the Old Stuff:


Before I dropped the leaf springs I wanted to check my positioning and welding of the perches and the tire clearance. This is a B body rear Going into the A Body Frame. so it should push the wheels and tires out quite nicely with no spacers needed.


Clearance was good on right, but was making contact on left, so I need to center the rear end better when I weld up the link attachments or do a bit of trimming, or both.
Right Has clearance..
Left not so much...

New Rear Stance..

More work on it today!
Greg
volvoclearinghouse said:
Man this is awesome. I still have some leftover '63/ '64 Dart parts (I had a '63 Convertible at one point). If you're interested, I'll let them go very cheaply. I know I have a front lower valence (forget if it's a 63 or 64, there's a few differences) and IIRC a box of small parts. Might be a few brake drums and other stuff too.
PM me if interested and I'll get you some more details.
I love me some 60's MoPars.
There are some odds n ends I need - Drivers side Vent box with Door that works and is not rusted to hinge.. A Spare gauge cluster with clean, clear plastic would be nice. On the Volvo Overflow - possibly It needs to be super small as the Horns bolt right beside the rad and I did not yet want to reroute or rewire them.
Greg
7/7/19:
I got the Top Bar for the street lynx welded in. It needed an 1/8" Plate on one side to close the gap between the rails.
Welding works better when there are not gaps between the pieces that you are burning in. :-)
Hopefully tomorrow I can continue on with the mock up and begin to set up the links, center the axle in the car, locate the mounting tabs for the top links on the rear axle, and then finish weld and paint the housing.
Have to get the driveshaft shortened as well as setup the axles. - I am cleaning, painting and getting new bearings and inner / outer seals.
Pics:


Greg
7/9/19:
Made some more progress yesterday..
- Got the housing situated and placed in car at 13 3/4" Shock Travel, 1° pinion angle up and centered in the frame rails. (as per RMS Instructions)
- Set the upper links on the housing, tacked in place.
- Got the spring perches and link attaching points fully welded to the housing.
- Polished the inner and outer axle seal surfaces on the lathe.
- Cleaned / prepped the axle flanges for paint.
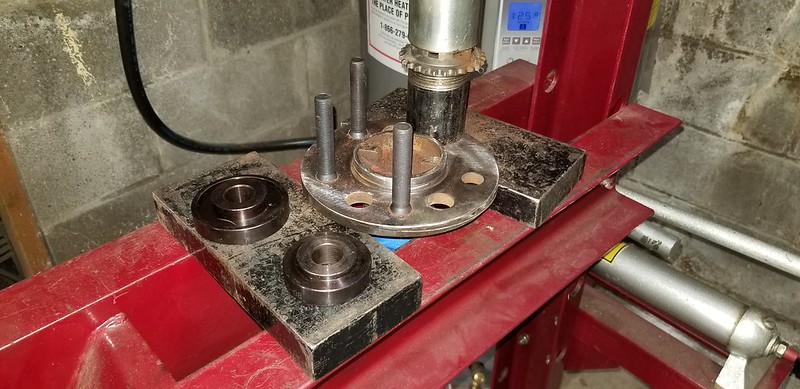
- Pressed in 3" long wheel studs.
- Took the Driveshaft to be shortened 2.25" to use with the 8.75" Rear end, also Dropped off my 3.91 Chunk at the same shop to have the Gear setup in it.. I was having a heck of a time with those gears so I will pay the pros to get those set up, that chunk has ant eaton truetrac in it so it should be nice when it's installed with a real Engine and trans. ( still have stock puny 1bbl, stock head, cam and 3 on the tree with no synchro 1st Gear) :-o
Pics of work:
Axle work:


Links Installed in car:

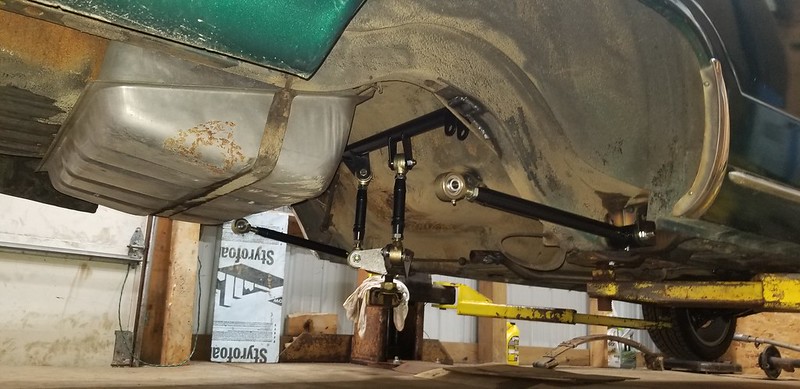
This trans jack sure comes in handy when doing this job...

Getting closer to Paint and Prep: - Its fully welded now.


Greg


