1 2 3
84FSP
84FSP SuperDork
6/26/18 7:36 p.m.
irish44j said:
badwaytolive said:


I'm now consternating over the price of racing harnesses. I haven't bought one in 10 years. Have they always been $400 each? Zoinks.

damen

Just go buy a set of Racequip. Just as safe, just as legal, just as good, have camlocks, way cheaper. I'd say a good half of rally teams I know use them (especially since we have to buy TWO sets for our cars, lol). I think the sets I got were like $129 each.....6-point camlock HANS 2-->3" in black. If you can deal with an ugly color (lime green) they can be even cheaper!

I went the racequips and bought a new set and then a matching used out of date set for the passenger side.  For my escapades they'll be more than adequate on the cheap.

Aeromechie
Aeromechie New Reader
6/29/18 9:37 a.m.

Dude. I know this car. I've ridden in this car!  I went to school with your brother in Rochester.

I'm glad to see someone is showing this car love, and I'll definitely be following this thread.  

Sappy emotions aside, the clutch squeak you noticed on startup/engagement seems to be par for the course on Subarus. My 2014 wrx did it, my 2015 wrx had a TSB out for it (look it up here). That's not to say that it's not the result of being under water, but a little squeak seems to be a mostly cosmetic design flaw without really serious consequences.


-Ryan

badwaytolive
badwaytolive Reader
6/29/18 11:25 a.m.
irish44j said:

Just go buy a set of Racequip. Just as safe, just as legal, just as good, have camlocks, way cheaper. I'd say a good half of rally teams I know use them (especially since we have to buy TWO sets for our cars, lol). I think the sets I got were like $129 each.....6-point camlock HANS 2-->3" in black. If you can deal with an ugly color (lime green) they can be even cheaper!

GRM ftw! Exactly what I'm looking for, thanks very much. Ordering two now.

damen

badwaytolive
badwaytolive Reader
6/29/18 11:25 a.m.

In reply to 84FSP :

Cheers, amigo, ordering now based on your and irish's feedback, thanks!

badwaytolive
badwaytolive Reader
6/29/18 12:24 p.m.

In reply to Aeromechie :

Cheers, Ryan! Thanks for stopping by!

Thanks for the TSB mention. I suspect that a clutch squeak may be the least of my worries right now. There are actually only a couple things preventing me from trying out a serious drive.

Seatbelt. Gauges. I guess there is some bushing or bearing that supports the steering column through the firewall. I think it has popped out, so the steering column is a bit wiggly. That needs fixed. Once I attend to those items, I'll take it out and hammer a bit more. Hopefully that doesn't reveal too many problems.

Then it'll be track prep stuff. I'm trying to assess whether the oil pickup and baffle and pan are required? Air oil separator? Definitely new pads and rotors, then brake flush. Good brakes are my absolute favorite on track. I got really obsessive about it with my last track car, going through a couple different solutions. I ended up with ap racing calipers with 4lb anti-knockback springs and really thick ferodo DS.UNO pads. Me gusta'd that very much.

Anyhow, what else do I need for this car for a track day? Billet IAG 2.5L short block? Those look rad.

damen

livinon2wheels
livinon2wheels GRM+ Memberand New Reader
6/29/18 1:54 p.m.

In reply to badwaytolive :

you are fixing to spend a TON of money lol. I will be curious to see what your new engine ends up costing you. These subies are pricey mothers. 

badwaytolive
badwaytolive Reader
6/29/18 3:22 p.m.
livinon2wheels said:

In reply to badwaytolive :

you are fixing to spend a TON of money lol. I will be curious to see what your new engine ends up costing you. These subies are pricey mothers. 

Uh oh, what do you mean?

I was just joking about the IAG short block...

AWSX1686
AWSX1686 GRM+ Memberand Dork
7/2/18 7:48 a.m.

I know the short block was a joke, and I'm also not sure how it compares, but my buddy has a '17 STI and is about to have an engine built. I think he'll be in about 10k said and done for a 600whp engine. Just for reference. 

badwaytolive
badwaytolive Reader
7/2/18 10:02 a.m.
AWSX1686 said:

I know the short block was a joke, and I'm also not sure how it compares, but my buddy has a '17 STI and is about to have an engine built. I think he'll be in about 10k said and done for a 600whp engine. Just for reference. 

Hey Andrew, thanks for the data point.

The billet block is ~$15k and rated for 1,000+ hp. It seems that just "closing the deck" can allow for 1,000hp too. I would take the over on $10k for a reliable 600hp engine; that seems awfully cheap!

I was hoping @livinon2wheels might give me some experienced-based guidance. I am not planning on any sort of engine build right now, certainly not 600 or 1,000hp, but I would like the current motor to stay alive on the track.

damen

AWSX1686
AWSX1686 GRM+ Memberand Dork
7/2/18 11:45 a.m.

In reply to badwaytolive :

Cool. 1000hp started getting into some crazy territory. Even 600 is going to be nuts on my buddies car! 

badwaytolive
badwaytolive Reader
7/13/18 2:42 p.m.

Short update here, but I spent just the end of a shop night getting the second seat installed.

I don't know how they fit in a regular WRX, but some serious grinding was required to get the passenger side seat mounts to fit too.

This triangular brace has to be ground nearly off at the corner, but that part isn't doing the structural support work anyway. If there's even any to be done. I admit I didn't FEA this before getting the grinder out. This is the before.

Not much to see; it all bolted together nicely. Not to mention I saved a huge amount of time over the driver side because I copied the settings and bolt placement.

Needs a wash badly.

I really do like the look of these seats. I guess it's that bit of white piping? I think they look damn sharp.

It's not long til I can take this for a serious drive. Harnesses and devil bar are on the way. Then I need to sort whatever that problem is with the steering column moving around near the firewall. Then a spirited test drive!

I'm debating whether I should install the gauges first. That's probably 1 - 2 shop nights worth of work. My brother had a 3-gauge pod cluster where the clock goes on top of the dash with boost pressure, EGT, and oil pressure. I think. It wasn't wired particularly robustly even before the flood, so it probably needs a full re-wire.

And then the stock cluster has been living outside for a bit of time. It's under the carport, but I won't really know the state until I try to plug it in.

damen

badwaytolive
badwaytolive Reader
7/20/18 2:47 p.m.

There really is just a short list of items that are keeping me from scheduling a track day. One of them, however, is this issue with the steering column. It moves when it's not supposed to. I've been avoiding dealing with it, but it has to get done, so I figured I might as well get it over with.

That's the steering column going through the firewall into the engine bay. You can sort of see some sheet metal damage at the 5-o'clock position. There's supposed to be some sort of bushing and grommet holding the steering column in place here, but they've been popped out.

So the column wiggles around as you turn the wheel. Not confidence inspiring. Our best guess is that when the steering column was dropped during the interior disassembly, it banged on the bottom there and popped those two pieces out.

Here's the view from underneath the car, looking up at the firewall underneath the brake booster where the column comes through. At this stage I'd managed to get the white plastic bushing back in place and was trying to get the rubber grommet/housing re-installed. It was a very annoying place to try to work. Only could get one hand in there, with access to maybe 200 degrees of the circle.

And the cabin side:

I tried for way too long to get it pressed in place before I finally admitted that I needed to pull the steering column out. I'm always scared of hard-to-reach keyed and splined attachments; they always seem so hard to put back in. But there was no way I could get this in with the column in place. 

Fortunately I had a second pair of hands to help. Another one of my really good racing friends has returned from overseas (does Newfoundland count as overseas?) and came to shop night to hang out. He helped me out with a bunch of this stuff. Thanks, Kevin!

Anyhow, the column came out pretty easily, really, which left good access. It took about 10 seconds to get the grommet on like that, then another 3 minutes to get the column back in.

What a waste of time. Oh well. Live and learn I suppose. With that, the steering was back to nice and solid- yay! I really was dreading that, so I'm glad it's over and fixed.

The harness-devil-bar-of-certain-death arrived, along with (2) RaceQuip 6-pt Camlock FIA-rated 2"/3" HANS-compatible pull-up harnesses that I got on closeout. Thanks, GRM, for the tip on harnesses! Saved me over $500 I reckon!

Kevin helped me get the harness bar installed, which was pretty straight forward. I thought very briefly about keeping the OEM 3 point belts in, but when I saw how moldy they were from the flood, it was easy to pull them out and bin 'em.

For some reason, there was a bunch of dirt in the shipping box with the harness bar. Unwashed, organic bar I guess?

Not too much to report from the bar, other than that it feels extremely solid. Like lift-the-car-from-it solid. And the geometry seems nice for the direction of loading. And the harness angle to the seat is well within the spec, which you don't typically get from harnesses that bolt to the back seat seatbelt mounts.

So I'm happy enough. It was pretty late at that point, so harnesses would have to wait til next time.

My plan is to track the Saabmarine until it blows up (which NASIOC has convinced me will be sometime before the first turn on the out lap), then rebuild it. I'll cage it at that point as I can't imagine rebuilding it without adding some serious power :)

damen

docwyte
docwyte SuperDork
7/20/18 6:14 p.m.

Good luck with "The harness-devil-bar-of-certain-death".  If you don't post anymore we'll know what happened!

badwaytolive
badwaytolive Reader
8/3/18 12:36 p.m.

Hi everyone-

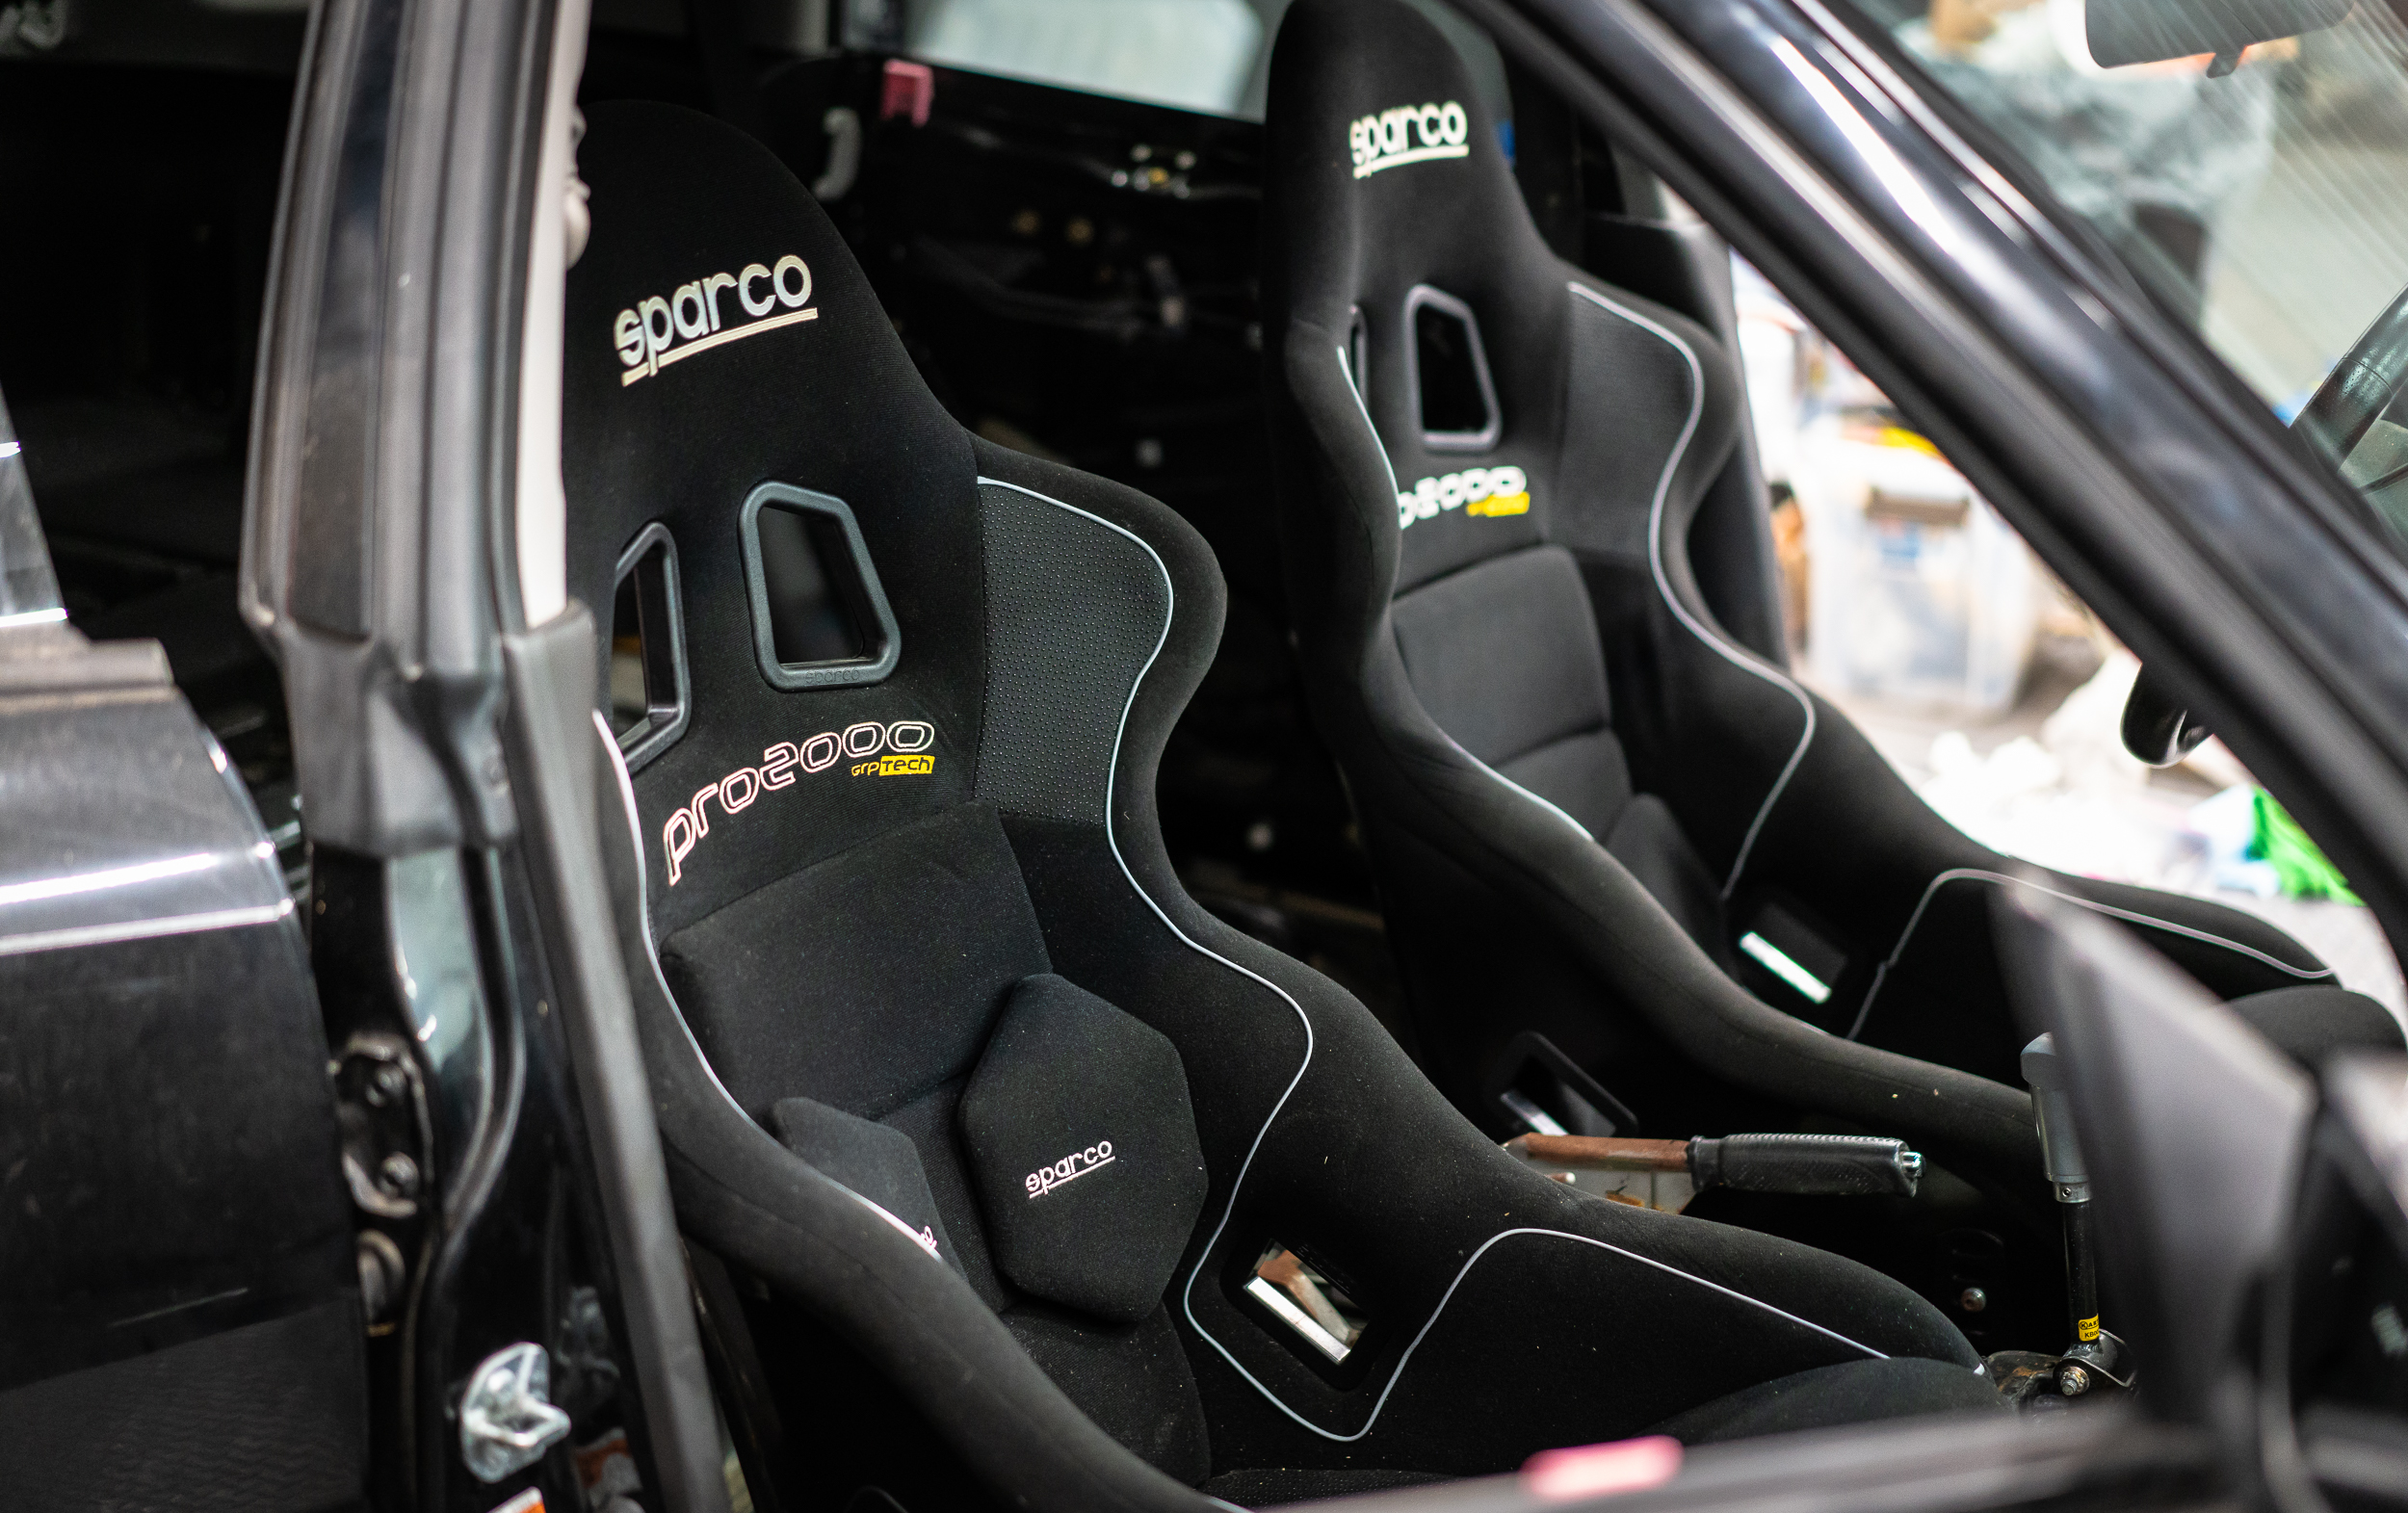
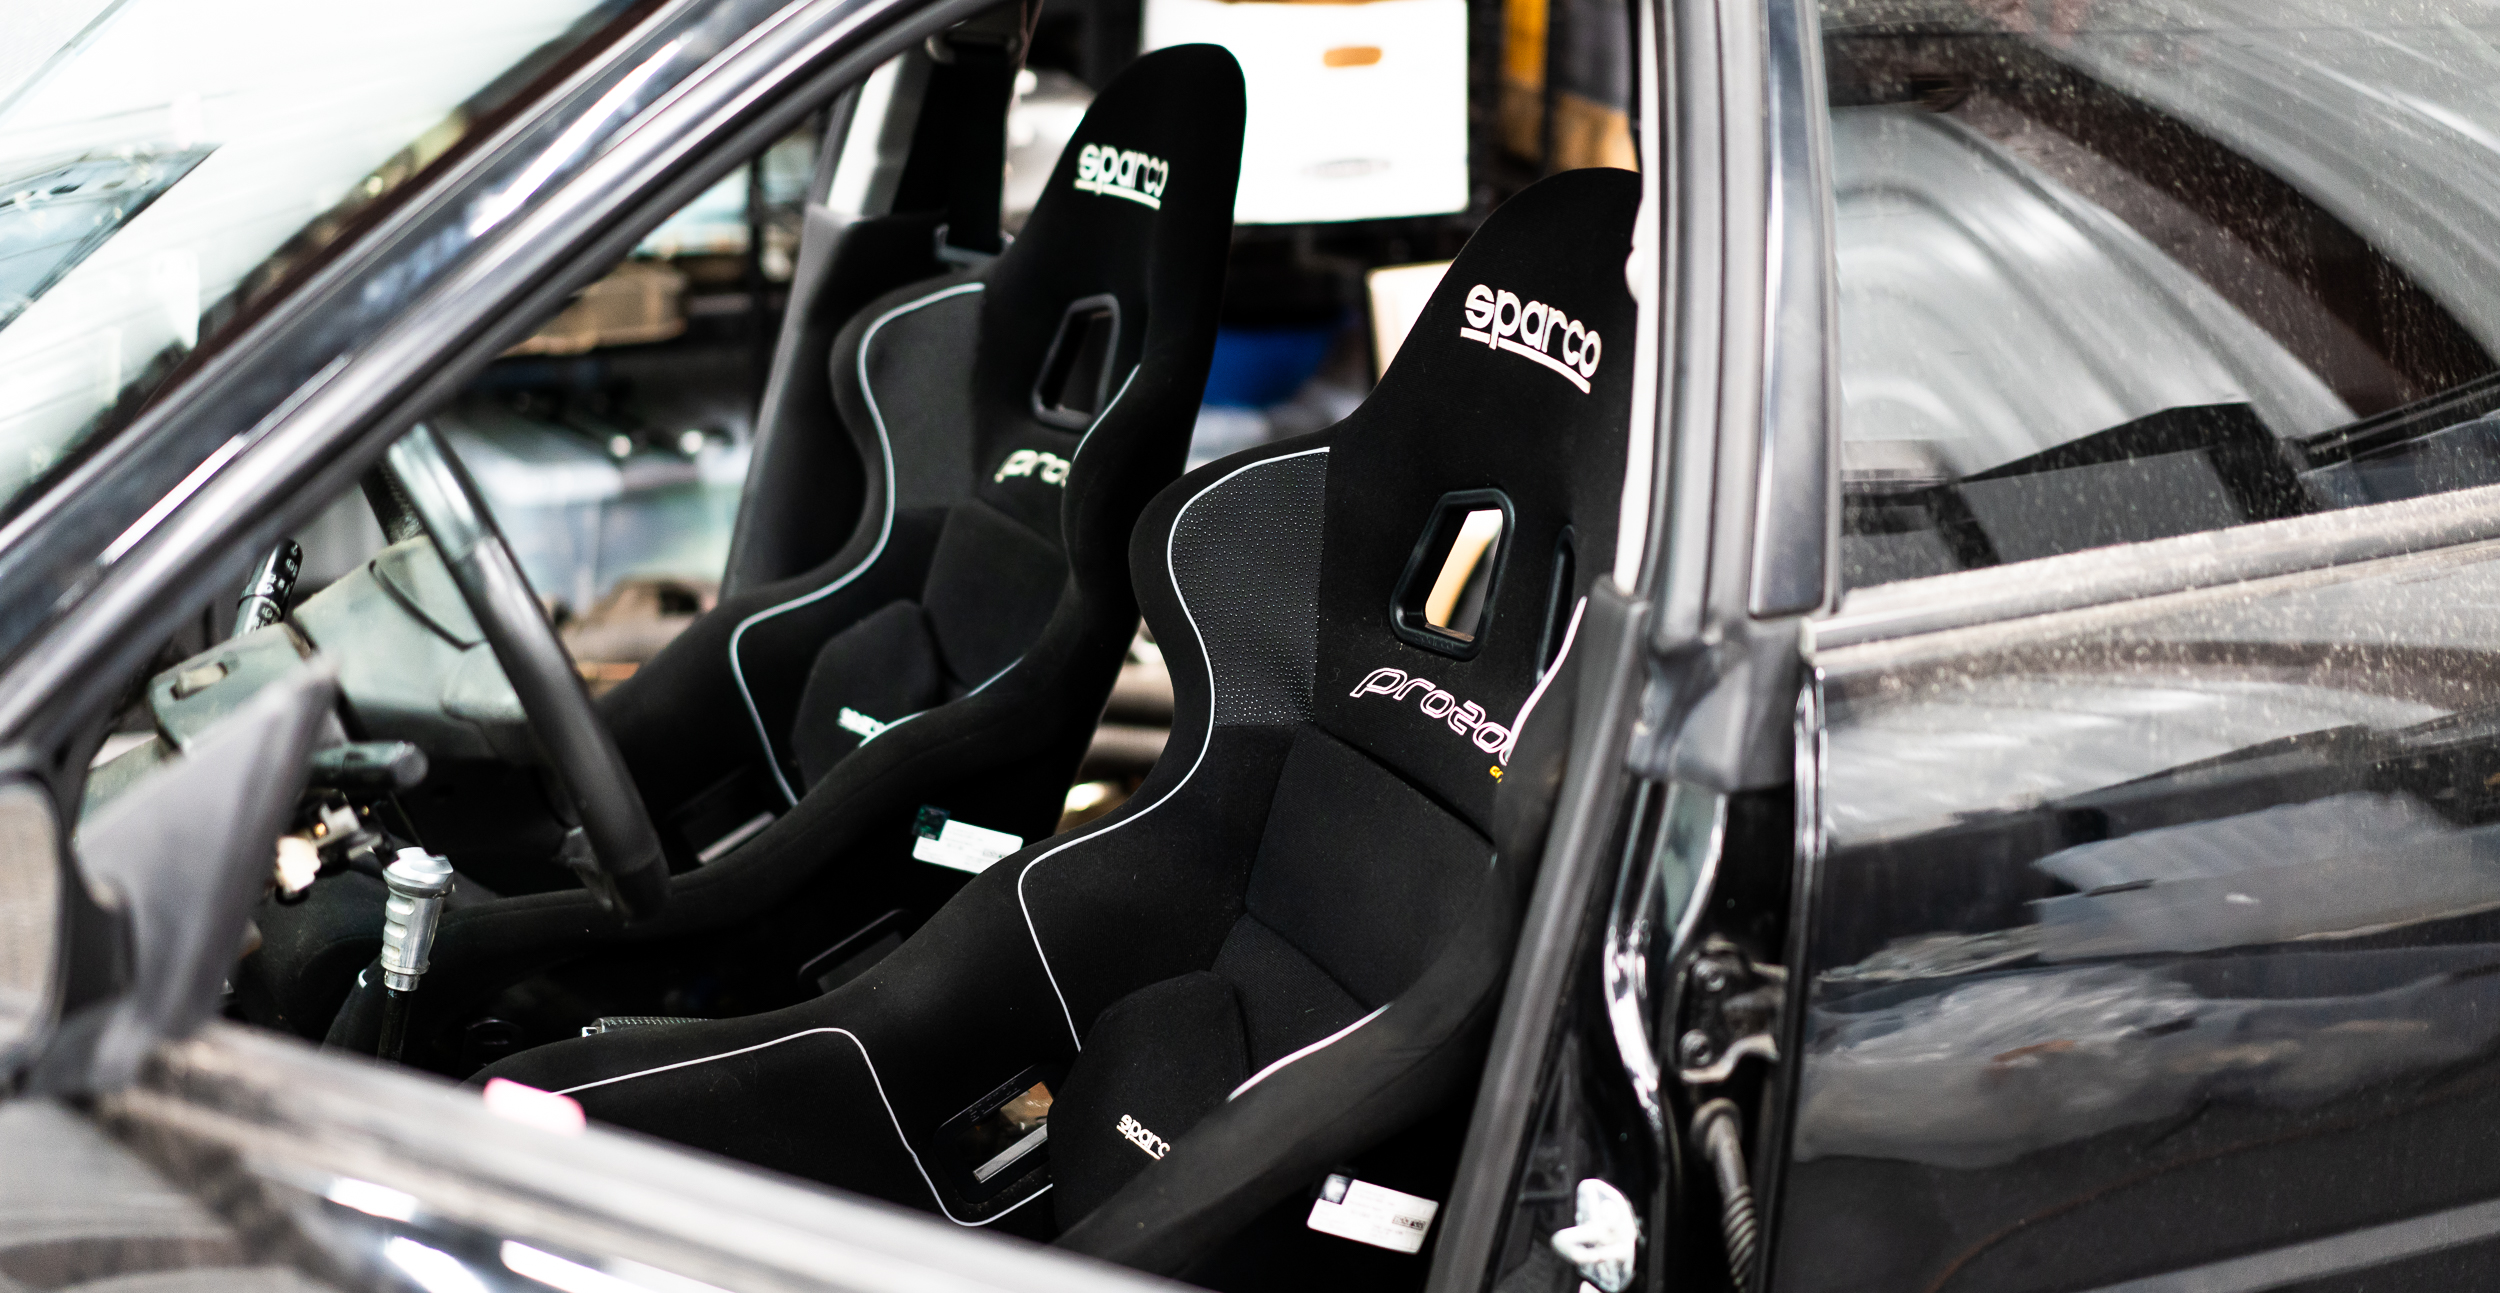
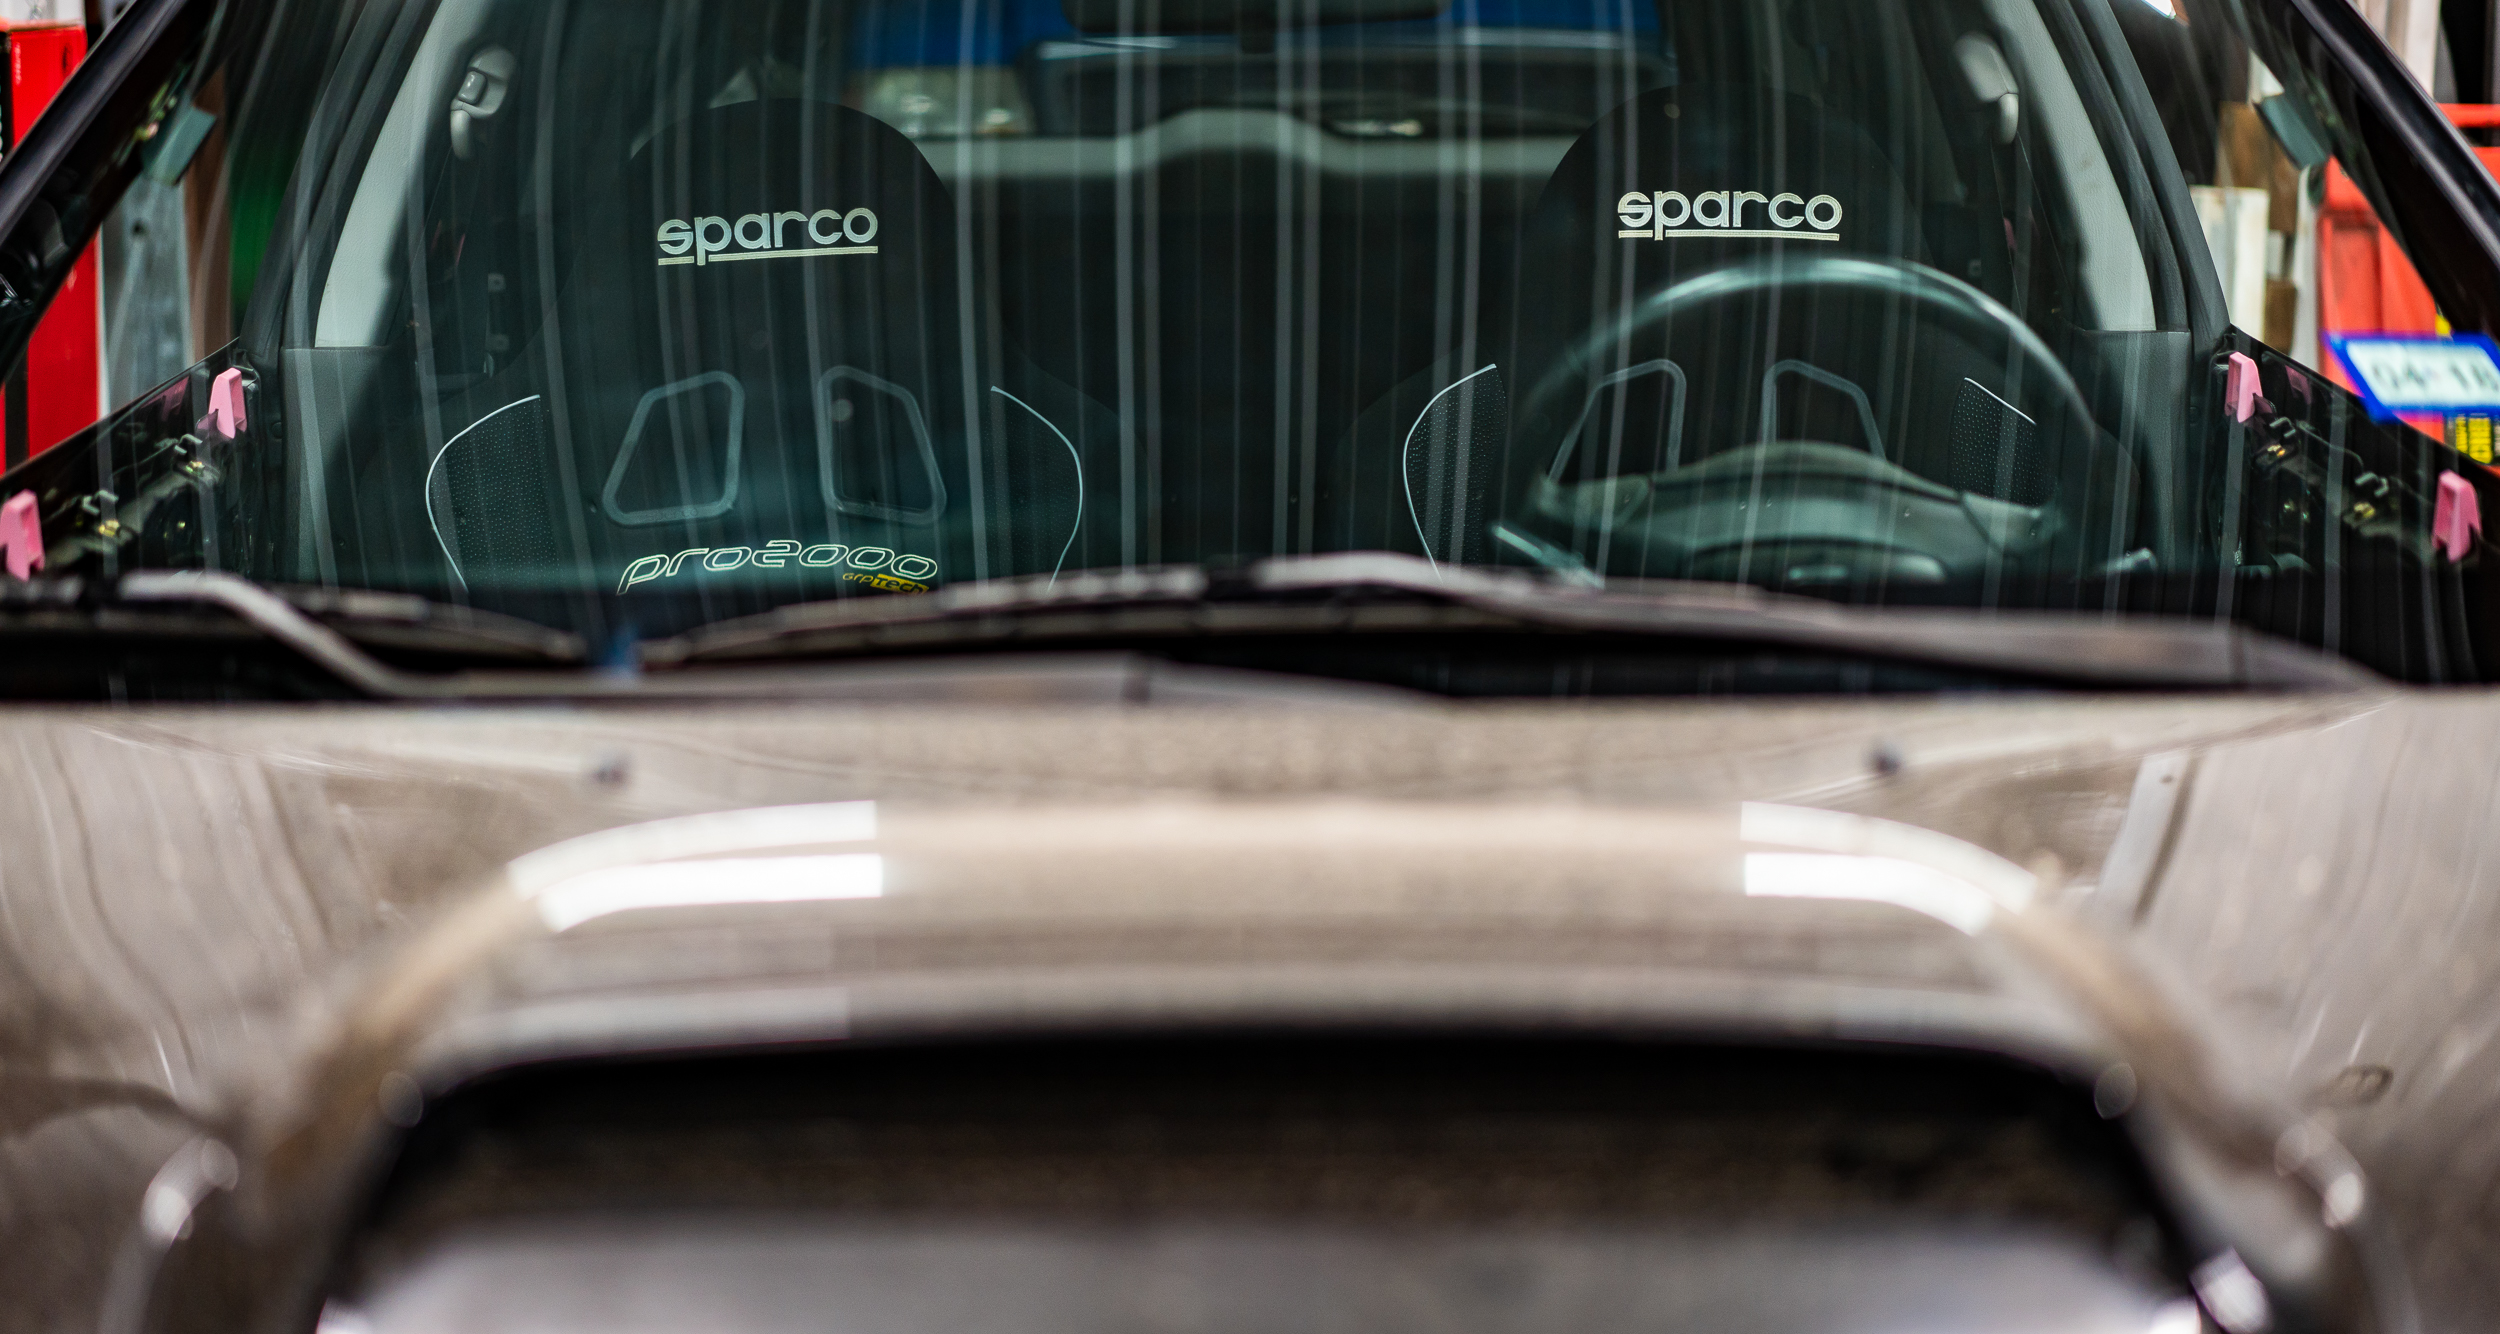
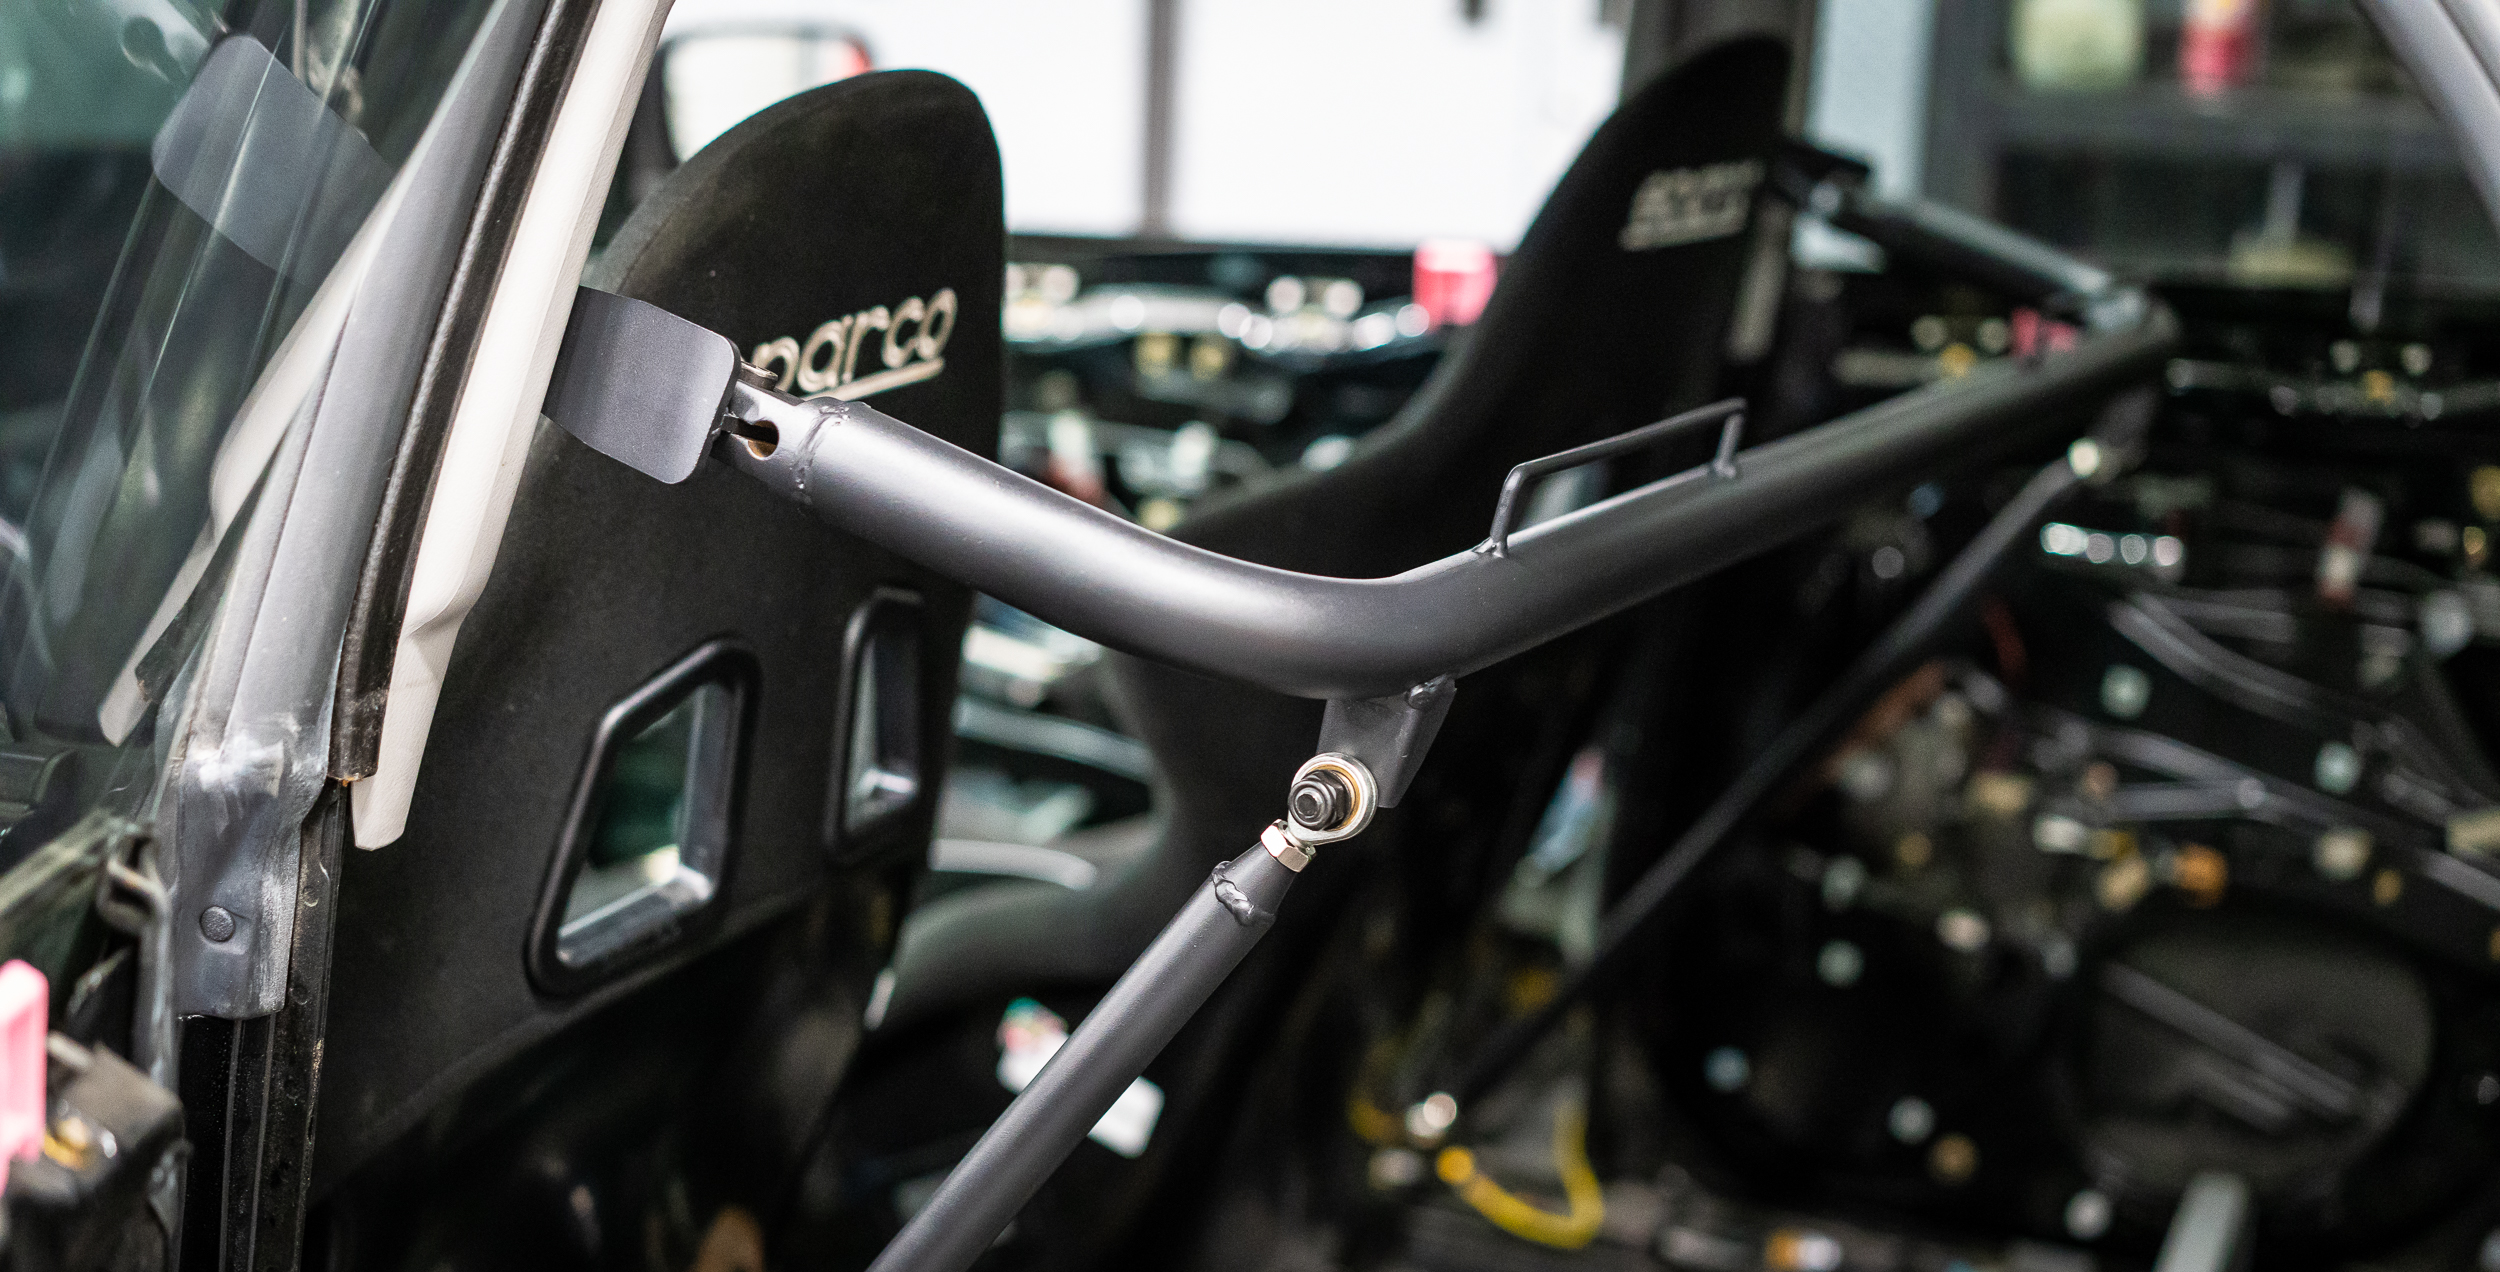
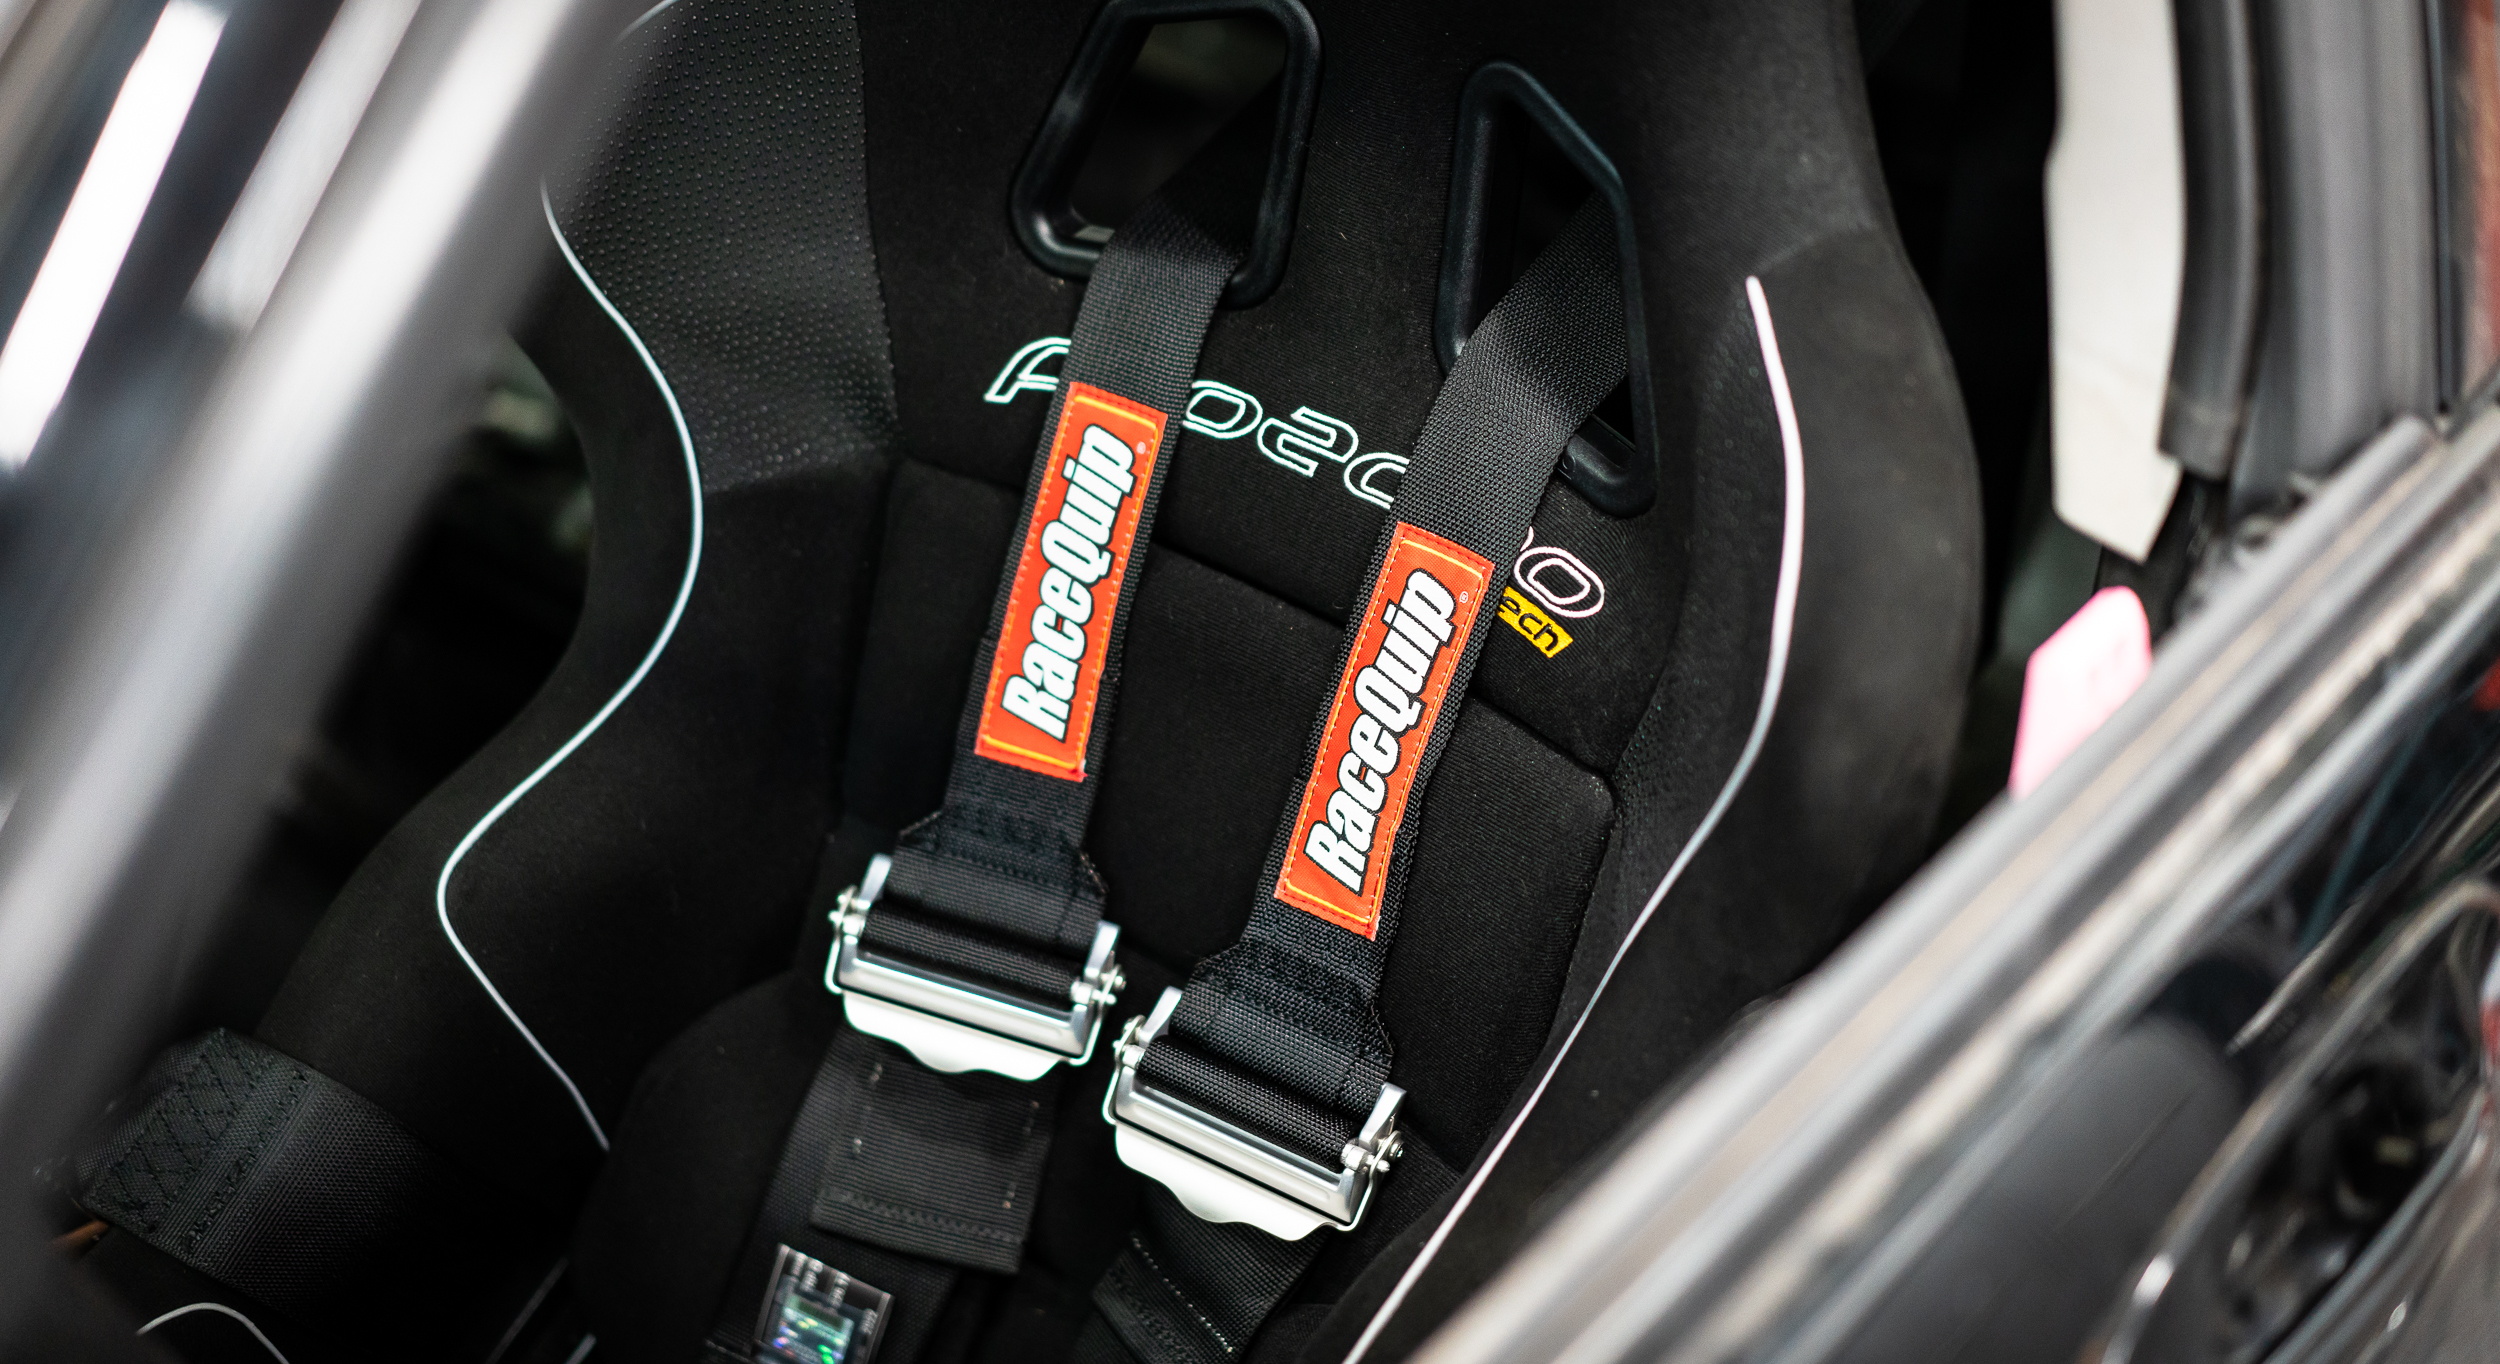
Just so there's no confusion following the light-hearted harness bar banter, I believe that a harness bar + 6-pt FIA harness + FIA race seat + HANS device is safer on the race track than a stock seat and seatbelt.

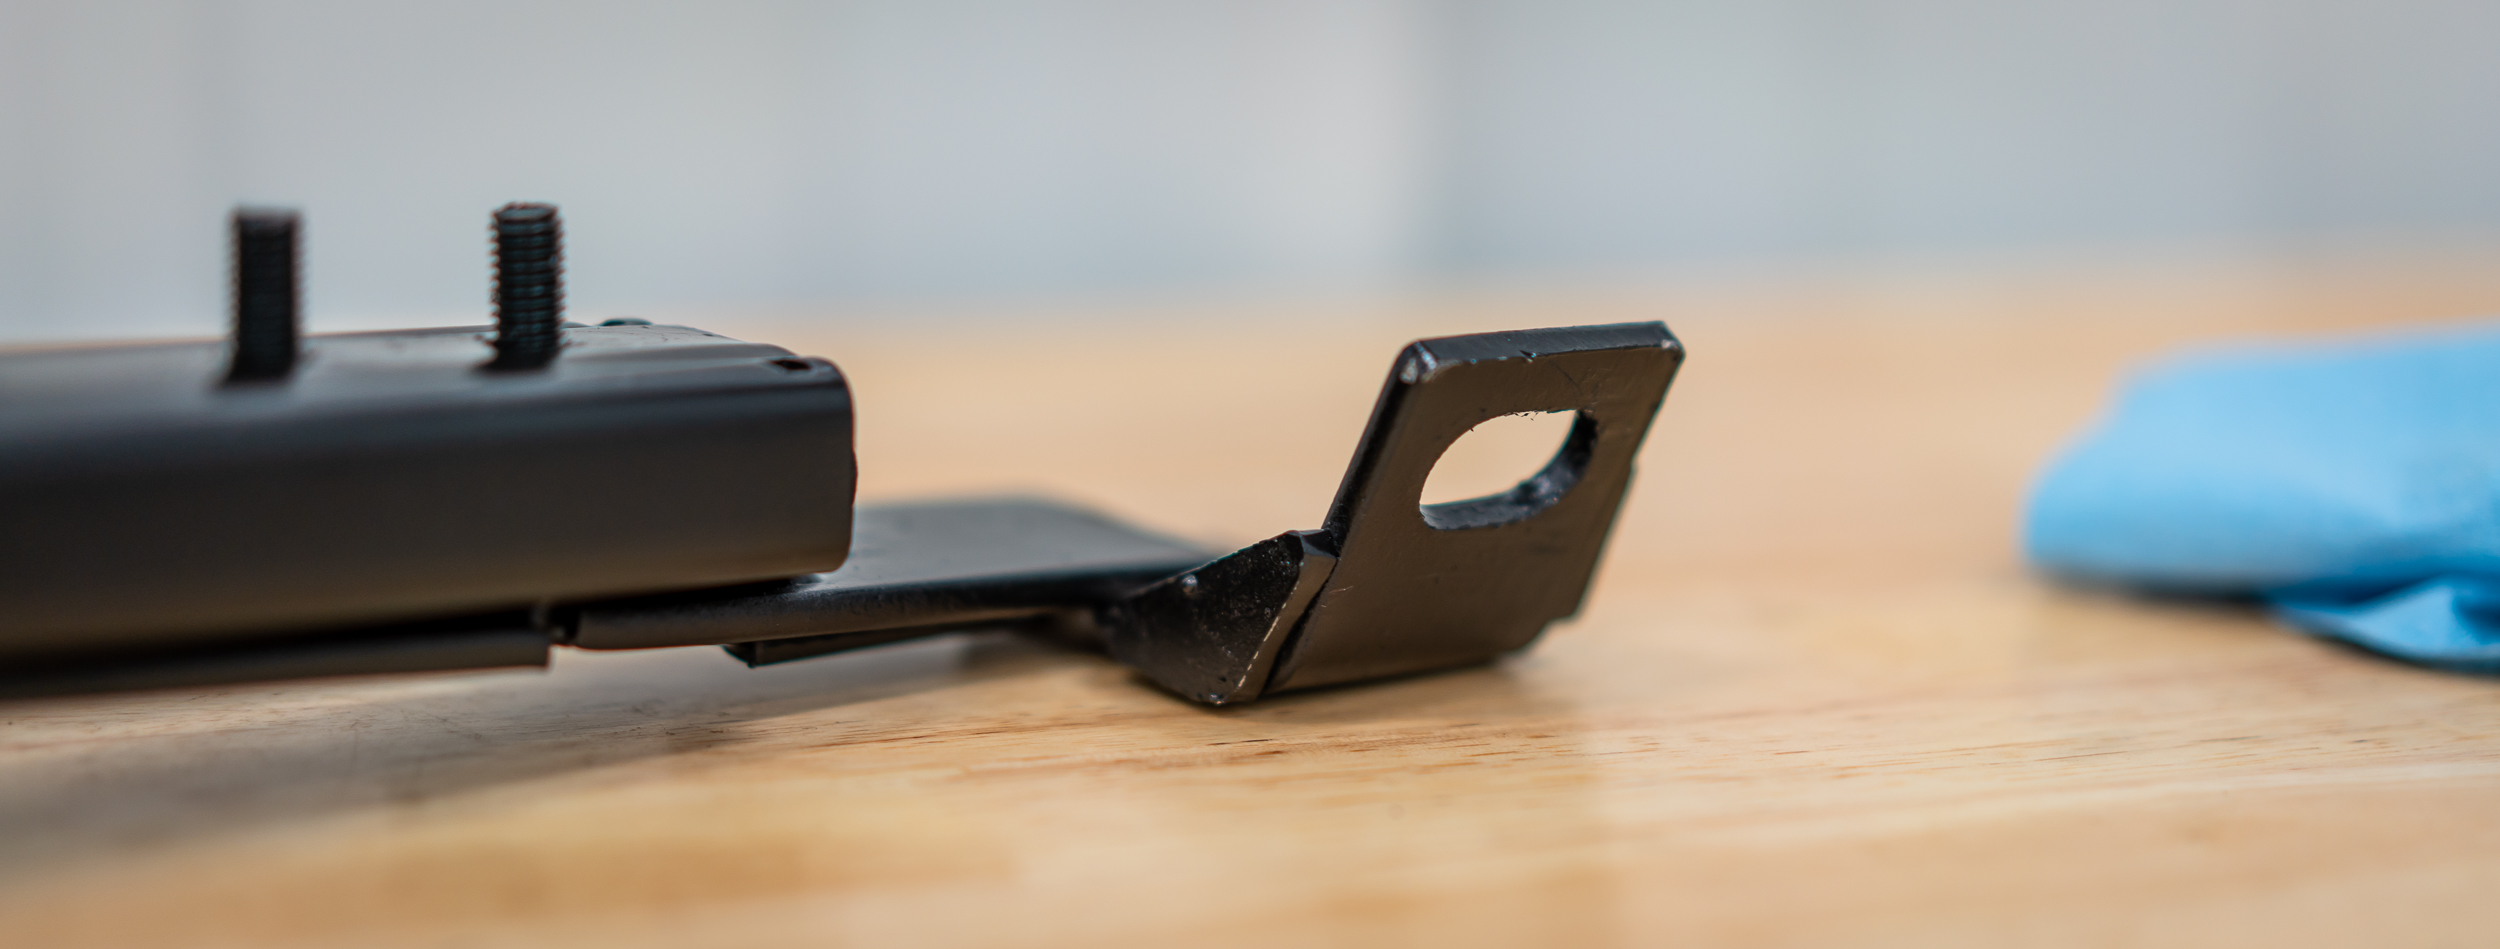
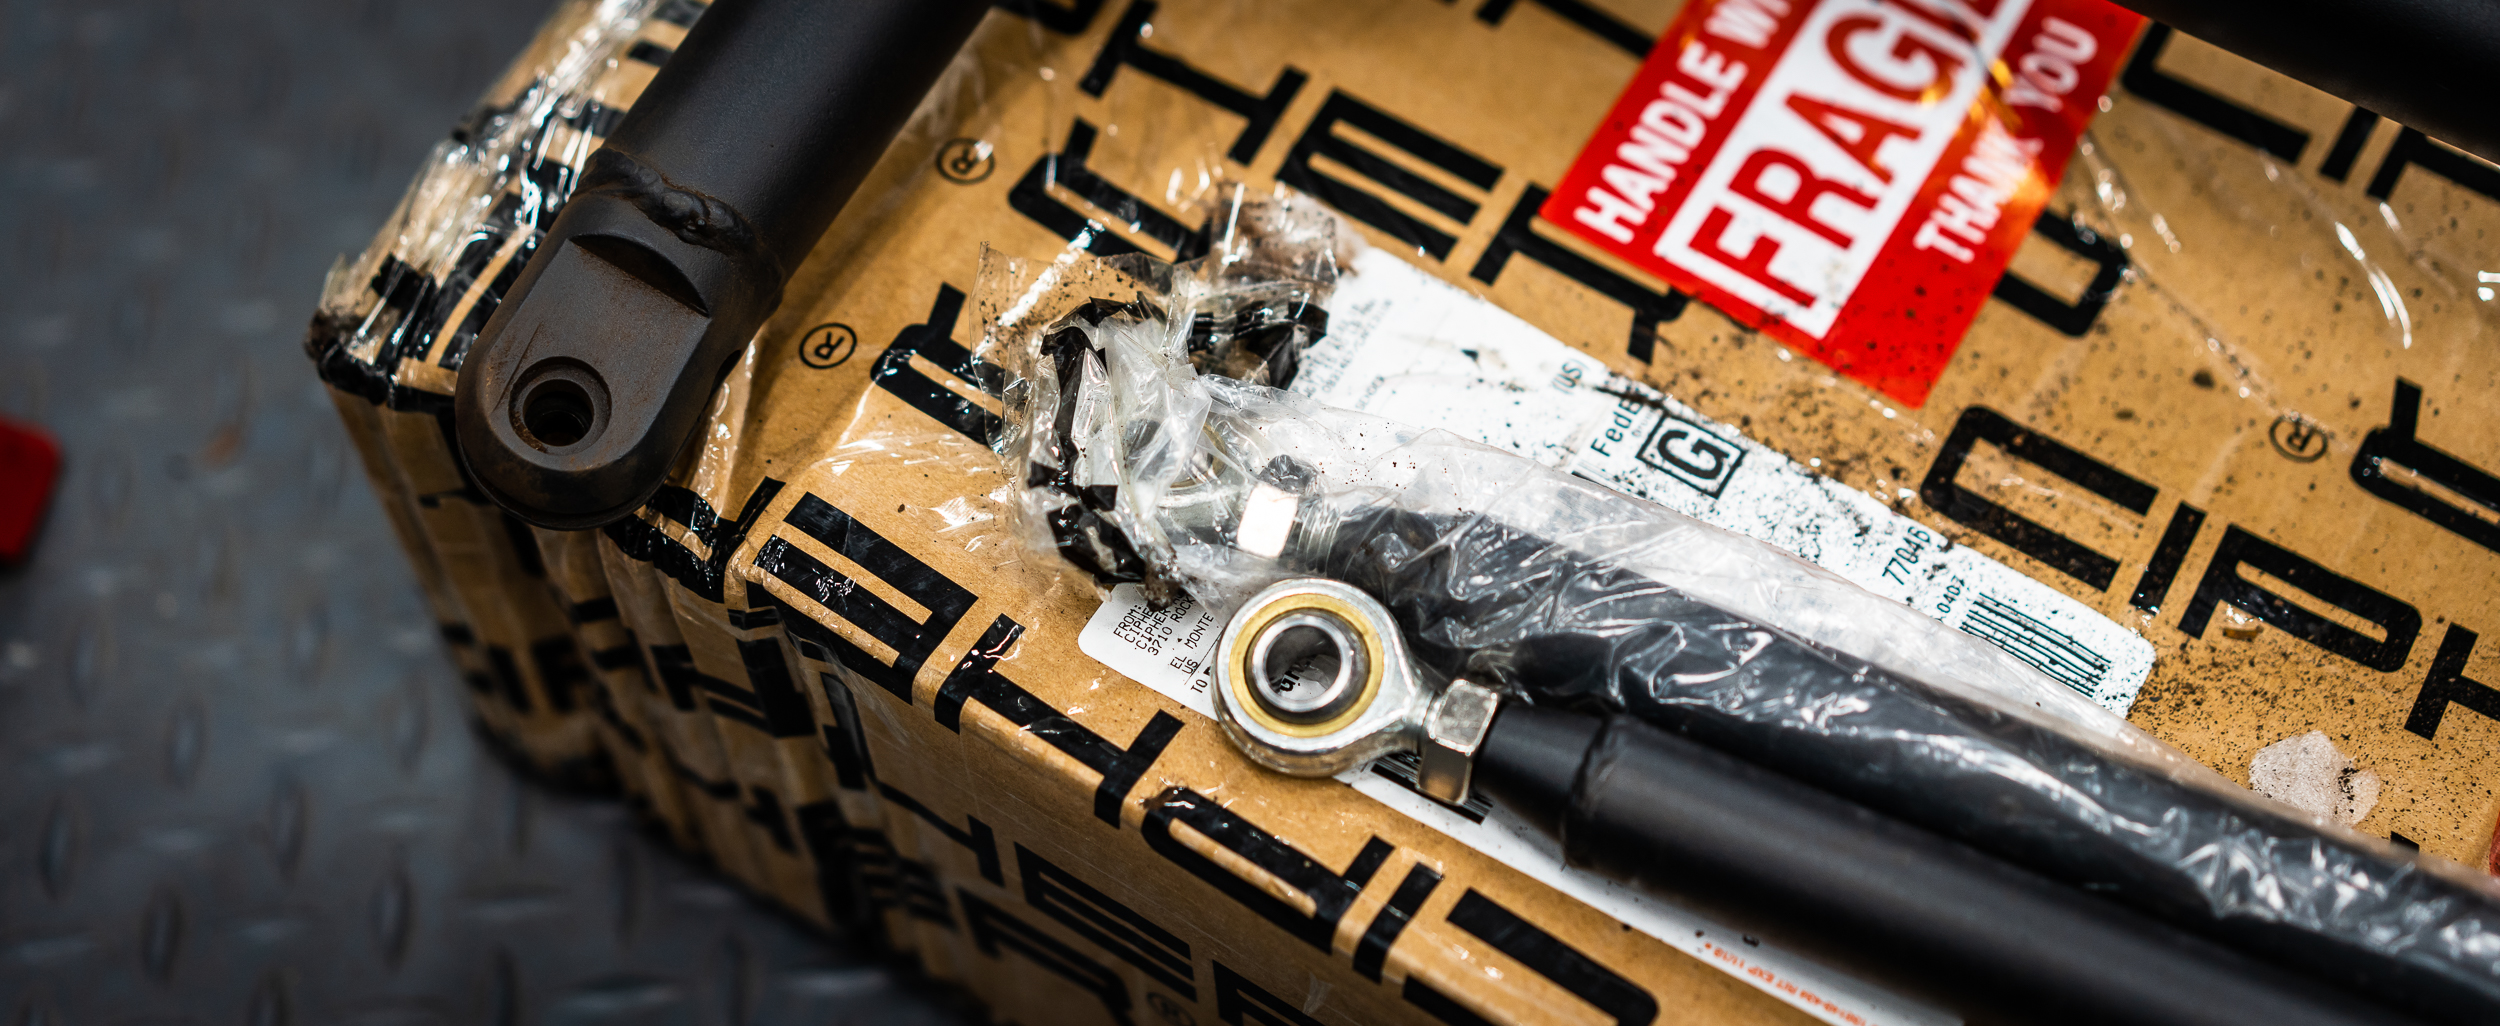
Thanks to the fine folks here, I scored a nice closeout deal on some Racequip 6-pt pull-up harnesses.

I assumed because of the large discount that they would have older hole punches on the dates.

Nope. Fresh as a daisy.

It comes with some nice eye bolts that threaded right into the stock seatbelt and seat mount holes. Yay.

I do need to sort the sub belt; it's mild-to-moderately cheese-rigged at the moment. I wanted to get it close enough to drive around the neighborhood.

I figured I should be able to get one side mounted in 30 minutes or so. It took almost 2 hours, and it's still not totally done. Classic.

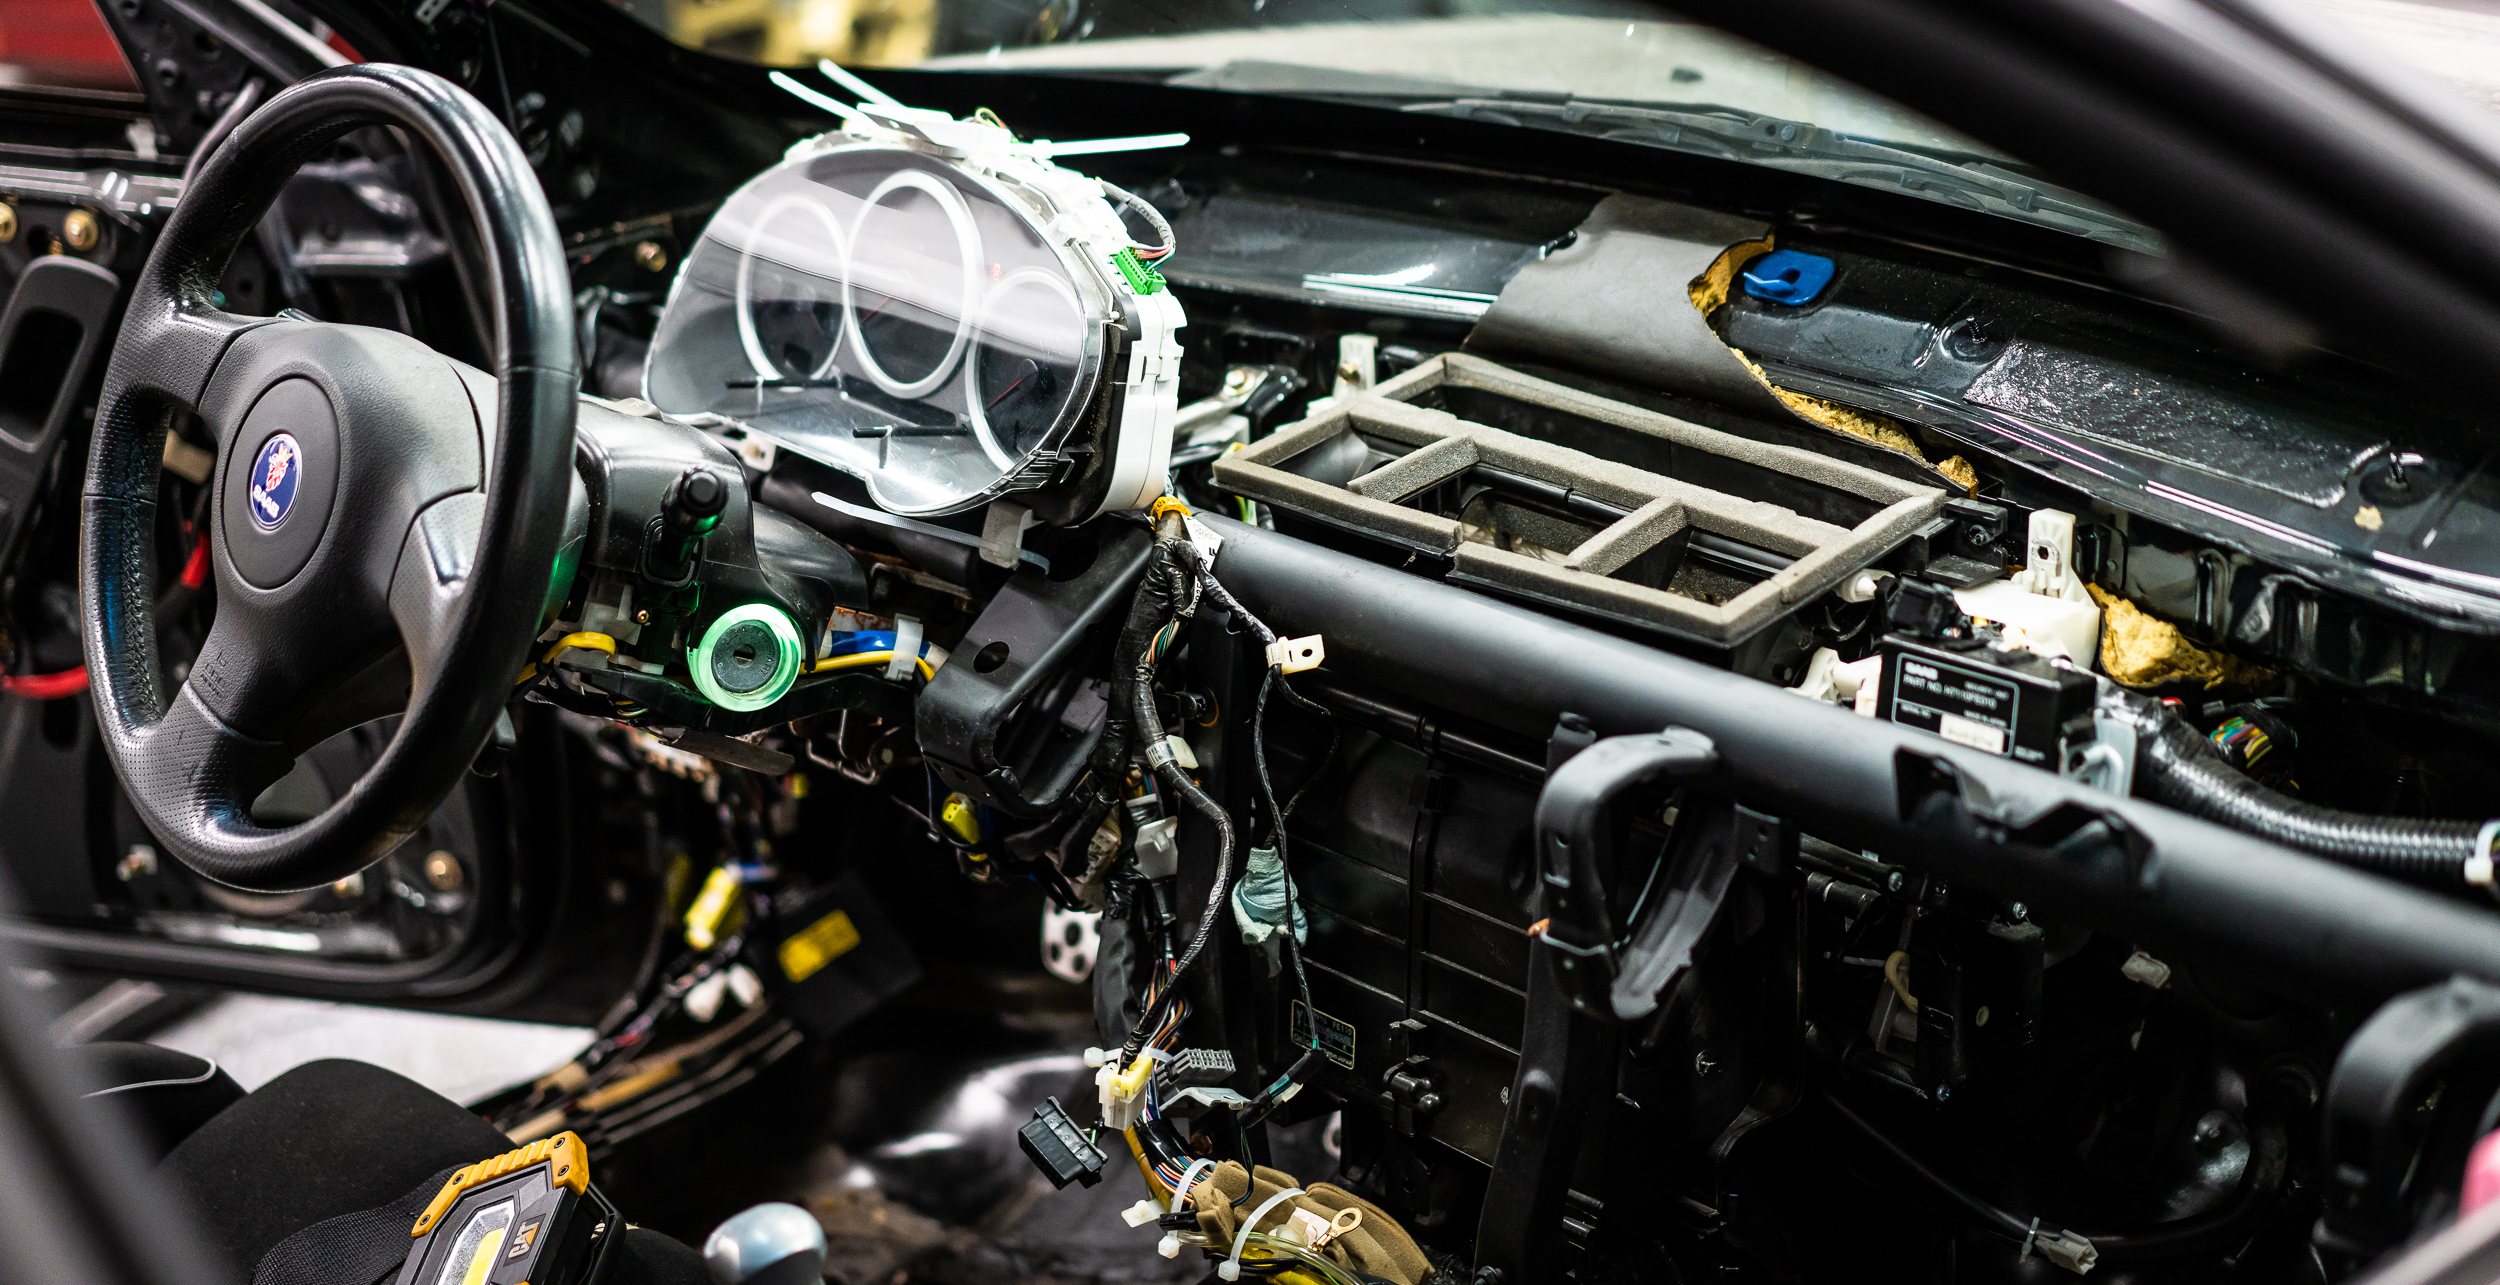
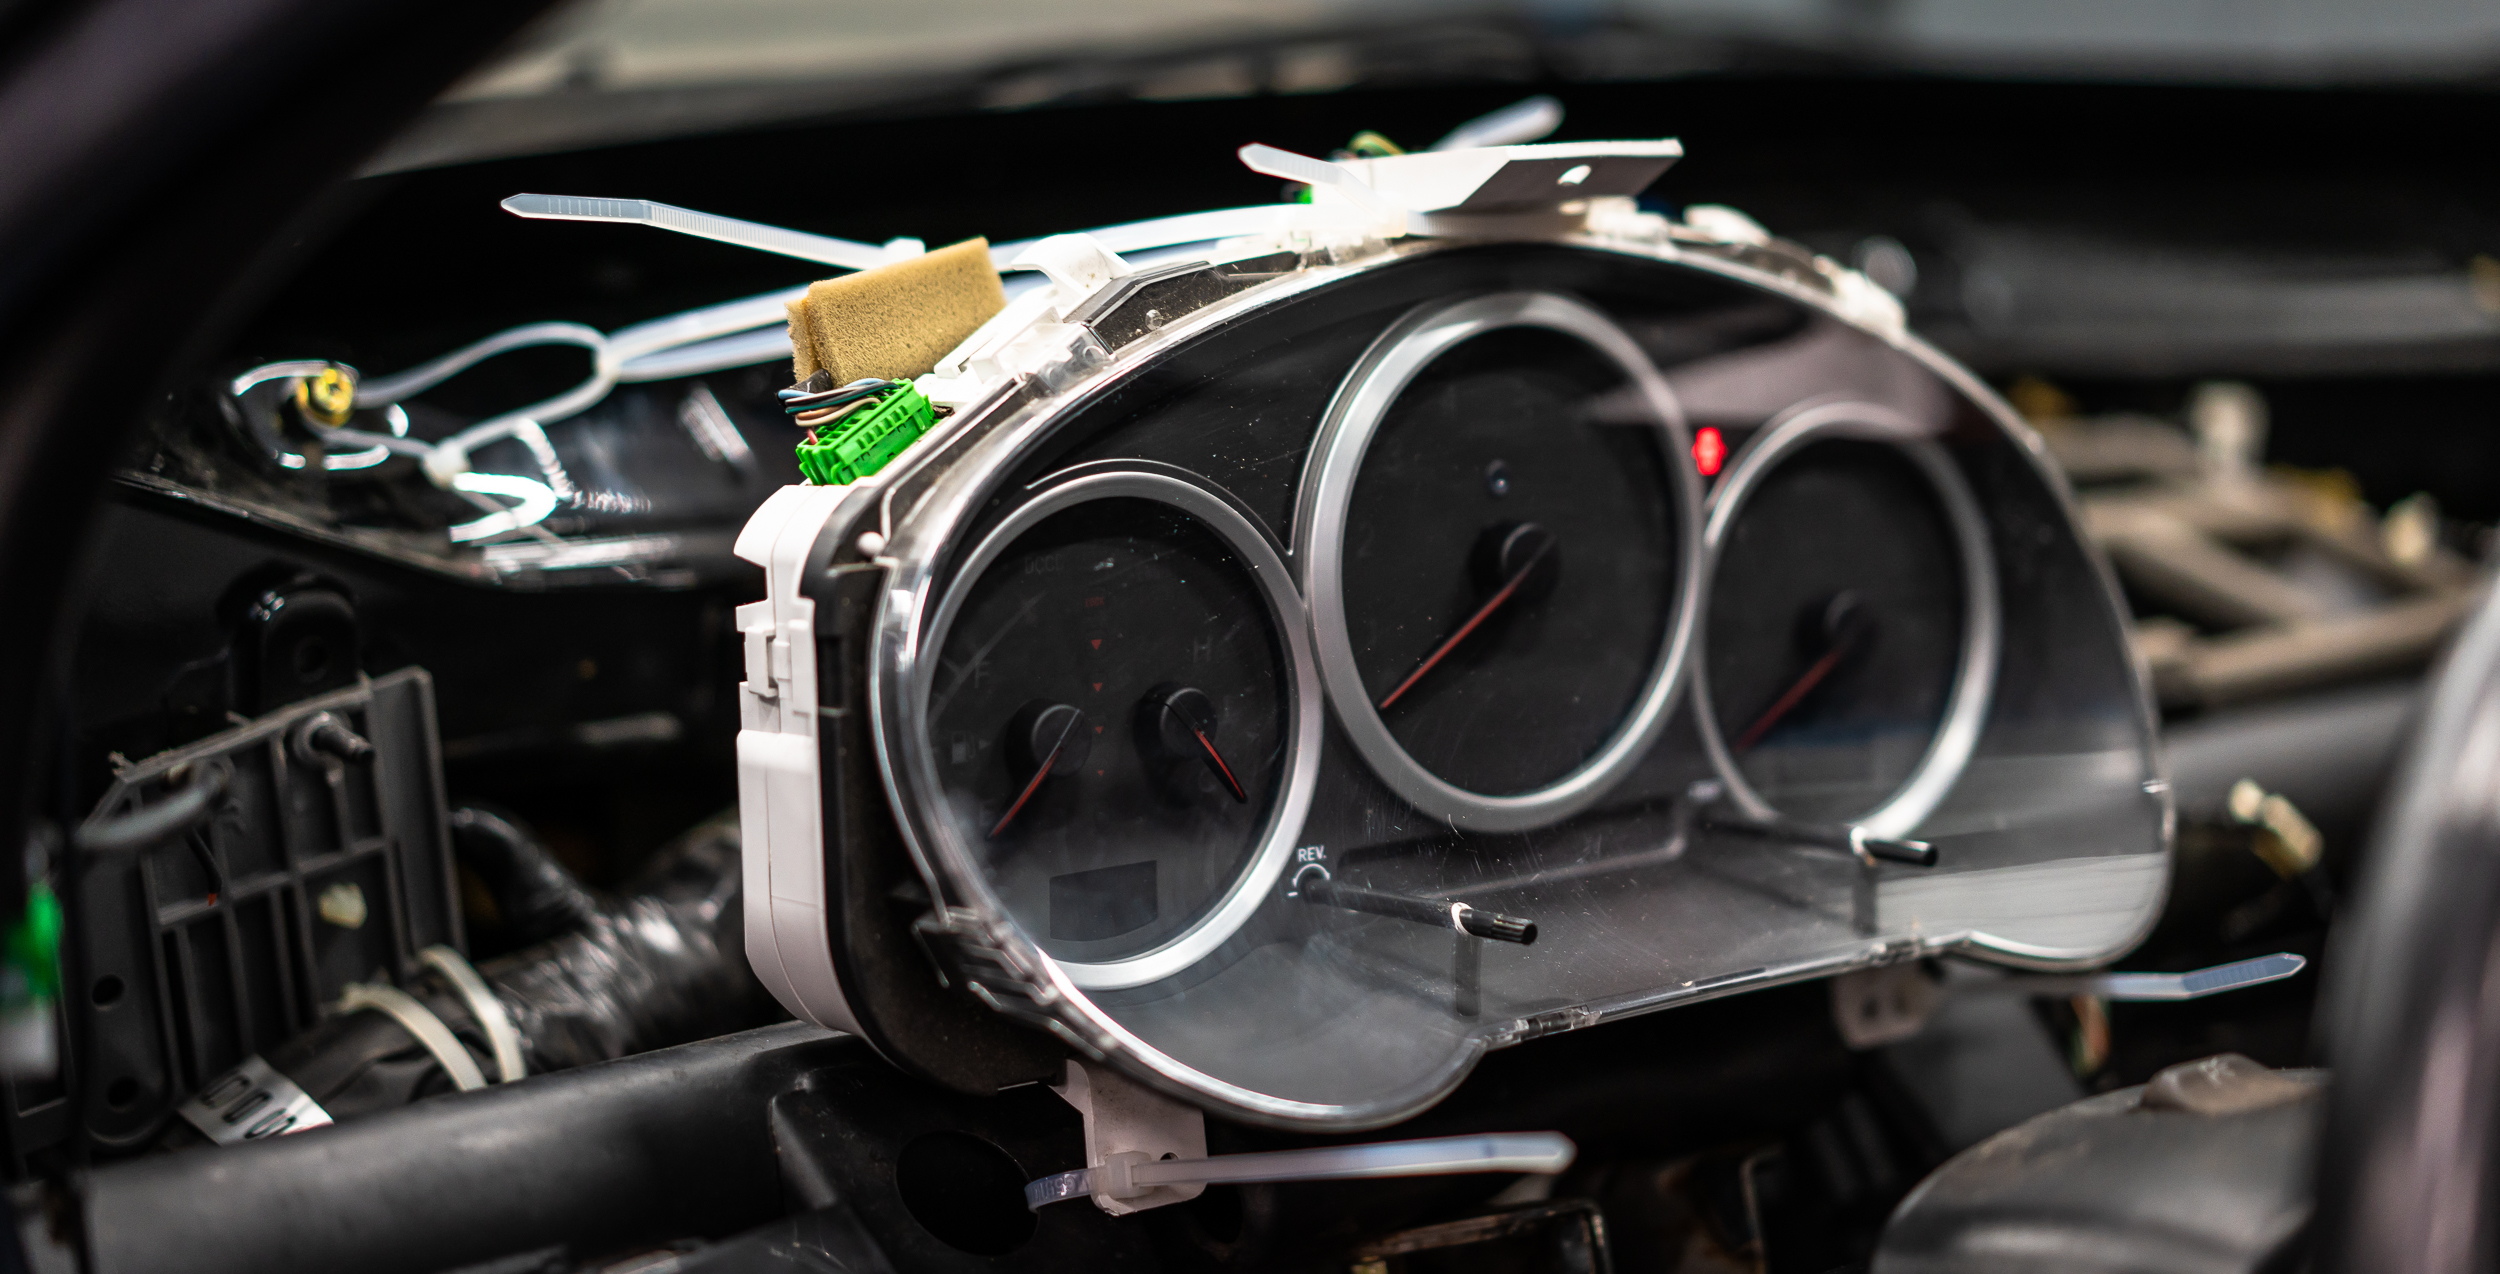
I considered hopping in right then, but driving a flooded car with no gauges was a step too far, even for me.

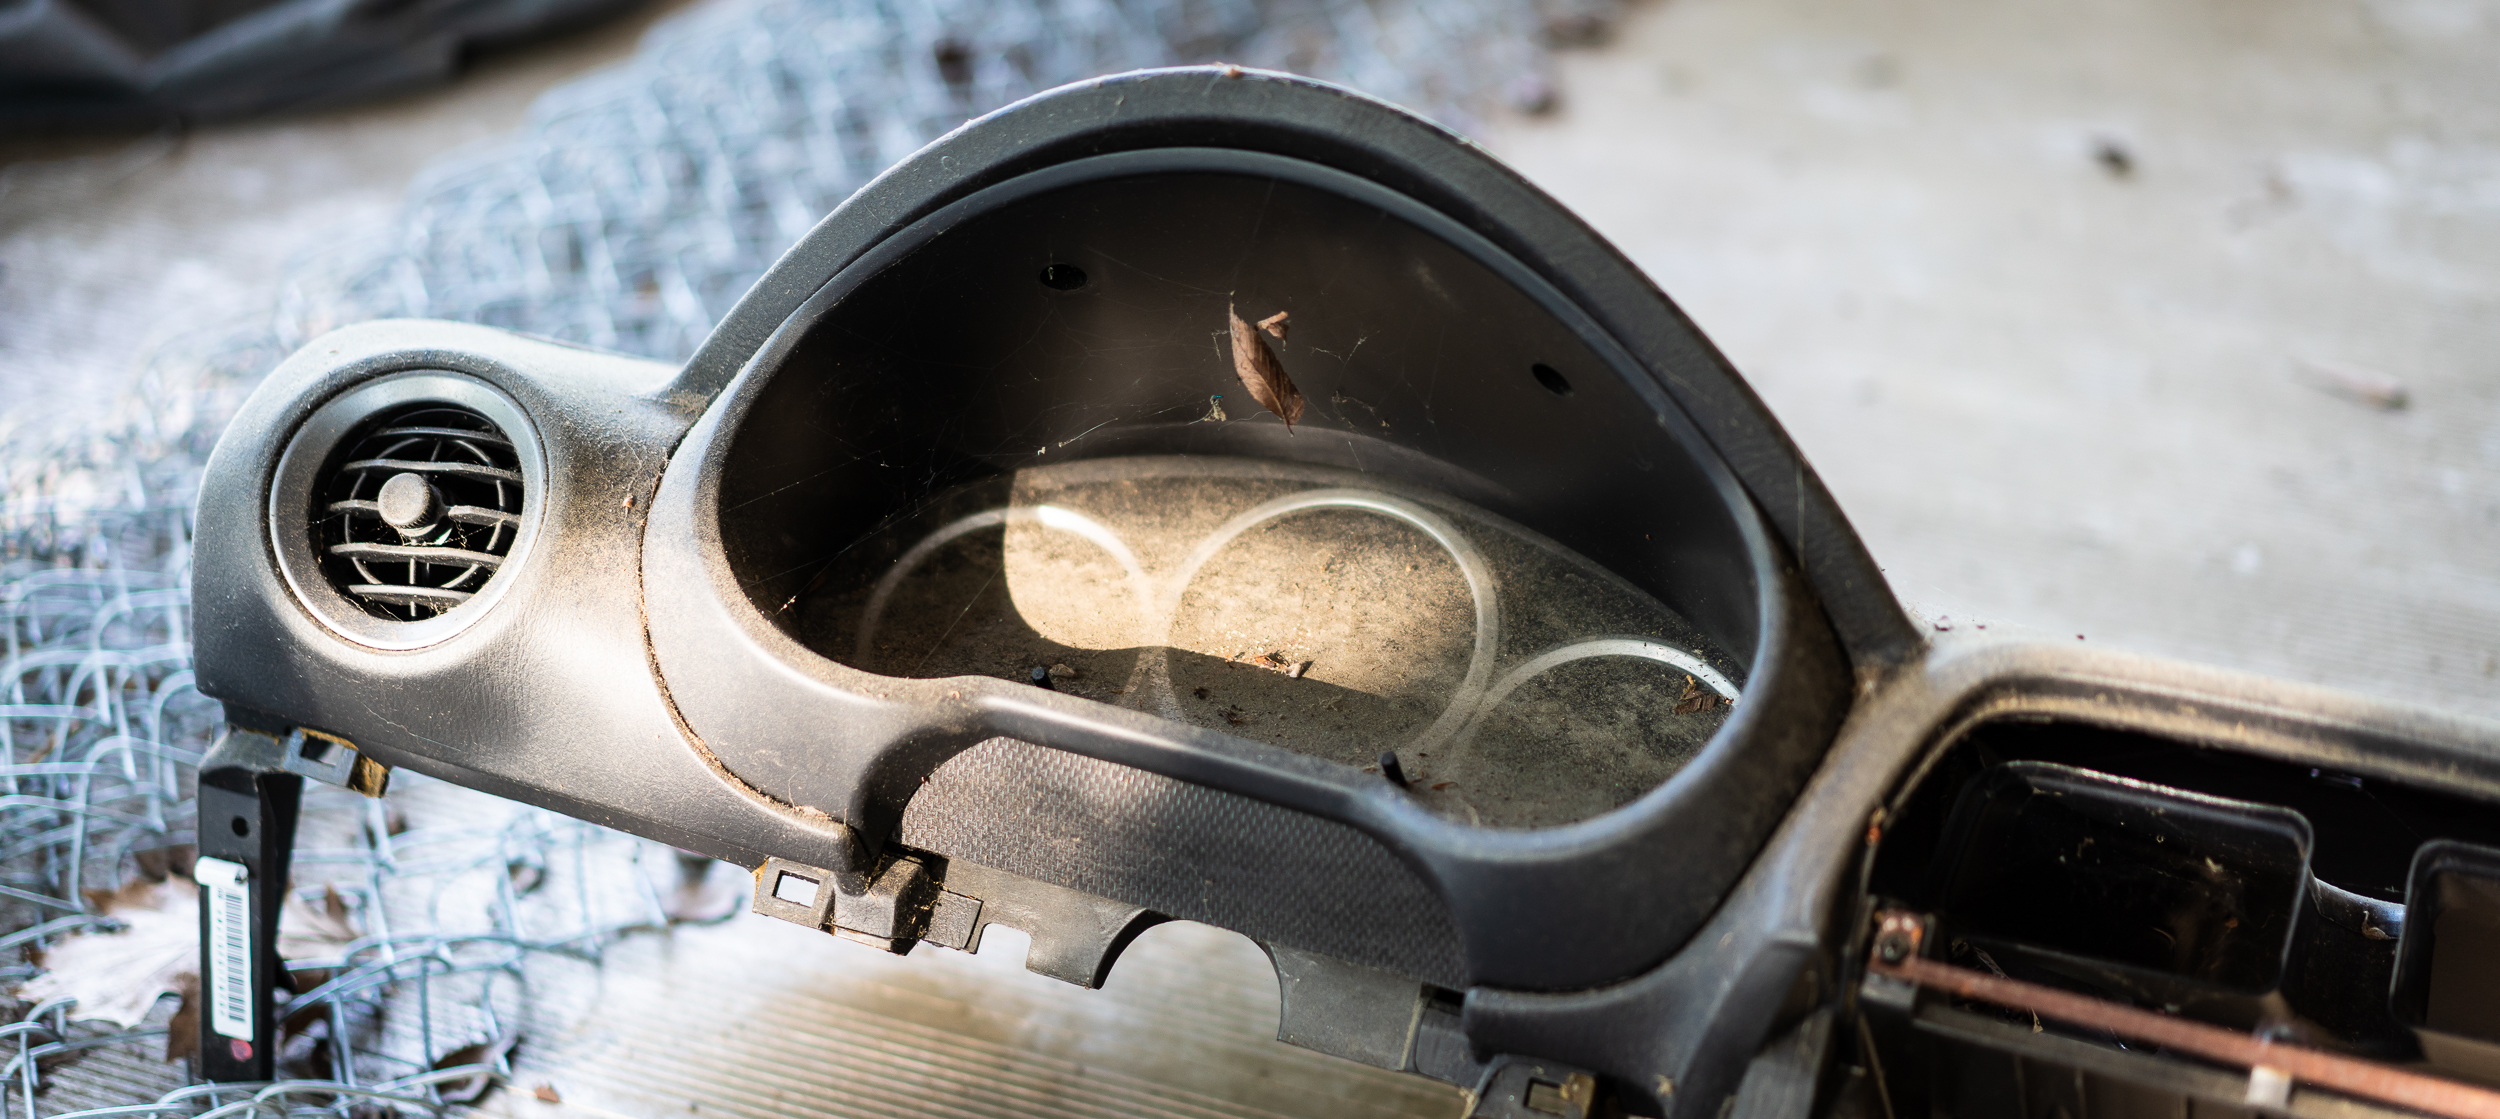
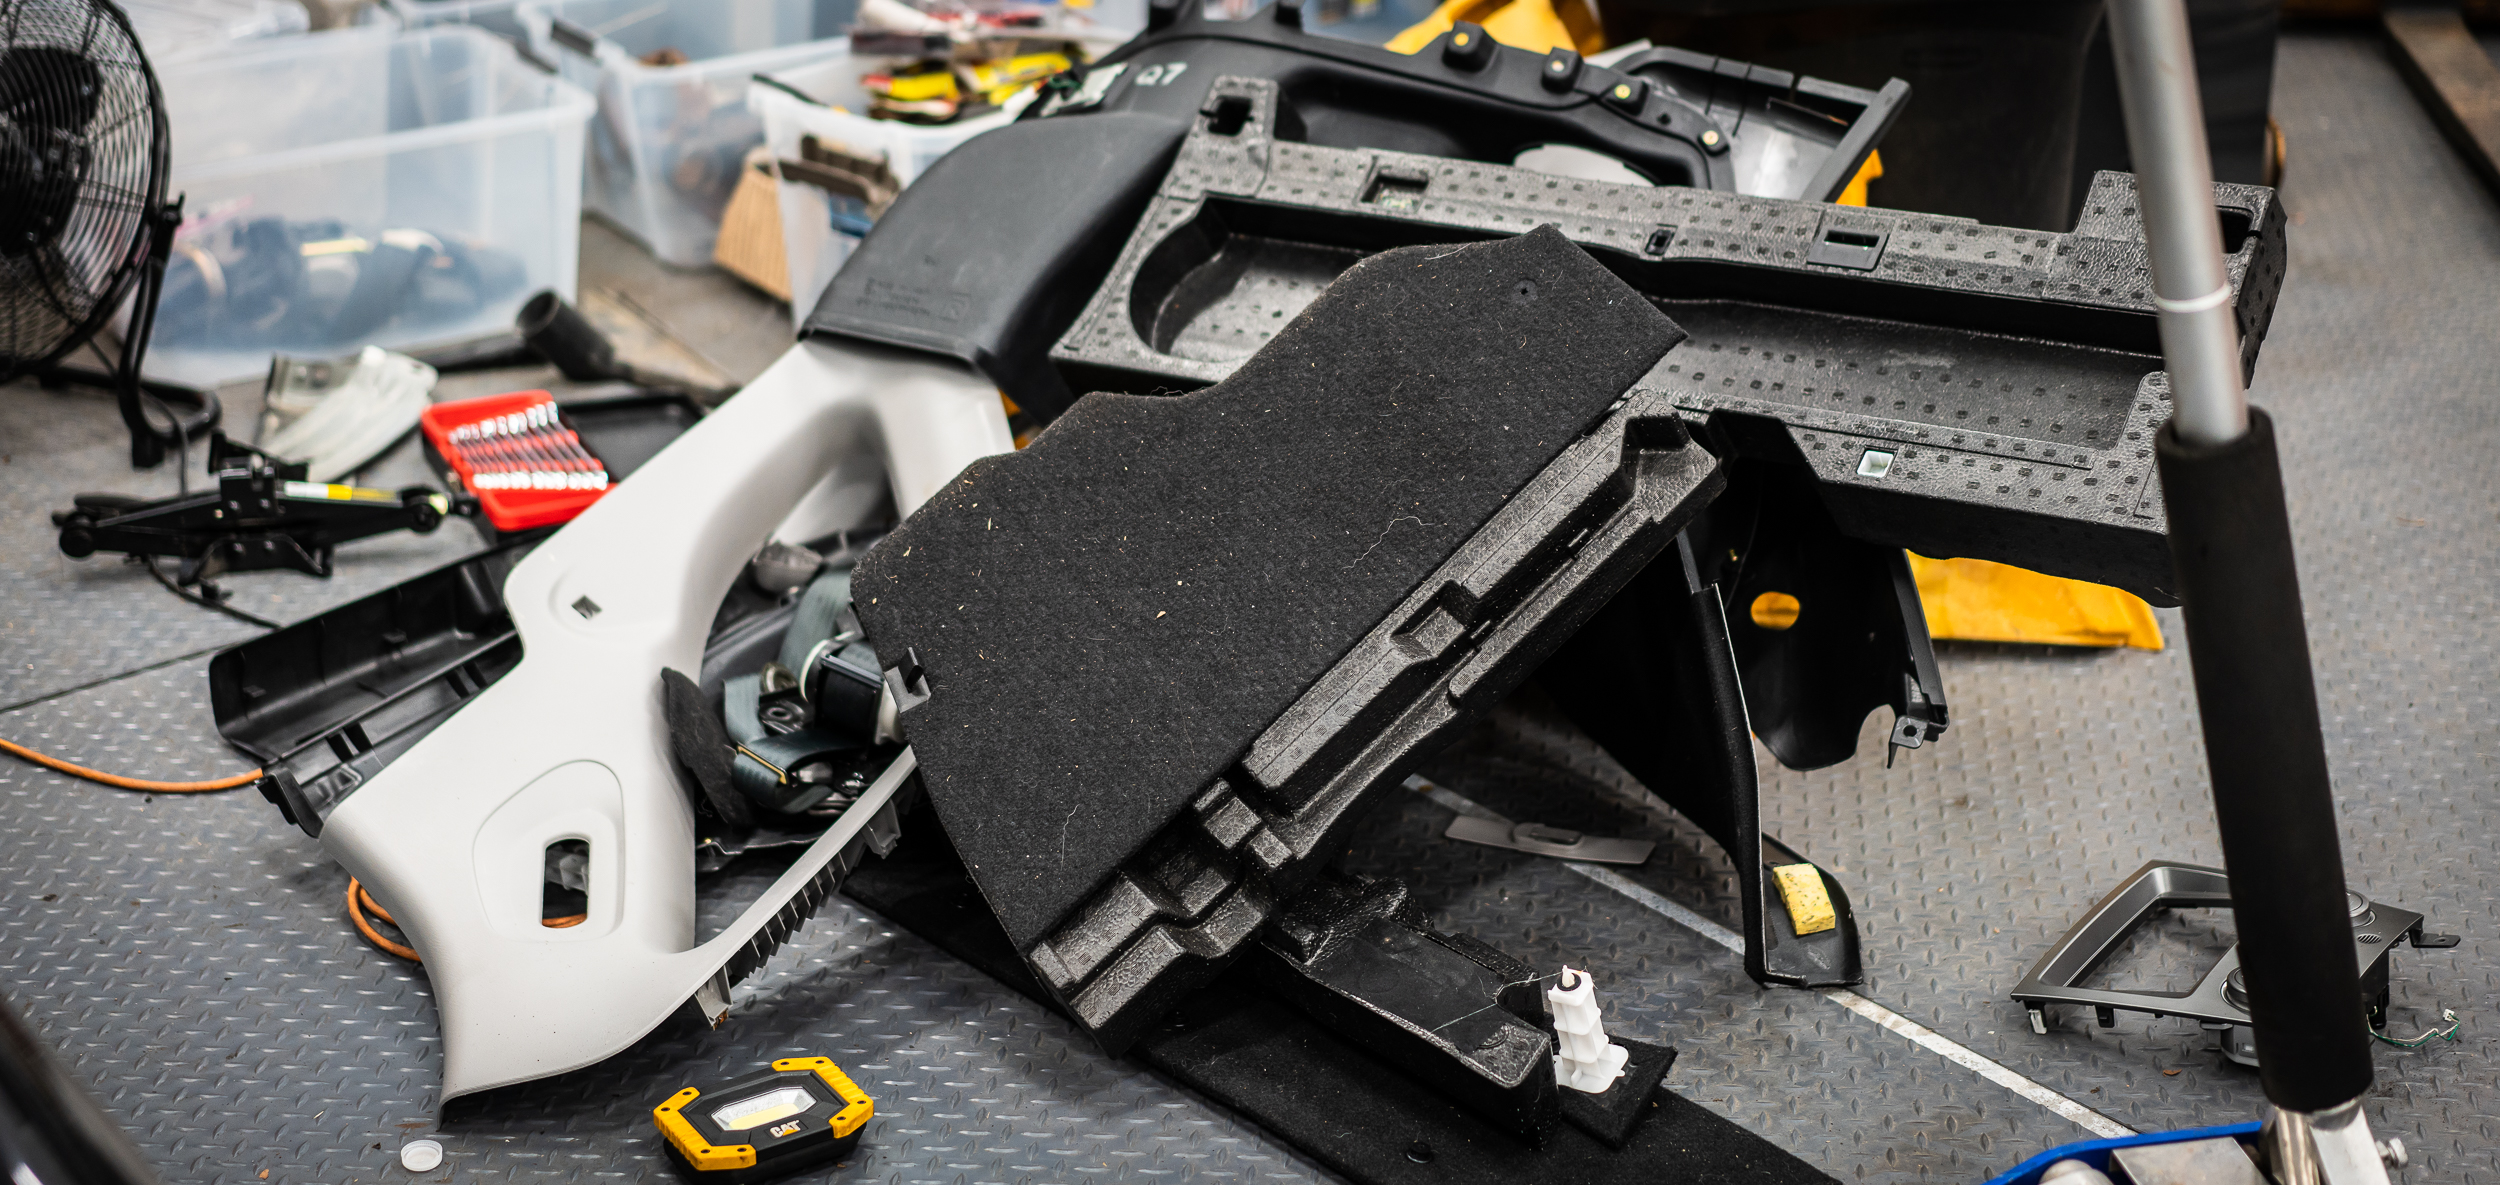
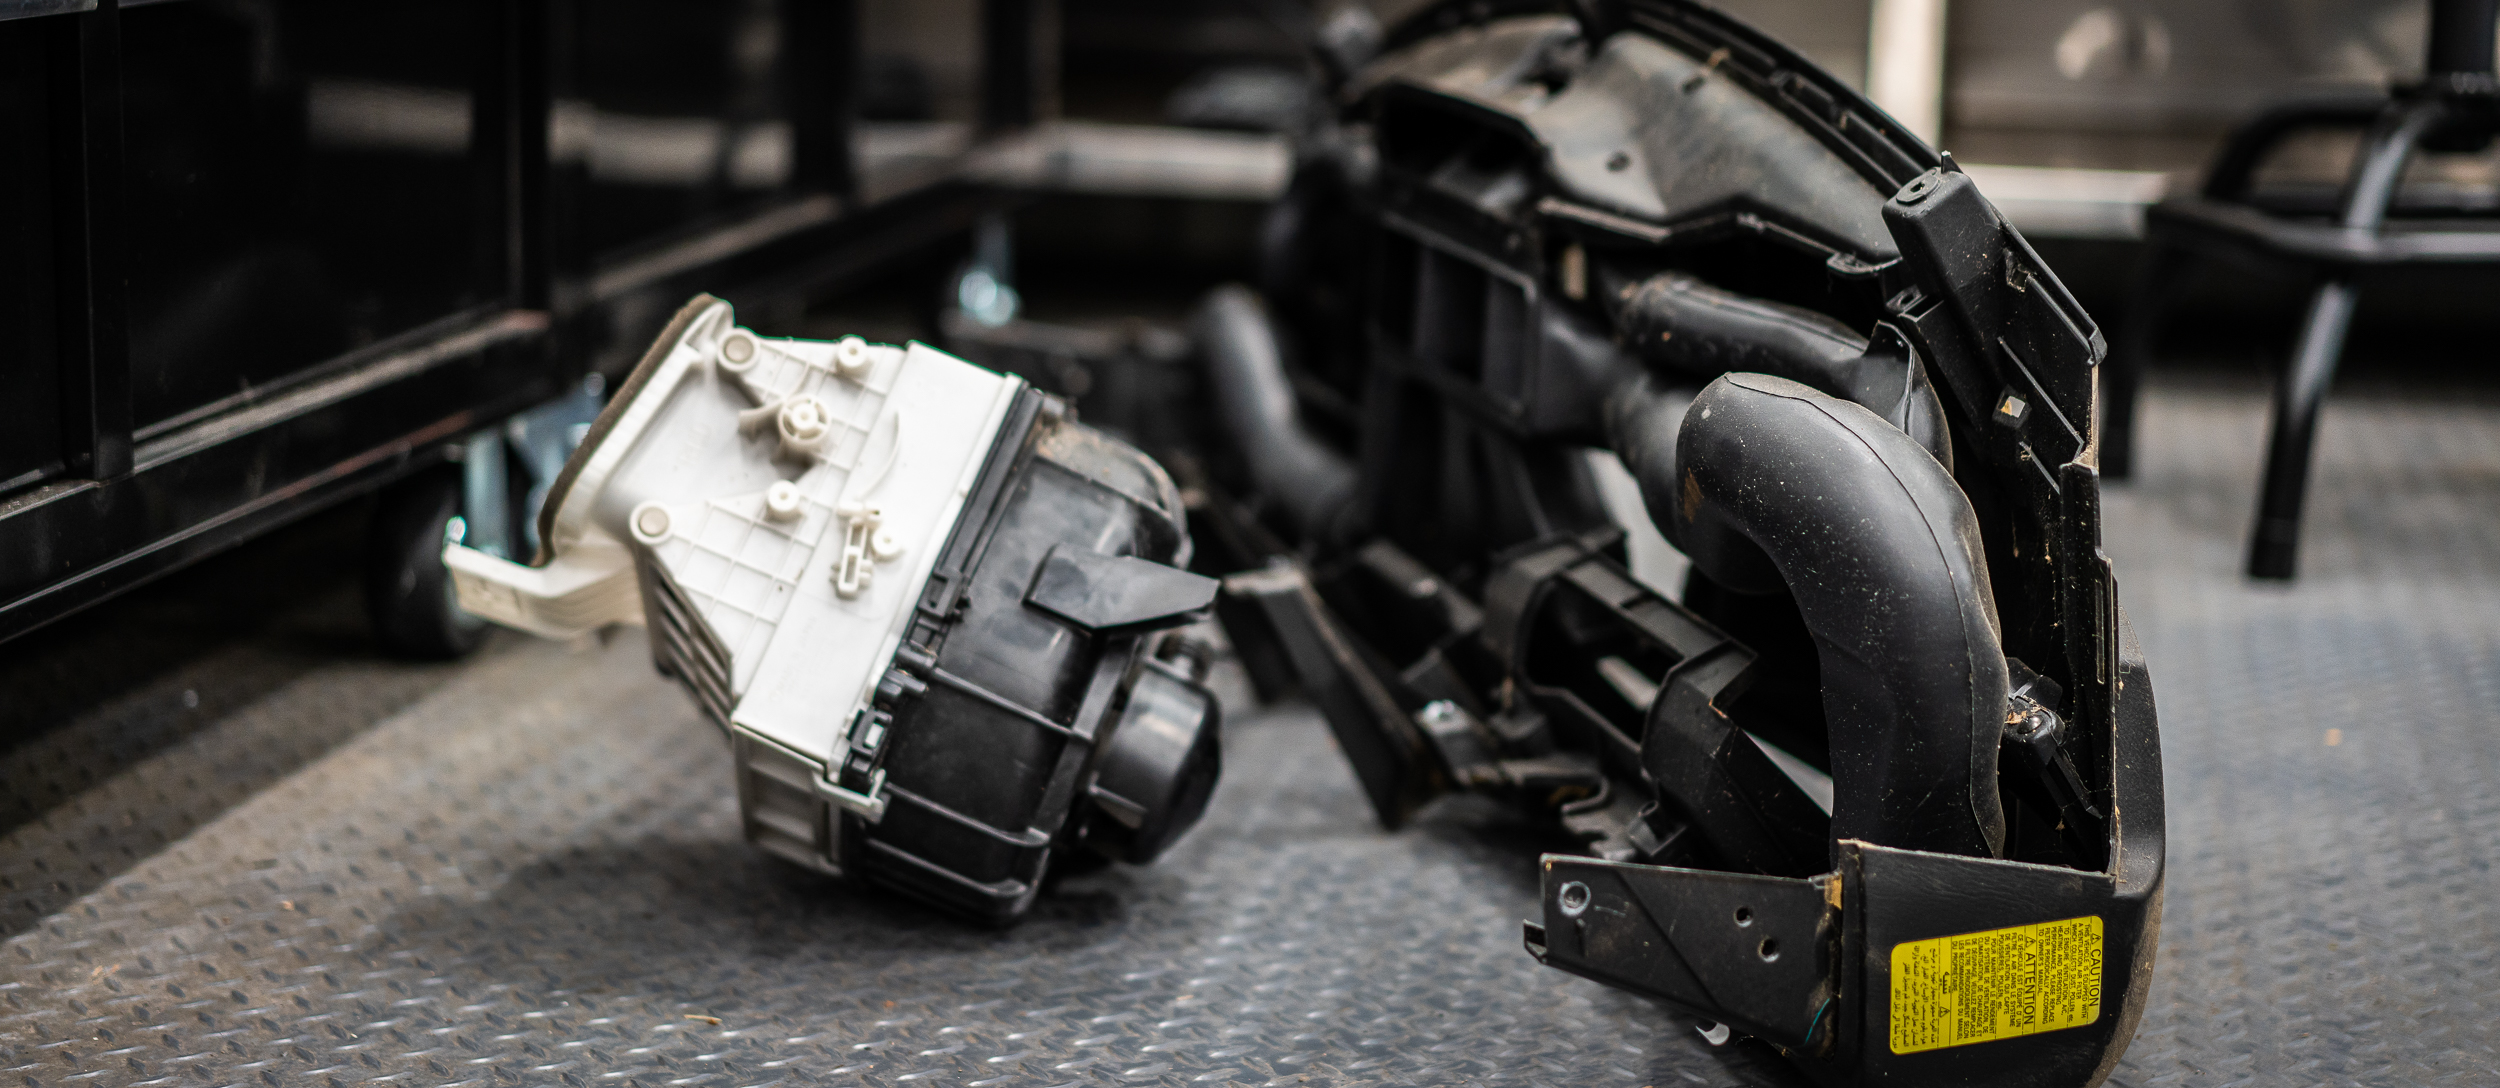
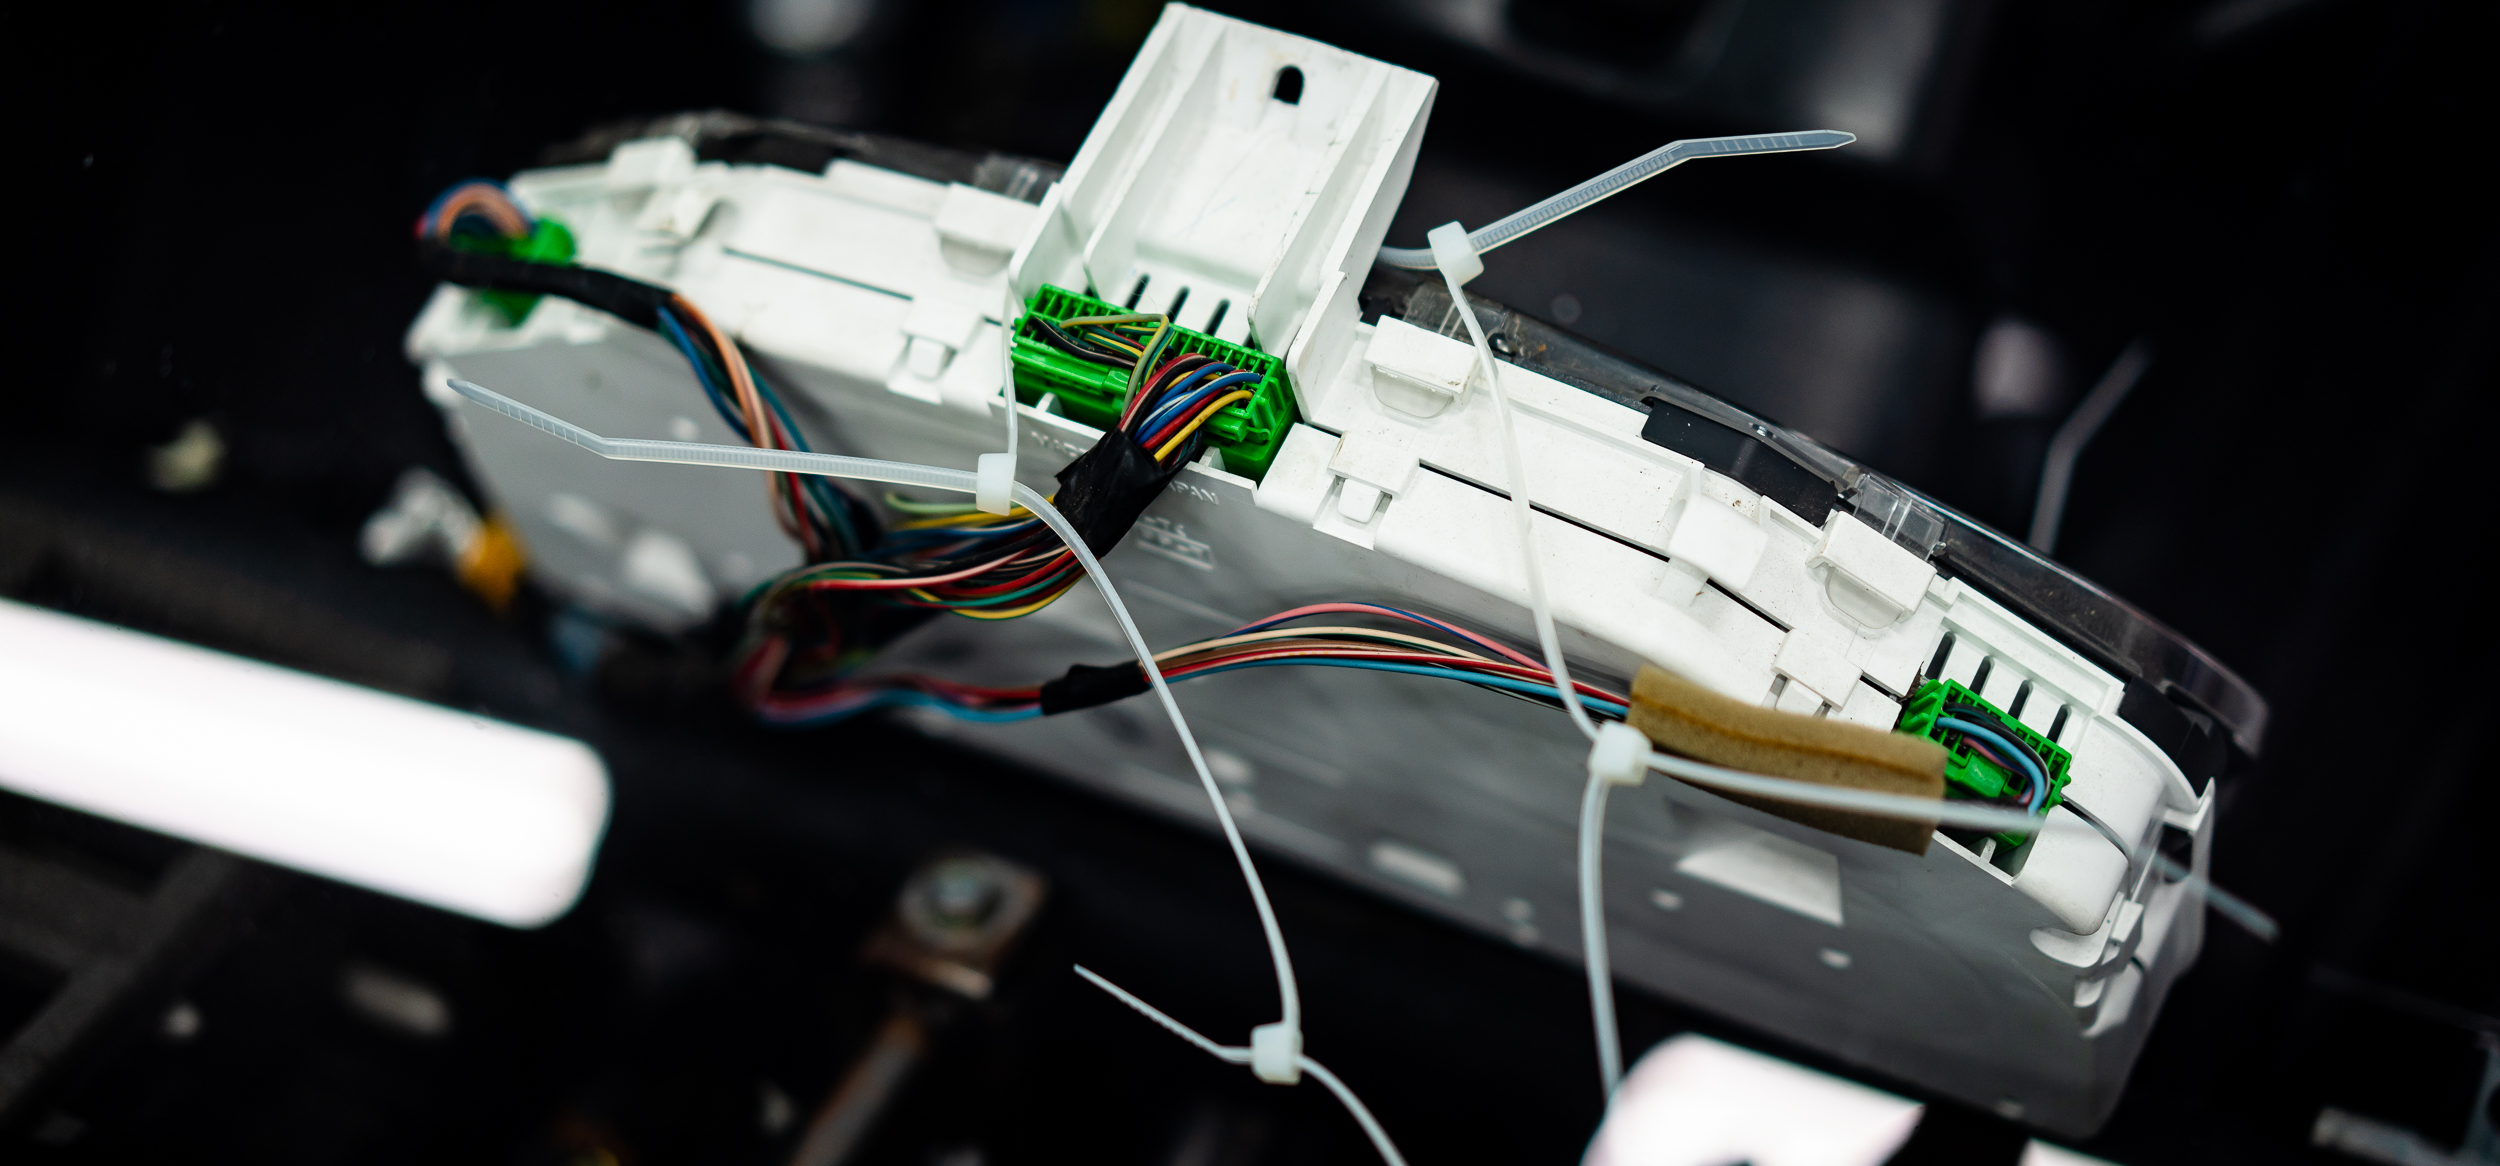
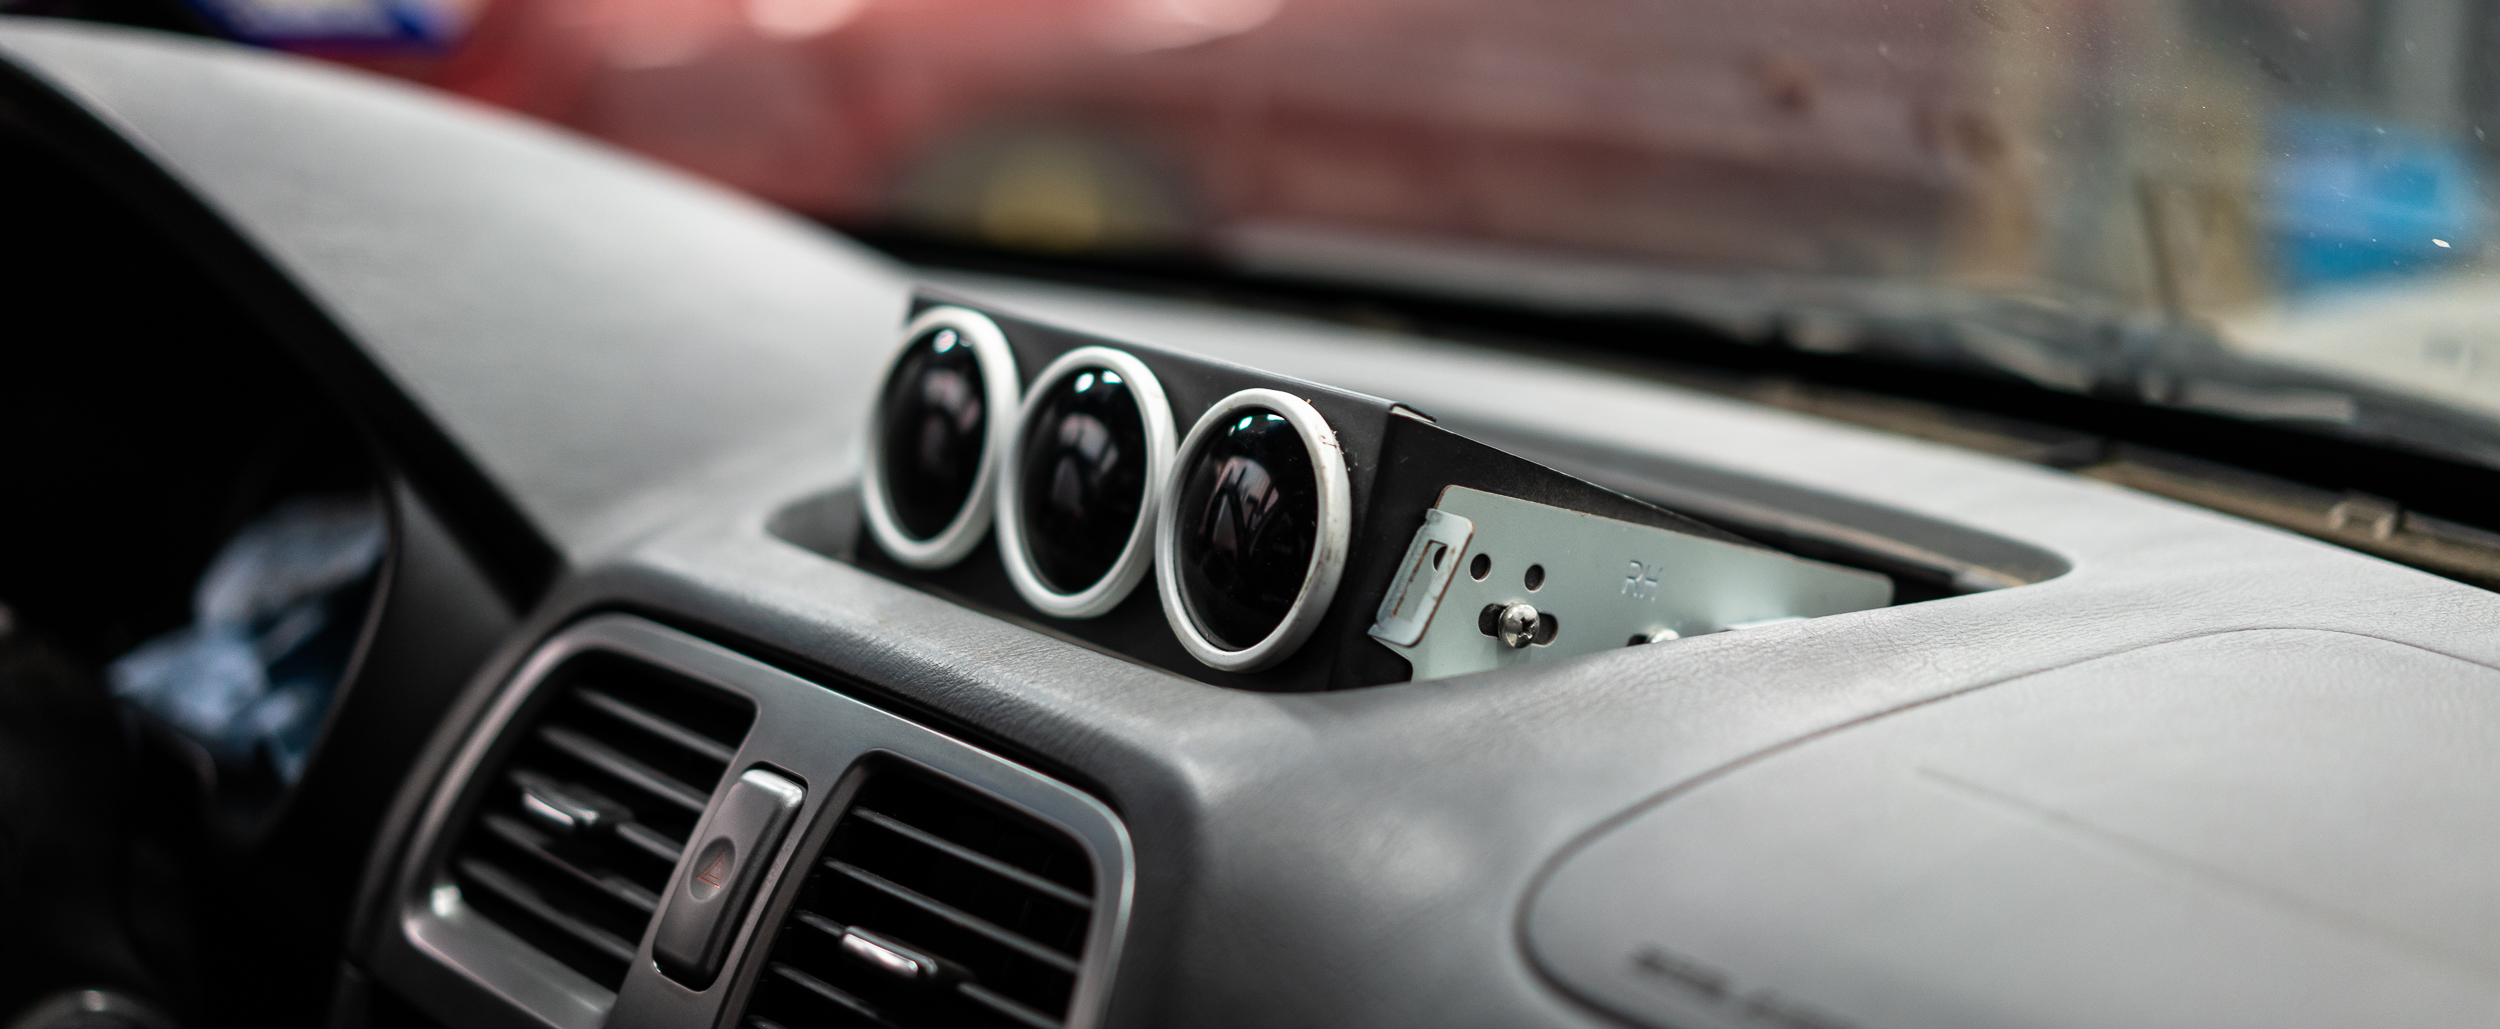
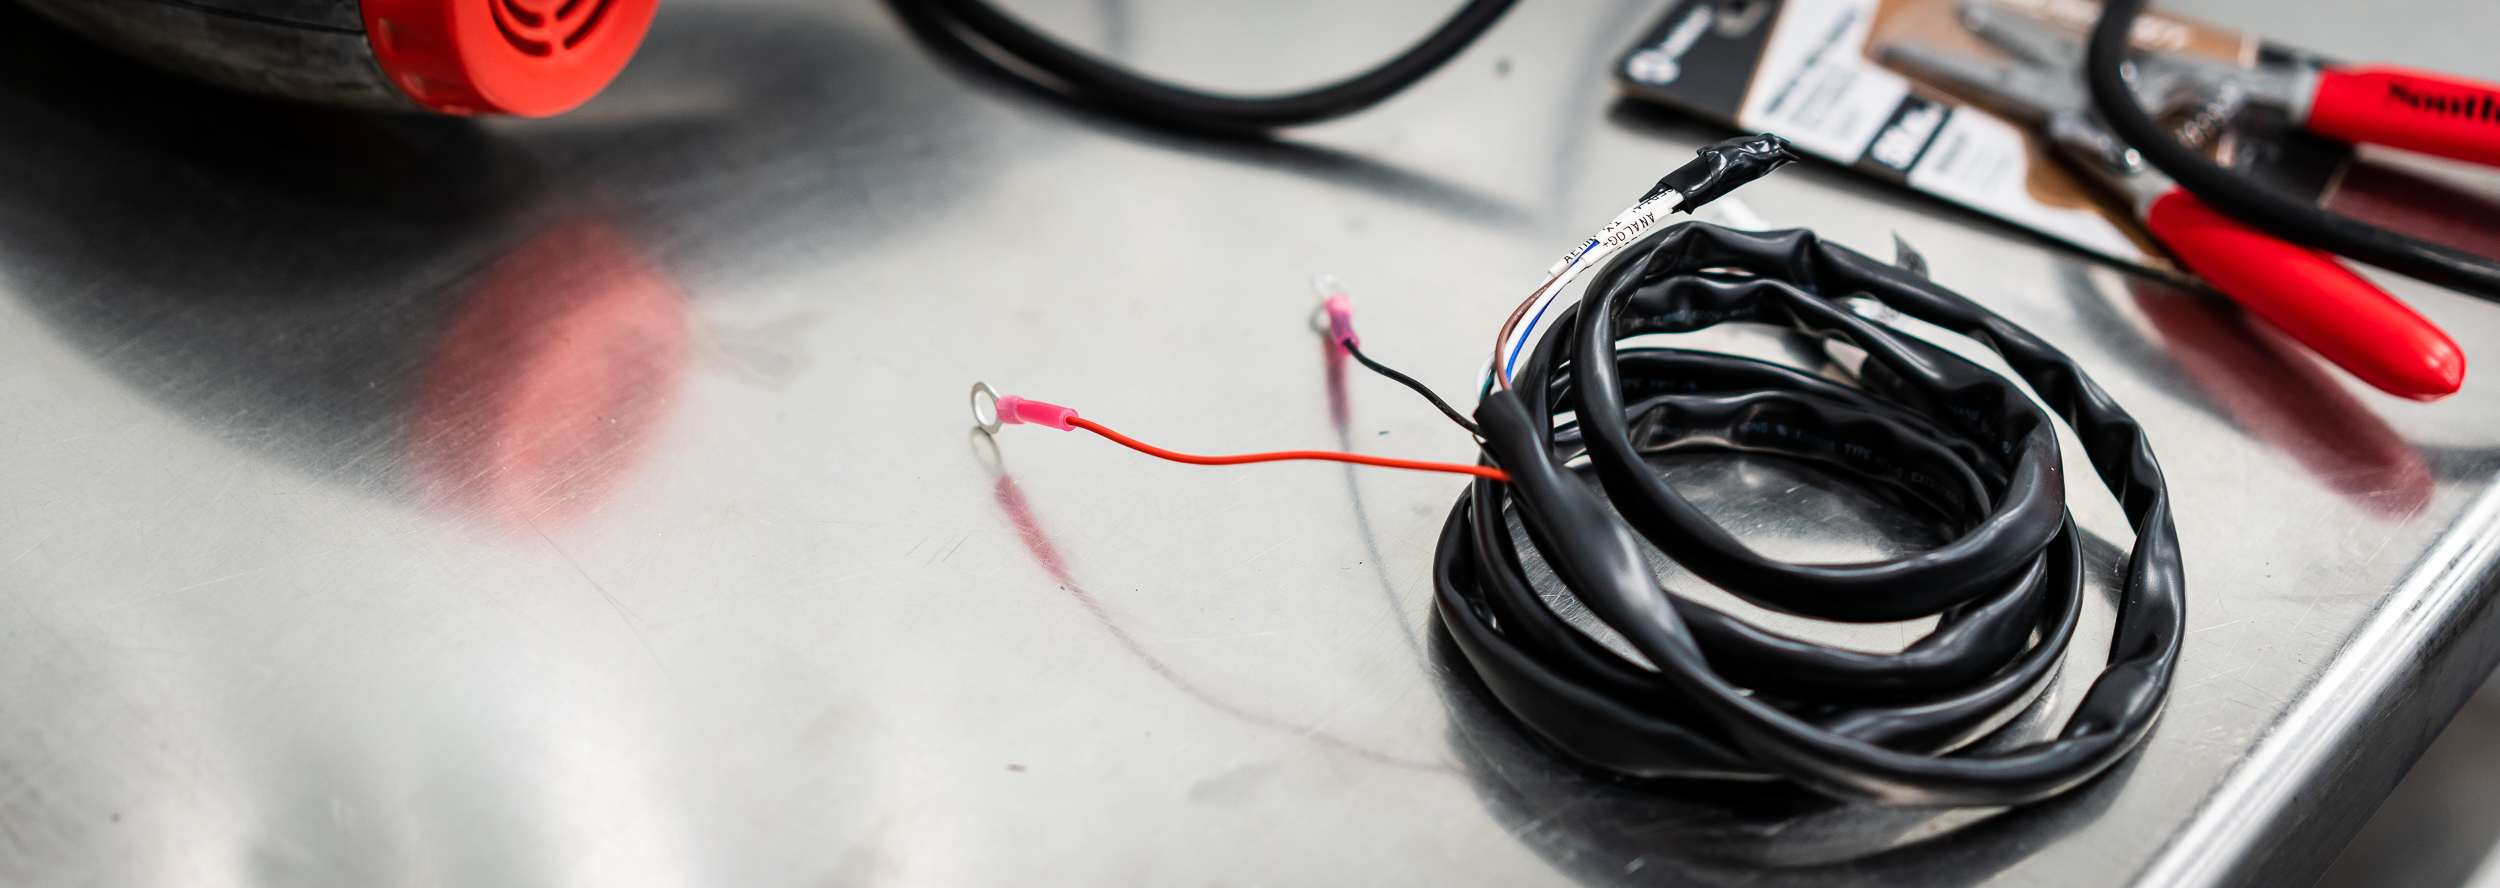
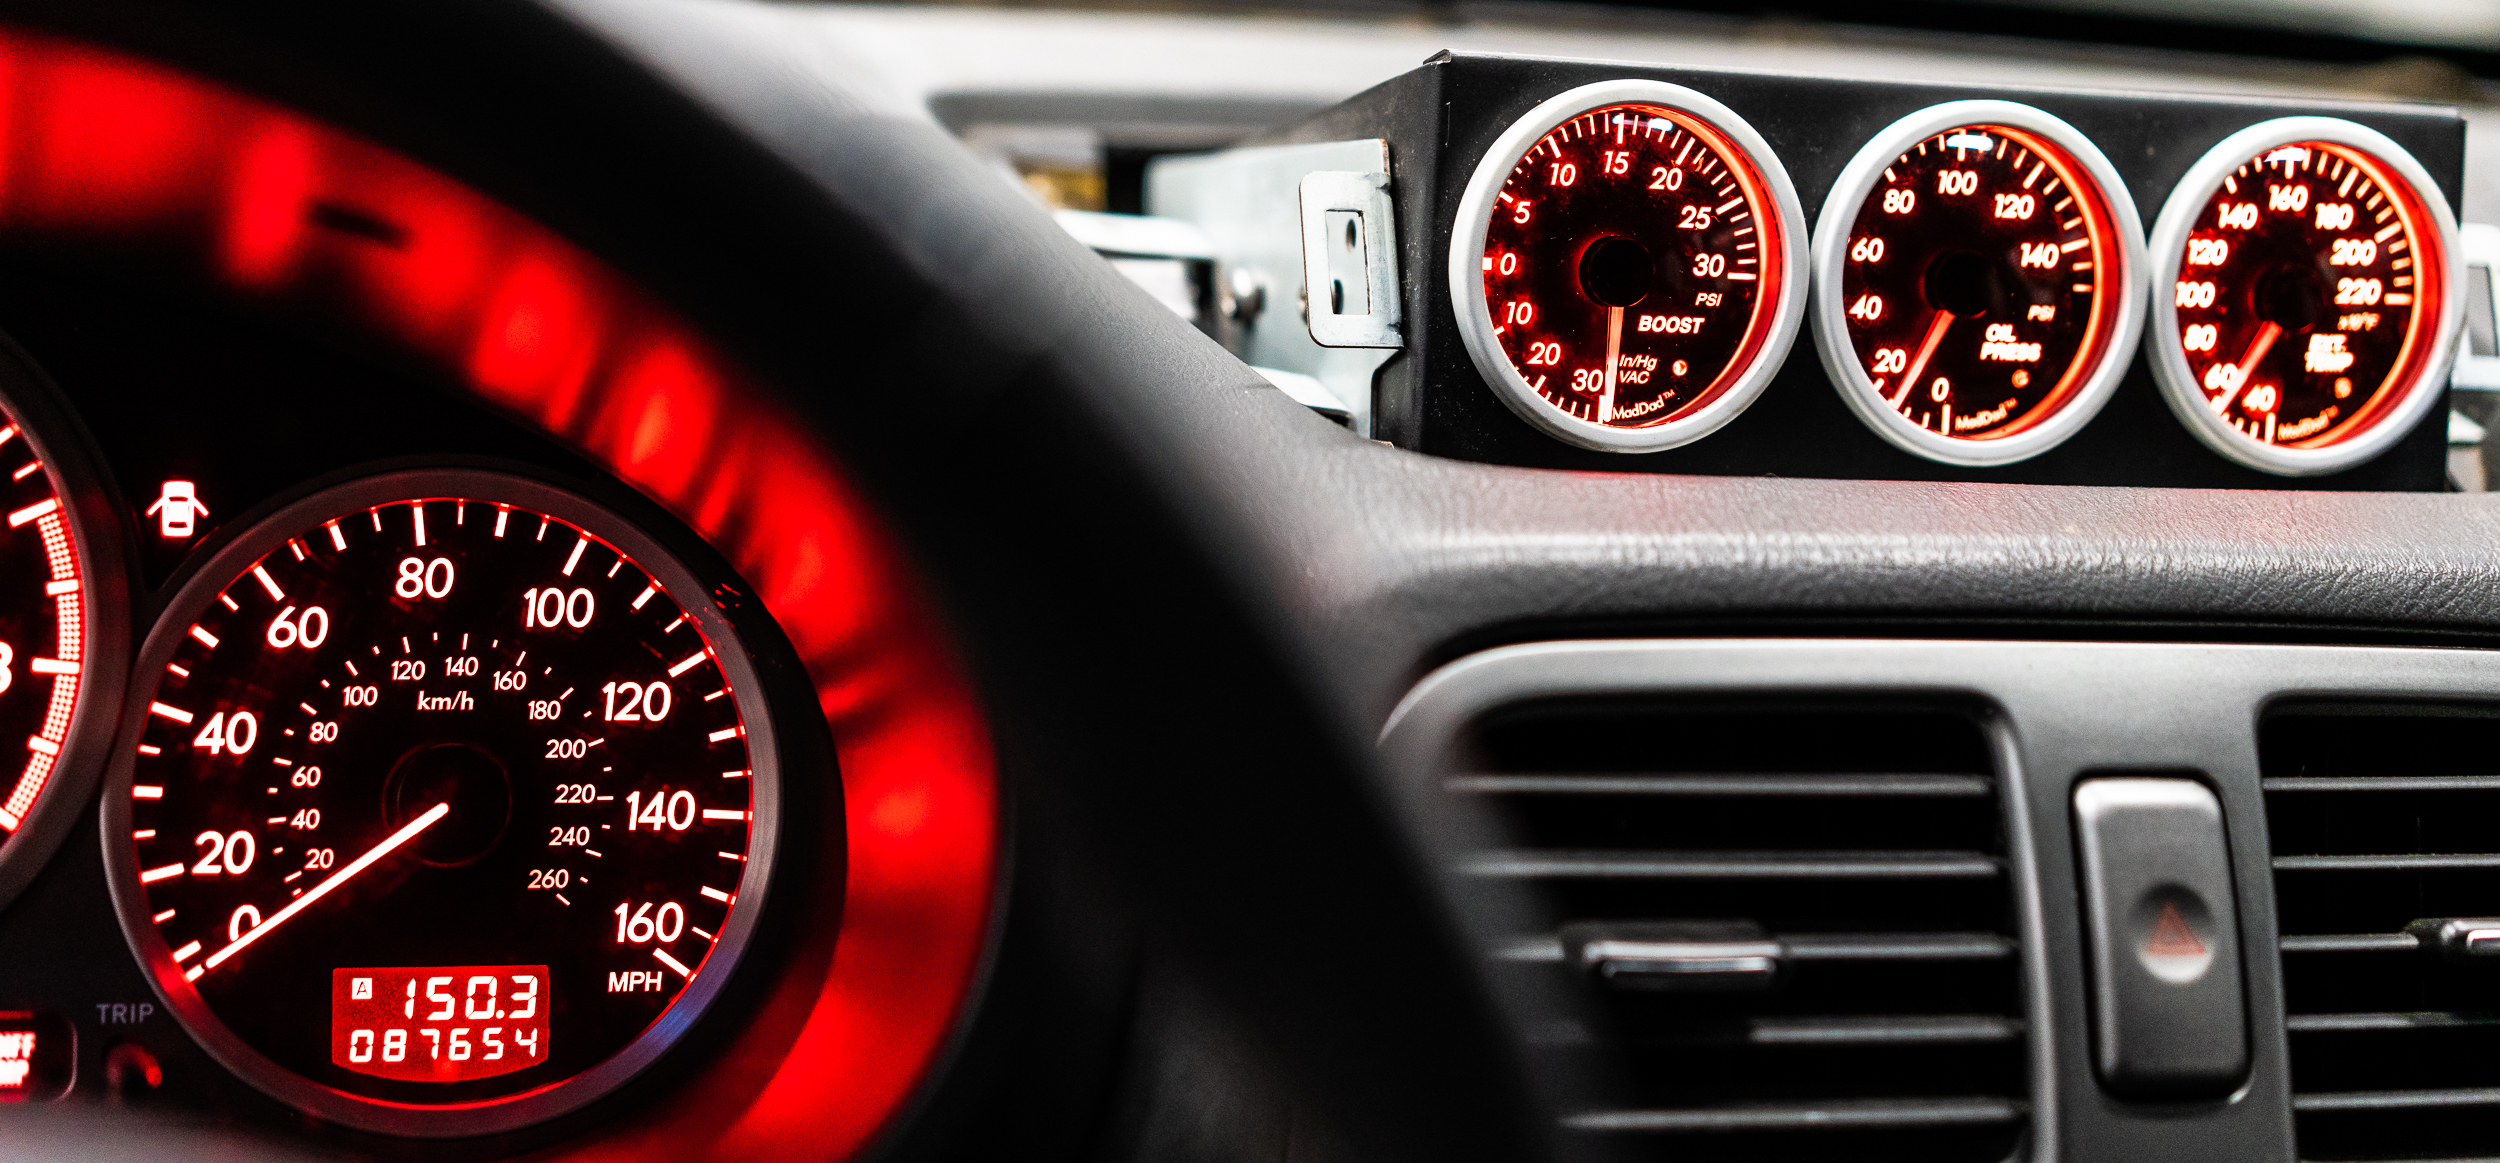
So I spent a few minutes unbolting the gauge cluster from the whoa-thats-heavy stock dash and using some milspec fasteners to mount it to the dash support bar.

Test drive time!

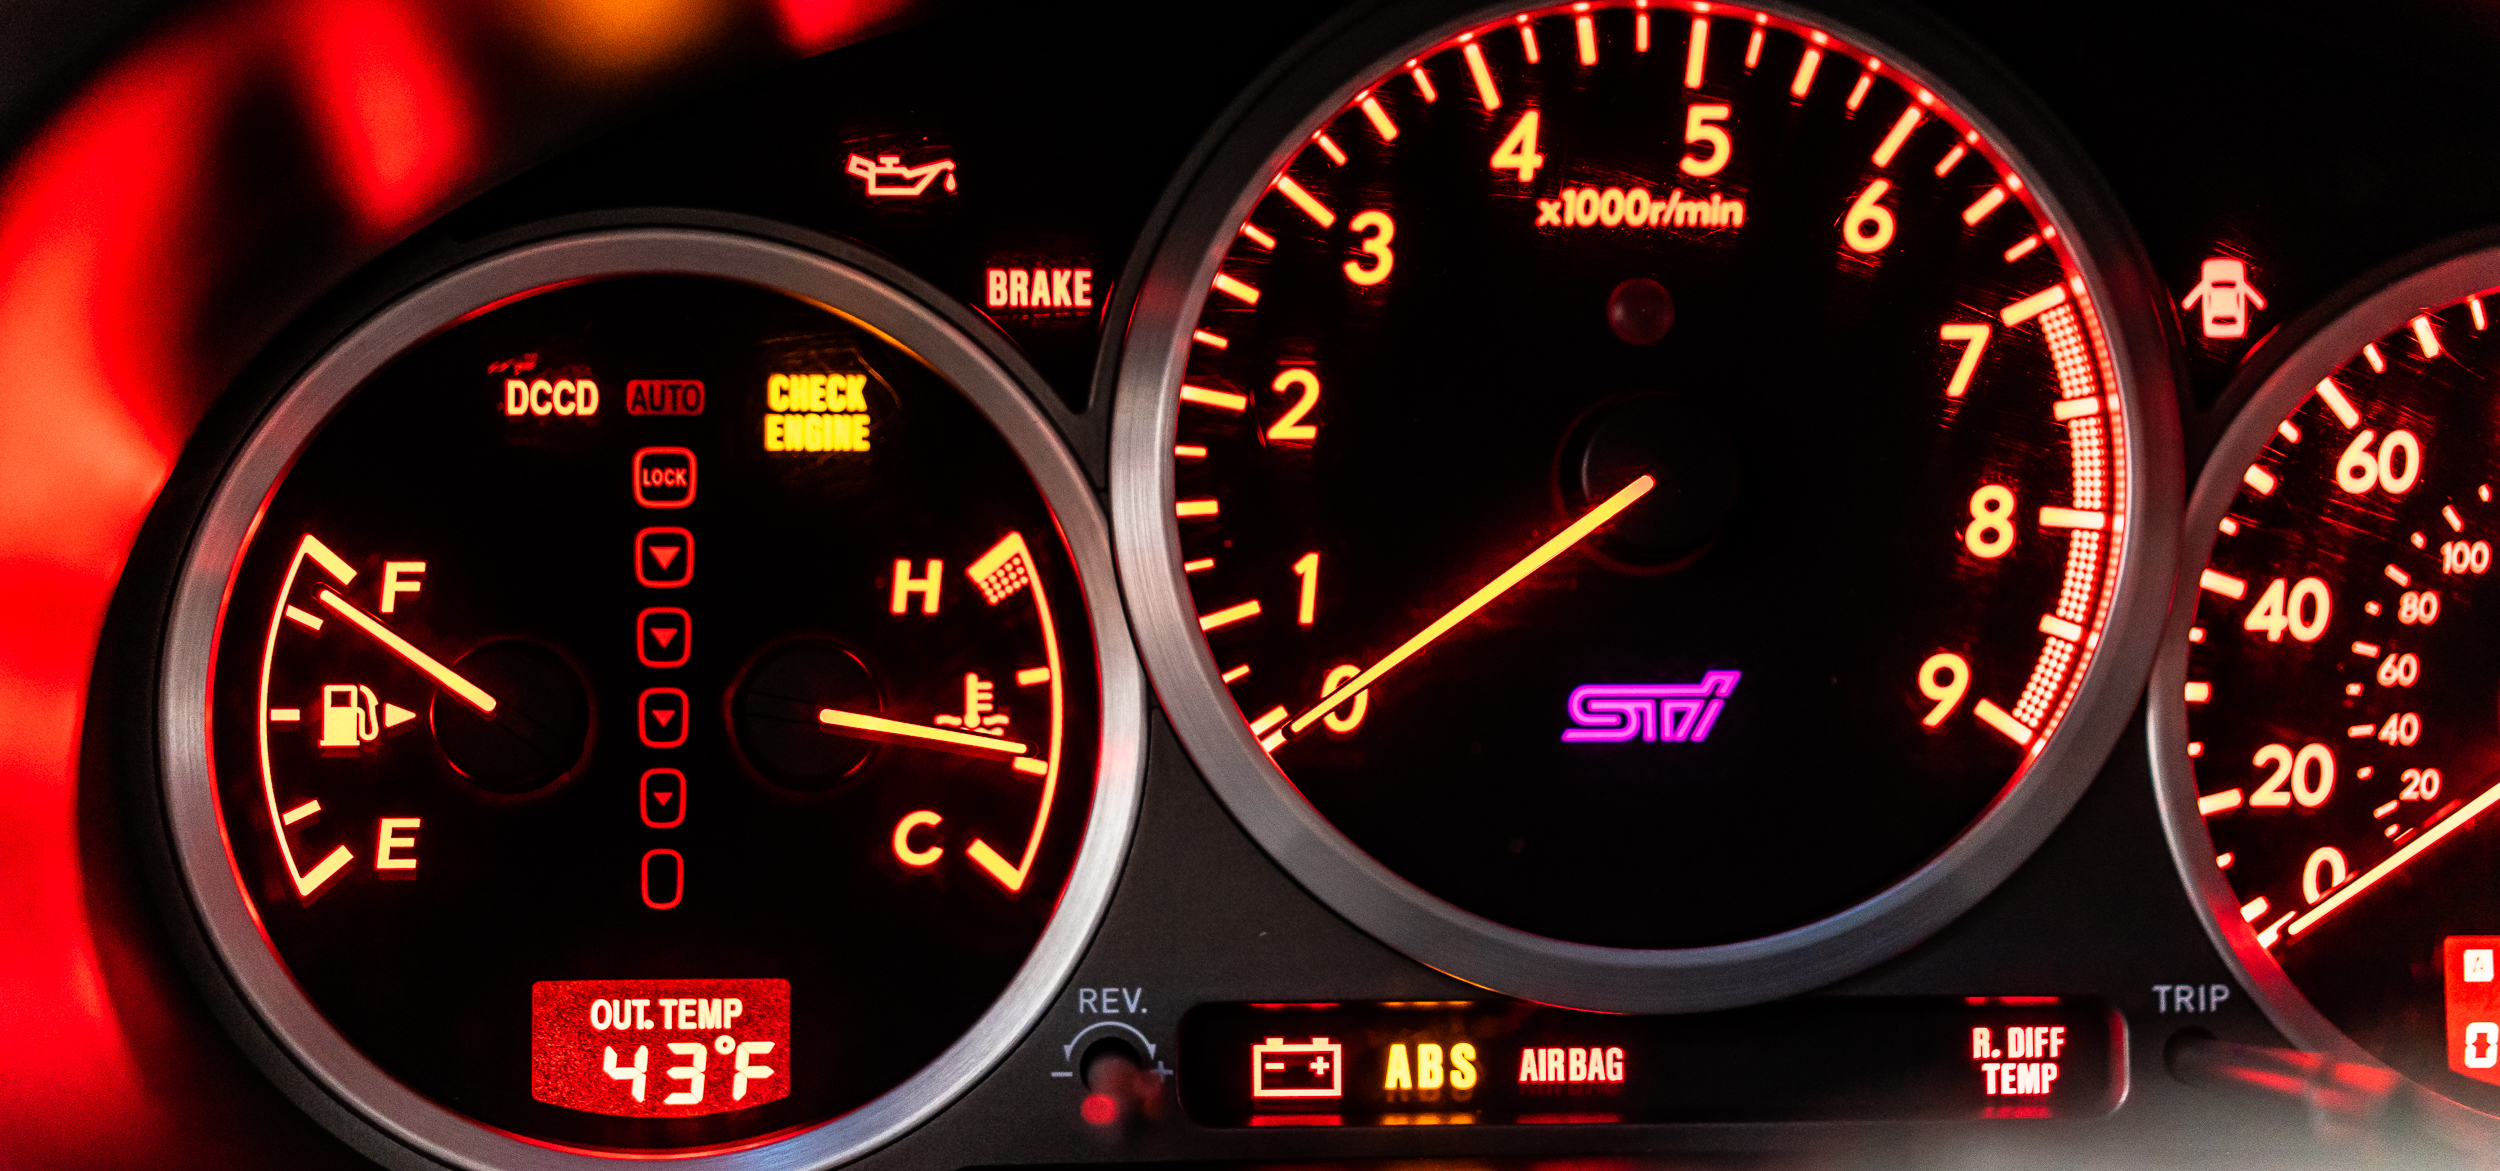
When I turned the key, the car started, but the gauges were a full Chevy Chase Christmas display of lights. In fact, the check engine light was actually flashing about 2x per second.

Not great, but it was running.

My brother had purchased a COBB Accessport V1 handheld tuner for the car way back when. One of the features of these handheld tuners is code reading and clearing, so after Nik found it in the shop (!), I plugged it in and pulled the codes.
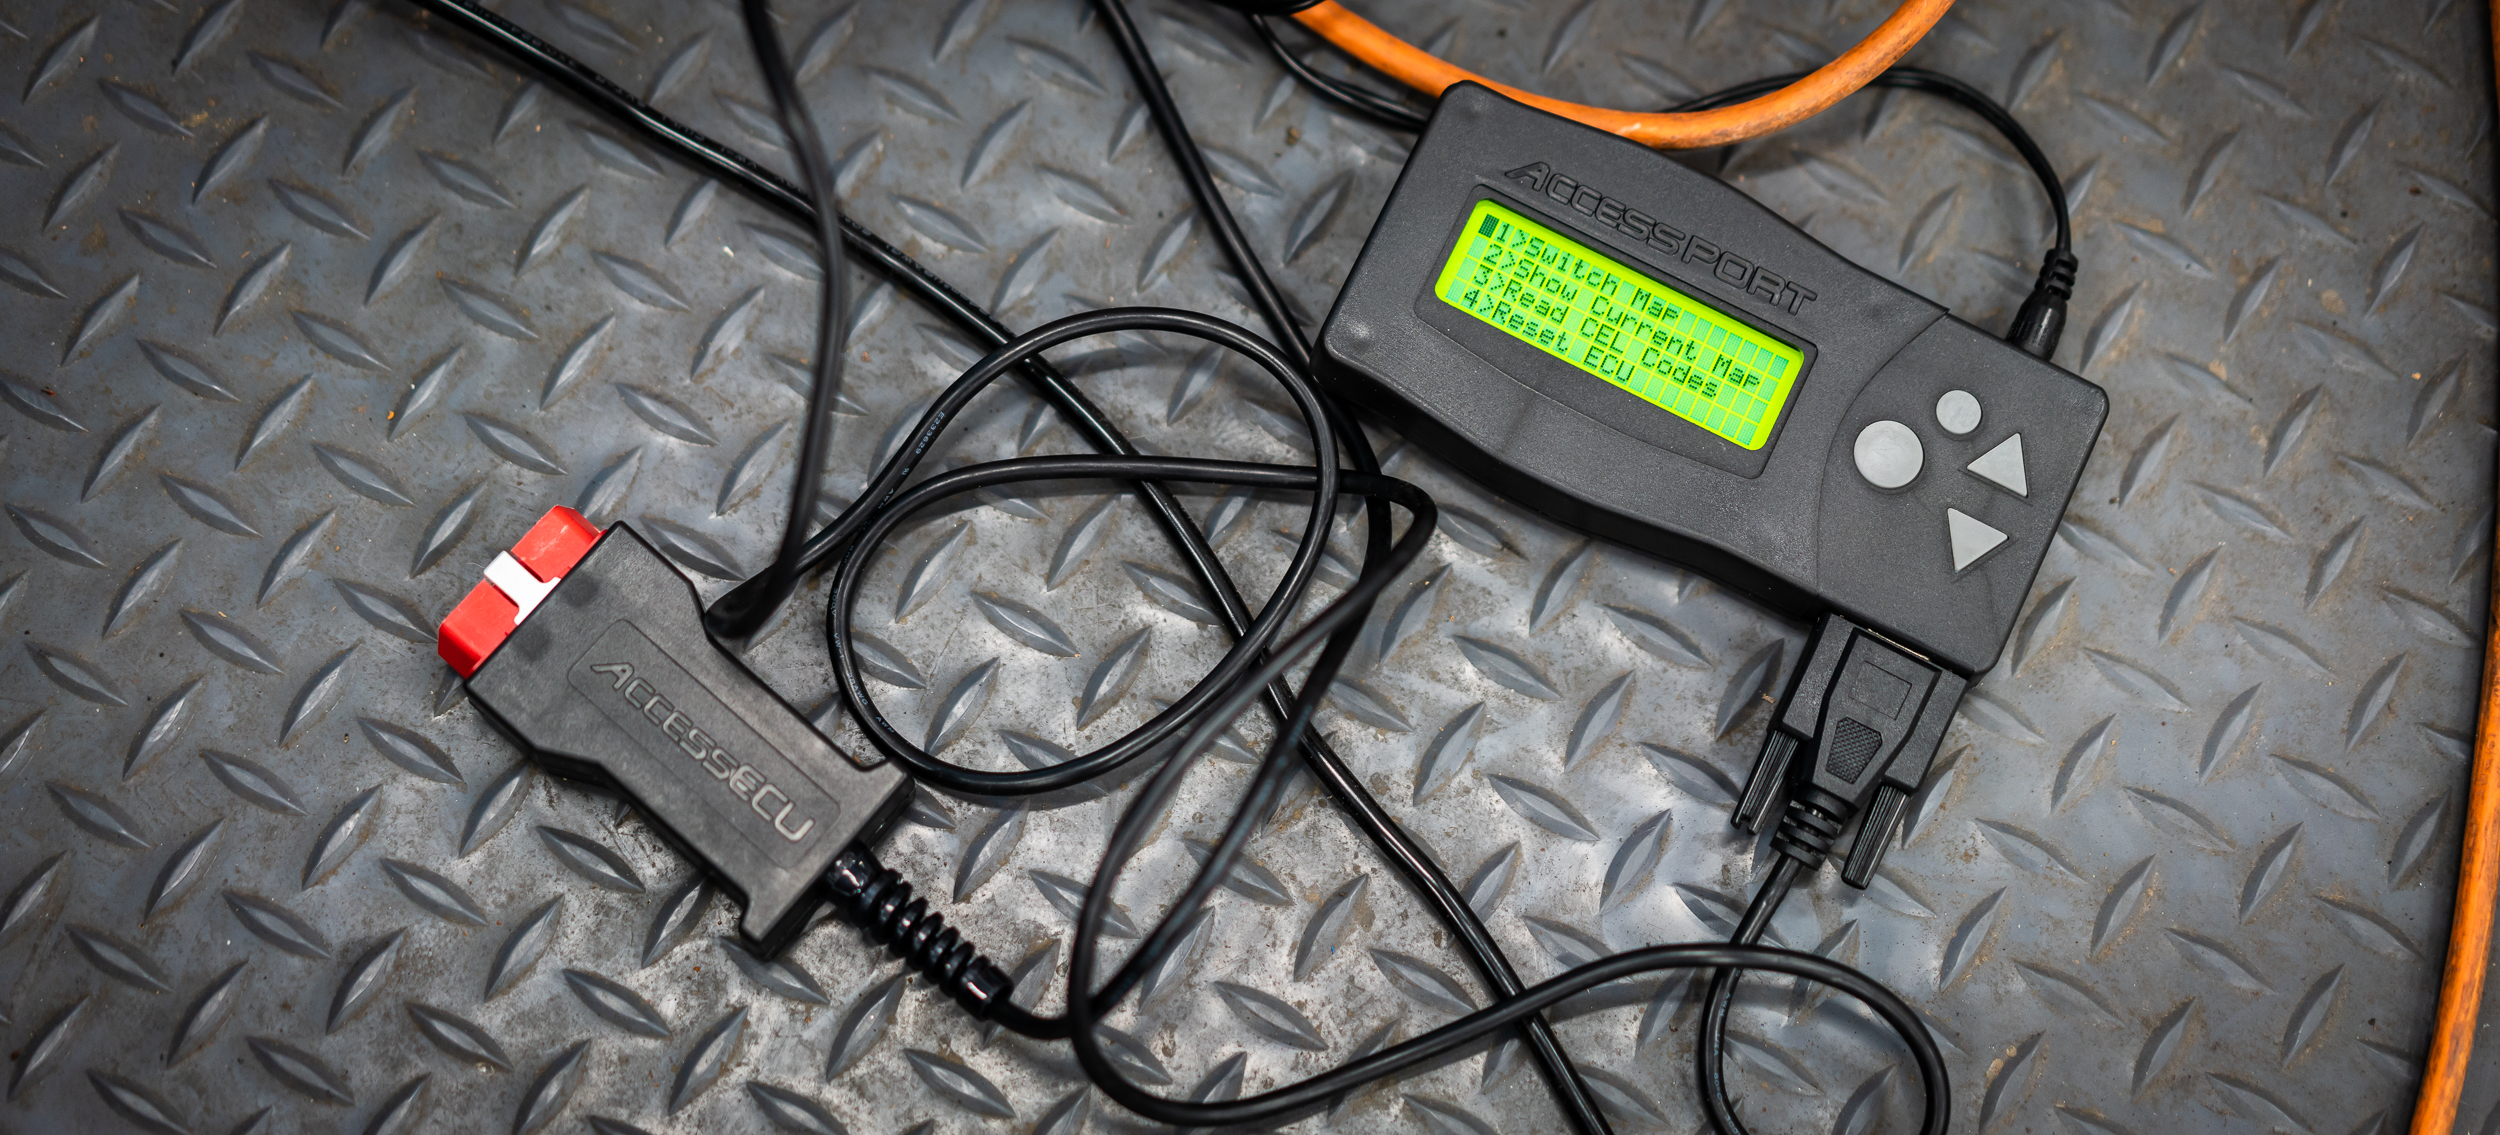
"No codes found!"

Huh? The CEL was flashing! I made sure I'd followed the procedure right with having the key in the right position and all that, but still nothing.

Well then, I decided I would take it for a test drive anyhow.

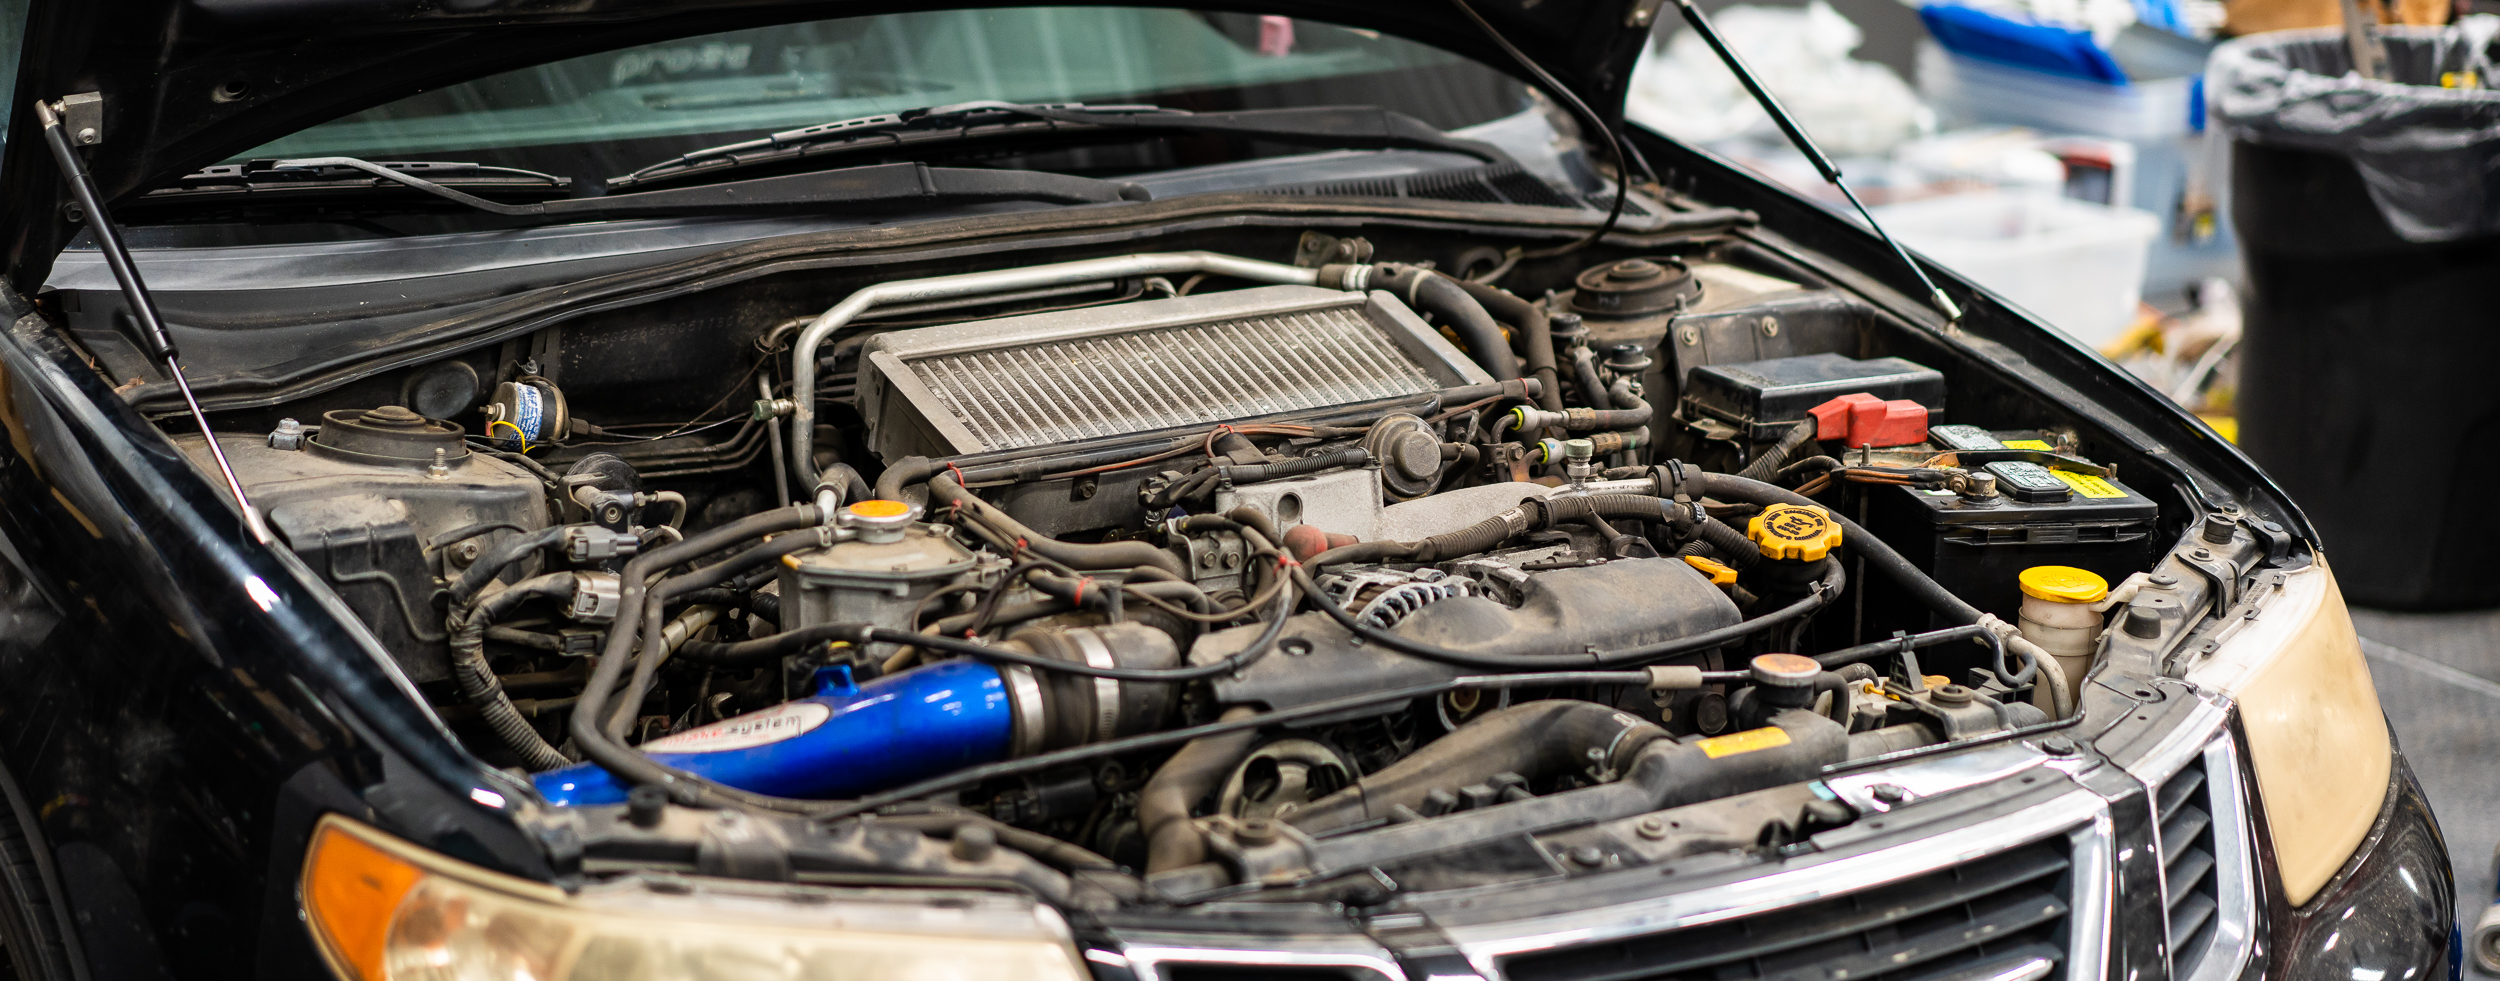
It was a pretty uneventful drive. Too uneventful, I'd say: the car was painfully slow. It didn't seem like it was misfiring or running down on cylinders or anything like that, just reeeeeally slow. The water temp came up properly and stayed right where it should be, but without the extra gauges hooked up, I couldn't tell much else. I drove back to the shop and parked.

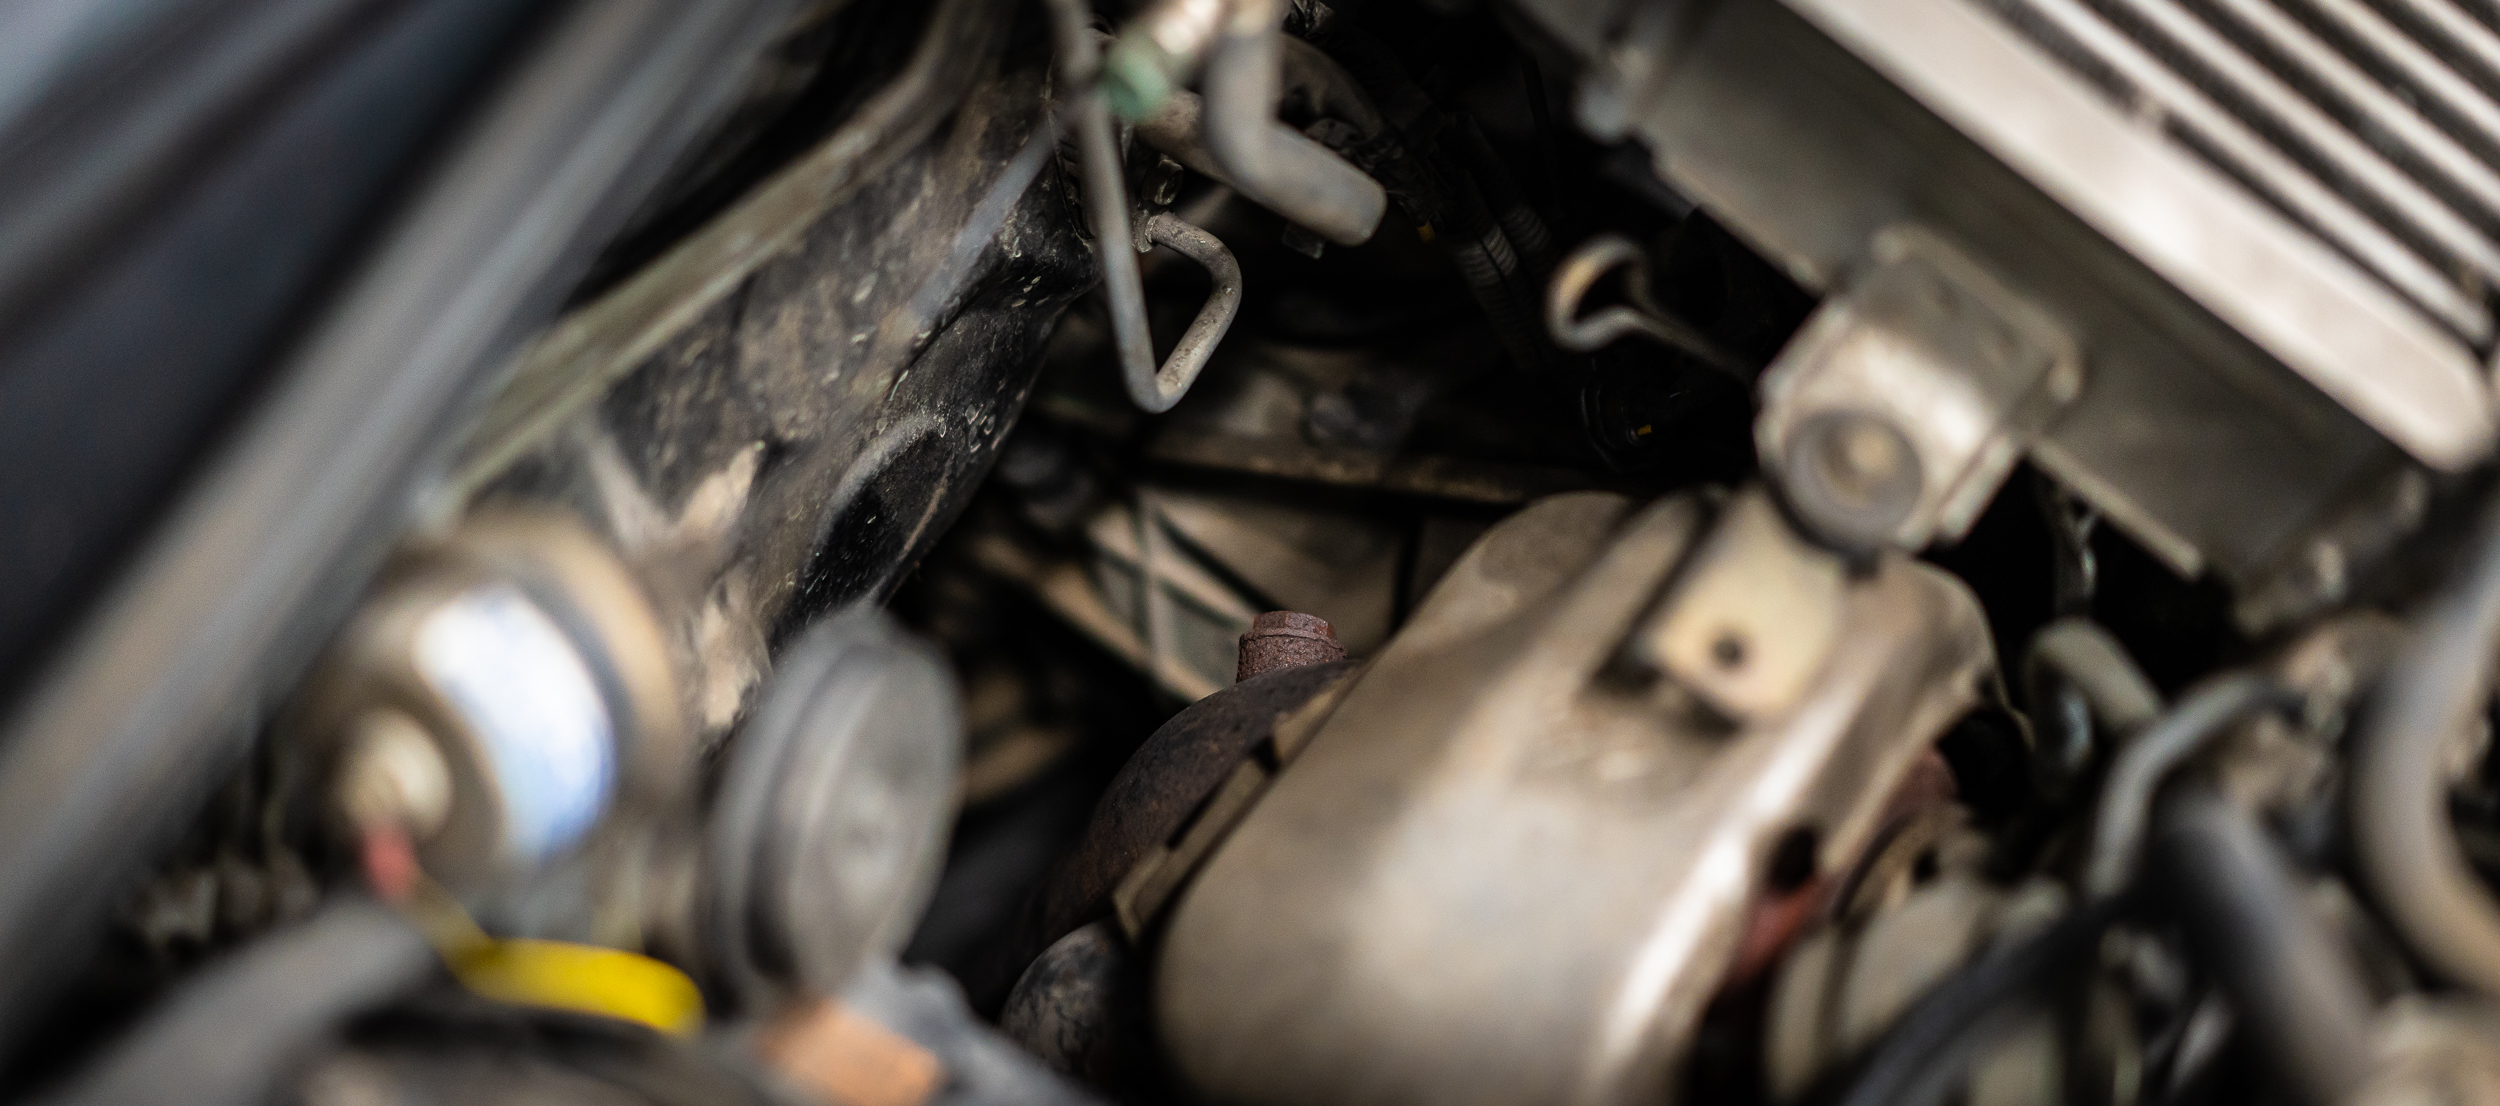
At that point, I noticed the idle was very low, like 400 - 500 rpm and hunting around. Nik and I half-heartedly poked around the engine bay a bit and didn't come up with anything. It was late, so I packed up and went home, not feeling too great about it all.

I did some internet searching later and found that the CEL will flash like that if you have the "Test Connector" hooked up in the car.

Huh?

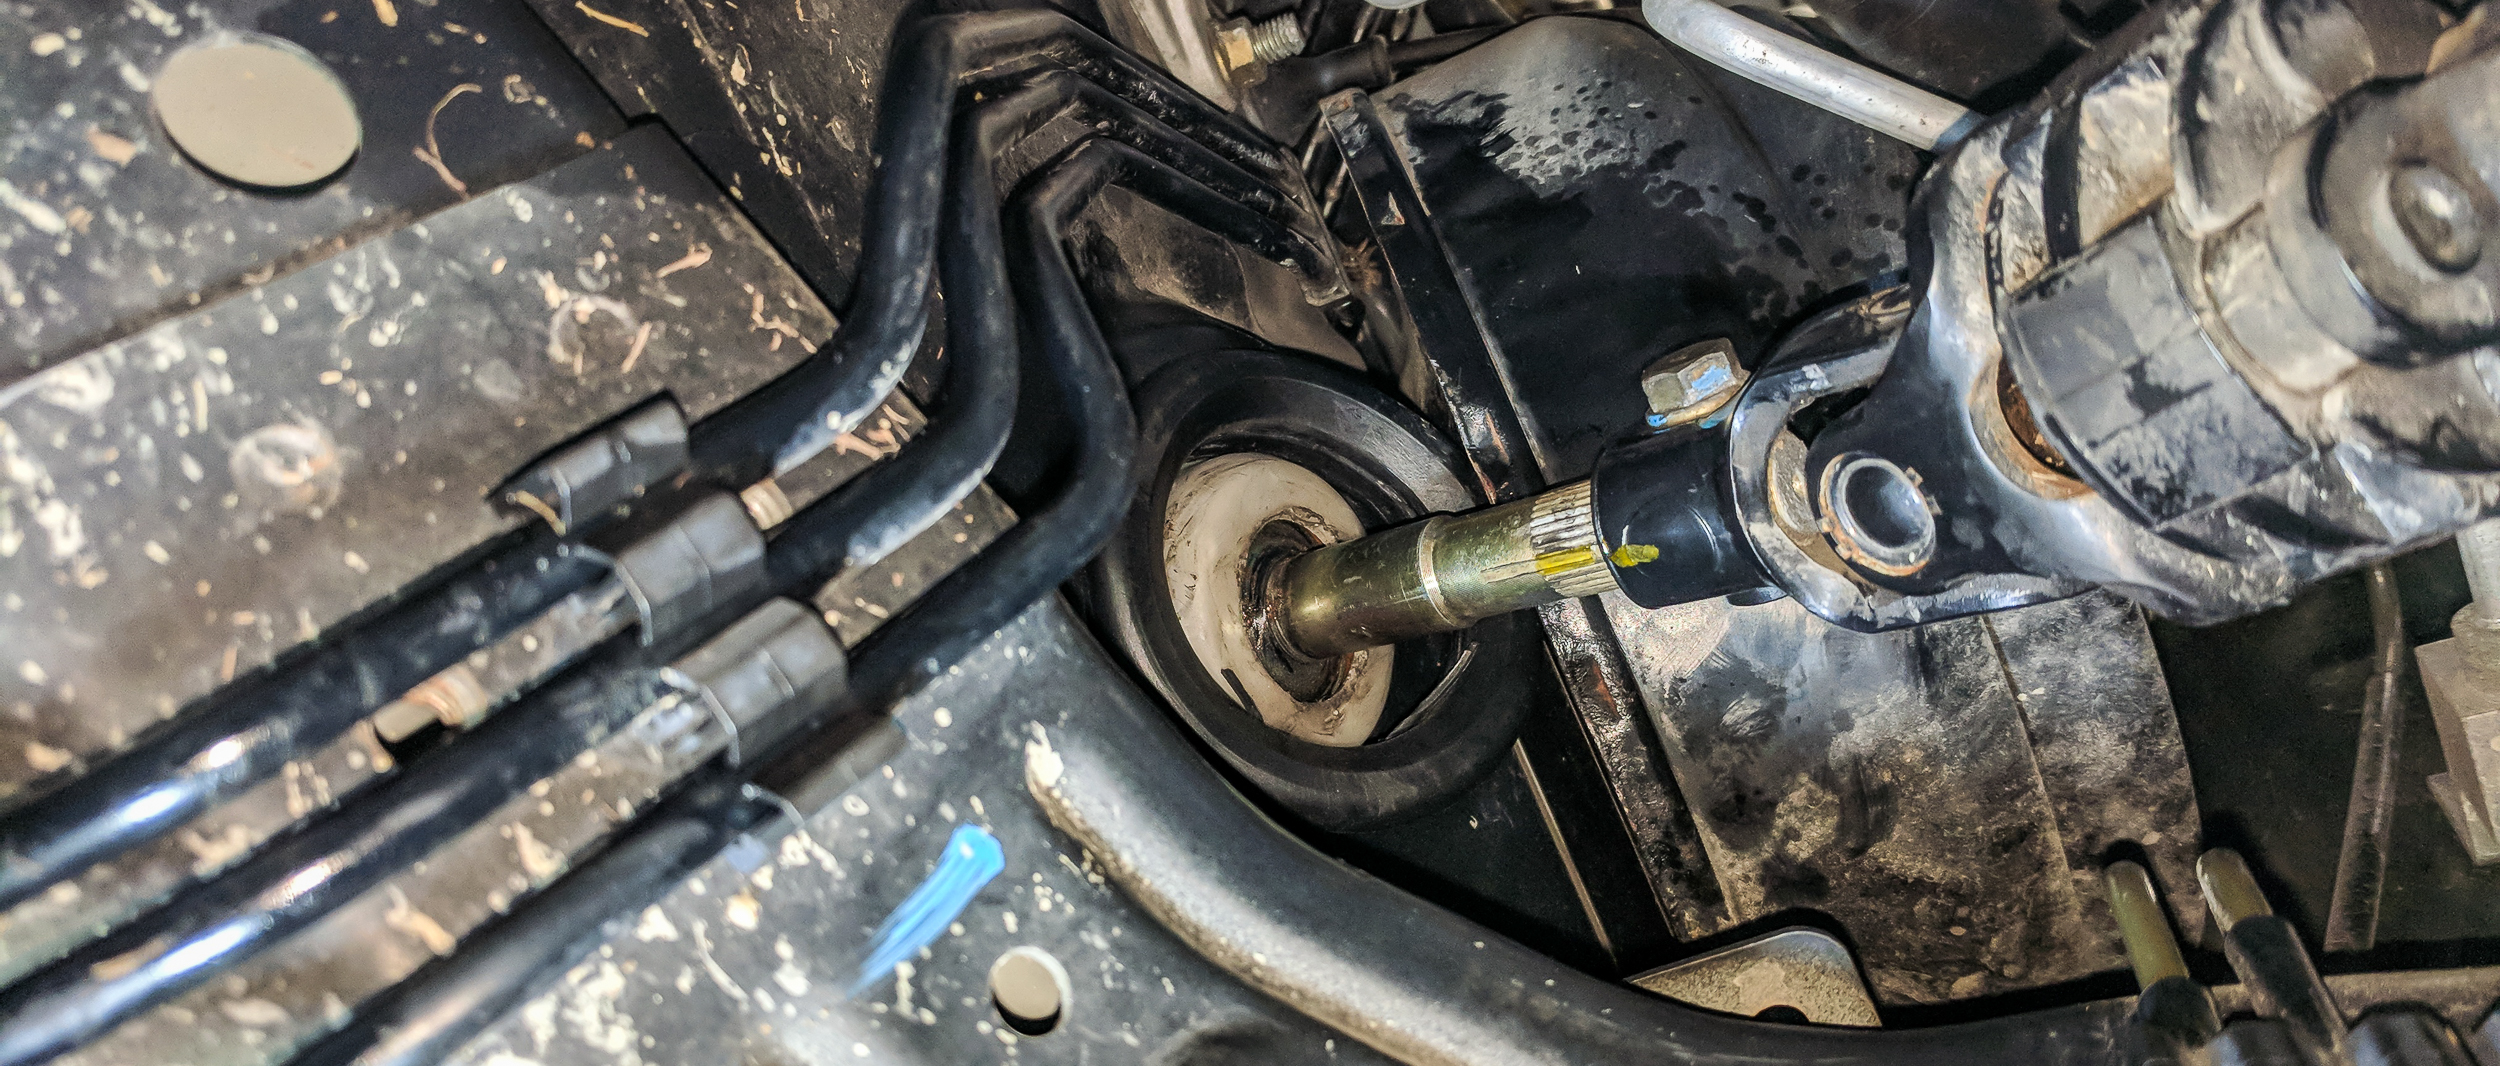
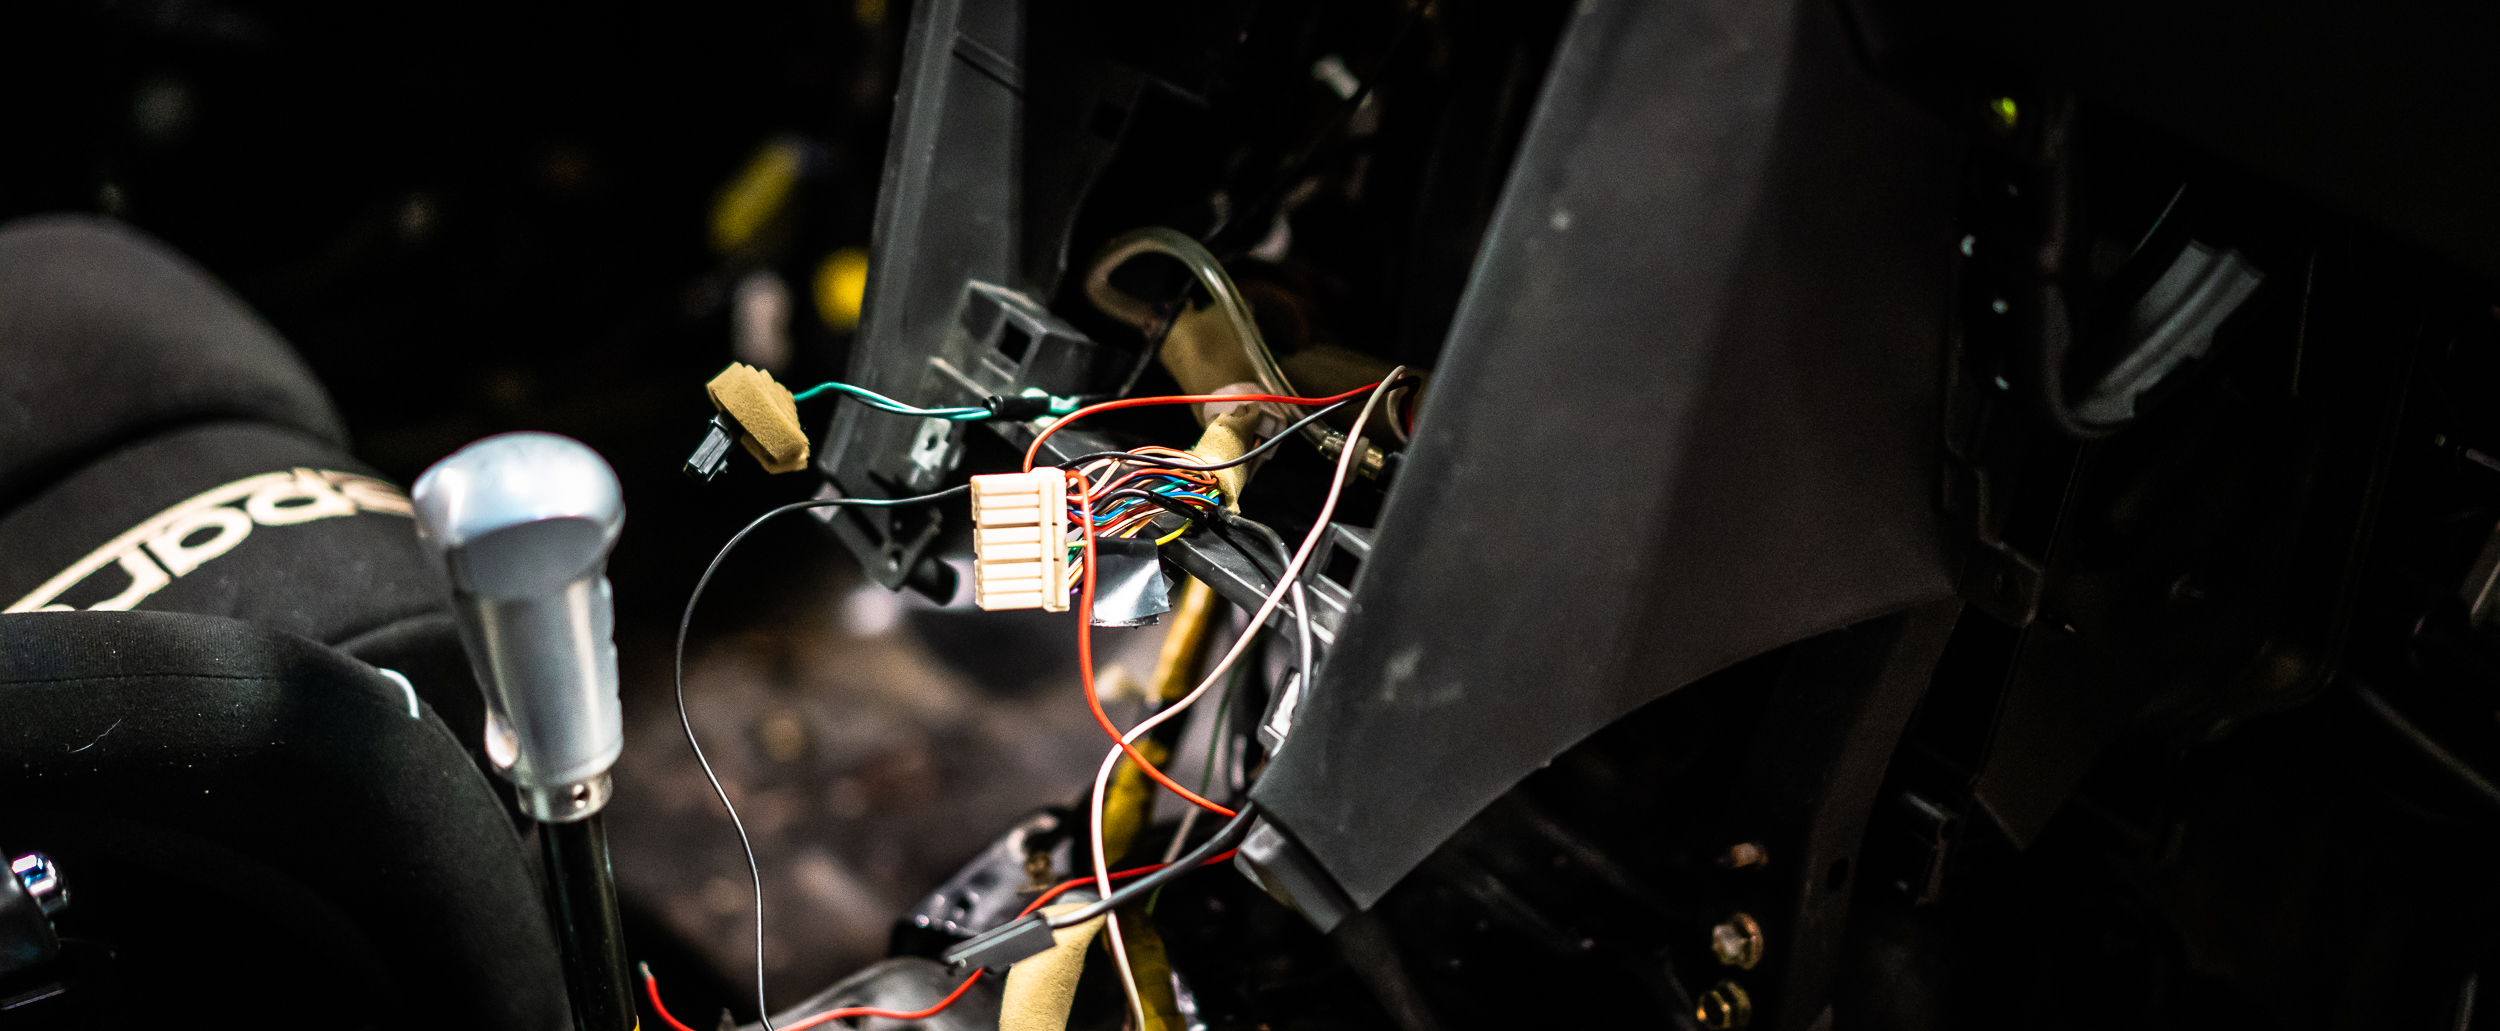
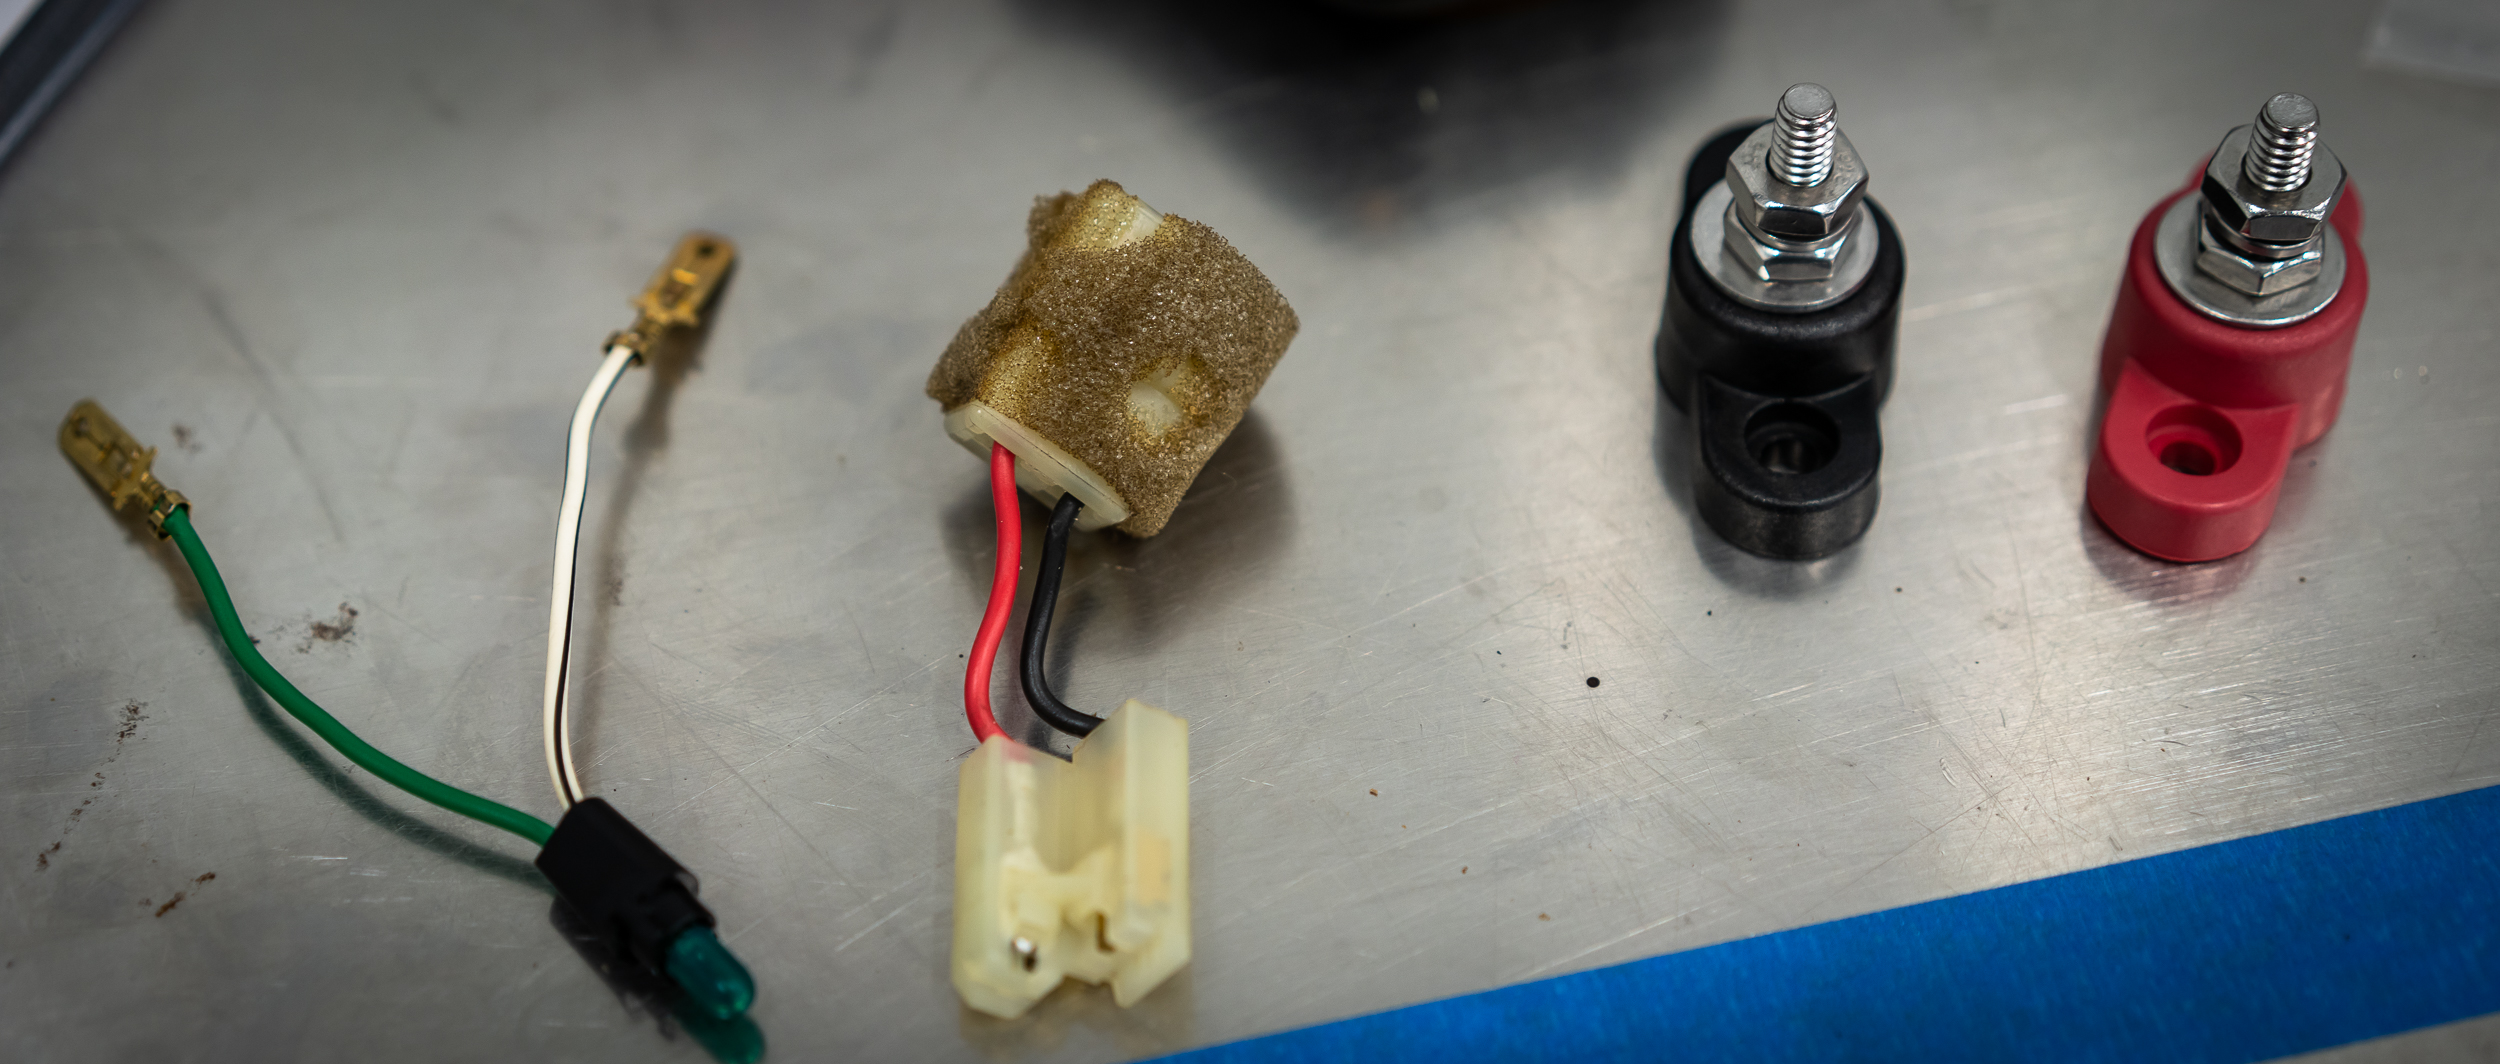
Apparently, on some earlier years of the WRX, Subaru installed a one-wire green connector, found under the steering column, that you plug in to put the car into "Test / Diagnostic Mode". The CEL flashes constantly while in test mode.

I was really hoping that was the problem, so on my next shop night, I went straight in and looked for the Test Connector.

I was so excited, I failed to get a photo, but yes! I found it and it was connected. So I disconnected it. In my haste to get the car back in running form, I had just gone around plugging everything back in that I could find, so this all made sense.

I started the car again. Success! The CEL was no longer flashing.

My excitement lasted about 1 second, as the CEL went on solid. So, I turned off the car, hooked up the Accessport, turned the key to the on position, and read the codes.

"No codes found!"

Oh great, now I'm thinking there's something wrong with the OBDII port, or the Accessport, or who knows what. There is clearly a code. In a last ditch effort, I "cleared the code" with the Accessport, then started the car again.

CEL turned back on. This time, I turned the car off, but I didn't take the key out, then turned back to the "ON" position and checked one last time for codes.
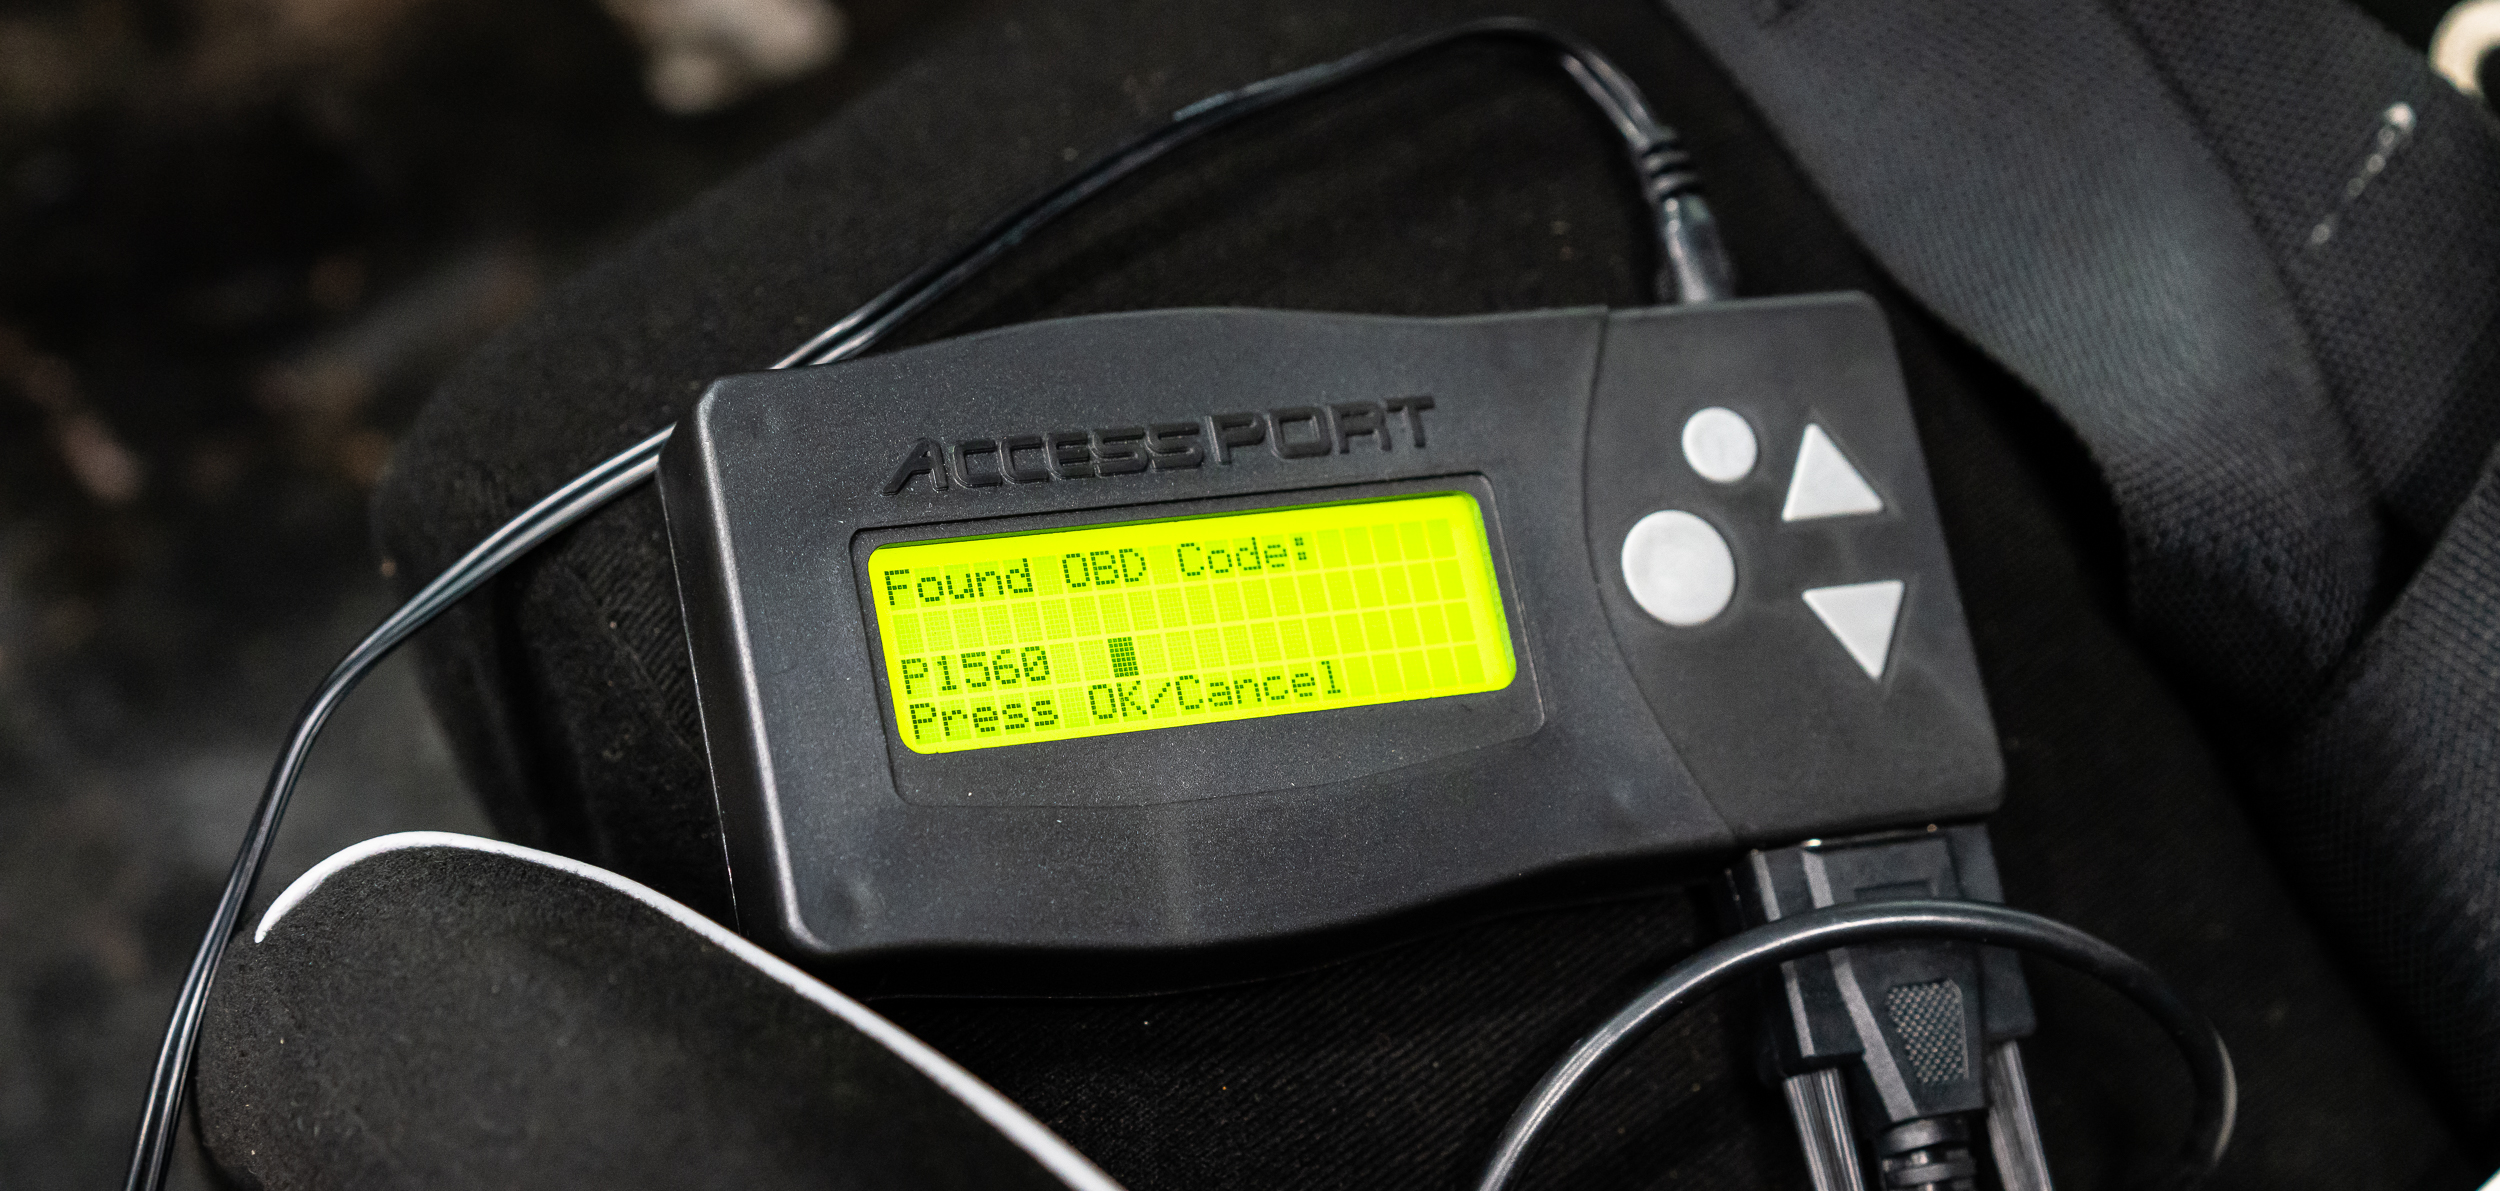
Hallelujah! A clue!

"P1560: Backup circuit voltage low"

Uh oh. An electrical problem.

I'm not sure why I thought I wouldn't have electrical problems in a flooded car, but I guess I subconsciously hoped?

My first troubleshooting step: To the internet!!

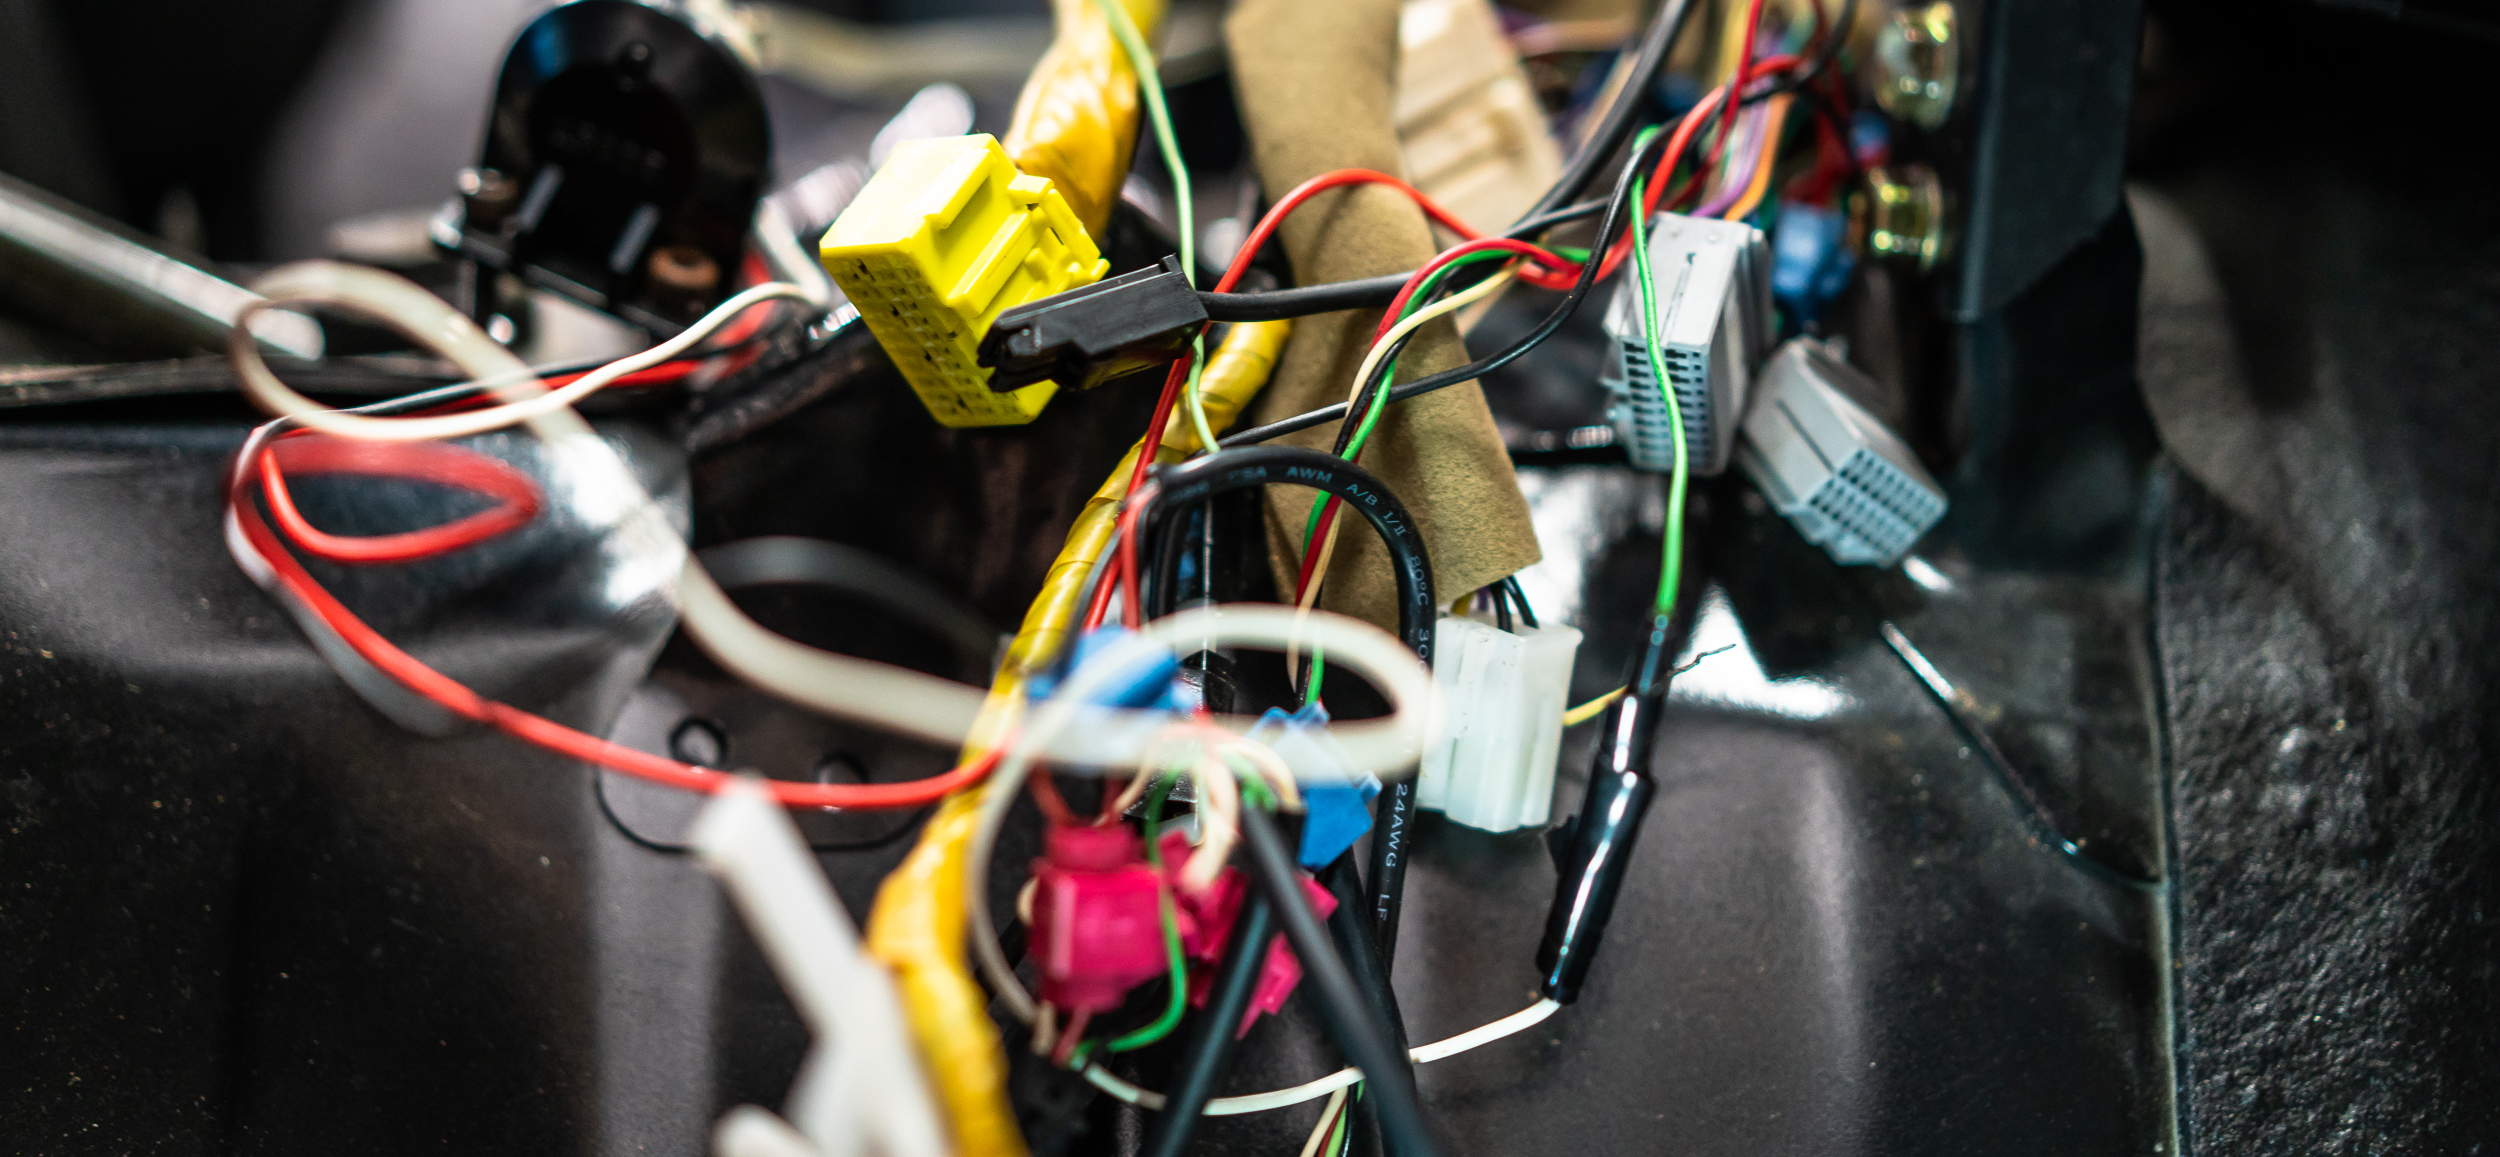
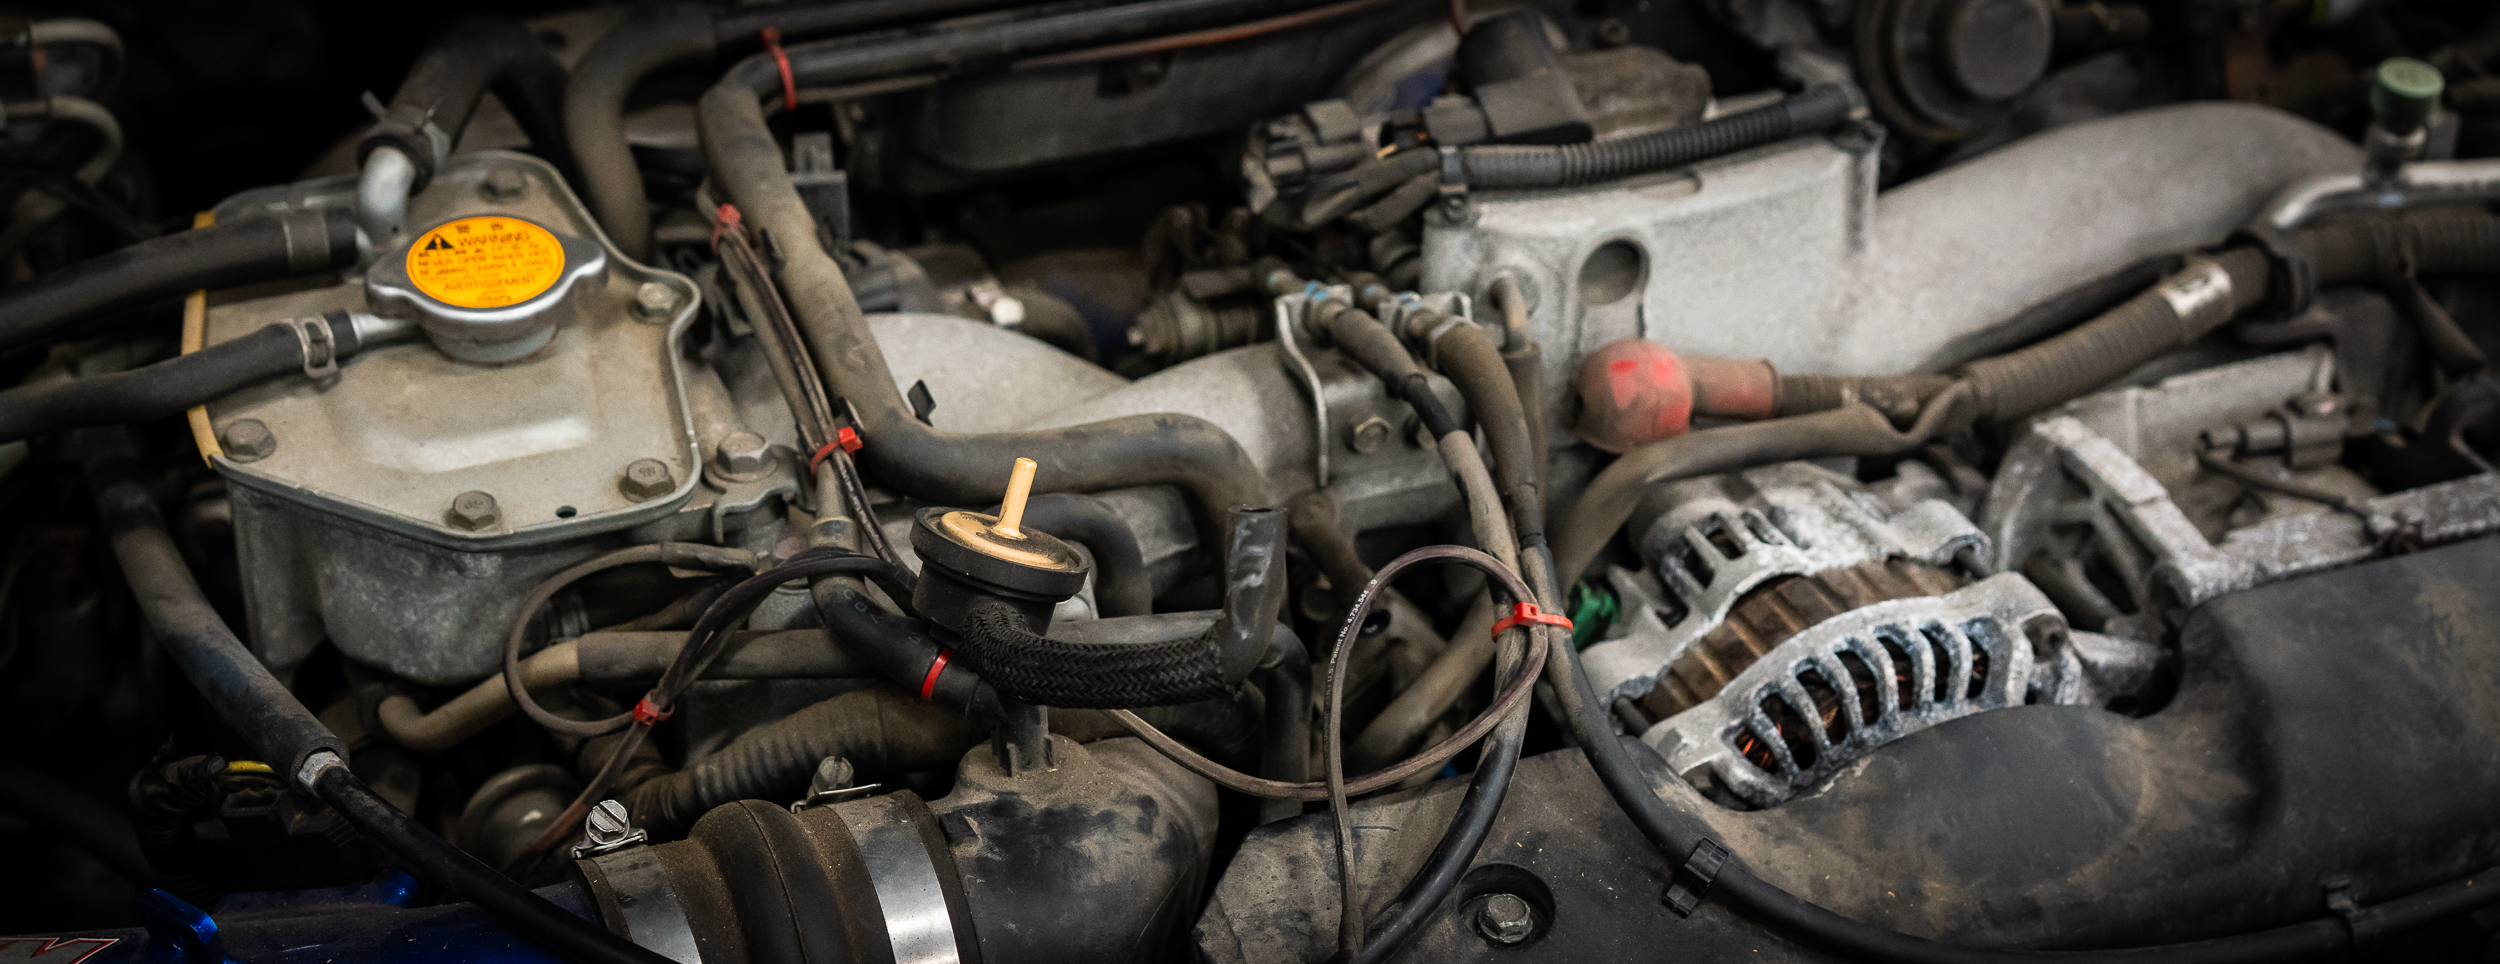
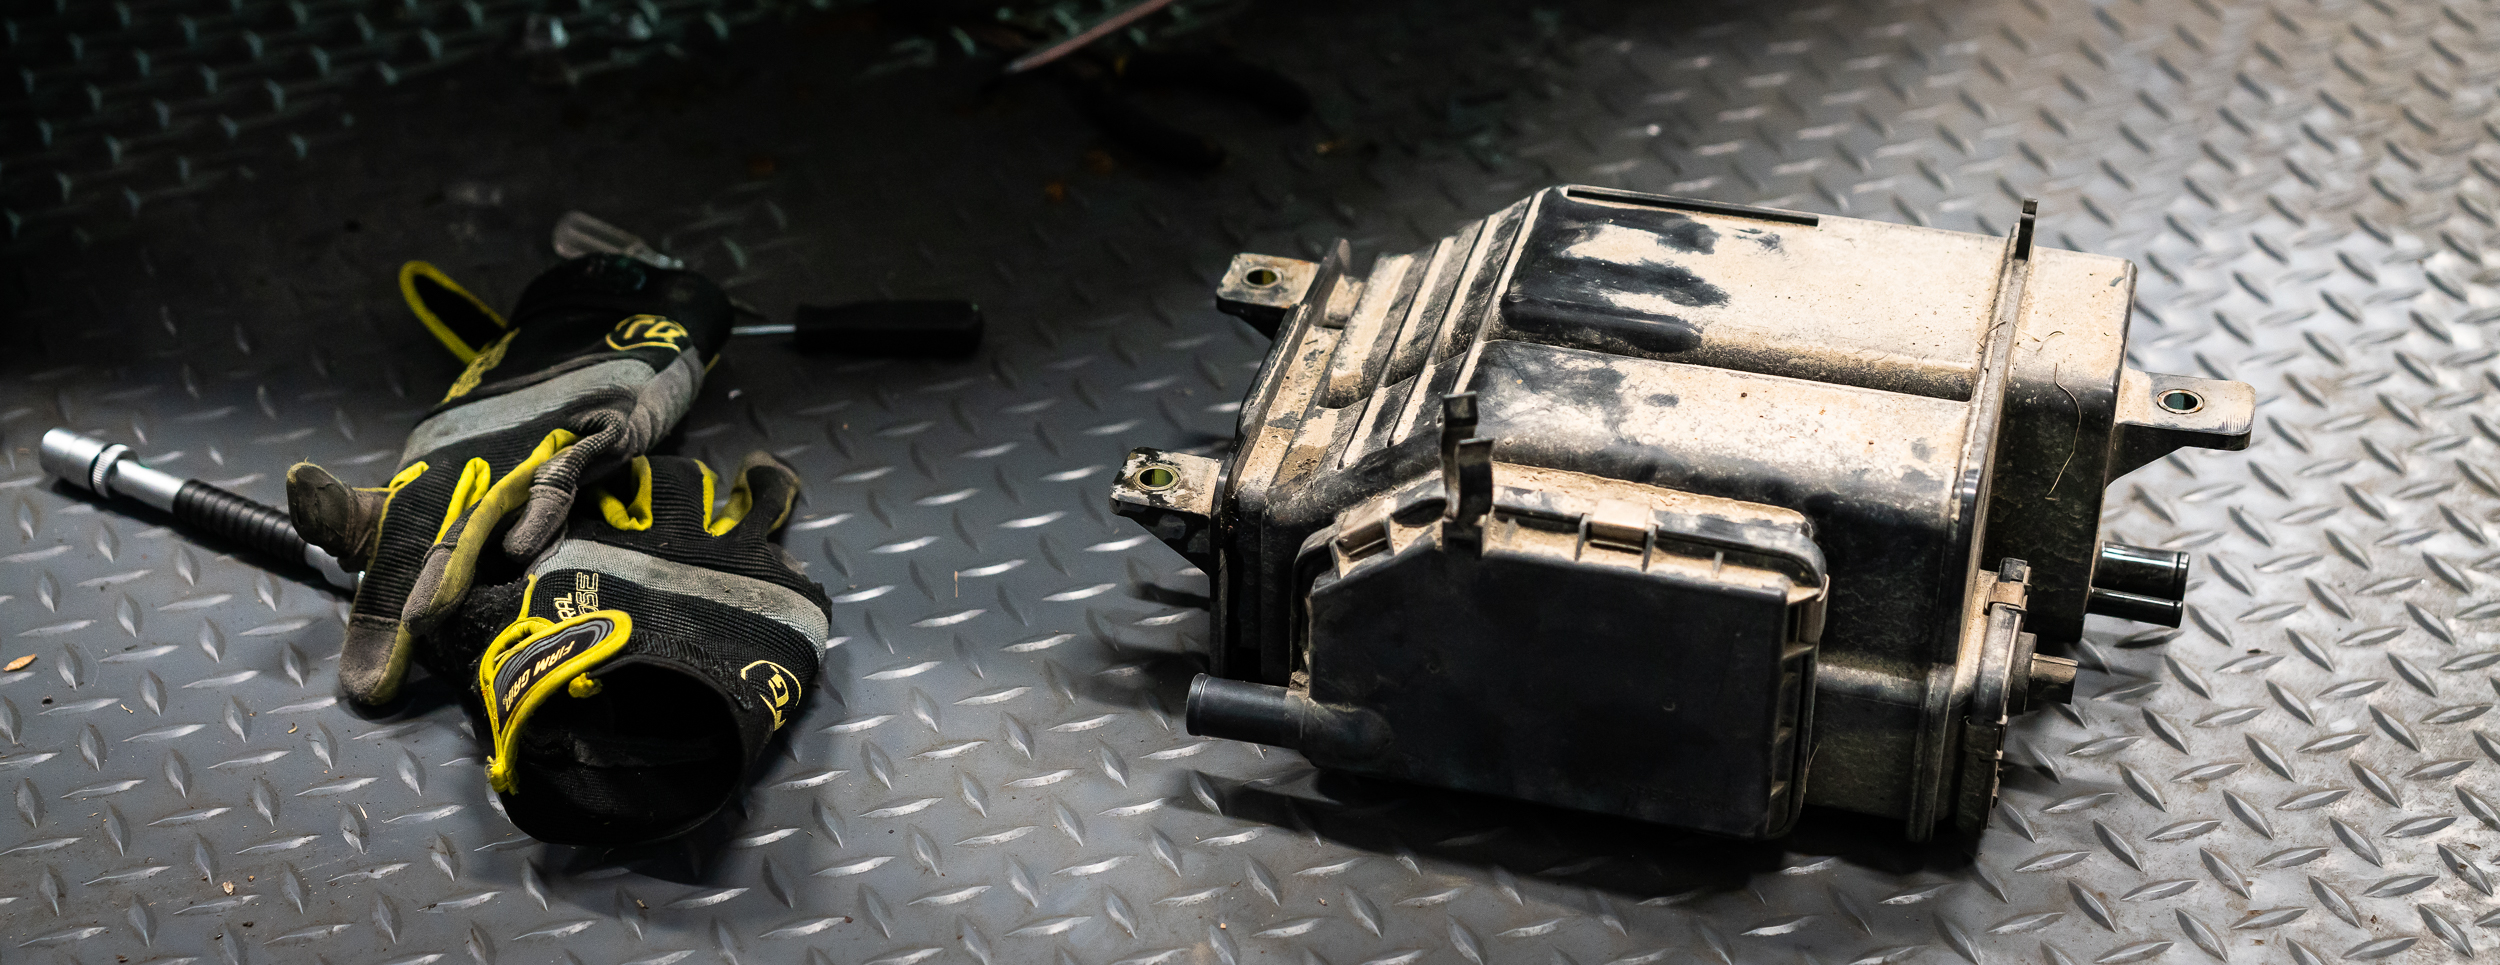
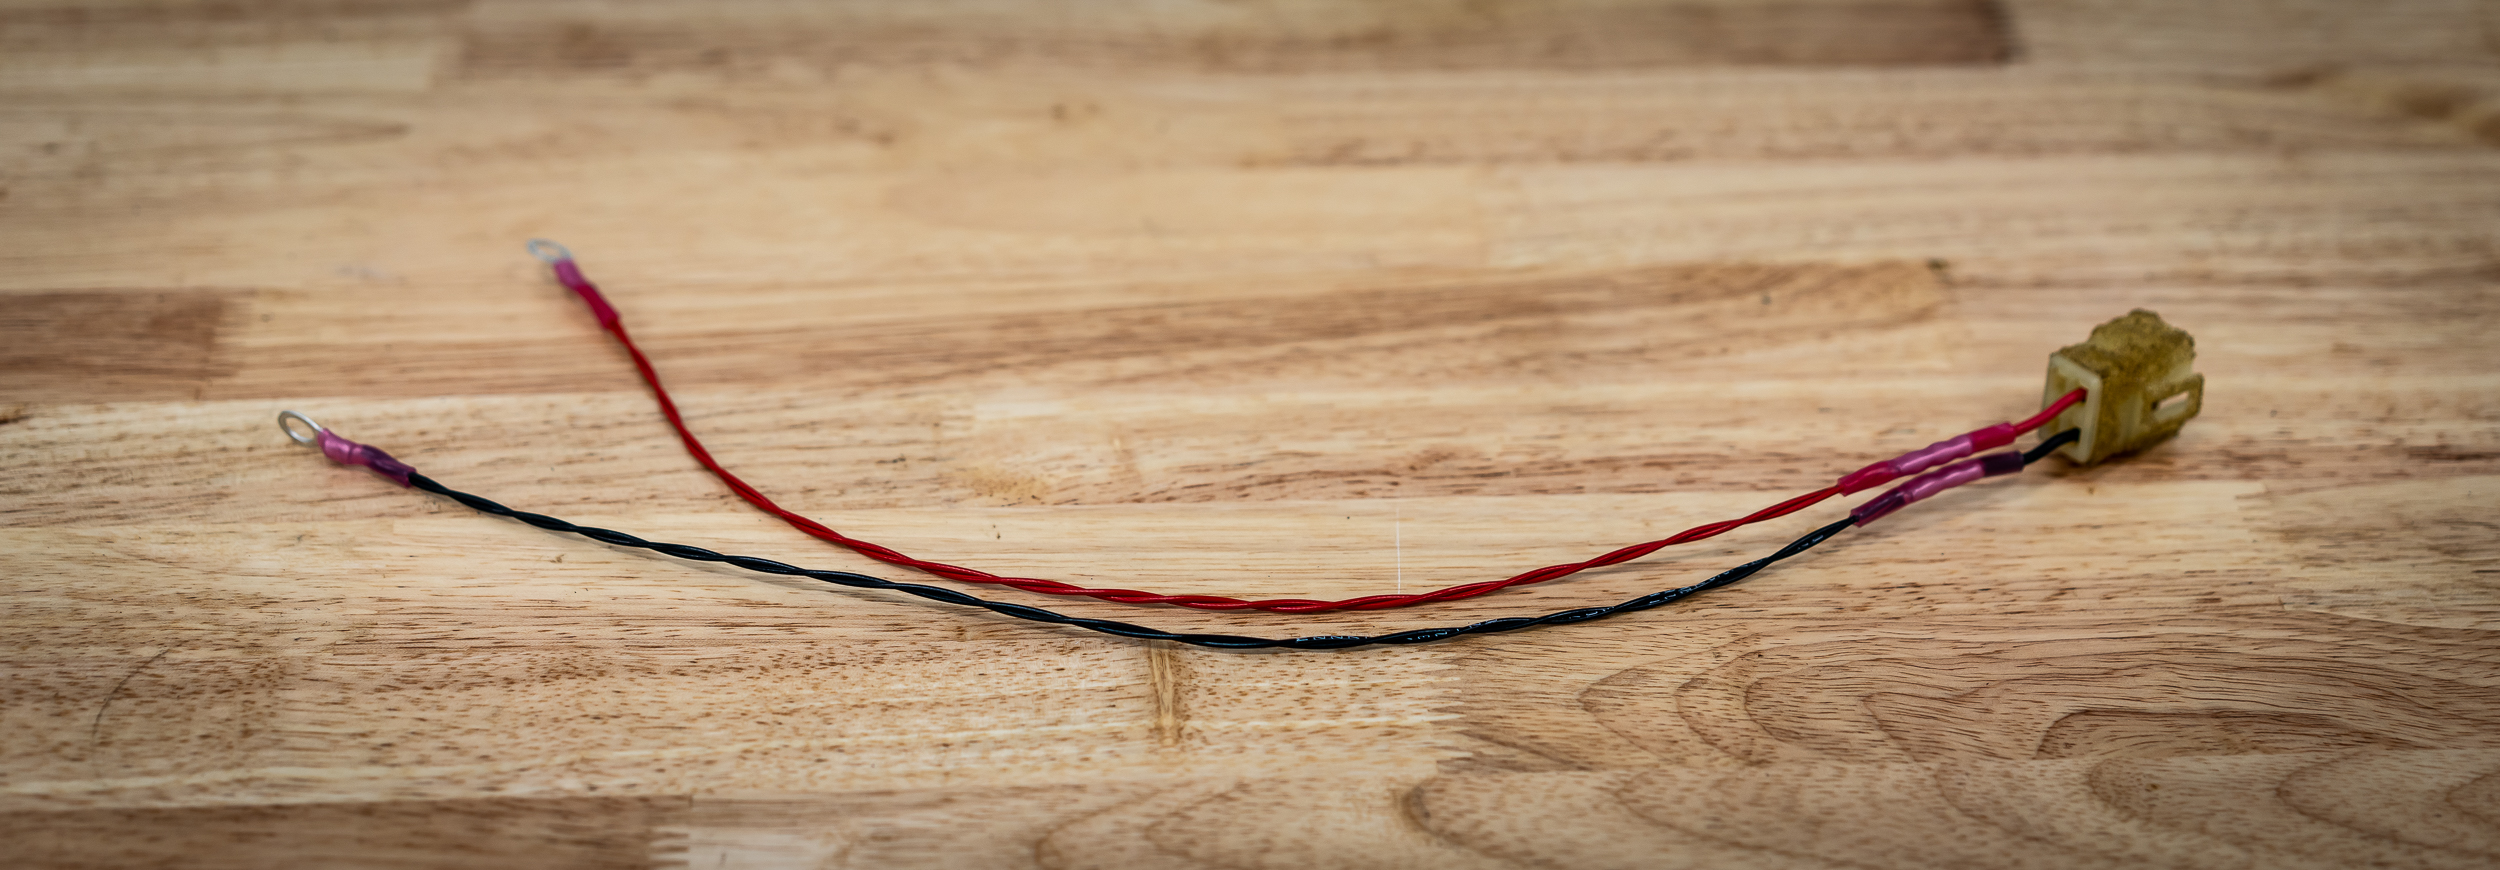
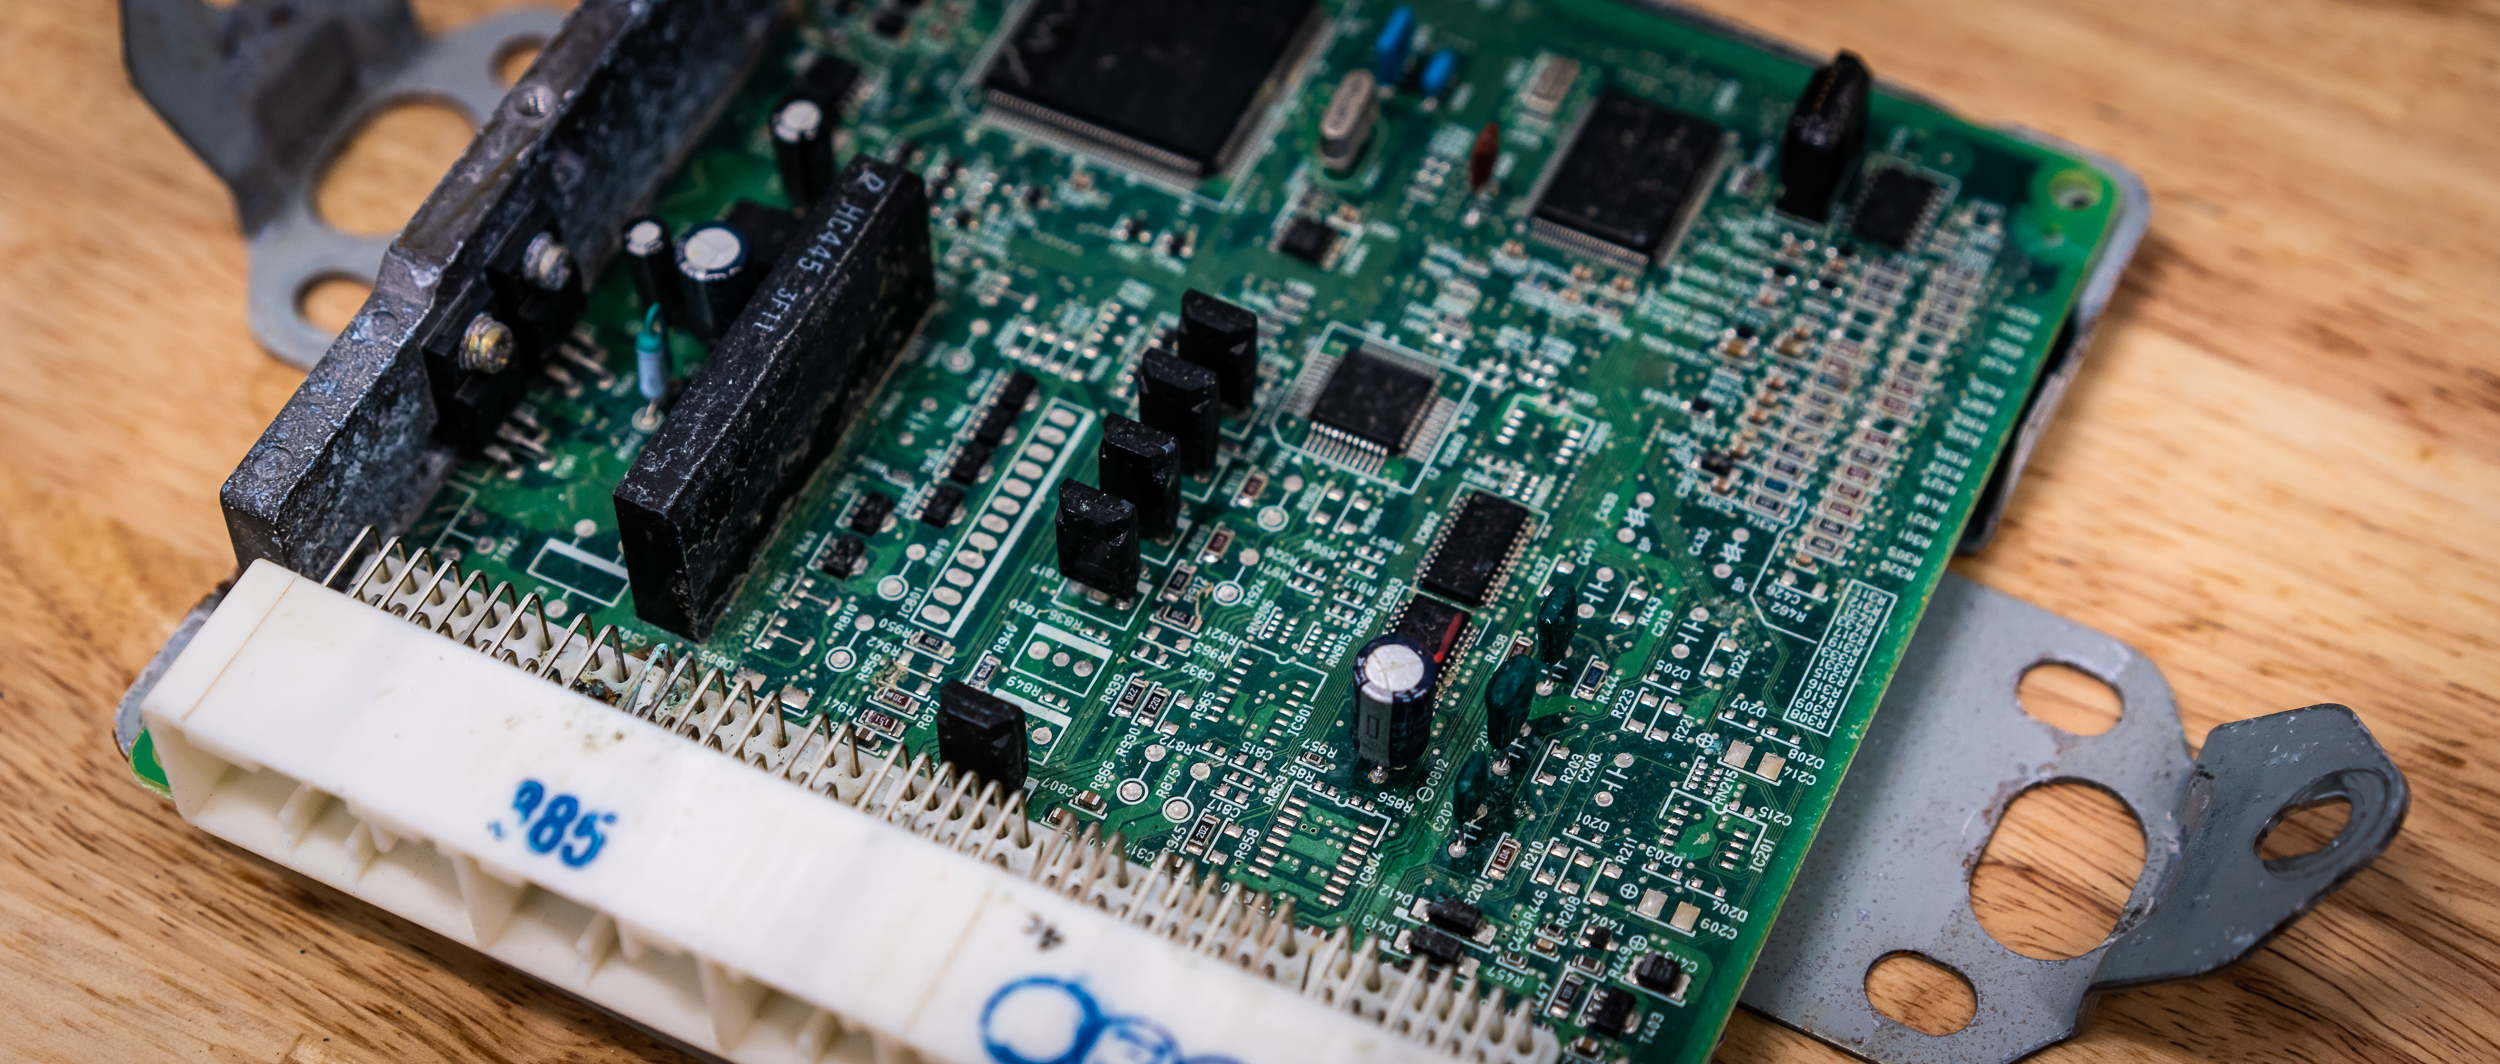
Apparently, this code is thrown when the ECU doesn't see proper (or any) voltage on a certain pin that provides constant +12V, even when the car is off. The easy fix is a blown fuse in the underhood fuse box, but that checked out fine. So I dug the ECU back out of it's home in the passenger footwell.

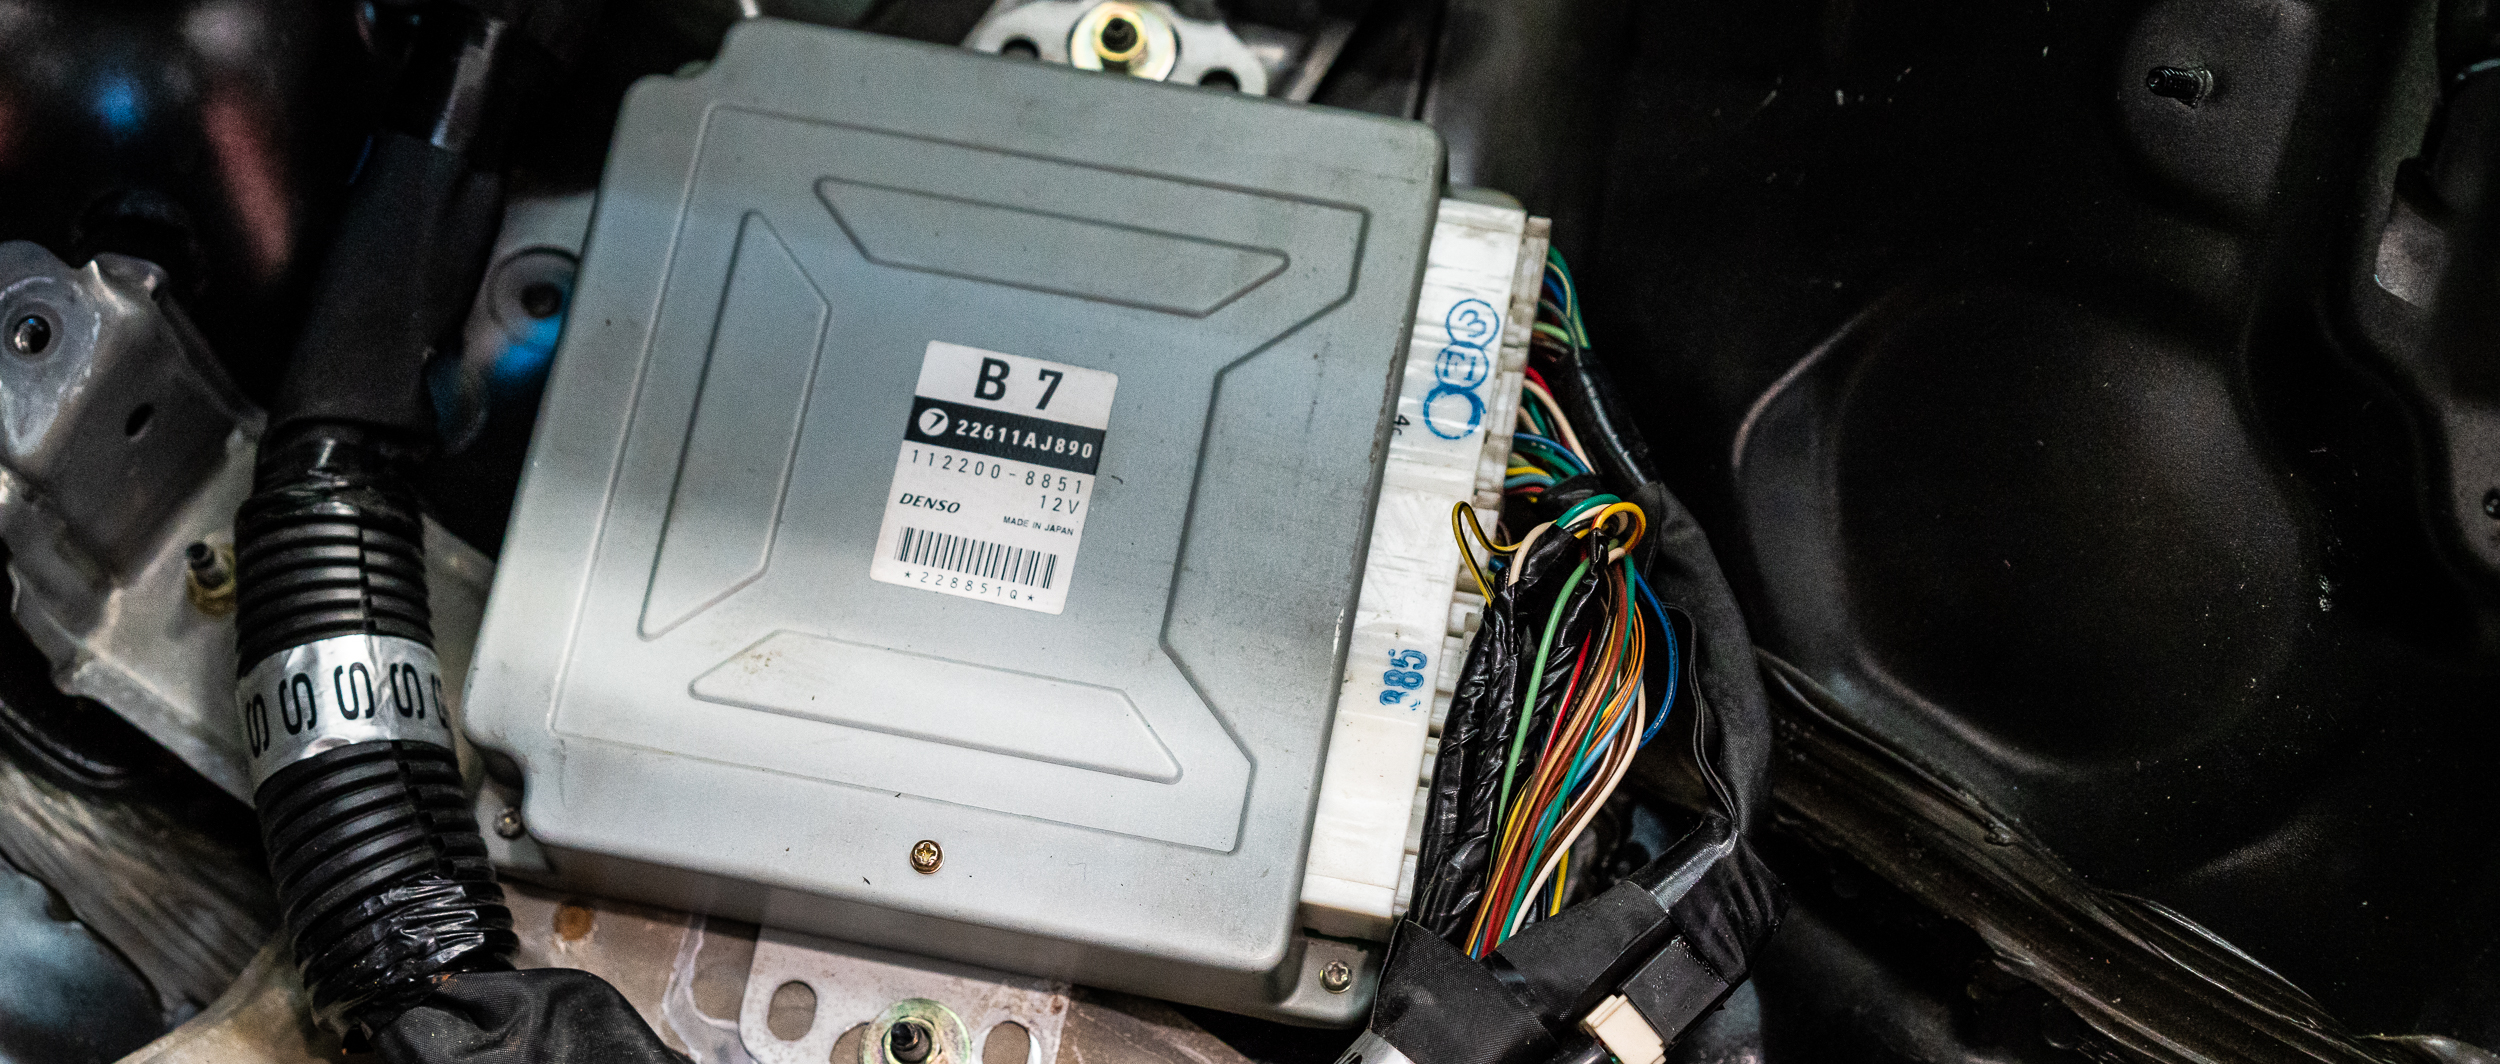
It took me an unreasonably long time to find which pin/wire exactly was responsible for this voltage. Without a factory service manual, I just kept digging up wiring diagrams that were close, but not an exact match. These ECU's changed pinouts a lot from year to year.

Eventually, I found it.

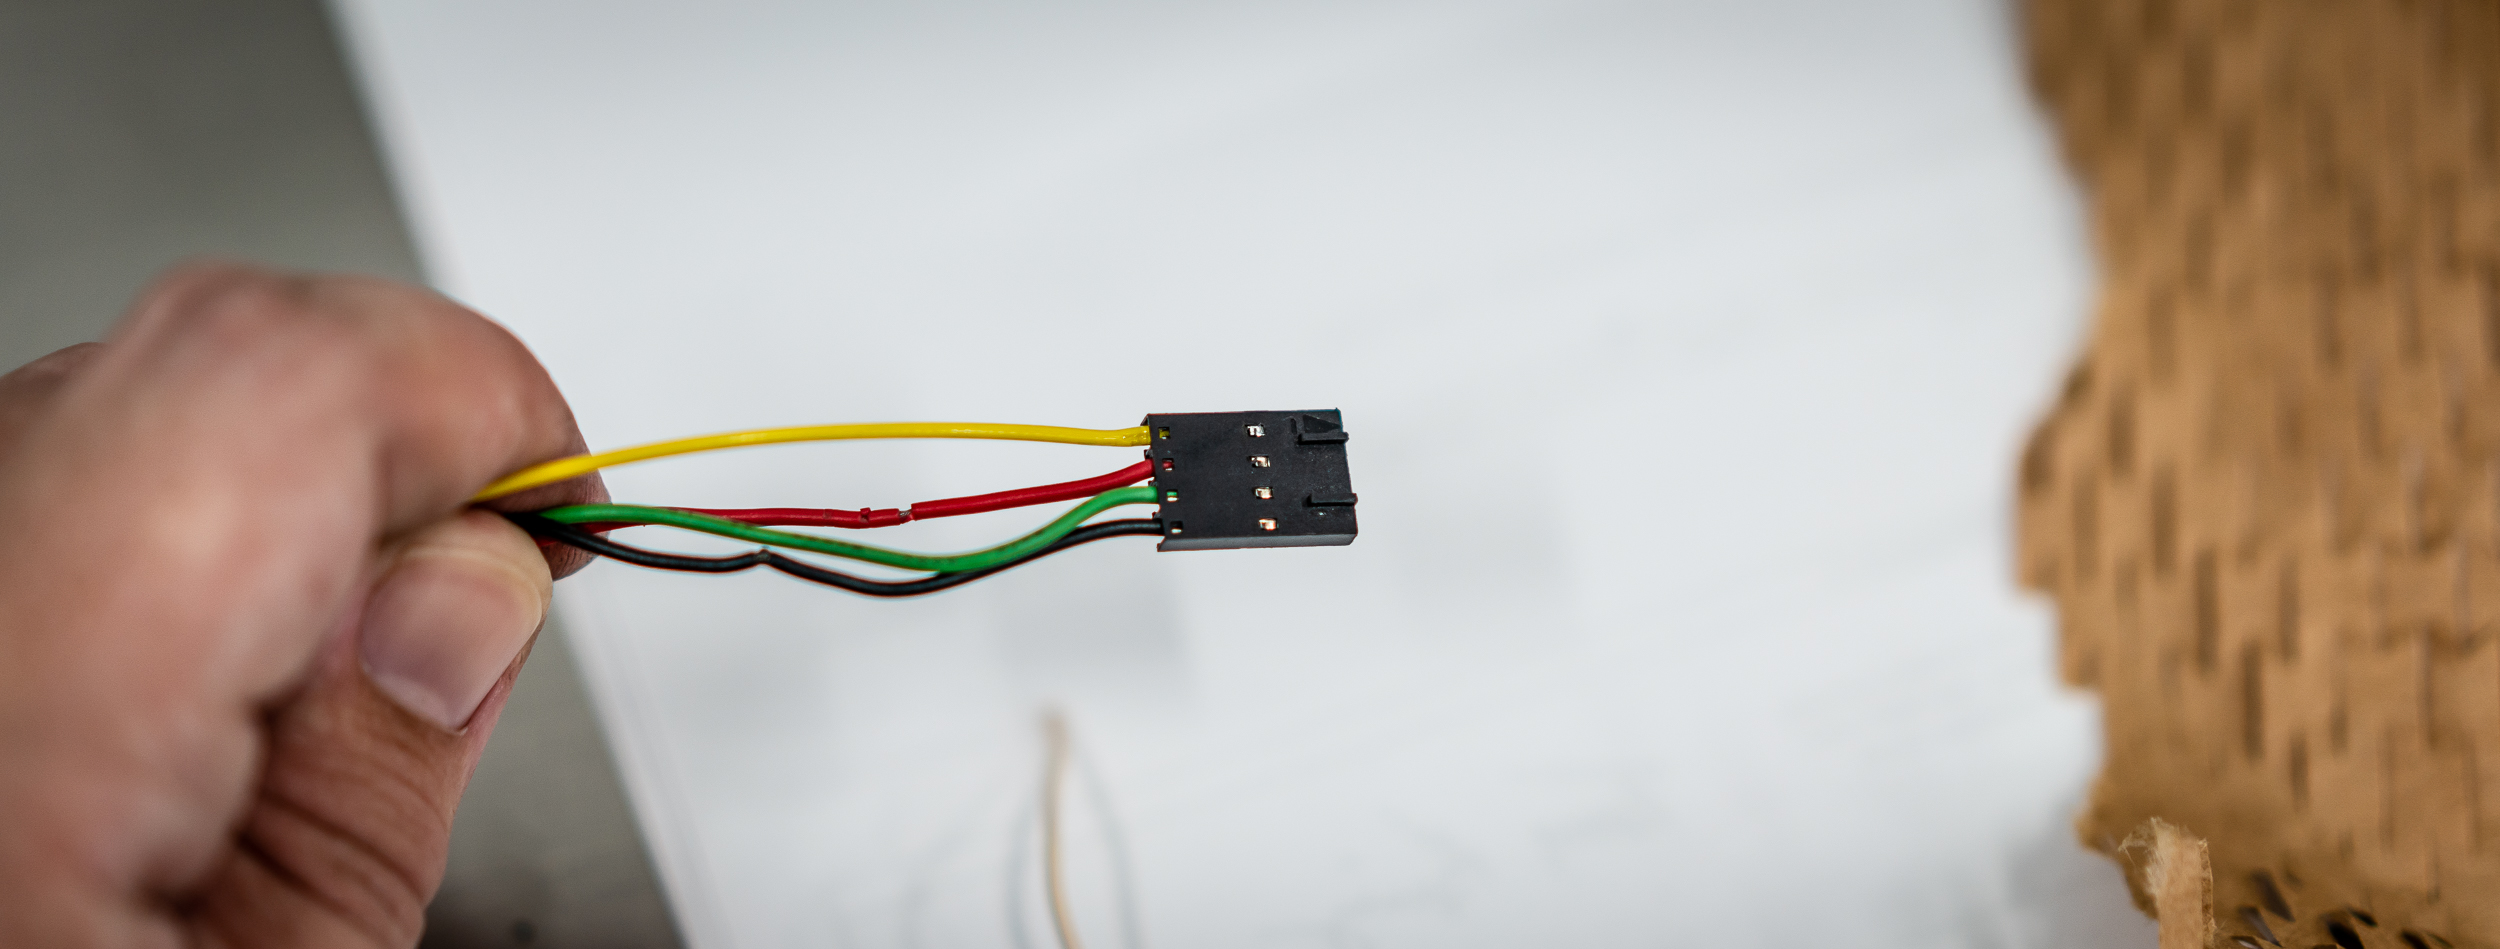
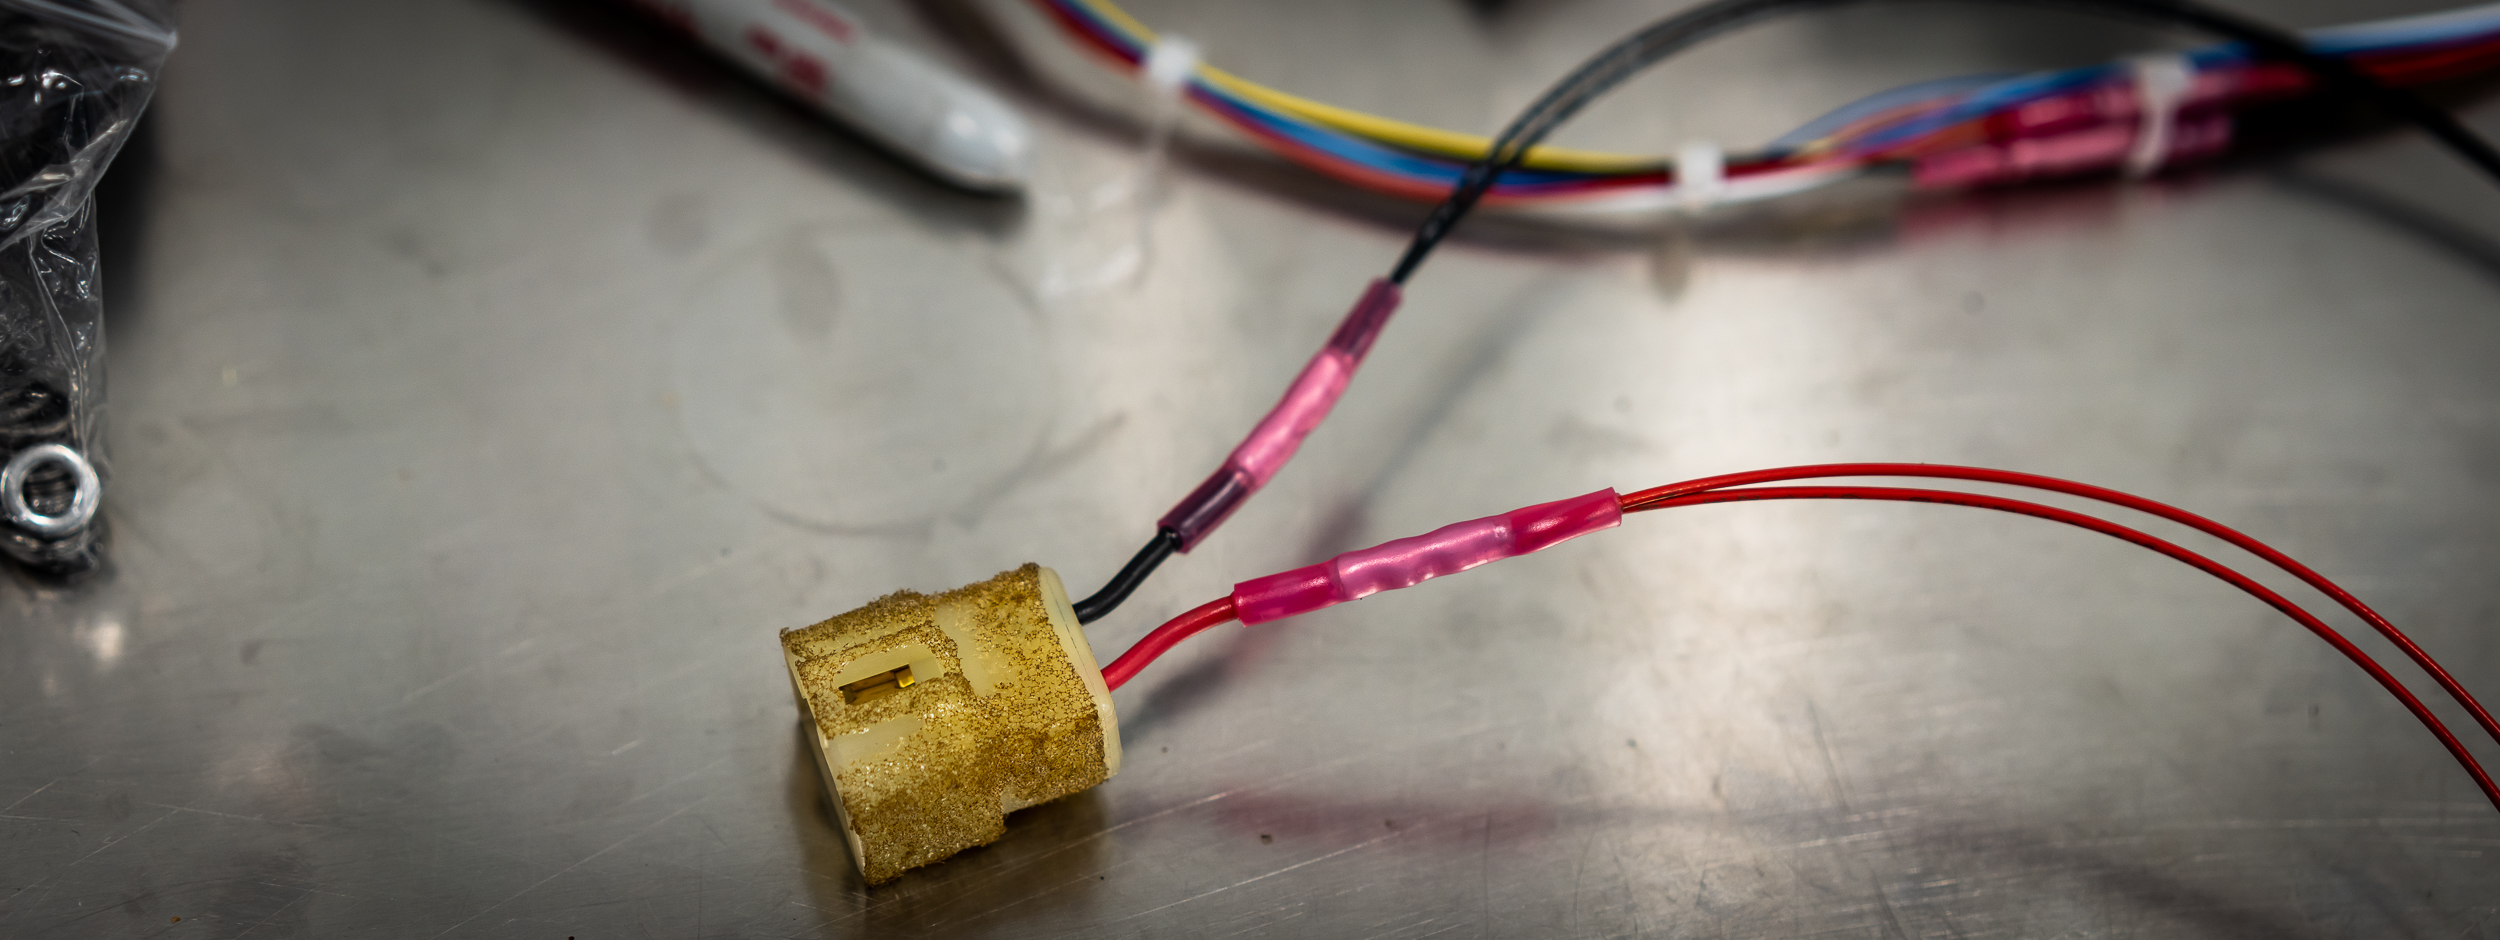
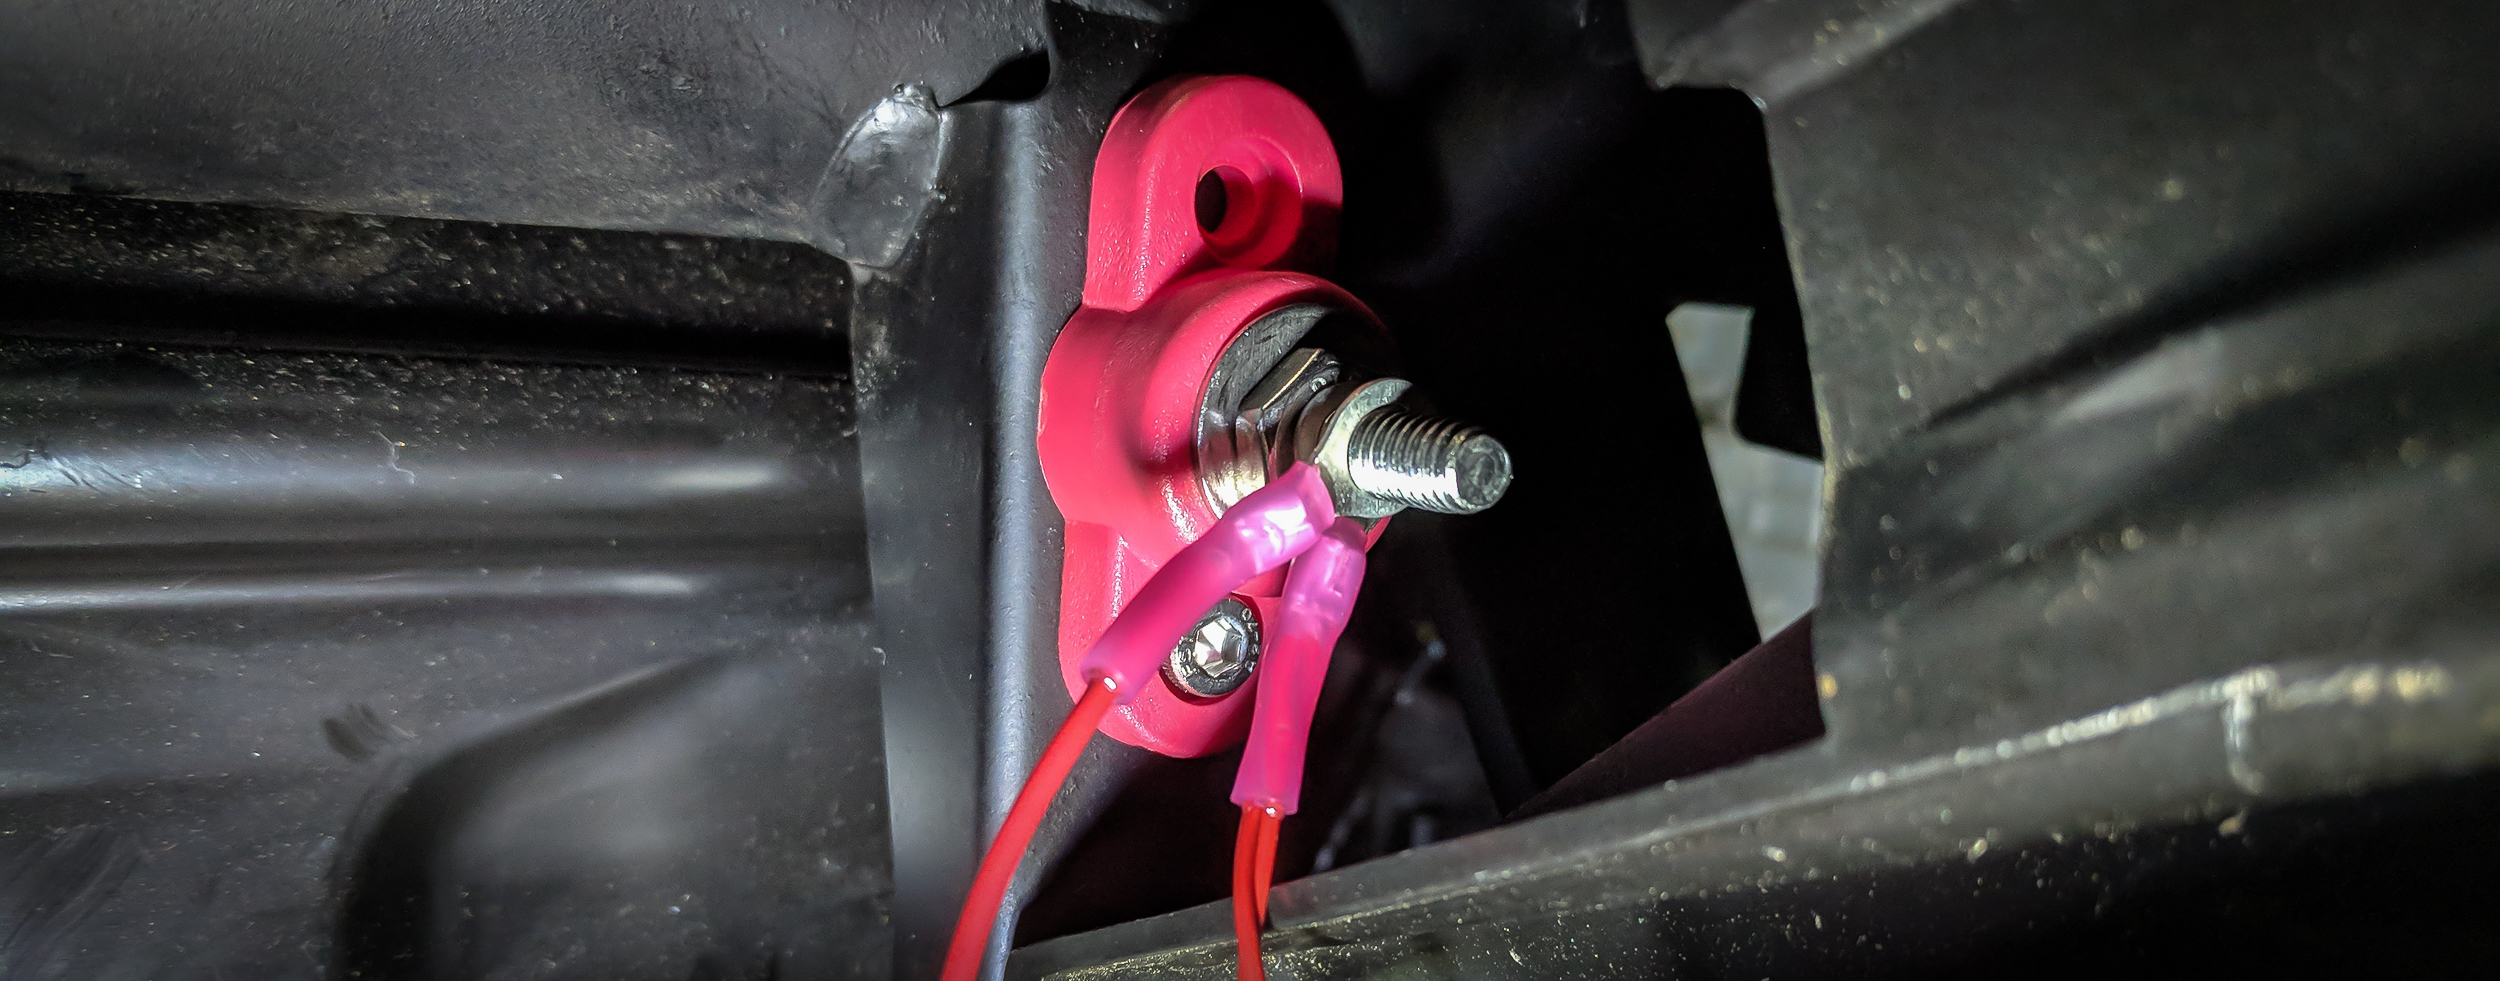
The middle wire on the far right (pin 10 on connector B137, which is the leftmost plug, for anyone finding this in the future) was looking pretty suspicious. I pulled a multimeter out to check for voltage on the wire.

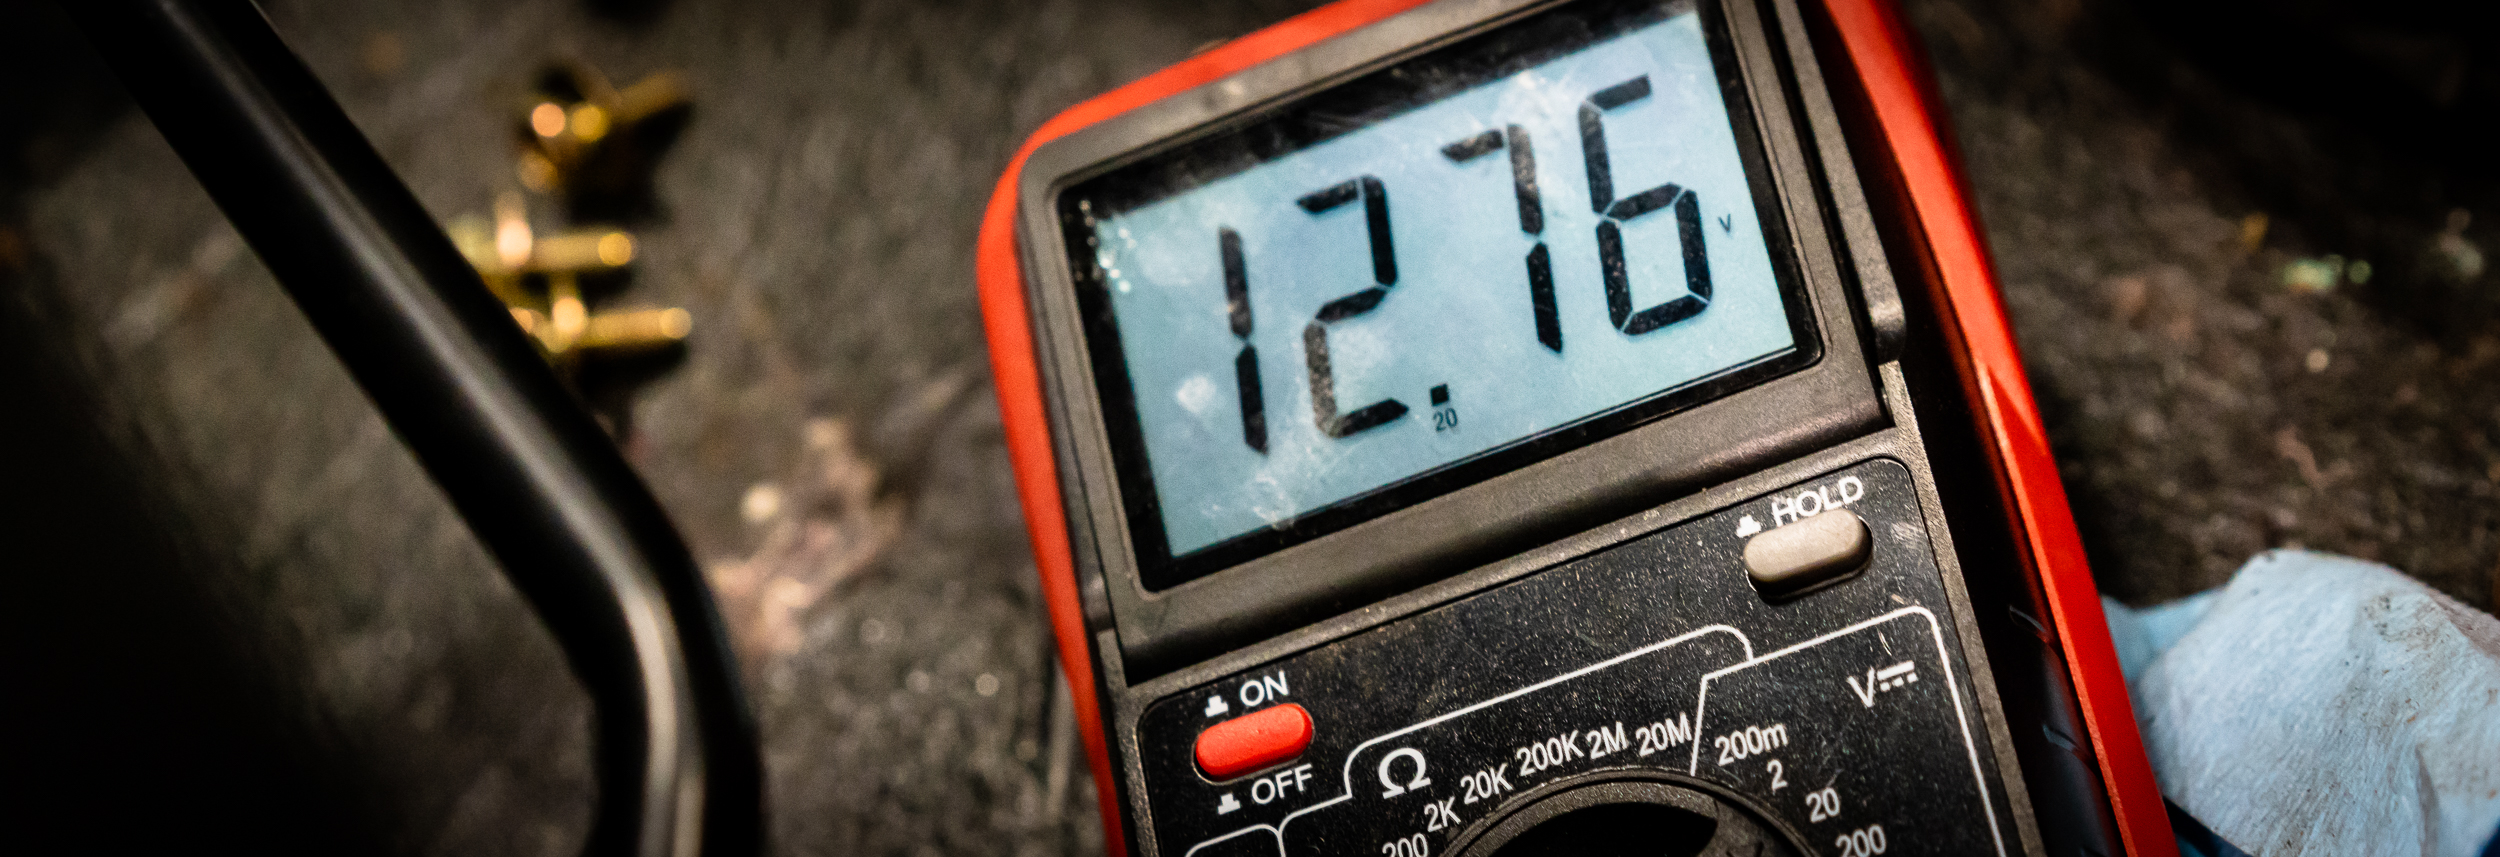
Just fine. So that eliminated problems from the fuse to the connector. Some people in the past had found problems in their harness to explain this code, but it wasn't my problem here.

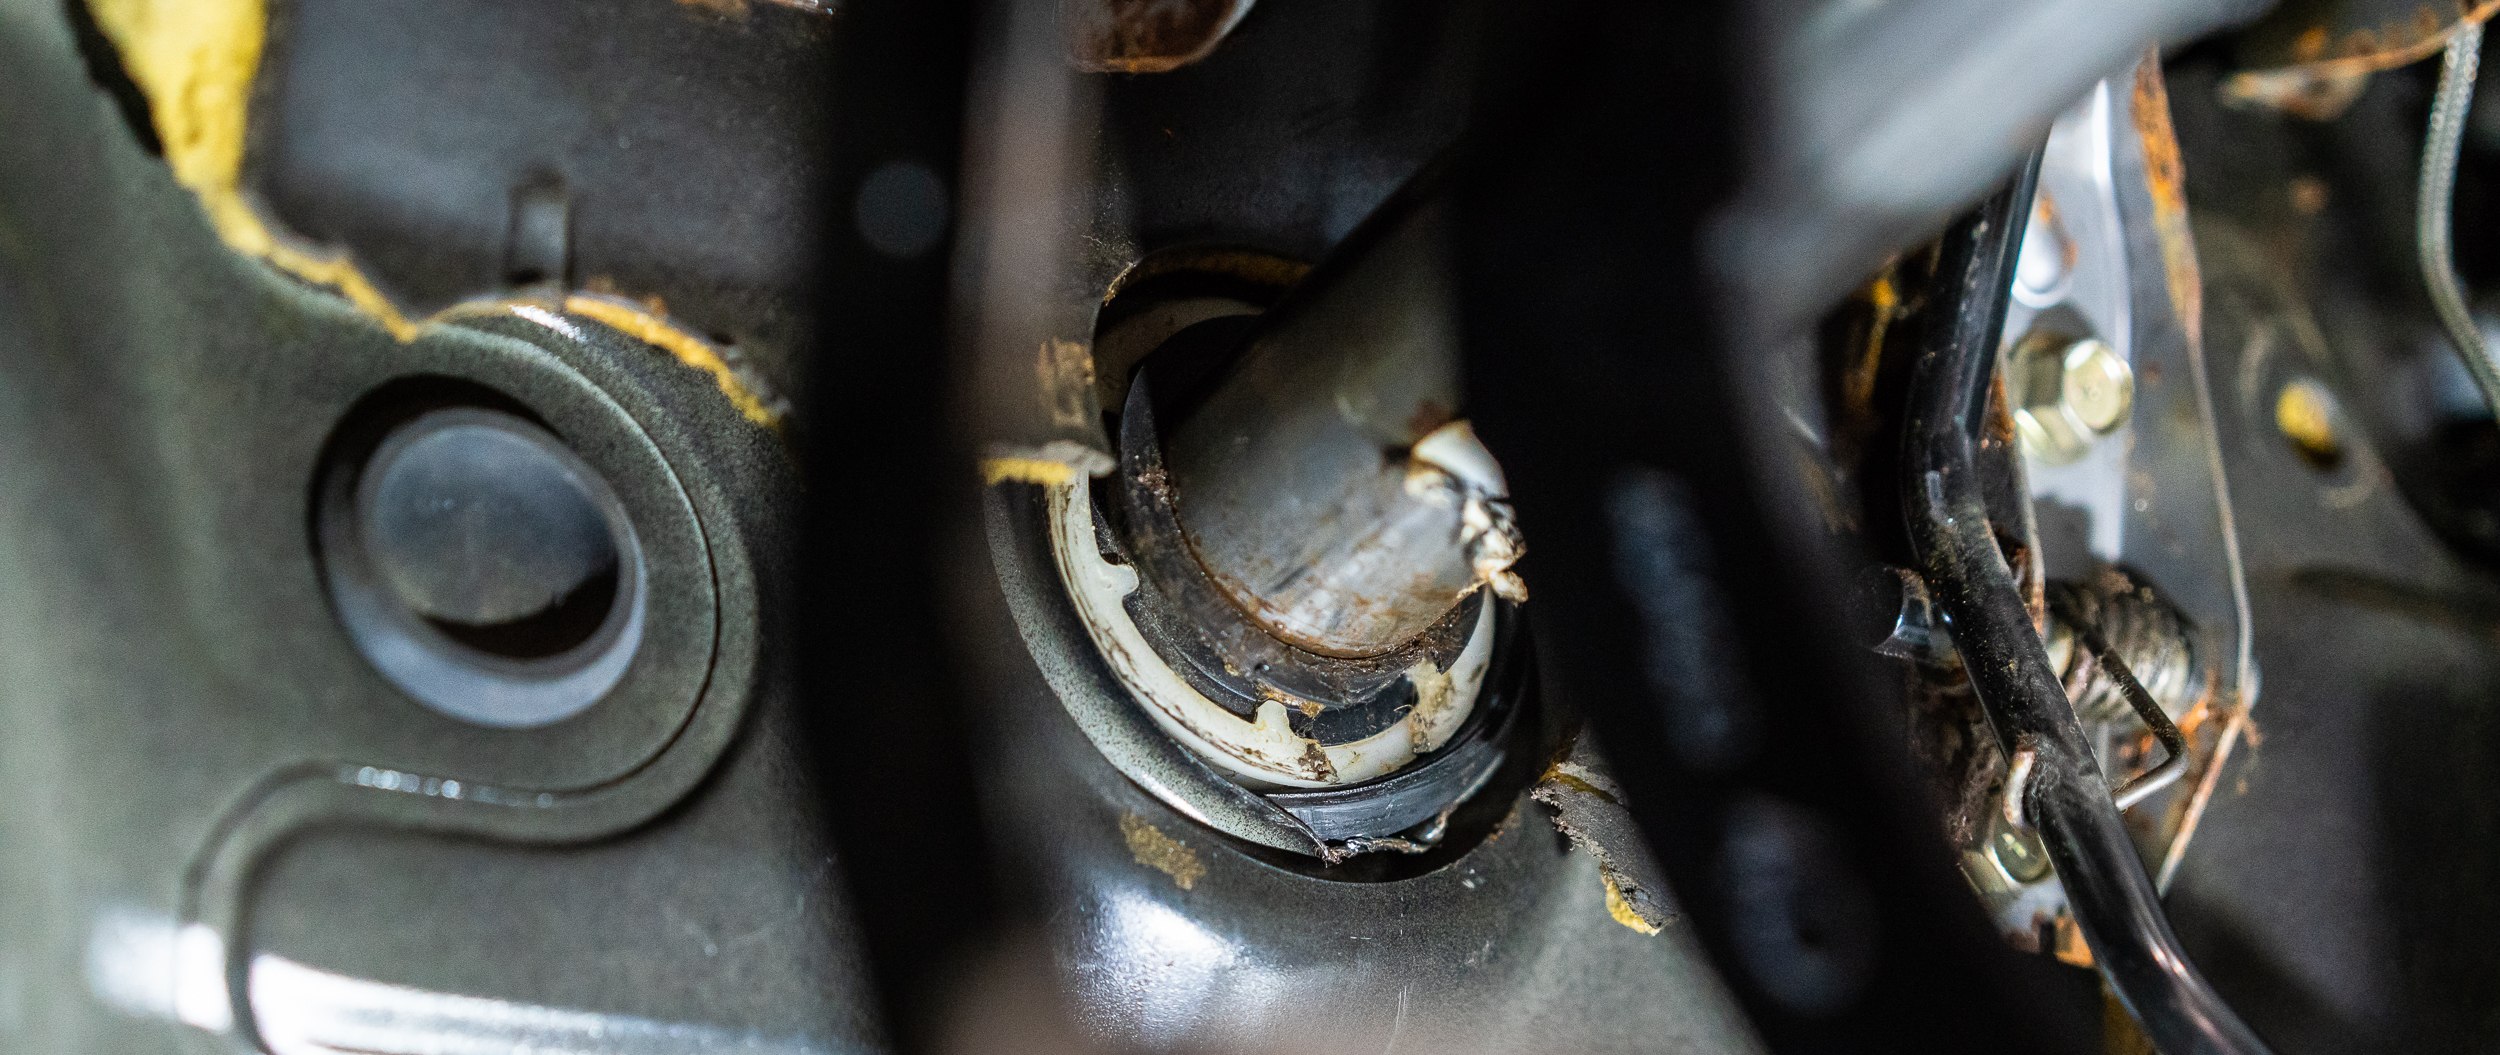
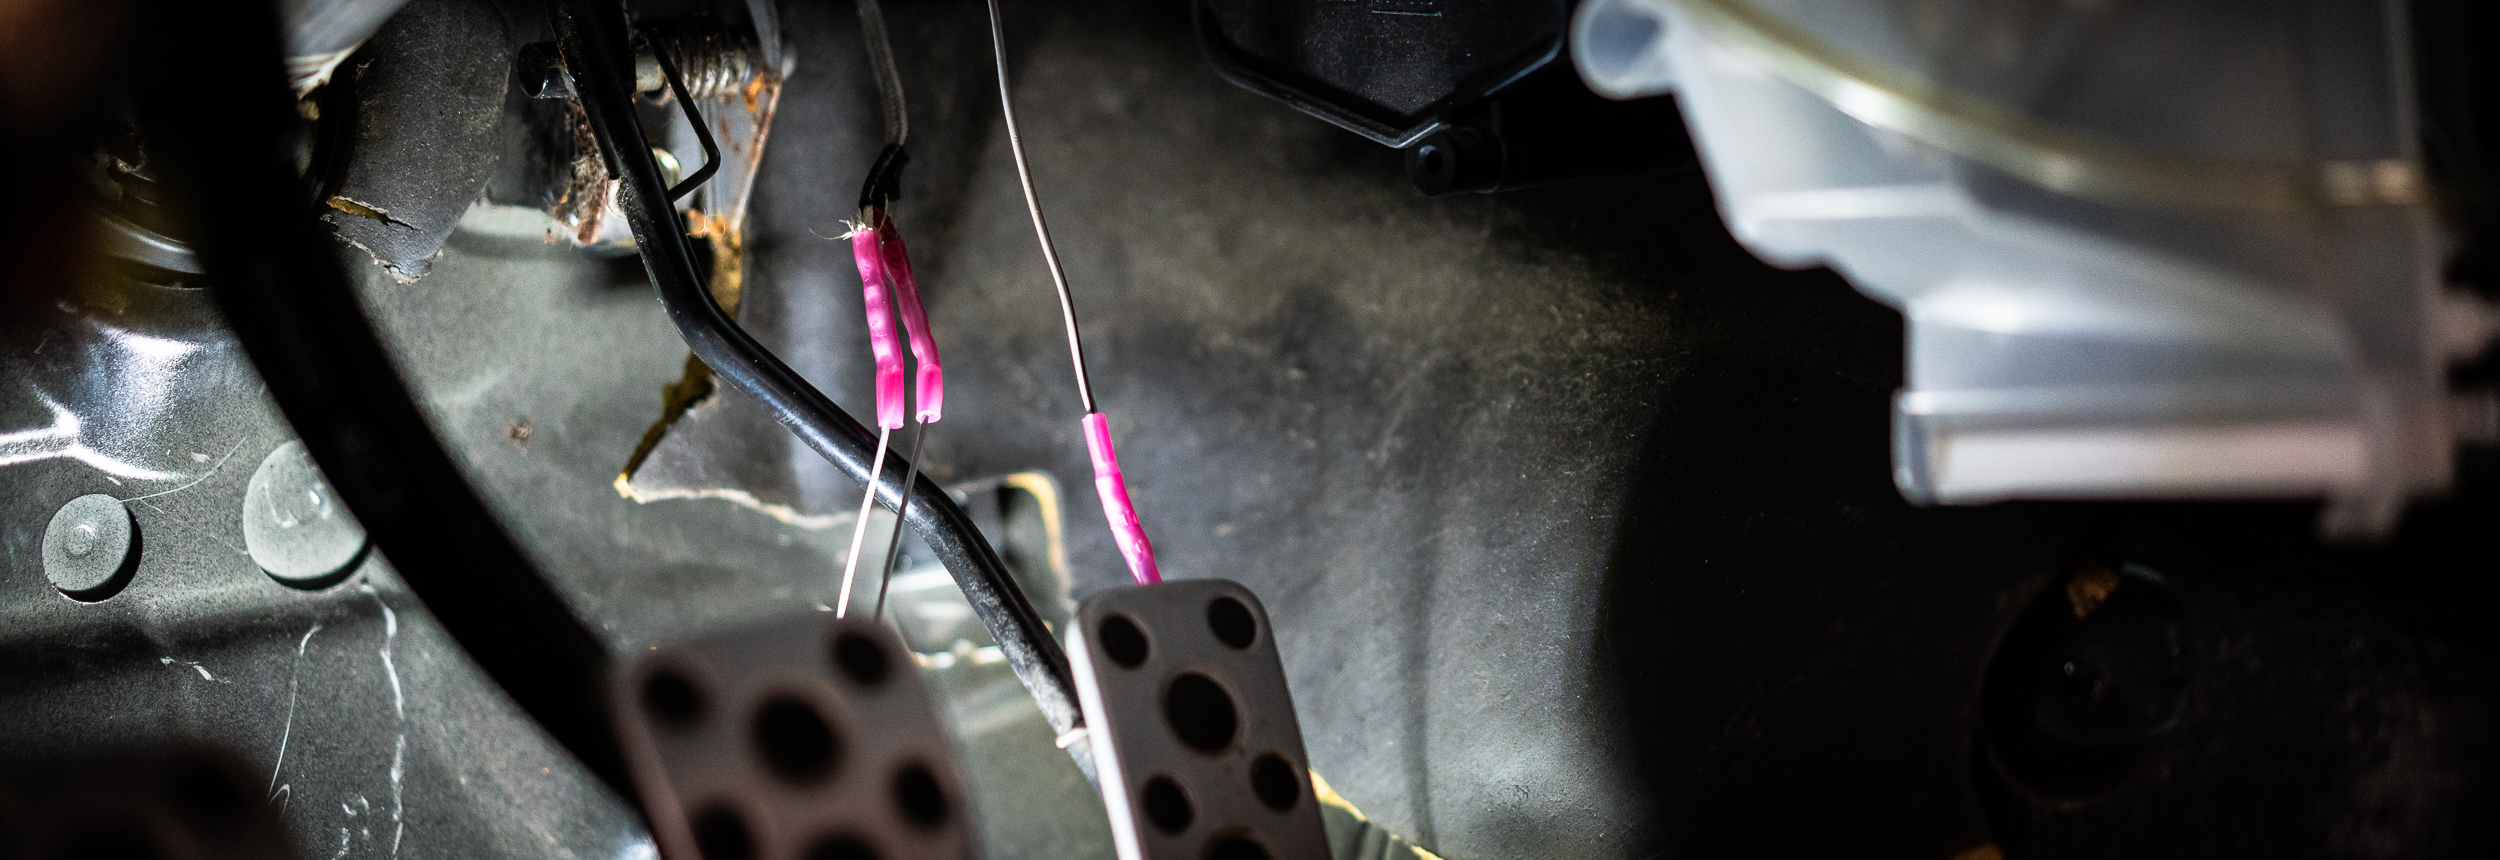
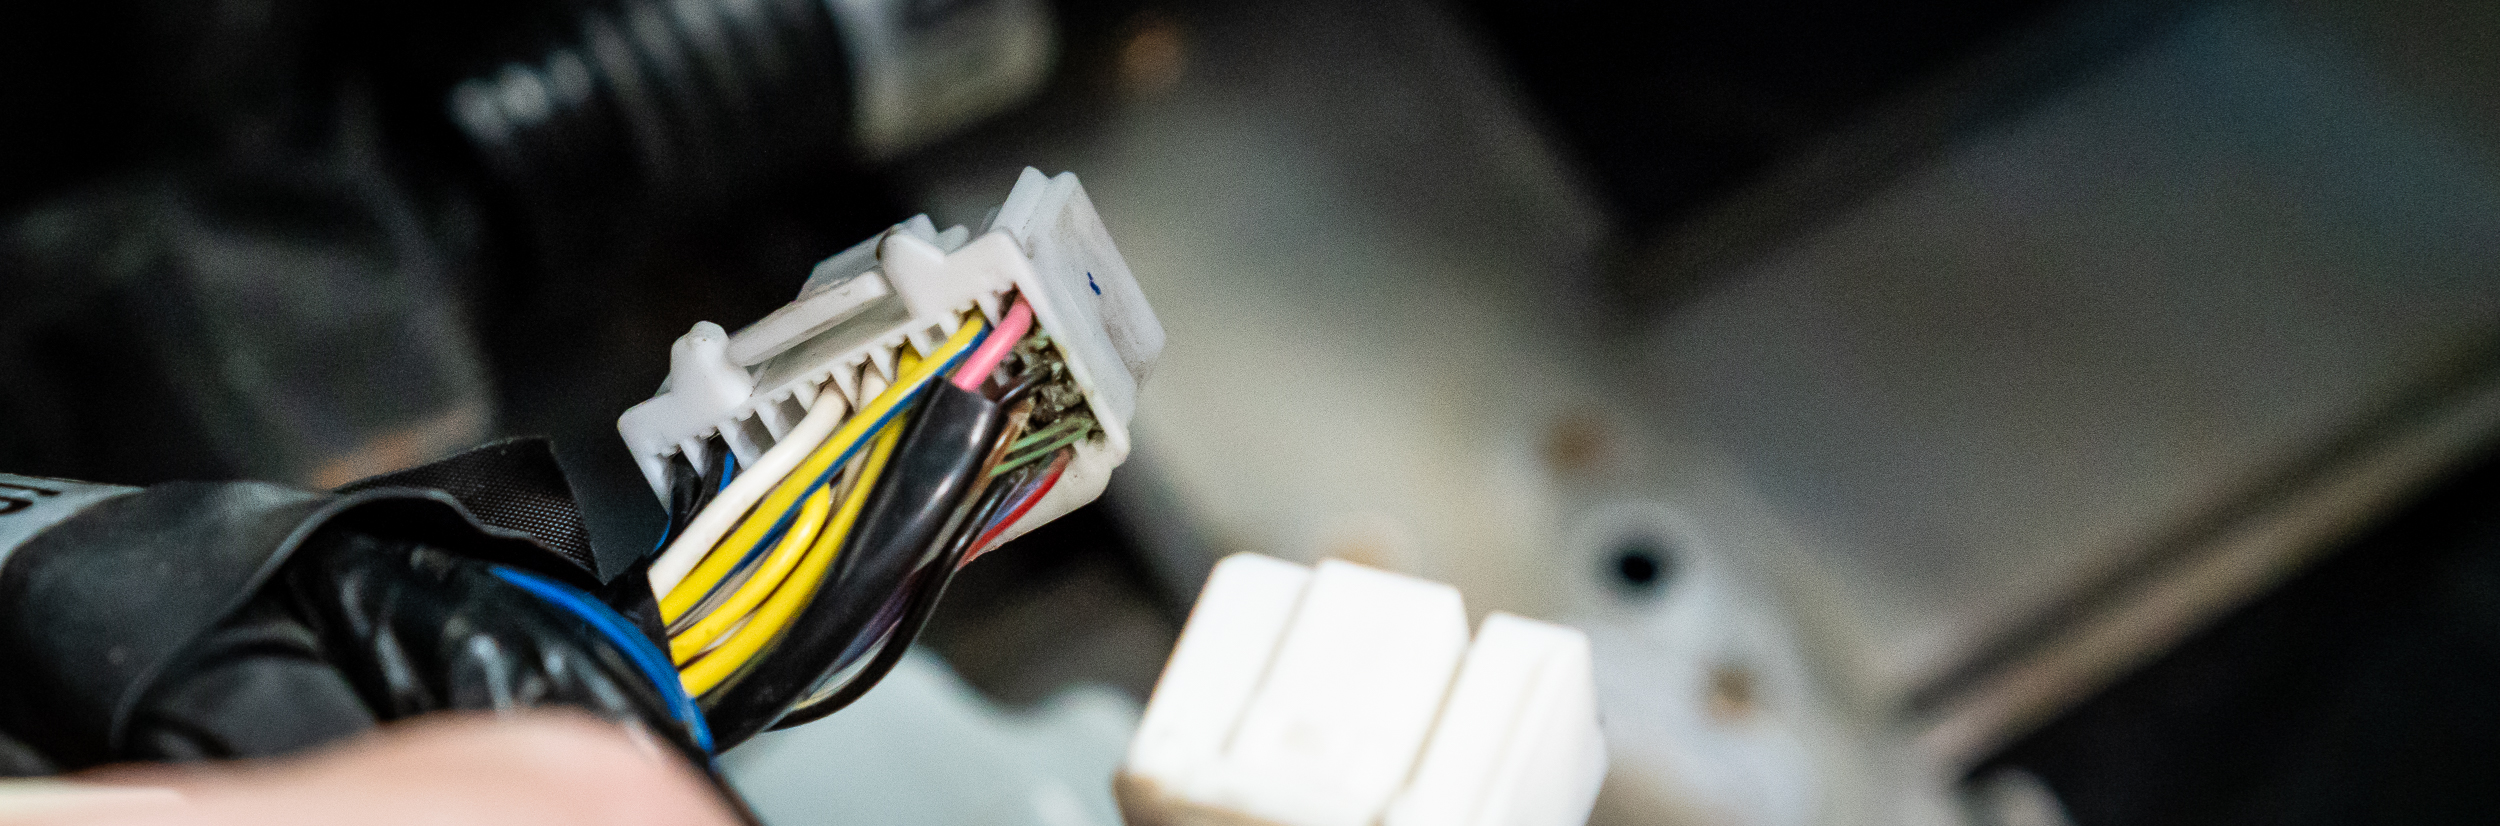
I took a look at the pin on the ECU side, then.

Anybody else see the problem here?

Leftmost connector, middle row, far right position.

THERE'S NO PIN!

But there is some nasty remnants of something?! So the wire on the connector wasn't connected to anything. The pin wasn't stuck in the connector, it was just gone.

?!?!?!

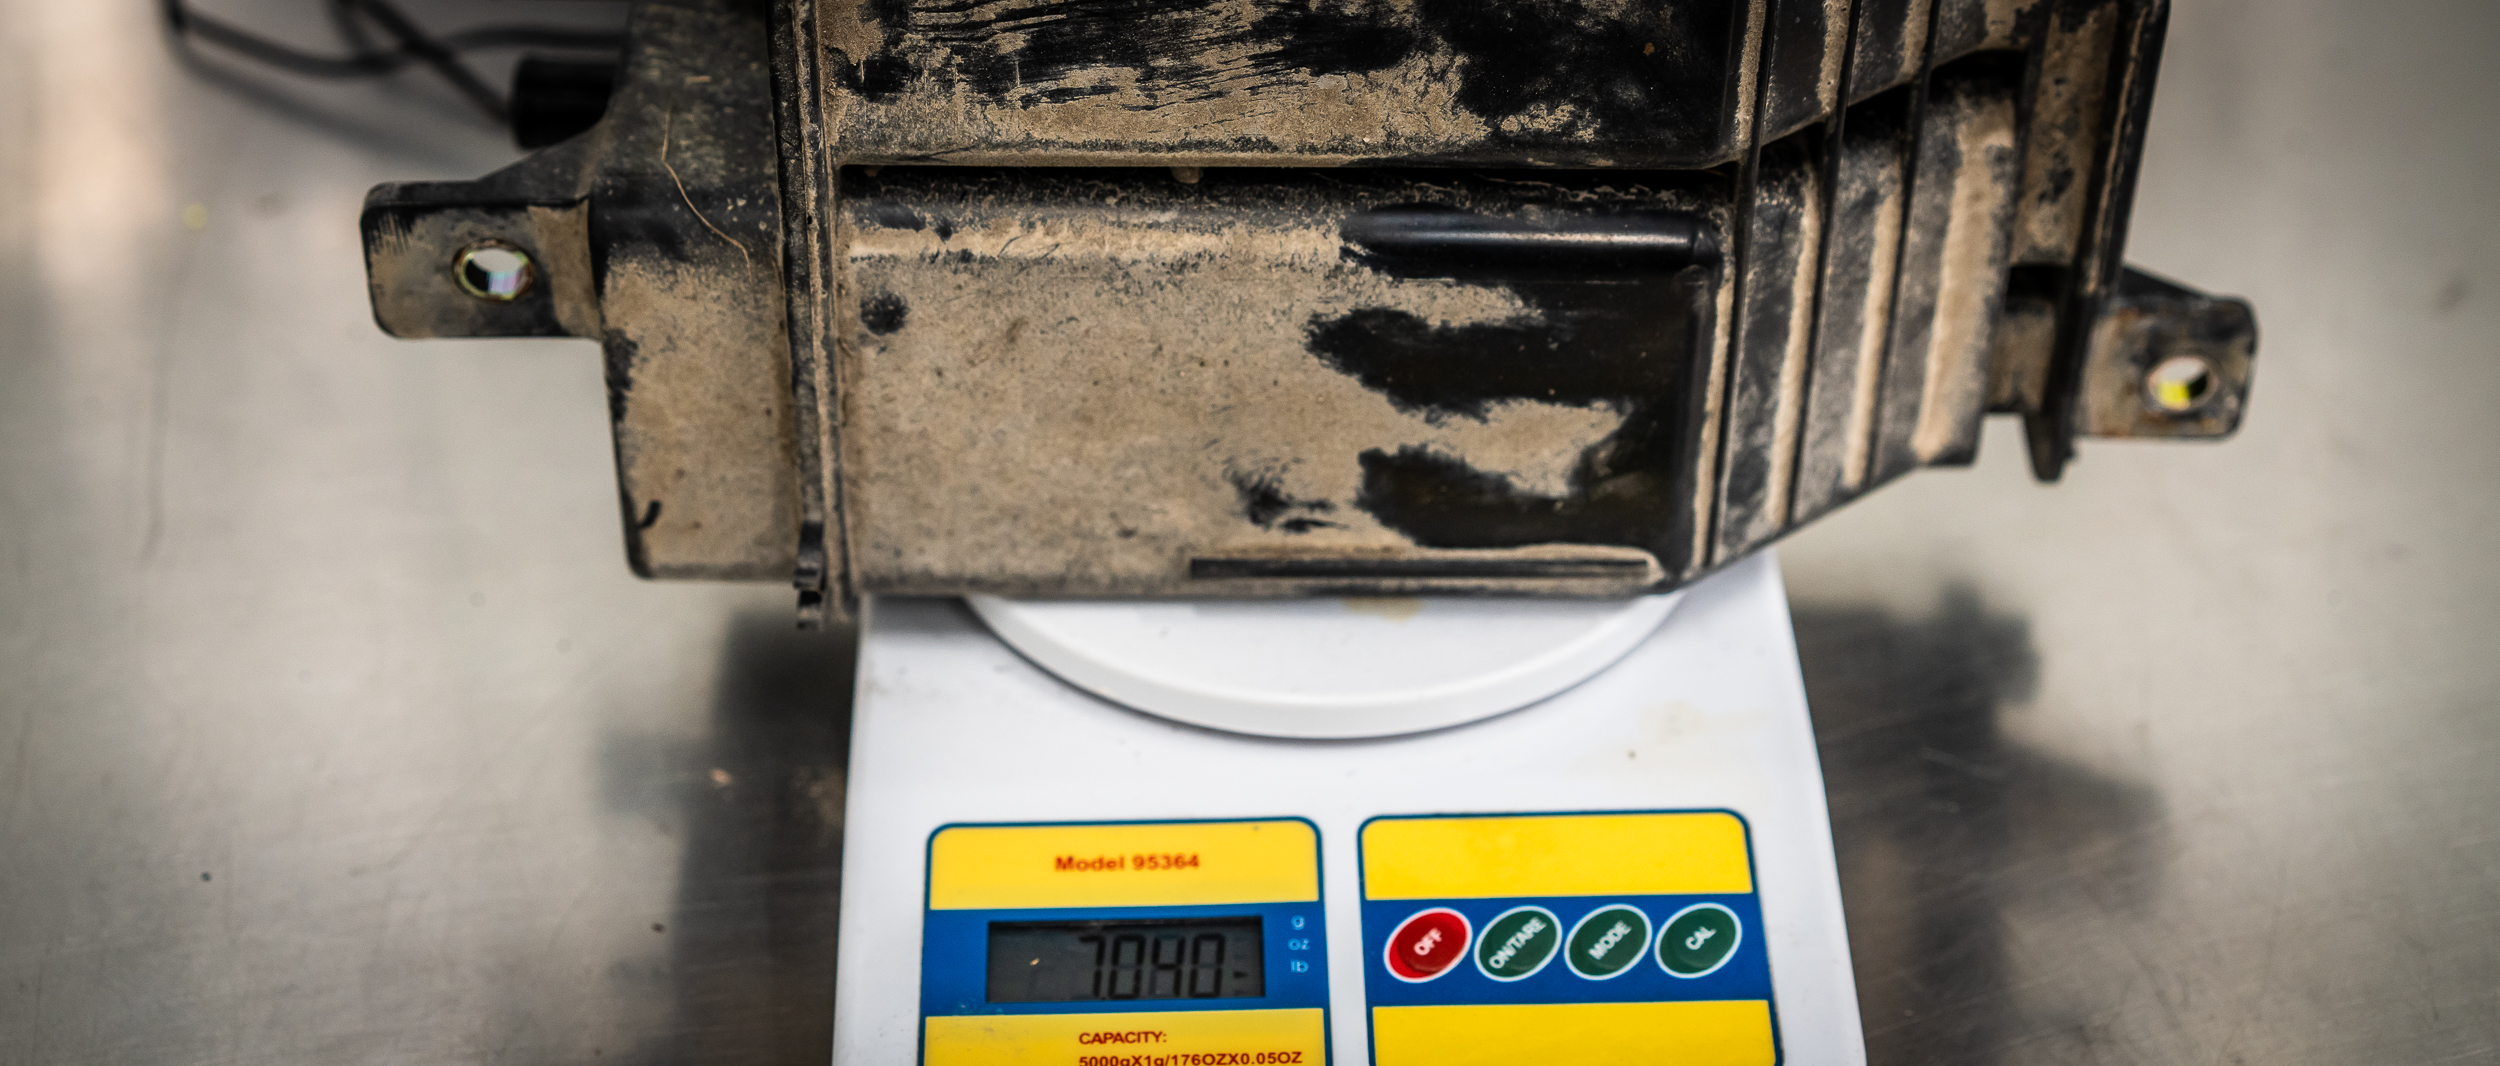
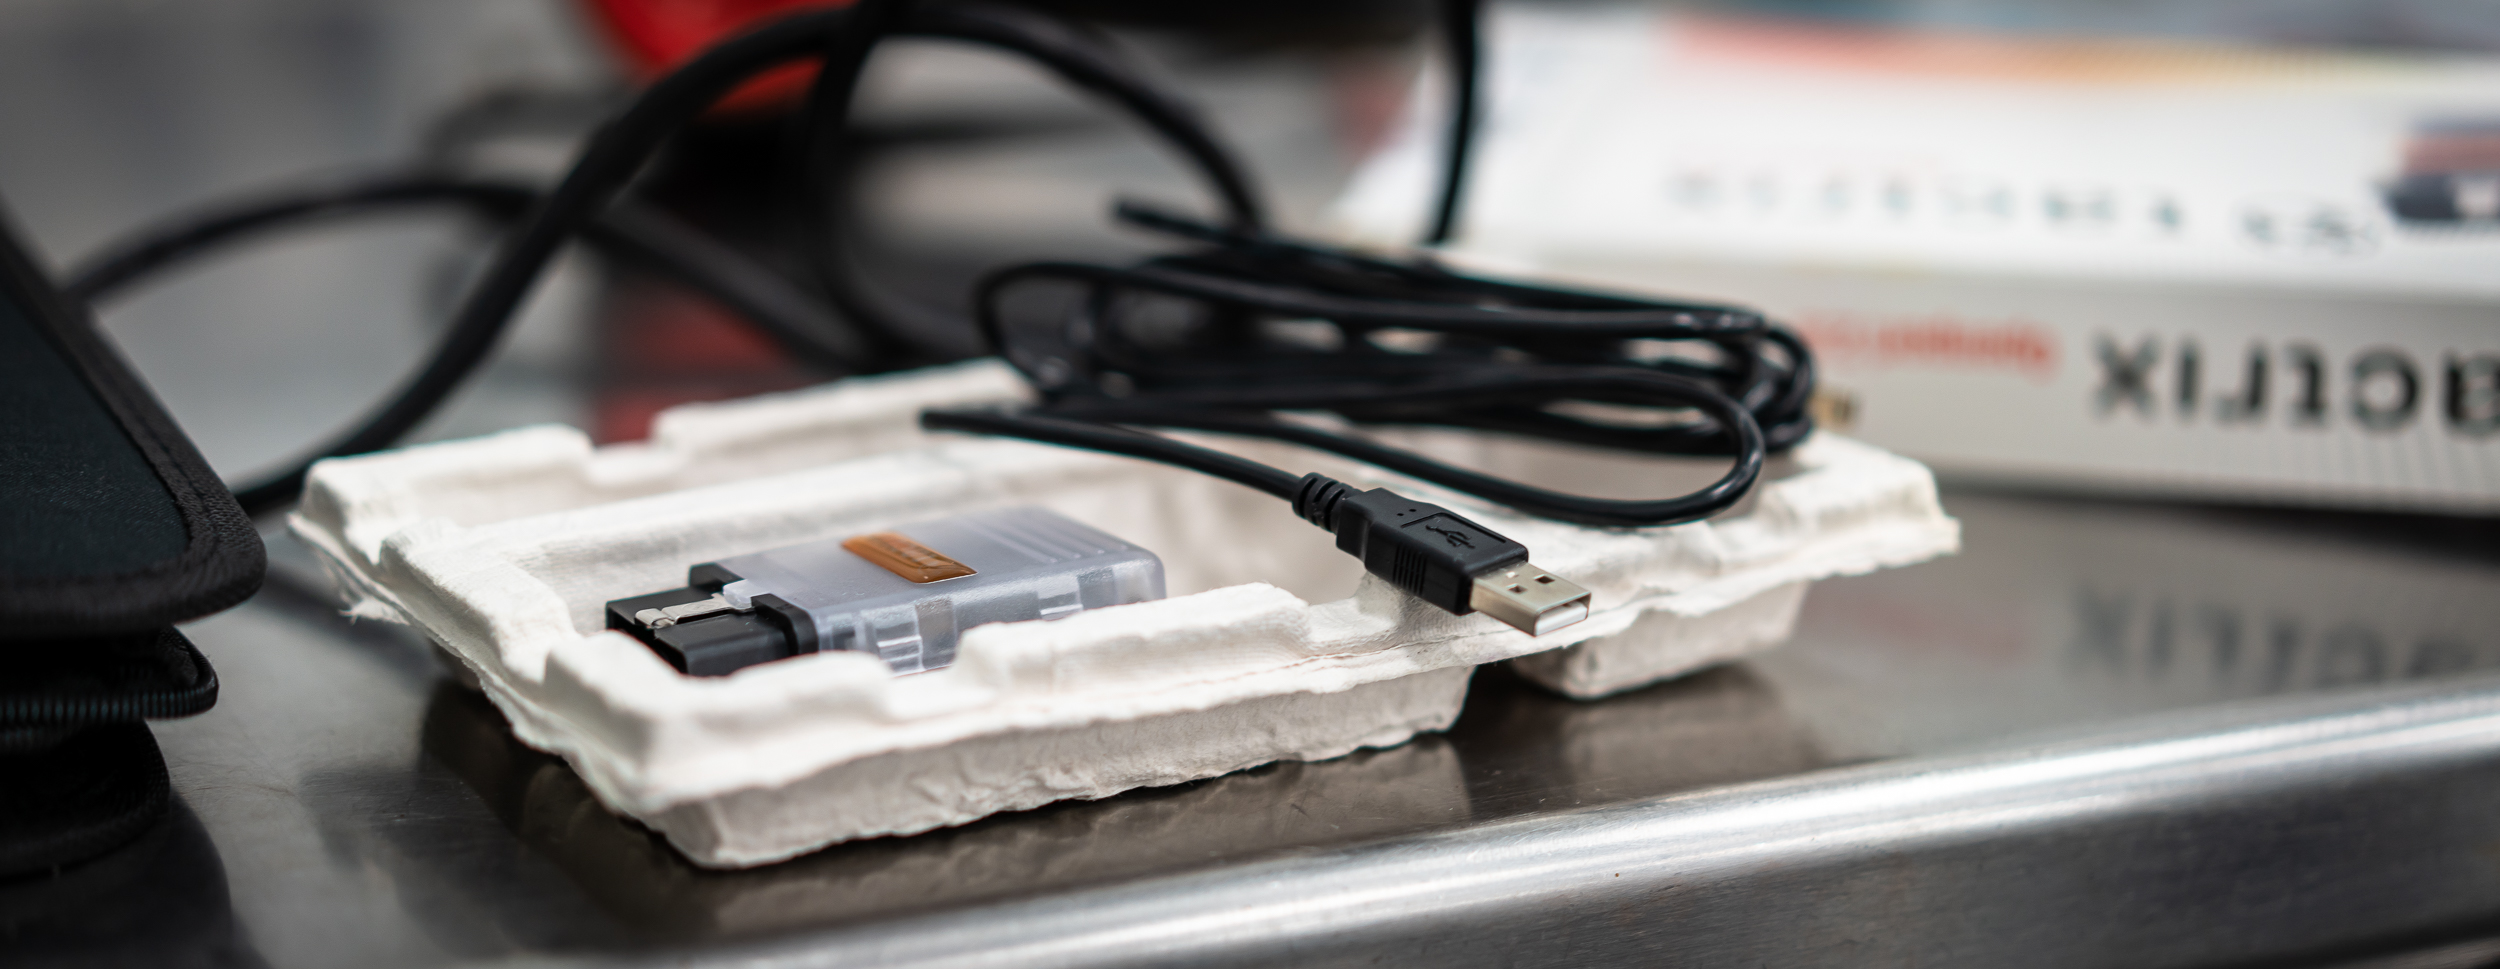
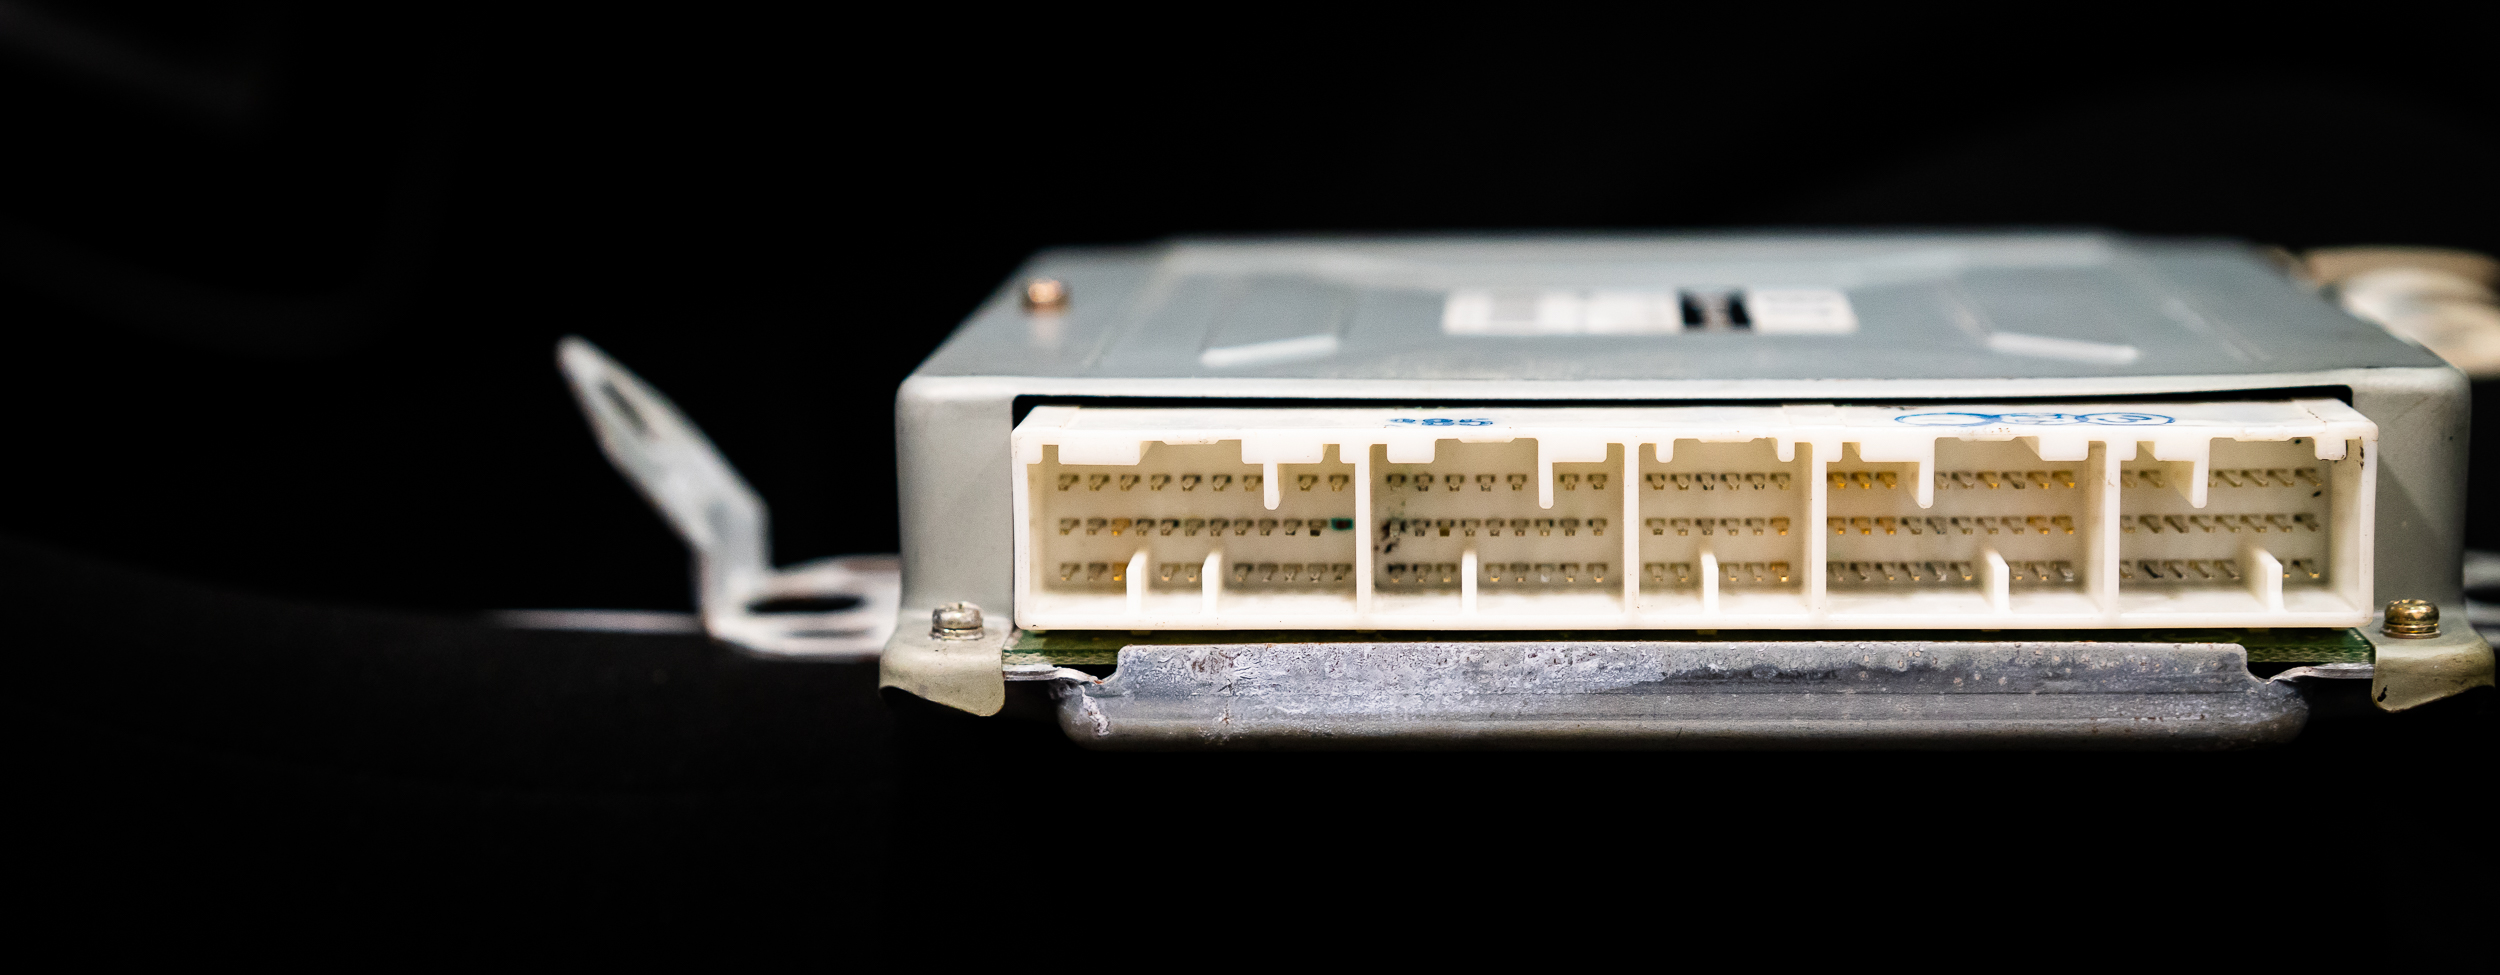
I guess it was time to pull the ECU apart and see what was going on. I was hoping this all just needed cleaned, but that hope was fading fast.

Ugh. 

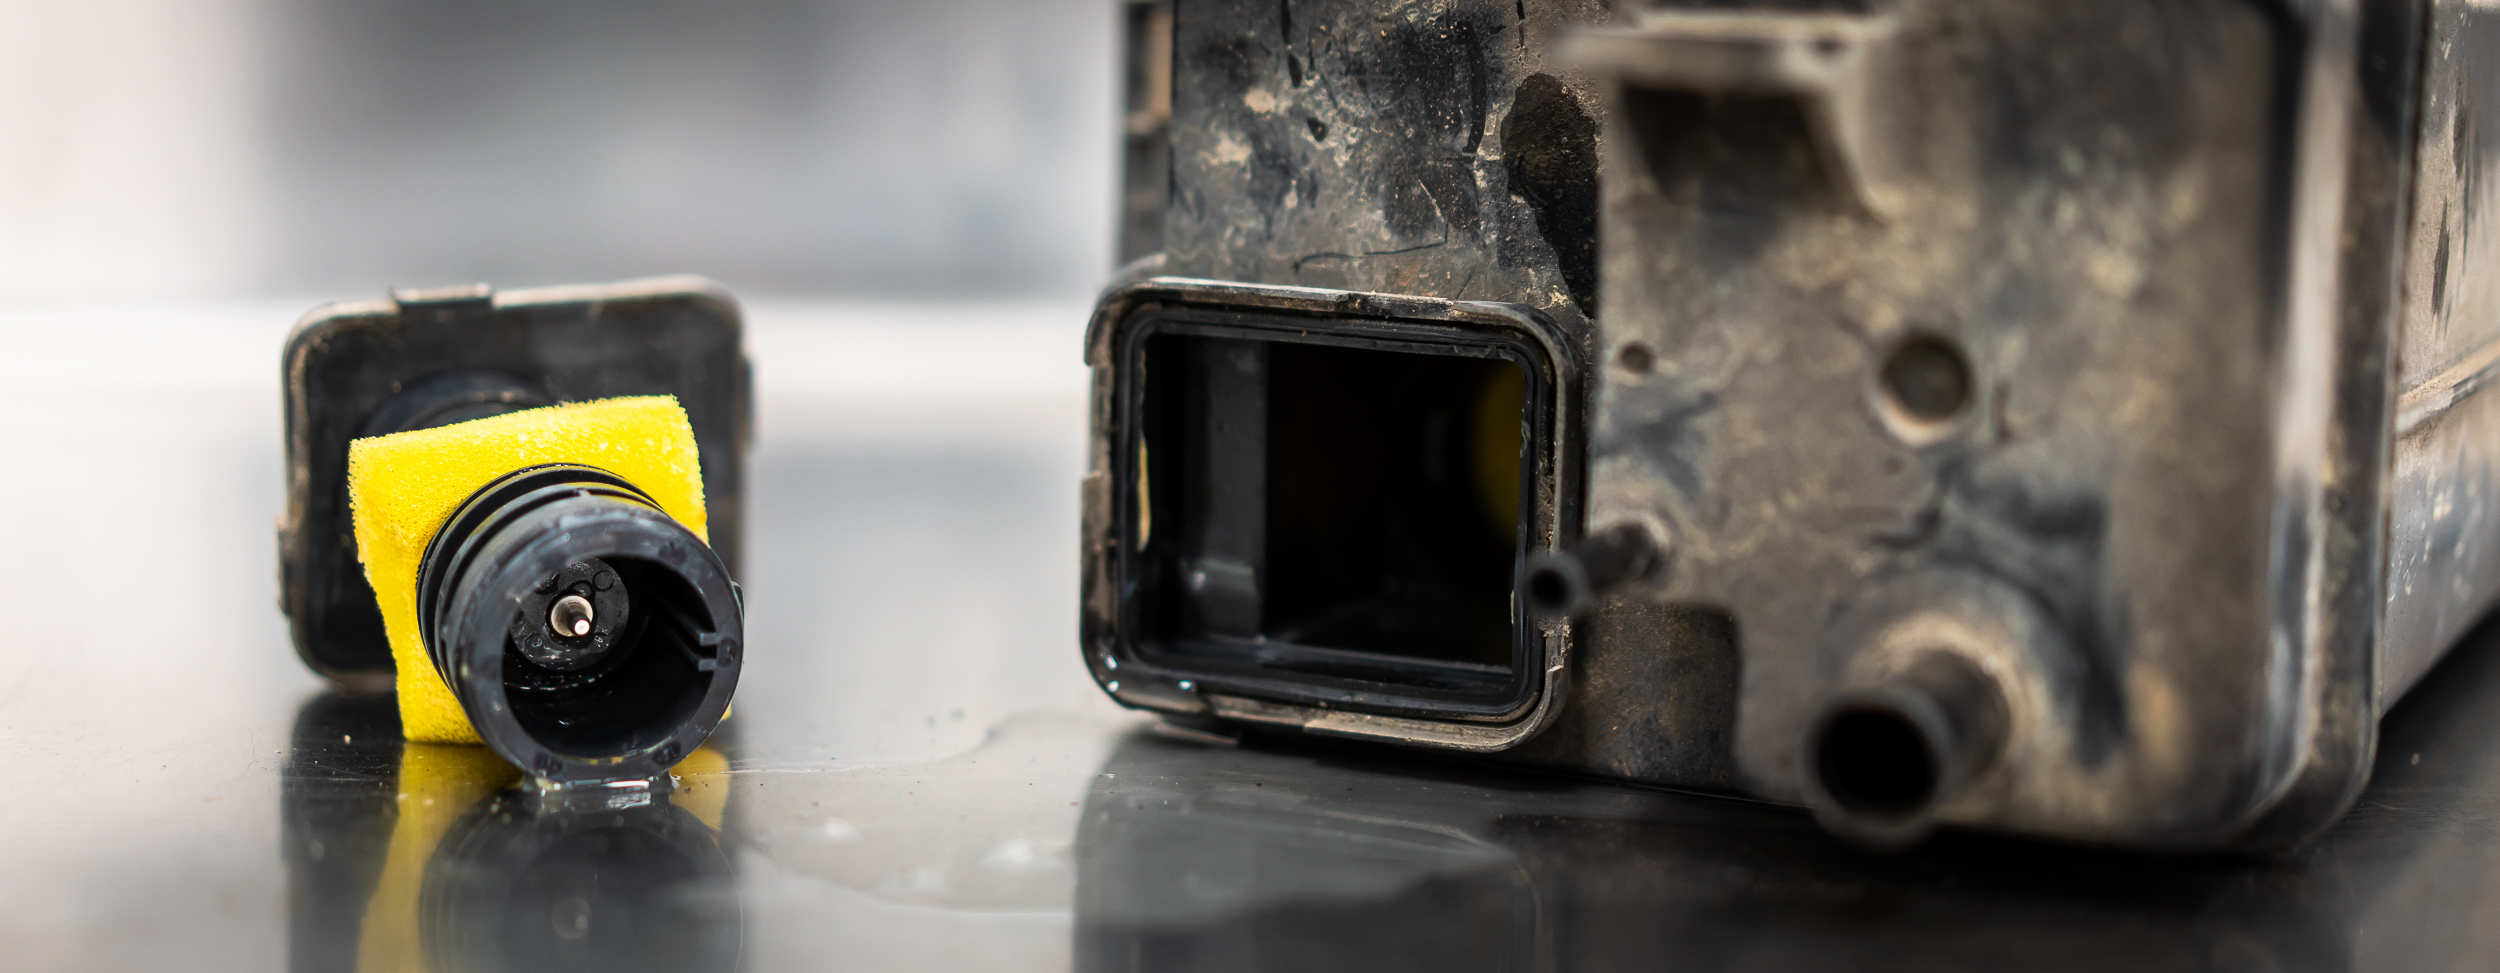
Not sure if you can tell here, but the ECU circuit board definitely went swimming. In very dirty water.

But that wasn't the worst of it.

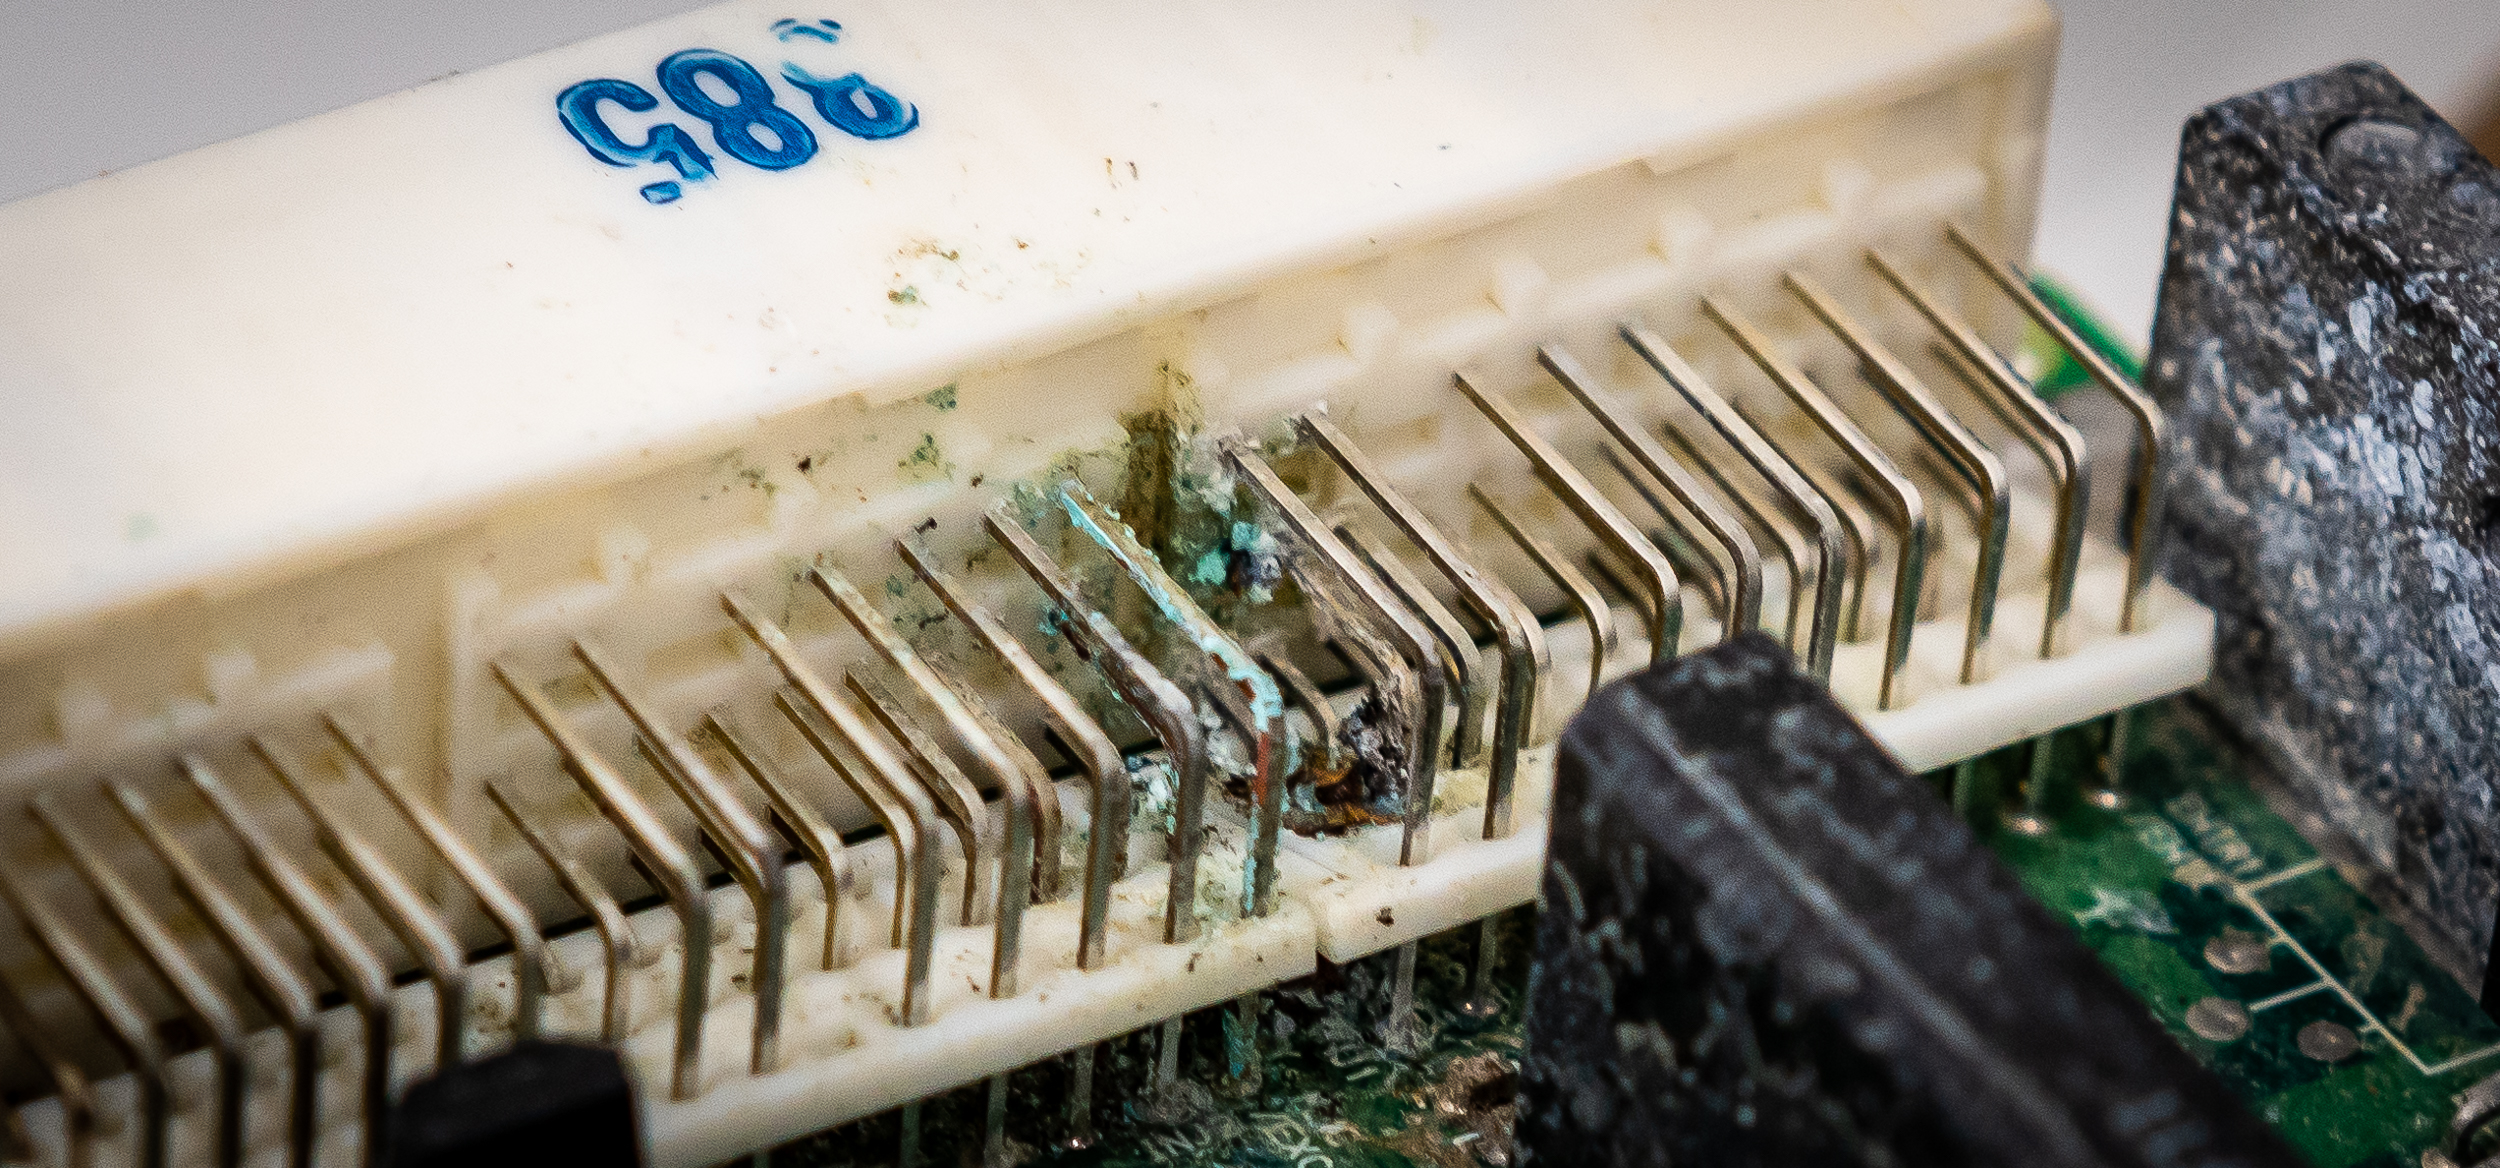
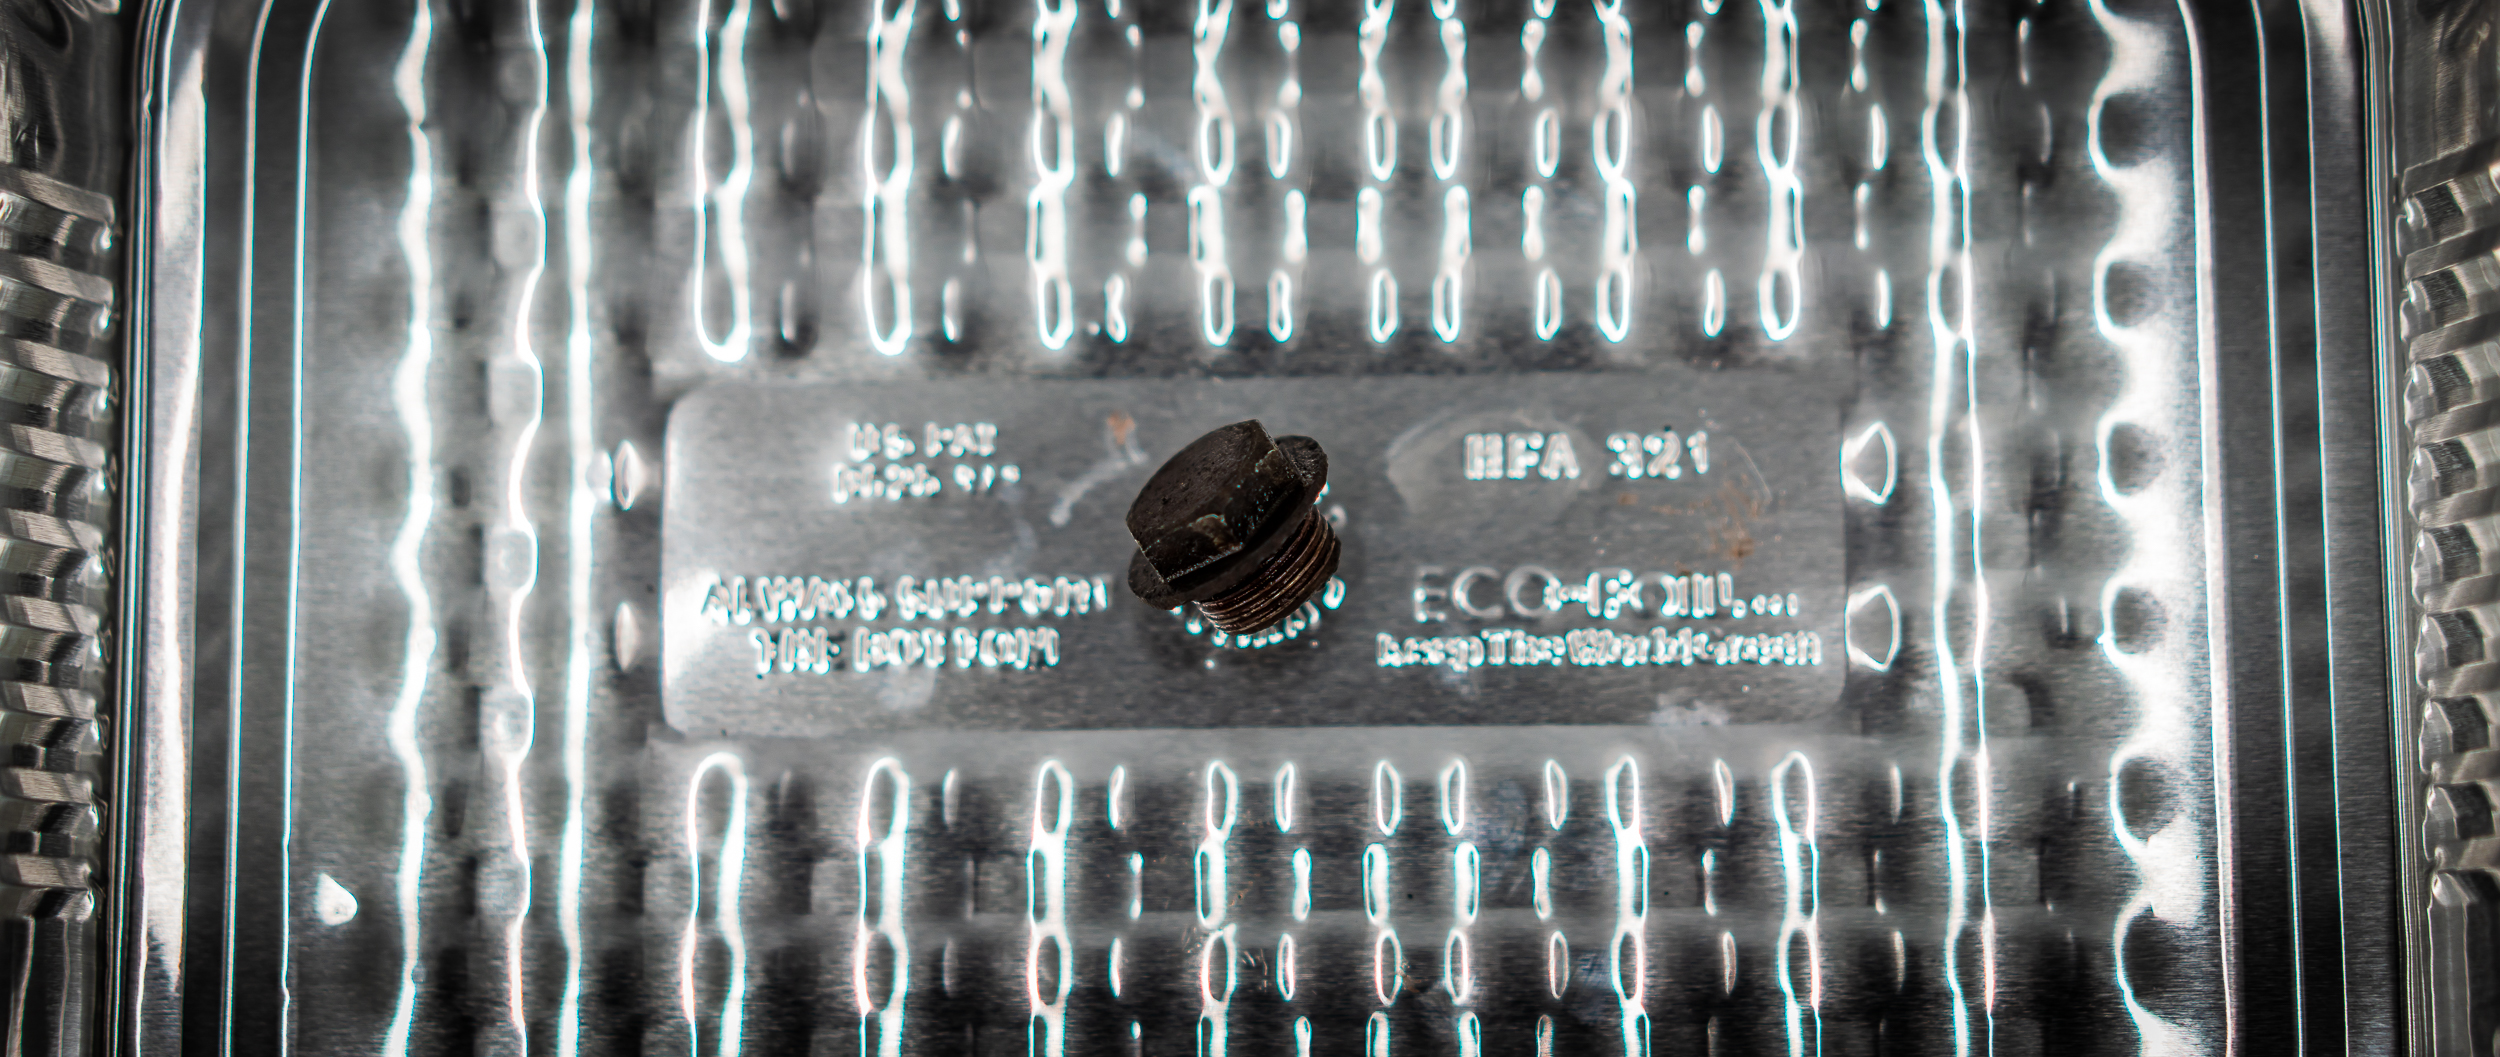
Sorry for the overly soft and zoomed photo here, but I don't have a macro lens that would get this just right.

That mess on the backside of the connector is where the pin used to be.

Used to be! The entire pin is just totally gone, all the way to the circuit board! I did some serious head-scratching for quite awhile. What happened here?!

My best guess is electrolytic dissolution? +12V on this pin while it took a nice long soak in some loaded water. What do you guys think?

Anyhow, I'm thinking this might also explain why I couldn't pull codes. As soon as I pull the key out after running, the ECU doesn't have the backup power and gets cleared?

Who knows what else is going on with this ECU; I'm amazed that I could drive the car at all.

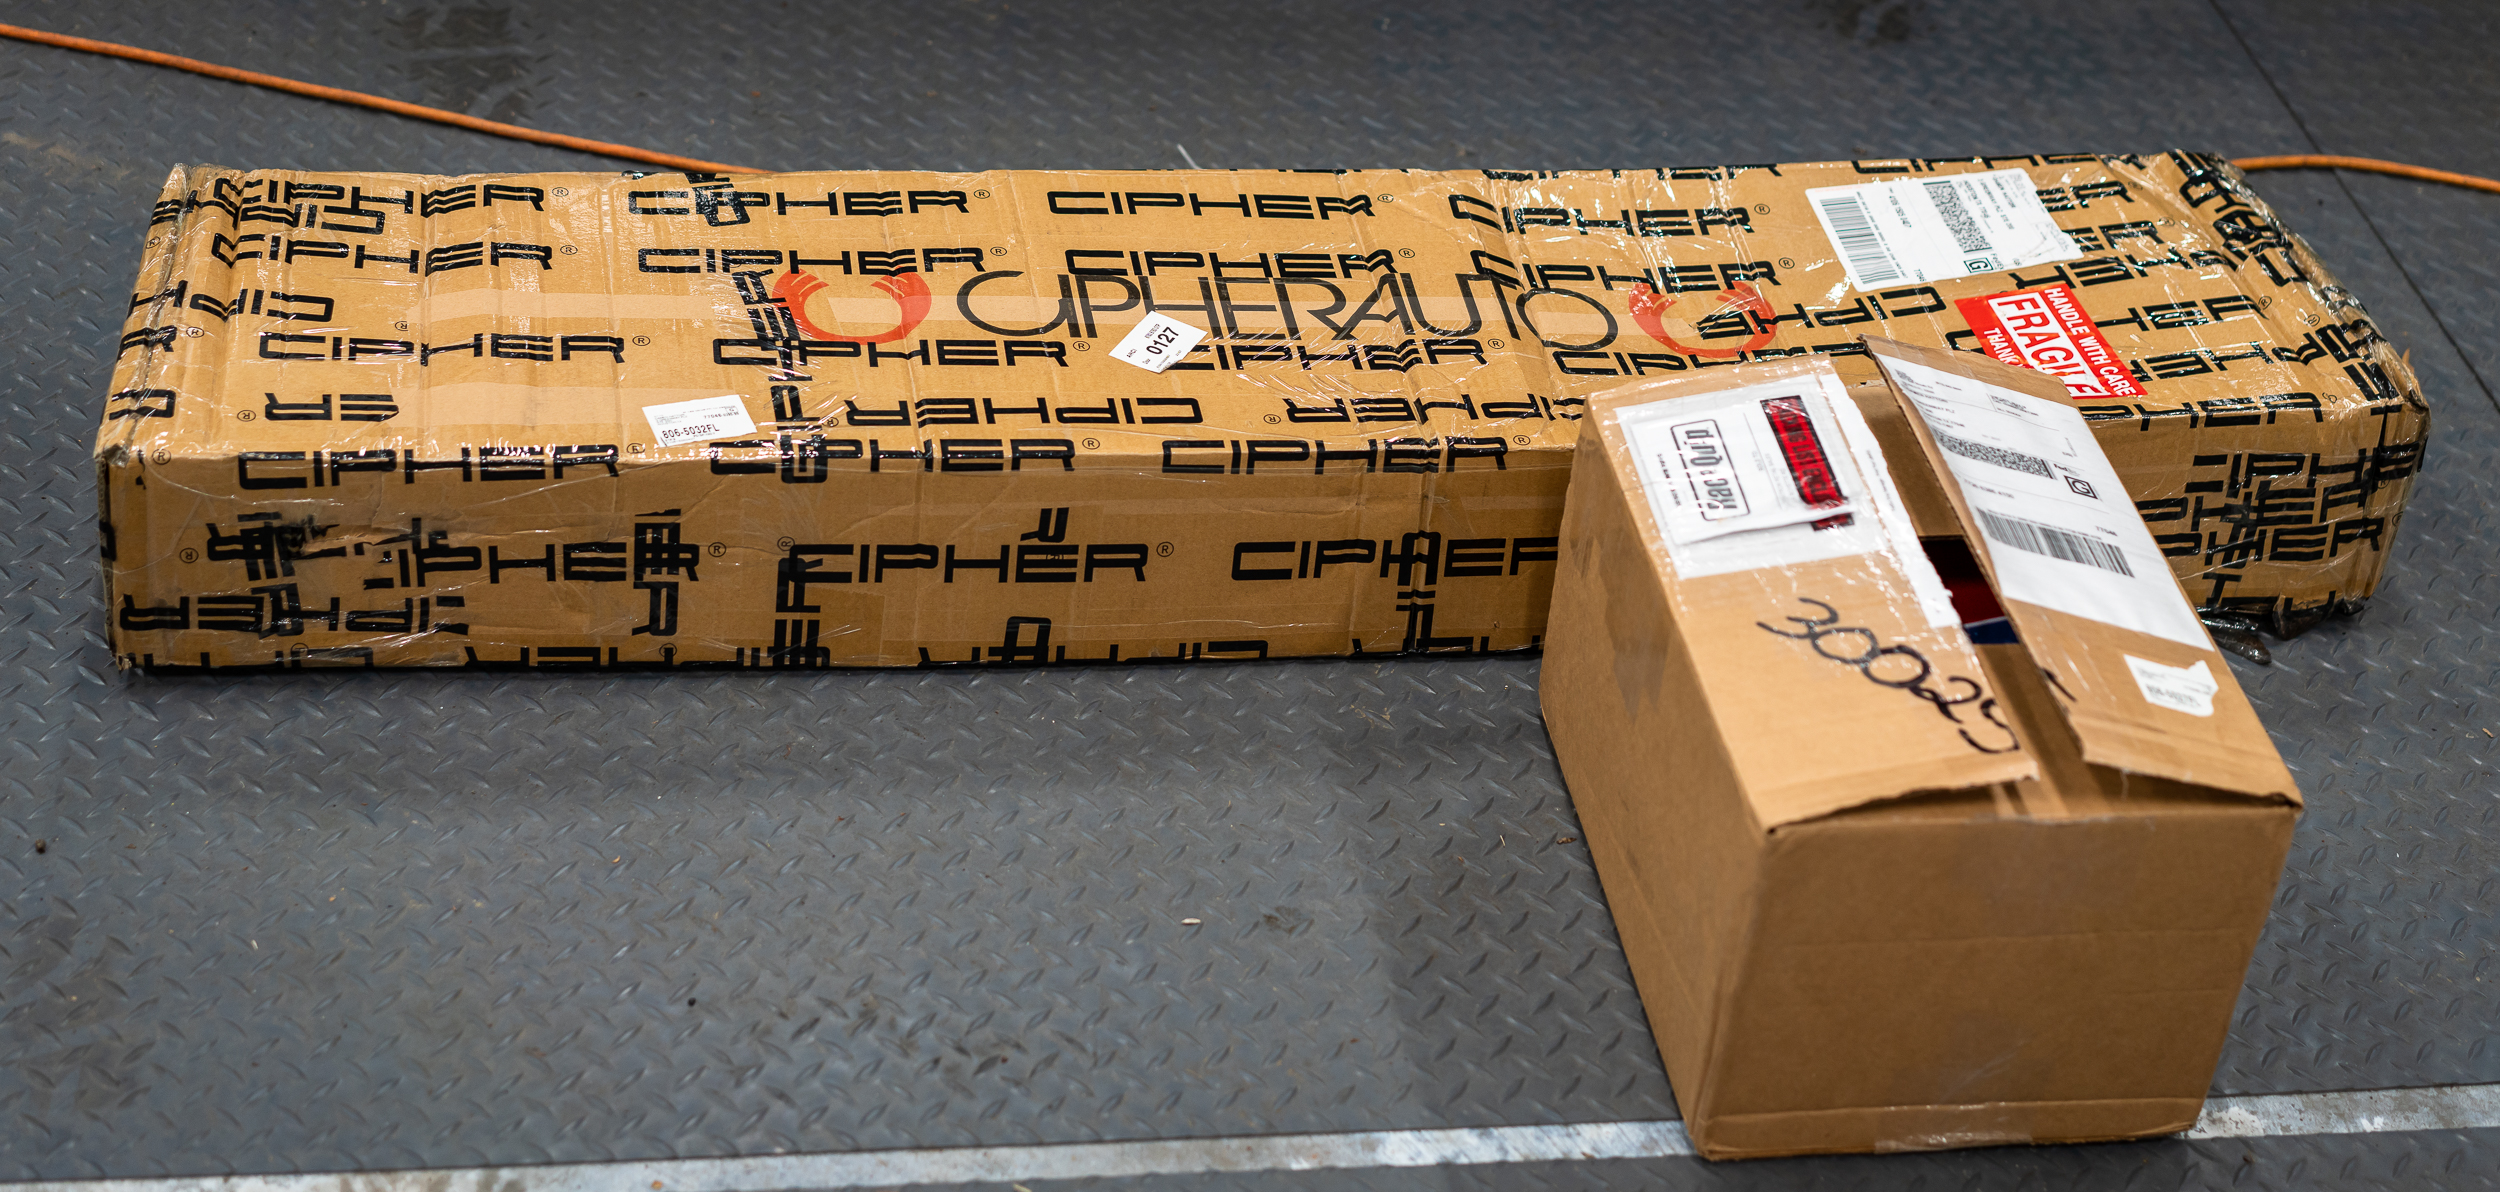
I found a used ECU online for $100 and ordered it immediately. It should be here sometime next week; supposedly this will be a plug and play operation, but I'll find out.

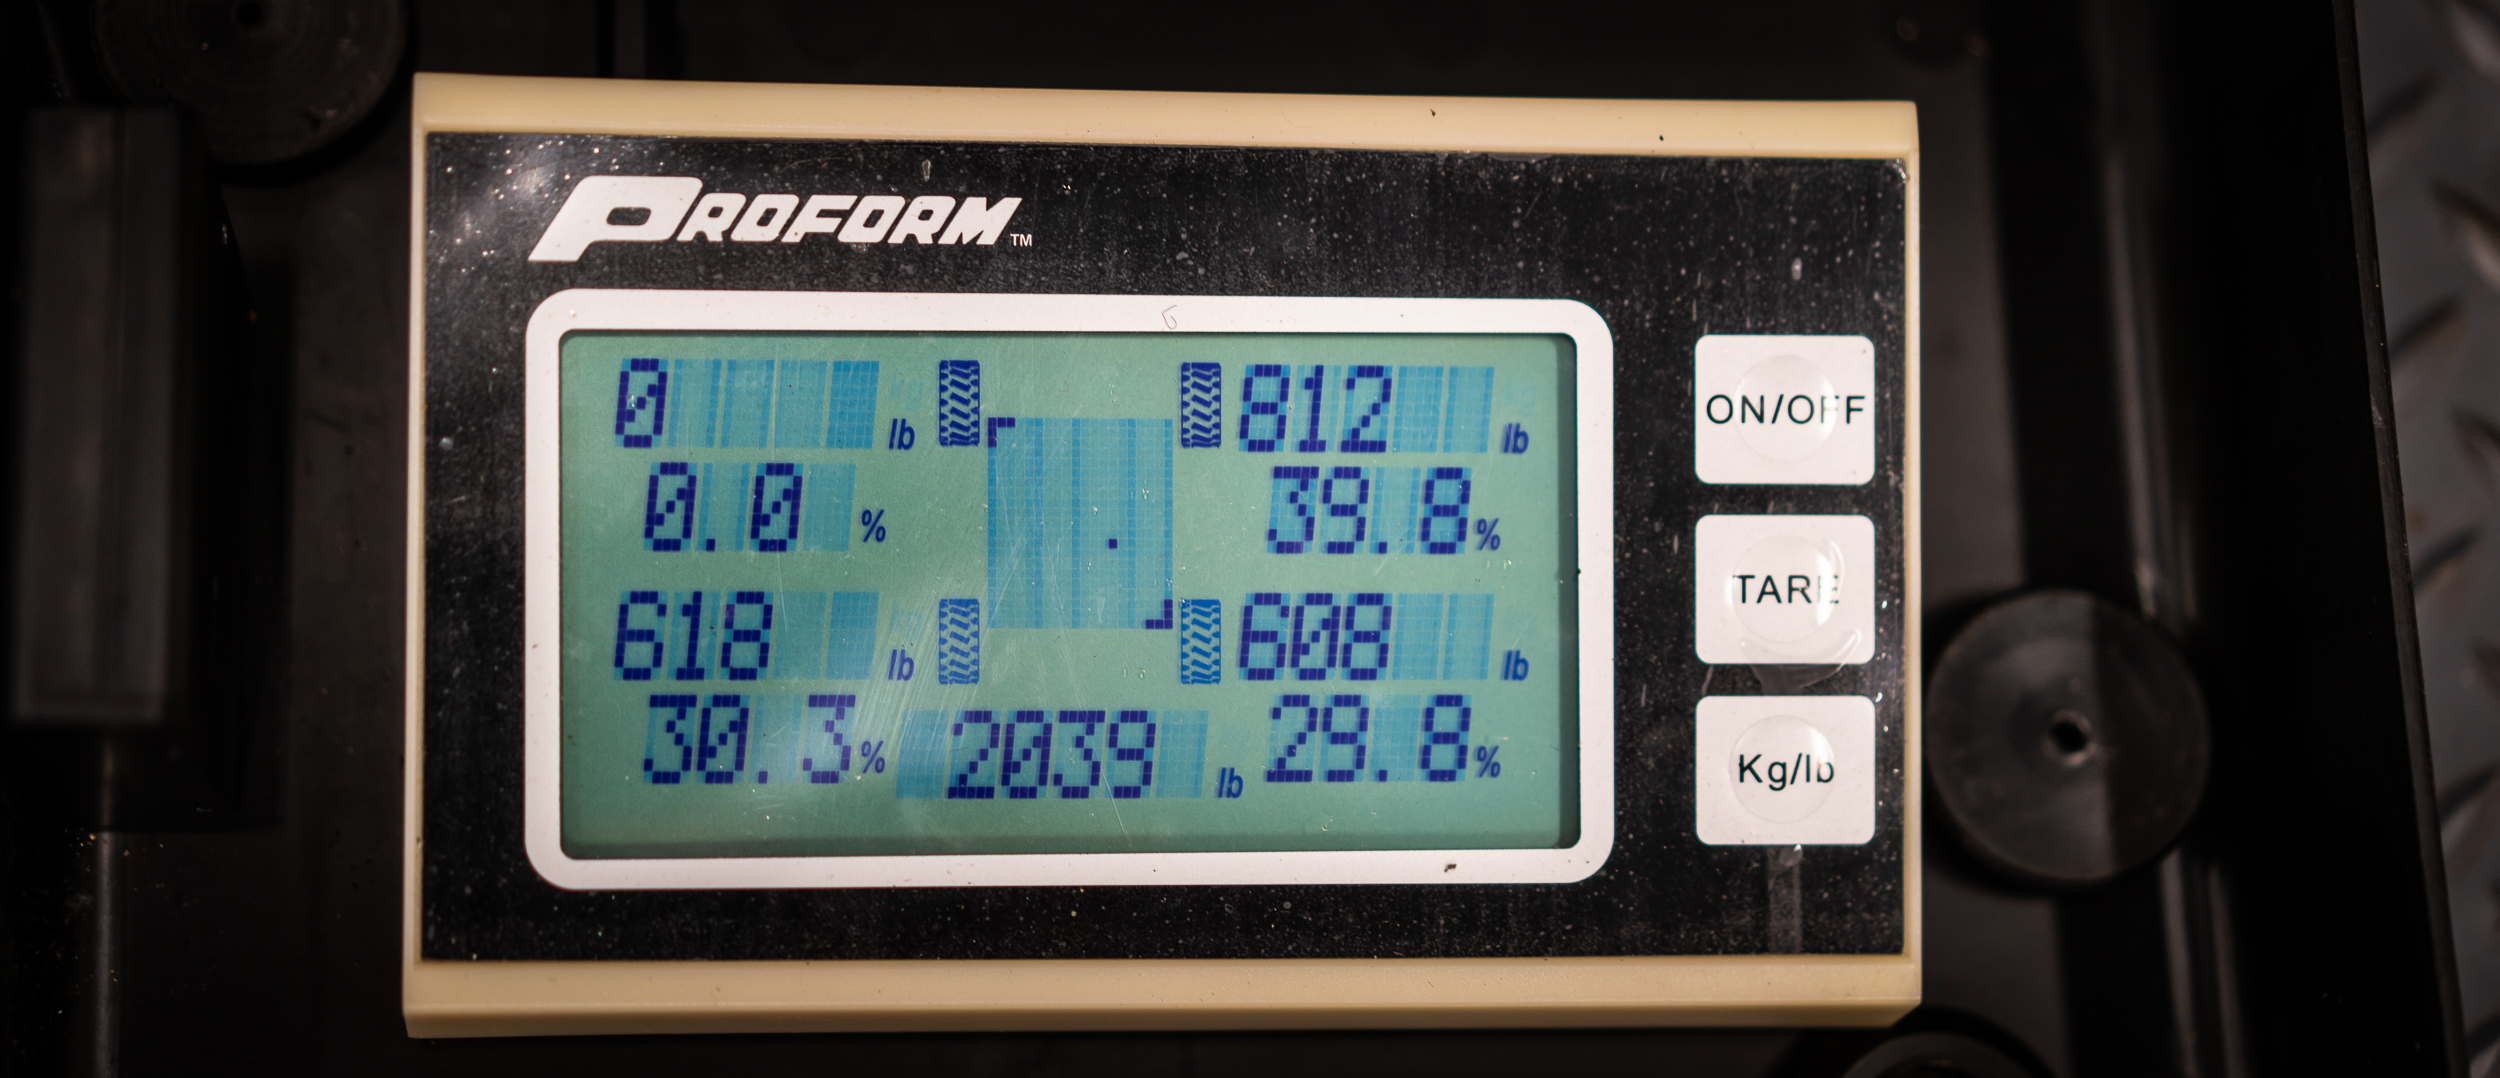
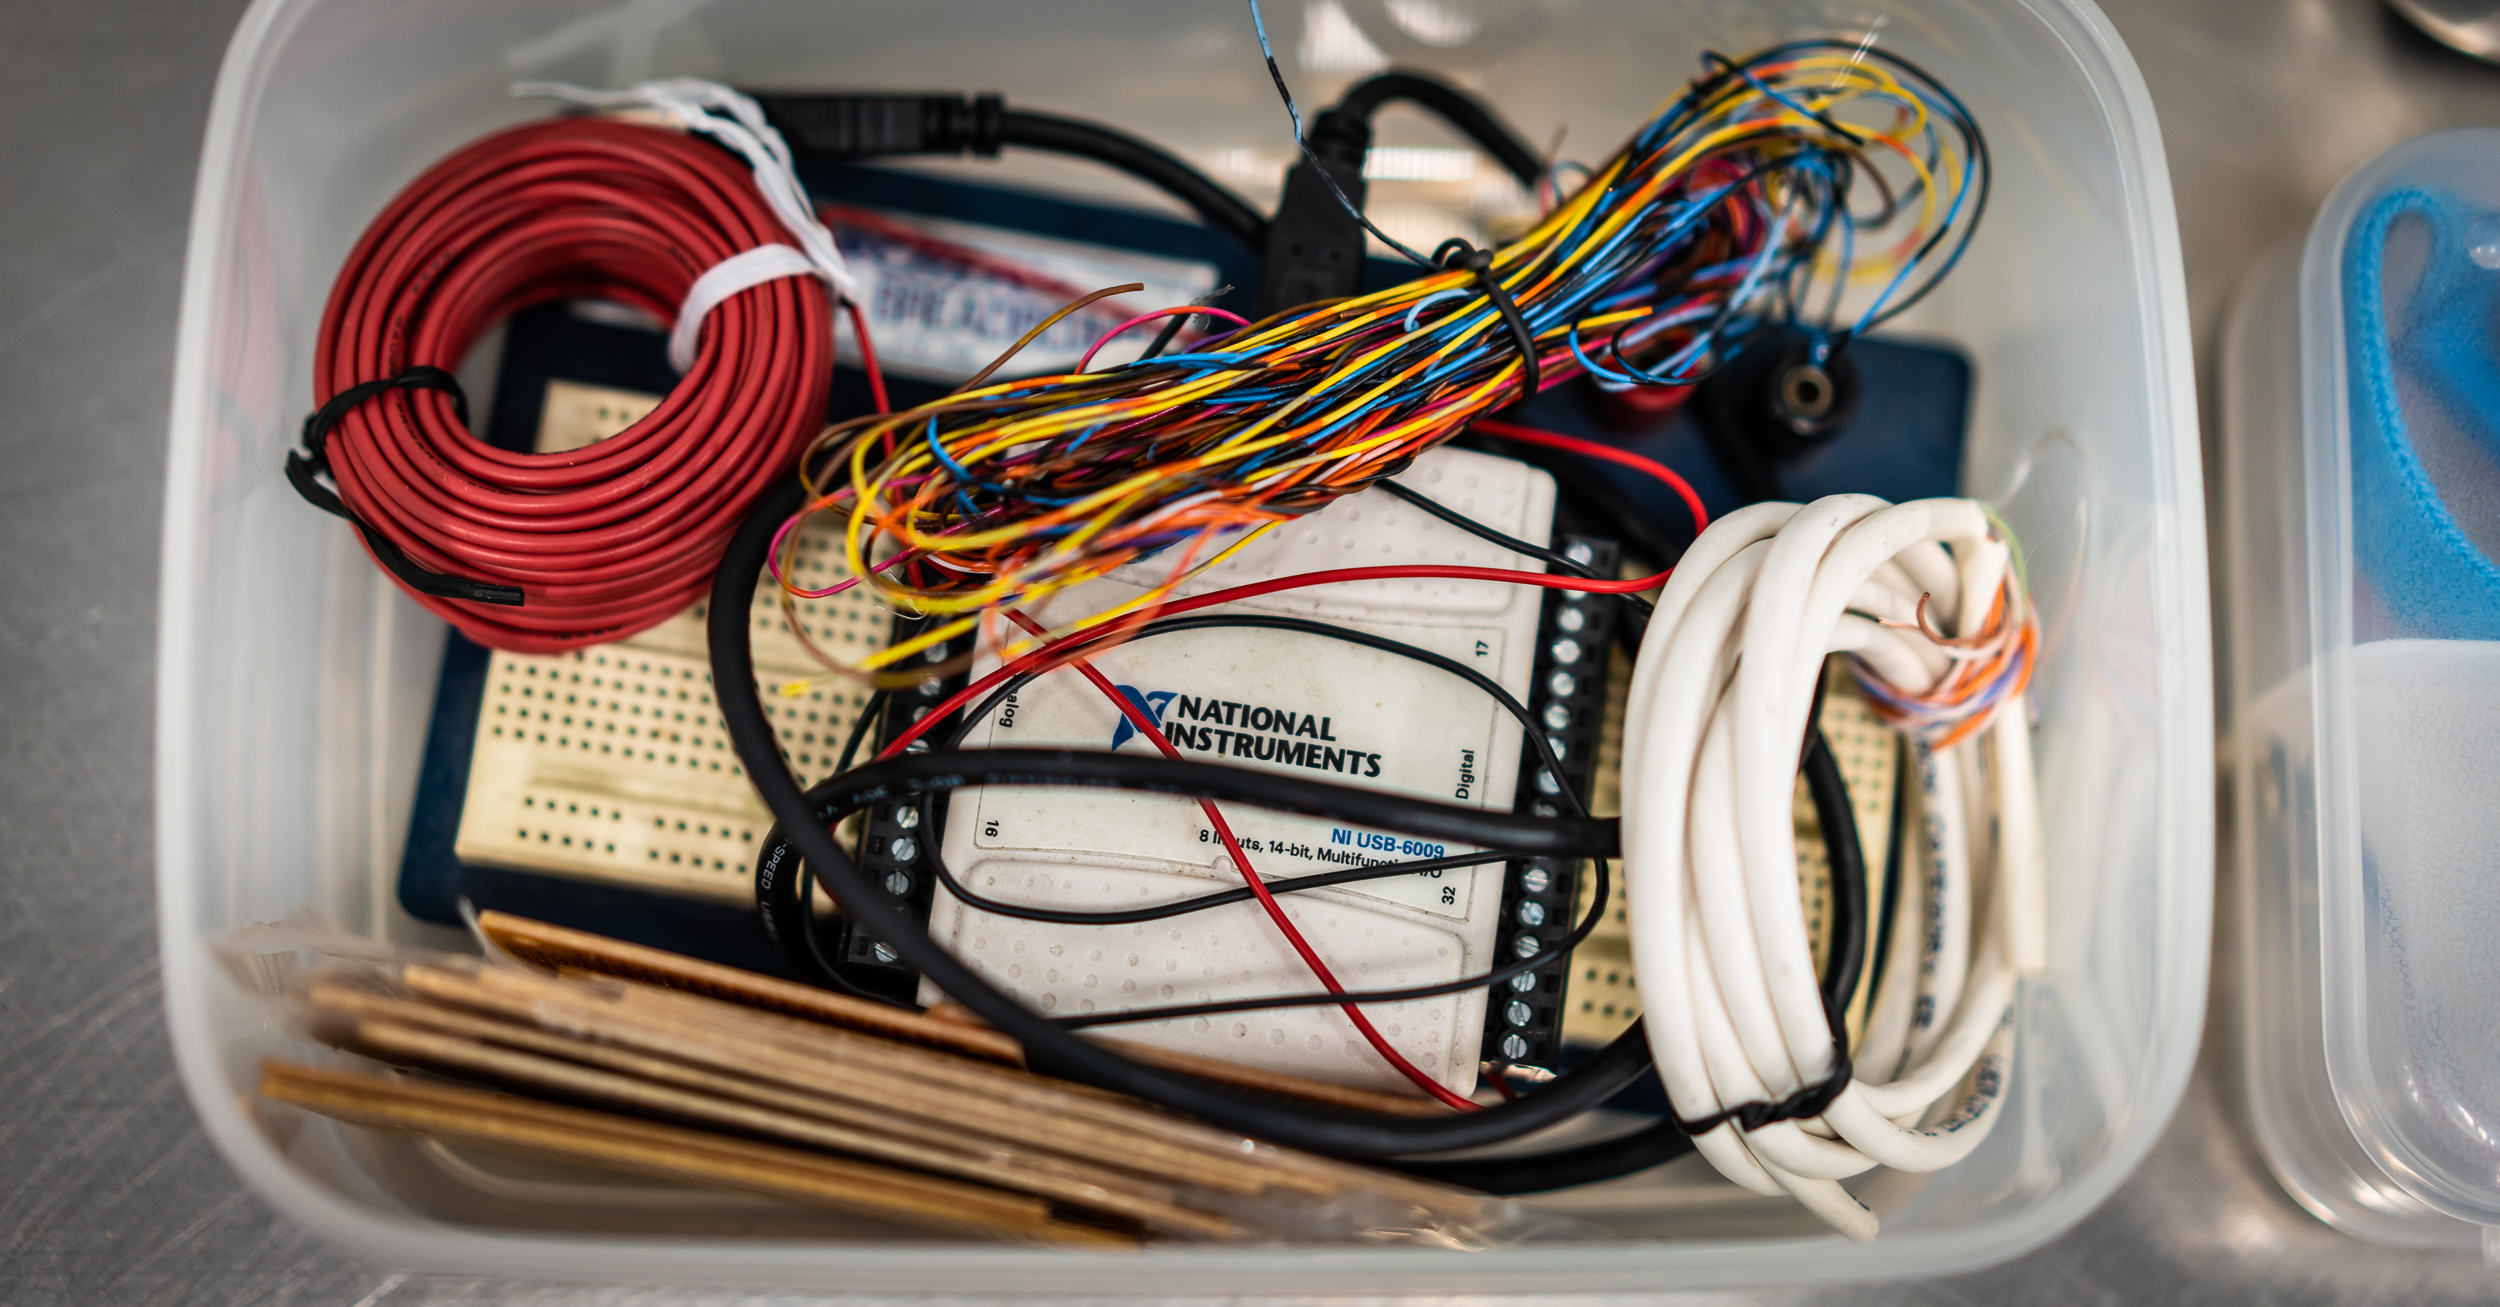
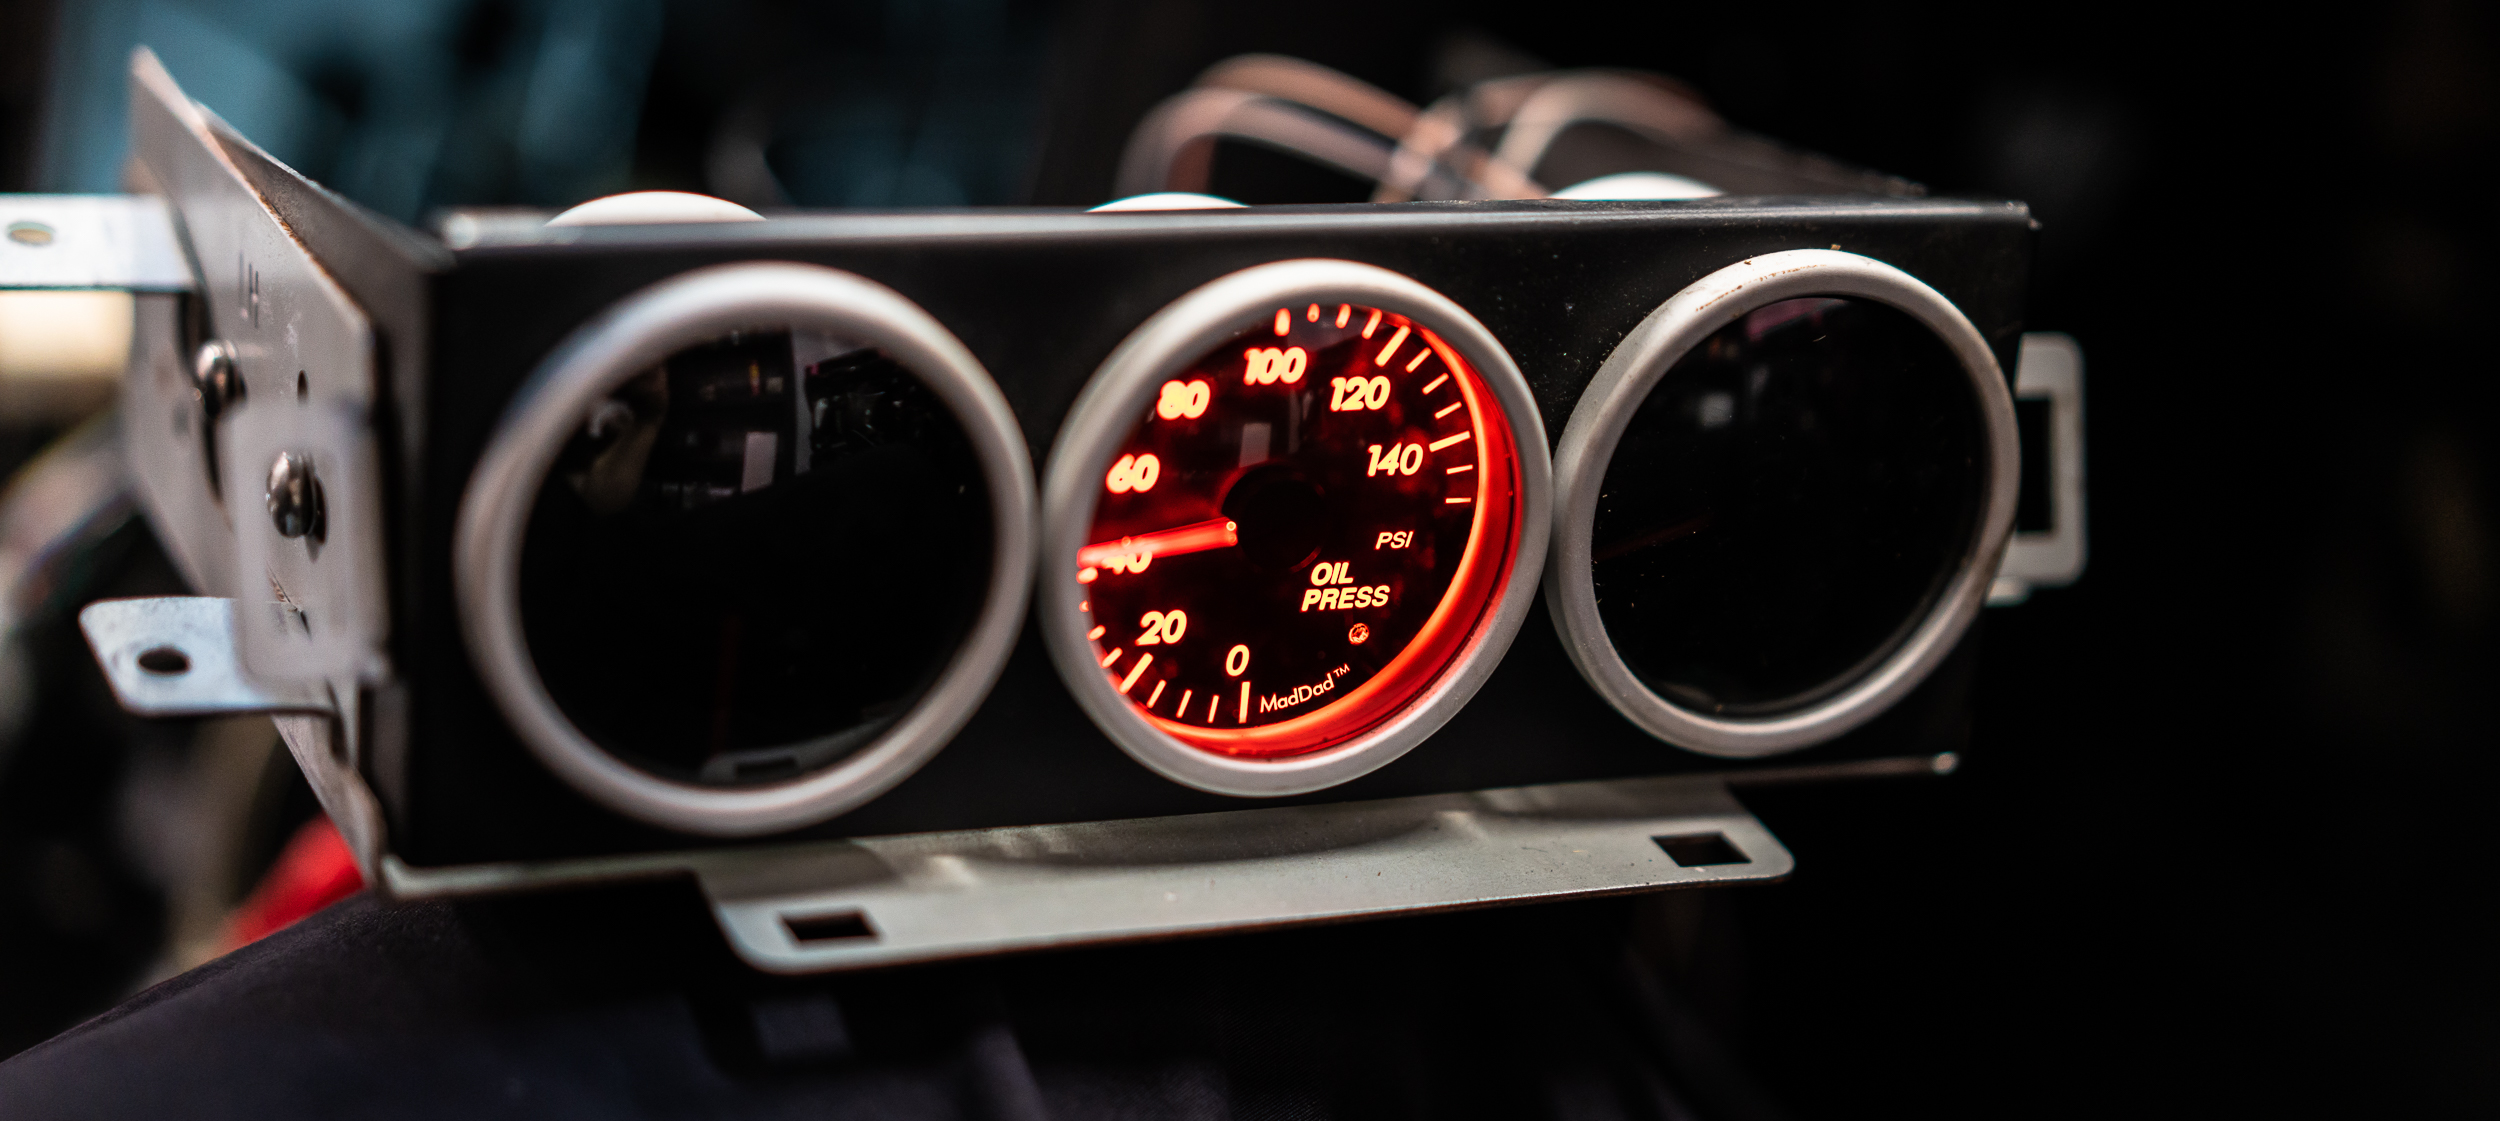
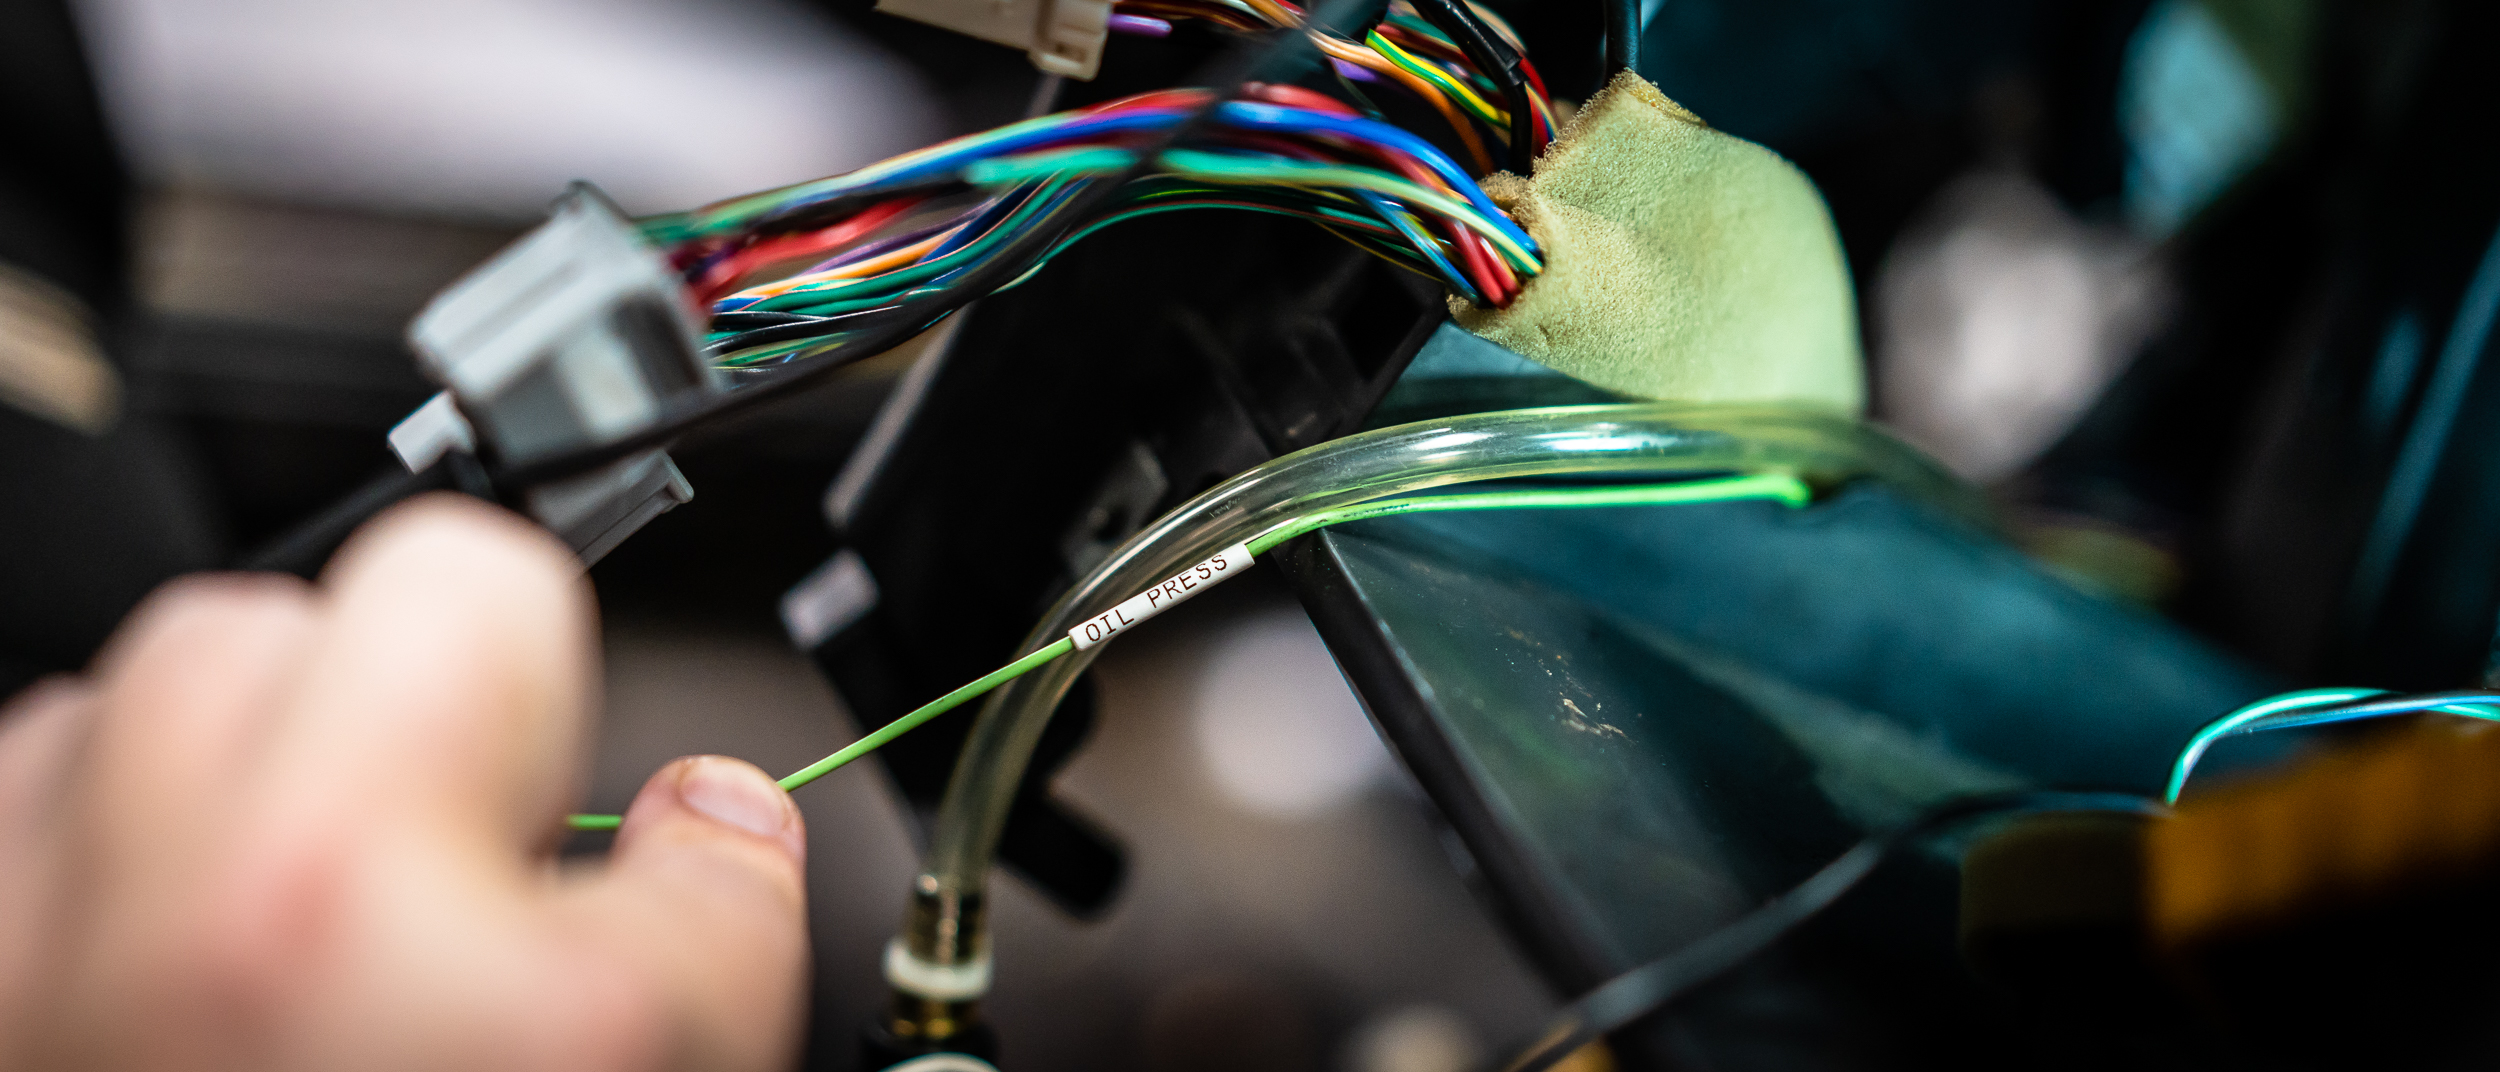
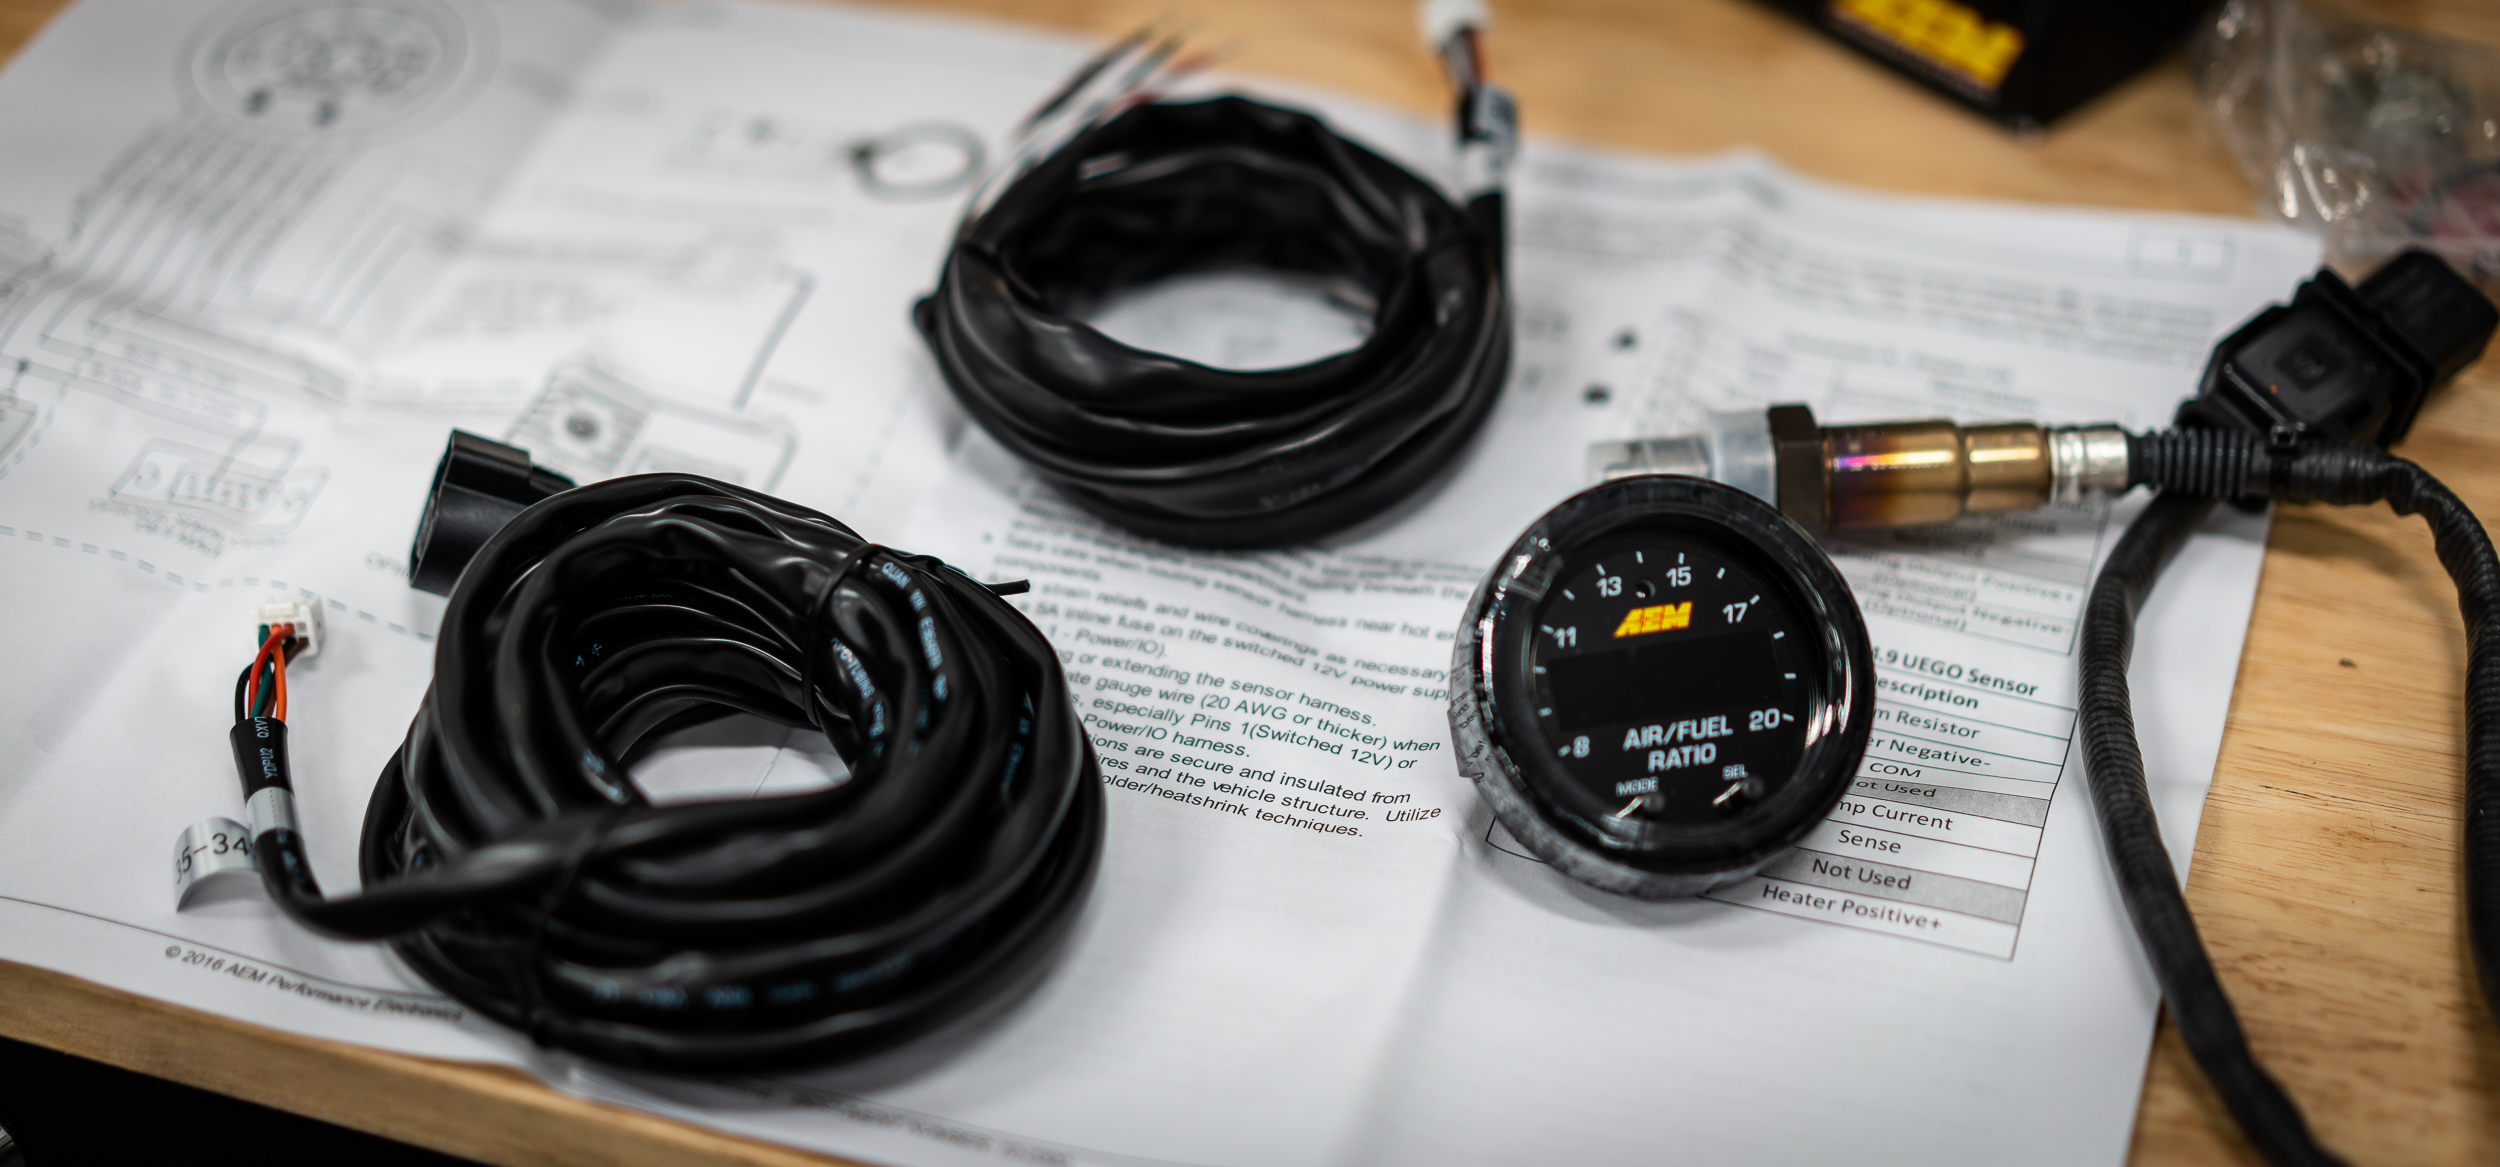
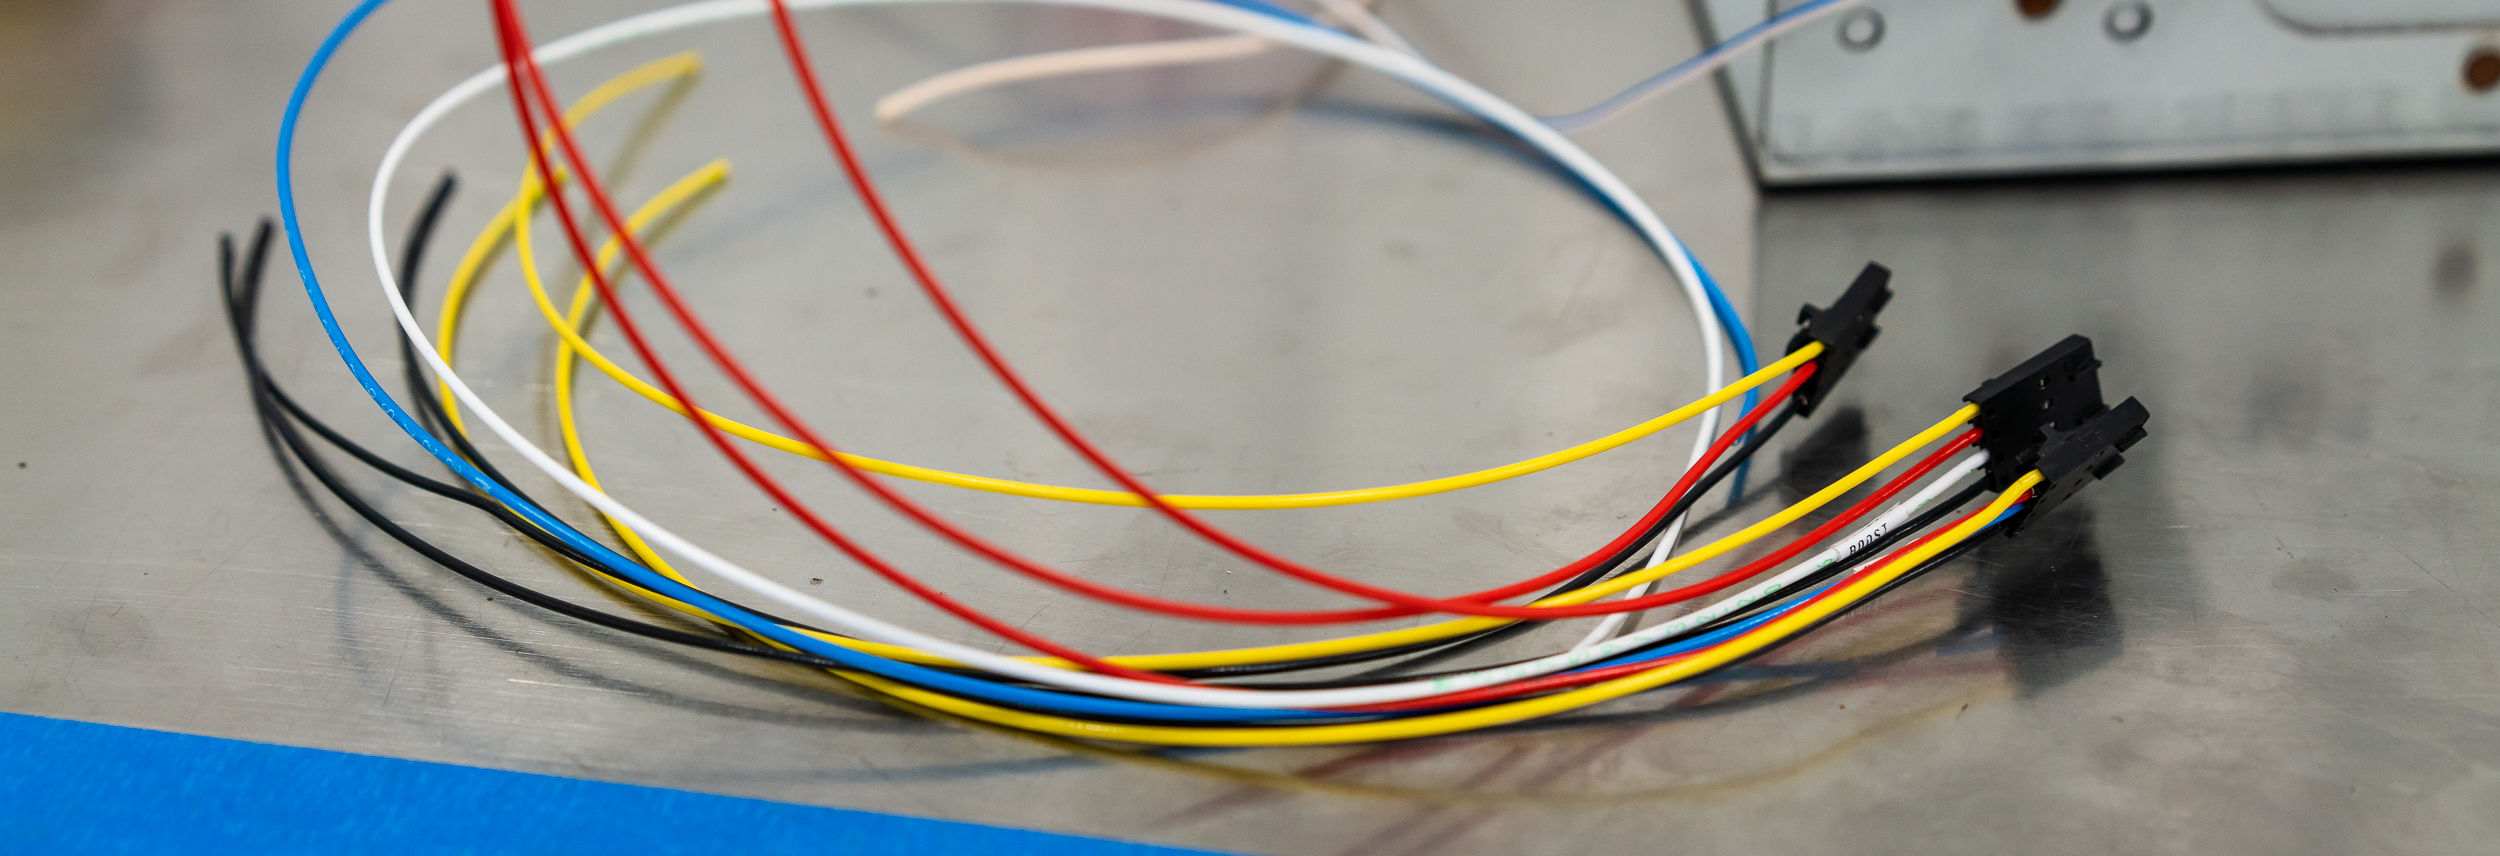
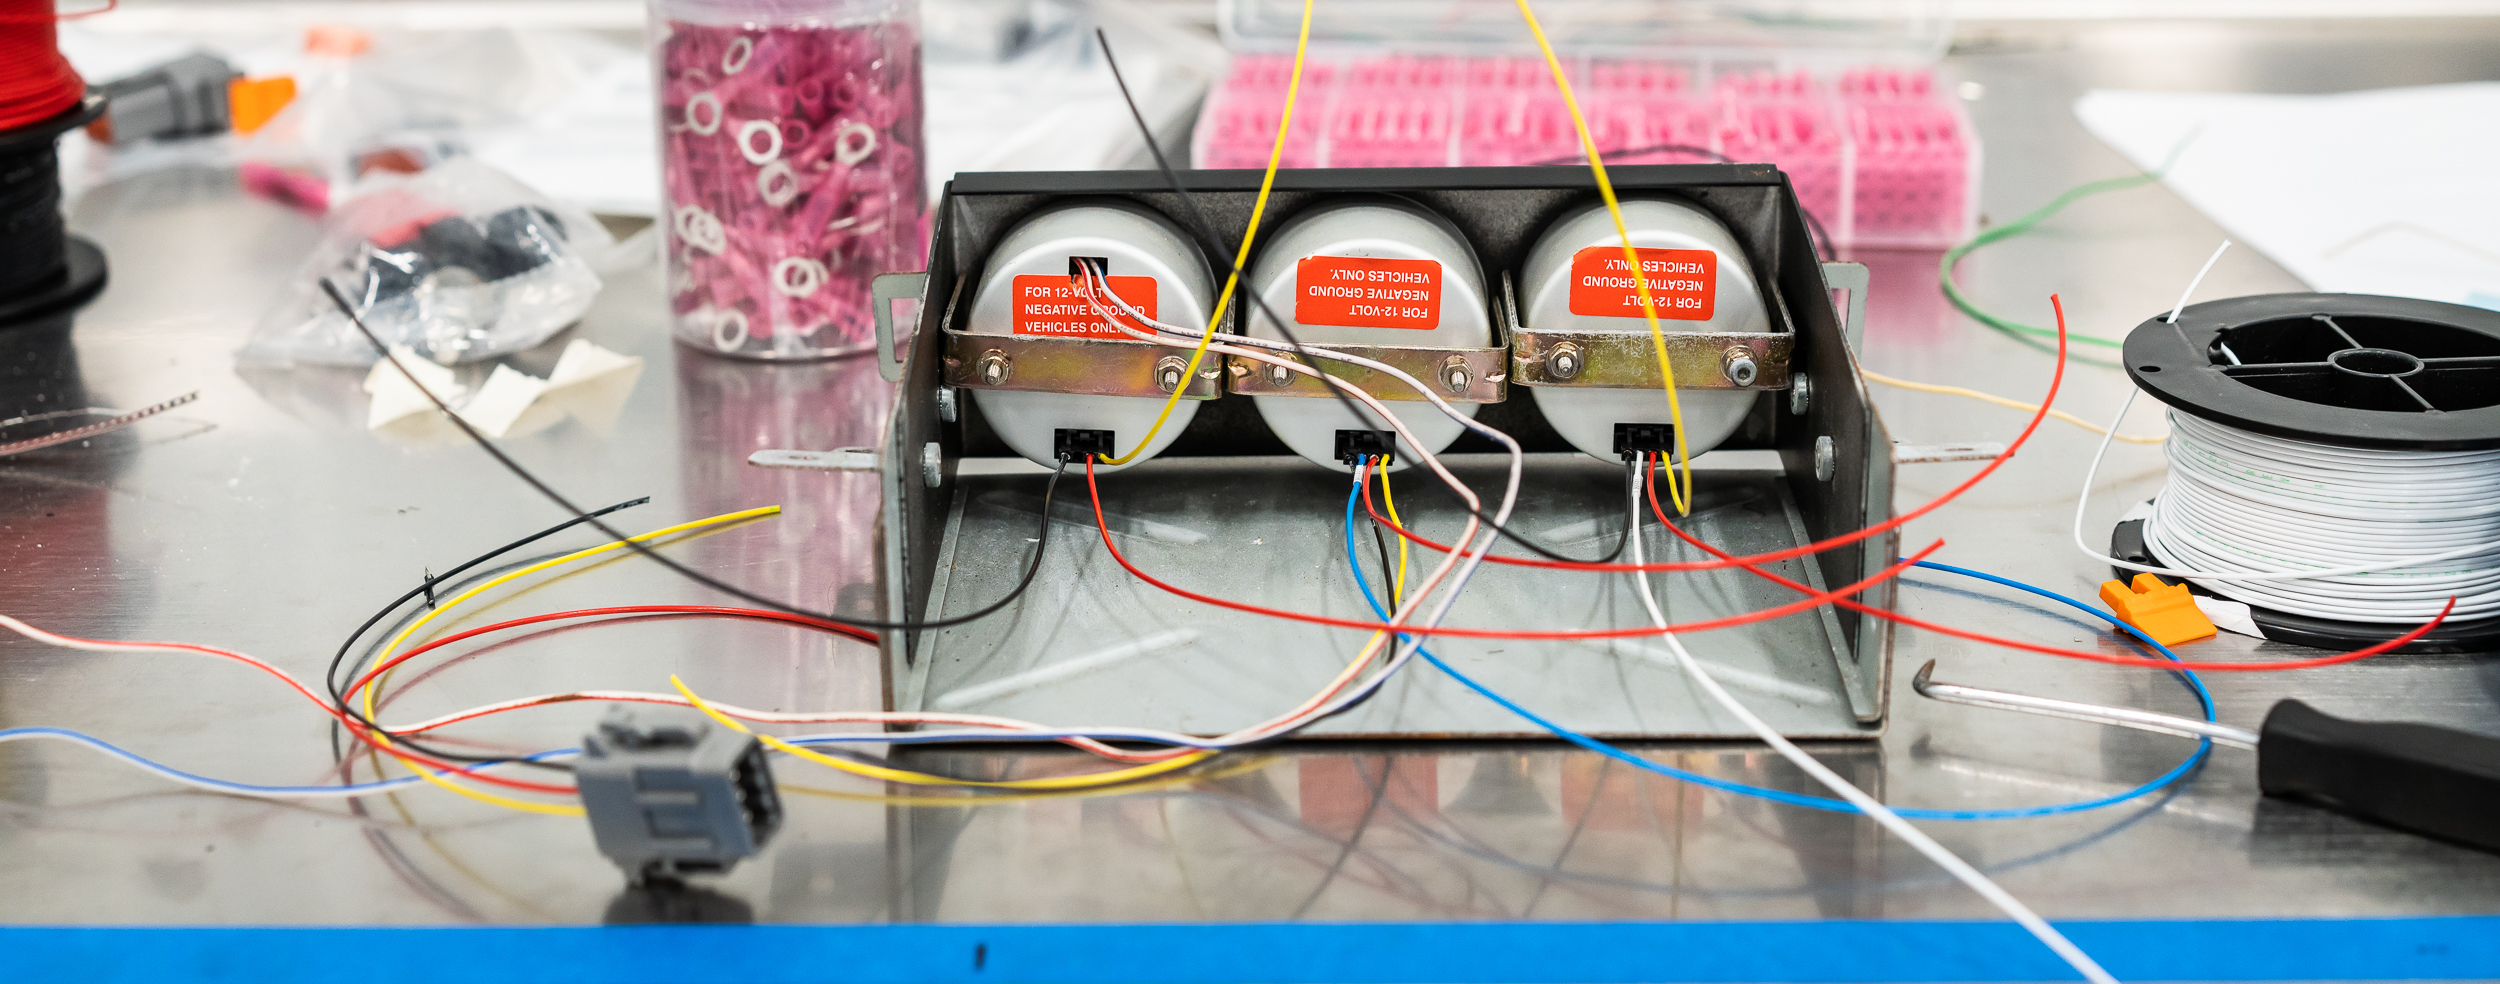
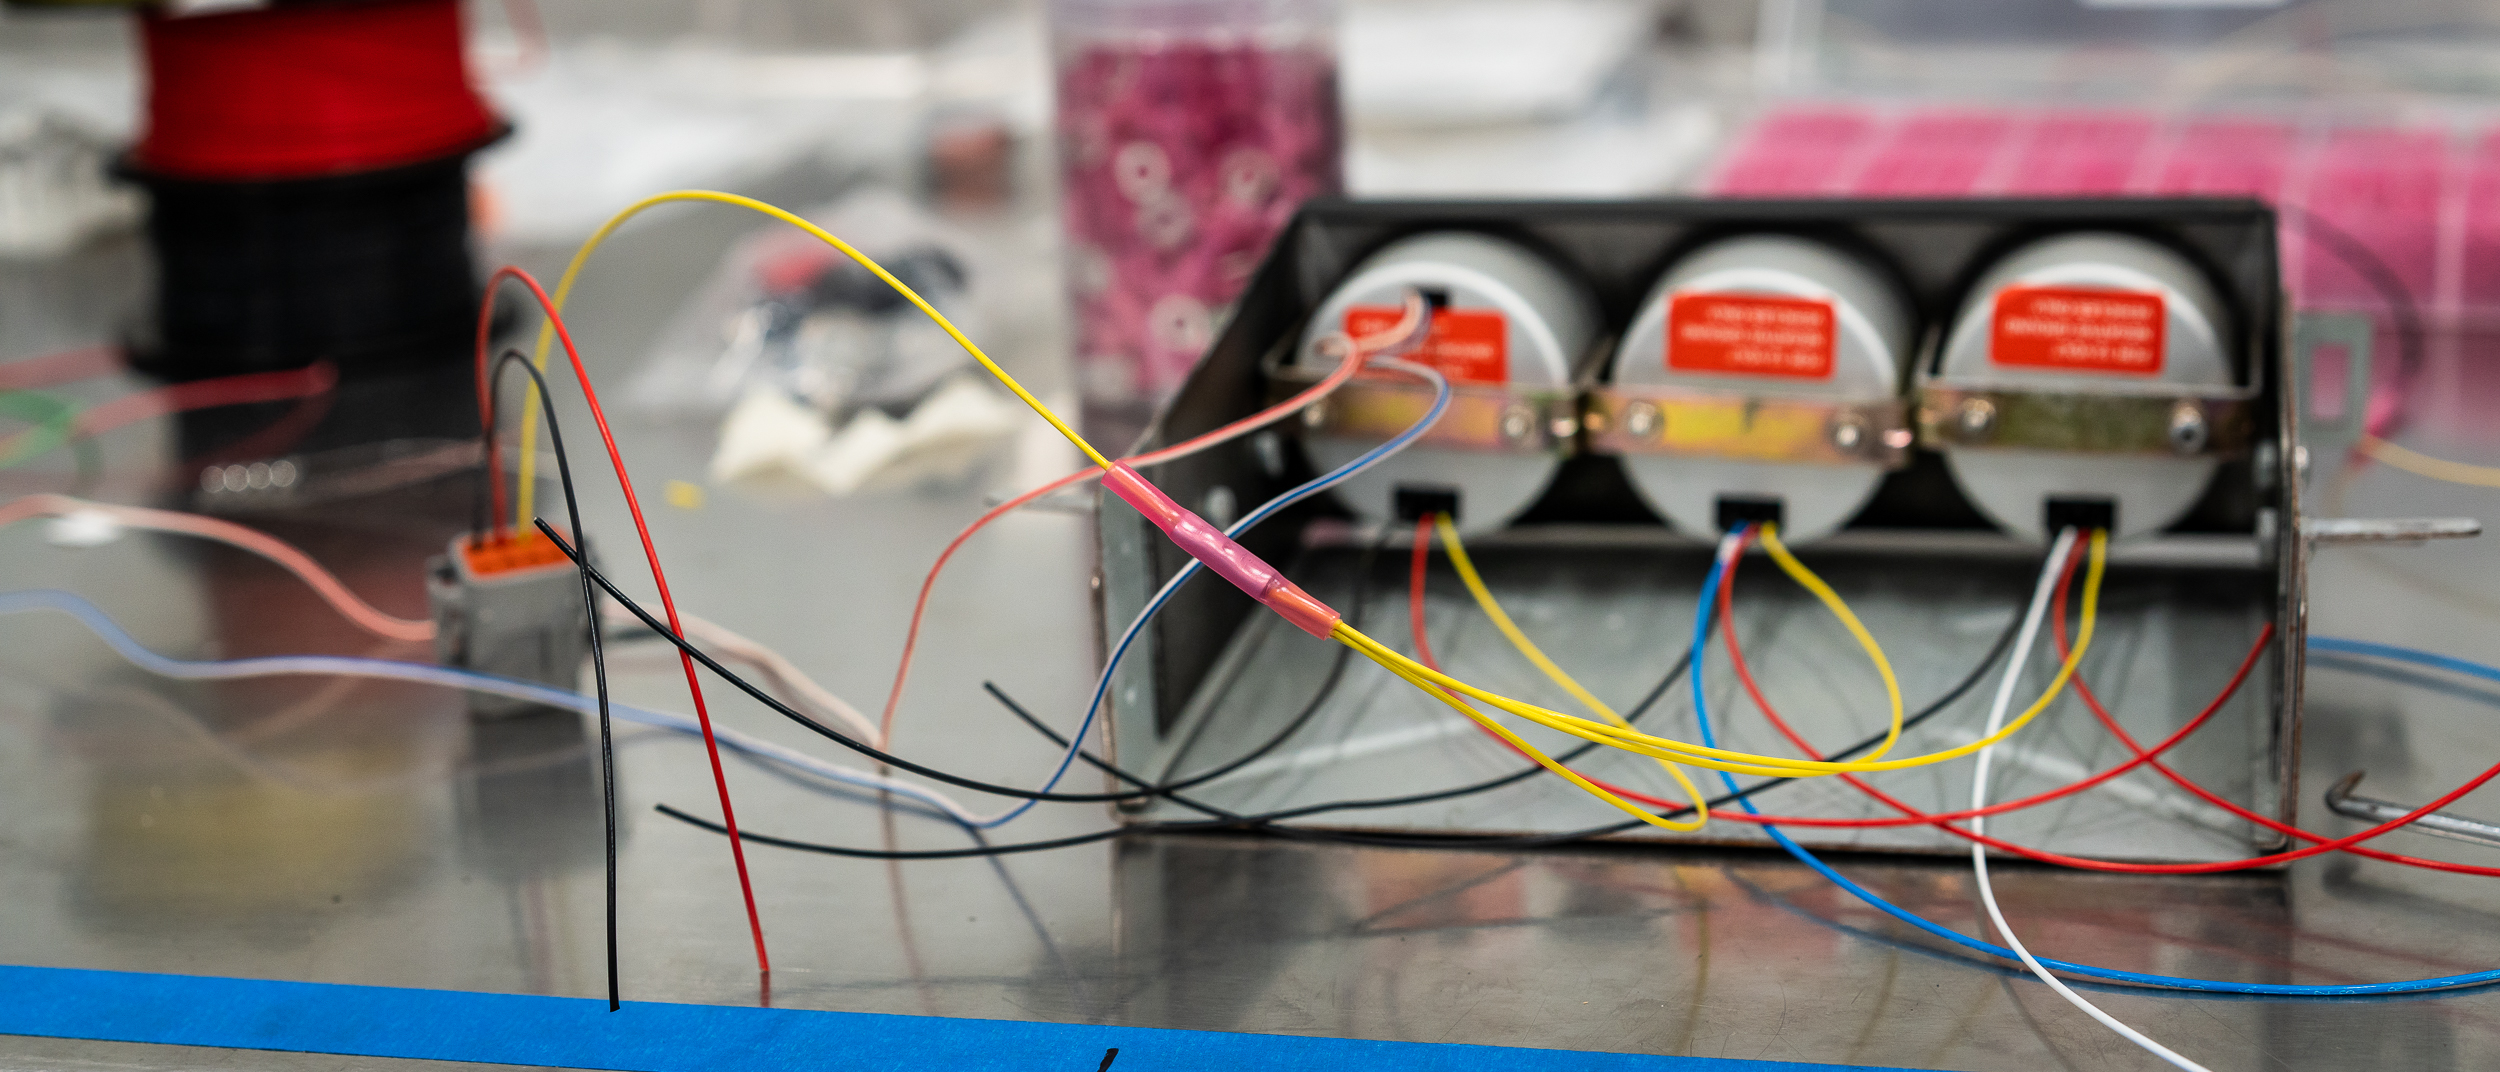
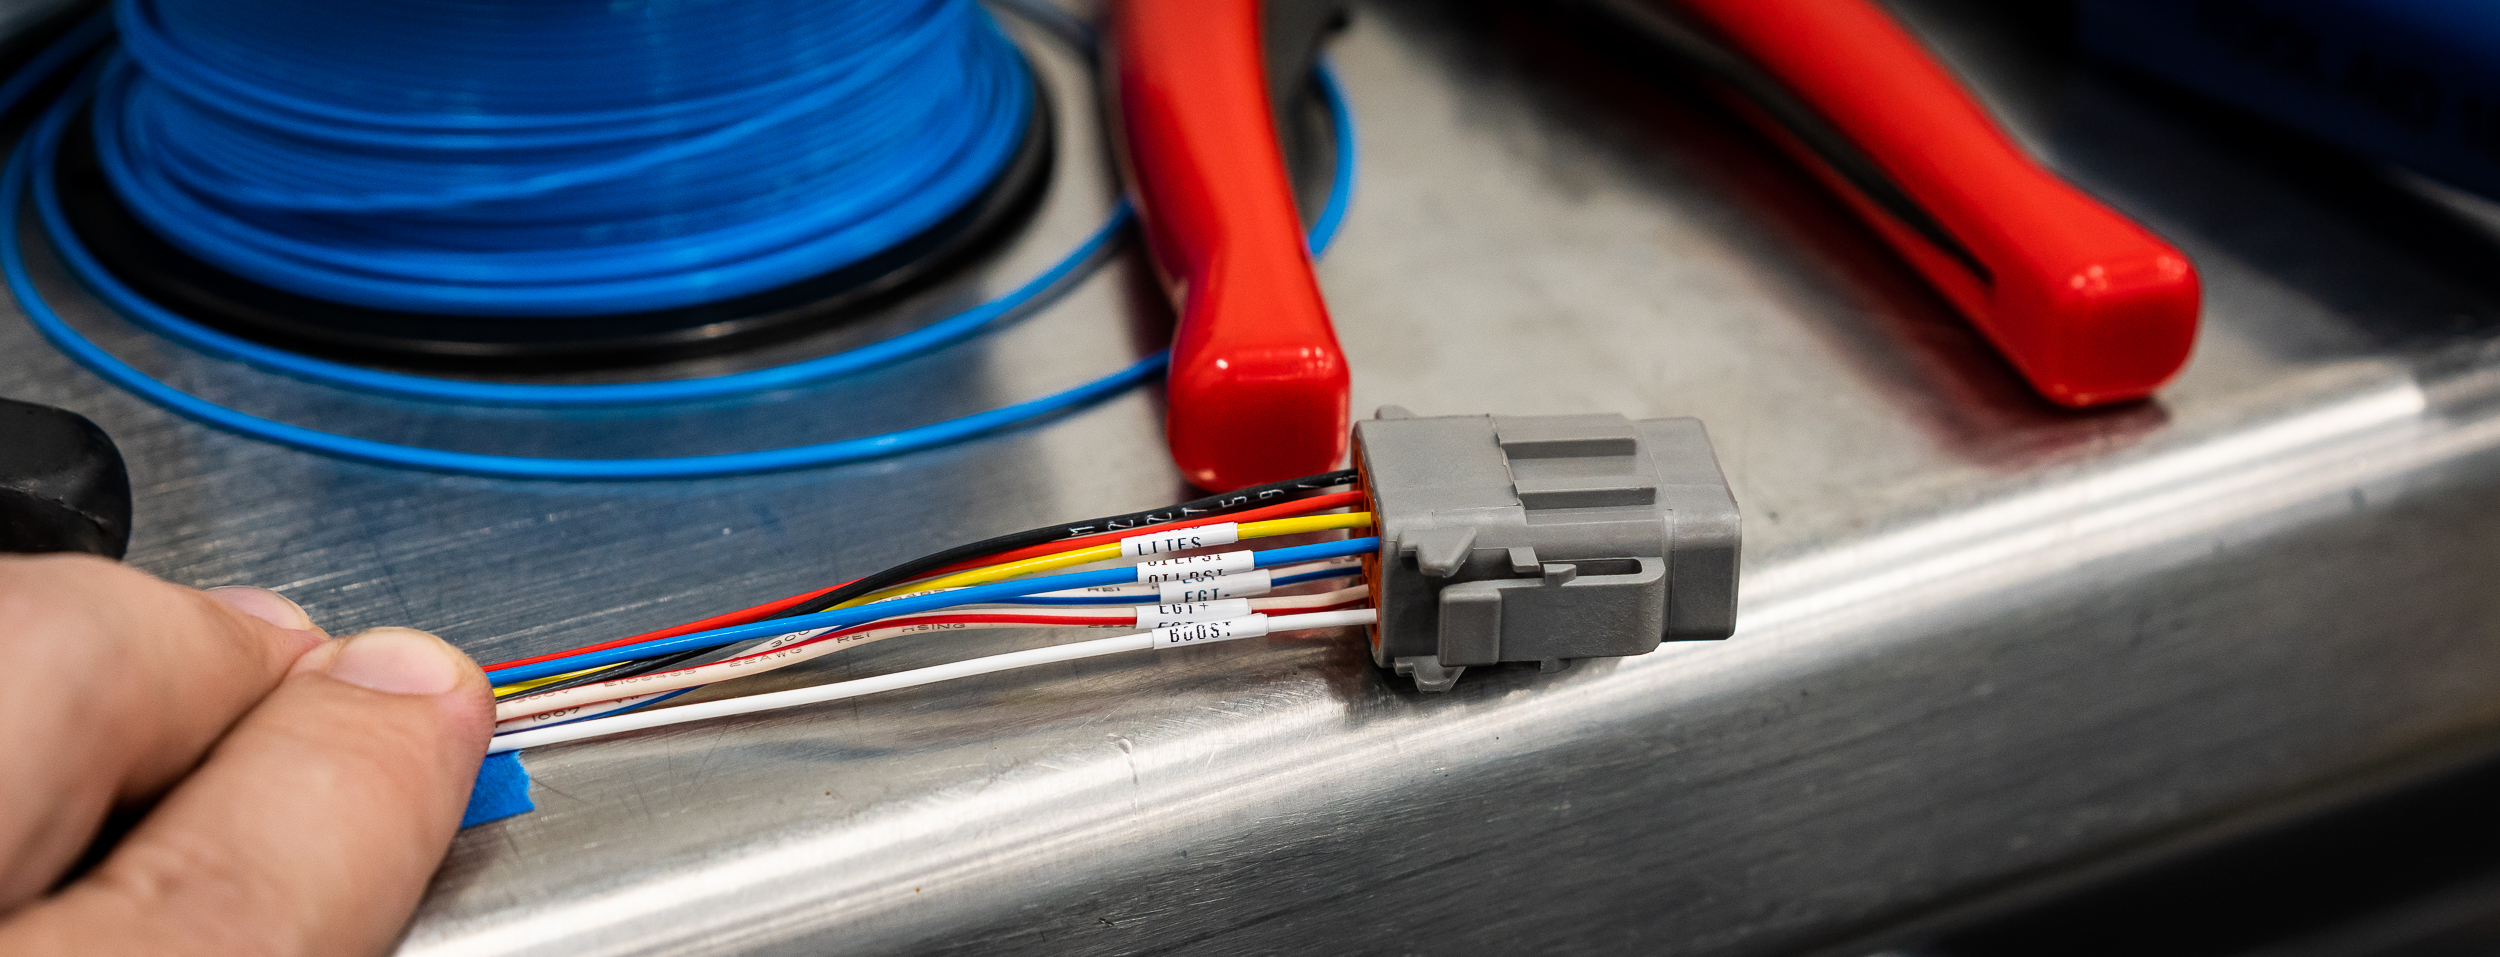
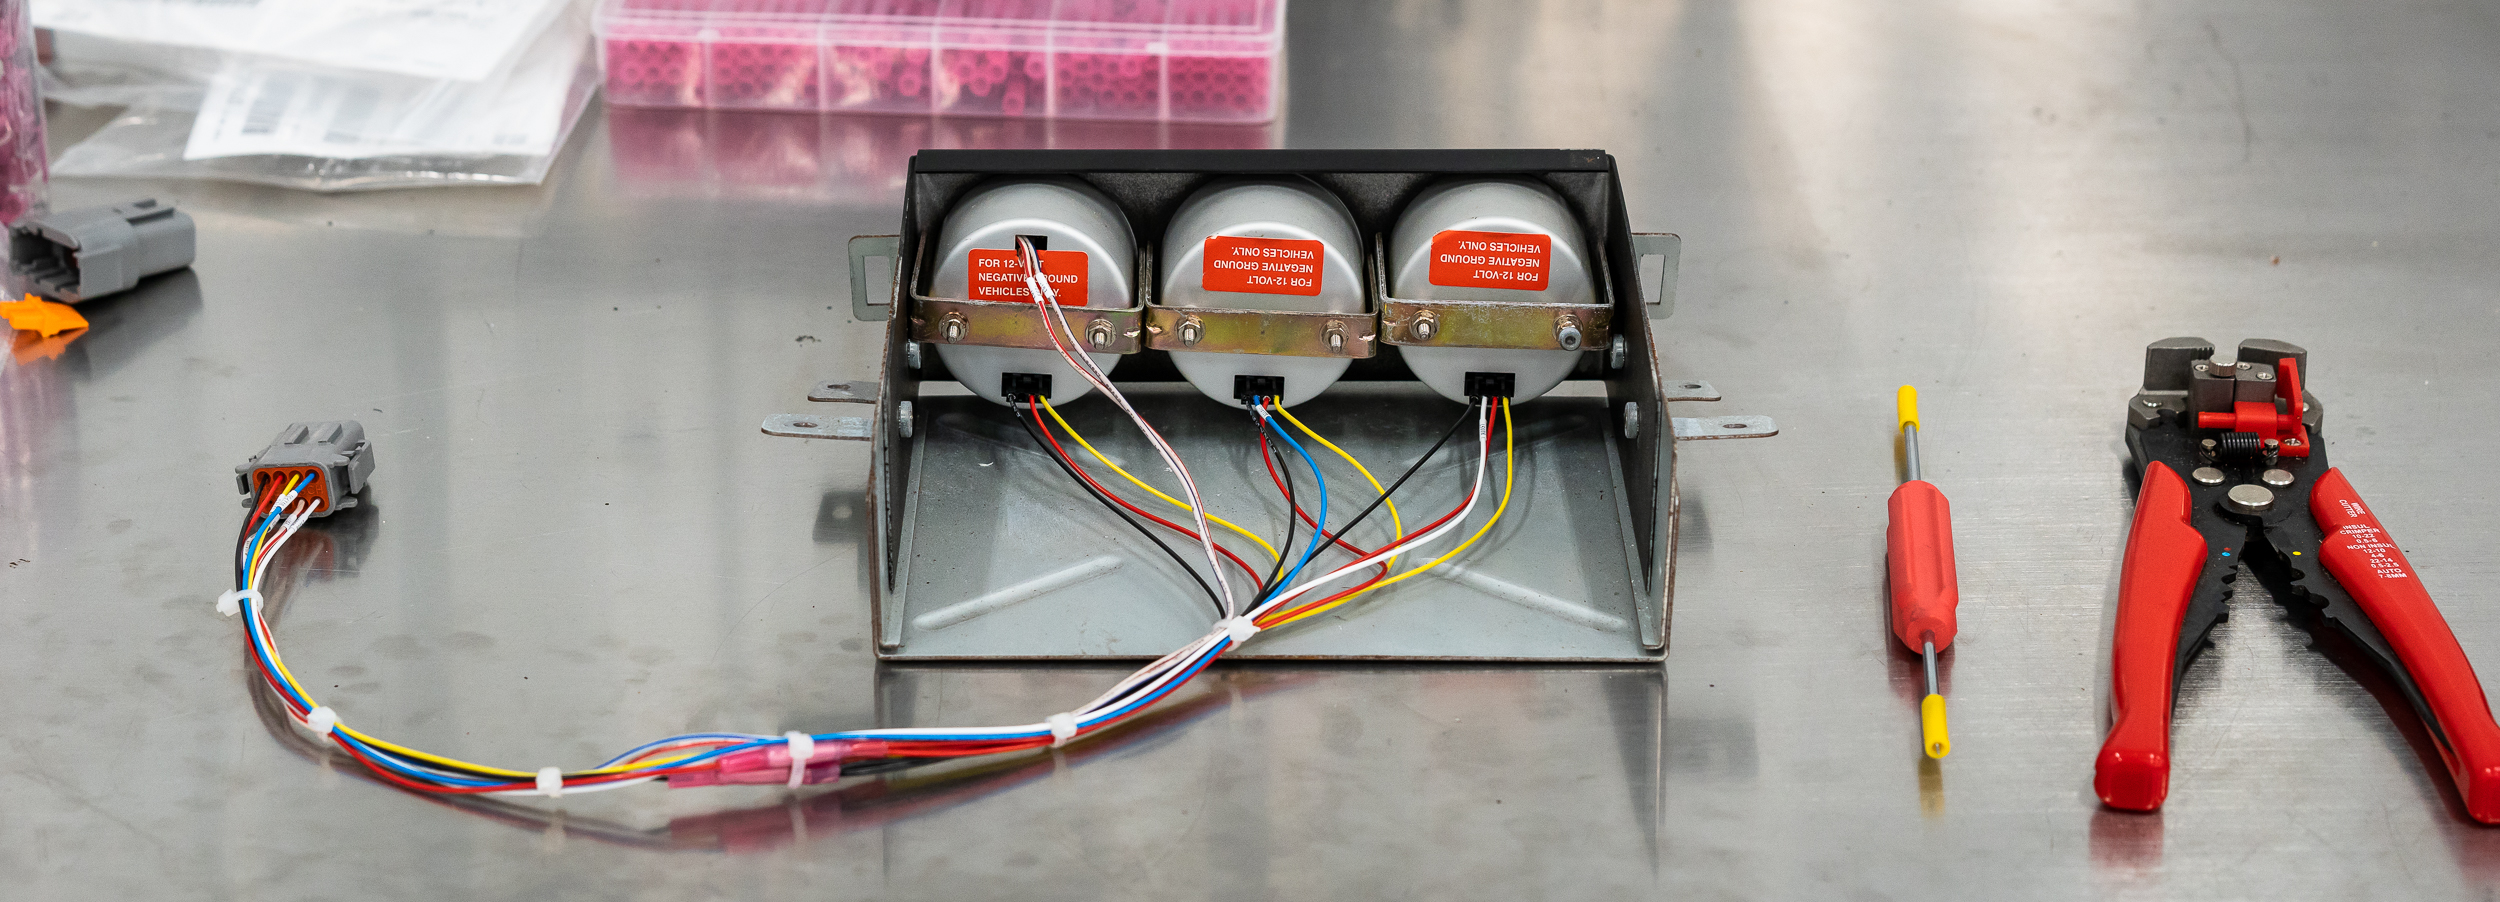
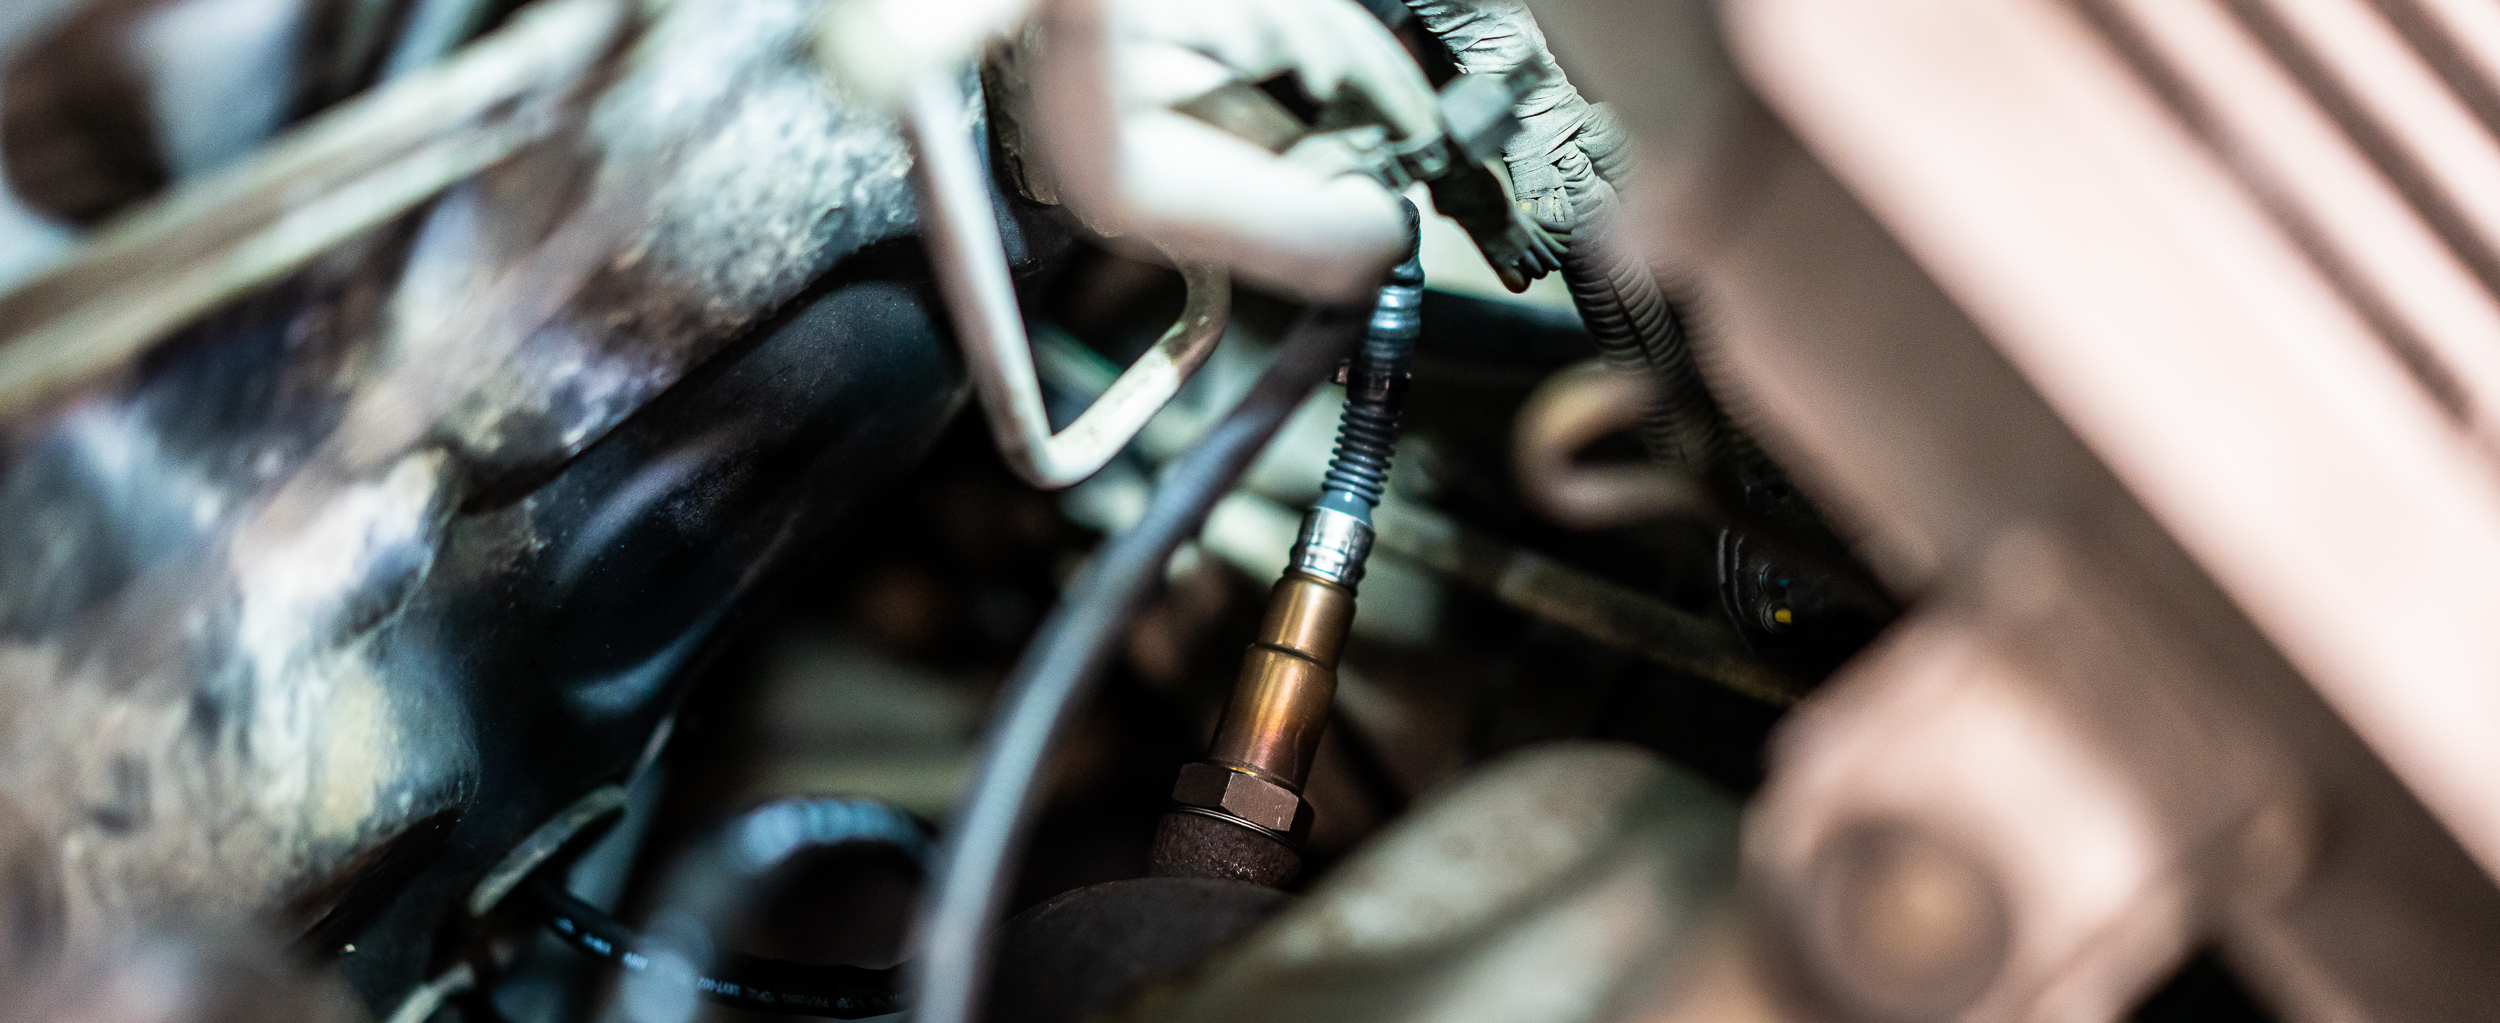
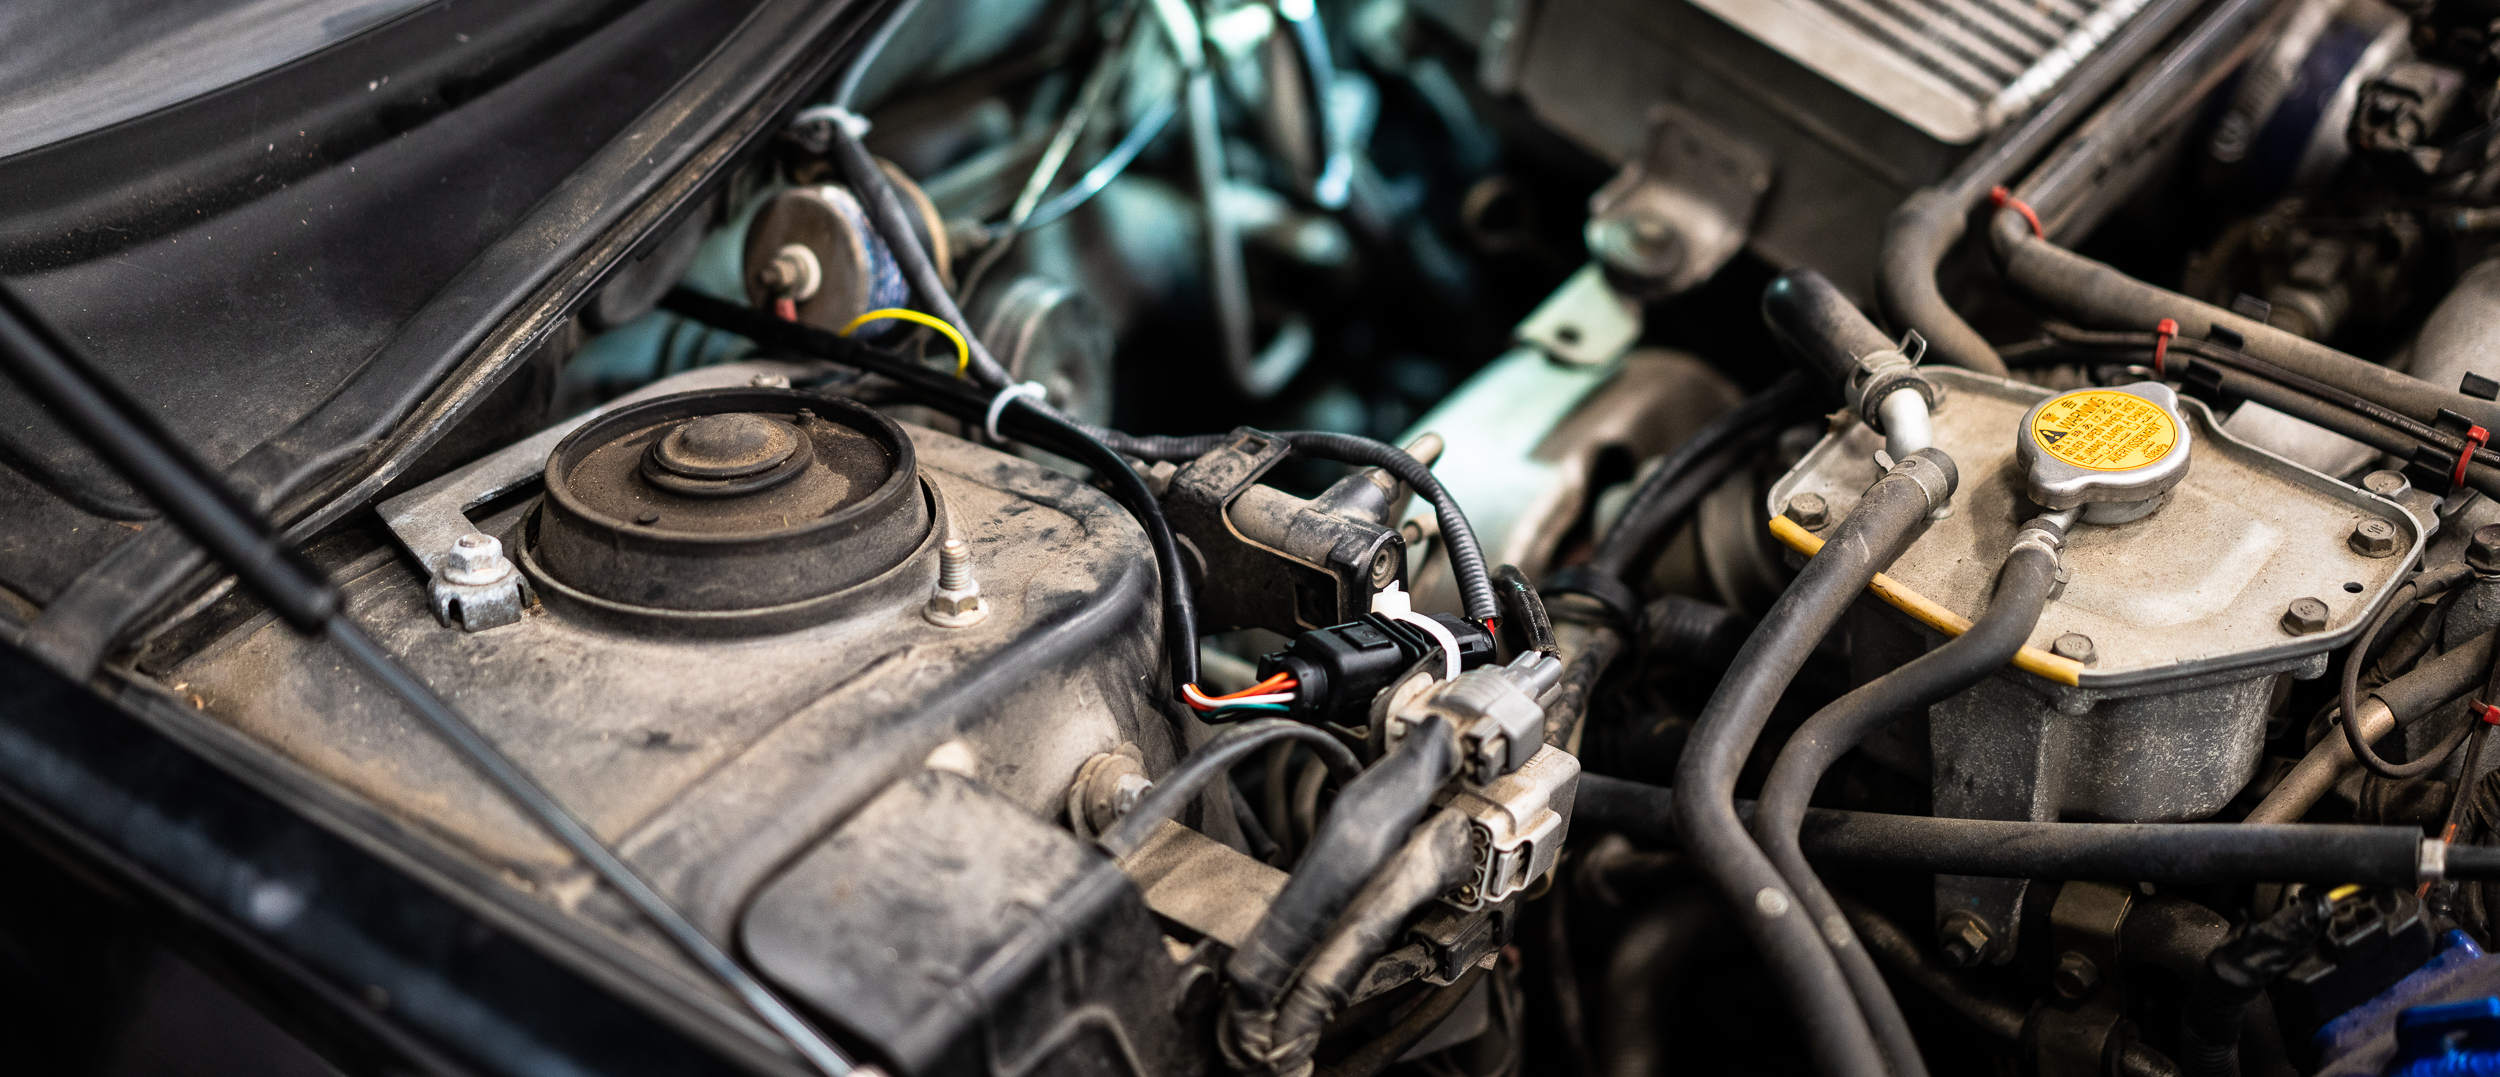
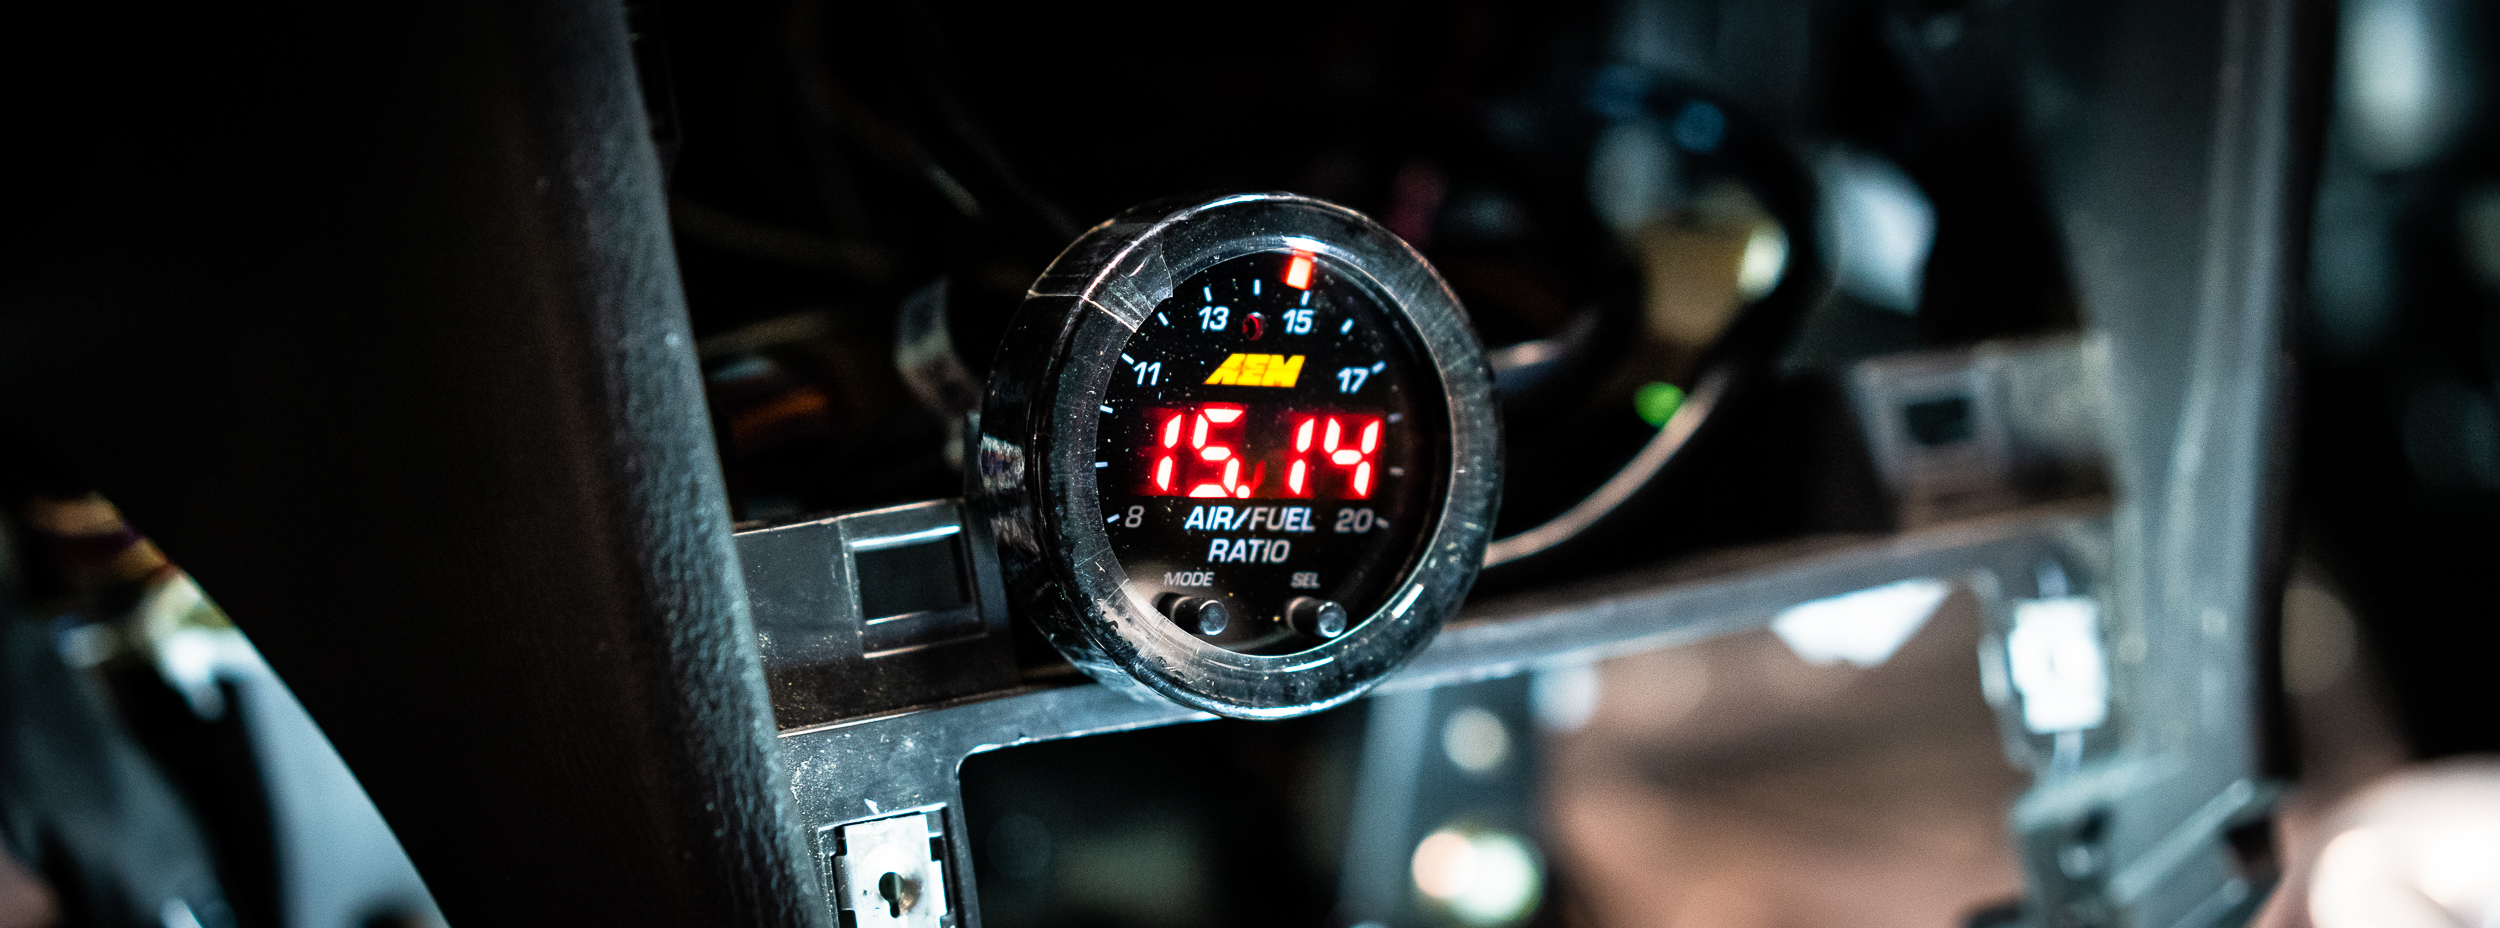
This event has given me pause, though. I was shooting for a September track weekend (HPDE), but I've decided to cancel that idea. I now want to get the dash cleared of lights and codes, get the boost, EGT, oil pressure, and wideband O2 gauges (that I already have) hooked up, and drive the car for a bit. I want to make sure this thing is still viable before I spend a bunch more money on go-fast bits like tires, brakes, aos, oil pickups, big turbos, 2.5L blocks, 6 spd transmissions, etc etc.

damen

java230
java230 UltraDork
8/3/18 12:49 p.m.

Yep that would be an issue! And I think your right, the 12V constant simply ate the pin away. Brackish/salt water?

FunkyCricket
FunkyCricket New Reader
8/7/18 3:32 p.m.

I've seen network cables do worse to a switch with 48V @ .5A when the cable gets soaked. Should be a quick fix, but I would check anything that gets constant power from the battery. Those batteries can put out some juice if it has a path, so it can eat stuff fast.

badwaytolive
badwaytolive Reader
10/5/18 3:22 p.m.

Here's some Saabmarine stuff. I haven't been in a super rush because my racing brochachos' cars' are not in service currently, and I don't want to go to the track by myself.

I finished removing some bits of interior, mostly in the trunk/hatch area. The pile is large, but as it always seems to go with these things, not a huge amount of weight saved.

We've been having trouble with the wireless scales; really only 2 read properly, so you have to weigh and jack back up and shuffle pads a couple times.

Then the drivers front corner was 835 lbs, for a total of 2,874 lbs with a 57.5% front, 42.5% rear split. 

Car and Driver weighed a stock version at 3,256 lbs, so that's a 382 lb weight loss? 

Man, that's still heavy though. I actually want to race this, probably in ST3 or 4 with NASA (or the time trial version), which are 10:1 and 12:1 WT:HP classifications. With a couple modifiers for being a 5-door wagon, running skinny tires, base aero, etc, I can probably have around 300whp, which is about the limit of the 5-spd driveline in the car anyhow.

I'll know more later once I get closer to the track.

It's unfortunate, but I'm going to have to drive this thing to and from track events. I really waffled badly about pulling the a/c out completely out, to save a purported 30 lbs or so, but I finally came to the conclusion that I'm too old and soft to suffer through hot Texas track days and transits without a/c. Which meant digging the blower motor and dash back out of the pile to reinstall.

I did strip the airbag out of the dash, so it was only 11 pounds to add back in. I didn't weigh the blower motor; I was too sad. Putting weight back in cars makes me sad.

There was a great deal of cleanup involved. It's been over a year since being flooded, then sitting outside, for these parts.

One big benefit of putting the dash back in is mounting for the gauge cluster and additional gauges just got a lot cleaner.

My custom mount is no longer needed.

Both pieces went in without drama.

Before:

After:

With that, I hooked up the HVAC controls. The blower fan and diverter solenoids all seem to work. I'll test the actual a/c later when it becomes driveable.

But that's a victory, as long as you don't consider the wiring part of it. I'll take it for now. An additional win is that the turn signals work now. The hazard switch is in series with all the flashing stuff, so when it wasn't in, nothing flashed. Yay, one less problem on the list.

In random shop news, Nik accidentally bought a 230,000+ mile E46 on ebay as a daily driver. It needed "a little maintenance", but it's been like this for over a month now:

Each time he goes to replace 1 thing, he finds 2 broken things. That diverges really quickly. Like a strut tower bar was hiding split strut towers on both sides that will need welded up. That sort of thing.

I went back to start looking at the wiring. I have the wideband and then the boost, oil pressure, and EGT Maddad aftermarket gauges that I want to get reinstalled nicely. I quite like redoing wiring; although it's time consuming, it's very satisfying and orderly. This gave me occasion to dig my old travelling elec bag out of the back of the closet.

I actually found a National Instruments USB DAQ card that I got for crazy cheap when I worked there in 2007. Neat! I might try to get it fired up and acquire some data.

I'm going to tackle the 3 Maddad gauges first. Here's the wiring that was installed with the gauges back in 2006 or so by a previous owner. The Scotchloks did not survive the flood; corrosion took over and rendered them non-conductive.

I jumped in there with a handful of alligator clips and a multimeter to try and see if the gauges were functional before I spent a bunch of time reinstalling them.

Fired right up, so I'll continue forward.

To the bench!

Before I tore out all the in-car wiring, I had the opportunity to use my new wire label maker, which I actually bought for the Datsun wiring harness.

I'm in love. It prints on a variety of tapes, but this is a chemical/abrasion/heat/cold resistant vinyl.

I took stock of all the connectors and source wires and am currently planning how I want to wire everything up. I think maybe I'll wire the gauges to a connector, then it will be one plug to put them into the car. And if/when they have to come out in the future, it will be greatly simplified as well.

I'm also installing this wideband, so I unboxed it to see what/if/how I might want to integrate that.

There are actually a lot of wires for this thing. Like 13? It has an analog 0-5V sensor output as well as a CAN output that can be used for DAQ, so I want to make sure that's accessible.

I zip tied some of the wires up and decided to do a bit of a test drive to see if I could get the Check Engine Light to come back on. Then I could have some time between shop nights to figure out what the problem might be.

It took about 10 minutes of driving, but it popped on. I know, the car was turned off at this point, but the CEL had triggered, promise.

There are a lot of lights to sort out here later, too. This is an STi dash that my brother swapped in. A lot of the lights are from that swap. Not sure how much time I'll spend on getting those out.

I thought maybe while the car was nice and hot, I'd remove the wideband bung plug (eesh). I anticipated a difficult removal.

Sweet jeebus, I almost blew out my shoulder/elbow applying Fmax at the end of a 4 foot extension to get this thing out. But it came out. Ooof.

So at least that's done for when it's time to install the wideband.

Nik got a sweet bluetooth OBDII reader, so we pulled the CEL code: P1443 - EVAP SOLENOID SOMETHING SOMETHING

Google told me that usually it's either a solenoid under the hood, or some problem with the charcoal canister.

I decided to start under the hood. Gawd these engine bays are ugly. Gonna take some time to get used to the flat configuration.

I used a nice write-up online to put the car in test mode, then pull some vacuum stuff to find the solenoid/valve in question. It recycles the vapors from the charcoal cannister into the intake.

Test mode cycles a bunch of fans and pumps, so you blow into the valve and it should alternate letting air through, and then stopping. It's this pile of stuff here:

It worked as intended, stopping and allowing air flow.

On to the charcoal canister. 

I learned that it was under the bumper behind the rear passenger wheel, and it doesn't like getting fluid in it.

Uh oh. There's 0% chance this thing wasn't fully submerged in the flood.

The salty-ocean-ship-corrosion on the metal parts around the canister didn't give me confidence.

It took a surprising amount of effort, but I got it uninstalled, along with the pile of hoses and whatnot that go with it.

Apparently, these should weigh 2-3 lbs, and when they get to 4 lbs, they need to be replaced: it's absorbed too much stuff.

So I weighed mine.

Yep, 7.04 lbs.

I'd say it's toast.

I pulled it apart in the name of science.

Ew.

A bunch of liquid came out. 

I might actually delete the entire evap system, just to simplify everything and not to have to buy $100 worth of heavy parts to put back on. Something to consider.

I think I have all the information to move forward with the wiring of the gauges, so I'll order that stuff and hopefully keep going.

damen

Mezzanine
Mezzanine Dork
10/5/18 5:03 p.m.

I'd replace the evap system in kind - you would eliminate all the CELs that would result in removing the system. Also, the evap system does the job of venting your fuel tank and probably has some rollover stuff built in too. I've been trying to retrofit an evap system to a car without one, so removing one from a car doesn't really make sense to me.

badwaytolive
badwaytolive Reader
10/6/18 10:43 p.m.

In reply to Mezzanine :

The fuel tank vent remains in place. I'll put a K&N breather on the 0.75" vent line to keep anything out of the tank.

The rollover shut-off valves are still in place on the top of the tank, so no worries there.

What performance benefit does the evap system provide? I'm always in favor of more performance!

Why are you looking to add one?

Thanks!

damen

badwaytolive
badwaytolive Reader
10/11/18 12:40 p.m.

Honestly, I'm just trying to get this thing on the road, but I want to do at least some of the work properly.

I decided it might be nice to have the 3 MadDad gauges (boost, oil psi, egt) on one connector, so I ordered a bunch of supplies. An extra bonus when making my own harness is that I get to choose the colors. I have some pretty strong red/green colorblindness (thanks, Grandpa!), so I usually need a buddy/color spotter to do any work on wiring harnesses. In fact, I've even employed my 2 yr old for the role on occasion. I went with red/black/white/yellow/blue/gray. Beautiful.

I first put the gauges in their spot to measure the length needed for the mini-harness.

There's a nice cover for these, so the install should look pretty nice if I don't mess it up.

The connectors for the gauges are tiny molex style that you more typically see in PC builds, but with the guidance of my wiring guru, RYEPhil, I was able to track down new pins for the connectors. If you can see (I really need a macro lens for this type of work, sorry), the original wires are badly chewed up from the scotchlok connectors used to hack it into the car originally, so instead of cutting and splicing as I might have in the past, I used new pins and all new Spec55 colorblind-friendly wire.

Chewed up original wires:

New pins:

New pin crimped onto new wire:

New pin/wire (yellow) in original connector with 3 left to go:

The connector to the wiring in the car needs 7 wires (power, ground, headlight-on-signal-for-dimming, boost signal, oil pressure signal, EGT thermocouple plus, EGT thermocouple minus), and I was free to choose any connector on earth. Which is actually a bit overwhelming.

The super hotness would be a Deutsch Autosport connector, but that would be over $100 for one 8-pin connector. I don't have what it takes to spend that on a connector. But Americans need dreams, right?

I went with a DTM (also Deutsch) 8-pin connector. It's pretty well regarded in the motorsports community. My only issue with it, once it arrived, is that it's gigantic. Oh well.

Here's the first wire crimped and installed:

I pulled out my wire labeler again. Love that thing.

And then I finished up the rest of the connector.

And then I did it twice more for the other gauge connectors:

And then I plugged them into the gauges:

Aaaaand then I did a 3-1 splice on the power, ground, and headlight-on-signal wires. I used heatshrink waterproof crimp butt connectors for that:

With those done, I was able to finish up the DTM connector:

And then organize the wires. Yay!

I thought I was done but RYEPhil says they need to be concentric twisted and DR25 heatshrinked. At the risk of disappointing my guru, I might just send it like this.

Shame.

damen

Mezzanine
Mezzanine Dork
10/11/18 3:07 p.m.

Great is the enemy of good...

Excellent work on the wiring - thank you for sharing this especially since everyone is afraid of wiring. Concentric twisting is waaaaayyyyy overkill for our stuff, as I'm sure you know. I was really happy to see that HPA started offering another wiring course aimed at a more pedestrian/plebian/prole level. Anything to encourage more people to try to do a good job on this work instead of throwing up their hands and cursing wires as black magic.

wvumtnbkr
wvumtnbkr GRM+ Memberand UltraDork
10/11/18 4:17 p.m.

Just found this thread.


Moar!

badwaytolive
badwaytolive Reader
10/12/18 5:50 p.m.
Mezzanine said:

Great is the enemy of good...

Excellent work on the wiring - thank you for sharing this especially since everyone is afraid of wiring. Concentric twisting is waaaaayyyyy overkill for our stuff, as I'm sure you know. I was really happy to see that HPA started offering another wiring course aimed at a more pedestrian/plebian/prole level. Anything to encourage more people to try to do a good job on this work instead of throwing up their hands and cursing wires as black magic.

Thanks very much for the kind words-

If I concentric twist, it will only be for the sake of interest and learning; I agree that it is nowhere close to necessary, or even beneficial, to do in this instance.

Unfortunately, I suspect the car side of this connector may not be as clean or straightforward, but we'll find out!

damen

badwaytolive
badwaytolive Reader
10/19/18 3:14 p.m.

More wiring, this time the car side.

I wanted to find a good source of switched +12V and ground.

I got sick of trying to stab a too-big-probe into the connectors to check for voltage while trying to hold the other probe on a ground and hold the meter and the connector and dropping everything etc etc.

So I bought a cheap small multimeter and a "probe kit" that I can change the tips. So I slapped on an alligator and a reeeeaally pointy probe. Clamp the alligator on a ground and easily poke the pins. Much better. Highly recommended.

I found the wires that went to the cigarette lighter and little light next to it- Jackpot!

So I went into the pile of interior bits removed from the car and even found the other side of the connector- double jackpot! I pulled the pins out for the little light, I won't be using that, and now have a nice connector to 20A fused power.

With the number of gauges, and hopefully a datalogger, to go in the car, I wanted to make a nice access point for ground and power, so I found these marine lugs the accept 1/4" ring terminals. They don't have caps, but will be back in the dash, so I'm not too worried. Plus, it's fused in case something goes too awry.

Here's the newfound connector and the lugs.

I clipped and spliced to get power to the lugs from the connector. I doubled up the 20awg wire because that's the only size I have, and it seemed like the right thing to do.

I found some nice holes to mount the lugs to in the car. At some point, I had the foresight to buy a kit of stainless hex screws with washers and nuts. It was eyebrow-raisingly cheap on Amazon, so I probably wouldn't trust my life to these, but it was nice to have fresh hardware to pop this stuff in.

Now I can easily add items that need power and ground in this dash area. Yay.

I had to run new wire for the EGT sensor and the oil temp sensor, but the splice had to be near the firewall by the pedals. Horrible contortions ensued to get this stuff spliced in nicely.

I've since learned from RYEPhil that the EGT sensor is probably a K-type thermocouple that needs special wire and connectors to work properly. Thermocouples work by generating a voltage from different materials as they are exposed to heat. When you splice in the wrong type of wire, it jacks with the relationship and pretty much ruins it.

So that's annoying to find out after-the-fact.

Anyhow, I got everything wired up to the other side of the DTM connector and plugged everything in to see if I got it right.

Here's an 11-second video of the gauges lighting up and doing the apparently-desirable needle sweep: GAUGE STARTUP VIDEO

Well, the boost gauge needle doesn't move at all, the oil pressure seems like it might be correct, and the EGT just acted bizarre, which i now know is probably due to my ham-fisted sabotage. 

I was grumpy and didn't take any photos. I spent some time double checking things, and that's when Nik told me the boost gauge wasn't working even before the flood. I probed the signal output of the boost sensor and there was nothing there. Due to the fact the gauge fired up and behaved normally otherwise makes me think the sensor is bad.

I hit up RYEPhil for a sensor recommendation and he pointed me to some $200+ MoTec 3bar 5V reference sensors that "might be acceptable". I paid $1500 for the car.

In a fit of cheapness and not being fully committed to this solution right now, I instead found a $17, yes $17, boost sensor WITH GAUGE. RYEPhil is not amused by my #1 Lucky Golden Boost Gauge, but it should be here next week and we can all find out together.

damen

badwaytolive
badwaytolive Reader
10/29/18 3:22 p.m.

I don't think I covered it here, but I did in fact get the ECU replaced with a "stock" version from eBay. I successfully unmarried the COBB tuner from the old ECU, then tried to hook it up to the new ECU. It wouldn't marry to the new eBay ECU, but because the COBB V1 is like 15 years old, I figured it had served its time. I contacted COBB just in case they had a recommendation to get it working, but they told me the V1 has been unsupported for quite a long time, but they'd give me $100 towards a V3 tuner.

I don't want to spend $650 on that right now, so I decided down another path: OpenSource!

There exists a non-zero amount of people that use some software called ECUFlash and Romraider with an OBDII adapter called a Tactrix OpenPort to download the ECU image, edit it, then re-upload it. This is tuning.

My friend Kevin did a bit of it on an STi he had in The Great White North, and while that car is gone now, he has a Tactrix OpenPort which he offered to loan me.

It looks like this:

I diligently followed the instructions online, but I kept getting some sort of read error whenever I tried to download the current image. Ye olde google eventually led me to numerous posts pretty much telling me that this ECU has been messed with in the past and is now locked and untunable by anything other than whatever is on there. There's a company called ECUtek that is infamous for locking these ECU's with their tune (in the name of protecting their IP), and it pretty much ruins the ECU for anything else.

The eBay person I purchased it from tells me he had no idea and it worked fine for him when he needed a stock ECU and "hope this helps!".

It does not, in fact, help. It does, however, explain why the COBB V1 I have was acting broken. So maybe that thing's okay after all. 

I've ordered ANOTHER eBay "stock" ECU, although this particular seller tells me it's OEM and "virgin". So hopefully I'll have better luck?

I was frustrated and wandering about the shop aimlessly after this series of discoveries, cursing my luck and just wanting to take my ball and go home. But instead I thought maybe I'd work on getting the wideband gauge installed.

So here's that.

I used to be really into tucking everything away to look good, but now that I've worked on so much stuff, I prioritize intelligent and easy to service. Fewer hidden things.

Like the connector for the wideband sensor is tied up nice and easy to see and service, if need be.

There are two connectors to the back of the gauge. One is the connector to the sensor, then the other is power, ground, and a bunch of signally stuff. There are outputs for 5V analog, CAN, and Serial. I'm not implementing any of that right now, but I will in the future, so I labeled everything for identification later.

I need to mess around with the settings on the labeller a bit more, because I currently waste >50% of the printing material.

The only wires I'm using for now are the power and ground. The lug/terminals I installed for the other 3 gauges are paying off already; it was so easy to just pop on a couple ring terminals to install this. Yay.

Victory:

Now I just need to figure out where to put it.

I learned from RYEPhil that I pretty much totaled the EGT gauge by cutting and splicing the thermocouple sensor wires. Thermocouples generate a tiny voltage (like microvolts) from two dissimilar metals forming an electrical junction. Splicing in other different metals totally jacks that all up, creating more unknown junctions.

It's not too big of a loss as the gauge was totally dead before I did all that anyway. I'd call the manufacturer or look at the documentation for the gauge to repair it and put in the right connections, but the company is out of business and there is no documentation. I think I'll probably put the wideband in that spot for now, then use EGT with new sensors and all that when I do a datalogger.

damen

1 2 3

You'll need to log in to post.

Our Preferred Partners
PFhWBTh6zrLKfhYtVvj6lFUSNN2srSF53FsaRPNWQd2CjS1CJXBDDh6SCHTy5XqM