
jr02518
New Reader
10/20/12 10:38 a.m.
You might have someone take a mold/pug of the glass hood and trunk, then lay-up the center profiles to splice into the wider car.
If you need to save the weight, have the same person repeat the process with the wider, and bound to be heaver, parts.
Carbon fiber might save you the weight, not money.
jr02518 wrote:
You might have someone take a mold/pug of the glass hood and trunk, then lay-up the center profiles to splice into the wider car.
If you need to save the weight, have the same person repeat the process with the wider, and bound to be heaver, parts.
Carbon fiber might save you the weight, not money.
I did some inquiries with other drivers in Mod class and concluded that there are some winning cars that are as narrow as what my car will have to be to keep the tires within the fenders, so I think I may look into that.
For solo work I wouldn't make the car wider,also I'd much rather work with steel and welder to narrow the frame rails/rear end etc over mucking with stinky,itchy,messy composite work on the body.I speak from experience having built an entire car body......one mistake I'll never make again thats for sure.
mguar wrote:
In reply to kevlarcorolla:
I've done a lot of fiberglass and carbon fibre work over the past decades.. I never find it itchy or messy. If it's stinky chances are you're mixing things wrong. I mean it's not perfume but it doesn't stink any worse than gas or grease does..
Yes there are techniques that are used by those of us who do a lot of work with the stuff to make sure things don't get messy or itchy. You might spend a little time with the pro's to learn those..
Haha,for sure I don't count myself as an expert in any way shape or form AND I have no interest in spending any further time with composites to learn the tricks. And I've never walked into a shop thats been doing any kind of resin work that didn't stink,I suspect you've simply become accustomed to it after all those years in it.
kevlarcorolla wrote:
Haha,for sure I don't count myself as an expert in any way shape or form AND I have no interest in spending any further time with composites to learn the tricks.
And I've never walked into a shop thats been doing any kind of resin work that didn't stink,I suspect you've simply become accustomed to it after all those years in it.
Didn't you actually build a KevlarCorolla? I would count you as fairly experienced. 
MrJoshua wrote:
kevlarcorolla wrote:
Haha,for sure I don't count myself as an expert in any way shape or form AND I have no interest in spending any further time with composites to learn the tricks.
And I've never walked into a shop thats been doing any kind of resin work that didn't stink,I suspect you've simply become accustomed to it after all those years in it.
Didn't you actually build a KevlarCorolla? I would count you as fairly experienced.
Yep sure did,took over a year to prep the body for making the moulds on,to make the moulds,make the body pcs and install those pcs.The only reason I tackled such a large project was simply due to not having a clue what I was getting into.
You can make all the bucks out of wood,bond and shape the foam,bondo and shape that to perfection in a day??.How long are the days in your world man?.
Oh I'm well aware of the awesomeness that is the green trim.
I get itchy just being in the same building as anything fiberglass so.......
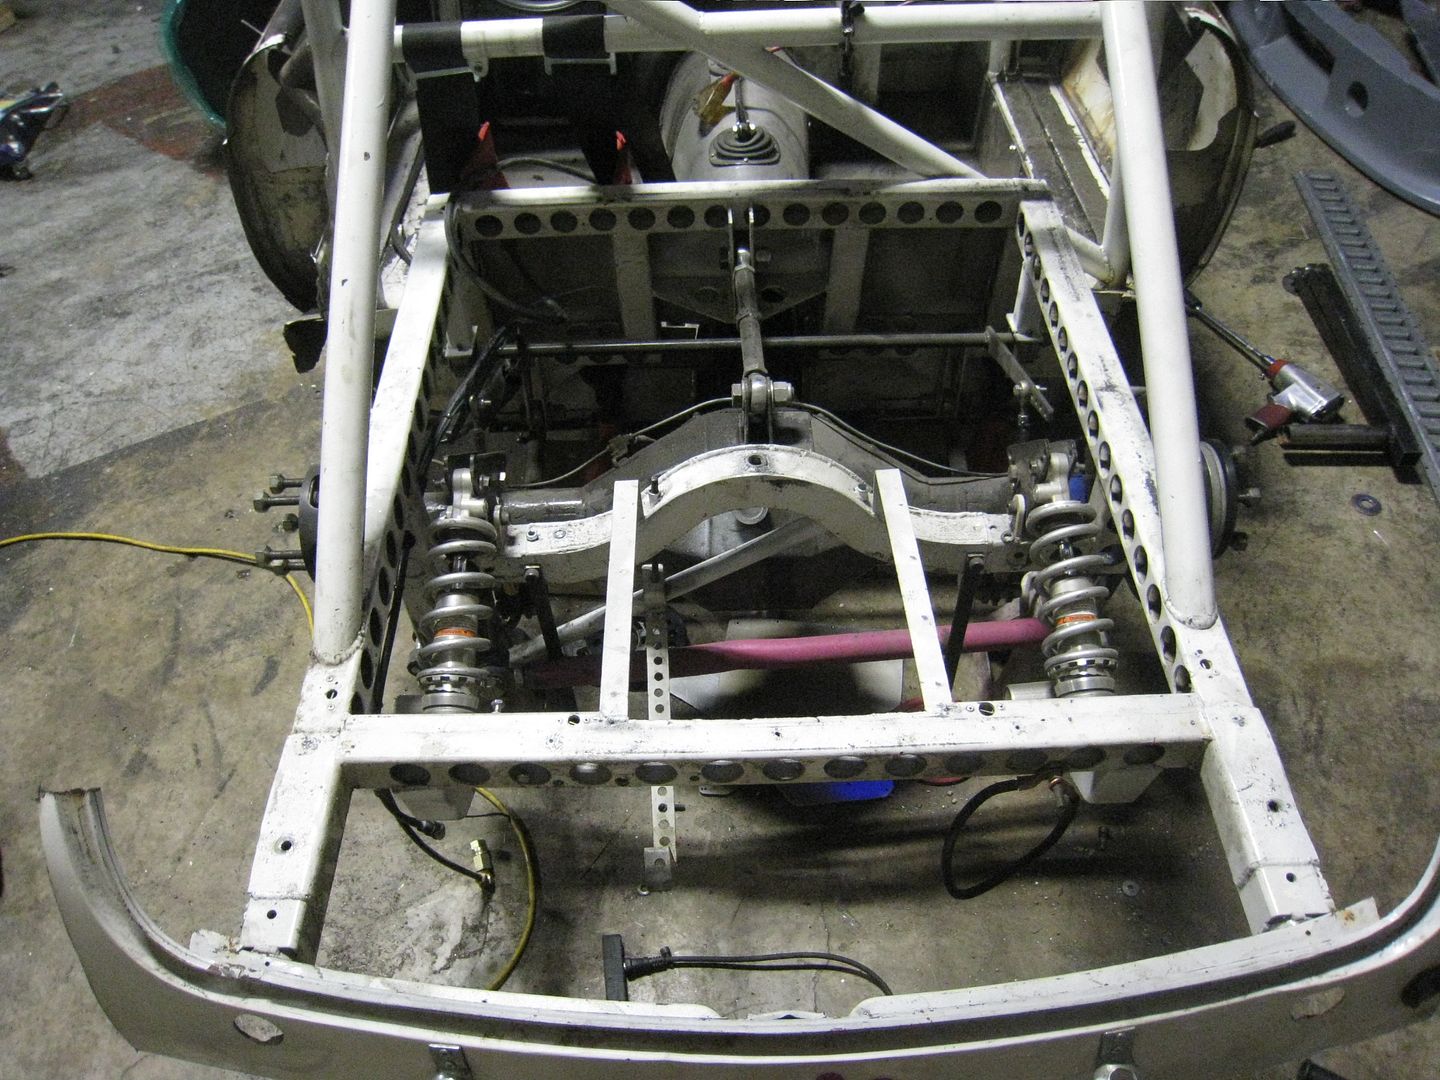
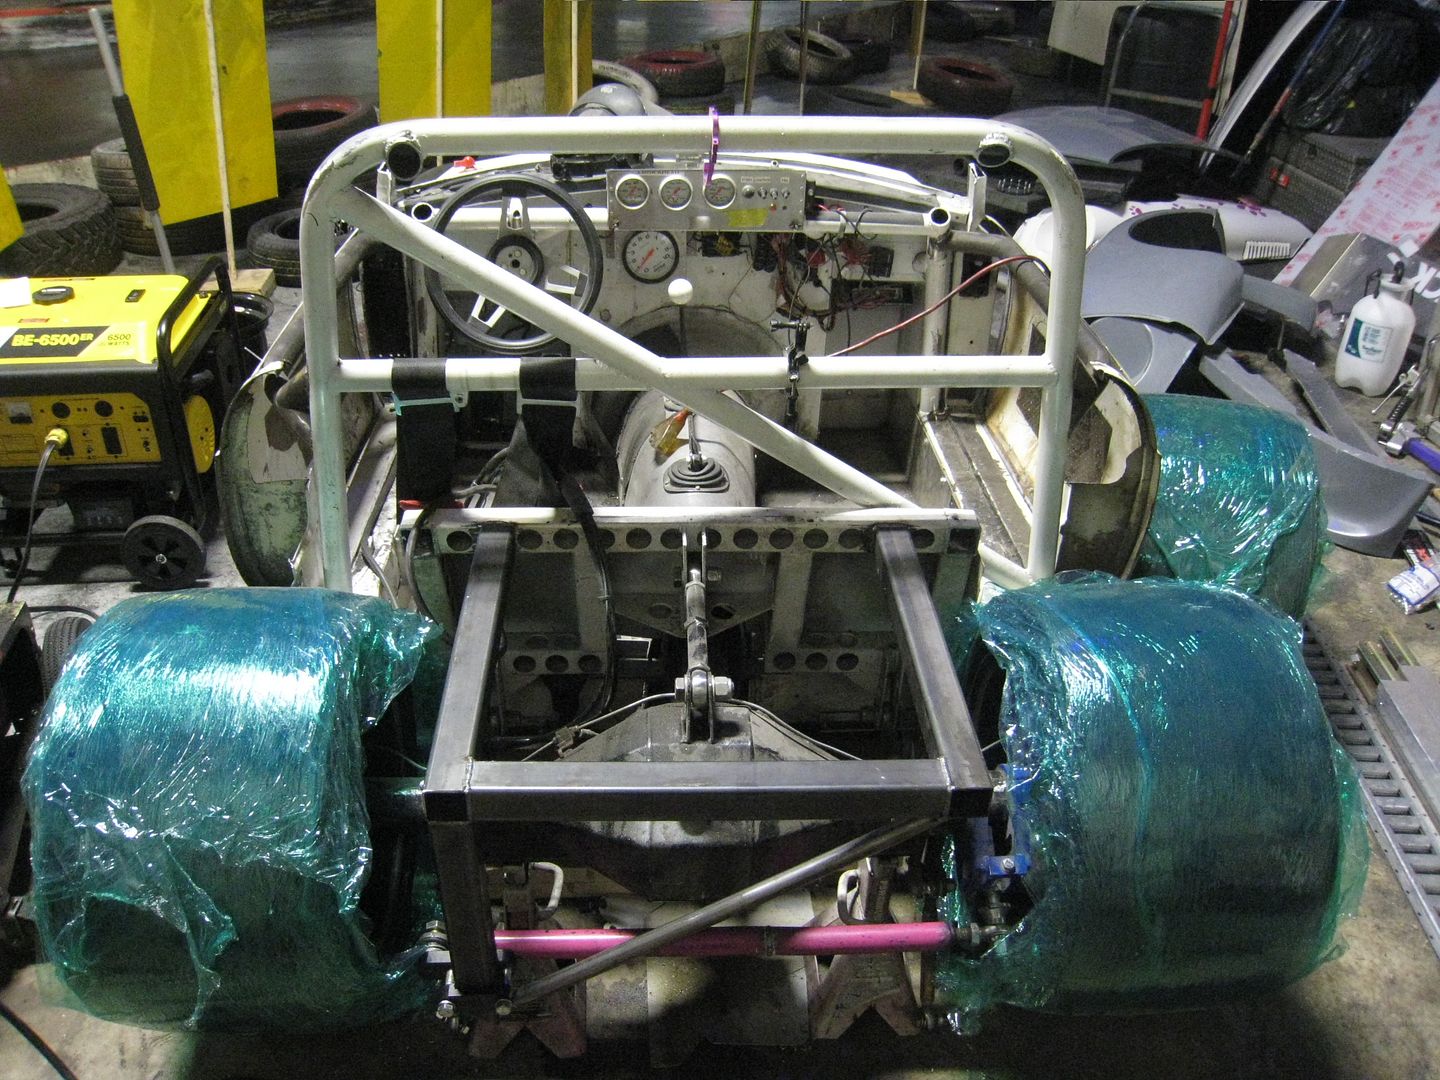
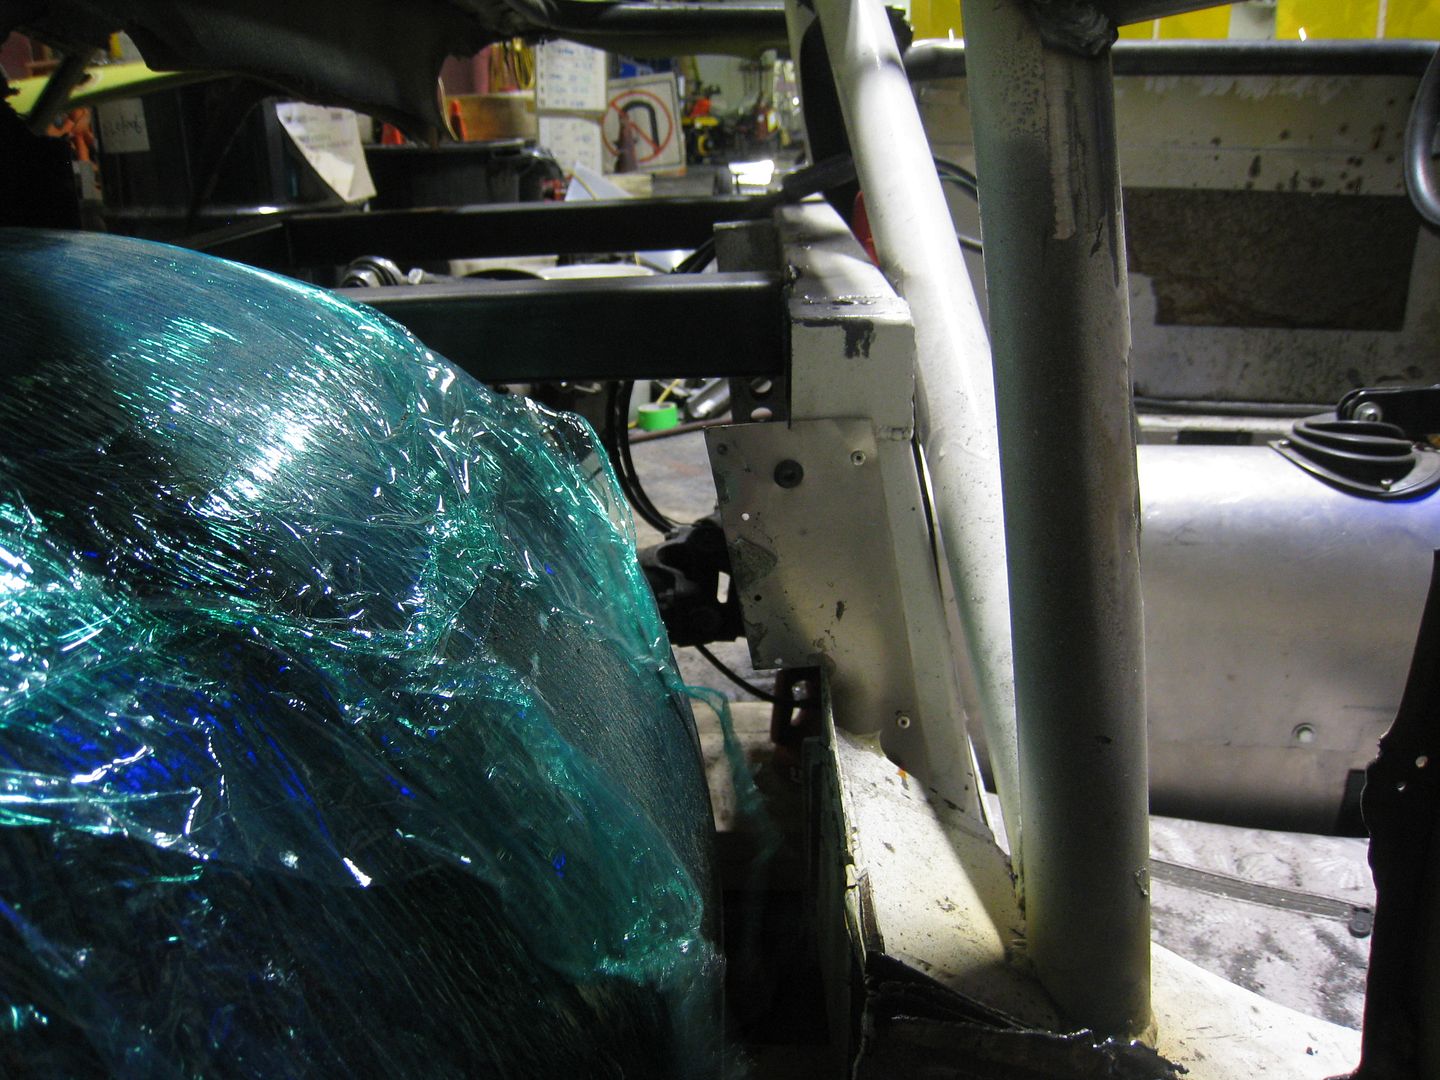
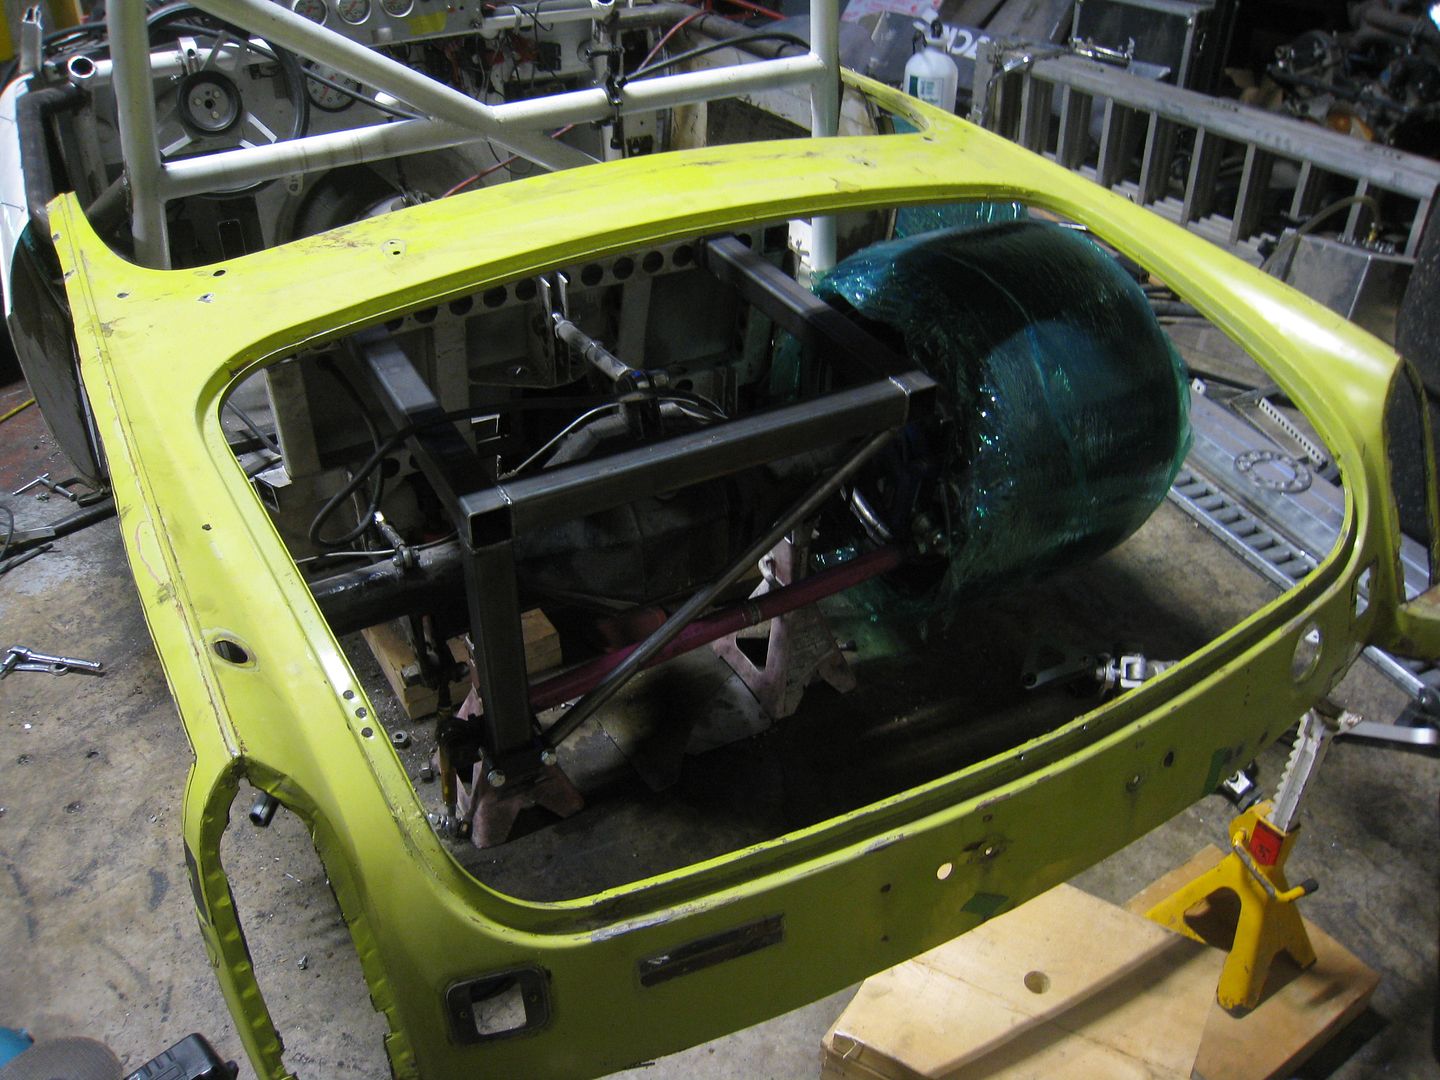
If you take a look at the first picture, you can see a lot of unnecessary steel. There are thick steel tubes going all the way to the back of the car and two crossmembers (one of them curved and extra heavy). So, I cut all that away and redid it with a thinner wall tubing because the rear bodywork will all be held up with aluminum and the shocks will be rotated so they mount to the top of the rear frame. I still have to weld the down tubes between the roll hoop and the new frame.
I think you made the right choice.
Looks good,btw my shop is in about the same condition as yours-need to put the tools down and do a clean up.
kevlarcorolla wrote:
I think you made the right choice.
Looks good,btw my shop is in about the same condition as yours-need to put the tools down and do a clean up.
Yeh, it's also my workplace so I cleaned it up before the weekend so my staff didn't have to search for tools. Today I attempted to build a fiberglass rear deck for the car, I say attempted because it's not cured yet and I haven't tried to pull it off. I'll post pictures if it works.
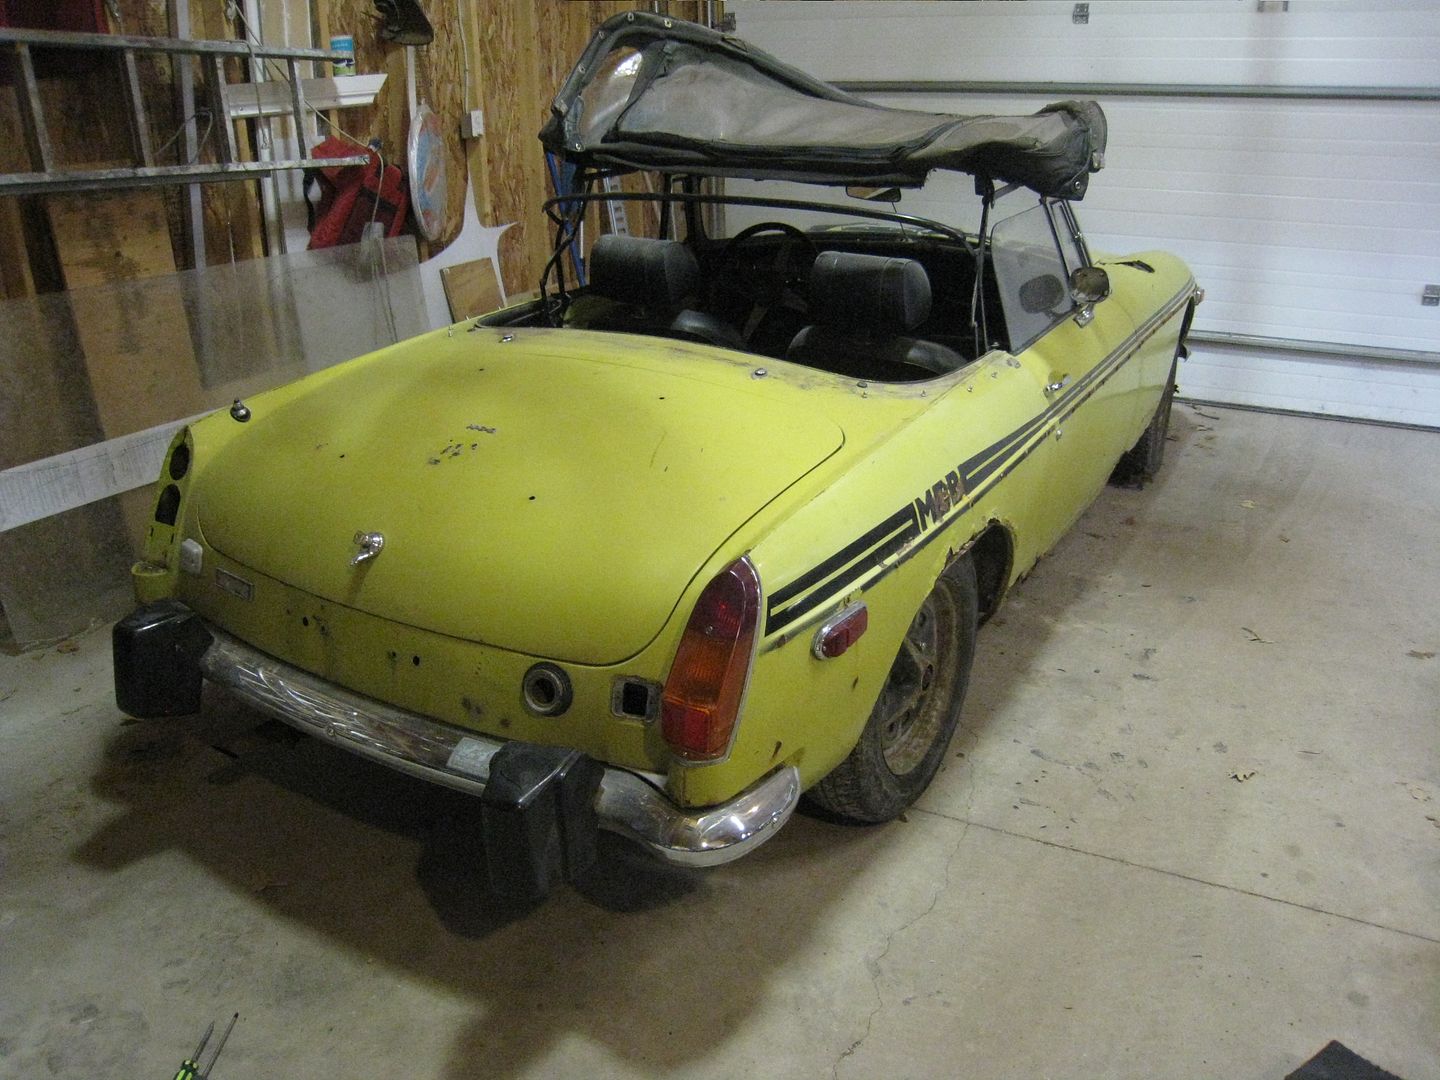
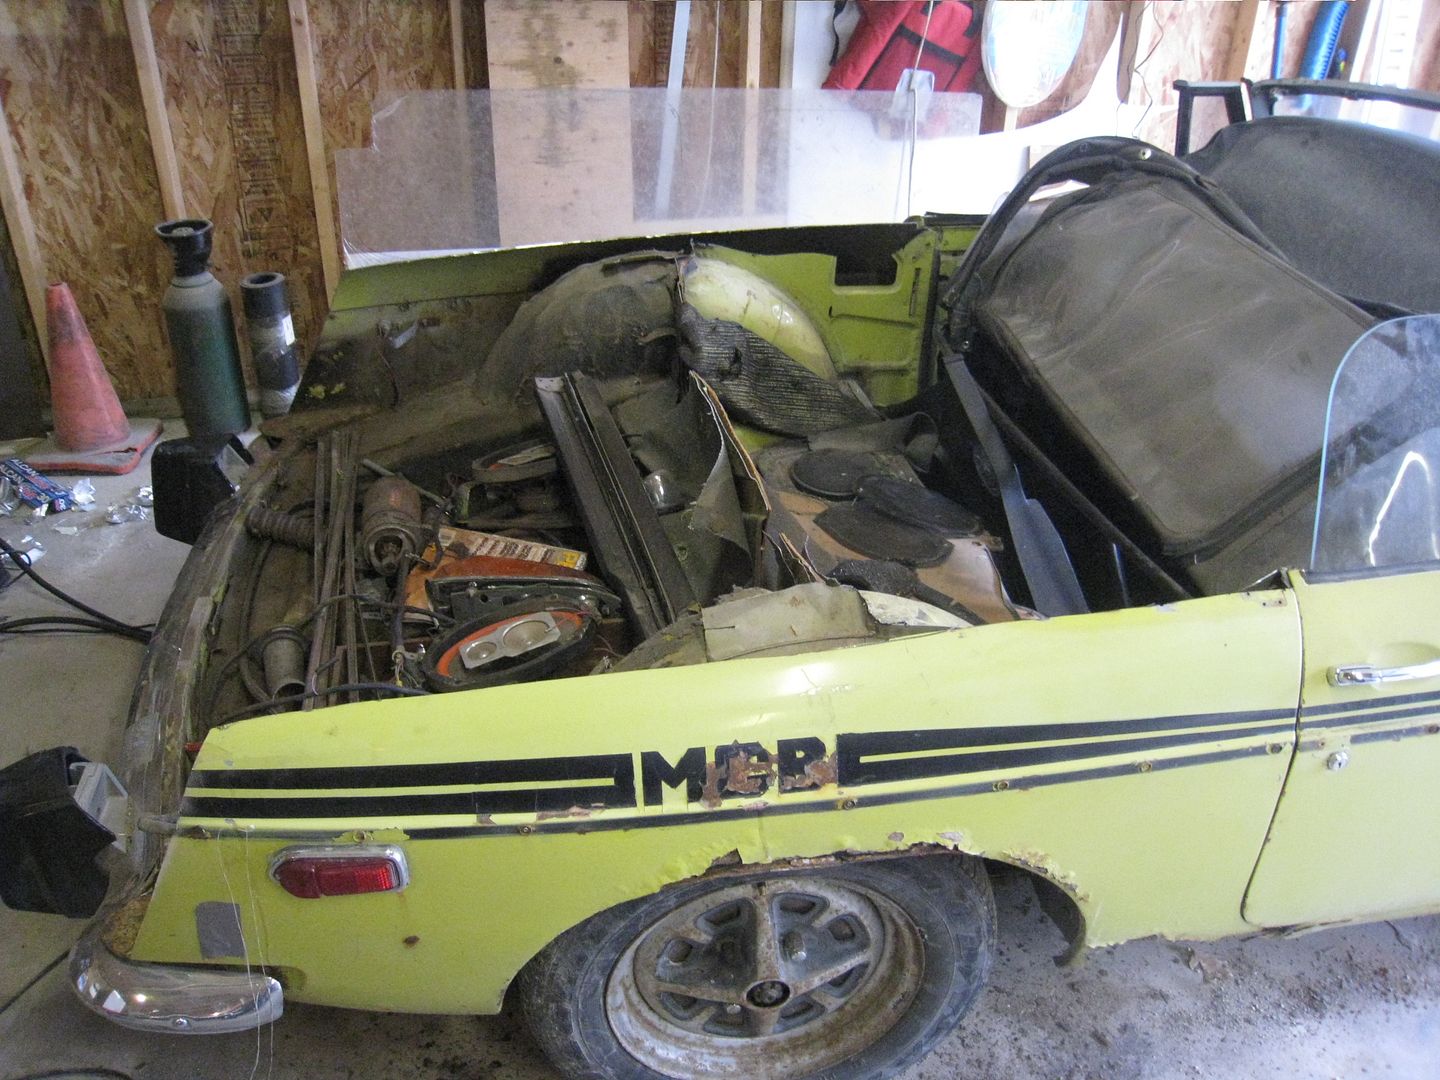
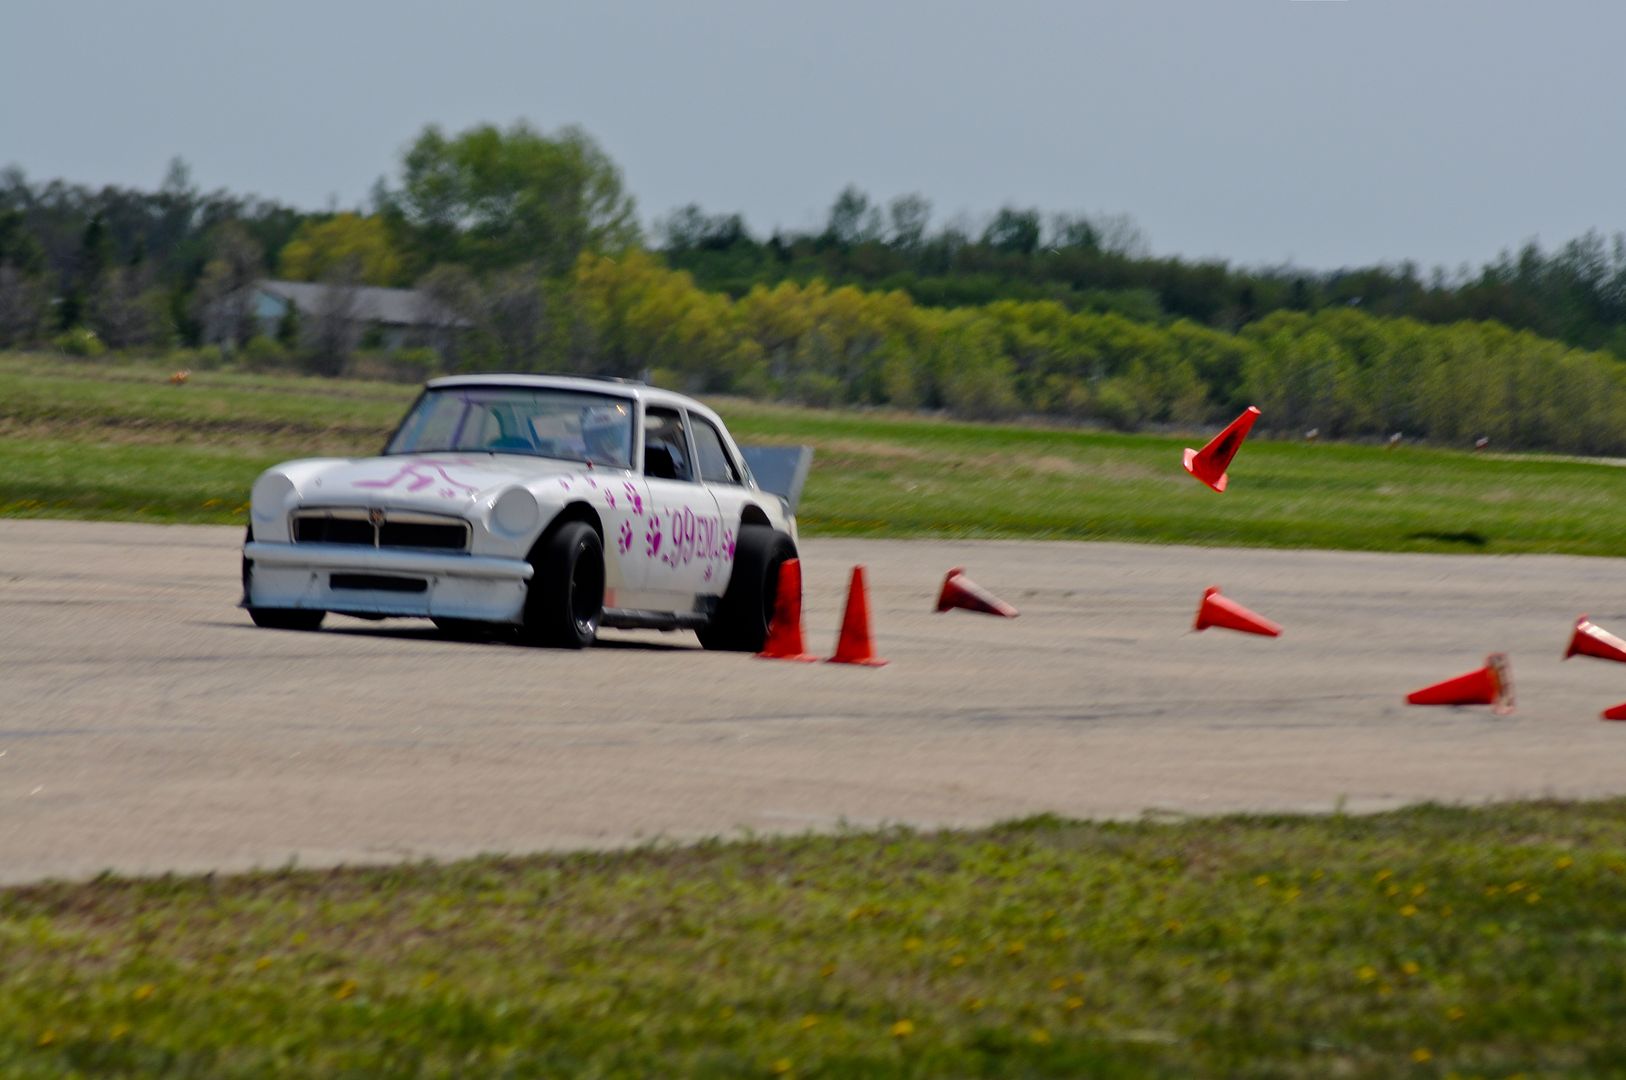
Paul from Red Bearing Auto Repair sold me the back half of an MGB convertible to use on the Pink Panther, but before cutting it off, I made a fiberglass mold.
I started by laying out the non-stick aluminum foil on the car, which conformed nicely to the contours.
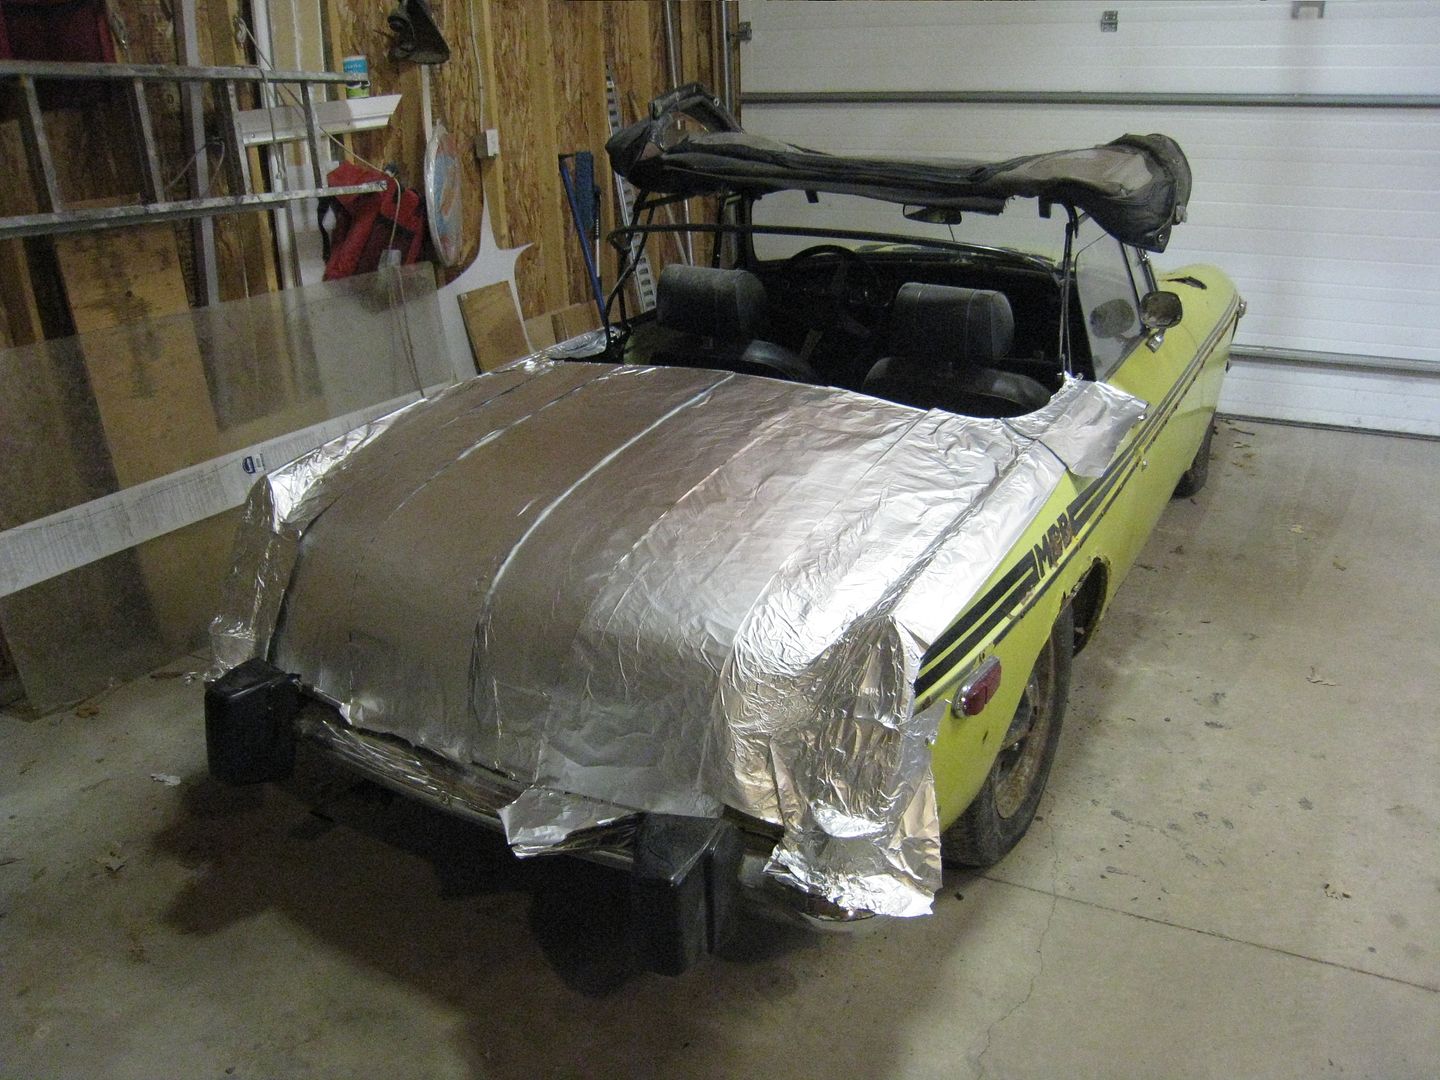
Then laid out fiberglass weave. I had never done this before and made the mistake of trying to do it in big pieces. I should have cut it into smaller squares.
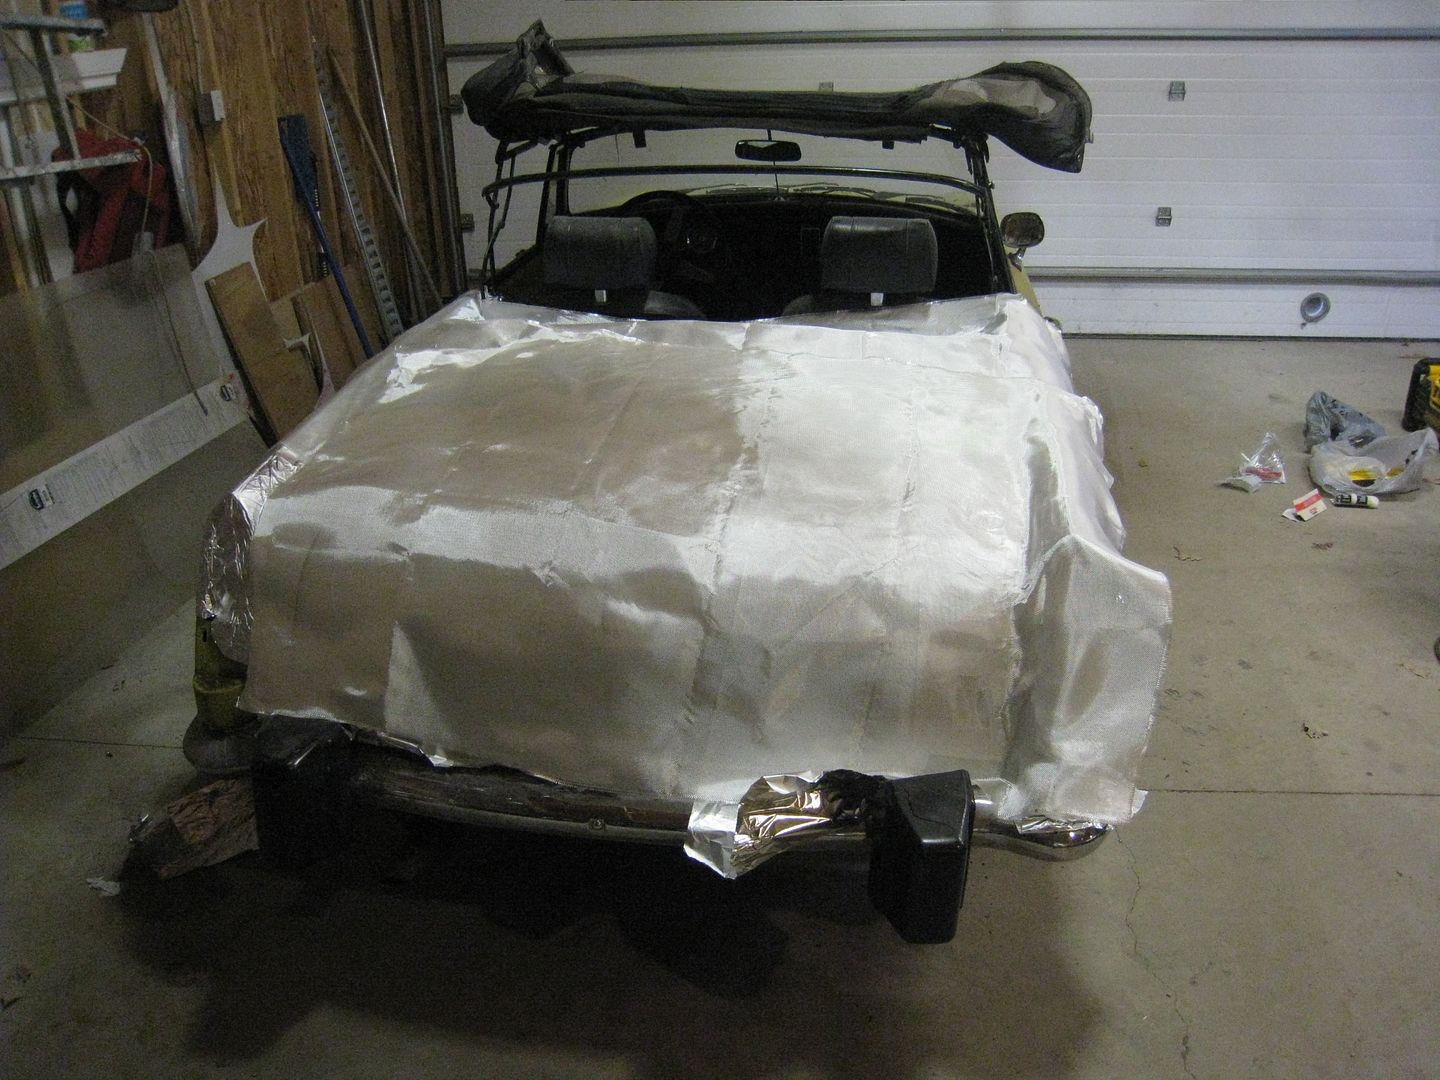
And poured and spread the resin with a roller and brush:
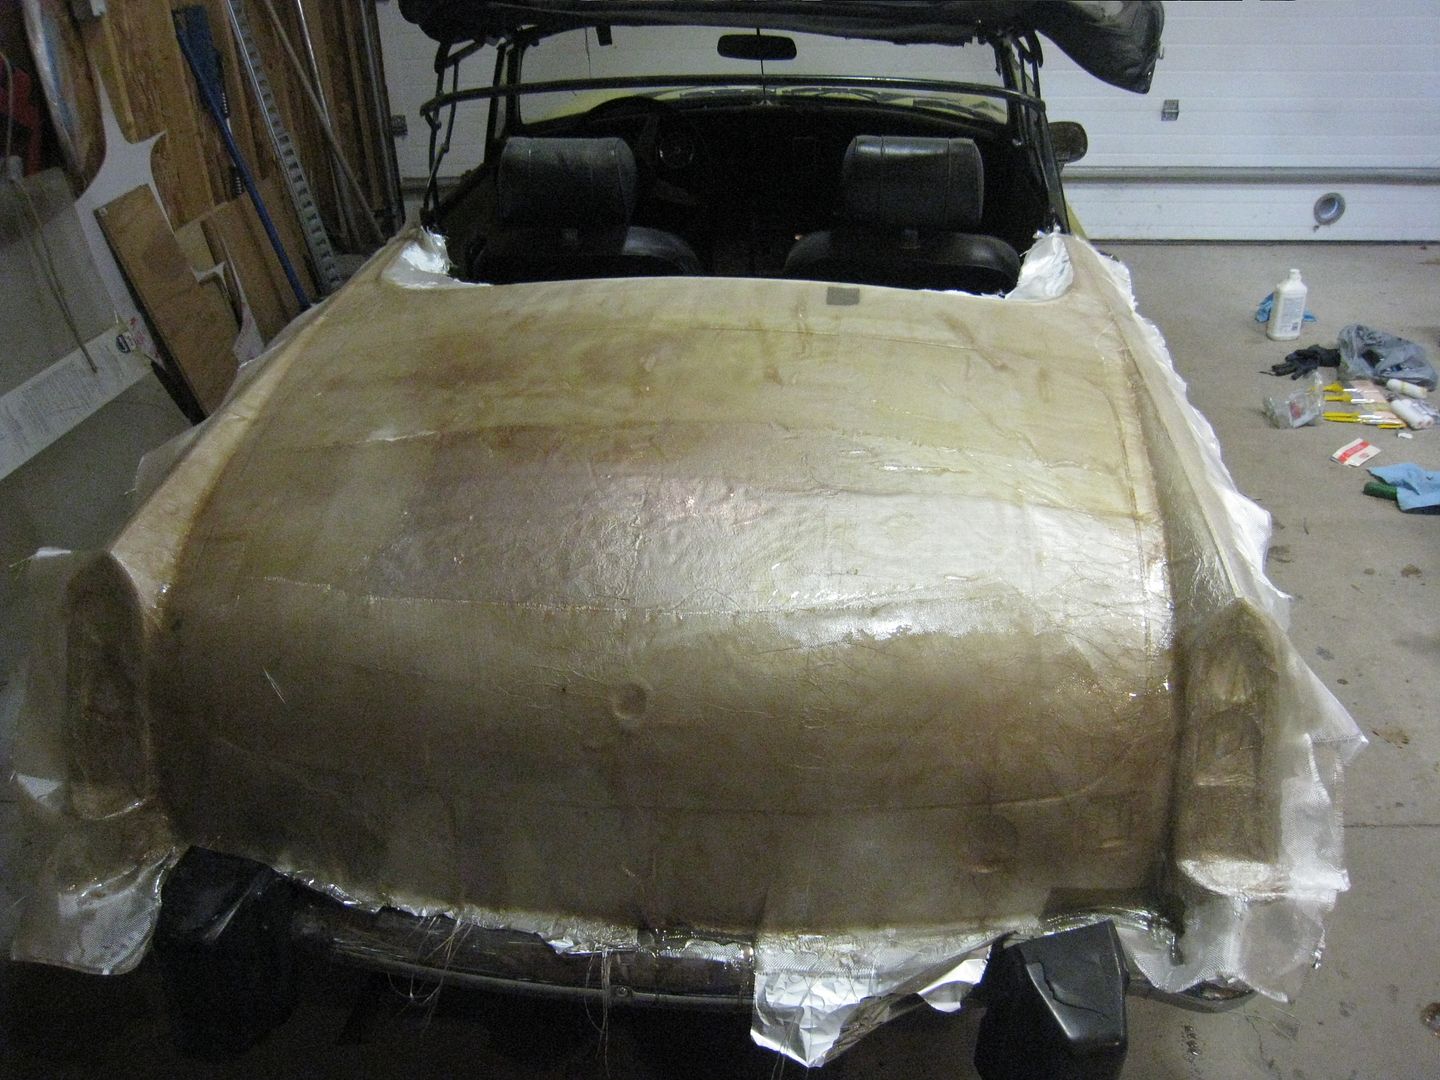
And after a few hours, it just popped right off, and the foil pealed off without much trouble


To give you an idea how things can spiral out of control, I submit the following tidbit of the Pink Panther build. I was pushing down on the new rear frame and it moved up and down quite a bit.
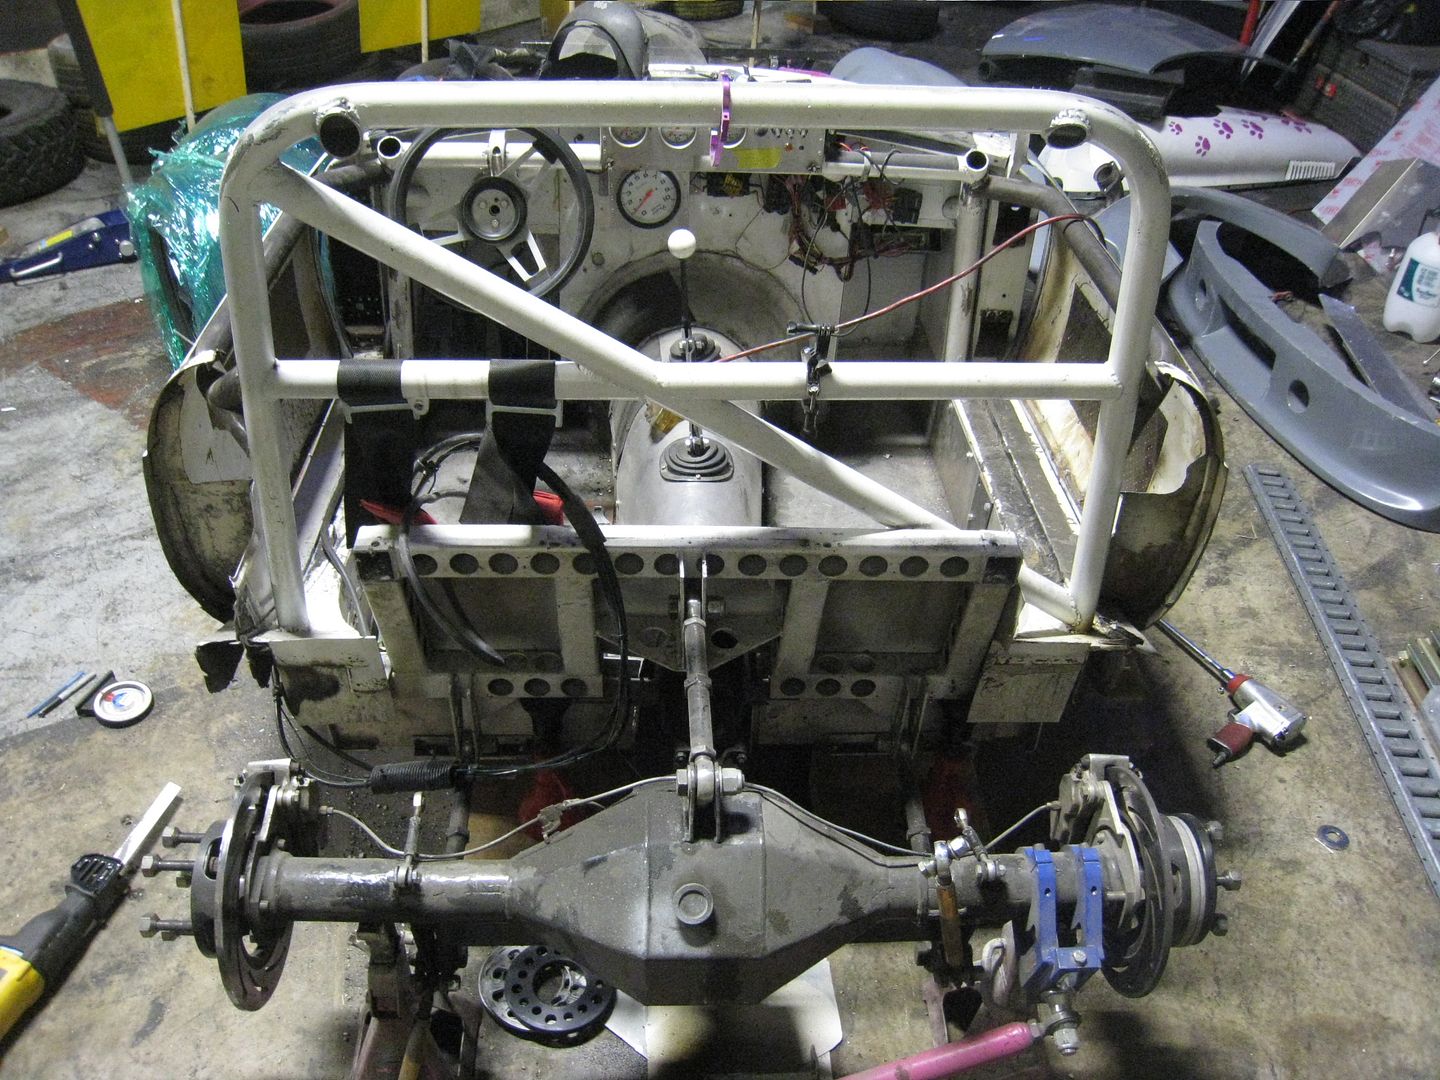
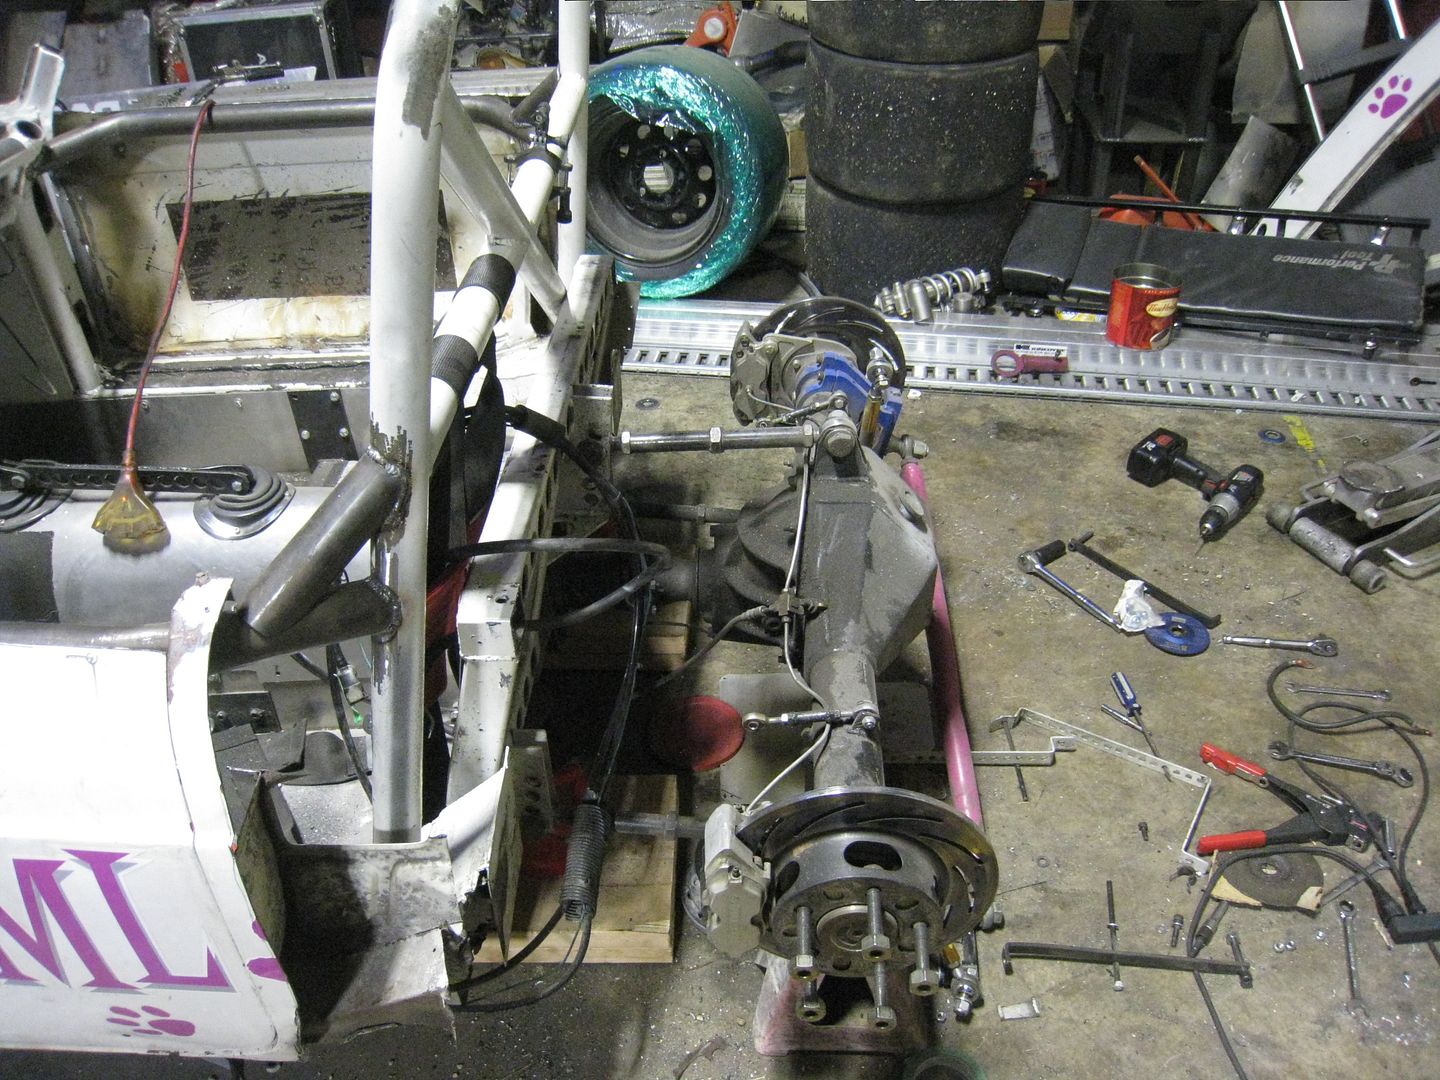
And I realized that the flexing was coming from this area. This is a shot of the inside of the car, passenger side, and it's a thicker steel piece from the original MGB frame. Right behind where I am pointing is welded the 2x4 frame rail.
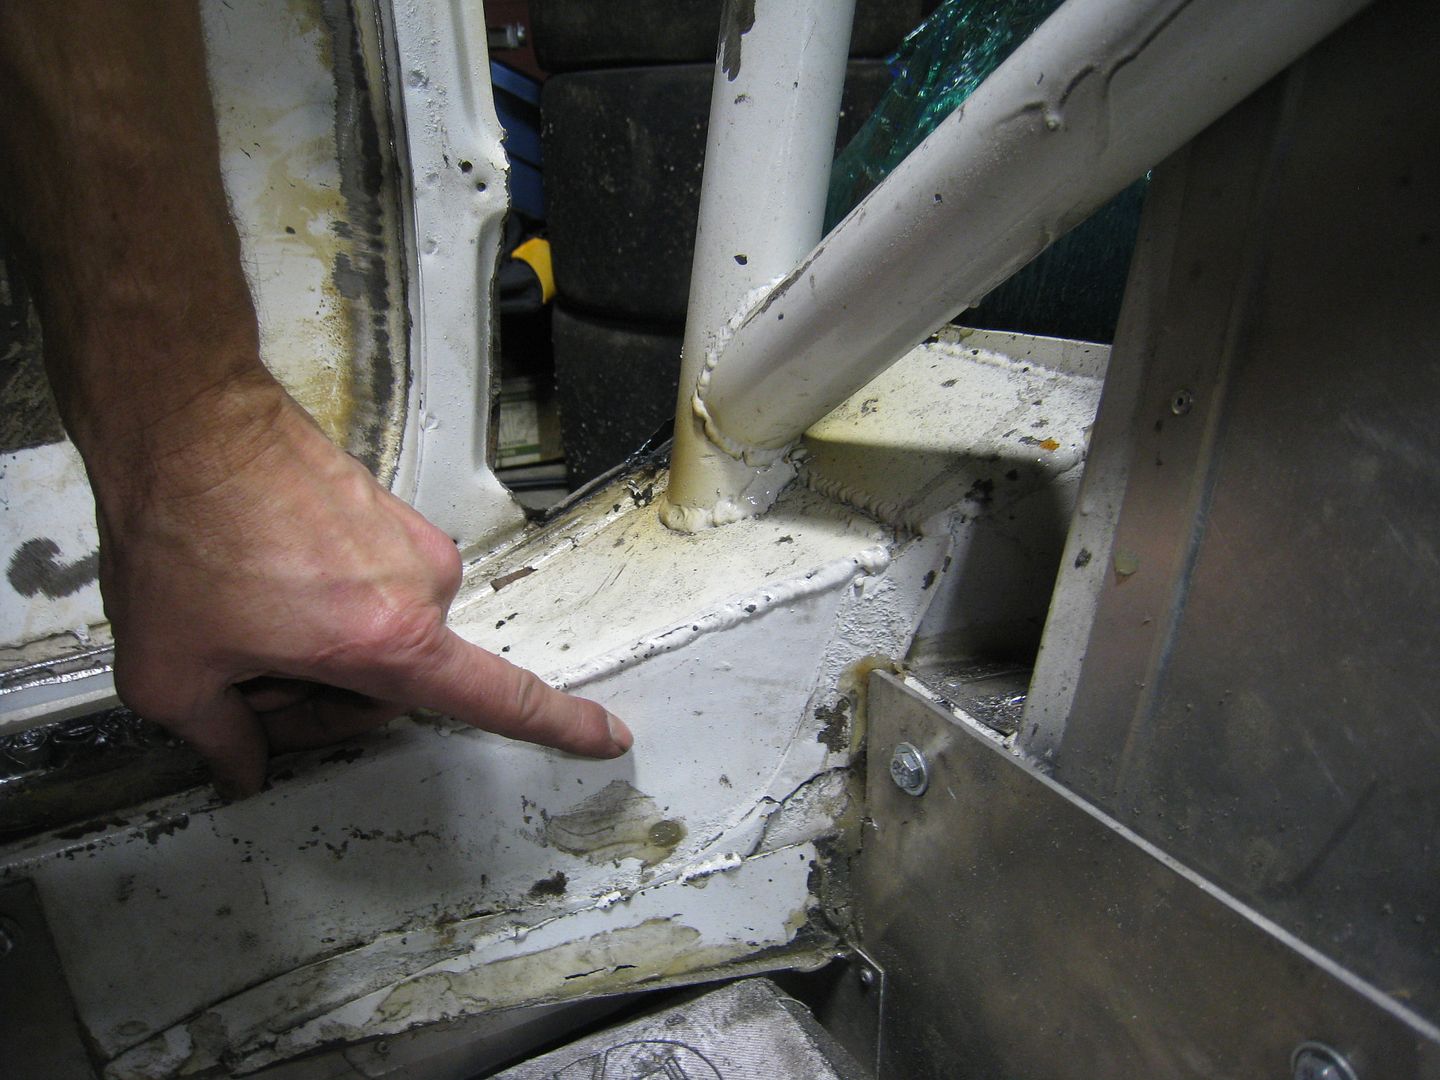
And this area where I am pointing is where the rear crossmember is welded. It's the same crossmember that the entire rear suspension is bolted to. As it turns out, the rear frame was only really held in place by the tubes going from the top of the roll hoop down to the back.
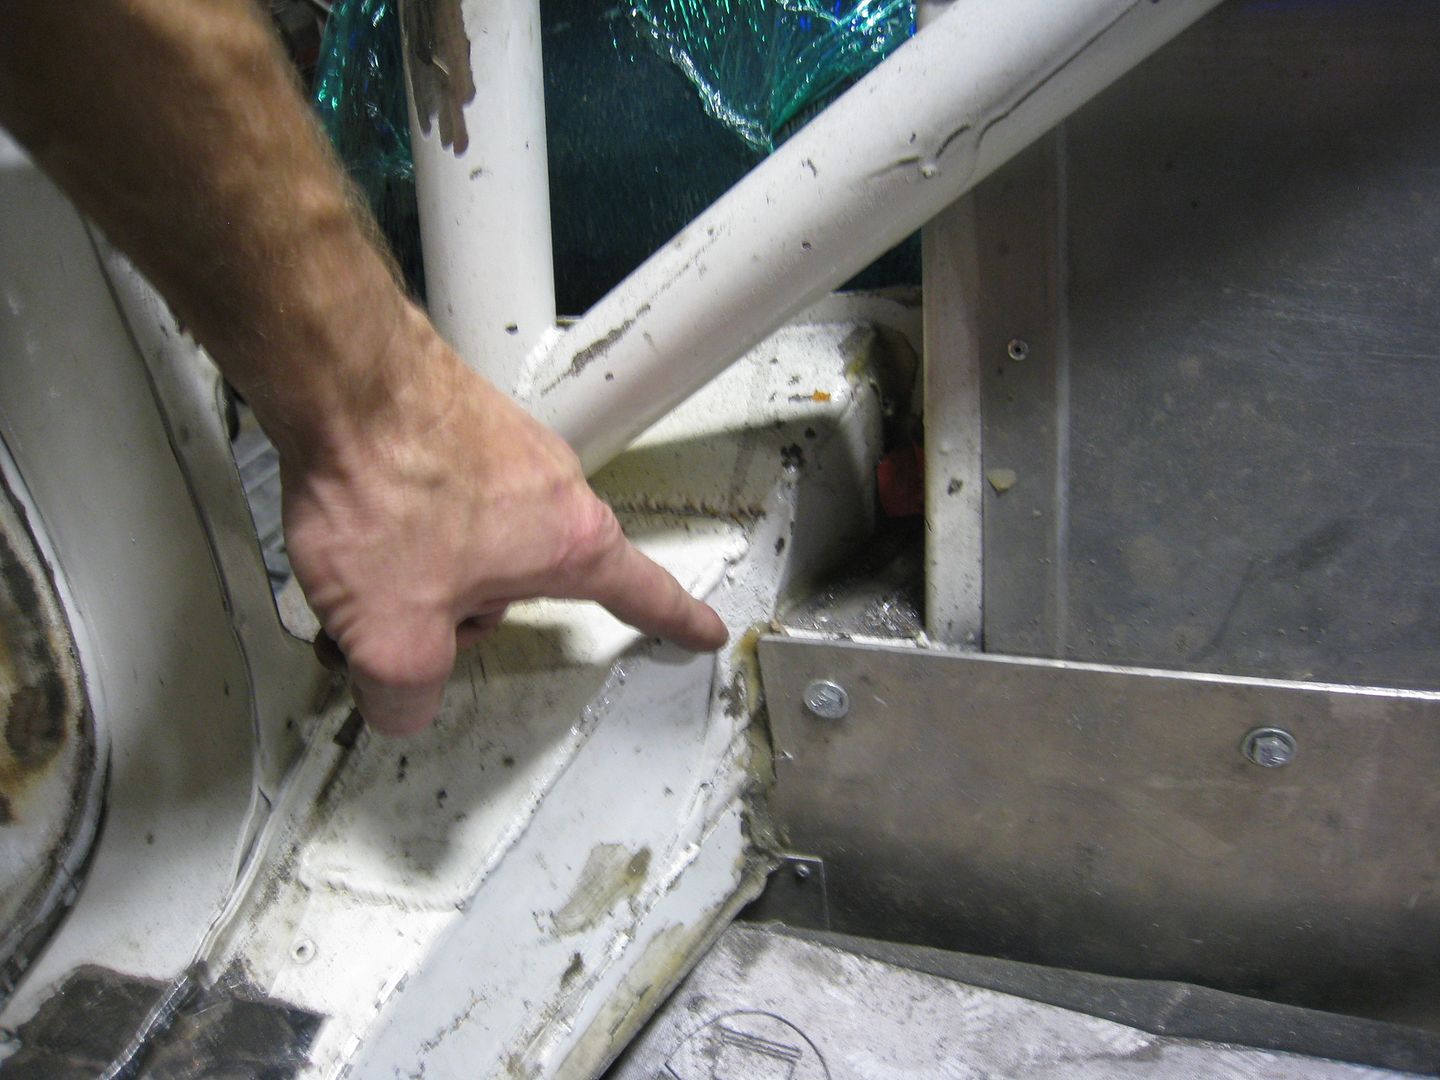
This would explain why I could never get the rear suspension working right, the whole thing must have been moving around where the suspension bolted to the car. Anyways, I'm glad I found this problem but when I started thinking about how to fix it, I thought I could extend the frame rails farther back and tie them directly to the crossmember. Then I thought that while I'm doing that, I could move the frame rail farther out, giving me more room in the footwell. Here is a picture of the drivers side frame rail and the footwell is right behind it:
Ok, since I'm already replacing the frame rail, I may as well re-do the roll hoop and since I'm doing all of that, I could just recreate the entire car to make it a true tube frame car. Then I could improve it's stiffness, move the engine more to the passenger side and back, make everything easier to work on and lighter.
Pink Panther 1.0 (PP1.0) was a V12 powered MGB-GT and it weighed 2550 lbs. PP2.0 was a V8 powered MGB-GT and weighed 2275lbs. Pink Panther 3.0 is a V8 powered MGB Roadster and hopefully weighs 1850 lbs. The idea of going tube-frame rolled around in my head for a while then I decided that it's going to have to wait until Pink Panther 4.0. For now I am just going to fix the flaw in the rear structure and go from there.
I made a pick up truck out of another MGB so I could get the rear deck for the Pink Panther.
Here is the piece I need to make my car into a Roadster

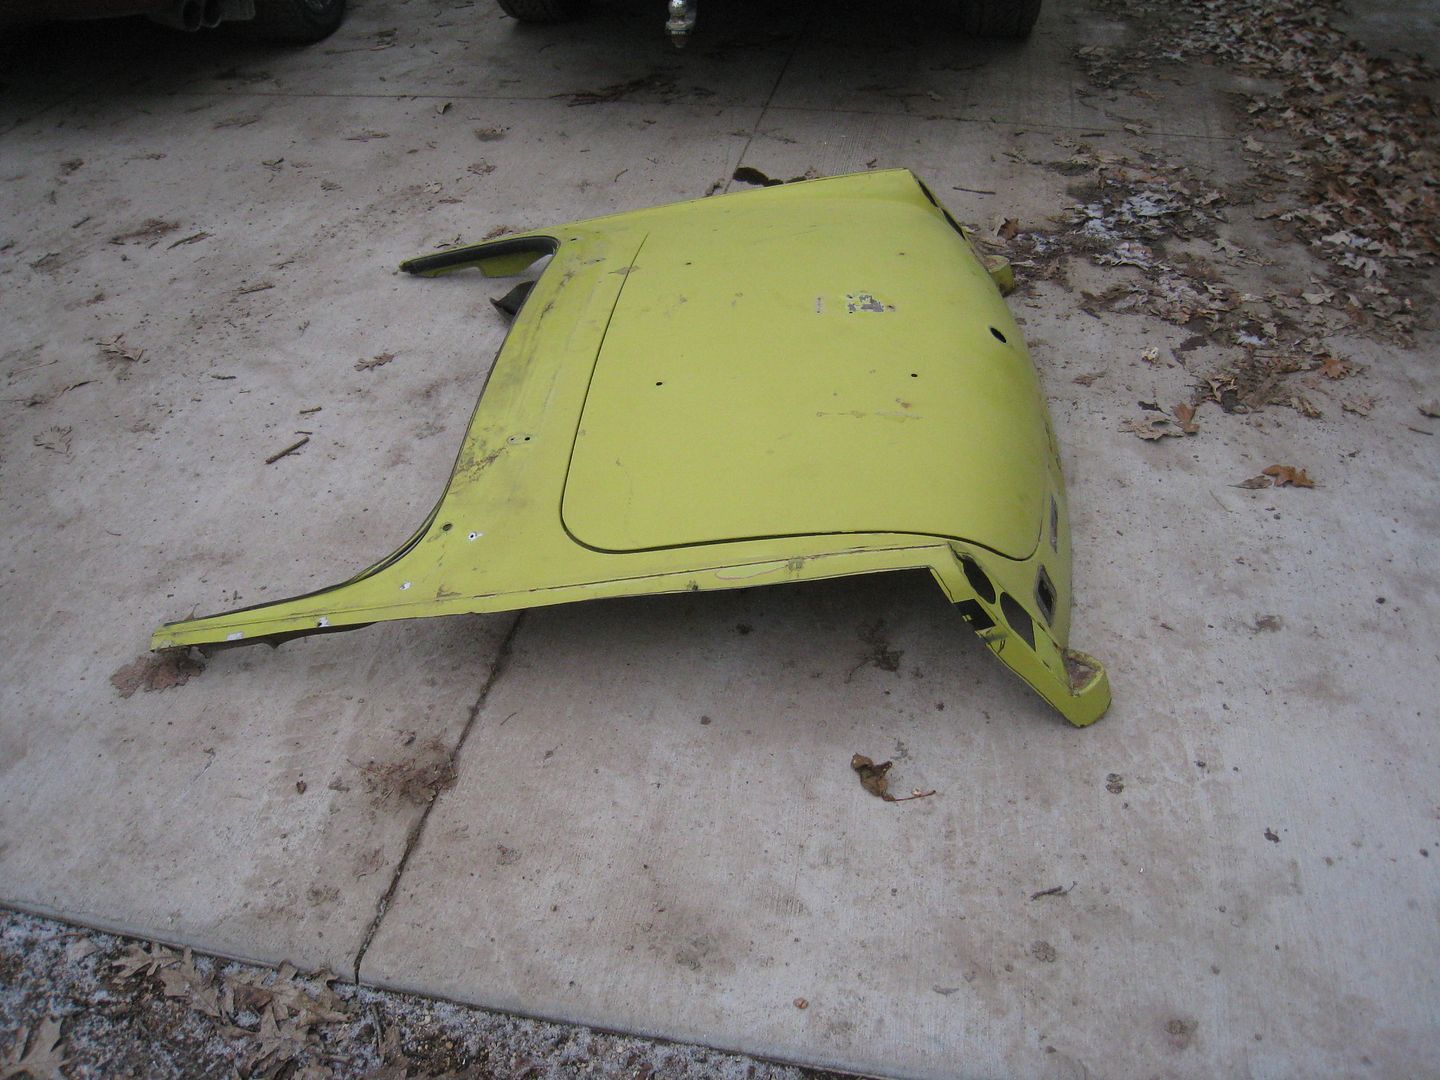
Once trimmed of all the fat, it weighs about the same as what the fiberglass copy would weigh once it was reinforced.
Bloody hell, that's just awesome.

one of my favorite builds ever...
So, I started cutting away some bad MGB metal to get at the root of the problem with the rear of the car and when I considered how much work there was to do, I decided that I may as well do a tube frame. This gives me the chance to improve the car in overall weight, balance, maintenance, ease of use and chassis stiffness. The frame and front suspension will be designed in CAD and I'm currently researching suspension geometry to make sure what I land up with will be as light and effective as possible. It will be a while before this process is complete so in the meantime, here are some pictures of the car in it's various stages:
 Pink Panther 1.0
 Pink Panther 2.0
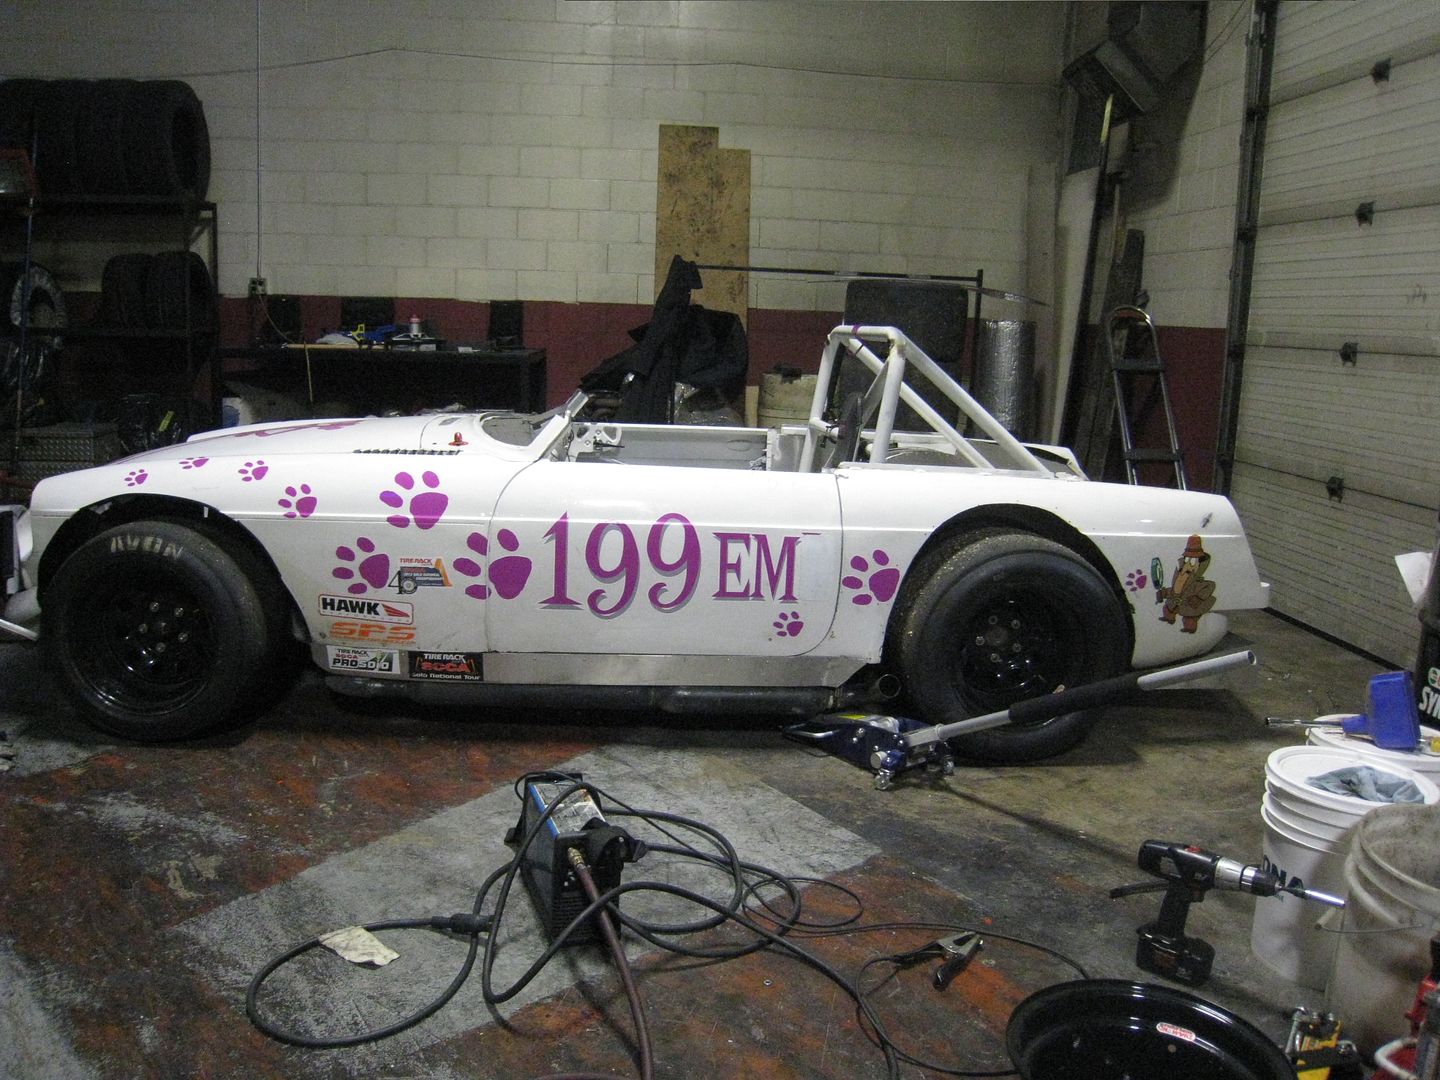 Pink Panther 3.0
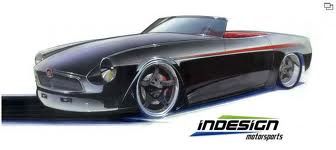 Pink Panther 4.0-not exactly as pictured, but lighter, faster, stronger than ever
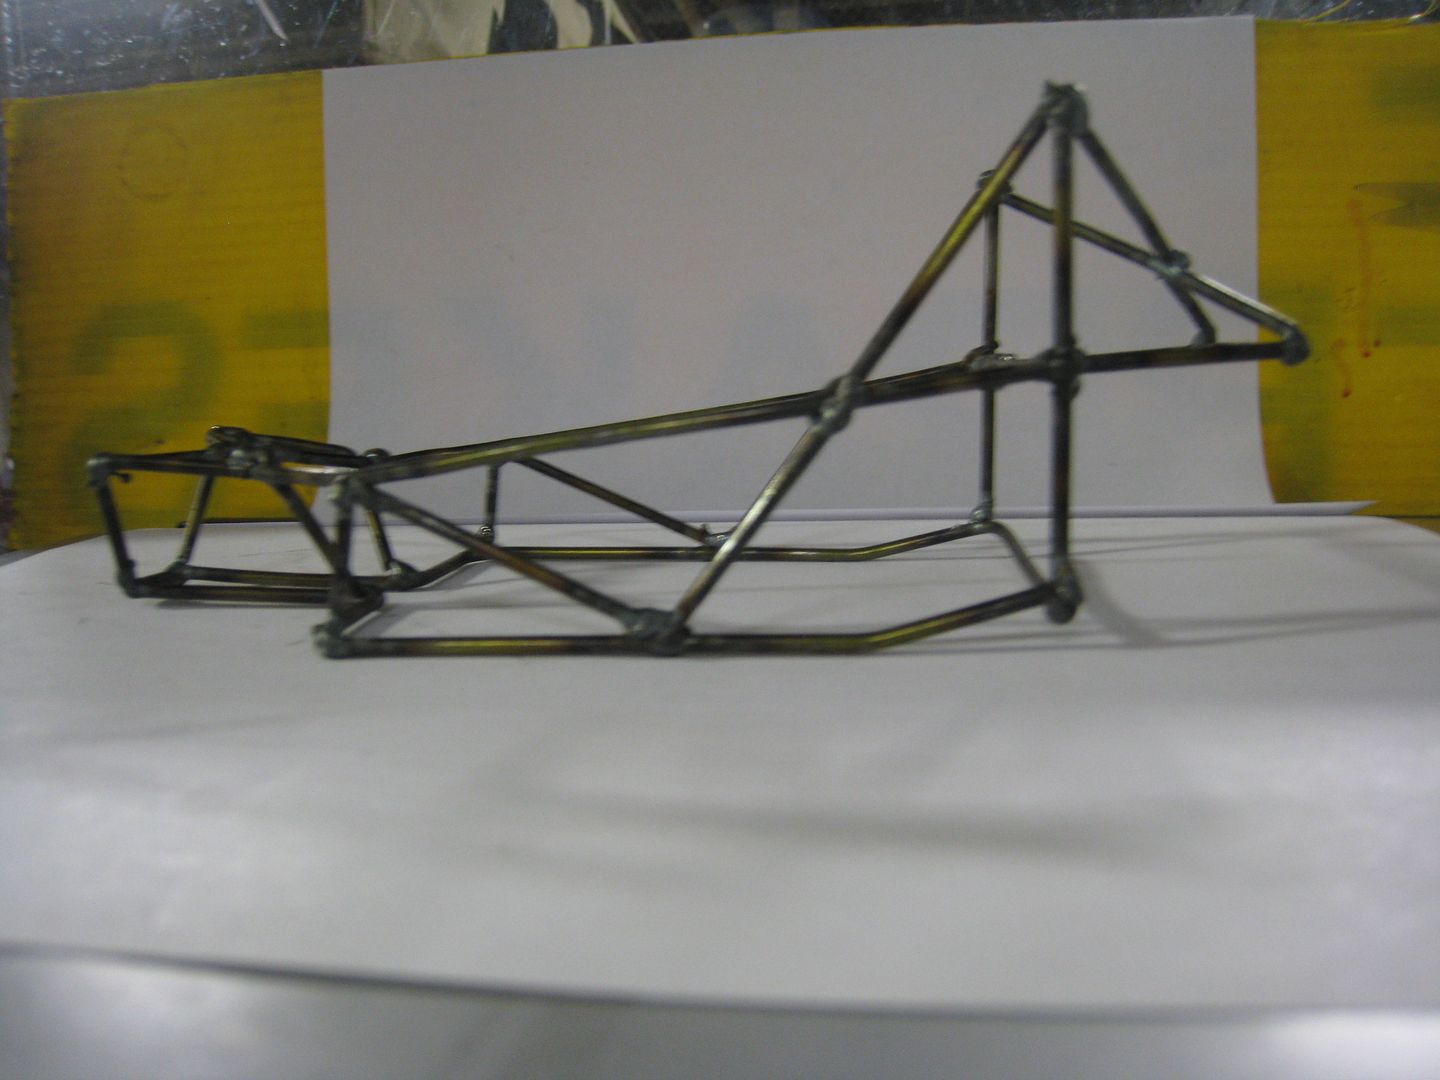
The frame is getting modeled in CAD but I still like to be hands-on so I put together a little scale model. This is NOT the final frame design, I'm just toying with ideas. The engine is not between the front suspension, it is behind the passenger side suspension but still ahead of the midpoint between the two axles, as per the rules.


mguar wrote:
In reply to loosecannon:
Look at the most recent Trans-Am cars for tube frame inspiration. The cornering loads on those high power (750+) light cars with wide tires should point you in the correct Direction.. They use thin wall square tubing like the Jaguar XK-E
Instead of round tube consider the advantages of square tube.. It's far easier to build with. You can use much thinner wall tubing and still get more rigidity.. (Yes I know the roll over structure needs to be round tube)
You are on the right track with your model.. test it for rigidity.. Then make other examples and test them.. Use a fixed weight and a fixed length of leverage to effect the test before you start cutting metal..
The inspiration Trans-Am cars use is the XK-E front subframe It's made with extremely thin (thinner than sheet metal) steel. The whole front sub-frame weighs only 11 pounds and yet in a front end impact test was almost undamaged.. In addition it's torsional rigidity is astonishing.. I believe something in the order of 5000 pounds per degree..
Don't forget when triangulating to gain rigidity square tube overlaps easier and can be welded wherever it overlaps making it both strong and rigid.. On top of that it is extremely simple to put a stressed aluminum skin on the outside thus multiplying rigidity numbers.. Look at Formula 1, A and Can-Am cars of the pre-carbon fibre period.. for examples..
Those are great suggestions. I will get it modeled with square and round tubing to see differences. I am aiming for 3000 pounds per degree or greater. The SCCA rules prevent using aluminum or CF as a stiffener on the main structure, rivets or bolts have to be far apart or you have to use Dzus fasteners.
And I thought my automotive ADD was outa control,you have me beat easily.
Good luck with the project,I'm sure with the speed you work it'll be race ready in no time.
mguar wrote:
In reply to loosecannon:
I didn't know that about SCCA. I suppose autocross rules are different than road race rules because road race cars use the technique all the time.. On the other hand I suppose you could use some of those 3M adhesives and just a few pop rivets to hold things in place while they dry. They have adhesives so sticky the metal tears before the glue joint yields.. (They are used in the air craft construction) Go to Aircraft spruce.com for which ones work.. Aircraft spruce is also a great place to find obscure aircraft stuff. .
The "trick" with square tubing is to triangulate everything by overlapping.. It is so much faster to do than notching round tube to fit together..
Look at an XK-E front subframe for a great example of what I'm talking about. The brilliant part is the gussets they use are simple flat sheets of steel. the edge is bent over 90 degrees for rigidity and then a large diameter hole is put in the middle and dimpled. That way they make a 3 ounce gusset as strong as a 7 ounce gusset would be.
I'll look around and see if I can direct you to a place to see the frame and note the details.
OK it was really easy.. just Google Jaguar XK-E front sub frame images plenty of examples..
What do you mean by "overlapping"? I couldn't tell from the Google images. I can see how to get around the rule by using square tubing for the perimeter of the frame then using hard core adhesive and rivets to attach aluminum. That would make it a lot stiffer but I would have to be careful to only do it with panels I don't want to ever remove.
Here is an updated frame design. This one uses much less steel and has more direct lines. See that little kick up on the bottom frame rail? That's so the crossmember lines up with the lower control arm mounts for the rear suspension. And the front of the car is strong this way, too.
Ok guys, time for some feedback. I purchased the Performance Trends suspension software so I can make sure the car will handle great. I took a model of a car and had it turning a 50' radius turn and leaning 1 degree, then moved suspension points around until I got some numbers I liked. Here are those numbers:
These are at a 1 degree roll with the wheels turned sharp enough to make a 50'
radius turn.
-RC height 1.48"
-RC change 1.2" to the outside
-Anti-dive 11%
-Camber gain -.62
These are pretty good, right? The lower arms almost meet in the middle and are
parallel and 19" long. The top bars are 12" long and angled up towards ball
joint. The top bars are also slightly lower where they mount at the back.
Making them the same height gives me zero anti-dive, I am thinking of making
this adjustable.
Update: The front suspension settings are pretty much settled and I will be building it SLA style with 20" long lower arms and 14" long upper arms. The roll center will be 2" high and RC change in a 2 degree roll turn is only 1.33". There are tons of other numbers but I don't want to bore you. I will be building the arms using 5/8 Chromoly rod ends, 1" round tube and Dodge screw-in style ball joints from Speedway Motors. I plan on making the rear arm mounts adjustable up and down to adjust anti-dive and the rod ends will be mounted on the arms in such a way that they will be 90 degrees to the frame.
I will be moving the engine towards the passenger side 4" and can move it up to 8" back before I break EMod rules. I will not be moving it 8" back because it puts the driveshaft into too sharp an angle but I will be moving it as far as possible to get weight on the back tires. The frame is going to be made of a mix of 2" x .100" wall square tubing and 1.5" DOM round tubing unless the Solidworks CAD program says it won't meet the 3000 lbs/degree twist criterea.


