


Body work is a pain in the ass but most of those cars dissolved so long ago I doubt anybody will notice.

Body work is a pain in the ass but most of those cars dissolved so long ago I doubt anybody will notice.

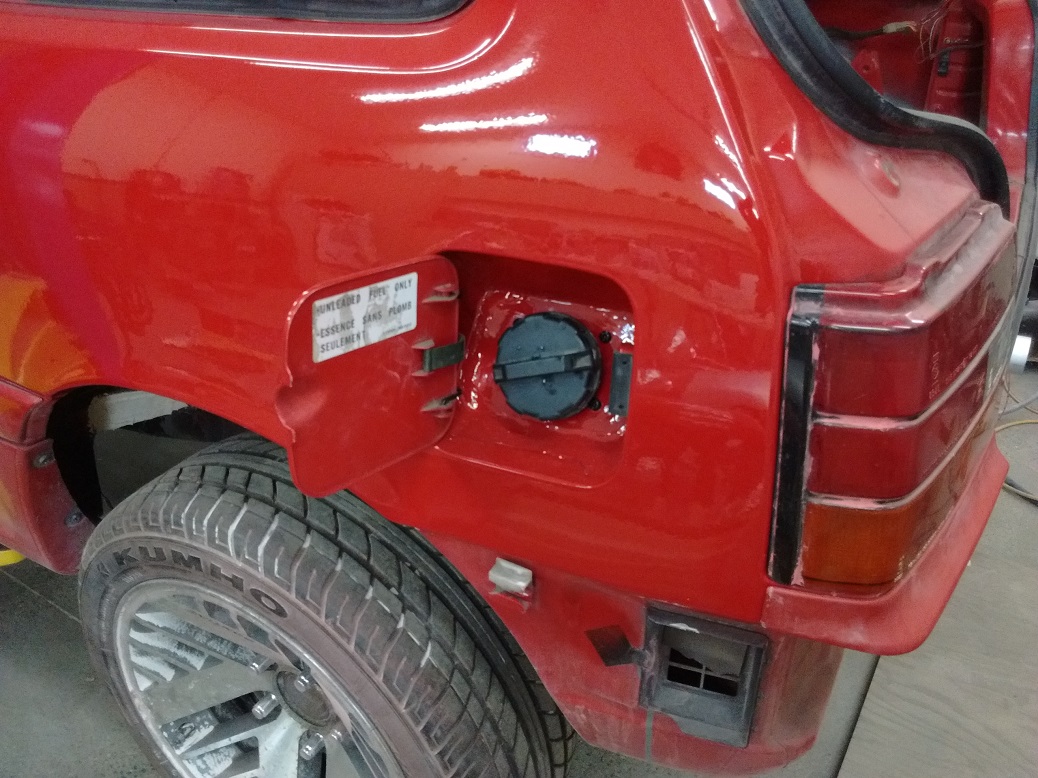
New filler door is going to be sweet!
The details on this thing are incredible.

You think so?
I'm trying to balance "it made sense at the time" with "what the hell was I thinking?!"
SkinnyG wrote: You think so? I'm trying to balance "it made sense at the time" with "what the hell was I thinking?!"
You go for it. Engineering, body work, electrical....very respectable.

SkinnyG wrote: You think so? I'm trying to balance "it made sense at the time" with "what the hell was I thinking?!"
Wait...if the filler door is the first time you have had this thought, you are doing one hell of a lot better than I am!
I rely on a steady intake of beer to keep me from delving into such thoughts about the Molvo.
Oh heaven's no. My list of what I would do differently is FAR longer than my list of what I've done. But you just have to keep going or you never get it finished.
The ~next~ one will be better.
I'm just not ready to build a next one yet. I want this one done.

That fuel filler door move is top notch. A lot of people would have just left it and had to open the hatch to fill the cell. Quality stuff sir. I want to see this thing move!
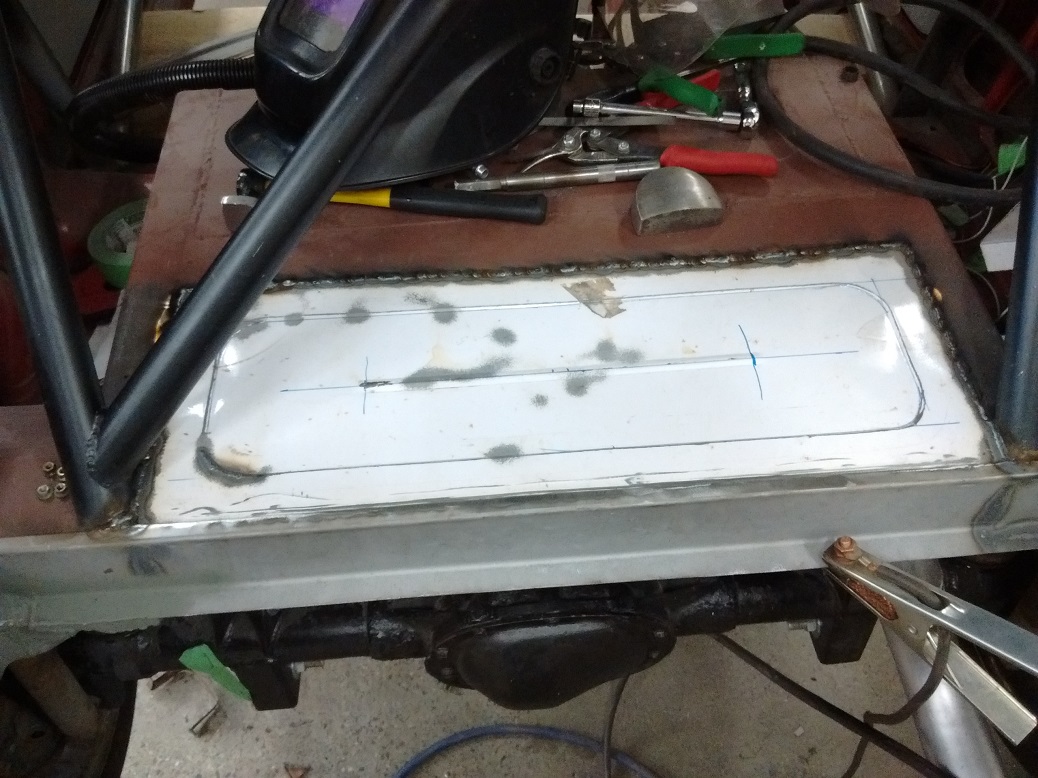
Ran out of MIG gas today welding in the patch over the original fuel opening. Dropped the bottle off, taking kid2 along in the Super 7. Will pick up tomorrow.
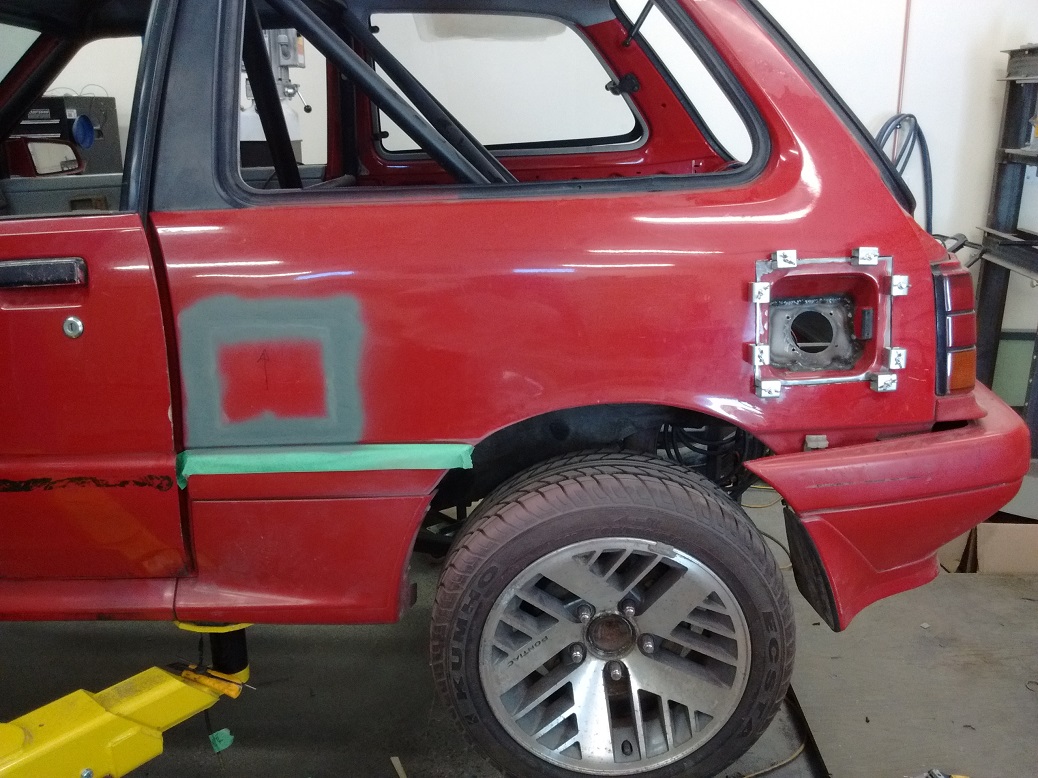
Drilled the hole for the fuel filler, and shortened and re-shaped the original neck. Working out how to seal off the filler neck from the passenger compartment. This is a bit more complex that I thought.
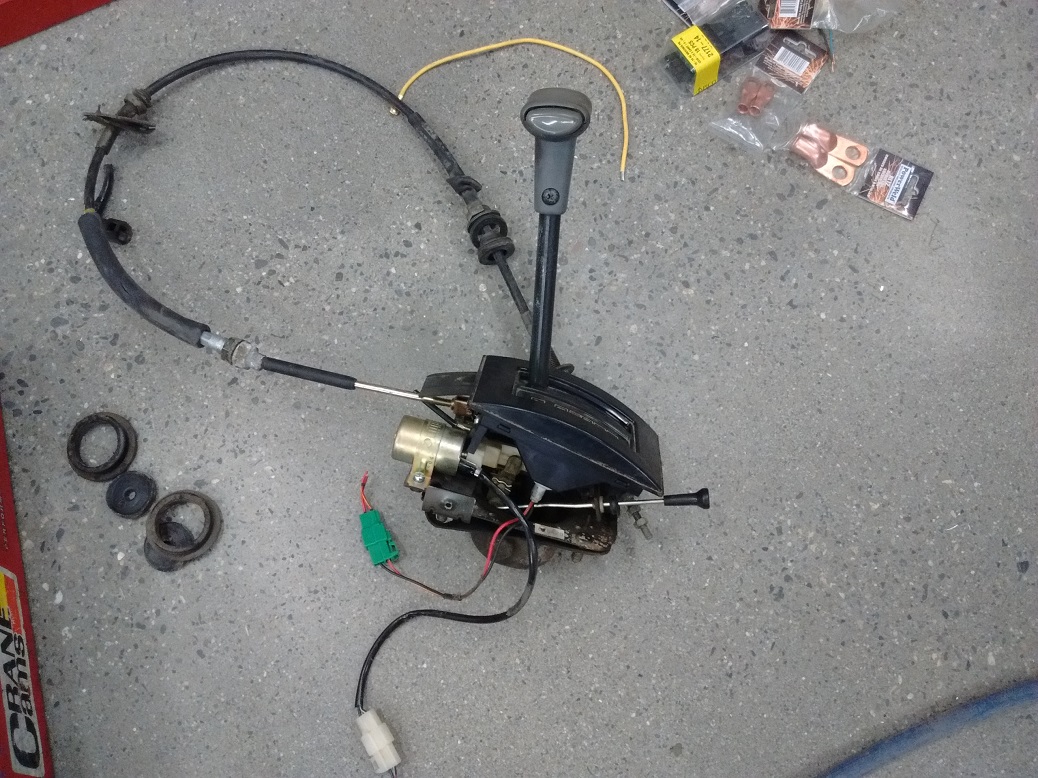
Yesterday I went to Pick-n-Pull and snagged a Chevy Sprint automatic shifter, which I will adapt to the TH350. Also snagged the temp gauge sender, which I should be able to run in the V8 with a pipe adapter and have the gauge work correctly. Likely the fuel gauge will be drunk, but I'll figure that out later. If at all.

Fuel gauge is just a float. As long as there's still a little fuel when it reads empty, its close enough. Who cares if it stays on full forever and drops like a rock all of a sudden?
'zacterly.
Quick Googlefu tells me:
Maybe I'll just relabel the gauge so "Full" now reads "Empty" and vice-versa.
Anyone know how to re-wire the tach to read 8 cylinders instead of 3??
Turns out the panel crown at the back of the panel was just enough different that I had to do some shrinking to make it all happy. Things didn't move as much as I wanted to, but it's in there, and there's nothing a hefty shmear of filler can't fix. Have I mentioned how much I love doing bodywork?
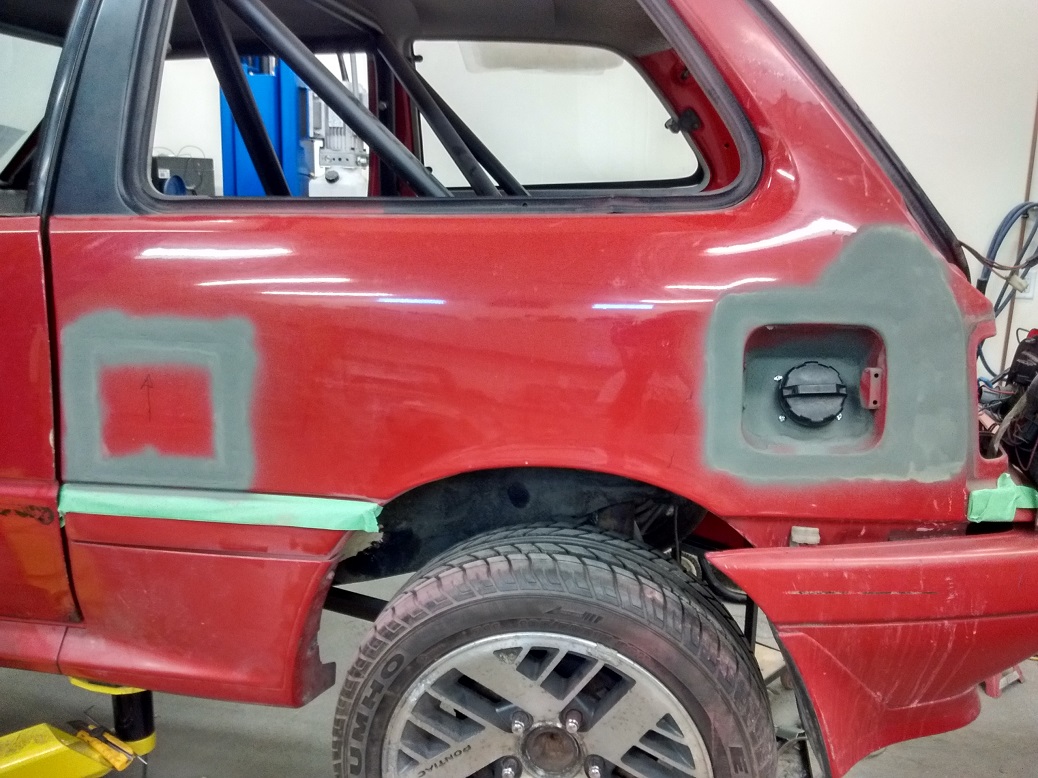
Here's where I'm at in concealing the filler tube. There are a couple of rust spots on the wheel arch seam that need to be dealt with, and apparently Rust Converter needs to dry for six hours, so I had to stop at this point, but I've got a pretty good plan in my head.
While the Rust Converter was drying, I made the last panel over the axle. More freezer sheet metal.
Can you just flip the sender upside down? Seems like it would be easier that making a gauge face.
SkinnyG wrote: Anyone know how to re-wire the tach to read 8 cylinders instead of 3??
A. Reverse engineer the circuit on the cluster board, modify and calibrate appropriately.
B. Build a device that multiplies the input frequency by .375 and feeds the lower frequency to the stock tach. Probably most easily accomplished with an Arduino these days if you can't buy such a device off the shelf.
C. Buy a small aftermarket tach and put the guts in the factory cluster, this would depend on the factory angle between the marks lining up or the aftermarket board having a calibration trim pot with enough range.
Drywalling my entire Workshop got me good at smoothing things out. Body filler is just like mud, only you gotta work faster. This filler is setting up unusually quickly for me today. The advantage of doing your own body work - it only takes one beer to get drunk at night.
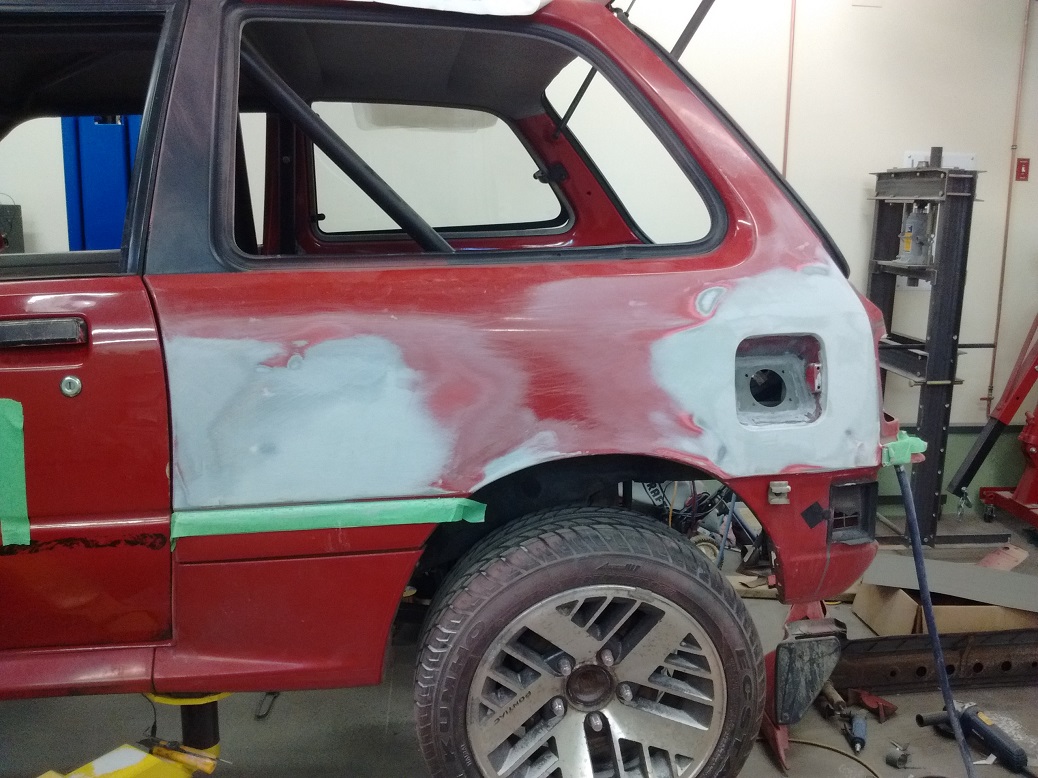
This quarter has been repaired once before - there was a skim coat of filler on the rear half. Also looks like it was sprayed a base/clear, you can actually see the base & clear & original transition half way up the C-pillar. I will check around the car and see if it's base clear as well, and buy paint accordingly.
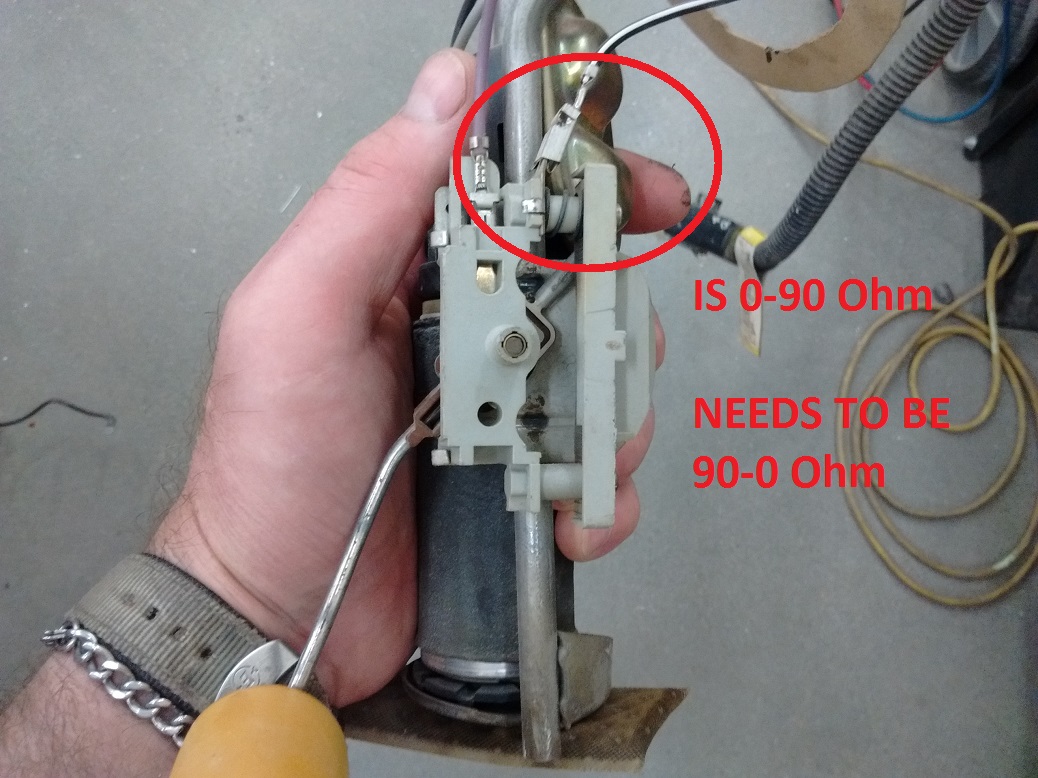
Dusterbd13: It ~looks~ like I could merely move the connection from one end of the resistor to the other. This ~looks~ really easy to do....
BrokenYugo: When I get around to taking the cluster out, I will have a look at how it's wired. A) I doubt I'll be able to reverse-engineer it. I'm not that smat. B) The cost of an Arduino is likely on par with a Princess Auto sale-price tachometer, which takes me to C) and we'll see what my options for incorporating it are. If I stay under budget, it will be by the skin of my teeth.
I am no professional at body work. But I do like high-build primer. It really speeds along the unpleasant.

In yet another experience of buying new canisters for my mask and discovering that they are not interchangeable, I bought another mask.
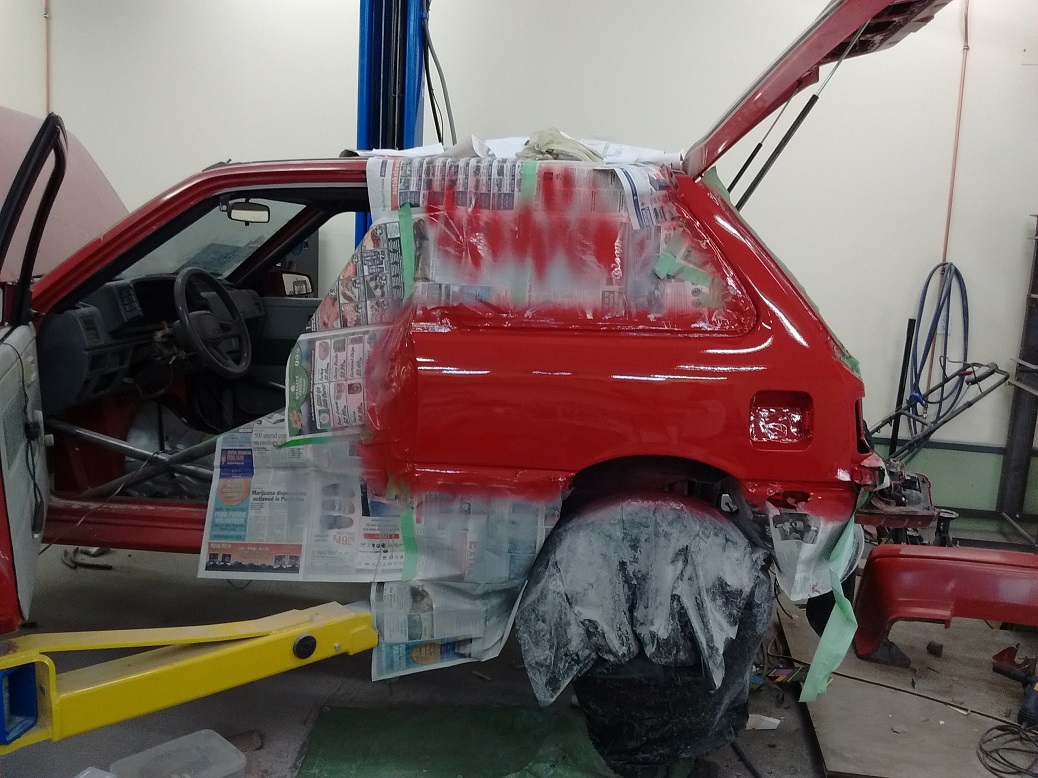
Laid down three coats of paint, with some defects I'll need to deal with once the paint is completely dry. I want to keep working on the fuel filler tunnel inside, but it's probably best to leave the shop alone till morning.
Dude you are pedal to the metal getting stuff done on this thing.

SkinnyG....just now finished reading from the beginning. A couple of questions .....was/has the drive shaft been an issue? and your front coil over fab episode, was there more to it than just the bottom bracket? Watch your back and we await the next 'push', also the fuel door relocation garners you the title of 'North American Binkster'.....well done!
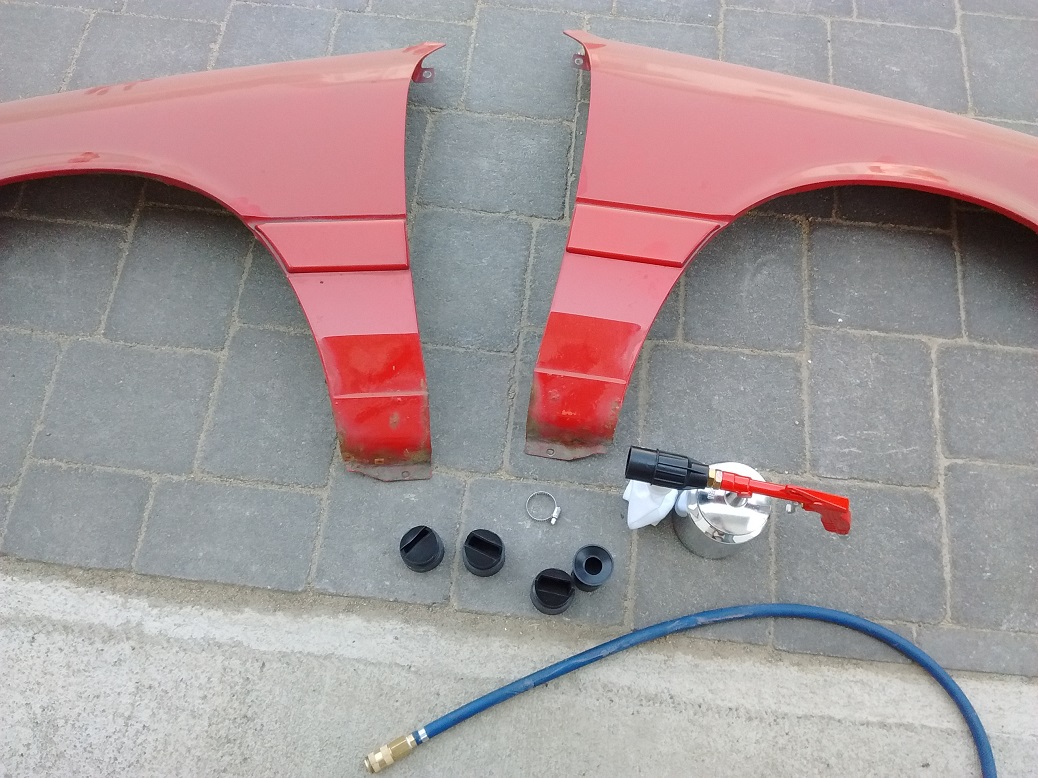
Paint looked good the next day. I felt good about it. I was a little ADD today. Dragged out the fenders, and took a good look at the rust. Hauled out my un-used soon-to-be-dissappointing spot-sandblaster. This thing sucked.
I left the door open on the blast cabinet and used it instead.
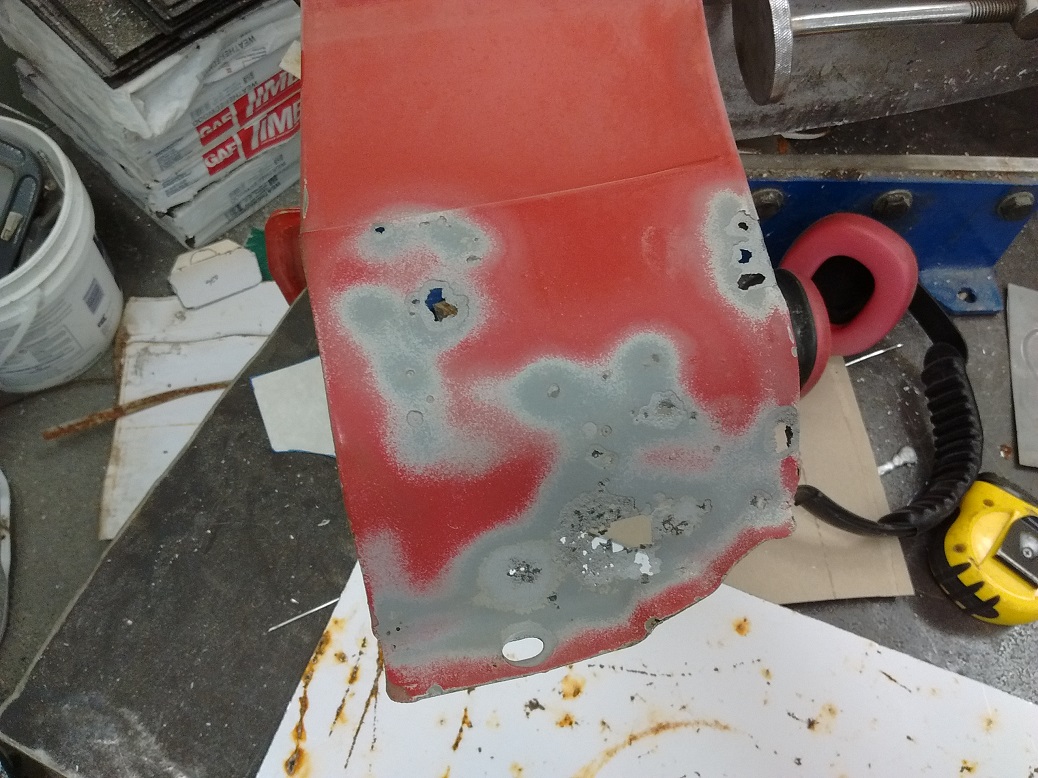
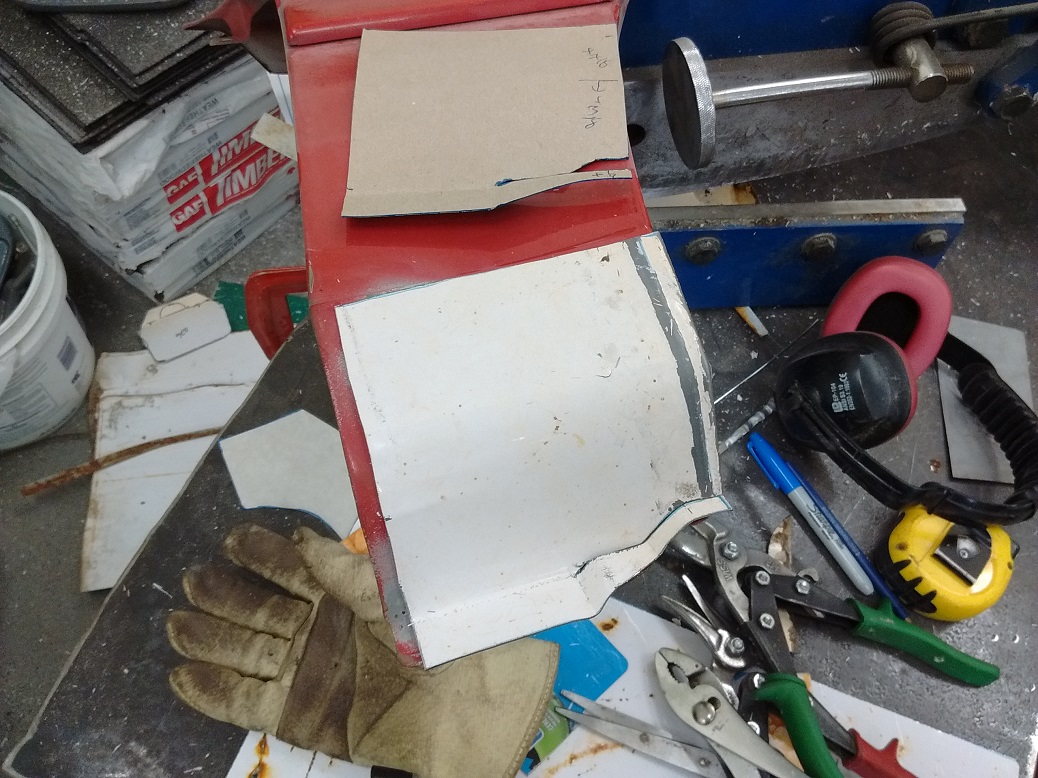
Looks like I'll be making some patch panels. Again.
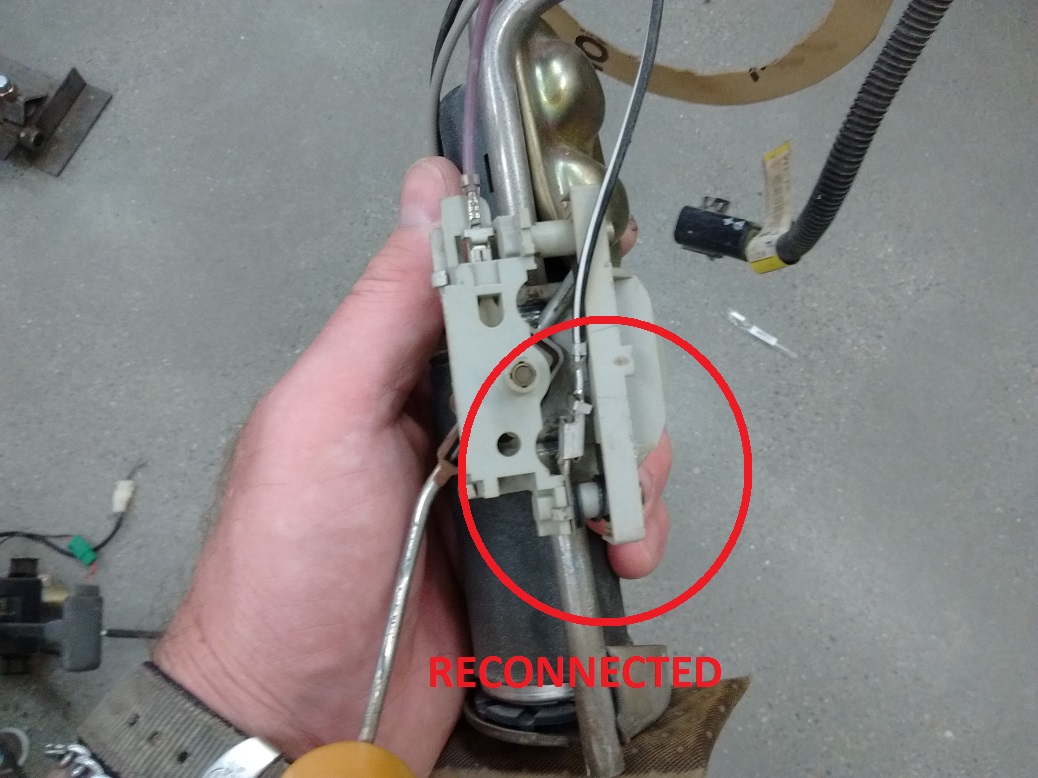
Then I thought "What the hell am I doing? Get the damn car running!" I changed the wiring to the fuel level sender on the Firebird gauge. It now reads reversed.
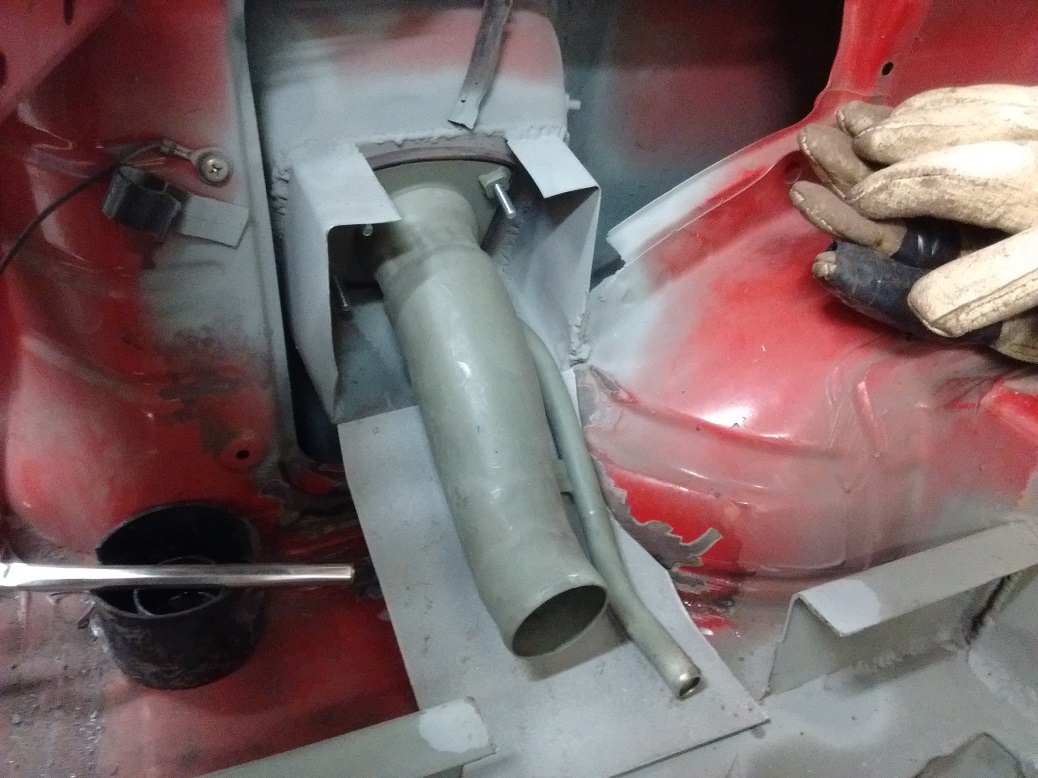
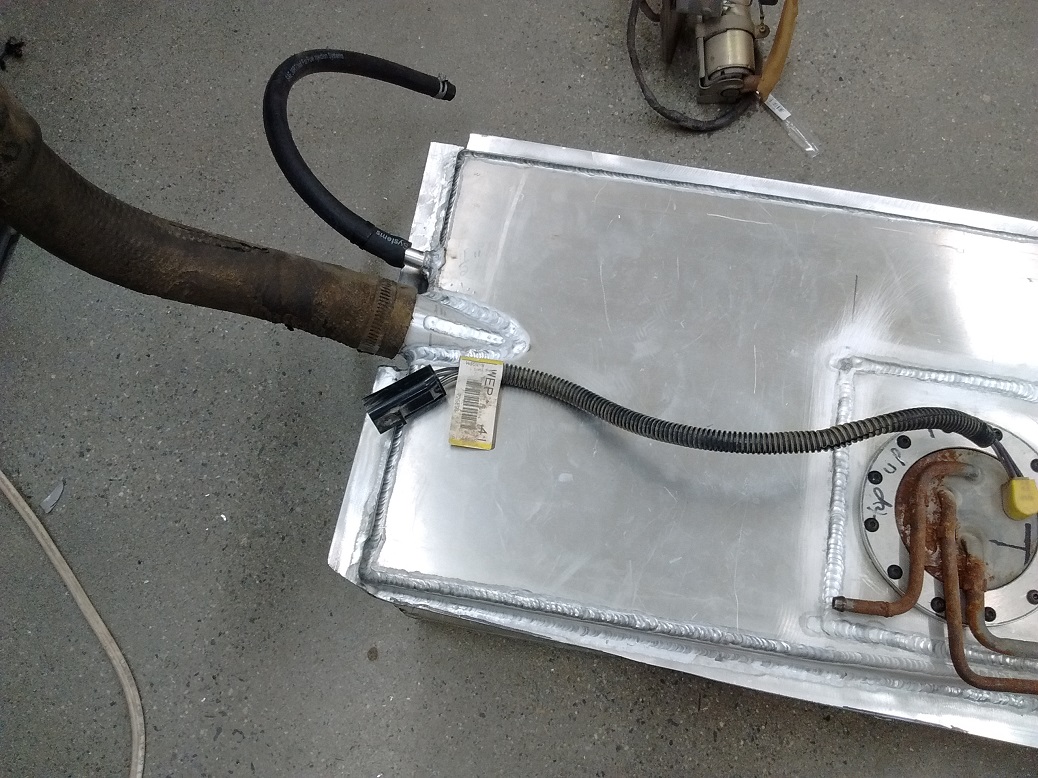
Also finished the tunnel to the tank. I will need to fabricate a top for it once the tank is in to stay. Did some seam sealing around the fuel tank area, as well as under the panel above the 4-link and exhaust. I fabricated the filler tube for the tank out of the offcuts of the road sign that made the fan shroud. Figure out circumference and cut, bead roll one end so the hose will stay on, anneal, then roll into a tube and weld. Also capped the tank end of the tube and drilled a 1-1/4" hole in the side that would face bottom. This should prevent filling 100% with fuel since some air would be trapped at the top of the tank.
I'll pressure test it tomorrow and see if it can go in to stay.
759NRNGM: The Firebird driveshaft was easily shortened. The bottom bracket for the coilover was very simple, it is what you saw. On my Locost I actually welded rings to the bottom of the shocks themselves to hold the coilover sleeves (they didn't explode. Or they did and I'm a ghost), which in retrospect is pretty sketchy (as is typing posthumously), but it's a light car and hasn't failed yet in 20,000km's and many an autocross.
What do you mean by "Watch your back" - is there something I should know about?
Take care of your back....watch what you're doing so as not to aggravate it...that's all....poor choice of phraseology ....my bad
Pressure tested the fuel tank. One leak - I'm on it.
Leak fixed. Holds pressure.
Vacuumed, blew, and then garden-hosed the tank to get all the aluminum shavings out of the tank. Soapy water and a scrubbie to get the aluminum shavings out of my hands.
I think I have some left-over roof underlay that should work to pad the tank mounts.
There was one leak in an awkward weld between the filler neck and the mounting flange. It was hard to get in there, and I didn't seal it up well enough. I cut out a section of the flange and gouged the weld out with a carbide cutter and plenty'o WD40 and re-welded it. No leaks! Which means, the tank can be installed for good! Ready for covers:
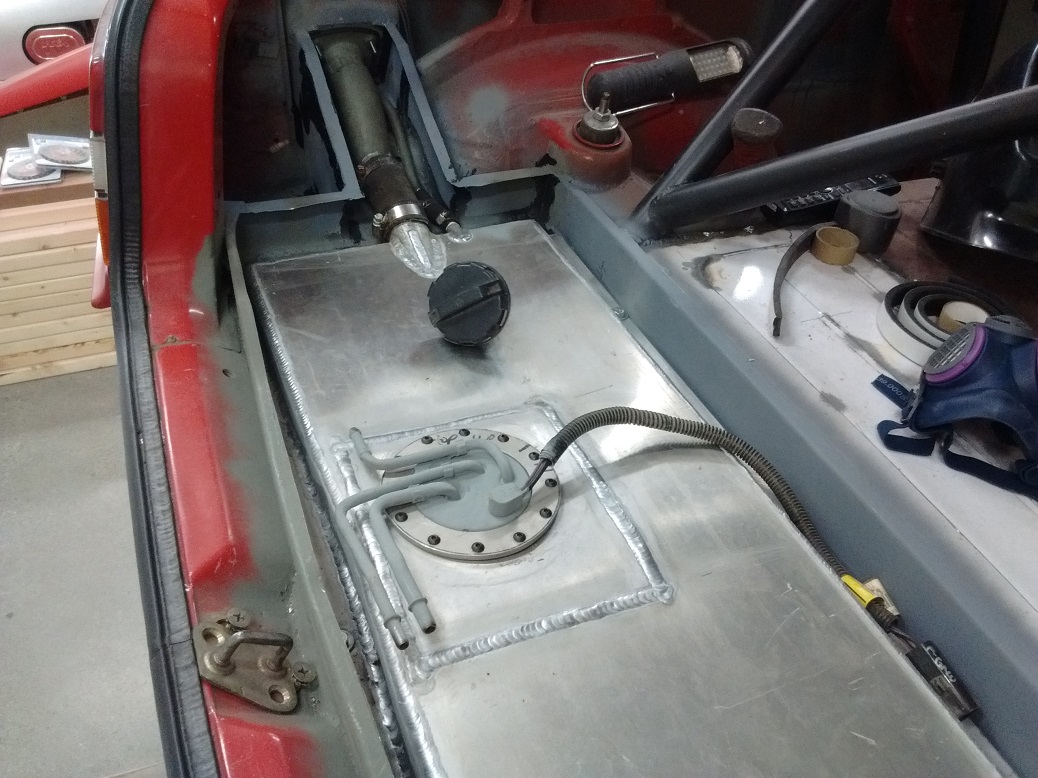
Factory looking goodness:
I did a good cleanup of the shop because the OCD was getting polysyllabic. I should be wiring up the pump and the battery disconnect, and the back will be done.
You'll need to log in to post.


