1 ... 4 5 6 7 8 ... 36
AxeHealey
AxeHealey GRM+ Memberand Reader
12/10/18 8:19 a.m.

The drivers door on the Healey closes! There's still fiddling to be done and metal to be added but the door closes. Astute observers will notice that there is a jack helping out in the pictures... I need to find some way to exert enough force on the door to tweak the rear edge up and the bottom rear out a little bit. The front edge of the door is perfectly on plane with the fender so I don't want to change anything up front. It's currently sitting with pressure from the jack so hopefully that helps some. Anyone have any tips (besides get stronger)??

I got to the shop convinced there was no option but to trim the quarter so I stripped off some paint (and bondo) to be able to mark it up accurately. This would essentially involve chopping and sectioning - skills I don't really have. So I took yet another look at it and gave the shroud/quarters assembly a big ole tug backwards. That got me to a point where the needed trimming on the door was acceptable in my eyes and the truck area is still workable.

Making the first cut. I made two more cuts after this. One more at the rear through the swage line and then one on the leading edge.

You can see where it was a little tight at the swage line. 

Will need to add some metal up top. Same is true with the bottom on the leading edge. 

Before the final cut up front.

I guess I was too excited to take a picture after the final cut. I'm really pleased with how this has come together. I don't have any pictures of it, but I also relocated the shut pillar after getting the door closed.

Other progress - I put Stabil in the E21 and ran it for a couple minutes. It's officially stored for the winter.

TurnerX19
TurnerX19 New Reader
12/10/18 11:04 a.m.

The gap at the top will probably close up when you put the engine in and put the car on the ground with its wheels on. Then you will have to re-adjust everything. Even a brand new Healey was flexible enough that you had to adjust the doors with the drive train in the car.

NOHOME
NOHOME UltimaDork
12/10/18 12:03 p.m.

Welcome to the " no fear cause I own a grinder and a Mig welder" club. That came out well.

Good chance you are going to want to twist the door to make the back of the door line up with the B post. Blocks of wood in the door or a piece of 2x4 bolted to the back of the doo so you have leverage.


Pete

AxeHealey
AxeHealey GRM+ Memberand Reader
12/10/18 12:10 p.m.

Turner - engine and trans are in the car, jackstands are in line with where the wheels will go. It's about as close as I'm going to get. But yes, stiff as a cooked noodle.

Pete - Give yourself some credit for me joining. Watching you figure out all the gaps on the Molvo helped a lot. Can you explain further your method for twisting the door? It definitely needs to be done.

AxeHealey
AxeHealey GRM+ Memberand Reader
12/15/18 6:25 p.m.

I was a bit pressed for time today with an 8AM meeting and having to get on the road by 1PM for my niece and nephew's birthday party. Some good progress was made but I only got 3, subpar pictures.

First task of the day was fixing the weatherstripping that Elmore took off - no pictures but it's done. Then it was back to the door.

I tried and tried to bend it and realized it just wasn't going to happen in the current state. It then dawned on me - more SHIMS. As it sat, I only had one shim on the door side and one on the pillar side of the bottom hinge. I whipped up a third out of slightly thicker metal, stacked them all on the door side and BAM I was really close. Close enough that a nice sturdy lift-with-the-legs got the job done. The swage still isn't perfect but a little filler will line them up fine. 

I made some measurements and decided that a 5" x 0.5" strip was where I needed to start with the top rear edge of the door. After cutting the strip I bent it to meet the curve of the door and then traced the profile on to it. The door edge is much more of a compound curve than it appears.

Tacked it into place.

Then trimmed it down. The gap between the door panel and the filler piece is nowhere near as big as it appears in this picture. It's a bit of an illusion.

The gap between the filler panel and the quarter is well within the acceptable range. In reality, I'll end up cutting off that little thin end at the bottom and just adding weld to the edge of the door for the first 1/4" inch or so and grinding it back. My plan is to weld from behind and then just have a thin layer of filler on the top.

Sharp eyes will notice that the top "ledge" of the door seems to be all lead (or some other metal) filler. You can see the color change where it goes back to steel about 2 inches in. Not sure how to handle this with the patch piece.

AxeHealey
AxeHealey GRM+ Memberand Reader
12/18/18 7:21 a.m.

My night was cut short when my relatively new Harbor Freight angle grinder stopped working but much progress was made.

I fully welded the strip onto the door edge. My intent was to weld only from the backside but I just could not get it clean enough to have good welds. I used the millions-of-little-tack welds technique.

Then it was just a couple rounds of flap disk, weld, flap disk, weld. Resulting in...

It's really hard to get an accurate picture of the gap but it's pretty berkeleying good. I'm pleased. Questions still remain about what to do on the top where all that lead (I think it's lead) filler is. On to the front, same process as the rear.

That's when the grinder decided it was done. From what it took to do the rear edge, I'm about half finished with the front. 

captainawesome
captainawesome Reader
12/18/18 7:26 a.m.

Check the brushes in the grinder. Usually they come with at least one pair of replacements in a little ziploc baggy.

Nice progress on the gaps. This kind of fiddling I just don’t have the patience for.


NOHOME
NOHOME UltimaDork
12/18/18 7:41 a.m.

Bravo! You really have gotten into the spirit of this game.  

Where you might save some time in the future is with the wedges you are welding on to the door edges. You could probably weld up the edge of the doorskin easier than cutting and welding the slices of tin.  Anything under a  quarter inch I just stack the bead and whittle it down with the grinder (s).

What I meant witht he door twist is to put a block of wood between te door and the sill and push if the top of the door sticks out.  Apply an opposite method of leverage ( harder to do) if the bottom sticks out. As you found out, shims might also come into play. In some cases, where all the shims are removed, but you need more in that direction, I have put the face of the hinge on a beltsander as a way to create "negative shim"

If I am trying to hang a door ( or any hinged panel) and it is giving me a hard time, I immediately remove any hinges, seals, locks or whatever and try to locate the door in the hole. If it fits flush with good gaps, then I know that I have a hardware challenge. If the door wont fit in the gap, then I know I have to sort the panel and then move on to the hardware.  All sounds easy when you say it real fast, but it is a slow tedious process. Dont be surprised when at the end you put the seal on the door opening and it pushes the bottom of the door out! Lots of bad rubber bits out there for Brit cars.


Pete

AxeHealey
AxeHealey GRM+ Memberand Reader
12/18/18 8:20 a.m.

captainawesome - I couldn't find the extra brushes last night. Between you, me and the internet I'm pretty sure using it to cut a patio's worth of brick pavers has something to do with it (see: E36 M3 ton of dust) but I've had good luck exchanging at Harbor Freight before. Going to give that a try. Still have the receipt from July.

Pete - I was going the slices route because I wasn't sure how much was "OK" to just add weld. For the passenger door I'll probably just start with weld, thanks.

Appreciate the more detailed description of your door-bending technique. I'll give it a shot. I was also thinking about using ratchet straps. One on the inside top of the door holding it closed (no latch in place yet) and one on the outside bottom of the door, cranking that one down pulling the bottom out. I did actually "anti-shim" both hinges in the spring. As it turns out only the top was needed.


AxeHealey
AxeHealey GRM+ Memberand Reader
12/24/18 7:26 a.m.

As it turned out, I had only a couple of hours to dedicate to cars this weekend. Three dinners with my wife's side and watching football with mine will do that. Nonetheless, I'm now about 98% done with the driver's door. 

Same process of flap disk, weld, flap disk, weld. This is somewhere in the middle.

After many a test fit and removal...

I'm really pleased with this. There are a couple areas that I may still fiddle with the get the gap better but even if it stays exactly this way, I'm OK.

Pete - your method worked amazingly well. I guess I didn't take a picture but the bottom edge of the door used to be inset about 1/2" at it's worst and now it's less than 1/8". I'll be able to get the rest of that out.

I had been putting off mocking up the rocker. When I last did so in the spring, it was WAY off and I thought there was going to be a lot of chopping involved. Not the case! I had to trim the leading edge to fit the hinge pillar correctly but that's about it!

I have to be generally available this morning for work and then this afternoon and tomorrow are a no-go for the shop. After that though, I'm pretty much off through the new year so I should be able to make leaps and bounds with the passenger door. I think my dad is actually starting to believe he may drive this thing again!

a_florida_man
a_florida_man GRM+ Memberand Reader
12/27/18 9:25 a.m.

Cool, a Healey guy on the GRM forum.

I have one too.

1958 100-6 BN4 Built 12-57

Overdrive, Heater, Wire Wheels and Hardtop.

I've had it for a while, there is a small part of the story and a couple of pics here:

1958 BN4

It's unrestored, but a little 'fixed up' and is very reliable. I have taken it on a couple of 300 mile round trips recently.

I'll be watching this thread for sure!!!

Kevin


NOHOME
NOHOME UltimaDork
12/27/18 9:38 a.m.

You have fallen into the spirit of this game I see! AND you do good work.

Next thing I will warn you about is that this metal-fixing can be addictive to the point where it IS the point and driving goes by the wayside.


Pete

a_florida_man
a_florida_man GRM+ Memberand Reader
12/27/18 9:55 a.m.
NOHOME said:

You have fallen into the spirit of this game I see! AND you do good work.

Next thing I will warn you about is that this metal-fixing can be addictive to the point where it IS the point and driving goes by the wayside.


Pete

Yep, I've seen the valley of metal work and repair, but I have yet to go deep into the abyss... I also own a 1946 CJ2a 'project'.

It's off the back burner and lying next to the stove though at this point... lol. 

AxeHealey
AxeHealey GRM+ Memberand Reader
12/27/18 1:07 p.m.
a_florida_man said:

Cool, a Healey guy on the GRM forum.

I have one too.

1958 100-6 BN4 Built 12-57

Overdrive, Heater, Wire Wheels and Hardtop.

I've had it for a while, there is a small part of the story and a couple of pics here:

1958 BN4

It's unrestored, but a little 'fixed up' and is very reliable. I have taken it on a couple of 300 mile round trips recently.

I'll be watching this thread for sure!!!

Kevin


Love the look of yours. Our Healey is the same deal as yours - there is definitely a no-sell rule in place. 

AxeHealey
AxeHealey GRM+ Memberand Reader
12/27/18 1:09 p.m.
NOHOME said:

You have fallen into the spirit of this game I see! AND you do good work.

Next thing I will warn you about is that this metal-fixing can be addictive to the point where it IS the point and driving goes by the wayside.


Pete

Thanks, much appreciated! I had my dad over looking at progress yesterday and had a discussion with him along the lines of "I know I could go on forever trying to perfect these gaps but need to reel myself in". So, yeah I can definitely see that happening.

AxeHealey
AxeHealey GRM+ Memberand Reader
12/27/18 1:46 p.m.

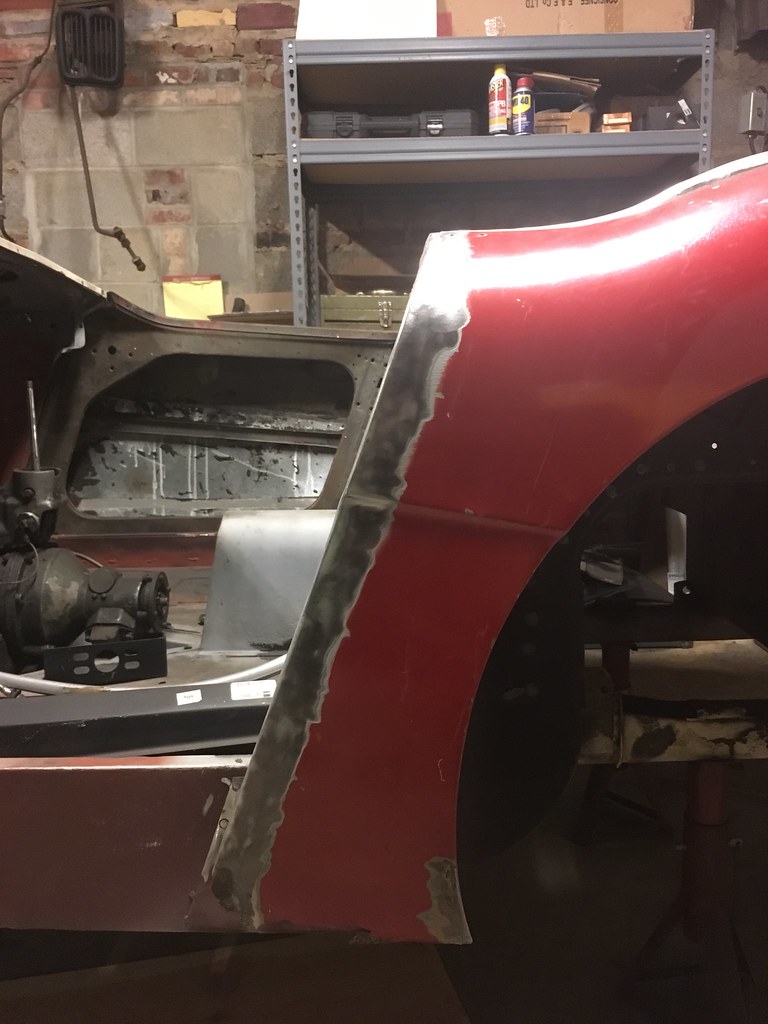
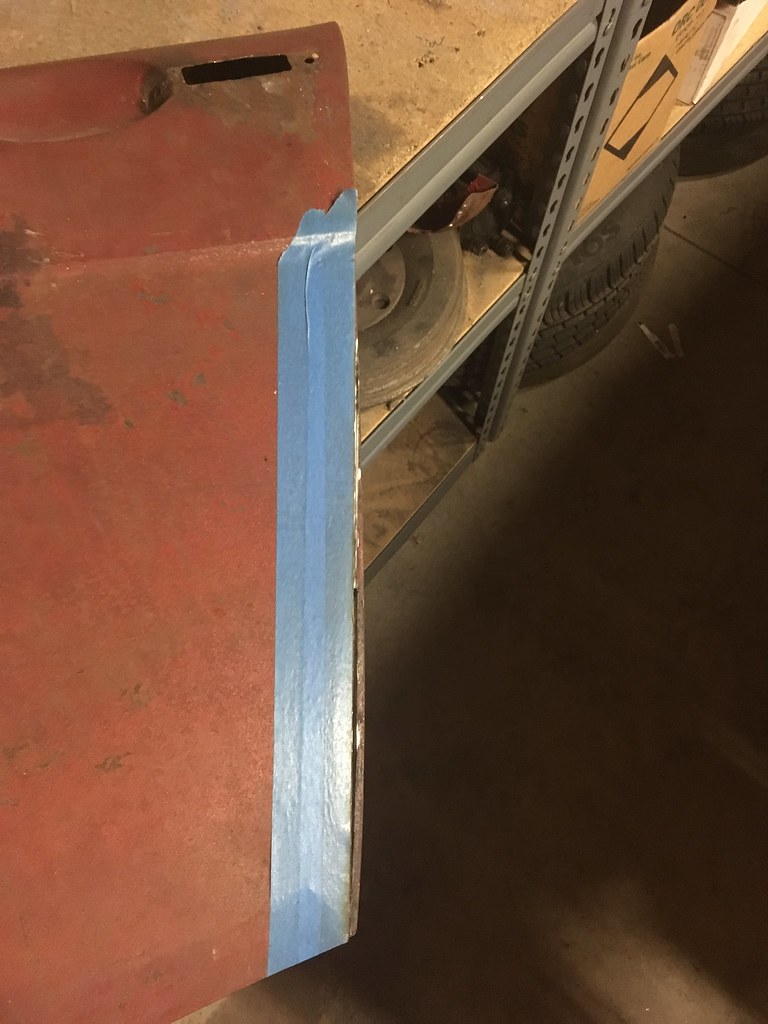
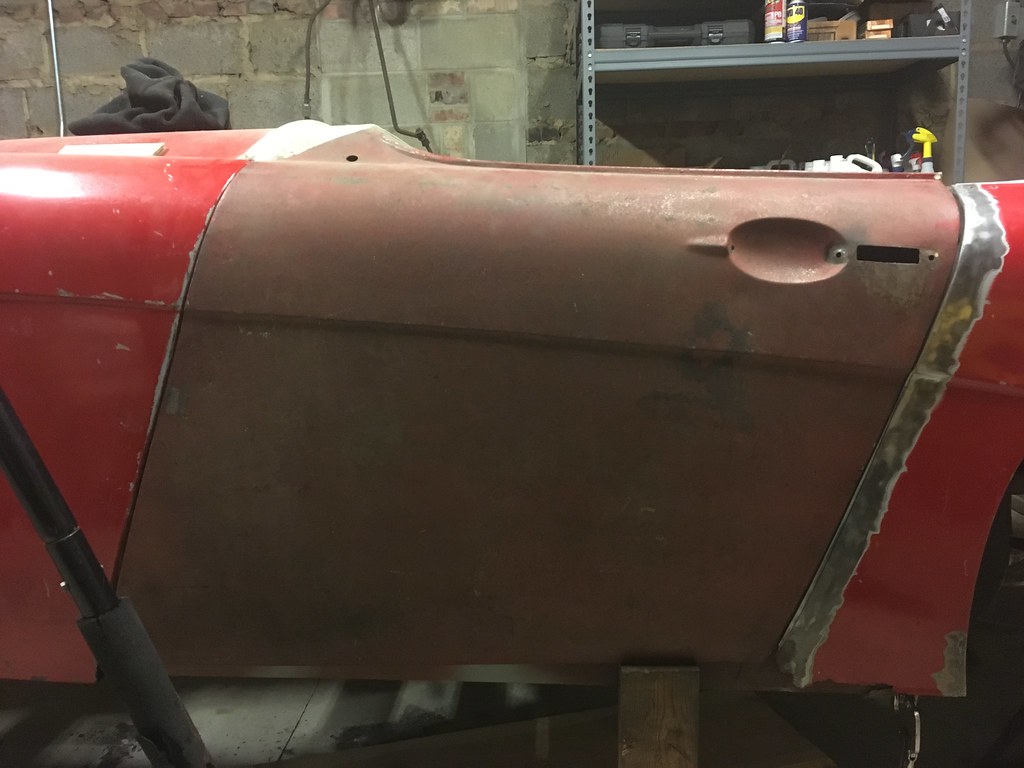
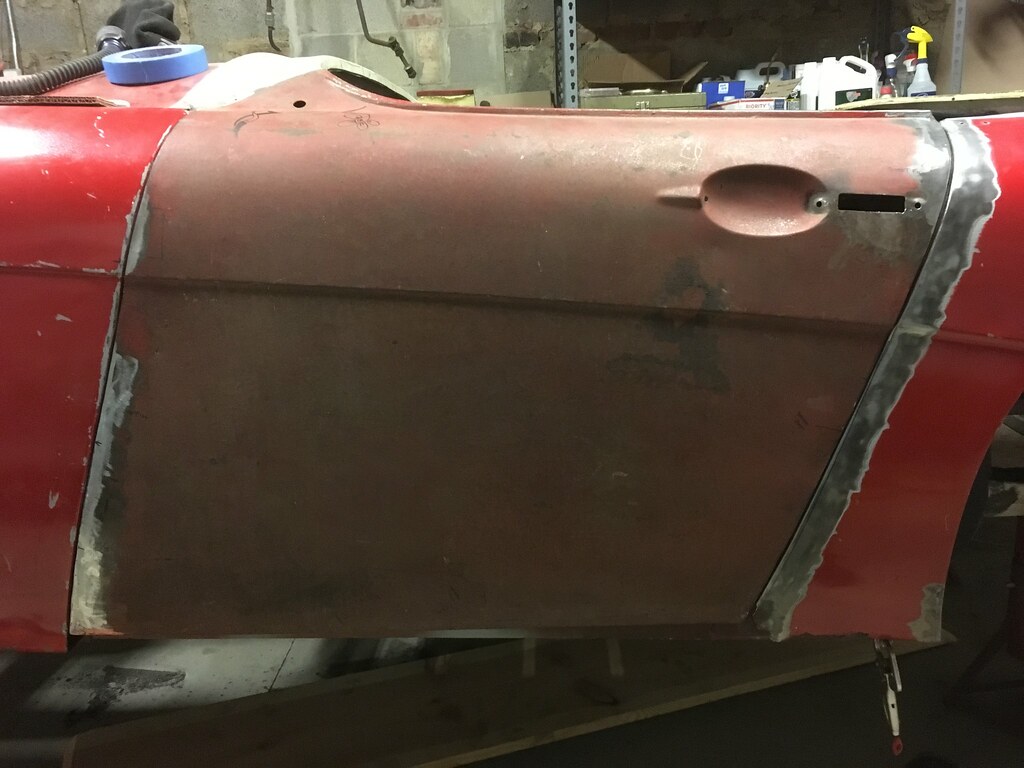
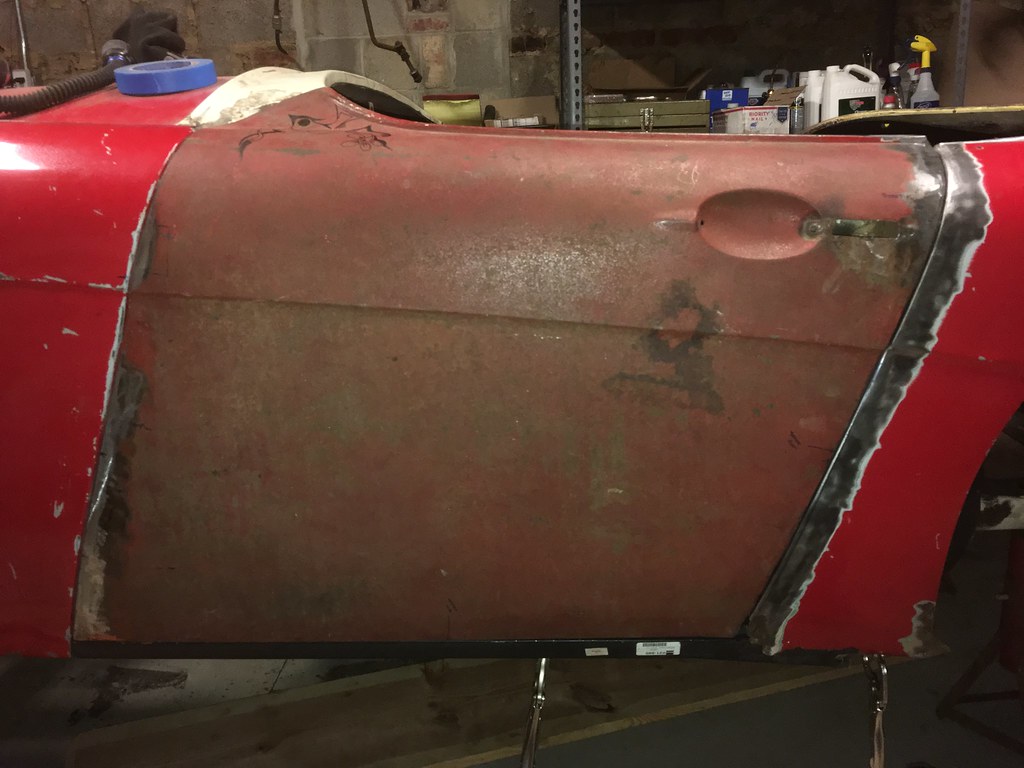
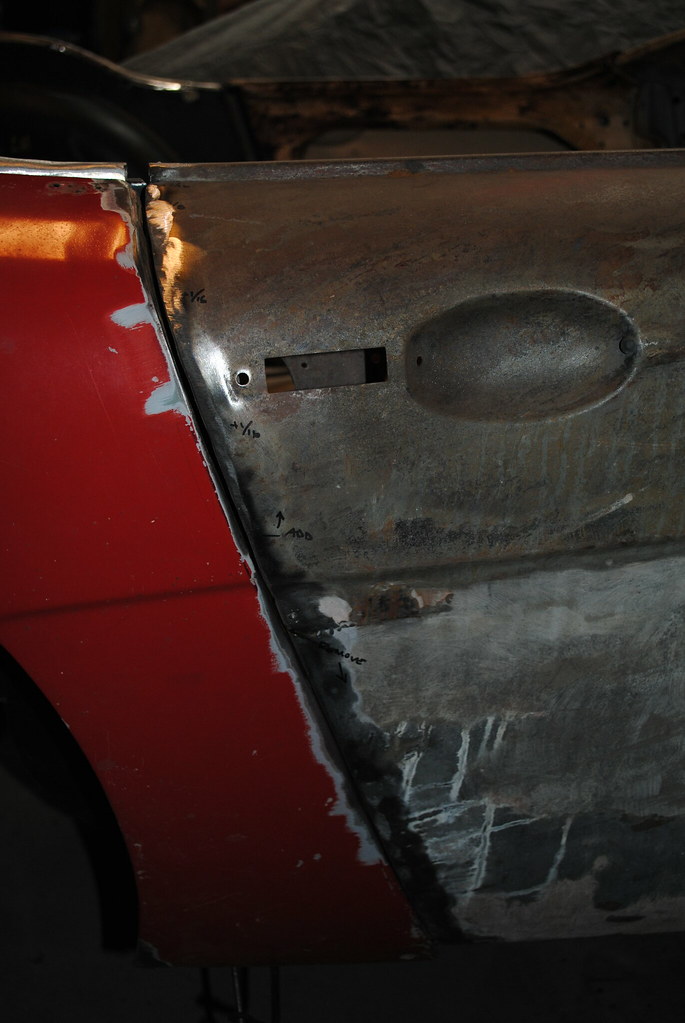
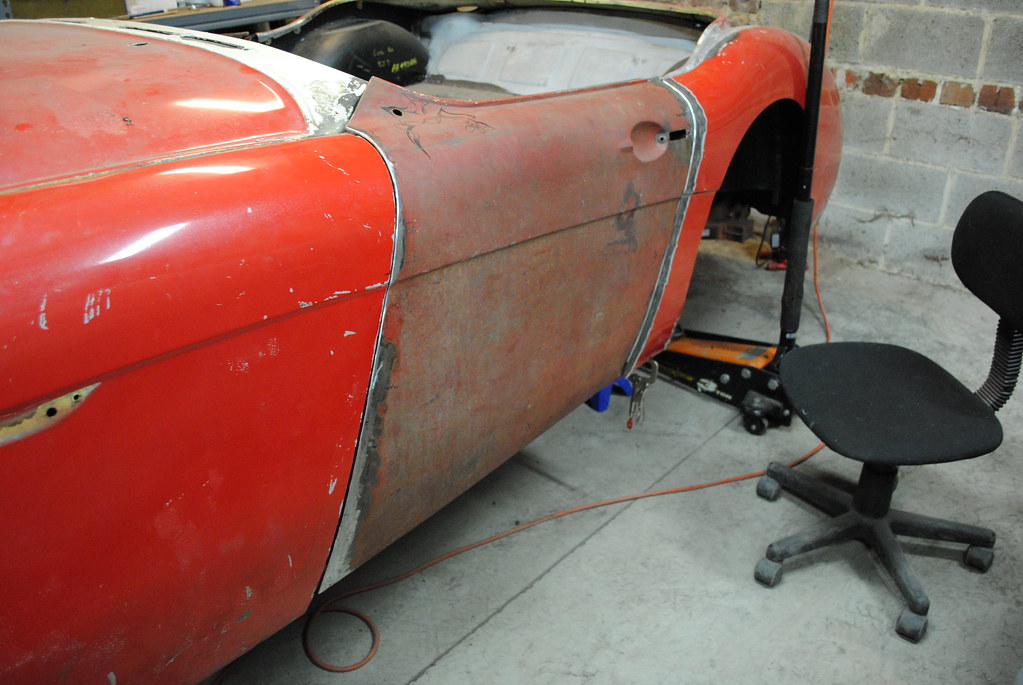
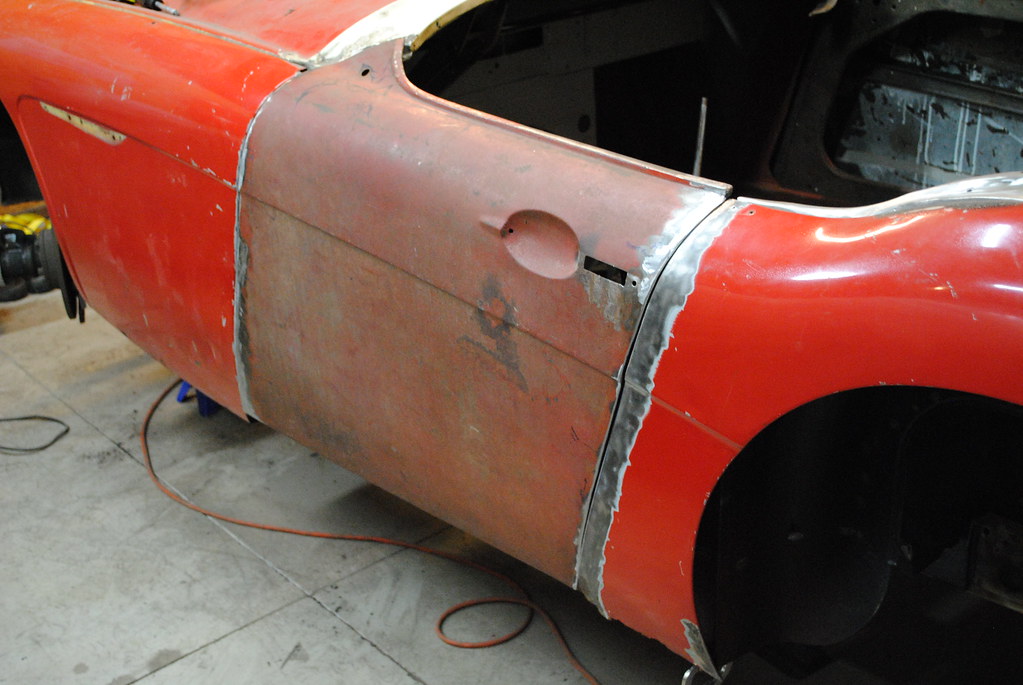
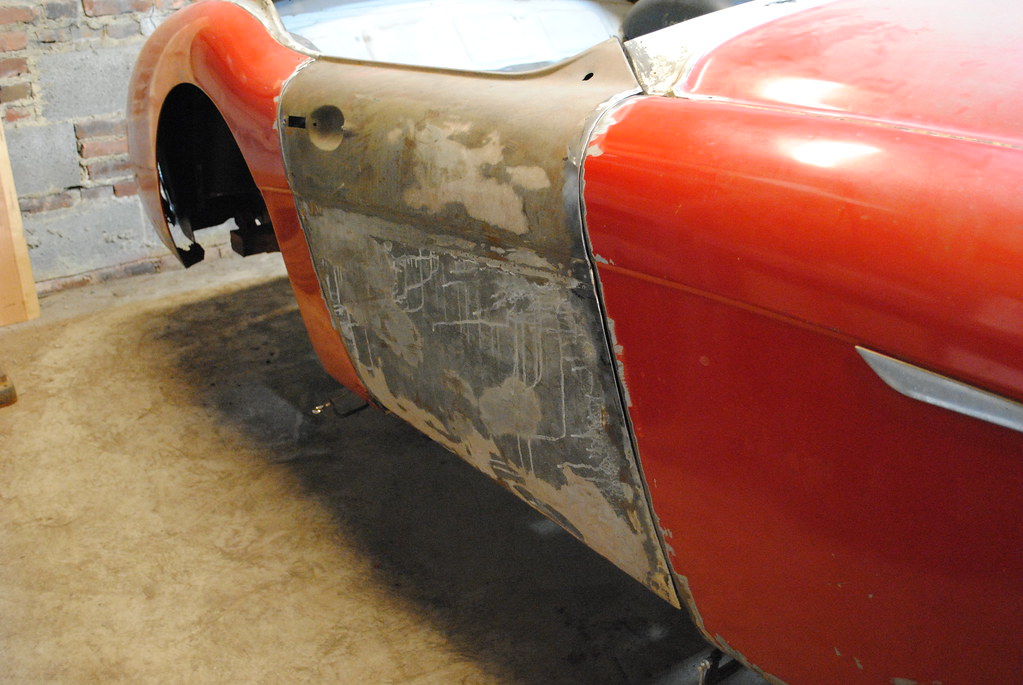
So far this has been a week of great success and big (painful) failure. Getting the driver's door just about finished was hugely exciting and really put me on a Healey high, itching to get moving on the other side. Christmas with half my family came and brought goodies for the shop and vehicles - the most immediately exciting were four linkable overhead LED shop lights. I went over yesterday and got them all hooked up. 

Before - two light bulbs over the one-car section and two florescent fixtures in the back over the two-car area.

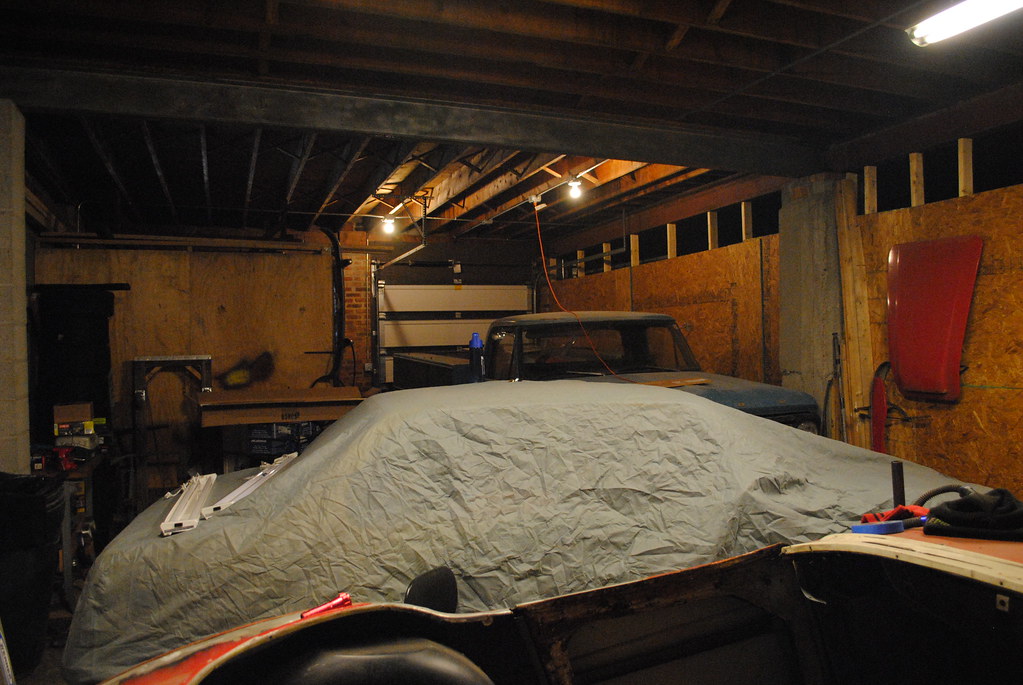
It's hard to really tell how dark it was in there. The shadow on this side of the car cover gives the idea. More often than not, I blocked the light I needed with my body/head and needed to use the auxiliary work lights I have.

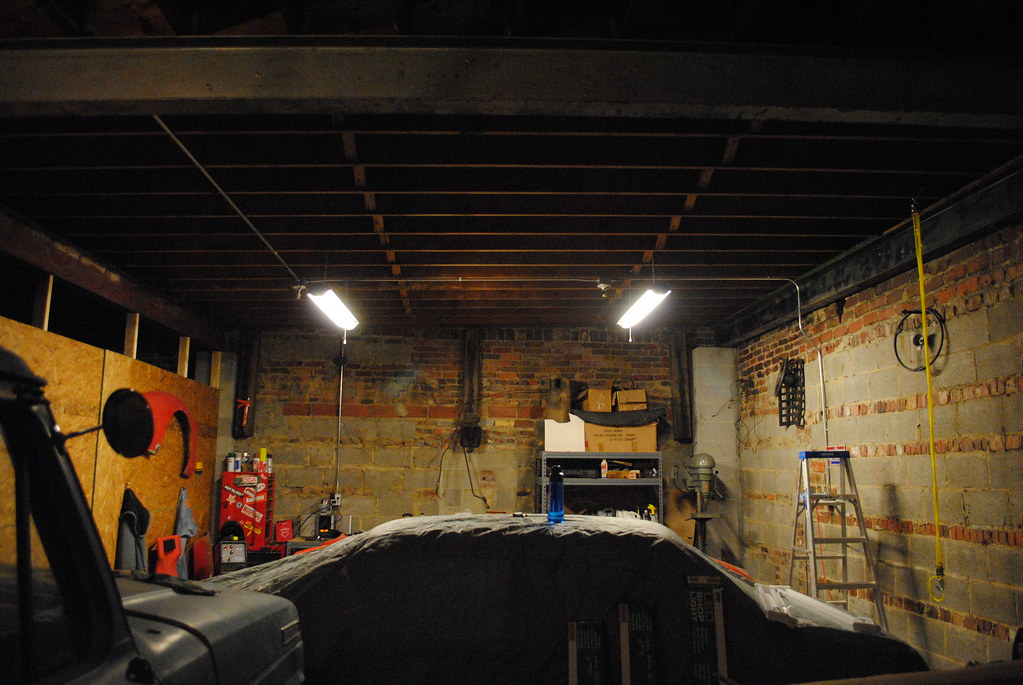
I decided the more important area to have light was the back section where the Healey is. Three of the new lights would go back there and one on the "truck" side. After much time up and down the ladder and screwing in hooks, here is what I ended up with.

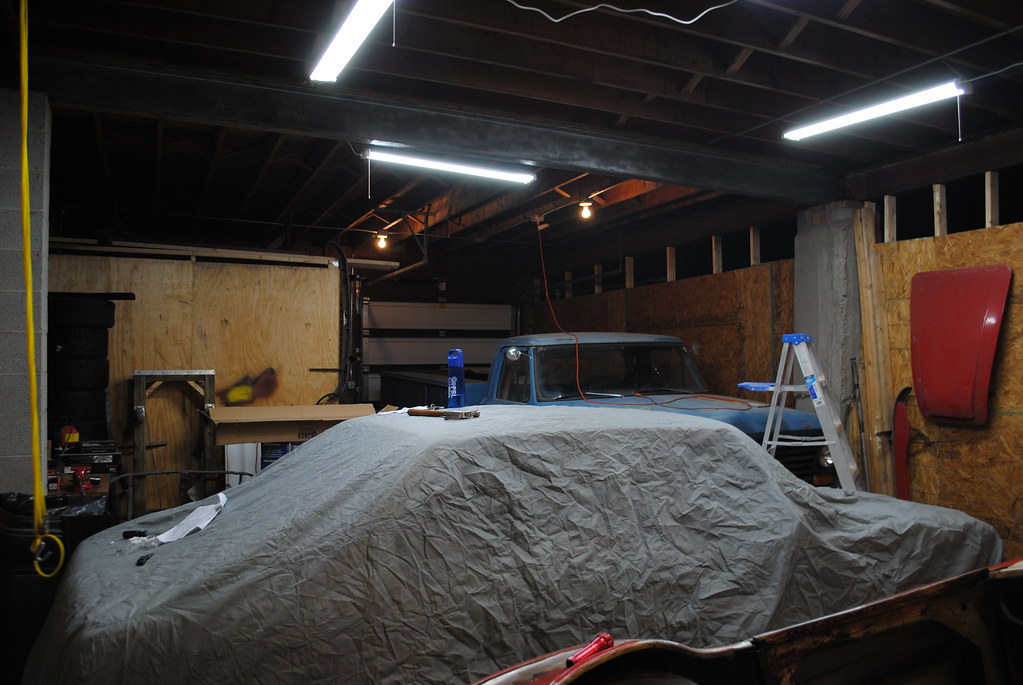
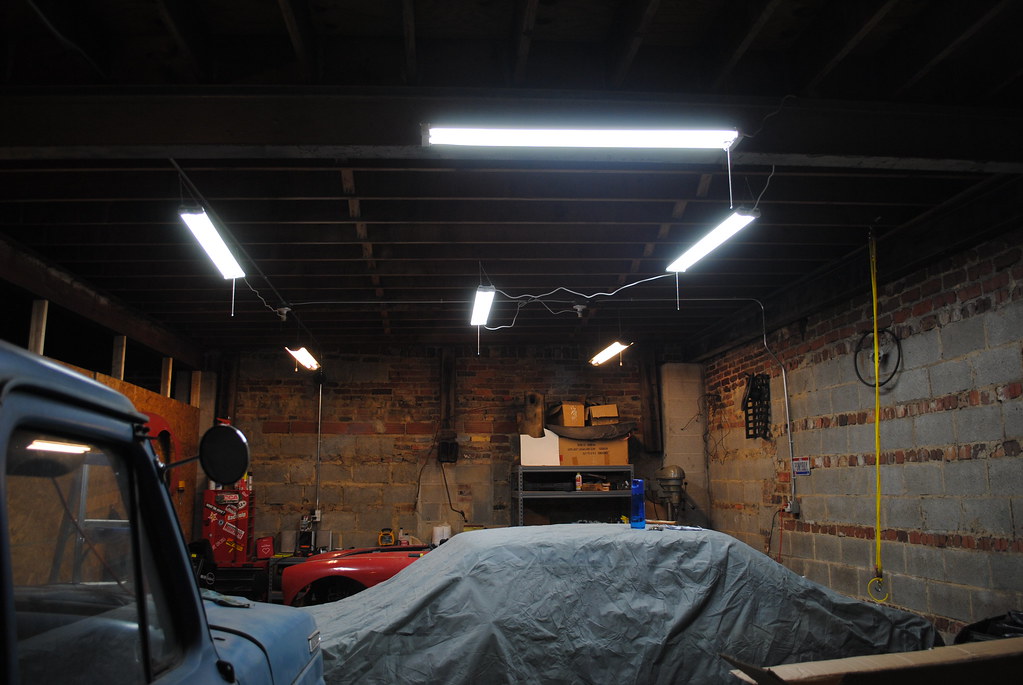
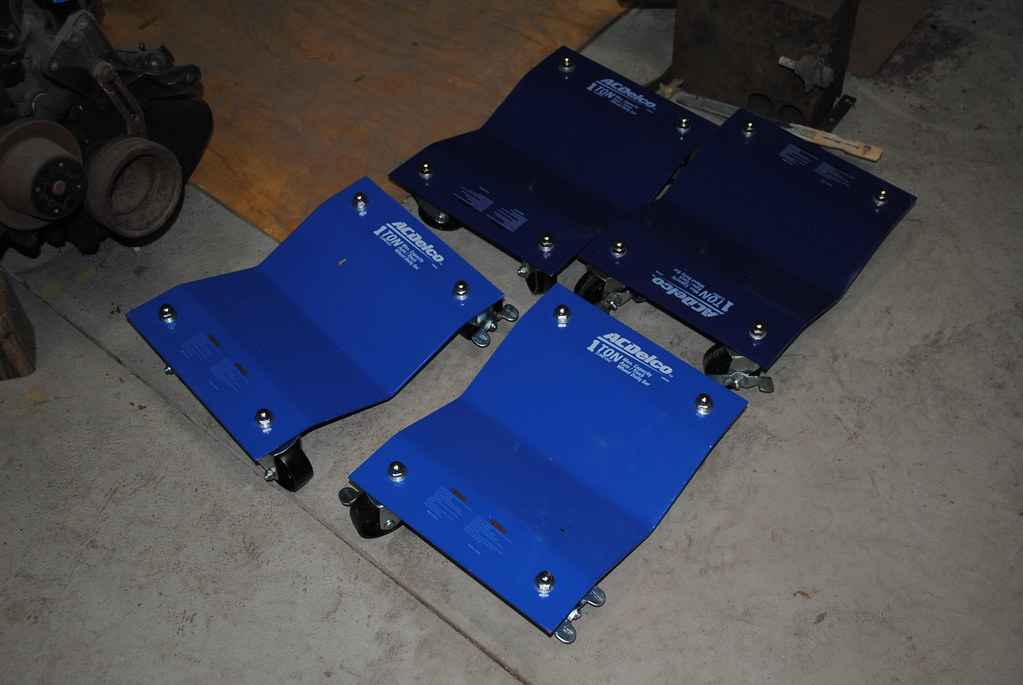
It's still much darker over the truck but I'm really happy for now. I also became a grown-up and hung a real wheel rack and got four more dollies (this is a precursor to the painful failure of today).

So that covers the successes of the weeks so far. 'Tell me, Andrew, what was this big failure?'. Glad you asked.

I had these grand visions of welding jackstands to the wheel dollies so the Healey would be easily scooted around the garage to access different sides/angles/etc. I also intended to secure the frame of the Healey to the jackstands.

This morning, I got the Healey up in the air on all four jackstands and dollies. I decided to do this before welding as a sort of proof of concept. As I was getting prepared to join the stands to the dollies, I decided it was a good idea to give the Healey a little test scoot. First I did the rear (moved it about 0.5") - great, this is going to work! Then I tried the front - the jackstand and dollie aparatuses moved about 0.25" and the car moved the the other 0.25". OK, I thought, I'll just reposition the car. After doing that, I tried scooting it again - DISASTER. I obviously was missing some brain power this morning. Why did I even test scoot? Why didn't I first secure the car to the stands? We'll never know.

The jackstands and the dollies stayed put and the car fell off the stands. I tried (to no avail) to catch the front of the car where I was standing. I pulled my back really bad, something stabbed me pretty deep in the ankle (still not sure what) and the Healey is showing some battle scars.

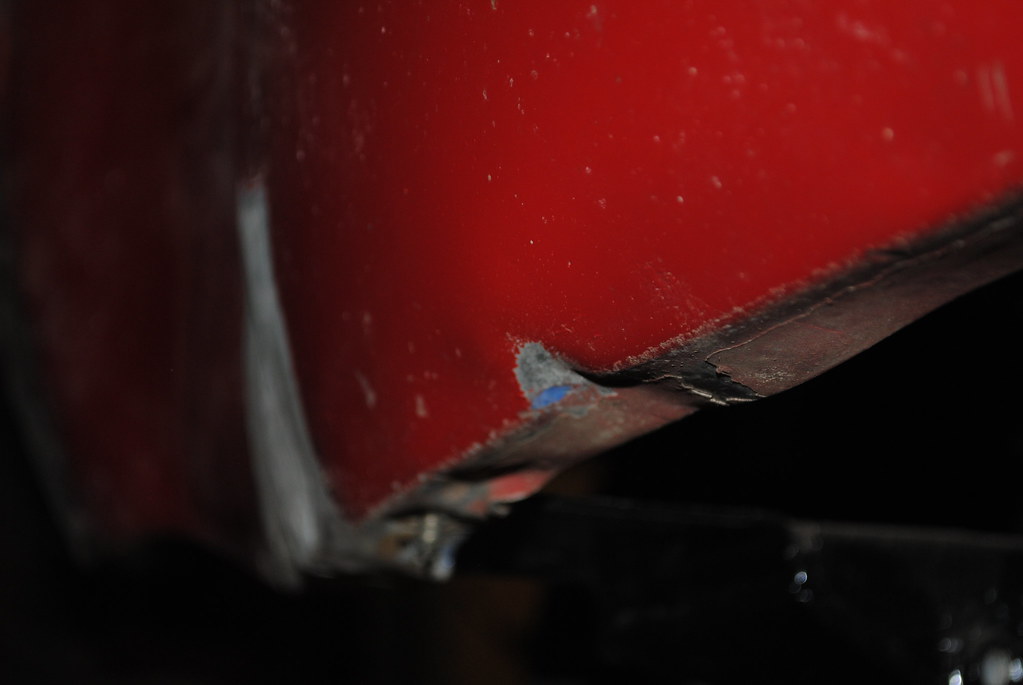
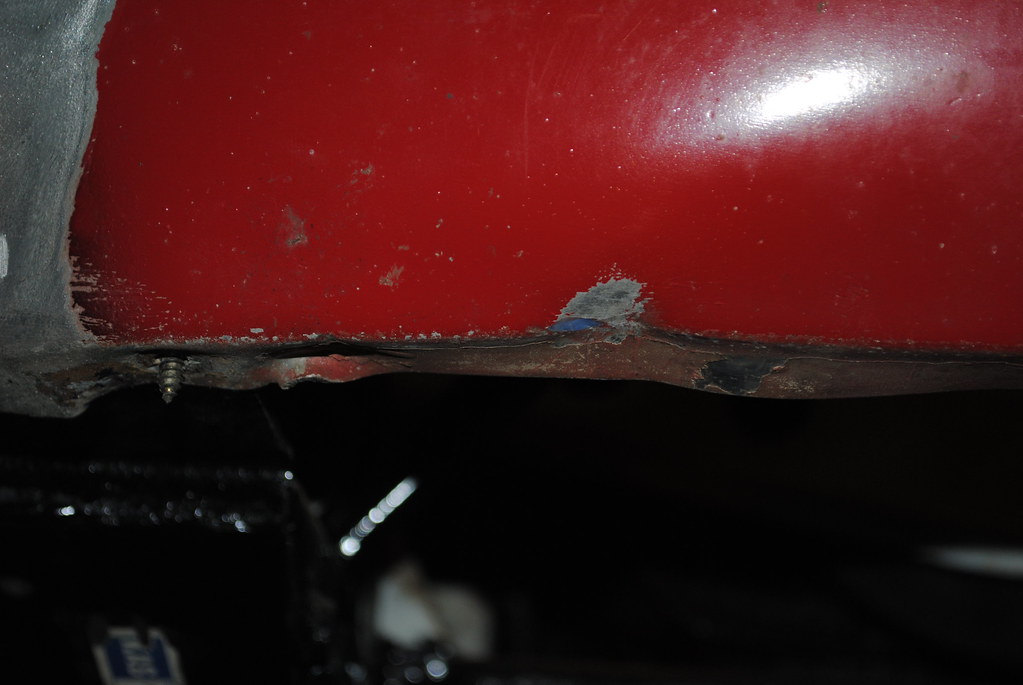
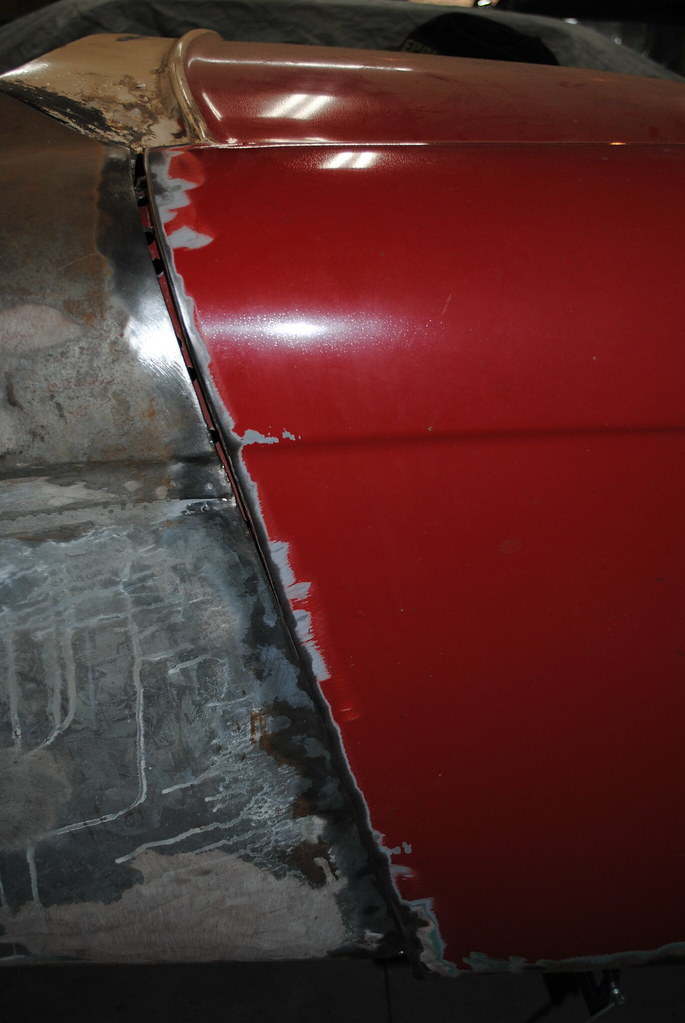
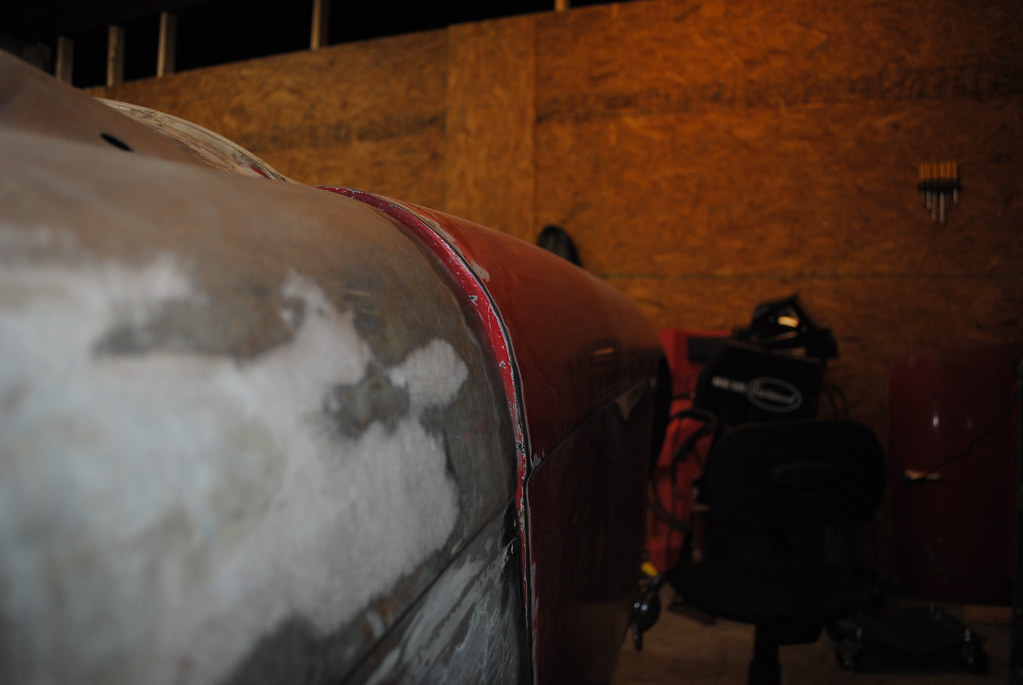
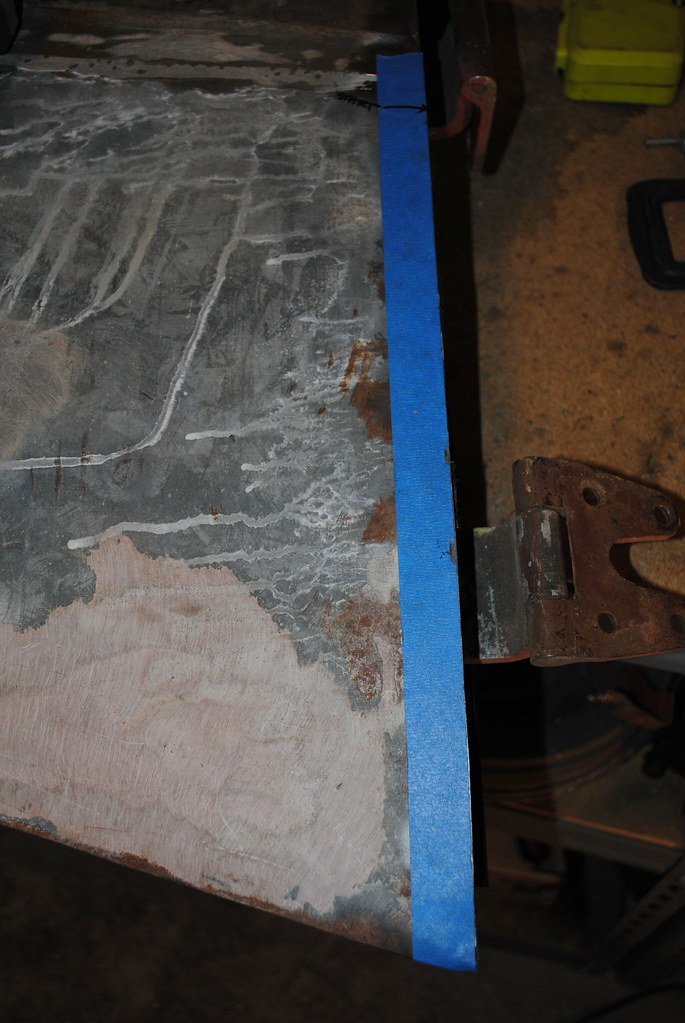
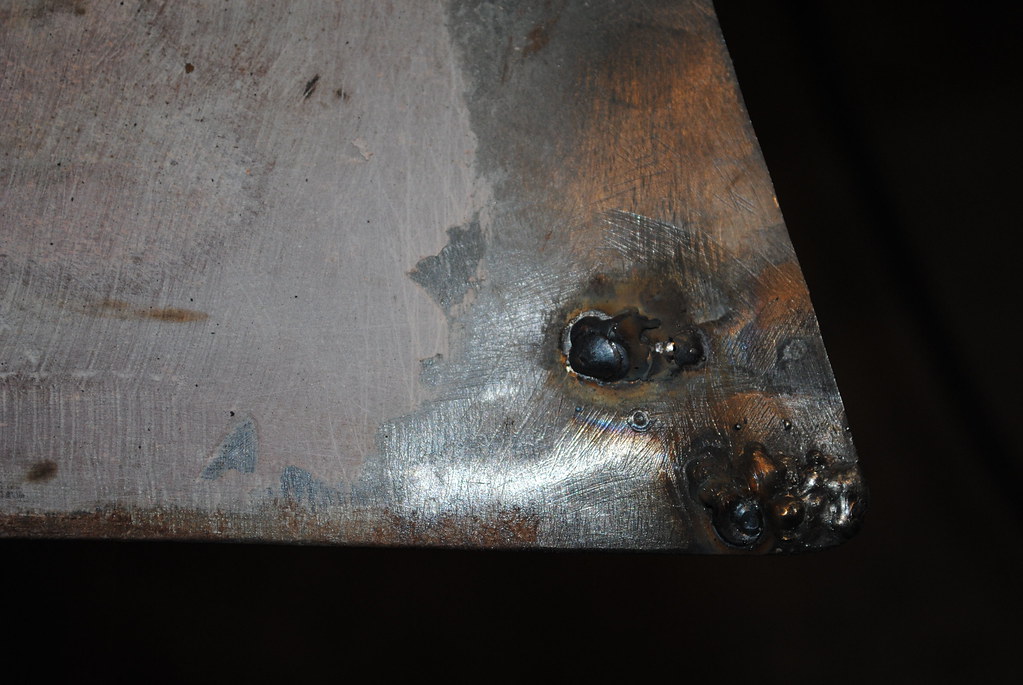
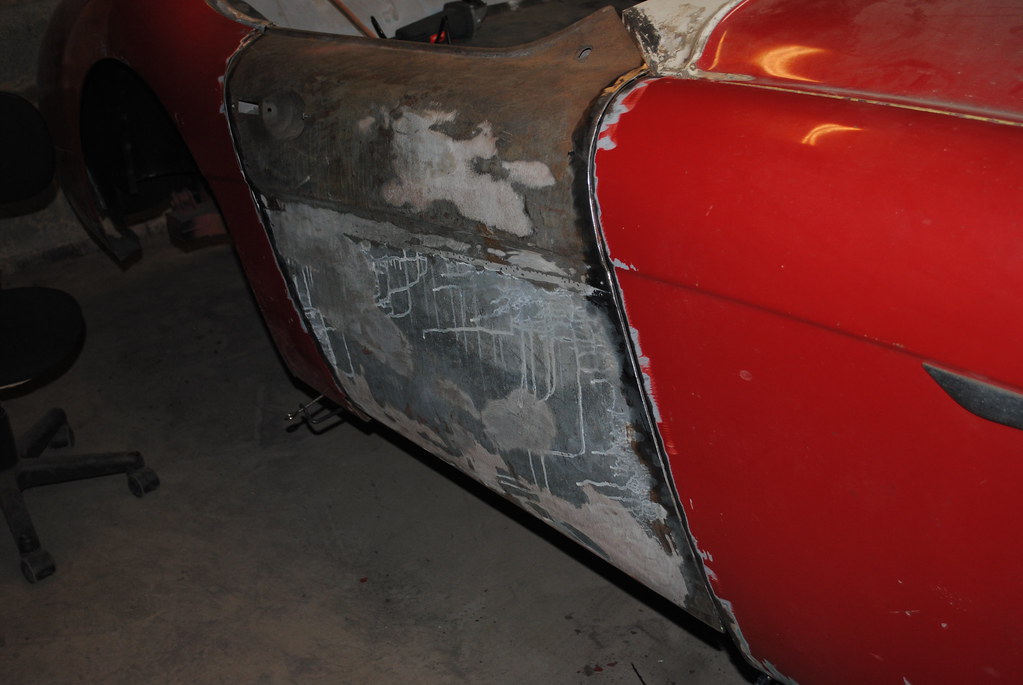
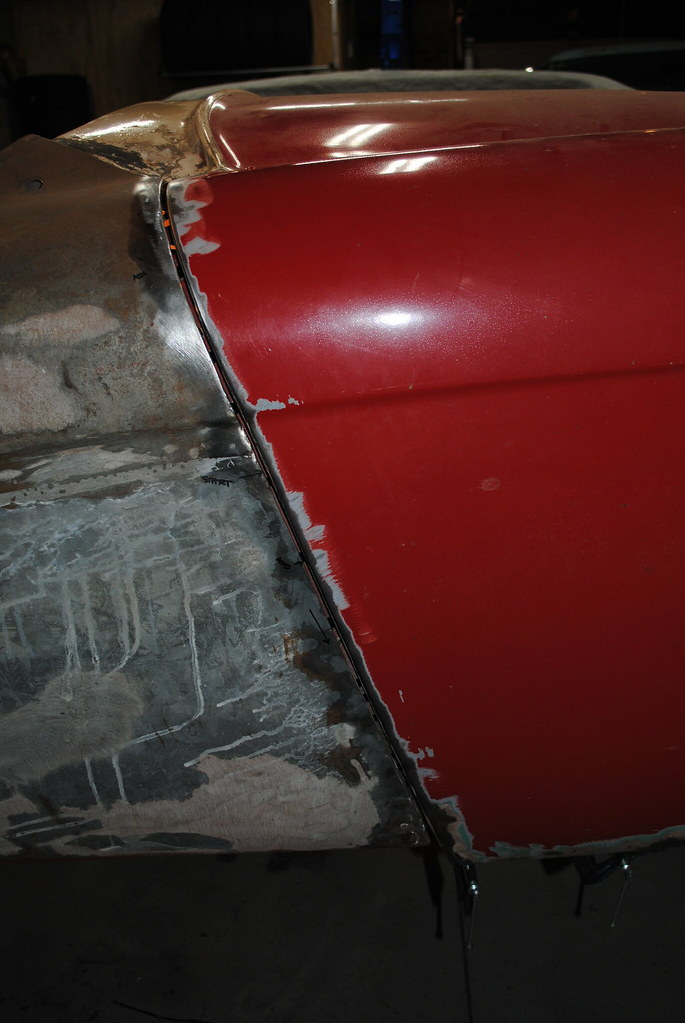
This was pretty upsetting but after a quick look, nothing seemed too bad. The shroud really didn't move much other than that dent and I was able to get it back into place. Later, I sat down in my chair in front of the Healey for a snack and something about the front crossmember caught my eye. After crawling under, I found this...

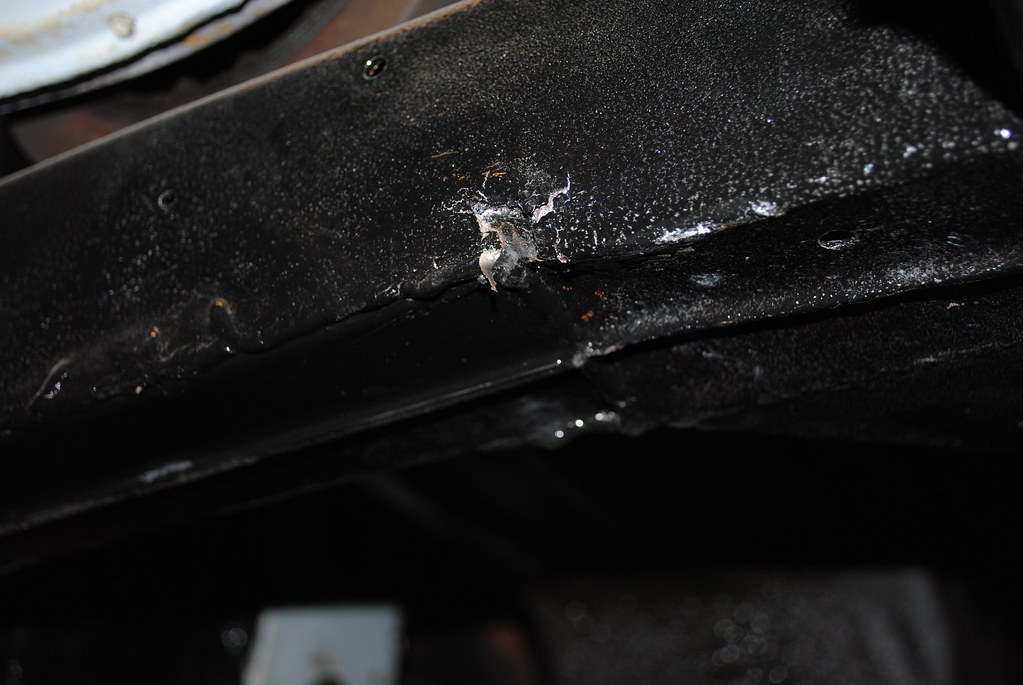
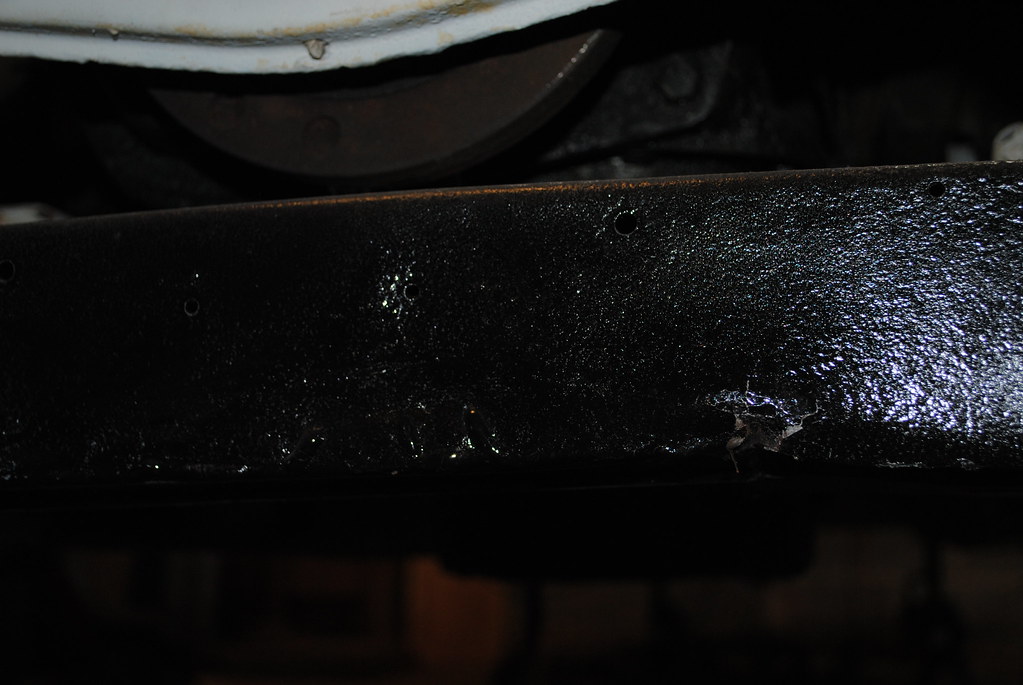
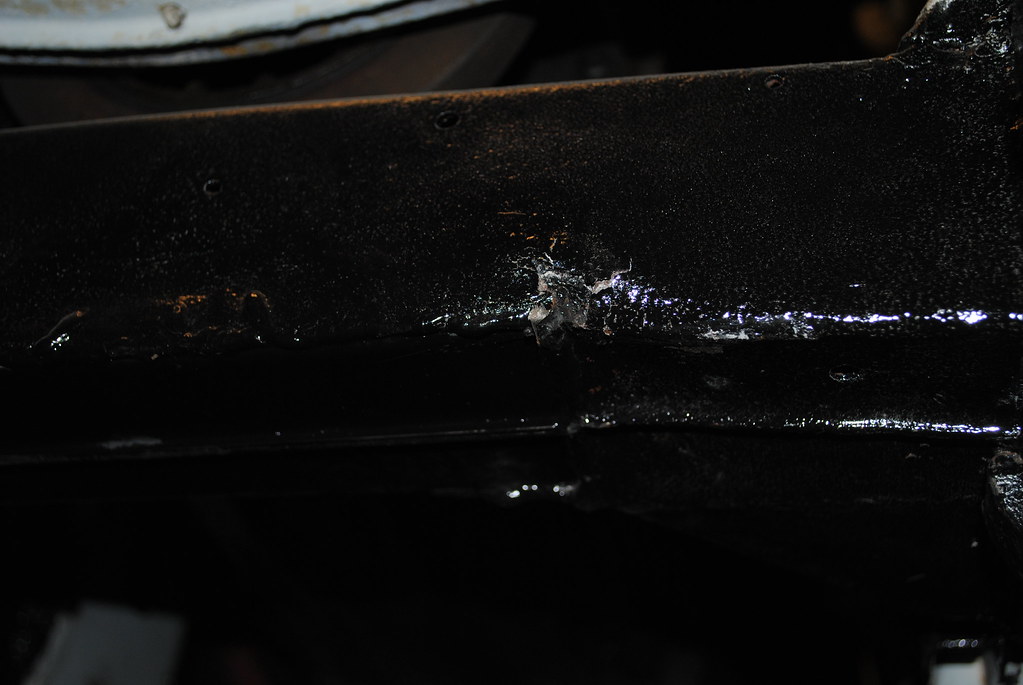
Now, the top edge of the crossmember is nowhere near as bent as it appears to be in these pictures. I think that's an illusion caused by the crank dampener and the curved support piece. That being said, it does have a bit of a hump but some of that was definitely there before. Now I get to repair a spot I already repaired and figure out how badly other things moved.

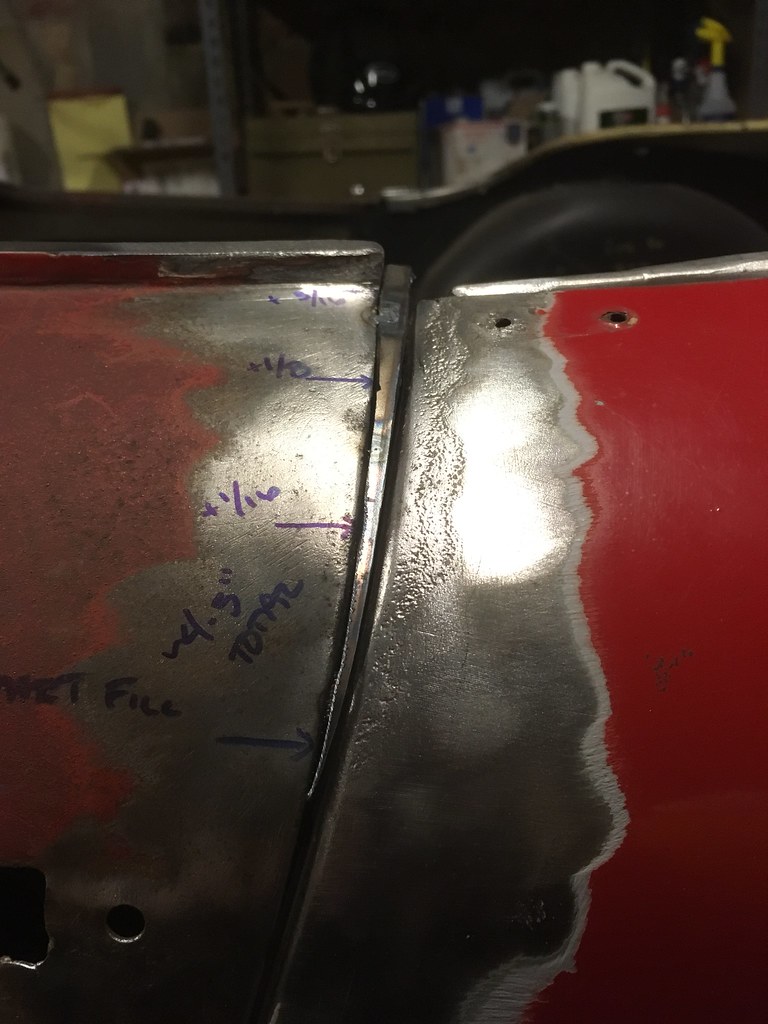
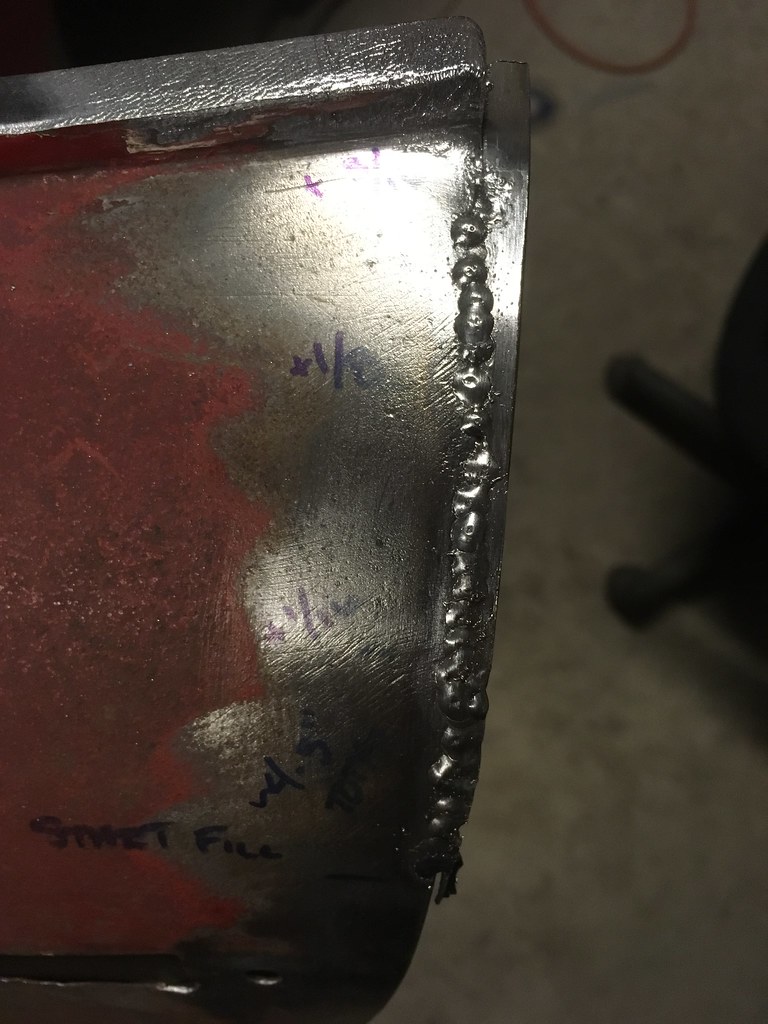
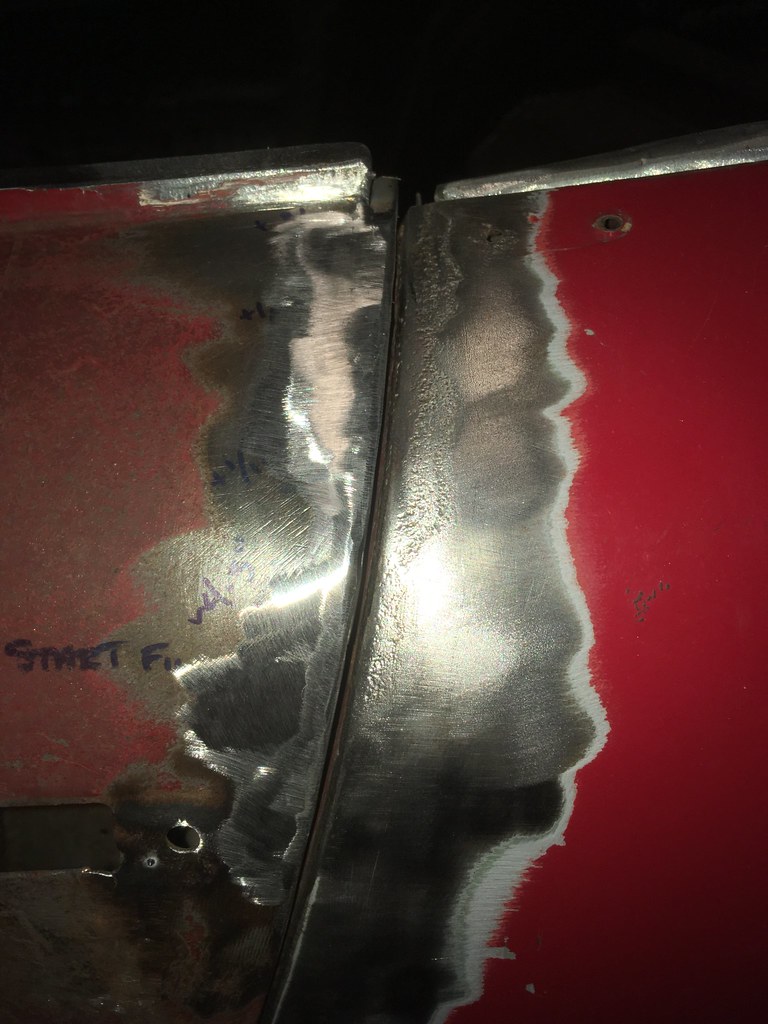
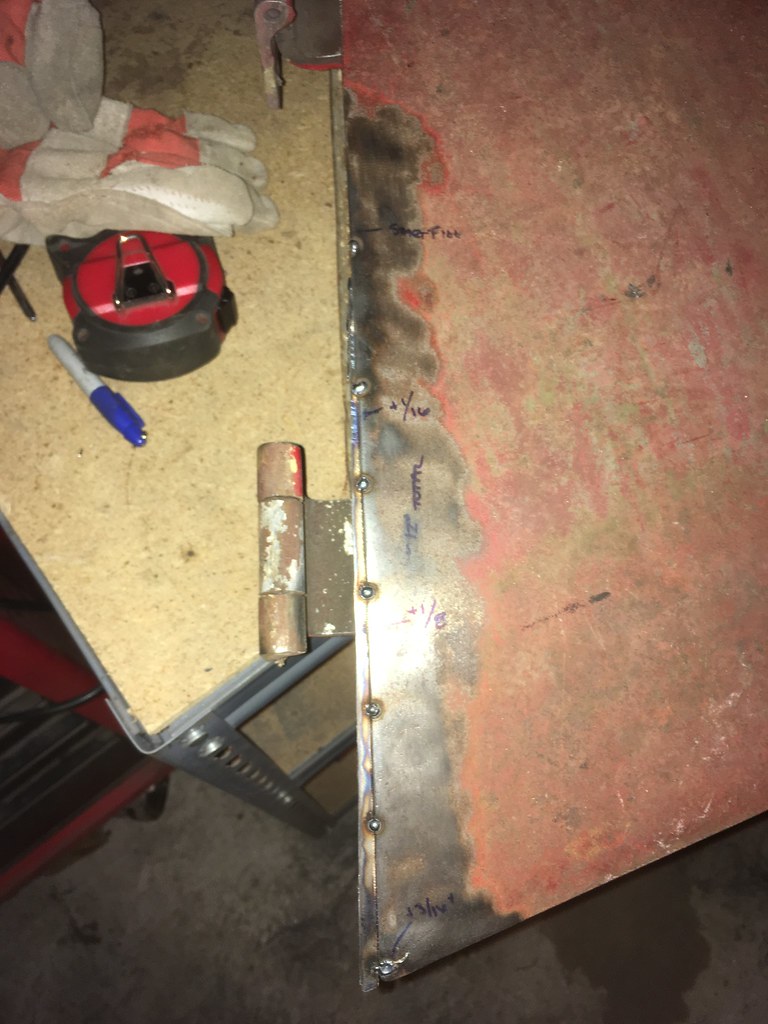
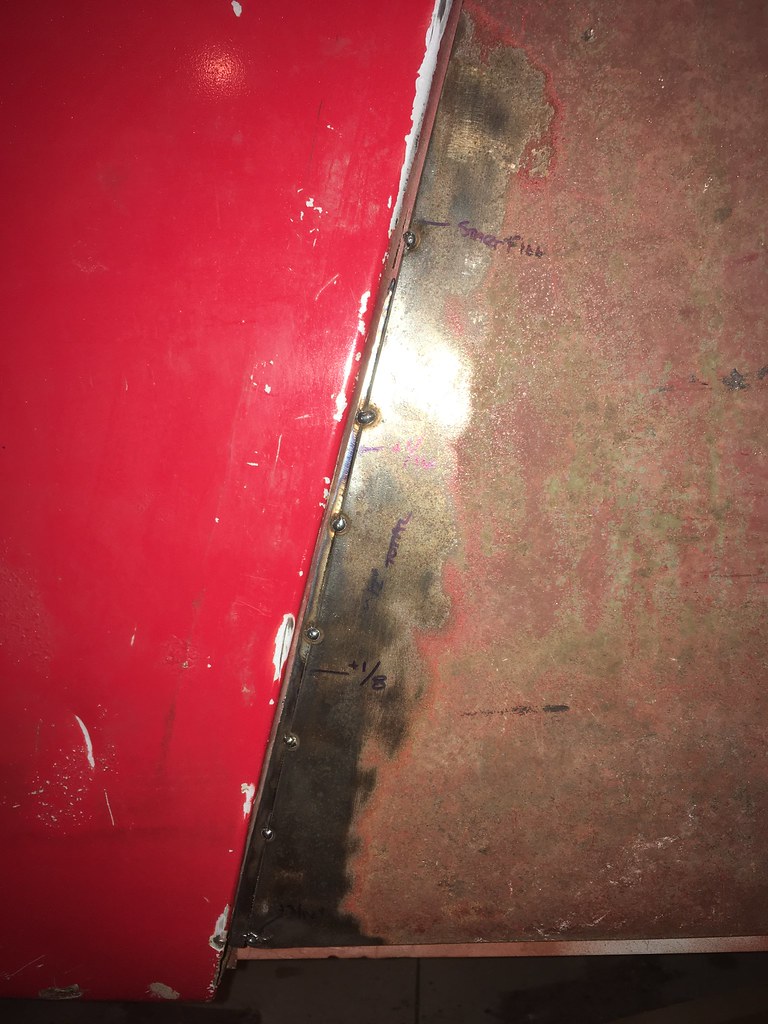
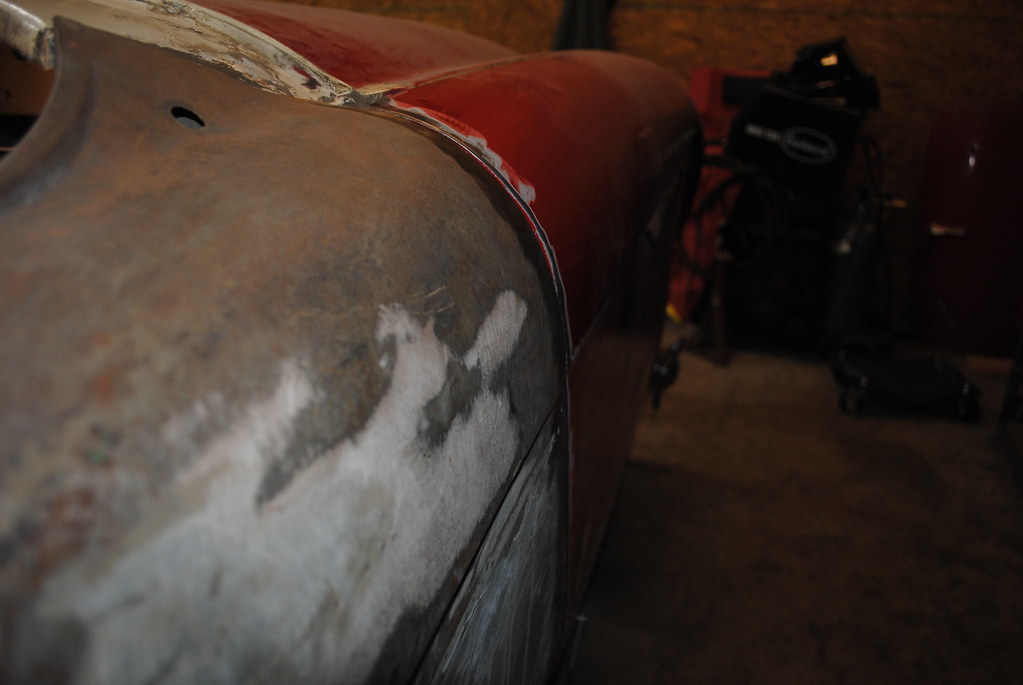
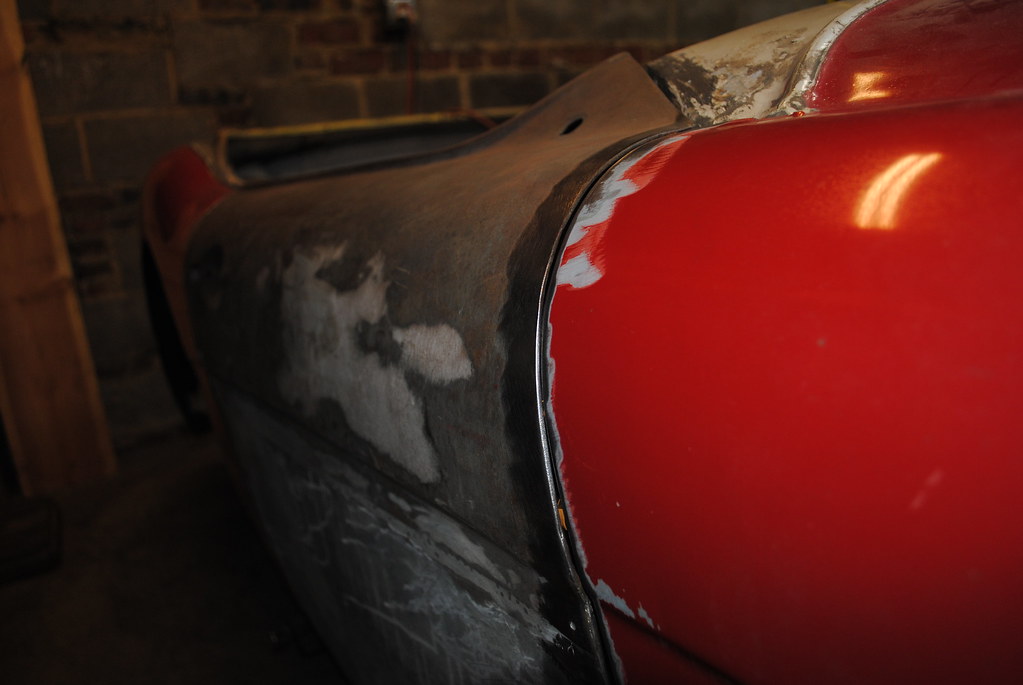
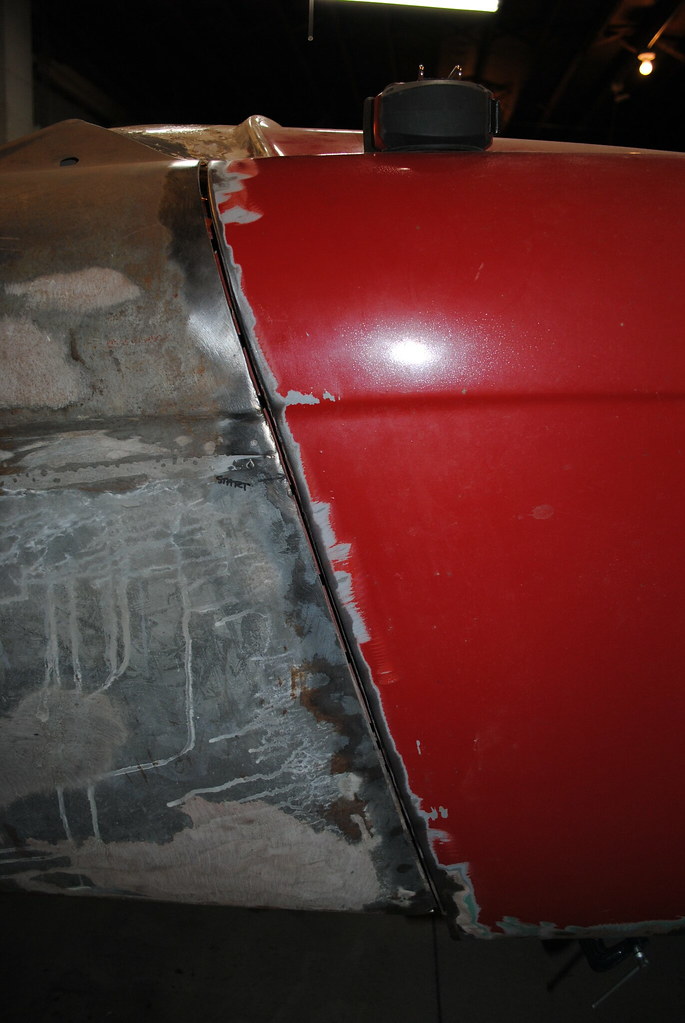
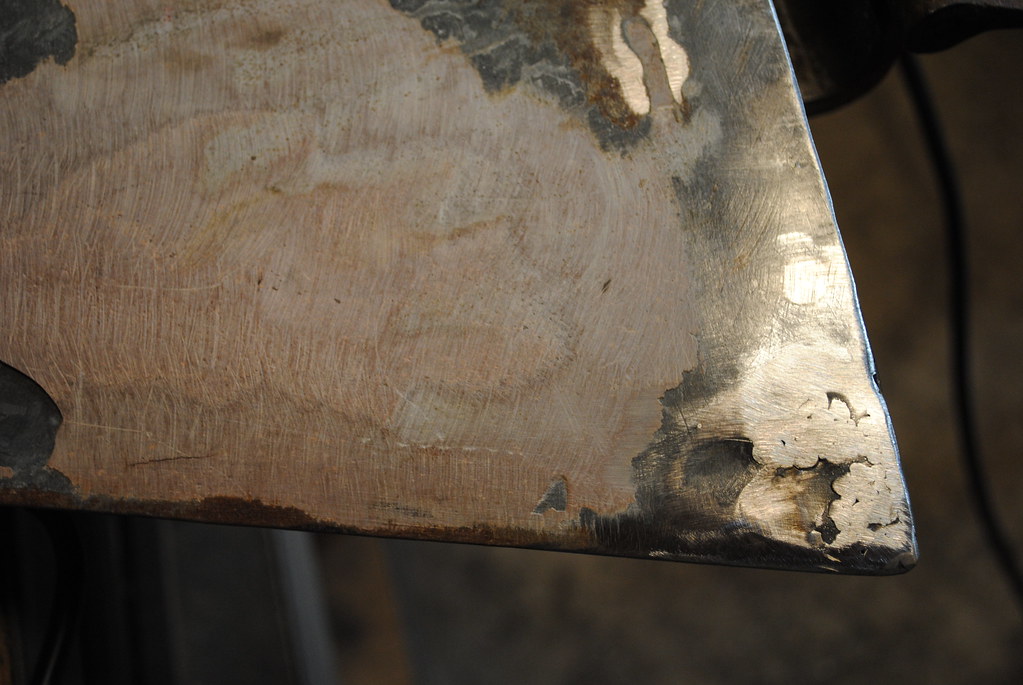
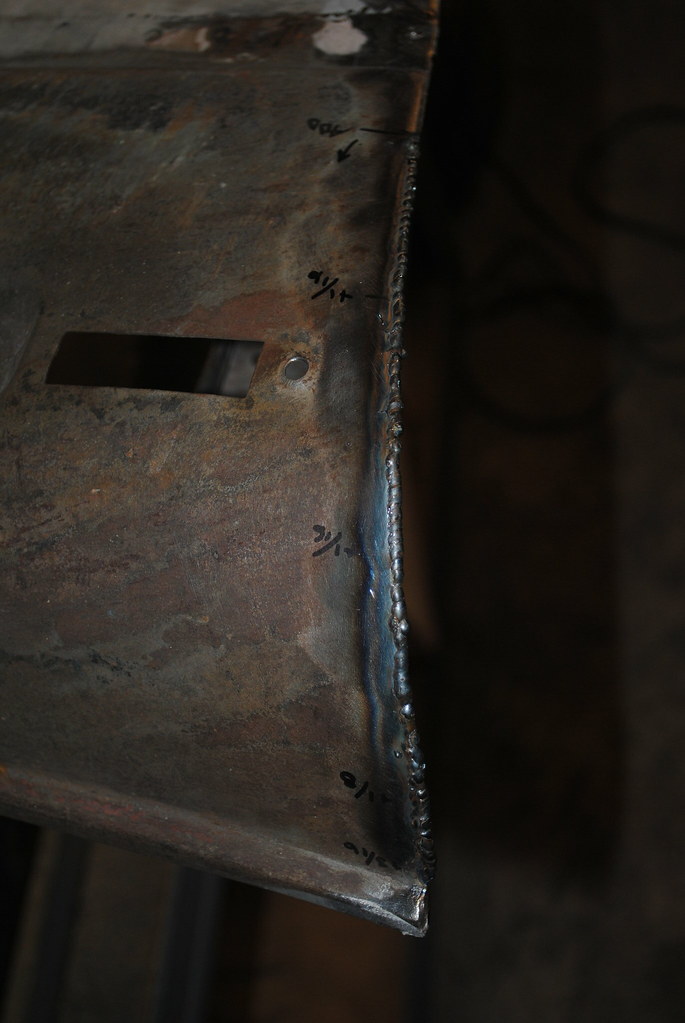
I knew this was all going too smoothly! I stuck it out for a while and made some progress on the passenger door but then my back and ankle really needed a break so I put my tail between my legs and went home. Luckily (?) I have plenty of time to dedicate to the shop tomorrow so I'll be able to further assess the damage and make more passenger door progress.

Now for a hot shower and some latkes with the other side of the fam.

NOHOME
NOHOME UltimaDork
12/27/18 1:47 p.m.

In reply to AxeHealey :

You are ware that the factory gaps were nothing to write home about, right? Good chance that you are already past that.

Are you going to block sand across the door gaps?  Most classics were never perfectly flat across the gap if you put a straight edge across, but a lot get restored that way. The perfectly flat surfaces across the gap give the car a crisper look, but its not quite right in some respects. Same deal with a base clear finish.


For that matter, are you going to do all the filler and paint also? Love to see someone else suffer.


Pete


AxeHealey
AxeHealey GRM+ Memberand Reader
12/27/18 2:10 p.m.

In reply to NOHOME :

Yes, very aware. This fact is part of my strategy for not being sucked into obsessing over it too much!

My aim is to get as close to flat across the gaps as possible but, again, trying to not kill myself over it. I definitely intend on single stage paint. In a lot of ways, I like dealing with it better.

At this point the plan is to do all of the filler, high build primer and prep myself and take the panels to be painted somewhere. We'll see.

Here's a good question related to this discussion. What color hides this type of imperfection (gaps) best? I'd like to paint this car black and I think that would suit it well but shiny black paint can do some unusual things.


AxeHealey
AxeHealey GRM+ Memberand Reader
12/27/18 2:12 p.m.

Almost forgot - check out what my wife got me for Christmas!

Since she bought it, maybe I can get away with removing our address and replacing it with this...

NOHOME
NOHOME UltimaDork
12/27/18 3:28 p.m.

Whatever you do, don't build up the edges of the panel with filler in order to match the one across the gap. If you must, bend the edge up and fill behind it so that you don't get chips.

I would do the best you can and not worry too much about the transition over the gaps. As long as it is pleasing to the eye I think you will be fine.

If going black, then you will be using a black sealer. I highly recommend doing the wet test to see how the surface is looking. This picture was taken after the sealer coat was sanded to 600 wet. I actually washed the car to get the slick look.  If you like what you see at this point, you are going to be happy with the paint.


Pete

AxeHealey
AxeHealey GRM+ Memberand Reader
12/28/18 9:36 p.m.

Thanks, Pete.

I had to knock some things out for actual work this morning but then was able to spend the entire afternoon at the shop. I started by digging more into the damage the Healey took from the fall. It's not too bad and should be easy to fix once the engine is back out. I was relieve and re-energized to work on the passenger door.

Yesterday I cut off the brand new shut pillar I had welded on. Then it was to mount the RR quarter and throw the door on. Just like it was in the spring, it was WAY off. The front edge of the door overlapped the fender, the top was inset and well below the fender and the rear edge was too low as compared to the quarter.

It was at this point that I got really worried. I knew that the strategies I used on the driver's side wouldn't get me the adjustment I needed for where the top of the door meets the fender. Some time spent considering options led me to see that I could shift the fender just so to get much of the issue to dissapear. Then it was on to the same old thing.

I bored out the holes where the bolts hold the hinges to the doors (to give more adjustment), utilized some shims at the bottom and got myself to a place where I was comfortable making the first cut.

After at least 3 sessions of taking the door off, trimming and putting it back on, I ended up with this!

Somehow, the front edge is damn near perfect. I may add some weld along the top. The rear edge has had nothing done to it and is already very close after a stiff tug up on the door. I'll just have to trim a bit from the halfway point down and add some at the top as well. 

NOHOME
NOHOME UltimaDork
12/28/18 11:39 p.m.

yes


This is going to end well. Can't wait till you start sanding.


Pete

AxeHealey
AxeHealey GRM+ Memberand Reader
12/29/18 8:32 a.m.

Cue Bill Nye voice - 'Consider the following...'

Since there's already filler covering much of every body panel, should I bother removing all the old stuff and getting down to bare metal - or - should I just sand/fill/sand/fill until it's perfectly smooth?

In the same vein, the passenger door seems to be about as wavy as NOHOME has described the Molvo panels. It's clearly been reskinned (poorly). Is this my chance to try a shrinking disc? Not only is it wavy but it's almost 'loose' in the middle if that makes sense. I think just using filler would end poorly.

AxeHealey
AxeHealey GRM+ Memberand Reader
12/29/18 9:07 p.m.

More of the same today. Still not completely happy with everything, but very close. 

There was some nastiness in the front-bottom corner that I tried to fix. This turned into a long project, ended up better than the second picture but still needs work.

AxeHealey
AxeHealey GRM+ Memberand Reader
1/6/19 6:44 p.m.

Doors are "done". I've got to do a little massaging to the passenger quarter to then fit the shut pillar. That work may, in turn, cause the door to need adjustment but for all intents and purposes the doors are finished! 

*Tentatively* my hope is to have all the body rust repair finished by the end of February, body work done by the end of March with all body panels going off to be sprayed. Fingers crossed. 


1 ... 4 5 6 7 8 ... 36

You'll need to log in to post.

Our Preferred Partners
oP5PJlaB4SqEsYOXwafBSfC6G4tHKkXenyLTOvUgfZjscFIT2uVBdzPbcHd4YnIP