
Back in November a GP Sprite popped up on the local Craigslist. I was planning on 2014 or 2015 being the year I'd make the plunge into wheel to wheel racing and vintage, Spec Miata, and Formula Ford were the likely classes.
Due to the cost of a set of tires the FF was #3 on the list so that left either SM or a vintage sports car class.
I mentioned it to a group of friends and was told to buy it (bringing it back would be good car guy karma or something like that). As luck would have it the Sprite was vintage and it was a sports car. It was also well within my capabilities even after sitting in a barn for 33 years. After a little negotiating with the seller it was in the trailer.
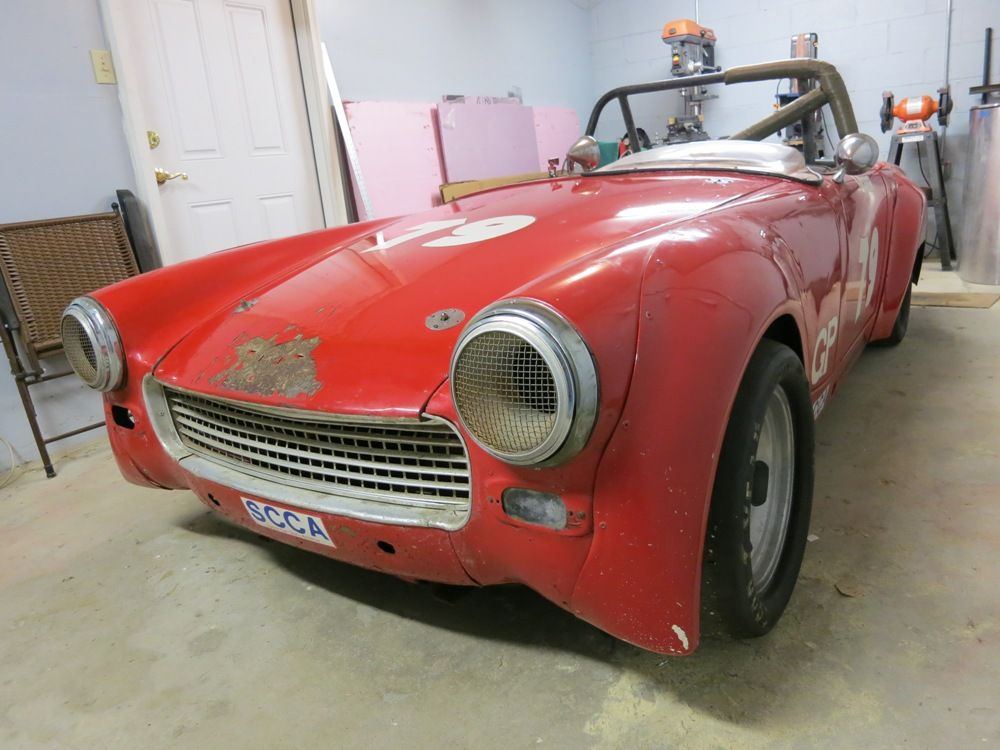
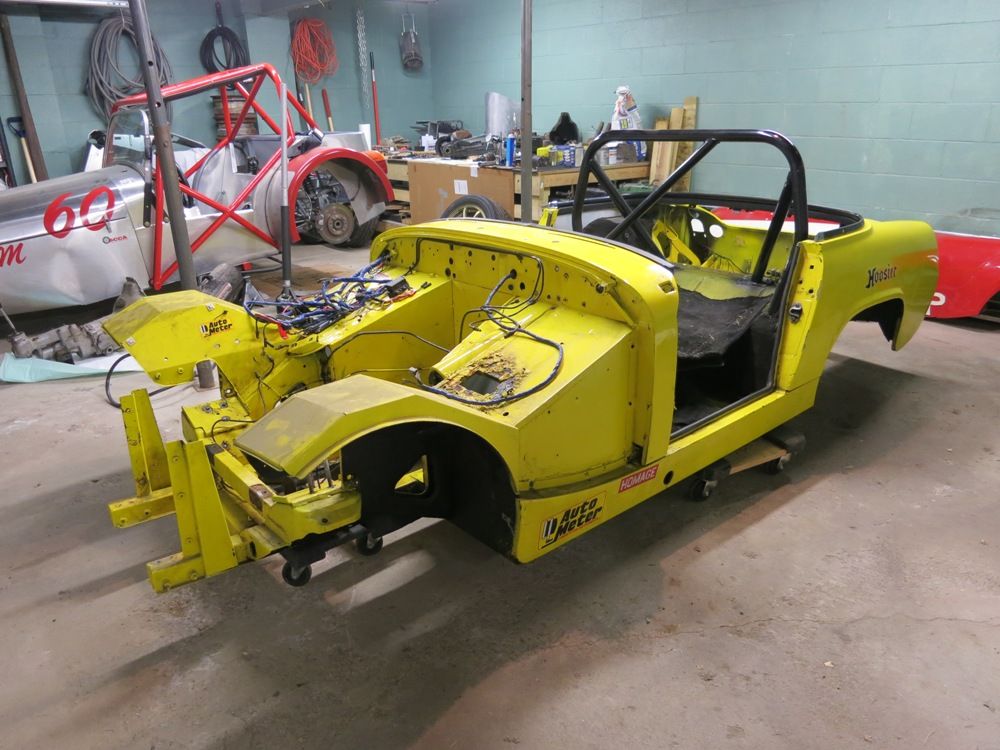
Aside from the dirt from years of sitting and dated safety equipment the car was a good basis for a vintage build. It has to be one of the few Spridgets with no rust (literally). The only thing keeping it from being a good basis for a restoration would be the dents, dings, and mods from years of racing that would need undone.
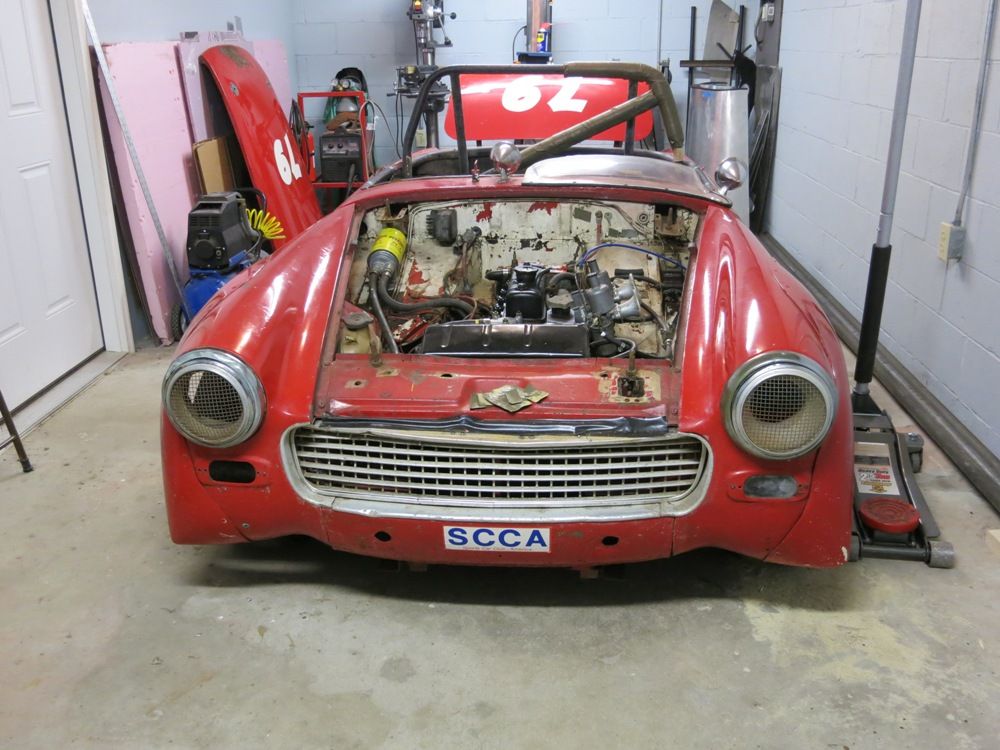
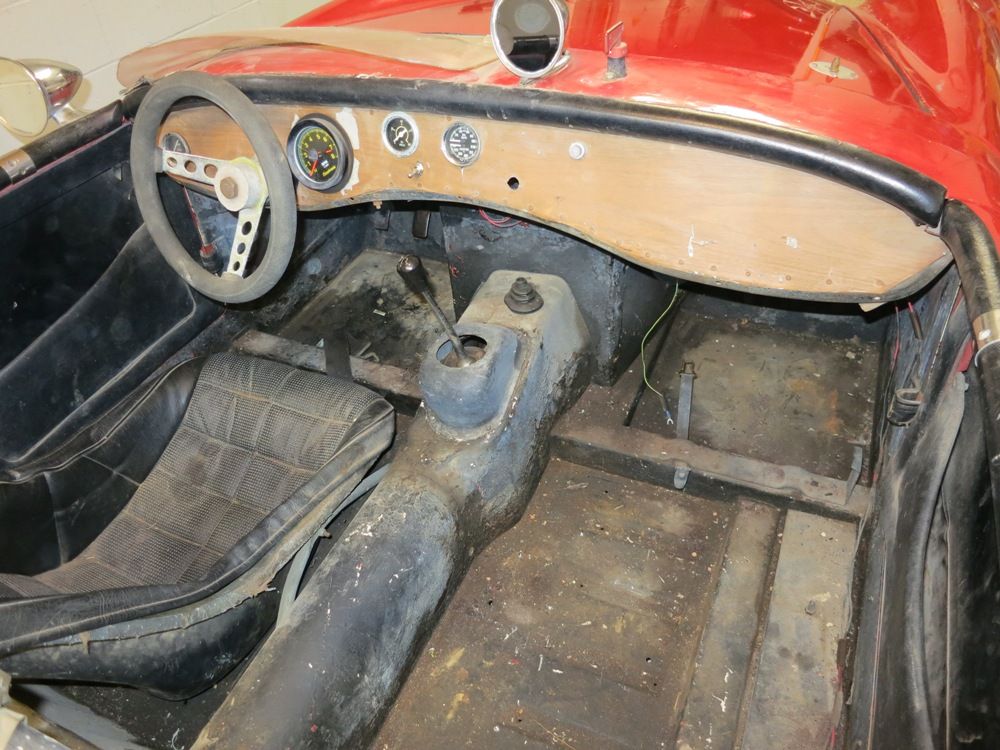
I started taking the car apart but decided to wait until the holidays were over to dive in. It was immediately evident that ALL of the safety equipment was going to need replaced. The car still had the stock tank, a roll bar, and a Y-harness which bolted to the parcel shelf and was at least 3 decades past its prime.
Early on I decided to go with a full cage for the extra safety. I can respect trying to keep vintage cars true to how they were but there are lessons we've learned the hard way and there are reasons fire suits, cages, fire systems, 5+ point harnesses, HANS devices, helmets, fuel cells, etc are required today. Along these lines I wanted a car that had the equipment to legally run HP (probably not competitively though).
So while I was not actually building during the holidays, I was planning.
If you can are you going to sawzall the old bar and braces out intact? If so you could offer it for sale to someone building a spridget autox car. If it's adequate thickness that would be a good app for it.

jgrewe
New Reader
6/3/14 11:41 p.m.
Which way are you going to go with it? I'm 99% sure you'll have to lose the flares in vintage other than SCCA. Those look pretty wide, any history of those cars running stuff that wide back in the 60's? Which engine is in it 1098 or 1275? The first thing you need to do is get rid of that stock master cylinder set up. Find a later Midget set up to get the dual circuit brake system.
I've got a '59 Bugeye that is a street car. Weber'd 1275 with a Datsun 5 sp, no Lucas electrics, front discs. I built it as a driver but it still wins trophies at shows.
I don't think the bar is reusable Graefin since things were done a bit differently back then. If I knew someone that was building a car I'd rather just bend a new hoop.
I'm going primarily vintage Jgrewe. I spoke with VRG and it seems like the "in the era" verbiage basically excludes everything that isn't a famous car that ran with flares. It sort of sounded like some clubs couldn't care less as long as you weren't running crazy rubber and others would make a big deal. As it is I have photos of the car from the 70s and it looks like the flares weren't in place until the middle of the decade. I've decided to lose the flares for simplicity's sake.
The car currently has a 1098 (10CC). I have another one and a 1275 sitting next to the workbench awaiting some TLC. The other 1098 is getting a quick once over (gaskets, bearings, rings) and will be a ~stock spare. The 1275 will be getting some more attention over the winter.
Regarding the brakes - I knew I was missing something from my list of safety items we now take for granted.
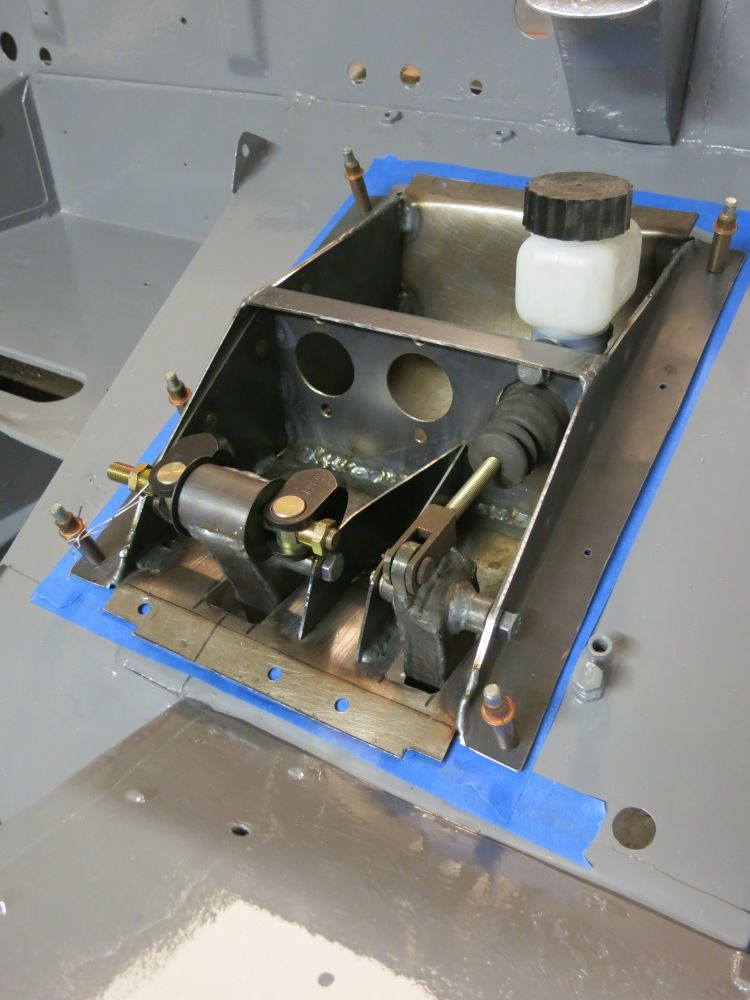
Which leads to the next update; pedals. The rules require dual systems and allow for dual master cylinders or one master cylinder for both circuits. Since the later pedal boxes appear to require a larger hole in the chassis, I was going to have to cut and reinforce regardless. I decided to use dual modern master cylinders. As a bonus replacement parts are readily available from Summit. ;)
The first step was to create the box using 0.063" and 0.040" thick steel sheet. The sides are doubled up 0.063" sheet for a little extra strength and stiffness.
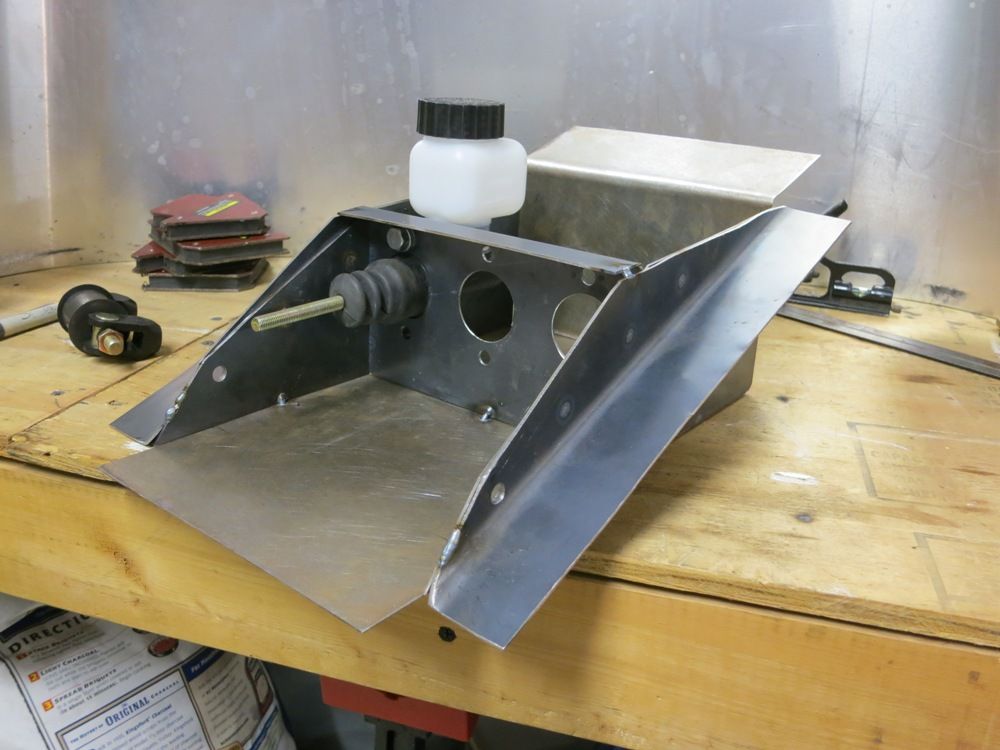
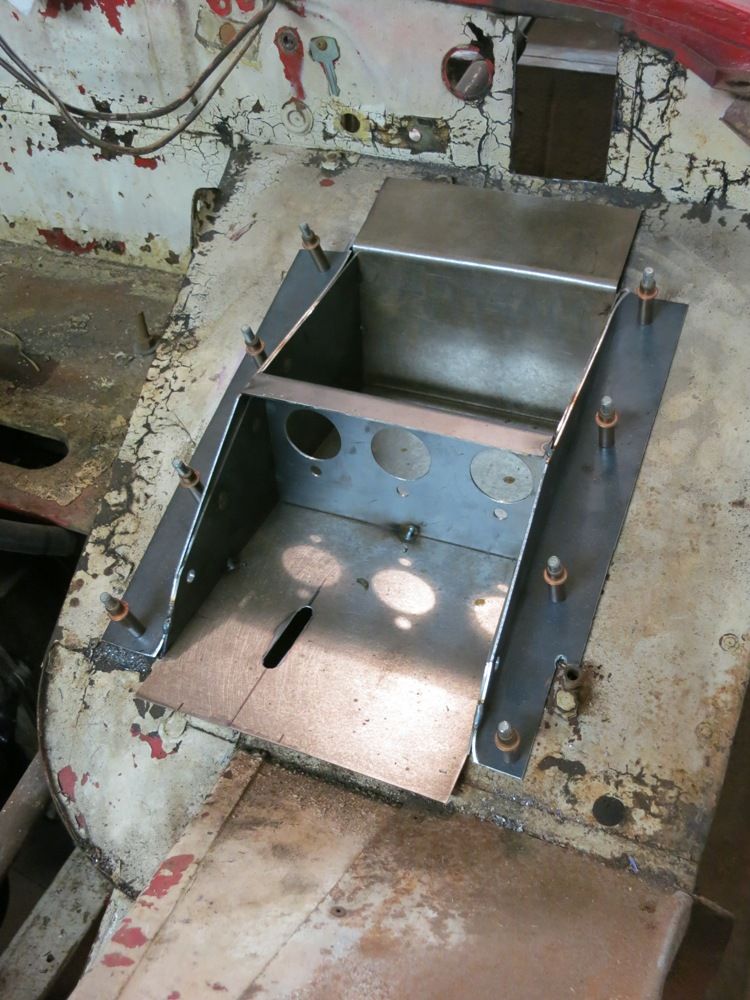
I also had to redo the attachment points to accommodate the wider pedal box. Based on pictures I found while researching, this seemed inevitable since the later dual system pedals appeared wider as well.
I was debating whether to reuse the stock pedals or to start from scratch and decided to go the scratch route. They're made from 0.040" steel sheet and are the same geometry as the stock ones.
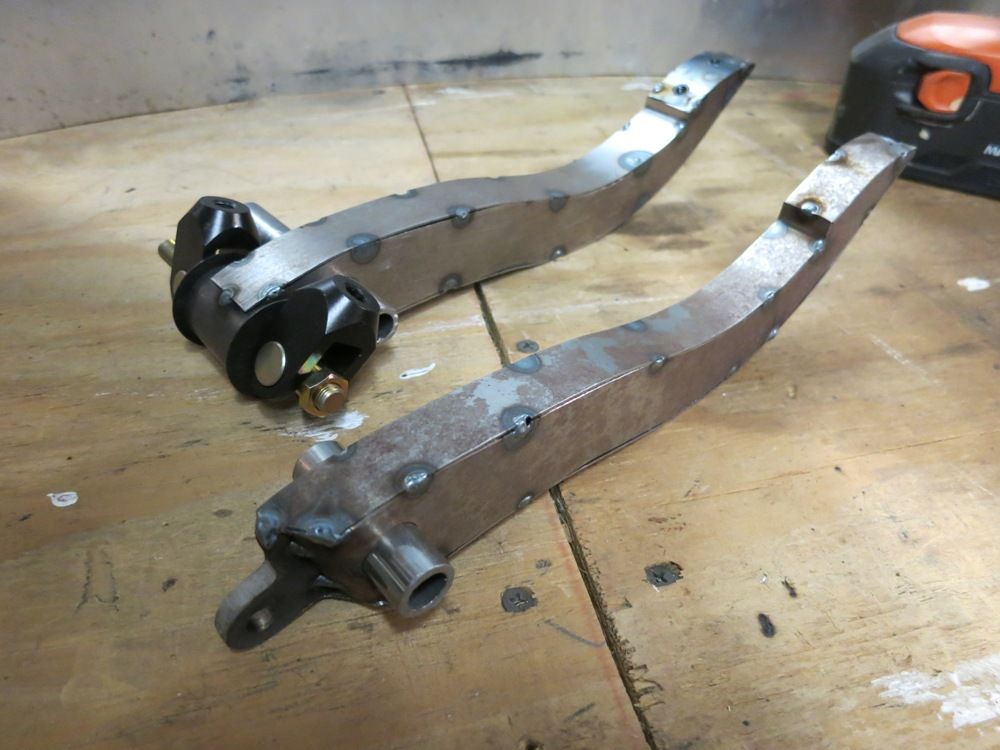
As luck would have it I later found a local fellow Spridget owner that was interested in the no longer required stock pedals - one less item (that will never be used) on the spares shelf!
More later...
jgrewe
New Reader
6/4/14 2:54 p.m.
I like your brake choice. The stock system would leave you limited on brake adjustment. Nice work too. I like the spare key on the firewall.
Where are you? I have a perfect model to take measurements from and a tube bender along with 25 years experience using it! I could ship you a front and rear hoop by Greyhound pretty cheap. I'm in St Pete, Fl.
I will be following this build as it is relevant to my interests. Looks like you found a great car to start with.
I had to relocate the spare key to the side of the work bench right next to the bottle opener. Add lightness right?
I'm in Pittsburgh PA. Thanks for the offer on the hoop but I have my own bender. 
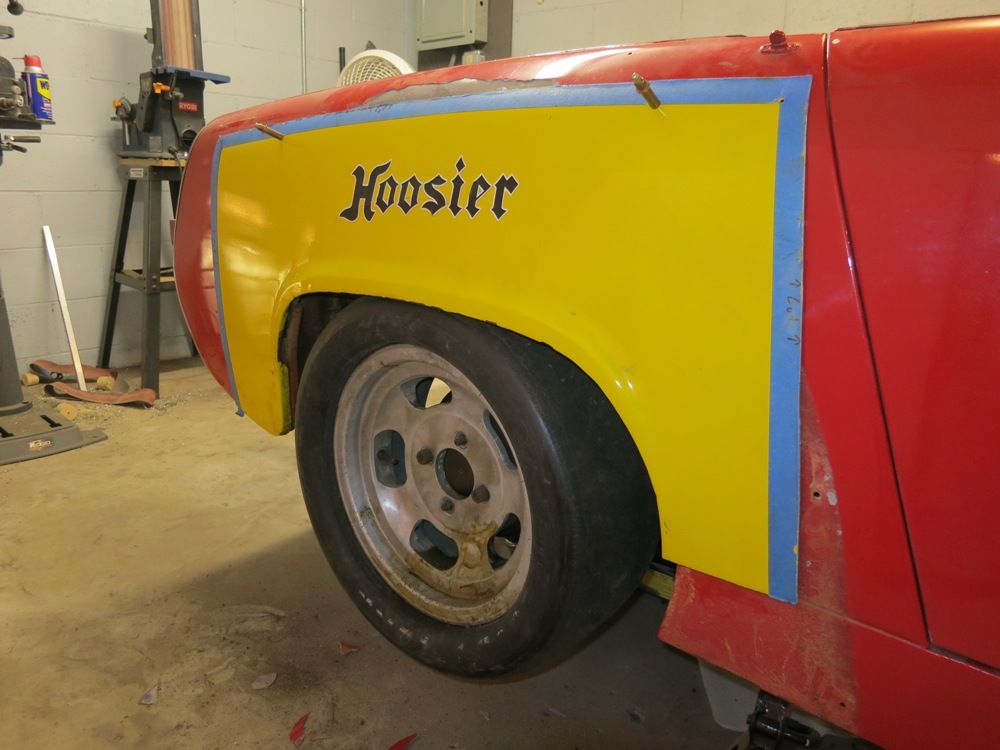
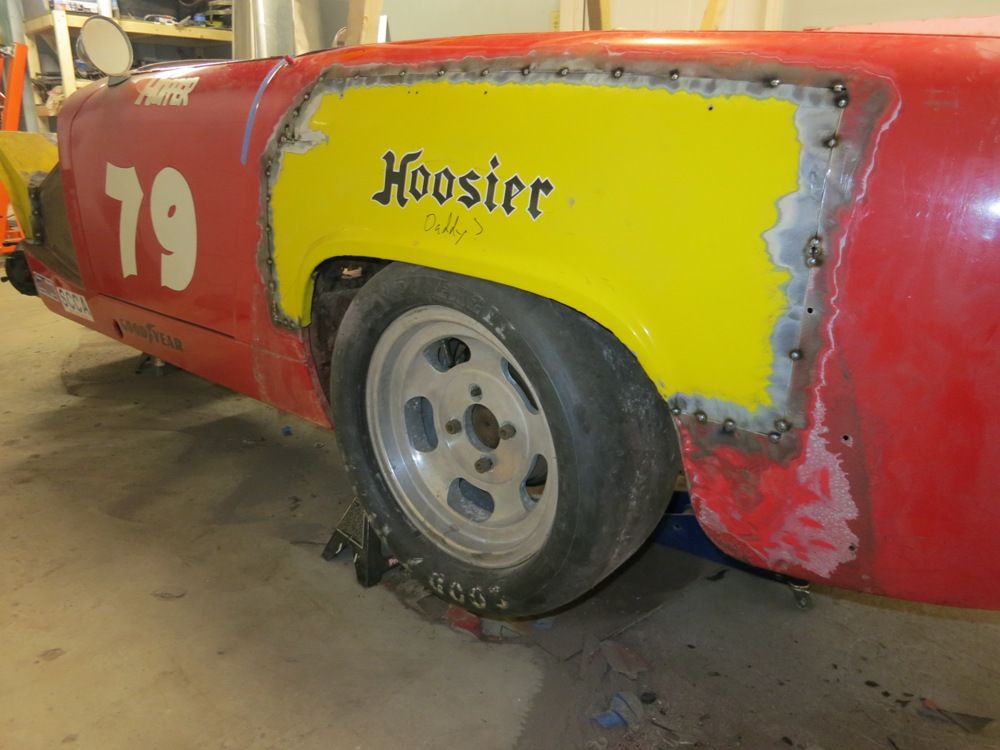
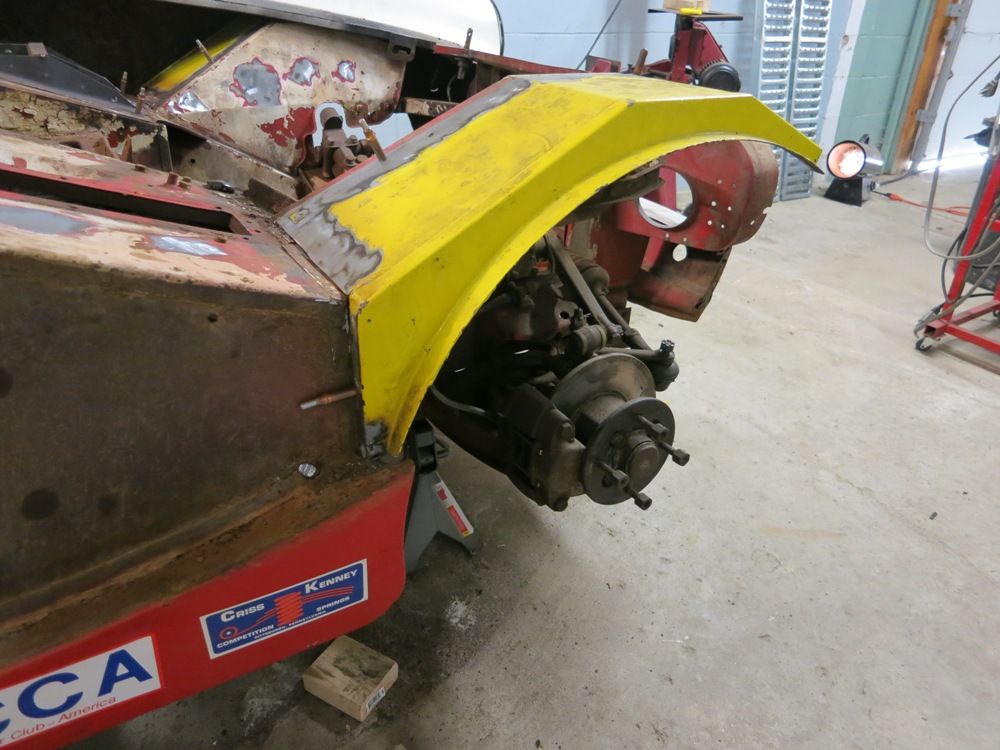
The front and rear fenders had been trimmed to allow clearance for GP sized slicks. Un-doing the fronts was as simple as finding another set of fenders but the rears were not so easy as the available patch panels were not tall enough (and they're expensive). Through the wonderful internet I found someone selling a Midget chassis that had been a vintage racecar. It had some rust repair work done to the rear fenders so what was there was good fresh sheet metal. After a quick run to Columbus with the trailer I had a donor.
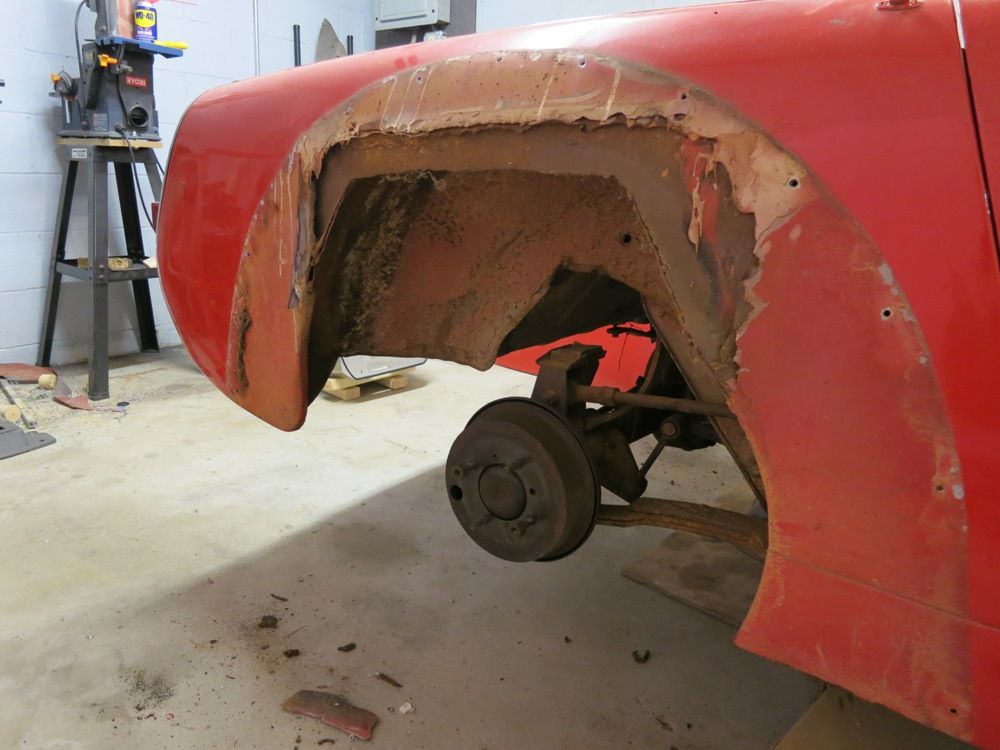
After a little cutting and a little welding the yellow sheet metal was grafted onto the red car. Once again Clecos saved the day and made the process much easier.
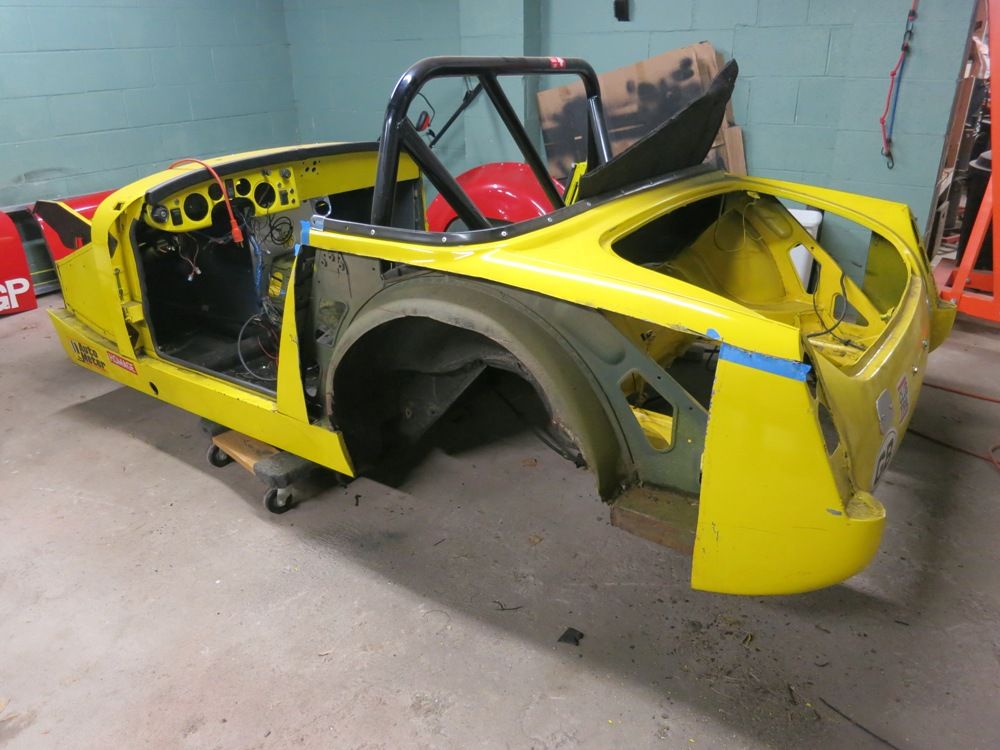
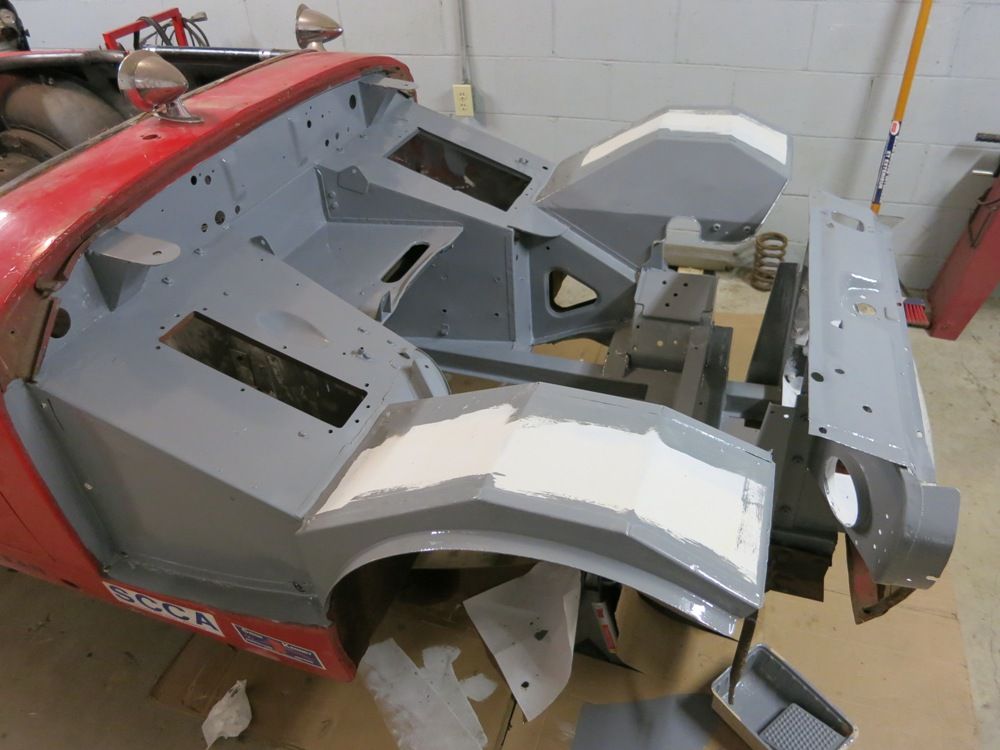
I was originally going to leave the front inner fenders alone even though they had also been trimmed but since I had a good set sitting there I decided it was worthwhile to replace them.
Before the front fenders could be welded in place I had to remove the underbody spray from the under side. All of my attempts to mechanically and chemically remove the stuff failed so out came the torch. I'm sure my neighbors thought I was nuts as I was standing outside in the 5 degree (Fahrenheit) weather with gloves, a respirator, a long gasket scraper, and a mapp gas torch. Sure enough though it worked.
When I used all that I could from the Midget chassis, Craigslist found it a new home a few miles away with a gentleman that was restoring a Bugeye. I sold him the chassis for $25 less than what I paid for it and it was going to become a bracket/miscellaneous sheet metal donor for a second car.
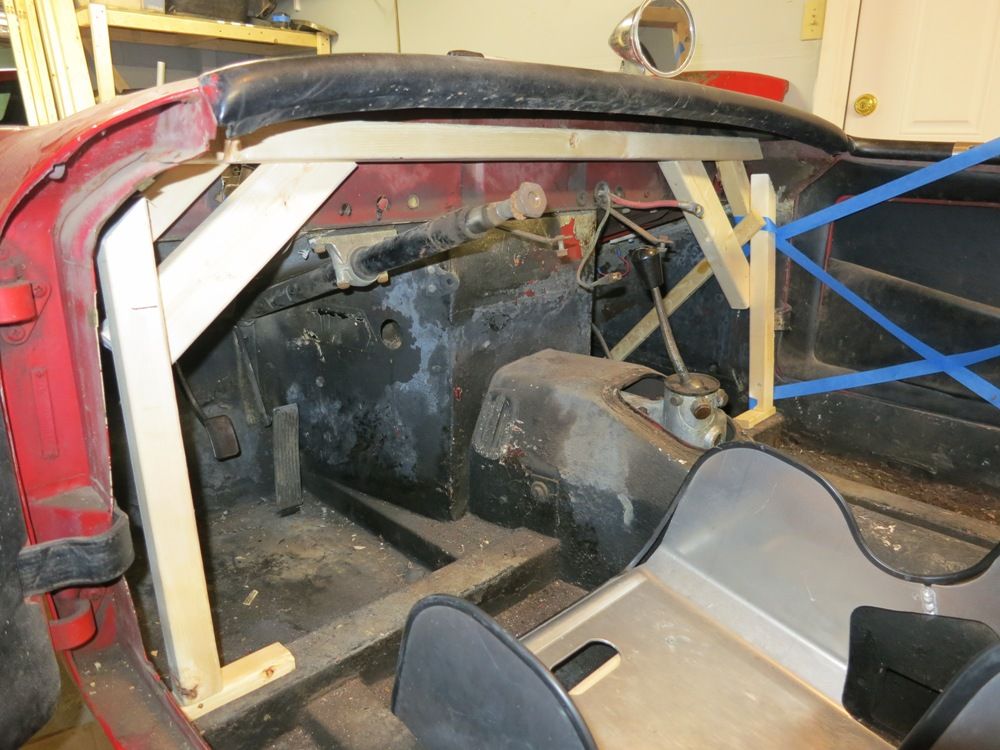
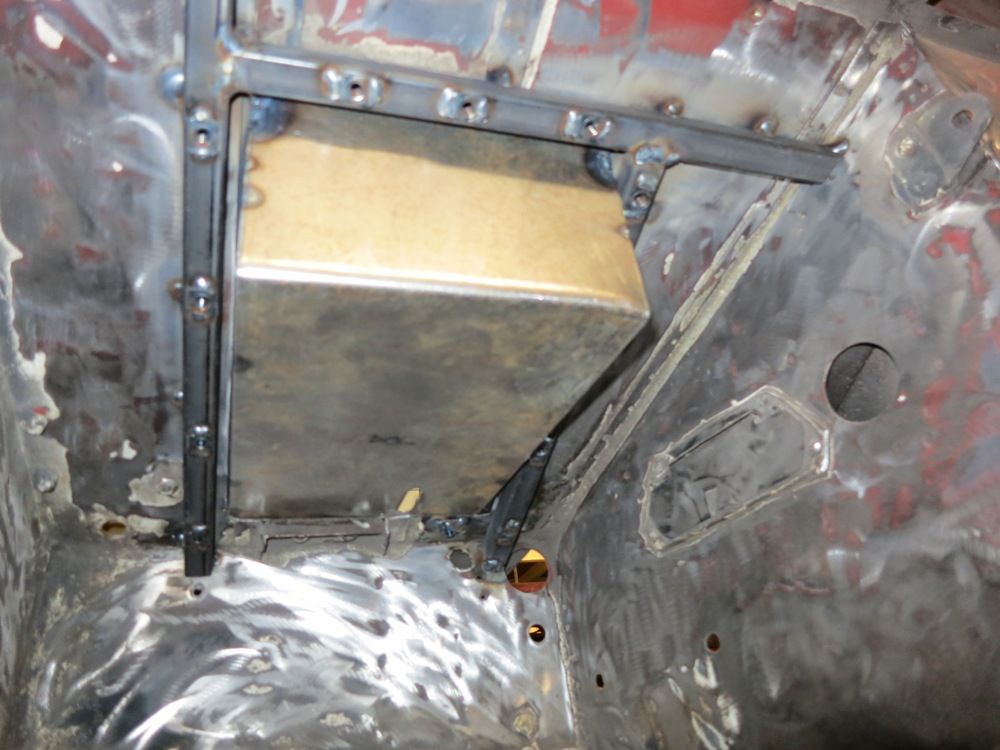
Finally with the front fenders in place I was able to clean up the engine compartment and give it a coat of primer and two coats of gray. This also meant it was time to see how the pedals fit.
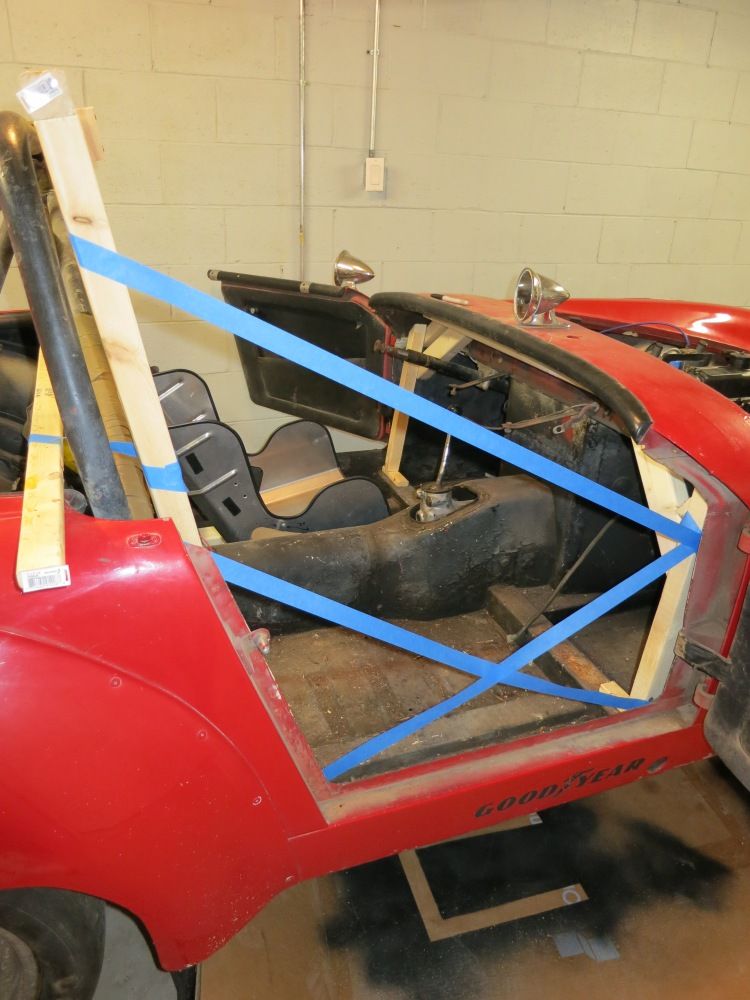
After the pedals were in place it was possible to finalize the seat position and begin the cage. I spent hours with a flap disk and the angle grinder removing old paint in preparation for the cage. In the future I'd seriously consider paying a professional to do the job - it was awful. The only positive note is that it was the middle of winter so it wasn't unbearably hot wearing long sleeves, long pants, a respirator, a face shield, and ear muffs. Once the paint was removed I was able to confirm that the floors were solid and would not need replaced.
A few years ago I built a bender from the plans at gottrikes.com. This is the second cage I've used it for and I've been pretty pleased with it. I've found that a digital angle finder is a must have though (I've made some surprisingly accurate bends on the first try).
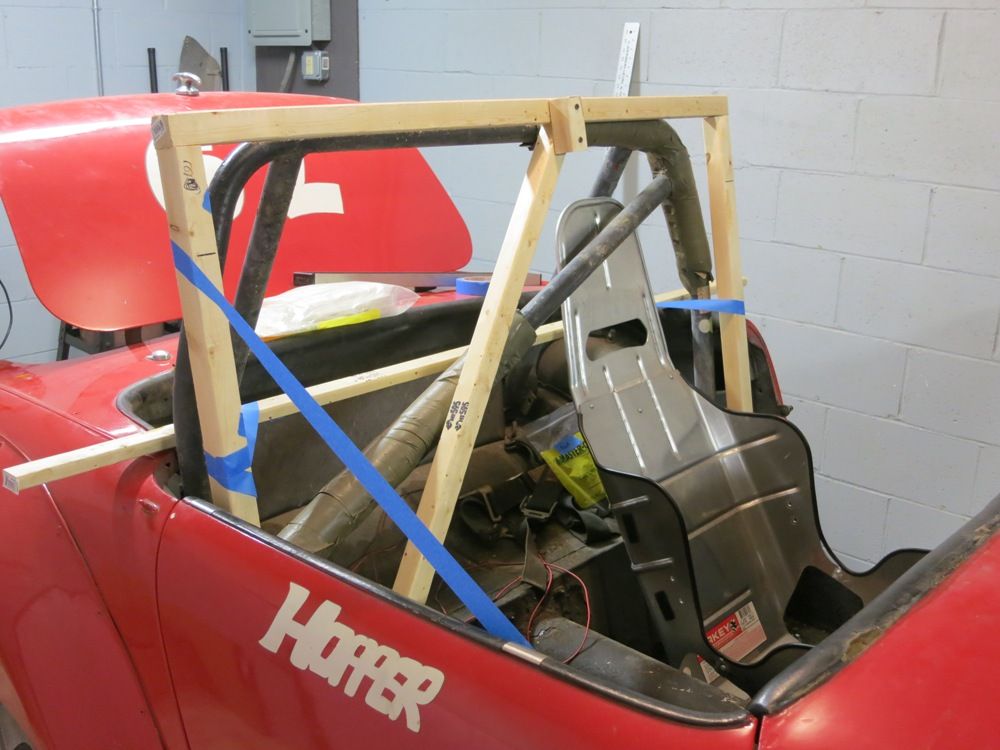
So step 1 was getting the forward hoop placed. I was able to tack everything together, cut the tacks that held the plates to the chassis, weld the tubes, then place everything back in the car. It was much easier than having to lay on my back and attempt to weld with my head in the foot box.
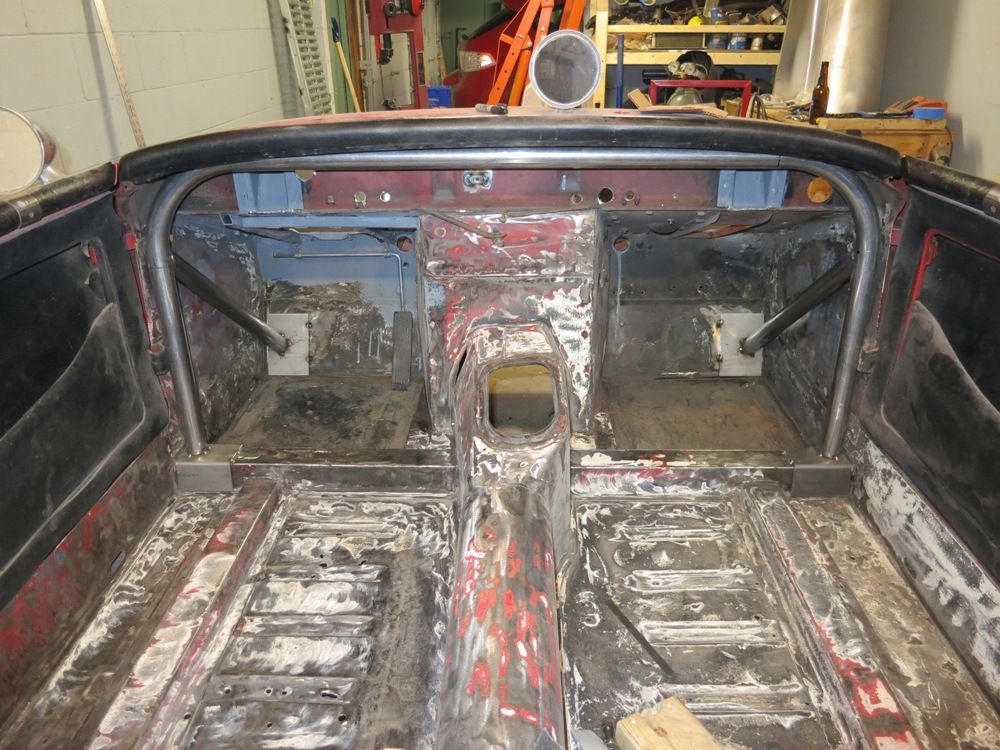
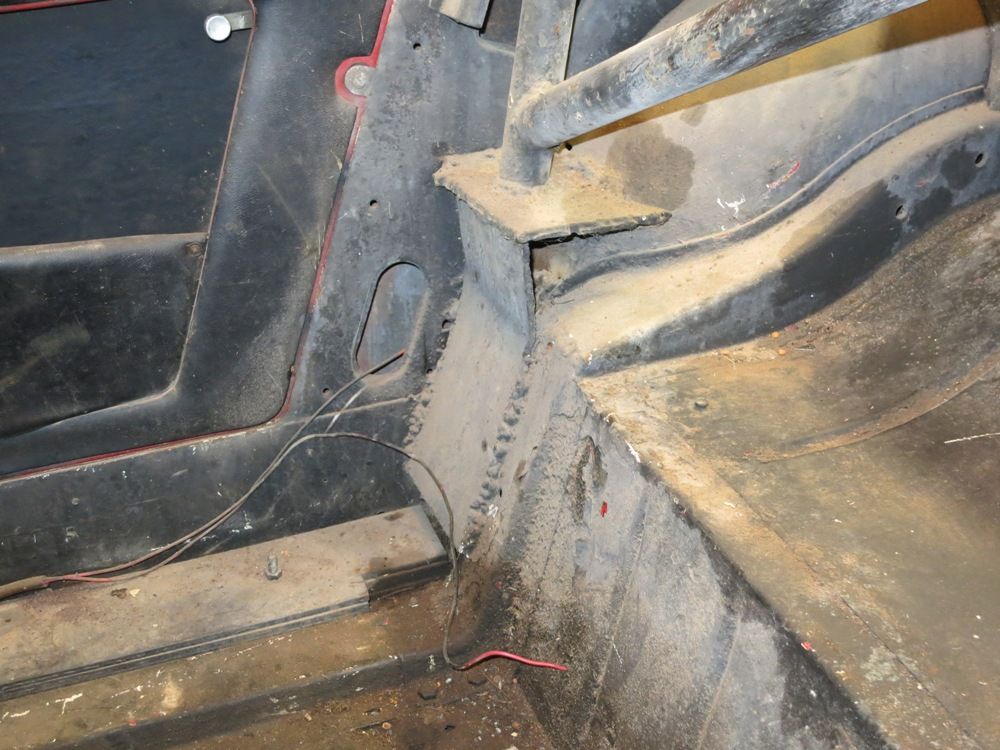
Step 2 was to fabricate the plinth boxes for the main hoop and place the main hoop. Being a uni-body there wasn't a really good structural place to mount the main hoop and I'm not a fan of stopping it at the parcel shelf; it really leaves the area below the hoop exposed.
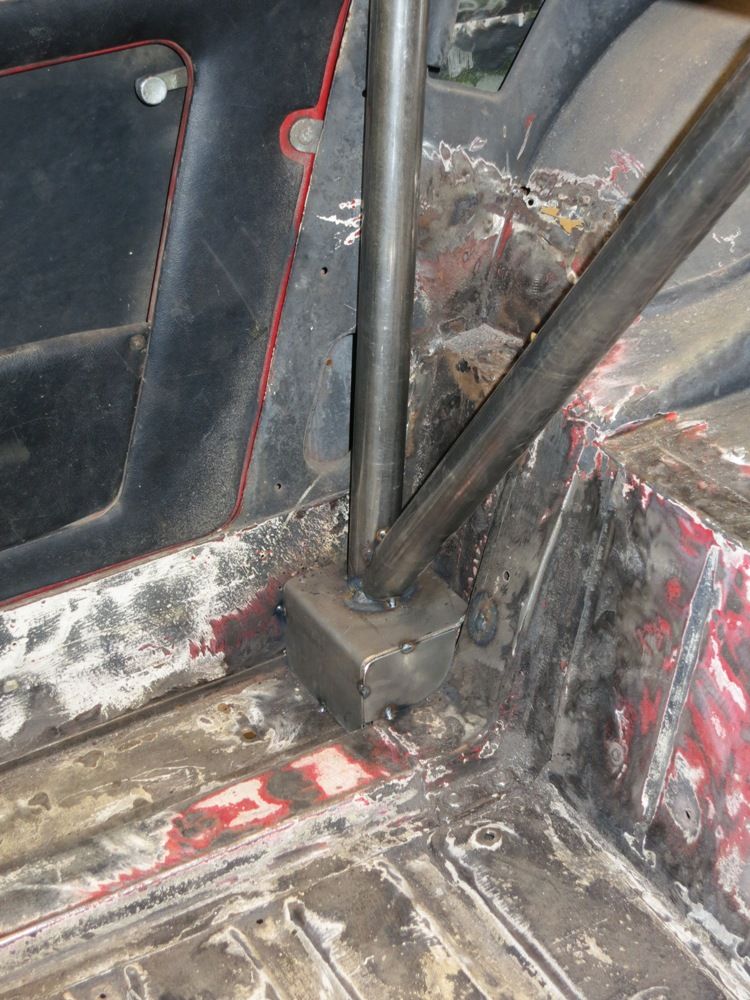
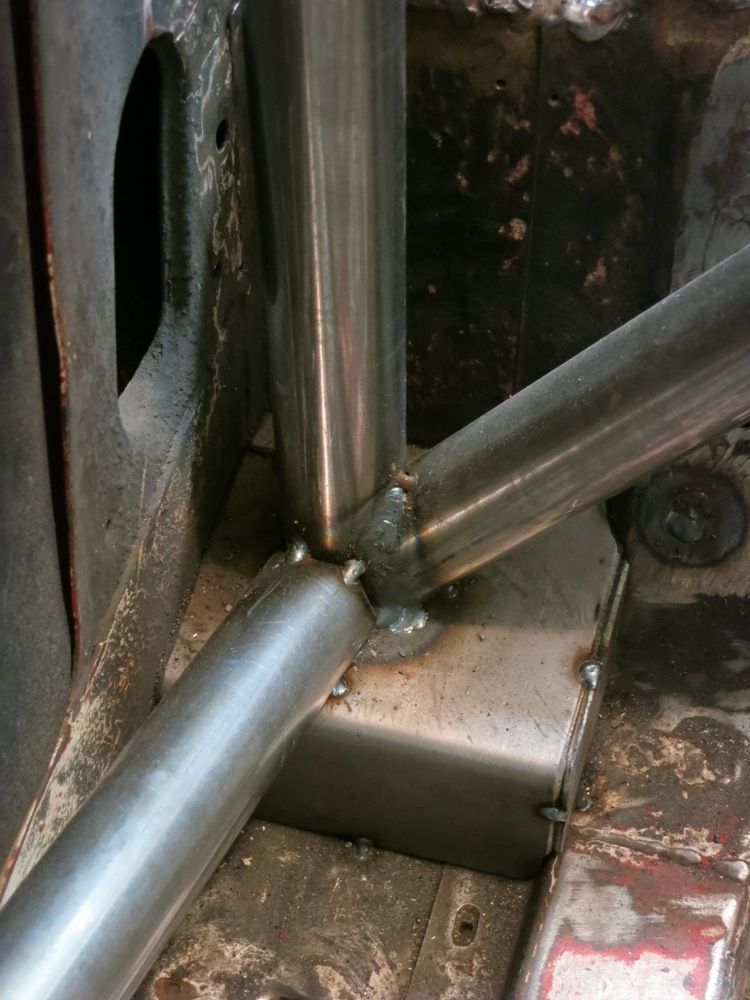
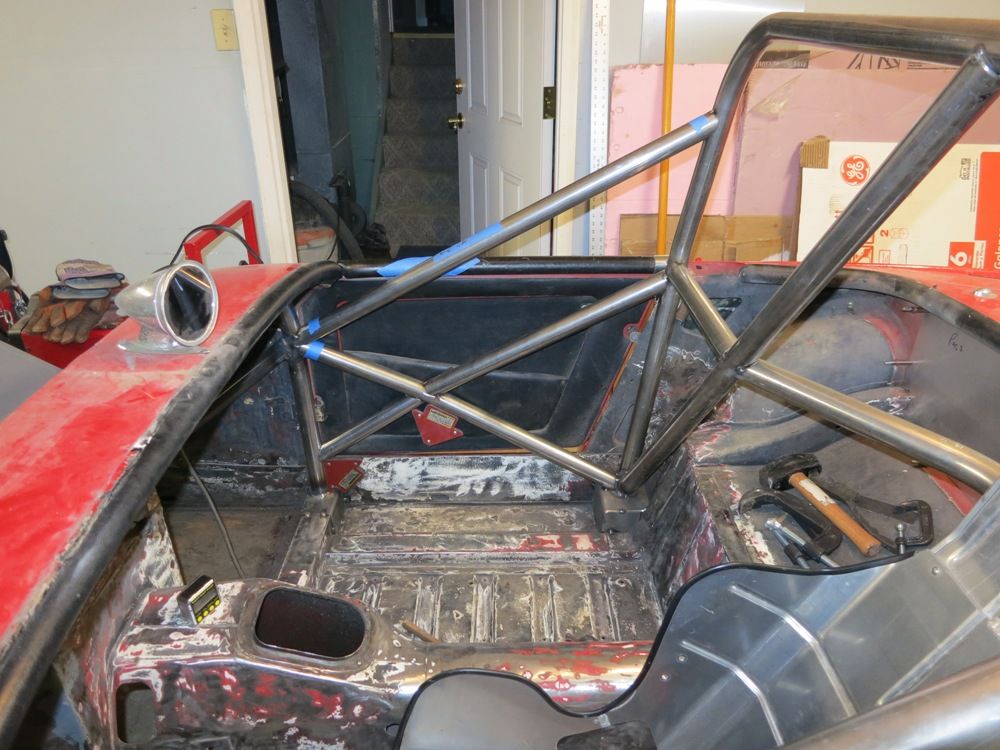
I was also able to use the boxes to tie the side impact structure into the chassis. Once the hoops were placed it was only a few fish mouths until it started to resemble a cage.


